PowerPoint has evolved dramatically over the past few years, transforming from a simple slide creation tool into a powerful platform capable of producing dynamic, engaging presentations that captivate audiences. Whether you’re a seasoned presenter or just looking to enhance your slide decks, mastering advanced PowerPoint techniques can take your presentations to the next level.
In this comprehensive article, we’ll explore a variety of practical, advanced PowerPoint hacks curated by Microsoft IT trainer Deborah Ash. These tips cover everything from image cropping and transparent overlays to morph transitions, merging shapes, and custom slide shows. You’ll also discover essential tools like the eyedropper for color consistency, font replacement, and the use of add-ins to supercharge your workflow.
Let’s dive into these expert tips and tricks that will help you create professional, polished, and visually stunning PowerPoint presentations in 2022 and beyond.
Table of Contents
- 1. Mastering the Crop and Fill Tool for Perfect Image Resizing
- 2. Creating Transparent Overlays for Readable Text on Busy Backgrounds
- 3. Selecting and Aligning Objects with Precision
- 4. Filling Shapes with Images the Right Way
- 5. Unlocking the Power of Morph and Advanced Morph Transitions
- 6. Merge Shapes to Create Custom Graphics
- 7. Use the Eyedropper Tool for Consistent Colors
- 8. Replace Fonts Globally for Quick Consistency
- 9. Setting Your Default Shape Style
- 10. Slide and Summary Zoom for Interactive Navigation
- 11. PowerPoint Add-Ins to Extend Functionality
- 12. Removing Backgrounds from Images
- 13. Creating Custom Slide Shows for Automated or Targeted Presentations
- Frequently Asked Questions (FAQ)
- Conclusion
1. Mastering the Crop and Fill Tool for Perfect Image Resizing
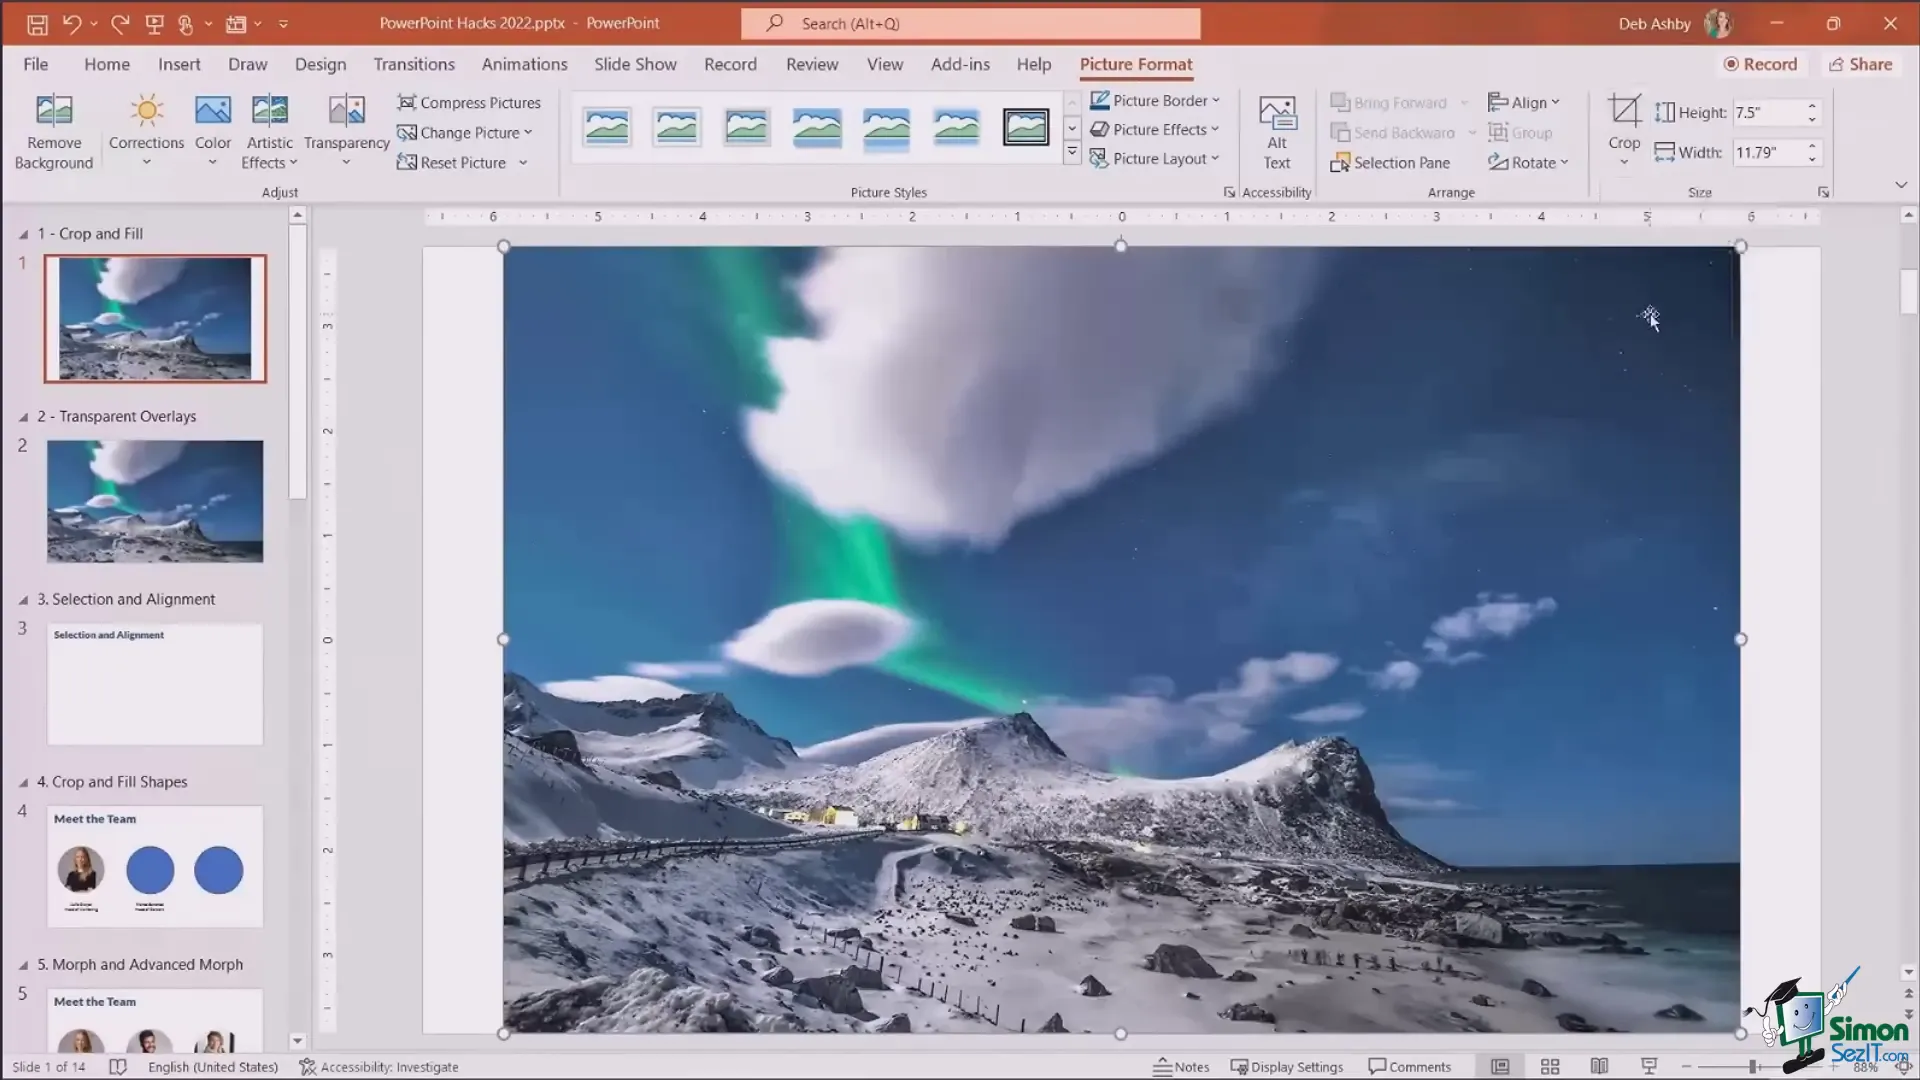
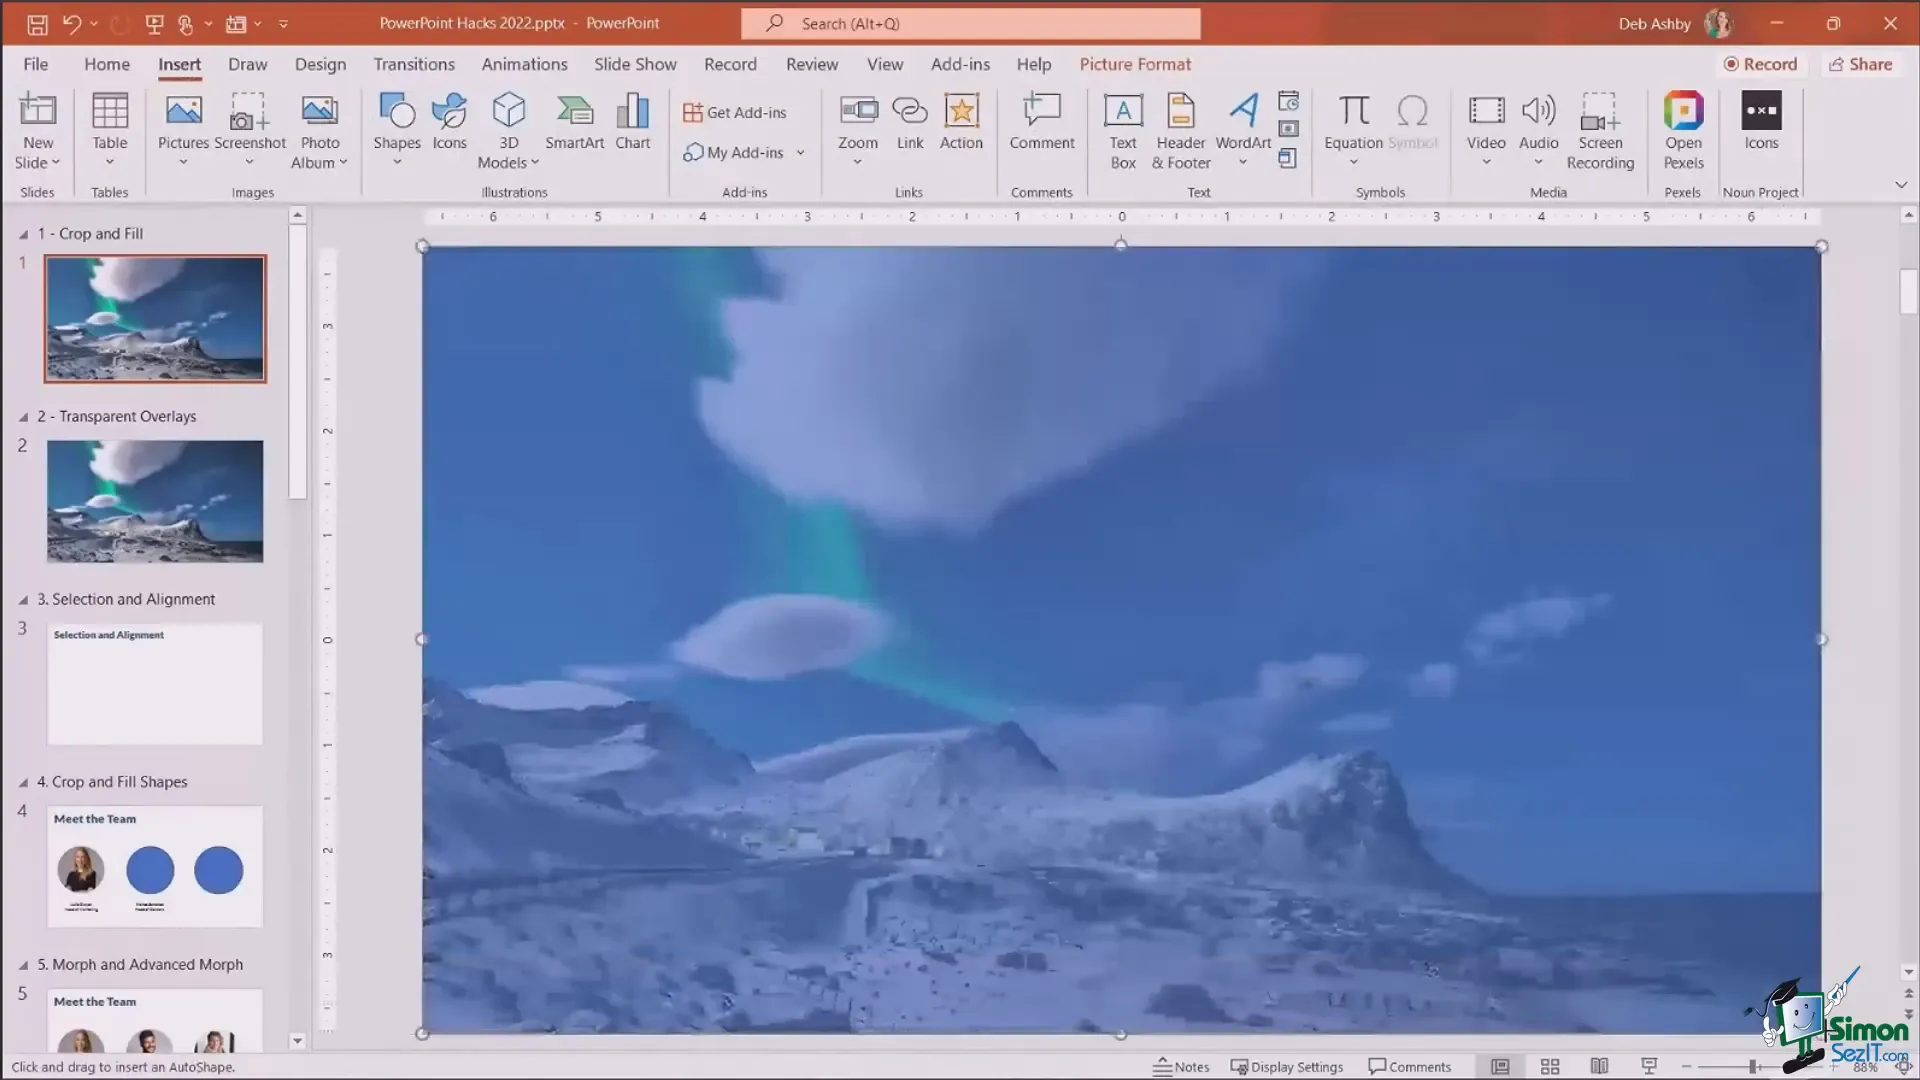
One of the most common mistakes when working with images in PowerPoint is resizing them incorrectly, which results in stretched or distorted visuals that look unprofessional. The secret to perfect image resizing lies in using the Crop and Fill tool properly.
Instead of dragging the resize handles to stretch your image to fit the slide background—which often leads to distortion—use the Crop tool’s Fill option:
- Insert your image onto the slide via Insert > Pictures.
- Select the image and navigate to the Picture Format tab.
- Click the lower half of the Crop button and choose Fill.
- Drag the black crop handles to extend the image so it fills the slide without distortion.
- Make fine adjustments by moving the image up or down as needed.
- Finally, click the top half of the Crop button to apply the crop.
This technique zooms into your image rather than stretching it, ensuring a crisp, professional look every time.
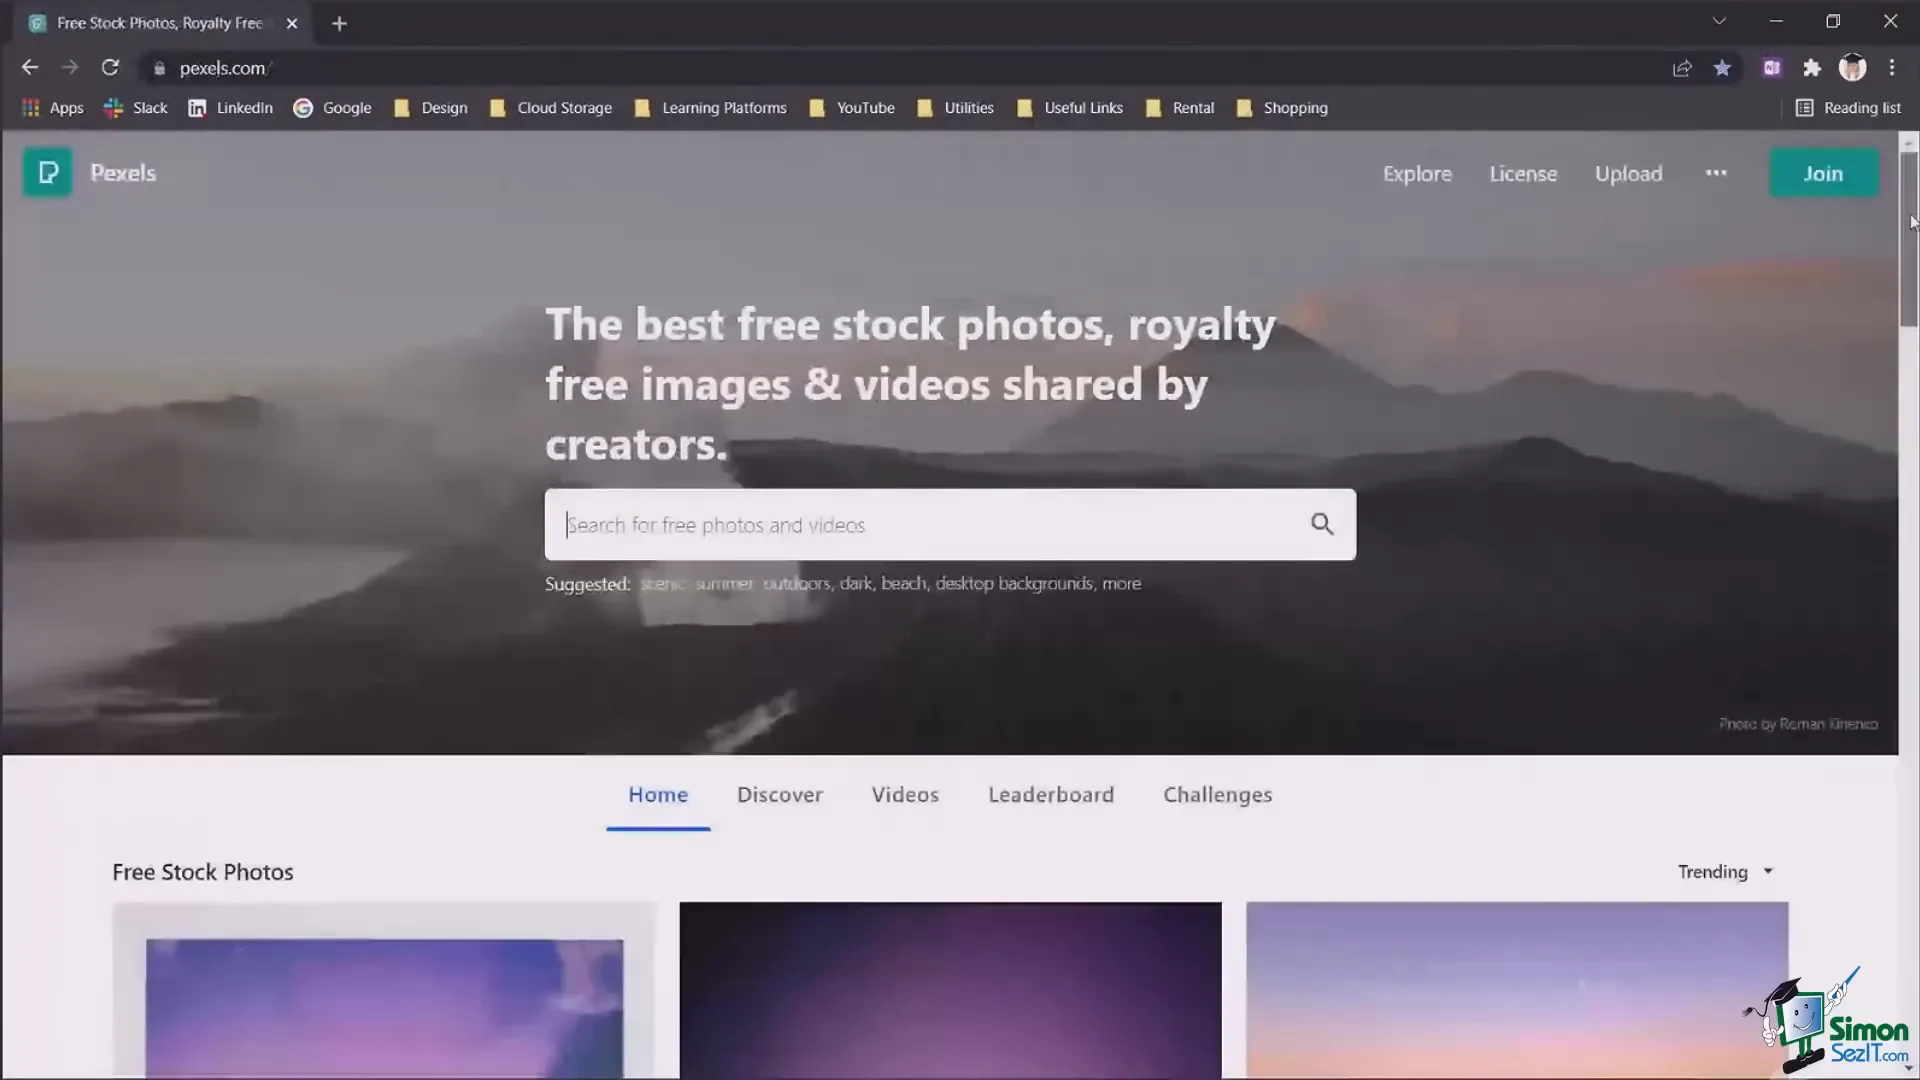
For sourcing high-quality images, Deborah recommends Pexels.com, a free resource offering stunning photos and videos for both personal and professional use. Simply search for your desired image, download it, and insert it into your presentation.
2. Creating Transparent Overlays for Readable Text on Busy Backgrounds
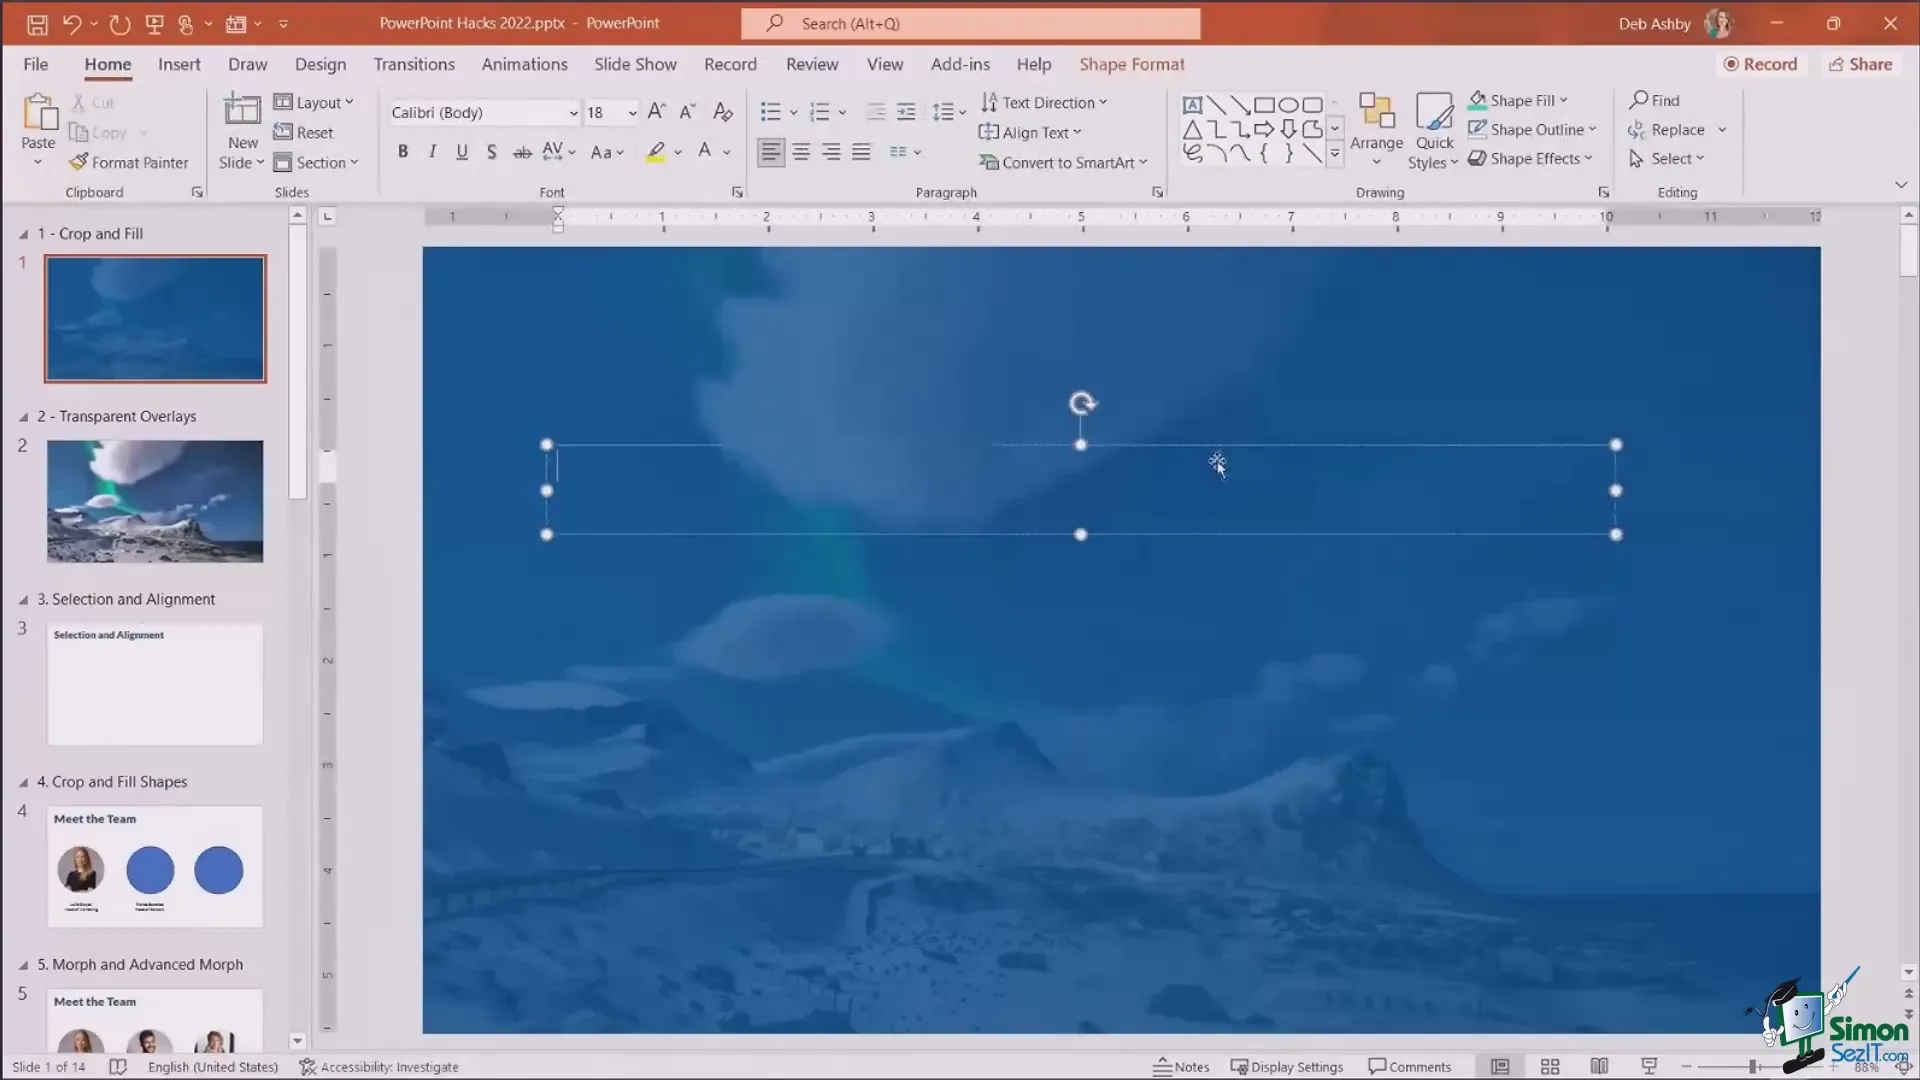
When placing text over a detailed or contrasty background image, readability becomes a challenge. Text can easily blend into the image, making it hard for your audience to focus. While PowerPoint‘s transparency adjustment on images exists, it lacks flexibility, especially when you want to control the color and intensity of the overlay.
Instead, use a transparent overlay by inserting a semi-transparent shape over your background image:
- Go to Insert > Shapes and select the rectangle tool.
- Draw a rectangle covering the entire slide or the area behind your text.
- Remove the shape outline by selecting Shape Format > Shape Outline > No Outline.
- Right-click the shape and select Format Shape to open the pane on the right.
- Under Fill, pick your desired color. A darker shade often works well to contrast white text.
- Adjust the transparency slider to let some of the background image show through while keeping the overlay solid enough for text readability.
This method provides granular control over both color and transparency, enabling your text to stand out without sacrificing the background’s visual appeal.
To add text precisely centered on the slide, Deborah suggests dragging the text box edges to align exactly with the slide edges. Then, center-align the text within the box. This ensures perfect horizontal centering across all devices and screens.
3. Selecting and Aligning Objects with Precision
Alignment is crucial to making your presentation look polished and professional. Slight misalignments or uneven spacing can distract your audience and diminish your message’s impact. PowerPoint offers multiple ways to select and align objects effectively.
Selecting Multiple Objects
- Shift-click to select objects one by one.
- Drag a selection box around objects to select everything within.
- Use Ctrl + A to select all objects, then Ctrl + Click to deselect any unwanted items.
Aligning and Distributing Objects
- With your objects selected, go to Shape Format > Arrange > Align.
- Choose Align Center or Align Middle to align objects uniformly.
- Use Distribute Horizontally or Distribute Vertically to space objects evenly.
Grouping and Ungrouping
Grouping objects helps manage multiple items as one, making alignment and movement easier.
- Ctrl + G to group selected objects.
- Ctrl + Shift + G to ungroup.
- Alternatively, use the Group option in the Shape Format > Arrange menu.
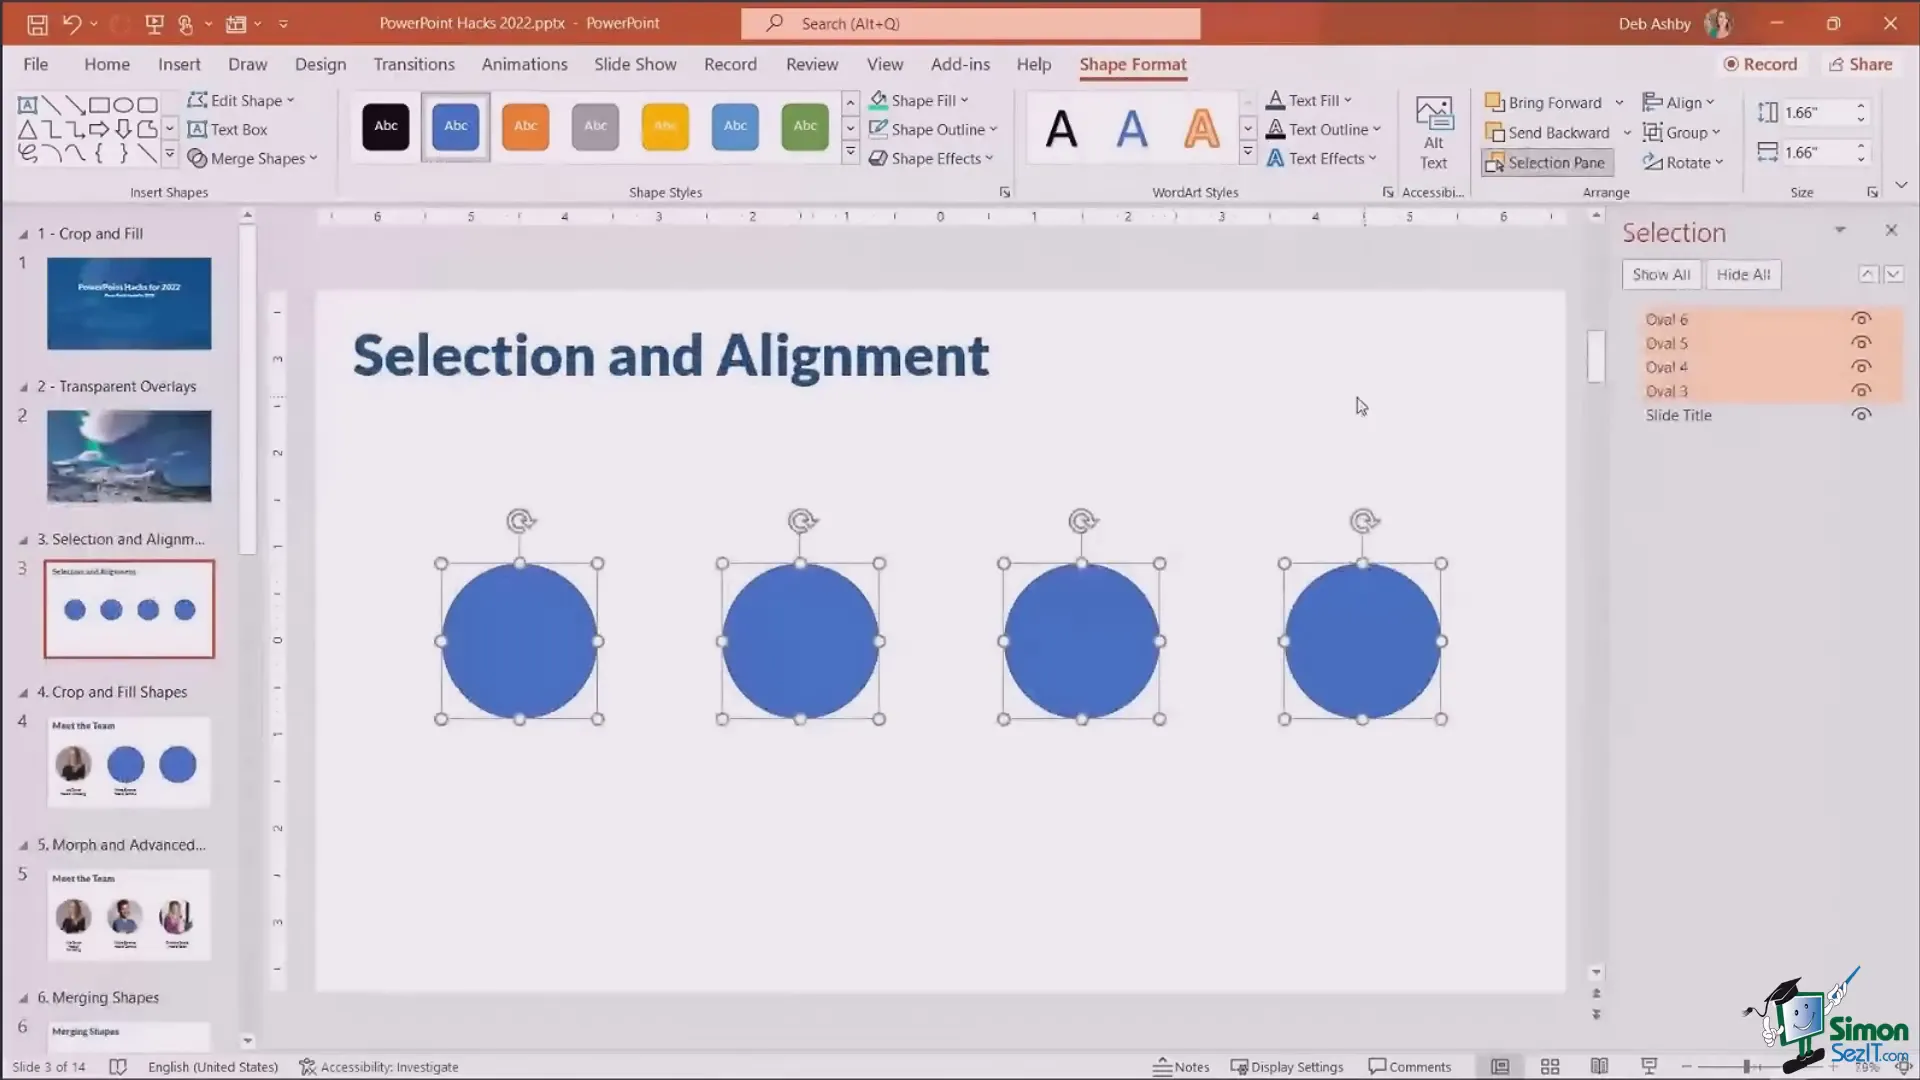
Using the Selection Pane
The Selection Pane is a powerful tool for managing complex slides with multiple overlapping objects:
- Open it via Shape Format > Arrange > Selection Pane.
- Rename objects for easier identification.
- Toggle visibility using the eye icons to work on hidden or overlapping items without moving them.
- Drag objects up or down in the list to change their layering order (Z-order).
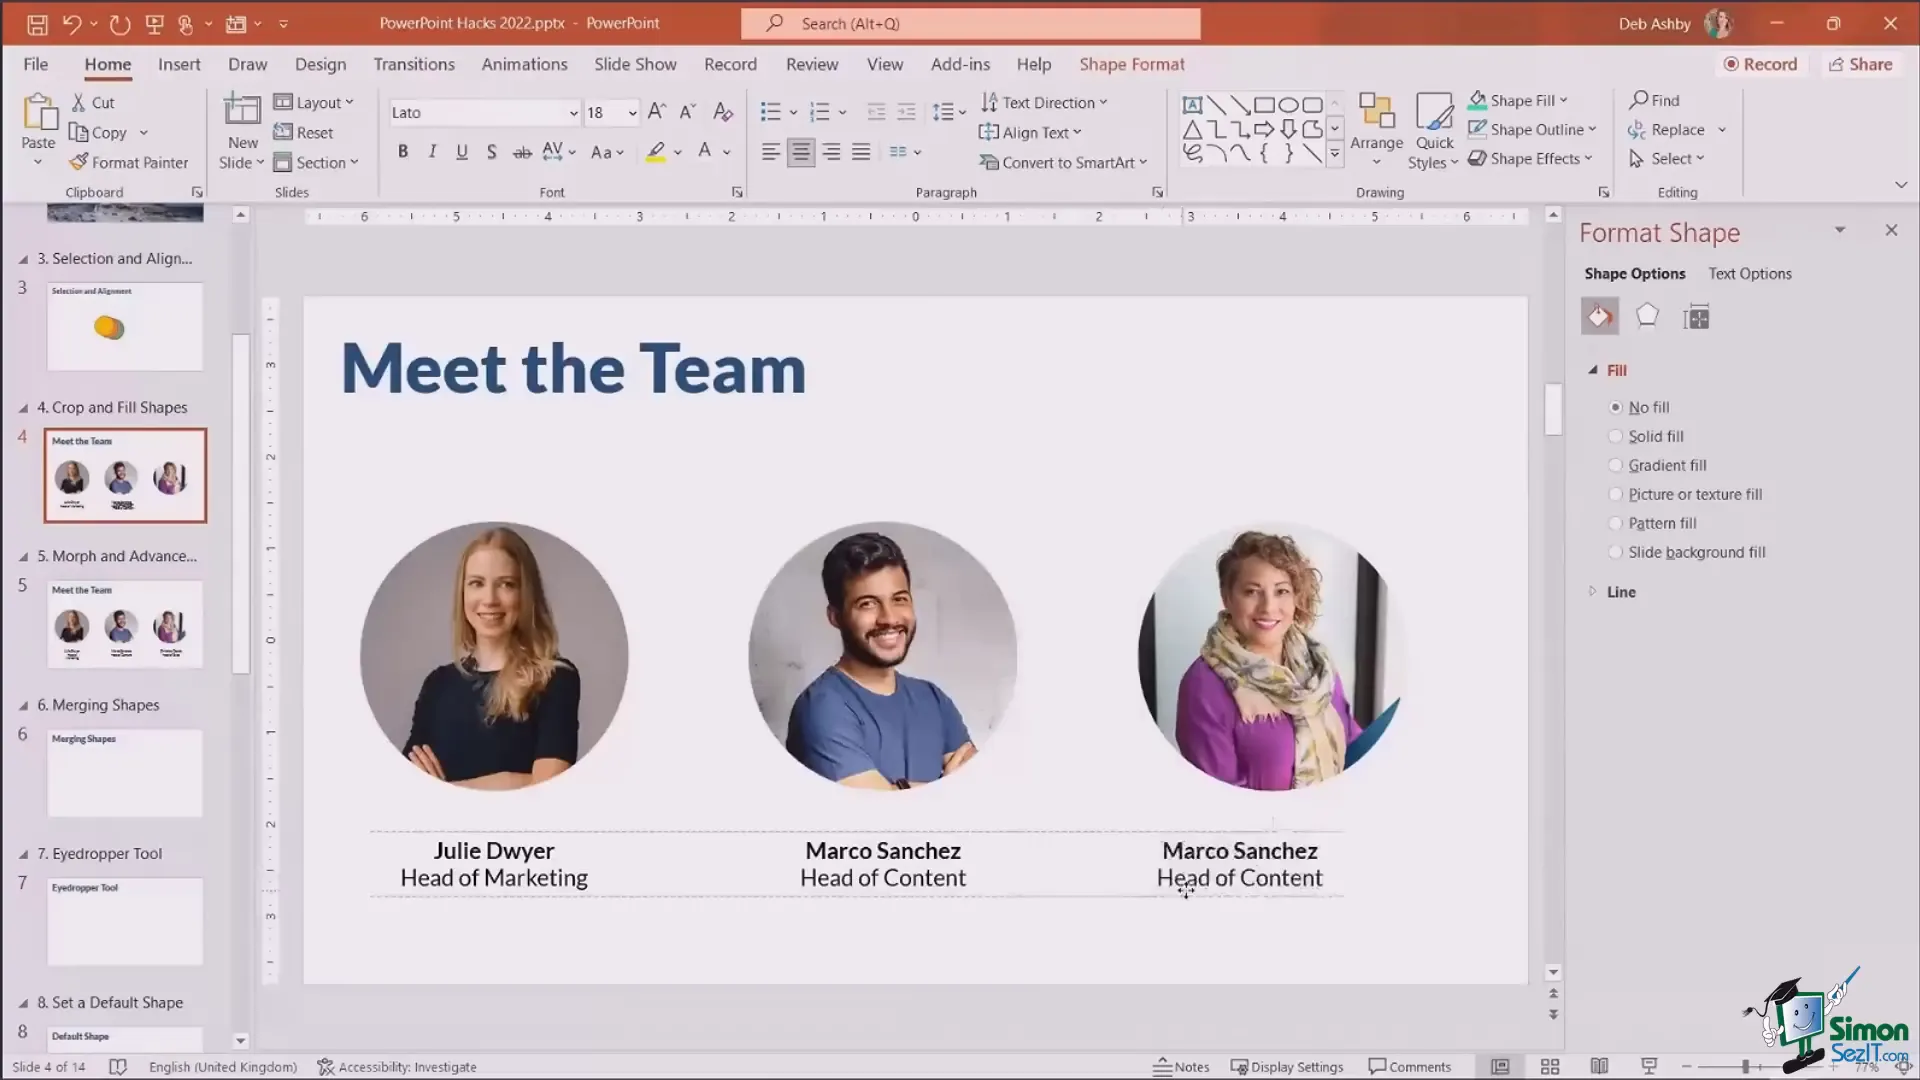
4. Filling Shapes with Images the Right Way
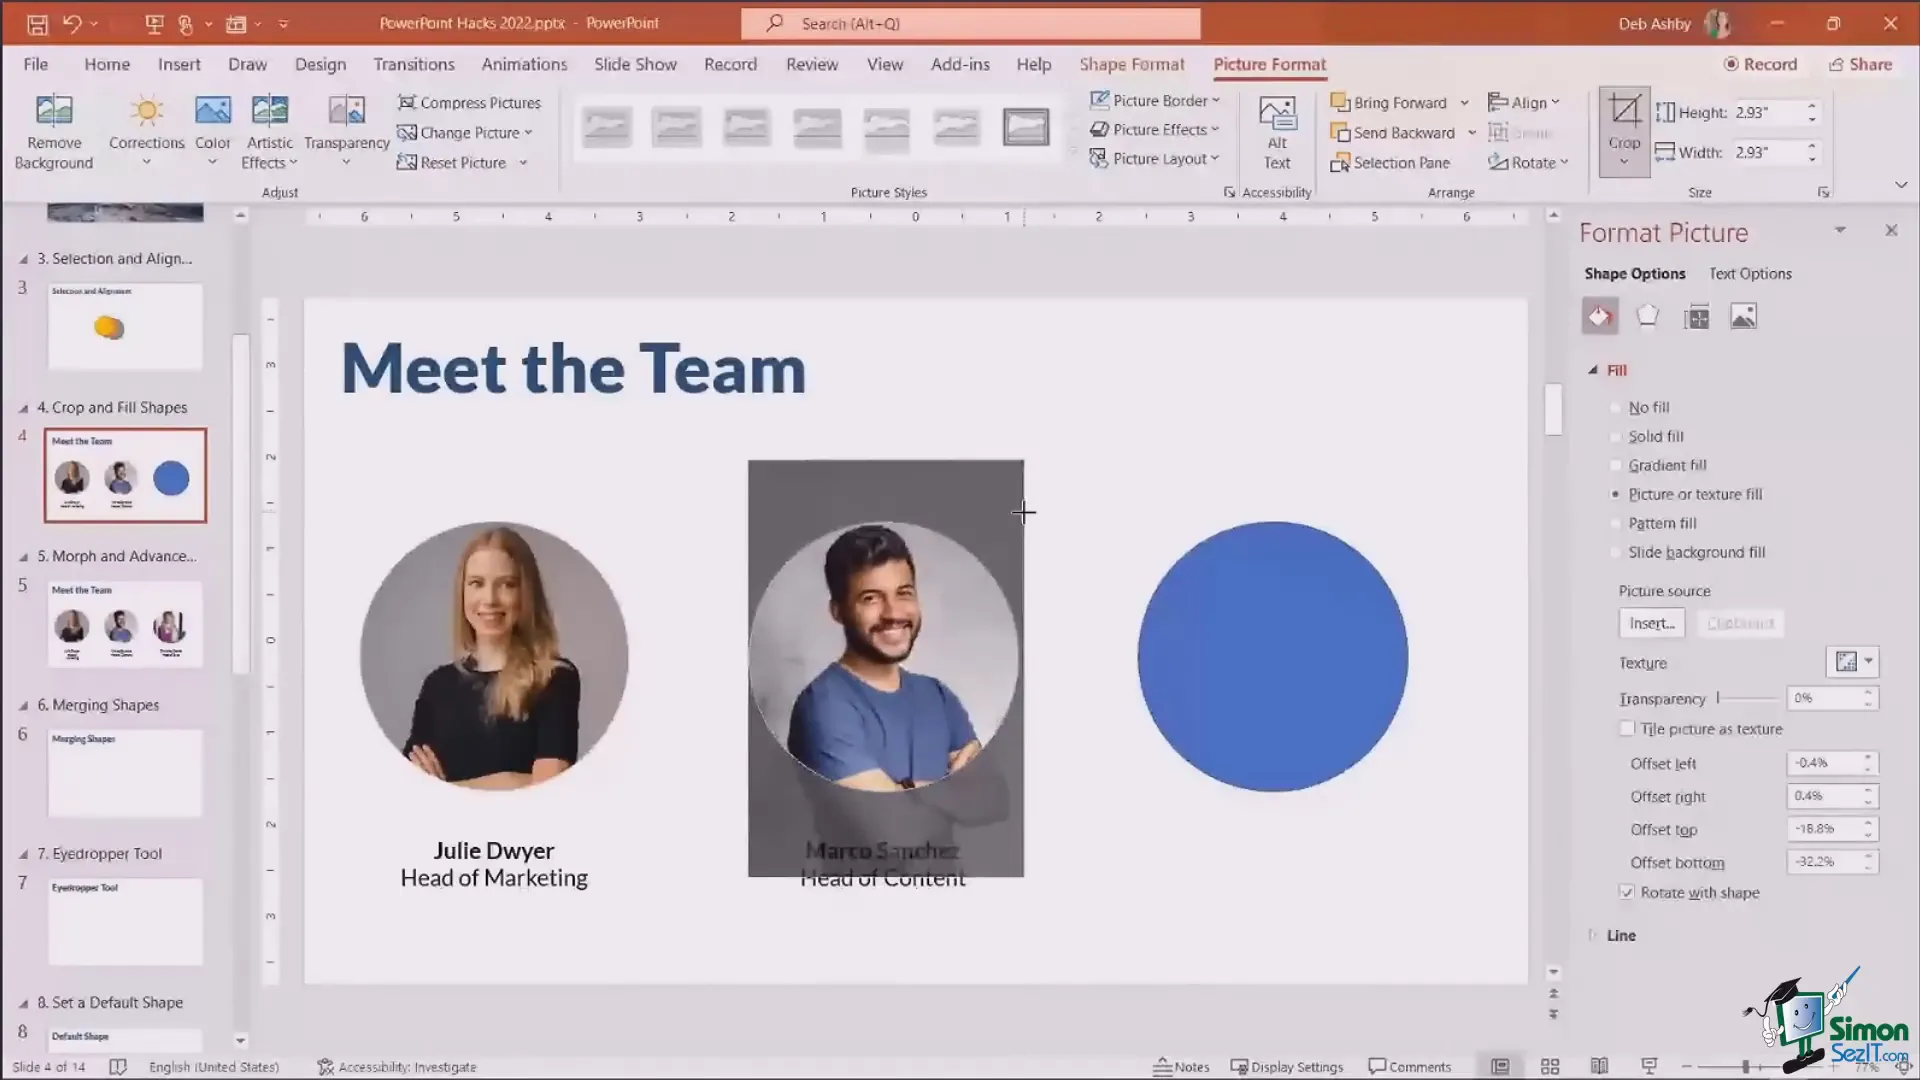
Filling shapes with images adds a creative touch to your slides, especially for profile pictures or decorative elements. However, incorrect filling can cause distortion or awkward cropping.
To fill a shape properly with an image:
- Create your shape (e.g., circle for a profile picture).
- Right-click the shape and select Format Shape.
- Choose Picture or texture fill under Fill options.
- Insert your image.
- Remove any shape outline via Shape Format > Shape Outline > No Outline.
- Select the image within the shape, go to Picture Format > Crop > Fill to zoom in without distortion.
- Adjust the crop handles to position the image perfectly.
- Click the Crop button to apply.
This method ensures your images fit nicely within shapes, maintaining proportions and positioning.
Deborah also highlights the usefulness of smart guides, which appear when moving objects to help align them with other elements on the slide.
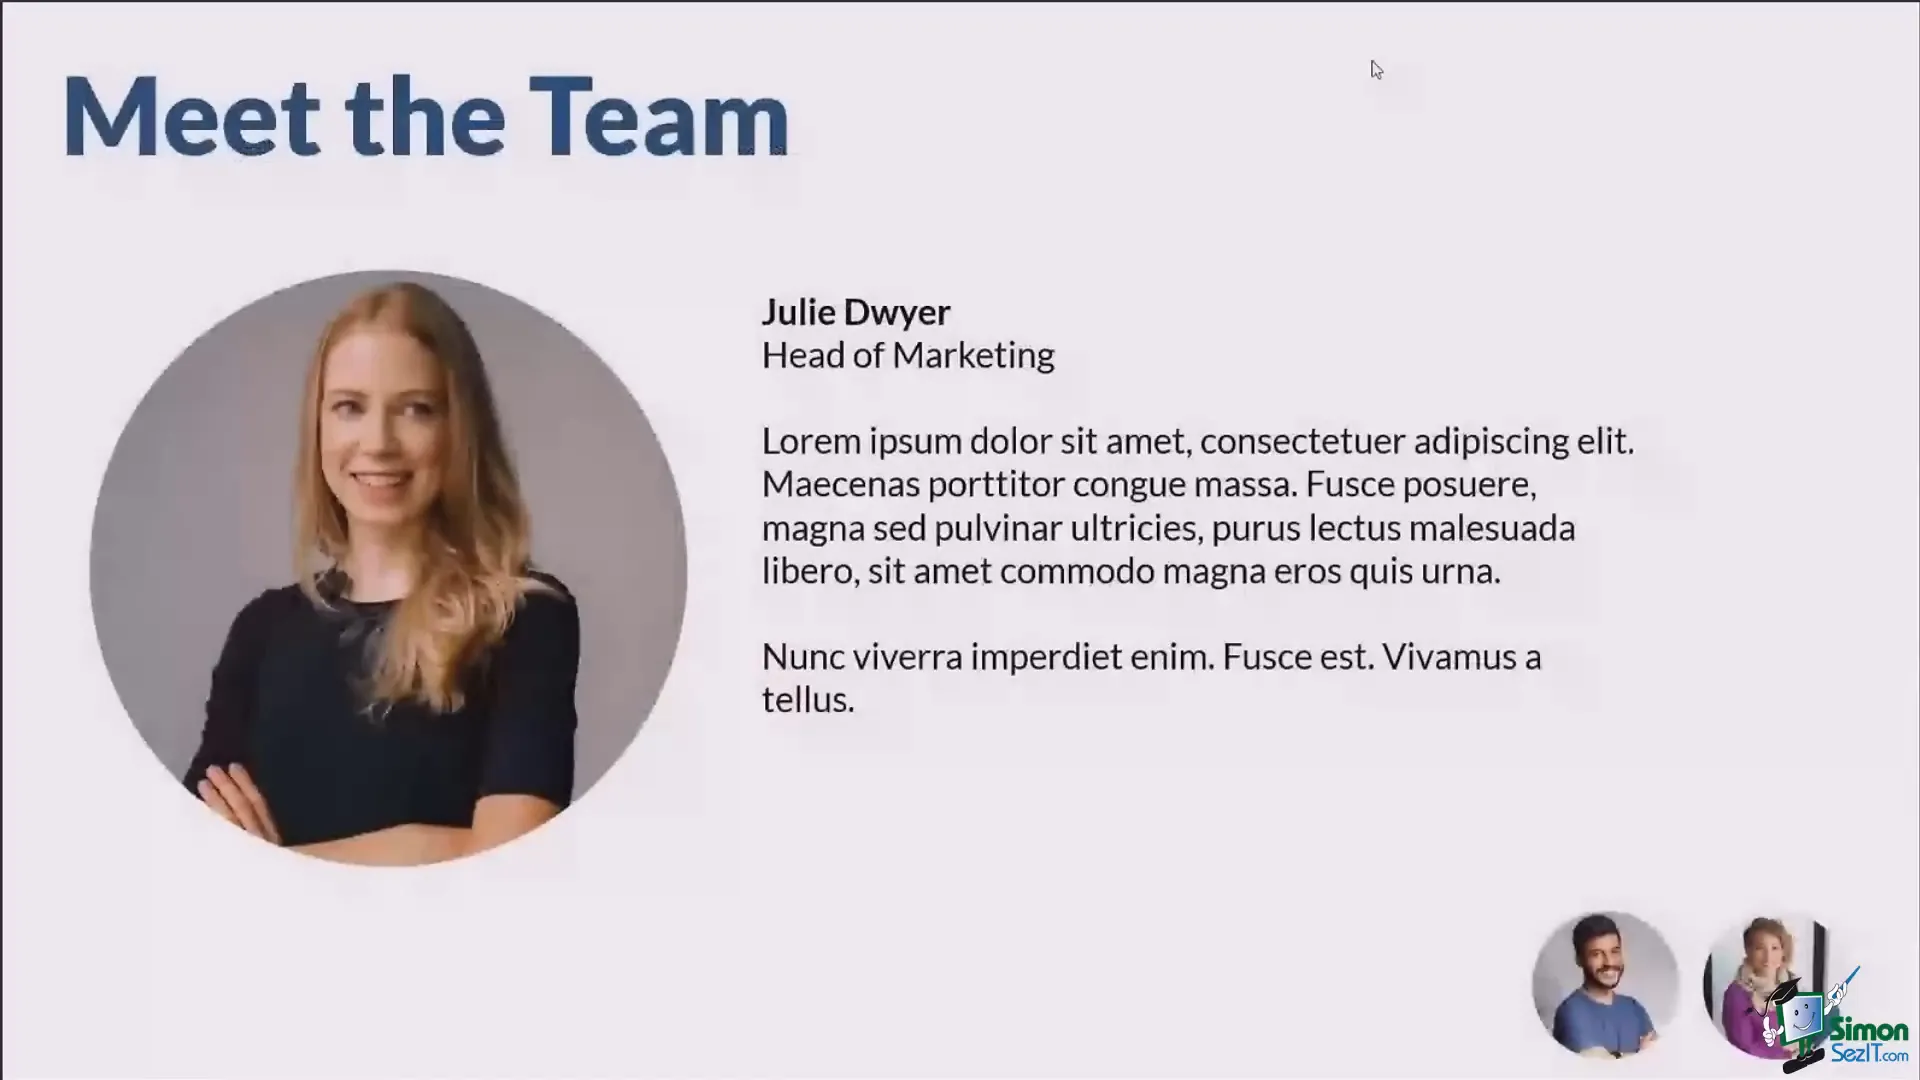
5. Unlocking the Power of Morph and Advanced Morph Transitions
The Morph transition is a dynamic feature that animates smooth movement, resizing, and transformation of objects between slides. It’s perfect for creating engaging, professional animations without complex software.
Basic Morph Transition
- Prepare your first slide with objects arranged as desired.
- Duplicate the slide (Ctrl + D).
- Adjust objects on the second slide (resize, reposition, or modify).
- Select the second slide, go to Transitions > Morph.
- Run the slideshow to see objects animate smoothly between the two slides.
This technique can be used to highlight team members, progress steps, or any visual change.

Advanced Morph for Shape Transformation
Advanced Morph allows you to morph objects into different shapes by linking them across slides using the Selection Pane:
- Duplicate the slide with the object you want to morph.
- Change the shape of the object on the second slide (Shape Format > Edit Shape).
- Open the Selection Pane on both slides.
- Rename the morphing objects with the exact same name, prefixed by
!!(e.g.,!!morph). - Apply the Morph transition to the second slide.
- Run the slideshow to see the shape smoothly morph from one form to another.
This creates sophisticated effects like morphing a circular image into a square or other shapes, adding a wow factor to your presentations.
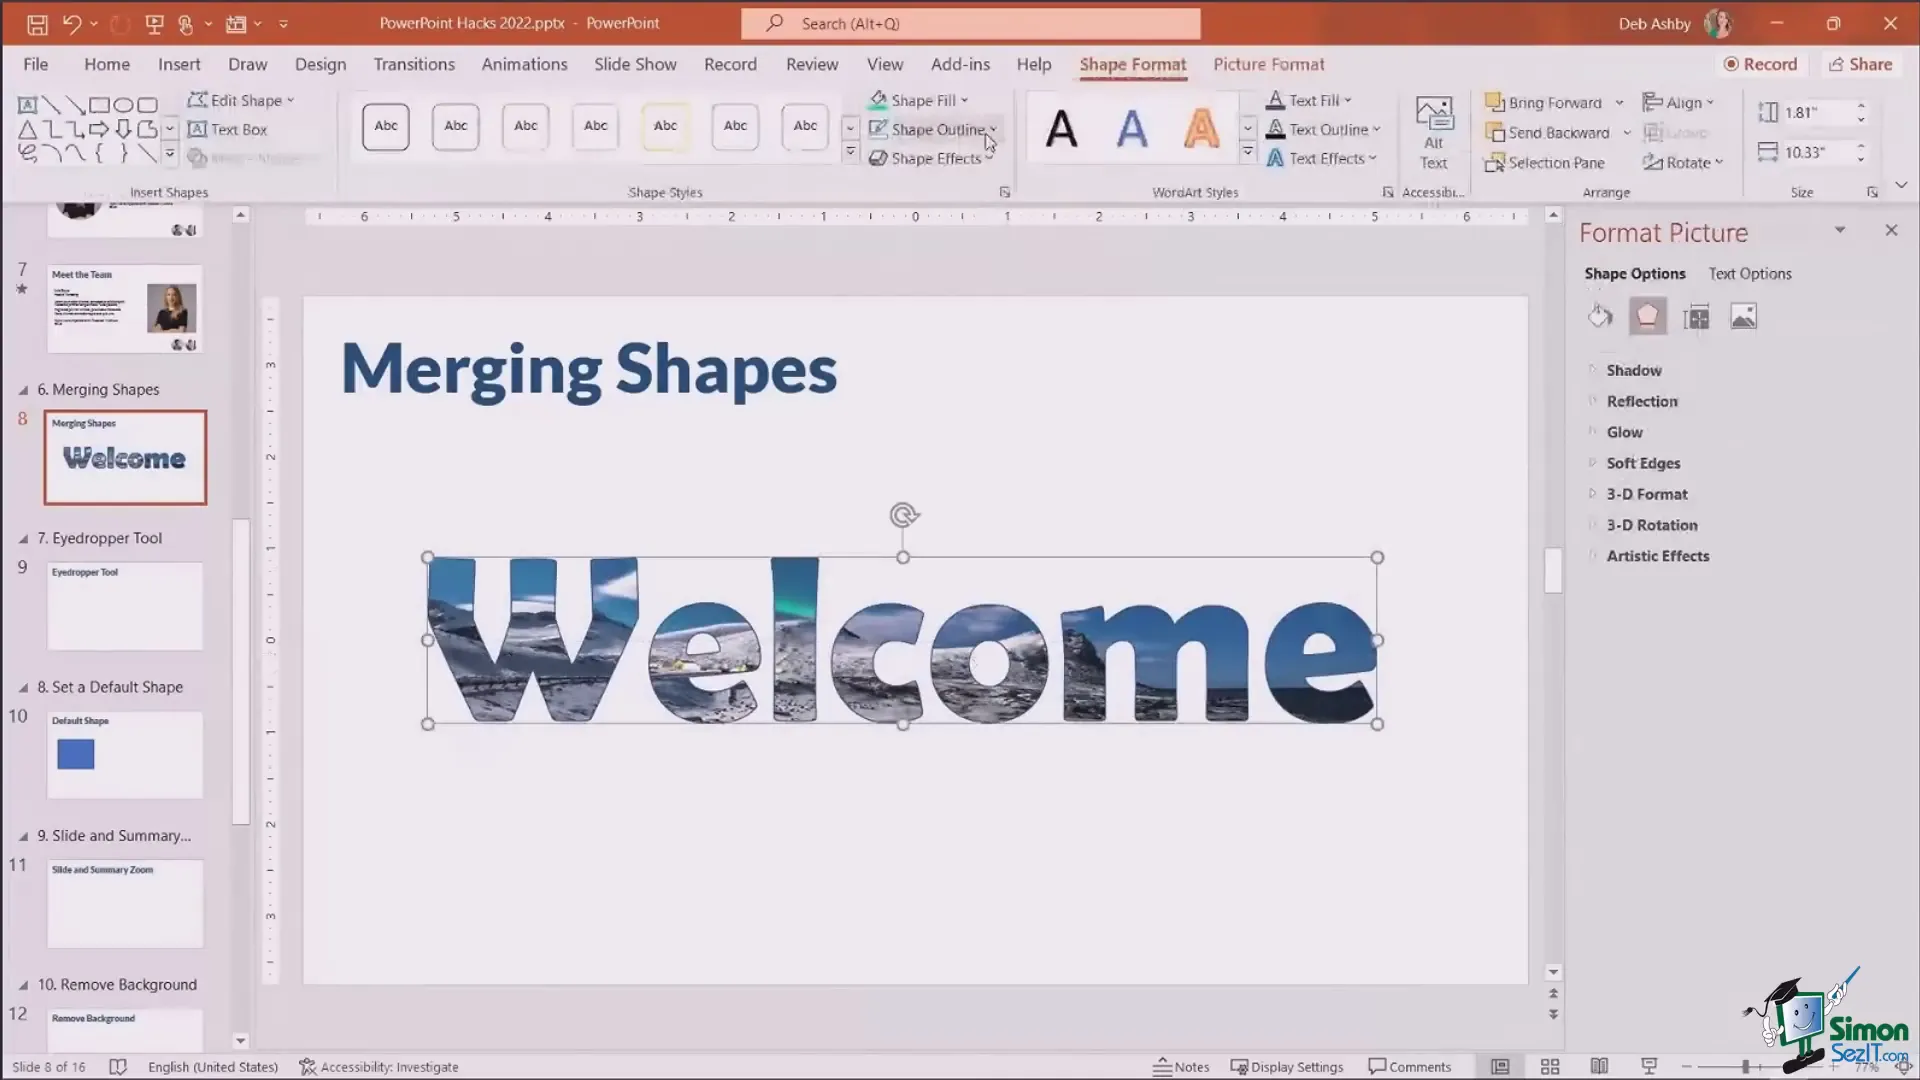
6. Merge Shapes to Create Custom Graphics
PowerPoint’s Merge Shapes feature lets you combine, fragment, or intersect shapes to create unique graphics and text effects:
- Union: Combines multiple shapes into one.
- Combine: Merges shapes but removes overlapping areas.
- Fragment: Breaks shapes into smaller pieces based on overlap.
- Intersect: Keeps only the overlapping areas between shapes.
- Subtract: Removes one shape from another.
For example, you can create text filled with an image by:
- Adding your text with a bold font.
- Inserting a large rectangle filled with an image behind the text.
- Sending the image to the back (Picture Format > Send to Back).
- Selecting both the text and the image.
- Using Merge Shapes > Intersect to fill the text with the image.
This effect adds a visually striking element to your slides, perfect for title slides or section headers.
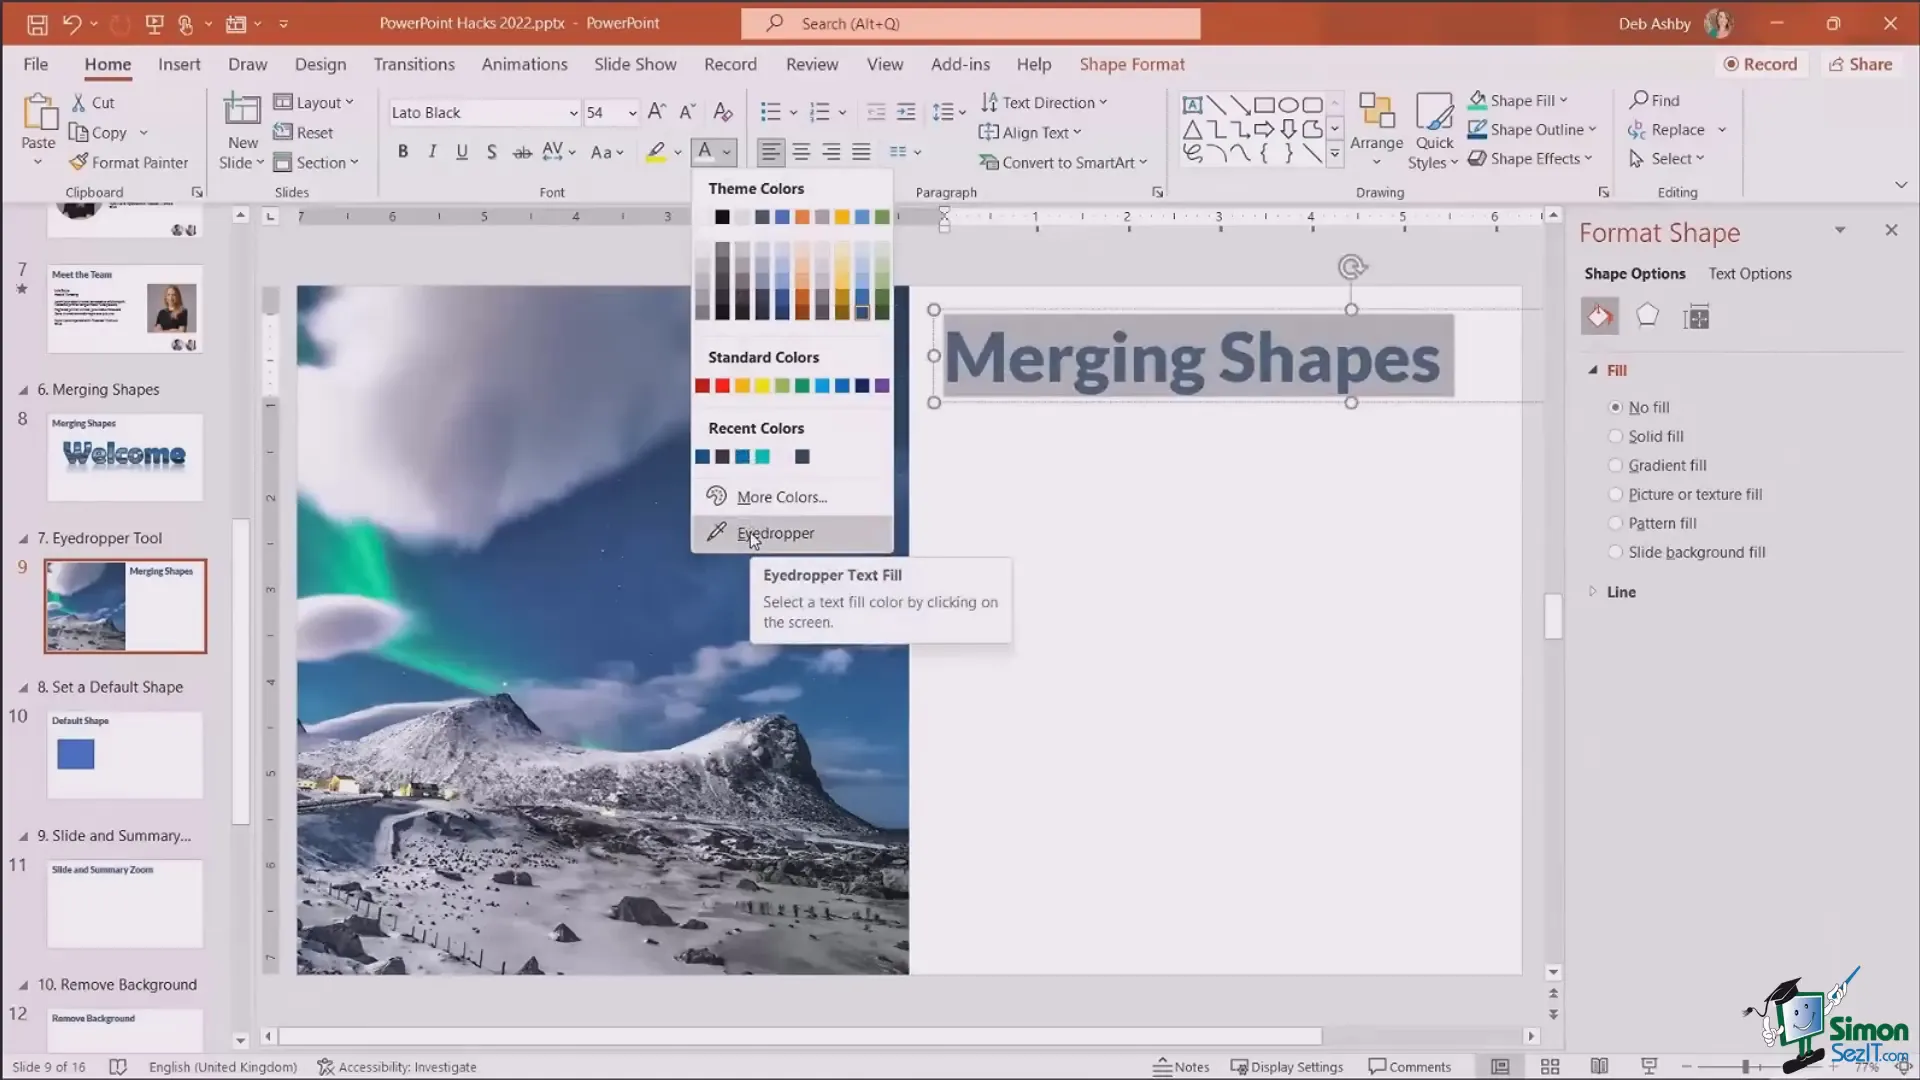
7. Use the Eyedropper Tool for Consistent Colors
Maintaining a consistent color palette across your presentation is key to a cohesive and professional look. The Eyedropper tool is invaluable for matching colors exactly from images, shapes, or other elements on your slides.
To use the eyedropper:
- Select the object or text you want to recolor.
- Open the Font Color dropdown (for text) or Shape Fill (for shapes).
- Choose Eyedropper at the bottom of the color menu.
- Hover over any color on your slide; the tool previews the color.
- Click to apply the selected color.
This technique ensures your color choices are perfectly matched and consistent throughout your presentation.
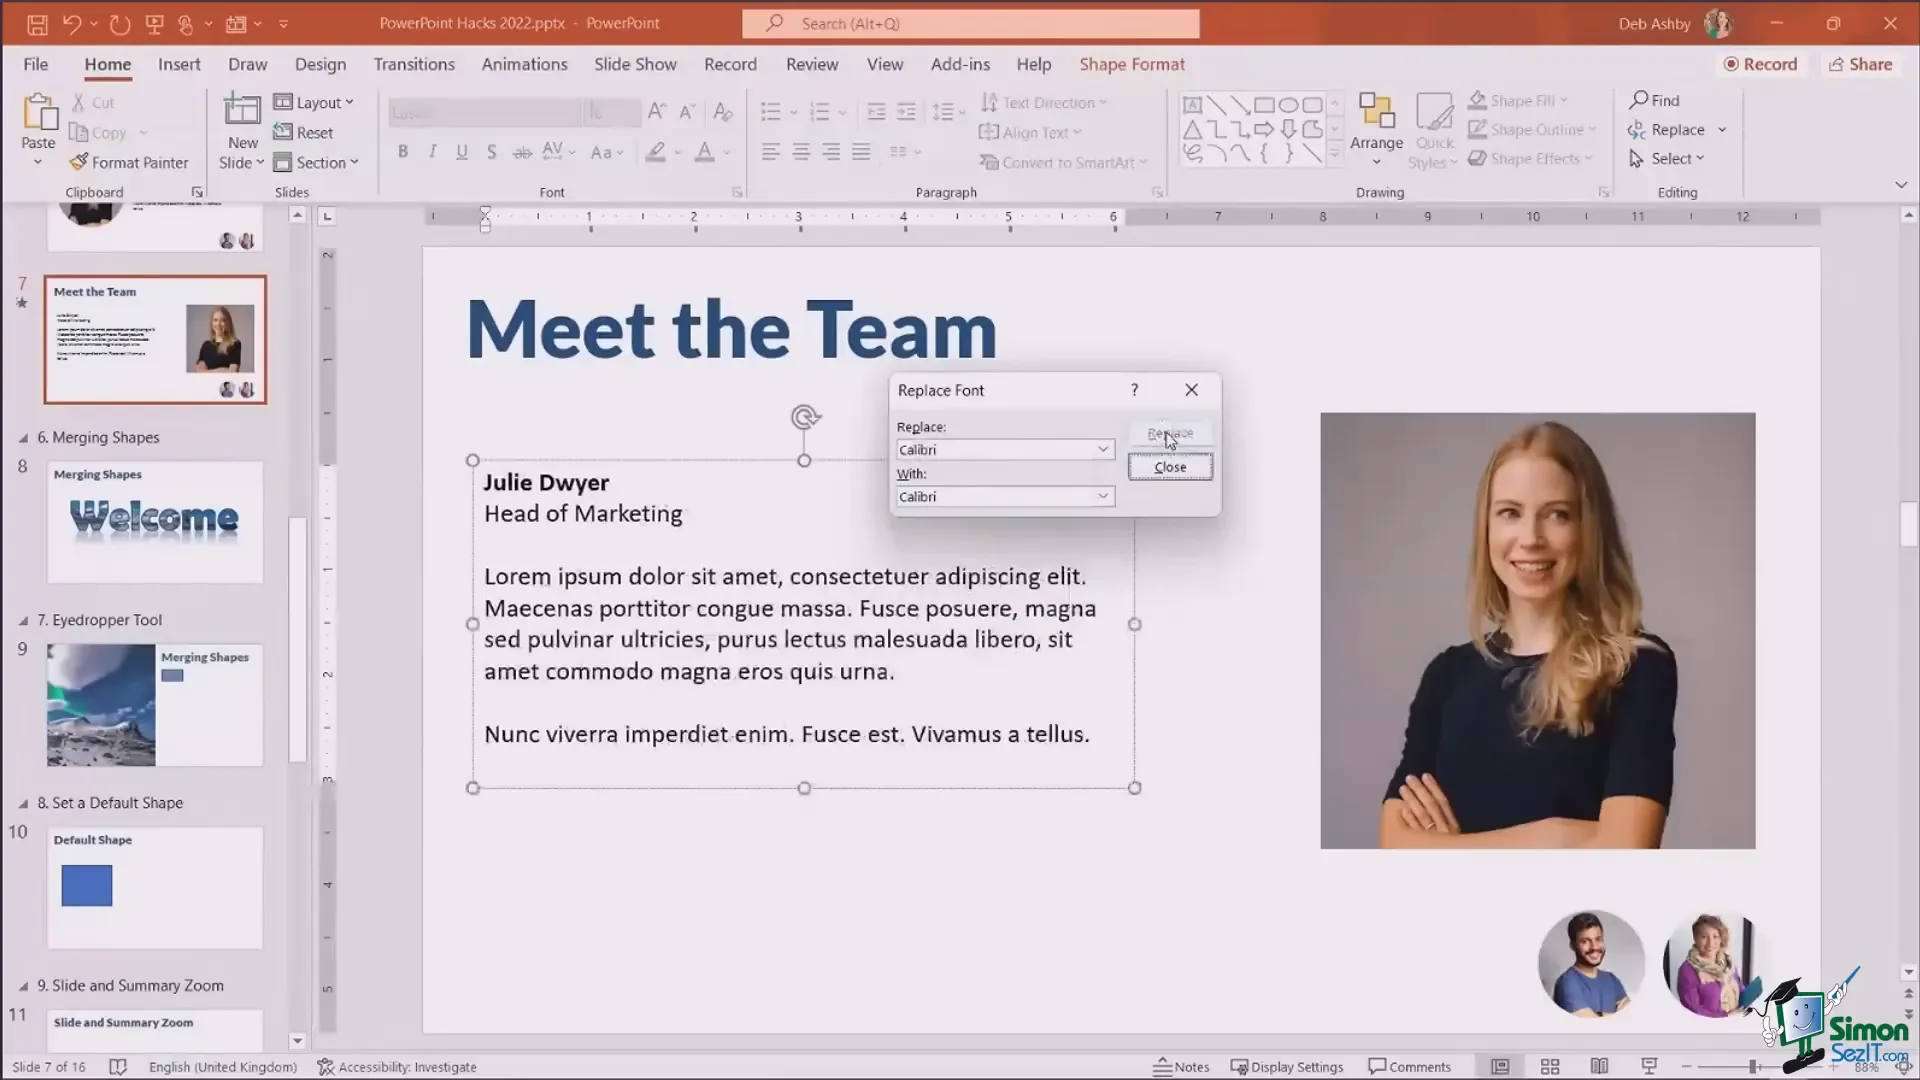
8. Replace Fonts Globally for Quick Consistency
Working with presentations from various sources often means dealing with inconsistent fonts. Rather than manually changing fonts slide by slide, you can replace fonts throughout the entire presentation:
- Go to the Home tab.
- Click the arrow next to Replace in the Editing group and select Replace Fonts.
- Choose the font you want to replace from the list.
- Select the new font you want to apply.
- Click Replace to update all instances.
This saves time and ensures brand consistency, especially when incorporating client presentations.

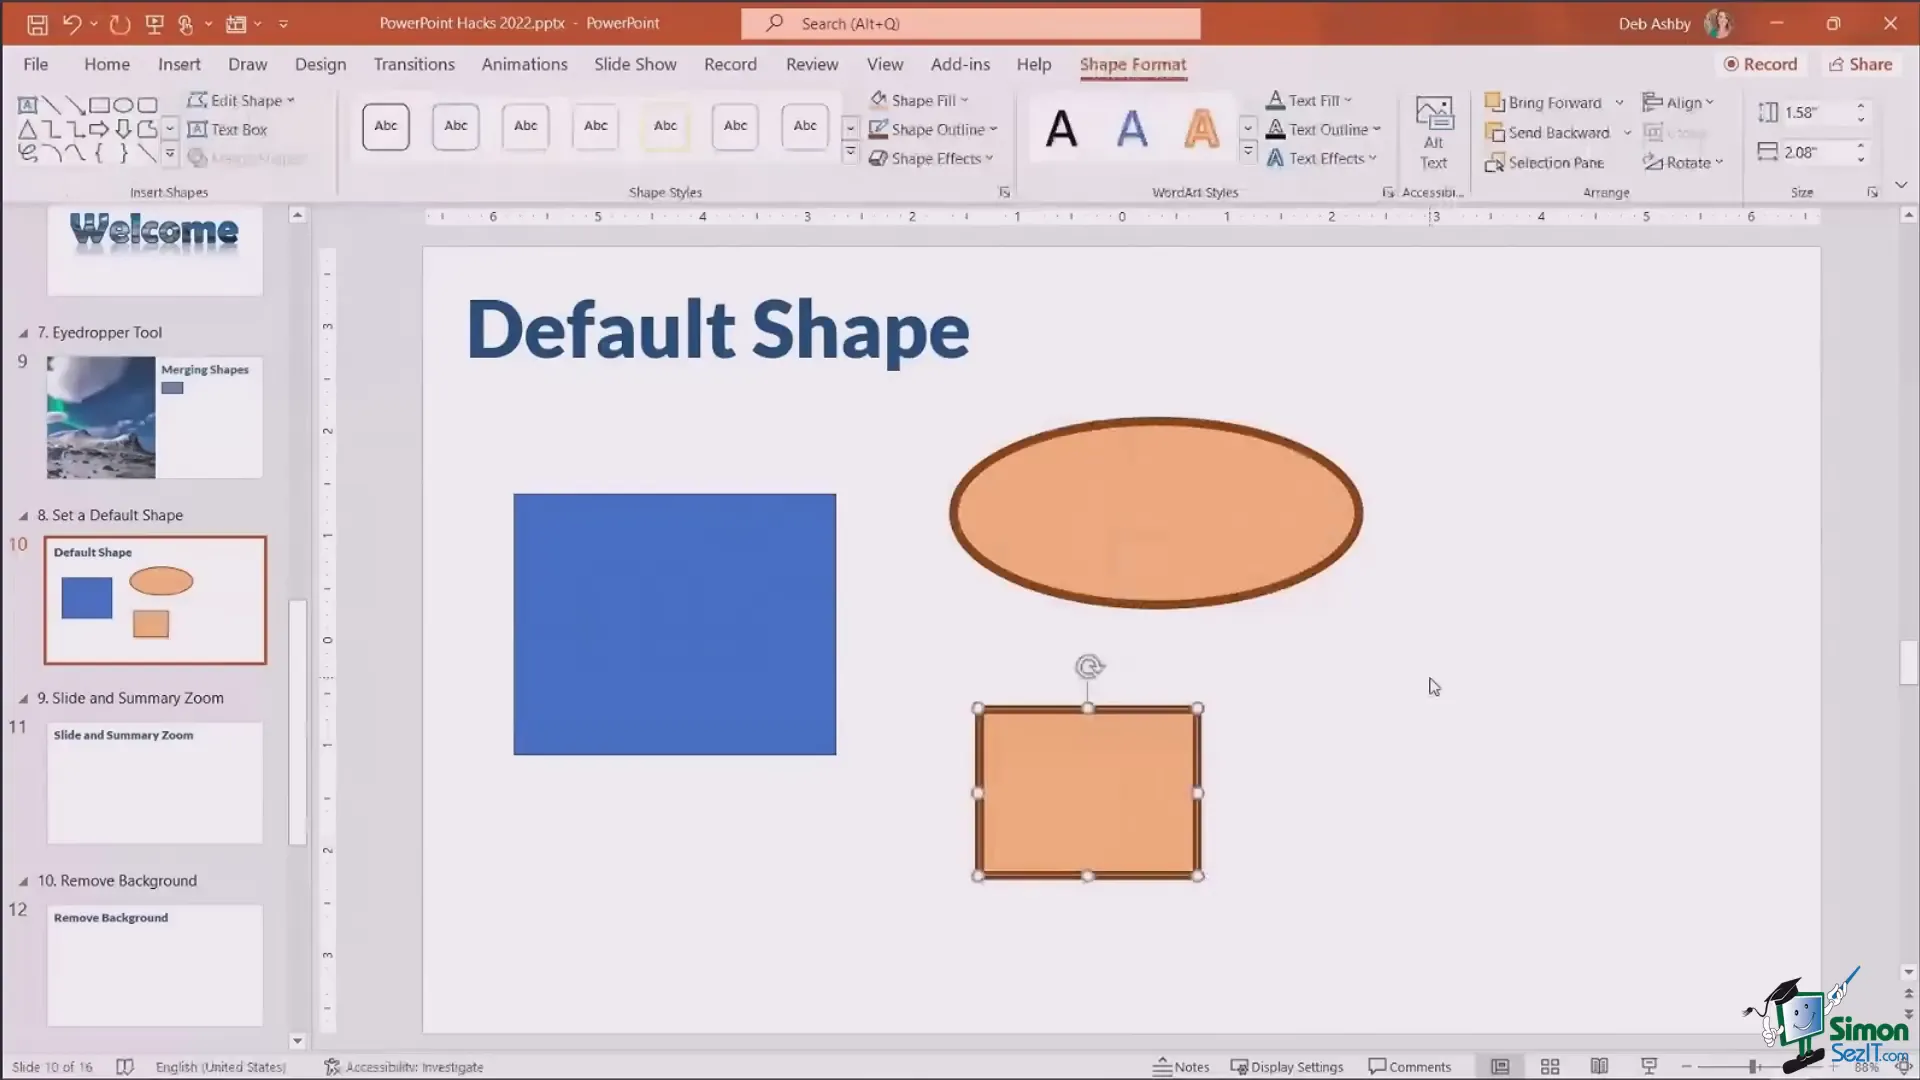
9. Setting Your Default Shape Style
If you frequently use shapes in your presentations, setting a default shape style saves time and keeps your slides uniform.
To set your default shape:
- Insert a shape and customize its fill, outline, and effects as desired.
- Right-click the shape and choose Set as Default Shape.
From now on, every new shape you insert will have this style applied automatically.
Another handy tip is locking shapes into drawing mode so you can insert multiple shapes consecutively without reselecting the shape tool:
- Right-click the shape in the Insert > Shapes menu and select Lock Drawing Mode.
- Draw as many shapes as needed.
- Press Esc or right-click and unlock to exit drawing mode.
10. Slide and Summary Zoom for Interactive Navigation
Traditional PowerPoint presentations follow a linear path, but the Slide Zoom and Summary Zoom features provide interactive navigation options that allow you to jump between slides or sections dynamically.
Slide Zoom
Slide Zoom lets you create clickable thumbnails of specific slides on a single slide, enabling the audience to jump to those slides instantly:
- Go to Insert > Zoom > Slide Zoom.
- Select the slides you want to link to.
- Position the thumbnails on your slide and add borders or effects as desired.
- Enable Return to Zoom on the Zoom tab for each linked slide to return to the main zoom slide after viewing.
This creates a “choose your own adventure” style presentation flow, ideal for interactive sessions or non-linear storytelling.
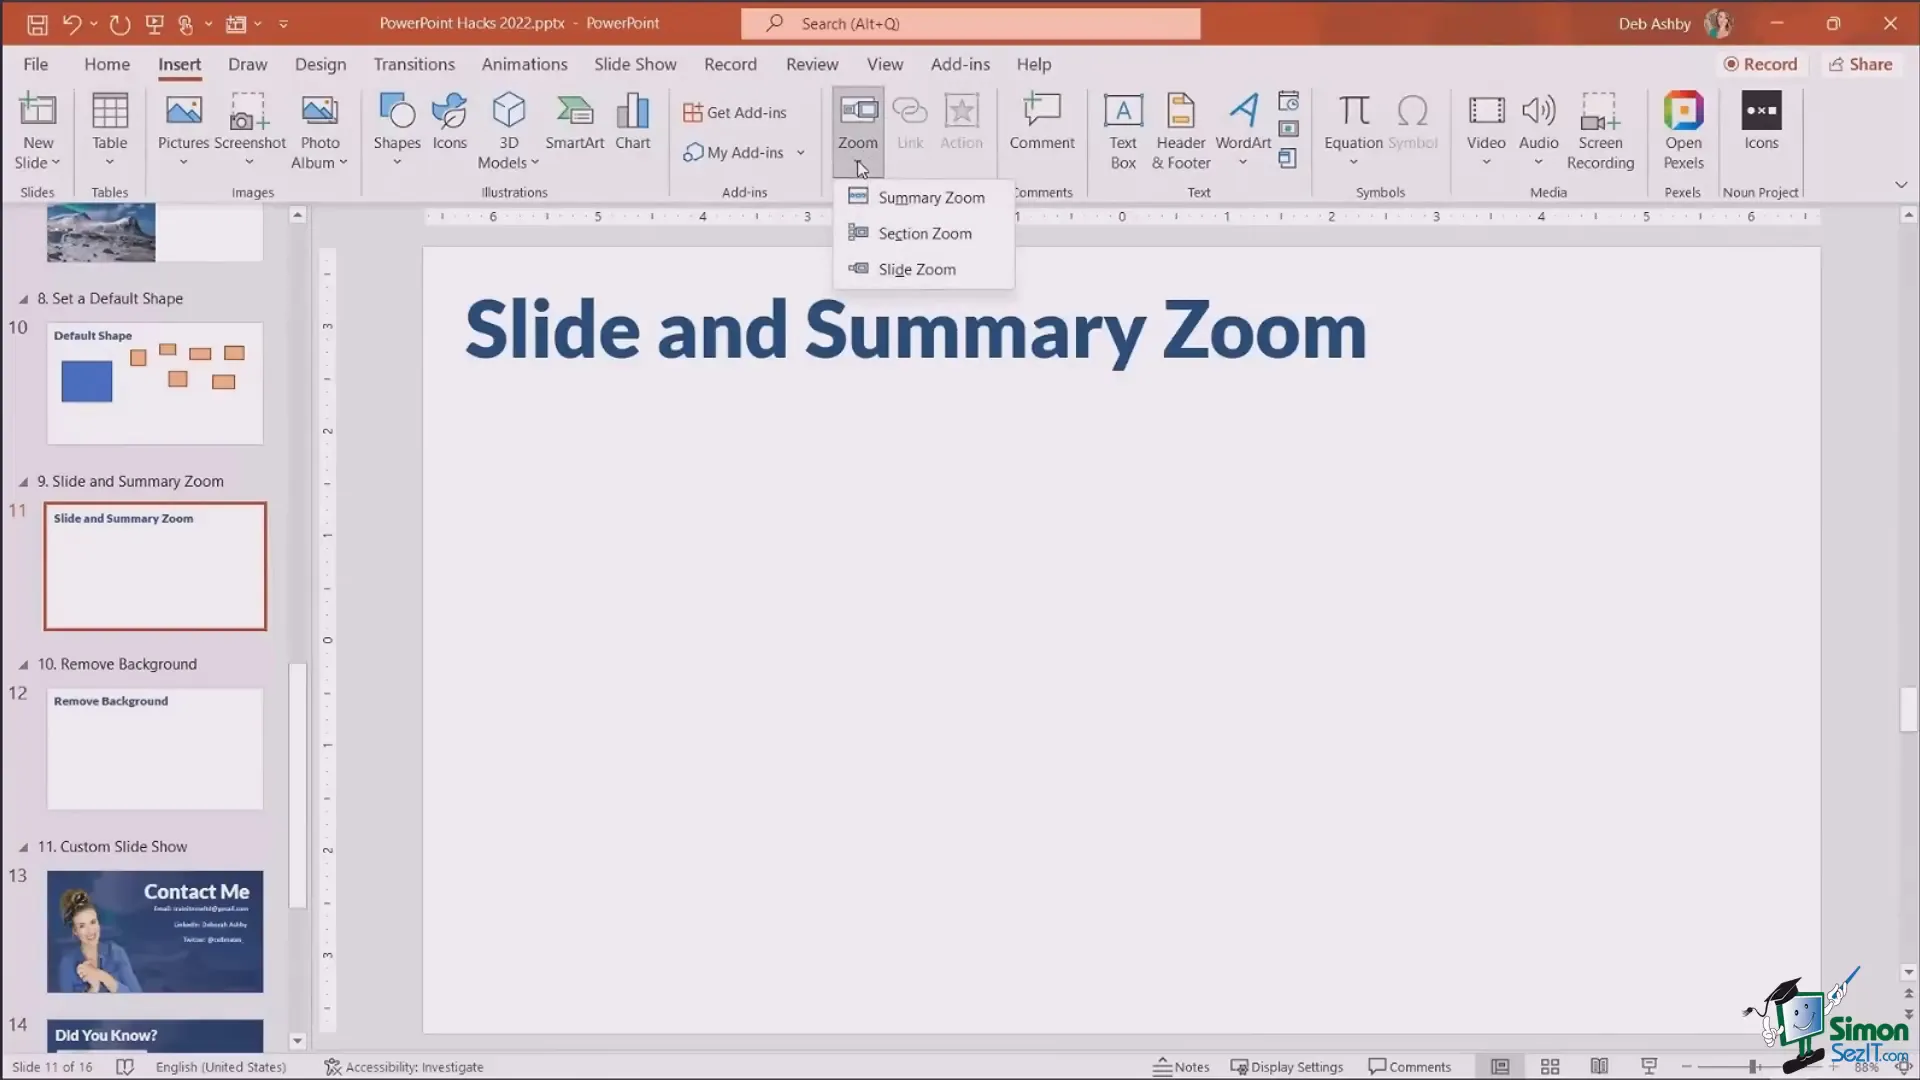
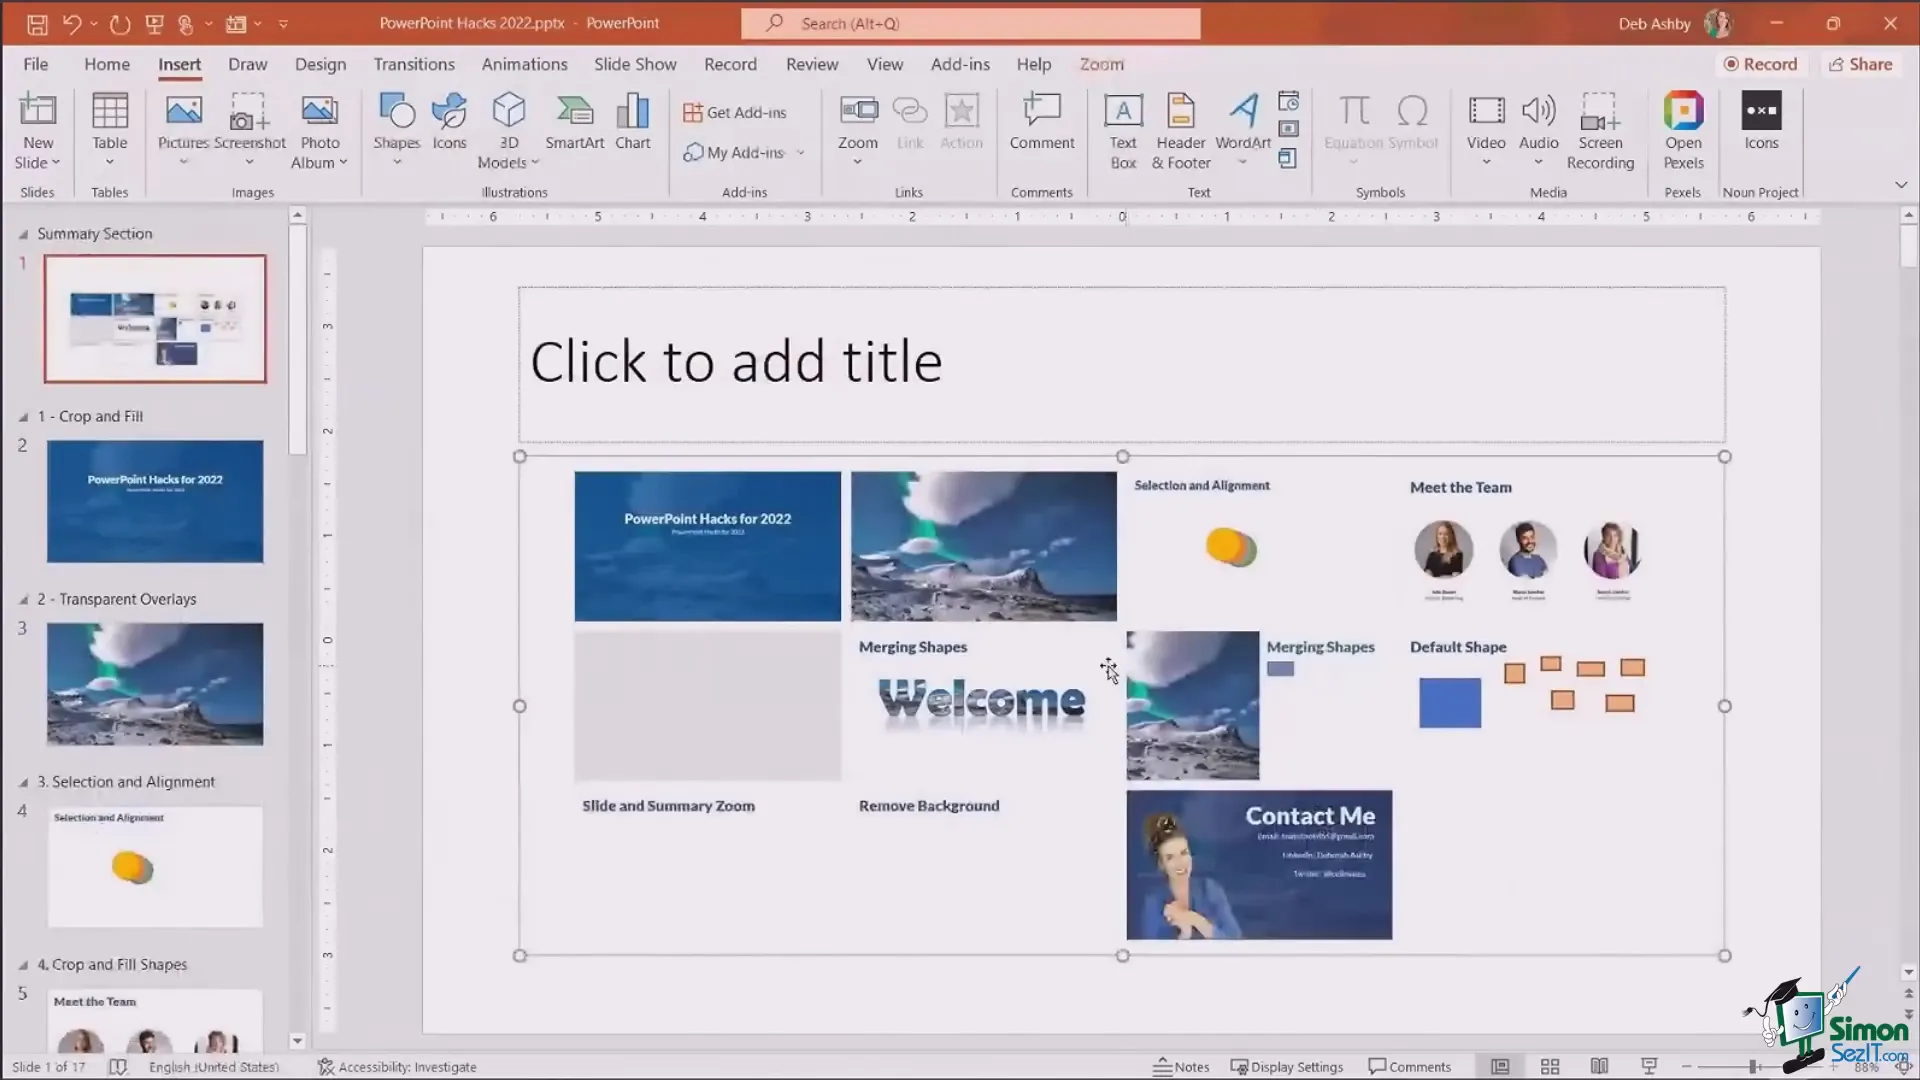
Summary Zoom
Summary Zoom aggregates entire sections of your presentation into a clickable menu, functioning like a table of contents:
- Go to Insert > Zoom > Summary Zoom.
- Select the sections to include.
- Arrange the summary thumbnails and add titles.
- Set Return to Zoom options as needed.
This feature helps your audience easily explore different parts of your presentation and is excellent for longer or modular presentations.
11. PowerPoint Add-Ins to Extend Functionality
PowerPoint supports a range of add-ins that enhance its capabilities, accessible via Insert > Get Add-ins. Two valuable add-ins Deborah uses are:
- Pexels: Search and insert high-quality images directly within PowerPoint.
- The Noun Project: Access thousands of free and premium icons for visual enhancement.
Installing these add-ins streamlines your workflow by eliminating the need to switch between applications.
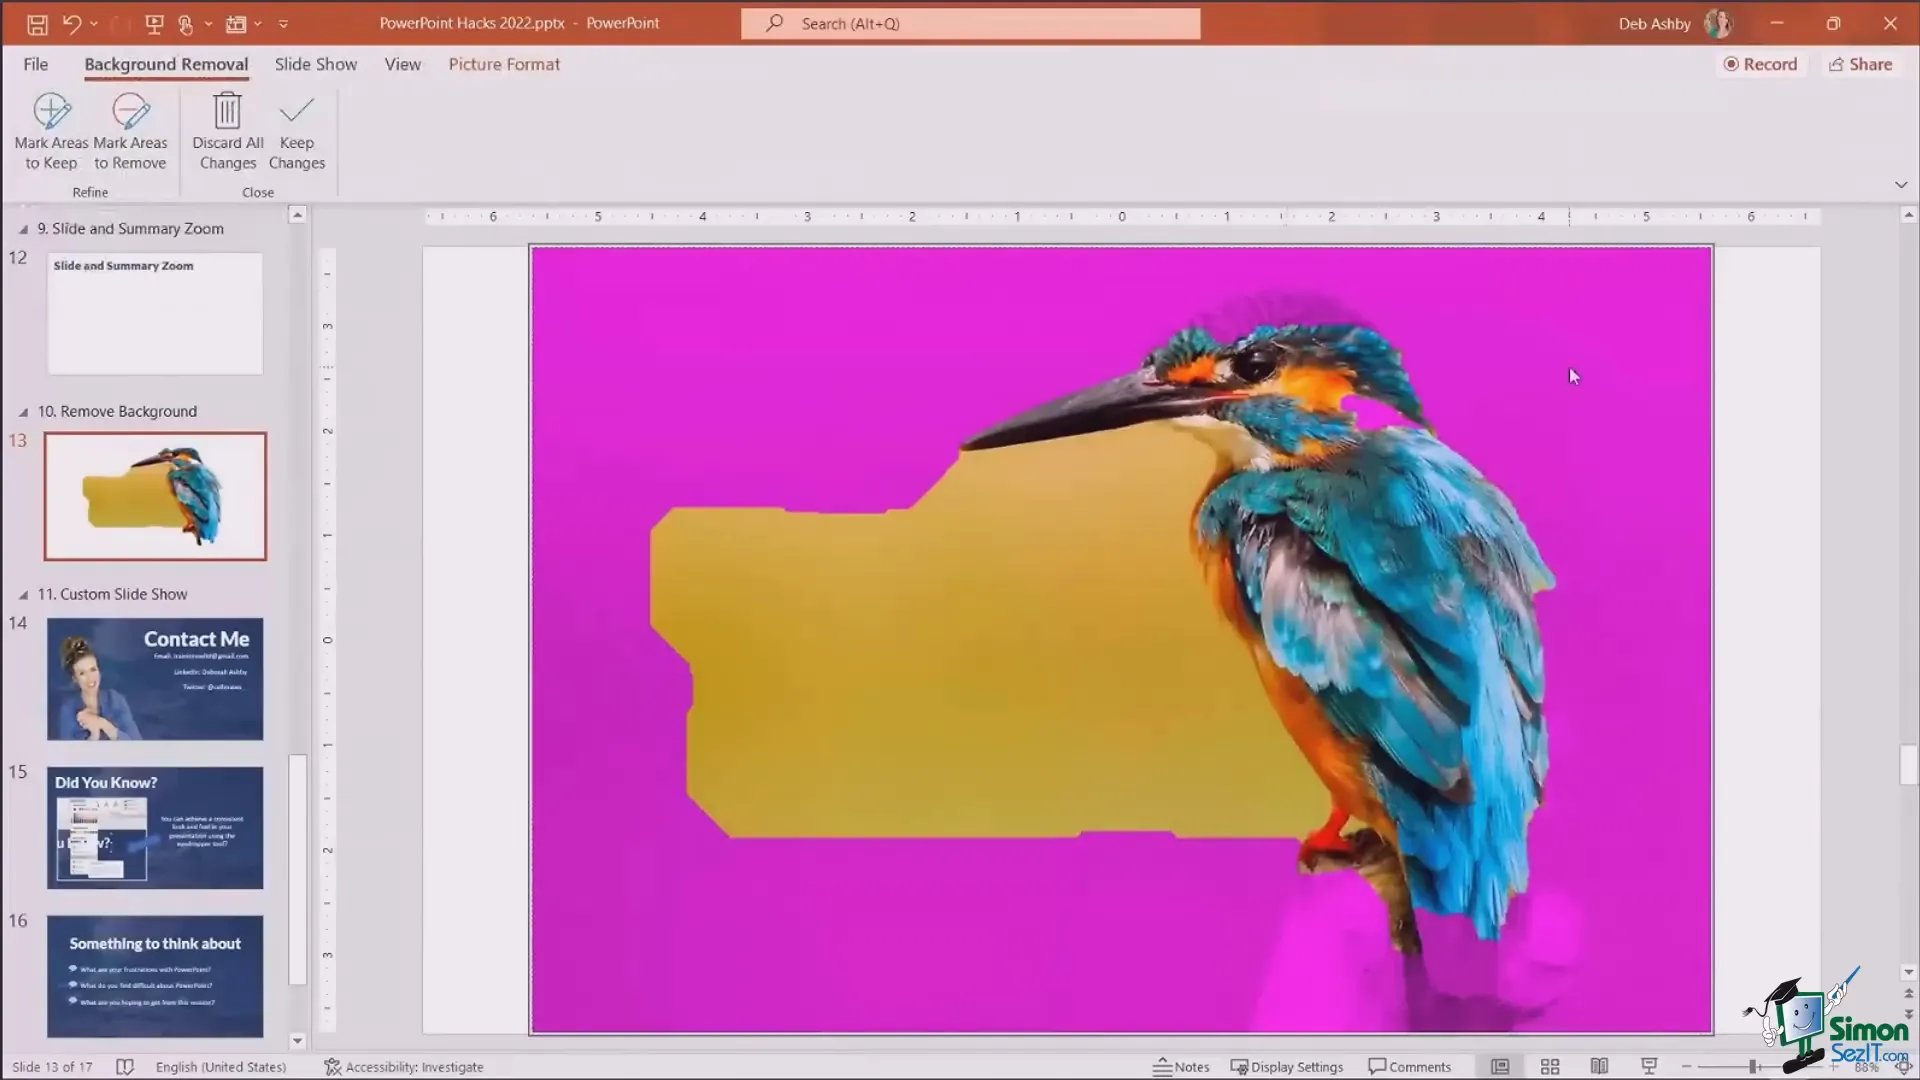
12. Removing Backgrounds from Images
While PowerPoint is not a replacement for professional image editing software like Photoshop, it offers a handy Remove Background tool for quick background removal, especially effective with images that have plain backgrounds.
To remove a background:
- Select the image and go to Picture Format > Remove Background.
- PowerPoint highlights the areas to remove in purple.
- Use Mark Areas to Keep and Mark Areas to Remove to fine-tune the selection.
- Click Keep Changes to apply.
This feature is perfect for isolating subjects and placing them on new backgrounds or creating layered slide designs.
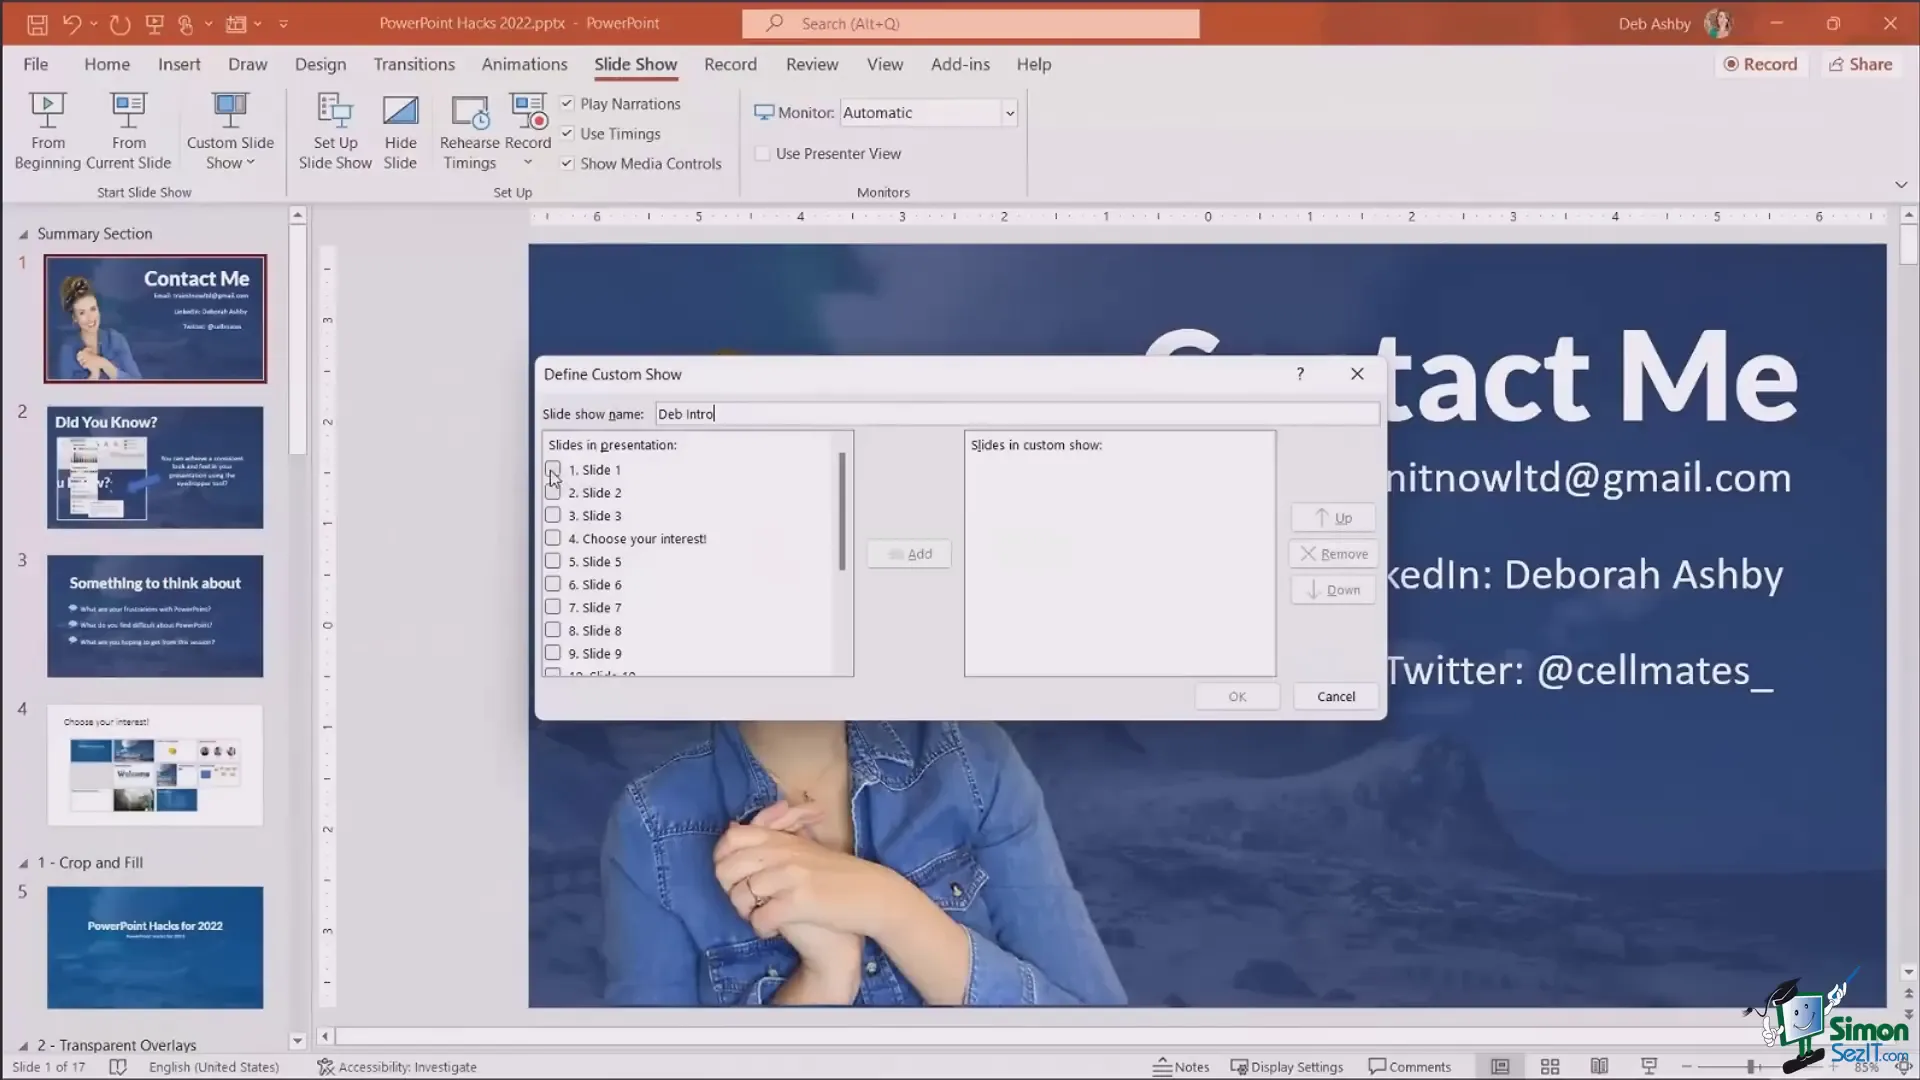
13. Creating Custom Slide Shows for Automated or Targeted Presentations
Custom slide shows allow you to create subsets of slides within a presentation for different audiences or purposes. They are also useful for creating automated loops for events or waiting rooms.
To create a custom slide show:
- Arrange your desired slides at the beginning of your presentation for easy access.
- Set slide timings via Slide Show > Rehearse Timings to automate slide transitions.
- Go to Slide Show > Custom Slide Show > Custom Shows > New.
- Name your custom show and select the slides to include.
- Set up the slideshow via Slide Show > Set Up Slide Show, choosing to loop continuously and use the custom show with timings.
This setup is ideal for displaying information on a loop before meetings or events, keeping attendees engaged and informed.
Frequently Asked Questions (FAQ)
Q1: Can I use these PowerPoint hacks in older versions of PowerPoint?
Most of these tips are applicable to PowerPoint 2016, 2019, 2021, and Microsoft 365 versions. Some newer features like Morph and Zoom transitions require recent versions, so ensure your software is up to date.
Q2: Where can I find free images and icons for my presentations?
Great free resources include Pexels for images and The Noun Project for icons. Both offer add-ins for direct PowerPoint integration.
Q3: How do I ensure my presentation colors stay consistent?
Use the Eyedropper tool to pick colors directly from your images or slides, maintaining a uniform color palette throughout your presentation.
Q4: Can I create interactive presentations that allow non-linear navigation?
Yes, Slide Zoom and Summary Zoom features enable you to create interactive, non-linear presentations where users can jump between slides or sections easily.
Q5: Is PowerPoint’s background removal tool effective?
It works well for images with simple, plain backgrounds but may struggle with complex or busy backgrounds. For advanced editing, dedicated software like Photoshop is recommended.
Q6: How can I quickly change all fonts in a presentation?
Use the Replace Fonts feature under the Home tab to globally substitute one font for another across the entire presentation.
Conclusion
PowerPoint is a versatile tool that, when mastered, can transform your presentations from ordinary to extraordinary. By leveraging advanced features such as Crop and Fill, transparent overlays, Morph transitions, merging shapes, and custom slide shows, you can create engaging, visually appealing presentations that hold your audience’s attention.
Consistency is key—using tools like the Eyedropper for color matching and Replace Fonts for typography ensures your slides maintain a professional and branded look throughout. Don’t forget to explore add-ins like Pexels and The Noun Project to access a vast library of visual assets without leaving PowerPoint.
Experiment with these hacks, practice regularly, and watch as your presentations evolve into polished, dynamic experiences that effectively communicate your message and impress your audience.
Happy presenting!
Check out the full video: Advanced PowerPoint Hacks: Practical Tips to BOOST Your Powerpoint Presentation


