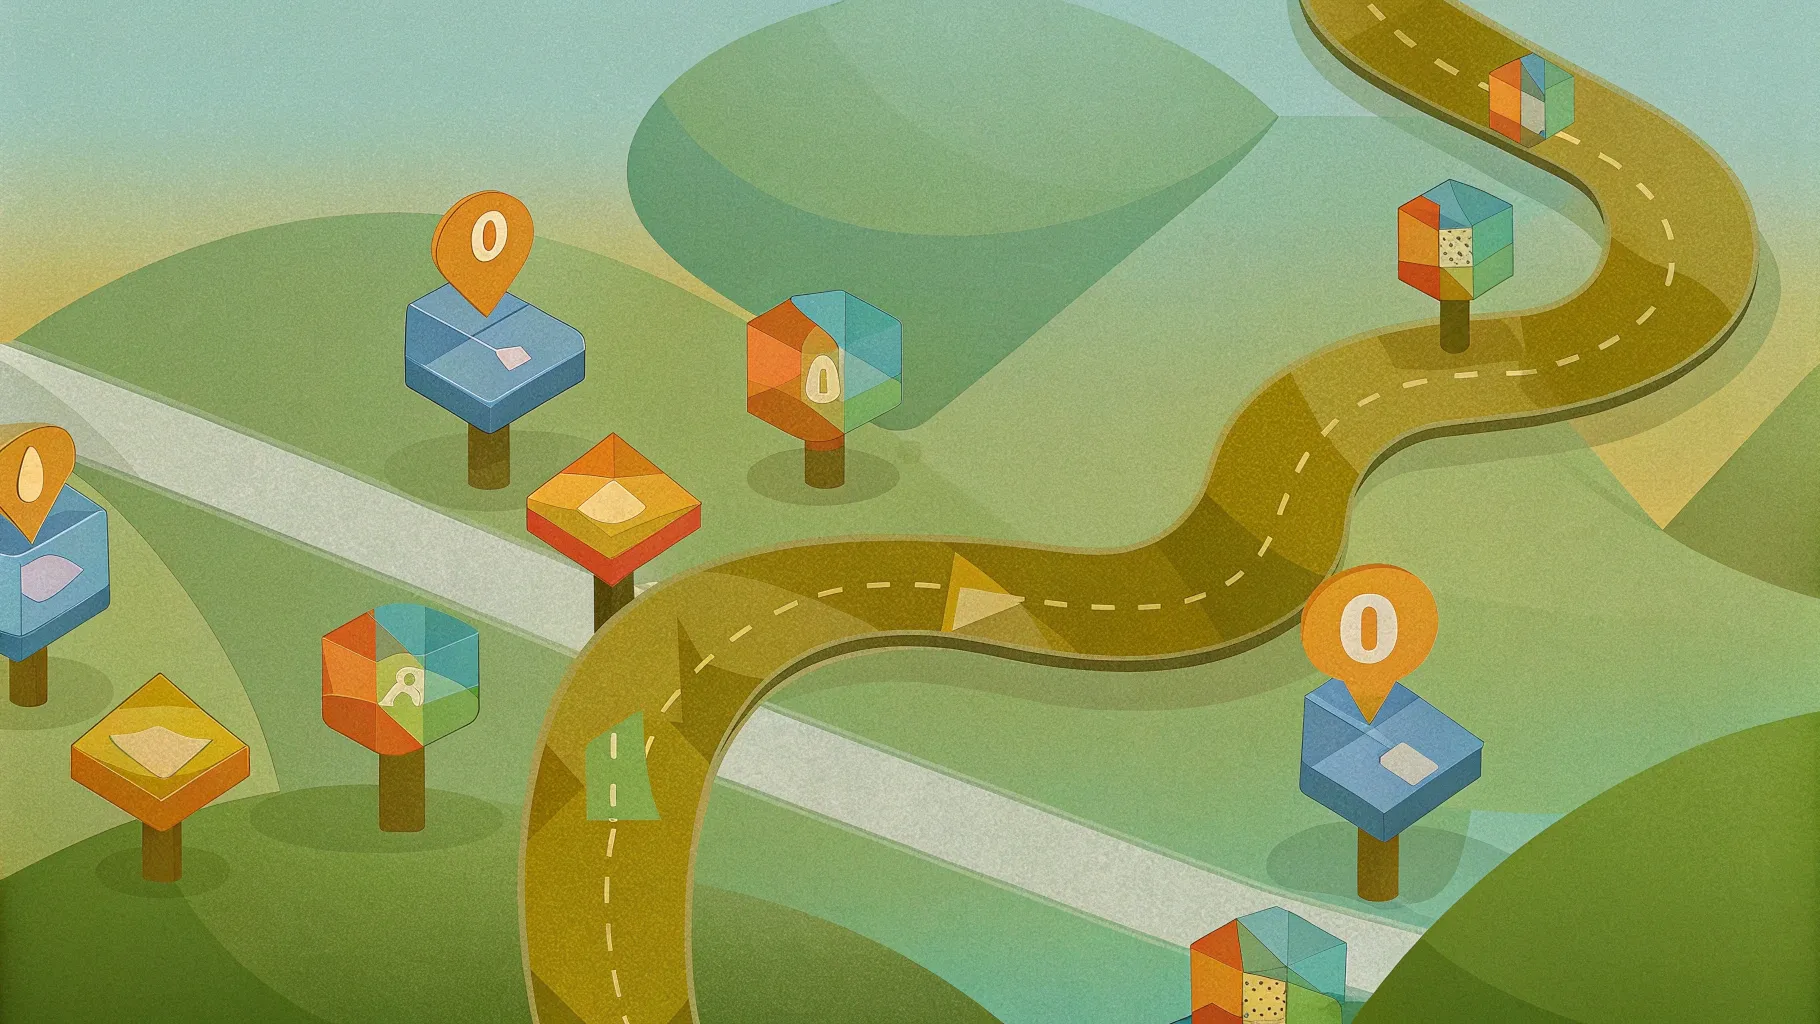
If you’ve ever wanted to create a modern, visually appealing animated infographic in PowerPoint, you’re in the right place. Today, we’ll walk through a step-by-step tutorial on building a stunning isometric roadmap infographic, complete with floating 3D numbers and a small animated square that follows the roadmap path. This kind of infographic is perfect for presentations, project timelines, or process overviews where you want to engage your audience with dynamic visuals.
This guide is based on a detailed tutorial by One Skill PPT, and we’ll cover everything from creating the isometric roadmap shape, designing colorful 3D cubes, animating floating numbers, to adding a custom motion path for the animated square. By the end of this article, you’ll have the skills to build your own animated infographic in under 10 minutes.
Table of Contents
- Getting Started: Setting Up Your Slide
- Creating the Isometric Roadmap
- Designing Colorful 3D Cubes
- Adding Floating 3D Numbers
- Animating the Floating Numbers
- Creating the Animated Square Motion Path
- Taking It to the Next Level: Clickable Slide Zooms
- Frequently Asked Questions
- Conclusion
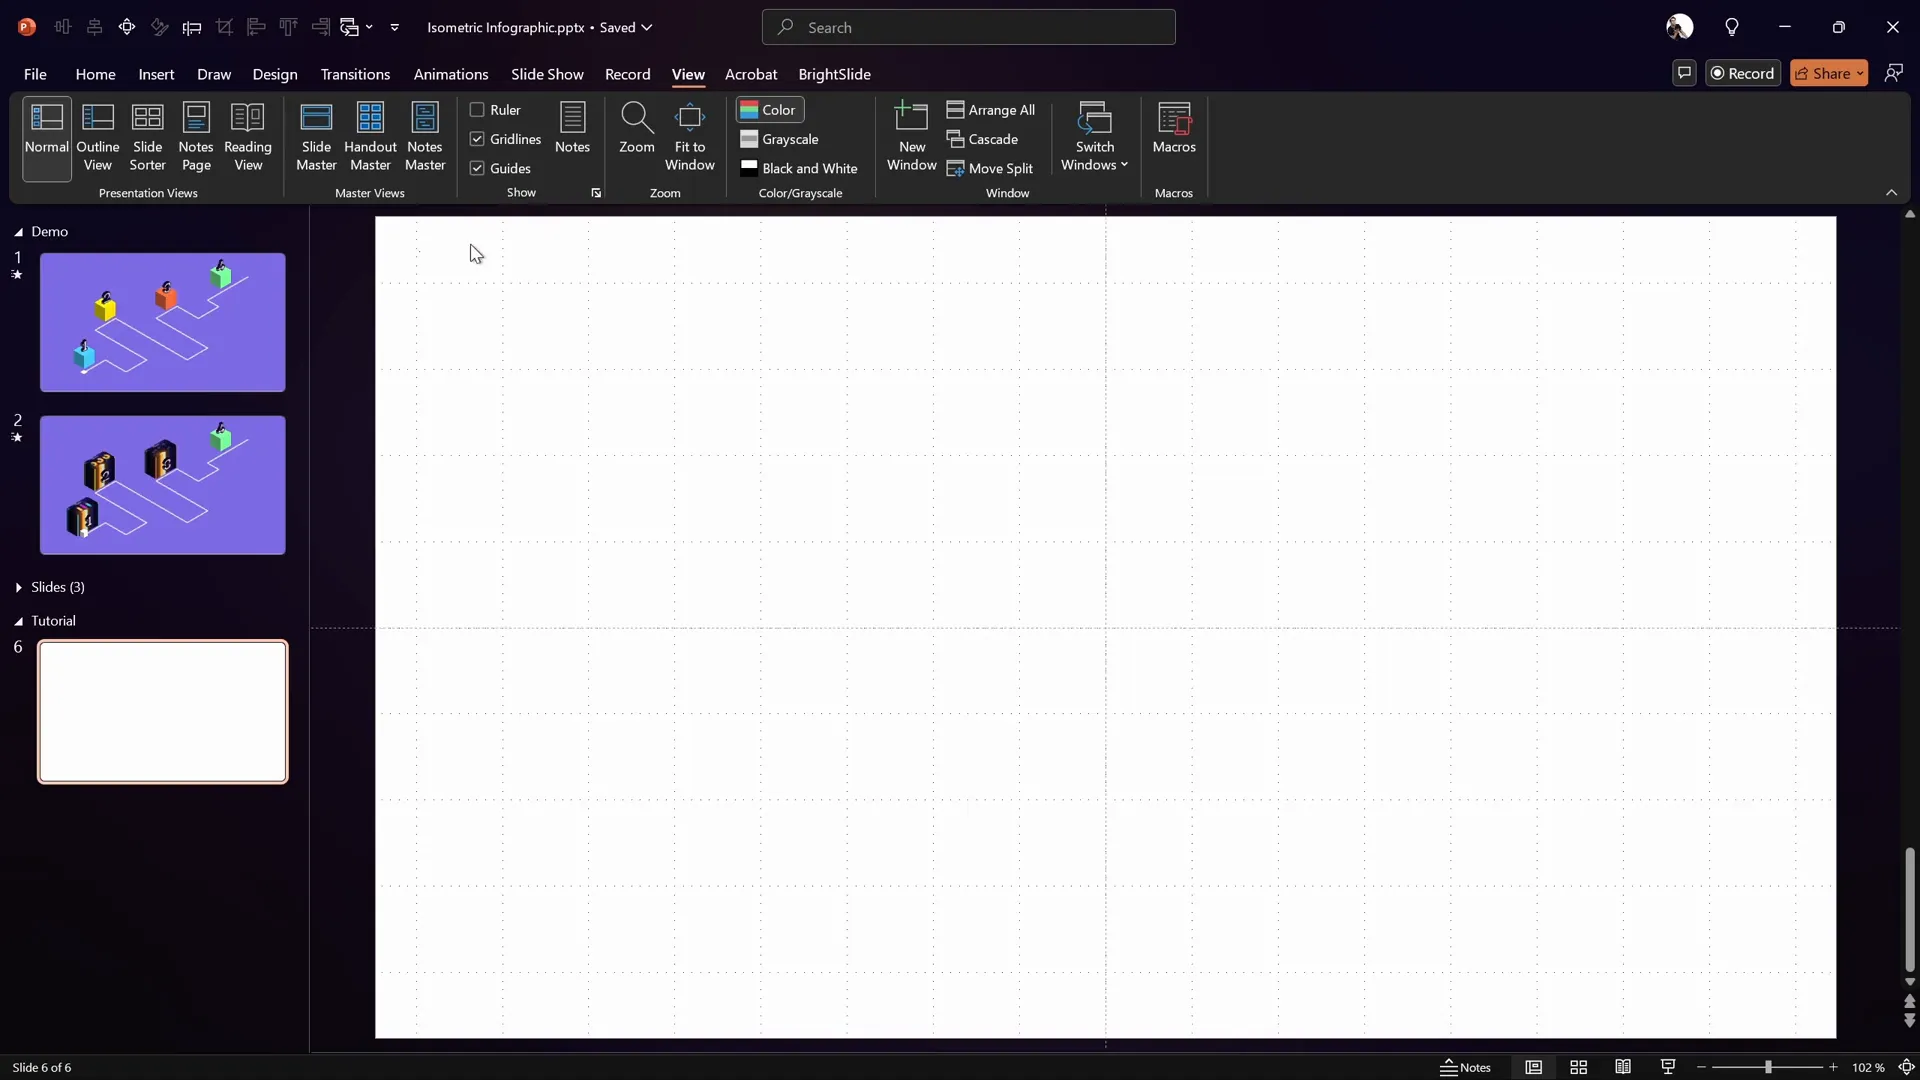
Getting Started: Setting Up Your Slide
Before diving into shapes and animations, it’s essential to create a clean workspace in PowerPoint. Start with a fresh, white slide and set up your guides and gridlines to help with precise placement and alignment of objects.
- Turn on Guides: This helps you find the center of your slide easily.
- Enable Gridlines: These are crucial for building custom shapes with precision.
Using these visual aids will make it easier to draw your roadmap and ensure everything is aligned perfectly.
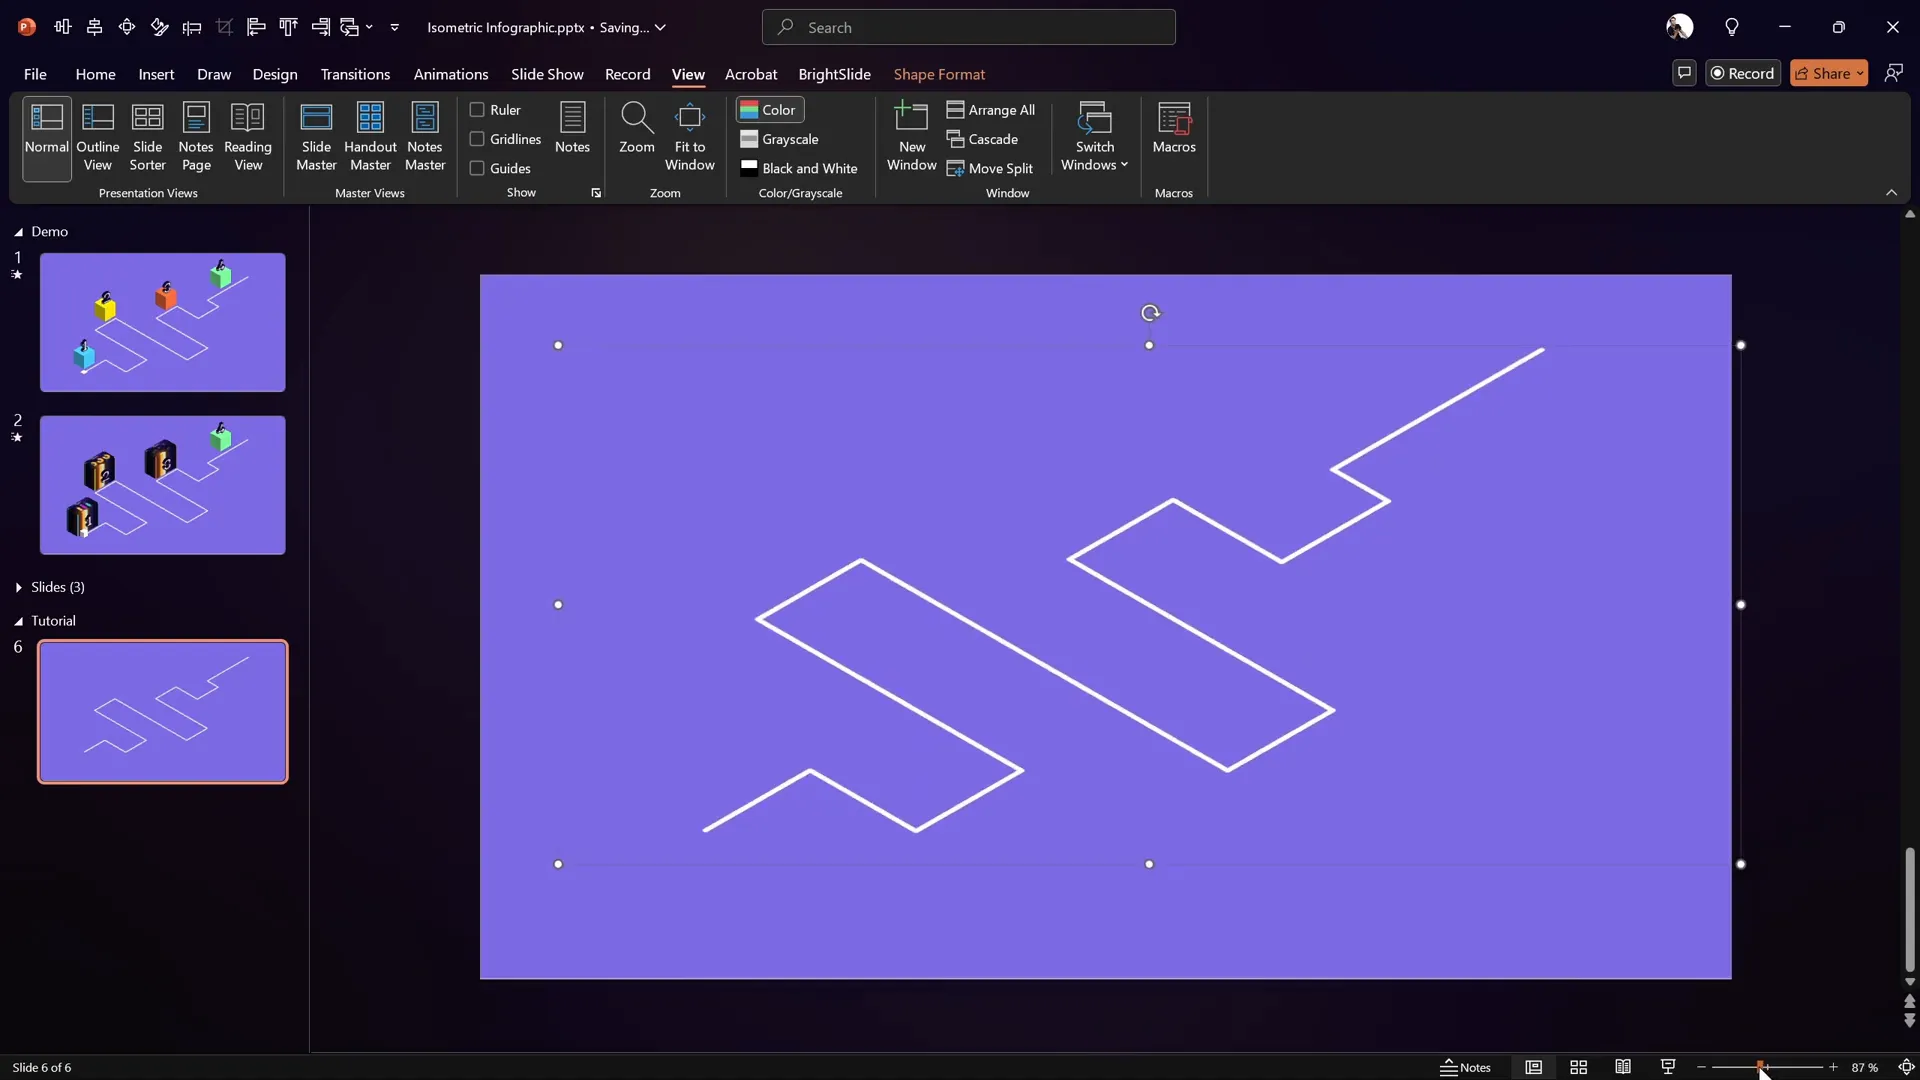
Creating the Isometric Roadmap
The heart of this infographic is the isometric roadmap—a custom-shaped line that follows a path and has a 3D isometric rotation applied. Here’s how to create it:
- Use the Freeform Shape Tool: Go to Insert > Shapes > Freeform Shape. This tool lets you draw custom shapes by clicking points on the slide.
- Draw the Roadmap Path: Click on the slide to place points, holding down the Shift key to constrain your lines to horizontal, vertical, or 45-degree angles. Follow this sequence:
- Click to start on the left side of the slide.
- Move two squares to the right.
- Two squares down.
- Two squares right again.
- Five squares upward.
Continue clicking to create turns and finalize the shape by double-clicking.
- Set Line Width and Color: Once your shape is complete, set the line width to 5 points for a bold look. Change the line color to white for contrast against a darker background.
- Change Slide Background: Go to Format Background and set a solid purple color for a modern and vibrant look. Use the hex code from the tutorial if you want the exact shade.
- Apply 3D Rotation: Select your roadmap shape, open Format Shape > 3D Rotation, and apply the preset called Isometric Top Up. This gives your roadmap an isometric perspective.
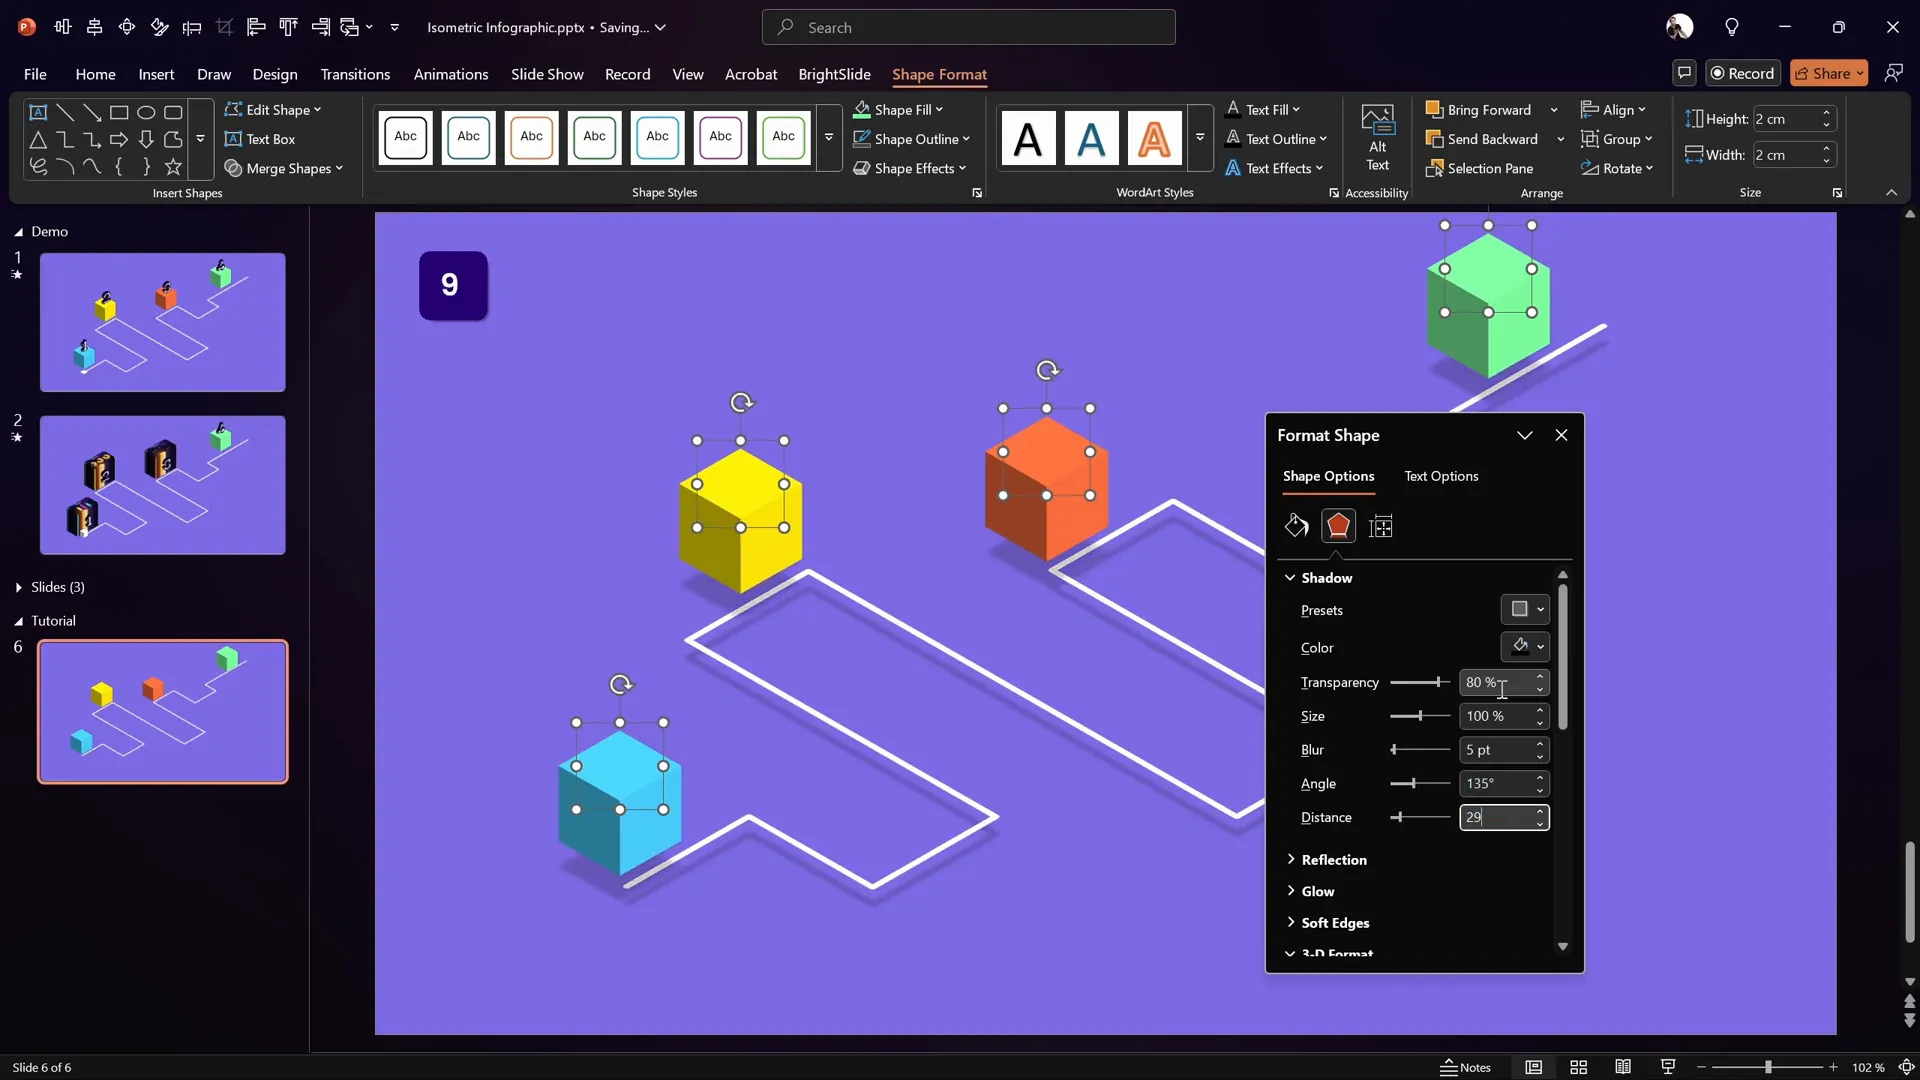
- Add a Subtle Shadow: For depth, add a shadow with these settings:
- Color: Black
- Transparency: 80%
- Blur: 5 points
- Angle: 135 degrees
- Distance: 20 points
Tips for Roadmap Creation
- Use the Gridlines: They help you maintain consistency with spacing and angles.
- Hold Shift: This ensures lines are perfectly horizontal or vertical, keeping the roadmap clean.
- Experiment with Shapes: The freeform tool allows for any path or roadmap you desire, so get creative.
Designing Colorful 3D Cubes
Next, to add visual interest and dimension, we’ll create colorful 3D cubes that will sit behind the roadmap. These cubes represent milestones or key points on the roadmap.
- Insert a Square: Use the rectangle shape tool while holding the Shift key to create a perfect square.
- Set Size and Color: Set the height and width to 2 centimeters for consistency. Fill the square with a solid color like yellow and remove the outline.
- Apply 3D Effects: Open Format Shape > 3D Rotation and apply the Isometric Top Up preset for the isometric look.
- Add Depth: Go to 3D Format and set the depth to 60 points. This extrudes the square into a cube.
- Duplicate and Color Variations: Hold Ctrl and drag to make copies. Change the fill colors to different bright hues like light blue, orange, and green for a colorful, eye-catching effect.
- Add Shadows: Apply the same shadow settings used for the roadmap to all cubes to maintain visual consistency.
- Arrange Layers: Send the cubes to the back so the roadmap lines appear on top.
Tips for Cube Design
- Consistent Size: Keeping all cubes the same size ensures a harmonious design.
- Color Contrast: Use vibrant colors that stand out against your background and roadmap.
- Shadows for Depth: Subtle shadows help the cubes “pop” and create a realistic 3D effect.
Adding Floating 3D Numbers
The next element is floating 3D numbers that hover above the cubes, adding a dynamic, animated feel to the infographic. These numbers can represent steps, milestones, or stages.
- Insert Text Boxes: Place a text box and type the number “1”. Use a bold, modern font like Darker Grotesque with a font size of 80 for visibility.
- Add Outline: In Format Shape > Text Options, add a solid black outline with a width of 0.75 points to make the numbers stand out.
- Apply 3D Rotation: Use the Isometric Right Up preset under Text 3D Rotation for a different isometric angle than the cubes.
- Add Depth: Set the depth to 10 points in the 3D Format to give a subtle extrusion effect.
- Position Numbers: Place each number directly above its corresponding cube.
- Duplicate and Adjust: Copy the text box for additional numbers and update the text accordingly (2, 3, 4, etc.). Adjust their positions to align with each cube.

Tips for Floating Numbers
- Font Choice: Use a clean, sans-serif font with good weight for legibility.
- Consistent Style: Match the 3D rotation style to the infographic’s overall isometric theme.
- Outline for Contrast: The subtle outline helps numbers remain visible against colorful backgrounds.
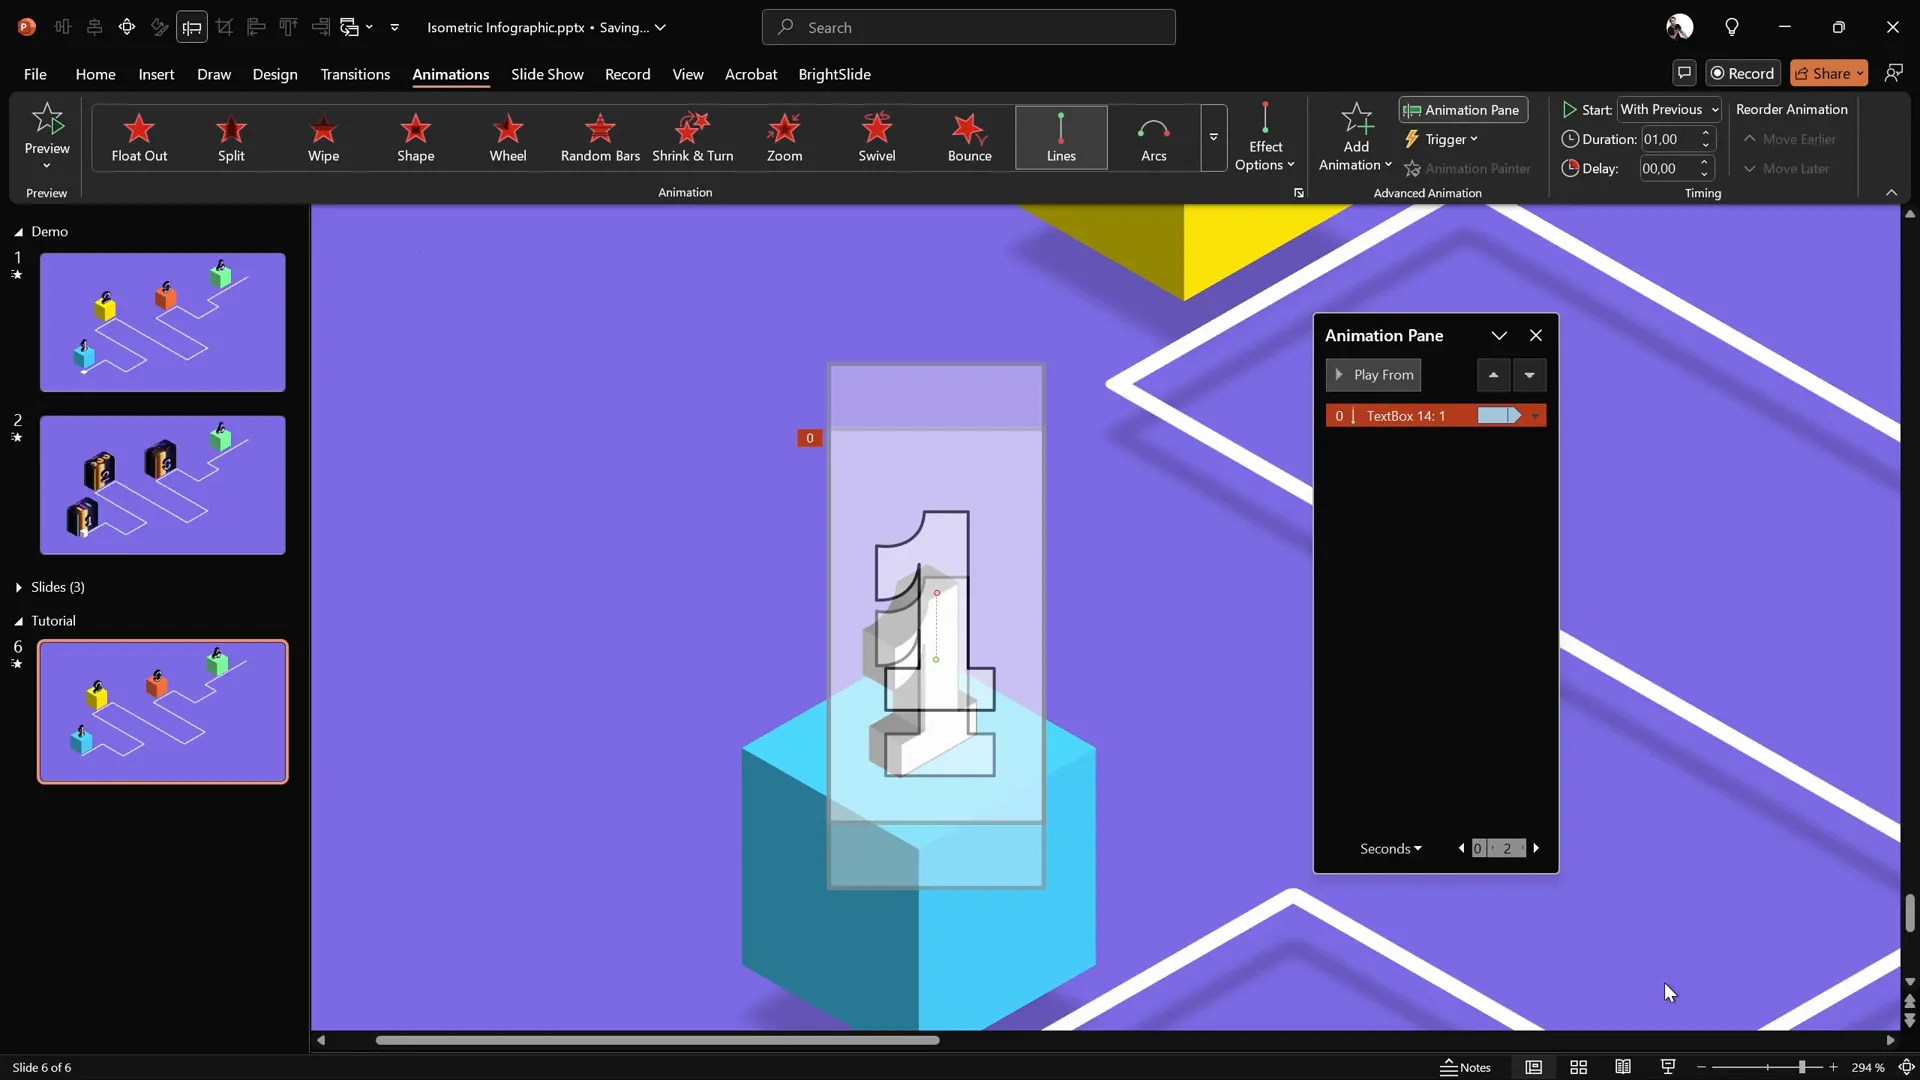
Animating the Floating Numbers
Animating the floating numbers adds life to your infographic and draws attention to key points. The animation will make the numbers gently float up and down, creating a subtle and elegant effect.
- Select the First Number: Click on the first number text box.
- Add Motion Path Animation: Go to Animations > Add Animation > Lines. Change the direction to “Up.”
- Adjust Path Length: Grab the red endpoint of the motion path and shorten the distance so the number floats just a little.
- Open Animation Pane: Set the duration to 1 second and make sure it starts “With Previous” for automatic play.
- Animation Options: Enable “Smooth Start” and “Smooth End” for fluid motion. Turn on “Auto Reverse” so the number floats back down.
- Repeat Animation: Set the animation to repeat “Until End of Slide” for continuous floating.
- Copy Animation to Other Numbers: Use the animation painter tool, double-click it, and click on the other numbers to apply the same floating animation. Click the painter again to deactivate.
- Add Slide Transition: Apply a subtle “Fade” transition to the slide for smooth entrance.
- Adjust Layout: Select all elements (Ctrl + A) and move the design slightly downward to give the top numbers more breathing space.
Tips for Animating Numbers
- Subtle Animation: Keep floating movements small and smooth to avoid distraction.
- Sync Animations: Use “With Previous” and repeat settings to keep animations in sync and looping.
- Use Animation Painter: Saves time by copying animations across multiple objects.
Creating the Animated Square Motion Path
One of the most eye-catching features of this infographic is a small white square that travels along the roadmap path, simulating movement through the timeline or process.
- Insert a Small Square: Use the rectangle shape tool holding Shift to draw a perfect square. Set the size to 0.7 centimeters for both height and width.
- Fill Color and Outline: Fill the square with white and remove any outline for a clean look.
- Apply 3D Rotation: Use the same Isometric Top Up preset to match the roadmap’s perspective.
- Remove Shadow: If a shadow is applied by default, remove it for clarity.
- Position the Square: Place the square at the start of the roadmap path.
- Bring to Front: Use Bring to Front so the square appears above all other elements.
- Create Custom Motion Path: Select the square, go to Animations > Add Animation > Custom Path. Start clicking at the center of the square, then click on each corner of the roadmap path to trace the exact path.
- Finish Path: Double-click at the end of the roadmap to finalize the motion path.
- Adjust Animation Settings: Open the animation pane, set the animation to start “With Previous,” set duration to 10 seconds, remove “Smooth Start” and “Smooth End,” disable “Auto Reverse,” and set it to repeat “Until End of Slide.”

Tips for the Animated Square
- Exact Path: Trace the roadmap carefully to ensure the square follows the path perfectly.
- Timing: Adjust duration according to the desired speed of movement.
- Layering: Always bring the animated square to the front for visibility.
Taking It to the Next Level: Clickable Slide Zooms
While the animated infographic itself is impressive, you can enhance it further by adding interactive elements like clickable slide zooms. This means you can create hotspots on your roadmap that link to other slides or deeper content, making your presentation more engaging and navigable.
Where to Learn More: This advanced technique is covered in the extended lesson on pptskill.com as part of the PowerPoint Animation Mastery course by One Skill PPT.
Adding slide zooms transforms your infographic from a static visual into an interactive dashboard, ideal for complex presentations or detailed project walkthroughs.
Frequently Asked Questions
What is an isometric roadmap in PowerPoint?
An isometric roadmap is a custom-designed path or flowchart drawn with isometric 3D rotation applied, giving a three-dimensional perspective to a 2D shape. It’s useful for visually representing processes, timelines, or journeys in a modern and engaging way.
How do I create a smooth custom motion path animation?
To create a smooth custom motion path, use the Freeform Shape tool to trace the desired path precisely, then apply the custom motion path animation to an object. Adjust animation options by disabling smooth start and end for consistent speed and enabling repeat to loop the animation.
Can I use this infographic style for other types of presentations?
Absolutely! This style is versatile and can be used for business timelines, project milestones, sales funnels, or educational content. The key is customizing colors, shapes, and animations to match your presentation’s theme and purpose.
Is it possible to add clickable links to parts of the infographic?
Yes, you can add clickable slide zooms or hyperlinks to shapes or objects on your infographic to make it interactive. This allows you to jump to related slides or sections directly from your roadmap.
What fonts work best for 3D numbers in this design?
Simple, bold sans-serif fonts like Darker Grotesque or similar grotesque fonts work best. They are clean, modern, and highly legible even with 3D effects and outlines.
Can I customize the colors and sizes of the cubes and numbers?
Yes, all elements including cubes, numbers, and the roadmap line can be fully customized in terms of color, size, and style to fit your branding or presentation theme.
Conclusion
Creating a modern animated infographic in PowerPoint is easier than you might think, especially with tools like the Freeform Shape tool, 3D rotation presets, and custom motion paths. By following this step-by-step tutorial, you can build a captivating isometric roadmap infographic complete with colorful 3D cubes, floating numbers, and an animated square that travels along the path.
This kind of infographic not only looks professional but also engages your audience with dynamic visual storytelling. Plus, the potential to add clickable slide zooms takes your presentation to the next level, making it interactive and user-friendly.
If you want to dive deeper into PowerPoint animation techniques and unlock extended lessons with downloadable slides, check out the PowerPoint Animation Mastery course by One Skill PPT.
Get ready to impress your audience with your new skills and create presentations that truly stand out!


