

In this guide I’ll walk you through a practical, repeatable workflow to create a modern company profile slide using the Animated Slide Design with Morph Transition technique in PowerPoint. I recorded the original walkthrough on my channel, POWERPOINT UNIVERSITY, and distilled the entire process here so you can follow the same steps, understand why each decision matters, and customize the design to match your brand or presentation needs.
This tutorial covers everything from setting up the background and layered ovals that create depth, to grouping elements, duplicating slides, and applying the Morph transition so each option smoothly expands to the center for detailed content. I’ll also share design tips, shortcuts, customization ideas, and a helpful FAQ at the end.
Keyphrase: Animated Slide Design with Morph Transition
Table of Contents
- Introduction: What you’ll build and why
- Quick materials checklist
- Step 1 — Slide setup and background
- Step 2 — Creating layered ovals for depth
- Step 3 — Adding option buttons and icons
- Step 4 — Grouping, duplicating, and sizing
- Step 5 — Applying the Morph transition for animation
- Step 6 — Adding titles and detailed text
- Finishing touches and export
- Design tips and best practices
- Advanced variations and customization ideas
- Troubleshooting common issues
- Accessibility and compatibility considerations
- FAQ
- Conclusion and next steps
Introduction: What you’ll build and why
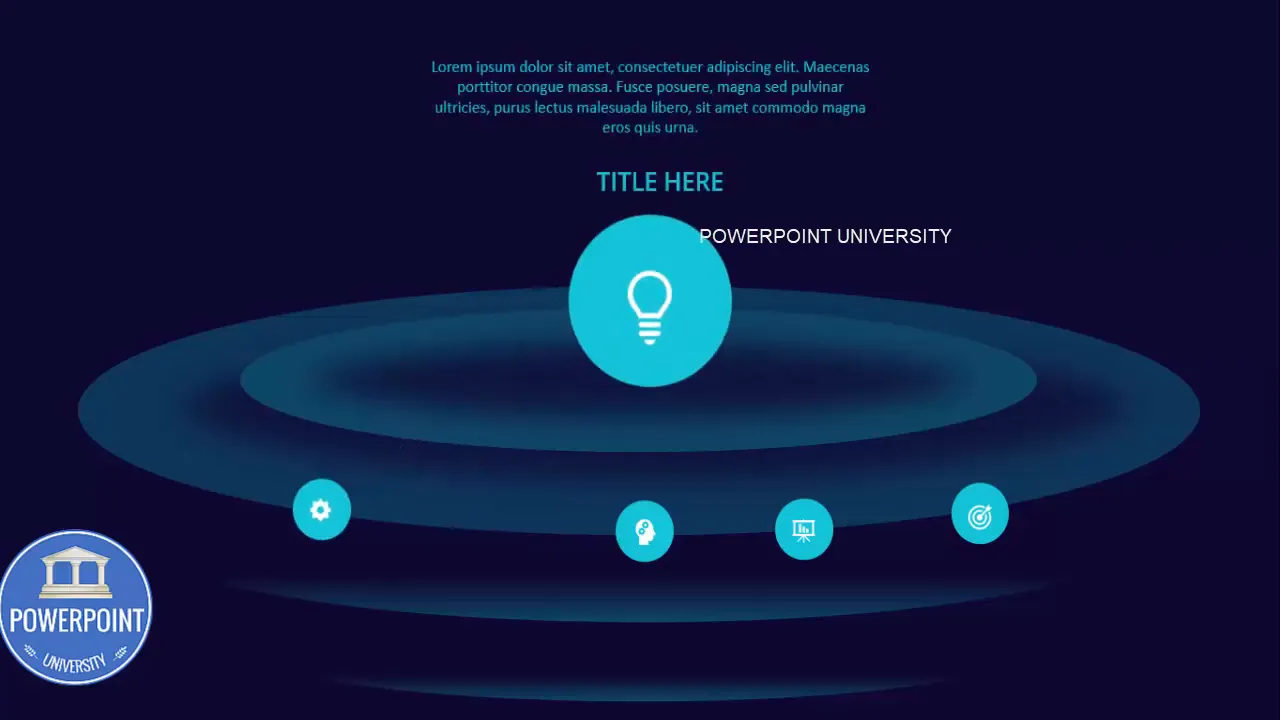
The goal of this tutorial is to create a single, reusable slide (or a small series of slides) that behaves like an interactive company profile: a large, central headline and multiple round option buttons (idea, projection, target growth, time bound, services) arranged around it. Clicking an option causes it to animate to the center where you can display supporting text. This effect is achieved using the Animated Slide Design with Morph Transition feature in PowerPoint.
This approach is excellent for one-page executive summaries, portfolio highlights, or elevator-pitch slides because it keeps the layout compact while allowing you to reveal details one focused item at a time. The Morph transition produces a smooth, professional feel that looks polished without complex animation timelines.
Why use this Animated Slide Design with Morph Transition?
- Minimal timeline effort: you don’t have to animate each object individually.
- Reusable template: duplicate the slide set to add more options or adjust copy.
- Focus control: the audience’s attention is directed to a single item at a time.
- Polished visual depth: layered ovals and gradients create a subtle background stage.
Quick materials checklist
Before you begin, gather the following:
- Microsoft PowerPoint (preferably a recent version with Morph transition)
- Brand colors or a color palette (dark blue and turquoise used in the example)
- Two or three icons (you can use PowerPoint’s built-in icons)
- Short labels for each option (idea, projection, target growth, time bound, services)
- Copy for the detail text that appears when an option is brought to the center
- Patience for arranging layered shapes — you’ll use duplicate and soft edge effects
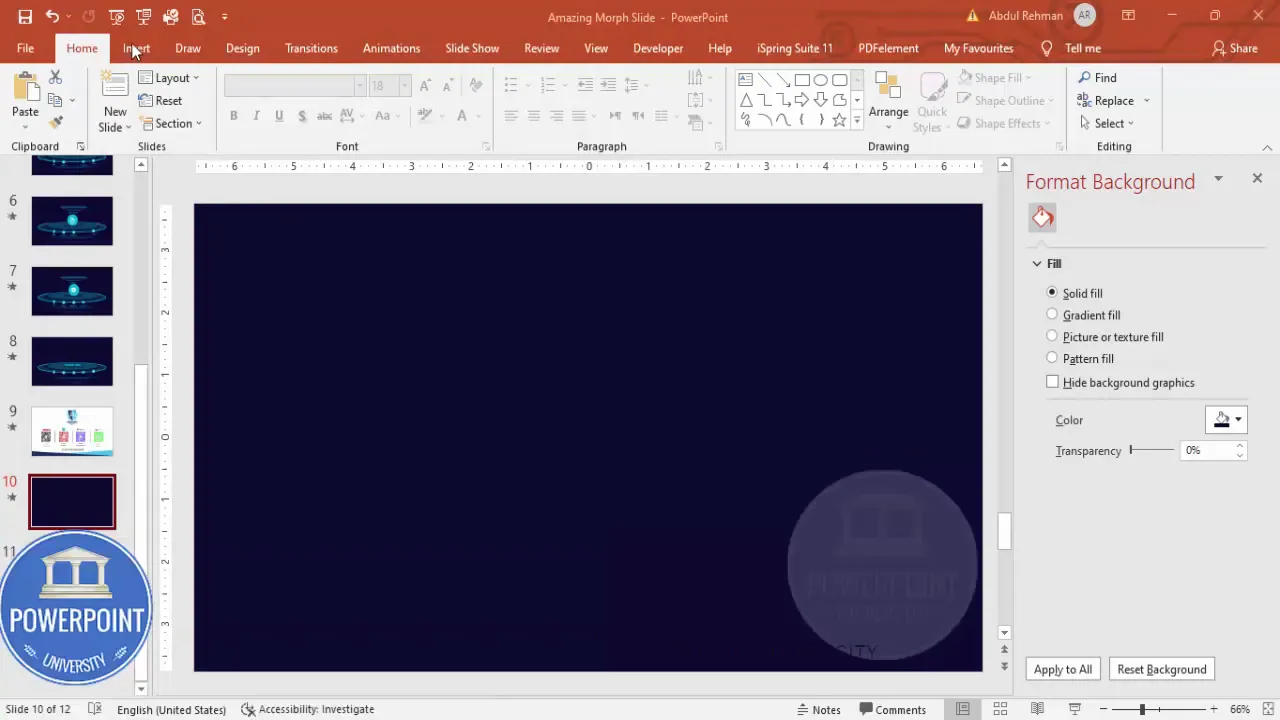
Step 1 — Slide setup and background
Start on a blank slide. The foundation of the entire effect is a cohesive background and multiple layered ovals that form a subtle stage for the interactive options.
- Insert a new slide and set the background to a dark blue tone. This forms the visual base for the Animated Slide Design with Morph Transition and helps the turquoise option buttons pop.
- Choose a dark, slightly desaturated blue. Avoid pure black — black flattens the composition while a very dark blue keeps it professional but slightly warm.
- Ensure slide orientation and size are correct before adding many objects. If you need custom dimensions, set them now to avoid later re-scaling issues.
Why a dark background? Dark backgrounds help foreground colors (turquoise, white icons) read more clearly and make drop shadows and gradients more visible, contributing to the layered depth that reinforces the morph animation.
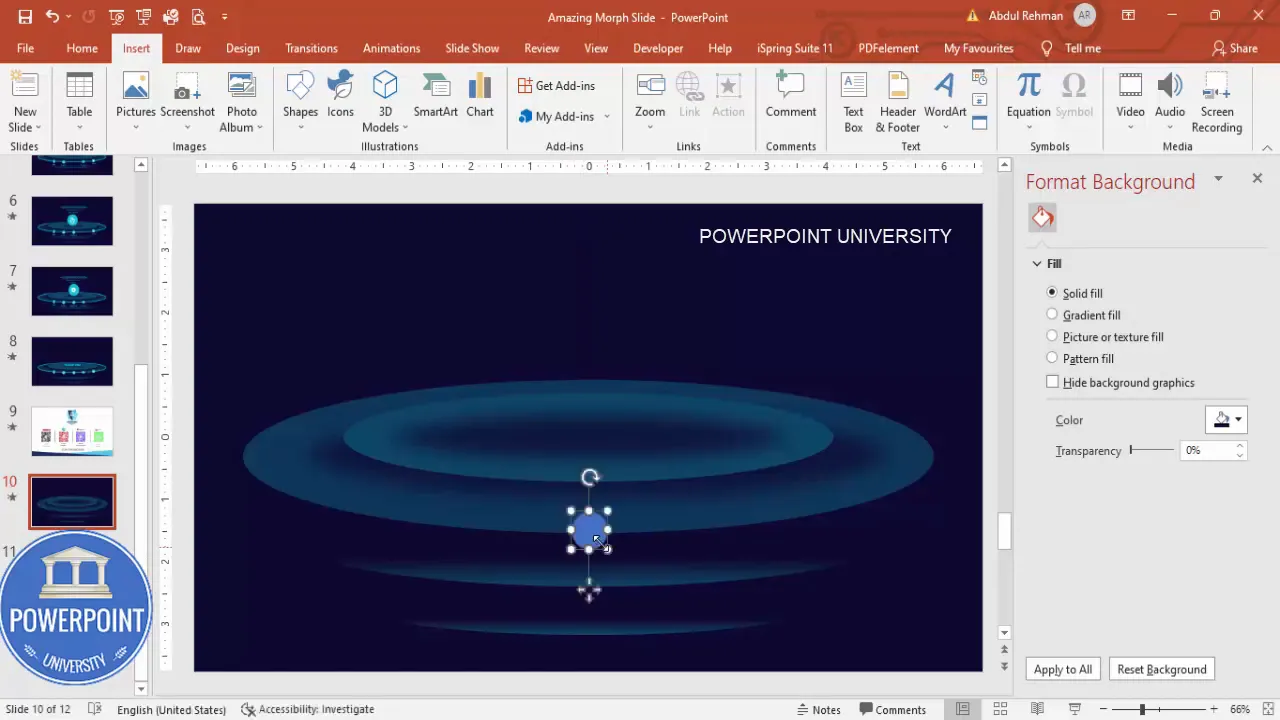
Step 2 — Creating layered ovals for depth
This is where the visual stage is made. You’ll draw several centered ovals, duplicate them, adjust fills, softness, transparency, and send objects to the back to build a subtle, layered backdrop.
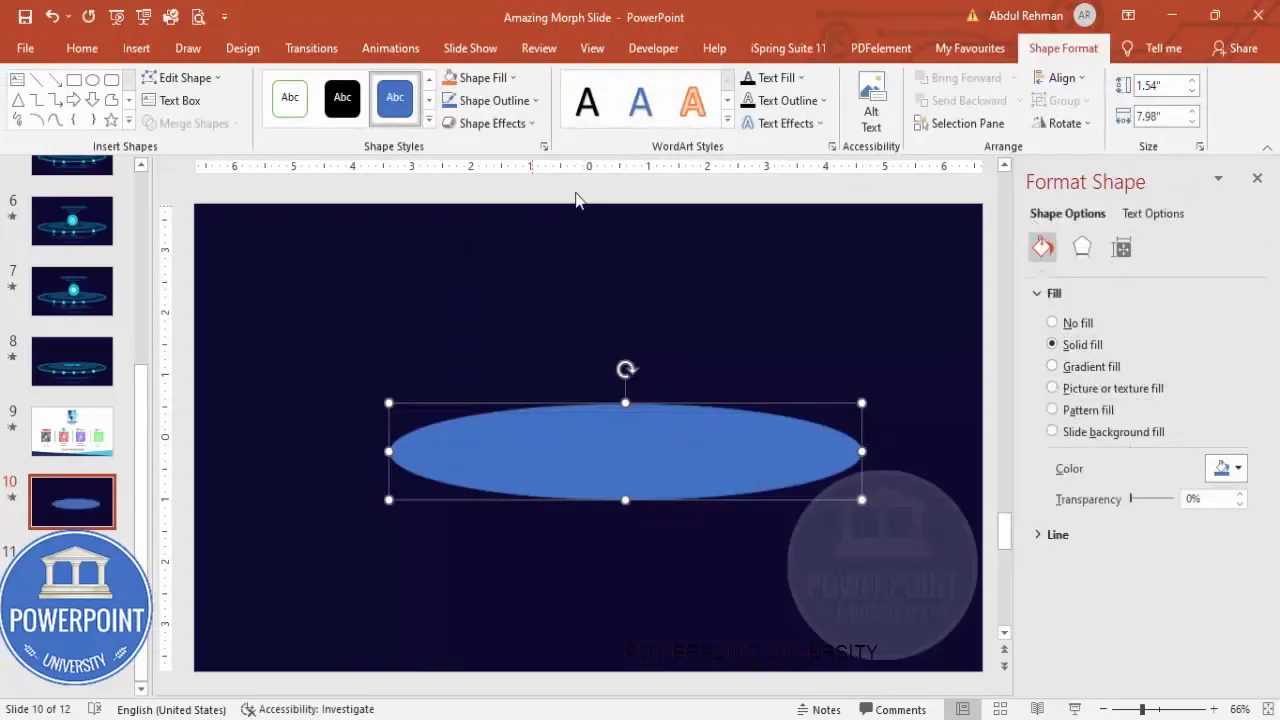
Draw the first oval
- Insert → Shapes → Oval.
- Hold Shift while drawing to keep it circular or release to make an oval depending on the look you prefer. For this design I use a small, centered oval first as a base element.
- Align it precisely: Home → Arrange → Align → Align Center and Align Middle to center on the slide.
- Set Shape Outline to None. Fill it with a slightly darker version of the background blue so it reads as a subtle ring in the center.
Duplicate and apply soft-edge shadow
- Press Ctrl+D to duplicate the oval immediately. Give the duplicate a slightly different dark fill.
- Go to Shape Effects → Soft Edges and increase the softness. This creates the impression of a shadow glow instead of a crisp shape.
- Place this duplicate exactly behind the original to produce a soft halo effect.
Repeat the duplication process with bigger ovals, different gradient fills, and different transparencies. Each layer contributes to a “stage” depth that makes the Animated Slide Design with Morph Transition feel dynamic even before any movement occurs.
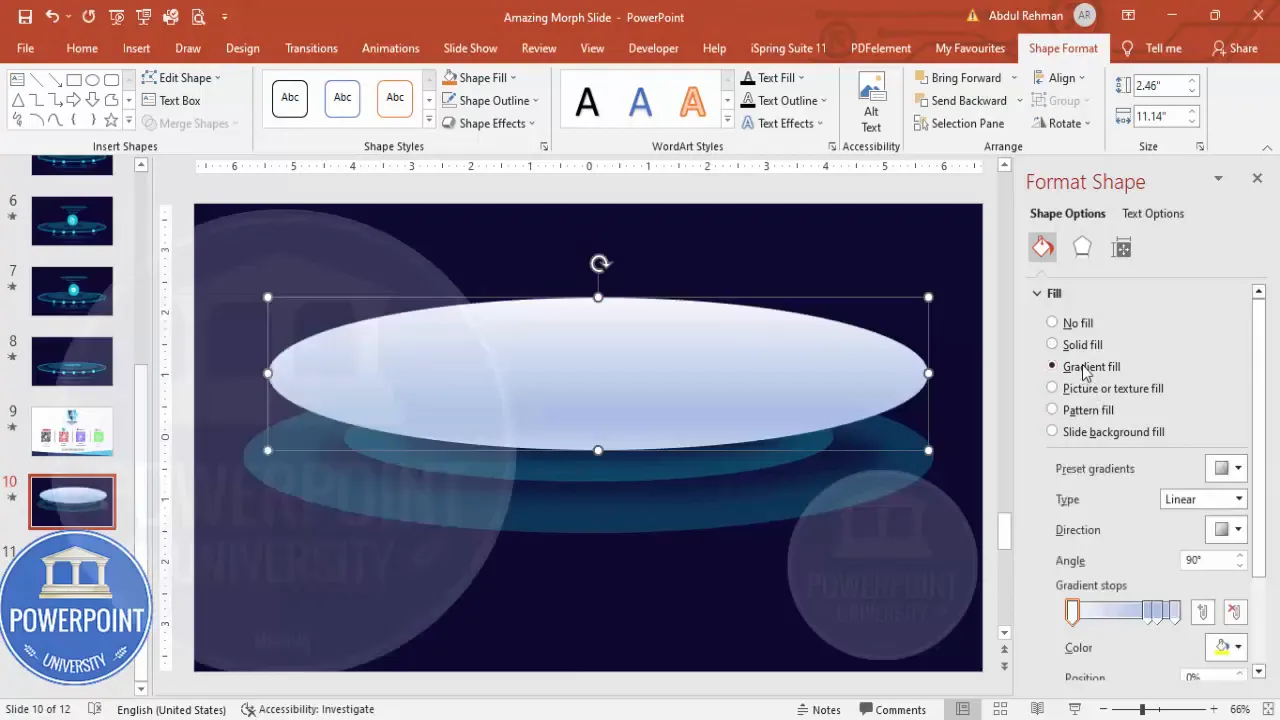
Using gradients and stops
On one of the larger ovals, switch to Format Shape → Fill → Gradient Fill. Use two stops: one color matching the dark background, the second a lighter blue from your palette. Drag the gradient stop so the center or edge glow reads like a subtle light source behind the center of the slide.
Practical tip
Keep these design layers grouped visually but not necessarily formally grouped in PowerPoint. You want the Morph transition to operate primarily on the option buttons later, so keep the background layers consistent across duplicated slides — you’ll duplicate the entire slide including the background to maintain continuity.
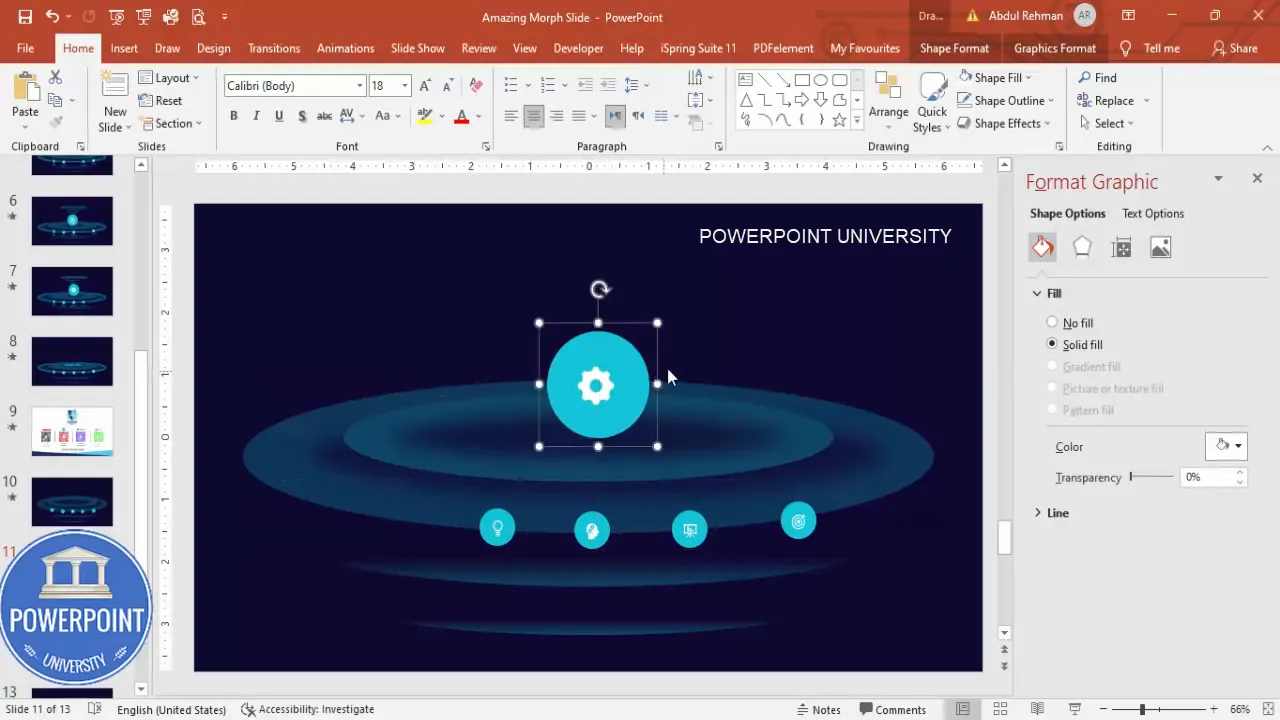
Step 3 — Adding option buttons and icons
Now build the interactive components: five small round option buttons positioned above the center stage. Each option will later scale and move to the center when clicked using Morph.
- Insert → Shapes → Oval. Hold Shift for a perfect circle and draw one circle directly over the center stage area. Then align it as needed.
- Set the Shape Fill to a turquoise color that contrasts well with the dark background. Remove the outline.
- While selected, press Ctrl+Shift and drag to create copies in other positions (top-left, top-right, bottom-left, bottom-right, etc.) — this keeps consistent sizing and spacing.
- Position the five option circles in a semi-circular arc or linear arrangement above the center — choose a layout that works with your content.
- Insert icons via Insert → Icons. Pick five icons that represent your labels (a lightbulb for idea, an upward chart for projection, etc.).
- Resize icons — small sizes around 0.3 (height/width units in the example) — set their fill to white and place each icon centered within each turquoise circle.
Grouping the circle and icon as a single object makes it easier to duplicate, scale, and move. Select both the circle and the icon, then press Ctrl+G to group. Repeat for every option.
Step 4 — Grouping, duplicating, and sizing
This is the operational core of the Animated Slide Design with Morph Transition. The idea is simple: each option exists in two states — a smaller button on the main slide and a larger centered object on the duplicate slide. The Morph transition interpolates the transformation between the two slides.
Procedure
- Group each pair (circle + icon) as described. Name them if you like, via the Selection Pane, to keep organized.
- Once grouped, create a duplicate of the entire slide: right-click the slide thumbnail → Duplicate Slide. The background and all buttons are copied exactly.
- On the duplicated slide, select the button you want to animate to the center. Hold Ctrl+Shift and drag the grouped object while increasing its size to create the ‘centered’ state. The Ctrl+Shift helps you scale proportionally from the center point.
- Move it to the exact center of the slide. You can use Align → Align Center and Align Middle to ensure precision.
Why duplicate? The Morph transition recognizes identical objects across slides by name, shape, and grouping. When an object is the same (grouped) and you reposition/resize it on the duplicated slide, Morph animates the change seamlessly.
Practical sequencing
You will create a base slide (Slide A) with all option buttons in their small state. Then duplicate Slide A multiple times: Slide B, Slide C, Slide D, etc. On each duplicate, move and enlarge a different option so each option gets its own centered state. Later, apply Morph to these duplicated slides to create the animated sequence.
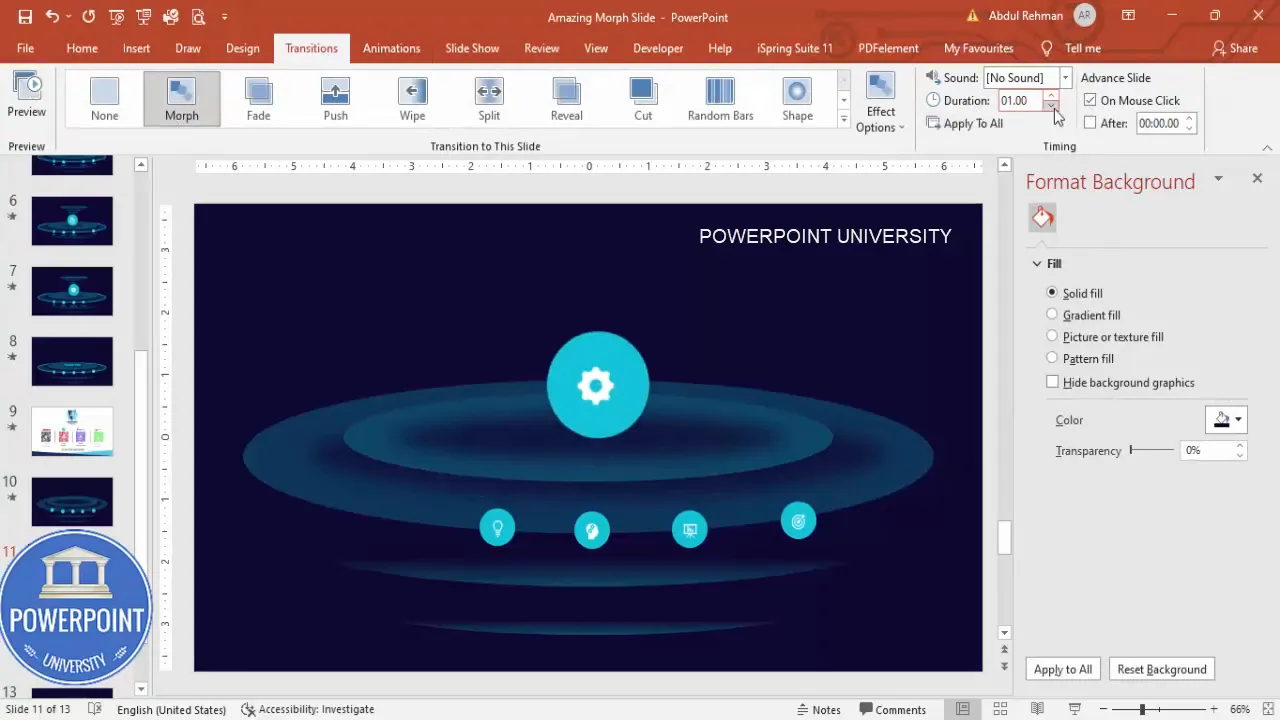
Step 5 — Applying the Morph transition for animation
Now that you have a sequence of slides where each slide has one option scaled and centered, it’s time to turn on the Morph transition to animate between these steps. The Animated Slide Design with Morph Transition is straightforward because Morph automatically animates movement, size, rotation, and shape changes between two slides that contain matching objects.
Steps to apply Morph
- Select the duplicated slide where you enlarged one option (Slide B).
- Go to Transitions → Morph.
- Set the duration to 1.0 seconds for a quick, fluid motion. You can experiment with slightly longer durations if you want a slower reveal.
- Ensure the very first slide (Slide A) is set to no transition or a minimal one so that the sequence kicks off from the base state. From Slide B onward, Morph handles the smooth motion back and forth.
When you play the slideshow and click to advance, the turquoise button will appear to glide and grow to the center position, while the other buttons subtly move back into place. This creates an interactive illusion with zero complex animations.
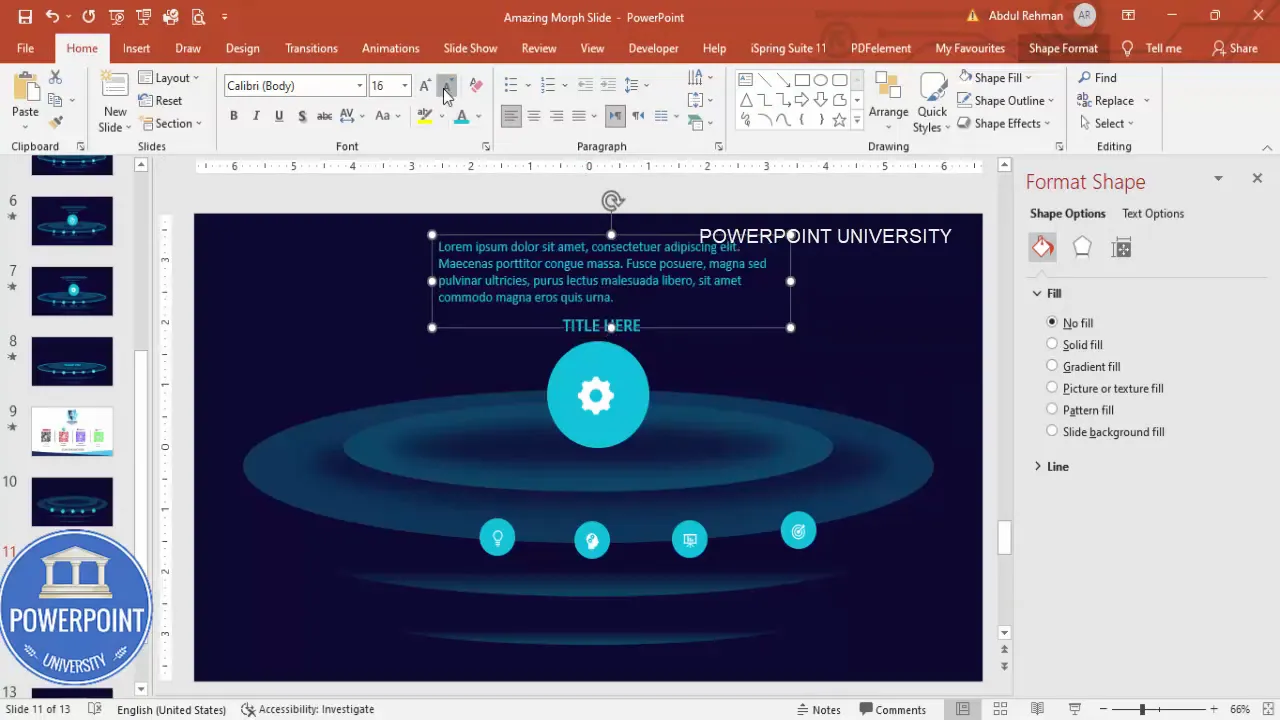
Step 6 — Adding titles and detailed text
With movement in place, you need readable content. Add a title that remains constant across slides and a smaller detailed text box that changes depending on the centered option.
- Insert a text box for the main title near the center. Use a white font; I recommend Open Sans or any clean sans-serif. Aim for semi-bold weight so the title stands out against the dark background.
- For the icon labels, you can use the turquoise color to tie the label to the button visually.
- Create another text box above the center for detailed content. This content should be short — bullet points or 30 words max per the design best practice — and should change from slide to slide depending on the centered option.
- To keep consistent size and placement, format the detail text box on the first slide and then duplicate the slide sequence; only replace the detailed copy on the duplicates. Morph will maintain smooth transitions for the position and presence of the text if the text boxes are present on both slides.
Use a formula approach when you want to make the detail text smaller or to lowercase for consistent styling: you can type copy in all caps or use PowerPoint’s text formatting options. In the video recording I used a small function “equals lower()” to format text; you can manually adjust case via Text Effects or simply edit the string.
Create Slides in Seconds with ExpertSlides AI |
|
Generate AI Presentations today: |
| TRY NOW! |
Finishing touches and export
Once you’ve built all duplicates and applied Morph transitions, run the slideshow in normal mode and click through the sequence to confirm everything behaves as expected. Here are a few final adjustments:
- Check alignment: all centered enlarged options should snap to the same exact center coordinates.
- Check consistency: ensure each grouped option keeps the exact group name or structure across slides — this helps Morph match objects correctly.
- Spacing: make sure the small options don’t overlap the background layers in undesirable ways when they move.
- Text legibility: verify contrast between text, icons, and background across screens (projector, laptop, mobile).
Exporting:
- Save your PPTX file as the master template for future reuse.
- Export to PDF if you need a static handout; be aware the Morph effect won’t translate to PDF.
- Export to video if you want an auto-playing demo: File → Export → Create a Video. The Morph animations will be baked into the video timeline.
Design tips and best practices
To make the most out of your Animated Slide Design with Morph Transition, here are practical tips based on what I use in my templates and tutorials:
1. Keep text short and scannable
Use the 6-8 line or 30-word guideline. The Morph animation draws attention to a section; therefore, concise supporting points are more effective than dense paragraphs.
2. Name objects in the Selection Pane
If you have trouble with Morph not recognizing objects, open the Selection Pane and name each grouped option consistently across slides. Morph uses object identity to match shapes between slides.
3. Use consistent grouping
Group circle + icon + label into a single object per option. If you forget to group one instance, Morph may create a “disappearing” or “popping” effect instead of a smooth motion.
4. Avoid large file bloat
Vector icons are lightweight and scale beautifully. Avoid using high-resolution photographic assets repeatedly on many duplicated slides; use a single background image or vector shapes instead.
5. Test in Slide Show mode
PowerPoint’s editing view sometimes misleads on how transitions will look. Always preview your Animated Slide Design with Morph Transition in Slide Show mode to confirm the motion and pacing.
6. Use subtle gradients and soft edges
The background halo created by soft edges and gradient stops adds depth without distracting. The turquoise options then read as touchpoints rather than competing elements.
Advanced variations and customization ideas
Once you’ve mastered the base Animated Slide Design with Morph Transition, try these variations to add sophistication or adapt the template:
- Alternate layouts: arrange options in a horizontal row instead of an arc. Morph will still animate between positions.
- Hover-style mimic: simulate hover by creating tighter, faster transitions (0.5 seconds) to mimic instantaneous interaction.
- Sequential reveal: instead of returning to the base slide, chain morph slides so clicking moves the animation from one option directly to the next enlarged option without a complete reset.
- Icon transformations: replace the icon on the centered slide with a more detailed graphic — Morph will animate the position and size; you can fade in additional elements via entrance animations if needed.
- Color swaps: change the turquoise to your brand color. For dramatic effect, invert the color palette when an option is centered (swap background hue slightly for emphasis).
- Interactive hyperlinks: attach hyperlinks to external slides or websites from the detail text if you plan to distribute the PPT as a clickable deck.
Troubleshooting common issues
Even with careful preparation, you might run into common issues. Here’s how to solve them:
1. Morph doesn’t animate a particular object
- Solution: confirm that the object exists on both slides and is grouped/named consistently. If the object was accidentally ungrouped, regroup and reapply.
2. Objects jump or flicker during transition
- Solution: check for duplicate objects that overlap (hidden copies). Use Selection Pane to inspect invisibles and remove them.
3. Icons change color unexpectedly
- Solution: ensure that icon graphic fills are the same across slides (white fill, for example). Morph interpolates fill color; mismatched fills can cause a color transition you didn’t intend.
4. Slide size or background scaling issues after resizing slides
- Solution: finalize slide size before creating many objects. If you must change size later, use Don’t Scale to avoid automatic rescaling of content, then manually adjust elements as needed.
5. The Morph effect looks slow or too fast
- Solution: adjust transition duration. One second is a good default; 0.5 seconds is snappy, and 1.5–2 seconds is more cinematic.
Accessibility and compatibility considerations
Before publishing or sharing your presentation, think about accessibility and whether Morph is supported for your audience:
- Compatibility: Morph works in newer versions of PowerPoint (Office 365 and recent desktop releases). If recipients use older viewers or PowerPoint Online with limited features, the effect may not display as intended.
- Alternate formats: provide a static PDF or a recorded video of the slide transitions for recipients who can’t run Morph-enabled PPT files.
- Captions and text: ensure all critical information is present in readable text, not just visuals or icons. Screen reader users need accessible content.
- Contrast: verify adequate text/background contrast — use contrast check tools or test in different lighting conditions.
FAQ
Q: What versions of PowerPoint support the Animated Slide Design with Morph Transition?
A: Morph is available in PowerPoint for Microsoft 365, PowerPoint 2019, and later desktop versions. For best behavior, use the latest Office updates. If you need to share with users on older versions, export to video or provide a fallback static PDF.
Q: How many option buttons can I use?
A: You can use any reasonable number, but consider cognitive load. The Animated Slide Design with Morph Transition works technically with many options, but from a design and usability standpoint, 4–7 options is a practical sweet spot. If you add more than 7, consider grouping related items into subcategories or using paging.
Q: Can I use images inside the option circles?
A: Yes. You can use pictures cropped into circles or vector icons. Vector icons are preferred because they scale cleanly and are small in file size. If you use images, ensure they are simple and high-contrast so they remain readable when scaled down.
Q: How do I make the option enlarge while its icon changes?
A: There are two effective techniques: 1) Prepare two grouped objects with the same name — a small group with the small icon and a larger group with the detailed icon — then place them on the respective slides. Morph will animate position and size; for swapping the icon itself, you can also fade in the larger icon using an entrance animation on the centered slide.
Q: Can I automate creating multiple centered slides?
A: There isn’t a one-click automation in PowerPoint, but you can speed things up: group each option, duplicate the base slide, then on each duplicate select one group and scale/move to center. This only takes a minute per option once your base layout is done. Naming consistency in the Selection Pane speeds Morph matching.
Q: Is the Animated Slide Design with Morph Transition suitable for live presentations?
A: Yes. It works well in live presentations because it keeps the presenter in control — click or advance to move focus — and the motion is smooth. For a Q&A mode, bring items to center to expand on a point. If you need audience interactivity (click-based on-screen), consider embedding hyperlinks or using a presenter remote.
Q: What file formats should I provide to stakeholders?
A: Provide the PPTX master for those who will edit. Provide a video (MP4) if the recipient just needs to view the animation without PowerPoint, and provide a PDF for print or static handouts. The Morph animations require PPTX/PowerPoint to play live.
Conclusion and next steps
The Animated Slide Design with Morph Transition gives you a powerful yet lightweight approach to producing visually compelling and interactive company profile slides. The core technique — build a base slide with small option buttons, duplicate the slide, enlarge and center a single option, and apply Morph — is scalable and adaptable to many presentation contexts.
Recap of the key workflow:
- Prepare a dark background and layered ovals for depth.
- Create grouped option buttons (circle + icon) and position them.
- Duplicate the slide for each option and enlarge/move one option to the center per duplicate.
- Apply the Morph transition (1 second recommended) on the duplicates.
- Add clear title and concise detail text for each centered state.
- Test in Slide Show mode, optimize, and export to the necessary formats.
If you want to save time, I included a free template used in the original tutorial that contains the base layout and grouped objects so you can jump straight to customization. Use it as a starting point—change the colors, swap icons, and replace copy.
Final reminder: Experiment with durations, color contrasts, and layout arrangements to make the template your own. The Animated Slide Design with Morph Transition is flexible; once you get comfortable, you can repurpose it for timelines, team bios, product features, or case-study highlights.
Happy designing — and if you build something cool, consider saving it as a template for future presentations. The Morph-powered motion will make even simple content feel intentionally crafted and engaging.
Additional resources: If you’d like the starting PPTX template file I used while creating this article, look for a free download provided on the original POWERPOINT UNIVERSITY resource page. It includes the layered background, grouped option elements, and sample text to help you get started quickly.
Check out the full video: Animated Slide Design with Morph Transition | PowerPoint | Tutorial 1108 | Free Template


