
PowerPoint slide design is an art that blends creativity with technical skill to captivate audiences and communicate ideas effectively. Today, I’m excited to share a detailed, step-by-step guide on how to create an eye-catching animated conic gradient effect in PowerPoint. This tutorial will not only show you how to achieve a unique spinning gradient background but also how to customize it for different moods and presentations. Whether you’re using Office 365 or an earlier version of PowerPoint, this technique is versatile and easy to implement.
This design idea was inspired by the brilliant work of UI Adrian, a talented designer known for his gradient effects in UI design, mainly created using Figma. I’ll walk you through how to replicate this effect in PowerPoint, combining the best of both worlds—Figma’s gradient creation and PowerPoint’s animation capabilities.

Table of Contents
- What Is a Conic Gradient?
- Why Use Animated Gradients in PowerPoint Slide Design?
- Creating the Conic Gradient Using Figma
- Importing and Preparing the Gradient in PowerPoint
- Making the Gradient Spin
- Adding Content and Fun Illustrations
- Customizing Background Colors and Gradient Looks
- Turning a Light Gradient Into a Dark One
- Best Practices for PowerPoint Slide Design
- FAQ
- Conclusion
What Is a Conic Gradient?
A conic gradient, also called an angular gradient, is a type of gradient that radiates colors around a center point, much like the spokes of a wheel. Instead of colors blending linearly or radially, they sweep around a circle.
This gradient style creates an appealing circular color progression, perfect for backgrounds or design elements that need to draw attention subtly but dynamically. Unlike linear or radial gradients, conic gradients offer a unique visual rhythm that enhances the aesthetic of any slide.

Why Use Animated Gradients in PowerPoint Slide Design?
Adding animation to gradients elevates your presentation by introducing movement and life to backgrounds that are typically static. Here are some key reasons to incorporate animated gradients in your PowerPoint slides:
- Engagement: Moving backgrounds can capture and hold audience attention more effectively than static images.
- Visual Appeal: Animated gradients add a modern, polished look that makes your presentation stand out.
- Customization: You can tailor colors and animation speed to match your brand or theme.
- Subtlety: Unlike flashy animations, a spinning gradient can be gentle and elegant, enhancing rather than distracting.
- Versatility: This effect suits a variety of presentation types, from business pitches to creative portfolios.
Creating the Conic Gradient Using Figma
PowerPoint’s native gradient options—linear, radial, rectangular, and path—do not support conic gradients. To overcome this, we use Figma, a free web-based design tool that allows easy creation of conic gradients.
Step-by-Step Guide to Create a Conic Gradient in Figma
- Login to Figma: You can sign in using your Google account for free.
- Create a New Design File: Click on New Design File to open a blank canvas.
- Insert a Frame (Page): Click the button to add a frame, which acts as your workspace.
- Set Dimensions: On the right panel, choose slide dimensions or set custom size. For easier PowerPoint adaptation, set width and height to 2000 pixels each.
- Add Fill: Click on the fill color option, then select Angular Gradient. This creates the conic gradient effect.
- Adjust Colors: By default, the gradient starts with solid white on the left and transparent white on the right. You can customize these colors, but sticking to white and transparent white gives you more flexibility later in PowerPoint.
- Rename and Export: Rename your frame to “Conic Gradient” and export it as a PNG file for use in PowerPoint.
This method is straightforward and leverages Figma’s powerful design capabilities to create a gradient effect that PowerPoint alone cannot produce.

Importing and Preparing the Gradient in PowerPoint
Once you have your conic gradient PNG ready, the next step is to bring it into PowerPoint and prepare it for animation.
Steps to Import and Prepare the Gradient
- Set Slide Background Color: Change your slide background from white to any color so the gradient stands out.
- Insert Gradient Image: Go to Insert > Pictures and select your exported conic gradient PNG.
- Resize Gradient: Use Ctrl + Shift while dragging corners to resize proportionally until the gradient covers the entire slide.
- Fix Coverage Issues: You may notice corners of the slide are not fully covered when the gradient spins. To fix this, insert a large circle shape:
- Hold Shift to draw a perfect circle centered on the slide.
- Make the circle’s fill fully transparent so you can see the gradient behind it.
- Resize the circle slightly larger than the slide.
- Resize the gradient so it’s slightly larger than the circle.
- Crop Gradient to Circle Shape: Select the gradient, then the circle, go to Shape Format > Merge Shapes > Intersect. This crops the gradient to the circular shape, ensuring full coverage when spinning.

Making the Gradient Spin
With the conic gradient in place, the next exciting step is to animate it to spin continuously, creating a dynamic background effect.
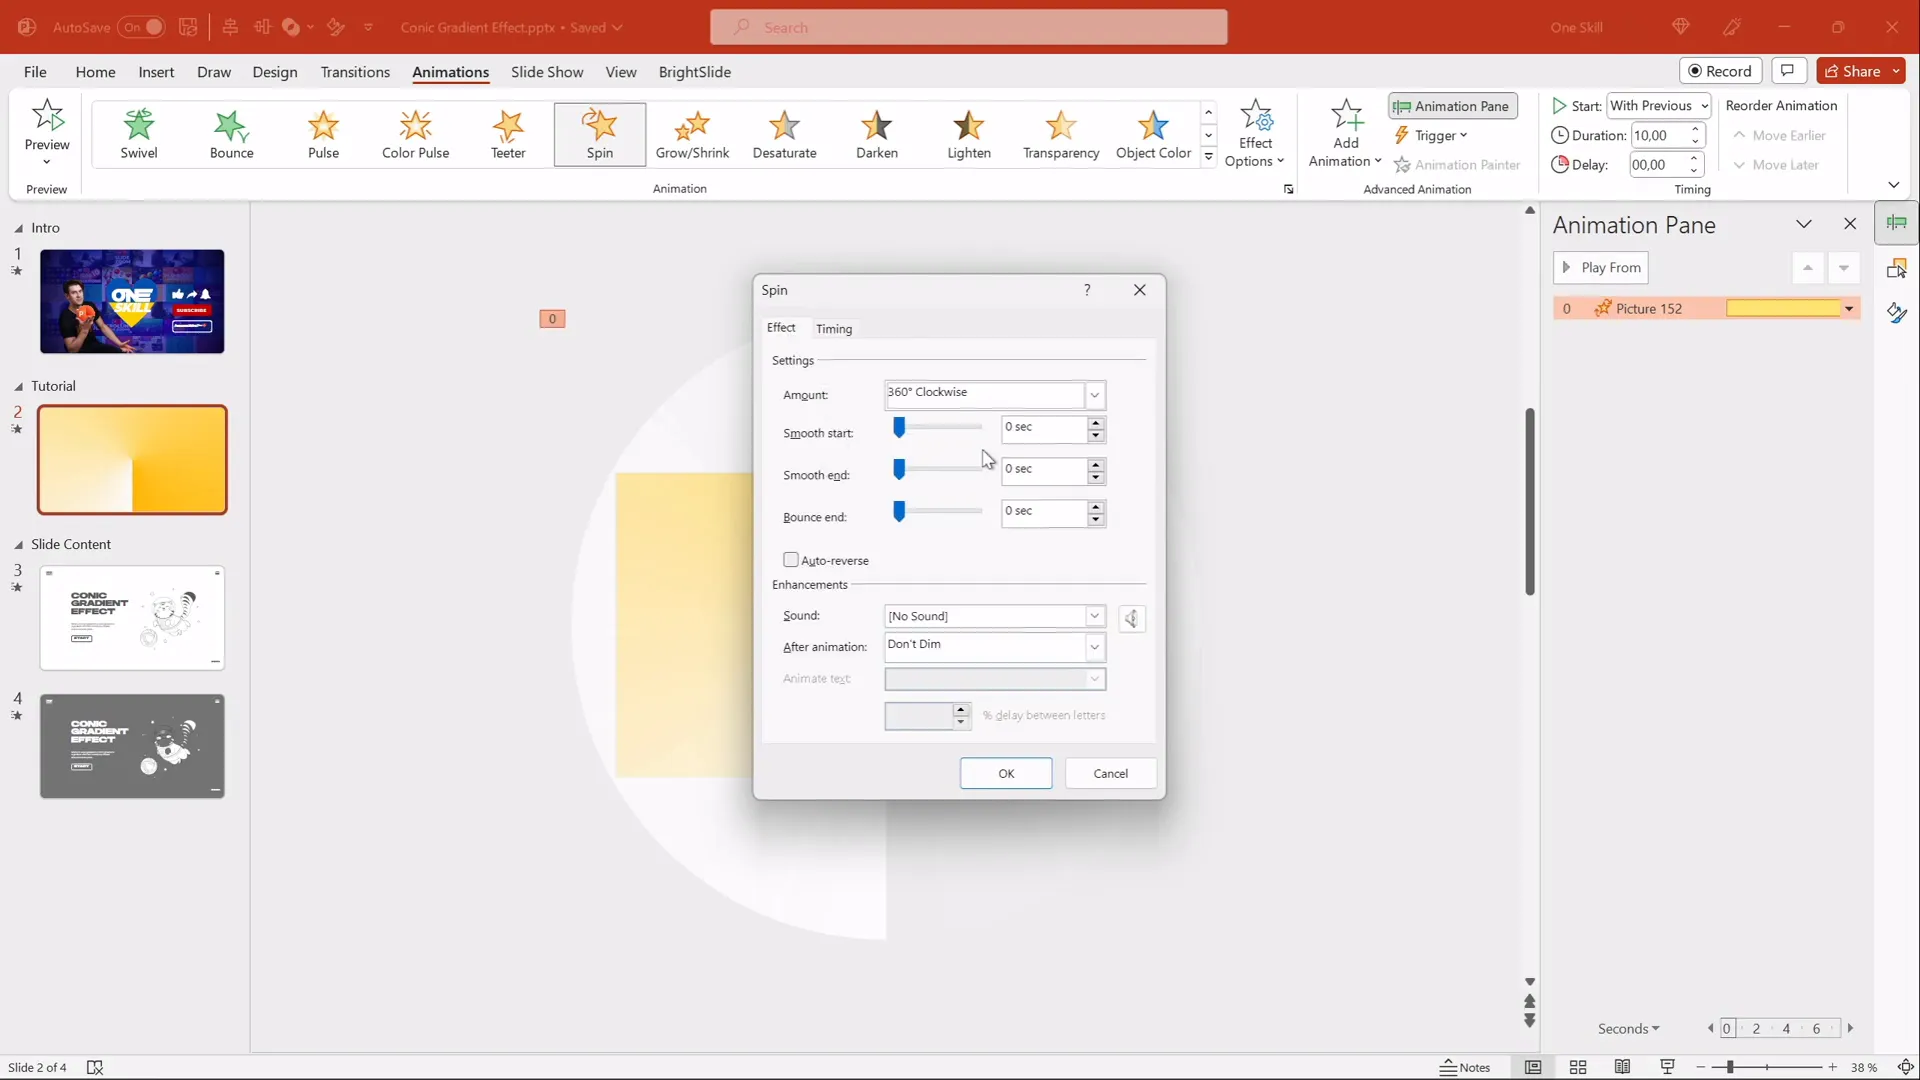
How to Add a Spin Animation
- Select the Gradient Image: Click on your cropped conic gradient.
- Add Spin Animation: Go to the Animations tab and select Spin from the animation options.
- Configure Animation Settings:
- Effect Options: Set rotation to Clockwise and amount to 1 Full Spin.
- Start: Choose With Previous so the animation starts automatically.
- Duration: Set the duration to 10 seconds for a smooth spin.
- Repeat: Choose Repeat Until End of Slide to keep the gradient spinning indefinitely.
- Disable Smooth Start/End: Uncheck these options for consistent rotation speed.
- Preview: Run the slideshow to see the gradient spin seamlessly.
Adding Content and Fun Illustrations
To showcase how the spinning conic gradient can be used in real presentations, adding content and illustrations on top creates a lively and engaging slide.
Incorporating Text and Illustrations
- Text Boxes: Insert text boxes to add headings or key messages. For this design, the font Hands On was used, lending a friendly and hand-crafted feel.
- Illustrations: Add fun, animated illustrations like a flying cat to bring personality to the slide. Resources like Storyset offer free SVG illustrations that are easy to customize in PowerPoint.
- Group Elements: Group your text and illustrations so you can move and resize them easily.
- Layering: Make sure the spinning gradient is behind all content to avoid overlap issues.
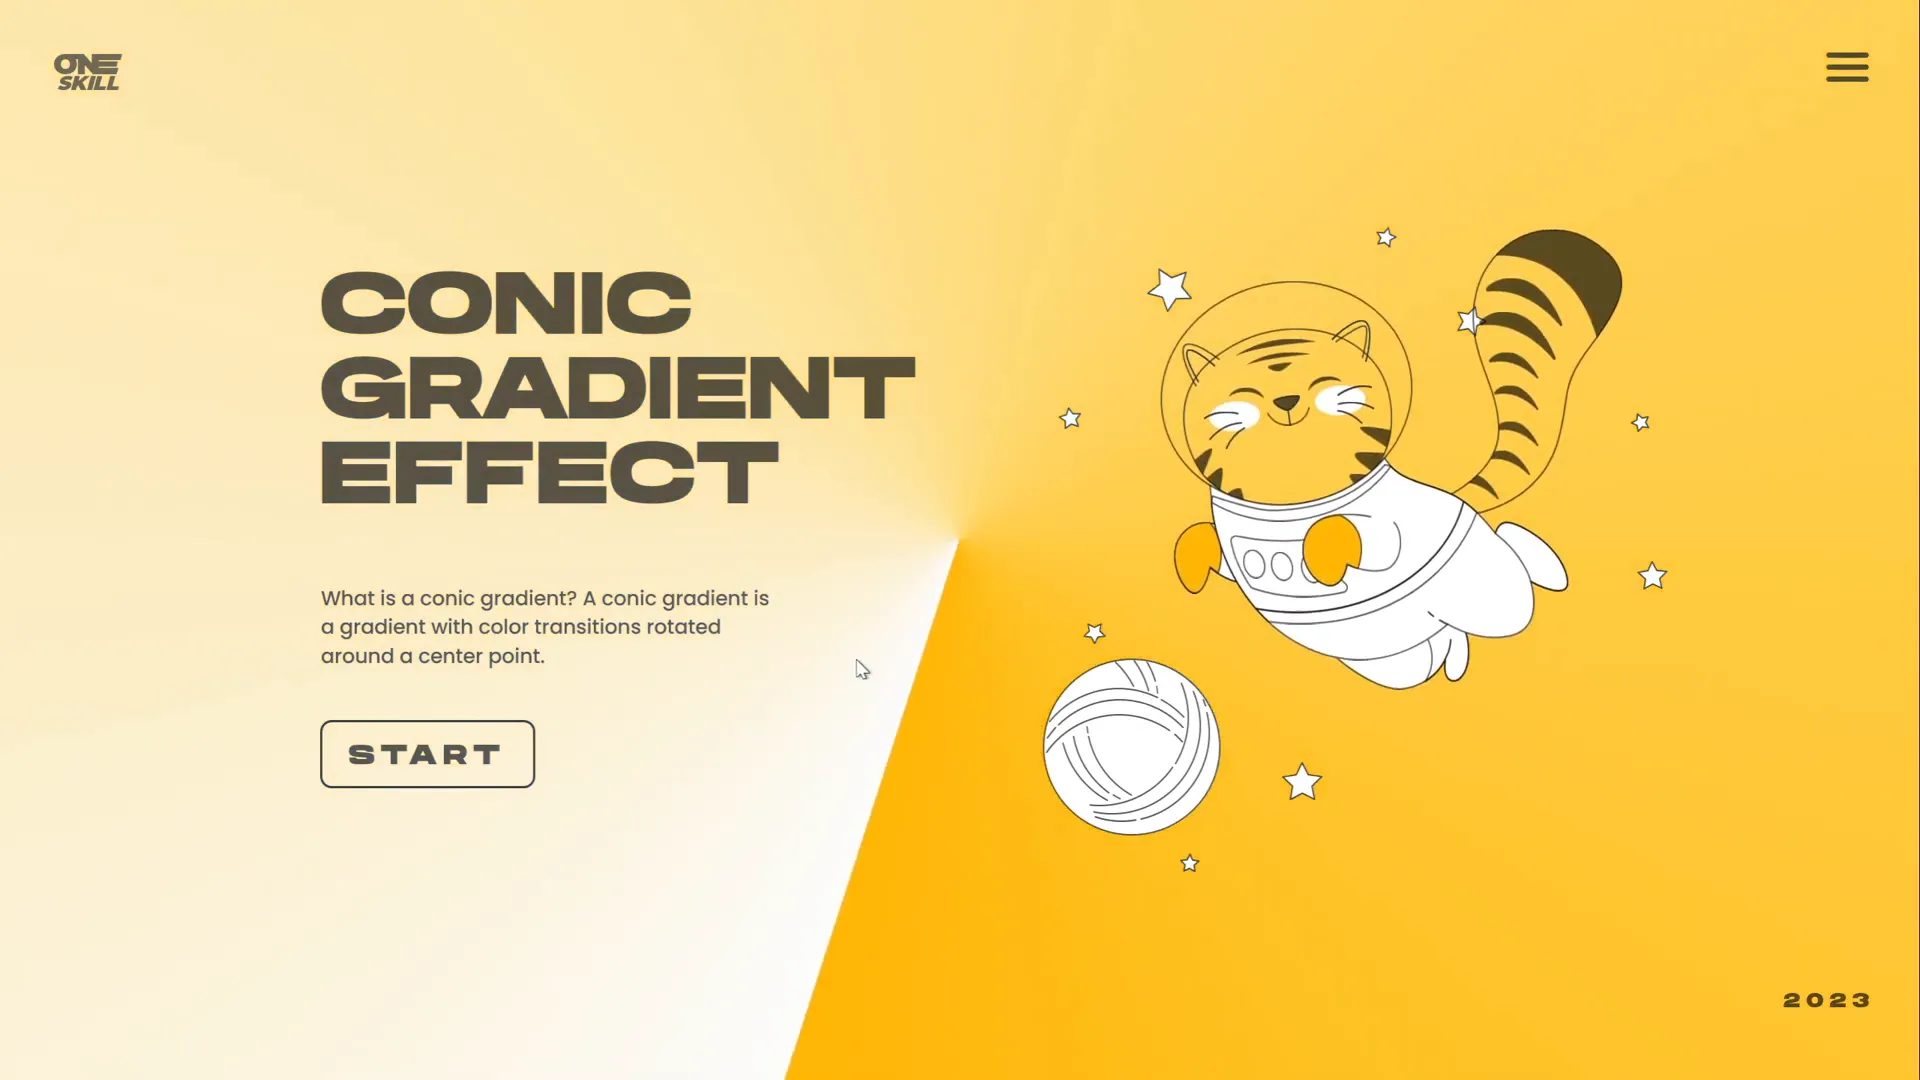
This approach shows how dynamic backgrounds can complement your slide content, making your presentation both visually interesting and professional.
Customizing Background Colors and Gradient Looks
One of the best features of this technique is its adaptability. Because the conic gradient is designed with white and transparent colors in Figma, you can easily change the slide background color in PowerPoint to create new gradient color effects.
How to Customize Colors
- Duplicate Your Slide: Right-click your slide thumbnail and select Duplicate Slide to create a copy to experiment with.
- Change Background Fill: On the duplicate slide, change the background color to any shade you want (e.g., light purple, pastel blue, or warm orange).
- Observe Gradient Change: Because the gradient PNG uses white and transparent colors, the gradient will adapt its color look based on the slide background.
- Create Multiple Variations: Repeat this process to create a palette of slides with different background colors and gradient vibes.
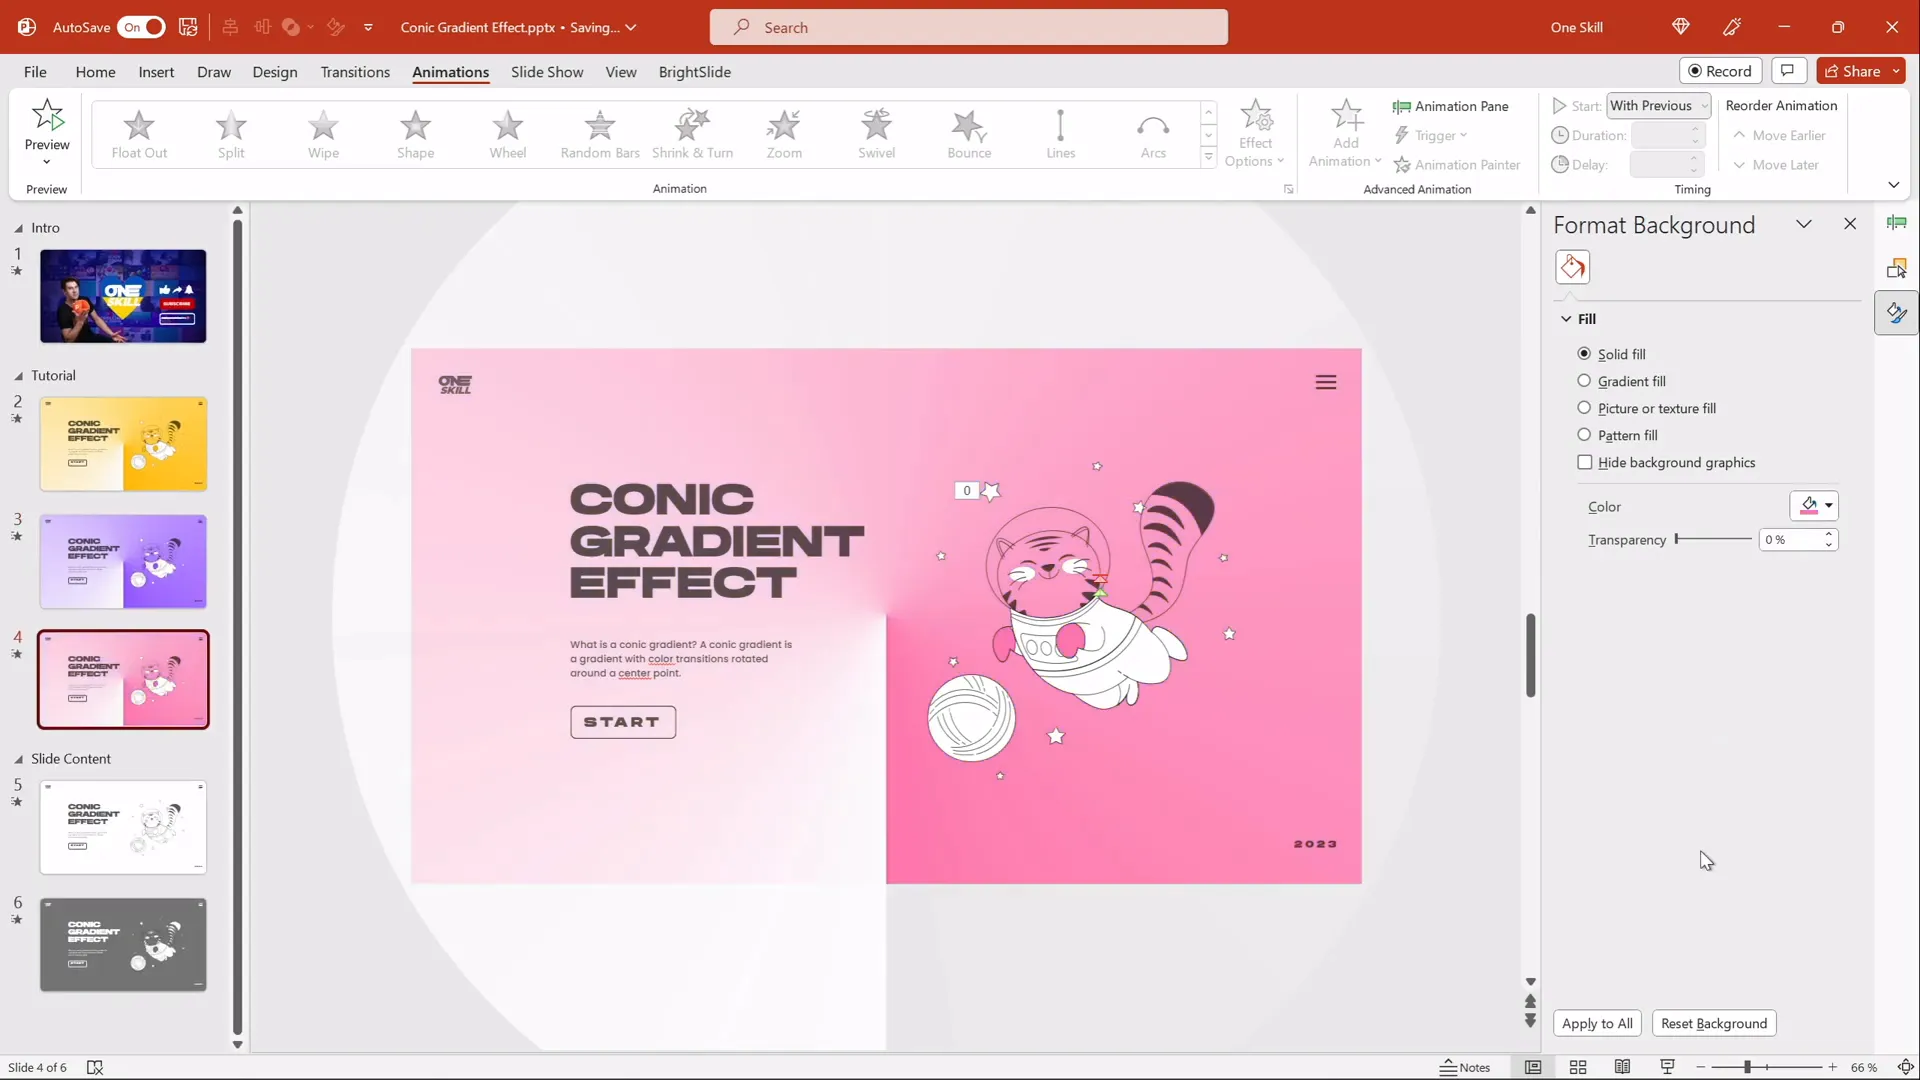
This flexibility makes it easy to maintain a consistent gradient style while adjusting to different branding or mood requirements.
Turning a Light Gradient Into a Dark One
If you want to switch from a light, airy gradient to a darker, moodier look, PowerPoint’s picture correction tools can help.
Steps to Darken the Gradient
- Select the Gradient Image: Click on the conic gradient PNG in your slide.
- Open Picture Correction Options: Right-click the image, choose Format Picture, then navigate to Picture Corrections.
- Adjust Brightness: Slide the brightness slider down to darken the image until you achieve the desired darkness.
- Adjust Transparency: If the dark effect is too strong, increase the transparency slider to soften it.
- Change Background Color: Experiment with darker or contrasting background colors to complement the dark gradient.
- Adjust Text Color: When using dark backgrounds, make sure your text is white or light-colored for readability.
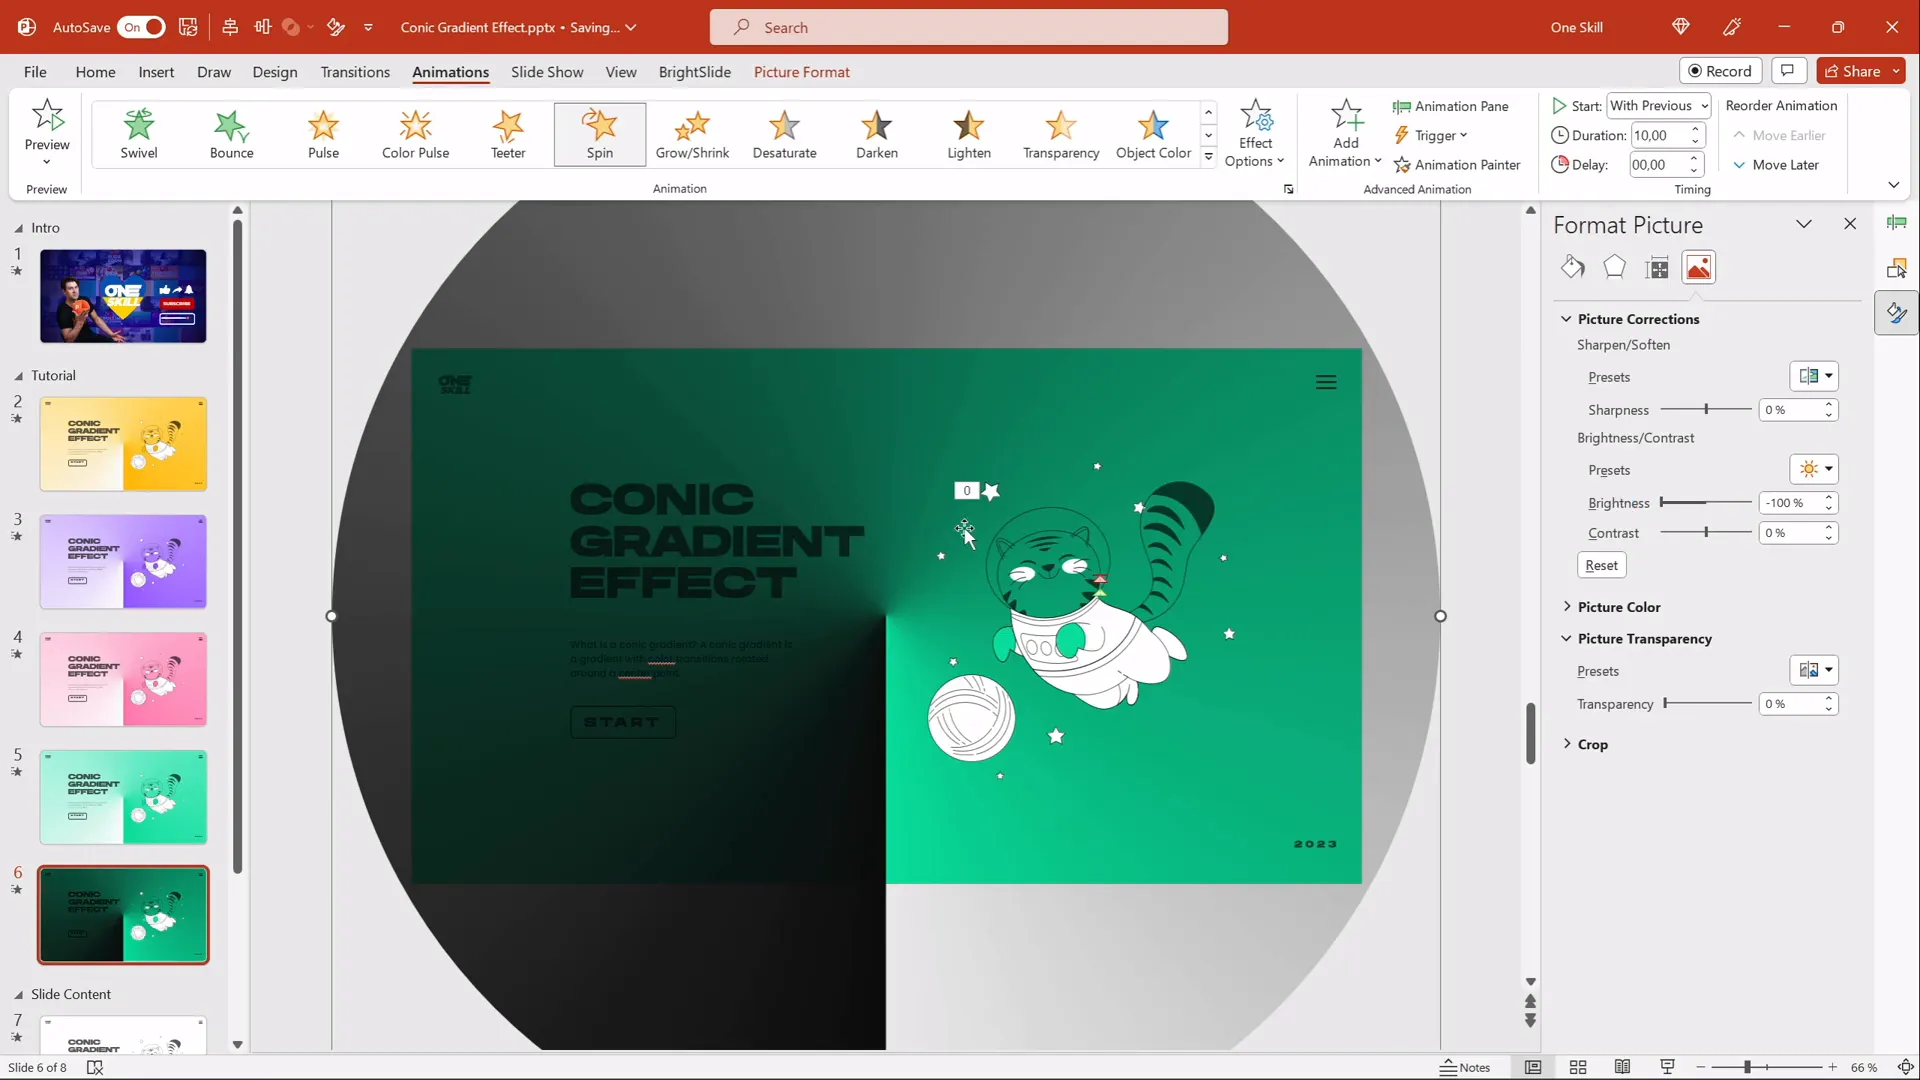
This technique expands your design possibilities, allowing you to use the same gradient asset for both light and dark-themed presentations.

Best Practices for PowerPoint Slide Design
Before you start creating your own animated gradients or other effects, keep in mind these essential tips to make your PowerPoint slides look polished and professional:
| Tip | Description | Why It Matters |
|---|---|---|
| Keep It Simple | Don’t overload slides with too much text or too many animations. | Maintains audience focus and prevents distraction. |
| Use Consistent Fonts | Stick to 1-2 font families and sizes for clarity. | Creates a cohesive visual identity. |
| Ensure Alignment | Align text and objects using PowerPoint’s guides. | Improves readability and aesthetics. |
| Test Animations | Preview animations to ensure smooth timing and flow. | Avoids awkward transitions and technical glitches. |
| Use High-Quality Images | Use vector or high-resolution images for sharpness. | Maintains professionalism and visual appeal. |
| Maintain Contrast | Ensure text contrasts well with background colors. | Enhances readability for all viewers. |
Applying these principles alongside creative techniques like the spinning conic gradient will elevate your PowerPoint slide design to the next level.
FAQ
What versions of PowerPoint support this animated conic gradient effect?
This technique works best with Office 365 but is compatible with most modern PowerPoint versions that support PNG images and the spin animation.
Do I need to be a Figma expert to create the conic gradient?
Not at all! Figma is user-friendly, and the steps to create a conic gradient are straightforward. The tutorial above walks you through the process, and you can use the free version of Figma.
Can I change the colors of the gradient after exporting it from Figma?
Since the gradient is exported as a PNG with white and transparent colors, you can change the slide background color in PowerPoint to alter the gradient’s appearance. For more complex color changes, you’d need to edit the gradient in Figma and re-export.
How do I add animations to other elements like text or illustrations?
PowerPoint allows you to apply animations to any object. Select the object, go to the Animations tab, and choose your desired effect. You can time animations to start with or after the previous ones for smooth flow.
Is it possible to use this gradient effect on multiple slides?
Yes! Simply duplicate your designed slide and adjust background colors or content as needed. This maintains consistency while allowing variety.
Where can I find free illustrations like the flying cat used in the example?
Websites like Storyset offer free SVG illustrations perfect for PowerPoint. Download SVG files for the best quality and editability.
Conclusion
Mastering PowerPoint slide design means blending creativity with technical know-how to produce presentations that captivate and communicate powerfully. The animated spinning conic gradient effect is a fantastic way to add motion and modern flair to your slides without overwhelming your audience.
By leveraging Figma’s angular gradient capabilities and PowerPoint’s animation tools, you can create a dynamic background that adapts to your presentation’s mood and style. This technique is flexible, customizable, and accessible even for those with basic PowerPoint skills.
Remember to experiment with colors, animation speed, and slide content to find the perfect balance for your audience and message. With these skills in your toolkit, your next presentation will surely impress.
Feel free to download the free tutorial slides and try out this effect yourself. Happy designing and may your slides always leave a lasting impression!
Check out the full video: IMPRESSIVE PowerPoint Design Idea 😍 Conic Gradient Effect


