
If you’re looking to bring a fresh, dynamic feel to your PowerPoint presentations, mastering push transitions is a game-changer. In this comprehensive guide, I’ll walk you through my five favorite push transitions that can take your slides from static to stunning. These techniques are not only visually appealing but also practical, helping you organize information clearly and engagingly. Whether you’re crafting timelines, creating scrolling effects, connecting slides with color or images, comparing pros and cons, or designing interactive roadmaps, push transitions can add that professional polish your presentations need.
Let’s dive into each of these push transition techniques step-by-step, with tips and tricks to make your slides truly stand out.
Table of Contents
- 1. Using Push Transitions for Timelines
- 2. Creating a Scrolling Effect with Push Transitions
- 3. Connecting Slides with Colors and Pictures
- 4. Comparing Pros and Cons with Push Transitions
- 5. Creating an Interactive Roadmap with Push Transitions
- Frequently Asked Questions (FAQ)
- Conclusion
1. Using Push Transitions for Timelines
Timelines are a common feature in presentations, but fitting all the information neatly can be a challenge. The push transition is perfect for expanding timeline slides without cluttering them. It creates a smooth flow that guides your audience through each step or event.
Step-by-Step Guide to Creating a Timeline with Push Transitions
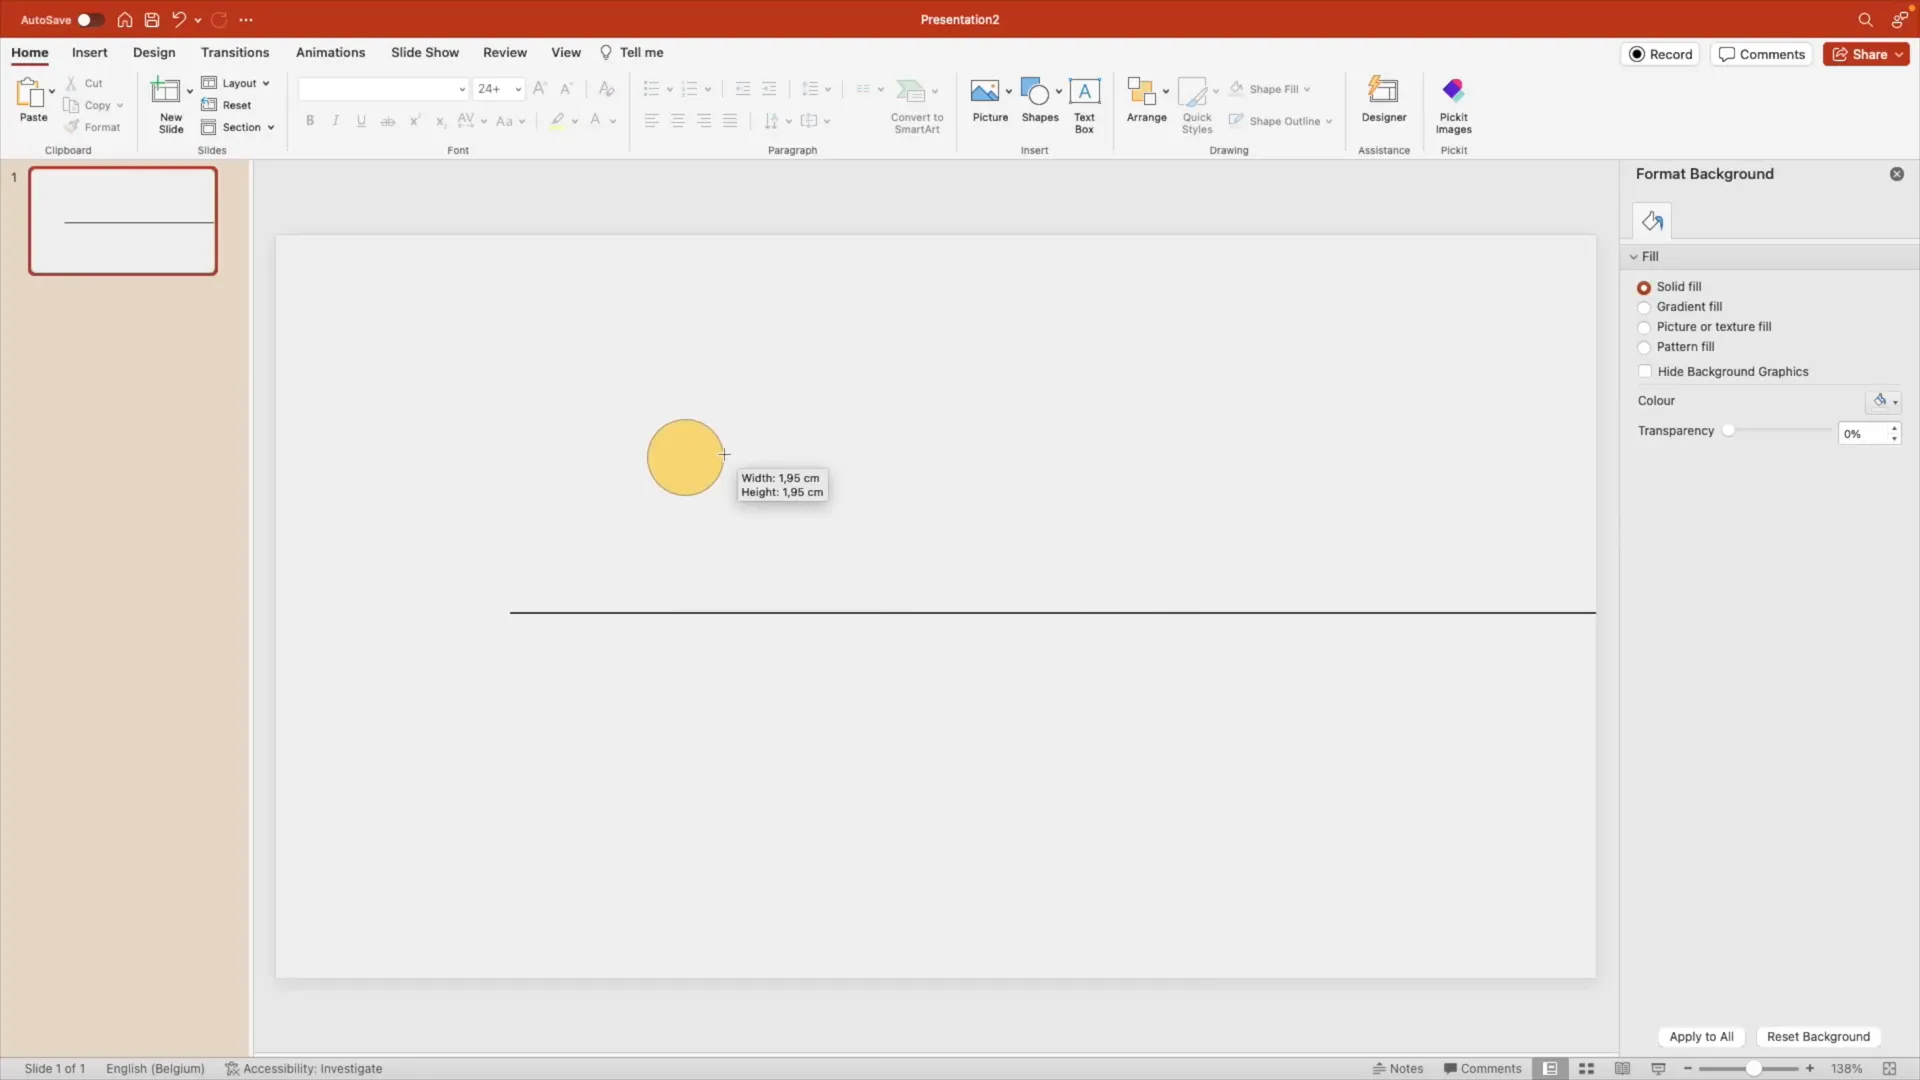
Start with a blank slide and set a comfortable, off-white background to avoid harsh contrasts that can strain the eyes.
- Add the Timeline Base: Insert a simple line starting from about halfway across the slide and extend it to the edge. Hold
Shiftwhile dragging to keep the line straight. Adjust the outline color to a darker shade and increase the weight to around 1.75 points for clarity. - Create Timeline Stops: Use circles to mark timeline points. Draw a circle while holding
Shiftto make it perfectly round. Set the fill color to match the background and outline it with the same color and thickness as your line. - Add Highlight Circles: Copy the circle using
Ctrl + Shiftand fill the copy with a bright yellow, removing the outline. Then, create a smaller copy of this yellow circle and center it inside the larger one to create a layered effect. - Number Your Stops: Insert a text box with a number, format the font to Avenir Next bold, dark color, size around 20, and center it inside the circles. Group these elements together for easy positioning.
- Add Text Descriptions: Above or below each timeline stop, add a title and descriptive text. Use consistent fonts—Avenir Next bold for titles and a smaller size (around 12) for descriptions. Align all elements for a neat appearance.
- Duplicate and Modify: Copy your timeline stops and text to create multiple points. Vary their vertical positioning (some above, some below the line) for visual balance.
- Add Decorative Icons: To enhance the slide, insert subtle icons like groups of people at the bottom with high transparency (around 95%) to avoid distraction but add personality.
Once your timeline slides are set, apply the push transition on the second slide. Choose the effect to push from the right and increase the duration to around two seconds for a smooth transition. This creates an expanding timeline effect where each click pushes the timeline forward without overwhelming the viewer with too much information at once.
Why Use Push Transitions for Timelines?
Push transitions help break down complex timelines into digestible parts, making it easier for your audience to follow along. Instead of squeezing everything on one slide, the push effect reveals each timeline point progressively, maintaining clarity and engagement.
2. Creating a Scrolling Effect with Push Transitions
Want your presentation to mimic the feel of a modern website? The scrolling effect is a creative way to achieve that sleek, dynamic look using push transitions. It’s surprisingly simple to build and adds a contemporary flair that keeps your audience intrigued.
How to Build the Scrolling Effect
- Choose a High-Quality Image: Start with a blank slide and insert a large image that extends roughly three times the height of your slide. This image will serve as the visual content that scrolls.
- Crop and Align: Crop the image so it fits the slide width perfectly, leaving extra height to allow for scrolling. Duplicate the slide, then adjust the crop and position the image upward on each successive slide to reveal different sections.
- Split the Image into Parts: By cropping and repositioning, you effectively split the image into three overlapping parts across three slides, simulating a scroll downward.
- Apply Push Transition: Select the bottom two slides and apply a push transition from the right with a duration of two seconds. Preview to ensure the image smoothly scrolls down as you click through the slides.
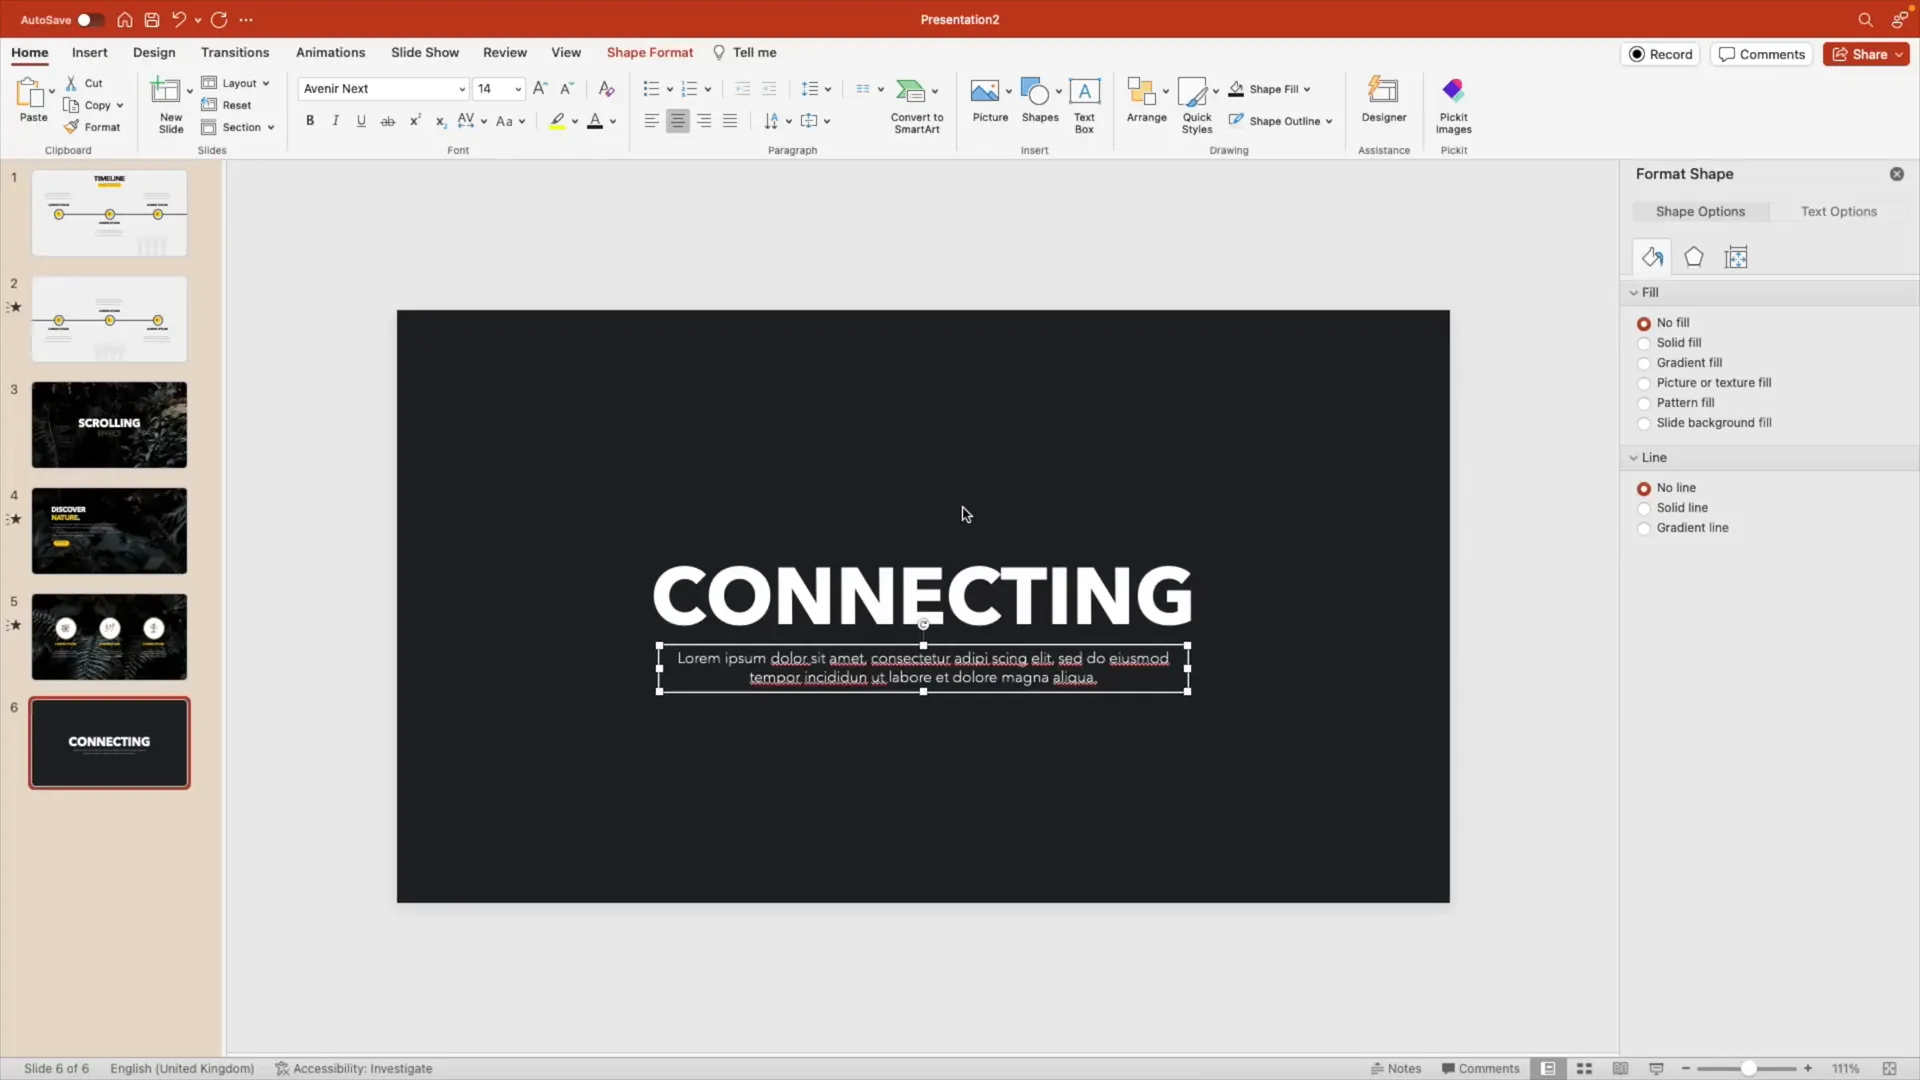
- Enhance with Text and Buttons: Overlay text boxes with white font for readability. Highlight keywords in yellow to maintain your color theme. Add a call-to-action button with rounded corners to encourage interaction.
- Adjust Image Brightness: If the text is hard to read, darken the image slightly using picture corrections or add a semi-transparent rectangle behind the text for better contrast.
- Add Supporting Icons: Include nature-inspired icons on the final slide to add visual interest and reinforce your theme.

Benefits of the Scrolling Effect
This effect mimics the natural scrolling behavior of websites, making your presentation feel modern and engaging. It’s perfect for storytelling, showcasing landscapes, or any content where a continuous visual flow enhances the message.
3. Connecting Slides with Colors and Pictures
Seamless transitions between slides can be achieved by connecting them through color schemes or overlapping images. This technique lends a cohesive, polished look to your slideshow and can help emphasize thematic shifts.
Connecting with Colors
- Set Background Colors: Begin with a dark-filled slide, add your title and descriptive text in yellow for contrast.
- Add Symbolic Icons: Insert icons like links or chains to symbolize connection and color them yellow to match your text.
- Include Directional Arrows: Add a yellow arrow on the side of the slide to indicate forward movement, subtly guiding the audience.
- Create a Color Transition Slide: Duplicate the slide and switch the background to yellow, changing text colors to dark for readability.
- Add Overlapping Shapes: Insert a triangle shape that overlaps between slides to create a spillover effect, enhancing the transition’s fluidity.
- Continue Alternating Colors: Repeat the process with dark and yellow backgrounds to maintain consistency and visual interest.
- Apply Push Transition: Use push transitions from the right with a duration of about 1.75 seconds for smooth color changes.
Connecting with Pictures
- Insert a Background Image: Choose a black and white photo to keep the presentation cohesive and less distracting.
- Crop and Position: Crop the image with a slight overlap to the left side of the slide to prepare for the transition.
- Create an Overlapping Triangle: Use a triangle shape filled with the cropped image texture to create a seamless transition effect between slides.
- Add Text Elements: Include a thank you message or relevant text aligned to the right for balance and professionalism.
- Apply Push Transition: Use push from the right with increased duration to link the slides smoothly.
Advantages of Connecting Slides
This method creates a narrative flow that feels natural and engaging. By linking slides through colors or images, you avoid abrupt changes that can distract or confuse your audience. Instead, your presentation gains a professional, unified look.
4. Comparing Pros and Cons with Push Transitions
Comparisons are a staple in presentations, especially when evaluating options or products. Using push transitions to highlight pros and cons one at a time helps maintain focus and avoids overwhelming viewers with too much information simultaneously.
How to Set Up a Pro vs. Con Slide
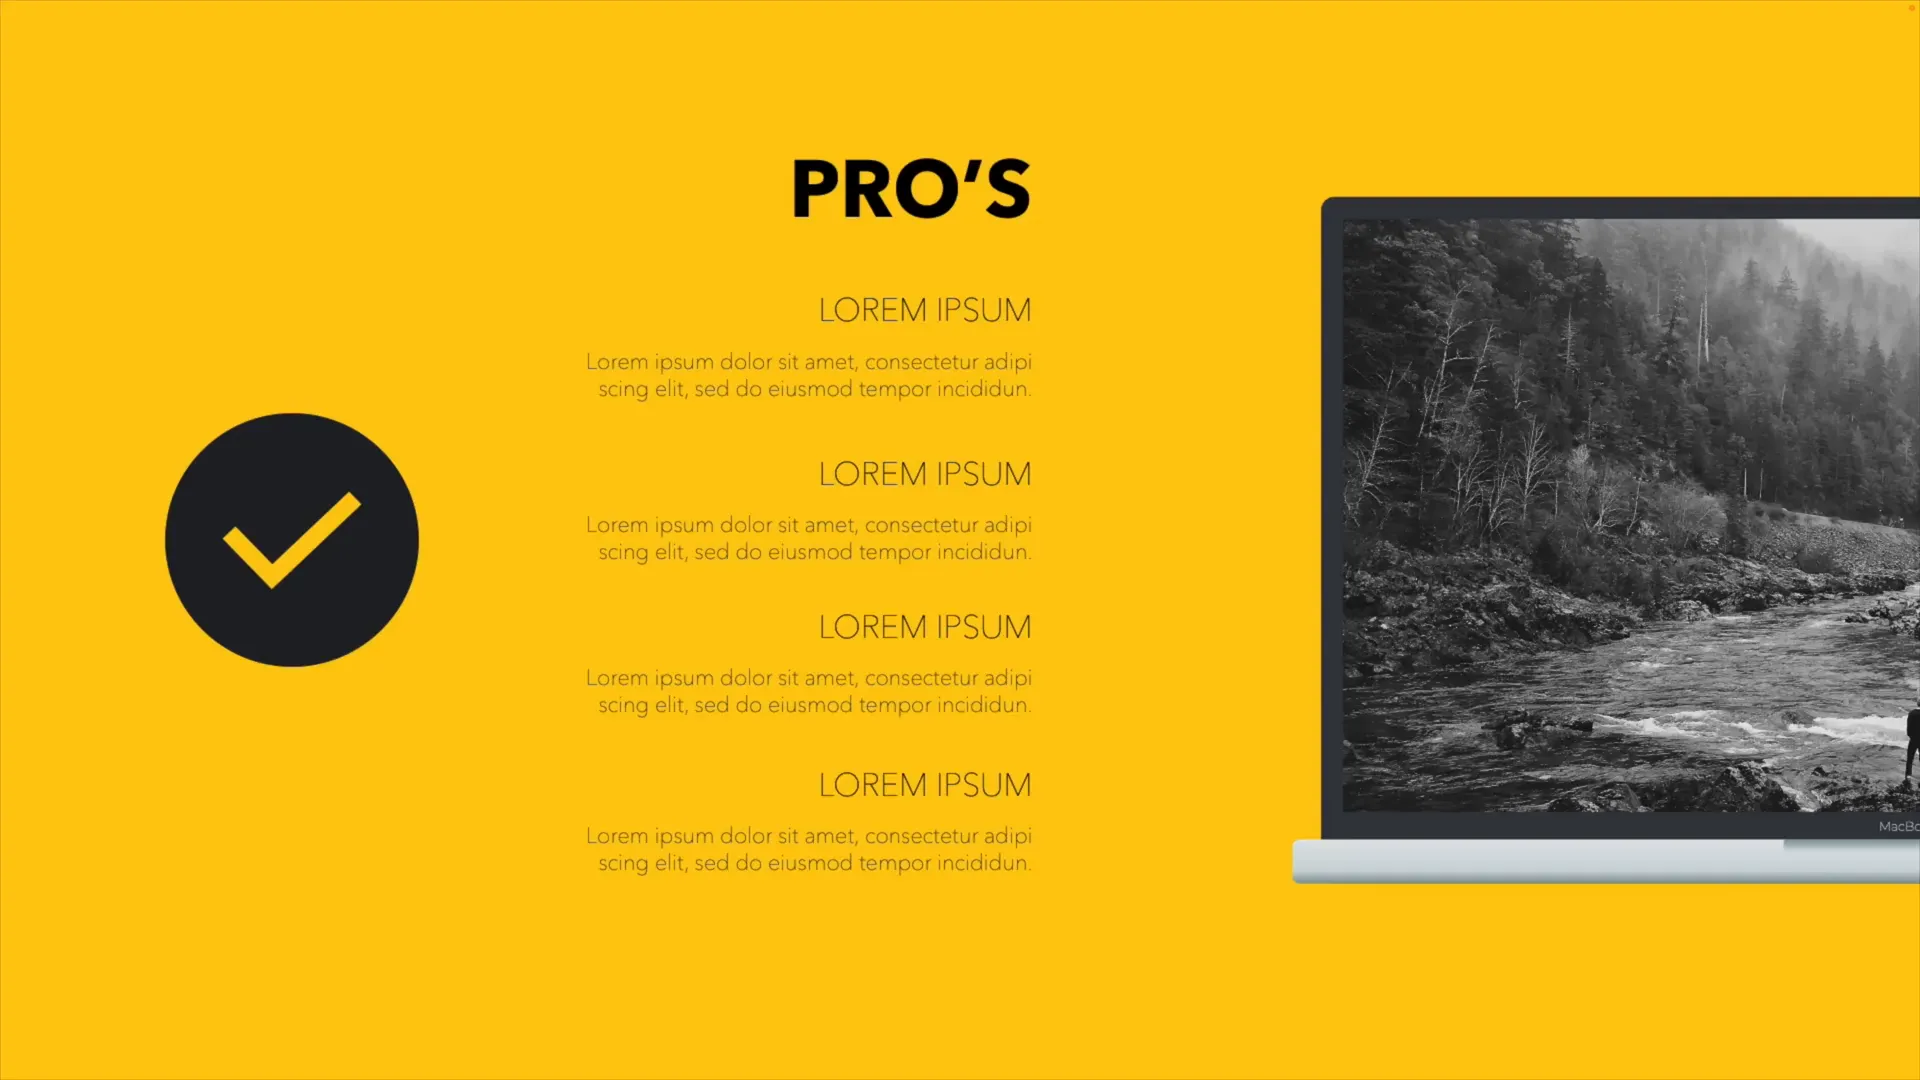
- Create a Yellow Background Slide: Insert a laptop mockup positioned halfway to the right.
- Insert Content on Laptop Screen: Add an image on the laptop screen to personalize the slide.
- Add Pros Text Boxes: Copy text elements and align them to the right side of the slide. Use lighter font weights for descriptions to create hierarchy.
- Highlight with Check Marks: Insert a dark circle on the left with a yellow check mark icon to symbolize positive points.
- Duplicate for Cons Slide: Change the background to dark and switch fonts to yellow for contrast.
- Replace Check Marks with Crosses: Insert a cross icon in the circle to indicate cons and position everything on the opposite side.
- Apply Push Transition: Use push from the right with increased duration to transition between pros and cons smoothly.
Why This Works
By separating pros and cons into different slides with push transitions, you direct the audience’s attention clearly to each side of the comparison. The visual cues of check marks and crosses further reinforce the message, making your argument more compelling and easier to follow.

5. Creating an Interactive Roadmap with Push Transitions
Finally, one of my favorite techniques is building a roadmap that links slides together dynamically. This interactive approach keeps your presentation engaging and clearly outlines the progression of ideas or project phases.
Building the Roadmap Step-by-Step
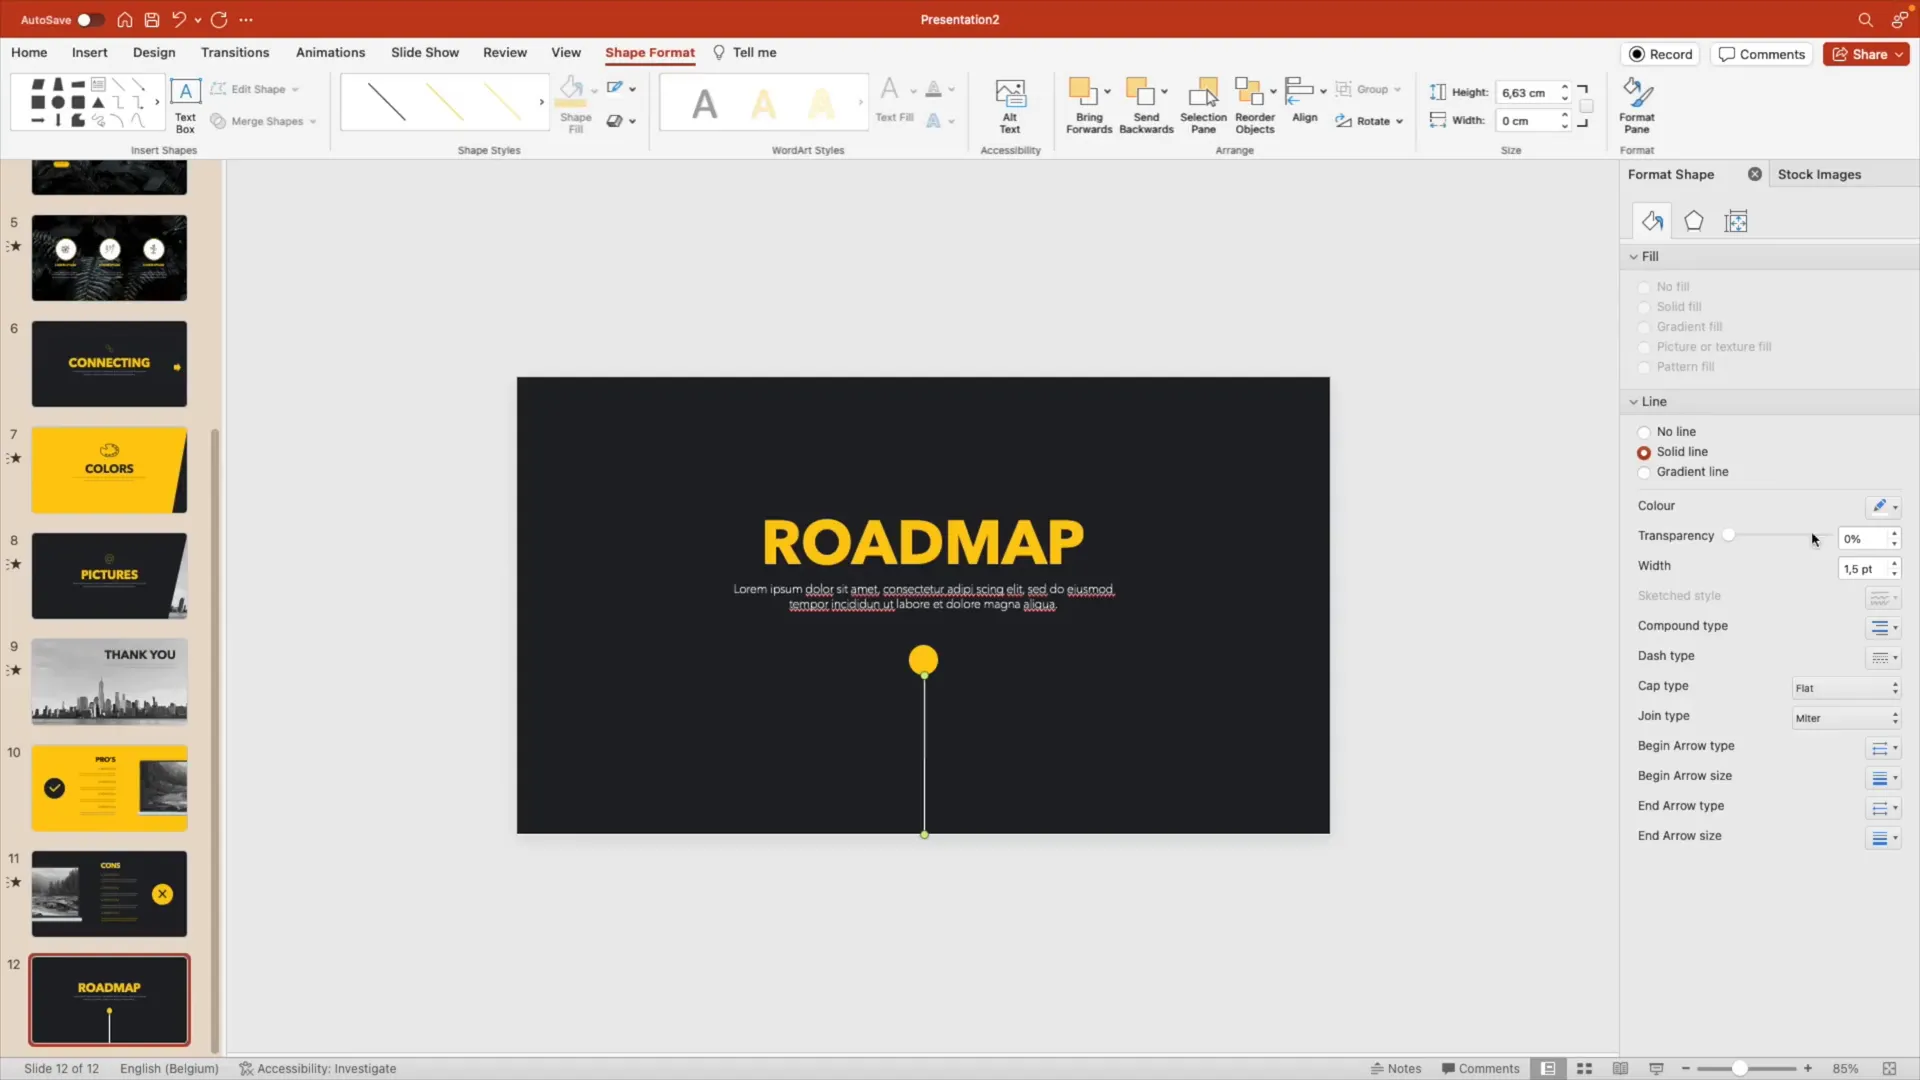
- Start with a Dark Background: Add a title “Roadmap” and use a yellow circle as a starting point.
- Add a Connecting Line: Draw a white line from the bottom of the circle down to the bottom of the slide, about 2 points thick, centered for balance.
- Duplicate and Modify Slides: Copy the slide and reposition the line and circle to the top. Add a text box with “Step One” and descriptive text in white, sized around 32 points.
- Create Horizontal Connections: Copy the yellow dot and line, rotate and position them horizontally on the right or left side of the slide to connect steps.
- Alternate Slide Layouts: Arrange steps alternating between left and right to create a zigzag roadmap path.
- Add Final Slide: Include a thank you message centered on the slide to conclude the roadmap.
- Apply Push Transitions: For vertical moves, push from the bottom; for horizontal moves, push from the right. Adjust duration to about 1.75 seconds for smooth flow.
What Makes This Roadmap Effective?
This roadmap is not just a static visual; it’s an interactive journey. The push transitions guide the audience’s eyes along the path, building anticipation for what comes next. The alternating layout prevents monotony and keeps the slide design fresh and balanced.
Frequently Asked Questions (FAQ)
Q1: What is a push transition in PowerPoint?
A push transition moves the current slide out of view while simultaneously pushing the next slide into view from a chosen direction (left, right, up, or down), creating a smooth sliding effect.
Q2: How do push transitions enhance presentations?
Push transitions add dynamic movement that helps maintain audience engagement, improve flow between topics, and visually organize information in a clear, progressive manner.
Q3: Can push transitions be customized in duration and direction?
Yes, you can customize the direction (left, right, up, or down) and duration (speed) of push transitions to suit the pacing and style of your presentation.
Q4: Are push transitions suitable for all types of presentations?
While push transitions are versatile, they work best in presentations where you want to emphasize progression, comparisons, or storytelling. For very formal or data-heavy presentations, use them sparingly to maintain professionalism.
Q5: How do I ensure text remains readable over images with push transitions?
Adjust image brightness or add semi-transparent overlays behind text boxes. Using contrasting font colors and clear fonts like Avenir Next also helps improve readability.
Conclusion
Mastering push transitions in PowerPoint opens up a world of creative possibilities that elevate your presentations to the next level. From expanding timelines and creating a scrolling website feel to connecting slides with colors and images, comparing pros and cons interactively, and building dynamic roadmaps, these techniques help you communicate your message more effectively and stylishly.
Remember, the key to success with push transitions is balance—use them to enhance your story, not distract from it. With thoughtful design and practice, your slides will not only look professional but also keep your audience engaged from start to finish.
Thanks for exploring these five best push transitions with me. Now, it’s your turn to experiment and transform your presentations into memorable visual experiences!
Check out the full video: 5 Best PowerPoint Push Transitions


