

Creating visually engaging and informative slides can transform your presentations from ordinary to extraordinary. One of the most effective ways to present multiple options, steps, or stages is through an infographic slide. In this comprehensive tutorial, I will guide you through the process of designing a colorful hanging options infographic slide in PowerPoint, a dynamic and eye-catching slide perfect for timelines, option displays, and much more.
This tutorial is designed to empower you with the skills to craft a slide that not only looks professional but also adds a creative touch to your presentations. Whether you’re a beginner or an intermediate PowerPoint user, this detailed guide will walk you through every step, from creating gradient backgrounds to adding animations that bring your infographic to life.

Table of Contents
- Why Use Hanging Options Infographic Slides?
- Getting Started: Setting Up Your PowerPoint Slide
- Creating the Base Shape for Hanging Options
- Adding Depth with a Smaller Inner Shape
- Designing the Hanging Option Marker: Creating the Oval Shape
- Creating a Hollow Center for the Oval Shape
- Duplicating and Customizing Colorful Options
- Adding the Hanging Thread and Knot Details
- Arranging the Hanging Options on the Slide
- Inserting Icons and Text for Each Option
- Animating the Hanging Options for Dynamic Presentations
- Tips for Customizing Your Hanging Options Infographic
- Frequently Asked Questions (FAQs)
- Conclusion
Why Use Hanging Options Infographic Slides?
Infographics are powerful tools for presenting information clearly and memorably. The hanging options infographic style is particularly useful when you want to:
- Showcase a step-by-step process or workflow
- Present multiple choices or categories in a visually appealing way
- Create timelines that are easy to follow
- Engage your audience with dynamic and colorful visuals
This style mimics the look of hanging tags or labels, adding a playful yet professional aesthetic. It is versatile enough to be used in corporate presentations, educational content, marketing plans, and more.
Getting Started: Setting Up Your PowerPoint Slide
Before diving into shapes and colors, the first step is setting up your slide background and layout correctly. Here’s how you begin:
- Add a new slide to your presentation.
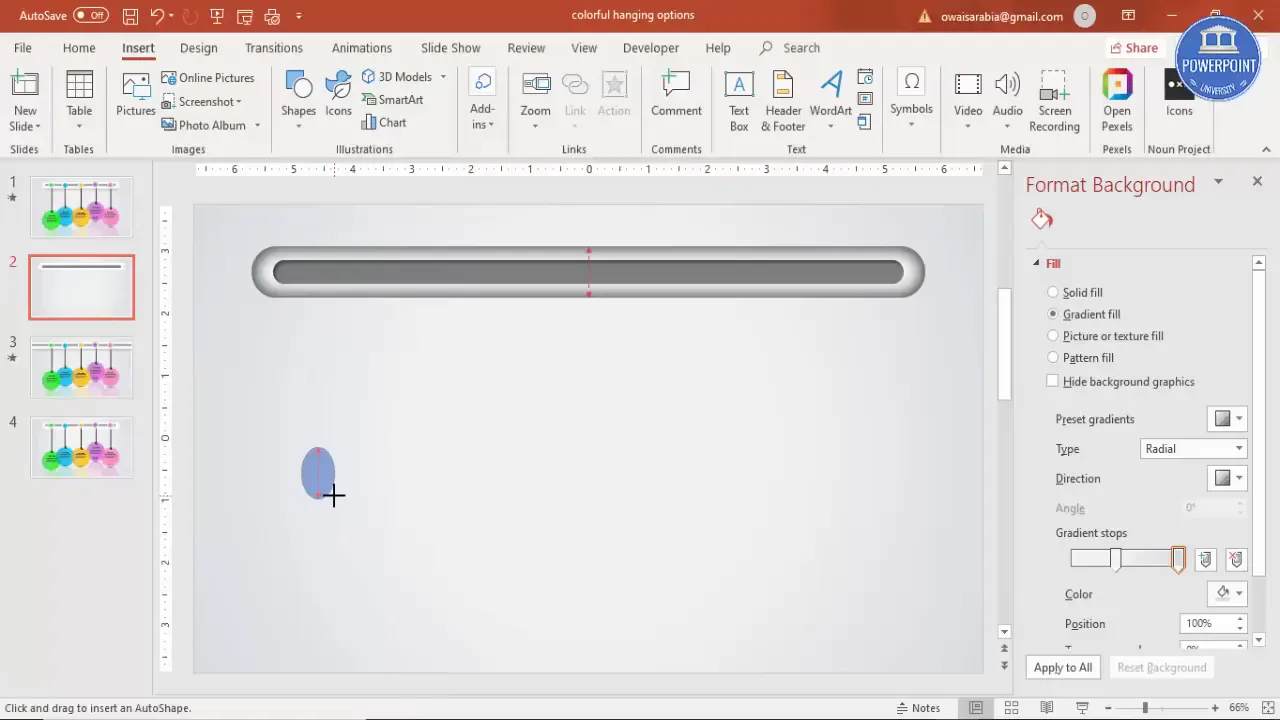
- Change the slide background to a gradient fill to give it a subtle, elegant look that enhances the infographic elements.
To do this, navigate to the format background options and select gradient fill. Choose colors that complement your overall design theme. A gradient background adds depth and dimension without overpowering your infographic.
Creating the Base Shape for Hanging Options
The core of this infographic slide is the hanging option shape itself. Follow these steps to create the unique rounded rectangle base with a shadow effect:
- Go to Insert > Shapes and under rectangles, select the Rounded Rectangle.
- Draw the shape roughly the size you want for your hanging option.
- Make the corners fully curved by adjusting the yellow corner handle to the maximum.
- Center align the shape on your slide and reduce its size slightly to fit your design.
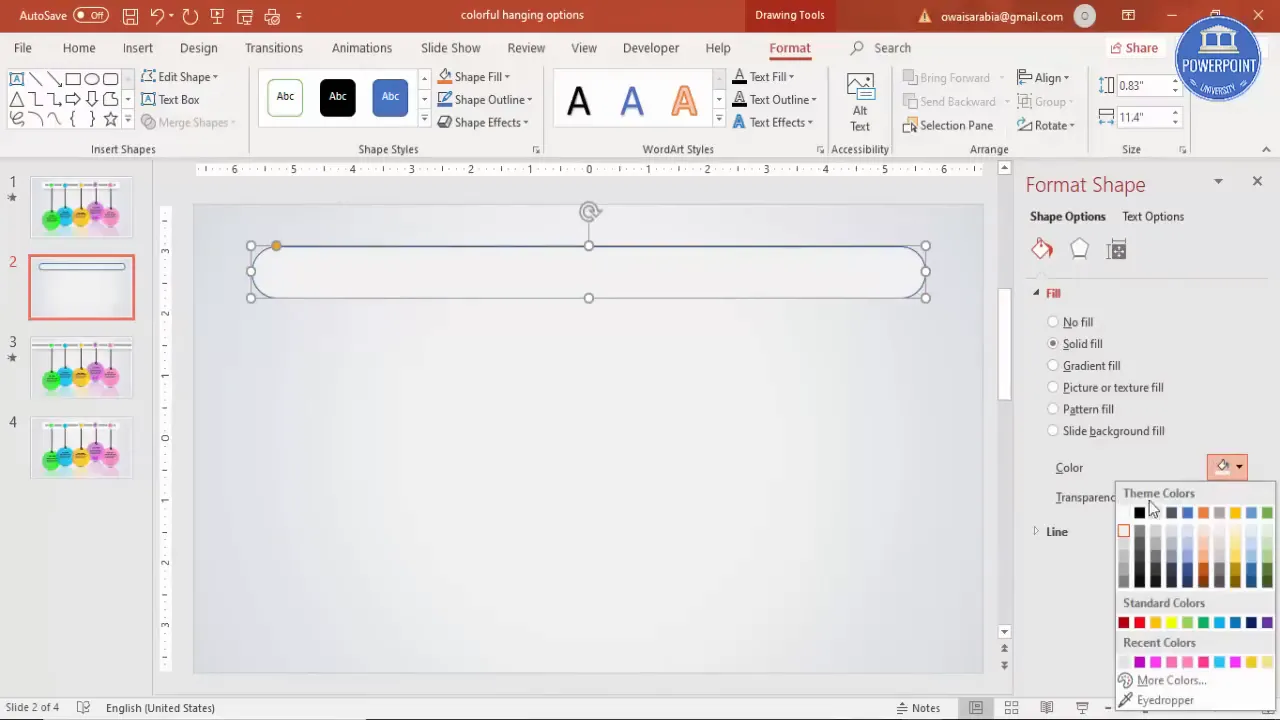
- Right-click the shape, select Format Shape, and set the fill color to white.
- Under Effects > Shadows, pick an inner shadow preset, preferably inside center, and increase the blur size to soften the shadow.
- Remove the shape outline by selecting no outline.
This base shape will serve as the foundation for each hanging option, giving it a clean and professional look.
Adding Depth with a Smaller Inner Shape
To add a layered effect, create a smaller rounded rectangle within the base shape:
- Insert another rounded rectangle but smaller and position it in the center of the larger shape.
- Make this smaller shape fully curved as well and remove its outline.
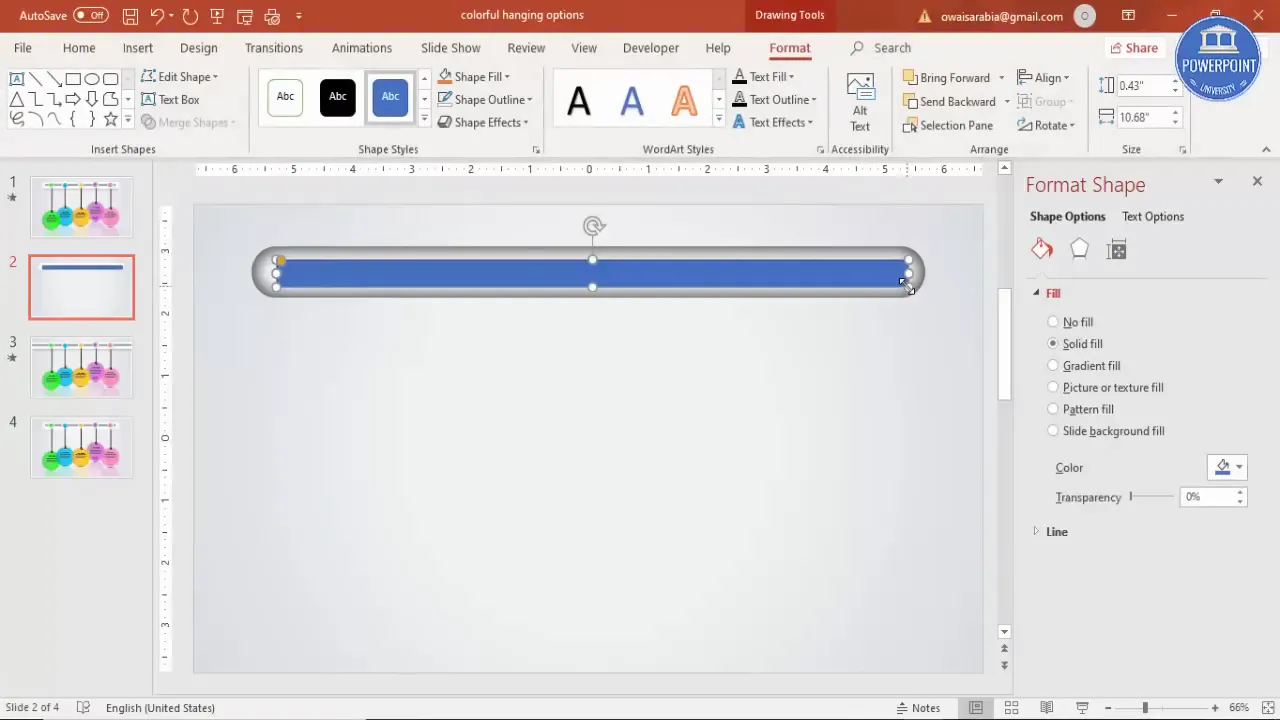
- Fill it with a dark color to create contrast.
- Apply a shadow effect such as inside top left to give it depth.
- Center align the smaller shape perfectly within the larger one.
This subtle layering technique enhances the 3D effect of your hanging option.
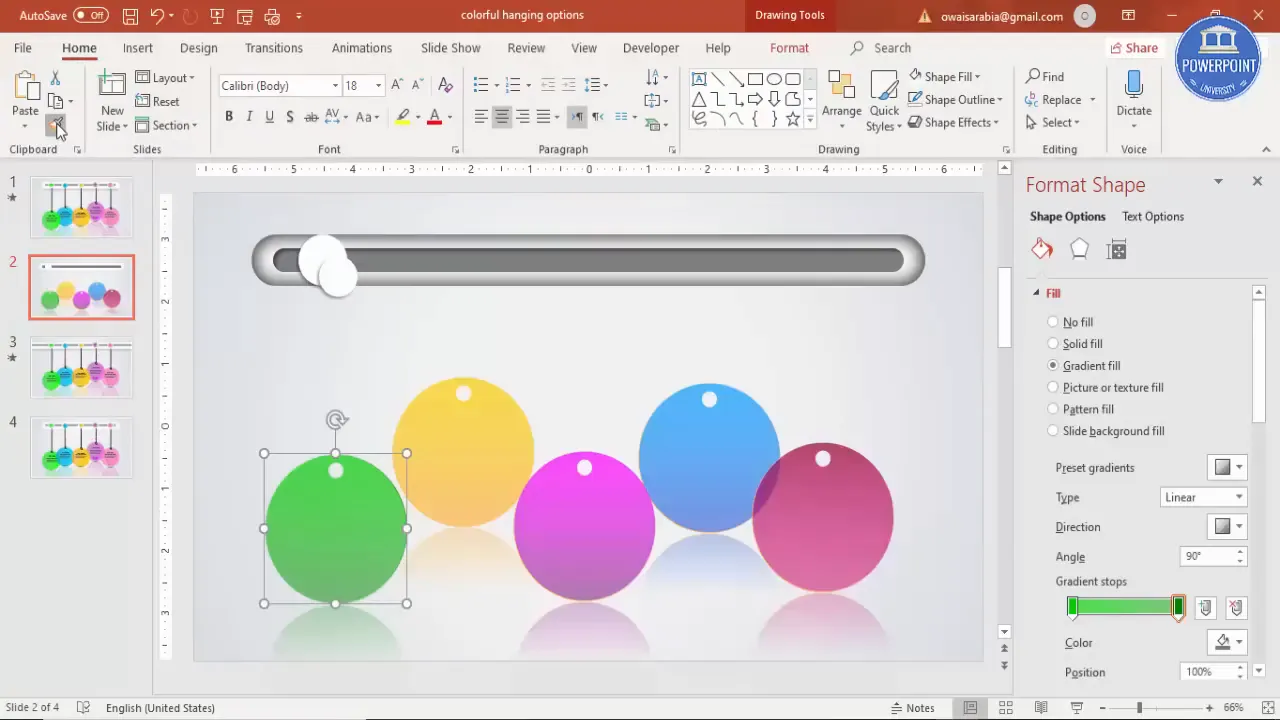
Designing the Hanging Option Marker: Creating the Oval Shape
Next, you’ll design the colorful oval shape that “hangs” from the base, which acts as a visual anchor for each option. Here’s how:
- Insert an oval shape by holding the Shift key while dragging to keep it perfectly circular.
- Adjust the size to about 2.4 cm width and height for a balanced look.
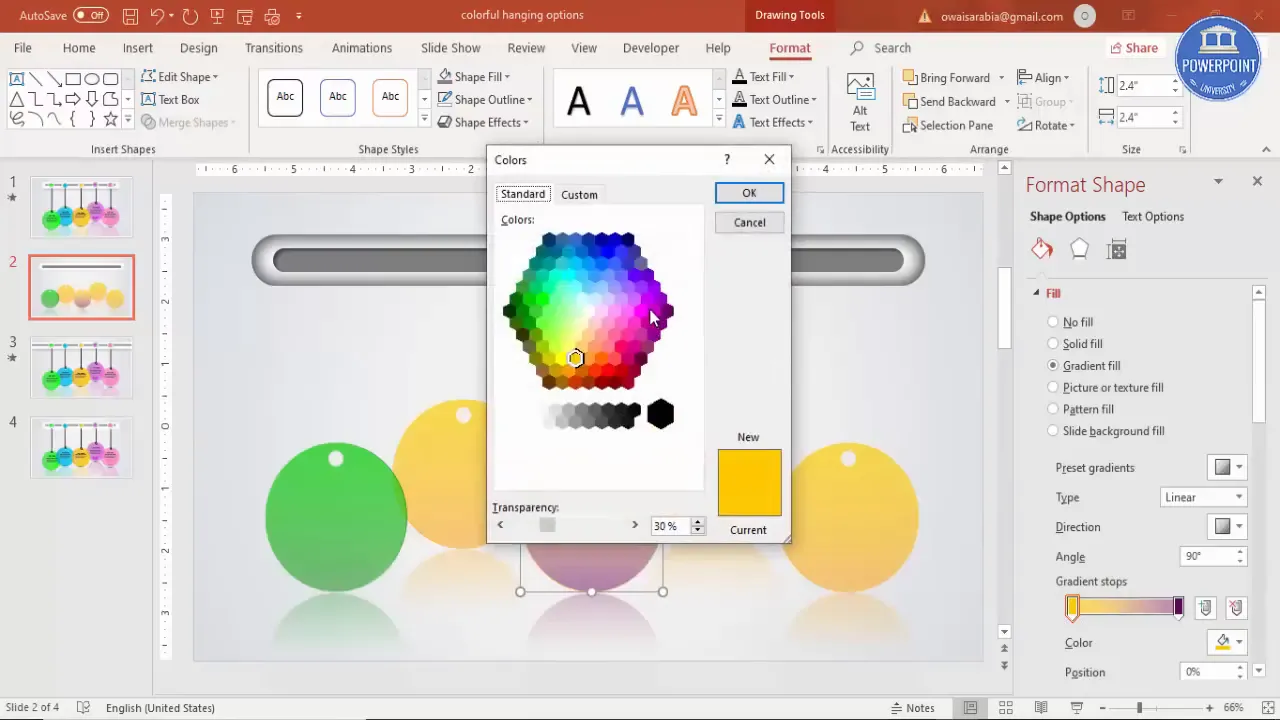
- Apply a gradient fill with two color stops. For example, use different shades of green or any color combination you prefer.
- Make the gradient linear and adjust the angle and transparency of each stop to add dimension (e.g., 20% and 25% transparency).
- For the shape outline, also use a gradient with two stops: one with the base color and the other fully transparent to create a soft edge.
This gradient effect makes the oval look polished and visually interesting.
Creating a Hollow Center for the Oval Shape
To mimic a hanging tag, create a hollow center inside the oval shape by subtracting a smaller oval:
- Insert a smaller oval shape and zoom in to position it exactly in the center of the larger oval.
- Select both shapes, go to Format > Merge Shapes, and choose Subtract.
- This will create a hollow ring shape that looks like a tag hole.
This small detail adds realism and charm to the hanging option design.

Duplicating and Customizing Colorful Options
Once your first oval shape is ready, duplicate it several times to create multiple options. Use Ctrl + D to duplicate quickly. Then, customize each duplicate by adjusting the gradient colors and outlines for variety:
- Try combinations like orange and yellow, purple and light purple, blue and light blue, or any colors that fit your presentation theme.
- Adjust the transparency levels for some shapes to create a sense of layering and depth.
- Consider adding reflection effects under Shape Effects to enhance visual appeal, but keep the transparency balanced so it doesn’t overpower the slide.
Arranging some options slightly behind others creates a dynamic 3D effect, making your infographic more engaging.
Adding the Hanging Thread and Knot Details
To complete the hanging effect, add the “thread” and knots that visually connect the oval shapes to the base:
- Insert a small white oval shape to represent the knot. Remove outline and add a subtle shadow effect for realism.
- Duplicate the knot shape and resize smaller copies to place inside the larger knot, aligning them centrally.
- Group the knot elements together for easier manipulation.
- Draw the hanging thread using a thin black line or curve shape. Adjust the thickness and curvature to mimic a realistic thread.
- Duplicate the thread and place it behind the oval shapes, adjusting placement to align with each hanging option.
- Add small additional curved lines near the thread to simulate knots or wrapped thread details.
- Group each hanging option’s oval, knot, and thread together for easy movement and editing.
This attention to detail elevates the infographic’s professionalism and charm.
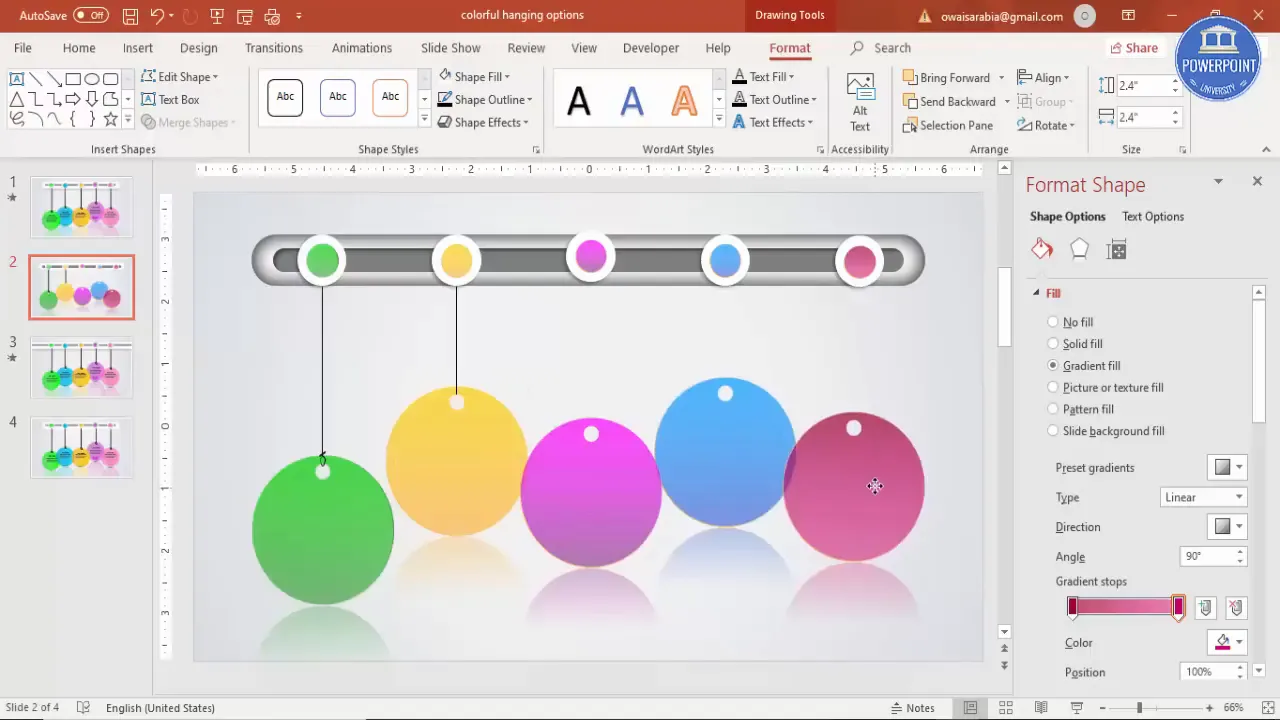
Arranging the Hanging Options on the Slide
Now that all individual elements are created, it’s time to arrange them neatly on your slide:

- Distribute the hanging options evenly across the slide using the Distribute Horizontally feature for equal spacing.
- Adjust vertical positioning to ensure the threads align with the base shapes.
- Send some options to the back and bring others to the front to create a layered, 3D effect.
- Make sure the knots and threads are properly placed behind the oval shapes but clearly visible.
Proper arrangement is key to achieving a balanced and attractive infographic layout.
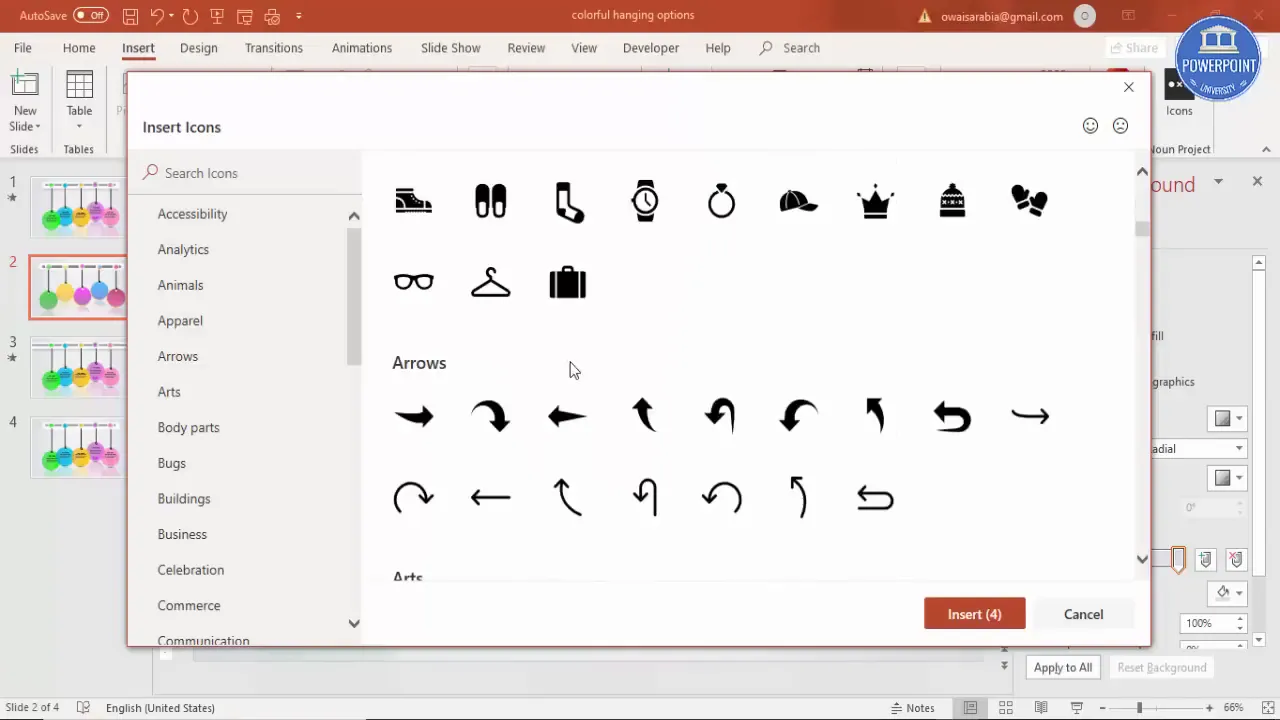
Inserting Icons and Text for Each Option
Icons and text labels add clarity and make your infographic informative. Here’s how to enhance your hanging options:
- If you have Office 365, use the Insert Icons feature to add relevant icons directly.
- Alternatively, download icons from resources like The Noun Project.
- Select icons that visually represent each option’s theme or idea.
- Change icon color to white or a simple contrasting color to stand out against the colorful oval.
- Add concise text labels below or beside each oval shape, center-aligning the text for symmetry.
- Use a white or light-colored font to maintain readability against the dark inner shape.
- Group the icon, text, and hanging option shapes together to keep everything aligned and easy to move.
These elements ensure viewers quickly grasp the meaning of each option.
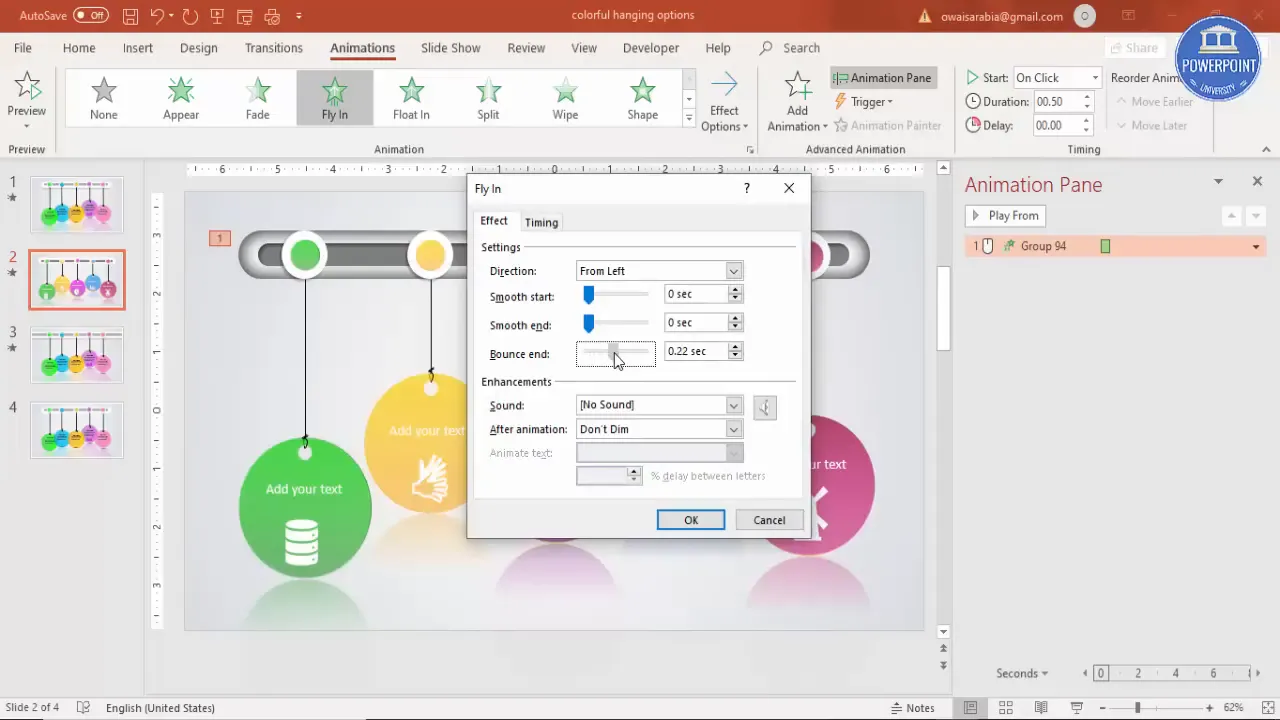
Animating the Hanging Options for Dynamic Presentations
To make your infographic slide come alive during your presentation, add simple but effective animations:
- Close any open formatting panes to access the Animations tab.
- Open the Animation Pane for detailed control.
- Select the first hanging option group and apply a Fly In animation.
- Choose the direction of the fly-in; for example, from the left for the first few options and from the right for others to add variety.
- Adjust the animation speed to medium or fast, depending on your preference, avoiding overly fast transitions.
- Use the Animation Painter tool to copy the animation effect quickly to other hanging options.
- Fine-tune the order and timing to ensure a smooth flow when presenting.
These animations add a professional touch and keep your audience engaged.
Tips for Customizing Your Hanging Options Infographic
While the tutorial provides a solid foundation, here are some additional tips to customize your infographic to fit your unique needs:
- Color Palette: Choose colors that align with your brand or presentation theme. Use complementary or analogous colors for harmony.
- Number of Options: Feel free to add more or fewer hanging options by duplicating or removing shapes accordingly.
- Icon Style: Maintain consistency in icon style—whether flat, line art, or filled—to keep your design cohesive.
- Font Choice: Use clean, readable fonts that complement your design style and maintain legibility.
- Background: Experiment with different gradient backgrounds or even subtle textures for added interest.
- Animation: Explore other animation effects like fade or zoom to find what best suits your presentation style.
Frequently Asked Questions (FAQs)
Can I use this infographic slide for timelines?
Absolutely! The hanging options infographic is ideal for timelines because it clearly delineates each step or event while maintaining a visually appealing flow.
Is this tutorial suitable for beginners?
Yes, the step-by-step instructions are designed for users with basic to intermediate PowerPoint skills. The tutorial carefully explains each action, making it accessible for beginners.
Can I customize the colors and shapes?
Definitely. All shapes, colors, and effects are fully customizable. You can adjust gradients, outlines, shadow effects, and more to suit your presentation’s style.
Do I need Office 365 to insert icons?
While Office 365 provides a convenient built-in icon library, you can also download free icons from websites like The Noun Project and insert them into your slides.
Can I add more than five hanging options?
Yes, you can duplicate the shapes to add as many options as needed. Just make sure to adjust the spacing and alignment accordingly.
How do I ensure the animations play smoothly?
Use the Animation Pane in PowerPoint to control the sequence and timing of each animation. Test the slide in slideshow mode to fine-tune the speed and order.
Conclusion
Designing a colorful hanging options infographic slide in PowerPoint is easier than you might think, and it can significantly enhance the impact of your presentations. By following this detailed guide, you’ll create a professional, visually captivating slide that clearly communicates multiple options or steps in a stylish format.
Remember, the key to success lies in attention to detail—choosing harmonious colors, aligning elements precisely, and applying subtle effects like shadows and reflections to add depth. Don’t forget to incorporate icons and text that clarify your message and use animations to engage your audience dynamically.
With practice, you can customize and expand this infographic style to fit various presentation needs, making your slides not only informative but also memorable and enjoyable to watch.
Start experimenting today and watch your PowerPoint presentations transform into creative storytelling masterpieces!
Check out the full video: Colorful Hanging options infographic slide in PowerPoint


