If you’re looking to make your PowerPoint presentations more engaging and dynamic, creating an interactive quiz within PowerPoint is an excellent way to do it. Interactive quizzes not only captivate your audience but also help reinforce learning, making your presentation more memorable and impactful.
In this comprehensive tutorial, we’ll walk you through the entire process of building a beautiful, fully interactive quiz in PowerPoint. You’ll learn how to use hyperlinks, animation triggers, and creative design elements to craft an engaging quiz experience. Whether you’re an educator, trainer, or presenter, this guide will equip you to create quizzes that stand out.
Let’s dive in!
Table of Contents
- Interactive Quiz Demo Overview
- Setting Up the Background and Design Elements
- Creating and Styling Diamond Shapes for Answers
- Adding the Start Quiz Button and Linking Slides
- Configuring Kiosk Mode for Controlled Navigation
- Building Question Slides with Animations
- Animating Correct and Wrong Answer Feedback
- Animating the Next Button
- Duplicating and Customizing Question Slides
- Bonus Tips and Custom Animations
- Frequently Asked Questions
- Conclusion
Interactive Quiz Demo Overview
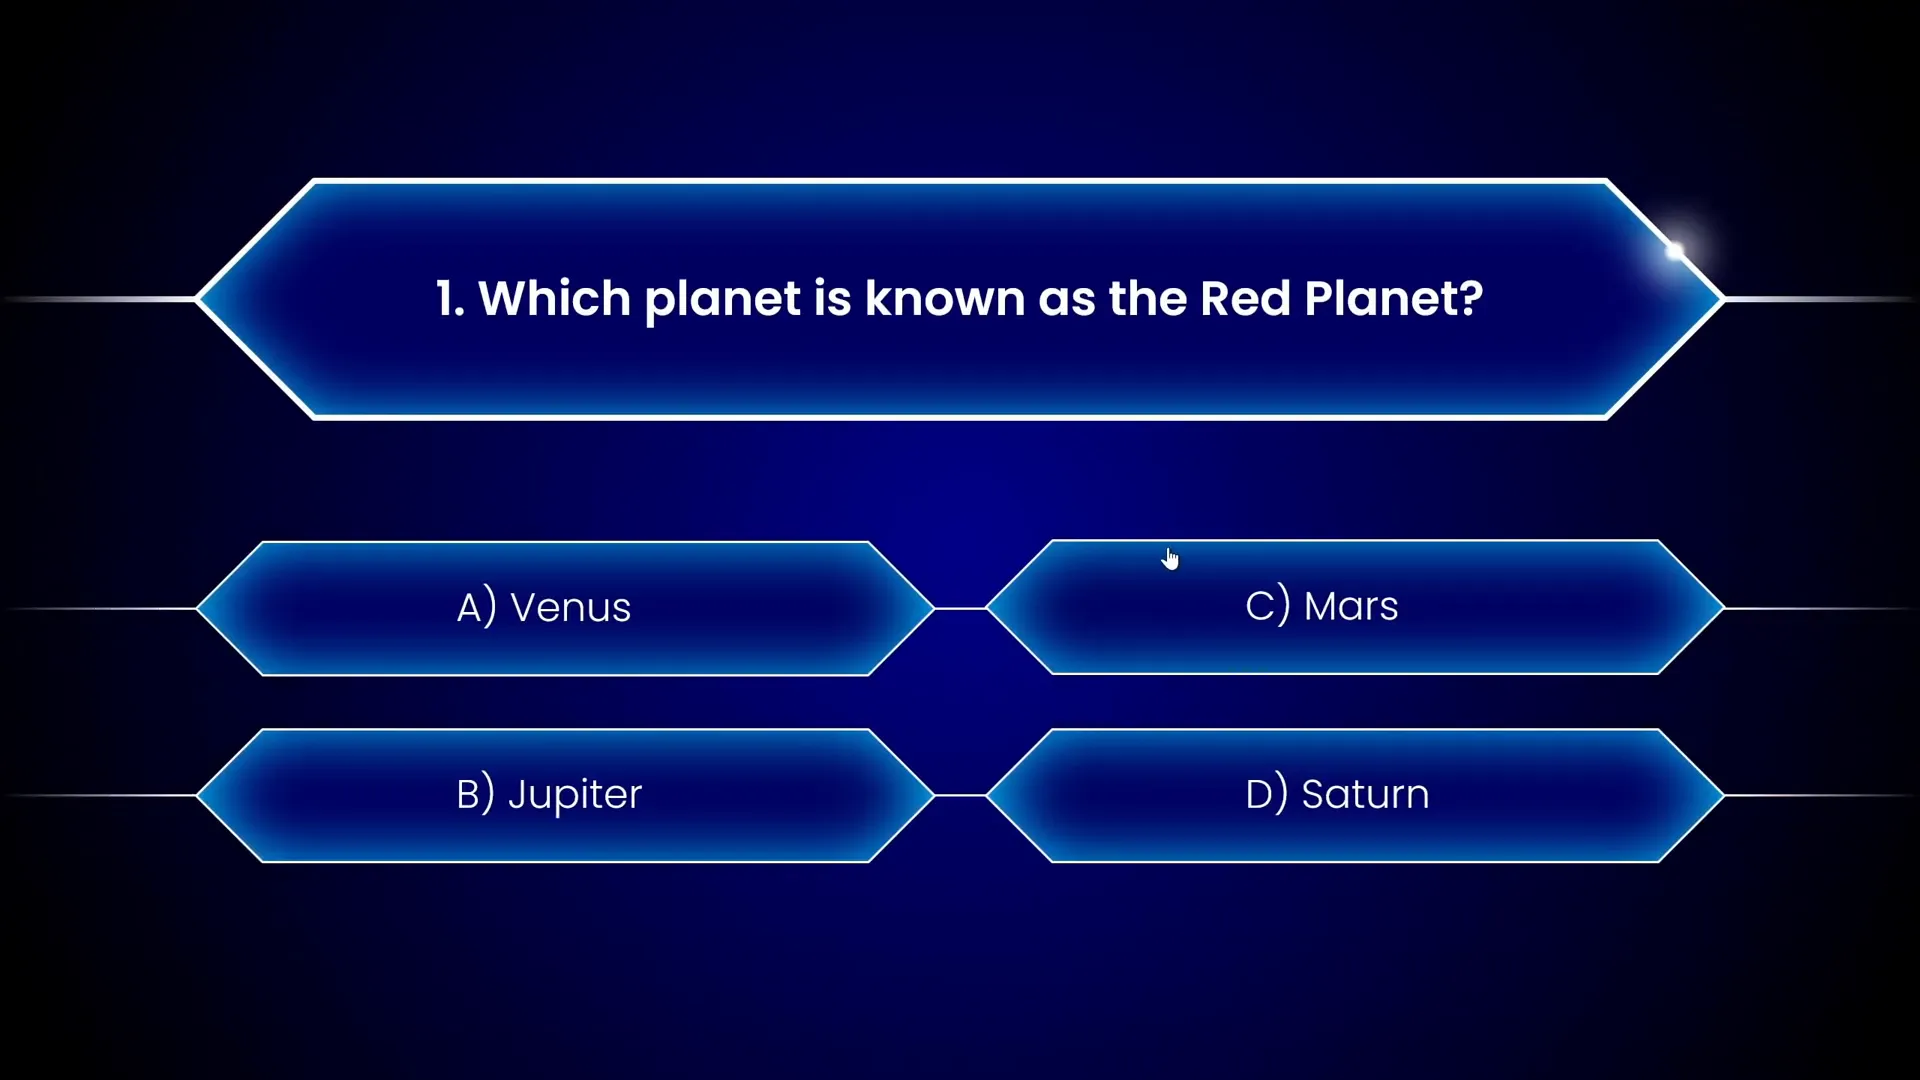
Before we begin building, let’s take a quick look at what the final interactive quiz looks like. This quiz features five questions with multiple-choice answers. Each question has four possible answers, but only one is correct. The quiz provides instant feedback by highlighting the answer in red if it’s wrong or green if it’s correct. Once the correct answer is selected, a “Next” button appears, allowing the participant to advance to the next question.
The quiz questions include:
- Which planet is known as the red planet? (Correct answer: Mars)
- What is the capital of Lithuania? (Correct answer: Vilnius)
- Who wrote Romeo and Juliet? (Correct answer: William Shakespeare)
- What is the largest mammal in the world? (Correct answer: Blue whale)
- What is the hardest natural substance on Earth? (Correct answer: Diamond)

This demo showcases the clean design, immediate feedback, and smooth navigation that make an interactive PowerPoint presentation quiz both fun and educational.
Setting Up the Background and Design Elements
Let’s start by setting up a visually appealing background for our quiz slides. The tutorial begins with a white background, but we’ll transform it into a sleek, professional look using a gradient fill.
- Go to the slide background and right-click to select Format Background.
- Choose Gradient fill.
- Set up two color stops for the gradient:
- First color stop: a dark blue with hex code
#0B3D91(example hex code from the video). - Second color stop: black, positioned at 95% to create a smooth gradient fade.
- Adjust the gradient direction and stops as needed to achieve a beautiful background.
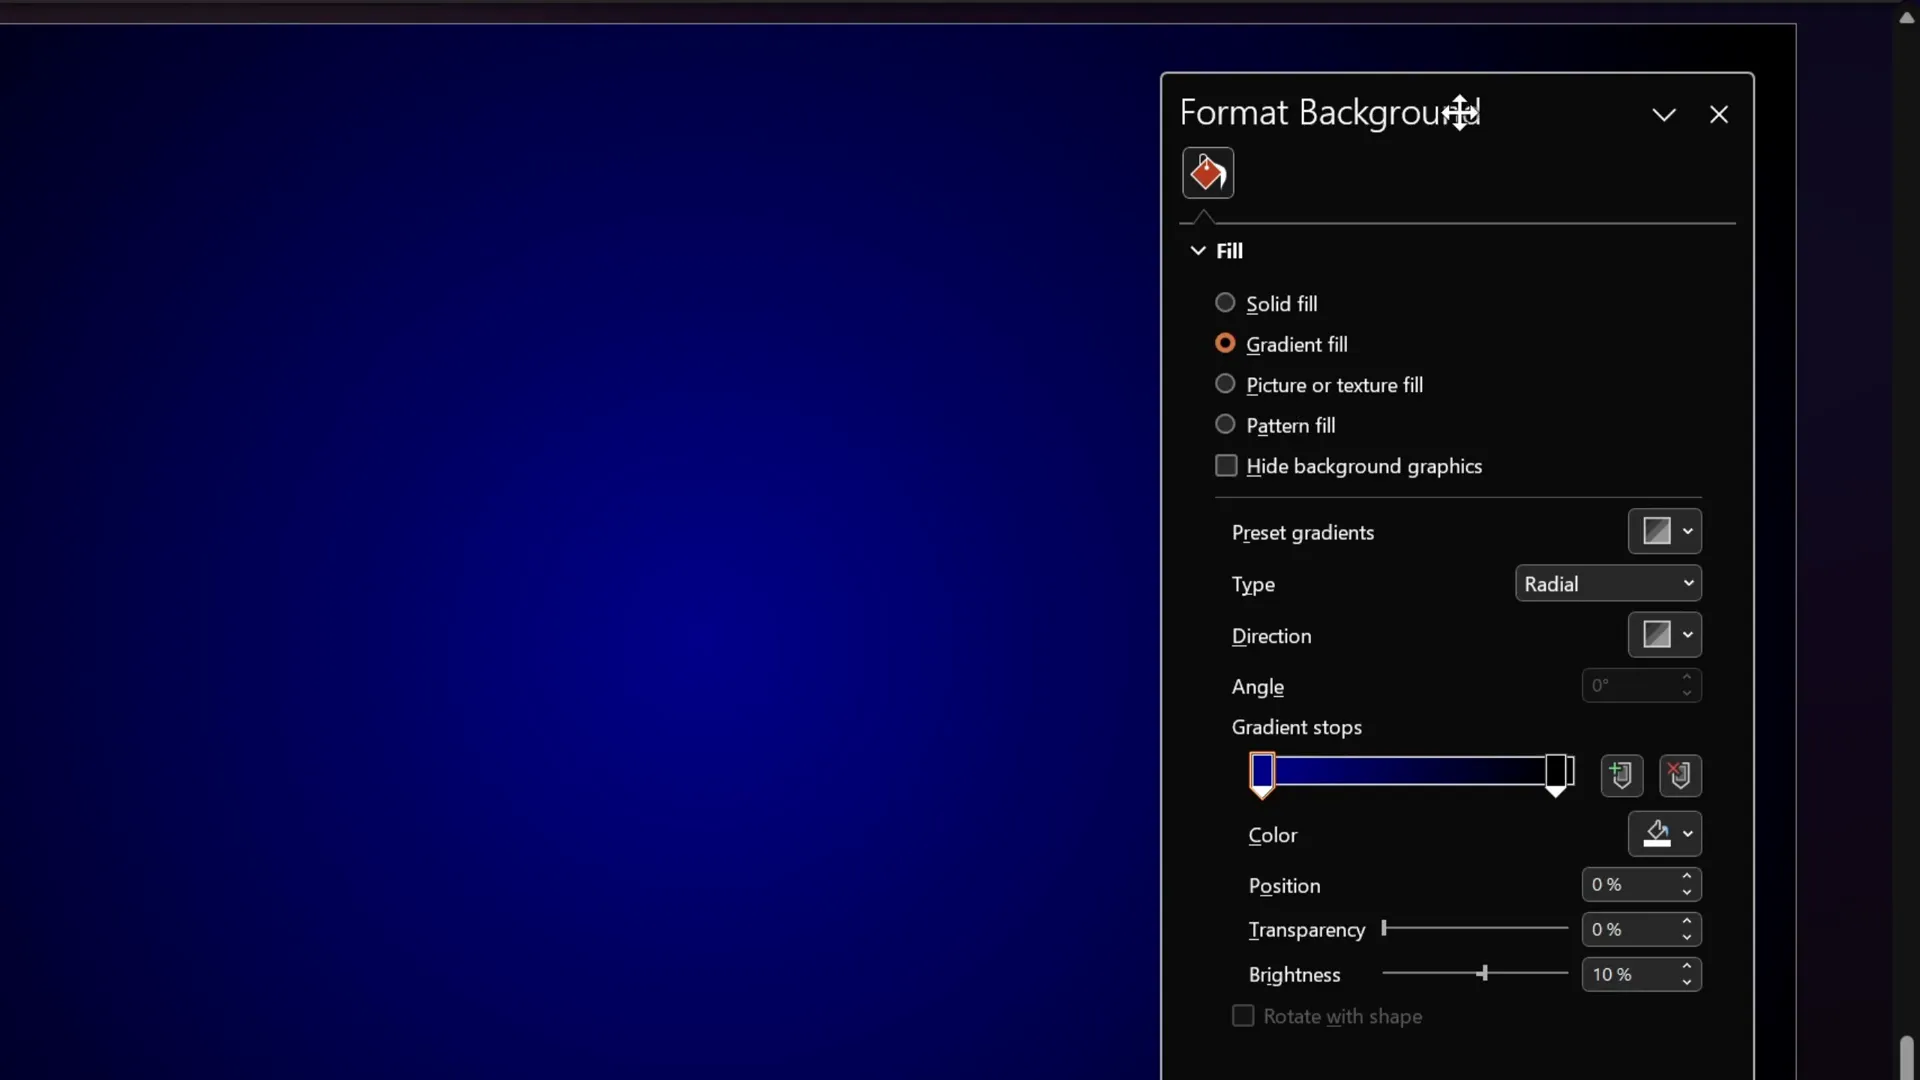
This gradient background forms a stylish base that complements the quiz’s interactive elements, ensuring the content stands out clearly.
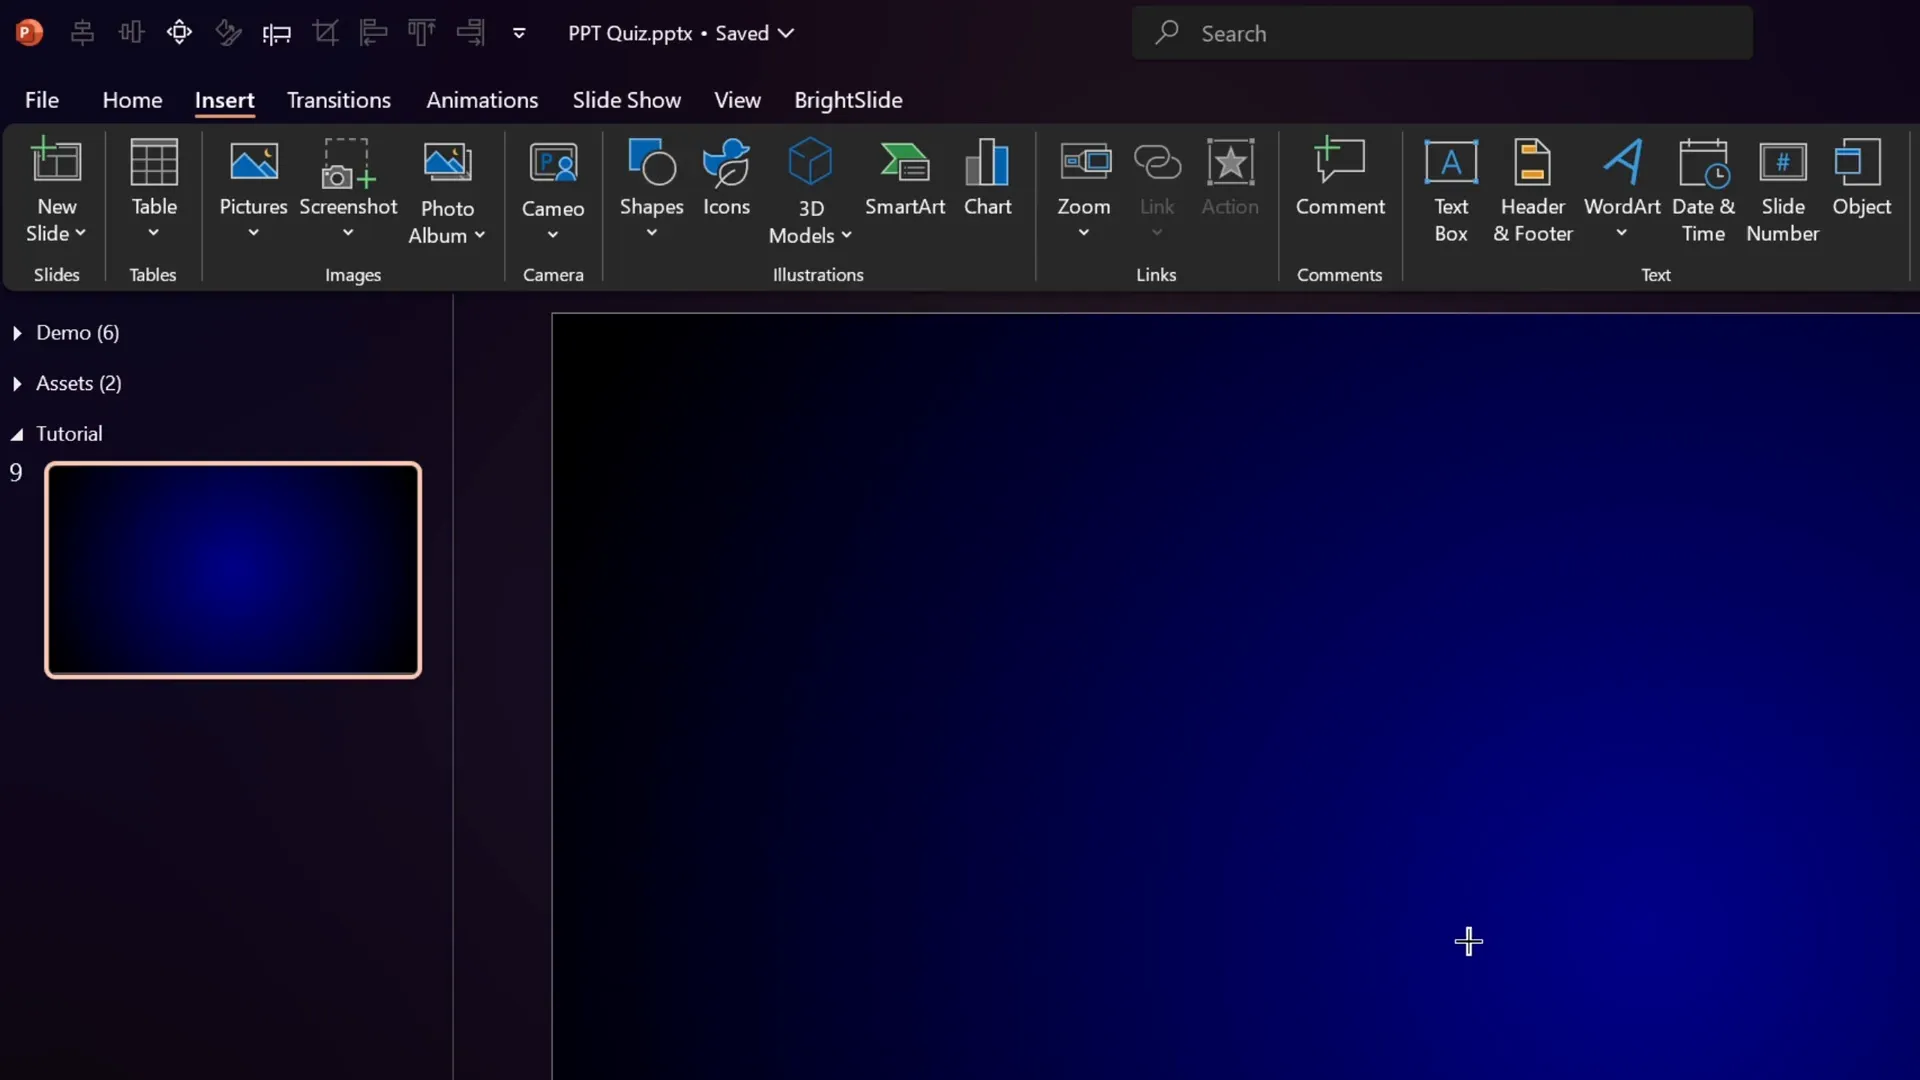
Creating and Styling Diamond Shapes for Answers
Next, we’ll create the diamond-shaped buttons for the quiz answers. These shapes are visually distinct and interactive, perfect for clickable quiz options.
- Go to Insert > Shapes.
- Under the Rectangles section, select the shape called Rectangle: diagonal corners snipped.
- Insert the shape onto the slide.
- Adjust the two yellow handles to form a perfect square rotated as a diamond.
To style the diamond shape:
- Fill the shape with a solid color matching the background blue, so it blends subtly.
- Add a white outline with a thickness of 3 points.
- Apply an inside shadow effect with a bright color (hex code example: #5D9CEC) and a blur radius of 40 points for subtle depth.
- Use the Poppins Semi Bold font for the text inside the shape to maintain a modern, clean look.
Use the Format Painter (Ctrl + Shift + C to copy formatting and Ctrl + Shift + V to paste) to quickly apply this style to all other diamond shapes.
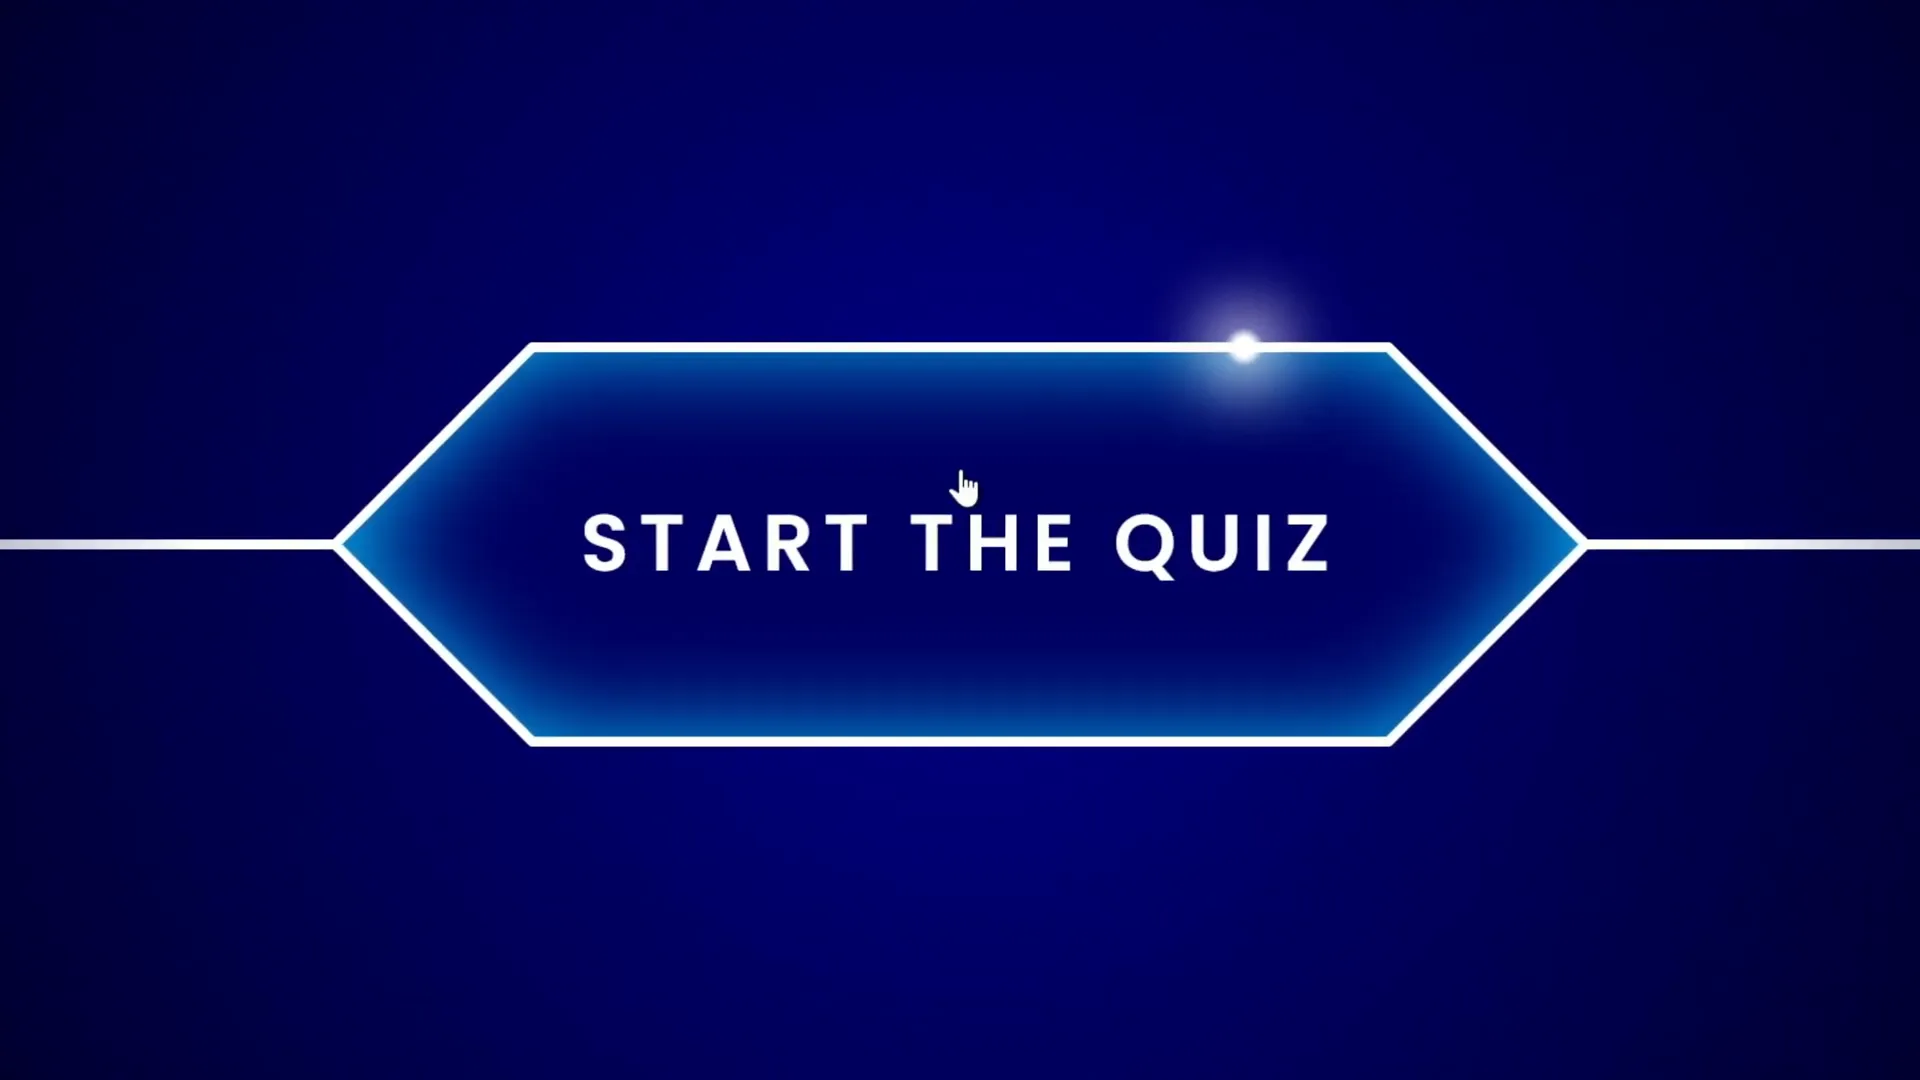
Adding Text to the Diamond Shape
Double-click inside the diamond shape and type the desired text, for example, “Start the quiz” for the first slide’s button.

Adding the Start Quiz Button and Linking Slides
Once the start button is designed, you want it to link to the first question slide so users can begin the quiz.
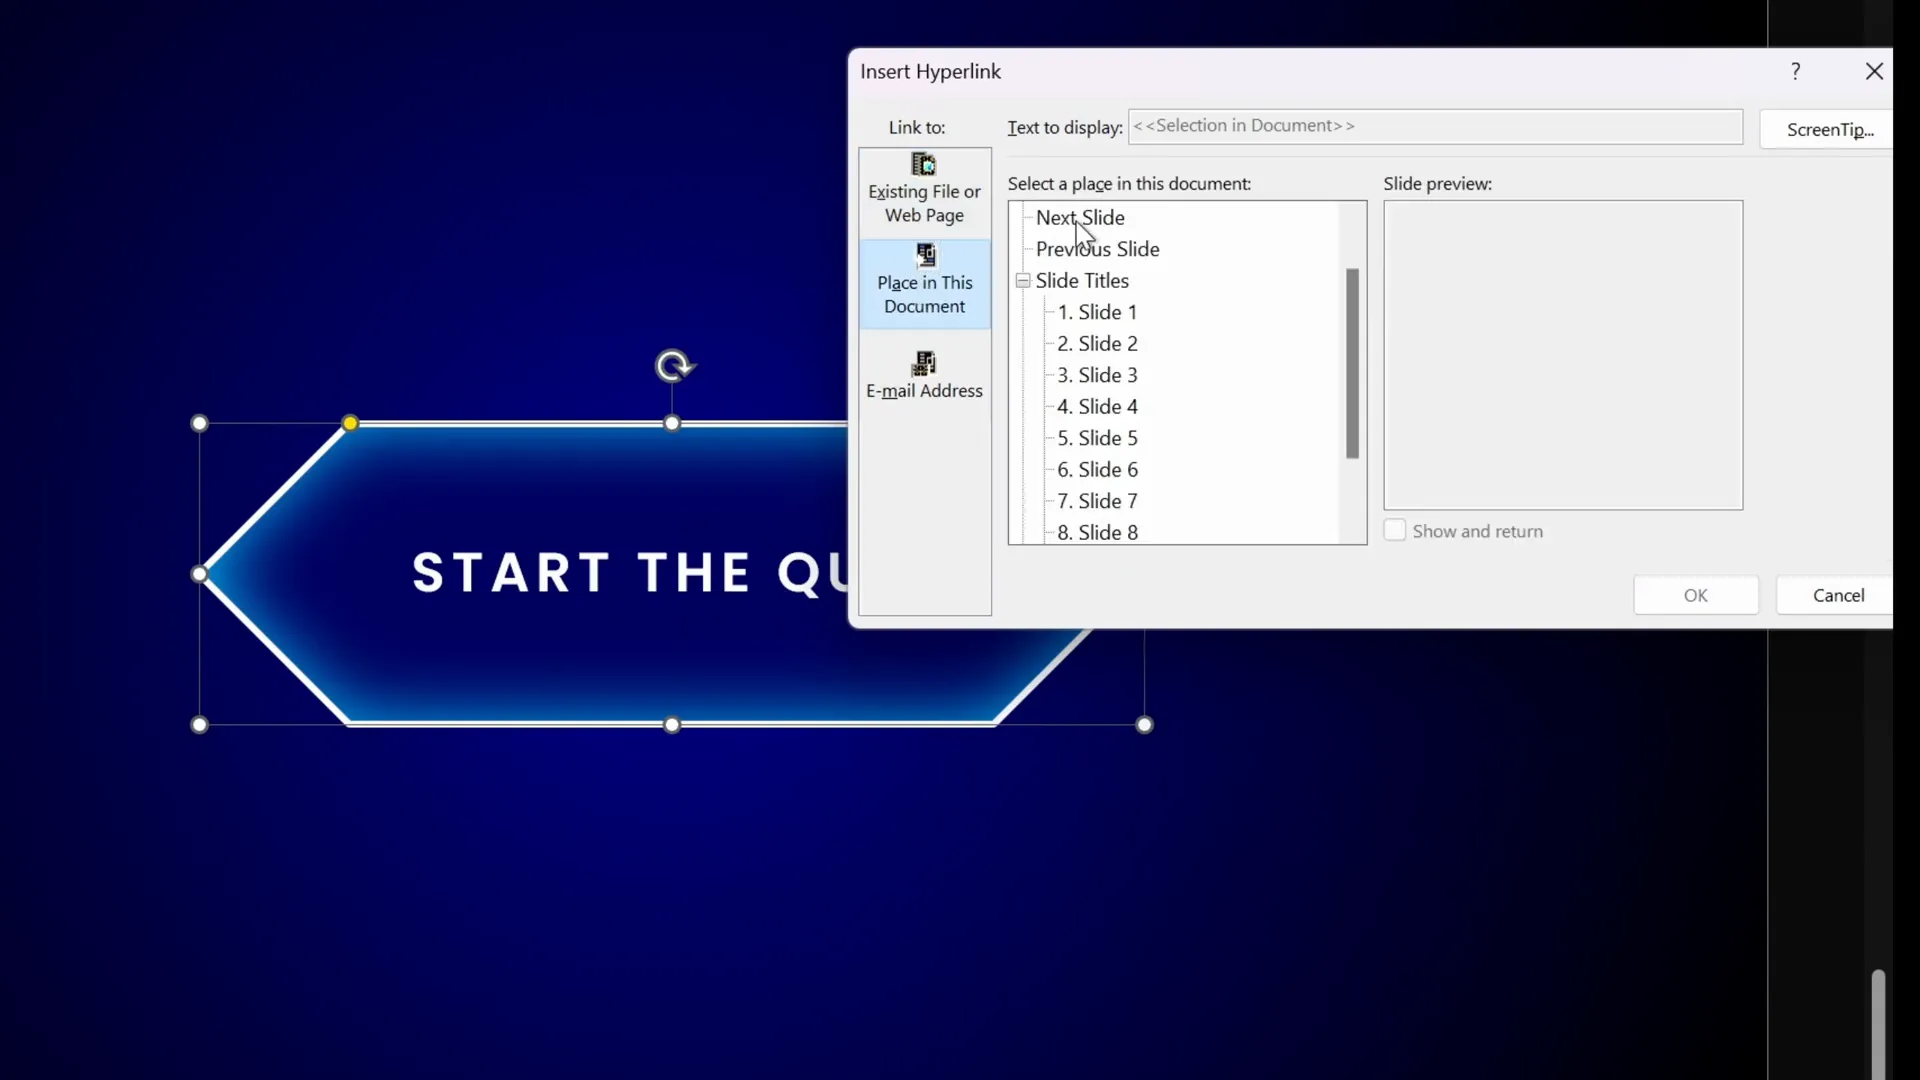
- Select the “Start the quiz” diamond shape.
- Go to Insert > Link (or press Ctrl + K).
- In the dialog, choose Place in This Document and select the slide number for the first question.
- Click OK.
This hyperlink makes the button interactive, allowing users to jump to the quiz questions when clicked.
Configuring Kiosk Mode for Controlled Navigation
To ensure that users can only navigate through the quiz by clicking on the interactive buttons and answers (and not by simply clicking anywhere to advance), it’s essential to set the slideshow to Kiosk Mode.
Here’s how:
- Go to the Slide Show tab.
- Click on Set Up Slide Show.
- Under Show type, select Browsed at a kiosk (full screen).
- Click OK.

In kiosk mode, the presentation won’t advance with regular mouse clicks or keyboard presses. Navigation will only happen through hyperlinks you create. This setup is crucial for maintaining the quiz’s interactivity and preventing users from skipping questions accidentally.
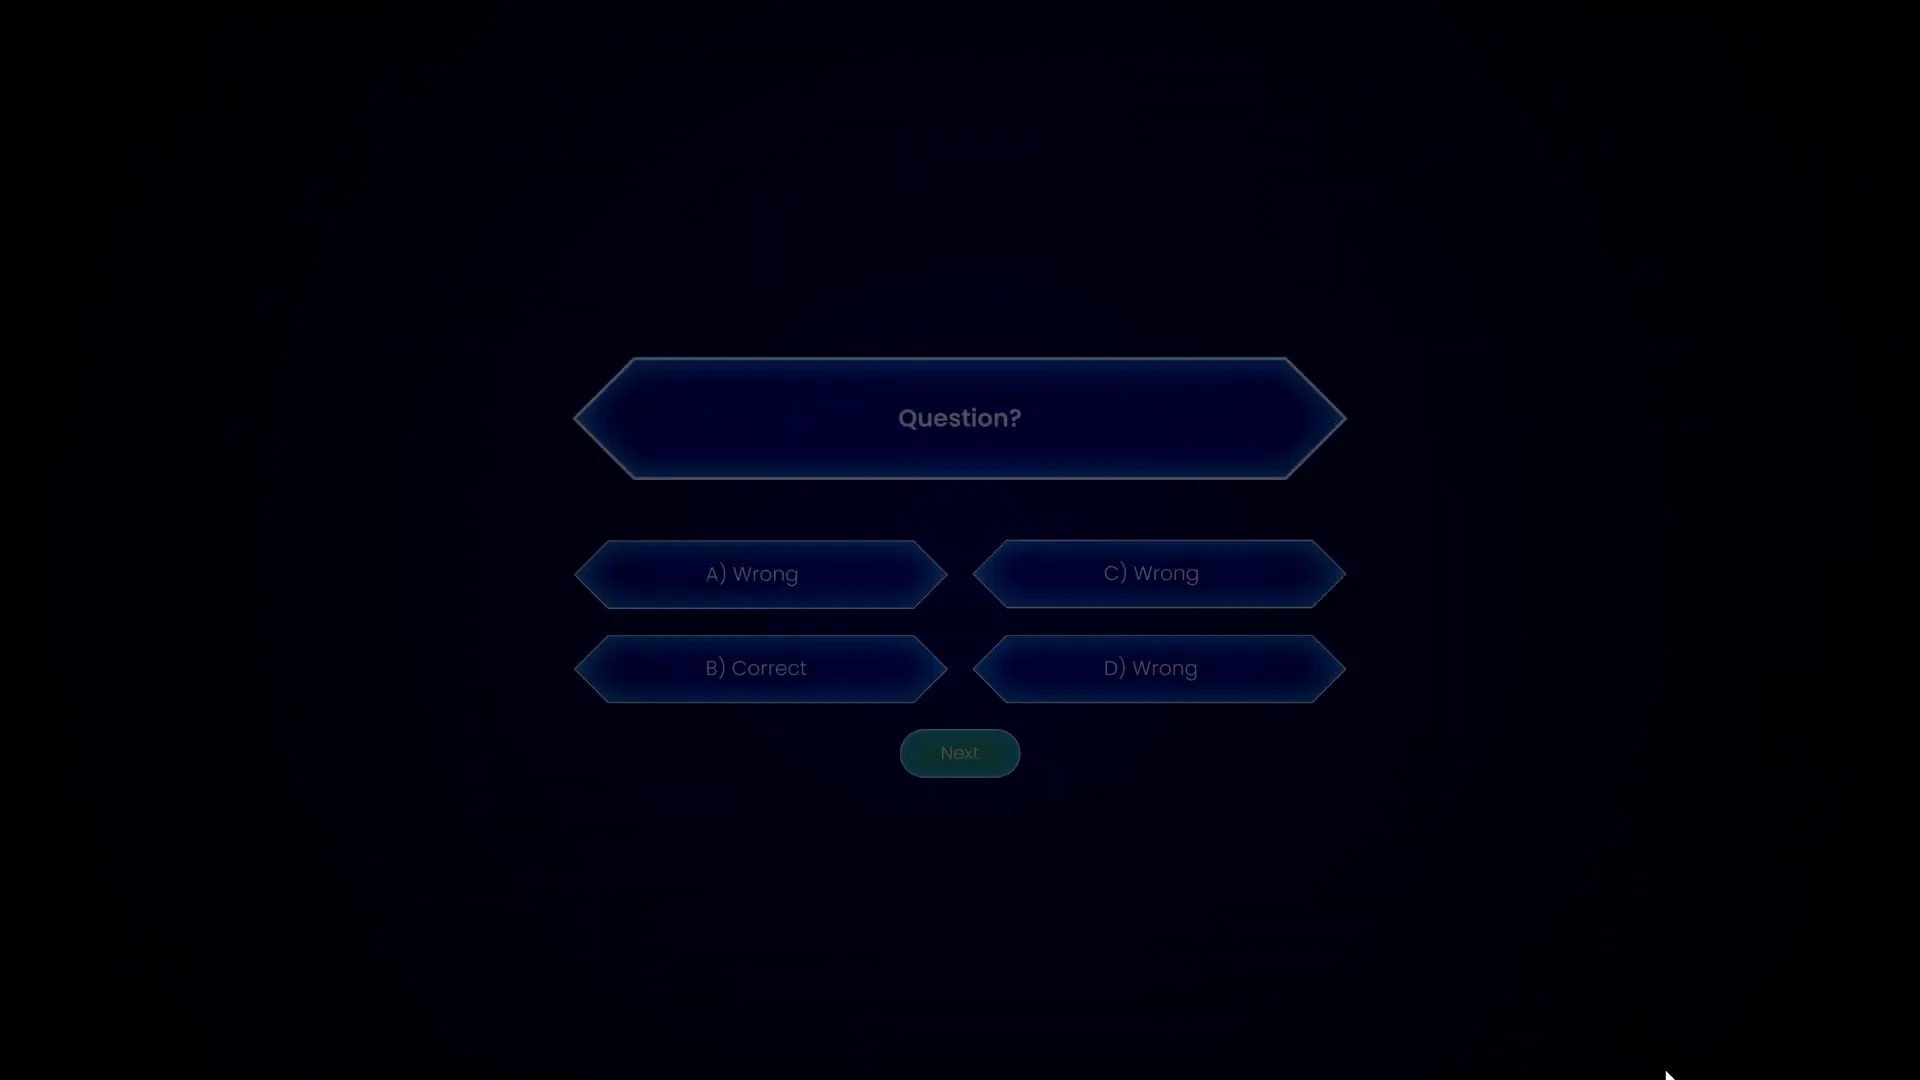
Building Question Slides with Animations
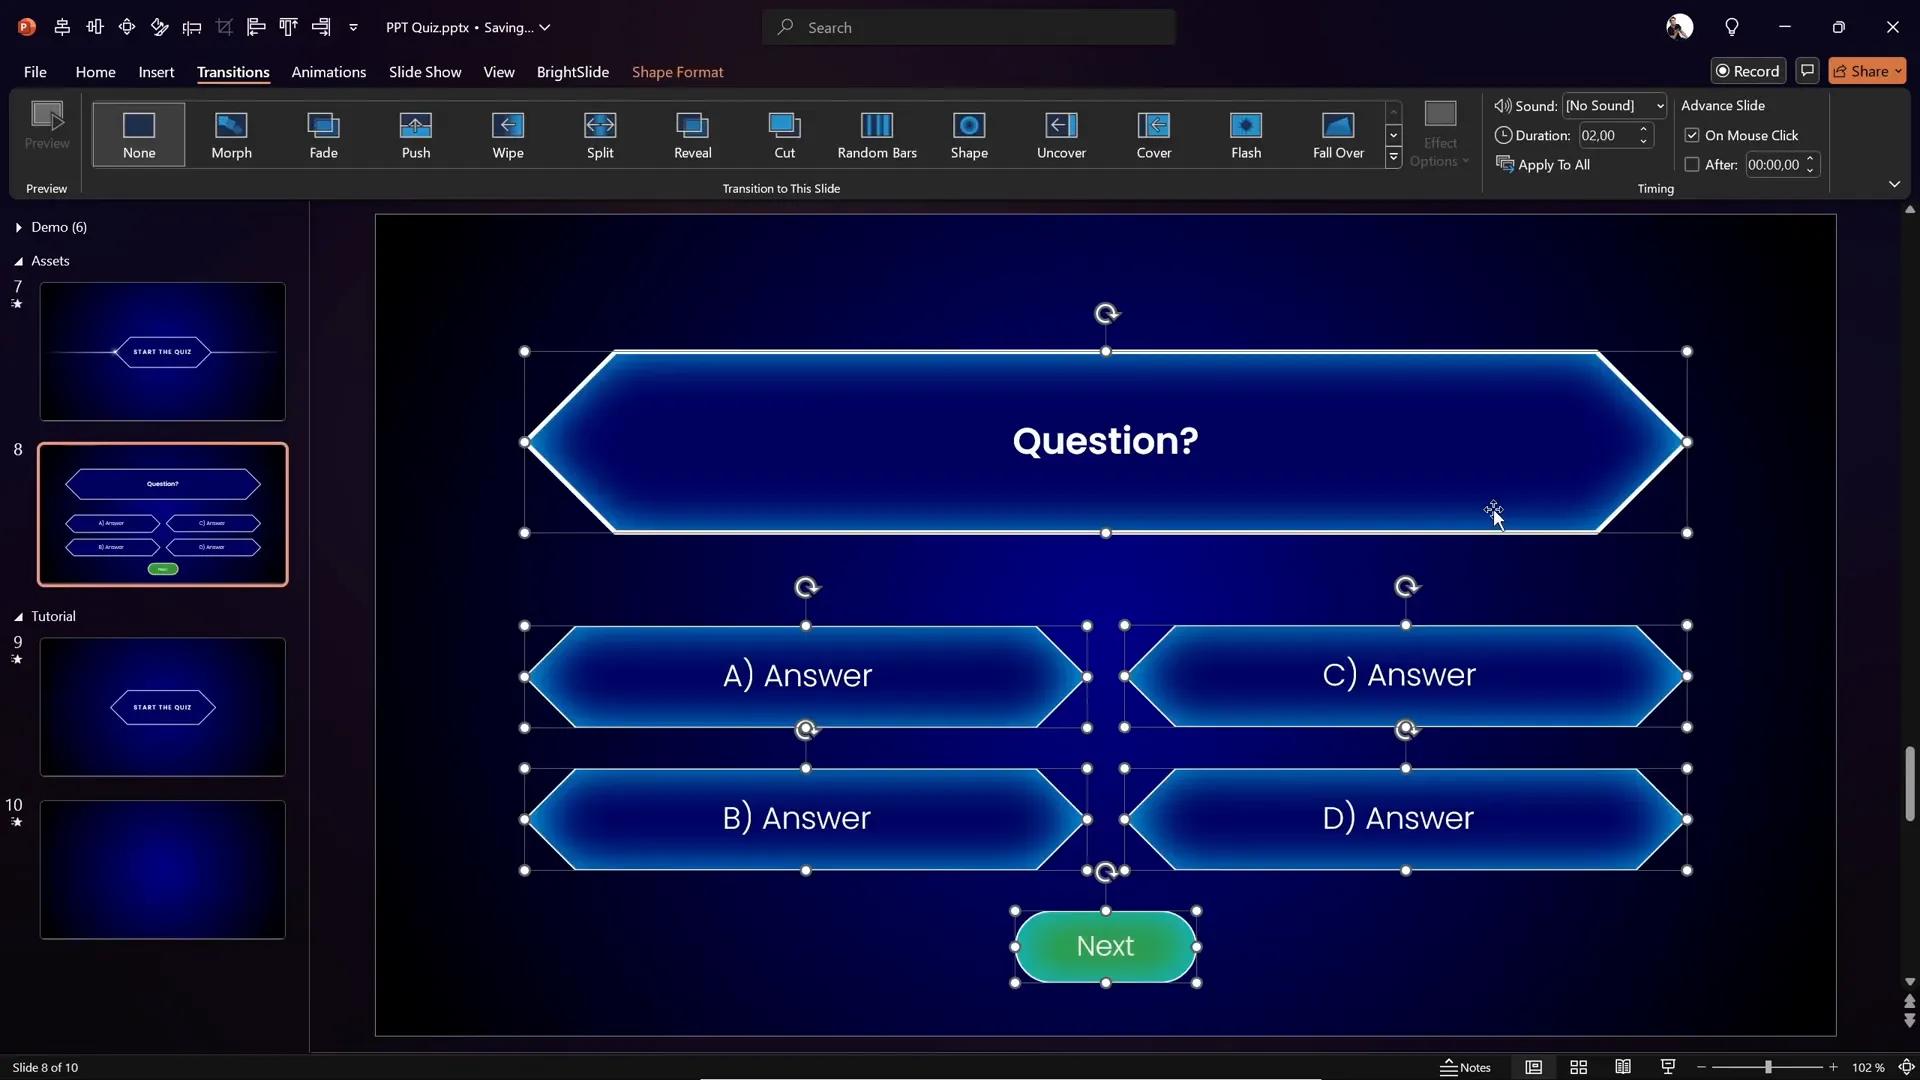
Now, let’s build the actual question slides. Each question slide includes:
- The question text at the top.
- Four diamond-shaped answer buttons.
- A “Next” button that remains hidden initially and appears only after selecting the correct answer.
To save time, duplicate the first question slide after setting it up to keep the layout consistent across all questions.
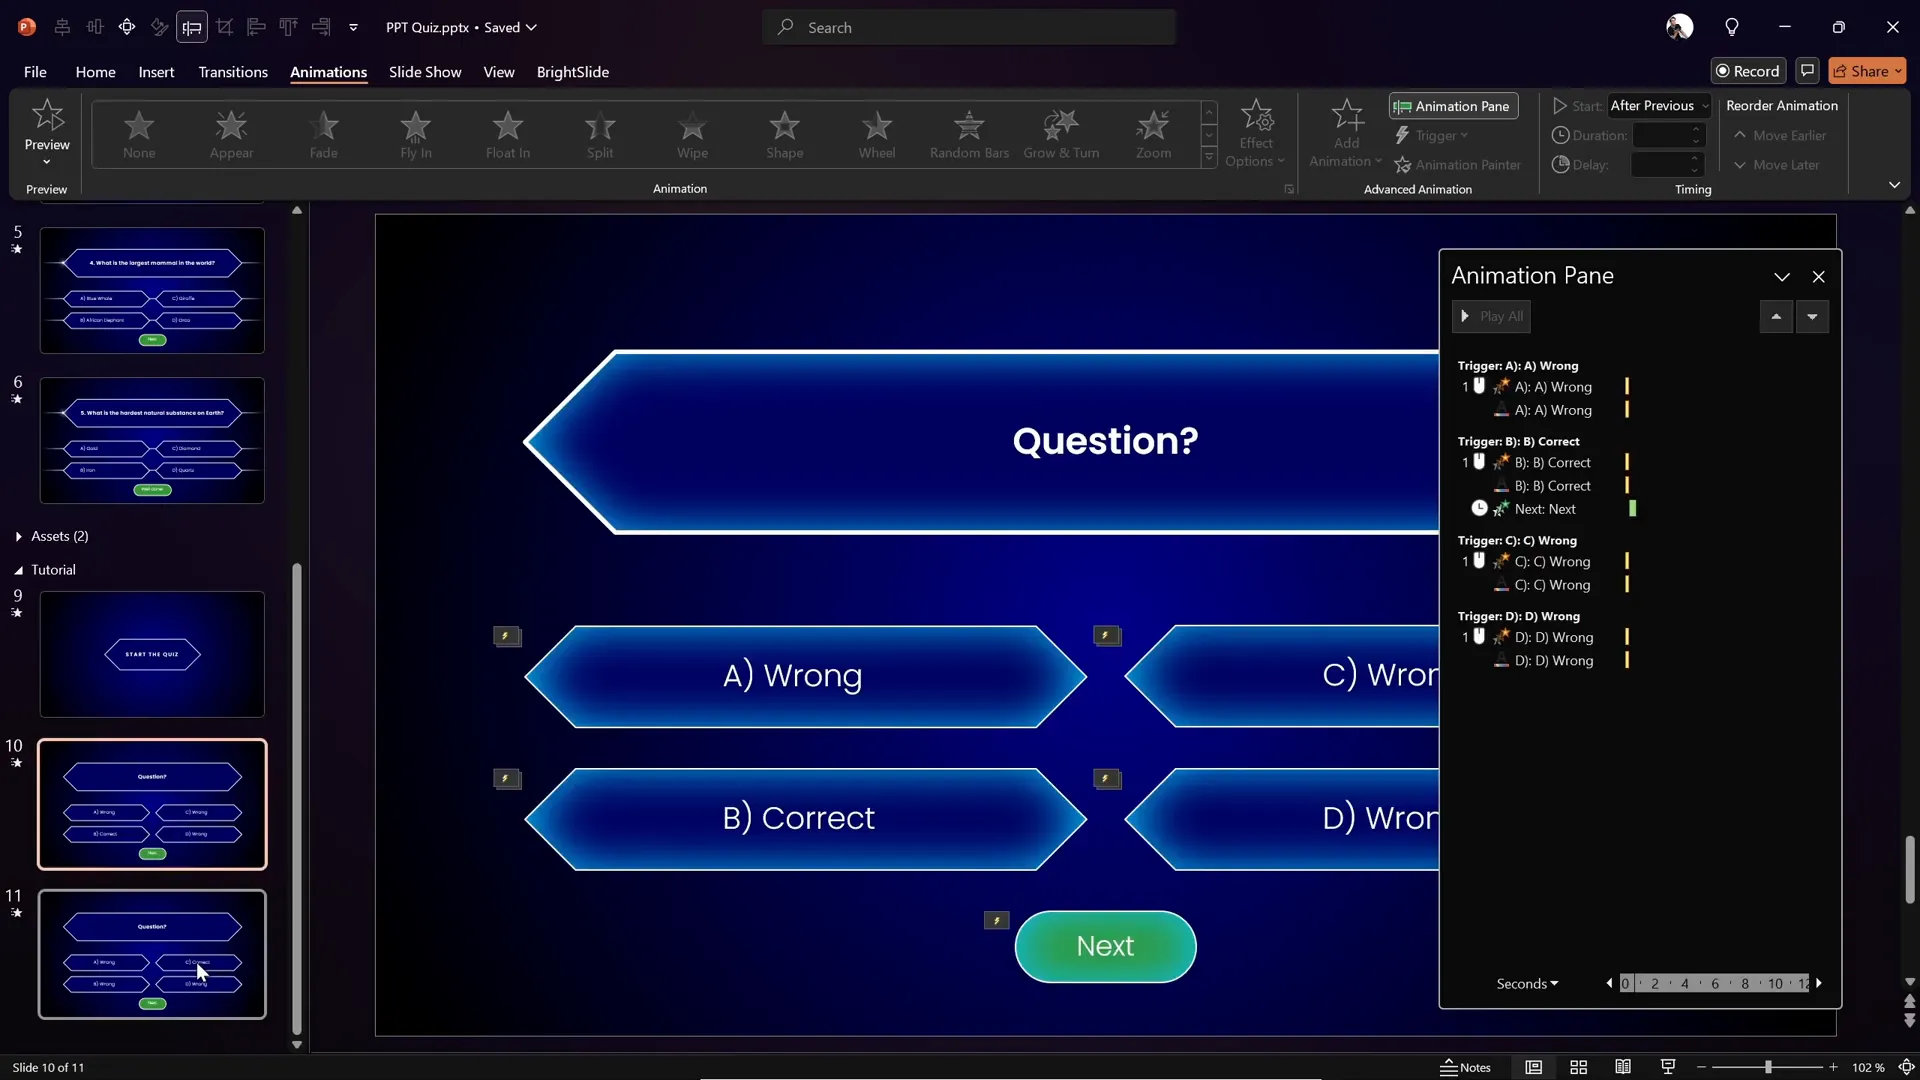
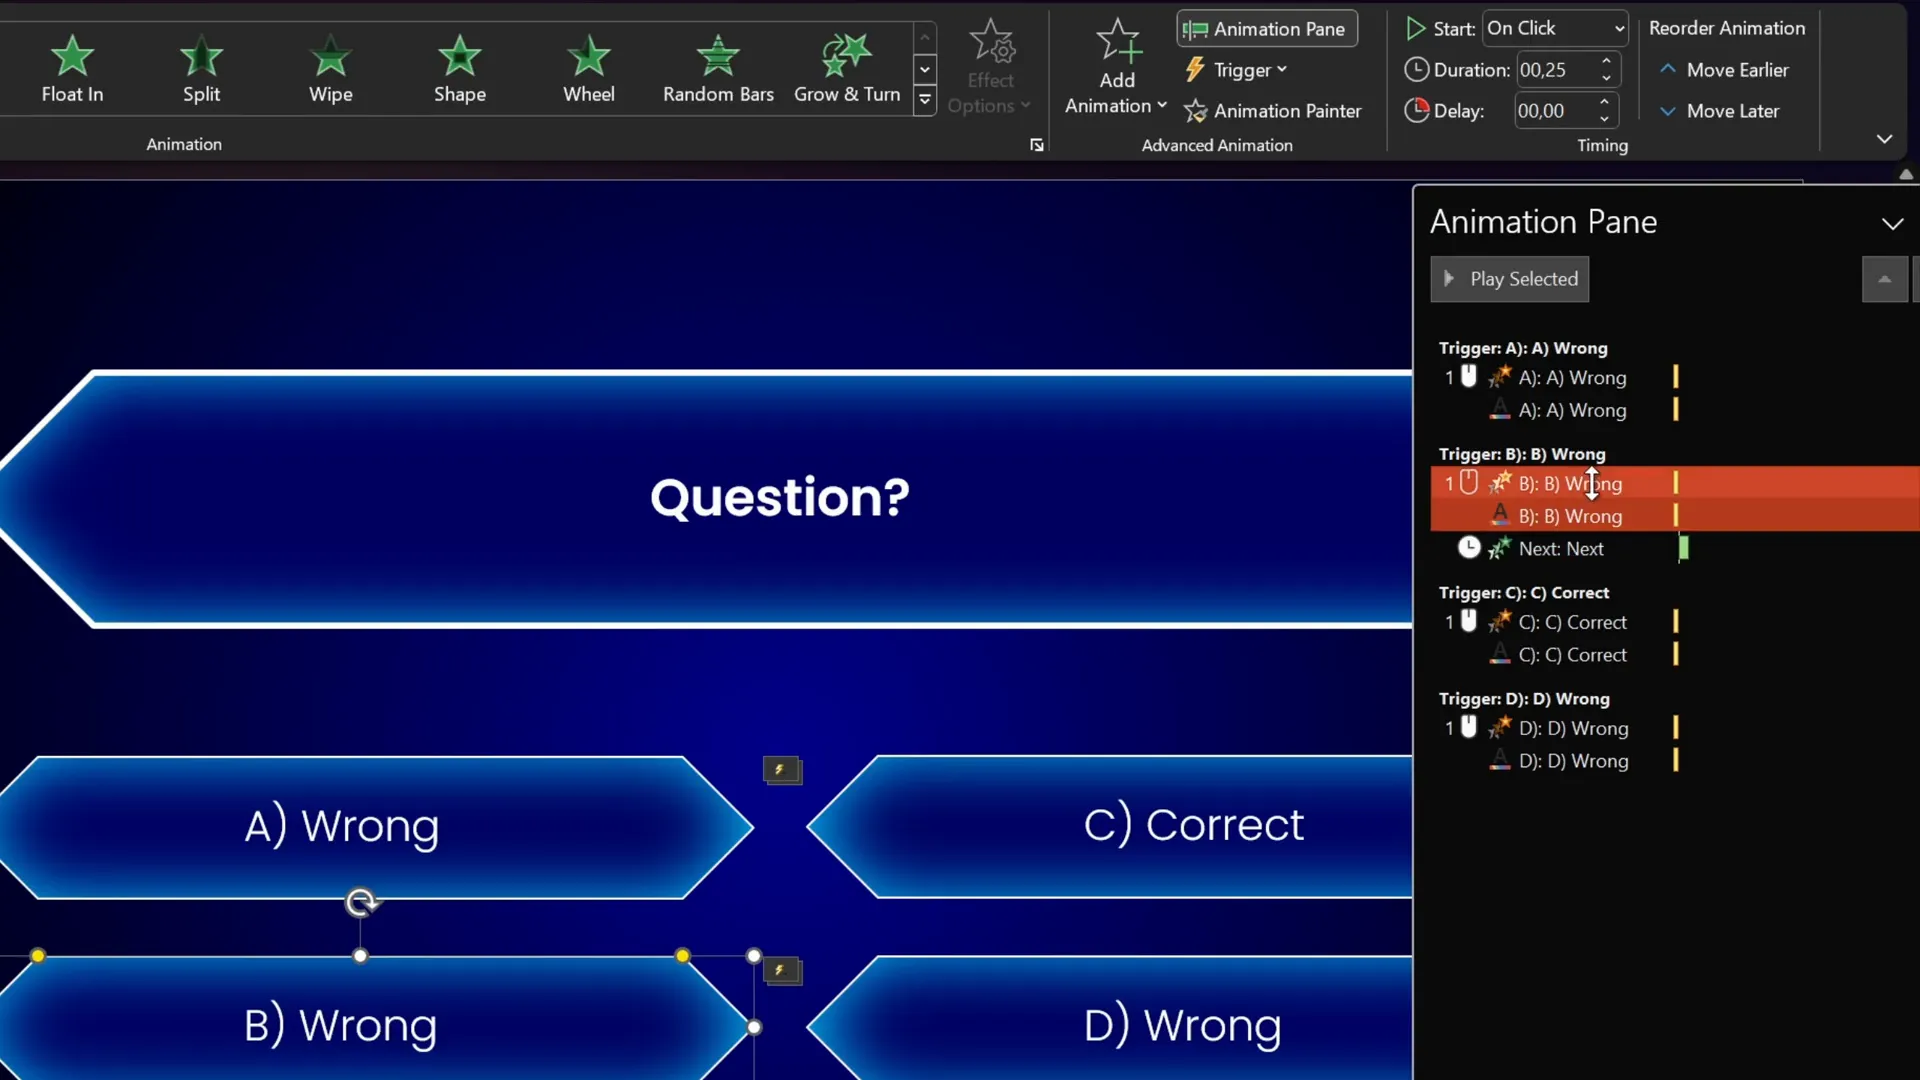
Animating Correct and Wrong Answer Feedback
To provide immediate feedback when an answer is clicked, we’ll add color-change animations triggered by clicks on each answer shape.
Animating Wrong Answers
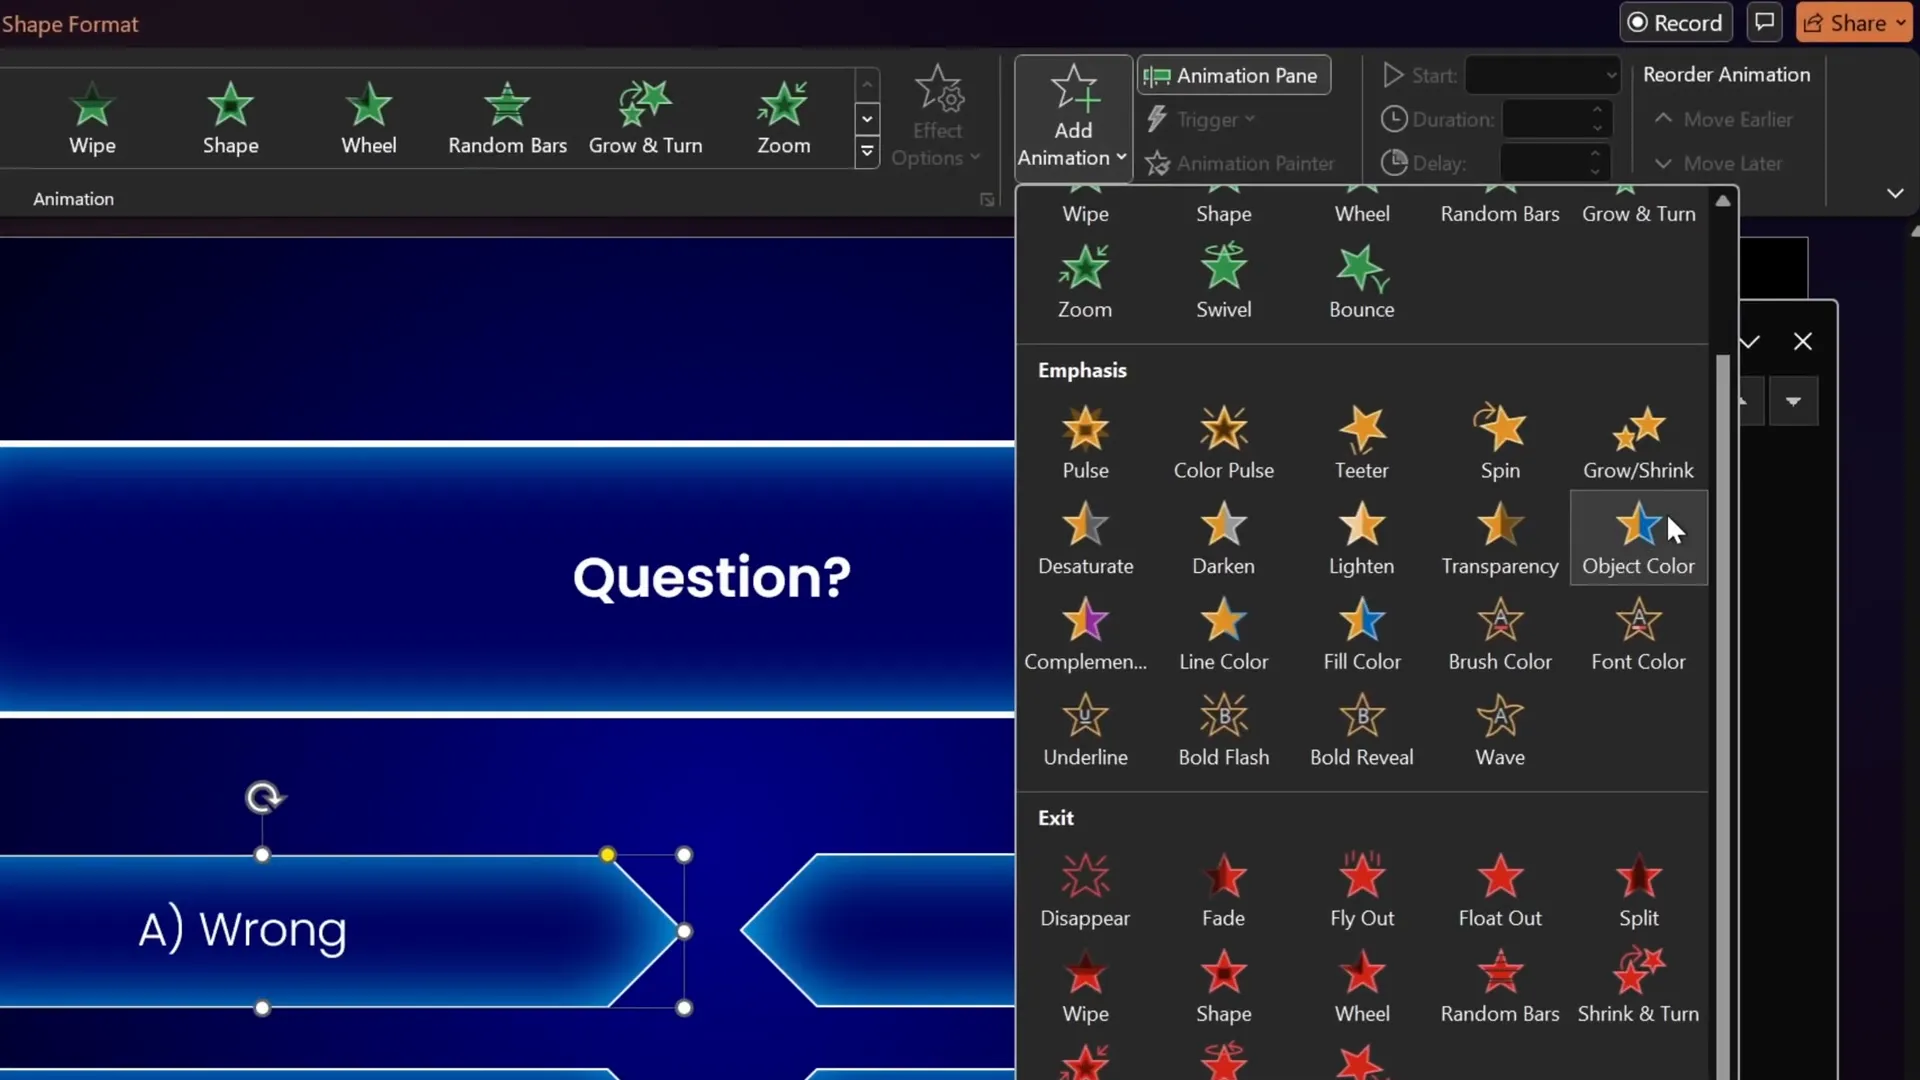
- Select one of the wrong answer diamond shapes.
- Open the Animations tab and add the Fill Color animation (called Object Color in PowerPoint).
- Set the animation to start On Click.
- Adjust the duration to 0.25 seconds for a quick effect.
- In the animation options, choose a fill color that indicates a wrong answer (e.g., a shade of red or purple).
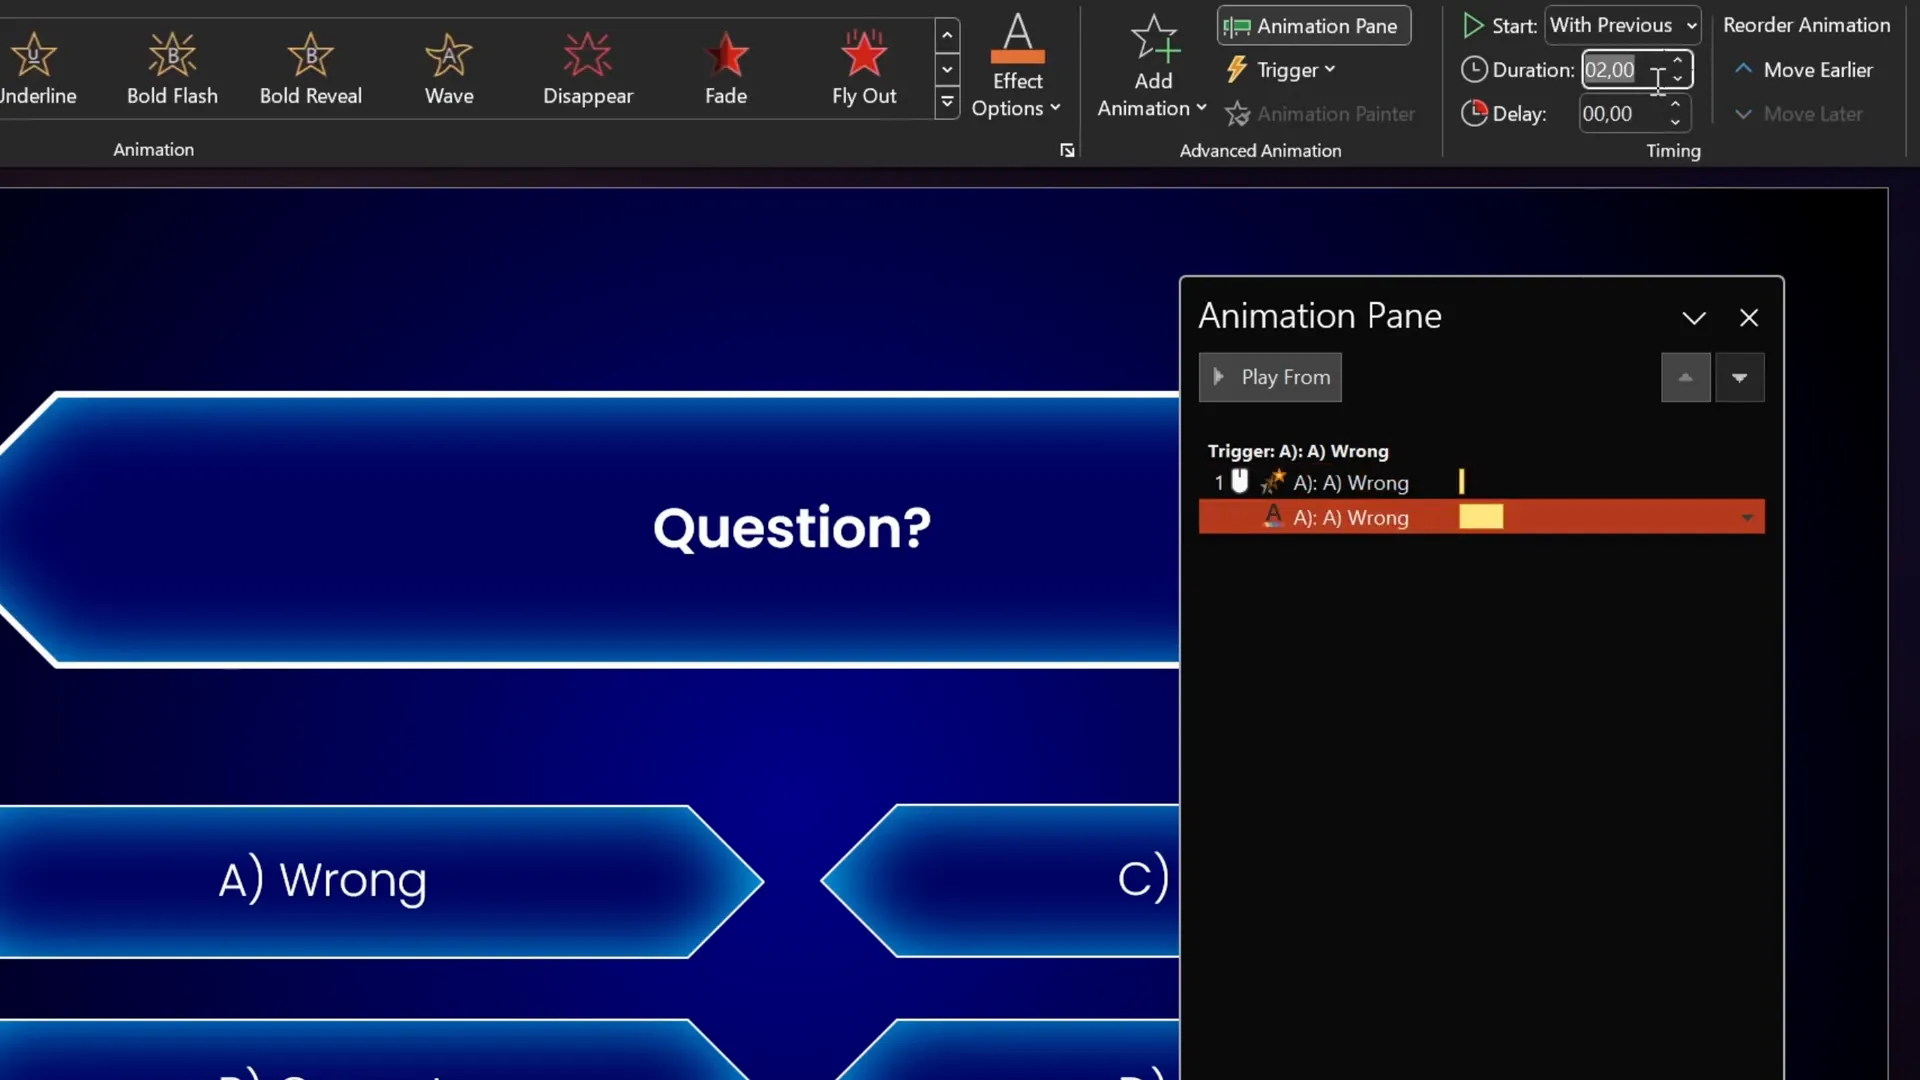
- Open the Animation Pane to manage animations.
- Click the animation, then select Trigger > On Click of and pick the corresponding shape (e.g., shape “A”) so the animation only triggers when that specific answer is clicked.
Note: Initially, the text may disappear when the shape fill changes color. To fix this, add a Font Color animation immediately after:
- Add a Font Color animation to the same shape.
- Set it to start With Previous (so it runs simultaneously with the fill color animation).
- Set the font color to white (or a contrasting color) so the text remains visible on the colored background.
- Ensure the font color animation is grouped under the same trigger.
Animating the Correct Answer
For the correct answer, repeat the steps above but choose a green fill color to indicate success.
Reusing Animations with Animation Painter
To speed up the process, use the Animation Painter tool to copy animations from one shape to others. Double-click the animation painter to apply multiple times. Then, adjust colors and triggers accordingly for each answer shape.
Animating the Next Button
The “Next” button should remain hidden until the correct answer is clicked. To achieve this:
- Select the “Next” button shape.
- Add an entrance animation, such as Fly In from the bottom.
- Set the animation duration to around 0.5 seconds for a smooth effect.
- Set the animation to start After Previous or With Previous and place it in the same trigger group as the correct answer (e.g., trigger on click of shape “B”).
- Drag the animation down in the animation pane so it plays after the correct answer color change animations.

This way, the “Next” button only appears after the user selects the correct answer, guiding them to proceed.
Duplicating and Customizing Question Slides
Once you’ve set up one question slide with all animations and triggers, duplicate it to create additional questions.
- Duplicate the slide (Ctrl + D).
- Change the question text and the answer options.
- Update which answer is correct by adjusting the animations’ triggers and colors accordingly.
- Make sure the “Next” button trigger is linked to the new correct answer shape.
This method ensures consistency and saves time, allowing you to scale your quiz to as many questions as you desire.
Bonus Tips and Custom Animations
The presenter also mentions some additional touches to make your quiz more lively, such as confetti animations and highlight effects when users select the right answer. These add a layer of polish and celebration that enhances user engagement.
If you want to learn how to create these special animations like confetti or highlight effects, feel free to comment on the original video with keywords like “highlight,” “confetti,” or “skadoosh” to request a dedicated tutorial.
Frequently Asked Questions
What is an Interactive PowerPoint Presentation?
An interactive PowerPoint presentation includes elements such as hyperlinks, clickable buttons, and animations that allow users to engage actively rather than passively viewing slides. Interactive quizzes are a popular example, where users select answers and receive immediate feedback.
Why use Kiosk Mode in PowerPoint for quizzes?
Kiosk Mode disables regular slide navigation via mouse clicks or keyboard presses, preventing users from skipping questions or advancing slides accidentally. It ensures users navigate solely through the interactive elements you provide, like buttons or hyperlinks.
Can I create quizzes with multiple correct answers?
Yes, you can customize your quiz to allow multiple correct answers by adjusting animation triggers and logic. However, this tutorial focuses on single-correct-answer quizzes for simplicity.
Does this method work in all versions of PowerPoint?
This tutorial uses features like animation triggers and hyperlinks that are supported in PowerPoint 2010 and later. Some features may not be available in older versions or PowerPoint for Mac.
Can I use this interactive quiz template for free?
Yes, the original creator provides a free PowerPoint quiz template available on Patreon. You can use it as a starting point to customize your own quizzes.
How do I add confetti animations or other special effects?
Confetti effects can be added using GIFs or custom animations layered on the slide. The creator offers to provide tutorials on these effects upon request.
Conclusion
Creating an interactive PowerPoint presentation quiz is a powerful way to engage your audience and deliver content in a memorable way. Using simple tools like hyperlinks, animation triggers, and smart slide design, you can craft quizzes that provide instant feedback and smooth navigation.
This tutorial showed you how to:
- Design a gradient background that enhances your quiz’s aesthetic.
- Create diamond-shaped answer buttons with consistent styling.
- Add interactive hyperlinks to navigate between slides.
- Configure kiosk mode to control slide navigation.
- Animate answer feedback for correct and wrong choices.
- Animate the “Next” button to appear only after correct answers.
- Duplicate and customize slides for multiple questions.
With these skills, you can build quizzes tailored to any topic, perfect for classrooms, training sessions, or engaging presentations. If you want to explore more advanced animations or special effects, keep an eye out for additional tutorials or reach out to the creator for personalized guidance.
Thank you for reading, and happy PowerPoint quizzing!
Stay happy, stay healthy, and keep creating!
— Juan Skill, One Skill PPT