
Welcome to this comprehensive guide on creating stunning animated subtitles in PowerPoint, a technique that some of the biggest YouTubers, including MrBeast, use to captivate their audiences. If you’ve ever wondered how to add dynamic, eye-catching captions to your presentations or videos without complex software, you’re in the right place. This tutorial will walk you through every step to easily create animated captions using just PowerPoint, unlocking a new level of professionalism and engagement for your slides.
This method is not only accessible but also highly customizable, allowing you to create subtitles with vibrant gradients, shadows, glowing effects, and smooth animations that bring your text to life. Whether you’re preparing a YouTube video, a business presentation, or an educational slide deck, these animated captions will elevate your content and keep your viewers hooked.
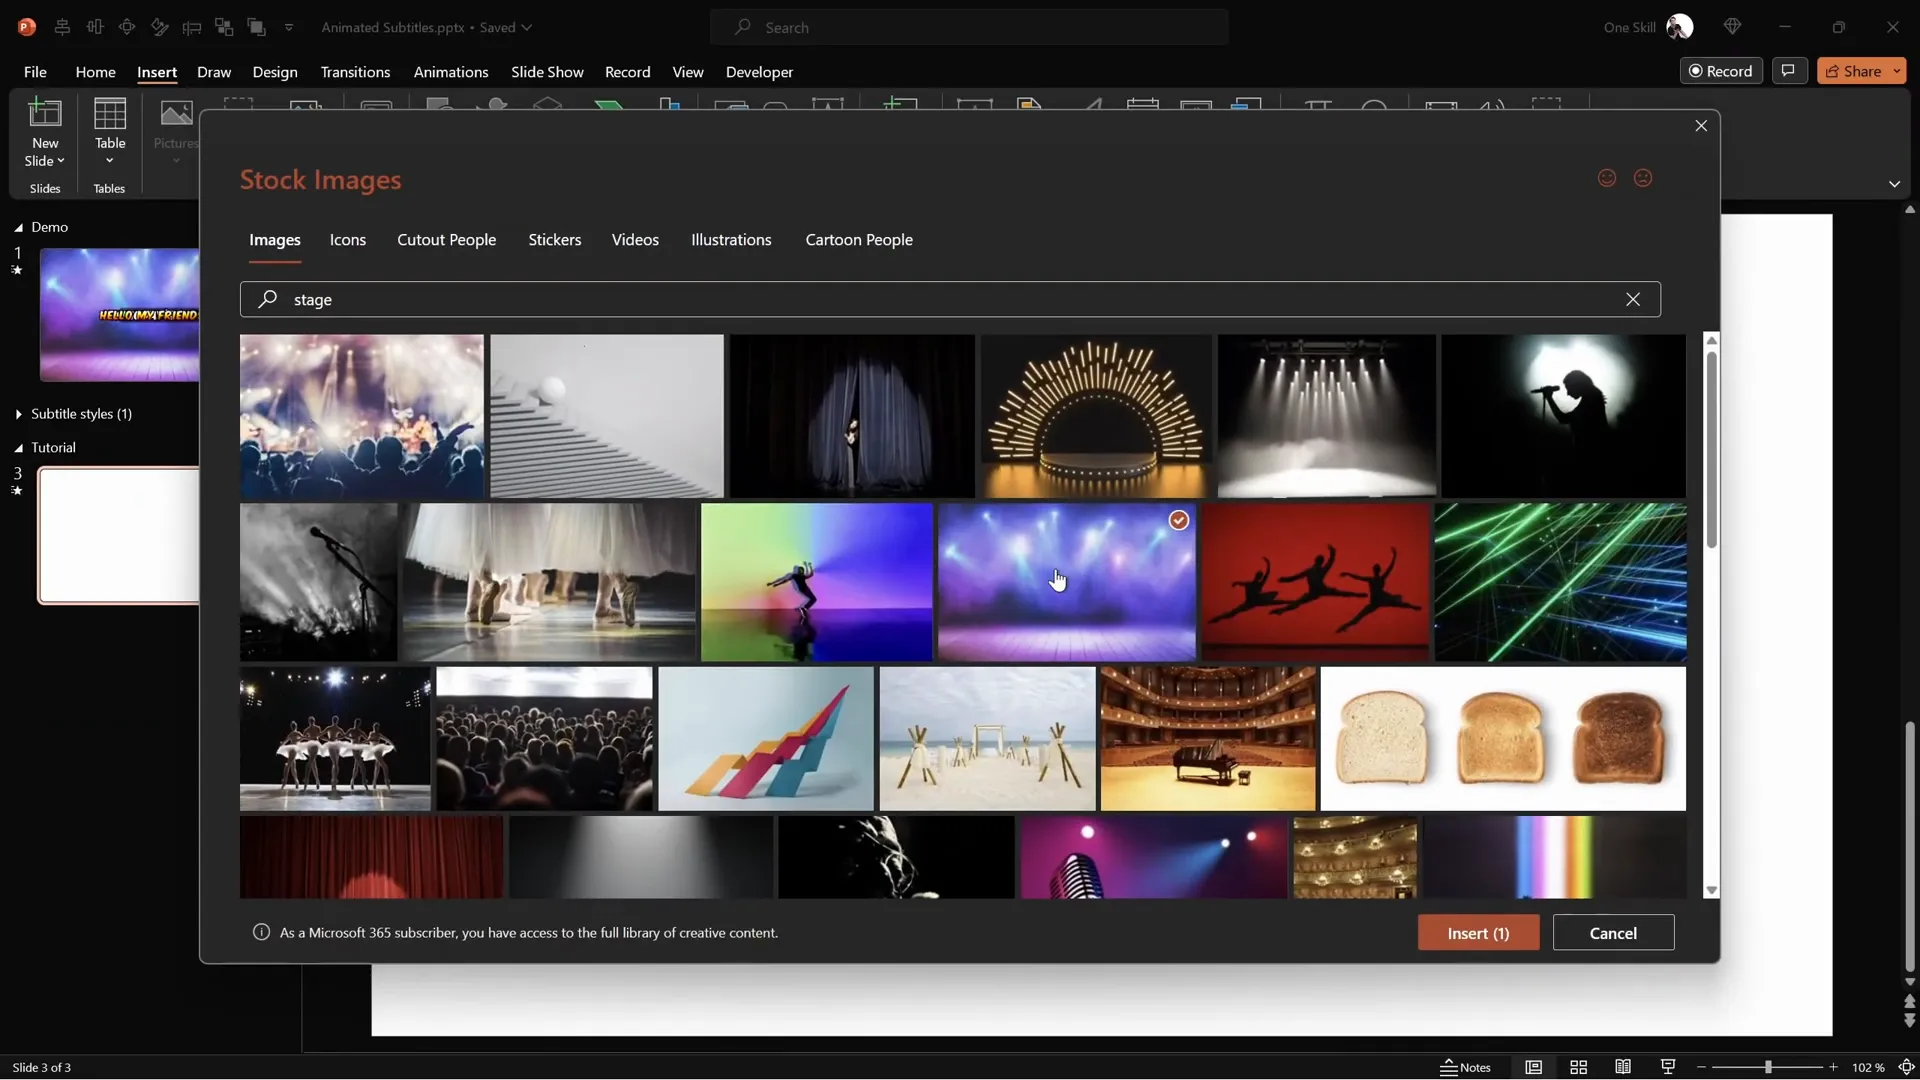
Table of Contents
- Setting Up the Animated Background
- Creating Your First Animated Subtitle
- Managing the Background and Text Selection
- Animating the Subtitles
- Creating Multiple Subtitles and Managing Animation Timing
- Final Preview and Additional Resources
- Frequently Asked Questions (FAQ)
- Conclusion
Setting Up the Animated Background
Before diving into the subtitles themselves, it’s essential to create a visually appealing background that complements your animated captions. A subtle animated background can add depth and professionalism to your slides without distracting from the text.
Choosing and Adjusting the Background Image
Start by inserting a background image that fits your presentation’s theme. Feel free to use any picture you like, but for this tutorial, we’ll select a “stage” picture from PowerPoint 365’s stock images to create a dynamic atmosphere.
Once inserted, you might notice that the image doesn’t fully cover the slide. No worries—here’s how to fix that:
- Make sure the picture is selected.
- Go to the Crop tool, then select Aspect Ratio and choose 16:9 to match the slide dimensions.
- Click outside the slide to apply changes.
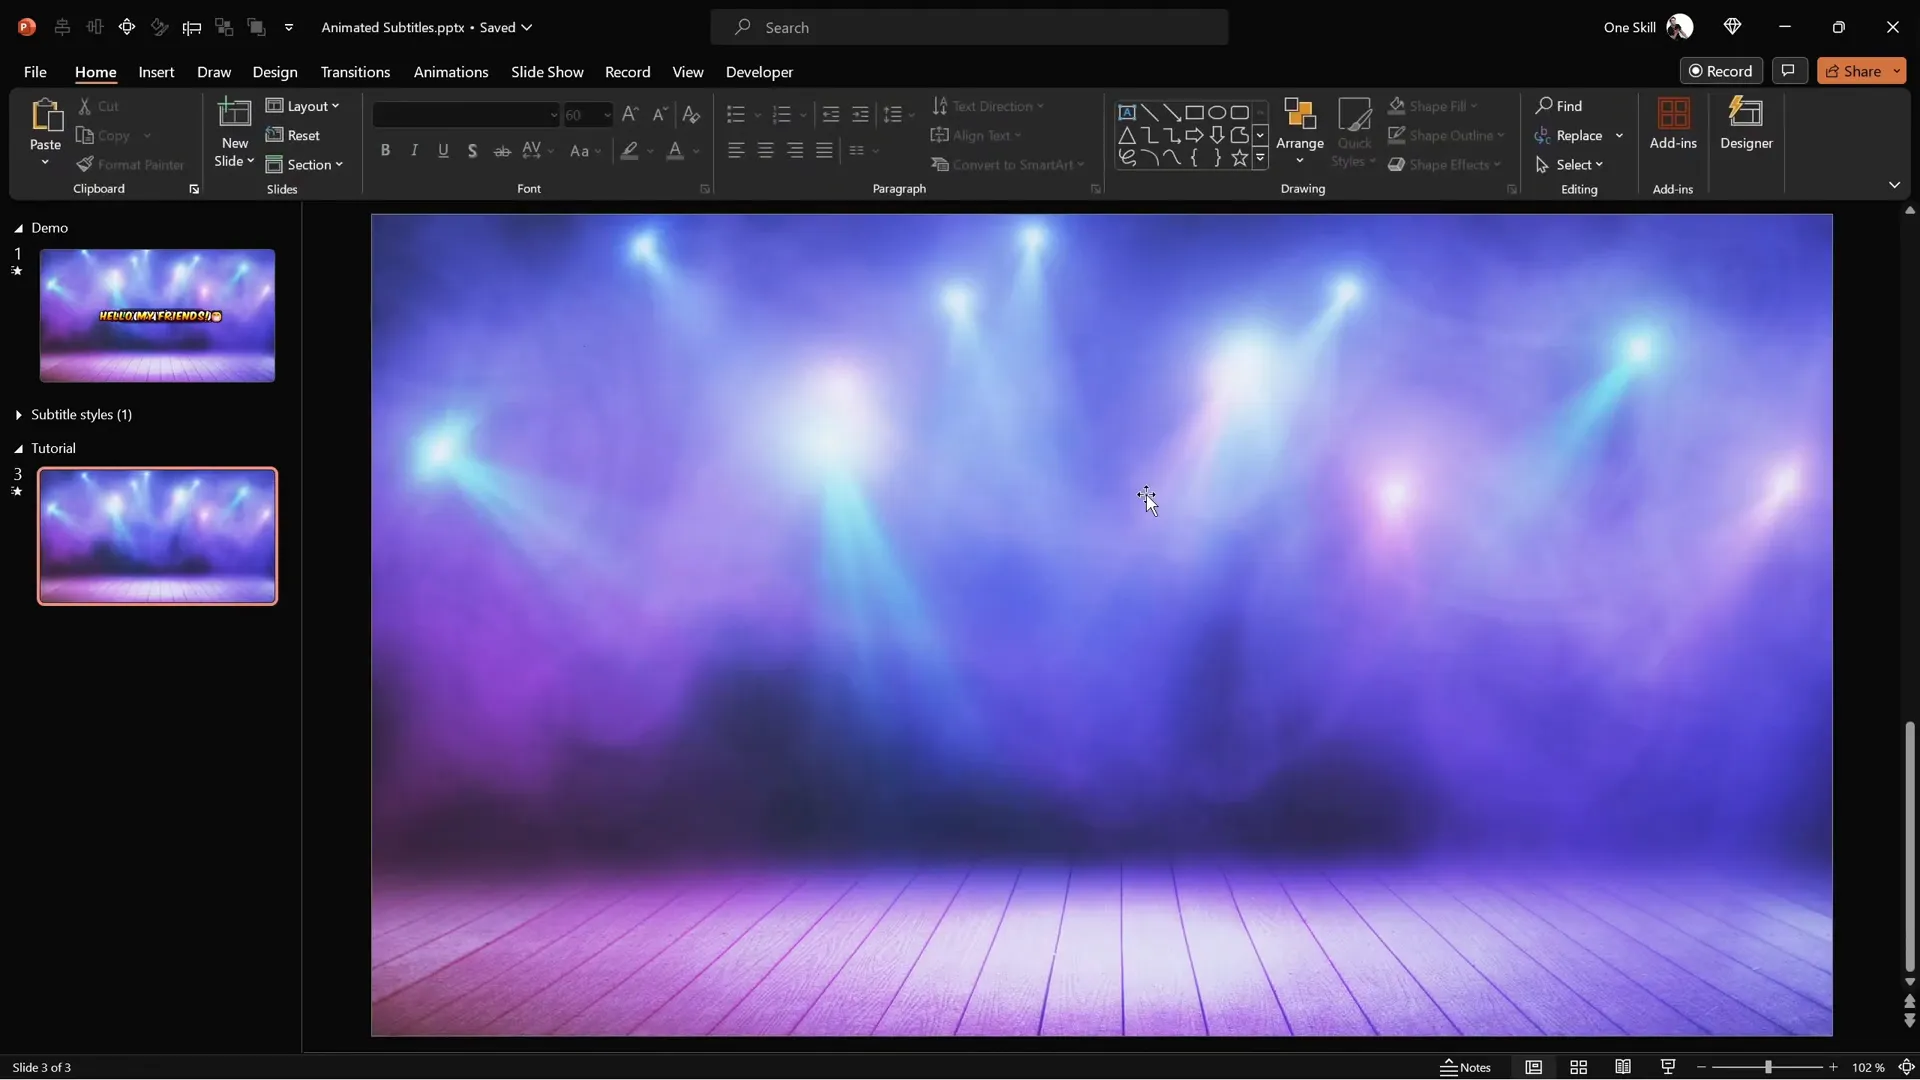
- Hold down Ctrl + Shift and drag one of the corners to resize the image until it perfectly covers the entire slide.
Adding a Subtle Zoom Animation to the Background
To make the background more engaging, we’ll add a smooth zoom (grow and shrink) effect that loops continuously. This animation gives a polished look and keeps the background lively without overwhelming the subtitles.
Here’s how to add it:
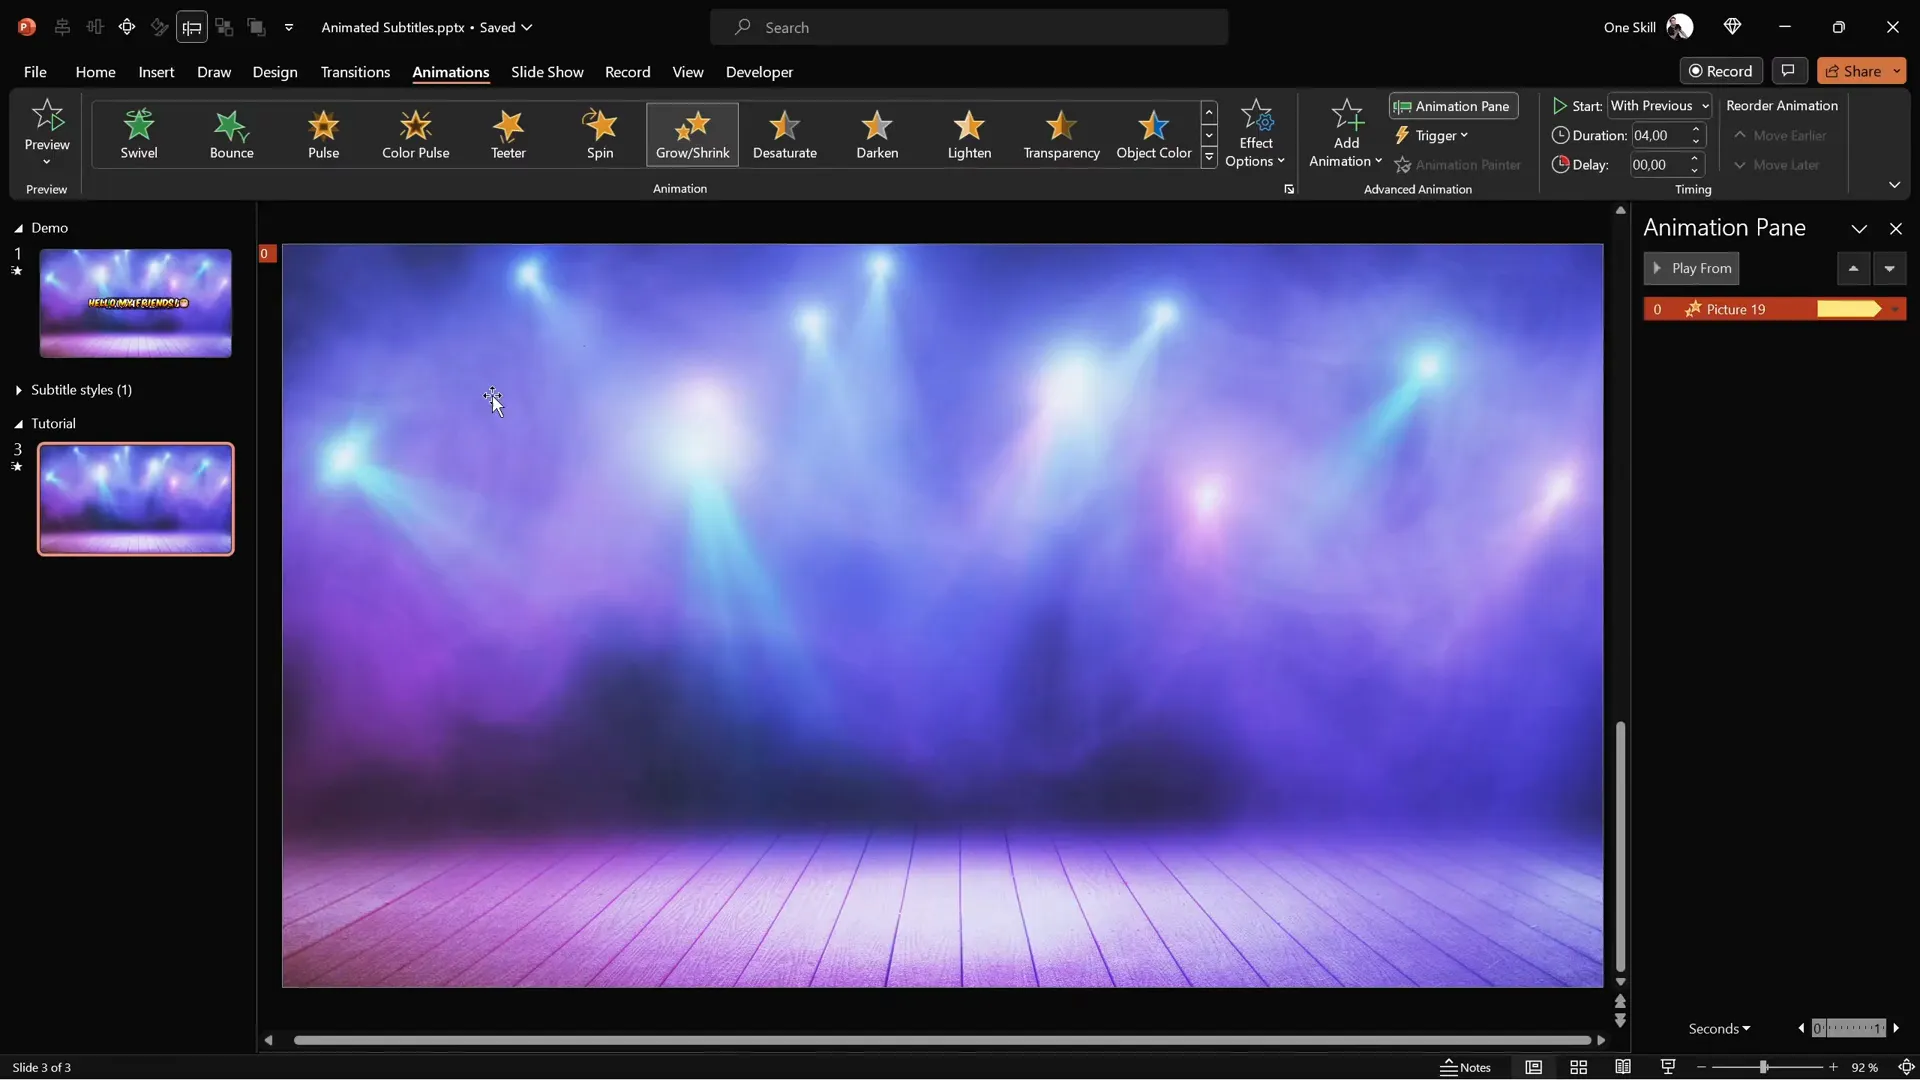
- Navigate to the Animations tab and open the Animation Pane to track all animations.
- Click Add Animation and select the Grow/Shrink animation.
- Set the animation to Start With Previous so it begins automatically.
- Adjust the duration to 4 seconds.
- Double-click the Grow/Shrink animation to open its settings.
- Set the size to grow to 110% for a subtle zoom effect.
- Dedicate 2 seconds each for a smooth start and smooth end, making the animation fluid.
- Enable Auto Reverse so the image zooms in and then returns to its original size.
- Under the Timing tab, choose Repeat Until End of Slide to loop the animation continuously.
Preview the slide in full screen to see the background gently zooming in and out, creating a dynamic yet unobtrusive backdrop for your subtitles.
Creating Your First Animated Subtitle
With the animated background set, it’s time to create subtitles that pop. We’ll start with a simple text box and then enhance it with colors, shadows, gradients, and animations.
Inserting and Formatting the Text Box
Follow these steps to add your first subtitle:
- Go to the Insert tab and select Text Box.
- Click once on the slide to add the text box.
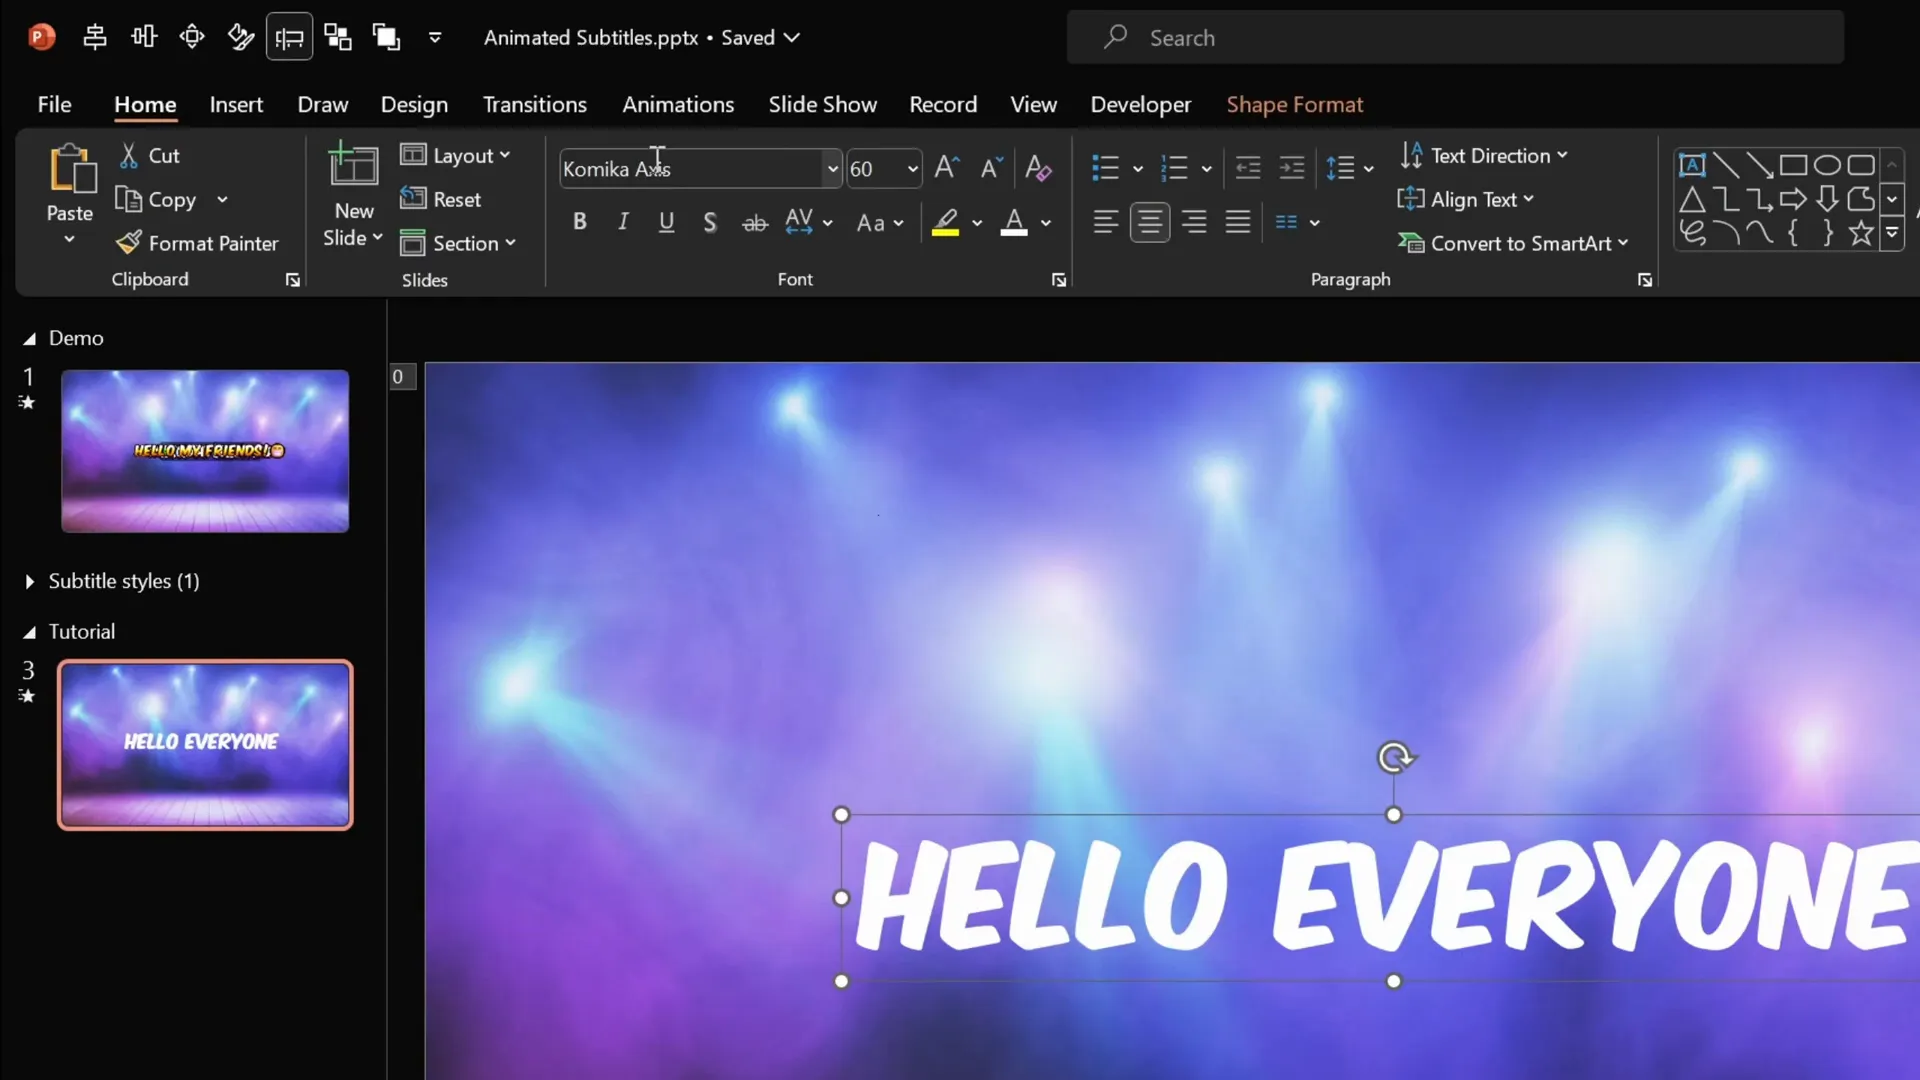
- Type in your subtitle text—for example, Hello everyone.
- Set the font to Comica Axis, a free font that you can download from DaFont.
- Adjust the font size to 60, color to white, and center-align the text.
- Center-align the text box itself both horizontally and vertically on the slide.
Enhancing the Subtitle with Shadows and Glow
To make your subtitle stand out against the background, adding effects like shadows or glow is crucial. These effects add depth and improve readability.
Here’s how you can add and customize these effects:
- Text Shadow: Go to Format Shape > Text Options > Shadow. Choose the preset Offset Center. Adjust the transparency to zero, size to 100, and tweak the blur to your liking for a subtle shadow effect.
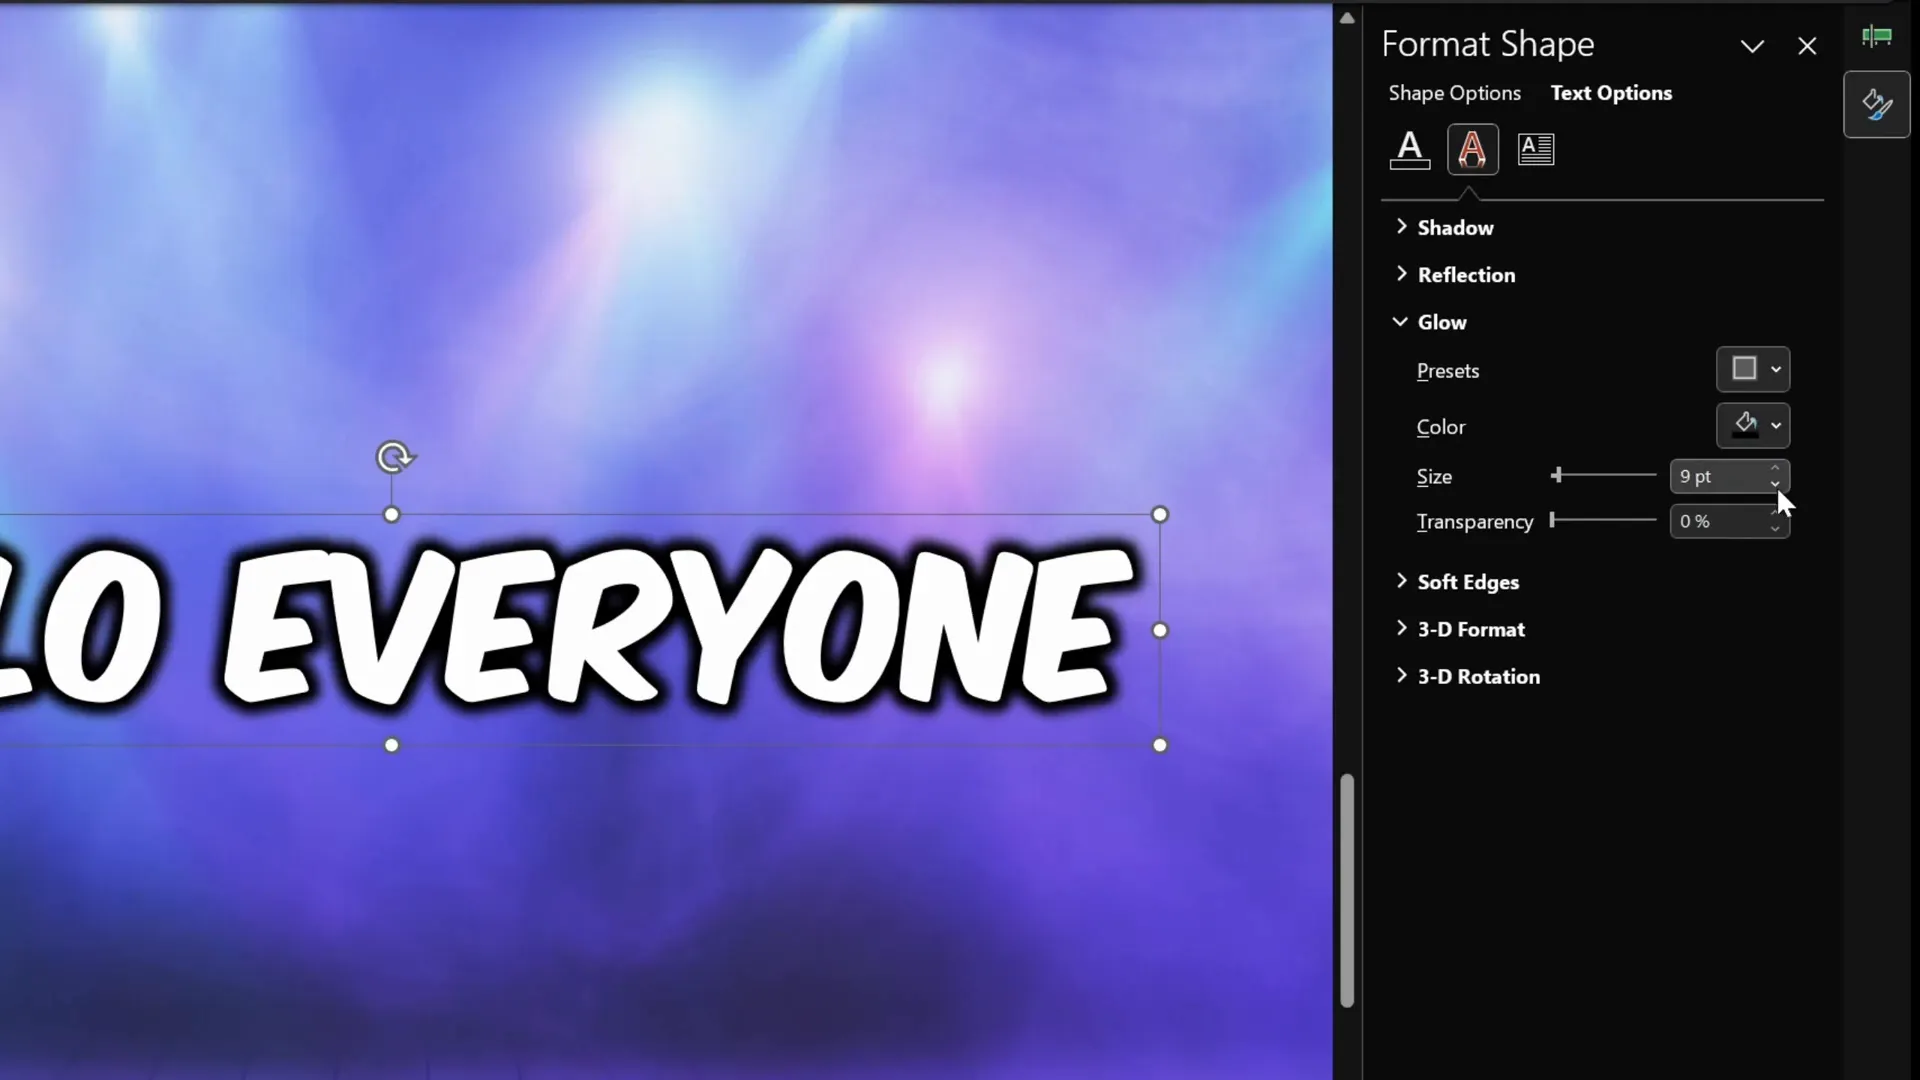
- Text Glow: If you want the subtitle to pop more, remove the shadow and add a glow instead. Choose Black as the glow color and set the size to about 9 points. This makes the subtitle more prominent.
Both these effects help the text visually separate from the background, making it easier for your audience to read.
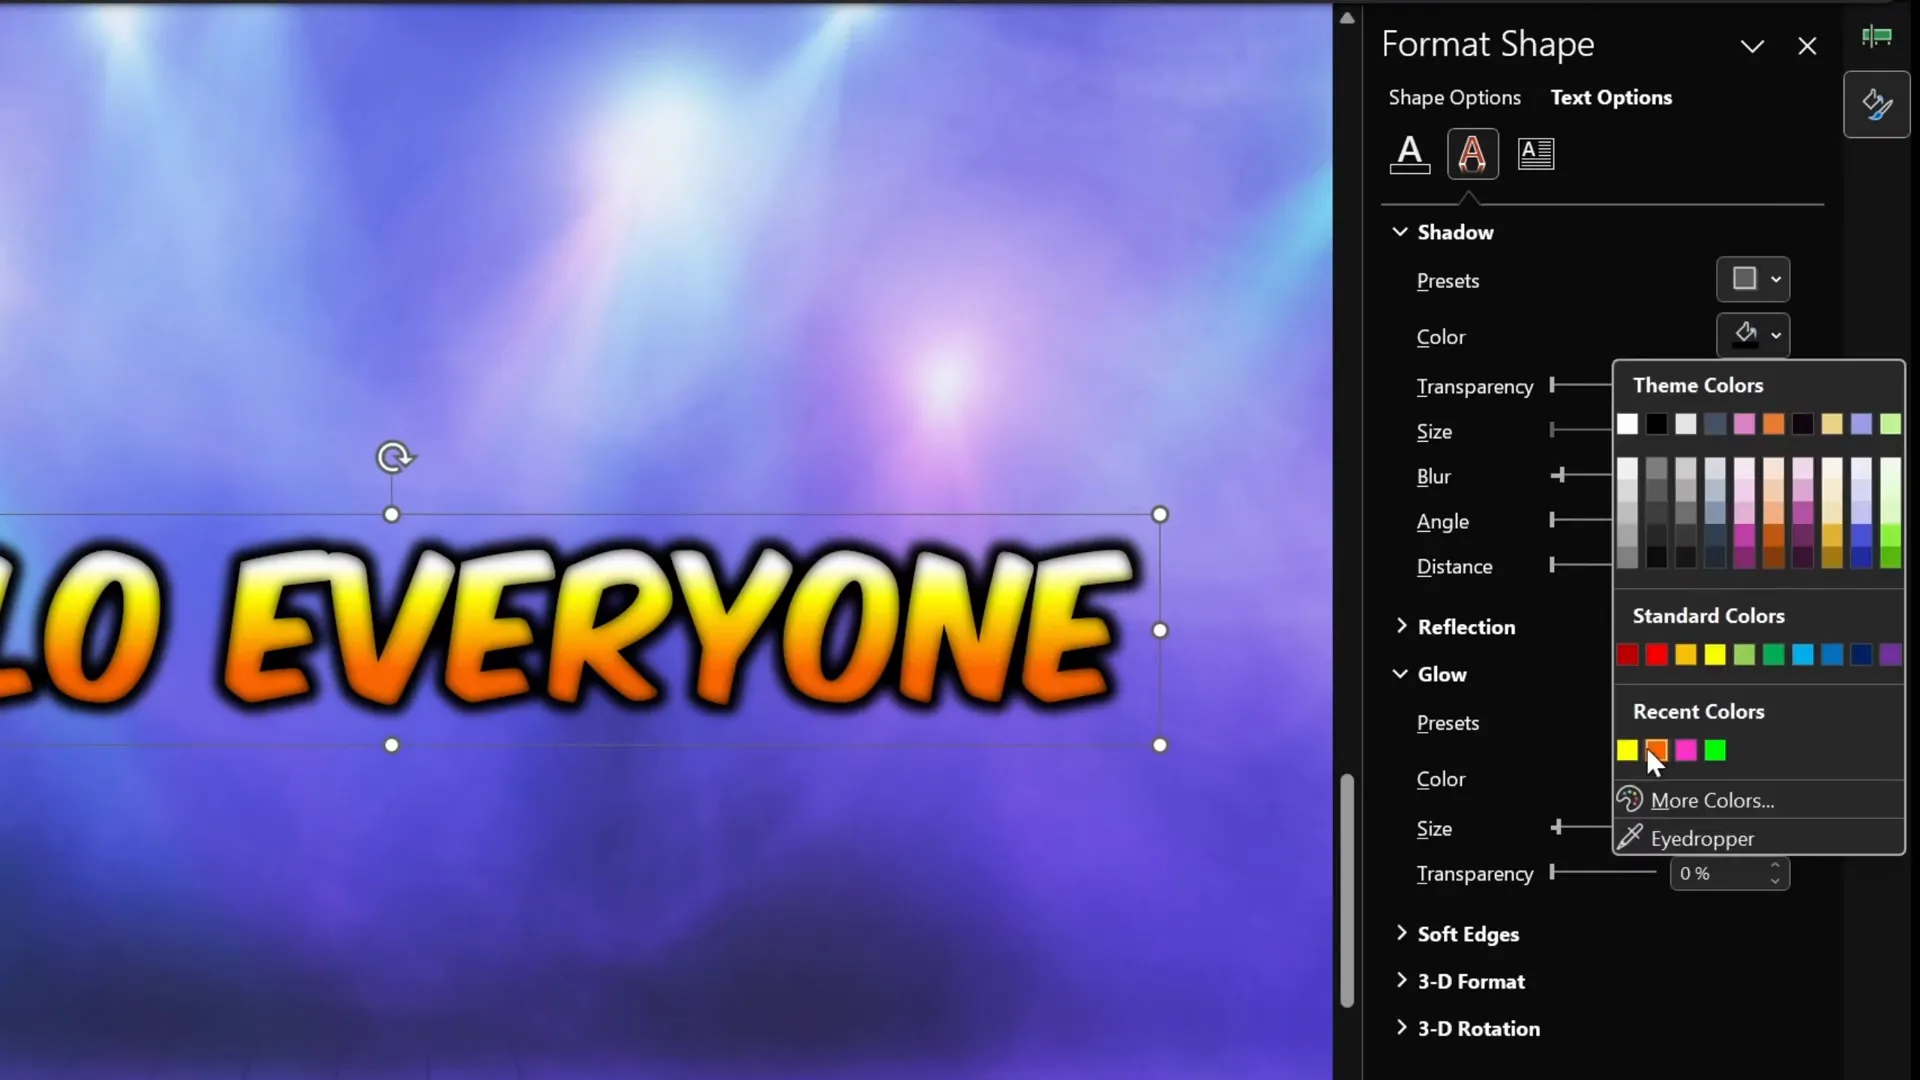
Applying a Vibrant Yellow Gradient to the Text
For a more eye-catching subtitle, adding a gradient fill can create a dynamic and colorful effect. Here’s how to apply a beautiful yellow-orange gradient:
- Select the text box.
- Go to Format Shape > Text Options > Text Fill and select Gradient Fill.
- Ensure the gradient type is Linear with a 90-degree angle.
- Set the left color stop to White, the right to a vibrant Orange (you can select this from the standard color tab).
- Add a middle color stop set to a bright Yellow.
- Adjust the positions of the stops for smooth blending: White at 20%, Yellow at 35%, and Orange at 70%.
This gradient gives your subtitles a warm, energetic look that grabs attention effectively.

Adding a Subtle Inside Glow
To further enhance the text, an inside glow effect can be applied, which adds a soft light from within the letters, making them appear luminous and stylish.
Steps to add inside glow:
- Select the text box.
- Go to Format Shape > Text Options > Shadow, but choose Inside Shadow presets.
- Select the Inside Center preset.
- Change the shadow color from black to a bright yellow matching your gradient.
- Adjust the blur to around 15 points for a smooth glow effect.
The result is a glowing, vibrant subtitle that really stands out on your slide.
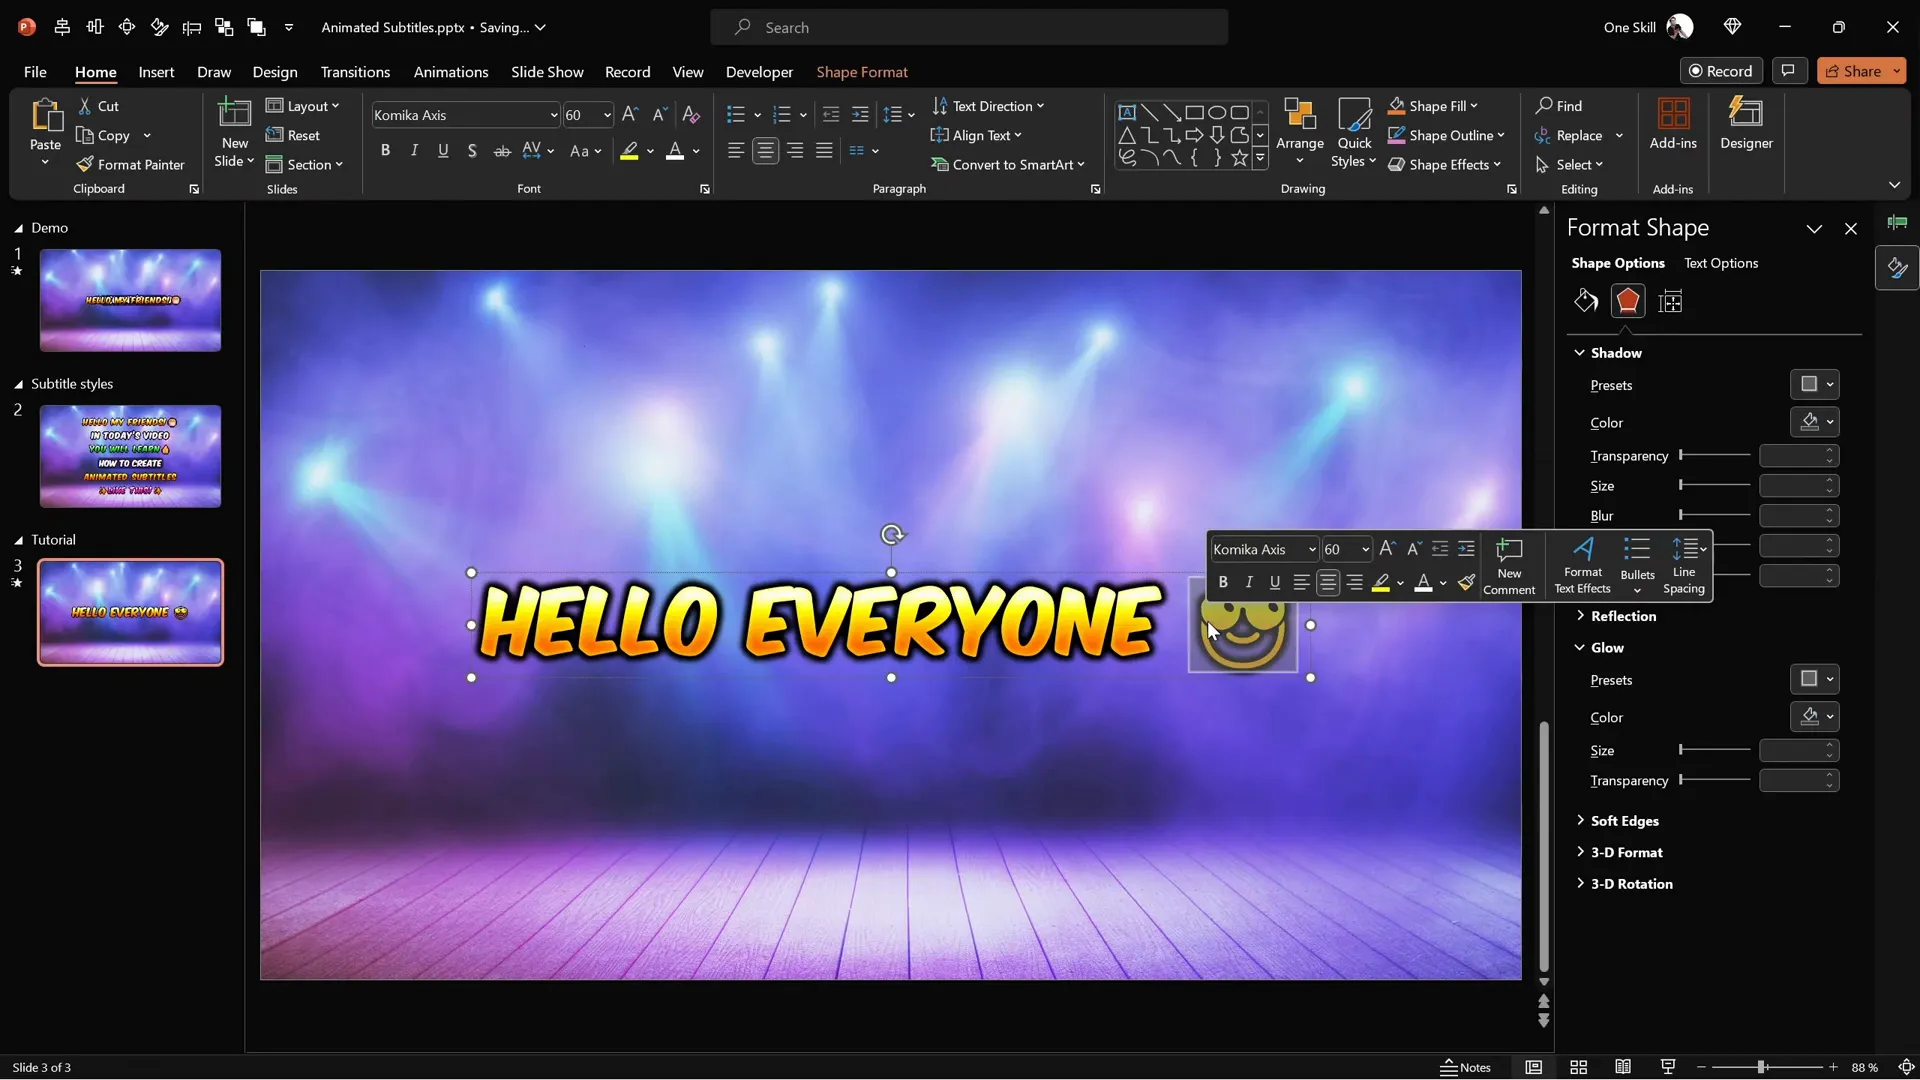
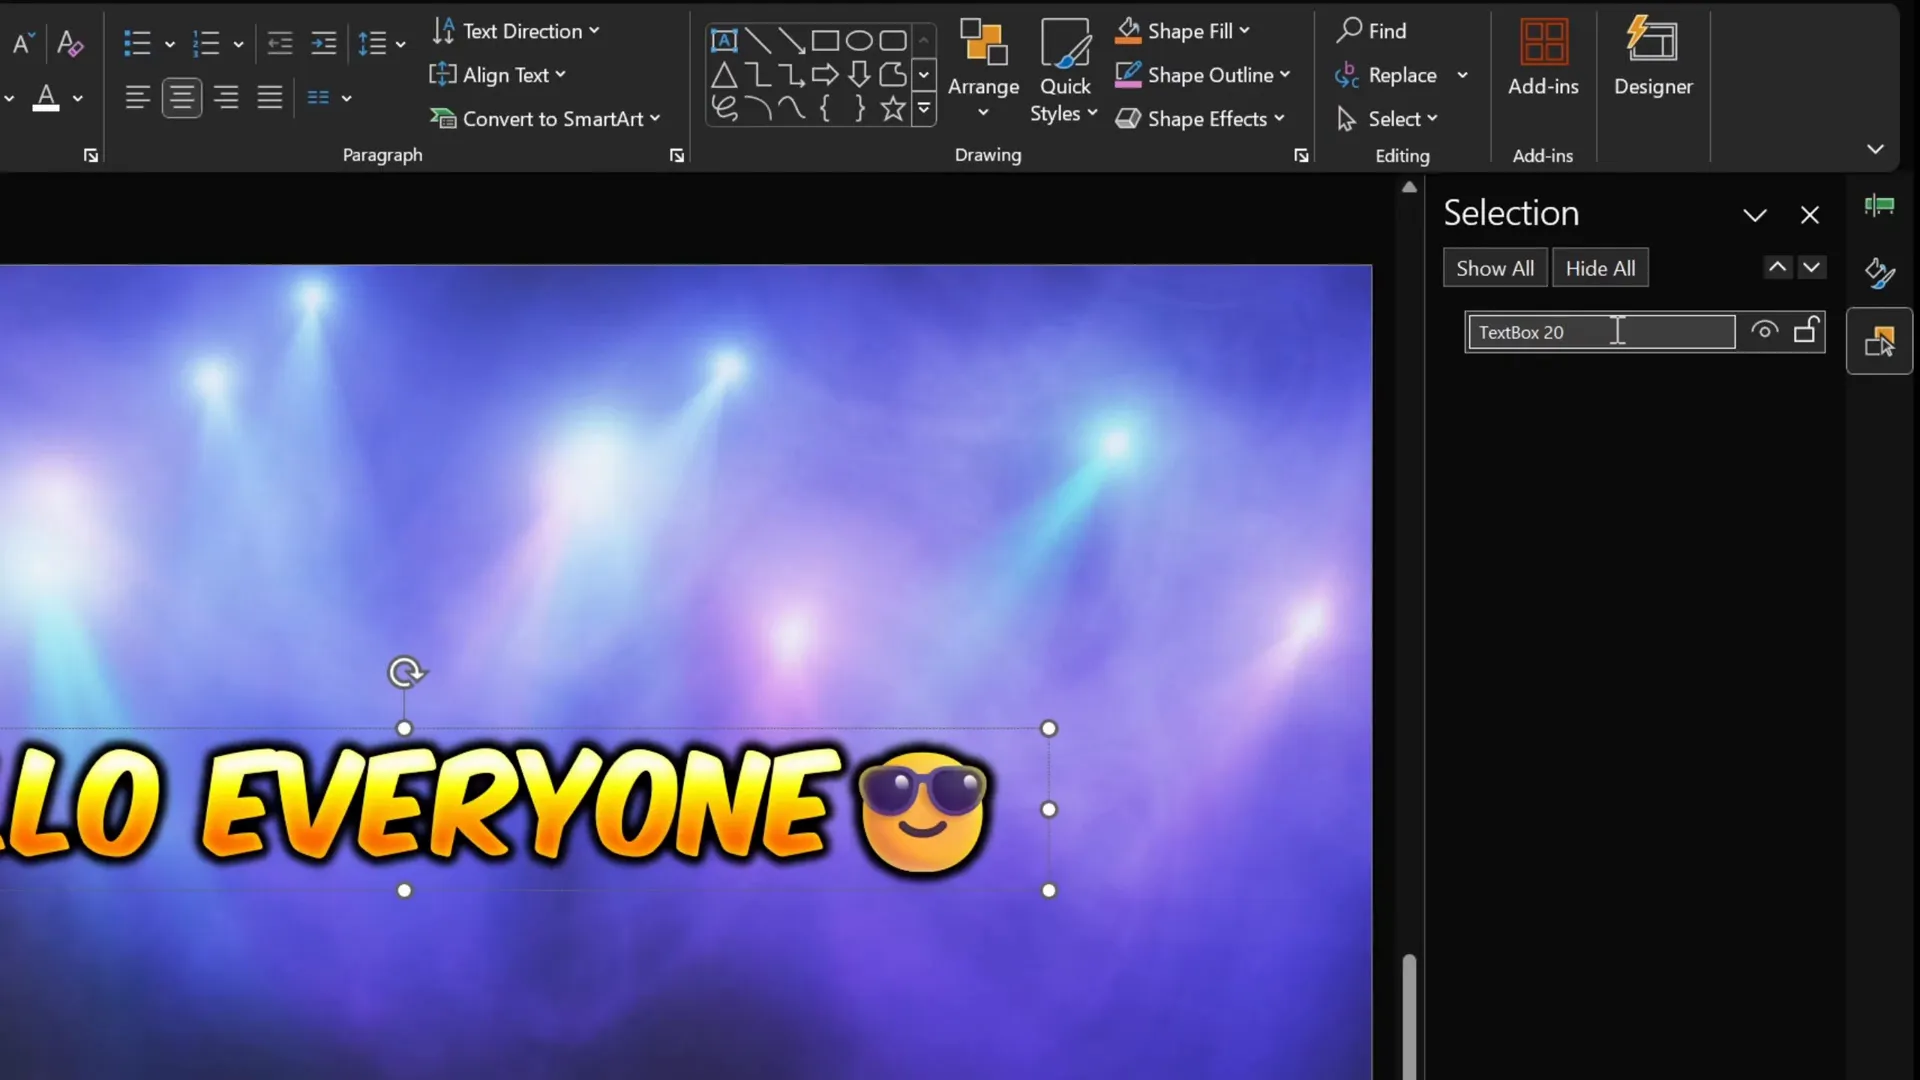
Inserting Emojis in Subtitles
Want to add a fun or expressive emoji to your subtitles? PowerPoint allows you to do this easily:
- On Windows, press Windows Key + Period (.) to open the emoji menu.
- Select your desired emoji and insert it into the text box.
- If the emoji inherits the gradient fill and looks odd, select the emoji alone and change its fill to Solid in the Format Shape options.
This keeps your emojis visually consistent and clear.
Managing the Background and Text Selection
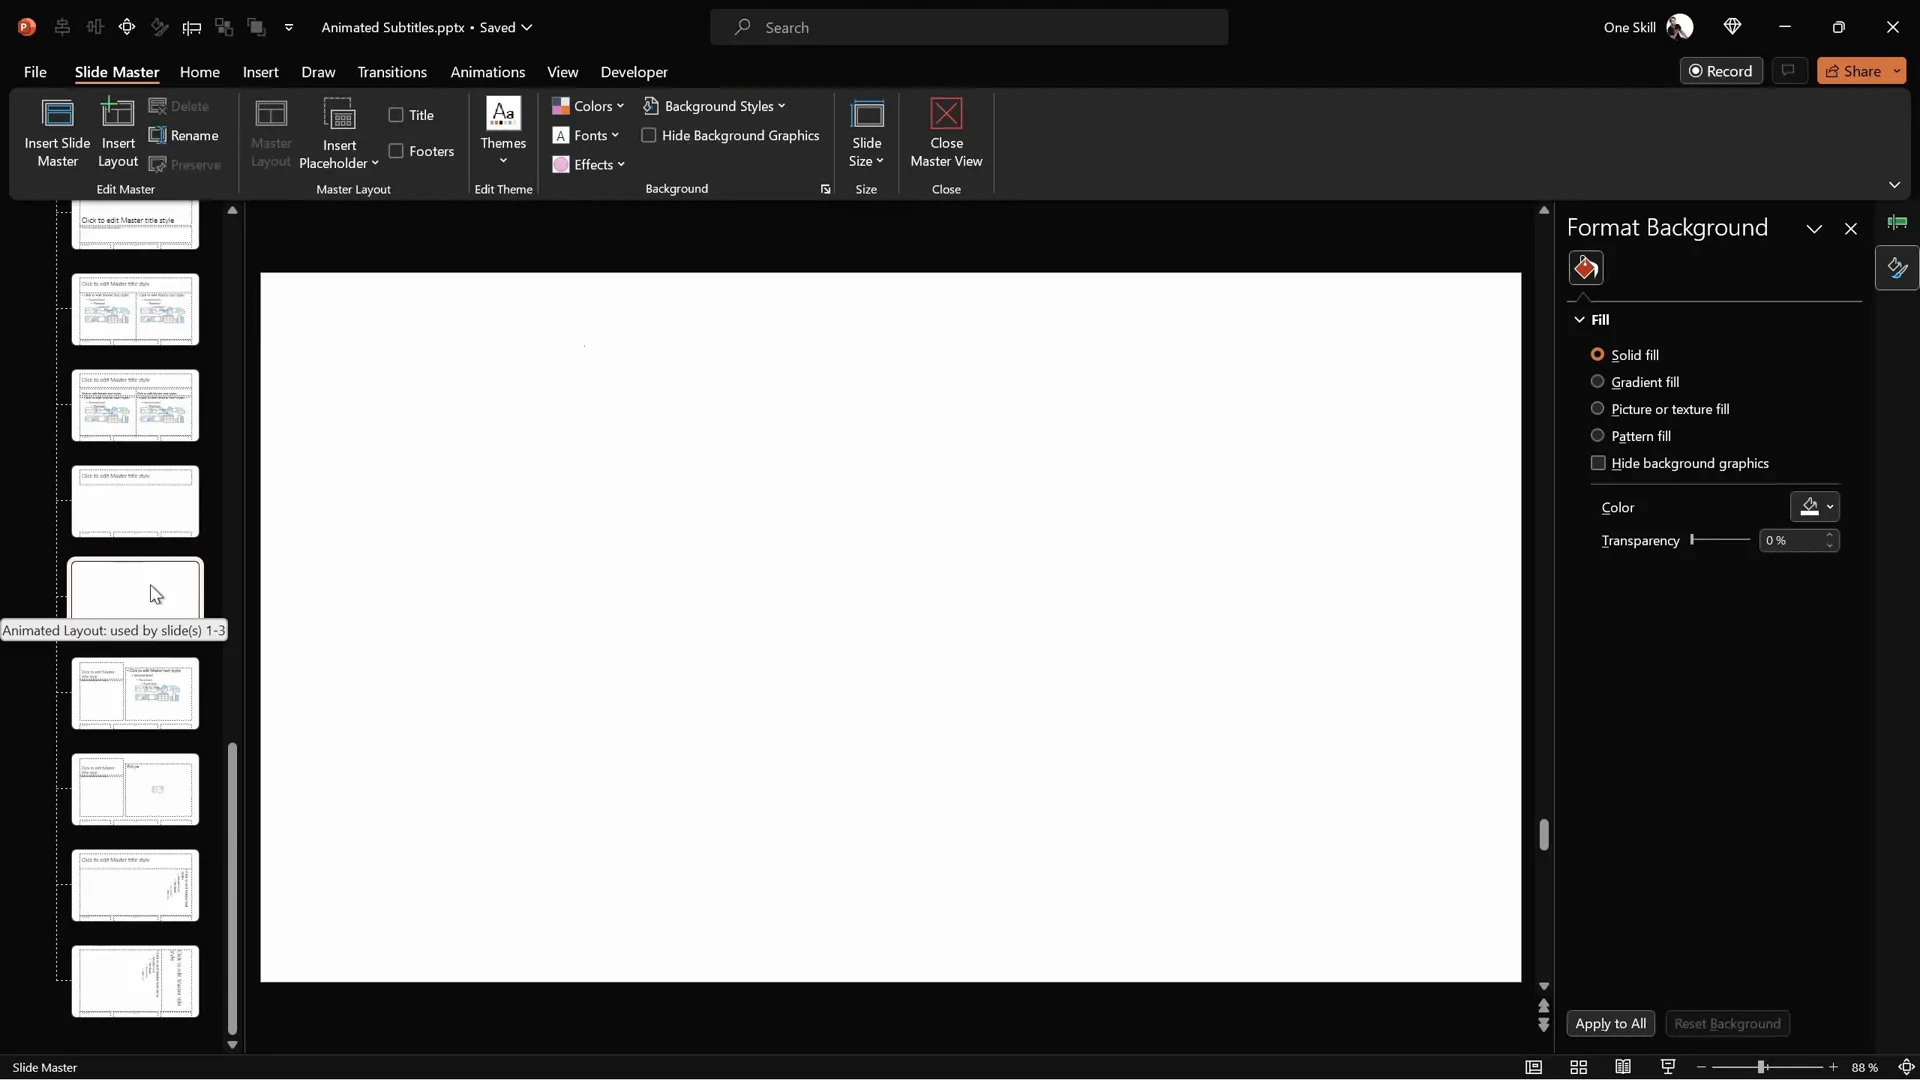
Sometimes, the background image can interfere when trying to select your subtitles, especially if it overlaps with the text box. To avoid this, you can move the background image to the slide master layout. This locks the image in place and prevents accidental selection during editing.
Here’s how:
- Select the background image and press Ctrl + X to cut it.
- Go to the View tab and open the Slide Master.
- Paste the image into the slide layout that corresponds to your current slide.
- Return to the normal slide view; now the background image is unselectable, making it easier to work with your subtitles.
Note: The animation for the background image remains intact in the slide master, even though it won’t show in the normal animation pane.
Animating the Subtitles
Now that your subtitles look great, let’s bring them to life with animations that make each letter appear dynamically and add a fun pop effect.

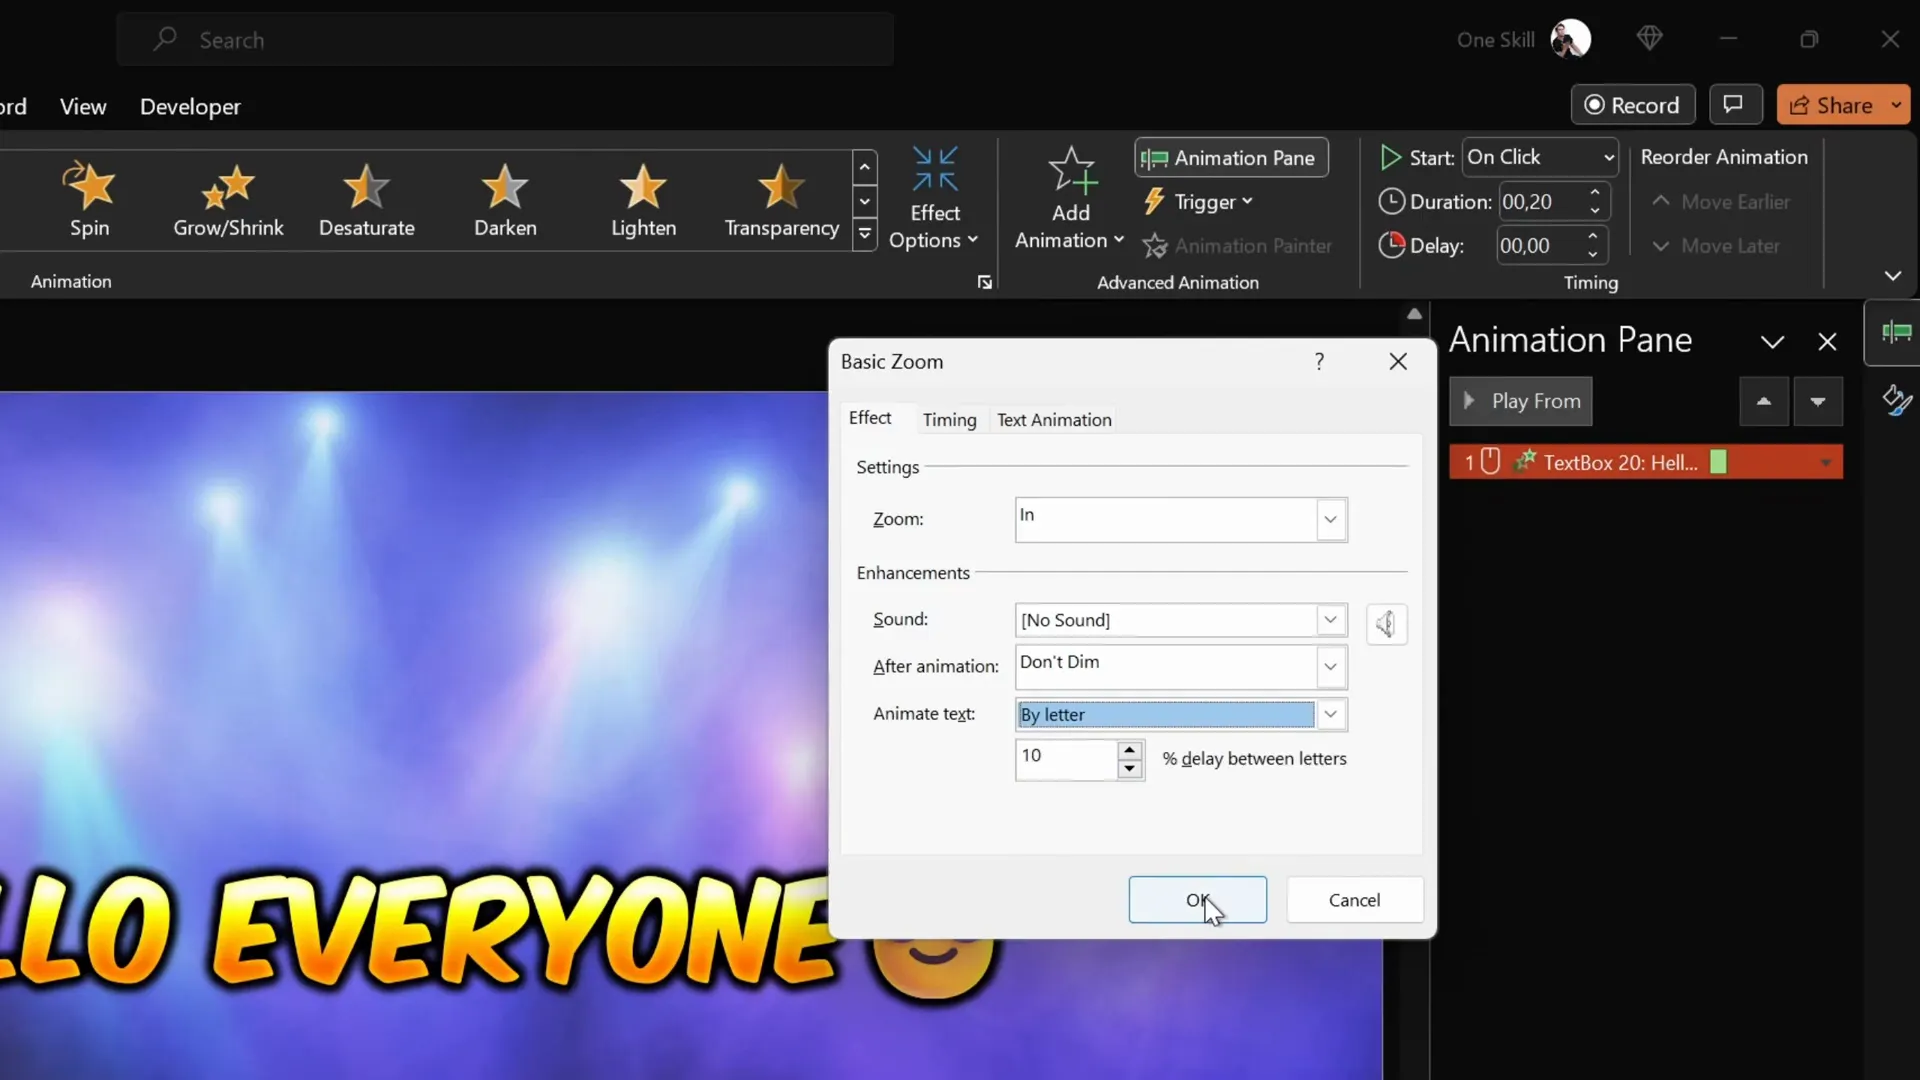
Adding a Basic Zoom Animation by Letter
To animate the subtitle text letter by letter with a zoom effect:
- Select the subtitle text box.
- Go to the Animations tab and click Add Animation.
- Scroll to More Entrance Effects and select Basic Zoom.
- Set the animation to start On Click and adjust the duration to 0.2 seconds.
- Open the animation options and change the Text Animation setting to By Letter.
- Set the Delay Between Letters to 10% for a smooth sequential appearance.
This creates a sleek effect where each letter zooms in one after another, perfectly timed with your presentation flow.
Enhancing with a Pop Effect
To add a playful pop effect where letters grow and shrink as they appear:
- Select your subtitle text box again.
- Add a Grow/Shrink animation.
- Set it to start With Previous to synchronize with the zoom animation.
- Adjust the duration to 0.4 seconds (twice the zoom animation duration).
- Open the animation settings and set the grow size to 130%.
- Devote half the duration to a smooth start and half to a smooth end (0.2 seconds each).
- Enable Auto Reverse so the letters pop out and then settle back to normal size.
When combined with the basic zoom, this effect makes the subtitle letters zoom in and pop individually, adding a lively and engaging visual.
Creating Multiple Subtitles and Managing Animation Timing
To build a sequence of subtitles appearing one after another in the same spot, follow these steps for efficiency and clarity:
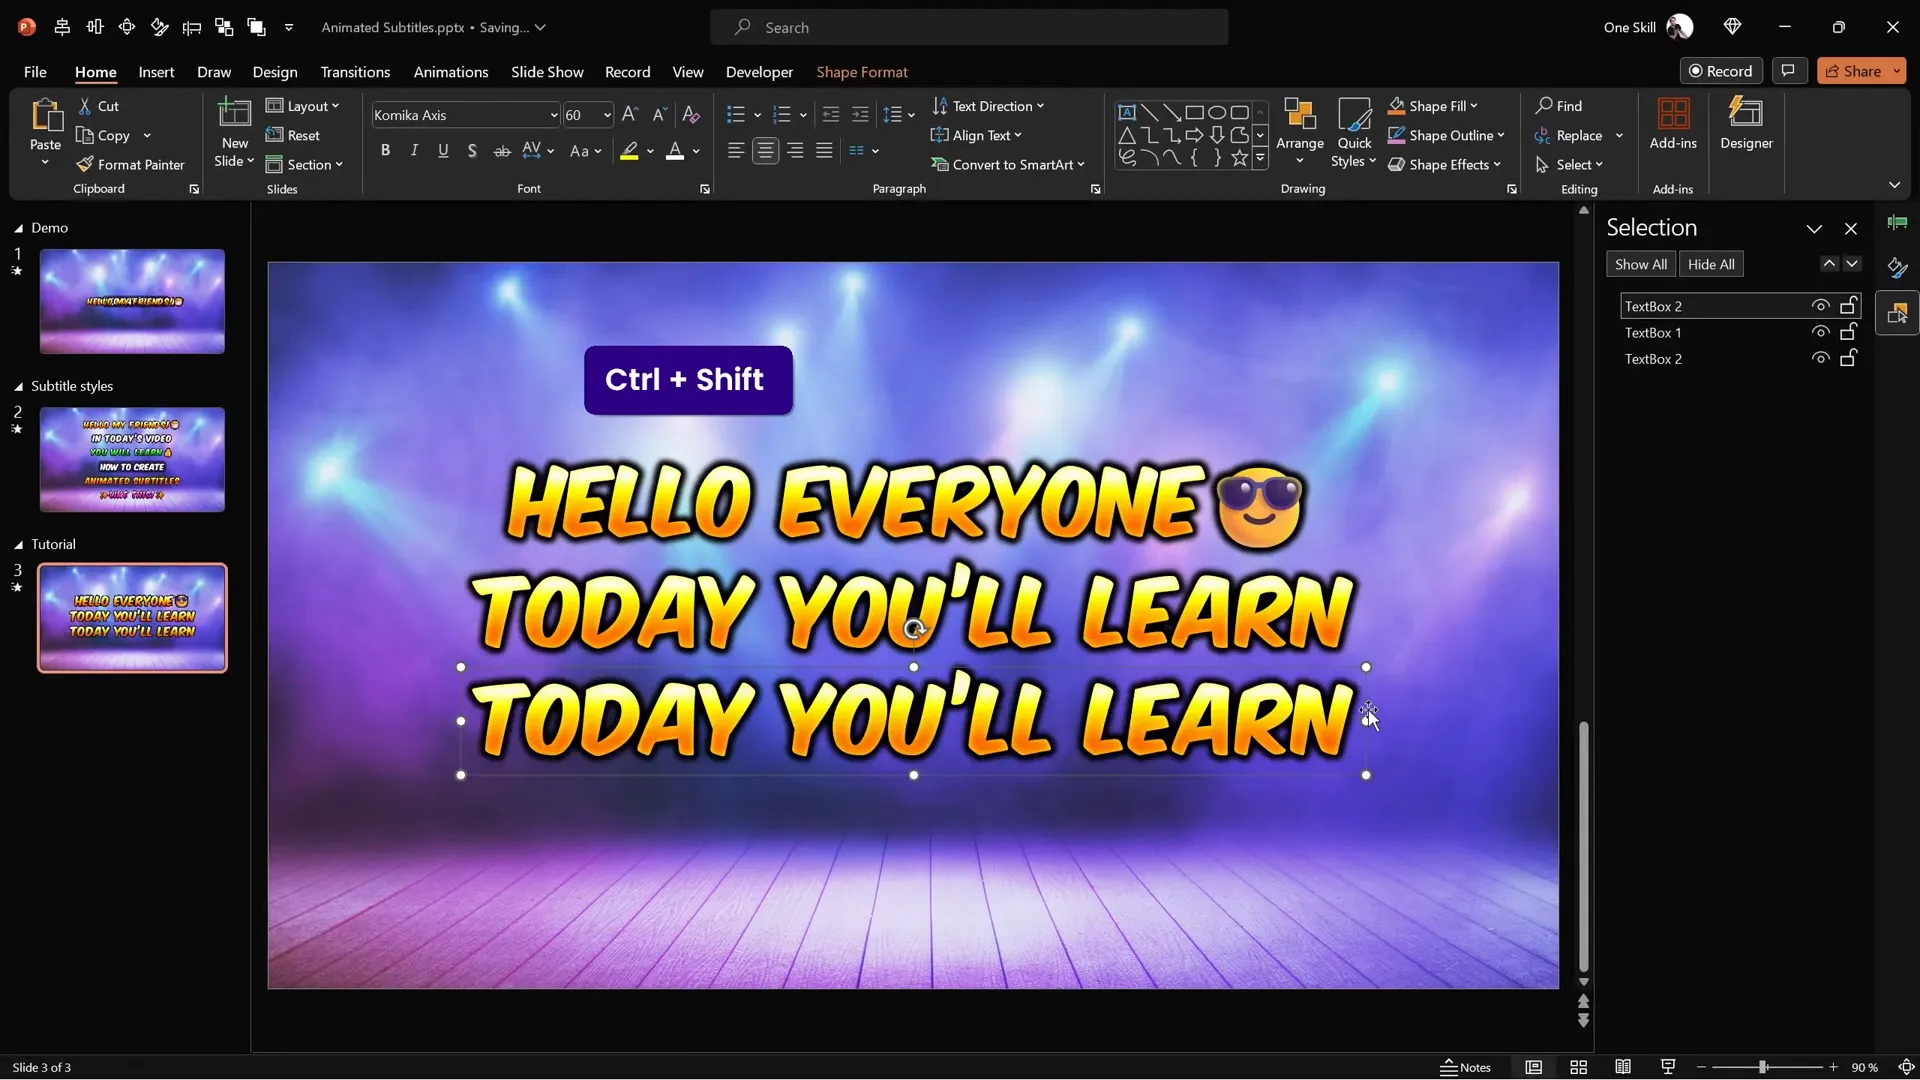
Duplicating and Renaming Text Boxes
- In the Selection Pane, rename your first subtitle text box to Text Box 1 for easy identification.
- Select the subtitle, hold Ctrl + Shift, and drag to duplicate it.
- Edit the duplicated text to your new subtitle, for example, Today you’ll learn, and rename it Text Box 2.
- Repeat for additional subtitles like Something awesome, naming as Text Box 3.
- Reorder the text boxes in the selection pane so that Text Box 1 is at the top and Text Box 3 is at the bottom for better management.
Aligning Subtitles to Appear in the Same Spot
Usually, subtitles should appear at the same location on the slide. To achieve this:
- Select all subtitle text boxes.
- Use the Align tool to center-align them horizontally and vertically.
Preview the animations to see all subtitles appearing in the same spot, but they may initially overlap.
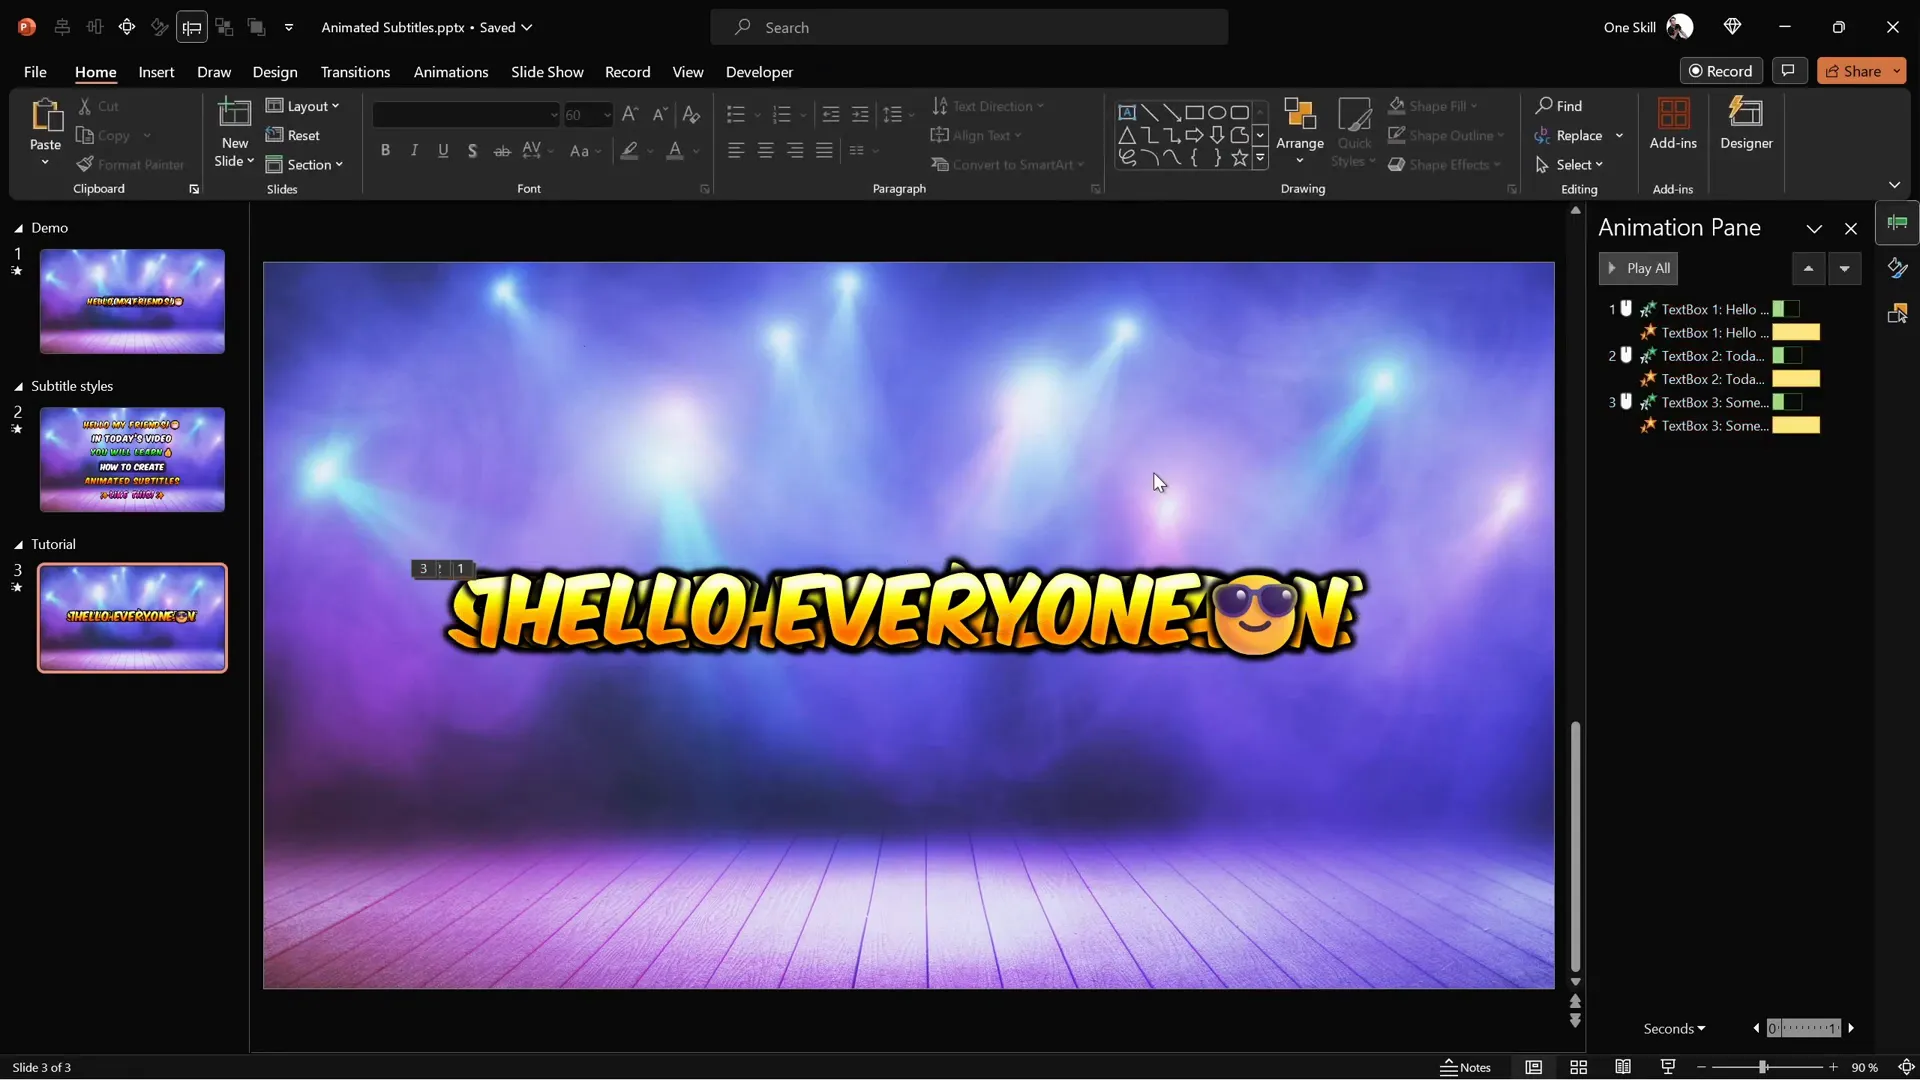
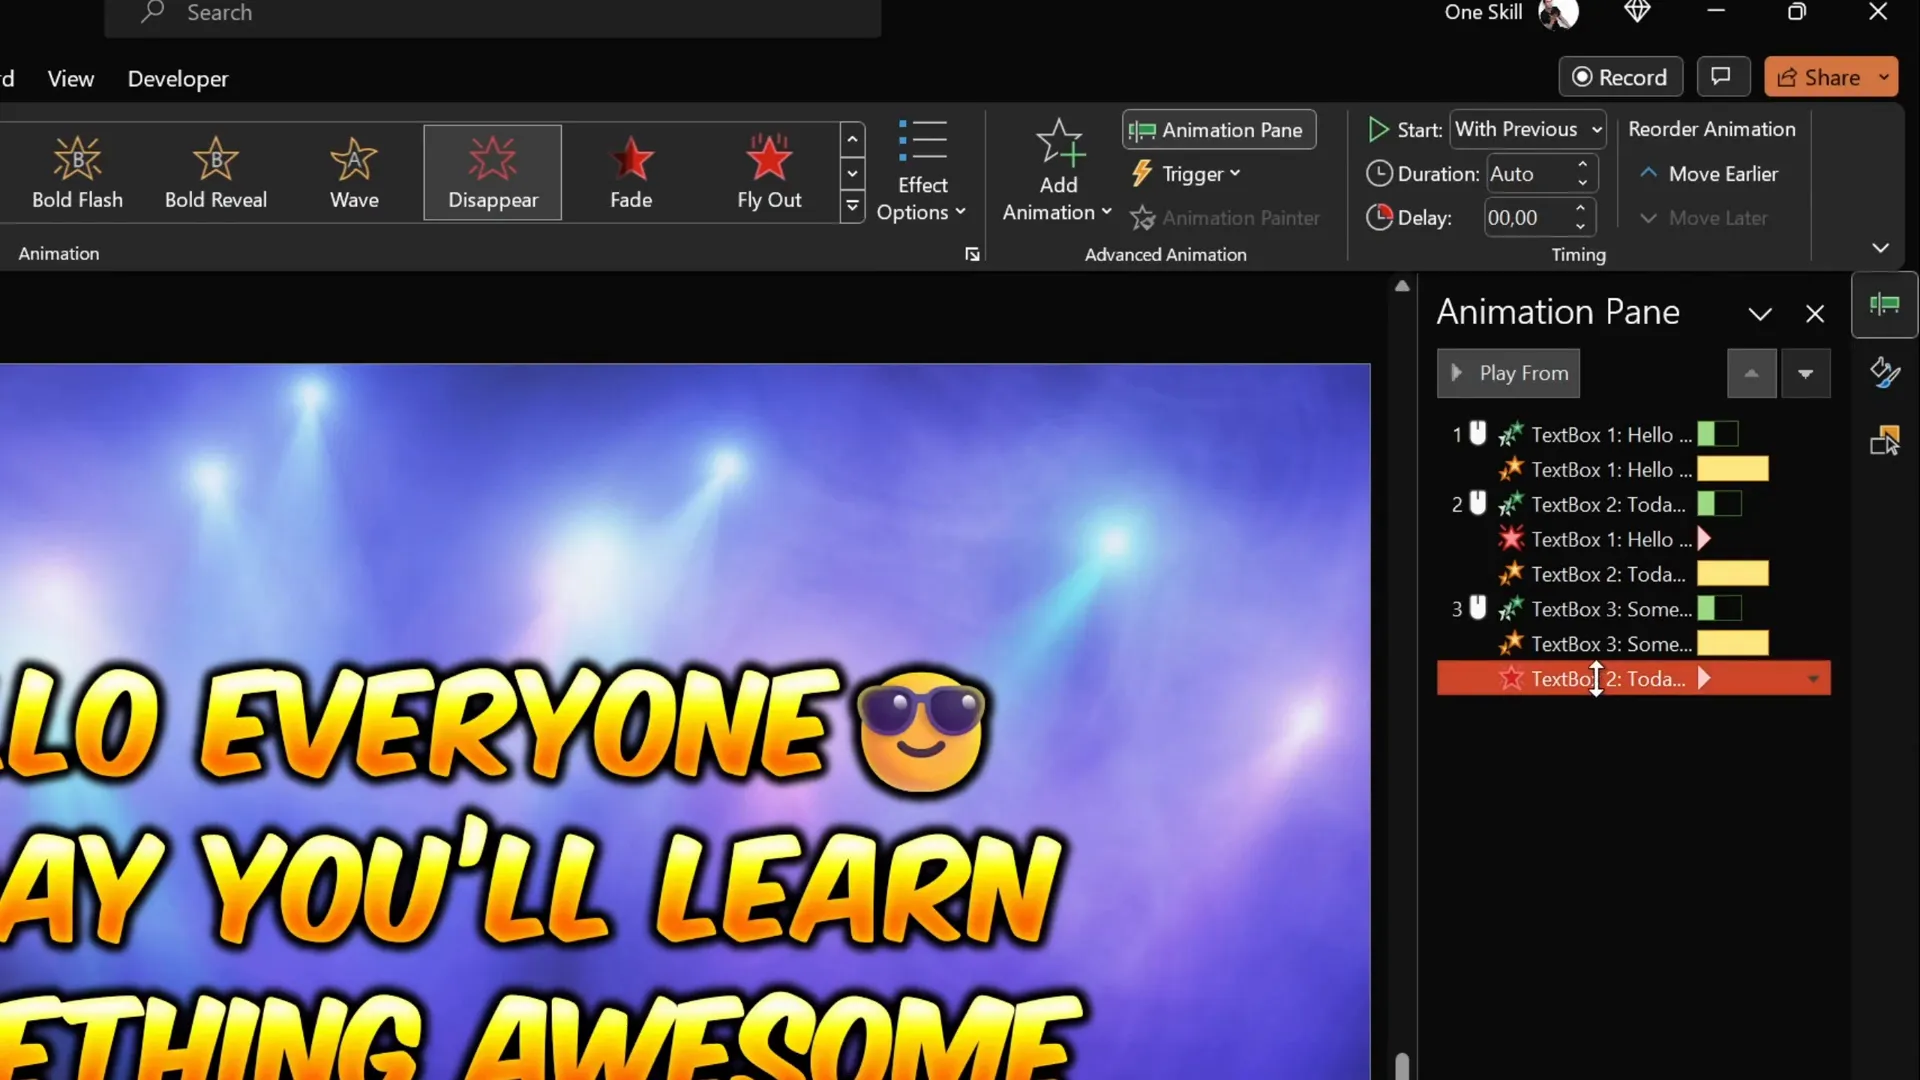
Adding Disappear Animations for Smooth Transitions
To prevent overlapping and ensure only one subtitle shows at a time, add disappear animations to the earlier subtitles as the next ones appear:
- Select the first and second subtitle text boxes.
- Go to Animations > Add Animation and select Disappear.
- Set both disappear animations to Start With Previous to synchronize them with the next subtitle’s entrance.
- In the animation pane, drag the disappear animation for Text Box 1 right below the entrance animation for Text Box 2.
- Similarly, place the disappear animation for Text Box 2 just below the entrance animation for Text Box 3.
Now, as each subtitle appears, the previous one smoothly disappears, creating a neat, professional sequence.
Final Preview and Additional Resources
When you review your slide in full screen, you’ll see:
- The background image continuously zooms in and out smoothly.
- Subtitles appear one by one with a zoom and pop effect.
- Each subtitle replaces the previous one cleanly without overlap.
This polished animation setup can dramatically enhance your presentations or videos, making your captions visually appealing and professional.
For those interested in more subtitle styles, including variations with icons and shadows, these resources are available on my Patreon page (link in the video description). Additionally, if you want to master looping animations like a pro, check out my other tutorials to expand your PowerPoint animation skills.
Frequently Asked Questions (FAQ)
Can I use any font for animated subtitles in PowerPoint?
Yes, you can use any font, but some fonts like Comica Axis work particularly well for animated subtitles due to their clear and bold style. Make sure the font is easy to read and suits your presentation’s tone.
Is it necessary to use the slide master for the background image?
While not mandatory, placing the background image on the slide master helps avoid accidental selection and editing of the image during slide work. It also keeps your animation pane cleaner and your workflow smoother.
How do I ensure the subtitle animations sync perfectly?
Use the Animation Pane to carefully order your entrance and disappear animations. Set disappear animations to start With Previous so they coincide exactly with the next subtitle’s entrance.
Can I add emojis to the subtitles?
Absolutely! You can insert emojis using the Windows emoji panel (Windows Key + .) or Mac emoji menu. Adjust the fill settings if the emoji inherits unwanted gradient effects.
Will this technique work in PowerPoint versions other than 365?
Most features used here, including animation pane and gradient fills, are available in recent PowerPoint versions. However, the stock image feature and some animations might vary. Always check compatibility with your version.
How do I make the subtitle animation smoother?
Adjust the Smooth Start and Smooth End times in the animation settings to soften the beginning and end of each animation. Also, use Auto Reverse for grow/shrink animations to create natural zooming effects.
Conclusion
Creating animated subtitles in PowerPoint is a powerful way to make your presentations and videos stand out. By combining a subtle animated background with vibrant, glowing, and smoothly animated text, you can achieve professional-quality captions that engage and impress your audience.
This tutorial has provided you with a step-by-step process to:
- Choose and animate a background image.
- Create and style subtitles with shadows, glows, and gradient fills.
- Add dynamic zoom and pop animations letter by letter.
- Manage multiple subtitles with entrance and disappear animations.
- Optimize your workflow by leveraging the slide master.
With these skills, you can now elevate your PowerPoint presentations and video captions to a whole new level, all without leaving the familiar PowerPoint environment.
Happy animating!
Check out the full video: BEST Way to Create Animated Captions in PowerPoint! ✨ Tutorial


