
Creating stunning presentations that captivate your audience is an art form—and today, I’m excited to share with you exactly how I crafted a cinematic PowerPoint presentation inspired by The Hobbit’s Middle Earth. This project was not only super fun but surprisingly straightforward, leveraging some powerful PowerPoint features like the Morph and Zoom transitions to bring the visuals to life.
As a professional presentation designer and content creator, time management and organization are critical to my workflow. I’ll also reveal a productivity hack using monday.com that has transformed how I handle projects, helping me save time and stay on top of deadlines. Plus, I’m providing you with free downloadable assets and slides so you can follow along and create your own cinematic presentation.
Whether you’re a beginner or experienced in PowerPoint, this comprehensive guide will walk you through every step—from image layering to advanced animation effects—so you can elevate your presentations and impress your audience. Let’s dive right in!
Table of Contents
- Preparing Your Visual Assets: Splitting Images Into Layers
- Boosting Productivity with monday.com Automations
- Building the Slide: Step-by-Step PowerPoint Assembly
- Animating with Morph Transitions: Creating Cinematic Effects
- Adding Interactive Elements: Maps and Zoom Transitions
- Final Thoughts and Tips for Your Cinematic Presentation
- Frequently Asked Questions (FAQ)
Preparing Your Visual Assets: Splitting Images Into Layers
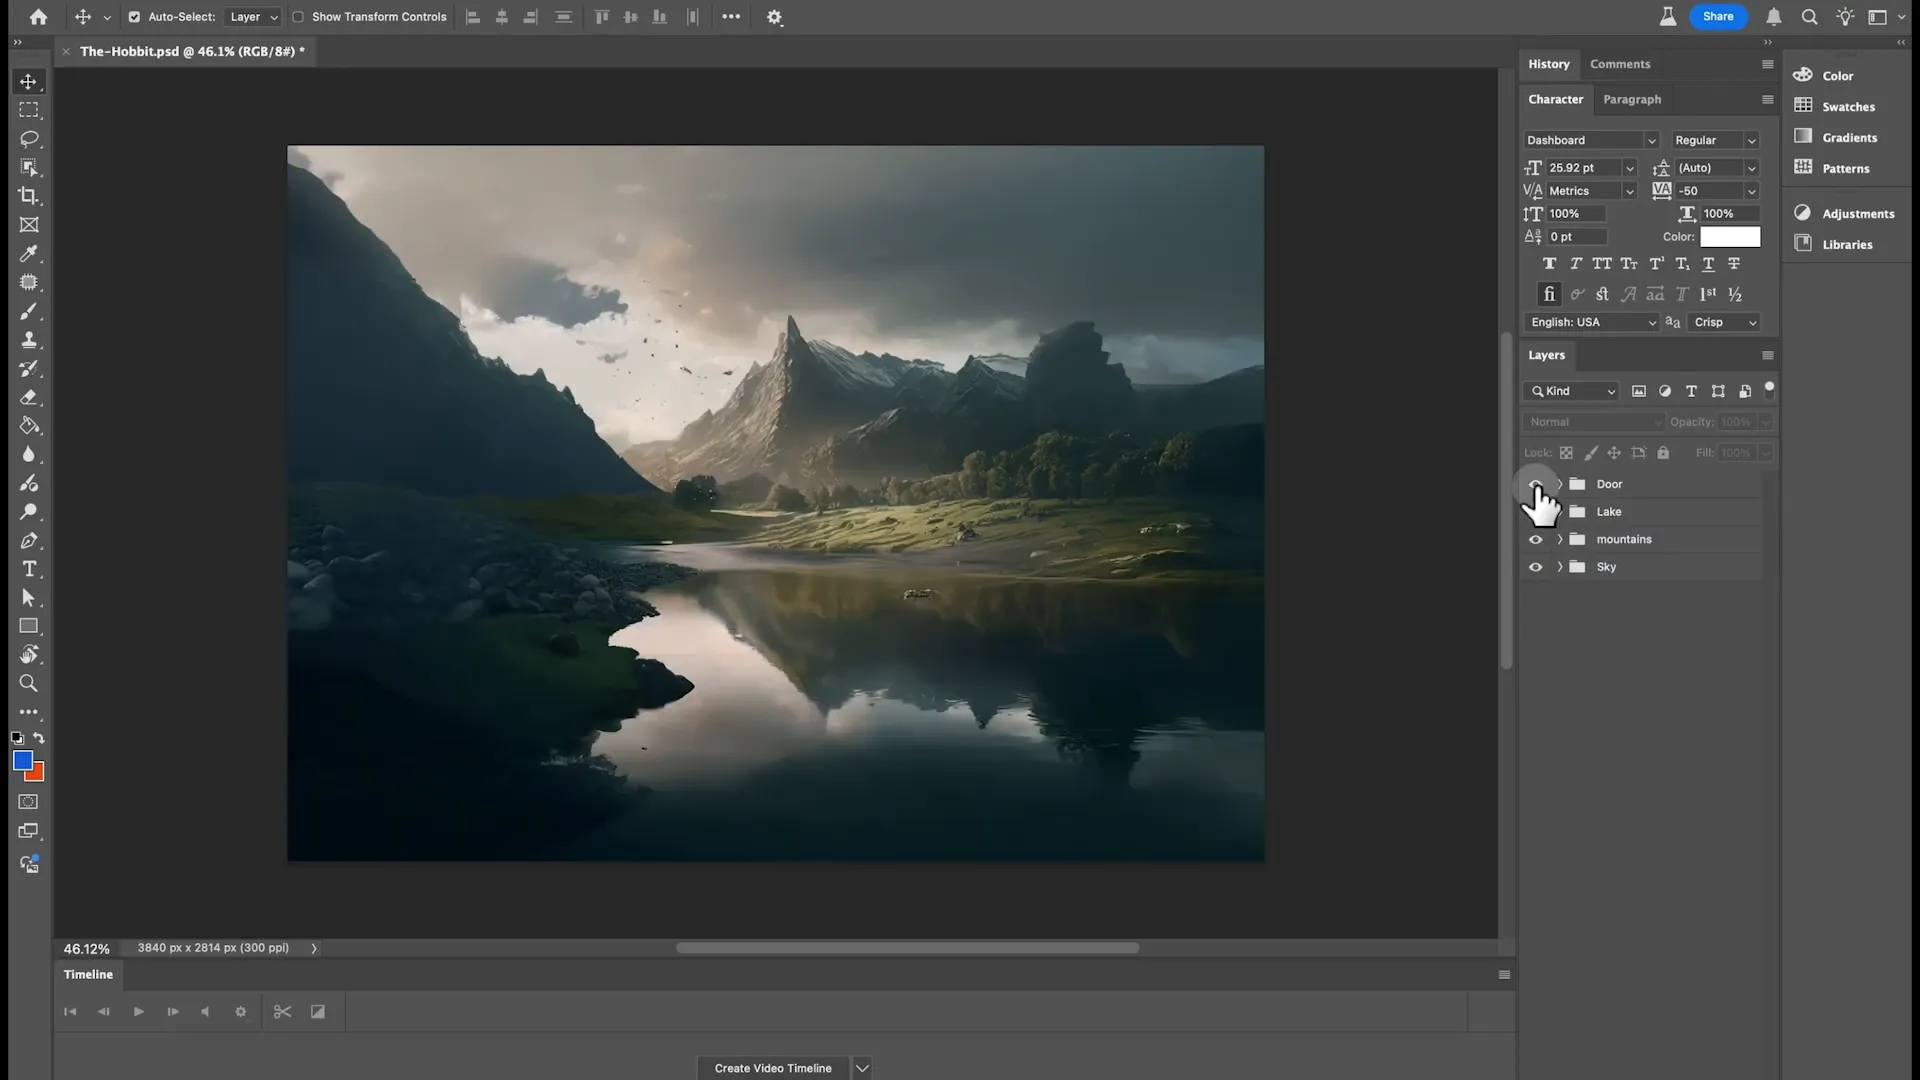
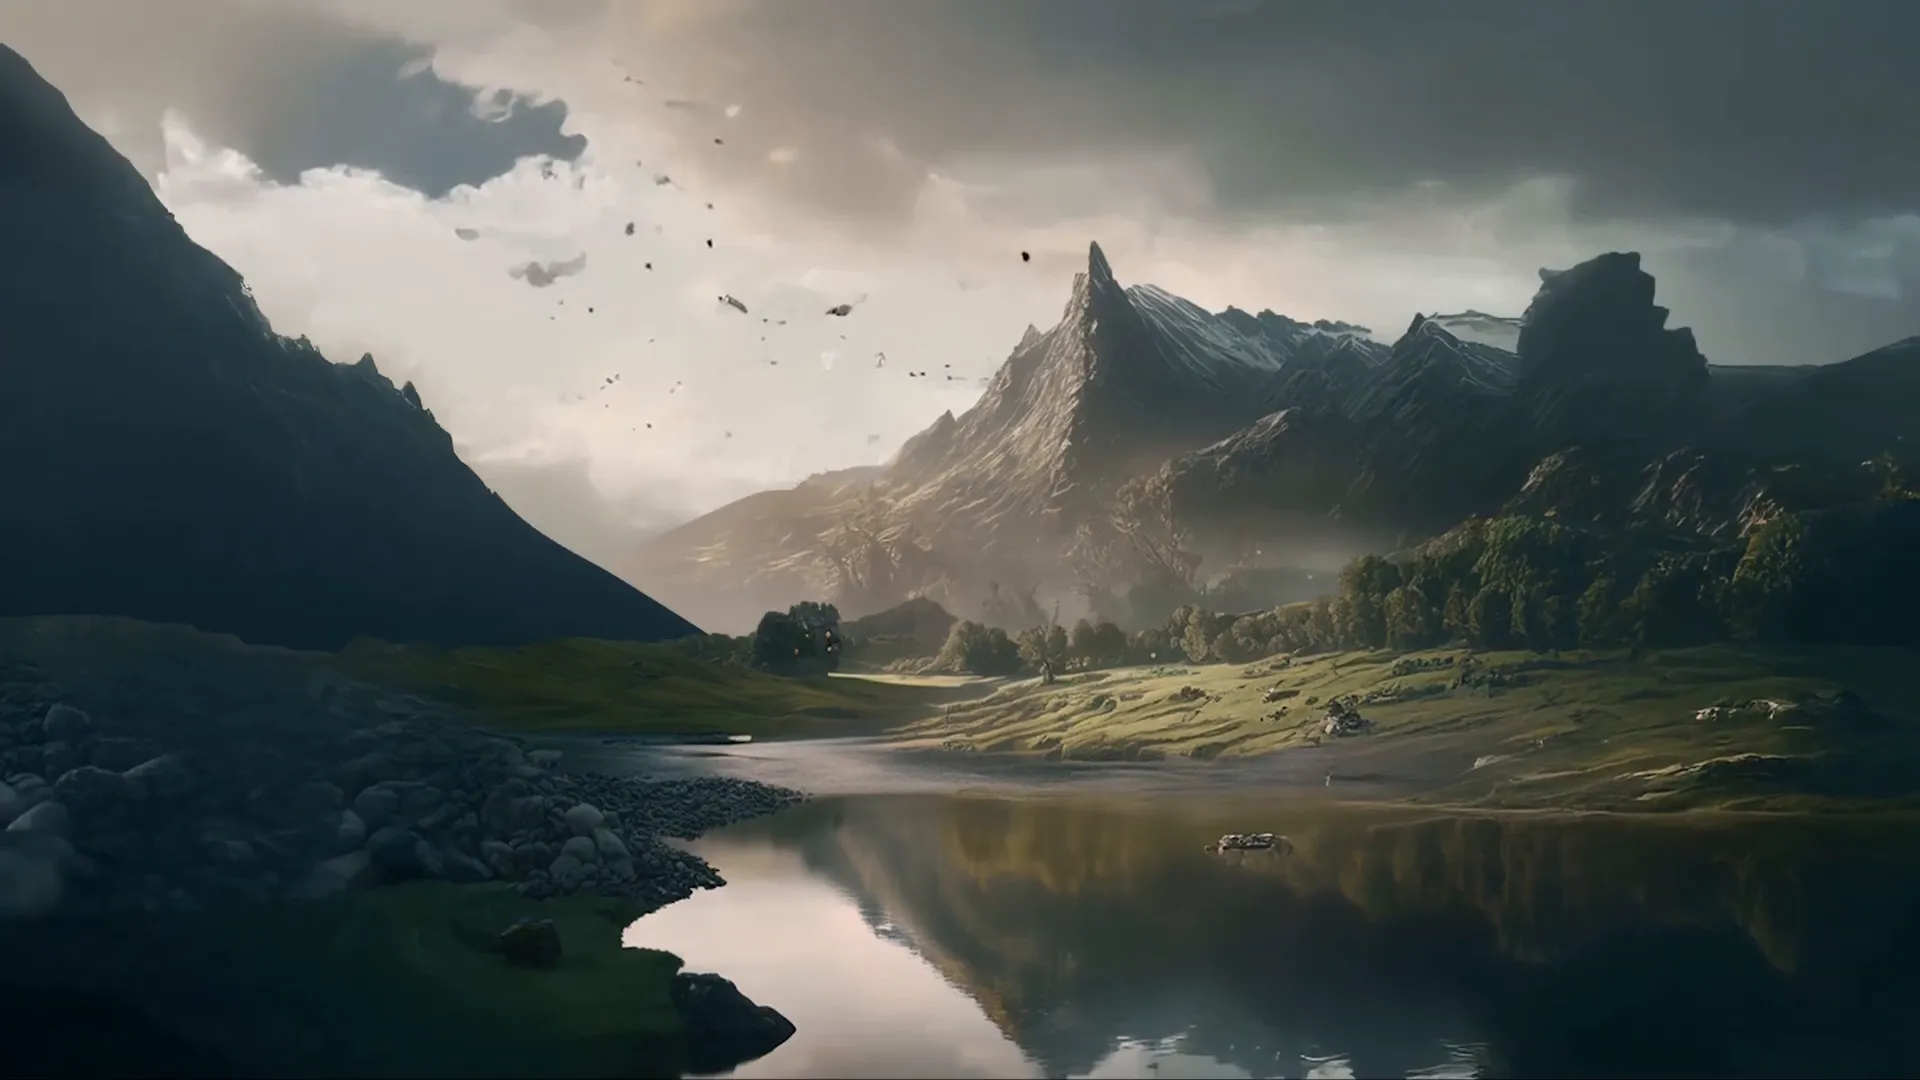
The first and most crucial step in creating a cinematic presentation is preparing your visual assets properly. For this project, I started by splitting a single image into multiple layers—each representing different elements such as the lake, mountains, sky, and a mysterious cave or hole.
This layering technique allows you to manipulate each component independently in PowerPoint, opening the door to dynamic animations and transitions that make your slides pop. If you’re unfamiliar with how to split images into layers, I’ve previously covered this in detail in my Napoleon presentation tutorial, which I highly recommend checking out.
Since this part can be quite time-consuming, I’ve done the heavy lifting for you by compiling all the necessary assets into a downloadable folder. You can grab these for free via the link in the description box, making it easier to follow along and create your own cinematic masterpiece without the hassle of image editing.
Why Layering Matters
Layering images is not just about aesthetics—it’s about control. By isolating elements like the sky, mountains, and lake into separate layers, you can animate them independently, apply effects selectively, and create a sense of depth and movement that draws viewers in.
For example, having the lake on one layer allows you to animate it sliding in or fading at a different pace from the mountains or sky. This separation is key to achieving the cinematic quality that turns a simple slide into an immersive experience.
Boosting Productivity with monday.com Automations
Before jumping into PowerPoint, I want to share a powerful time-saving tip that has revolutionized how I manage my presentation projects. As someone who juggles multiple deadlines, staying organized is essential, and monday.com has become my go-to project management tool.
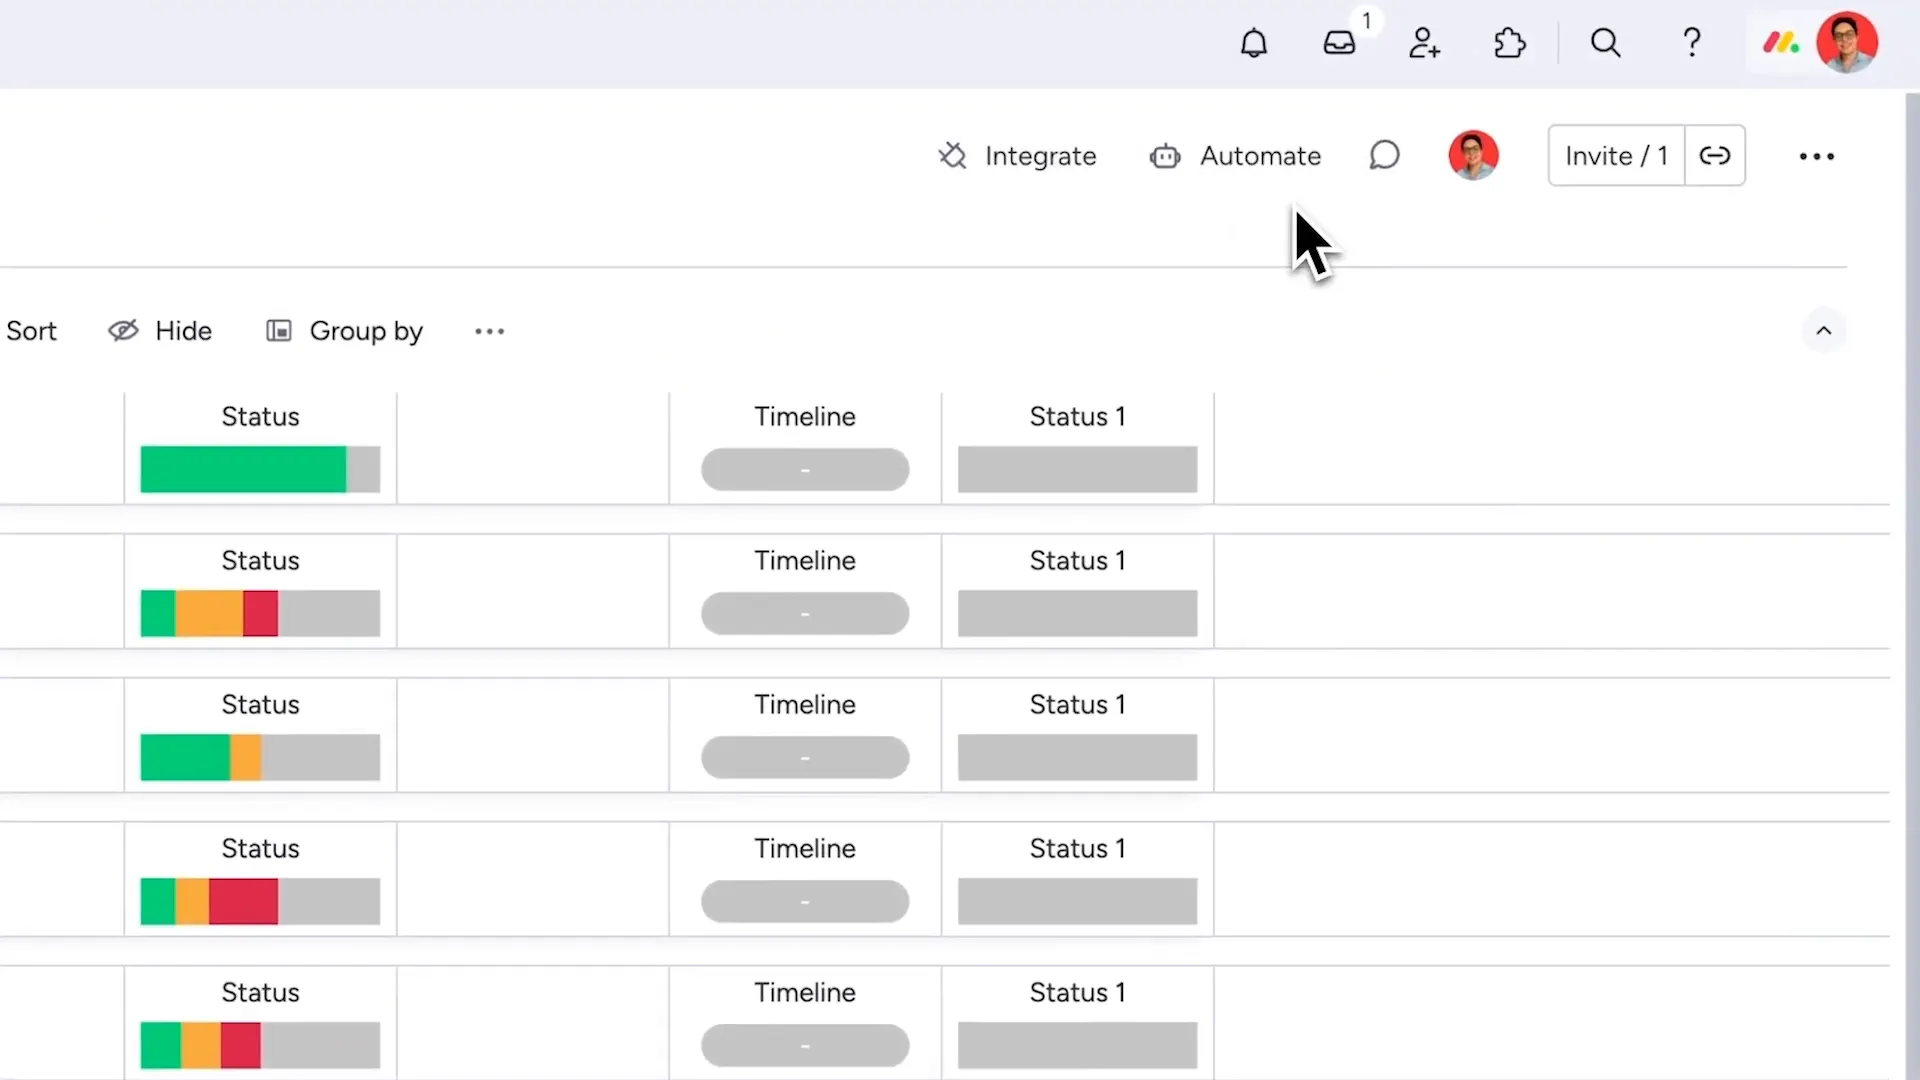
On my main monday.com board, I list all my projects along with their current statuses—whether they’re in progress, completed, or on hold. However, manually tracking due dates and archiving finished projects can be tedious.
That’s where automations come in. By setting up custom automations, I’ve streamlined my workflow, so the platform handles reminders and archival tasks automatically. Here’s how I set up two key automations:
- Deadline Reminder Automation: This triggers a notification three days before a project’s due date—but only if the project status is “working on it.” This way, I get timely alerts about projects that need my attention without unnecessary noise.
- Auto-Archive Automation: When a project’s status changes to “done,” it automatically gets archived, keeping my project board clean and focused on active work.
Setting these up is straightforward via monday.com’s automation center, where you can create custom triggers and actions or use predefined templates. Plus, you can integrate with apps like Gmail or Slack to send emails or messages based on project status changes, making the possibilities endless.
If you want to explore monday.com yourself, I have an exclusive free trial link in the description. It’s a game-changer for anyone managing multiple projects.
Building the Slide: Step-by-Step PowerPoint Assembly
With our assets ready and productivity tools in place, let’s get hands-on with PowerPoint. The goal is to create a slide that layers images and text to produce a cinematic effect.
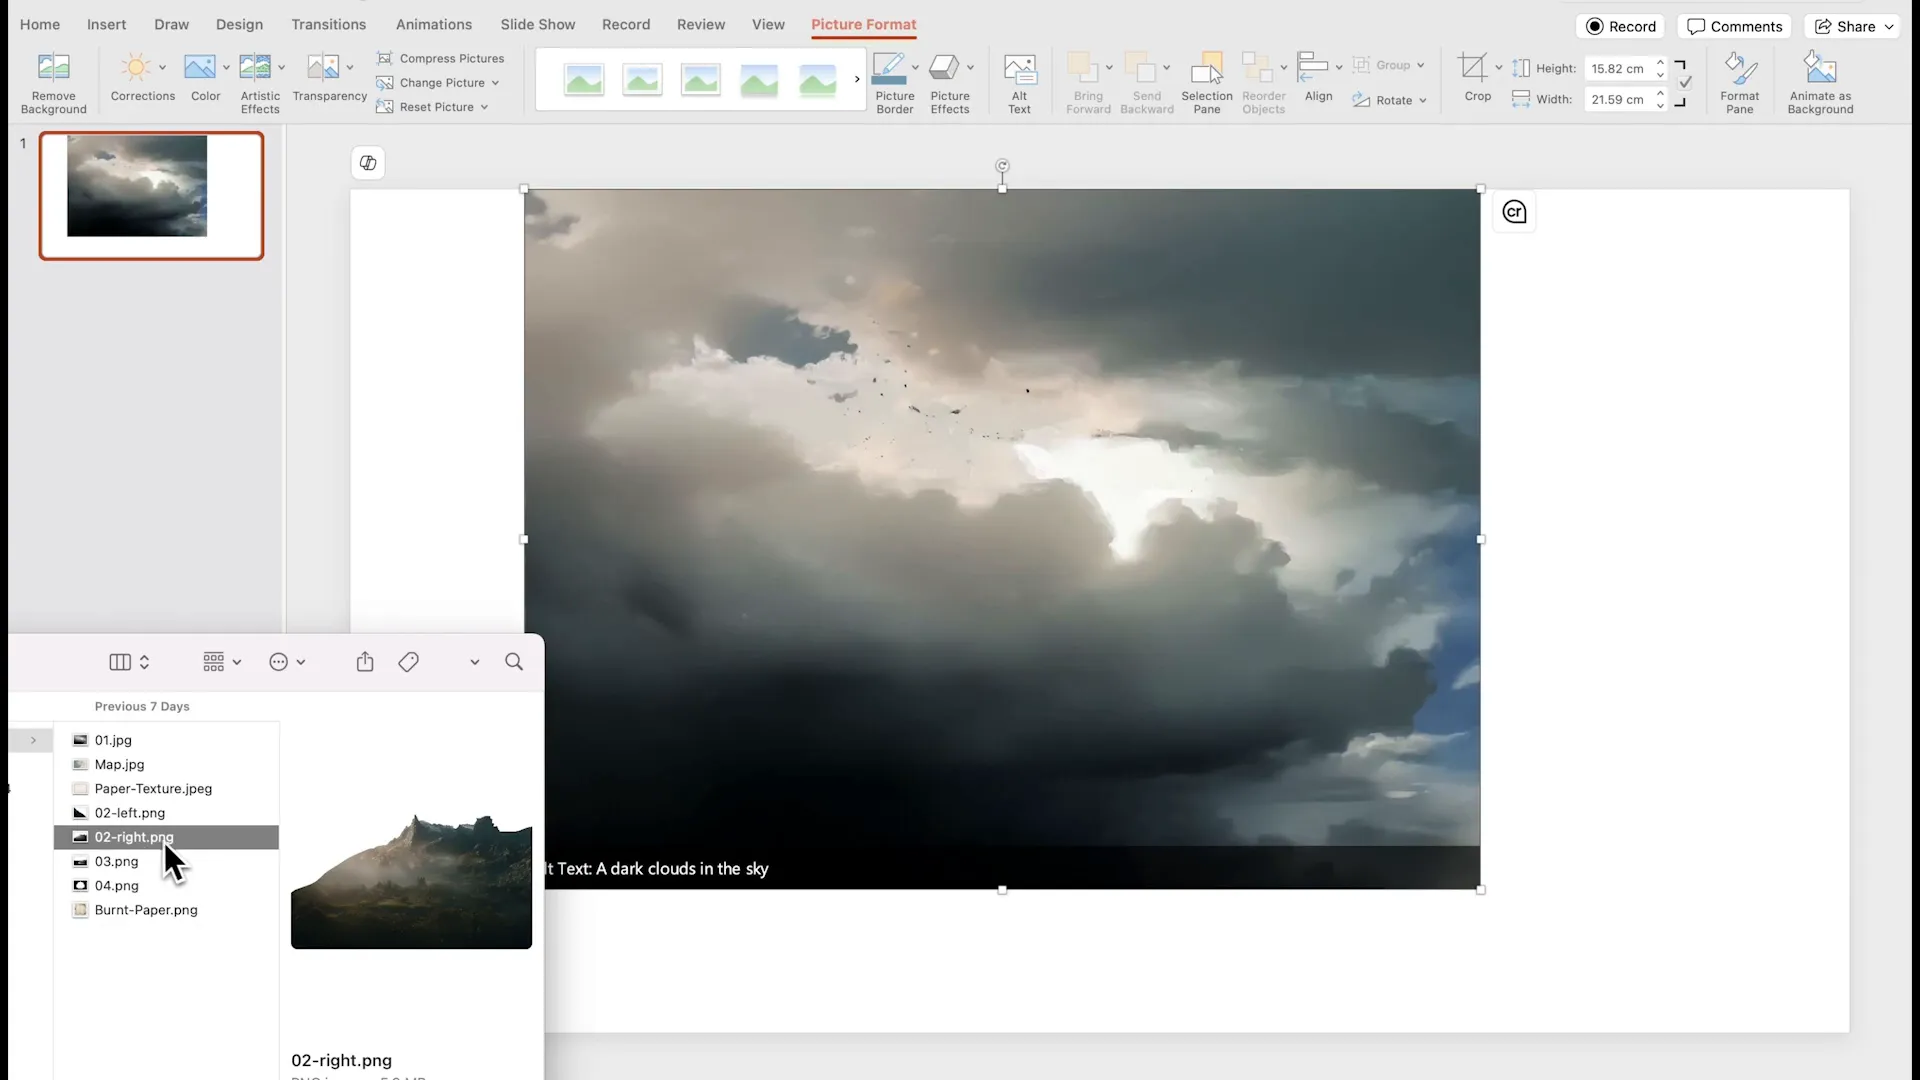
Step 1: Adding Background and Foreground Images
Start by inserting the image of the sky as your base layer. Make sure it fills the entire slide area for a seamless backdrop. Next, add the mountain images—one on the right and one on the left. To keep your workspace organized, temporarily move the mountains outside the slide area while adjusting the sky.
Once the sky is set, bring the mountains back into position on either side of the slide. Use the crop tool under the Picture Format tab to trim any excess and align everything perfectly within the slide boundaries.
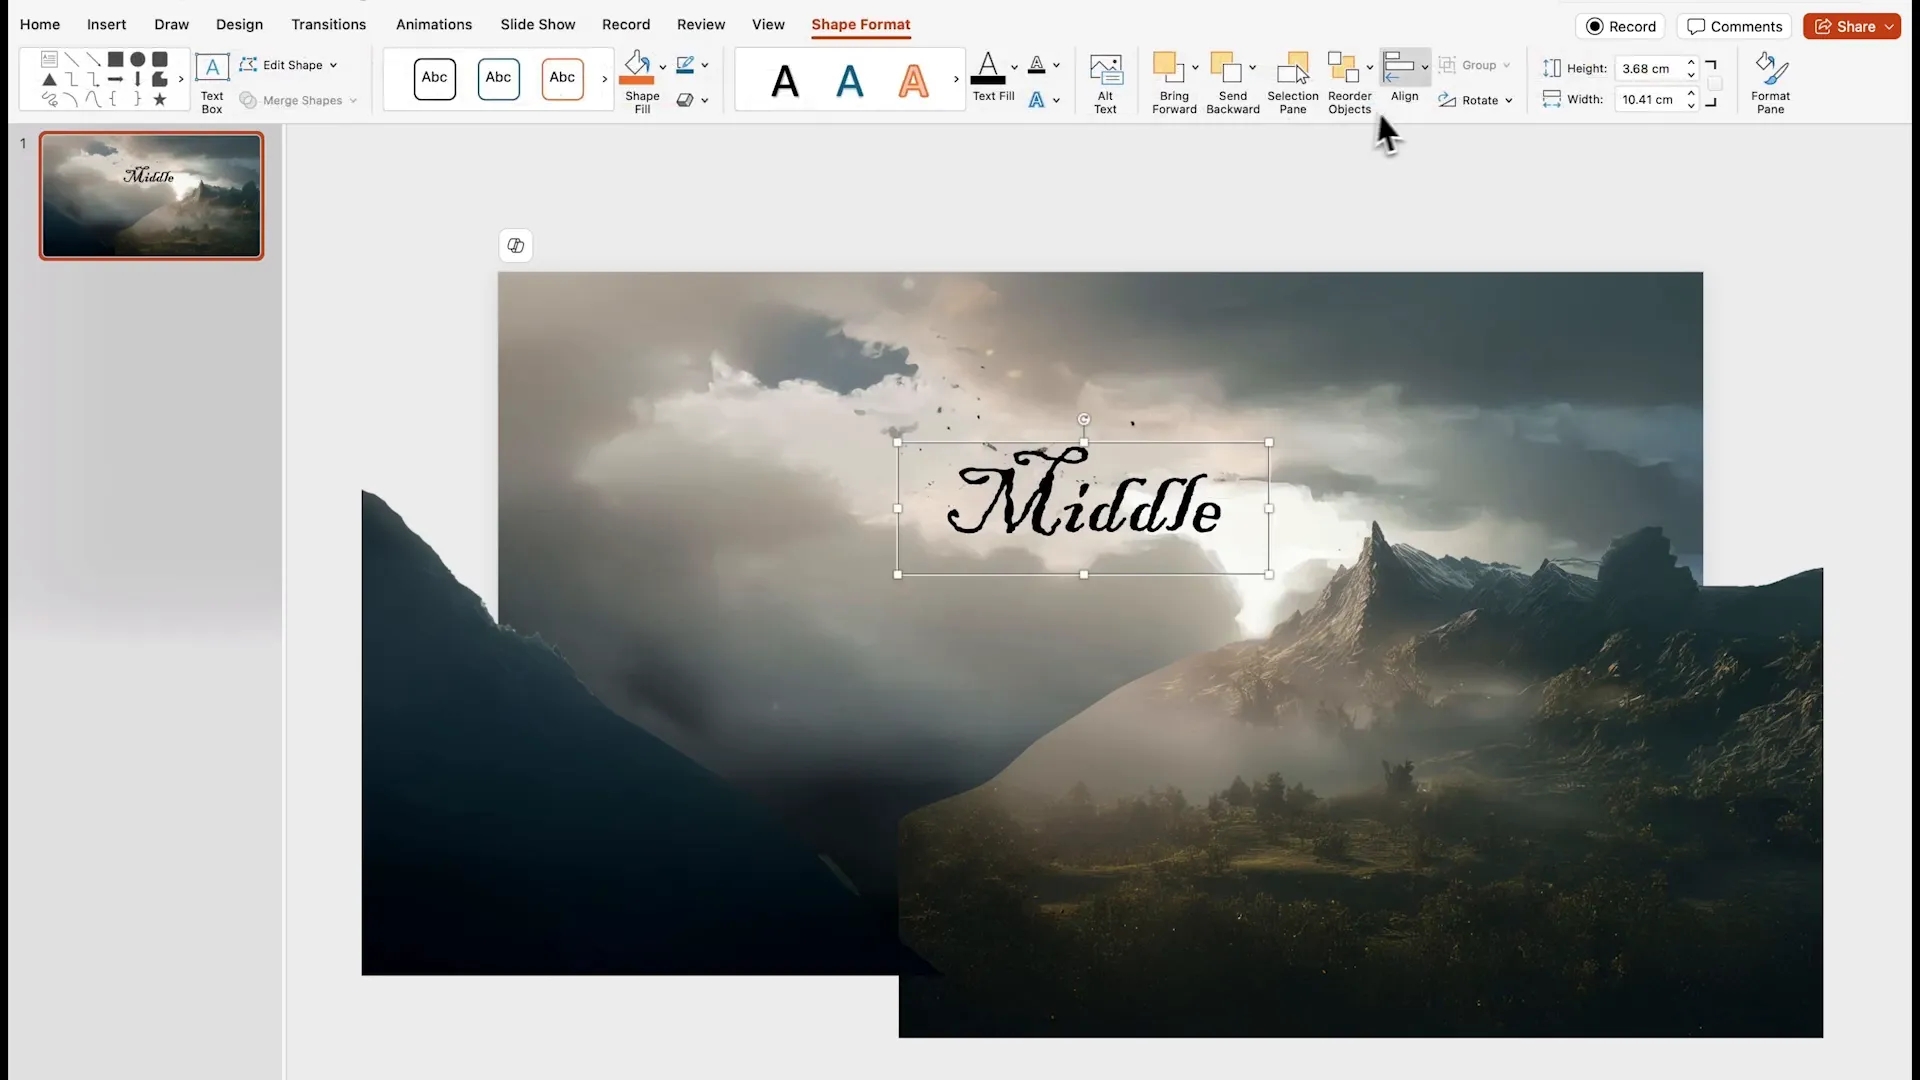
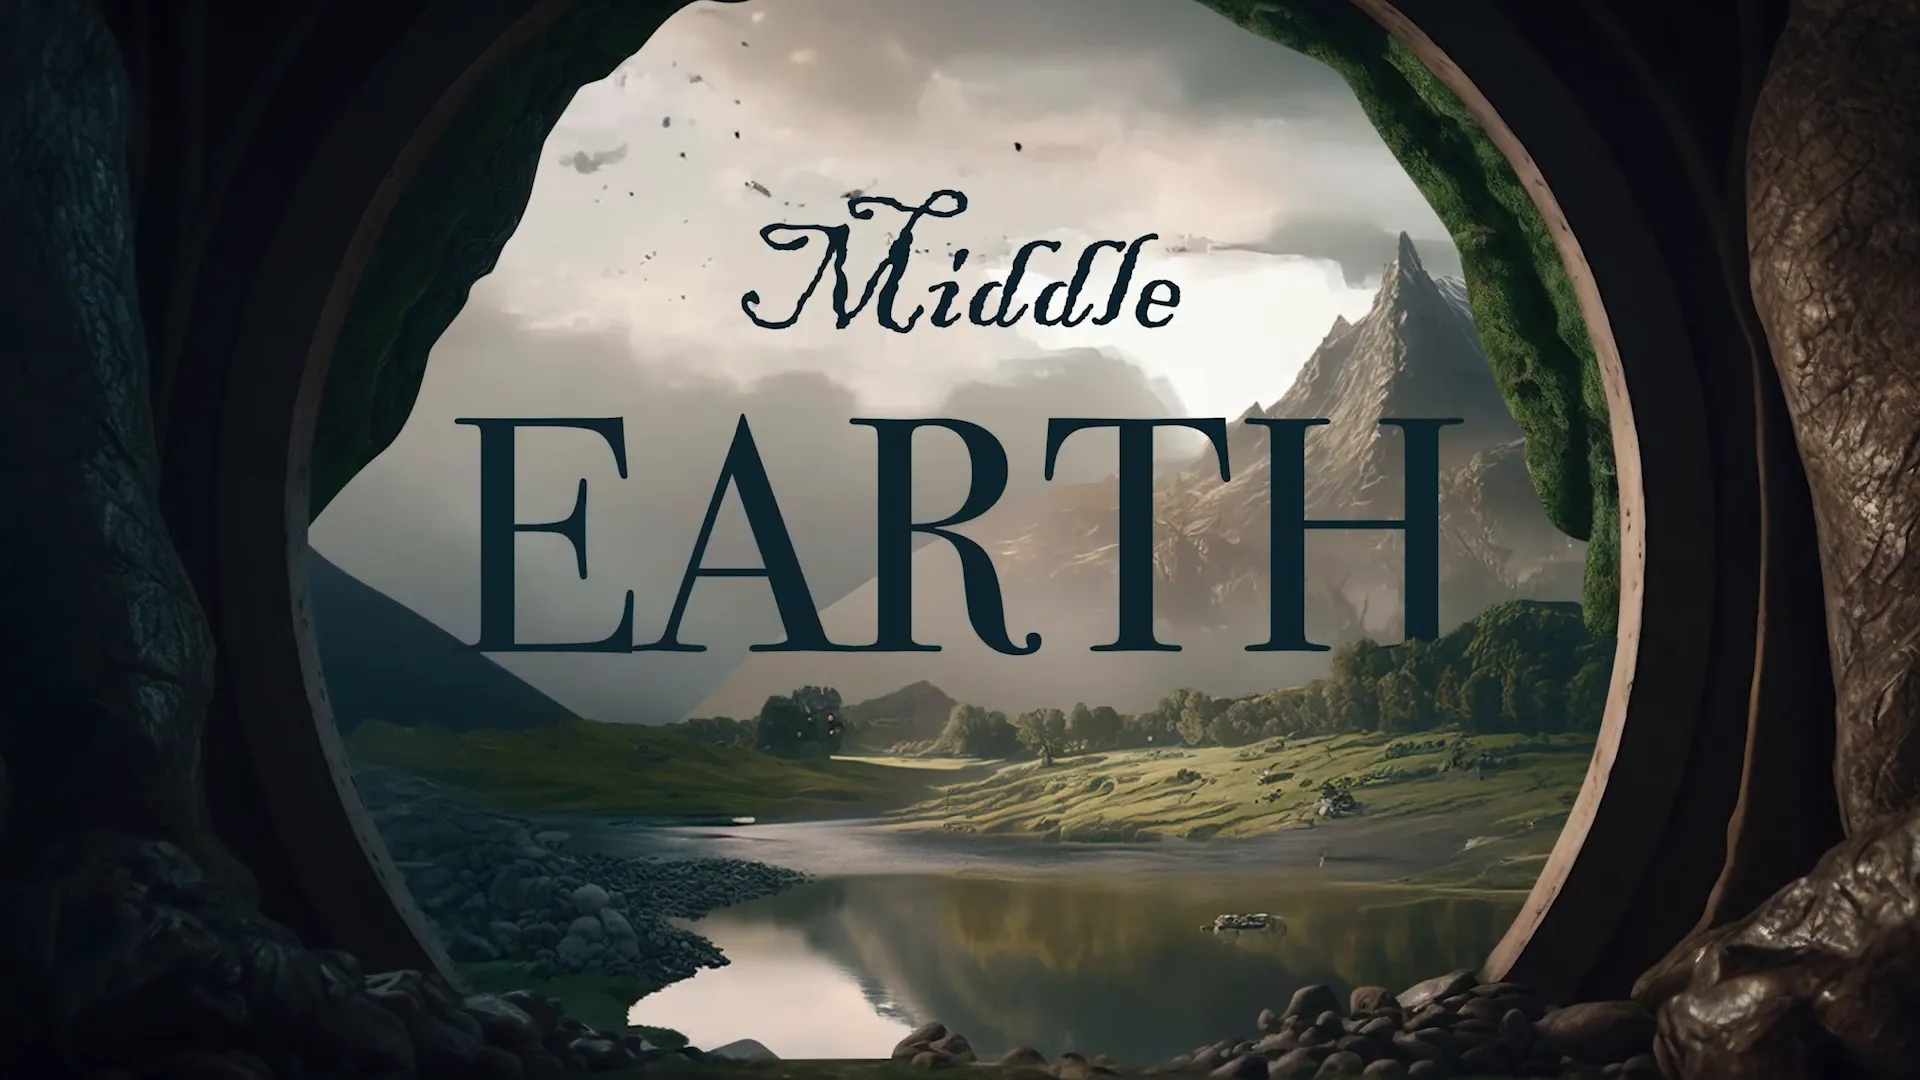
Step 2: Incorporating Text with Style
Now it’s time to add your title text. Click on the text box and place it in the middle of the slide. For the first word, I used the font Blackadder ITC, which adds a unique, stylized flair. Make sure the text is center-aligned and increase the font size to make it prominent.
For the second word of the title, duplicate the first text box and change the font to Bodoni 72, a classic serif font that contrasts nicely with the first. Position this text at the bottom of the slide, ideally on a gray area for better readability.
This combination of fonts adds personality and cinematic appeal to the slide while maintaining clarity.
Step 3: Adding Additional Layers
Next, bring in the image of the lake and resize it to cover the bottom half of the slide. This creates a natural foreground element that grounds the composition.
Finally, add the cut-out image of the cave or hole. This mysterious element fills the slide and adds depth. Align it to the middle for balance. This layer will become essential for the cinematic “fly-through” effect later.

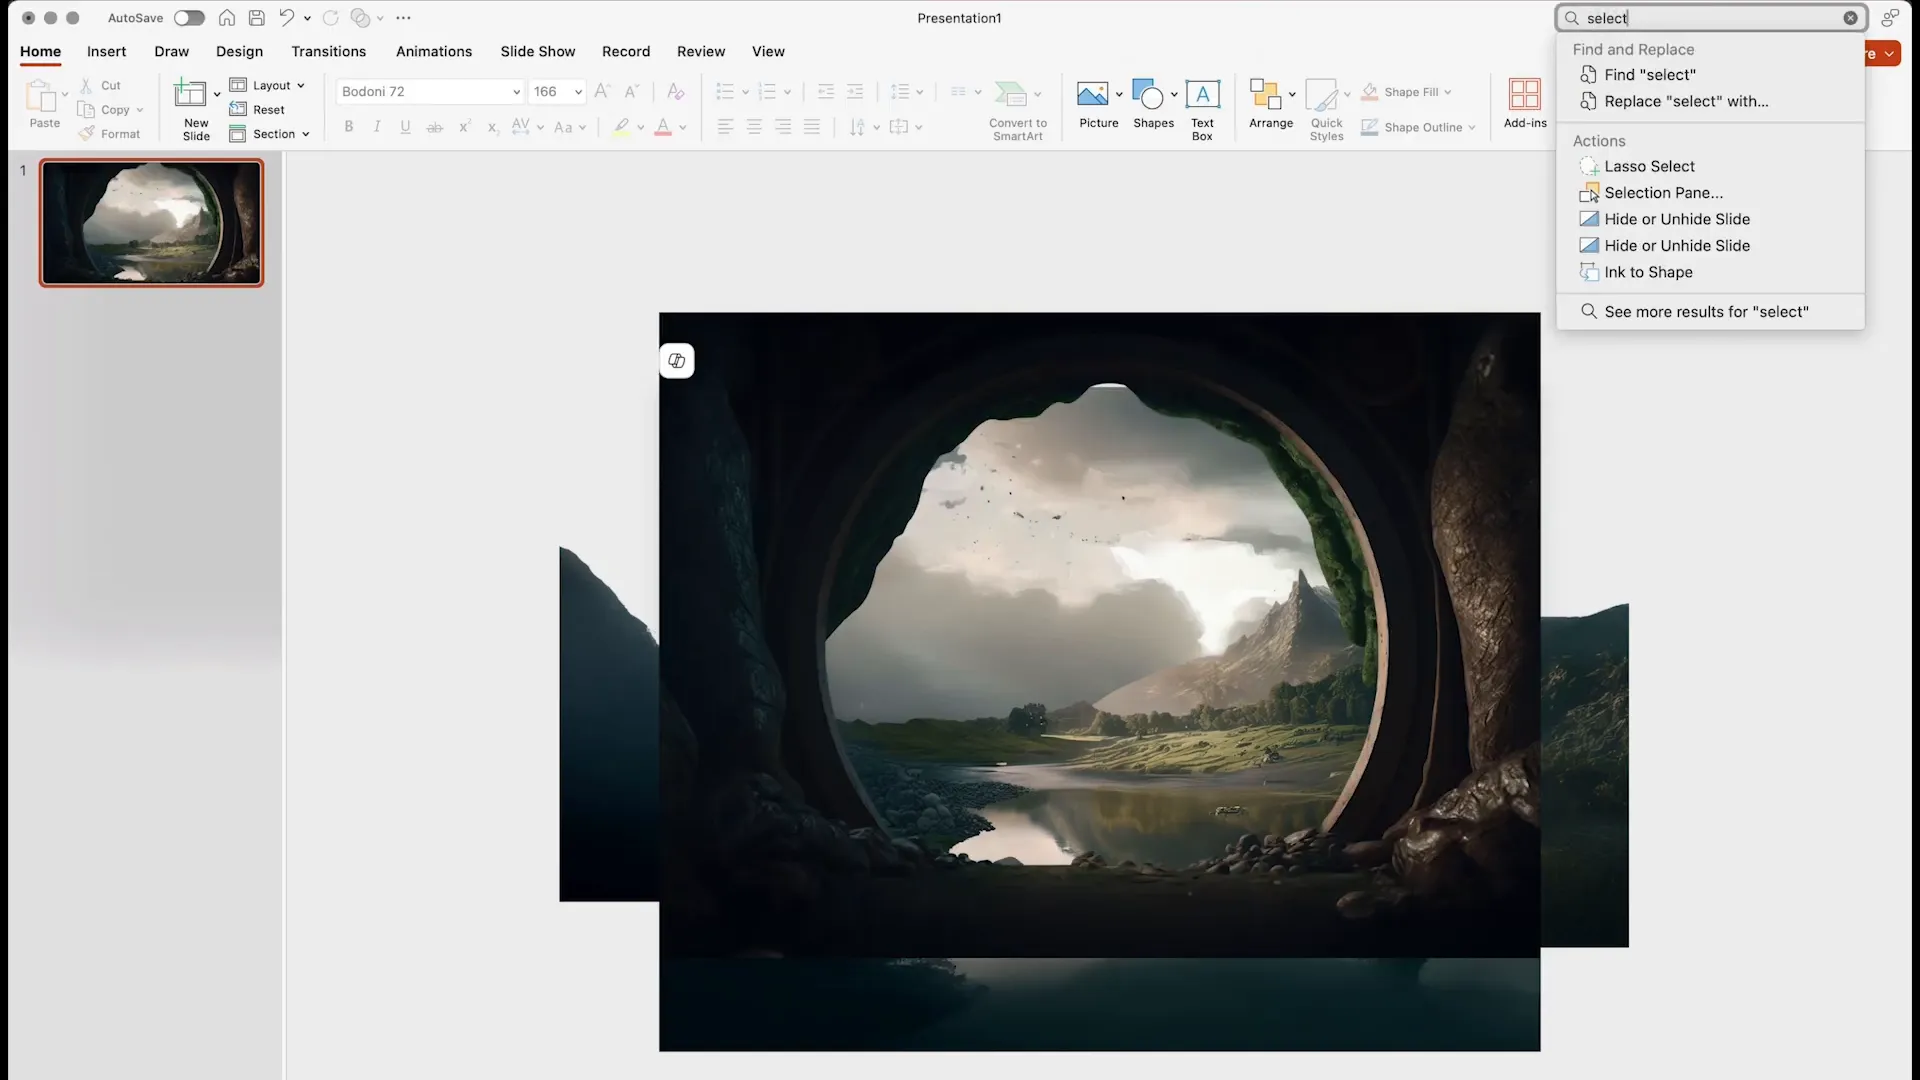
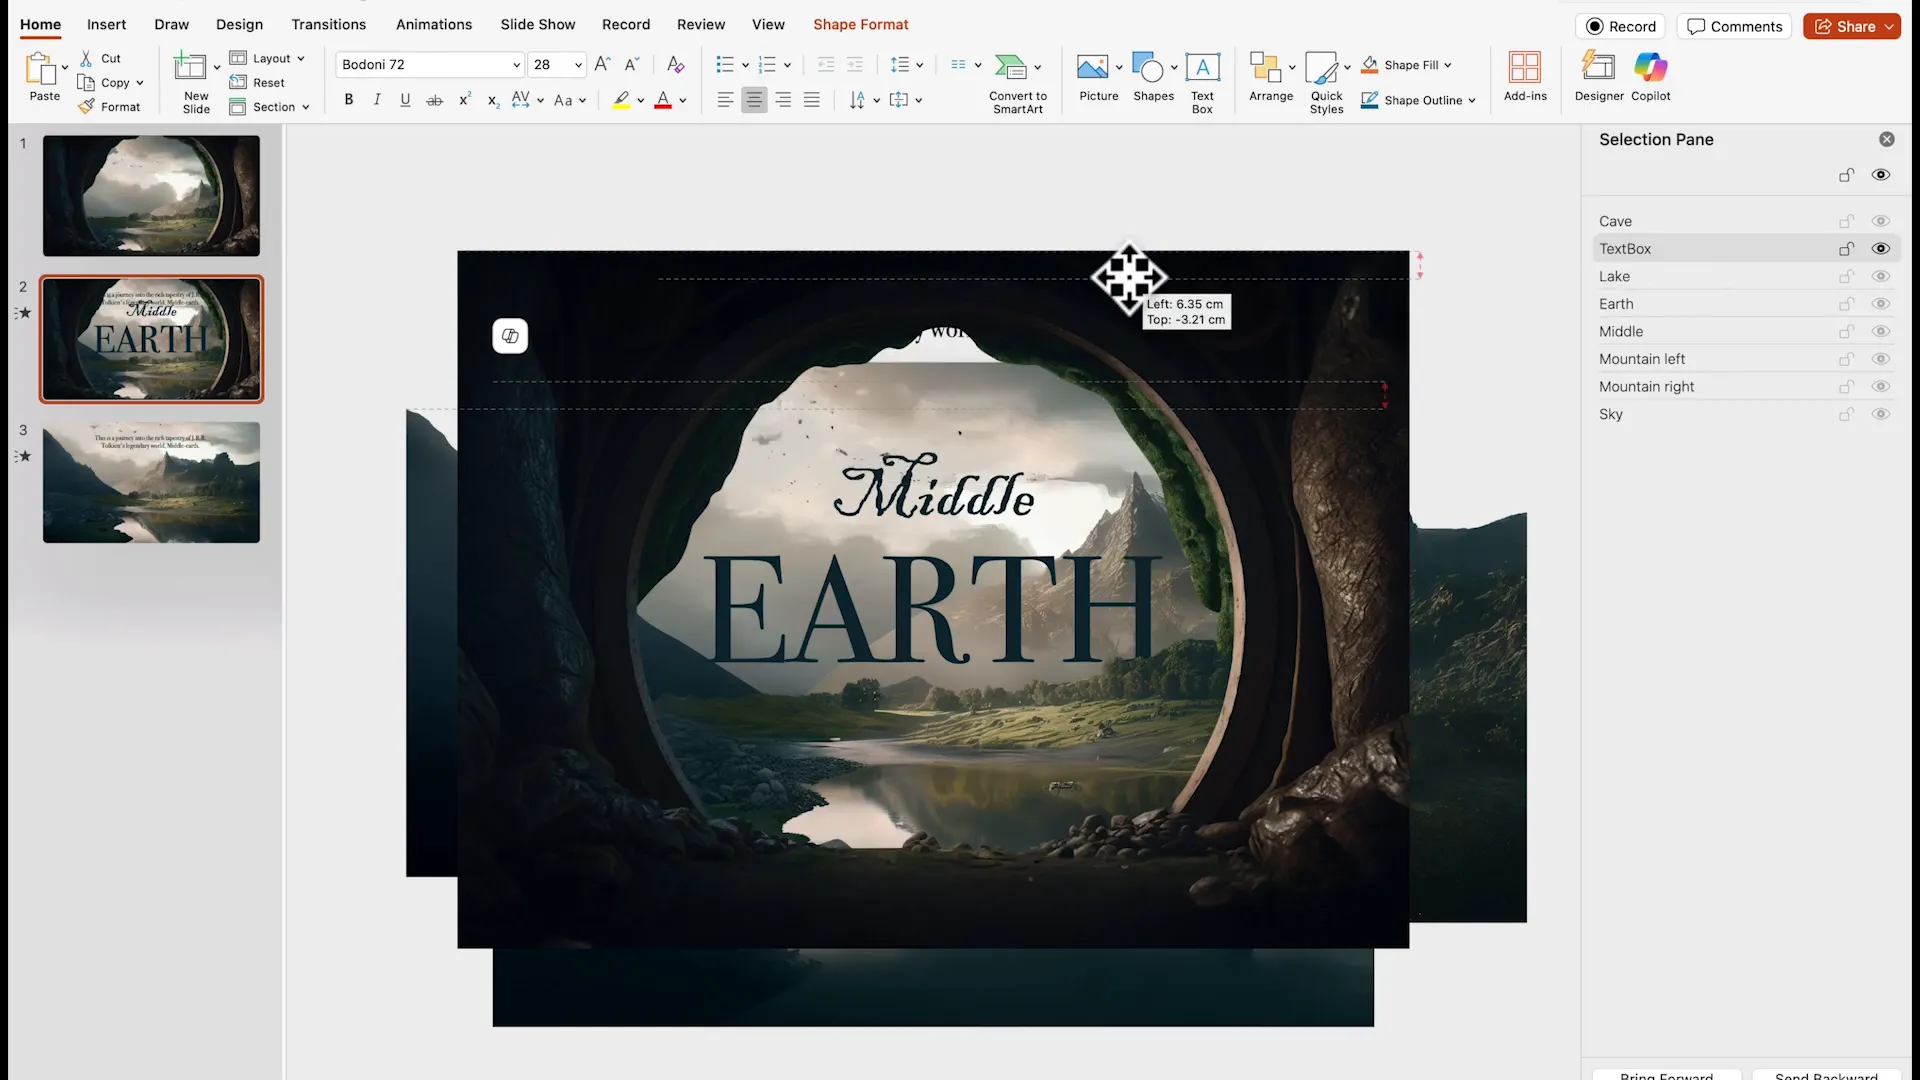
Step 4: Organizing Layers with the Selection Pane
As your slide grows more complex, managing layers becomes critical. Open the Selection Pane (search for it in the ribbon) to toggle visibility, rename elements, and reorder layers. Renaming each element helps you quickly identify and manipulate parts without confusion.
For instance, name layers as “Sky,” “Mountain Right,” “Mountain Left,” “Lake,” “Cave,” and “Title Text” so you can easily turn layers on or off or adjust their stacking order.
Animating with Morph Transitions: Creating Cinematic Effects
One of PowerPoint’s most powerful animation tools is the Morph transition, which smoothly animates changes between slides by interpolating object positions, sizes, and properties.
Here’s how I used Morph to enhance the cinematic feel of my presentation:
Step 1: Duplicate the Slide
Duplicate your completed slide using Control+D (Cmd+D on Mac). Hide the first two layers temporarily in the Selection Pane to make it easier to select and move the text.
Move the text to the center of the slide and slightly enlarge the mountain images for a subtle zoom effect. Crop and reposition the sky image as needed to create a sense of movement upward.
Bring back the hidden layers. Slightly enlarge the cave image to increase immersion.

Step 2: Apply the Morph Transition
Select the duplicated slide, go to Transitions, and choose Morph. When you play the slideshow, the text will appear to float up behind the lake, creating a captivating cinematic effect.
Step 3: Creating a Fly-Through Effect
Duplicate the first slide again and move it to the end of your slide deck. Enlarge the cave cut-out image dramatically to simulate flying through it. Temporarily hide the cave layer to reposition the mountains closer together and enlarge them, enhancing the tunnel-like effect.
Crop and enlarge the sky image as well, moving it slightly downward to maintain continuity. Bring back the cave layer and apply the Morph transition.
This sequence makes it appear as if the viewer is flying through the hole while the text moves gracefully behind the lake, adding a breathtaking cinematic touch.
Step 4: Managing Text Layers for Depth
If you want to add text to this slide, ensure it’s the second element in the Selection Pane, just below the cave layer. This positioning ensures the text appears behind the cave but above other elements.
Copy and paste text between slides as needed, adjusting their position outside of the slide area to enable smooth Morph animations.
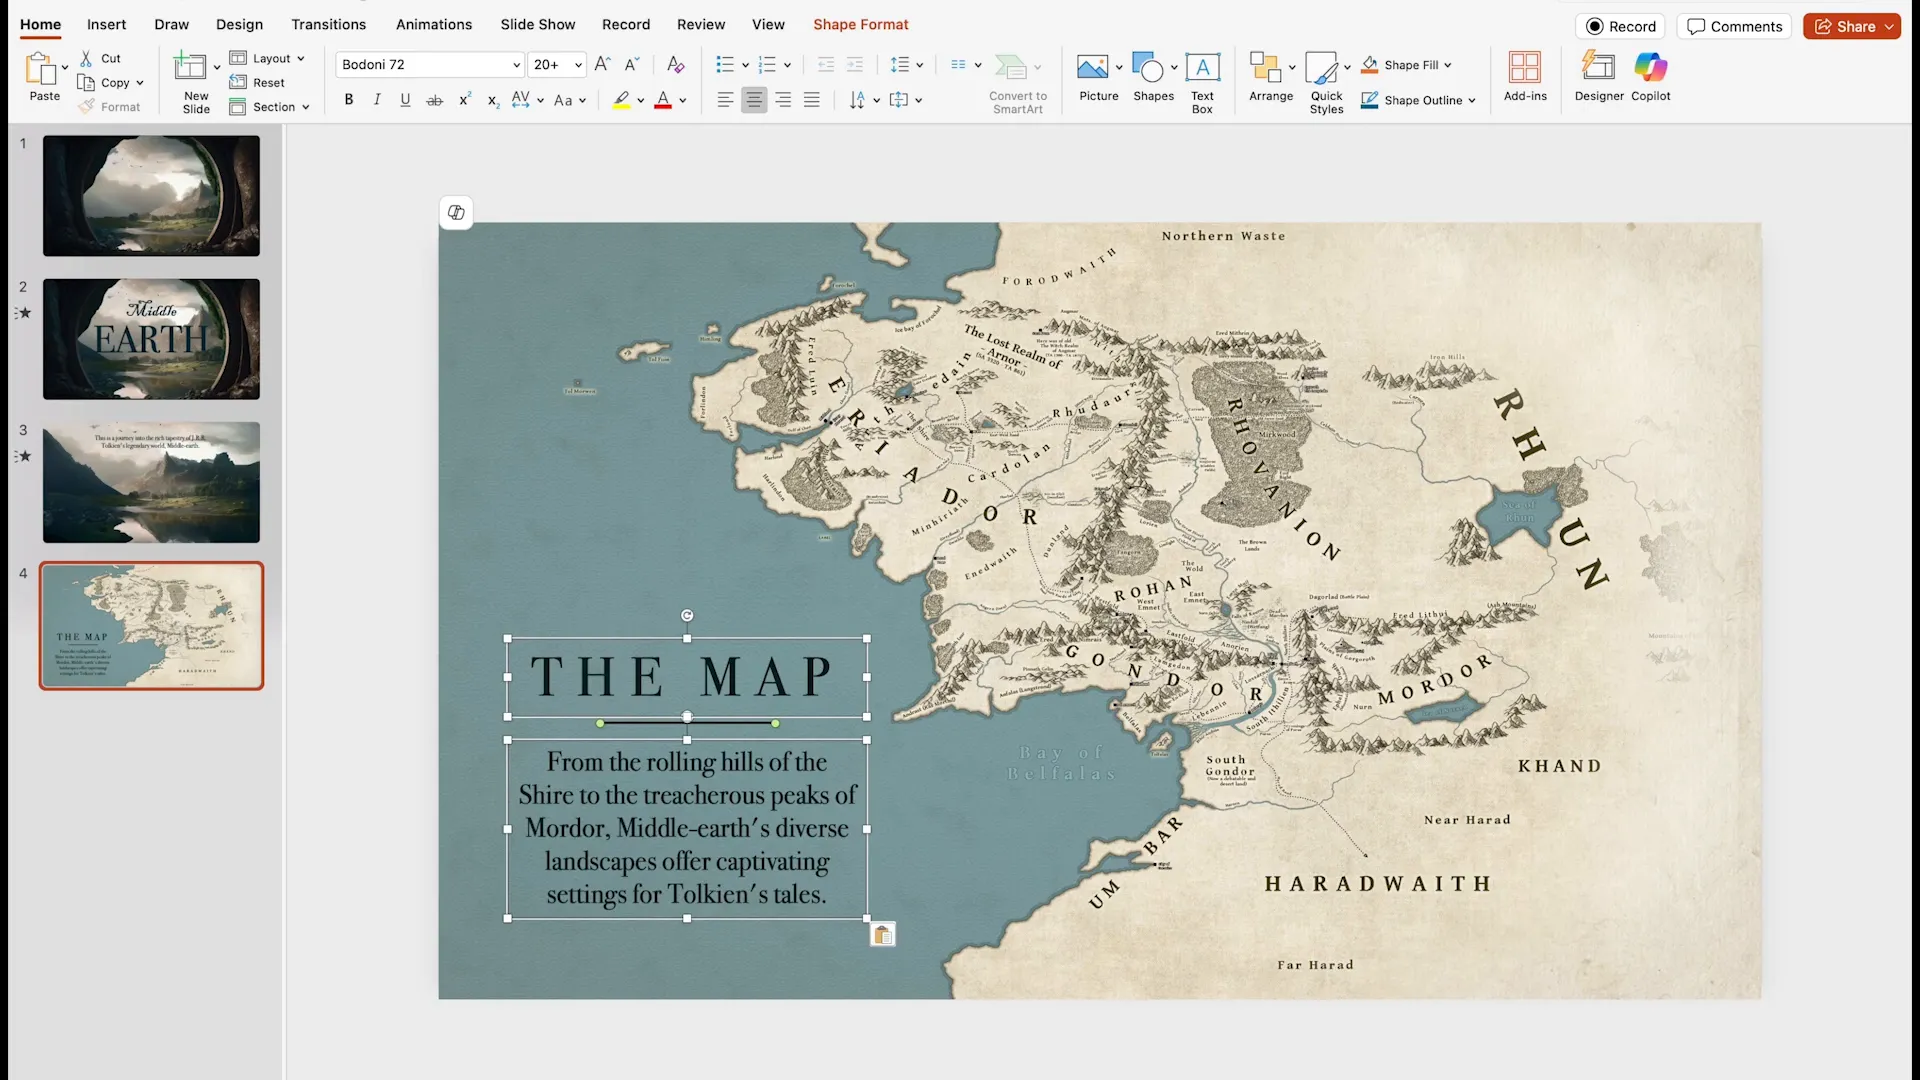
Adding Interactive Elements: Maps and Zoom Transitions
To add another layer of interactivity, I included a map slide that highlights specific locations with a zoom effect.
Step 1: Insert a Map Image
Insert a blank slide and drag in a map image that covers the entire slide. Place your content over a designated area on the map.
Step 2: Apply a Reveal Transition
For a subtle entrance, apply the Reveal transition to this slide. It adds a smooth effect that’s easy on the eyes and keeps the focus on the map.
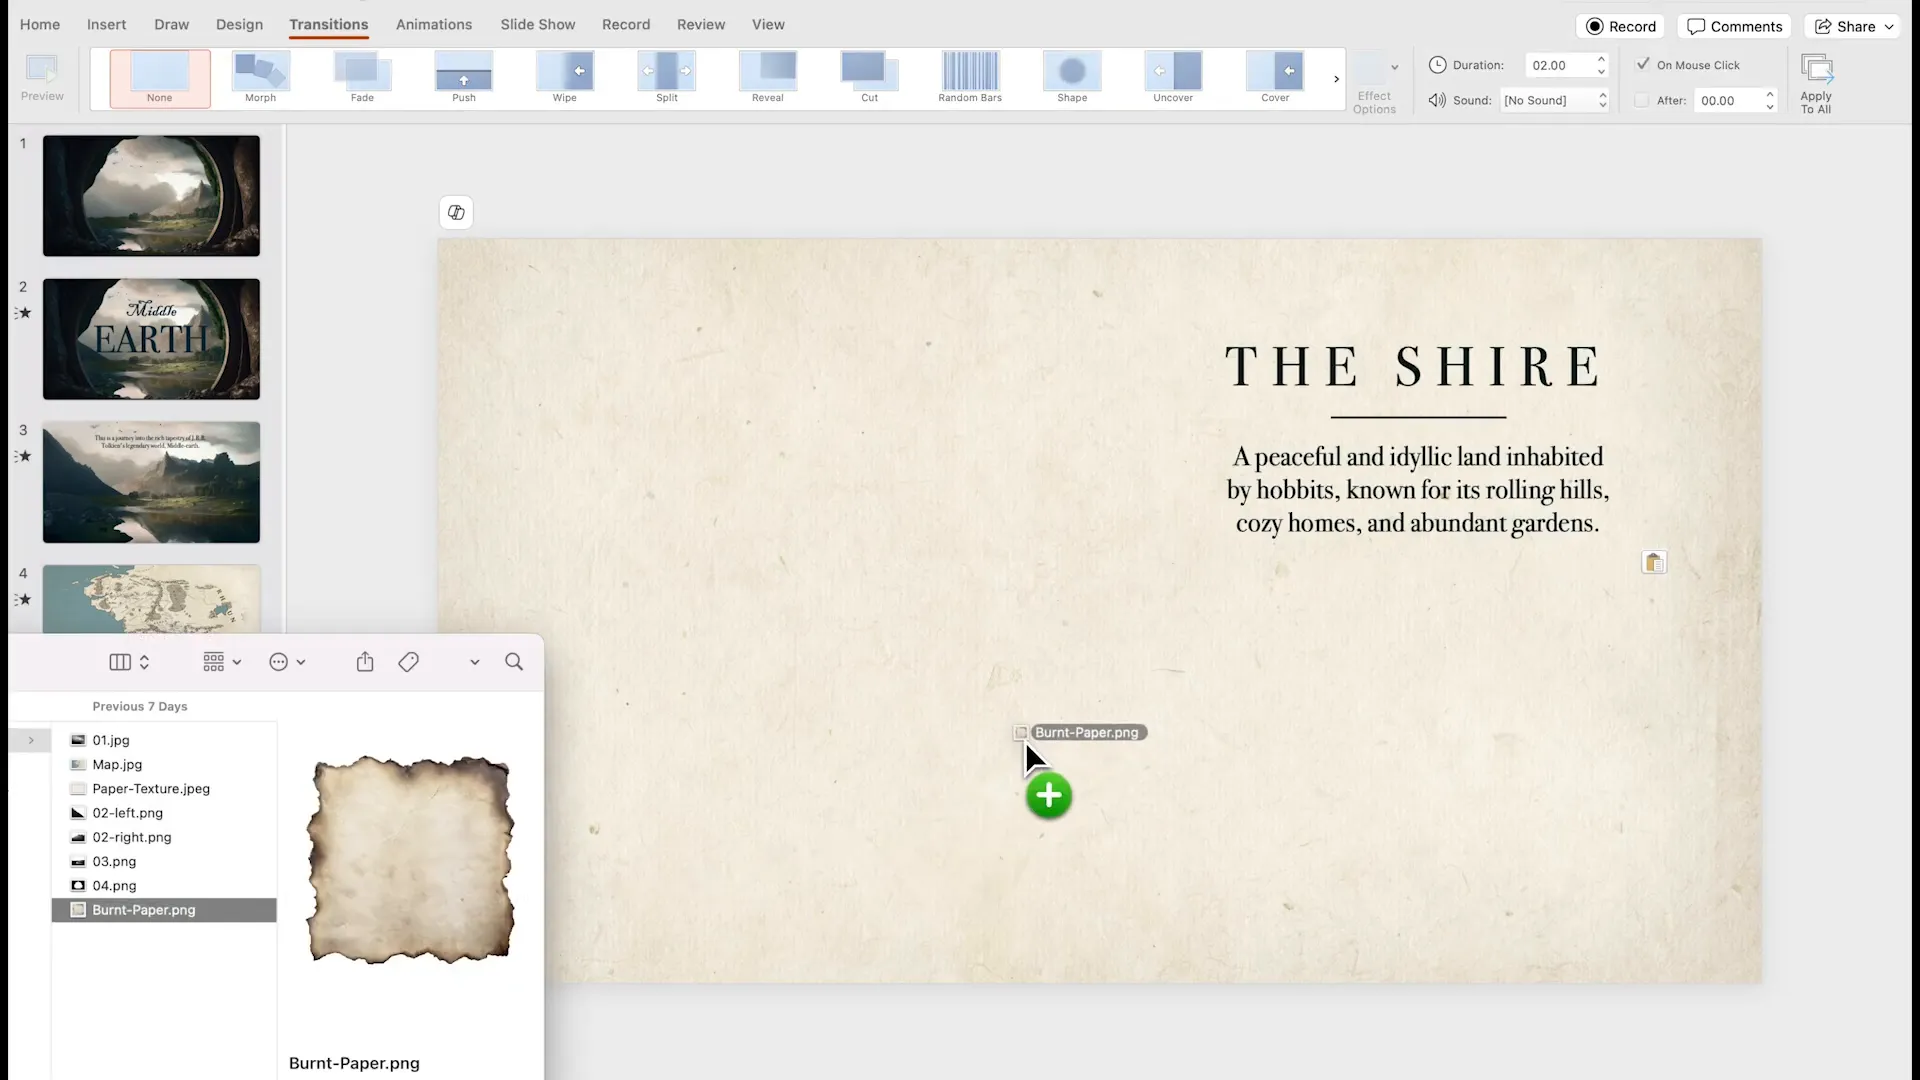
Step 3: Create a Paper Textured Slide
Insert another blank slide and format the background with a paper texture image from the assets folder. This gives the slide a tactile, realistic feel.
Add your content and overlay a paper PNG for added visual interest. To seamlessly blend an image into the paper, bring in your image, resize it, then right-click and choose Format Picture. Under Soft Edges, increase the size so the image blends softly with the paper texture.
I added a PNG Afroto image for a unique artistic touch.
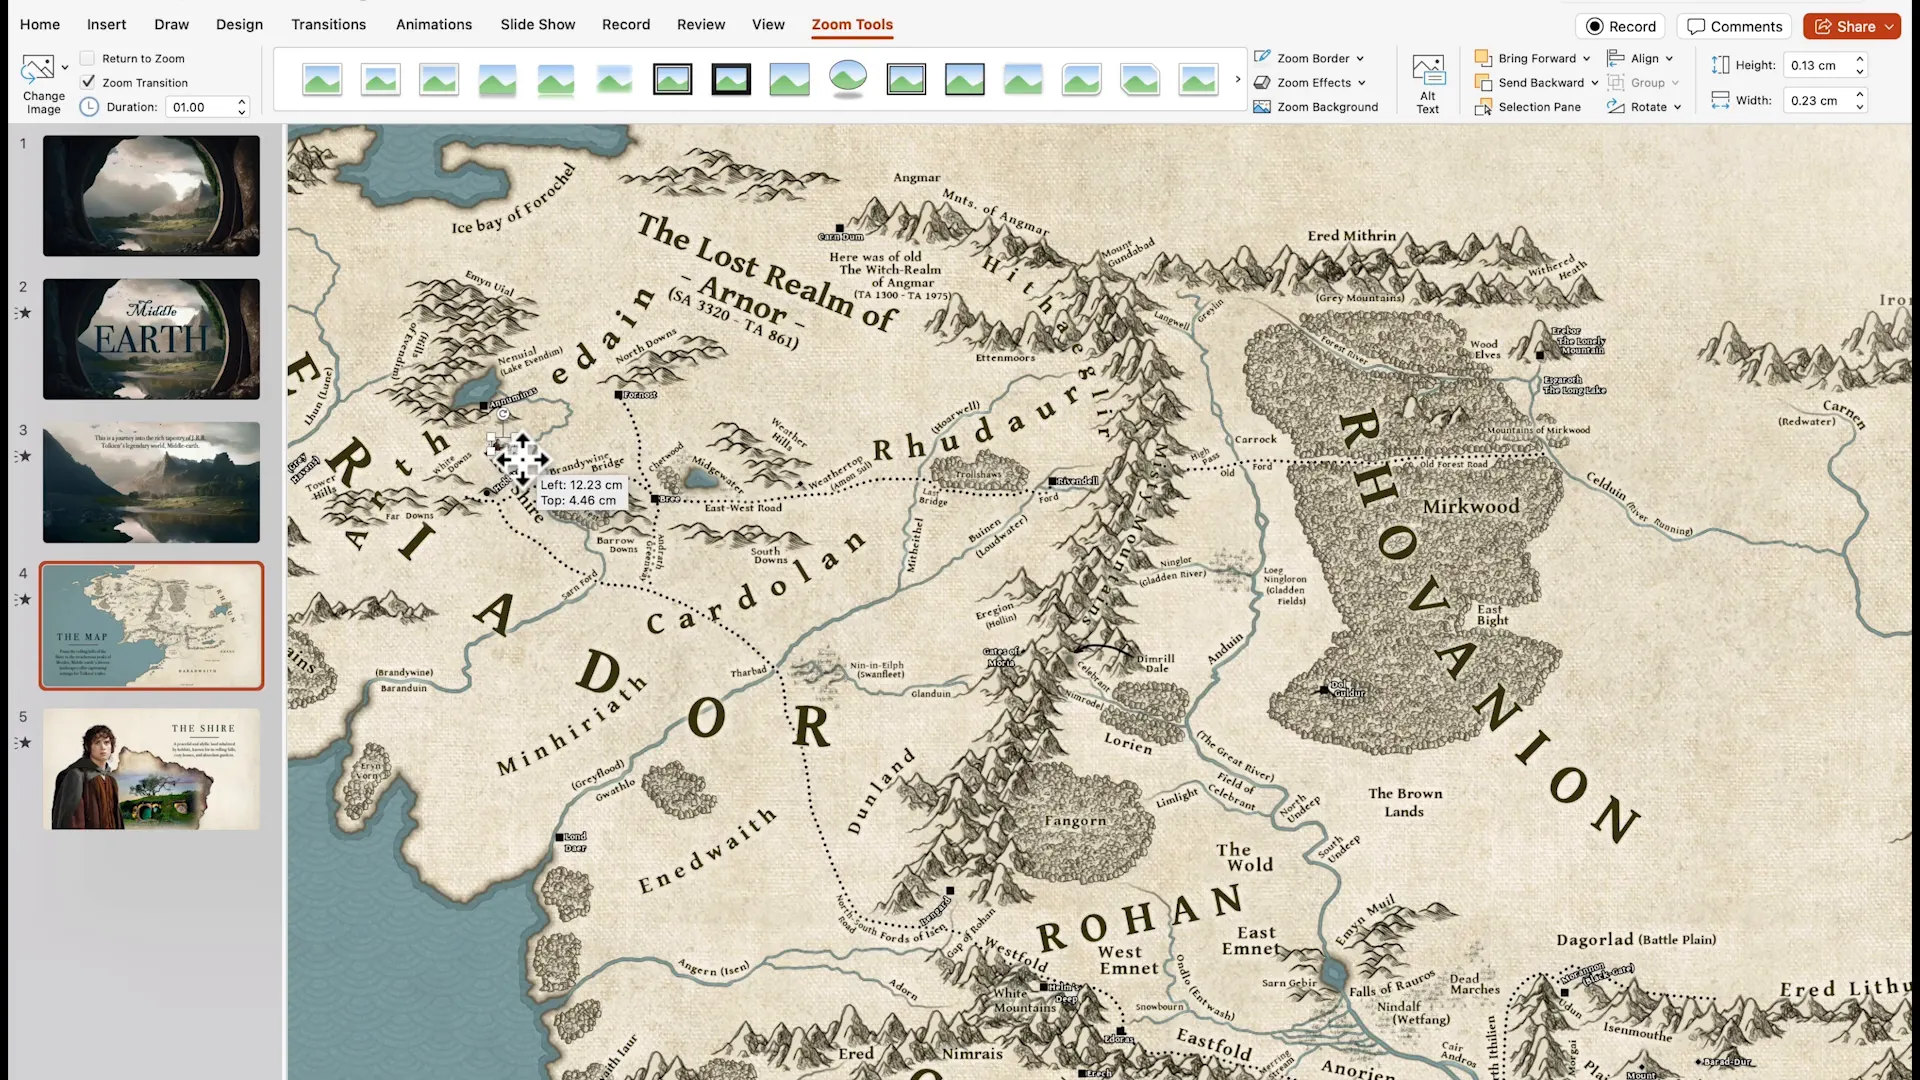
Step 4: Insert Slide Zoom for Interactive Navigation
Go back to the previous slide, insert a Slide Zoom via Insert > Zoom > Slide Zoom, and select the paper textured slide you created. Remove the zoom border for a clean look and resize the zoom thumbnail to be very small—almost invisible.
Place this tiny zoom over the relevant area on the map (e.g., Riverdale). In slideshow mode, clicking this area will zoom into the paper textured slide, creating an amazing interactive experience.
Final Thoughts and Tips for Your Cinematic Presentation
Creating a cinematic presentation in PowerPoint might seem daunting, but with the right techniques and a bit of creativity, it’s entirely achievable. Here are some key takeaways from this project:
- Prepare your assets carefully: Layer your images for maximum control and animation flexibility.
- Use PowerPoint’s Morph and Zoom transitions: These features bring your slides to life with smooth, professional animations.
- Organize your layers: Use the Selection Pane to rename and manage elements, preventing confusion as your slide complexity grows.
- Leverage productivity tools: Tools like monday.com can save you time and help you focus on design instead of project management.
- Experiment with interactivity: Adding clickable zooms and layered animations can make your presentation engaging and memorable.
Remember, the cinematic quality comes from thoughtful layering, smooth transitions, and attention to detail. Don’t be afraid to experiment and tailor effects to fit your unique style and content.
You can download the full set of slides and assets to practice these techniques by visiting my website (link in the description). With these resources, you’ll be well on your way to crafting presentations that wow your audience every time.
Frequently Asked Questions (FAQ)
What software version do you use for creating cinematic PowerPoint presentations?
I use PowerPoint for Microsoft 365 on Mac, which includes the Morph and Zoom transitions essential for these effects.
How do I split images into layers for PowerPoint?
Image layering involves using photo editing tools like Photoshop or free alternatives to isolate parts of an image and save them as separate files. You can then import these layers individually into PowerPoint. Check out tutorials specific to your editing software for detailed steps.
Can I use the Morph transition on older versions of PowerPoint?
The Morph transition is available in PowerPoint 2019 and later, including Microsoft 365 subscriptions. If you have an older version, consider upgrading or using alternative animation techniques.
How do I manage complex slides with many layers?
Use the Selection Pane in PowerPoint to rename, reorder, and toggle the visibility of layers. This helps prevent confusion and makes editing easier.
Is monday.com necessary to create presentations?
No, but it’s a fantastic tool for managing your projects and deadlines, especially if you juggle multiple presentations or clients. It helps automate reminders and keeps your workflow organized.
Can I customize the notifications and automations in monday.com?
Absolutely. You can create custom triggers and actions, integrate with other apps like Gmail and Slack, and tailor messages to fit your workflow.
Where can I download the assets and slides used in this tutorial?
You can download them for free from the links provided on my website and in the description of my video tutorial.
Thank you for reading! I hope this guide empowers you to create your own cinematic PowerPoint presentations that stand out and engage your audience like never before.
Check out the full video: How I made this crazy CINEMATIC POWERPOINT presentation 🤯


