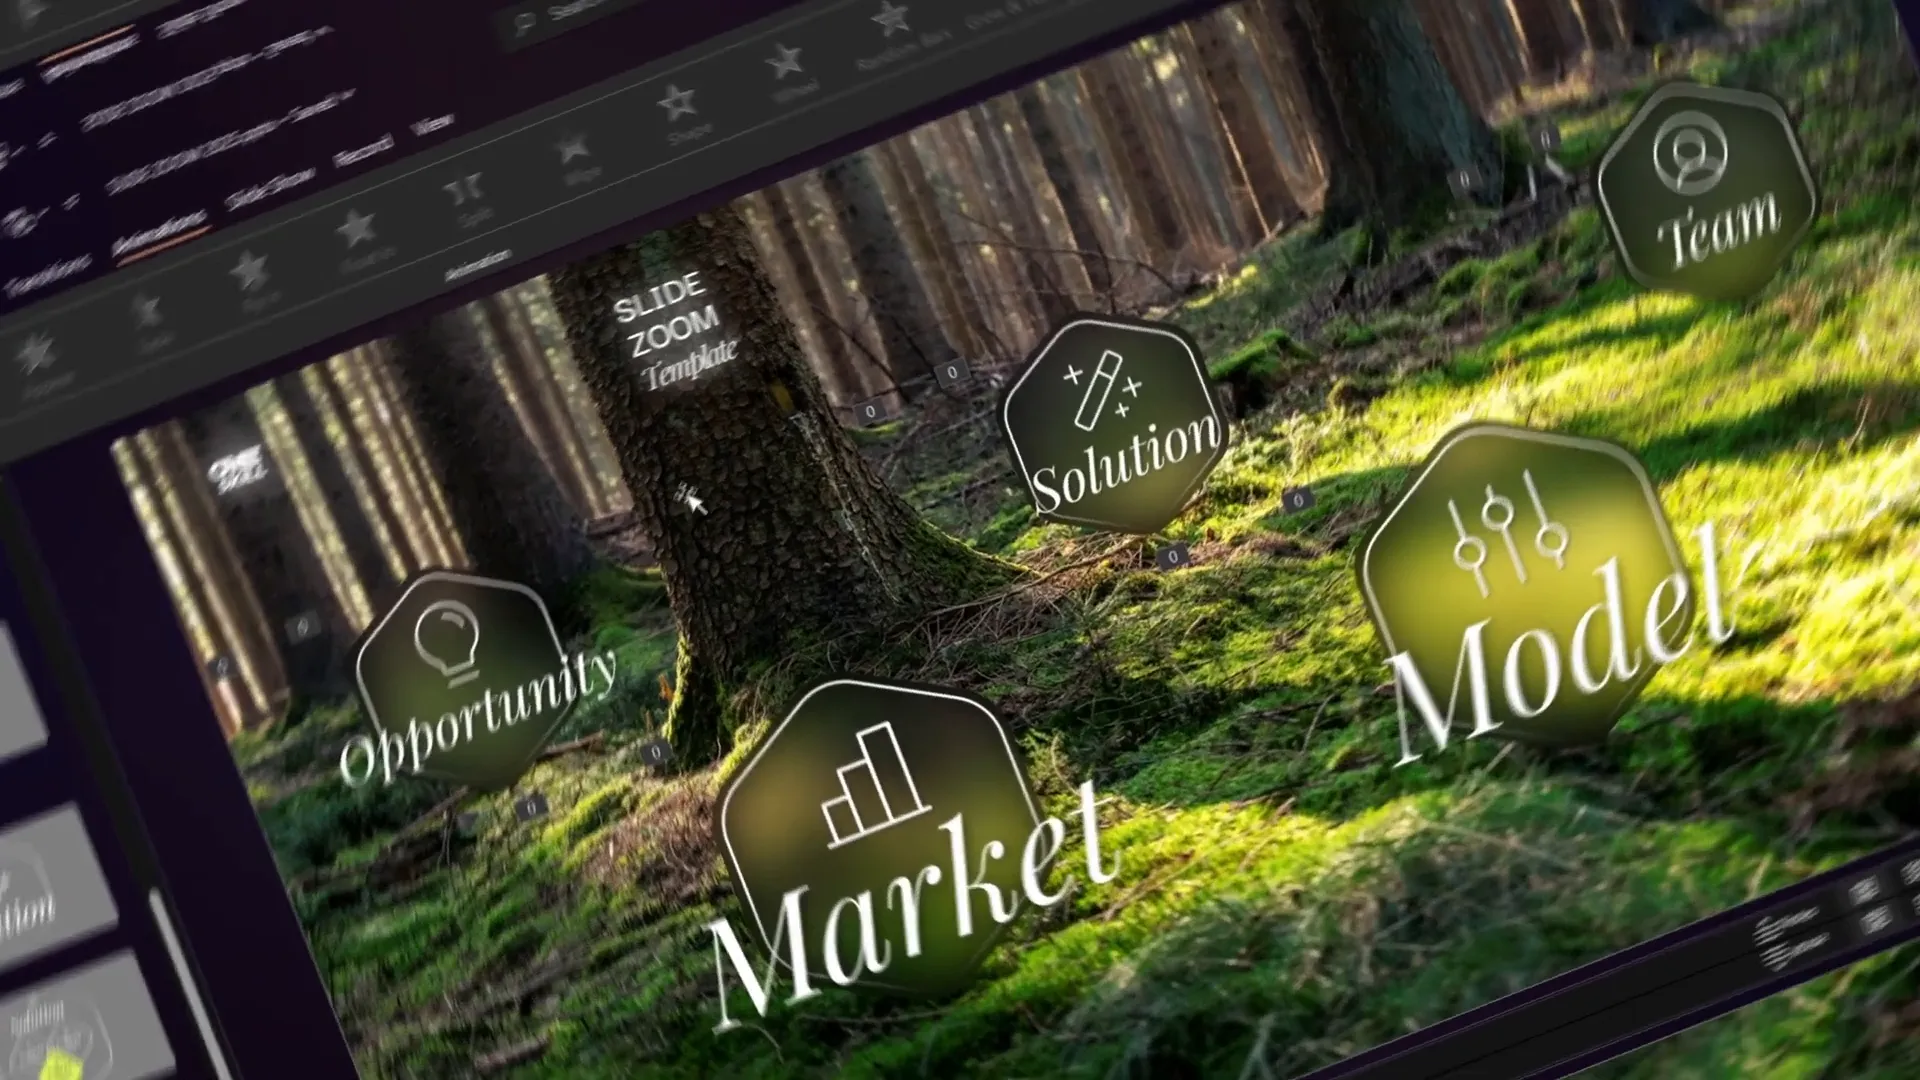
If you’ve been looking to elevate your PowerPoint Presentation skills by adding interactive and visually stunning elements, you’re in the right place. This comprehensive tutorial will guide you through creating a brand-new slide zoom template in Microsoft PowerPoint featuring clickable section zooms and dynamic animations — all step by step.
Whether you’re preparing a business pitch, educational content, or a creative showcase, mastering the slide zoom technique will add professionalism and engagement to your presentations. This article draws from an expert tutorial by One Skill PPT and breaks down every aspect of the process for you.
Table of Contents
- Getting Started: Setting Up Your PowerPoint Environment
- Adding and Adjusting a Background Image
- Creating Slide Sections for Section Zooms
- Designing Rounded Hexagons Using Figma and PowerPoint
- Inserting and Styling Icons
- Adding and Formatting Text Elements
- Setting Up Slide Transitions and Morph Animations
- Inserting Section Zooms and Customizing Appearance
- Creating a Glassmorphic Blurry Background Effect
- Animating Section Zooms for Extra Impact
- Workaround to Control Animation Repetition
- Expanding Your Slide Zoom Template
- Frequently Asked Questions (FAQ)
- Conclusion
Getting Started: Setting Up Your PowerPoint Environment
Before diving in, it’s important to note the PowerPoint version used for this tutorial. The creator uses Microsoft 365, which supports the morph transition, a key feature for some animations. However, if you are using PowerPoint 2019 or 2021, morph is also available. For older versions without morph, no worries — you can still create the majority of the template, though some animations may look less dynamic.
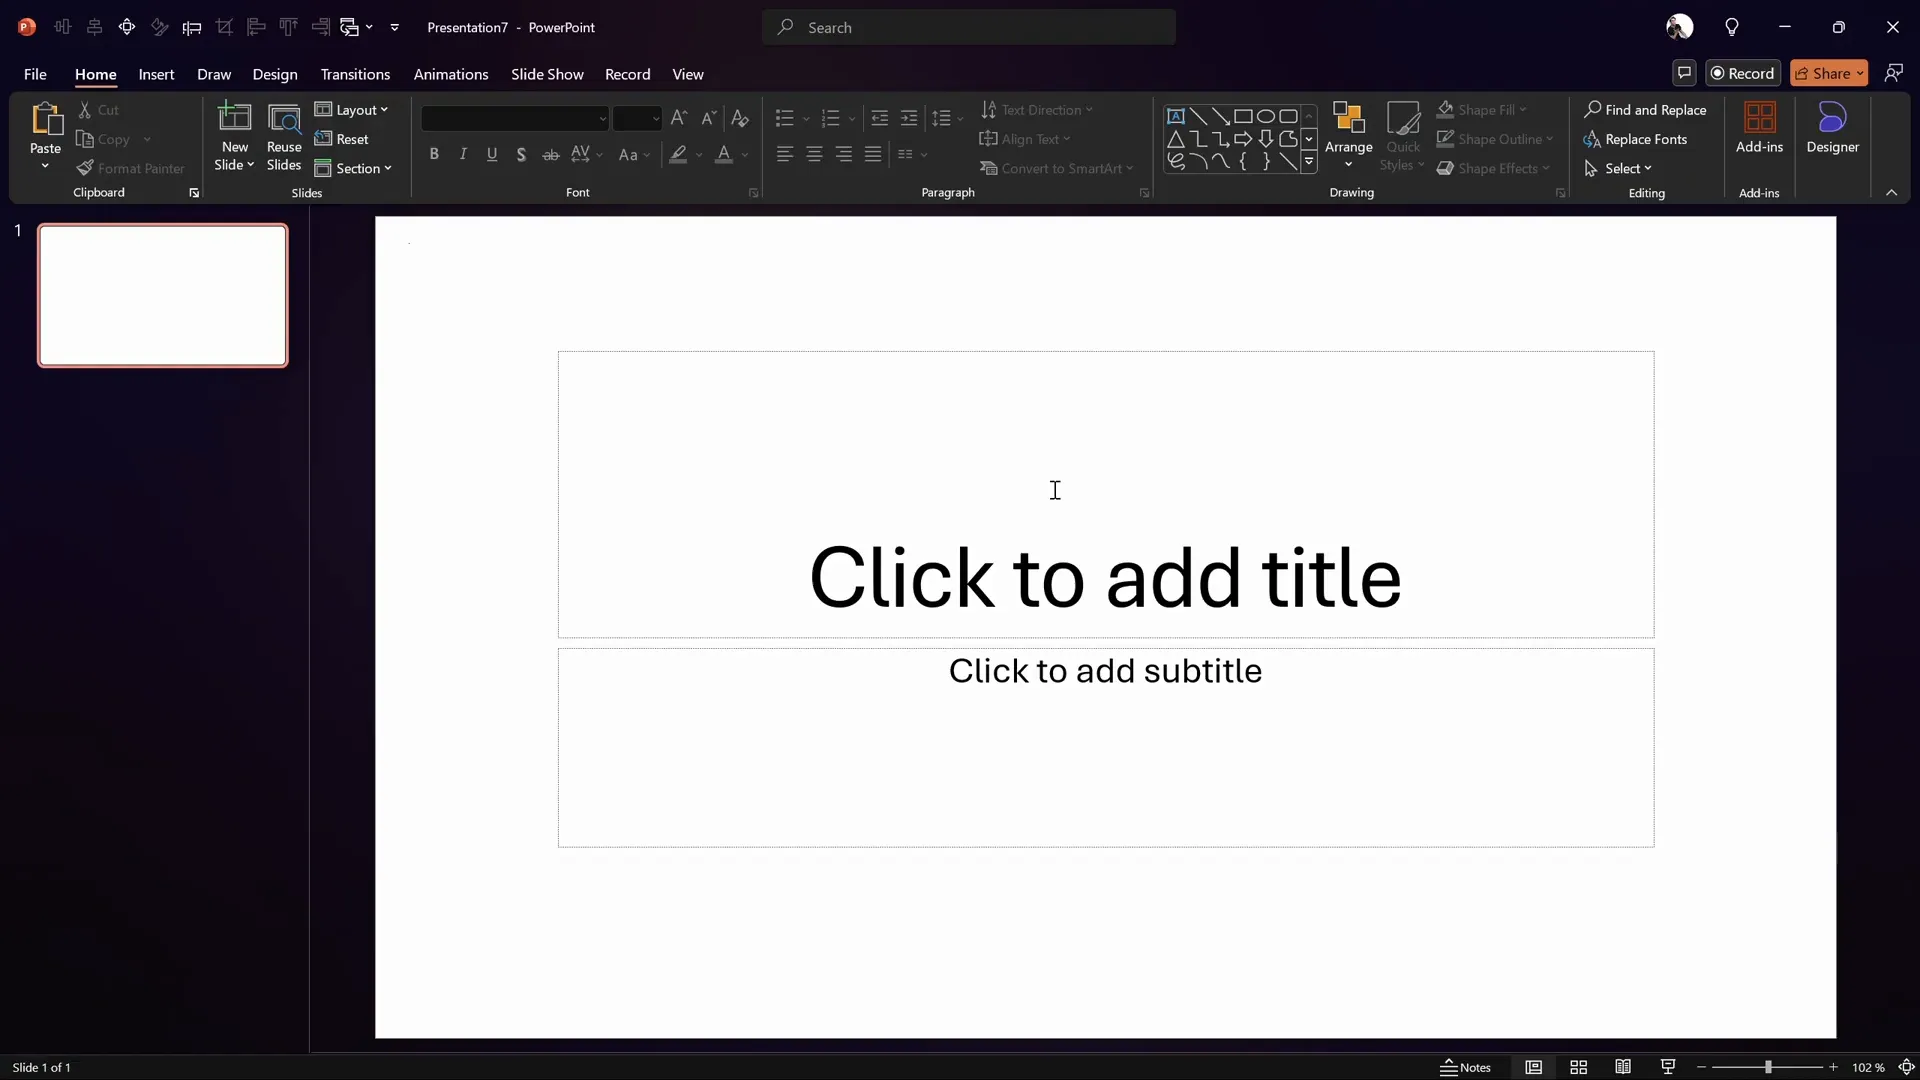
Start by opening a fresh, blank presentation. To maximize your workspace:
- Close the notes section at the bottom of the window.
- Change the slide layout to Blank by selecting it from the Layout dropdown menu to remove default text placeholders.
Adding and Adjusting a Background Image
A captivating background sets the tone. In this tutorial, a forest photo from Unsplash is used, specifically a fresh image by Kat Clausen.
Steps to insert and adjust your background image:
- Find your desired image online or use the recommended source.
- Copy the image and paste it into your PowerPoint slide.
- If the photo does not cover the whole slide, select it and drag its corners while holding the Shift key to maintain proportions and stretch it to fit.
- Use the Crop tool under the Picture Format tab to trim excess parts for a perfect fit.
- Flip the image horizontally to achieve a warmer, “golden hour” effect similar to the original design.
- Adjust picture settings by increasing brightness (around 10%), adding contrast, and tweaking the temperature to around 11,200K for a warm tone.
This process ensures your background is visually appealing and consistent throughout your presentation.
Creating Slide Sections for Section Zooms
Section Zooms are a powerful way to create clickable navigation between parts of your presentation. But before you can insert section zooms, you need to organize your slides into sections.
Here’s how to set up sections:
- Right-click above the slide thumbnails pane and select Add Section.
- Name your first section, for example, Home.
- Add a second section and name it, such as Opportunity.
- Insert new slides inside each section as needed.
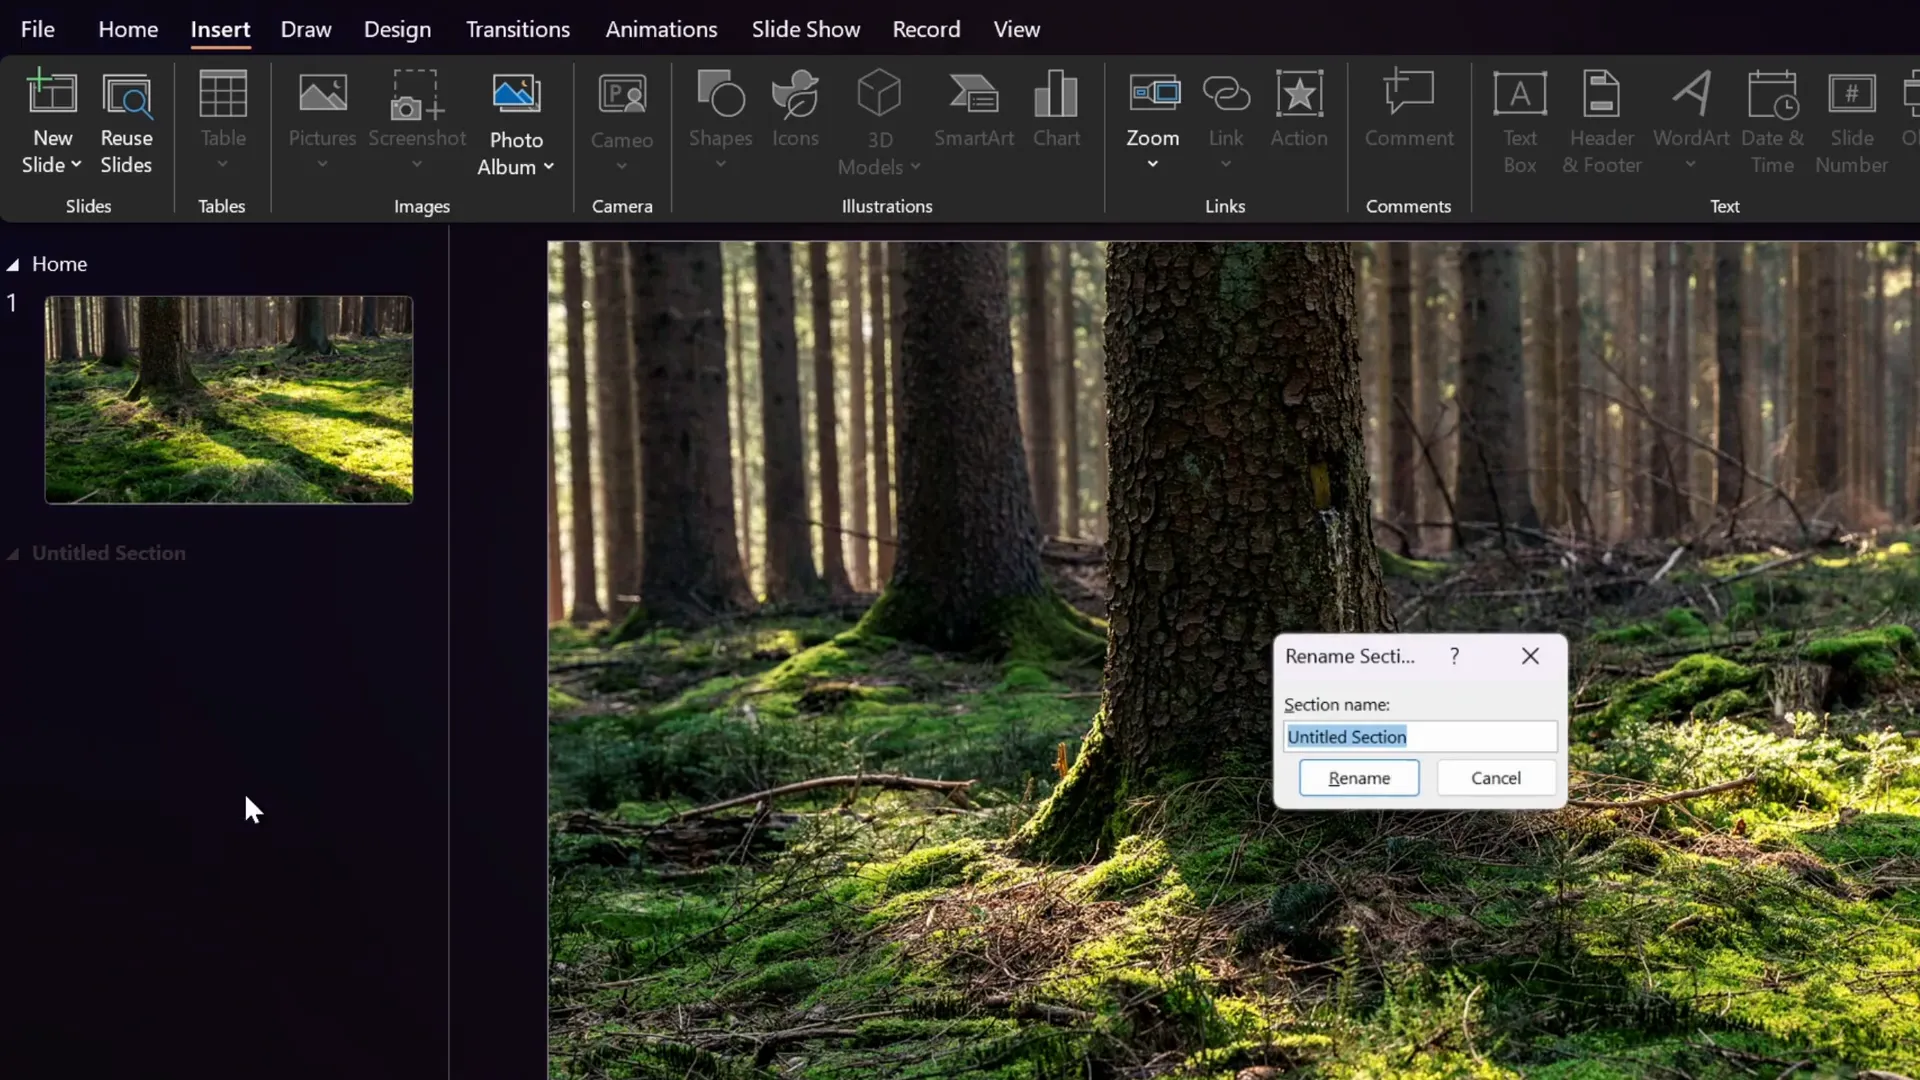
Once you have sections, the Section Zoom option becomes available under the Insert > Zoom menu.
Designing Rounded Hexagons Using Figma and PowerPoint
One of the signature design elements in this template is the rounded hexagon, which PowerPoint cannot create by default with smooth rounded corners.
To solve this, the tutorial uses Figma, a free online design tool, to create a custom rounded hexagon which can then be imported into PowerPoint as an SVG.
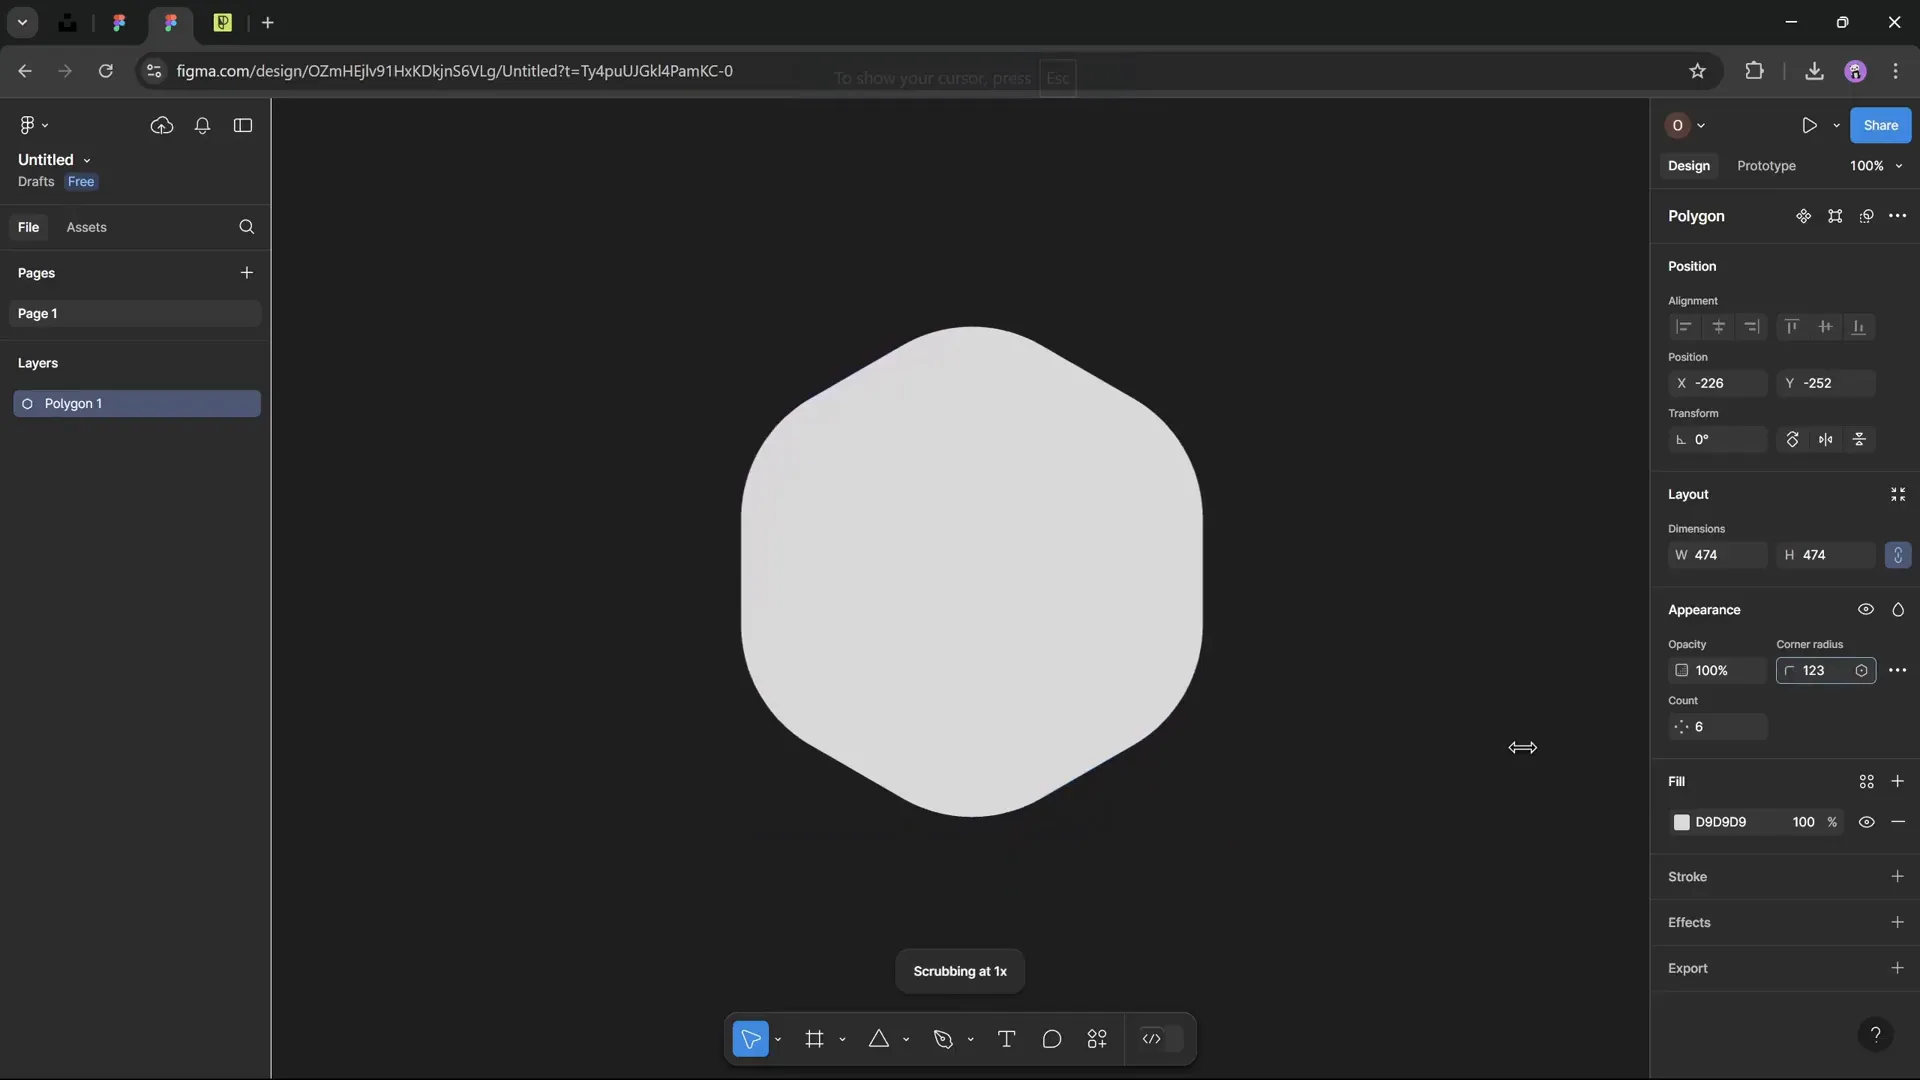
Step-by-step process in Figma:
- Open Figma and create a new design file.
- Select the Polygon tool and hold Shift while drawing a triangle.
- Change the polygon sides count to 6 to create a hexagon.
- Adjust the corner radius to around 50 to get smooth rounded corners.
- Fill the shape with any color you want.
- Name the layer for easy export (e.g., “hexagon”).
- Export the shape as an SVG.
After exporting, insert the SVG into PowerPoint:
- Go to Insert > Pictures > This Device and select your hexagon SVG.
- Convert the SVG to a shape using the convert button for easier editing.
- Center-align the hexagon on the slide.
- Resize it to match your design needs.
- Remove the fill color and add a gradient line stroke to create a fading effect around the hexagon edges.
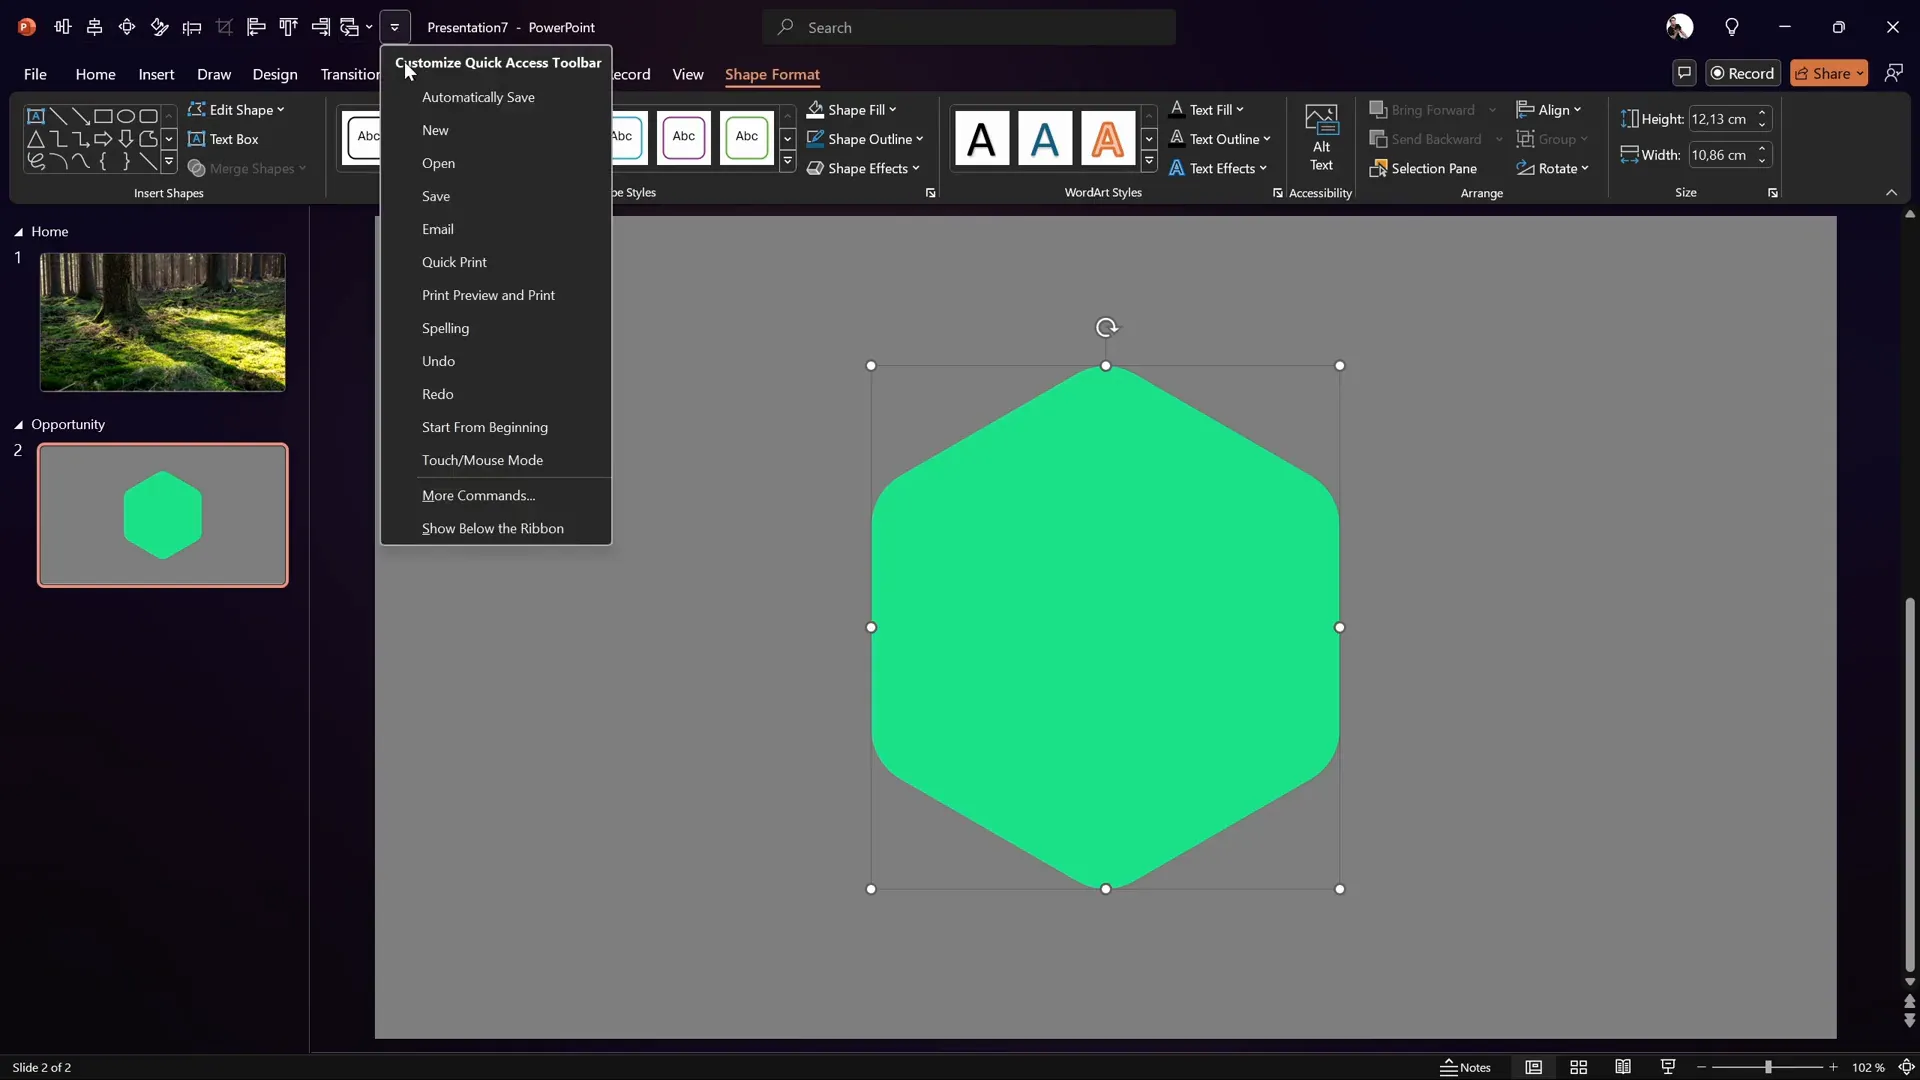
Tip: Use the Quick Access Toolbar in PowerPoint to add frequently used commands like Format Shape for faster access. Pressing Alt + 4 opens the Format Shape pane quickly.
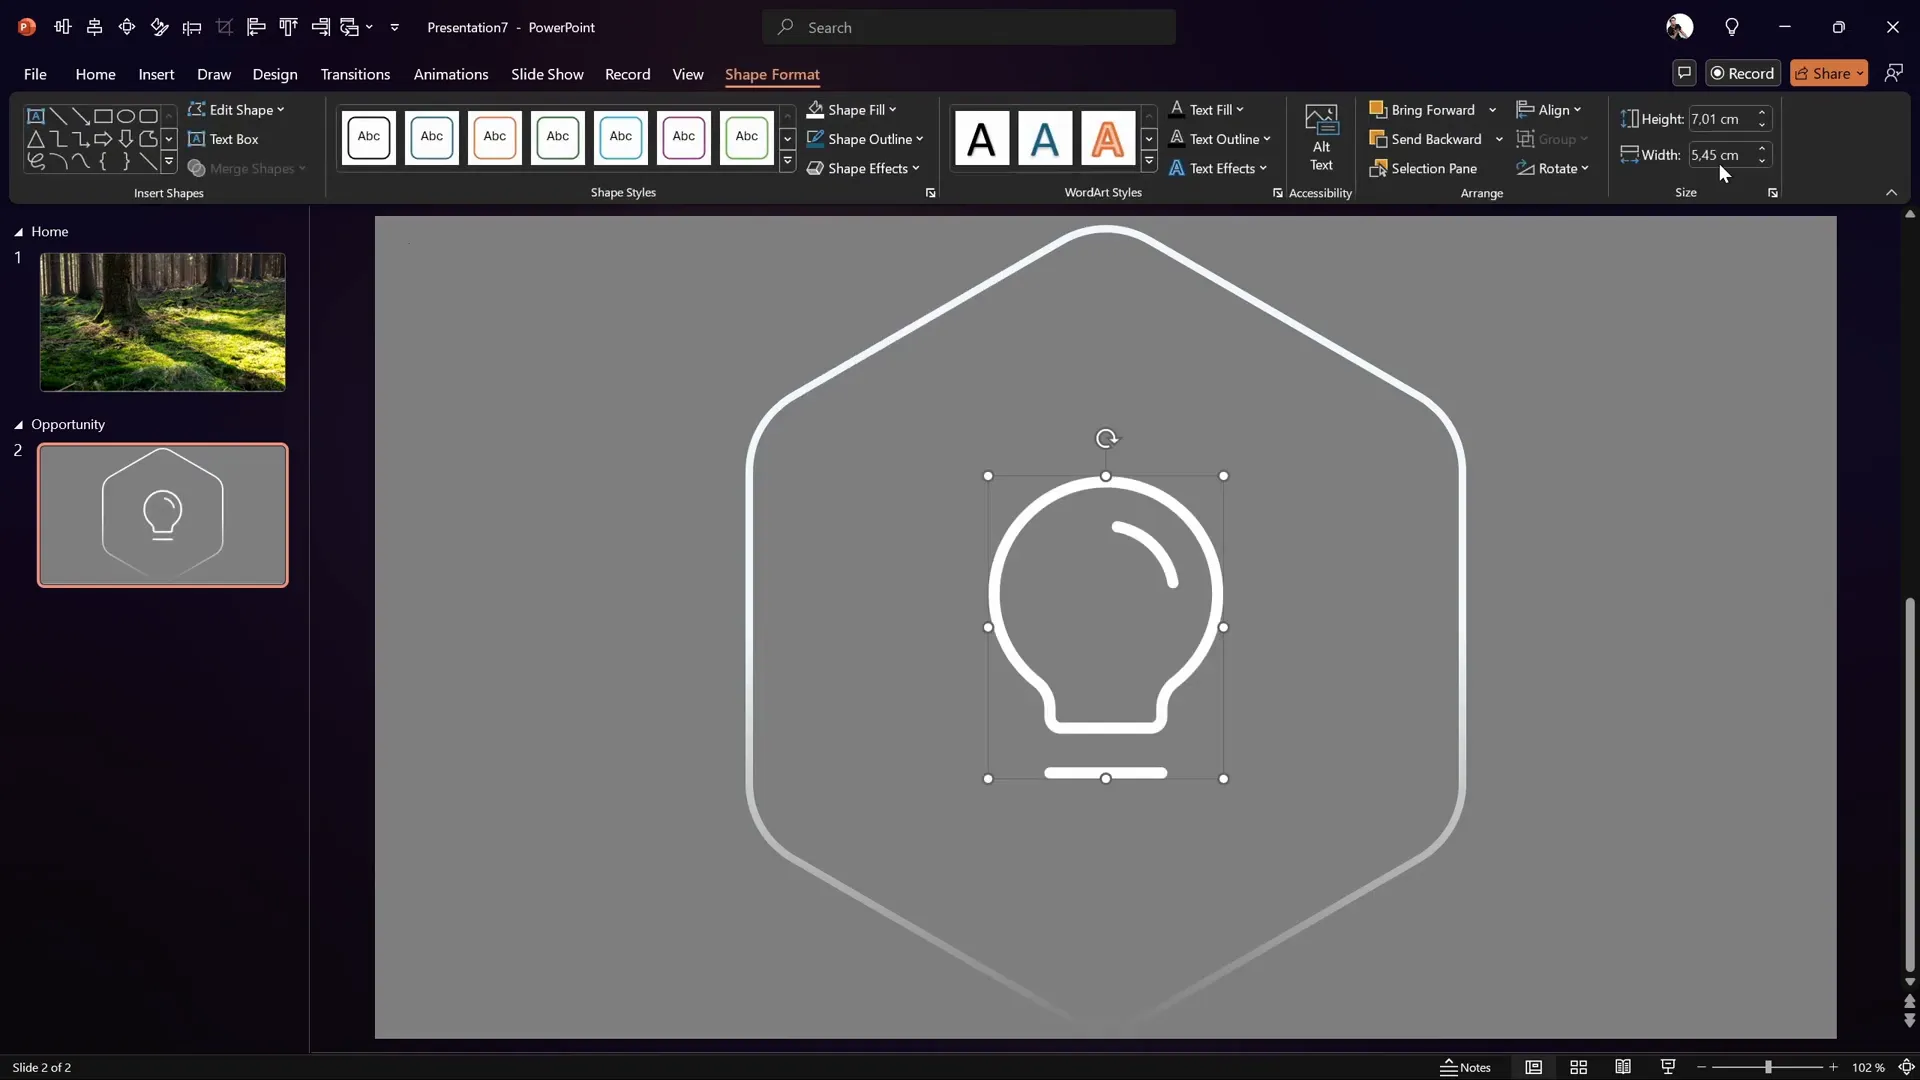
Inserting and Styling Icons
Icons add visual interest and help convey meaning quickly. Instead of using PowerPoint’s built-in icons, this tutorial recommends Phosphor Icons — a free icon library.
To add an icon:
- Search for the desired icon, such as “bulb,” and select the style you prefer (thin style is used here).
- Download the icon as an SVG.
- Insert the icon into PowerPoint via Insert > Pictures > This Device.
- Convert the SVG to shape for easy formatting.
- Resize and fill the icon with white or your preferred color.
- Lock the aspect ratio to maintain proportions when resizing.
- Add a subtle shadow effect to make the icon stand out.
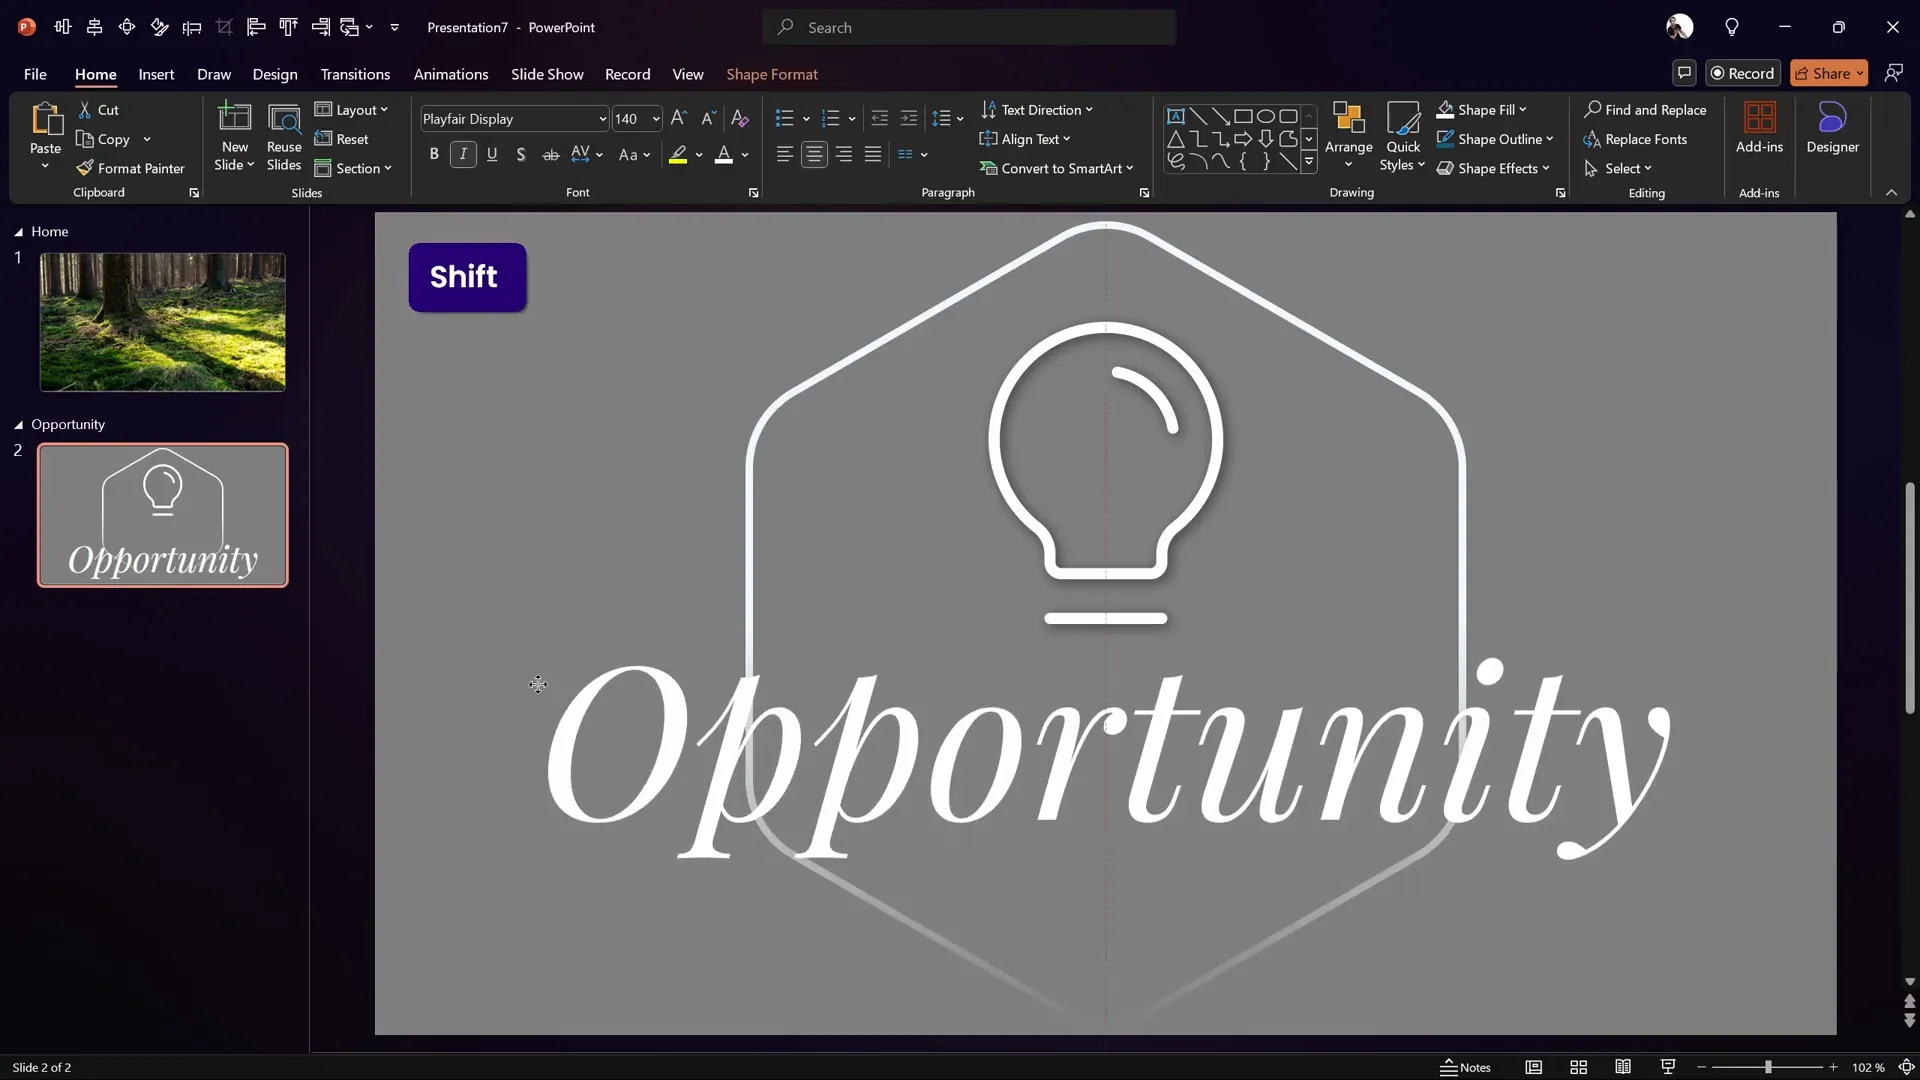
Adding and Formatting Text Elements
Text is key to communicating your message clearly. For the slide title, the tutorial uses the Playfair Display font in italic style for a sophisticated look.
Steps for adding the text:
- Insert a text box below the icon.
- Type your heading, e.g., “Opportunity.”
- Center-align the text within the box and center the box on the slide.
- Set the font to Playfair Display, italic, white color, and size 140 pt for the main slide.
- Adjust letter spacing to “tight” for a cleaner look.
- Add a subtle shadow to the text for better contrast and depth.
For subsequent slides, resize the icon and reduce the text size for a hierarchy effect, for example, shrinking the icon to 2 cm height and the font size to 72 pt.
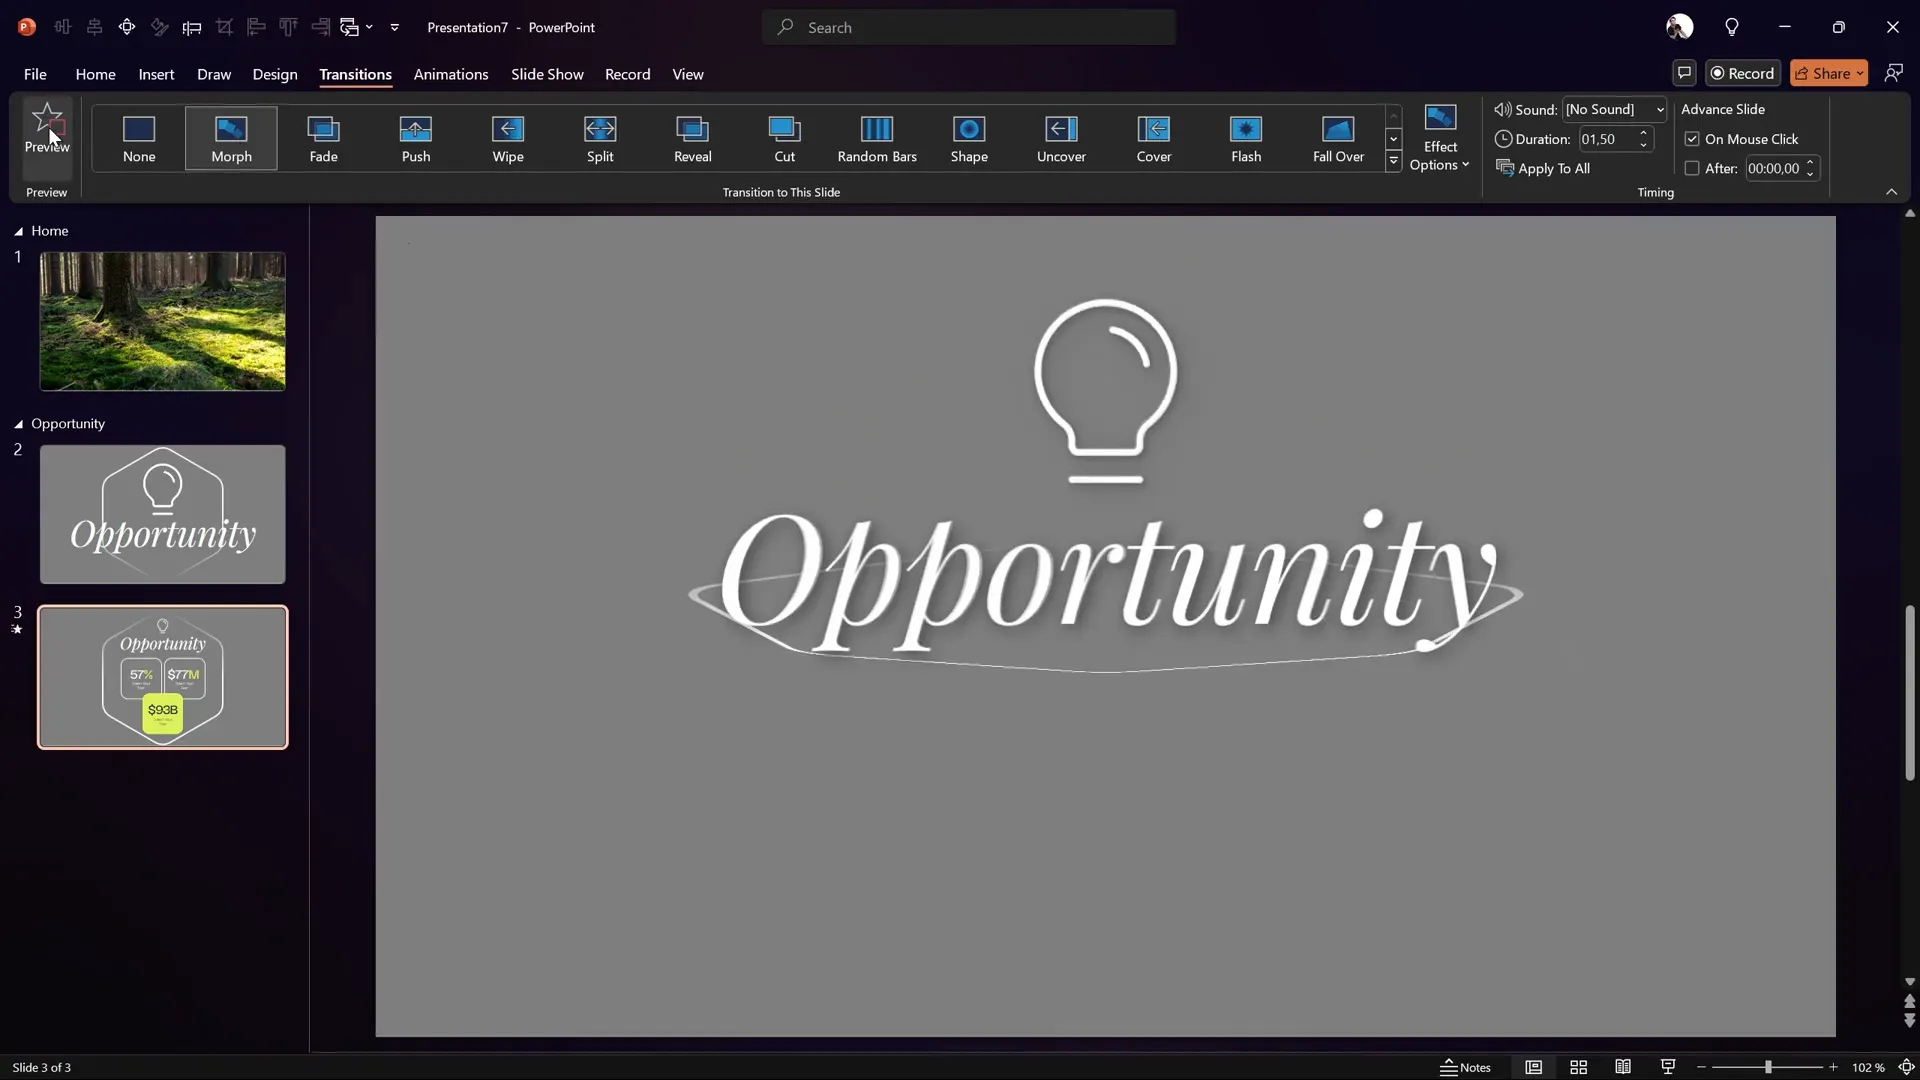
Setting Up Slide Transitions and Morph Animations
Transitions and animations breathe life into your slides. Here’s how to set them up effectively:
- Set the first slide in a section to transition automatically after 0 seconds for seamless flow.
- Use the Morph transition on the following slide for smooth animations, especially for flipping shapes.
For example, flipping the rounded hexagon vertically between slides creates a dynamic flip effect when combined with the morph transition.
If you don’t have morph available, choose any other slide transition. The animation will be less smooth but still functional.
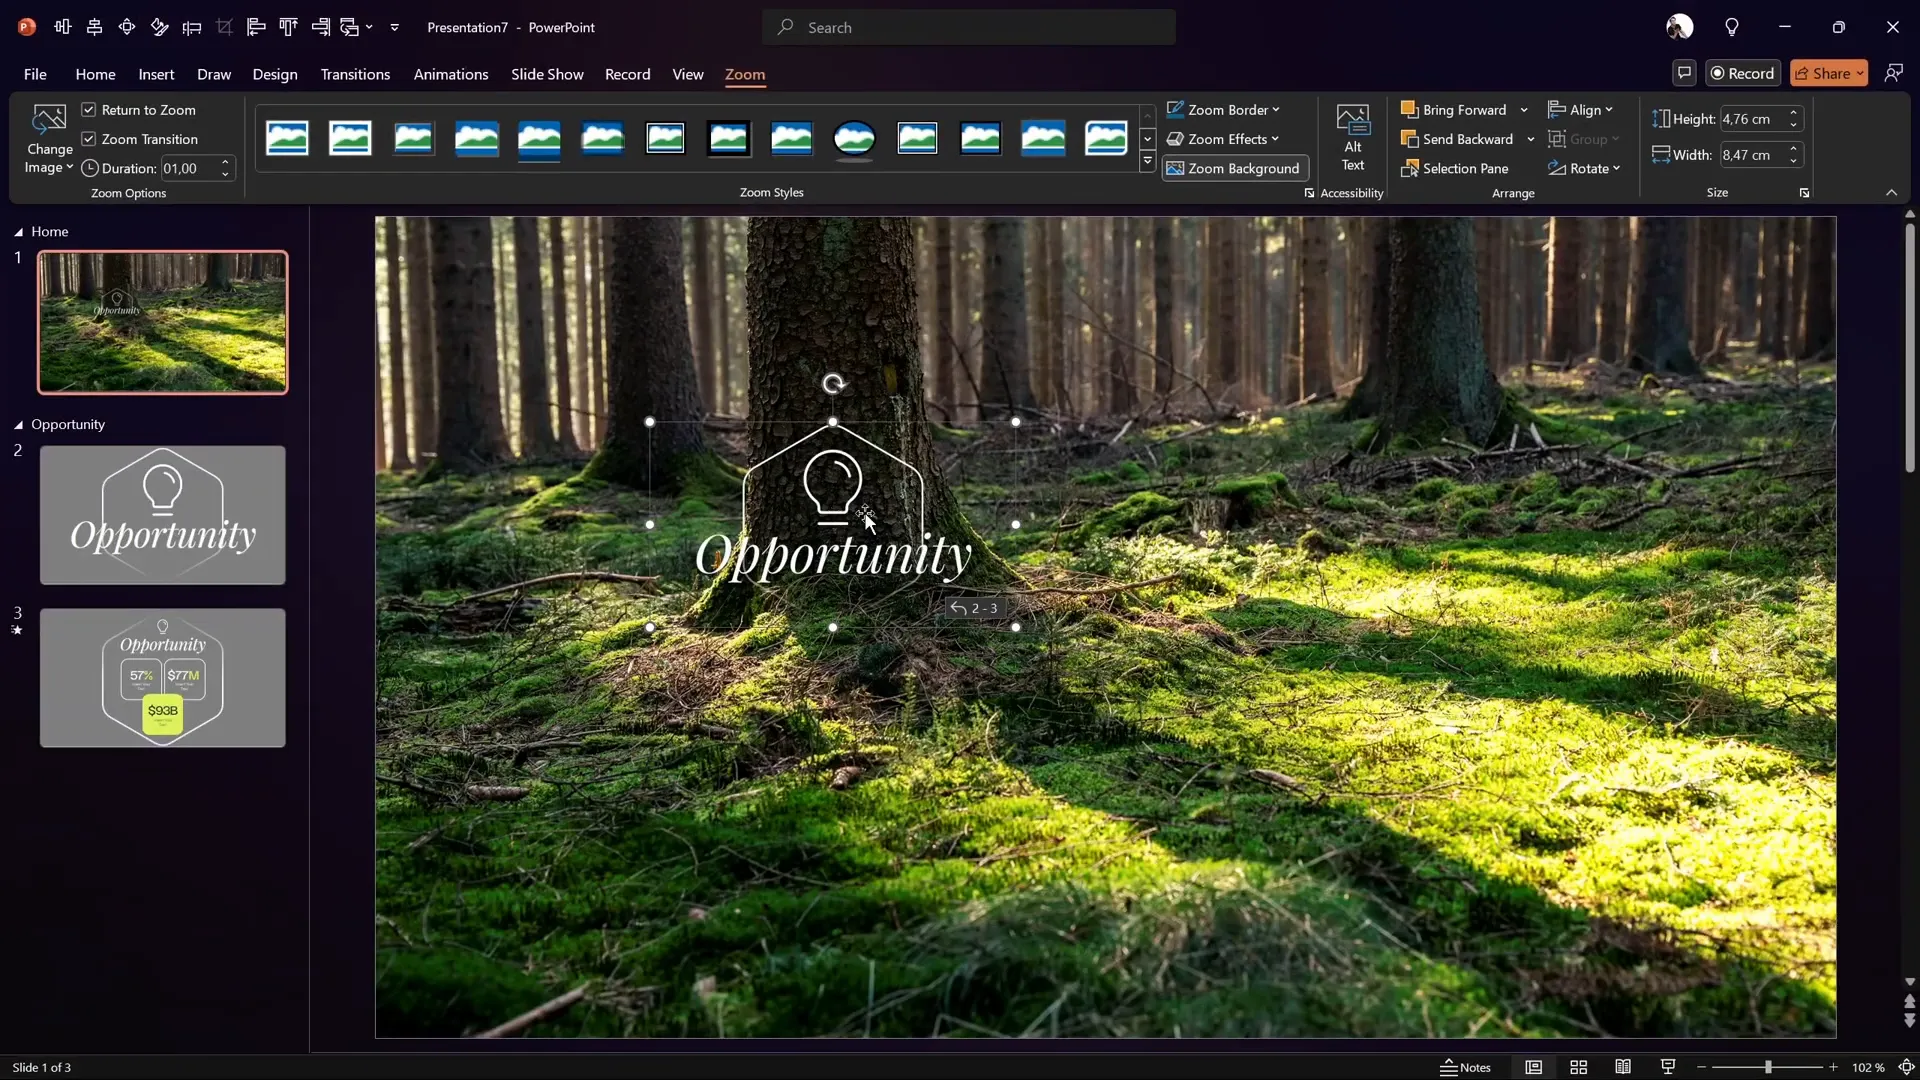
Inserting Section Zooms and Customizing Appearance
Section Zooms allow clickable navigation to different sections of your presentation, ideal for interactive storytelling.
To insert a section zoom:
- Go to the Insert > Zoom menu and select Section Zoom.
- Choose the section you want to link to, such as “Opportunity.”
- Insert the zoom on your home slide.
- Remove any unwanted background color by selecting the zoom and clicking Zoom Background to make it transparent.
- Ensure Return to Zoom is enabled so that after navigating through the section slides, the presentation returns to the home slide.
Test your zoom by entering presentation mode and clicking the zoom. It should smoothly transition into the linked section.
Creating a Glassmorphic Blurry Background Effect
For a modern and elegant look, you can add a glassmorphic, blurry background behind your section zoom, mimicking the popular UI design trend.
Here’s how to achieve it:
- Duplicate your background photo and apply a heavy blur effect (maximum radius of 100) using Artistic Effects in the Picture Format pane.
- Copy the blurred photo and set it as the slide background using Format Background > Picture or texture fill > Clipboard.
- Insert a new hexagon shape below your section zoom.
- Set the hexagon’s fill to Slide Background Fill so it reveals the blurred background.
- Add an inside shadow to the hexagon for subtle edge definition and depth.
- Ensure the section zoom stays on top of this hexagon shape.
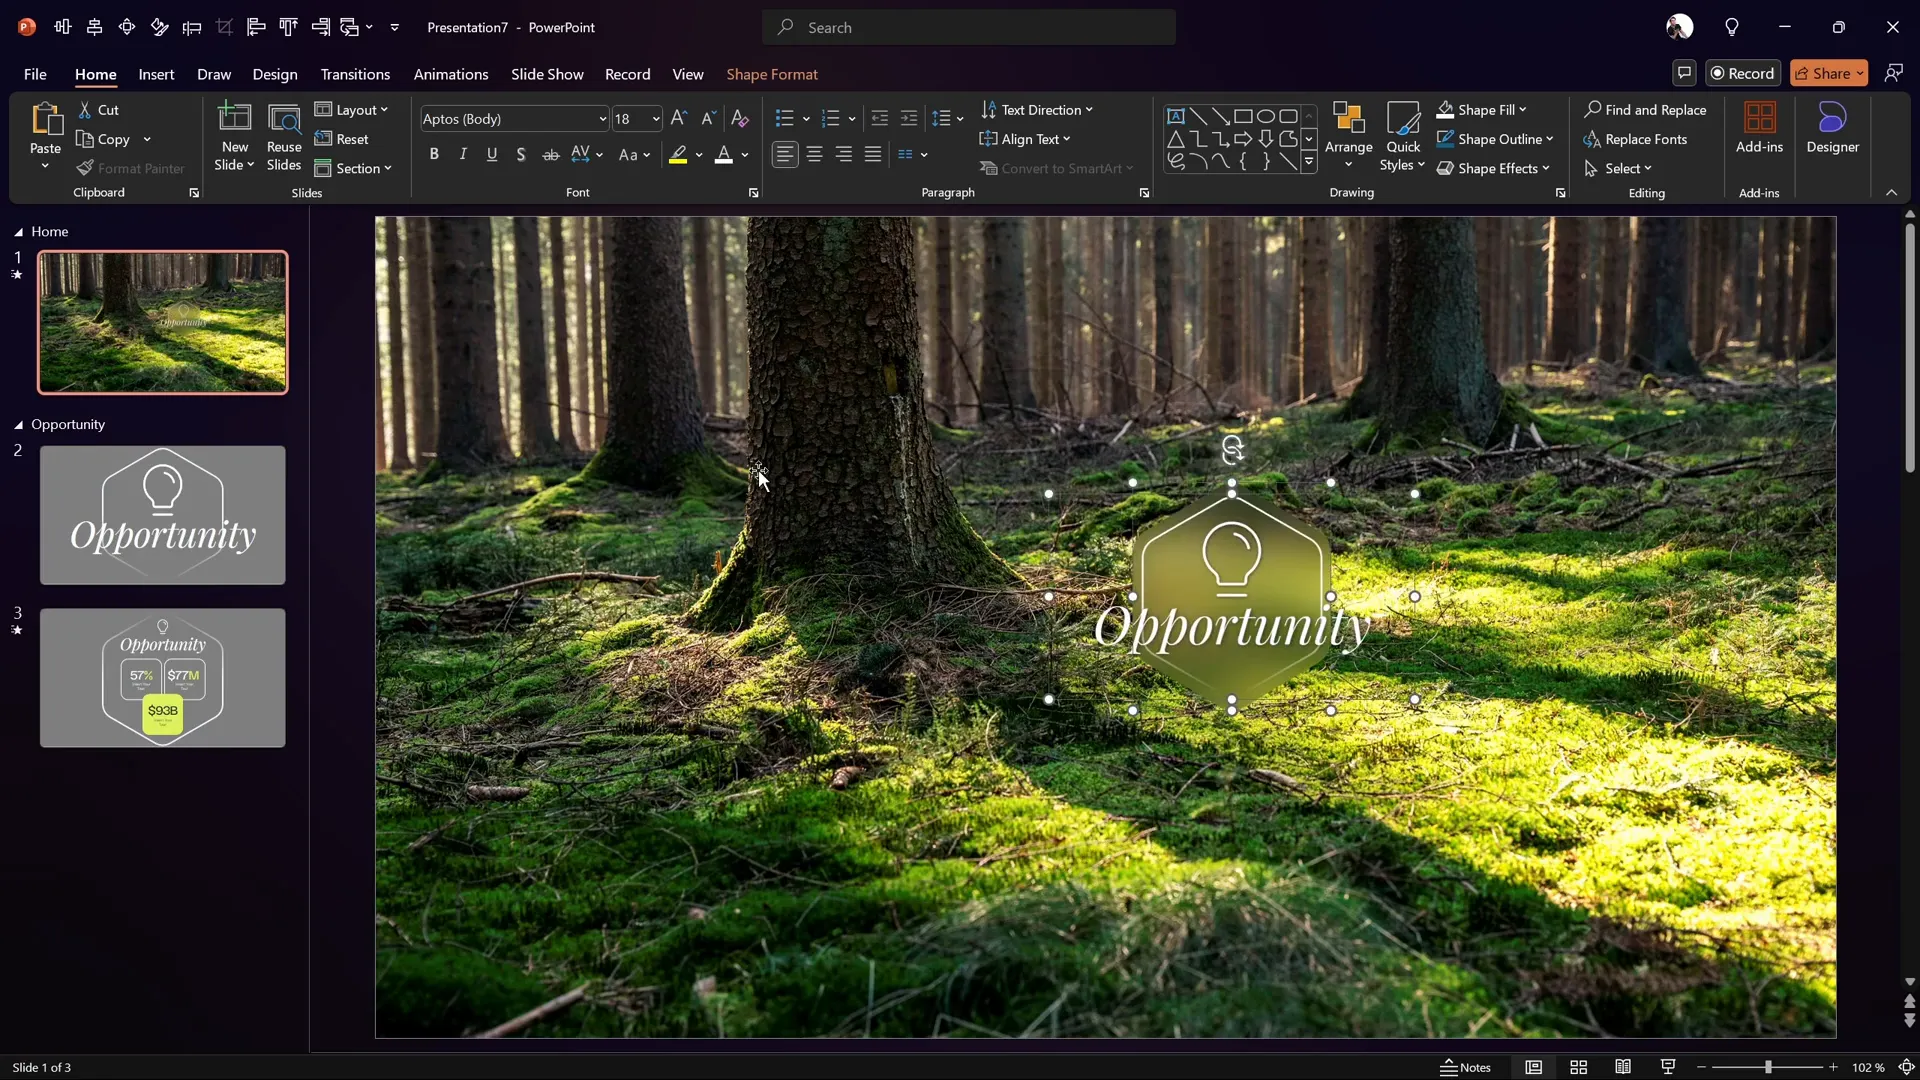
This approach creates a visually appealing, translucent effect that enhances the focus on your interactive section zoom.
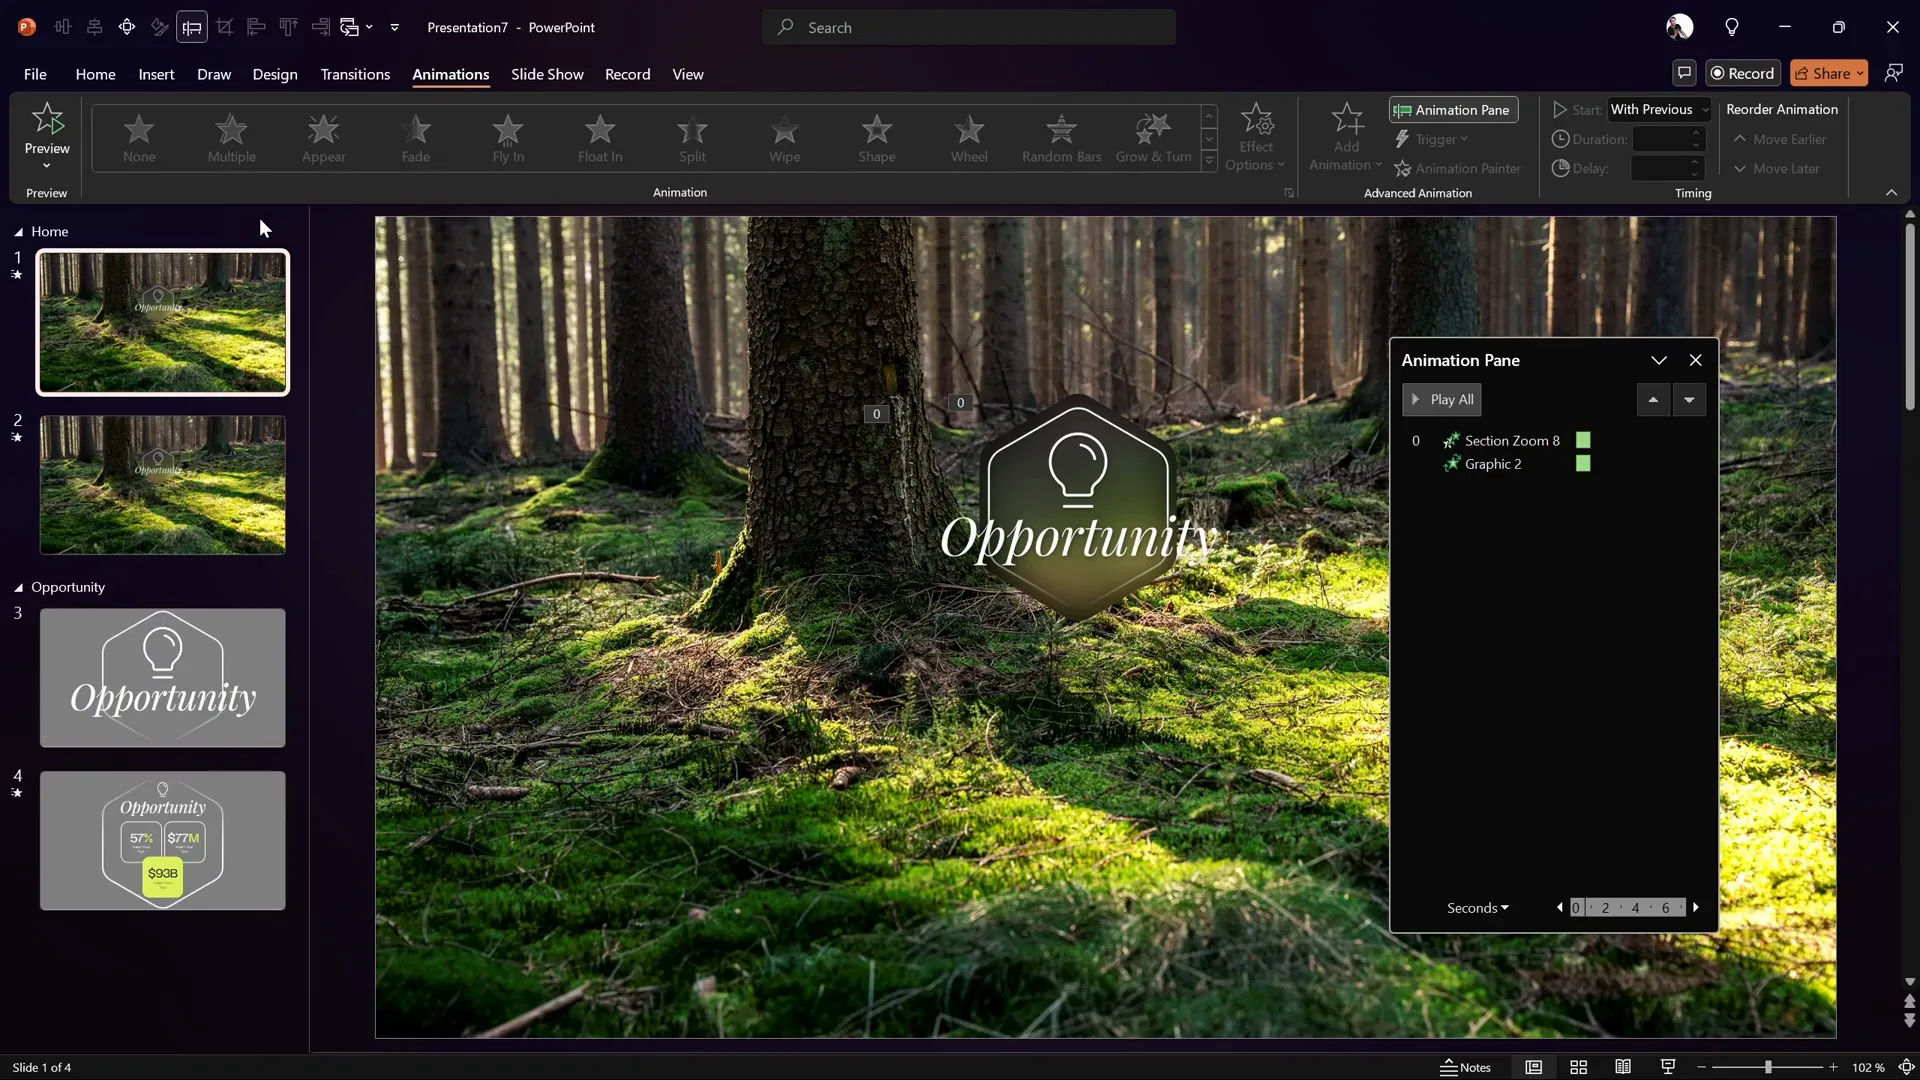
Animating Section Zooms for Extra Impact
Animations can make your section zooms more eye-catching. To add animation:
- Select the section zoom and add a Zoom entrance animation with a duration of 1 second, starting with previous.
- Select the blurry hexagon background shape and add a Spinner entrance animation, also 1 second duration and starting with previous.
When you run the presentation, the hexagon spins in as the section zoom zooms in, creating a smooth, professional effect.

Workaround to Control Animation Repetition
By default, these animations replay every time you return to the home slide, which can be distracting if you prefer the animations to play only once.
To limit animations to a single playthrough:
- Duplicate the home slide.
- On the duplicate, delete all animations.
- Set the first (animated) home slide to transition automatically after 0 seconds to the duplicate.
- Use the duplicate slide as your main home slide after the first load.
This setup lets the animations play once on the first home slide, then switch to the duplicate without animations for subsequent interactions.
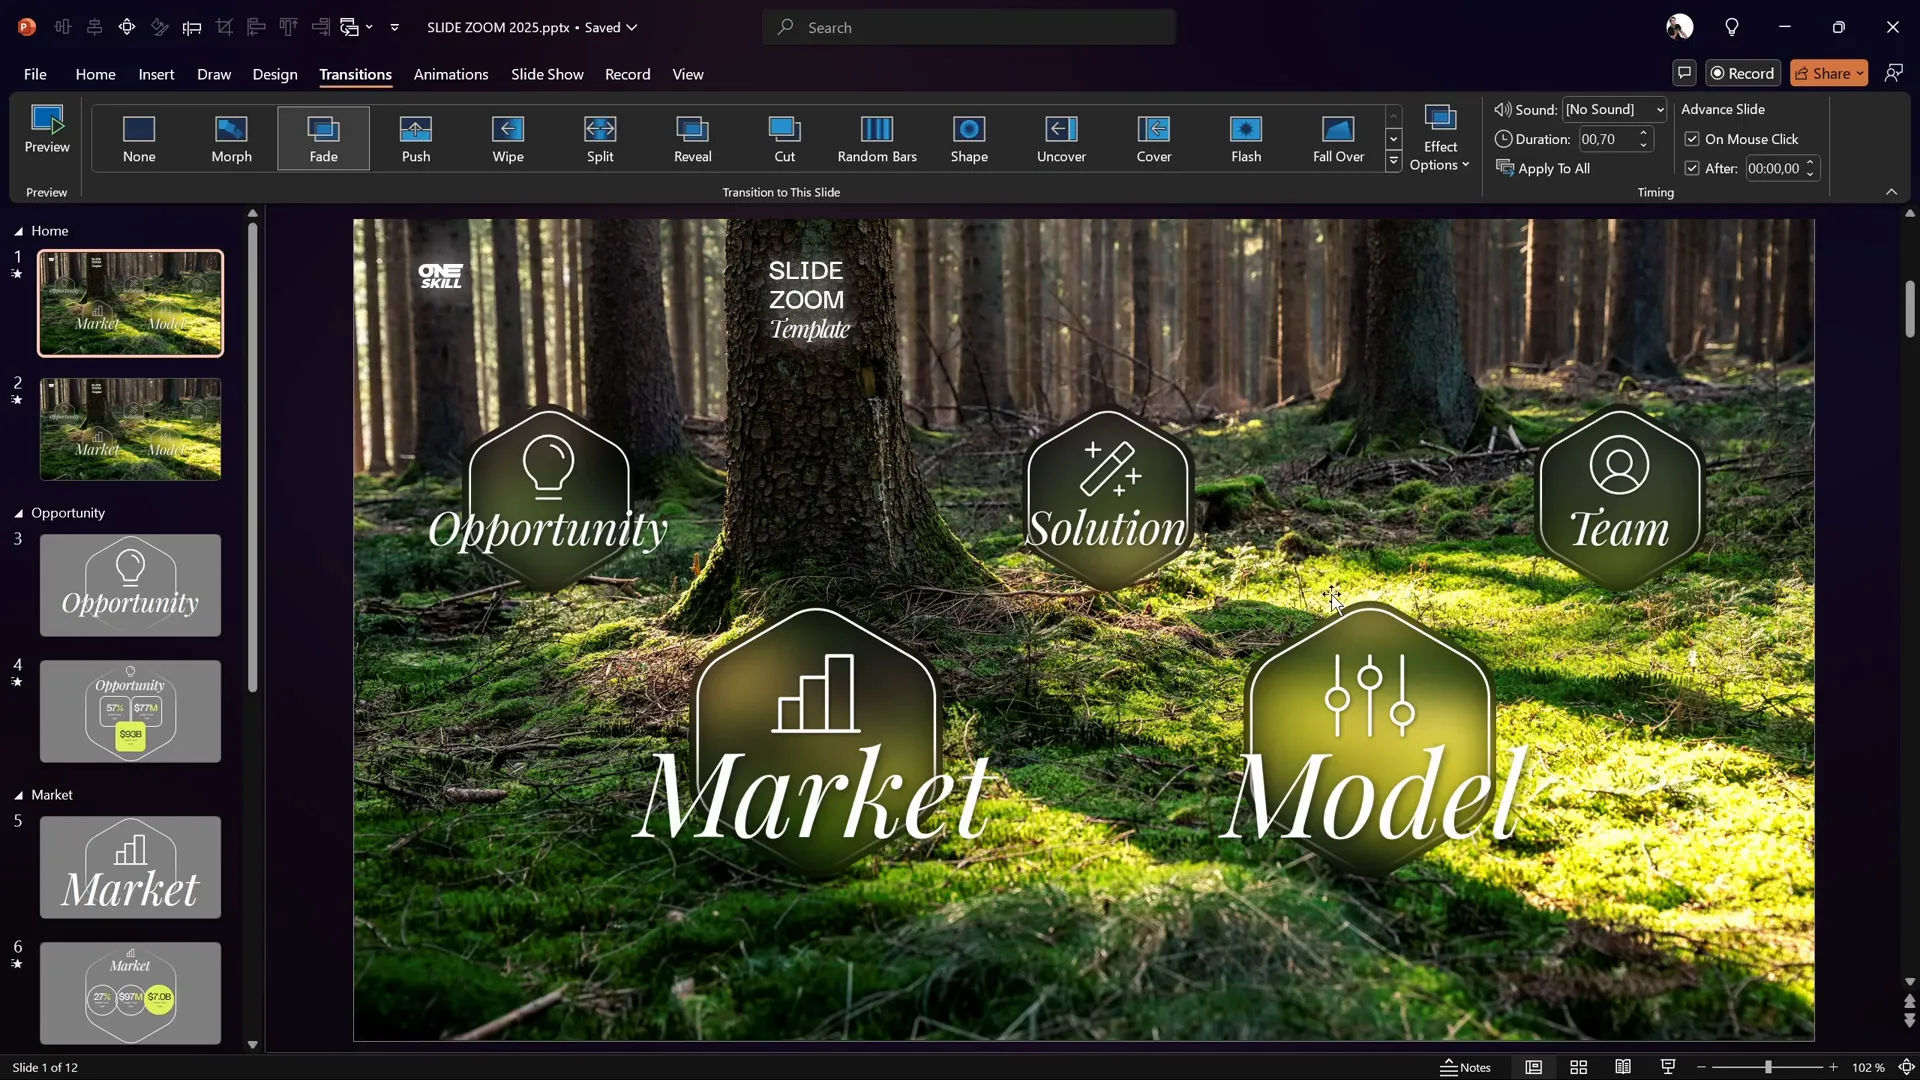
Expanding Your Slide Zoom Template
Using the same technique, you can create multiple section zooms for various parts of your presentation such as:
- Opportunity
- Market
- Solution
- Model
- Team
All these slides and templates are free to download from the video description link provided by One Skill PPT.
Frequently Asked Questions (FAQ)
What PowerPoint version is required to create this slide zoom template?
The tutorial uses Microsoft 365, which supports the morph transition, but PowerPoint 2019 and 2021 also support morph. If you don’t have morph, you can still create the template but some animations will be less dynamic.
Can I create rounded hexagons directly in PowerPoint?
PowerPoint doesn’t support smooth rounded hexagons by default. The workaround is to create the shape in Figma (a free online tool), export it as SVG, and import it into PowerPoint.
How do section zooms differ from slide zooms?
Section zooms link to an entire section (a group of slides) and allow navigation through multiple slides before returning to the main slide, whereas slide zooms link to a single slide.
How can I make the background of a section zoom transparent?
Select the section zoom, then under the Zoom tab, click Zoom Background to toggle transparency.
Is the glassmorphic blurry background effect difficult to create?
Not at all! It involves duplicating your background image, applying a blur effect, setting it as slide background, and layering a shape with slide background fill on top.
Conclusion
Creating an interactive and visually appealing PowerPoint Presentation is easier than you might think with modern tools like section zooms, morph transitions, and external design apps such as Figma.
This step-by-step guide has walked you through setting up your workspace, designing custom shapes, inserting icons and text, applying slide transitions, and building clickable section zooms with animations and a stylish glassmorphic effect.
Whether you’re a beginner or an experienced PowerPoint user, these techniques will help you craft presentations that are both professional and engaging, keeping your audience hooked from start to finish.
Don’t forget to download the free slide zoom template linked in the original tutorial to get started quickly and customize it to your needs.
Stay creative, and happy presenting!