
PowerPoint presentations are an essential tool for communicating ideas, delivering lectures, and making business proposals. But sometimes, the standard fonts and animations can feel a bit too mechanical or impersonal. What if you could add a personal, creative touch that mimics handwriting? Imagine your slides coming alive as if someone is writing them out in real-time, making your presentation more engaging and visually appealing.
In this comprehensive guide, inspired by the expert tutorial from Passionate Learning, I will walk you through two effective methods to create a handwriting text effect in PowerPoint. Whether you are using PowerPoint 2010, 2013, 2016, or later versions, these techniques will help you add a dynamic handwriting animation to your slides, making your presentations stand out.
Let’s dive into the step-by-step process of creating this effect, explore the differences between the two methods, and provide useful tips to help you master this animation style.
Table of Contents
- Why Use a Handwriting Text Effect in PowerPoint?
- Method 1: Creating Handwriting Effect Using Custom Path Tracing
- Method 2: Creating Handwriting Effect Using Predefined Zigzag Motion Path
- Comparing Both Methods
- Tips for Perfecting Your Handwriting Effect
- Frequently Asked Questions (FAQ)
- Conclusion
Why Use a Handwriting Text Effect in PowerPoint?
Before we get into the technical details, let’s understand why adding a handwriting effect can be beneficial:
- Enhances Engagement: The animation simulates real-time writing, capturing the audience’s attention and keeping them engaged.
- Personalizes Your Presentation: Handwriting adds a human touch, making your slides feel more approachable and less robotic.
- Improves Visual Appeal: It breaks the monotony of static text, adding movement and style to your slides.
- Emphasizes Key Points: The gradual reveal of text can highlight important messages effectively.
- Works Across PowerPoint Versions: The methods discussed are compatible with multiple PowerPoint versions, ensuring versatility.
Now that we appreciate the value of this effect, let’s explore how to implement it.
Method 1: Creating Handwriting Effect Using Custom Path Tracing
This method involves tracing the exact path of your text with a custom motion path animation and synchronizing it with a hand image holding a pen or pencil. It’s the more refined and realistic way to simulate handwriting but requires a bit of manual effort.
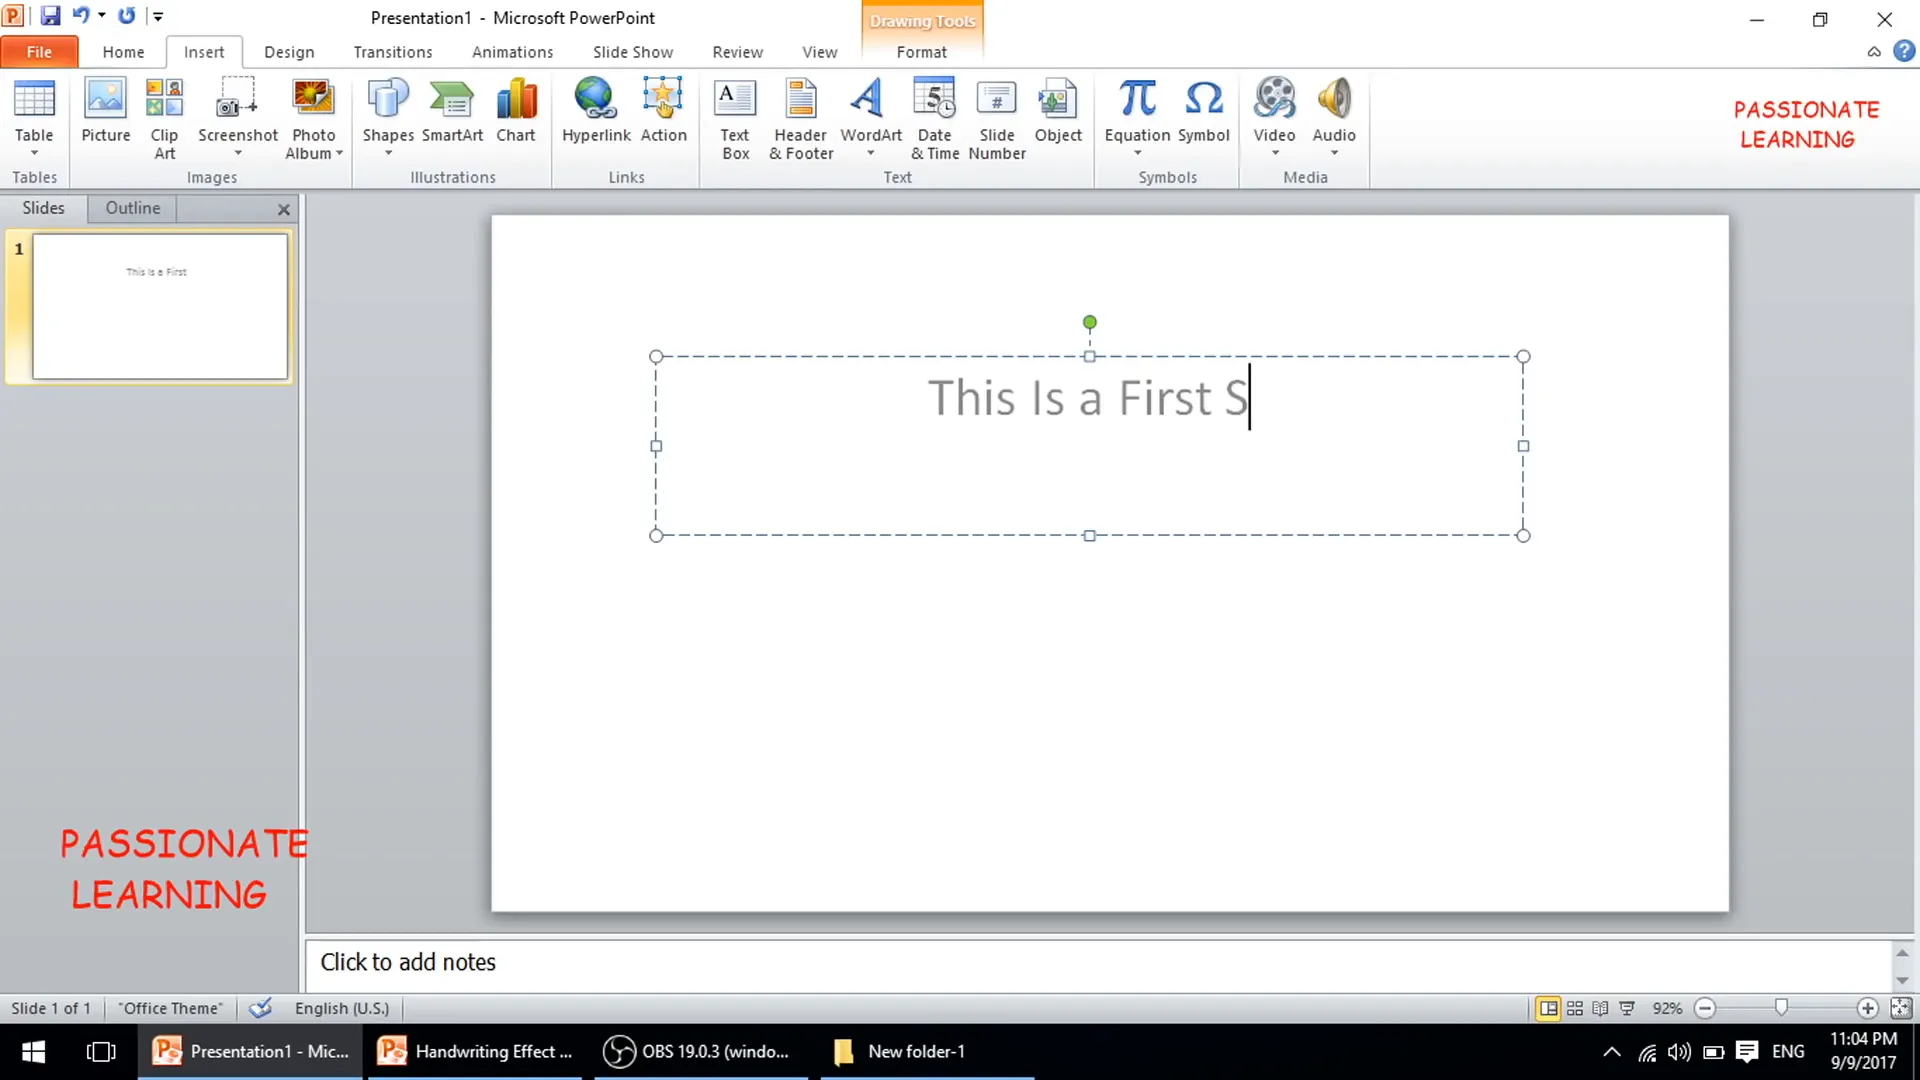
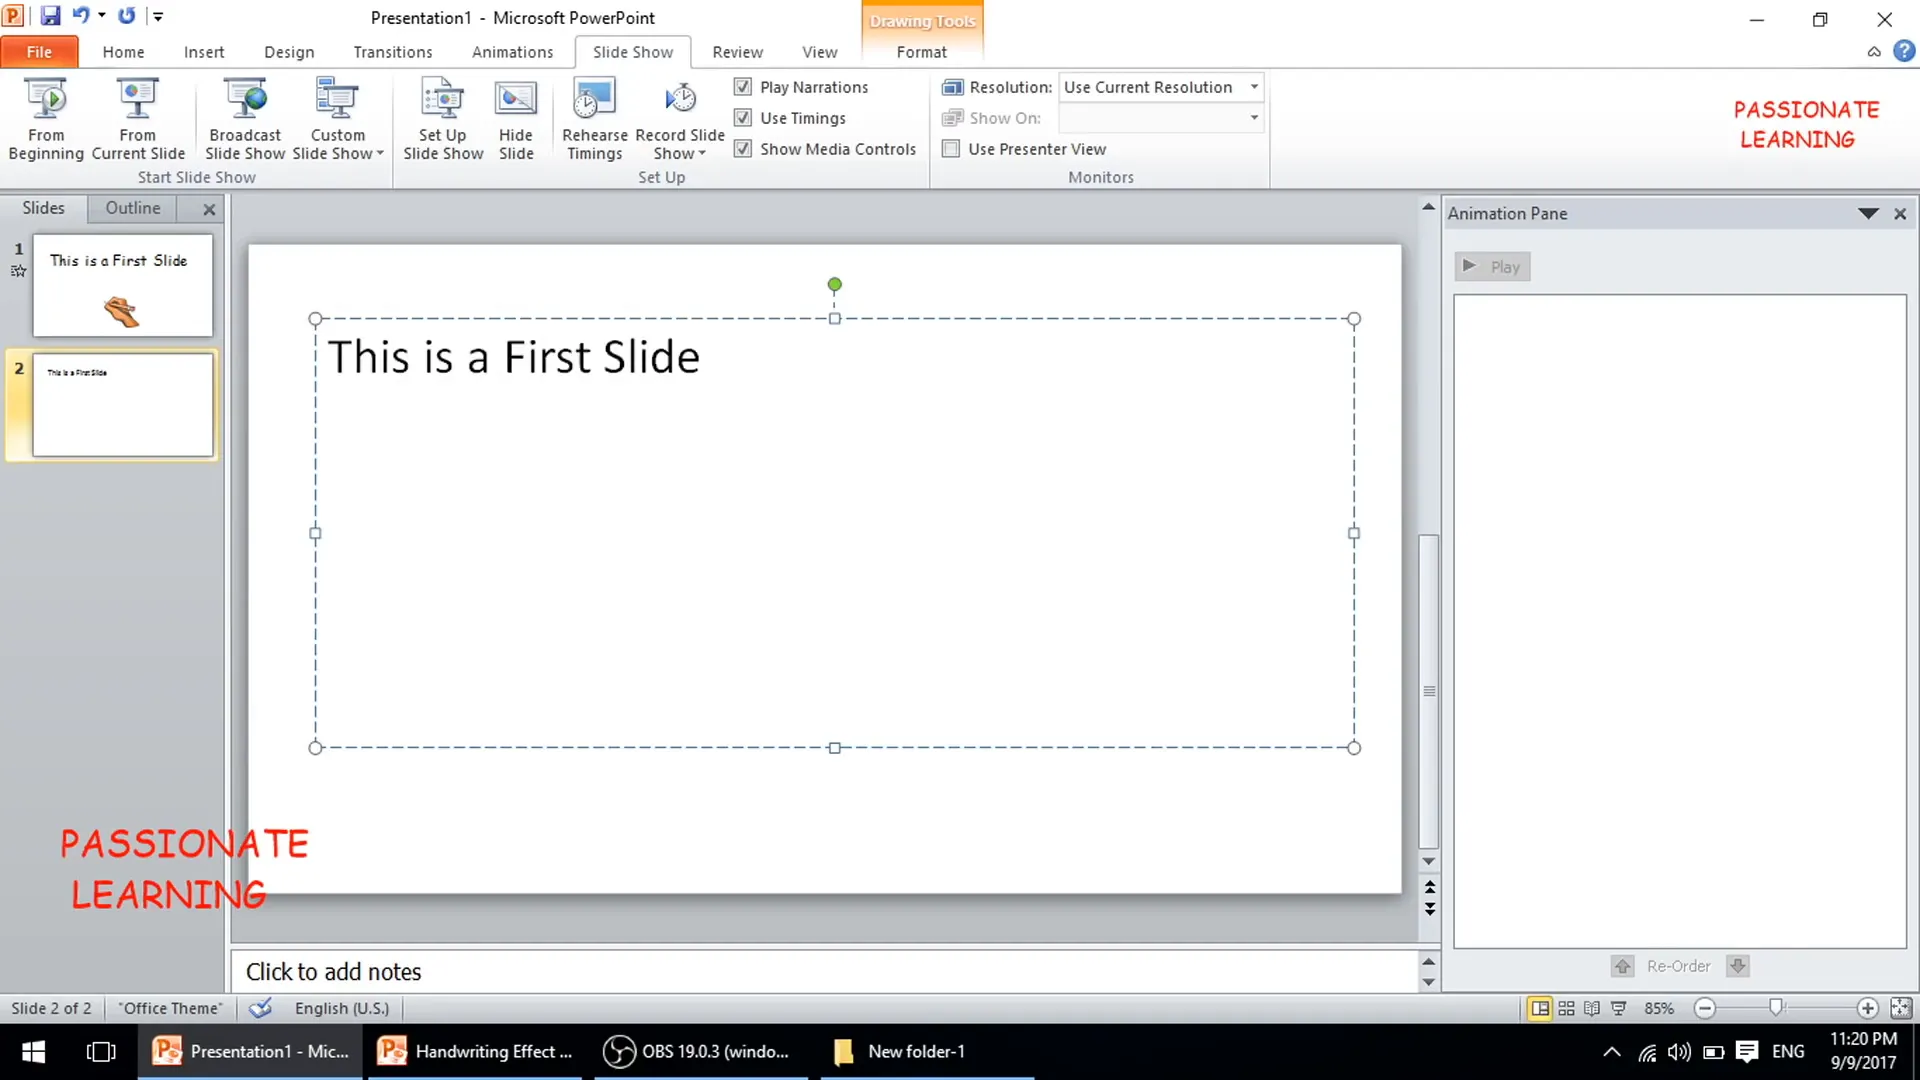
Step 1: Setting Up Your Slide
Start by opening your PowerPoint presentation and preparing the slide where you want the handwriting effect.
- Delete any unnecessary placeholder shapes or text boxes on the slide.
- Add the text you want to animate. For example, type “This is first slide.”
- Choose any font you prefer for your text. For demonstration, Comic Sans or any casual script font works well.
- Change the font color to solid black or any color that contrasts well with your slide background.
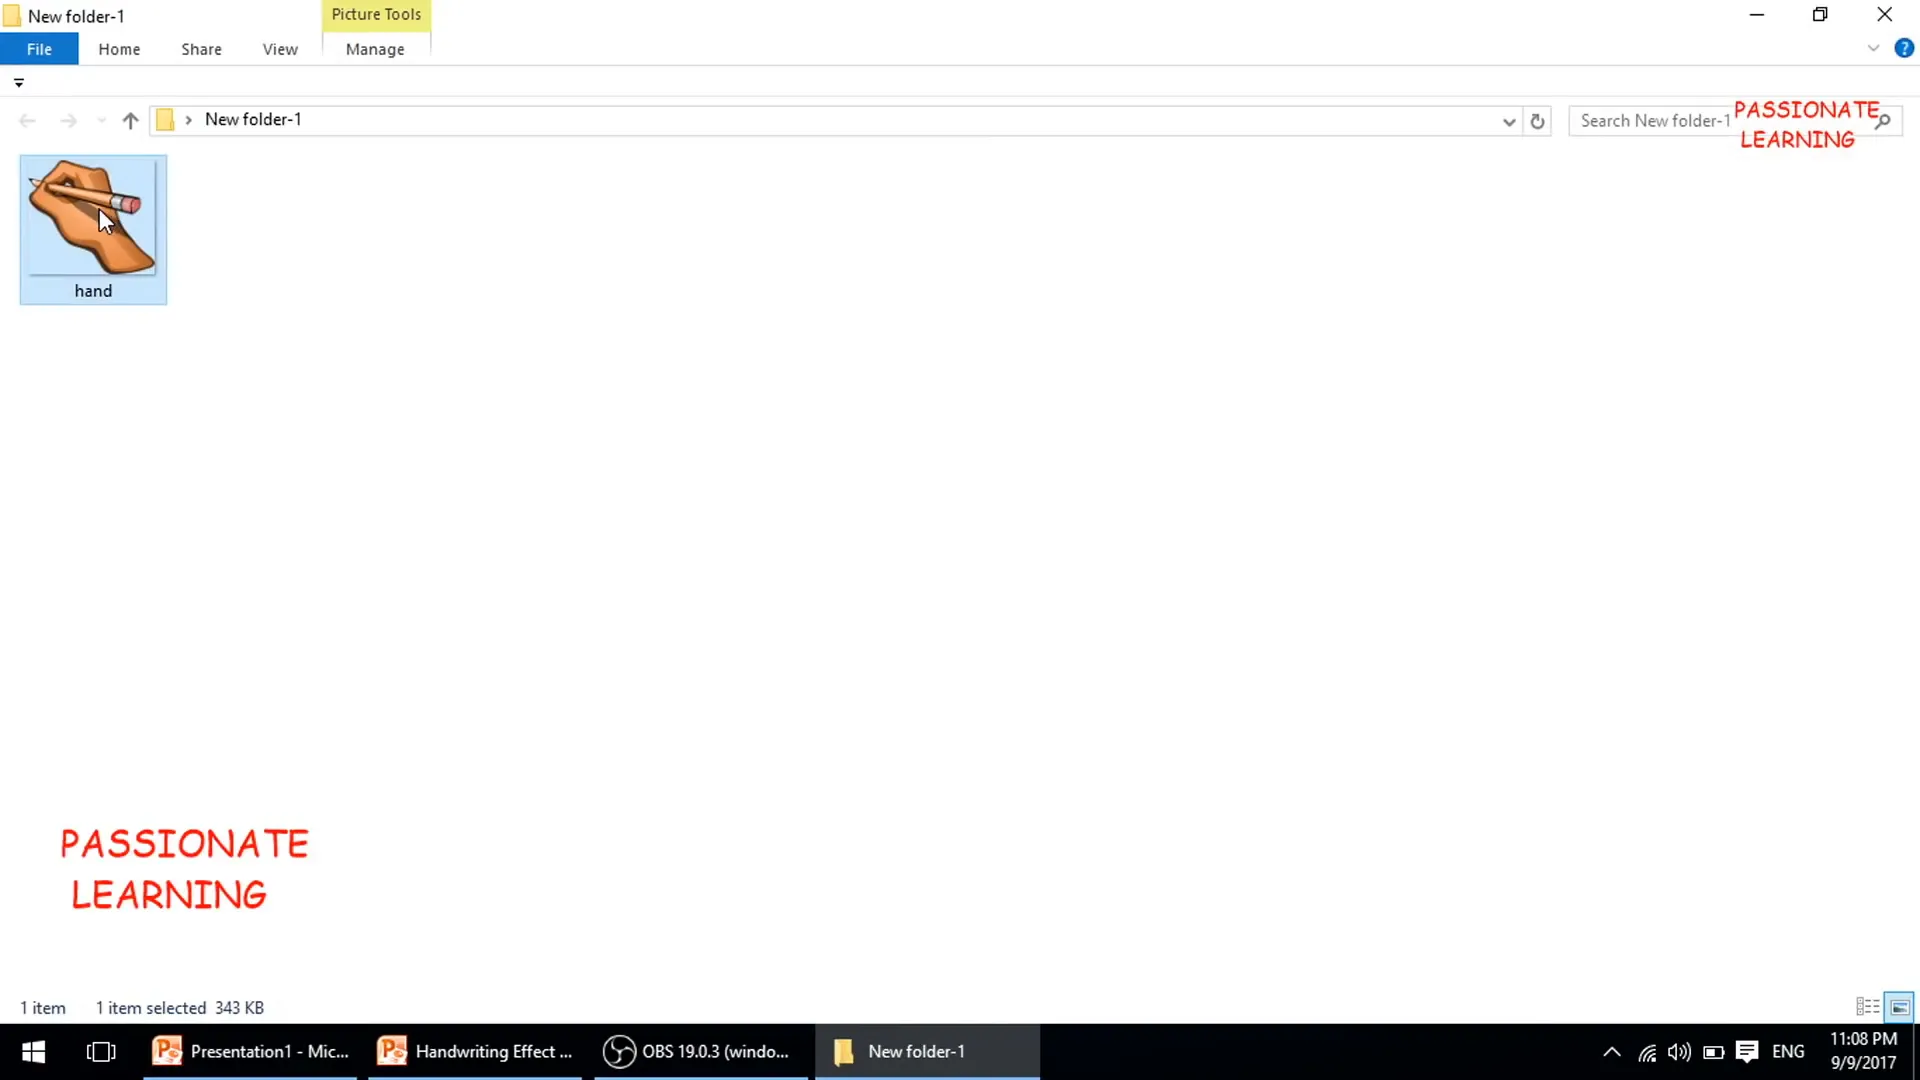
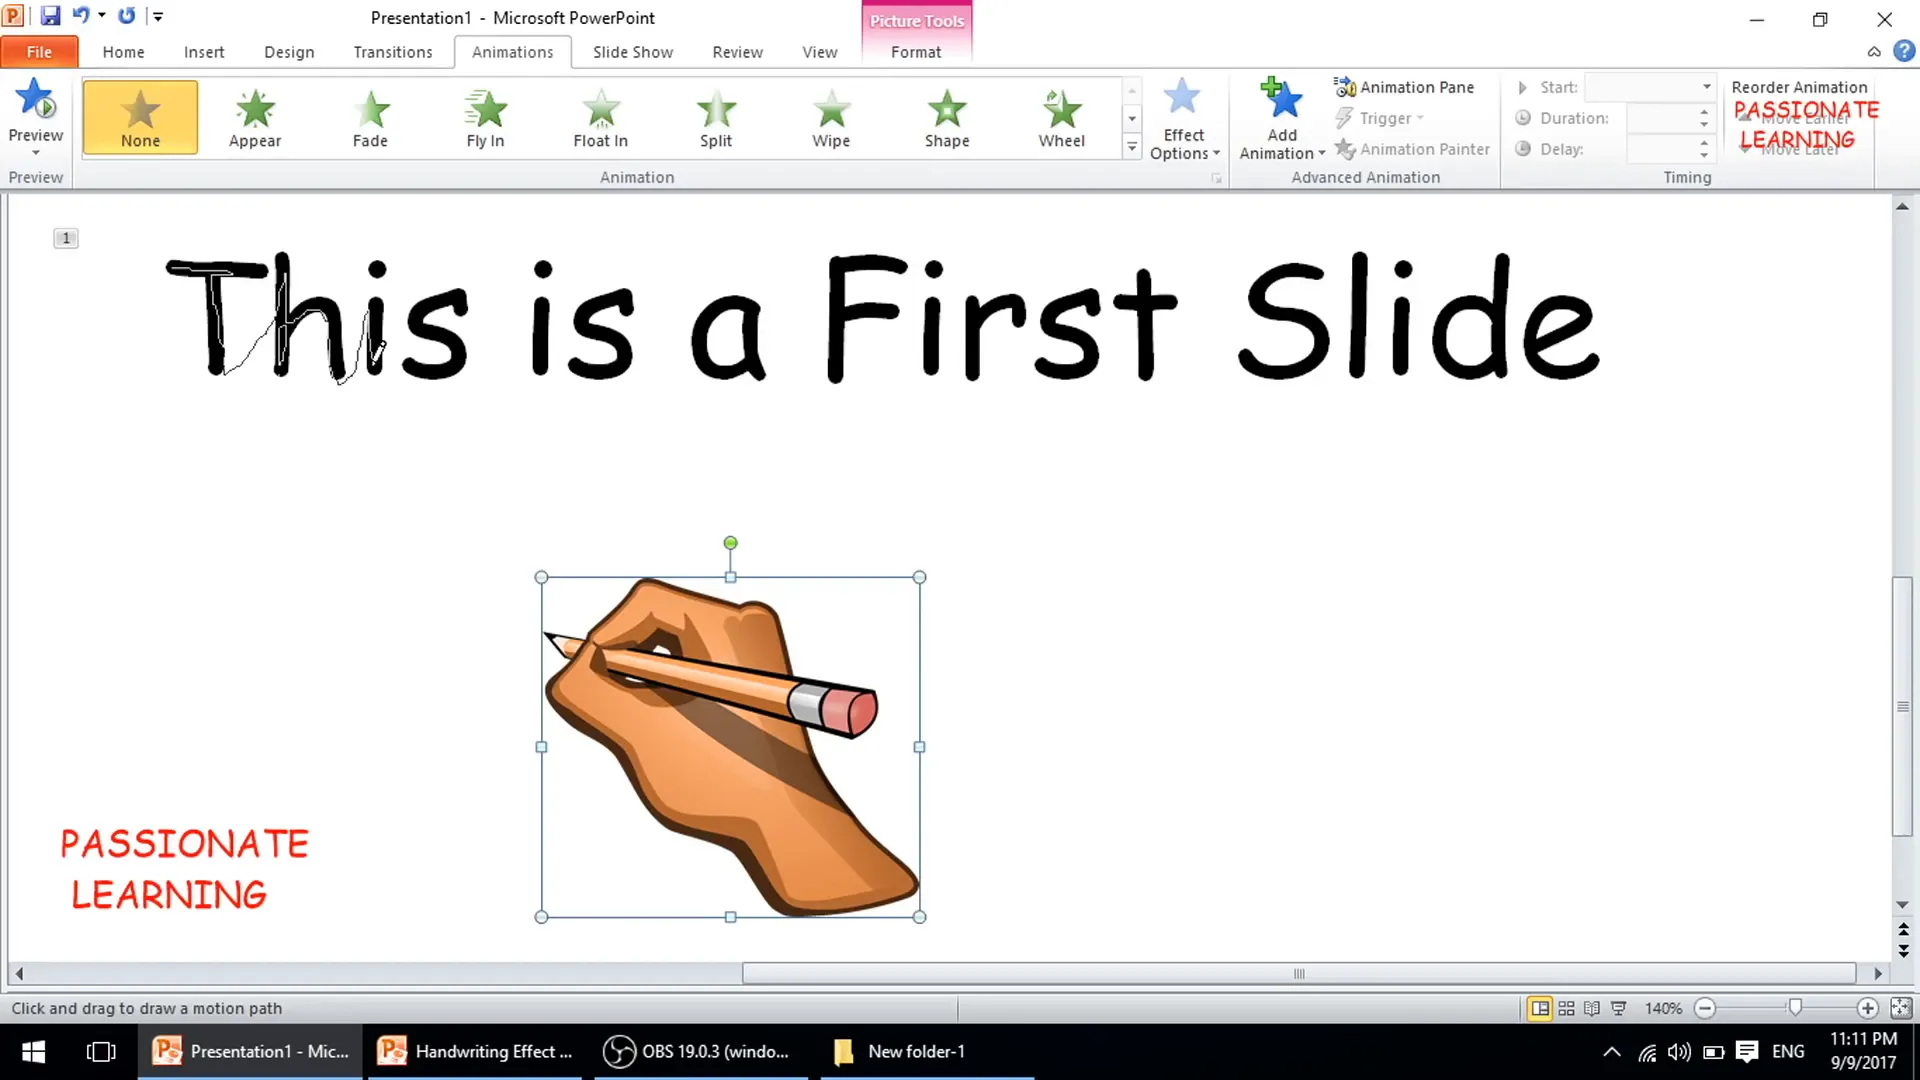
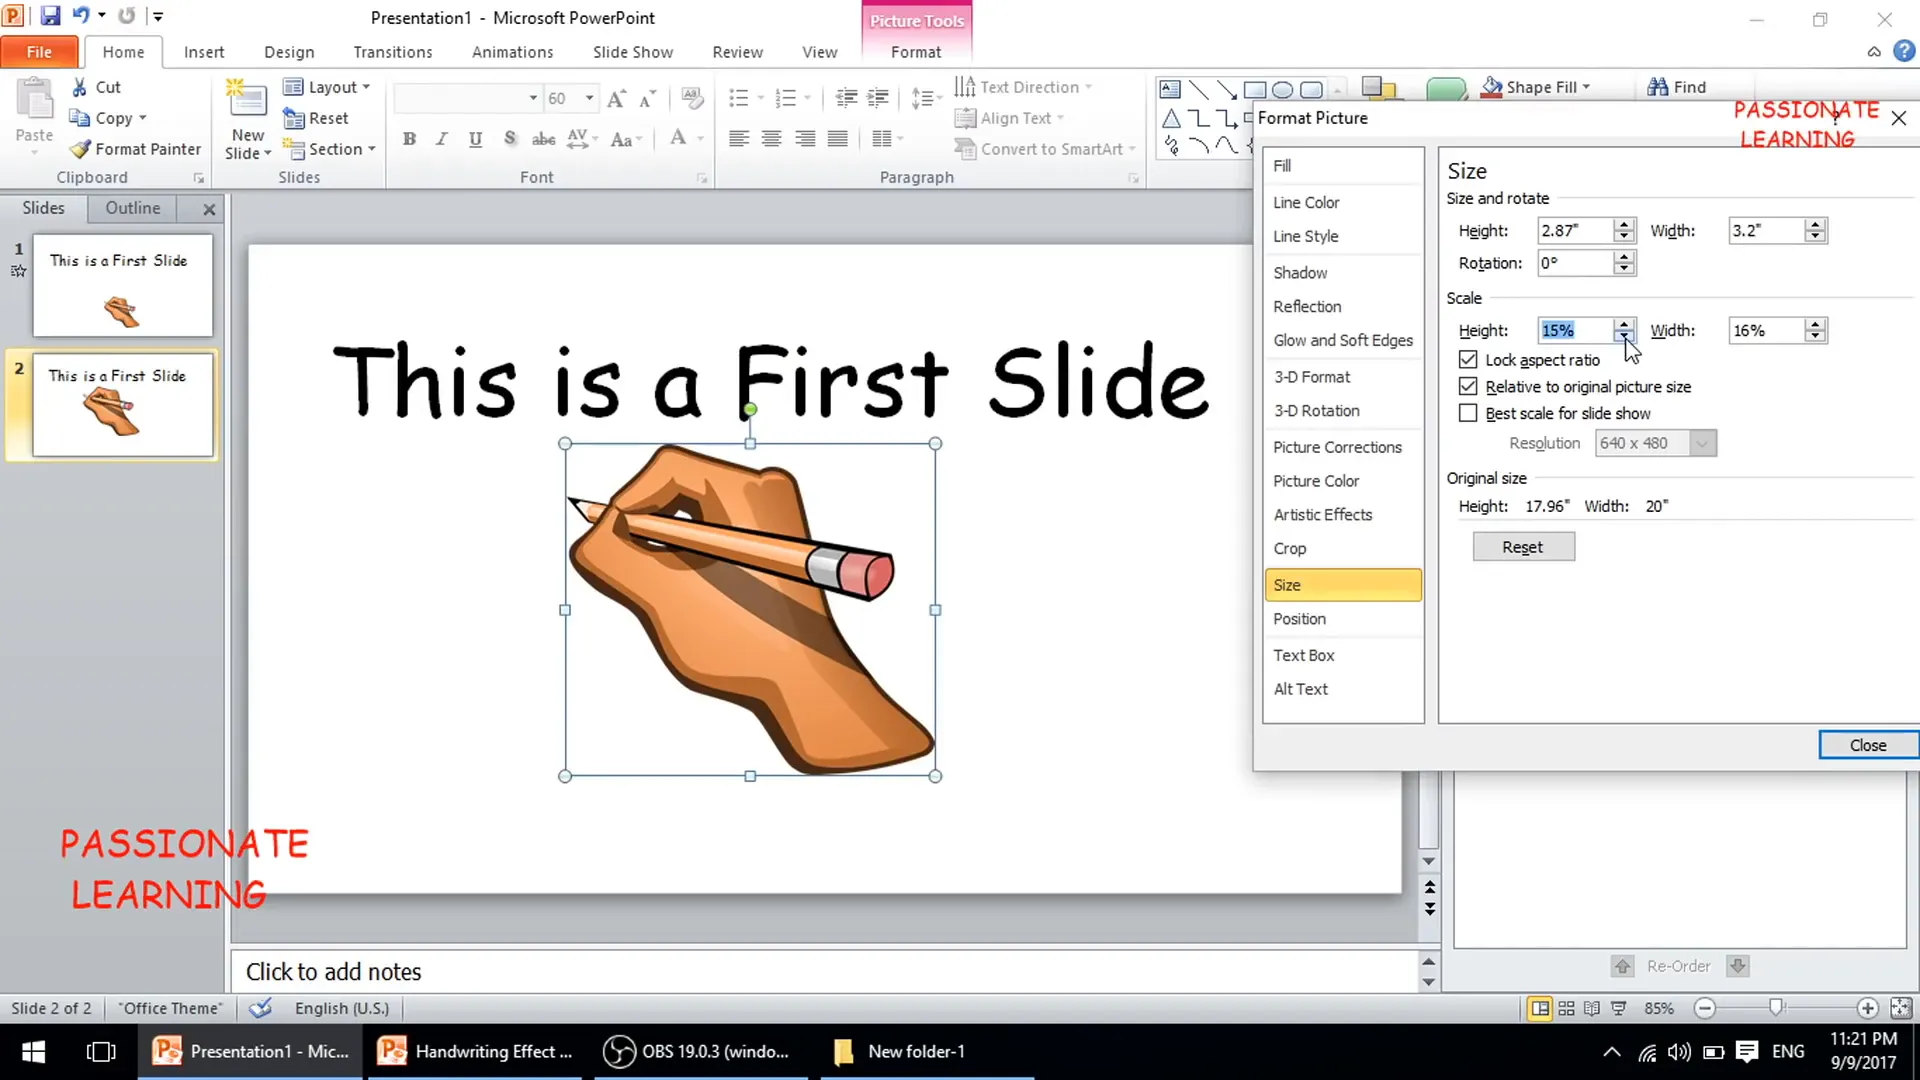
Step 2: Inserting the Hand Image
To simulate the handwriting, you need an image of a hand holding a pen or pencil. You can either insert an image from your computer or drag and drop it directly onto the slide.
- Go to the Insert tab and select Pictures.
- Choose the hand image from your folder or drag the image file into the slide.
- Resize the image appropriately so it doesn’t overpower your text but is visible enough to follow the writing path.
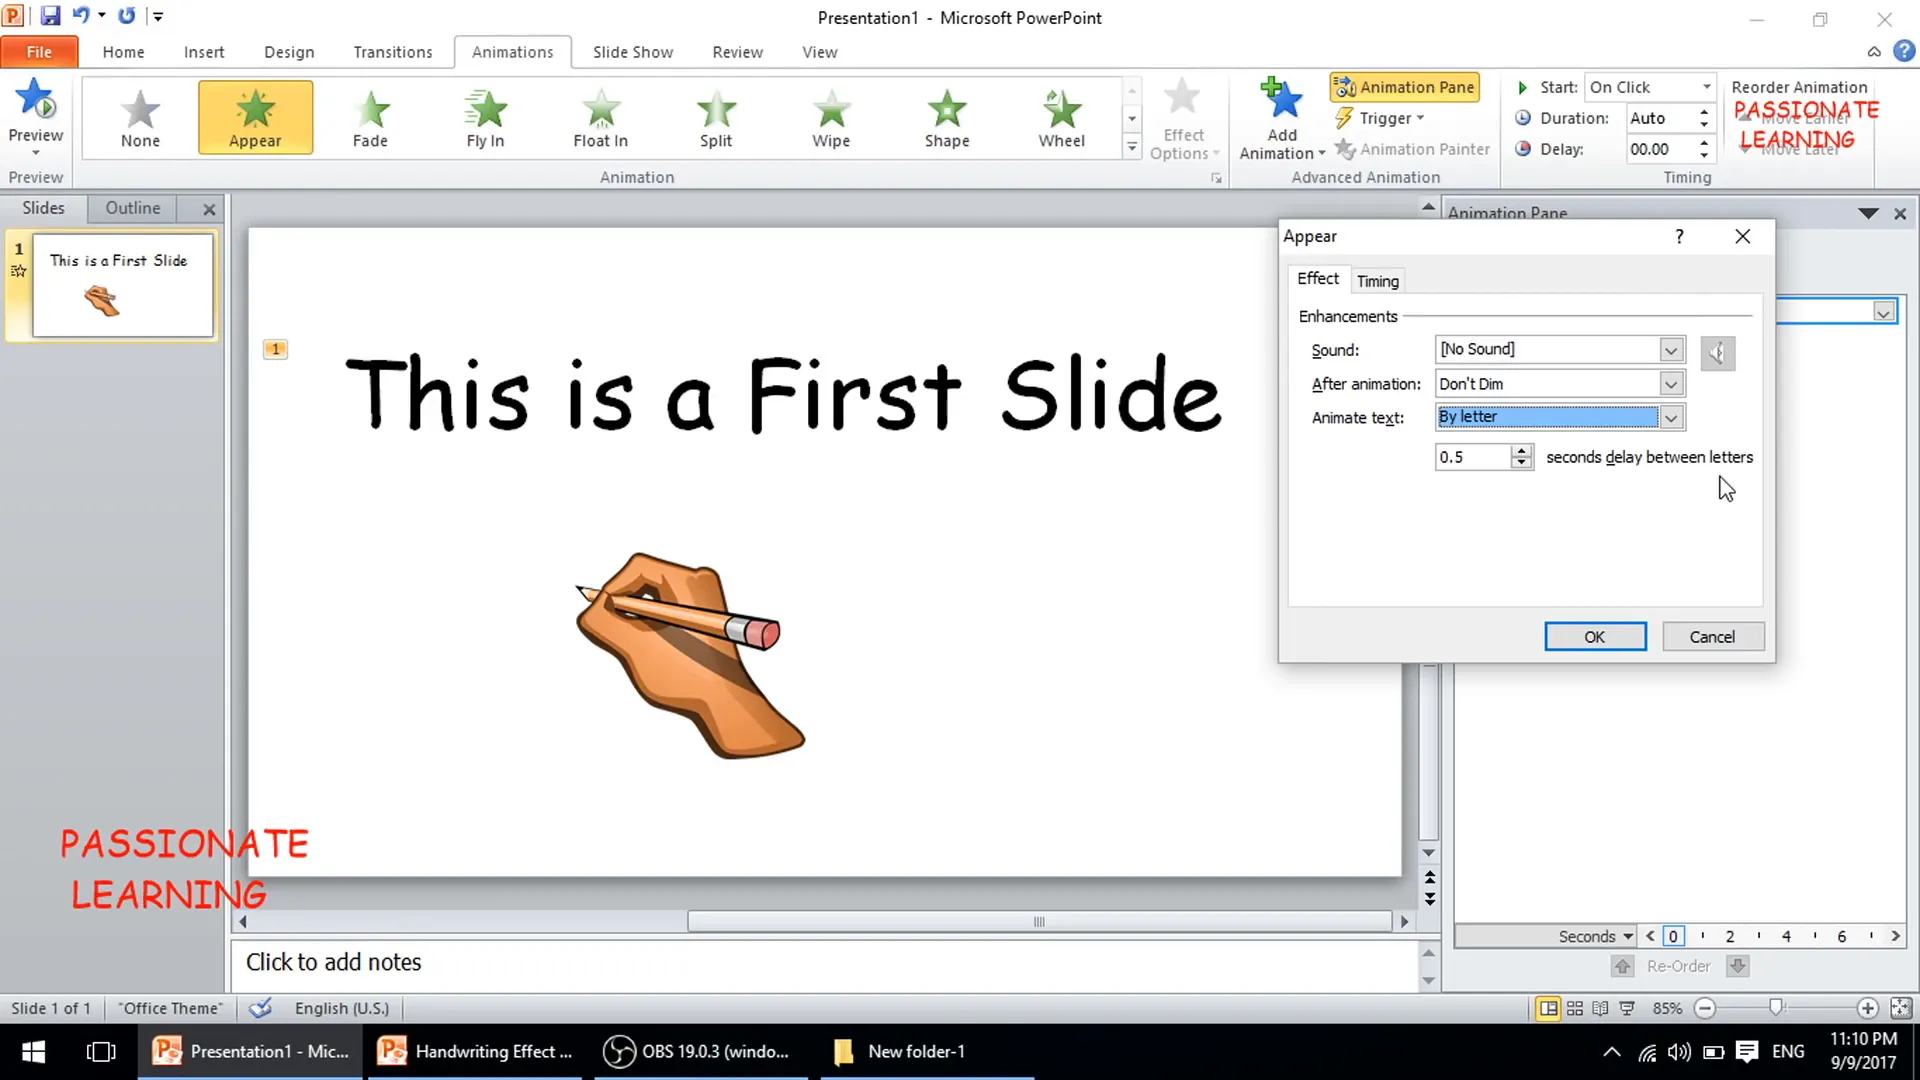
Step 3: Animating the Text with Typewriter Effect
Next, we add the typewriter animation to the text to simulate the letters appearing one by one.
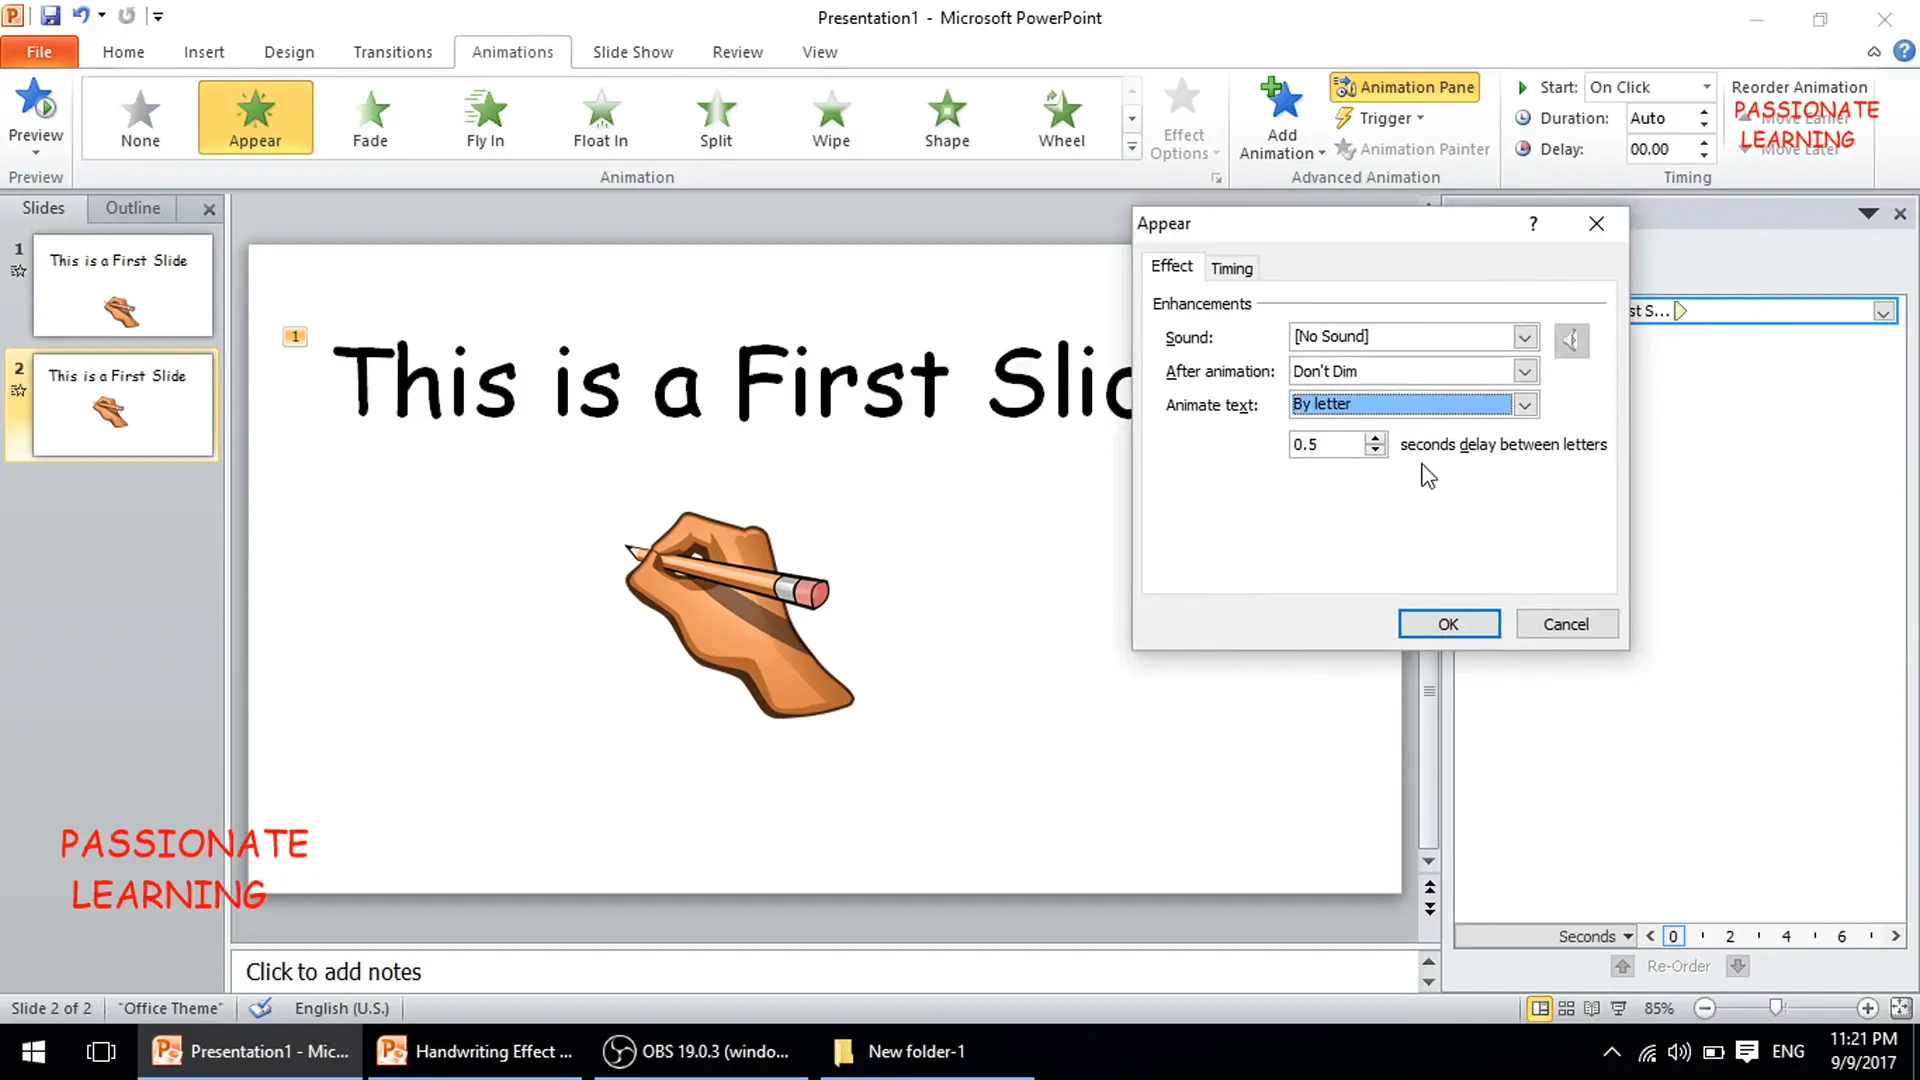
- Select the text box.
- Go to the Animations tab and choose the Appear animation.
- Open the Animation Pane to manage animation settings.
- Right-click the text animation and select Effect Options.
- Under Animate text, change from All at once to By letter.
- Set the delay between letters to 0.5 seconds (or adjust as per your preference).
This setup creates a typewriter-like effect where letters appear sequentially, enhancing the handwriting illusion.
Step 4: Animating the Hand Image Using Custom Motion Path
Now, the most critical part: making the hand image follow the actual path of the handwritten text.
- Select the hand image.
- Go to the Animations tab and select Custom Path from the motion paths.
- Your cursor will change to a plus sign (+), indicating you are ready to draw the motion path.
- Carefully trace the outline of each letter and word in the text with your mouse, keeping the left button pressed while tracing.
- Try to follow the natural flow of handwriting, but perfection is not mandatory; a rough tracing is sufficient.
- Once you finish tracing the entire text, release the mouse button and press the Escape key to end the path drawing.
This custom path will guide the hand image to follow the same route as the handwriting, creating a synchronized animation.
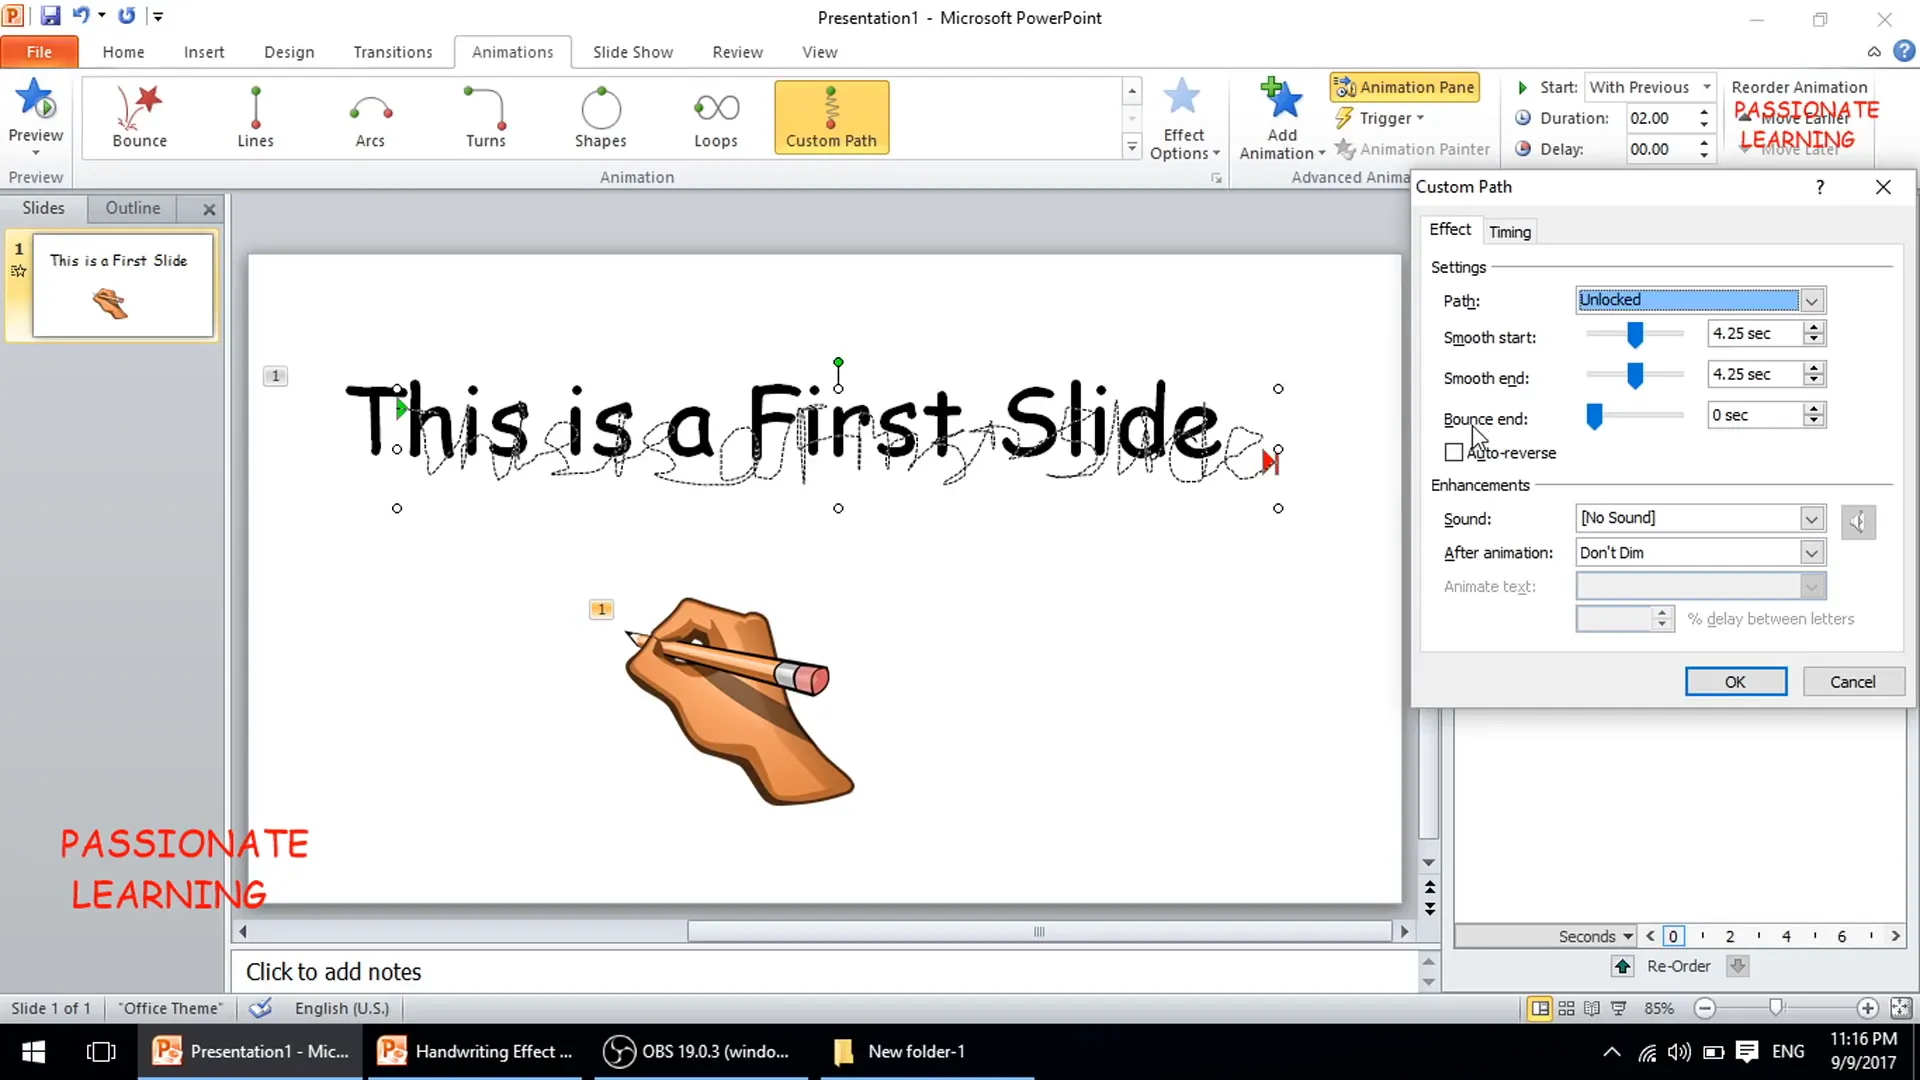
Step 5: Adjusting Animation Timings
To make the effect smooth and realistic, both the text animation and the hand motion path must have synchronized timings.
- Calculate the total duration of the text animation by counting the number of letters and multiplying by the delay time (e.g., 17 letters x 0.5 seconds = 8.5 seconds).
- In the Animation Pane, right-click the text animation and check its Timing settings.
- Right-click on the hand image animation and set its Duration to match the text animation duration (e.g., 8.5 seconds).
- Ensure Smooth Start, Smooth End, and Bounce End are all set to zero in the Effect Options for the hand animation.
- Set the hand animation to start With Previous so it moves in sync with the text.
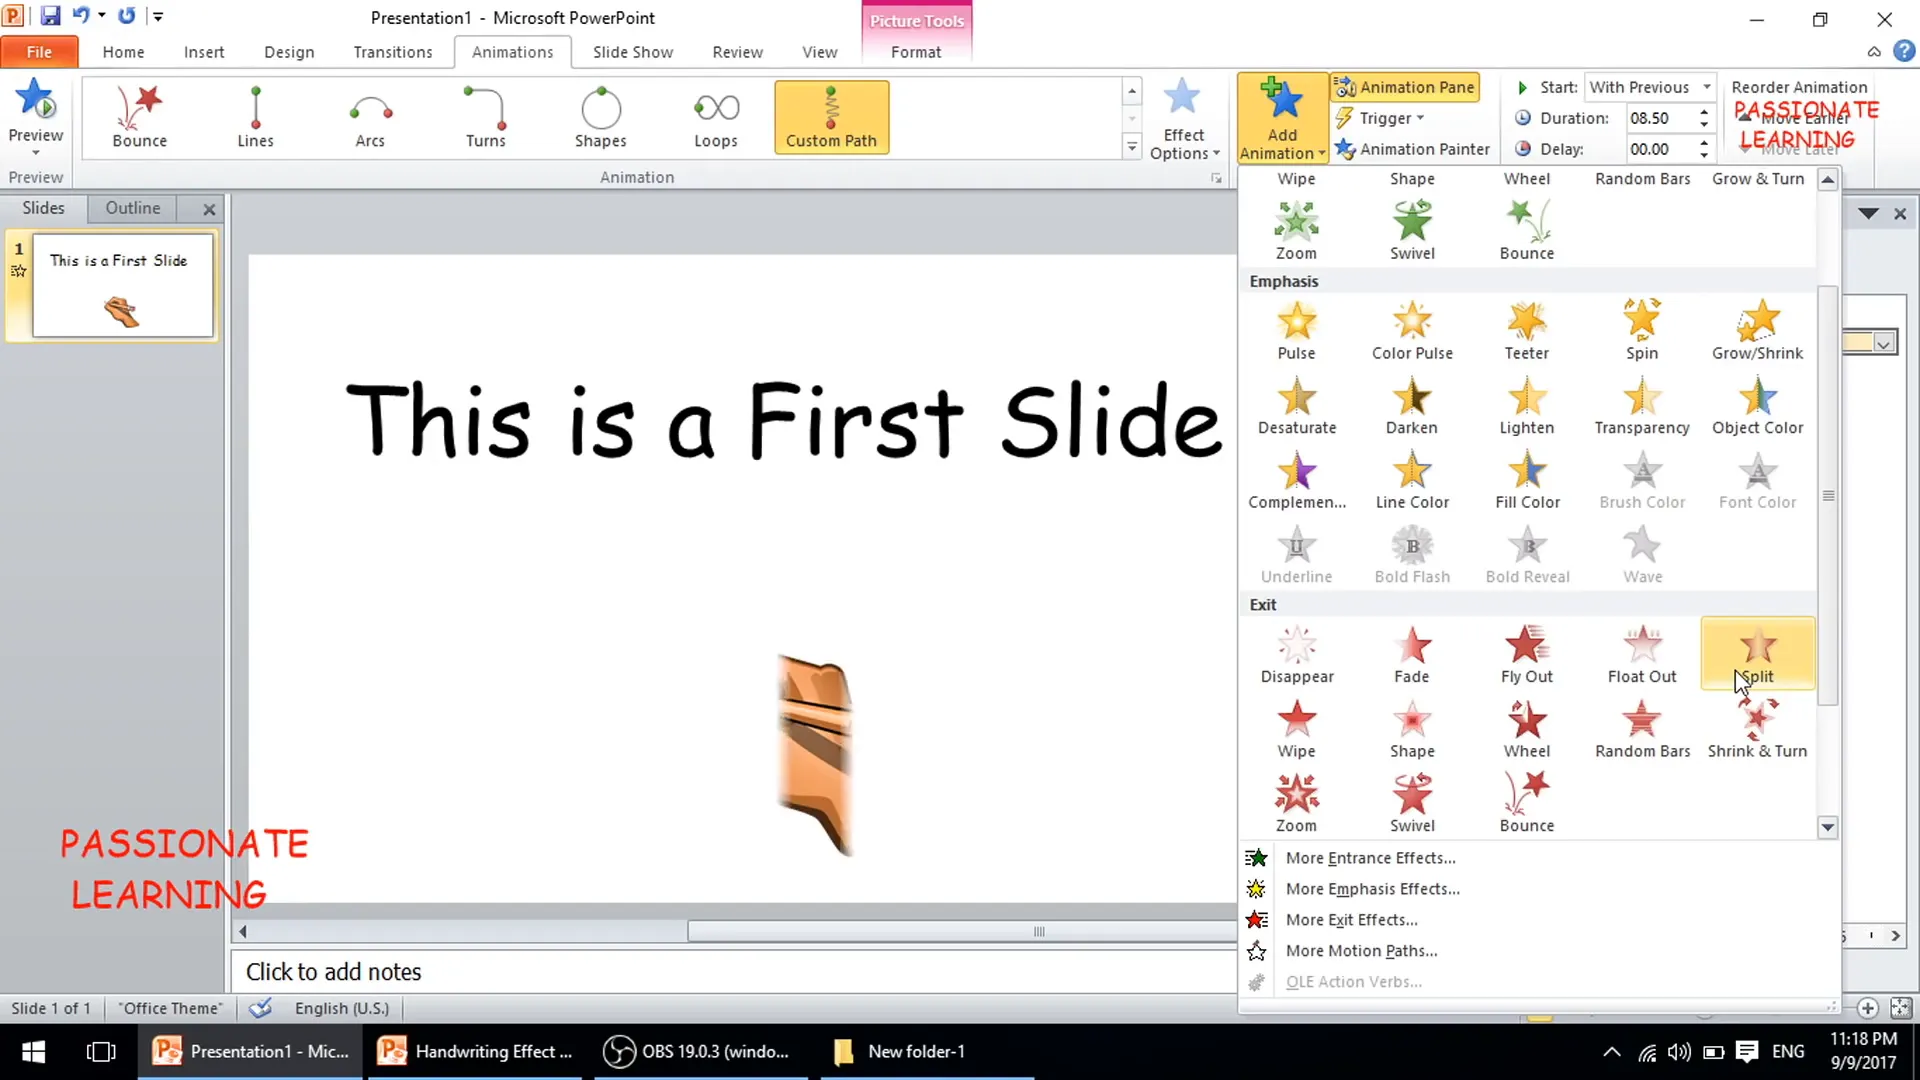
Step 6: Adding Exit Animation to the Hand Image
Once the handwriting is complete, you can animate the hand image to exit the slide, adding polish to the effect.
- Select the hand image.
- Go to Add Animation, then choose an Exit effect such as Float Out, Fade, or Fly Out.
- Set the exit animation to start After Previous so it triggers after the handwriting finishes.
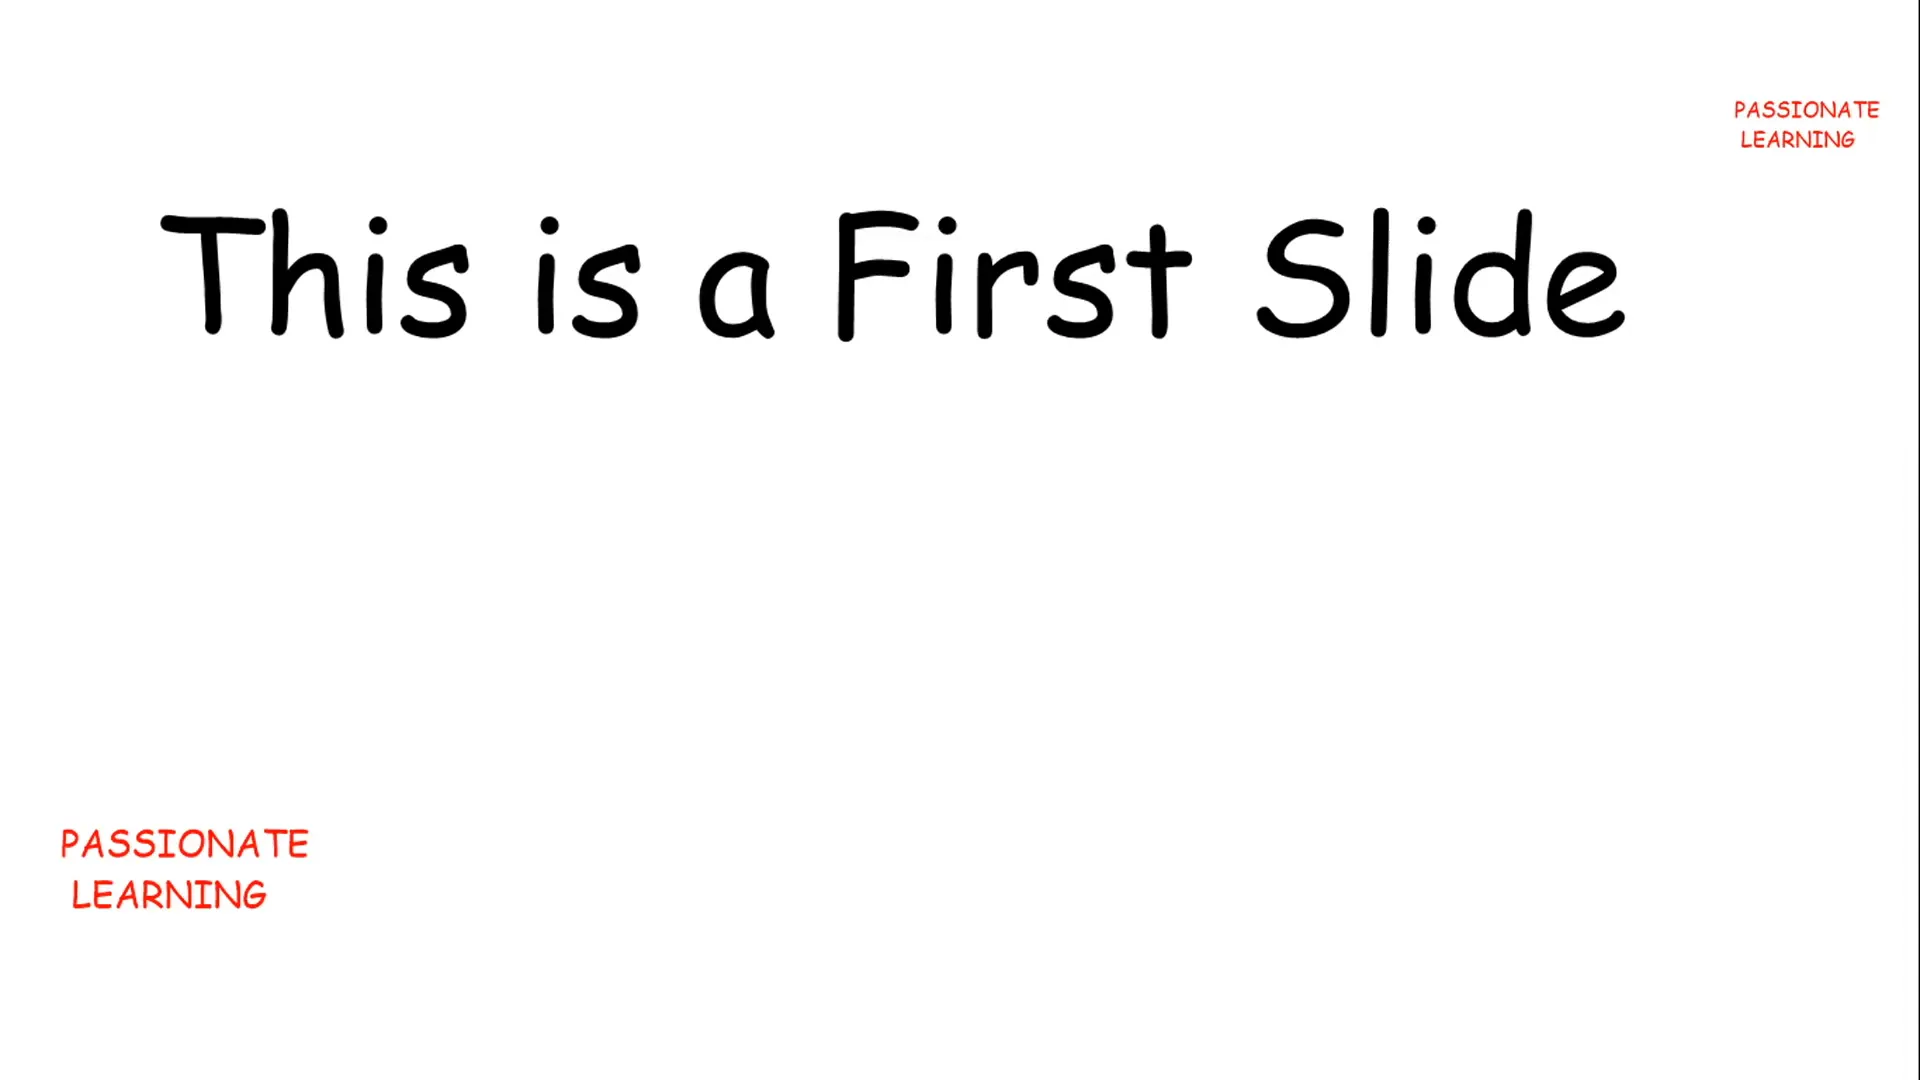
Step 7: Previewing the Handwriting Animation
Run the slideshow from the beginning to see your handwriting effect in action. The text should appear letter by letter while the hand image moves along the traced path, creating a natural handwriting effect.
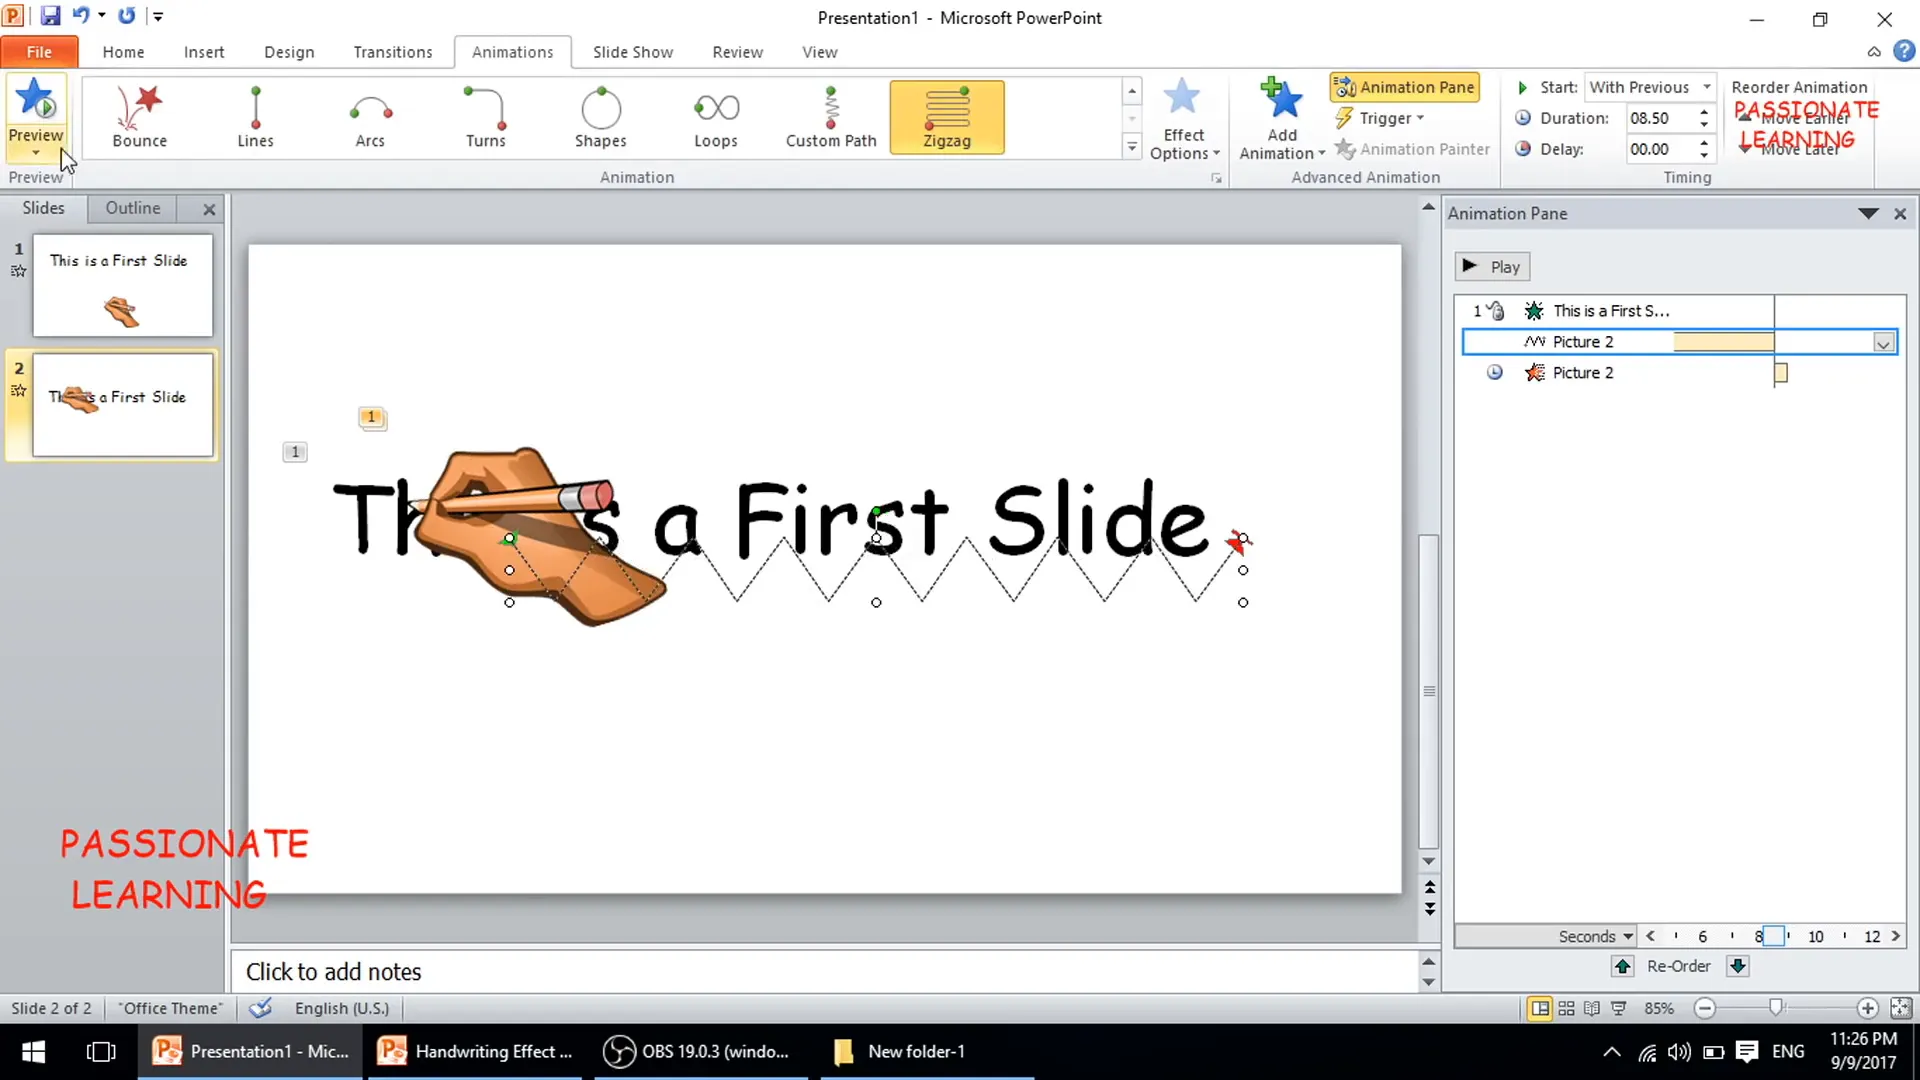
Method 2: Creating Handwriting Effect Using Predefined Zigzag Motion Path
If you are short on time or prefer a quicker method, the second approach uses a predefined zigzag motion path for the hand image instead of manually tracing the text.
This method is less precise but simpler and faster to implement.
Step 1: Preparing the Slide
Just like in Method 1, start by setting up the slide:
- Delete any unnecessary placeholders or shapes.
- Add your text, such as “This is a first slide.”
- Choose a font like Comic Sans or any casual, handwriting-style font.
- Adjust the font size and color for visibility.
Step 2: Inserting the Hand Image
Insert the hand holding pen image as before, resizing it to fit neatly on the slide without overshadowing the text.

Step 3: Applying Typewriter Animation to Text
Apply the same typewriter effect to the text:
- Select the text box.
- Go to Animations and choose Appear.
- Right-click the animation, open Effect Options, and set Animate text to By letter.
- Keep the delay between letters as 0.5 seconds or modify as needed.
Step 4: Applying Zigzag Motion Path to Hand Image
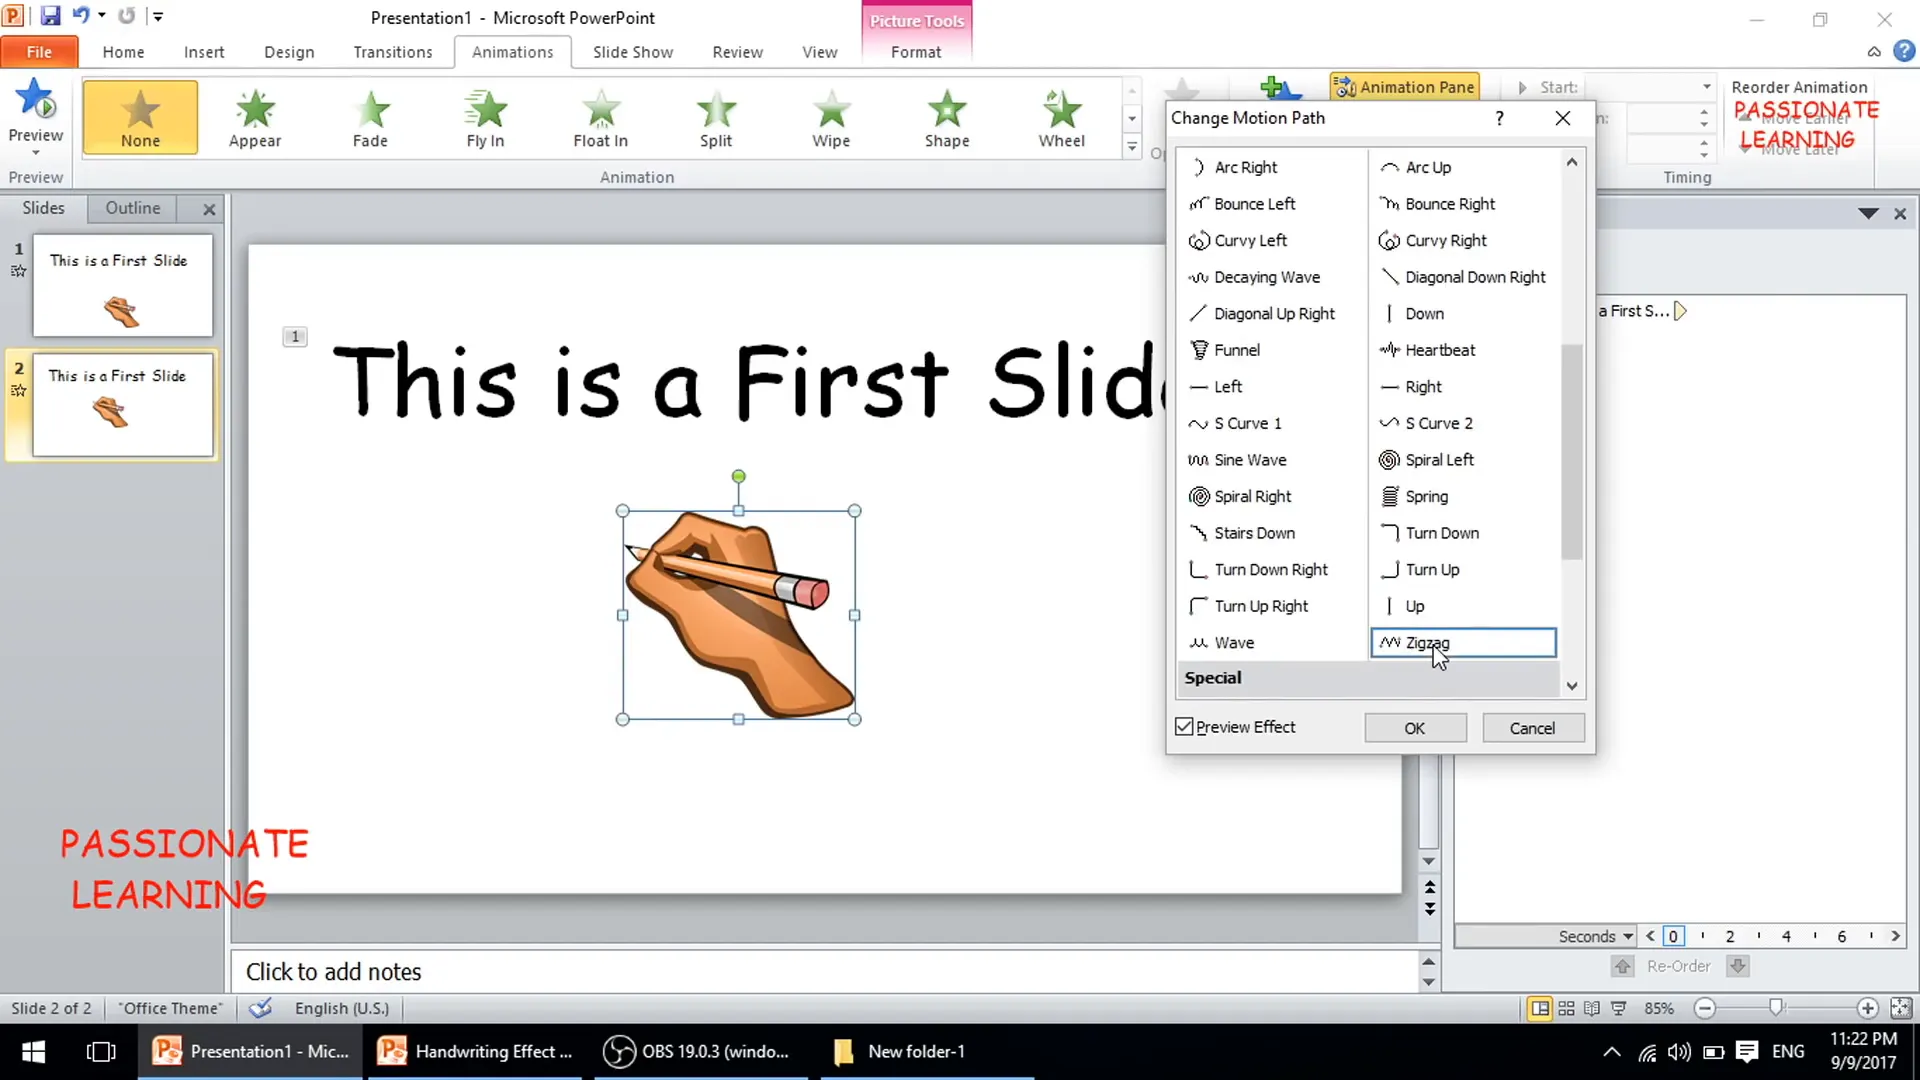
Instead of tracing, use the predefined zigzag motion path:
- Select the hand image.
- Go to Animations, select More Motion Paths at the bottom of the menu.
- From the list, choose Zigzag and click OK.
- Position the zigzag path over the text as best as you can to simulate handwriting strokes.
Step 5: Adjusting Timing and Position
Synchronize the hand movement with the text animation duration:
- Calculate the total time for the text animation (number of letters × delay per letter, e.g., 17 × 0.5 = 8.5 seconds).
- Right-click the hand image animation, select Timing, and set the Duration to match the text animation time.
- Set the animation to start With Previous so it runs concurrently with the text animation.
- Adjust the zigzag path’s size and position to better align the hand movement with the text.

Step 6: Adding Exit Animation
Add an exit effect like Split to the hand image to complete the animation:
- Select the hand image.
- Apply an exit animation such as Split.
- Set it to start After Previous so it plays after the handwriting animation ends.
Step 7: Preview and Adjust
Preview the slide to see the handwriting effect using the zigzag path. Make manual adjustments to the motion path and timing until you achieve a satisfactory effect.

Comparing Both Methods
Both methods achieve the handwriting text effect but differ in complexity and quality:
- Custom Path Tracing (Method 1): Offers a realistic and smooth animation by closely following the text shape. It requires patience and careful tracing but results in a highly professional look.
- Zigzag Motion Path (Method 2): Faster and easier to implement, ideal when time is limited. However, the animation is less precise and the hand’s movement may not perfectly follow the text.
Depending on your needs and available time, choose the method that best fits your project.
Tips for Perfecting Your Handwriting Effect
- Choose the Right Font: Fonts that mimic handwriting (e.g., Comic Sans, Bradley Hand, or other script fonts) enhance the effect.
- Use High-Quality Hand Images: A clear image of a hand holding a pen or pencil improves the realism.
- Keep Animations in Sync: Matching the duration of text and hand movement is key to a smooth effect.
- Practice Tracing: If using the custom path method, practice tracing to improve accuracy and fluidity.
- Experiment with Exit Animations: Adding a subtle exit animation to the hand image adds polish to your presentation.
- Test on Different Devices: Ensure your animations run smoothly on various versions of PowerPoint and different computers.
Frequently Asked Questions (FAQ)
Can I use these handwriting effects in all versions of PowerPoint?
Yes. The fundamental animation features used in these methods are compatible across PowerPoint 2010, 2013, 2016, and newer versions.
Do I need special software or plugins to create these effects?
No. All animations and image insertions are done using PowerPoint’s built-in features.
Can I use any hand image for the animation?
Yes, but it’s best to use a clear image showing a hand holding a pen or pencil. Transparent background images (PNGs) work best for seamless integration.
Is the custom path tracing method difficult to master?
It requires some practice to trace smoothly and accurately, but with patience, anyone can learn it. Start with simple text and gradually attempt more complex handwriting.
Can I adjust the speed of the handwriting animation?
Absolutely. You can change the delay between letters in the text animation and adjust the duration of the hand motion path to speed up or slow down the effect.
Can I add sound effects to enhance the handwriting animation?
Yes, you can add typewriter or pencil writing sounds through PowerPoint’s audio features to make the animation more immersive.
Conclusion
Adding a handwriting text effect to your PowerPoint presentations is a fantastic way to increase audience engagement and make your slides visually captivating. Whether you choose the detailed and realistic custom path tracing method or the quicker zigzag motion path approach, both techniques allow you to bring your presentations to life with a personal touch.
Remember, the key to a successful handwriting animation lies in synchronizing the text appearance with the hand movement and practicing the animations to refine the flow. With these skills, you can create professional and memorable presentations that stand out.
Start experimenting with these methods today, and soon you’ll be an expert in creating handwriting effects in PowerPoint!
For more tutorials and tips on PowerPoint animations and presentation design, keep exploring and practicing regularly. Good luck and happy presenting!
Check out the full video: Handwriting Text Effect In PowerPoint ( 2 Ways To Create A Handwriting Effect In PowerPoint )


