Creating visually striking presentations that capture attention and convey your message effectively is a powerful skill. In this comprehensive guide, I’ll walk you through the step-by-step process of designing a unique “Investigation” style presentation using Microsoft PowerPoint from the Microsoft 365 suite. This style mimics the look and feel of an old-school detective case file, complete with folder flaps, top secret stamps, and scribbled notes, giving your presentation an engaging and mysterious vibe.
Along the way, I’ll also introduce you to an incredible free online tool called Pixlr, which I’ve been using to enhance my creative projects with AI-powered image editing and generation features. Whether you’re a beginner or an experienced PowerPoint user, this tutorial will equip you with design techniques, tips, and tricks to elevate your slides and make your content truly stand out.
Table of Contents
- Why Choose an “Investigation” Presentation Style?
- Getting Started: Tools You’ll Need
- Step-by-Step Guide to Creating the “Investigation” Presentation in PowerPoint
- Tips for Maximizing Your Presentation Impact
- Frequently Asked Questions (FAQ)
- Conclusion
Why Choose an “Investigation” Presentation Style?
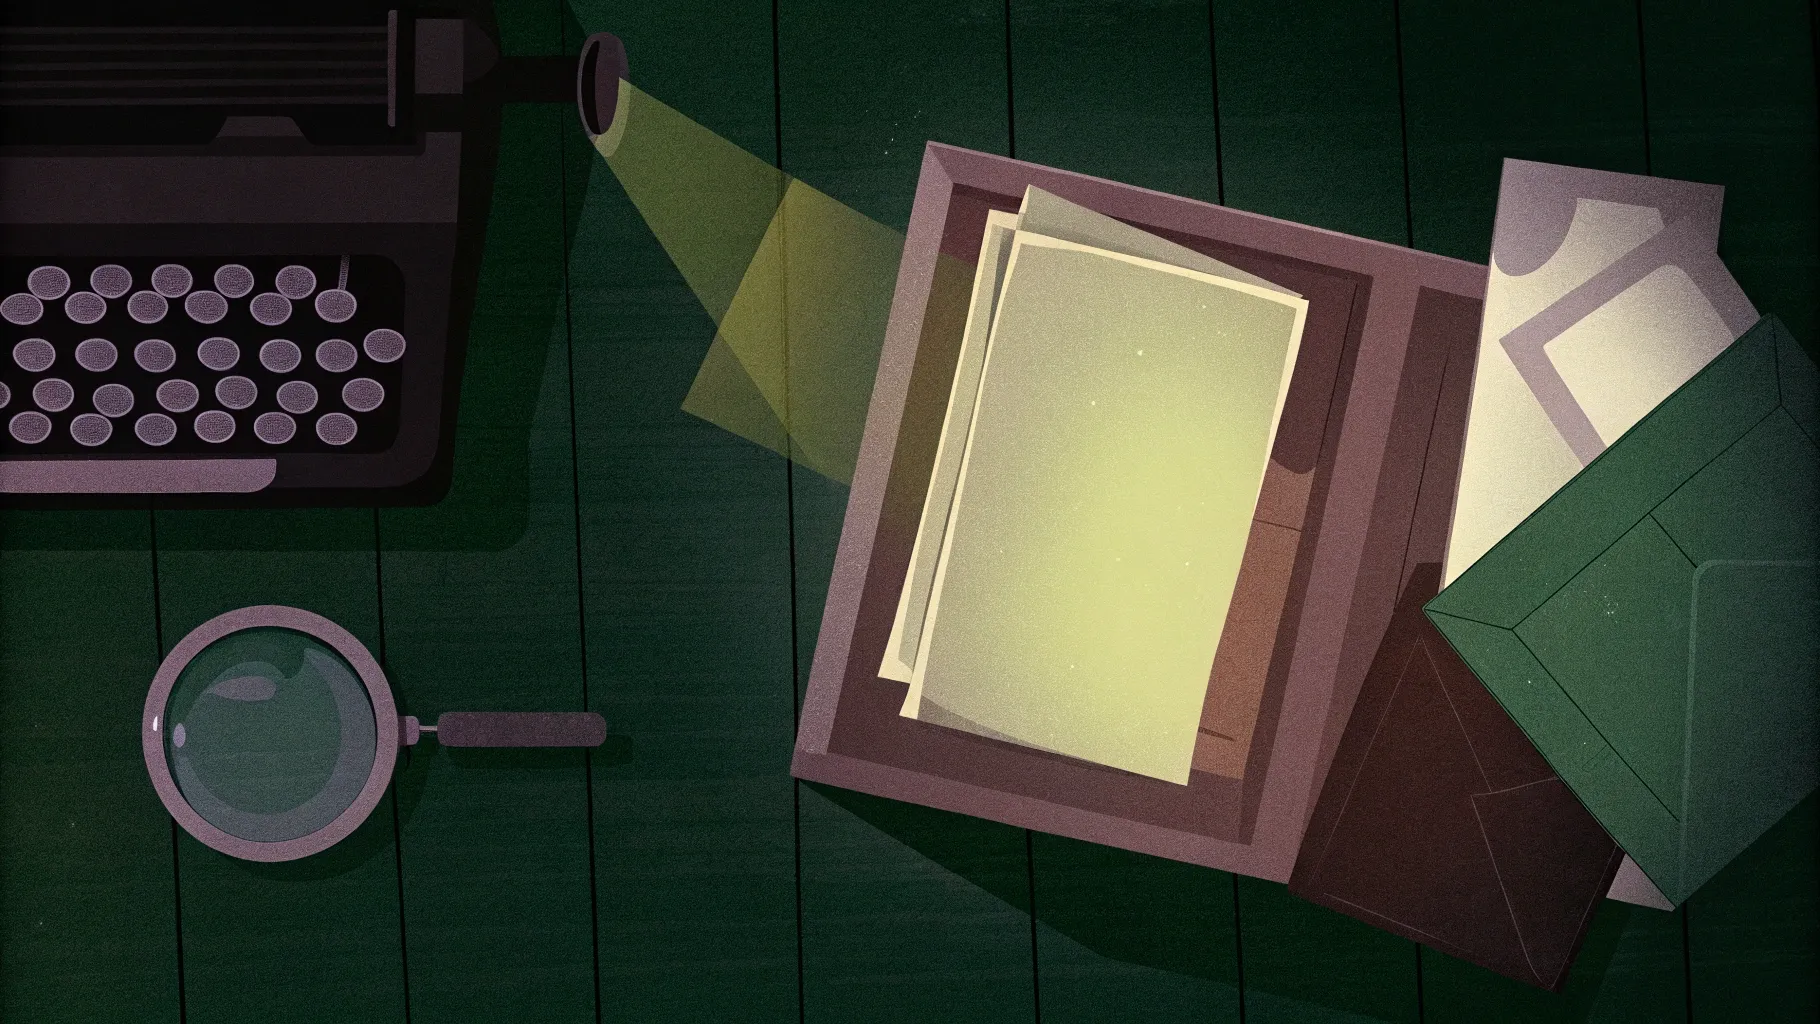
The “Investigation” style presentation is visually captivating and perfect for storytelling, case studies, project reports, or any scenario where you want to add a layer of intrigue and professionalism. The design leverages a folder motif, layered papers, and stamps to simulate a detective’s case file, which can help keep your audience engaged and make your key points memorable.
This style is also versatile. It can be adapted to different themes by changing colors, images, and text, making it suitable for business, education, or creative projects alike.
Getting Started: Tools You’ll Need
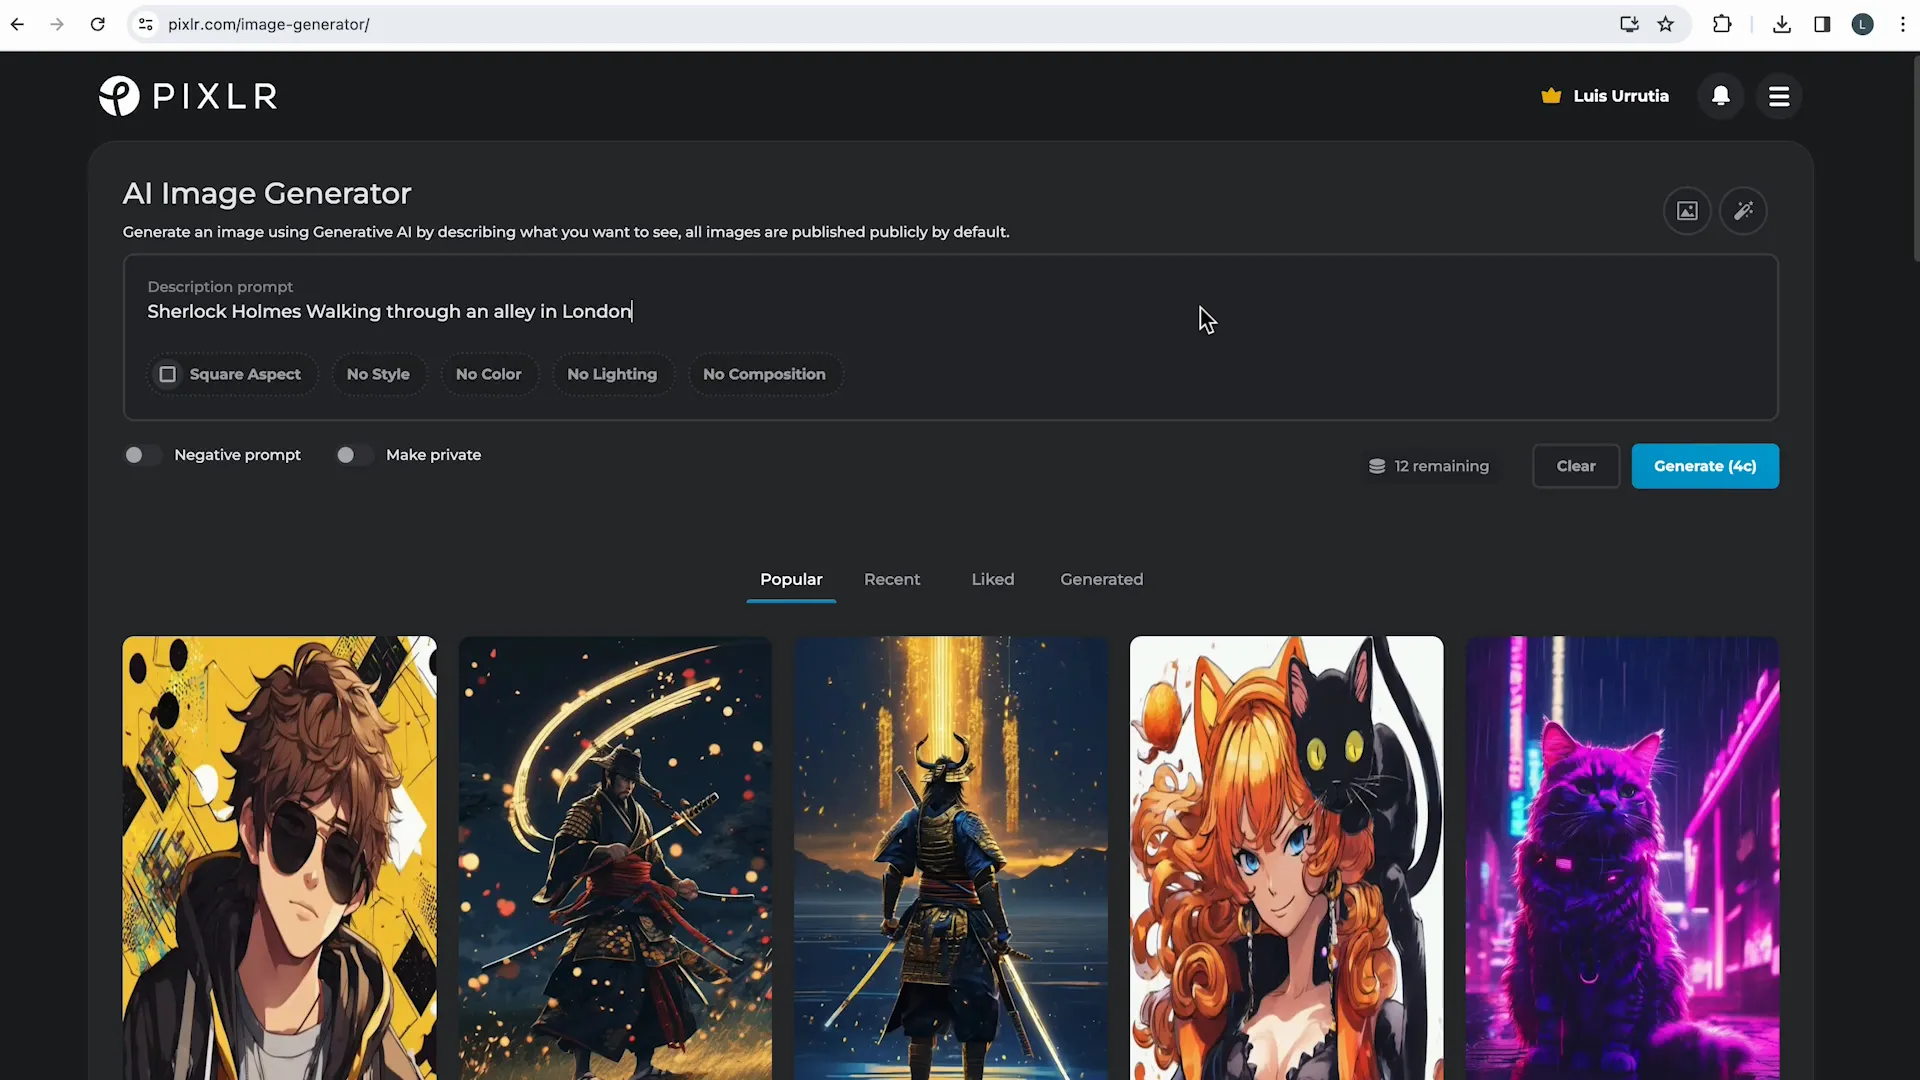
Before diving into PowerPoint, I want to introduce you to Pixlr, a free online photo editor packed with AI features that I’ve found invaluable for creating and editing images for presentations.
- AI Image Generator: Simply type a descriptive prompt, and Pixlr generates four unique images in seconds. This is perfect for creating custom visuals tailored to your presentation’s theme.
- Generative Expand: Upload an image and select a ratio; Pixlr intelligently expands the image with AI, seamlessly filling in surrounding areas.
- Generative Transform: This tool automatically separates an image into layers, allowing you to move, resize, or rotate individual objects freely — a feature that blew me away.
- Background Remover and Batch Editing: Efficient tools to clean up images or process multiple files at once, saving you tons of time.
I highly recommend exploring Pixlr at pixlr.com to discover which features best suit your workflow and creative style.
Step-by-Step Guide to Creating the “Investigation” Presentation in PowerPoint
1. Setting Up the Slide Background
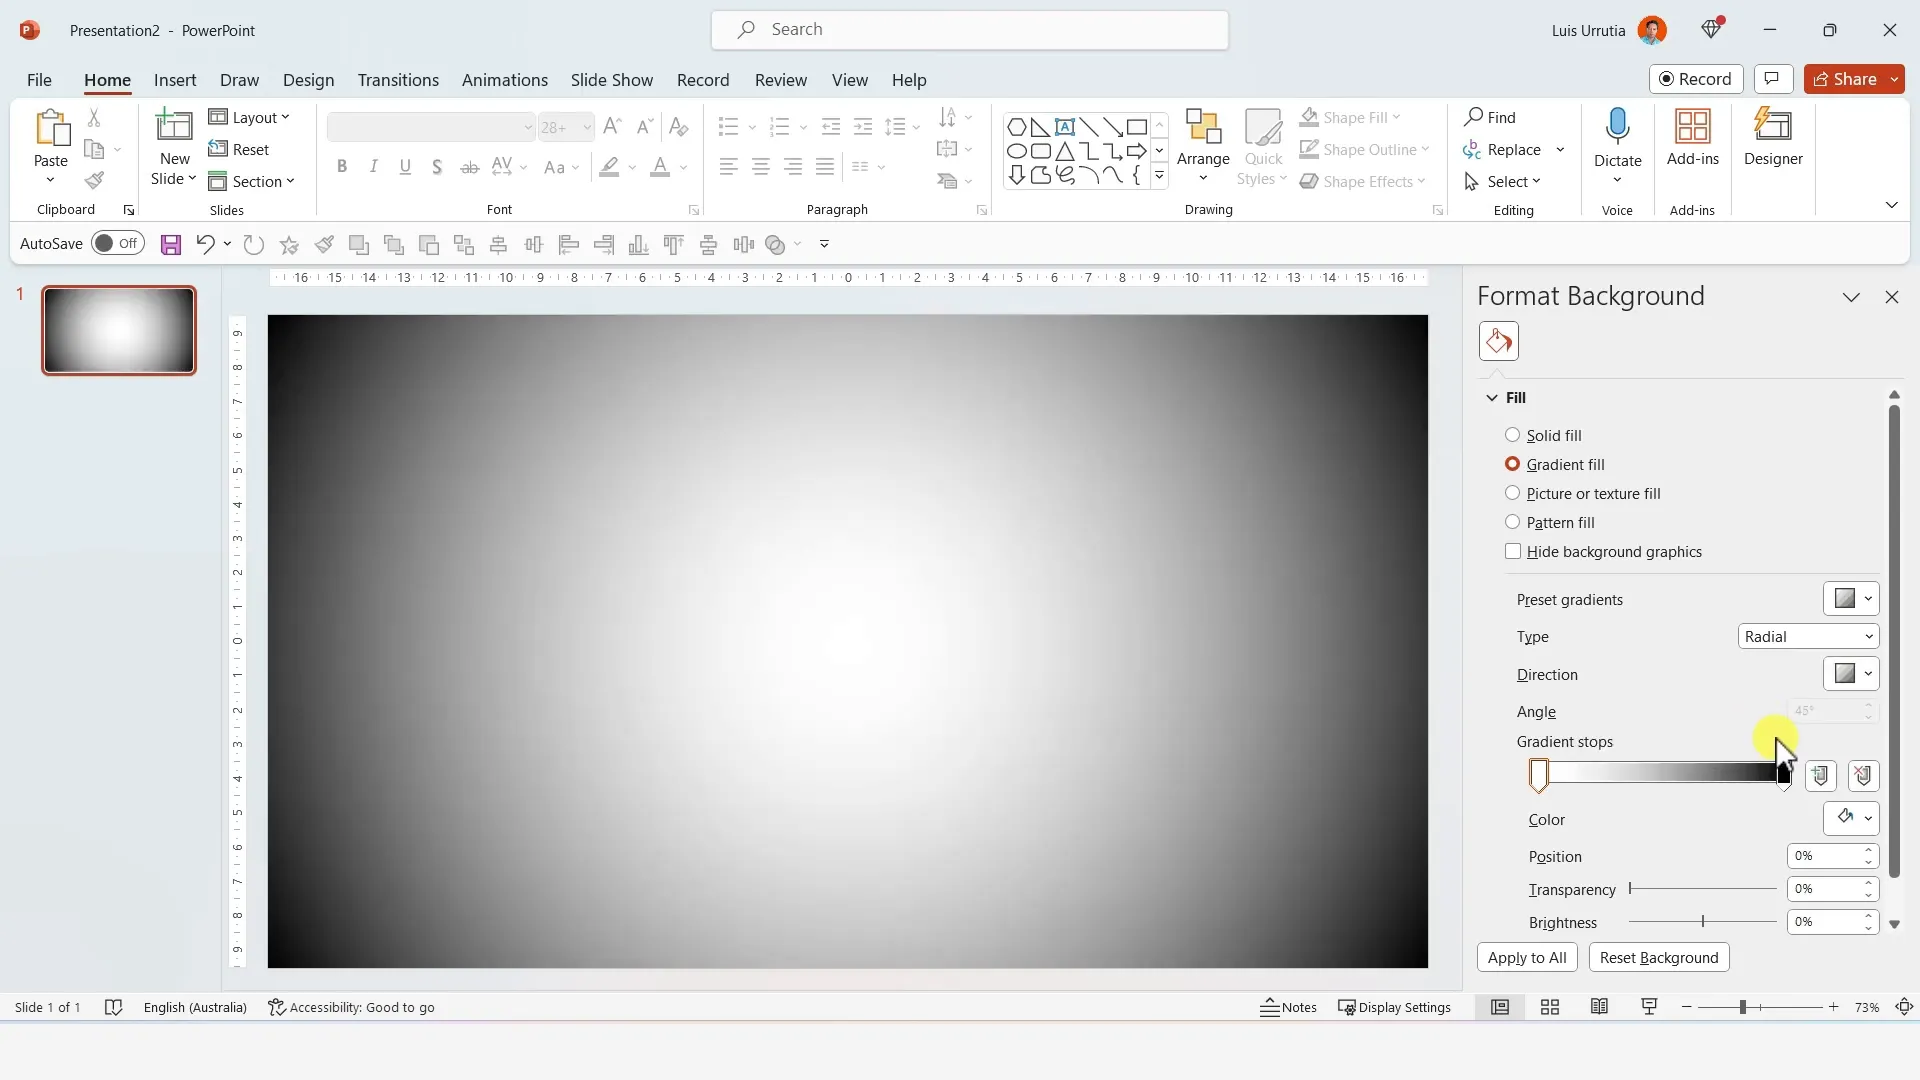
Start by right-clicking on the slide background and selecting Format Background. Choose Gradient Fill and then set the type to Radial with the direction centered. This creates a subtle spotlight effect that draws focus to the center of your slide.
Make sure you have only two gradient stops. For the right stop, select black, and for the left stop, choose a dark gray. Adjust the stops closer together to intensify the spotlight effect.
2. Designing the Folder Base
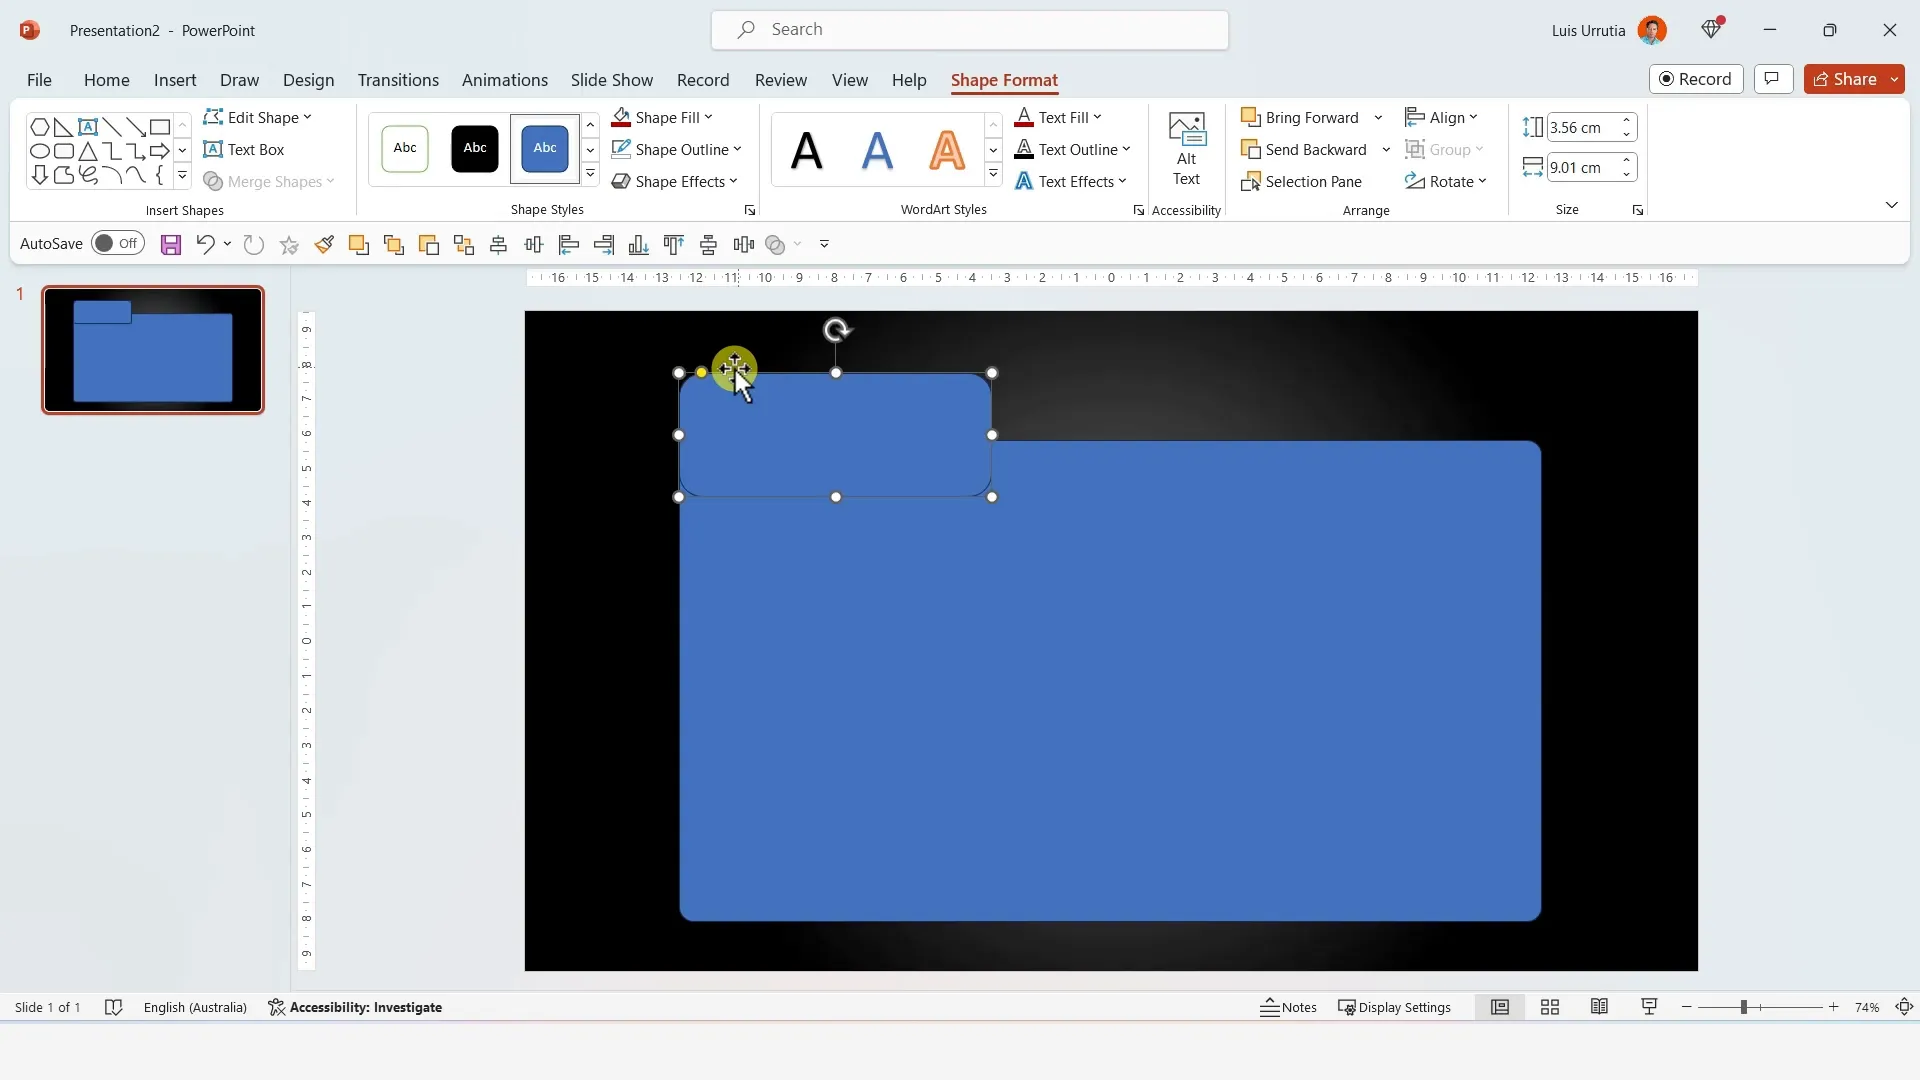
From the Shapes panel, select a Rounded Rectangle. Insert it onto the slide and use the yellow handle to adjust the roundness of the corners to your liking. This shape will serve as the back of the folder.
Duplicate this shape using Ctrl + D, move it slightly upward, and resize it smaller. This smaller shape will become the folder’s flap. Adjust the corner roundness independently and position it slightly downward to create a layered effect.
Select both shapes (hold Shift while clicking each), then go to Shape Format > Merge Shapes > Union to combine them into a single folder shape.
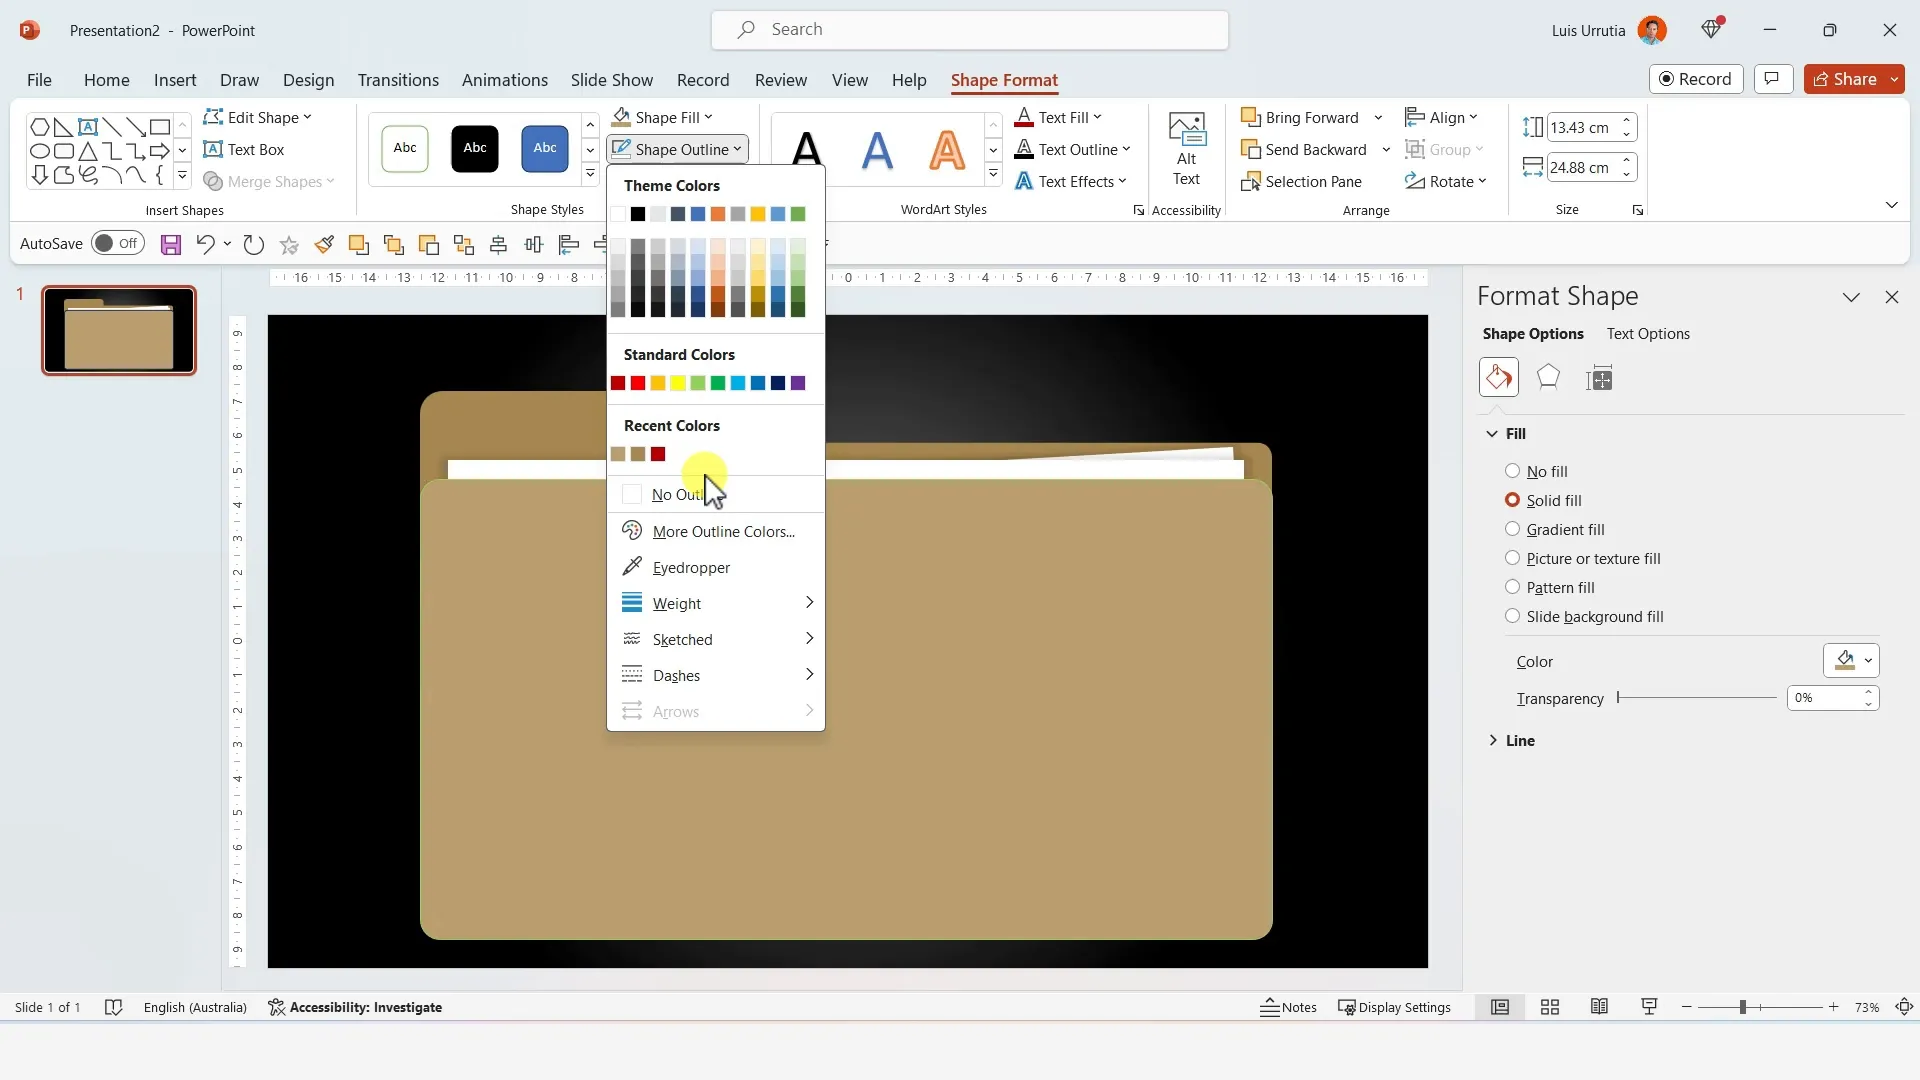
Remove the outline by selecting No Outline in the shape outline menu and fill the folder with a dark brown color to mimic leather or aged paper.
3. Adding Sheets of Paper
Next, insert a regular rectangle shape to represent a sheet of paper. Rotate it slightly to add a natural, casual look and fill it with white.
To add depth, apply a center shadow effect from the Shape Effects menu. Right-click the shadow effect to open Format Shape and increase the transparency slightly for a softer shadow.
Duplicate this paper shape, rotate it differently, and layer it behind the folder flap to simulate multiple sheets inside the folder.

4. Creating the Folder Cover
Insert another rounded rectangle matching the width of the folder’s back. Use a lighter brown fill to differentiate it as the folder cover. Remove the outline and add a center shadow for consistency.
Adjust the positioning quickly so that all elements—the folder back, flap, cover, and papers—are visible and layered correctly.
5. Adding Text Elements
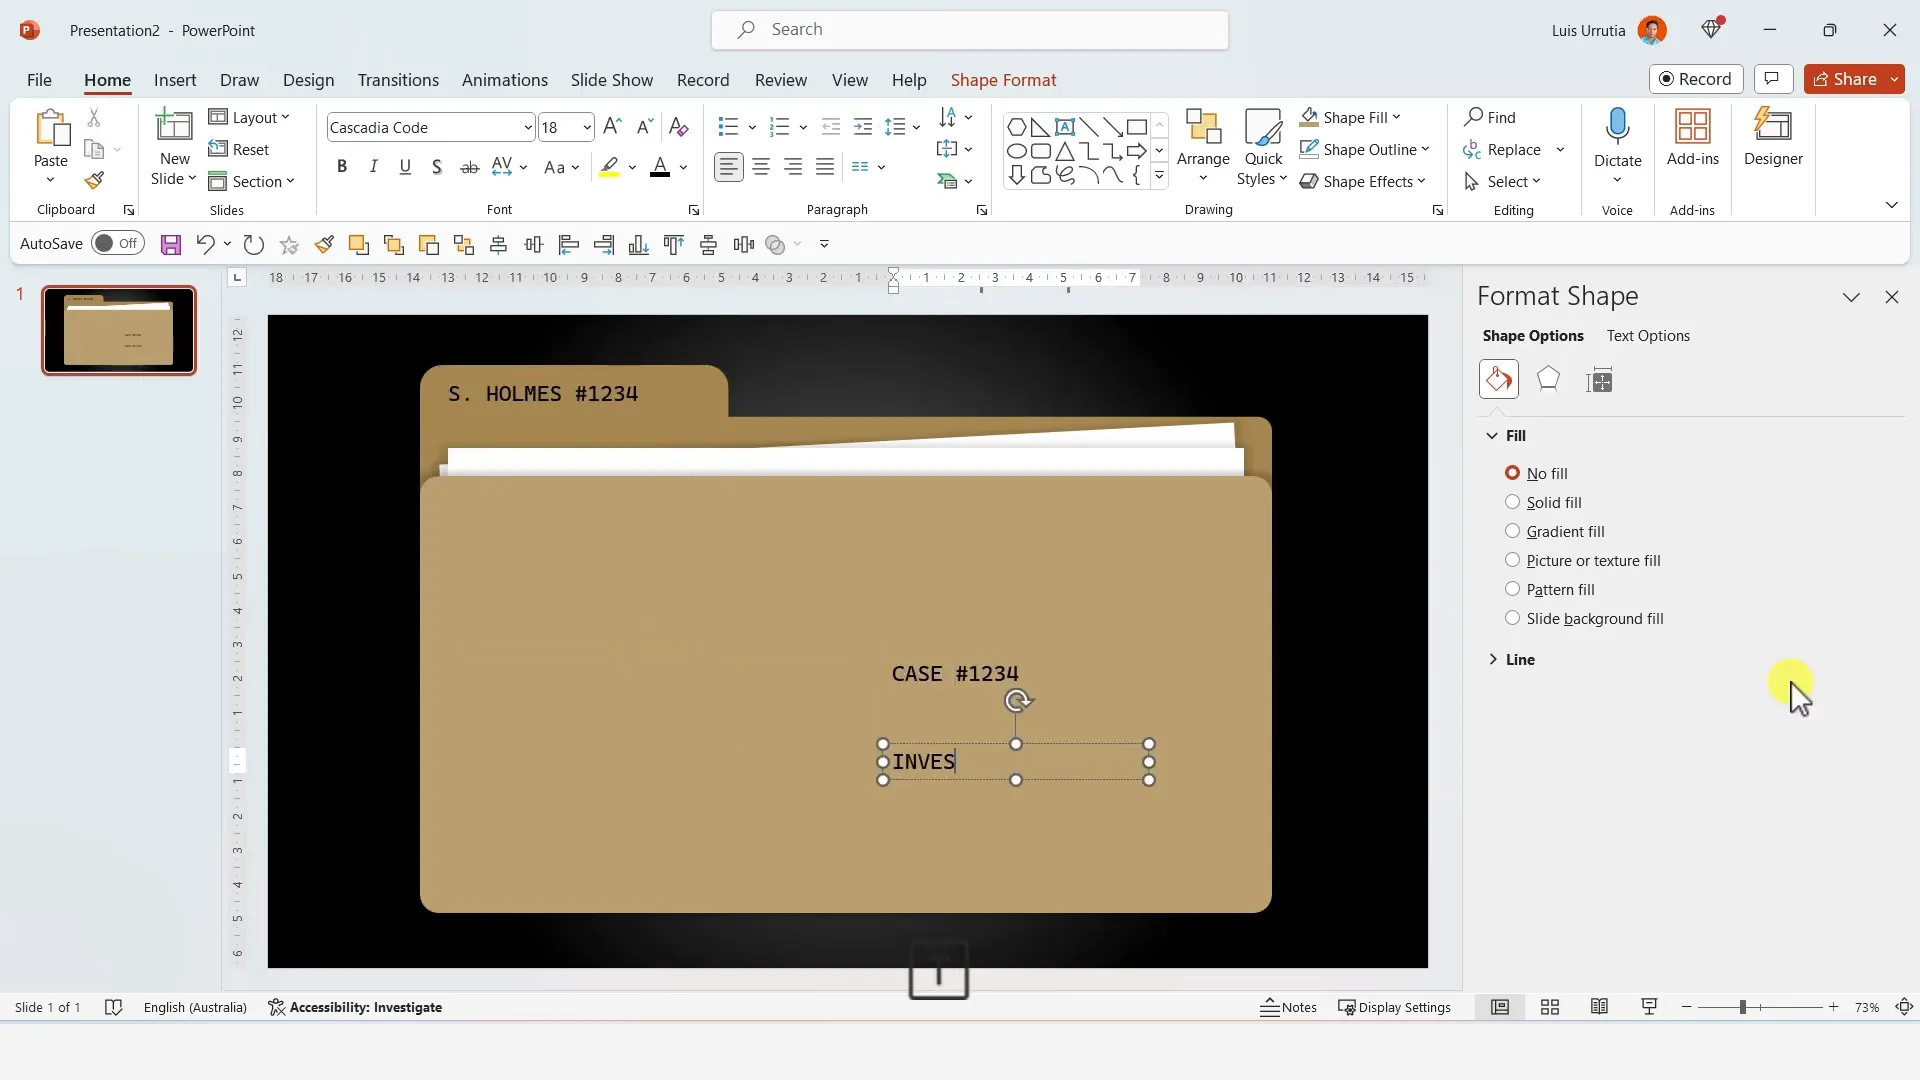
Insert a text box and type your desired title or label for the folder flap. I used the Cascadia Code font for a modern, clean look. To duplicate text elements easily, hold Ctrl and drag the text box to a new position, then edit the content accordingly.
This method allows you to quickly populate your presentation with consistent text styles and formatting.
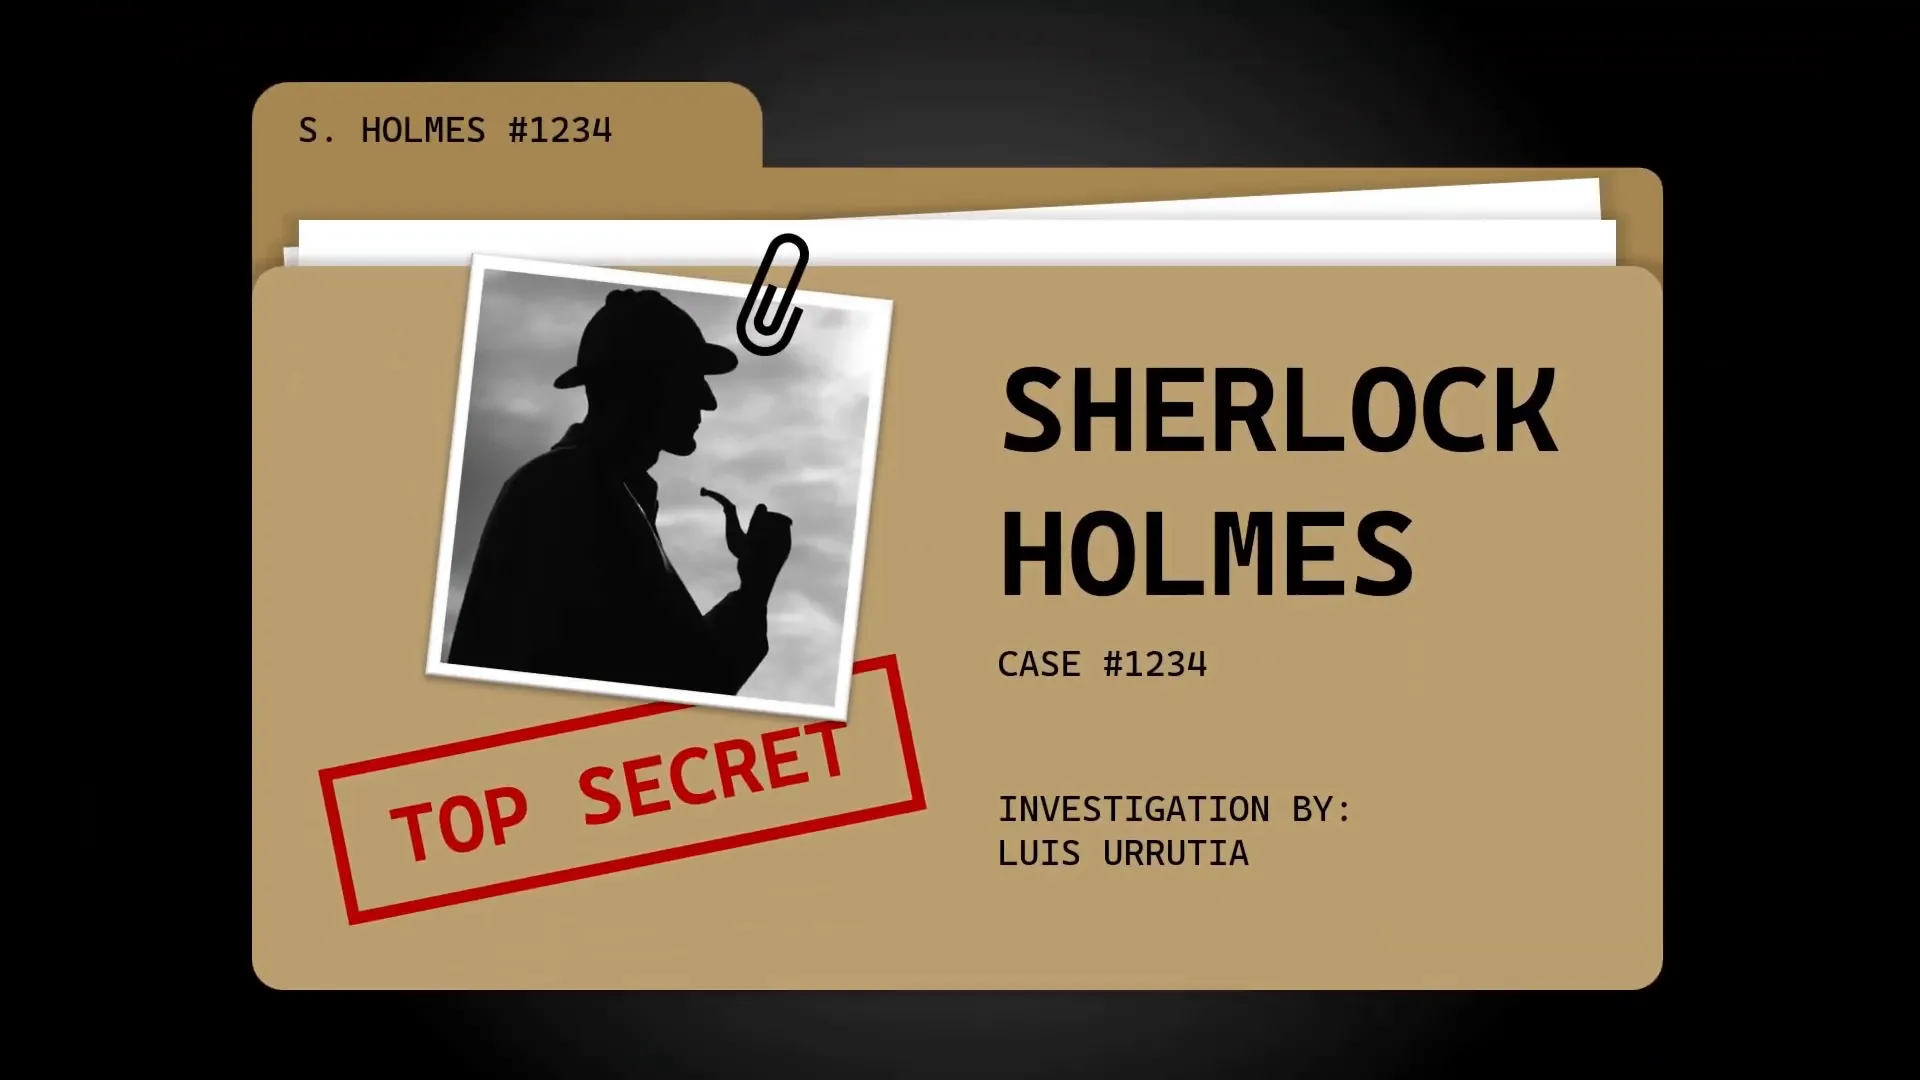
6. Designing the “Top Secret” Stamp
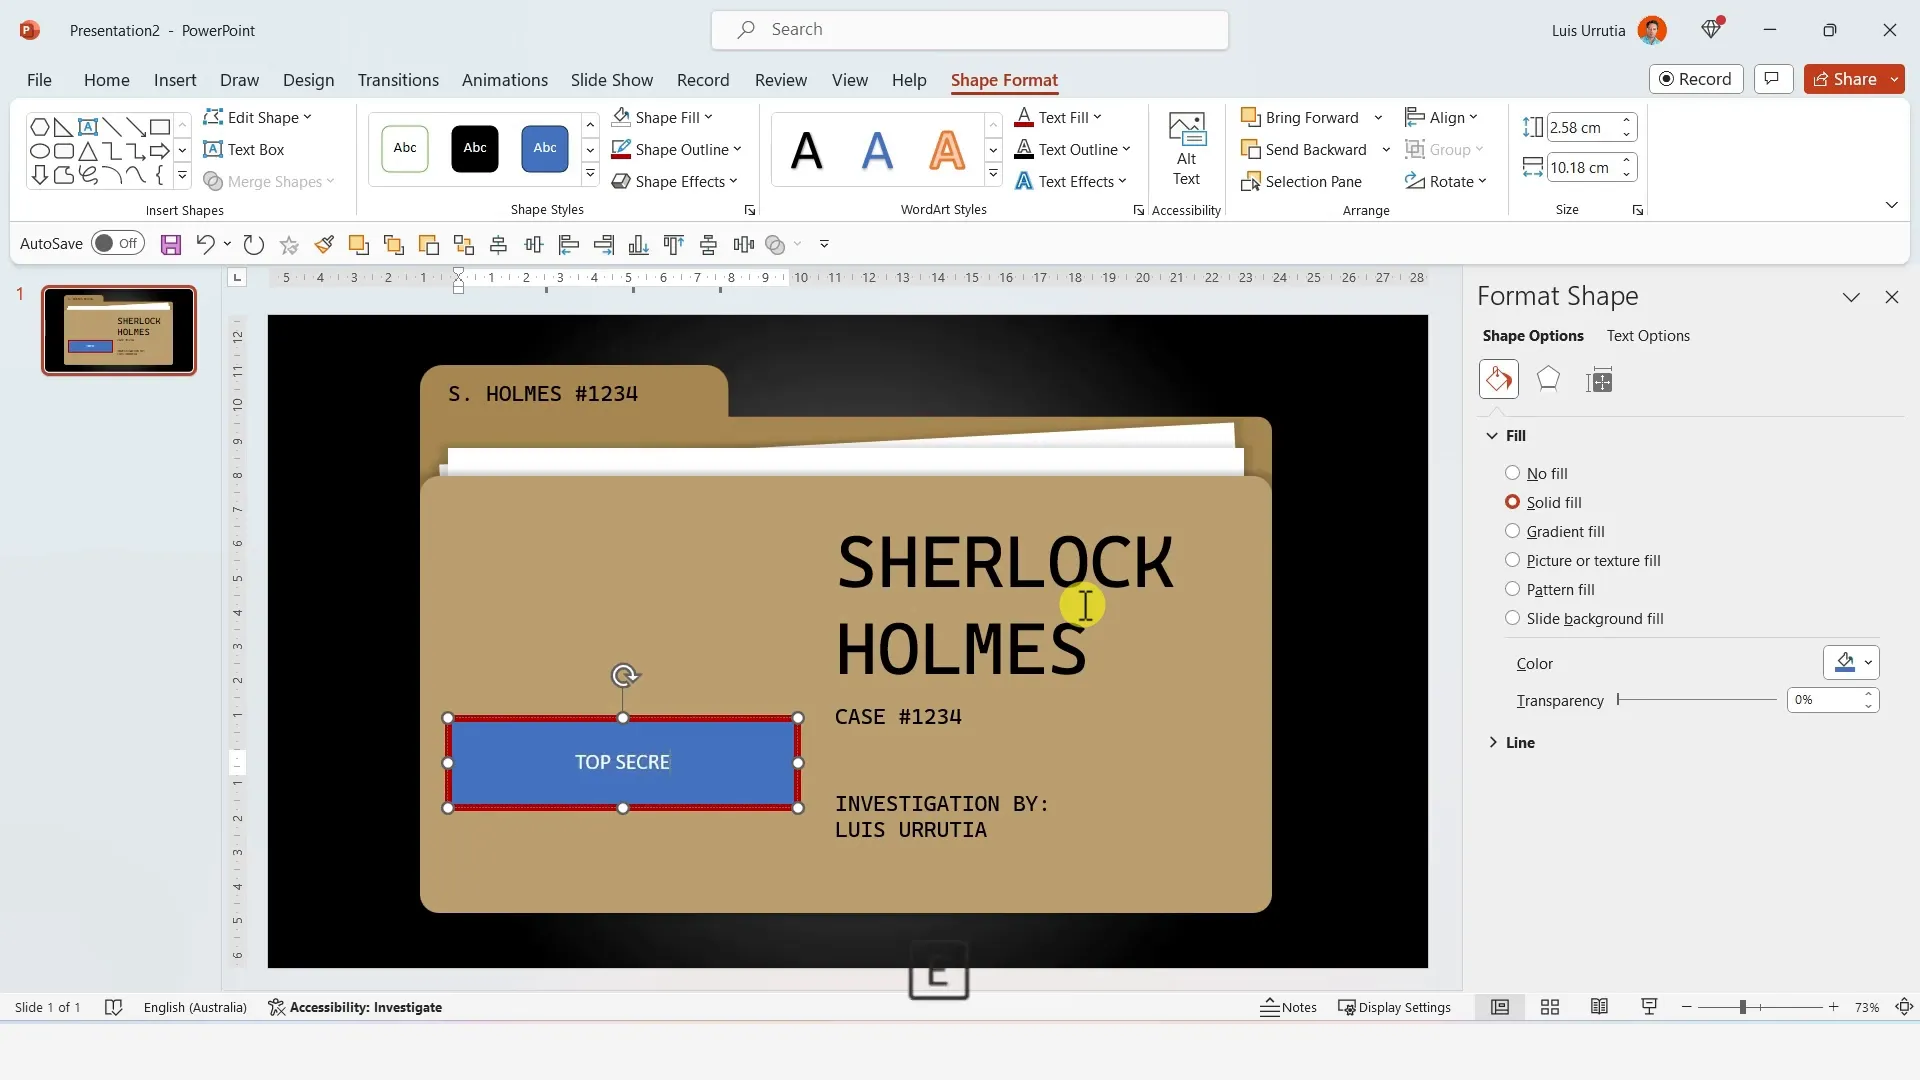
Insert a rectangle and set the outline color to bright red. Increase the stroke weight to 6 points for a bold effect. Remove the fill color to create a hollow stamp look.
Double-click the shape to enter text, type “TOP SECRET,” and format the font and color to match the outline. Rotate the text slightly for a stamped effect and align it with the folder design.
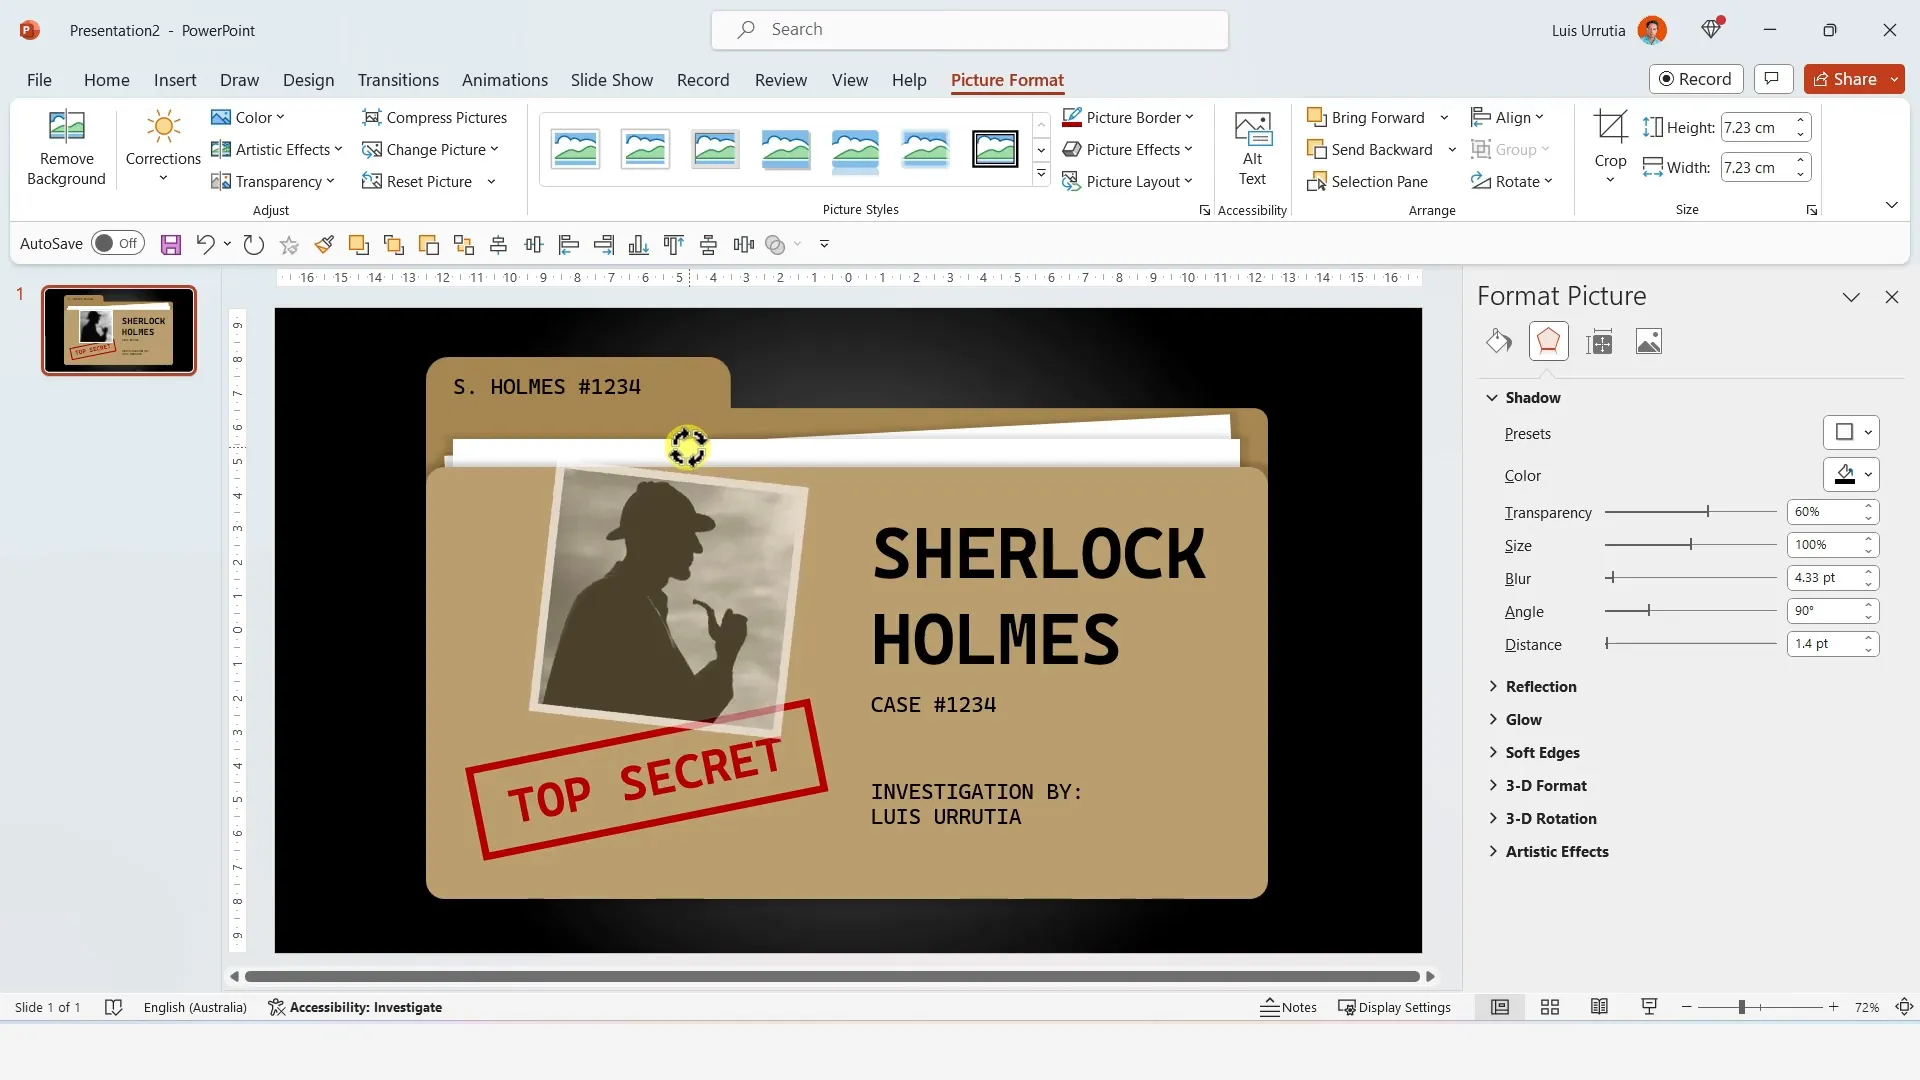
7. Adding an Image with a Frame
Insert your chosen image and crop it to a 1:1 aspect ratio to create a neat square. Resize the image to fit the designated area on the folder.
Apply a preset frame to the image for a polished appearance that complements the overall folder aesthetic.
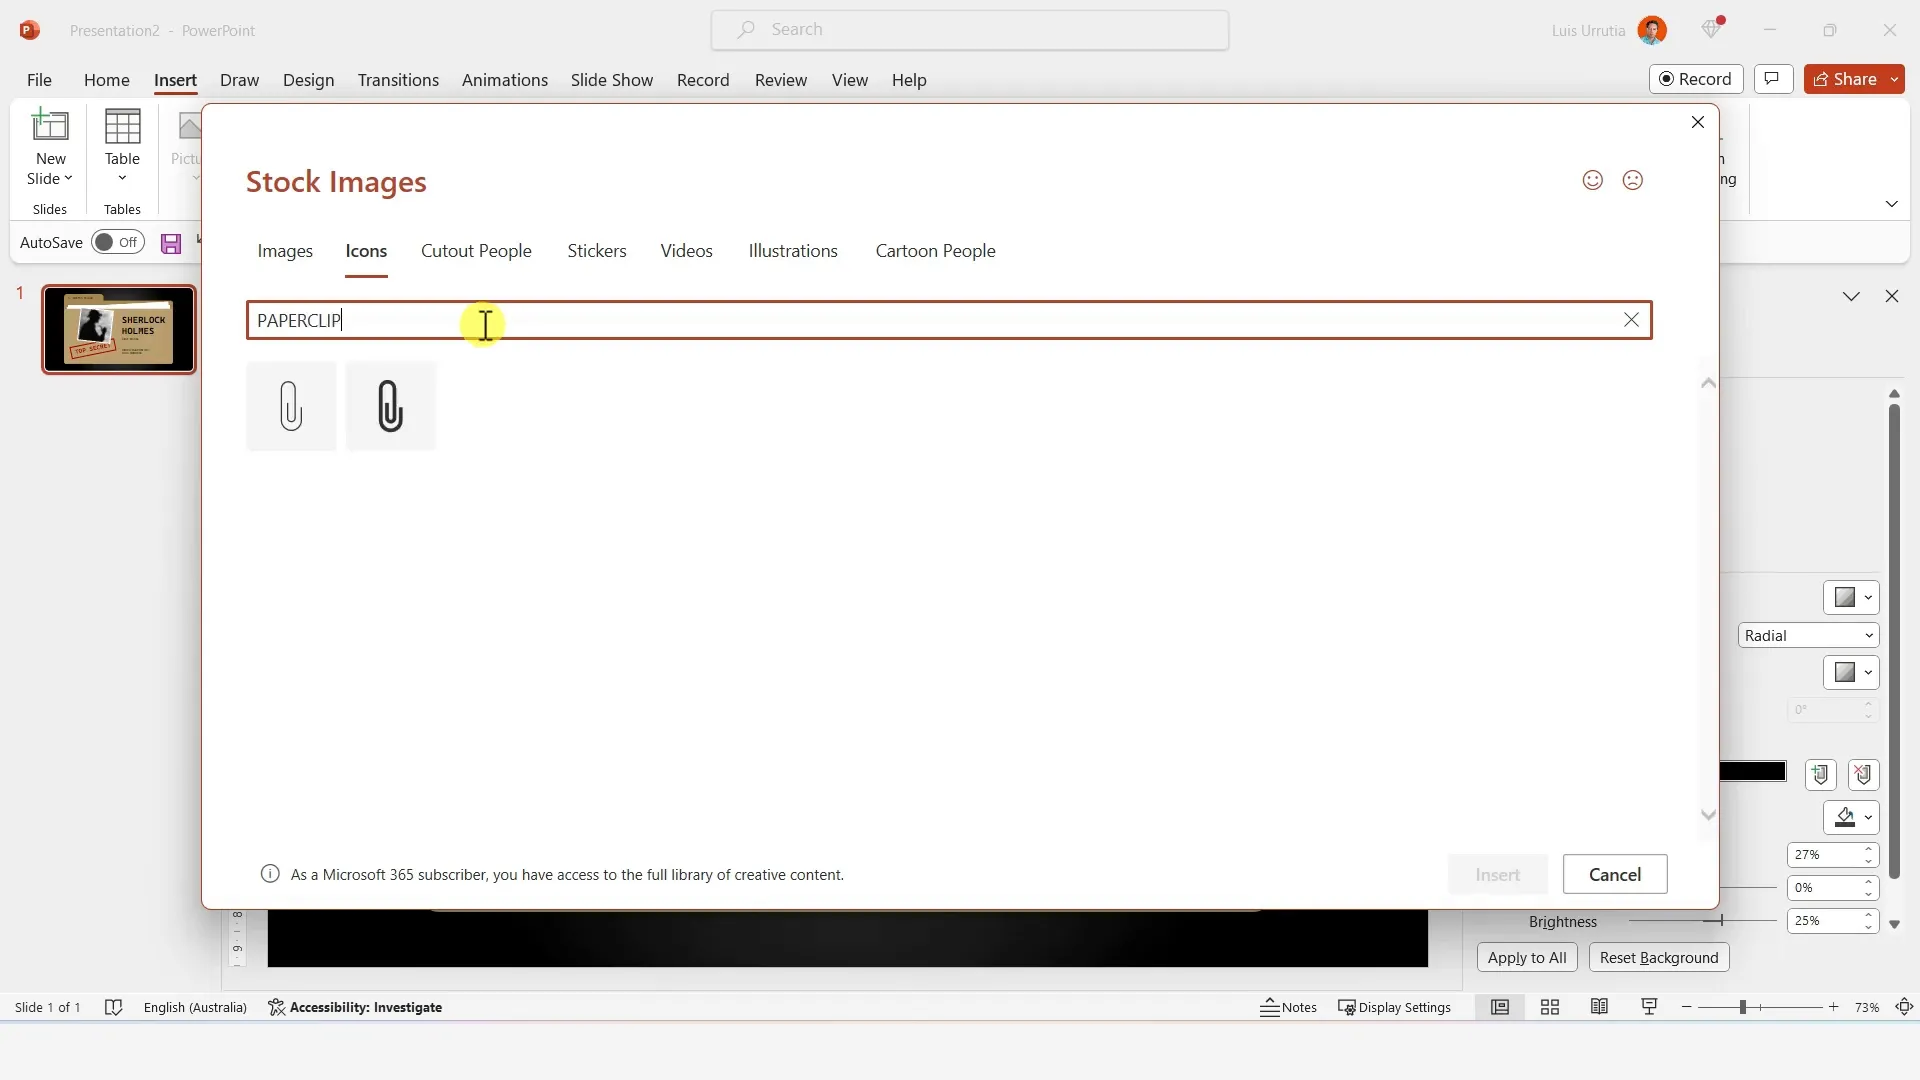
8. Adding a Paper Clip Icon
Insert an icon of a paper clip from PowerPoint’s icon library, rotate it slightly, and position it at the top corner of the folder. This subtle detail adds realism and enhances the investigation file vibe.
9. Grouping and Animating the Slide
Duplicate the completed slide using Ctrl + D. Select all elements and group them with Ctrl + G to manipulate the entire folder as a single object.
Use Ctrl + Shift while dragging to scale the grouped folder up or down without losing proportions. Ungroup with Ctrl + Shift + G if you need to adjust individual components.

Arrange the folder cover, image, text, and icon to the bottom gray area of the slide. Then, select the stacked papers and scale them down slightly to create a sense of depth and layering.
Finally, apply the Morph transition to this slide to enable smooth, dynamic animations that mimic folder opening or document movement.
10. Creating Additional Slides with Shapes and Lines
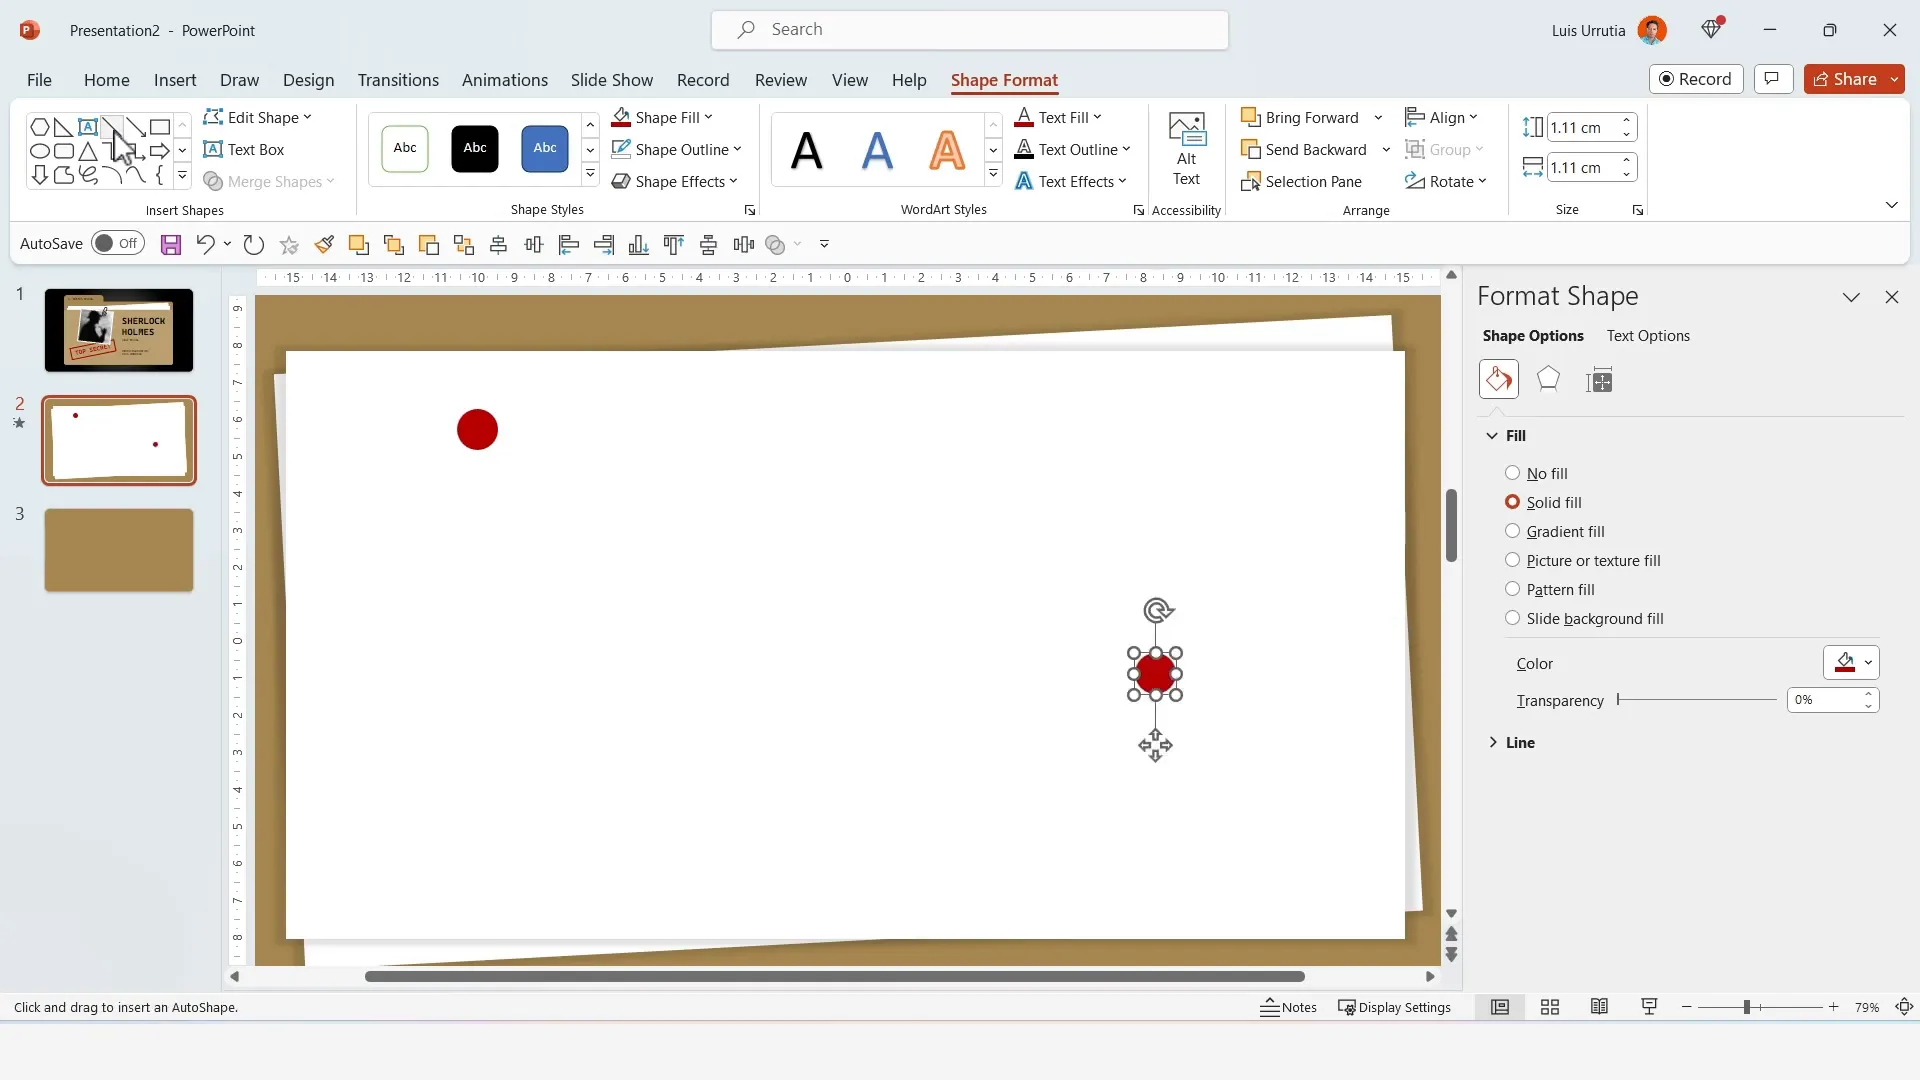
For the next slides, change the background to the darkest brown color to maintain theme consistency.
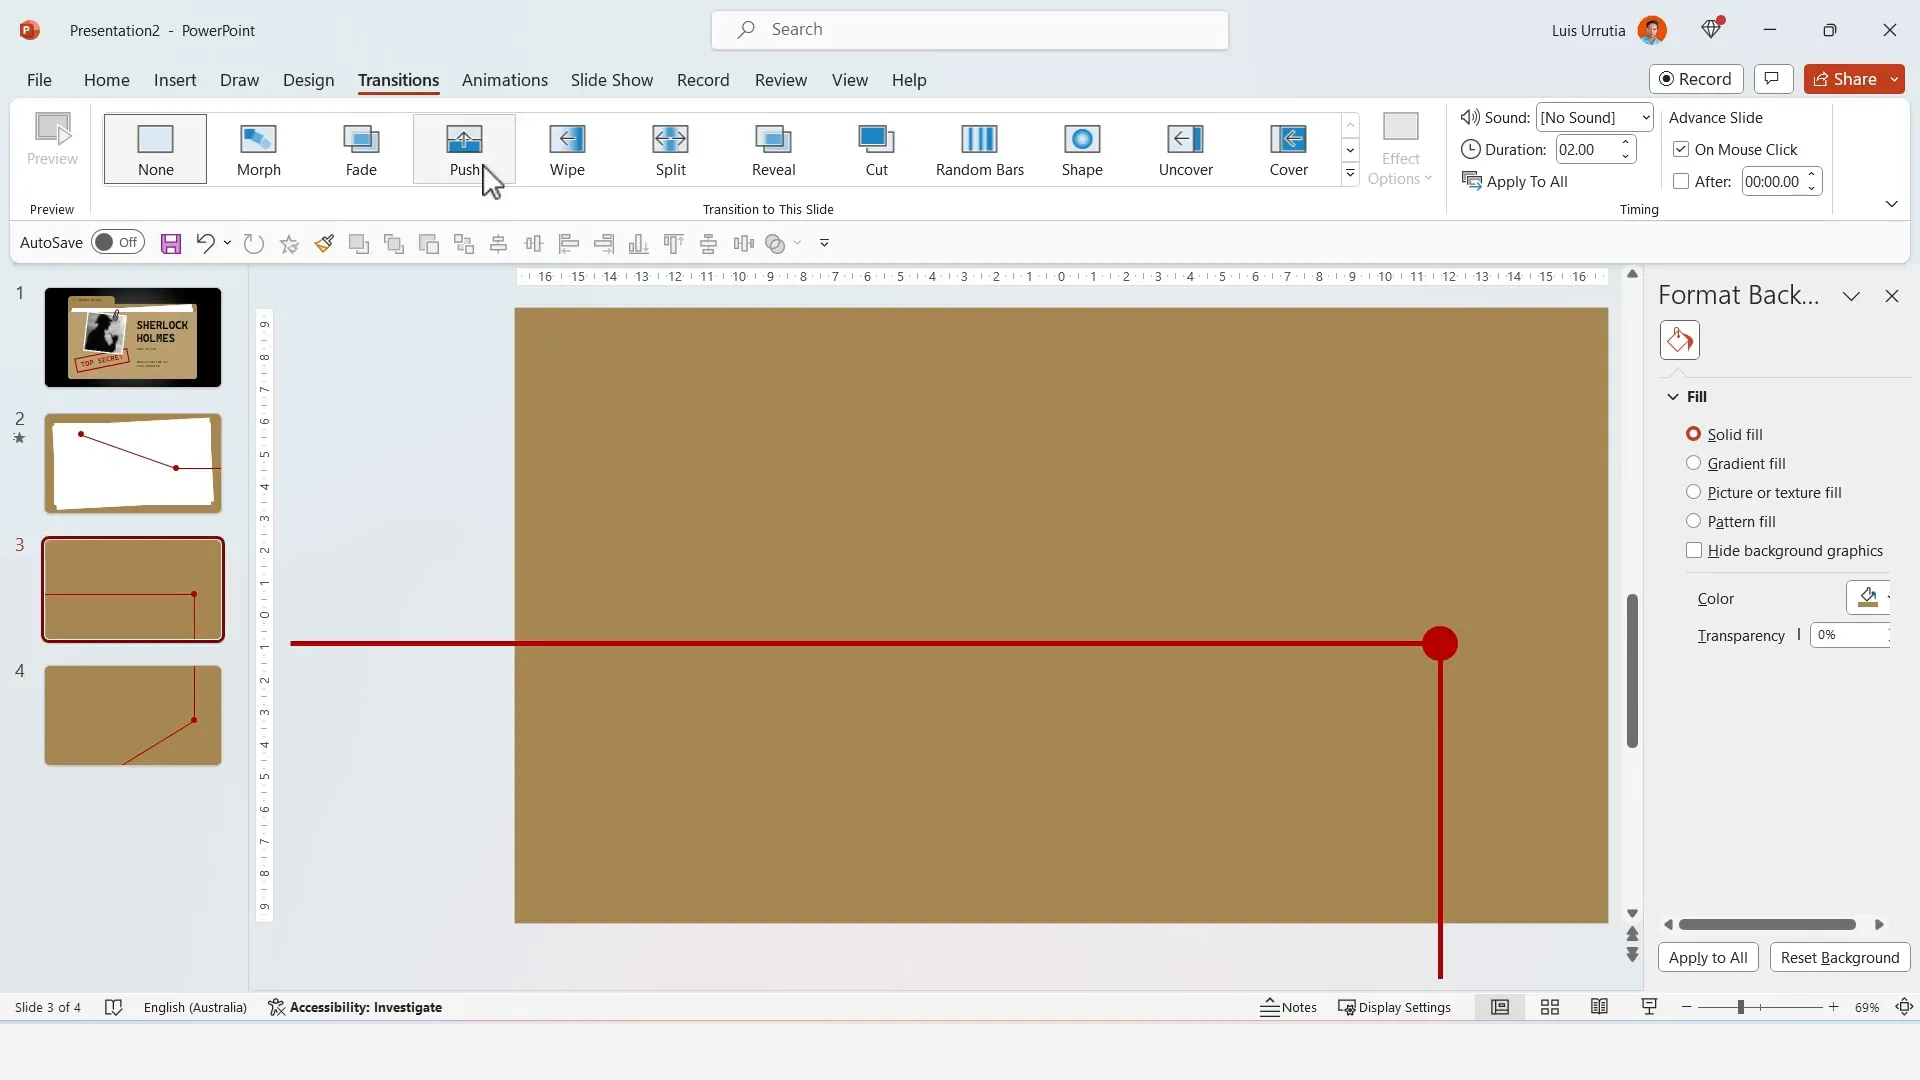
Insert circles filled with red and position them on opposite sides of the slide. Connect these circles with red lines using the line shape tool, adjusting stroke weight to 4.5 points for visibility.
Duplicate and reposition lines and circles across slides to create a connected, flowchart-like visual. Rotate some lines vertically or diagonally to add variety and interest.
11. Using Transitions for Slide Movement
Apply the Push transition on slides three and four for smooth directional movement between slides. Set the effect options to “From Right” and “From Bottom” respectively to simulate directional flow.
This enhances the storytelling aspect by guiding viewers through the investigation narrative visually.
12. Populating Slides with Content
Fill your slides by copy-pasting design elements from previous slides to create placeholders for text and images. Maintain consistent styles for fonts, colors, and effects to ensure a cohesive presentation.
Use the same text treatment and image frames to keep the look unified across all slides.
13. Adding Final Details: Scribbles and Annotations
To give the presentation a hand-crafted, authentic feel, use the Draw tool in PowerPoint. Select a pen, customize its color and thickness, and add scribbles such as circles, arrows, or lines.
This might take some practice to get natural-looking marks, but it adds a valuable layer of detail that supports the investigation theme.

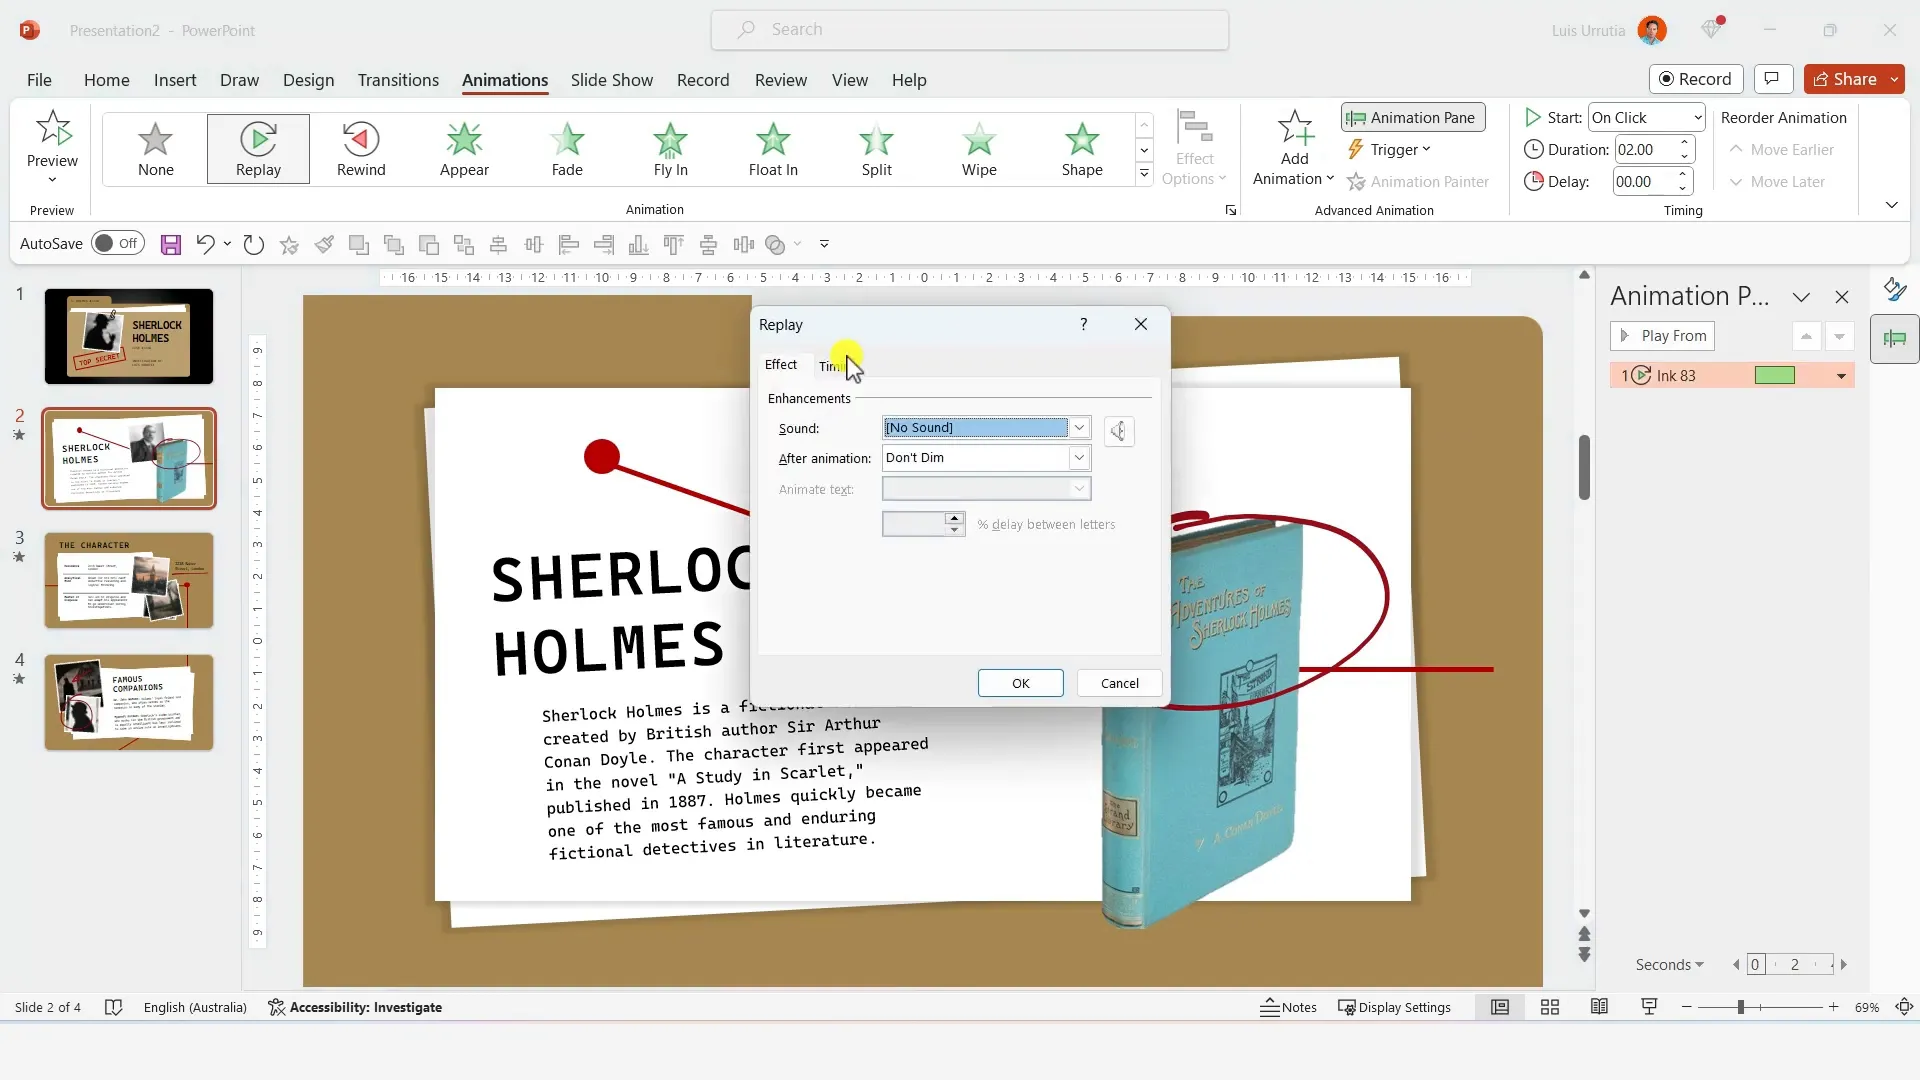
14. Animating the Scribbles
Switch back to the cursor tool to select your scribbles. Open the Animations pane and apply the Replay animation to each scribble.
Adjust the timing to Start With Previous and set the duration to 1 second for smooth, synchronized effects.
Applying these animations brings your presentation to life and mimics the dynamic unfolding of an investigation.
Tips for Maximizing Your Presentation Impact
- Maintain Consistency: Use the same fonts, colors, and styles throughout your presentation to create a professional and cohesive look.
- Use AI Tools for Custom Images: Leverage Pixlr’s AI features to generate unique visuals tailored to your topic, saving time and enhancing originality.
- Layer Elements Thoughtfully: Use layering and shadow effects to add depth and realism, which makes your slides more engaging.
- Practice Your Animations: Smooth transitions and animations can make your presentation feel polished, but avoid overdoing them to keep focus on your content.
- Keep Text Clear and Readable: Choose fonts like Cascadia Code for clarity, and use bold or color accents to highlight key points.
Frequently Asked Questions (FAQ)
Can I create this investigation-style presentation using older versions of PowerPoint?
While the tutorial uses Microsoft 365 PowerPoint for its latest features, many design elements like shapes, shadows, and basic animations are available in older versions. However, advanced features like the Morph transition or the new icon library might be limited or unavailable.
Is Pixlr really free to use, and do I need to install anything?
Yes, Pixlr offers a free online photo editor accessible directly through your web browser at pixlr.com. No installation is required, and it includes AI tools such as image generation, background removal, and more.
What fonts work best for this presentation style?
I recommend using monospaced fonts like Cascadia Code for a clean, modern look that complements the investigation theme. Other similar fonts include Consolas, Courier New, or Source Code Pro.
How can I make my animations smoother and more professional?
Use transitions like Morph and Push for natural movement between slides. For object animations, set the timing to “Start With Previous” and adjust durations to avoid abrupt changes. Preview your animations frequently and fine-tune timings for the best effect.
Can I customize the colors used in this presentation?
Absolutely! While I used specific brown and red tones to match the folder and stamp aesthetics, you can use any color palette that fits your brand or theme. Just ensure there’s enough contrast for readability and visual appeal.
Conclusion
Designing a viral “Investigation” presentation in PowerPoint is not only fun but an excellent way to differentiate your content and engage your audience. By combining creative folder designs, layered papers, bold stamps, custom images, and handwritten scribbles, you create a narrative that’s visually compelling and memorable.
Using tools like Pixlr alongside PowerPoint’s versatile features allows you to push the boundaries of traditional slide design. Whether for business reports, educational projects, or creative storytelling, this style adds an element of intrigue that keeps viewers hooked.
Take your time experimenting with shapes, colors, and animations, and don’t hesitate to add your personal flair. With practice, you’ll be able to create captivating presentations that look like professional investigation case files, all within PowerPoint.
Happy designing!
Check out the full video: How to make this VIRAL “Investigation” PRESENTATION using POWERPOINT! 🔍🤩


