PowerPoint animation effects can transform your presentations from ordinary to extraordinary. Whether you’re preparing a business pitch, teaching a class, or sharing ideas, the right animations can captivate your audience and deliver your message with style. Inspired by the innovative Microsoft 365 Copilot’s animation capabilities, this guide dives deep into how you can replicate similar impressive animations using PowerPoint’s built-in tools, especially focusing on the powerful Morph transition.
In this comprehensive tutorial, you will learn step-by-step how to create a beautiful photo crop animation combined with an elegant text reveal effect. These techniques not only enhance your slide aesthetics but also add dynamic storytelling elements that keep your audience engaged. Let’s explore how to master these PowerPoint animation effects and elevate your presentations to the next level.
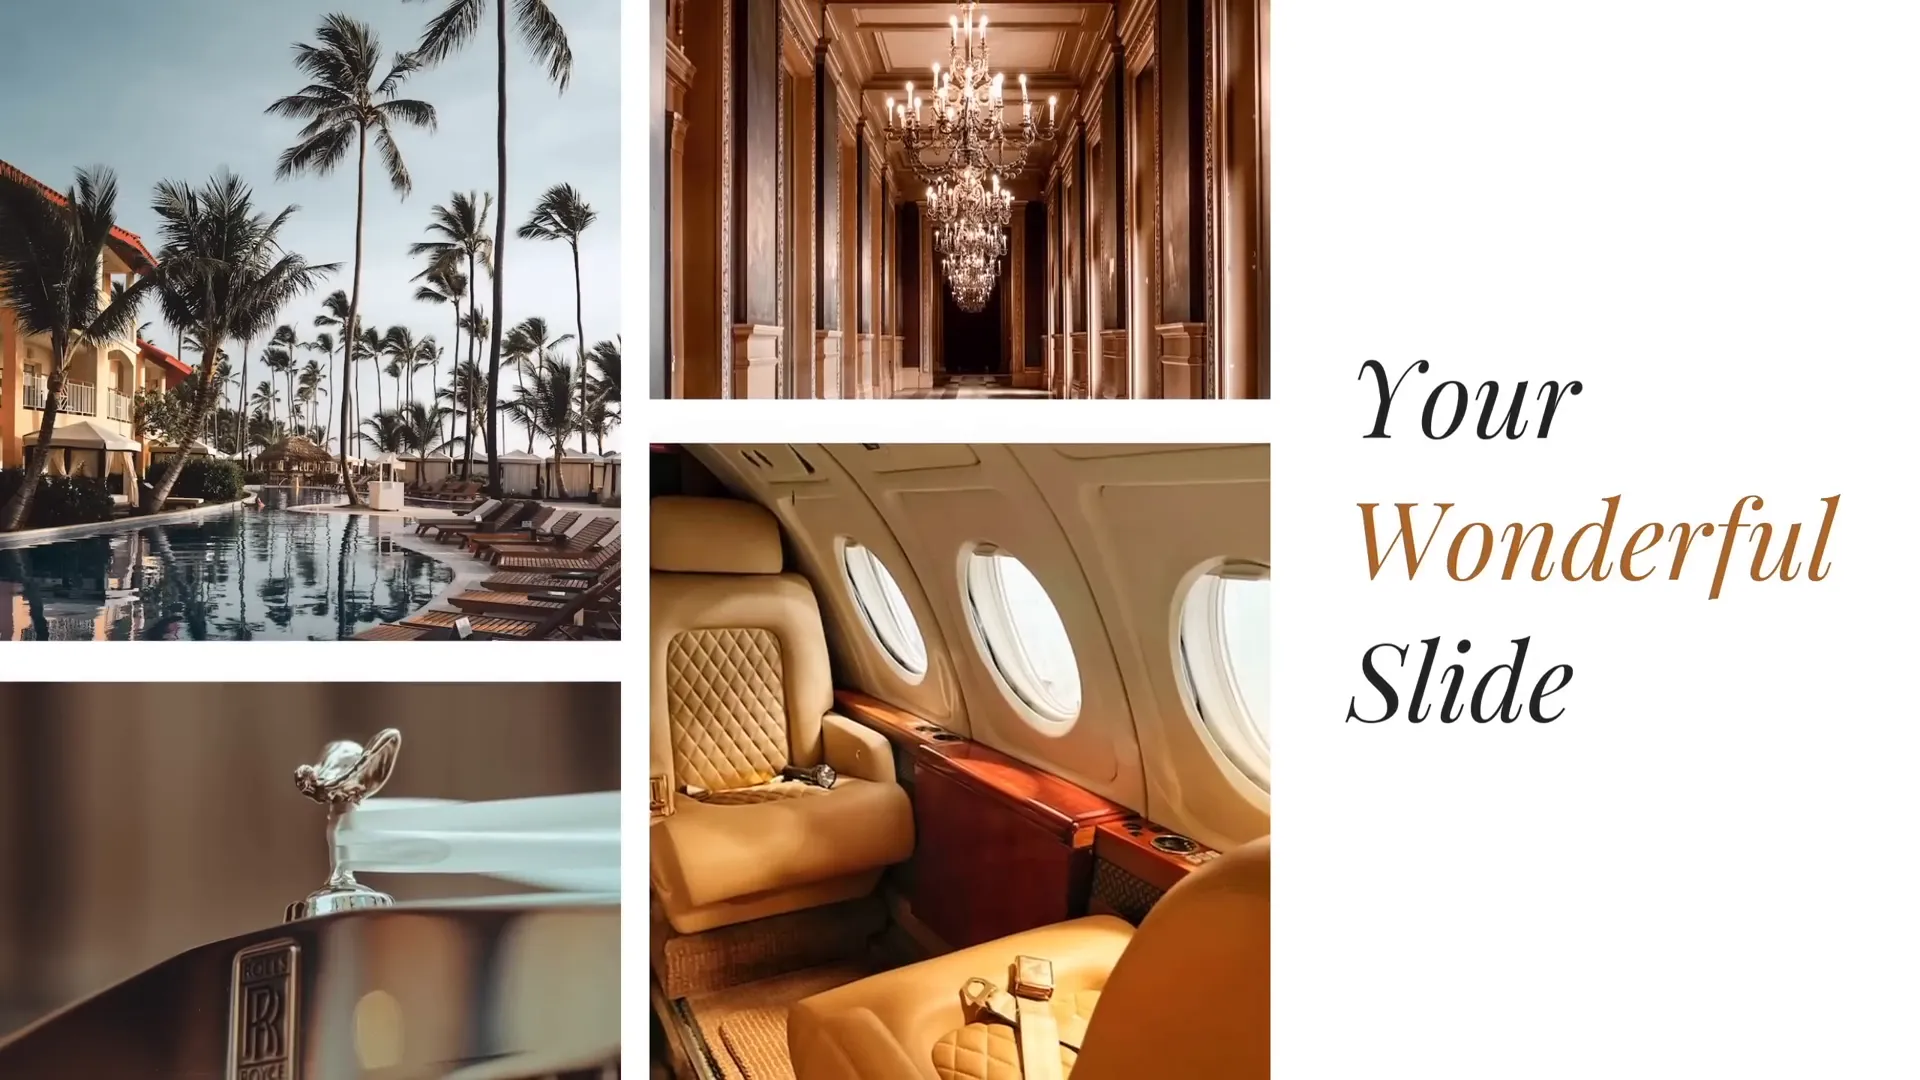
Table of Contents
- Introduction to Microsoft 365 Copilot Inspired Animations
- Setting Up Your Slide with Rectangles and Text
- Advanced Photo Filling Techniques for Shapes
- Arranging and Styling Text Boxes for Animation
- Animating with the Morph Transition
- Creating the Photo Crop Animation Effect
- Adding Animation Delays for a Dynamic Look
- Final Tips and Additional Resources
- FAQ: PowerPoint Animation Effects
Introduction to Microsoft 365 Copilot Inspired Animations
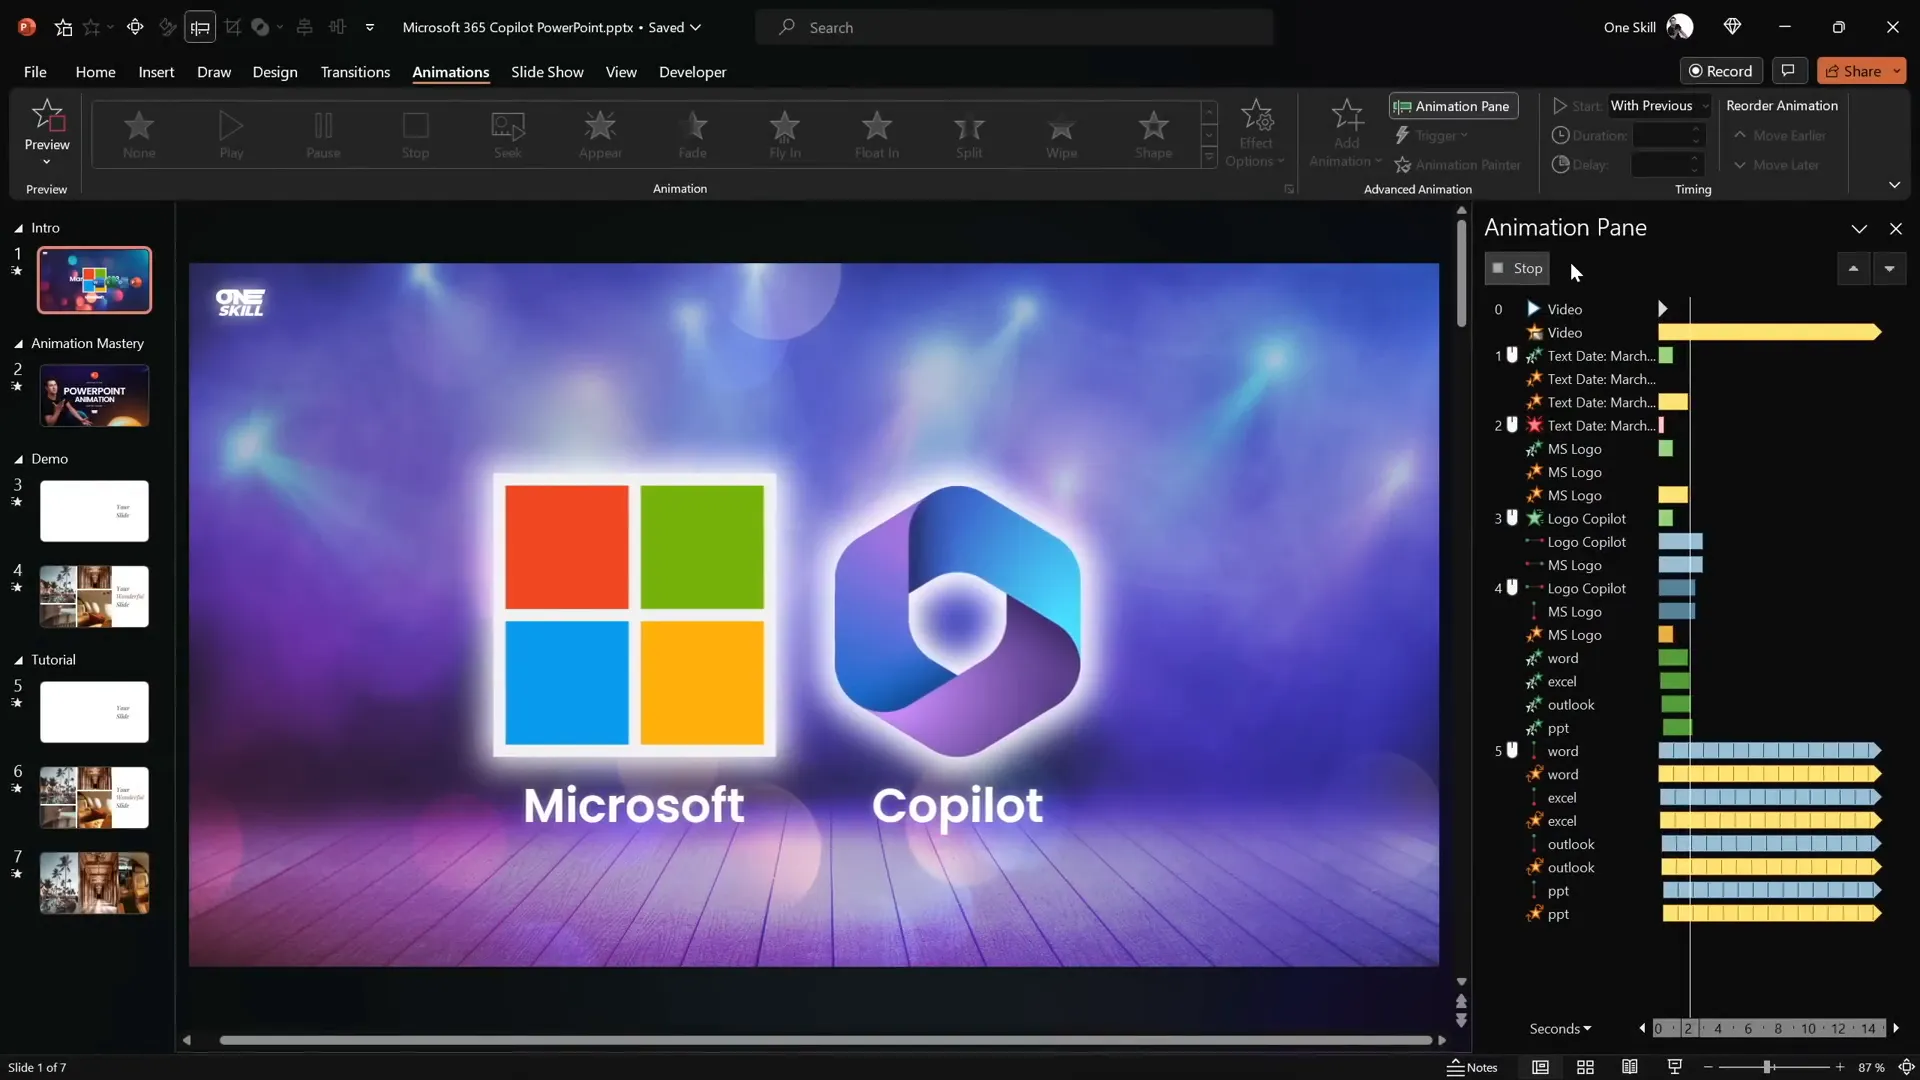
On March 16th, Microsoft announced an exciting AI productivity tool called Microsoft 365 Copilot, integrated across popular apps like Word, Excel, Outlook, and PowerPoint. One standout feature demonstrated was Copilot’s ability to automatically transform written documents into visually engaging PowerPoint presentations, complete with professional animations.
Among the animations, a photo crop effect paired with a smooth text reveal caught my eye. Although Copilot isn’t publicly available yet, this inspired me to recreate the look using PowerPoint’s native tools. The goal was to replicate those seamless animations that make the slides both beautiful and impactful.
By leveraging PowerPoint’s Morph transition and creative shape merging techniques, you can achieve similar effects that make your presentations pop. All the logo animations you might have seen earlier in this post were crafted solely with PowerPoint animations — no external software needed!
Setting Up Your Slide with Rectangles and Text
The first step is to create a slide layout that serves as the canvas for your animations. Here’s how to get started:
- Create four rectangles: Insert four rectangles on the left side of the slide. For visual interest, vary their heights but keep equal gaps between them to maintain balance.
- Add text boxes: On the right side, add two simple text boxes. Use the Playfair Display font at size 54 for a classy look.
Balancing the shapes and text visually is key to achieving a professional layout. The rectangles will later be filled with photos, and the text boxes will animate to reveal content smoothly.
Advanced Photo Filling Techniques for Shapes
PowerPoint offers a basic option to fill shapes with pictures by right-clicking a shape and selecting Format Shape > Fill > Picture. However, this method lacks flexibility for the animation we want to create.
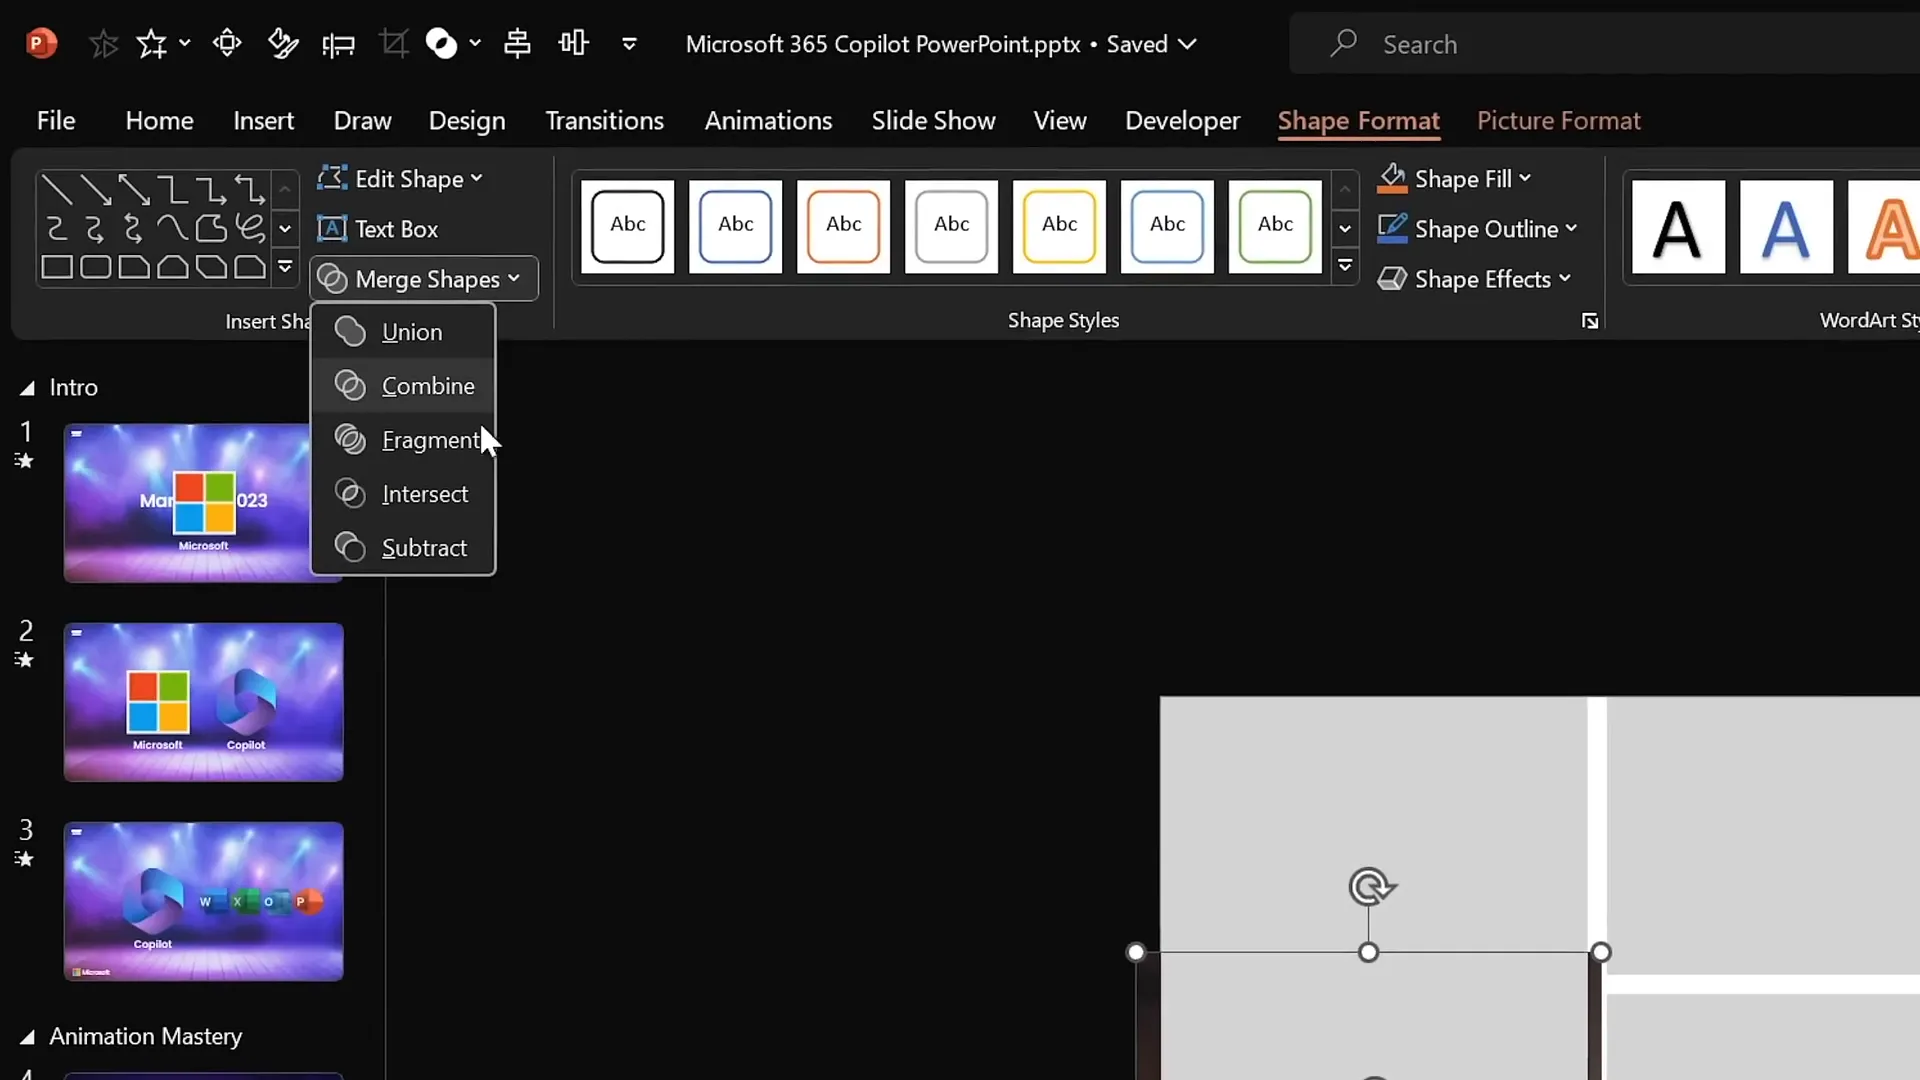
Instead, I recommend this advanced technique using the Merge Shapes feature:
- Insert photos: Upload your chosen images to the slide. I used high-quality photos from Unsplash (credits and links in the resources).
- Position photos: Drag a photo over a rectangle so it covers it completely.
- Send photo to back: Right-click the photo and select Send to Back so it’s behind the rectangle.
- Select both photo and rectangle: Hold Shift and click the rectangle while the photo is selected.
- Use Merge Shapes: Go to Shape Format > Merge Shapes > Intersect. This will crop the photo perfectly inside the rectangle’s shape.
- Adjust cropping: If needed, select the cropped photo, click Crop, and reposition the image inside the shape for the best framing.
- Repeat: Do this for all rectangles to fill them with different photos.
This method gives you full control over how photos appear inside shapes, which is essential for the upcoming animation steps.
Arranging and Styling Text Boxes for Animation
With the photos in place, it’s time to polish the text on the right side for animation:
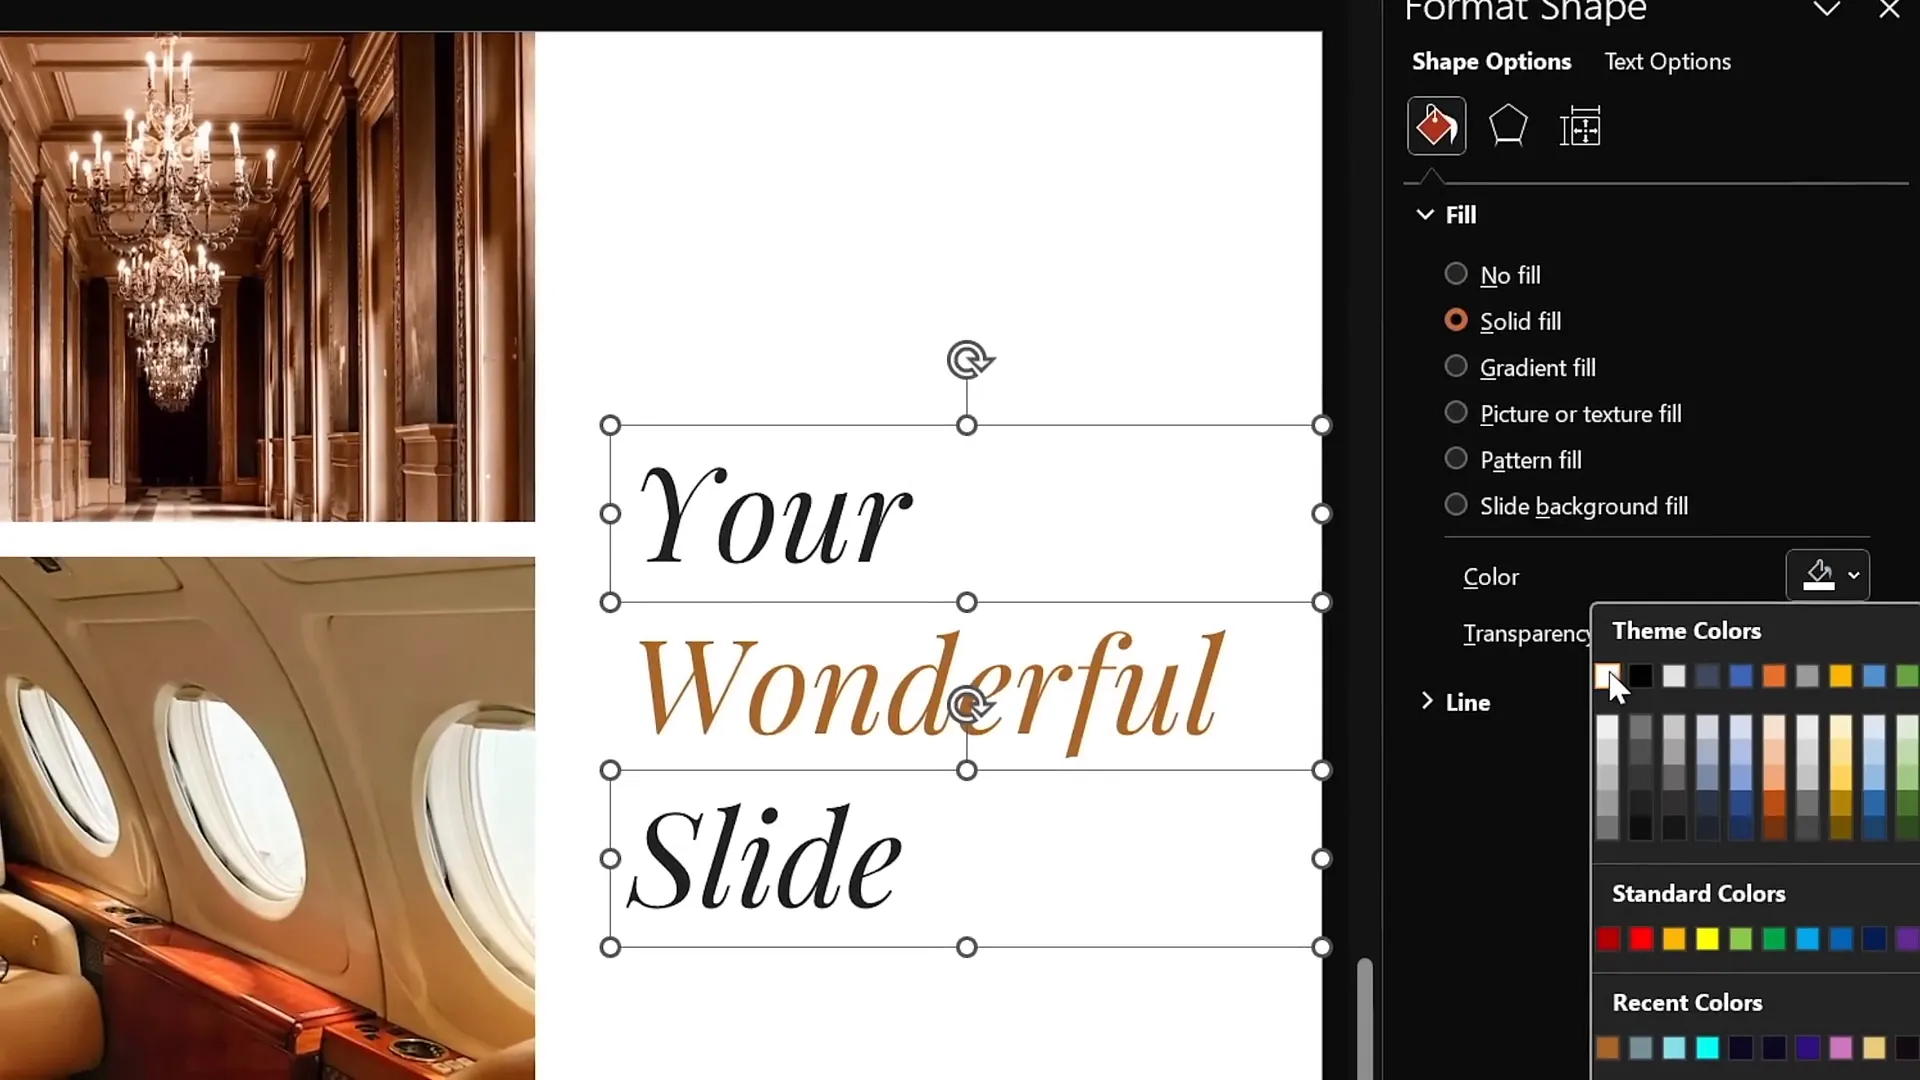
- Add a third text box: Duplicate one of the existing text boxes by selecting it and holding Ctrl + Shift while dragging it to a new position in a straight line.
- Edit text and color: Change the middle text box’s content to a word like “wonderful” and adjust its text color to a shade that complements the design.
- Distribute text boxes: Select all three text boxes, then use the Align > Distribute Vertically option to space them evenly.
- Group and center: Group the three text boxes and align the group to the center of the slide for proper positioning.
- Ungroup for final adjustments: Ungroup the text boxes to style individual elements.
- Add white solid fill: For the top and bottom text boxes, add a solid white fill (Format Shape > Fill > Solid Fill > White). Initially, this may seem invisible, but when you zoom out and move these text boxes slightly, you’ll see the fill.
- Bring text boxes to front: Send these white-filled text boxes to the front so they can mask the middle text box during animation.
This arrangement sets up the text to reveal itself dynamically using the Morph transition.
Animating with the Morph Transition
The Morph transition is a powerful tool in PowerPoint that creates smooth animations between slides by automatically animating movement, resizing, and other changes. Here’s how to apply it:
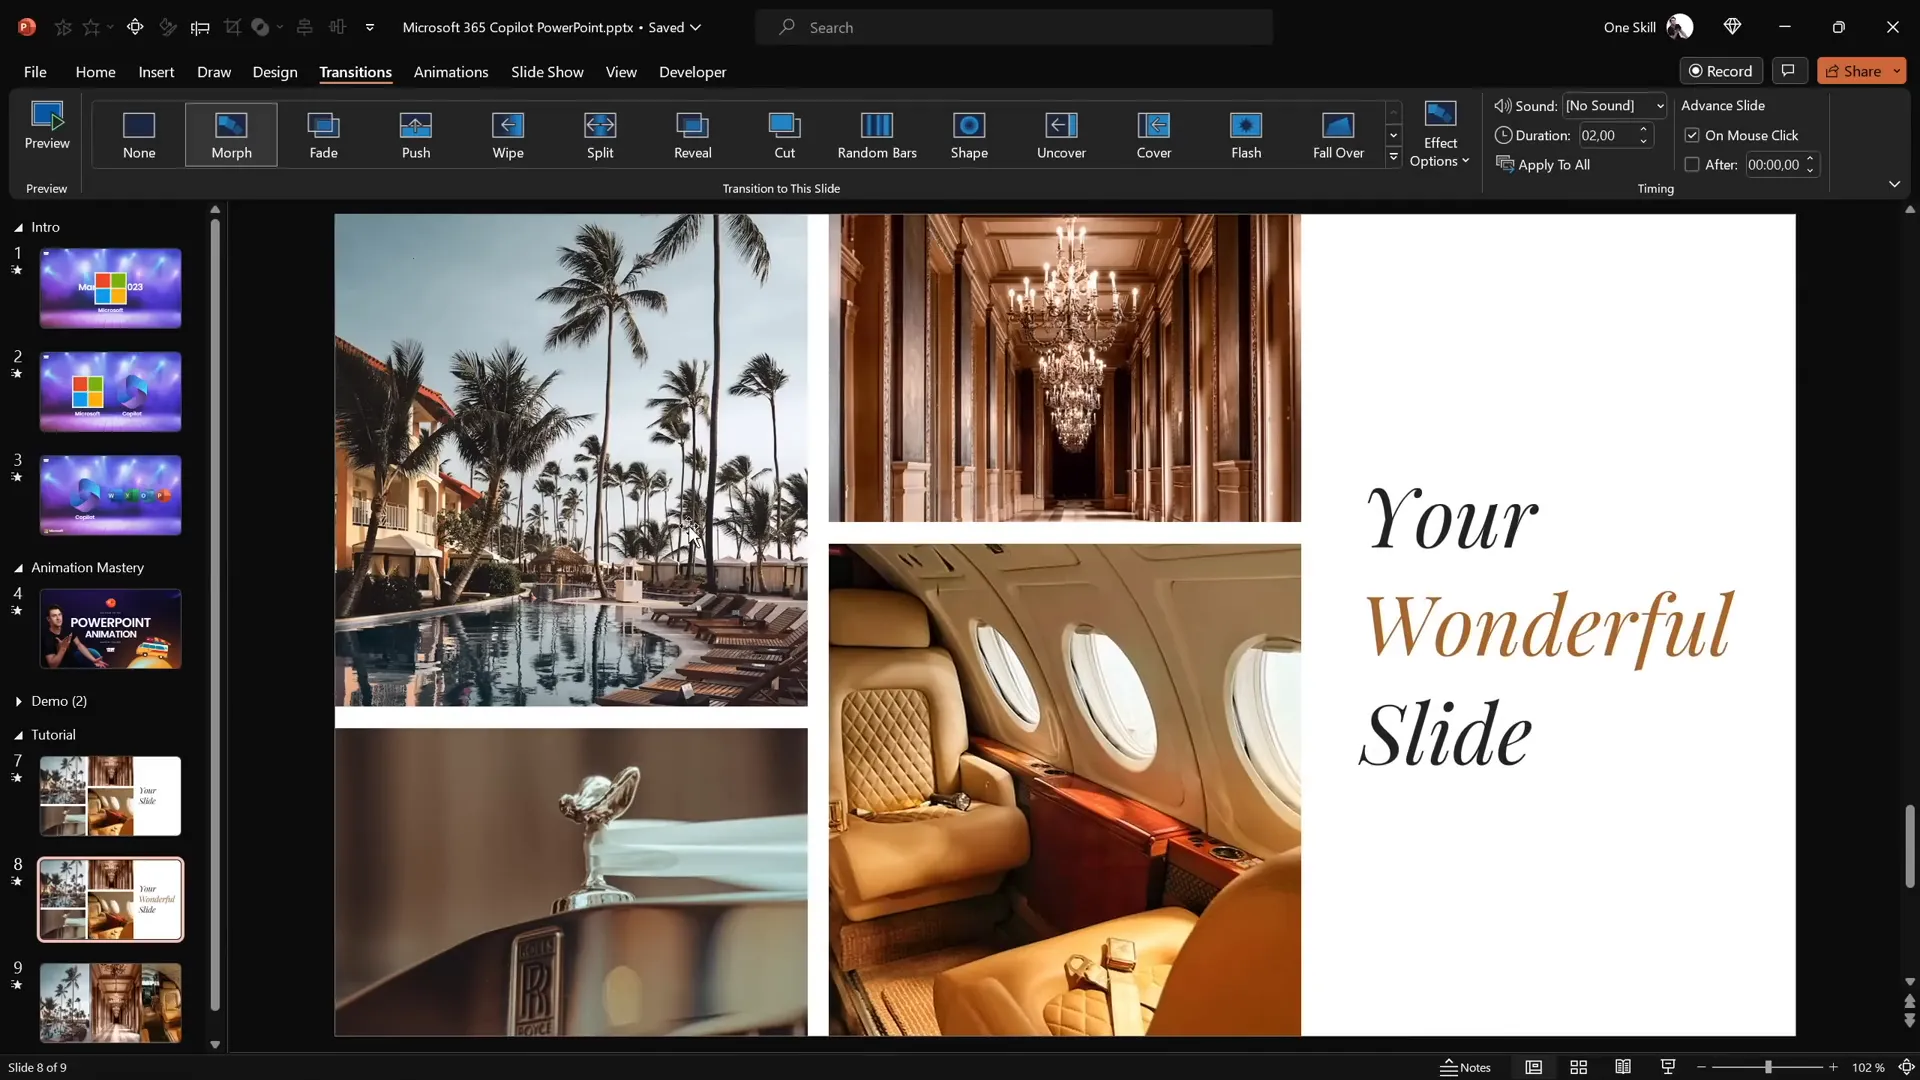
- Duplicate the slide: Create a copy of your completed slide with photos and text boxes.
- Set transitions: Leave the first slide’s transition as Fade (or none), and apply the Morph transition to the duplicated slide.
- Prepare the first slide for animation: On the first slide, hide the middle text box by either deleting or making it invisible.
- Move text boxes: Drag the top text box down to the middle line of the slide and the bottom text box up until they overlap the hidden middle text box area.
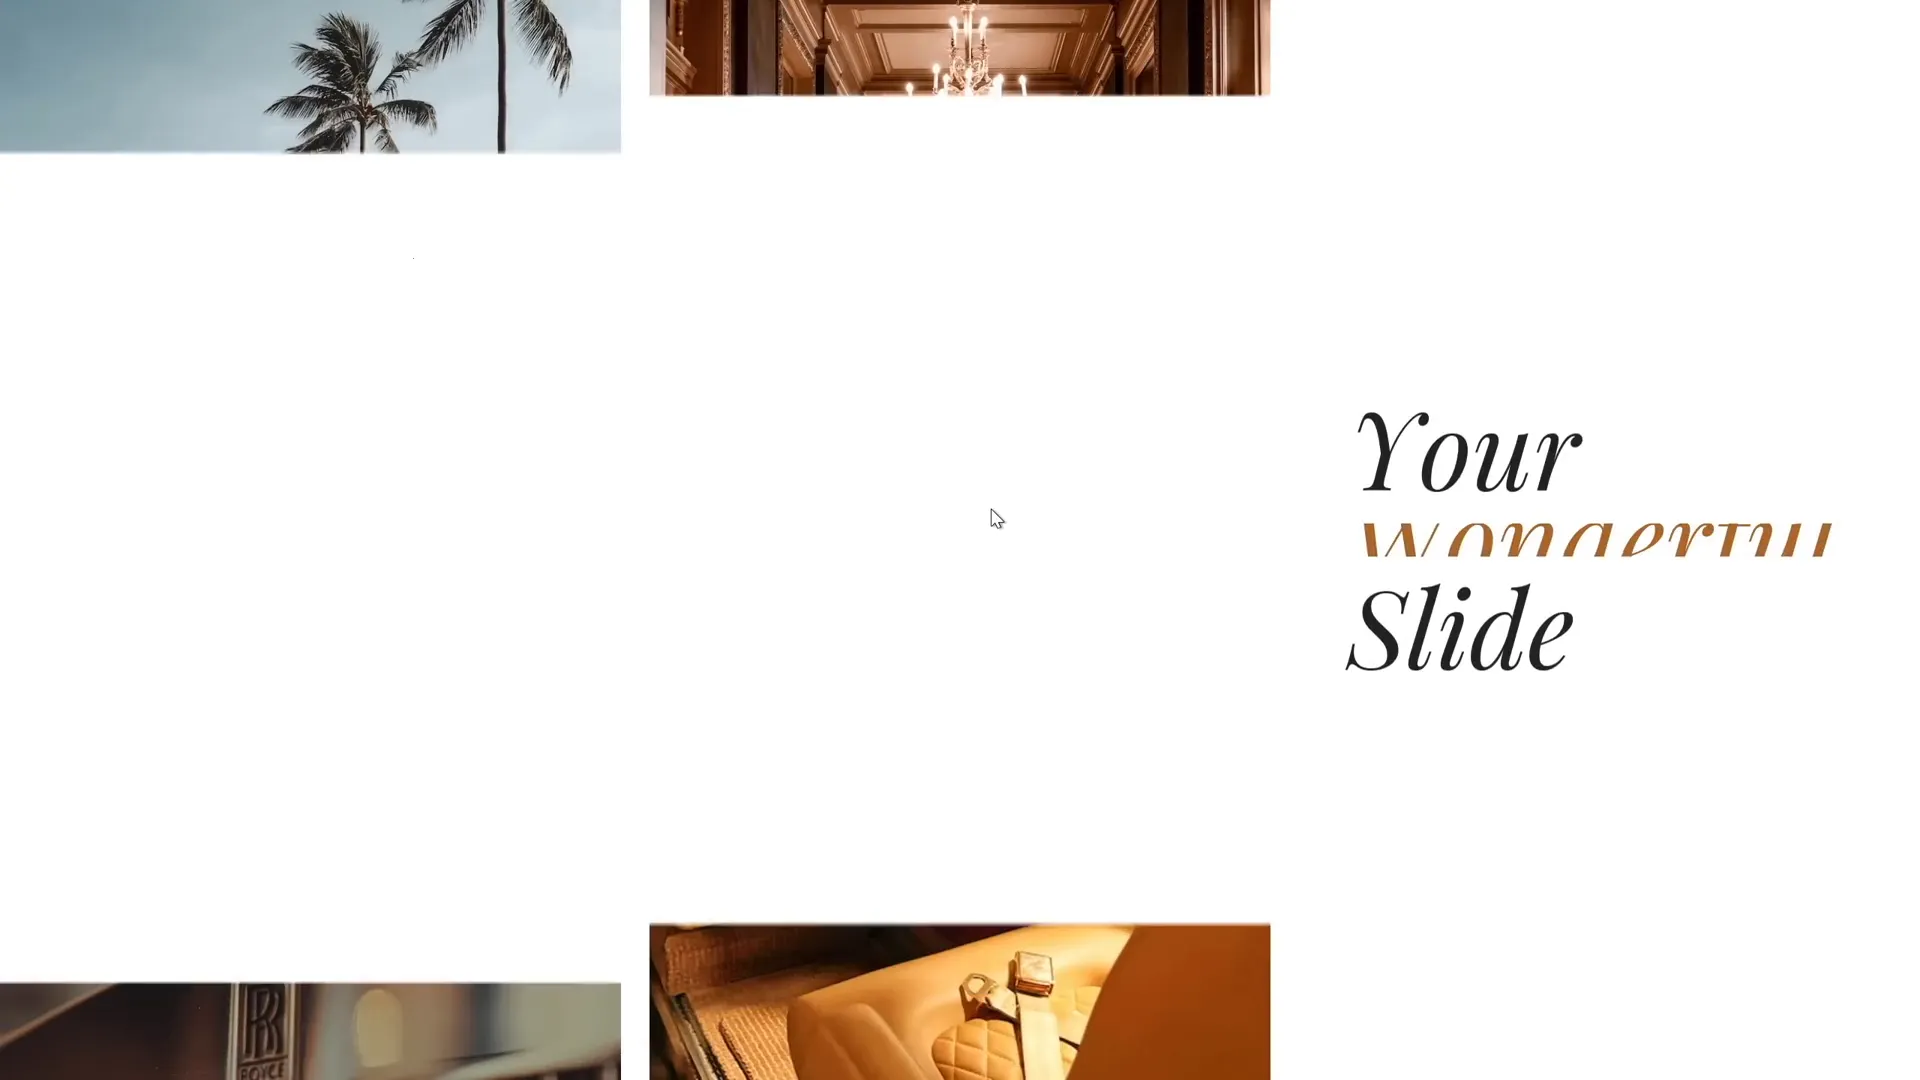
- Preview the transition: Go to the first slide, click Transitions > Preview, and watch the beautiful text reveal animation happen as you move to the second slide.
This technique uses Morph’s magic to animate text smoothly without manually creating complex animations.
Creating the Photo Crop Animation Effect
Next, we focus on animating the photos inside the rectangles to mimic the photo crop effect seen in the Microsoft 365 Copilot animations:
- Adjust cropping handles: On the first slide, select each photo and enter the Crop mode.
- Move cropping handles outside the slide: For the top photos, drag the bottom crop handle slightly outside the slide. For the bottom photos, drag the top crop handle just outside the slide boundary.
- Exit crop mode: Save these changes.
- Test animation: Run the Morph transition to see the photos smoothly crop into place from outside the slide area.
This gives the impression that photos are sliding or cropping into view dynamically, creating a visually appealing entrance effect.
Adding Animation Delays for a Dynamic Look
In the original Copilot animation, photos didn’t animate all at once; they appeared with slight delays for a more natural effect. We can simulate this using Morph by varying the distance photos start from outside the slide:
- Move photos on the first slide to different distances outside the slide boundaries. For example, some photos are just outside the edge, others further away.
- The Morph transition automatically animates photos from their starting positions to their final positions on the second slide.
- Photos starting further away animate later, creating staggered timing and a cascading effect.
This simple trick introduces a professional and polished look to your animations without complex timing settings.

Final Tips and Additional Resources
Congratulations! You now have the skills to create a stunning photo crop animation combined with elegant text reveals that rival high-end AI-generated presentations. Here are some final tips to help you master PowerPoint animation effects:

| Tip | Description |
|---|---|
| Use High-Quality Photos | Select photos with good resolution and composition to ensure crisp visuals after cropping. |
| Balance Text and Images | Ensure text boxes complement the photos and don’t overcrowd the slide. |
| Experiment with Morph | Try different shape movements and cropping adjustments to create unique animations. |
| Maintain Consistent Spacing | Equal gaps between shapes and text keep the slide visually balanced. |
| Group and Align Elements | Use grouping and alignment tools to keep your layout clean and organized. |
If you want to deepen your understanding of the Morph transition, consider exploring tutorials that break down its features and creative applications. Mastering this tool will unlock countless possibilities for dynamic and professional PowerPoint animation effects.
For those interested in further advancing their skills, I also recommend checking out specialized courses like the PowerPoint Animation Mastery course, which dives deeper into animations and presentation design.
FAQ: PowerPoint Animation Effects
What is the Morph transition in PowerPoint?
The Morph transition is a feature that animates smooth movement, resizing, and transformation of objects between two slides. It helps create seamless animations without complex setup.
Can I use Morph transition to animate photos and text together?
Yes! Morph works by comparing object positions and properties between two slides, so you can animate photos, shapes, and text simultaneously for coordinated effects.
How do I create photo crop effects in PowerPoint?
Use the Merge Shapes > Intersect feature to crop photos inside shapes, then animate cropping handles or object positions using Morph to create dynamic photo crop animations.
Is Morph transition available in all PowerPoint versions?
Morph is available in PowerPoint for Microsoft 365 and PowerPoint 2019 or later. It may not be available in older versions.
How can I add animation delays using Morph?
Place objects at varying distances or positions on the first slide before applying Morph. Objects further away will animate later, creating a staggered effect.
Where can I find good photos for PowerPoint animations?
Free high-quality photos can be found on sites like Unsplash. Always check licensing to ensure proper use.
What fonts work well for animated text in PowerPoint?
Fonts like Playfair Display add elegance and readability. Choose fonts that align with your presentation’s tone and are easy to read at a distance.
Can I use these animation techniques for business presentations?
Absolutely! Well-crafted animations enhance professionalism and engagement, making your message more memorable in any setting.
Where can I learn more about PowerPoint animations?
Check out online tutorials, courses like PowerPoint Animation Mastery, and Microsoft’s official resources to expand your skills.
Are there any tips to avoid overusing animations?
Yes, use animations purposefully to emphasize key points. Avoid excessive or distracting effects that detract from your message.
Conclusion
PowerPoint animation effects, when done right, can dramatically elevate your presentations. Inspired by Microsoft 365 Copilot’s AI-powered animations, you now know how to create your own stunning photo crop and text reveal effects using PowerPoint’s Morph transition and shape merging tools.
By carefully setting up your slide, filling shapes with photos using Merge Shapes, arranging text boxes with thoughtful styling, and applying Morph transitions with staggered photo positions, you can achieve a polished, professional look that impresses any audience.
Remember, the key to great animations is balance, timing, and purpose. Practice these techniques, experiment with your own creativity, and watch your PowerPoint presentations come to life with engaging animation effects.
Keep exploring, keep animating, and happy presenting!
Check out the full video: How I Made Microsoft 365 Copilot Animation in PowerPoint 😁✨


