
If you’ve ever wanted to add a sleek, interactive sliding sidebar menu to your PowerPoint presentations, you’re in the right place. This comprehensive guide will walk you through creating a fully functional sliding sidebar menu that works across all PowerPoint versions—even as far back as 2010. Whether you’re a seasoned presentation creator or just starting out, this tutorial will equip you with the skills to elevate your slides with professional navigation features.
Inspired by the creative insights shared by One Skill PowerPoint, this tutorial combines practical PowerPoint techniques with animation triggers, layering, and smart object management to build a sidebar menu that not only looks great but also enhances user experience. Let’s dive in and build this impressive feature step-by-step!

Table of Contents
- Why Create a Sliding Sidebar Menu in PowerPoint?
- Getting Started: Tools and Preparation
- Step 1: Creating the Hamburger Menu Button
- Step 2: Adding the Dark Overlay
- Step 3: Designing the White Sidebar
- Step 4: Creating the Close Button
- Step 5: Adding Menu Links
- Step 6: Animating the Menu Elements
- Step 7: Adding Bounce Effects and Animation Delays
- Step 8: Linking Menu Items to Slides
- Step 9: Creating the Closing Animation
- Step 10: Enhancing User Experience with Multiple Closing Triggers
- Step 11: Replicating the Menu Across Slides
- Step 12: Using Kiosk Mode for Controlled Navigation
- Additional Tips for Customizing Your Sliding Sidebar Menu
- Frequently Asked Questions (FAQ)
- Conclusion
Why Create a Sliding Sidebar Menu in PowerPoint?
PowerPoint presentations often need intuitive navigation, especially when dealing with complex slide decks or interactive content. A sliding sidebar menu offers a user-friendly way to jump between sections or slides without cluttering your presentation with too many buttons or links visible all the time.
This kind of menu provides:
- Clean design: The menu stays hidden until needed, keeping your slide neat and focused.
- Easy navigation: Users can quickly access different parts of your presentation with just a click.
- Compatibility: Designed to work on all PowerPoint versions, ensuring your presentations remain functional even on older software.
- Customization: You can tailor the menu’s appearance, size, and links to suit your presentation’s theme and structure.
With these benefits in mind, let’s begin crafting your sliding sidebar menu.
Getting Started: Tools and Preparation
Before jumping into PowerPoint, it’s good to recognize the value of learning complementary tools and techniques. Vector graphic skills, for example, can enhance your design workflow. Programs like Adobe Illustrator offer advanced vector shape creation, which can be adapted to PowerPoint’s shape tools.
For those interested in boosting their skills, online learning platforms like Skillshare offer excellent classes. One such course, “Mastering Illustrator: Ten Tips and Tricks to Speed Up Your Workflow” by DKNG Studios, can help you create more sophisticated shapes and design elements that translate beautifully into PowerPoint.
As you develop your PowerPoint menu, consider how vector shapes and animations complement each other to create smooth, interactive experiences.

Step 1: Creating the Hamburger Menu Button
The hamburger menu icon is the universally recognized symbol for navigation menus, consisting of three horizontal lines stacked vertically. Here’s how to create it in PowerPoint:
- Go to the Insert tab and select Shapes, then choose the Line tool.
- Draw a straight horizontal line on your slide. Set the line color to black and increase the weight to 3 points for visibility.
- Adjust the length of the line to approximately 1.25 centimeters for consistency.
- Duplicate this line twice so you have three identical lines stacked vertically.
- Select all three lines, align them to the left, and ensure equal vertical spacing between them.
- Group the three lines together to create one cohesive hamburger icon.
- Open the Selection Pane (found under the Home tab → Select → Selection Pane) and rename this group to hamburger icon for easy identification when animating.
This simple icon will serve as the trigger to open your sliding sidebar menu.

Step 2: Adding the Dark Overlay
When the menu slides in, it’s helpful to dim the background to focus attention on the navigation. This effect is achieved with a semi-transparent dark overlay.
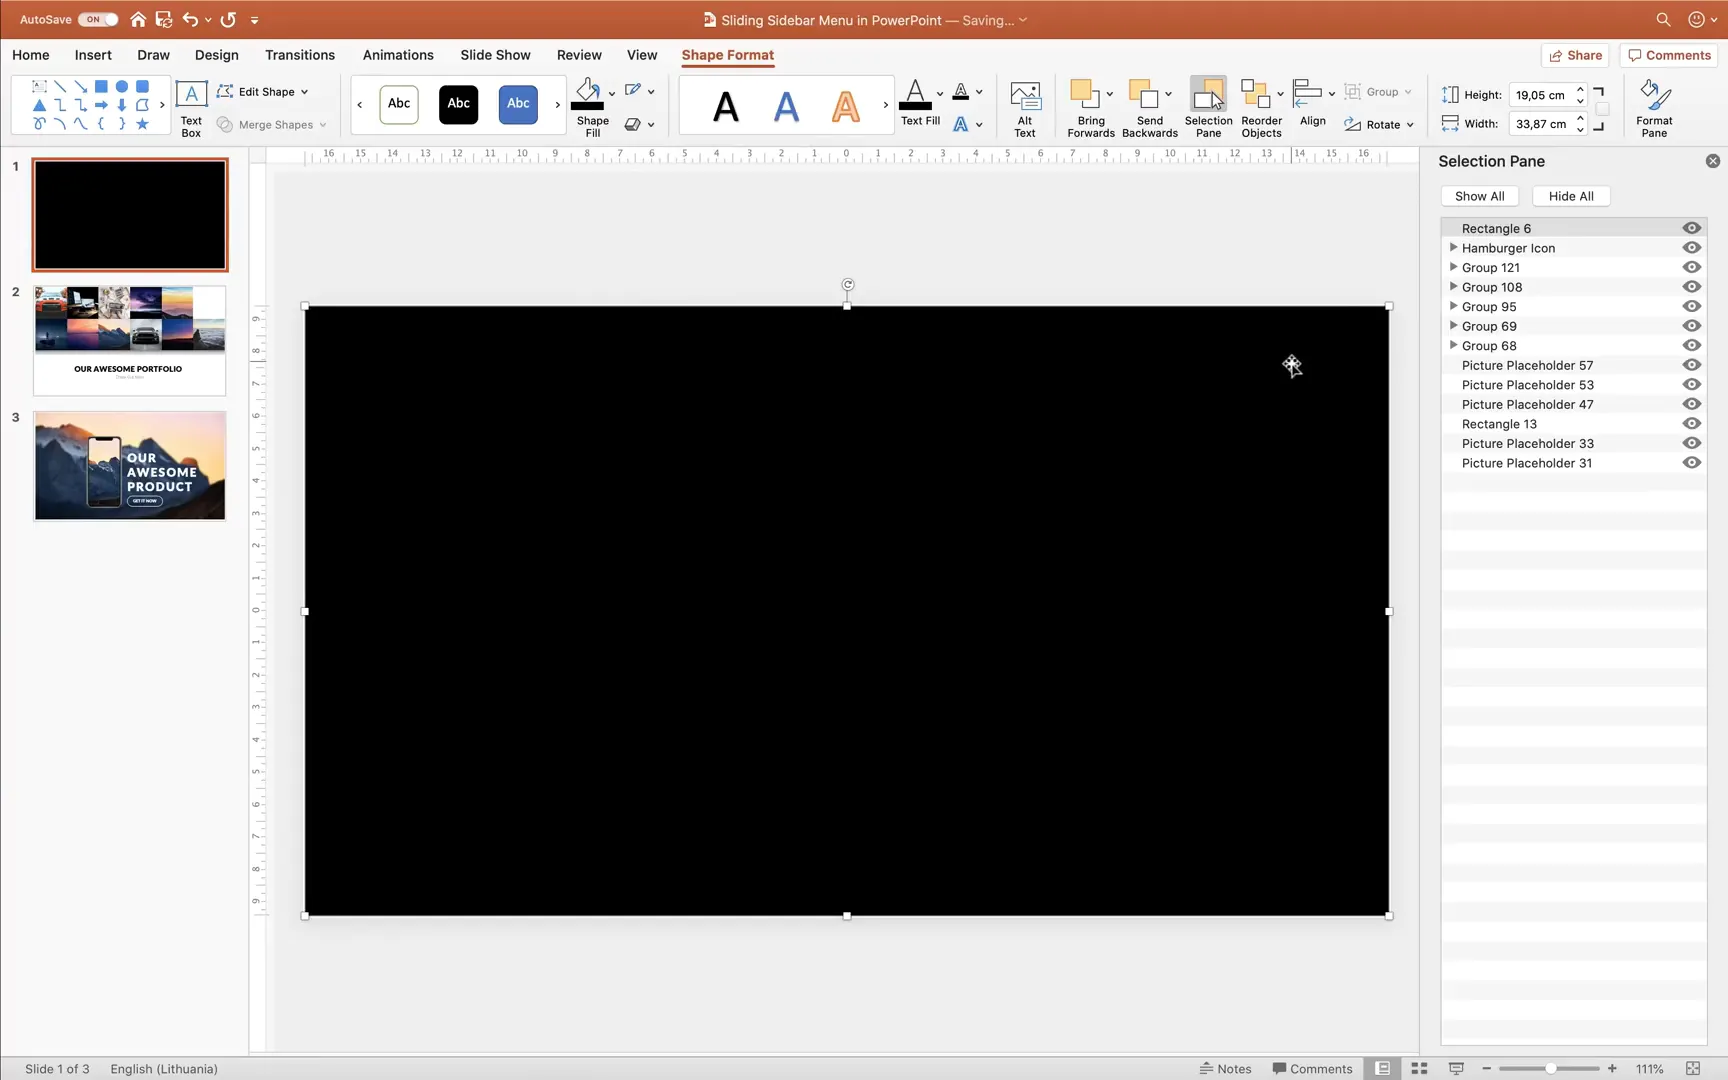
- Insert a rectangle shape that covers the entire slide.
- Remove the outline of the rectangle.
- Fill the rectangle with black color.
- Adjust the transparency of the rectangle to about 40% to create a darkened overlay effect without obscuring the slide completely.
- Rename this rectangle to dark overlay in the Selection Pane.
This overlay will appear behind the sidebar when the menu is activated, enhancing visual clarity and user focus.
Step 3: Designing the White Sidebar
Next, create the actual sidebar panel where your navigation links will live.
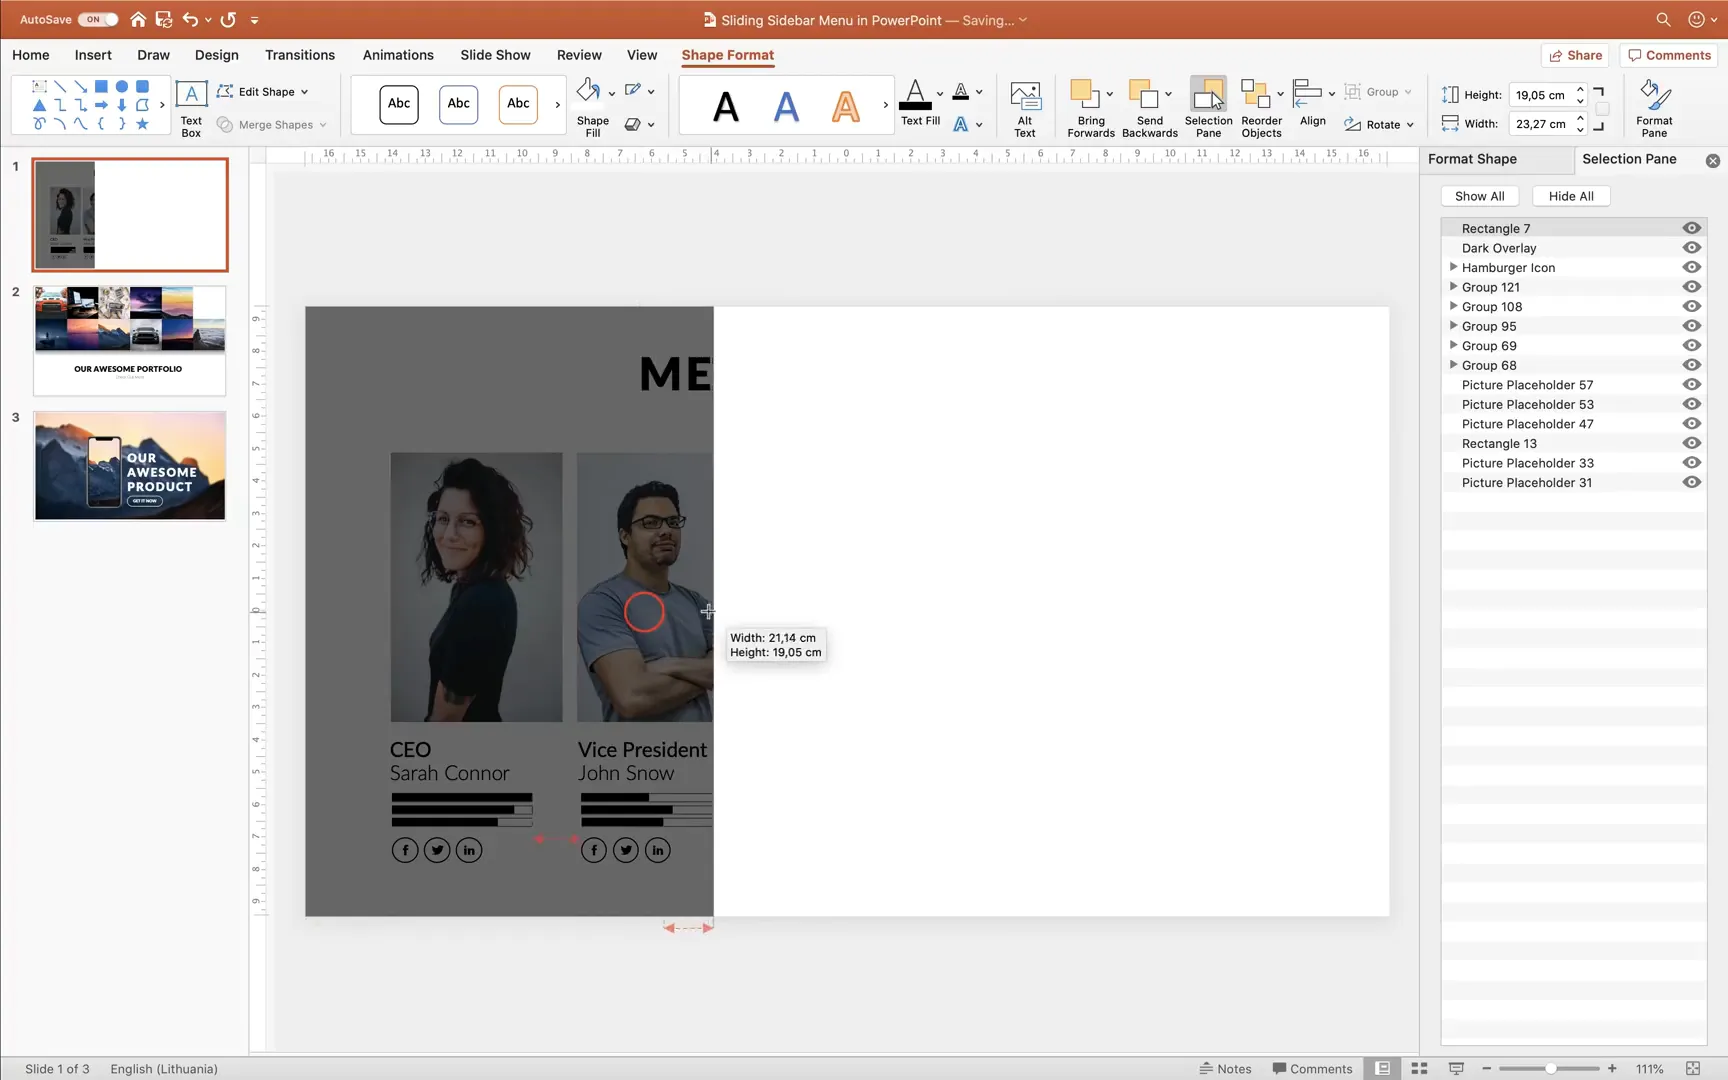
- Insert another rectangle, this time smaller and positioned along the left or right edge of the slide, depending on your preference.
- Fill this rectangle with white color to contrast with the dark overlay and slide content.
- Name this shape white sidebar in the Selection Pane.
You can customize the size of this sidebar to fit the number of menu items and your design aesthetic.
Step 4: Creating the Close Button
To close the sidebar menu, you’ll need a close button, typically represented by an “X.” Here’s how to create it using simple lines derived from the hamburger icon:
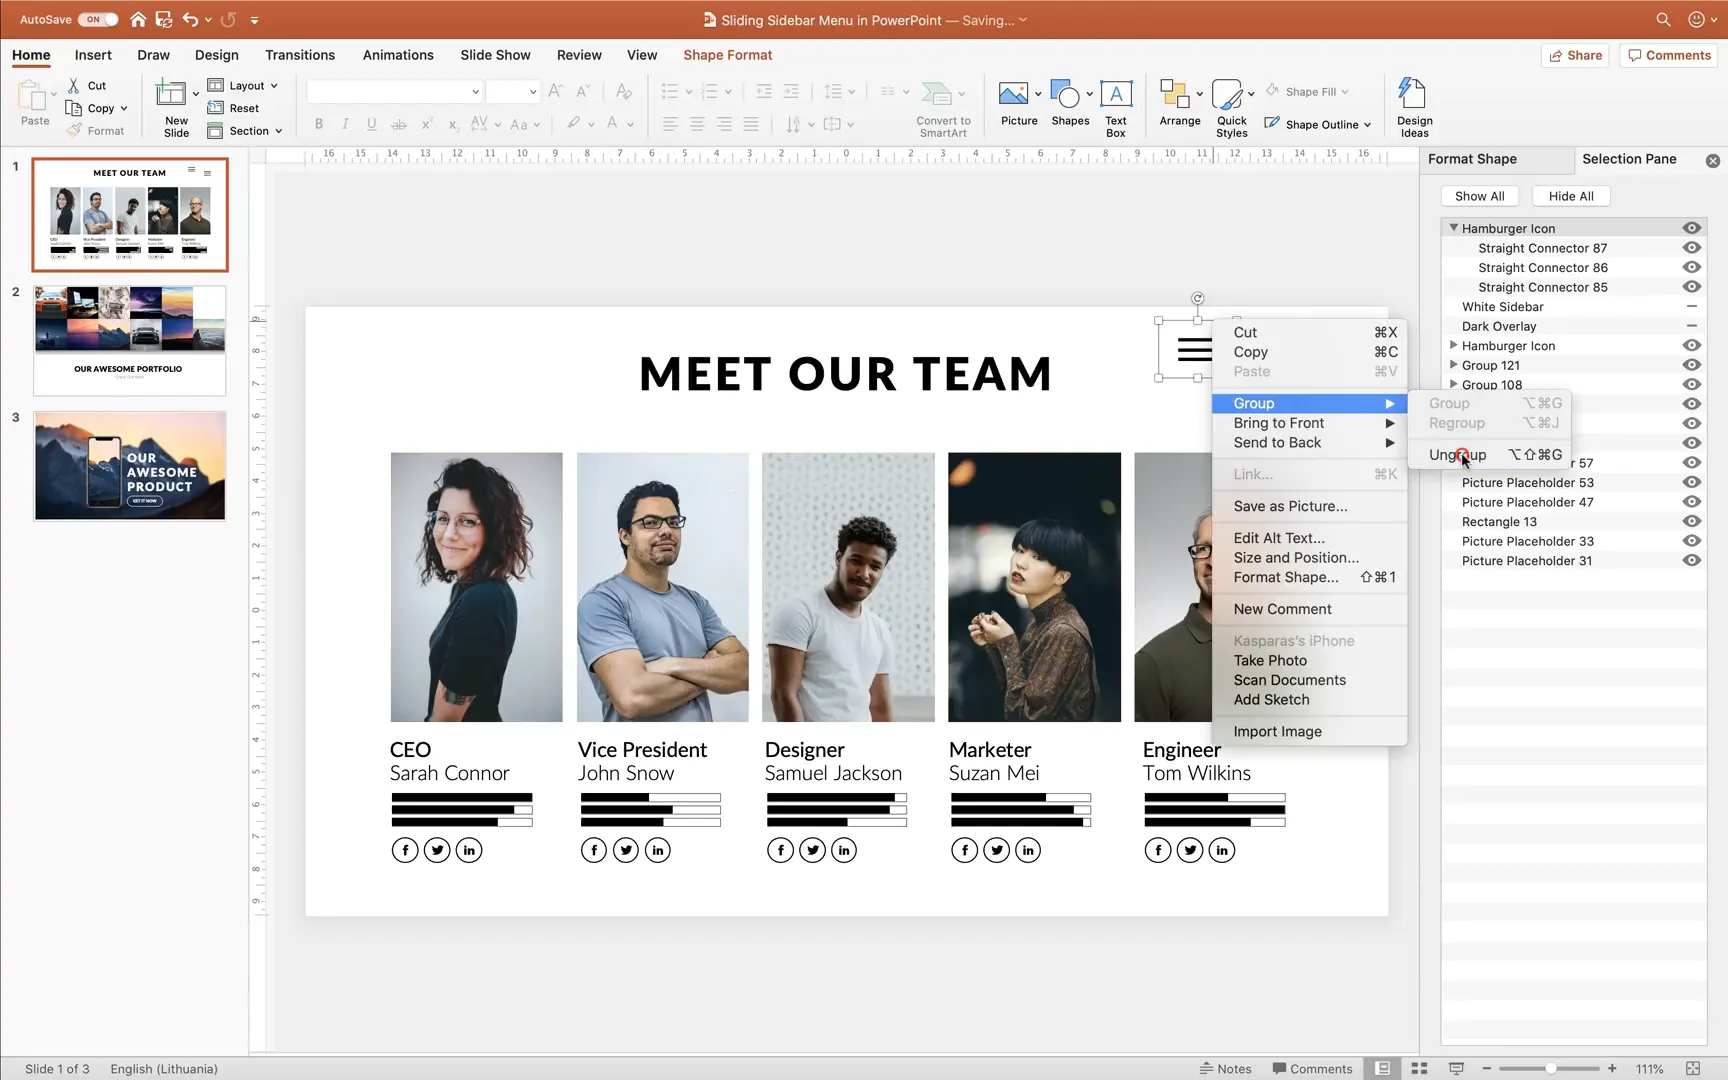
- Duplicate the hamburger menu icon group and ungroup it.
- Delete two of the three lines, leaving only one line.
- Rotate this line by 45 degrees.
- Duplicate this rotated line, then flip it horizontally to create a cross shape.
- Align the two lines at the center and group them together.
- Position this close button exactly where the hamburger button is located for consistency.
- Cut the close button from the slide temporarily.
- Make the other menu objects visible again and paste the close button on top.
- Rename this group to close icon in the Selection Pane.
This close icon will act as the trigger to hide the sidebar menu when clicked.
Step 5: Adding Menu Links
Now it’s time to add the navigation links that will allow users to jump to different slides in your presentation.
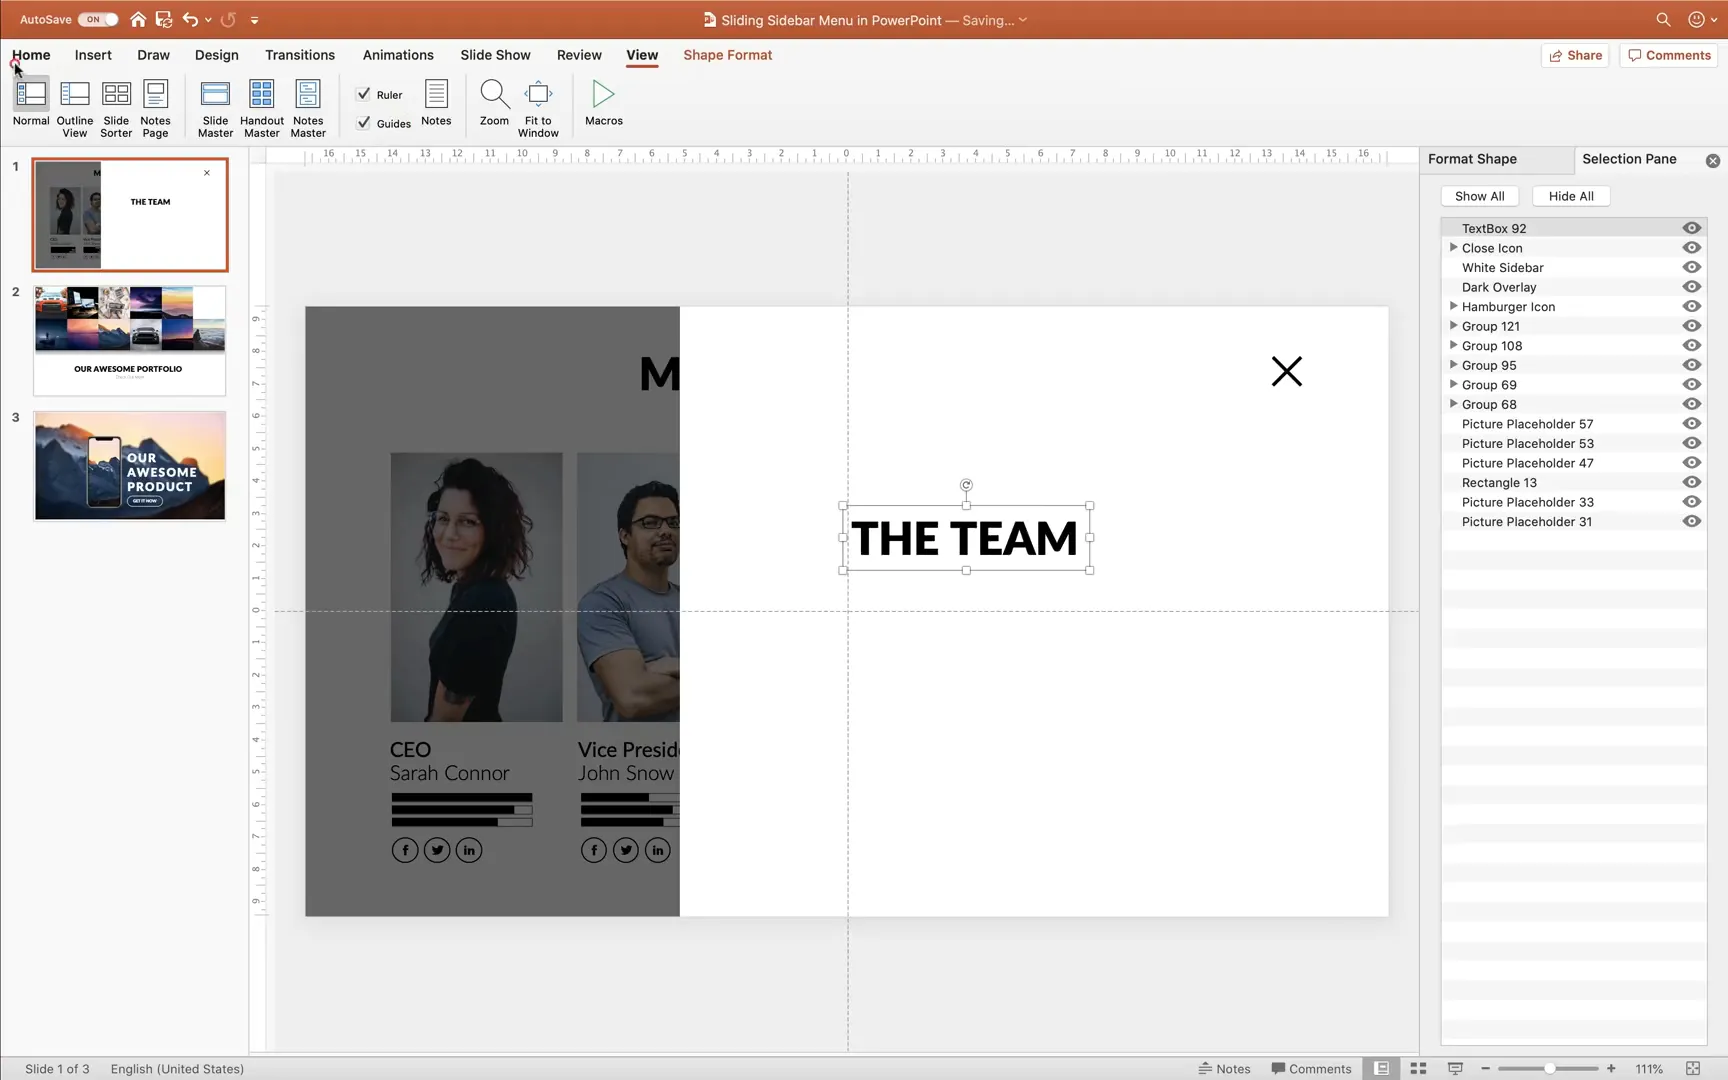
- Copy a text box from an existing slide or create a new one.
- Paste it onto the slide with your menu elements.
- Type the name of the first menu item, for example, Team.
- Customize the font size and style as desired.
- Duplicate this text box two more times to create three links in total.
- Rename each text box accordingly in the Selection Pane: team, portfolio, and products.
- Position the text boxes vertically inside the white sidebar with adequate spacing.
These text boxes act as clickable links to different slides, enhancing the interactive navigation experience.
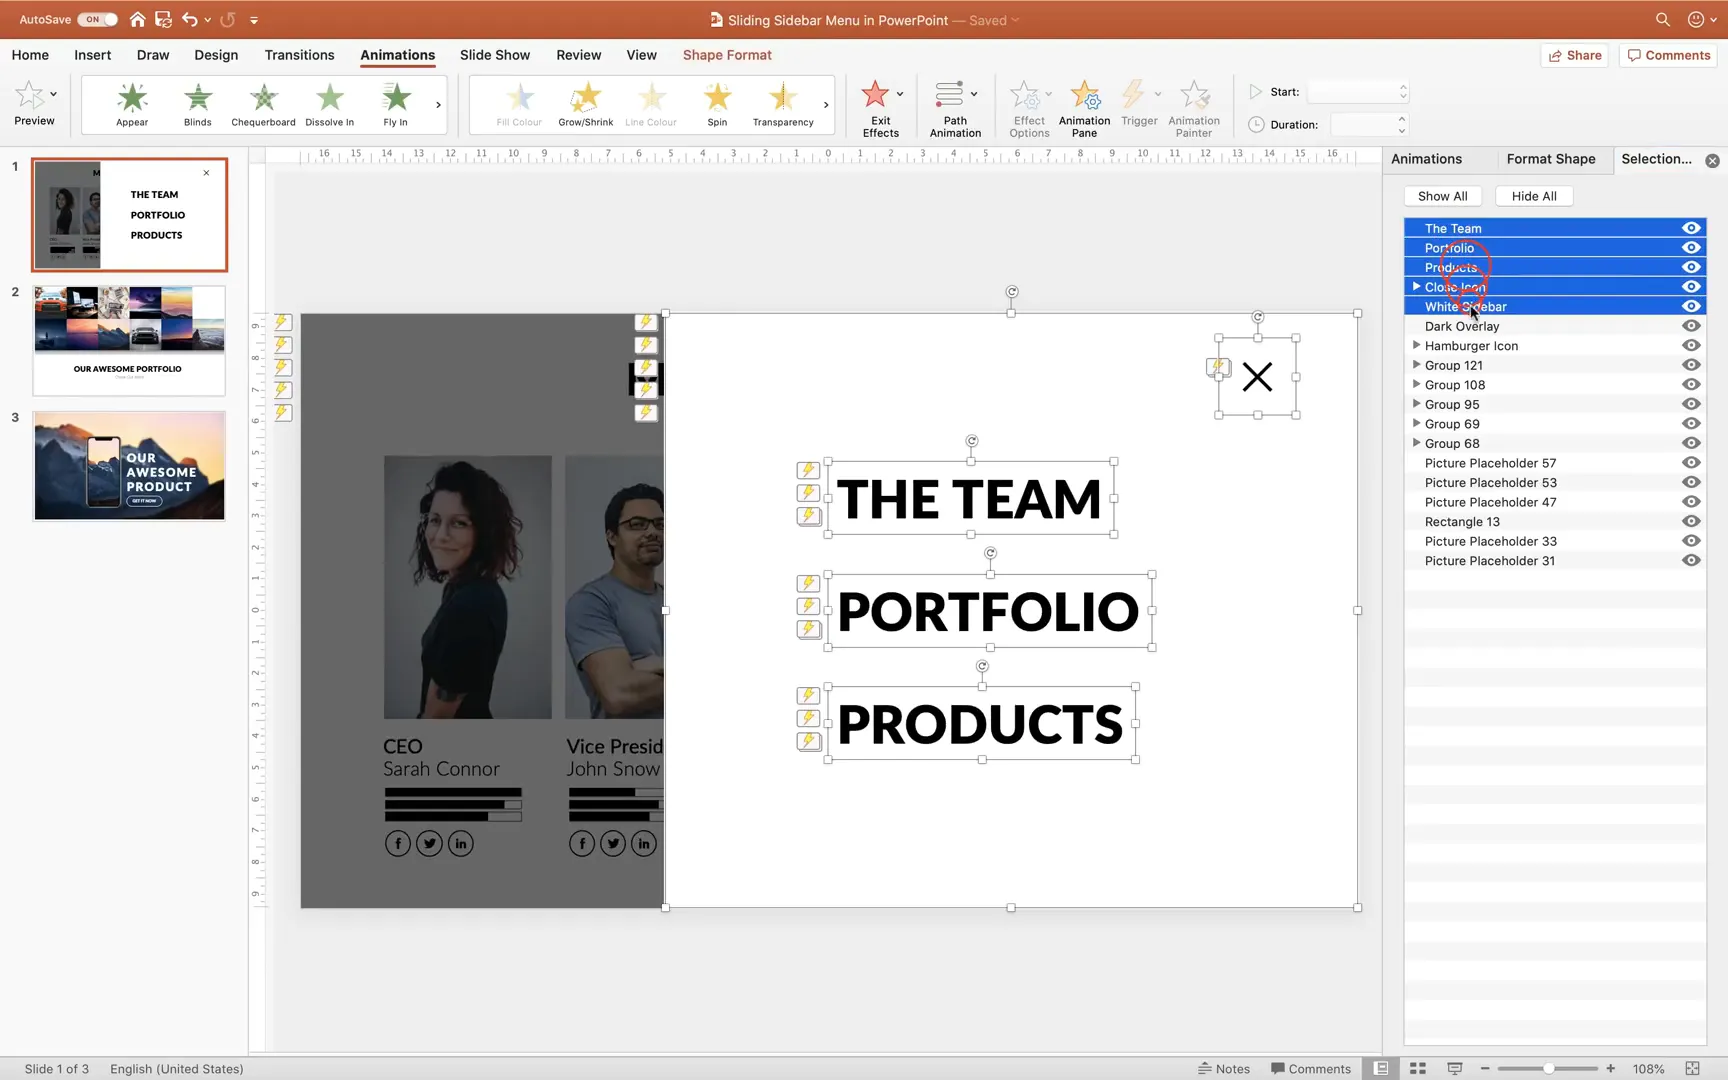
Step 6: Animating the Menu Elements
Animations bring the menu to life by making it slide in and out smoothly. Let’s set up entrance animations first:
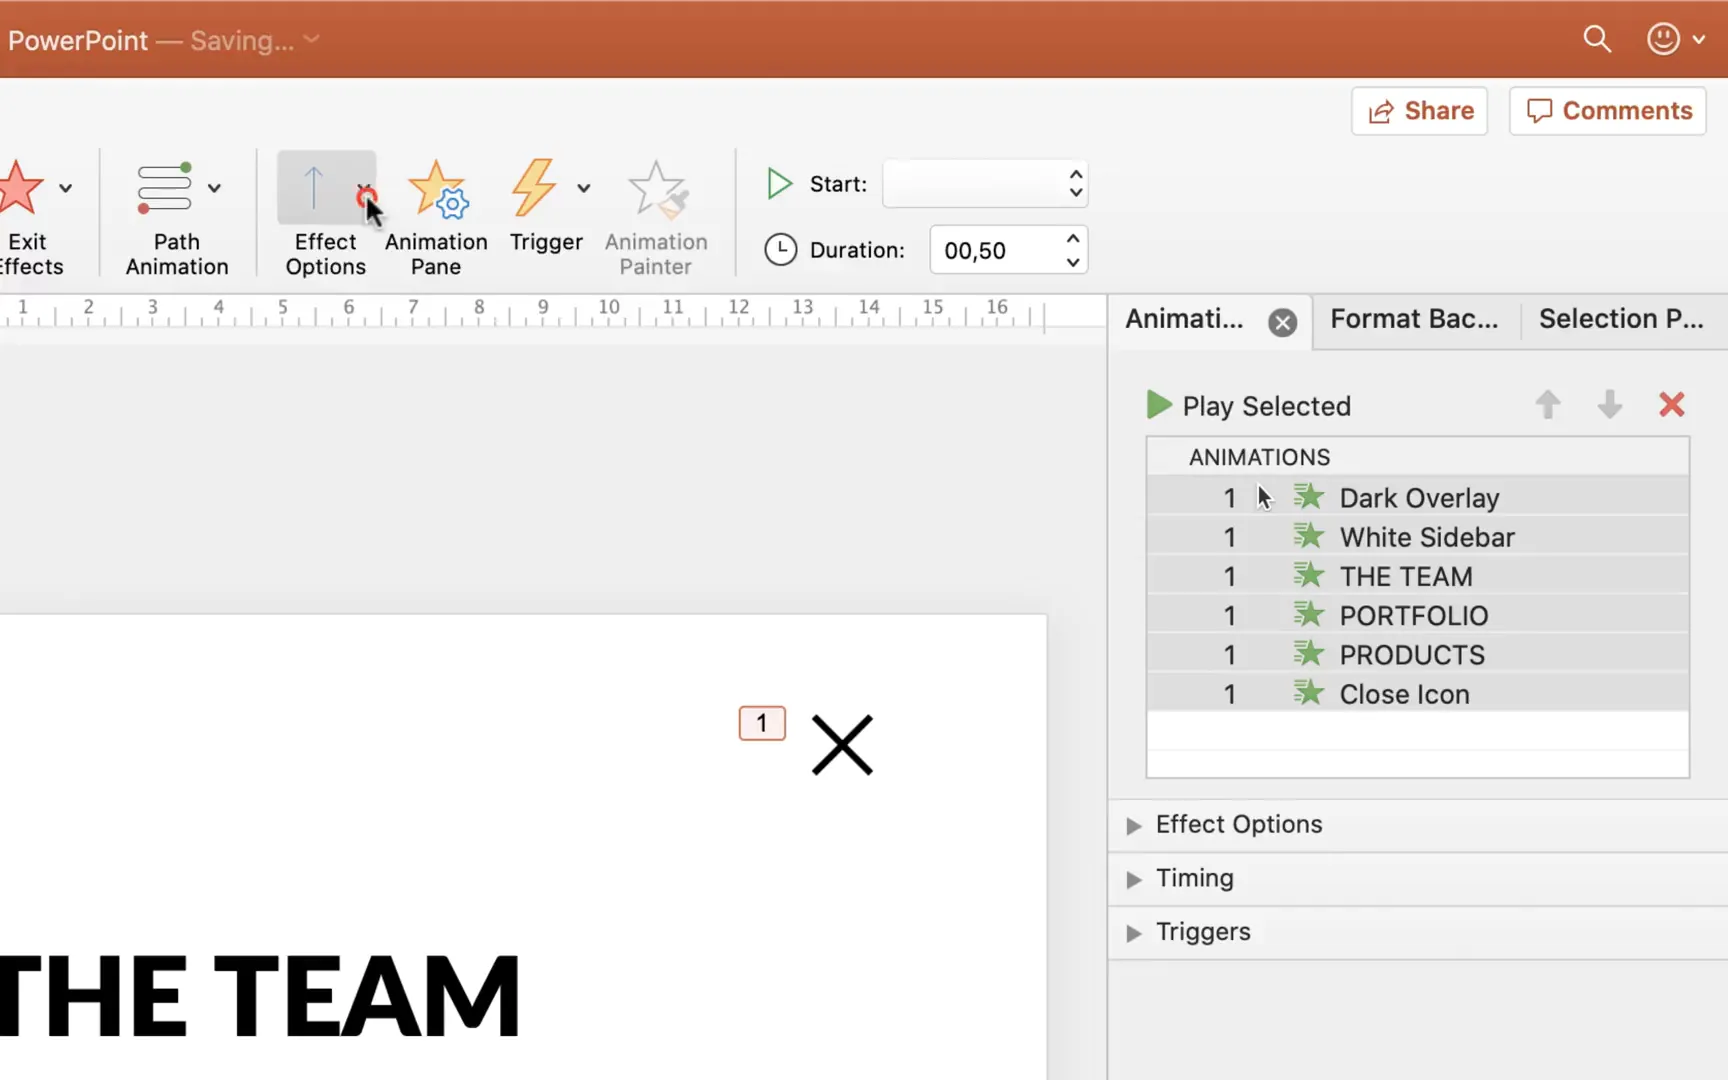
- Open the Animation Pane from the Animations tab.
- Select the following objects while holding the Shift key: dark overlay, white sidebar, all three text boxes, and the close icon.
- Apply the Fly In entrance animation.
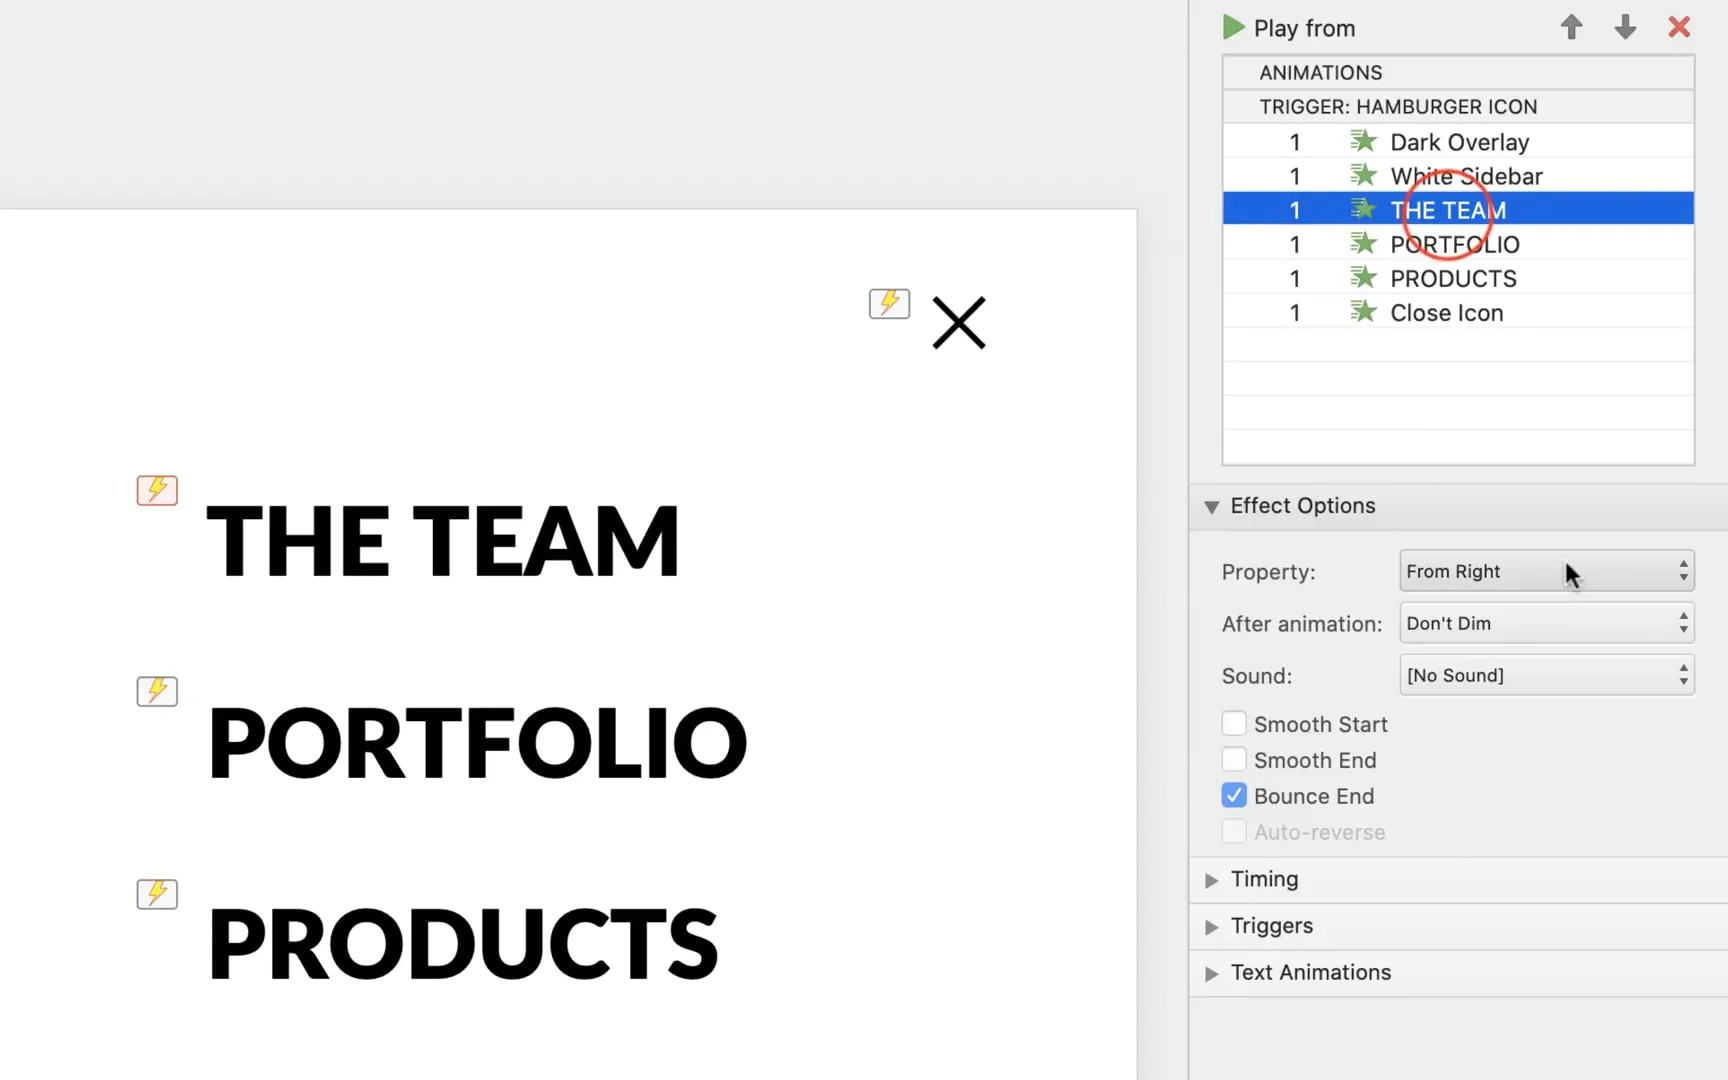
- Set the direction of the animation to From Right.
- Adjust the duration of these animations to 0.3 seconds for smoothness.
- Change the dark overlay animation to Fade instead of Fly In, with a shorter duration of 0.2 seconds.
- Assign all these animations a trigger linked to the hamburger icon, so they play when the hamburger button is clicked.
Now, when you click the hamburger icon, the menu will slide in with a fade effect on the background.
Step 7: Adding Bounce Effects and Animation Delays
To make the menu feel more dynamic and polished, add a bounce effect to the text box animations and stagger their appearance with delays:
- Select all three text boxes.
- In the Animation Pane, check the Bounce End effect to add a slight bounce when the text boxes finish animating in.
- Add incremental delays so the text boxes fly in one after another, creating a cascading effect.
This subtle enhancement grabs attention and adds a professional touch to your menu.
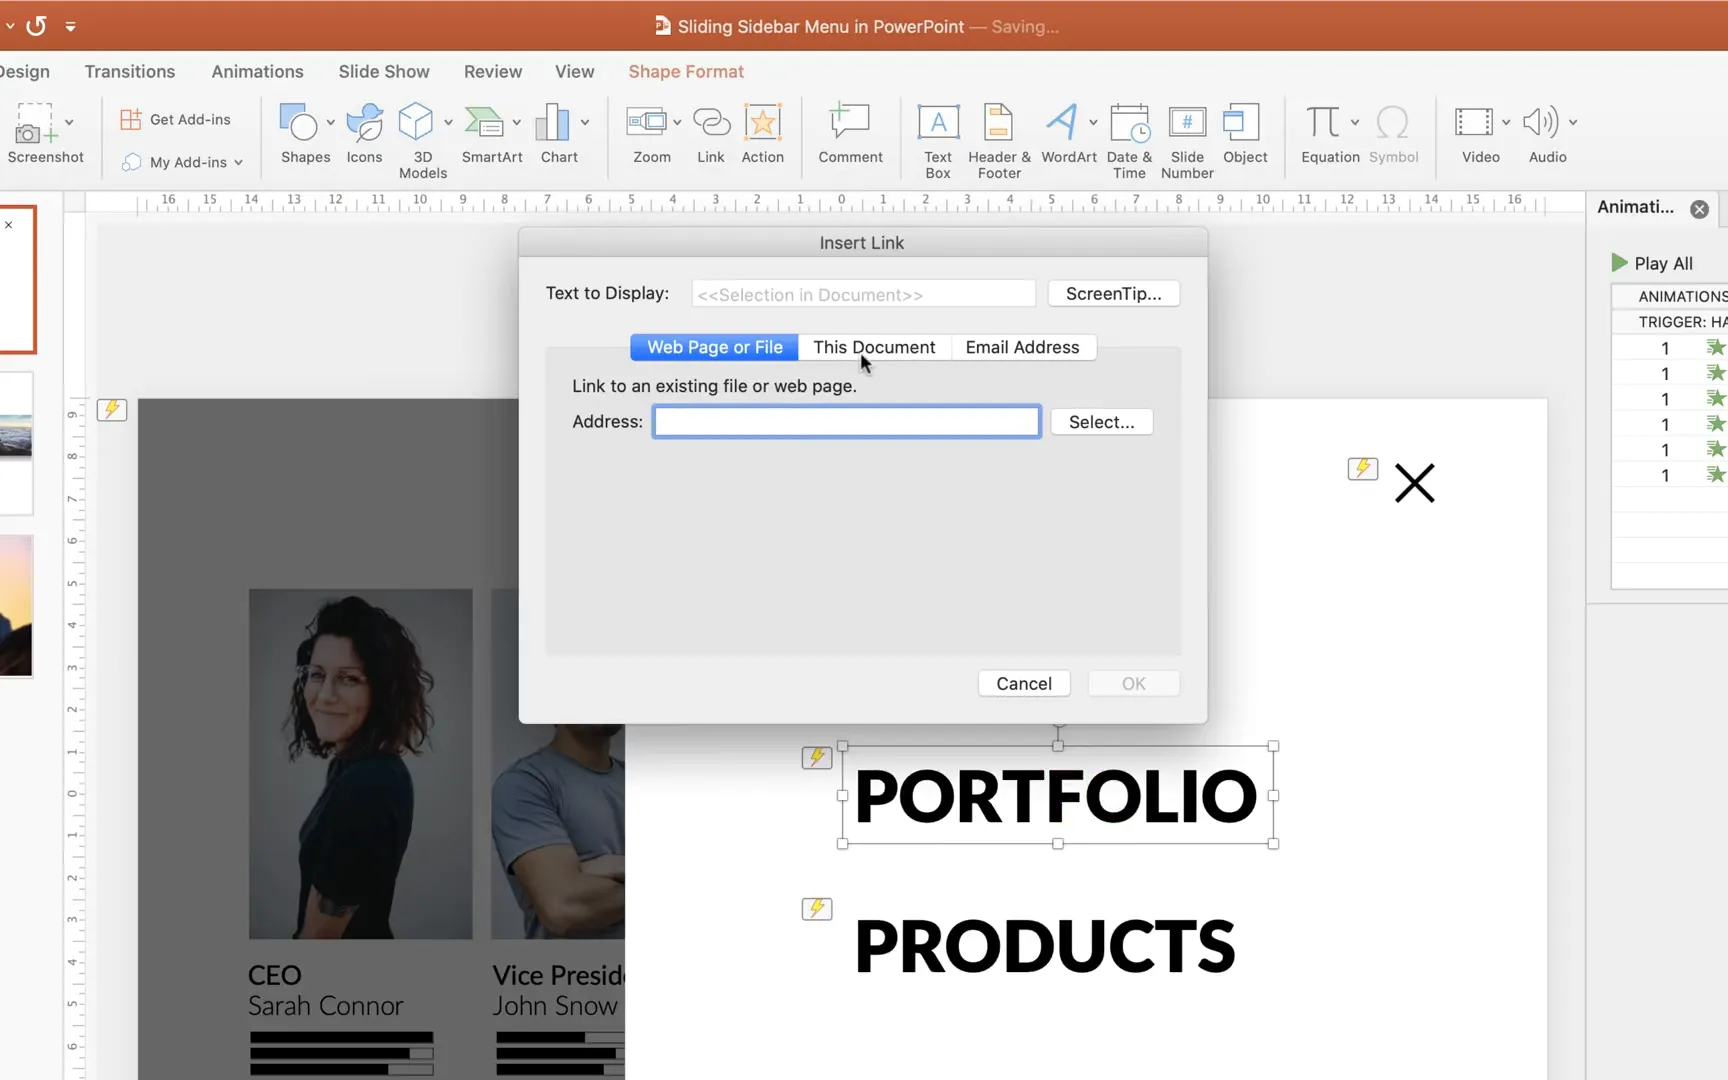
Step 8: Linking Menu Items to Slides
Each menu item should navigate to a specific slide when clicked. Here’s how to set up these internal links:

- Select a text box (e.g., team).
- Go to Insert → Action.
- Choose Hyperlink to: and select Slide… from the dropdown.
- Pick the slide number corresponding to the menu item (for example, slide 1 for “Team”).
- Repeat this process for the other text boxes, linking portfolio to slide 2 and products to slide 3.
Alternatively, you can use the shortcut Ctrl+K (or Cmd+K on Mac) to open the hyperlink dialog quickly.
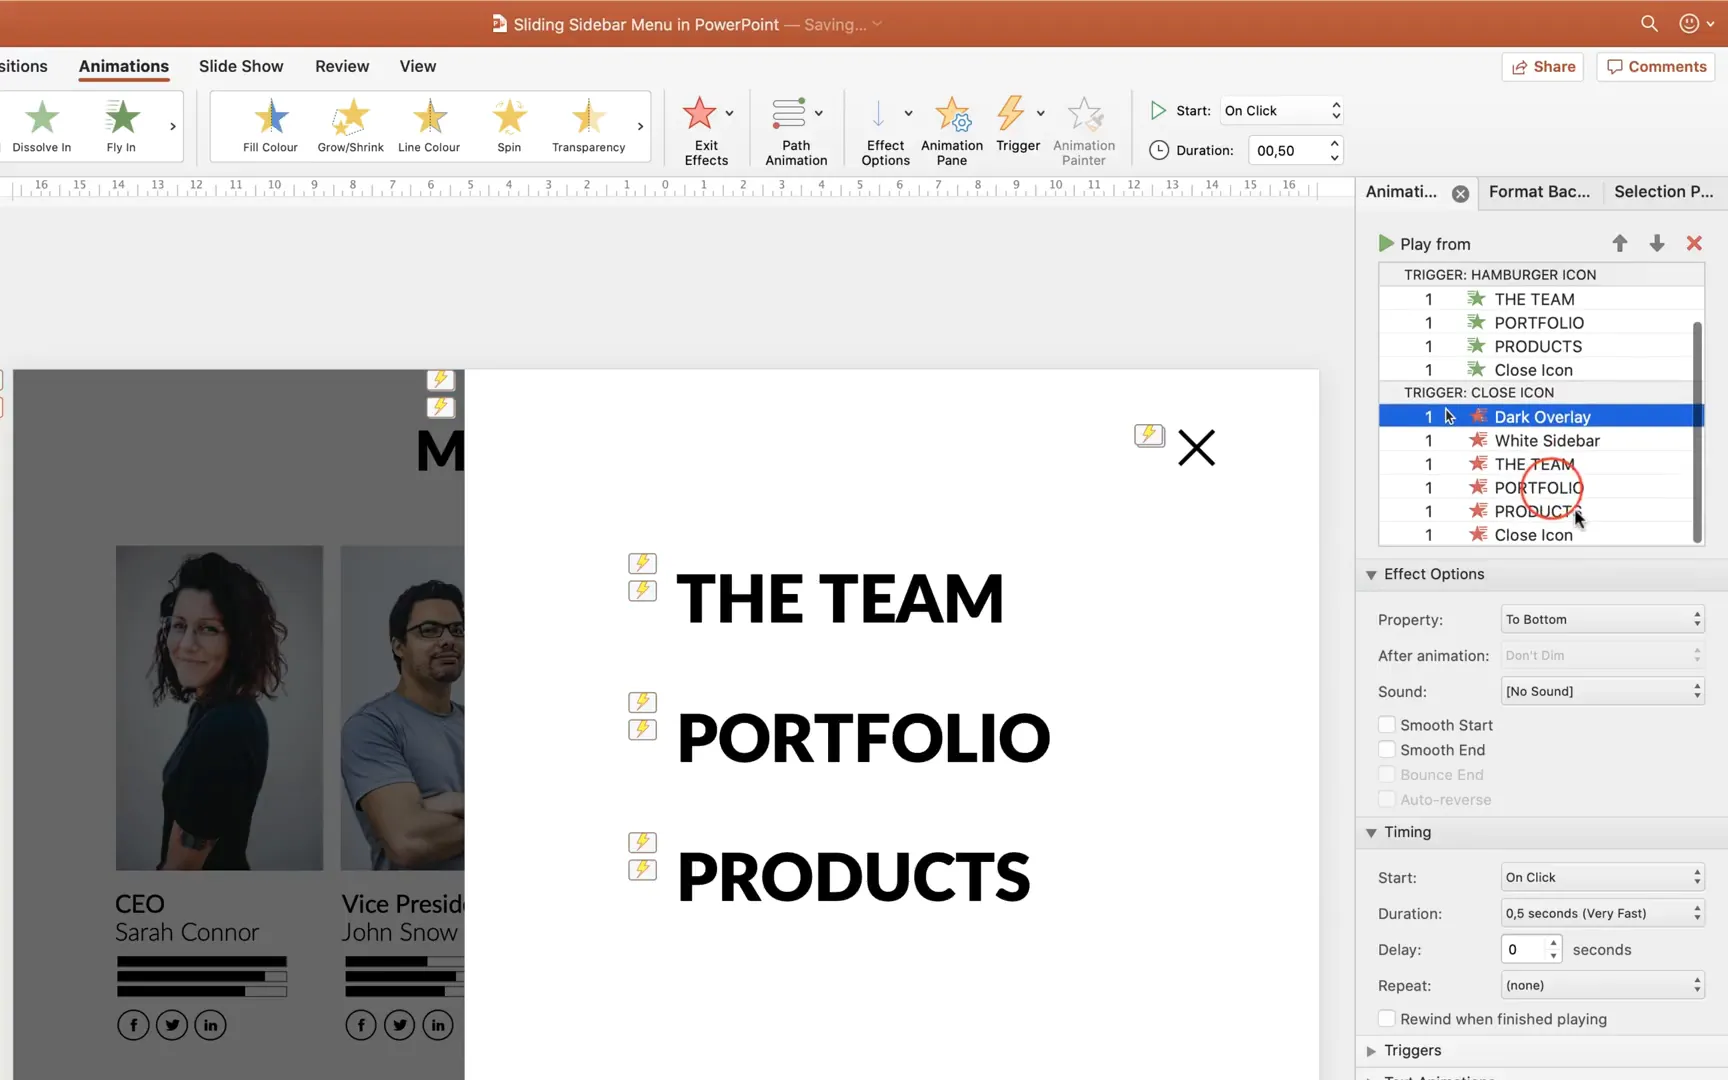
Step 9: Creating the Closing Animation
To hide the sidebar menu, you need to animate the objects to fly out and fade away when the close icon is clicked:
- Select the dark overlay, white sidebar, the three text boxes, and the close icon.
- Apply the Fly Out exit animation.
- Set the direction of the fly-out animations to To Right to slide the menu off screen.
- Change the dark overlay animation to Fade Exit for a smooth fade-out effect.
- Assign the close icon as the trigger for these animations.
- Set the duration for all exit animations to 0.2 seconds.
- Reorder the animations so they play in a logical sequence: close icon first, then text boxes, white sidebar, and finally dark overlay.
- Add incremental delays to the text boxes to create a staggered exit effect.
Now, clicking the close icon will smoothly hide the menu and restore the slide to its original state.
Step 10: Enhancing User Experience with Multiple Closing Triggers
To improve usability, you might want the menu to close not only when the close icon is clicked but also when any of the menu links are selected. This avoids forcing users to click the close button after navigation.
Here’s how to set multiple closing triggers:
- For each text box (team, portfolio, products), add additional fly-out exit animations similar to the close icon’s exit animations.
- Assign each text box as a trigger for its own exit animations.
- Ensure the dark overlay also fades out with these triggers.
- Maintain the same order and delay pattern for smoothness.
This means that clicking any menu item will both navigate to the corresponding slide and close the sidebar menu automatically, creating a seamless user experience.

Step 11: Replicating the Menu Across Slides
Once your sliding sidebar menu functions perfectly on one slide, you’ll want to copy it across your entire presentation.
Follow these steps:
- Use the Selection Pane to easily select all menu components (dark overlay, white sidebar, text boxes, hamburger icon, close icon).
- Copy the entire group.
- Paste it onto each slide where you want the menu available.
Because your animations and triggers are already set up, the menu will work consistently across all slides, allowing smooth navigation throughout your presentation.
Step 12: Using Kiosk Mode for Controlled Navigation
To make your presentation navigation fully dependent on your sliding sidebar menu, consider setting your slideshow to Kiosk Mode. This mode disables advancing slides by clicking anywhere on the screen, restricting movement only to interactive elements like your menu links.
To enable kiosk mode:
- Go to the Slide Show tab.
- Click on Set Up Slide Show.
- Under Show type, select Browsed at a kiosk (full screen).
- Click OK.
This is especially useful for self-running presentations or interactive kiosks where you want to control exactly how viewers navigate your content.

Additional Tips for Customizing Your Sliding Sidebar Menu
- Customize Colors and Sizes: Adjust the sidebar width, button sizes, and colors to fit your brand or presentation theme.
- Add Icons or Images: Enhance menu items with icons to visually represent each section.
- Use Consistent Naming: Naming your shapes and groups in the Selection Pane helps you manage complex animations easily.
- Test on Different Versions: Since this method works on PowerPoint 2010 and newer, test on the version your audience will use to ensure compatibility.
- Keep Animations Smooth: Avoid overly long animations that may distract or frustrate viewers.
Frequently Asked Questions (FAQ)
Can I use this sliding sidebar menu on older versions of PowerPoint?
Yes! This tutorial is designed to be compatible with PowerPoint 2010 and all later versions, ensuring broad usability.
Is it possible to add more menu items?
Absolutely. You can add as many text boxes as needed to your sidebar. Just remember to name each appropriately and add corresponding animations and links.
How do I make the menu open and close with keyboard shortcuts?
PowerPoint does not natively support keyboard shortcuts for animation triggers. However, you can simulate this by adding buttons and assigning macros, but that requires VBA scripting, which is beyond the scope of this tutorial.
Can I customize the animation effects?
Yes, you can experiment with different entrance and exit animations like Fade, Wipe, or Zoom. Just ensure the animations are smooth and consistent to maintain a professional look.
How do I add this menu to an existing presentation?
Simply copy the grouped menu elements from your working slide and paste them onto each slide of your existing presentation. Make sure to adjust slide links in the text boxes if your slide order differs.
Conclusion
Creating a sliding sidebar menu in PowerPoint is a fantastic way to add interactivity and professional navigation to your presentations. By combining shape creation, grouping, animation triggers, and clever use of the Selection Pane, you can build a menu that works seamlessly across multiple slides and PowerPoint versions.
This tutorial walked you through every step: from designing the hamburger and close icons to animating your menu elements and setting up slide links and triggers. With a bit of practice, you can customize this menu to match your style and presentation needs.
Remember, the key to effective presentation design is blending form and function. A sliding sidebar menu not only looks modern and clean but also empowers your audience to explore your content with ease.
Stay creative, keep experimenting, and transform your PowerPoint presentations into engaging, interactive experiences!
Check out the full video: How To Create 🔥 Sliding Sidebar Menu 🔥 in PowerPoint


