
If you’ve ever wanted to add a professional touch to your PowerPoint presentations, mastering animations is a great place to start. One animation effect that can really elevate your slides is the Smooth Zoom Animation. Unlike the default zoom animations in PowerPoint, which often end abruptly, a smooth zoom animation offers a polished and visually appealing way to introduce text, shapes, or logos. In this comprehensive guide, we’ll walk you through how to create a custom smooth zoom animation by combining existing PowerPoint animations, making your presentations more engaging and dynamic.
This tutorial is inspired by the expert insights from One Skill PPT, a leading PowerPoint expert with over 15 years of experience. Whether you’re a beginner or an experienced user, this guide will help you achieve a smooth zoom effect that looks professional and is easy to replicate across your slides.
Table of Contents
- Understanding Default Zoom Animations in PowerPoint
- Why a Smooth Zoom Animation Matters
- Creating a Smooth Zoom Animation Step-by-Step
- Applying the Smooth Zoom Animation to Your Slides
- Tips for Mastering PowerPoint Animations
- Frequently Asked Questions (FAQ)
- Conclusion
Understanding Default Zoom Animations in PowerPoint
PowerPoint offers two primary zoom animations to introduce elements like text or shapes onto your slides:
- Basic Zoom Animation: This animation zooms an object in, but it does so abruptly without any fading effect.
- Zoom Animation with Fade: This version combines a fade-in effect followed by a zoom, making the entrance a bit smoother visually.
While both animations serve the purpose of introducing slide elements, they share a common drawback — they end with a hard stop. This means the zoom effect quickly finishes, creating a sudden and somewhat jarring “landing” for the viewer’s eye.

This abrupt ending can detract from the overall fluidity of your presentation, making the animation feel less polished and professional. The visual impact is diminished because the animation doesn’t taper off gracefully.
Why a Smooth Zoom Animation Matters
Imagine a zoom animation that doesn’t just stop suddenly but instead finishes with a soft, smooth landing. This effect can make your slides feel more natural and captivating, especially when presenting logos, titles, or key shapes.
Here’s why a smooth zoom animation is a game-changer:
- Improves Visual Appeal: A smooth ending looks more elegant and less distracting.
- Enhances Viewer Experience: It guides the audience’s eye gently to the focal point without abrupt stops.
- Increases Professionalism: Subtle animations convey a higher level of design skill and attention to detail.
- Versatile Application: Works well on slide titles, subtitles, paragraphs, logos, and other shapes.
Unfortunately, PowerPoint’s built-in zoom animations don’t offer a smoothing option by default. But the good news is, you can create this effect yourself by cleverly combining other animations that do support smooth ends.
Creating a Smooth Zoom Animation Step-by-Step
To build a smooth zoom animation in PowerPoint, you will combine three animations:
- Two Grow/Shrink animations
- One Fade animation
These animations have smoothing options that allow you to create a zoom effect with a soft ending. Here’s how to do it, using a 3D logo as an example:
Step 1: Remove Default Zoom Animations
Begin by selecting your object (e.g., a logo or text). Check if any default zoom animations are applied and remove them, as they don’t support smooth endings.
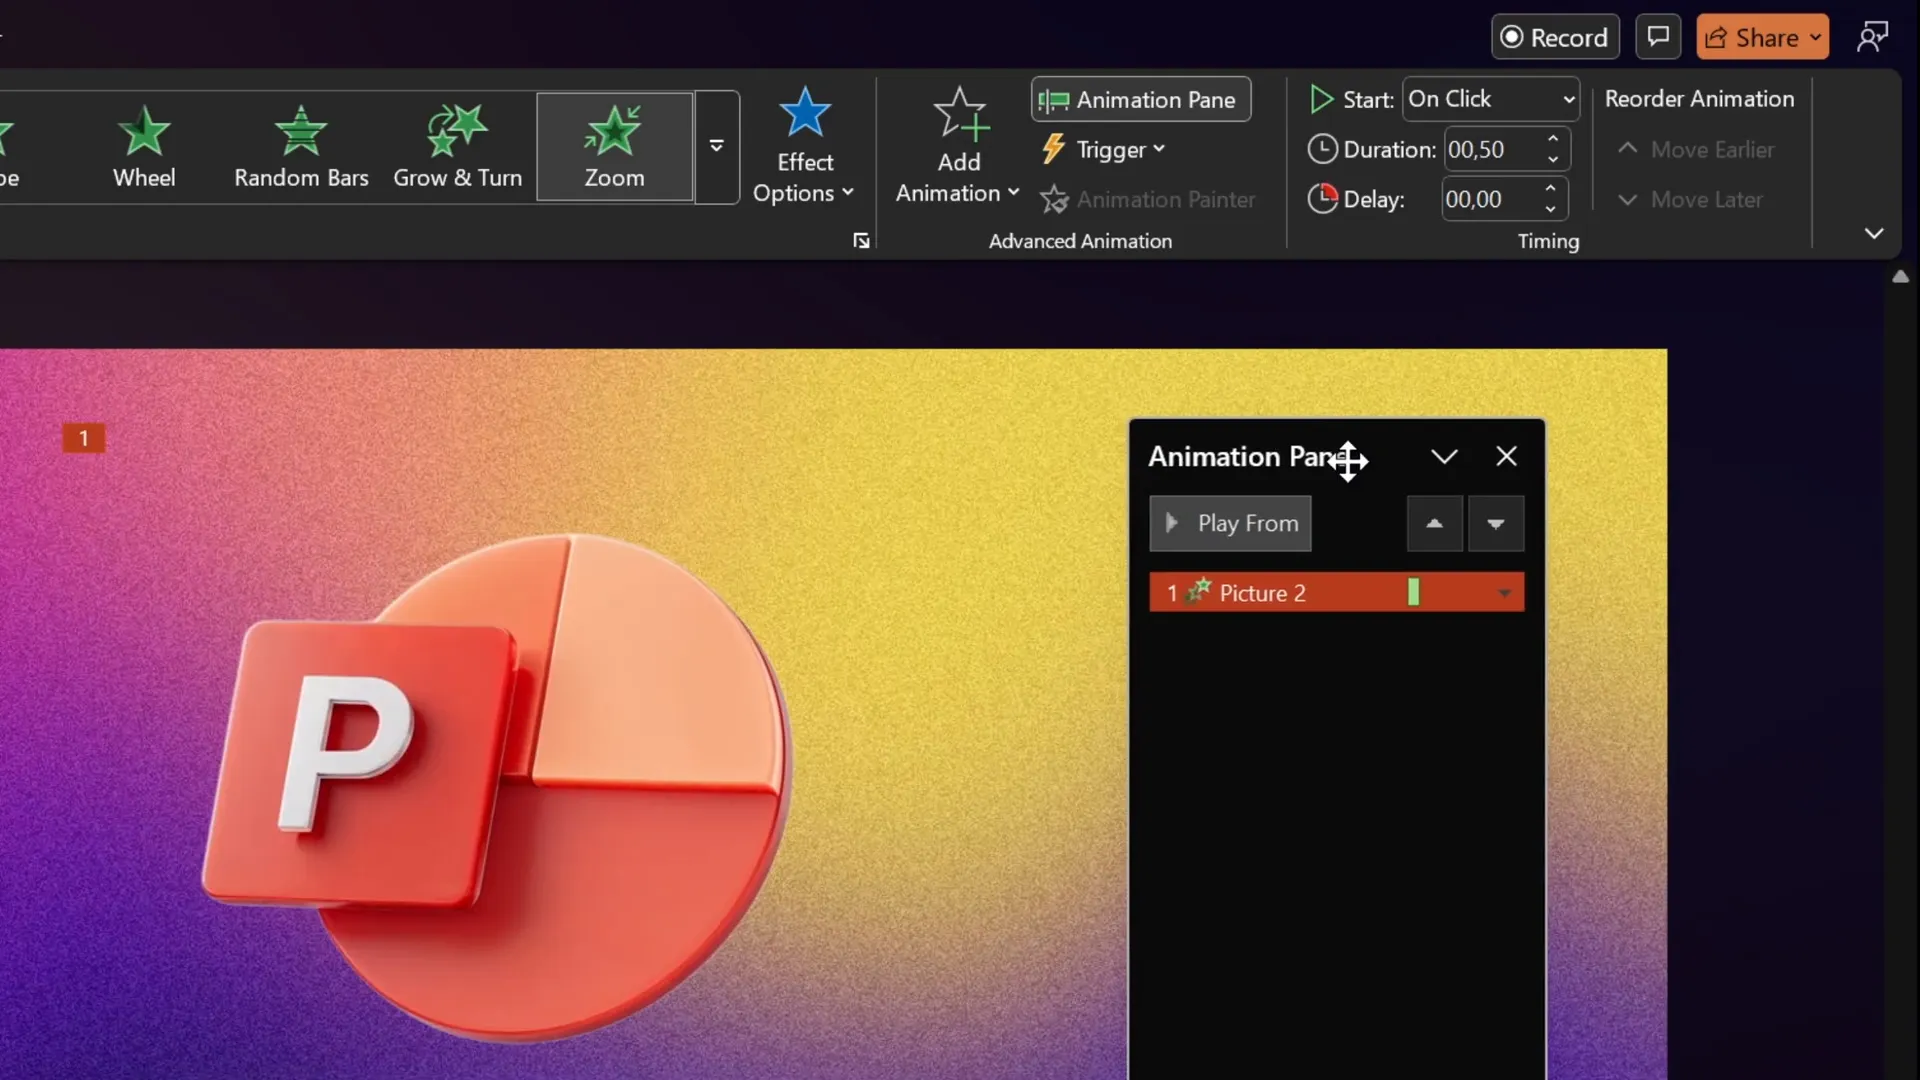
Step 2: Add the First Grow/Shrink Animation (Shrink)
- Select the object.
- Open the Animations tab and add a Grow/Shrink animation.
- Set the animation to Start With Previous so it plays automatically.
- Change the duration to the shortest possible, 0.01 seconds.
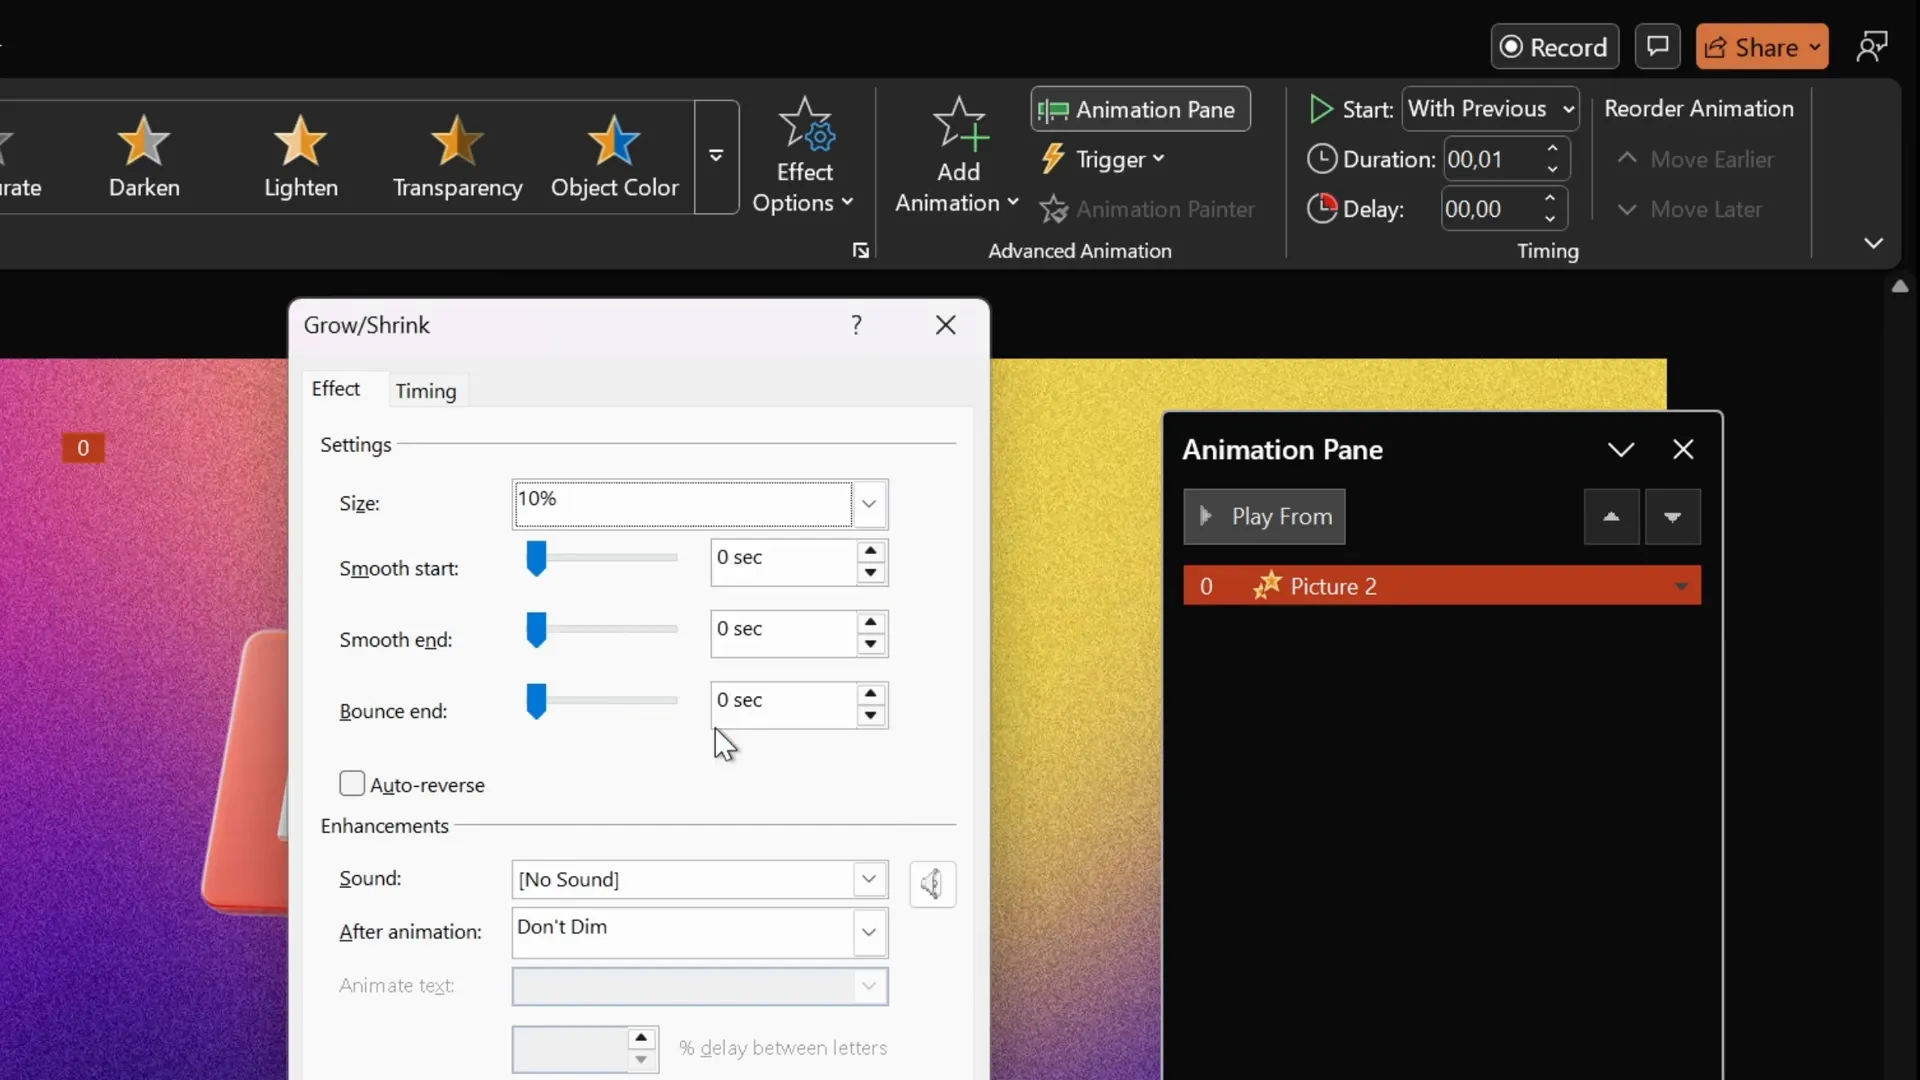
- Double-click the animation to open effect options.
- Set the size to 10% to shrink the object down.
- Click OK.
This step quickly shrinks the object to 10% of its original size, preparing it for the zoom-in effect.
Step 3: Add the Second Grow/Shrink Animation (Grow)
- With the object still selected, add a second Grow/Shrink animation.
- Set it to Start With Previous so it plays right after the first.
- Set the duration to 2 seconds for a smooth zoom.
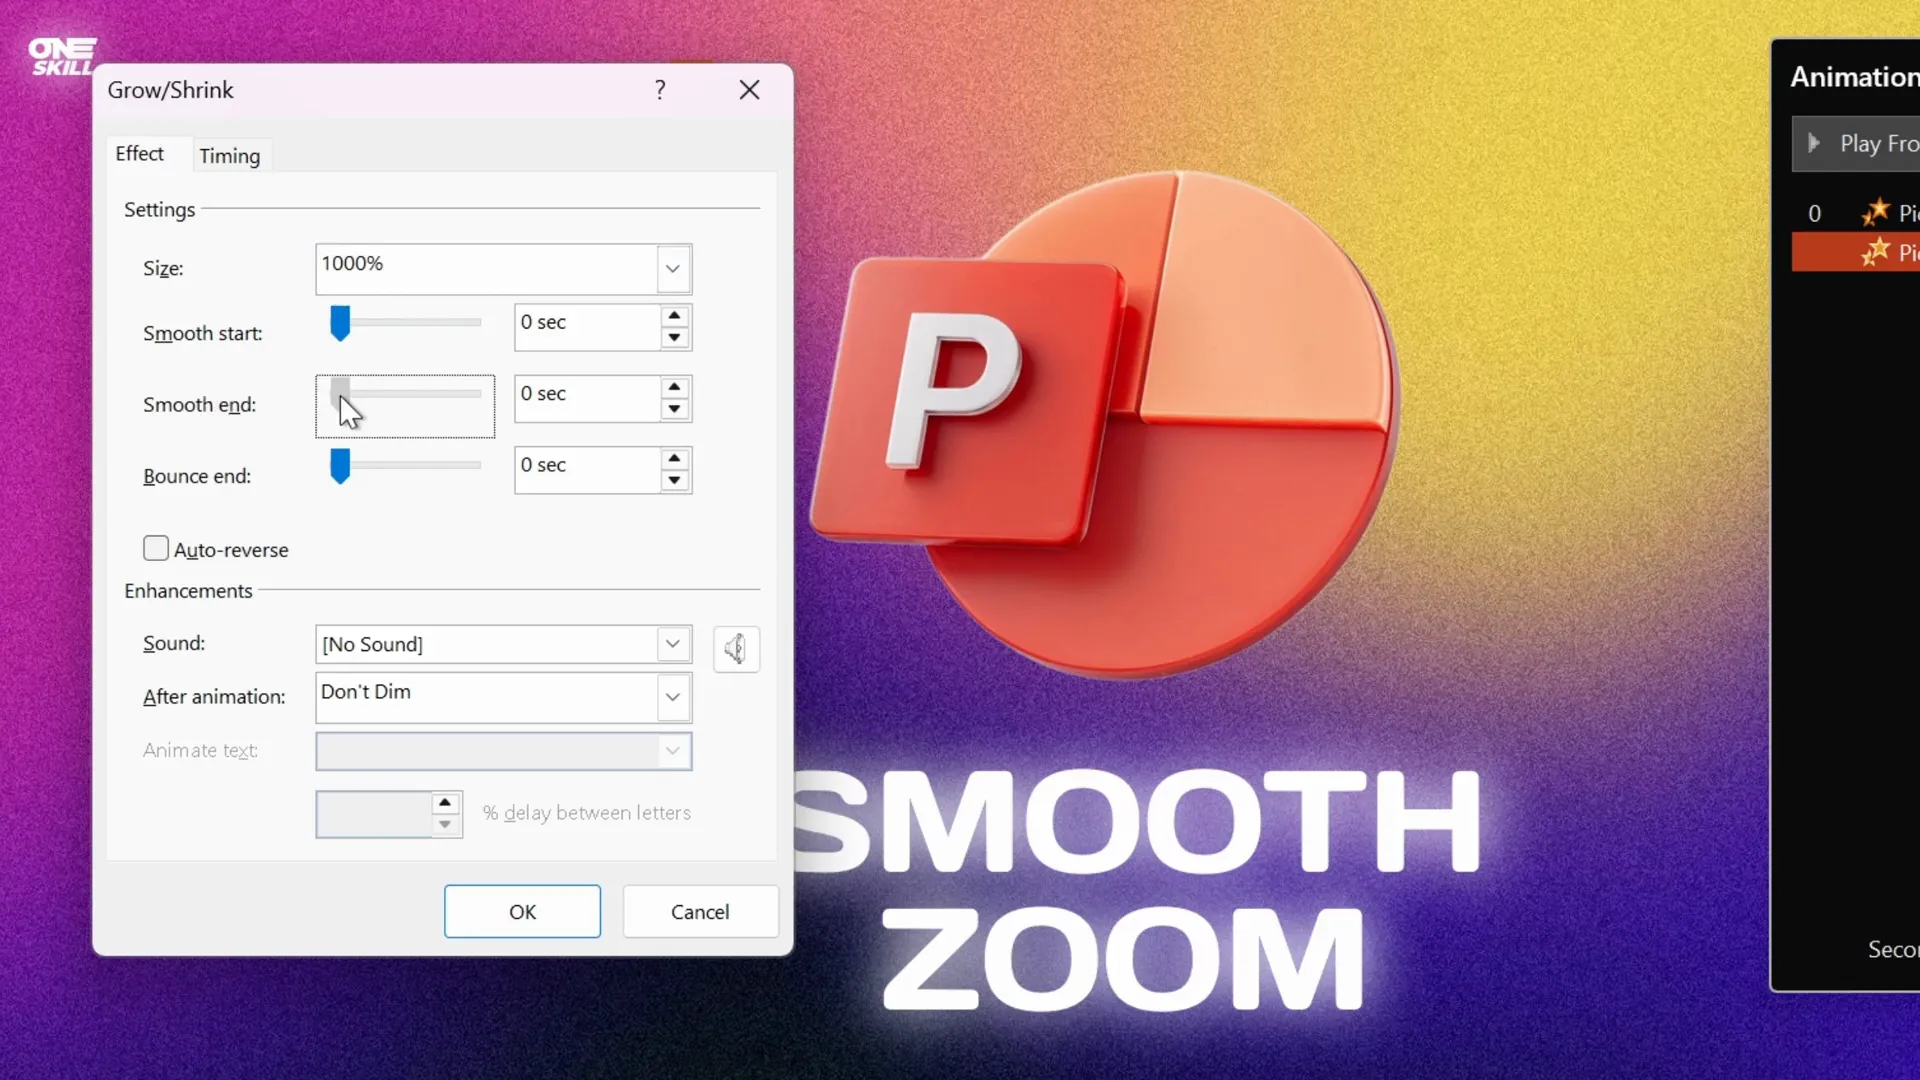
- Double-click this animation and set the size to 1000% to grow the object back to its original size.
- Use the Smooth End slider and drag it to the maximum.
- Click OK.
This animation zooms the object back up from 10% to 100%, creating the zoom-in effect with a smooth ending.
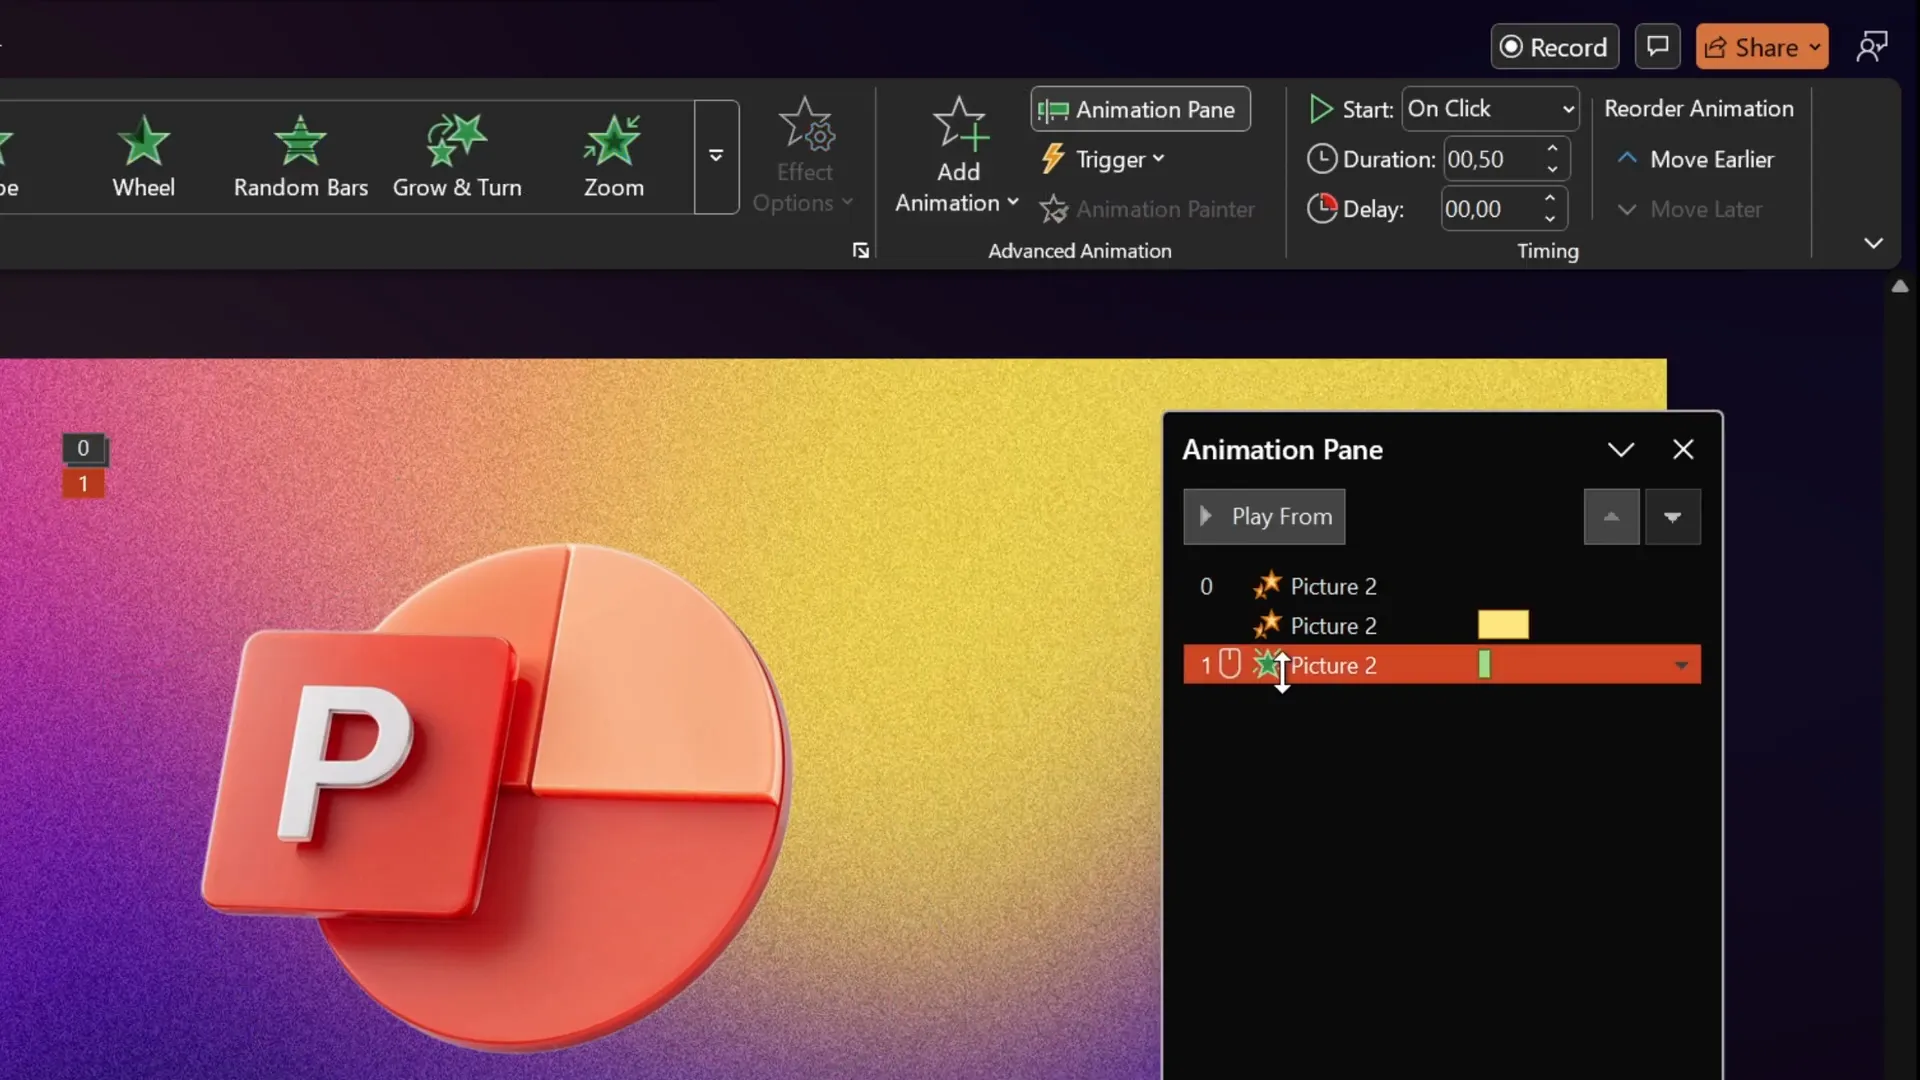
Step 4: Add a Fade Animation
- Select the object.
- Go to Add Animation and choose Fade.
- Drag the fade animation to the top of the animation pane so it plays first.
- Set the fade animation to Start With Previous.
- Set the duration to 0.5 seconds.
This adds a gentle fade-in at the beginning, making the overall entrance more elegant.
Step 5: Preview Your Smooth Zoom Animation
Now play your slide in full-screen mode to see the smooth zoom animation in action. You should notice the object fading in, quickly shrinking, and then smoothly zooming back to its original size with a soft landing.
Applying the Smooth Zoom Animation to Your Slides
Once you’ve created this smooth zoom animation on one object, you can easily apply it to other elements on your slides:
- Use the Animation Painter tool to copy the animation settings from one object and apply them to others, such as slide titles, subtitles, or other shapes.
- This saves time and ensures consistency across your presentation.
For example, after creating the smooth zoom on the 3D logo, you can quickly apply the same effect to the slide title with just a few clicks.

Tips for Mastering PowerPoint Animations
Learning to create custom animations like the smooth zoom effect is a valuable skill for any presenter. Here are some additional tips to help you master PowerPoint animations:
- Experiment with Animation Pane: The animation pane is your control center. Use it to order, time, and fine-tune animations.
- Use “Start With Previous” Wisely: This setting allows animations to play automatically and in sequence.
- Adjust Duration for Impact: Short durations create snappy effects; longer durations feel smoother and more elegant.
- Combine Animations: Sometimes, combining fade, zoom, and motion effects can create unique and engaging animations.
- Practice Consistency: Consistent animation styles across your presentation maintain professionalism and avoid distracting your audience.
If you want to deepen your knowledge, consider enrolling in dedicated courses such as the PowerPoint Animation Mastery course offered by One Skill PPT. It covers all animation secrets and techniques learned over 15+ years.
Frequently Asked Questions (FAQ)
What is a Smooth Zoom Animation in PowerPoint?
A Smooth Zoom Animation is a custom animation effect that creates a zoom-in motion with a gradual and soft ending, rather than an abrupt stop. It gives a polished look to objects entering a slide.
Can I create a Smooth Zoom Animation using PowerPoint’s built-in zoom effects?
No, PowerPoint’s default zoom animations do not have an option for a smooth ending. However, you can create a smooth zoom by combining grow/shrink and fade animations that support smoothing options.
How many animations are required to create the Smooth Zoom effect?
You need to combine three animations: two Grow/Shrink animations and one Fade animation.
Can I apply the Smooth Zoom Animation to text as well as shapes?
Yes! Once created, you can use the Animation Painter to quickly apply the smooth zoom effect to any slide element, including titles, subtitles, paragraphs, and shapes.
What is the purpose of setting the Grow/Shrink percentage to 10% and then 1000%?
The first Grow/Shrink animation shrinks the object to 10% of its size instantly. The second grows it back to 1000%, which effectively brings the object back to its original size, creating the zoom-in effect with a smooth transition.
Is the Smooth Zoom Animation compatible with all versions of PowerPoint?
The method uses basic animations available in most modern versions of PowerPoint. However, some older versions may have limited animation options or different interface layouts.
Can I adjust the speed of the Smooth Zoom Animation?
Yes. You can modify the duration of the Grow/Shrink and Fade animations to make the zoom faster or slower according to your needs.
Conclusion
Adding a Smooth Zoom Animation to your PowerPoint presentations is a simple yet effective way to enhance your slides and captivate your audience. While PowerPoint’s default zoom effects lack smooth endings, combining two Grow/Shrink animations with a Fade animation allows you to create a custom smooth zoom that looks professional and polished.
By following the step-by-step instructions in this guide, you can easily apply this animation to logos, titles, text, and shapes, making your presentations stand out. Remember, the key to great presentations is not only in the content but also in how you visually engage your audience.
If you’re eager to explore more PowerPoint animation secrets and save time with ready-to-use presets, check out the PowerPoint Animation Pack and the PowerPoint Animation Mastery course by One Skill PPT.
Feel free to experiment, practice, and most importantly, have fun creating smooth, dynamic presentations that leave a lasting impression!


