

Hello, my friends! I hope you’re doing super duper wonderful today. I’m excited to share with you a fantastic PowerPoint design technique that will elevate your presentations with a stunning animated gradient effect. This effect is known as the conic gradient, a unique gradient style that radiates colors around a center point, creating a captivating visual spiral. In this comprehensive guide, I’ll walk you through how to create this beautiful spinning conic gradient effect right within PowerPoint, using Office 365 or virtually any recent version of PowerPoint.
Not only will you learn how to craft this eye-catching background, but I’ll also show you how to animate it to spin gracefully, add some playful animated elements for fun, and customize the colors and brightness to fit your presentation’s mood perfectly. Whether you’re a PowerPoint beginner or a seasoned designer, this tutorial offers a fresh way to bring your slides to life with minimal effort.
So, let’s dive into the world of conic gradients and unlock a new level of creativity for your presentations!

Table of Contents
- What is a Conic Gradient?
- Finding Inspiration: UI Adrian’s Work
- Can You Create a Conic Gradient Directly in PowerPoint?
- Creating a Conic Gradient in Figma for PowerPoint
- Importing and Preparing the Conic Gradient in PowerPoint
- Fixing Gradient Coverage with Shape Cropping
- Animating the Spinning Conic Gradient
- Adding Content and Fun Elements to Your Slide
- Changing Background Colors to Customize the Gradient
- Turning the Gradient From Light to Dark
- Summary and Final Thoughts
- Frequently Asked Questions (FAQ)
- Additional Resources
What is a Conic Gradient?
Before we jump into the creation process, let’s understand what a conic gradient actually is. Unlike traditional linear or radial gradients, a conic gradient wraps colors around a central point in a circular fashion. Imagine colors blending like a rainbow swirl or a pie chart with smooth color transitions around its center. This gradient style is sometimes called an angular gradient because the color changes are based on the angle around the center point rather than distance.
This effect is visually dynamic and can add a modern, stylish vibe to your slides. It’s particularly effective as a background because it naturally draws viewers’ attention toward the center, which is often where your main content or focal point resides.

Finding Inspiration: UI Adrian’s Work
My inspiration for this effect comes from UI Adrian, a talented designer whose work with conic gradients on Instagram blew me away. He created mesmerizing gradient animations using Figma, a popular web design tool. You can find his incredible gradient art on his Instagram page (link in the video description). Seeing his work sparked the idea: why not recreate this effect in PowerPoint, a tool many of us use daily for presentations?
If you want to explore UI Adrian’s work, I highly recommend checking out his Instagram. His use of color and motion is truly inspiring and a great example of how design trends can cross over different platforms and tools.
Can You Create a Conic Gradient Directly in PowerPoint?
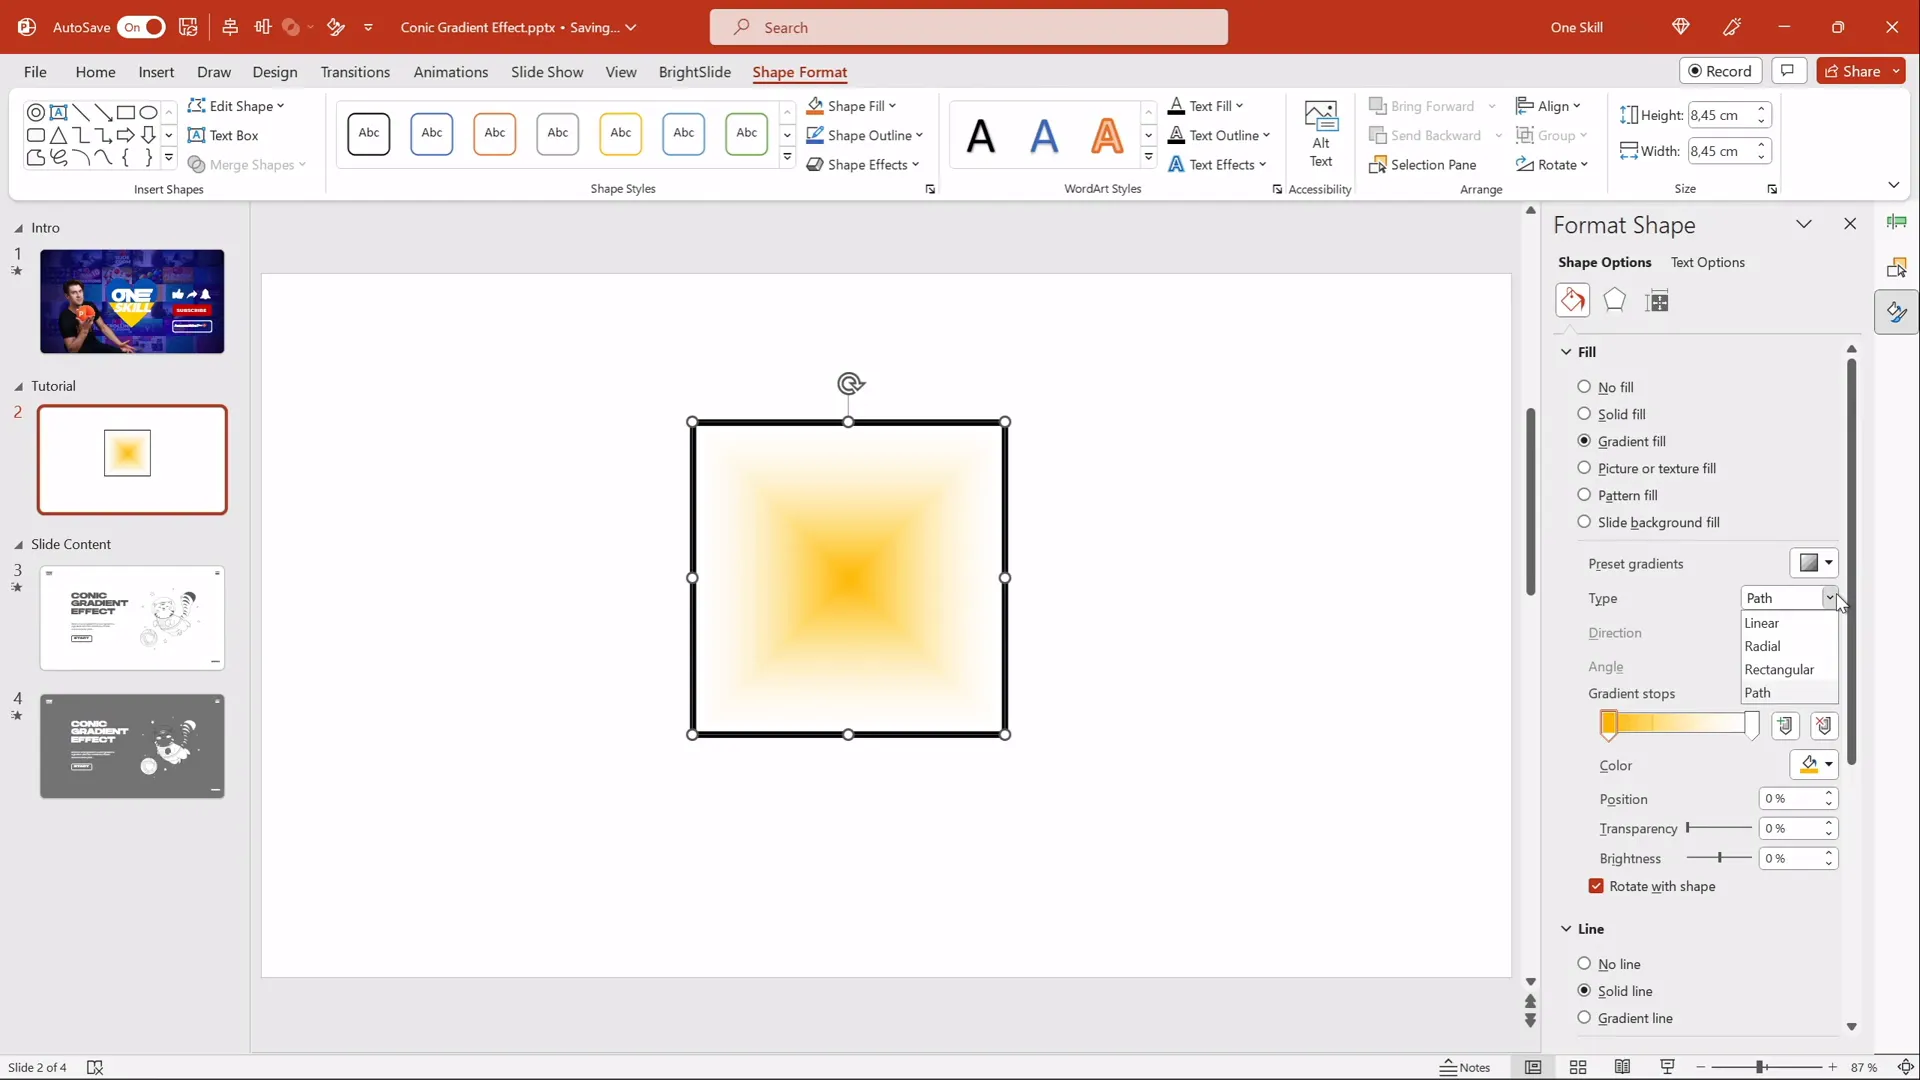
At first, I tested whether PowerPoint’s built-in gradient options—linear, radial, rectangular, and path gradients—could produce a conic gradient. Unfortunately, none of these options offered the circular, angle-based gradient we needed. PowerPoint’s gradient fills are powerful but don’t natively support conic gradients yet.
So, what’s the workaround? We’ll use Figma, a free and easy-to-learn design tool, to create the conic gradient and then export it as a PNG image. This image will then be imported into PowerPoint where we can animate and customize it.
Creating a Conic Gradient in Figma for PowerPoint
Figma is a fantastic, web-based design tool that you can use for free. Here’s a step-by-step guide on how to create the conic gradient in Figma:
- Log in to Figma: You can sign up or log in using your Google account at figma.com.
- Create a New Design File: Once logged in, click on “New Design File” to open a blank canvas.
- Insert a Frame: In Figma, pages are called frames. Click the frame tool and select a preset dimension for slides, or set your own.
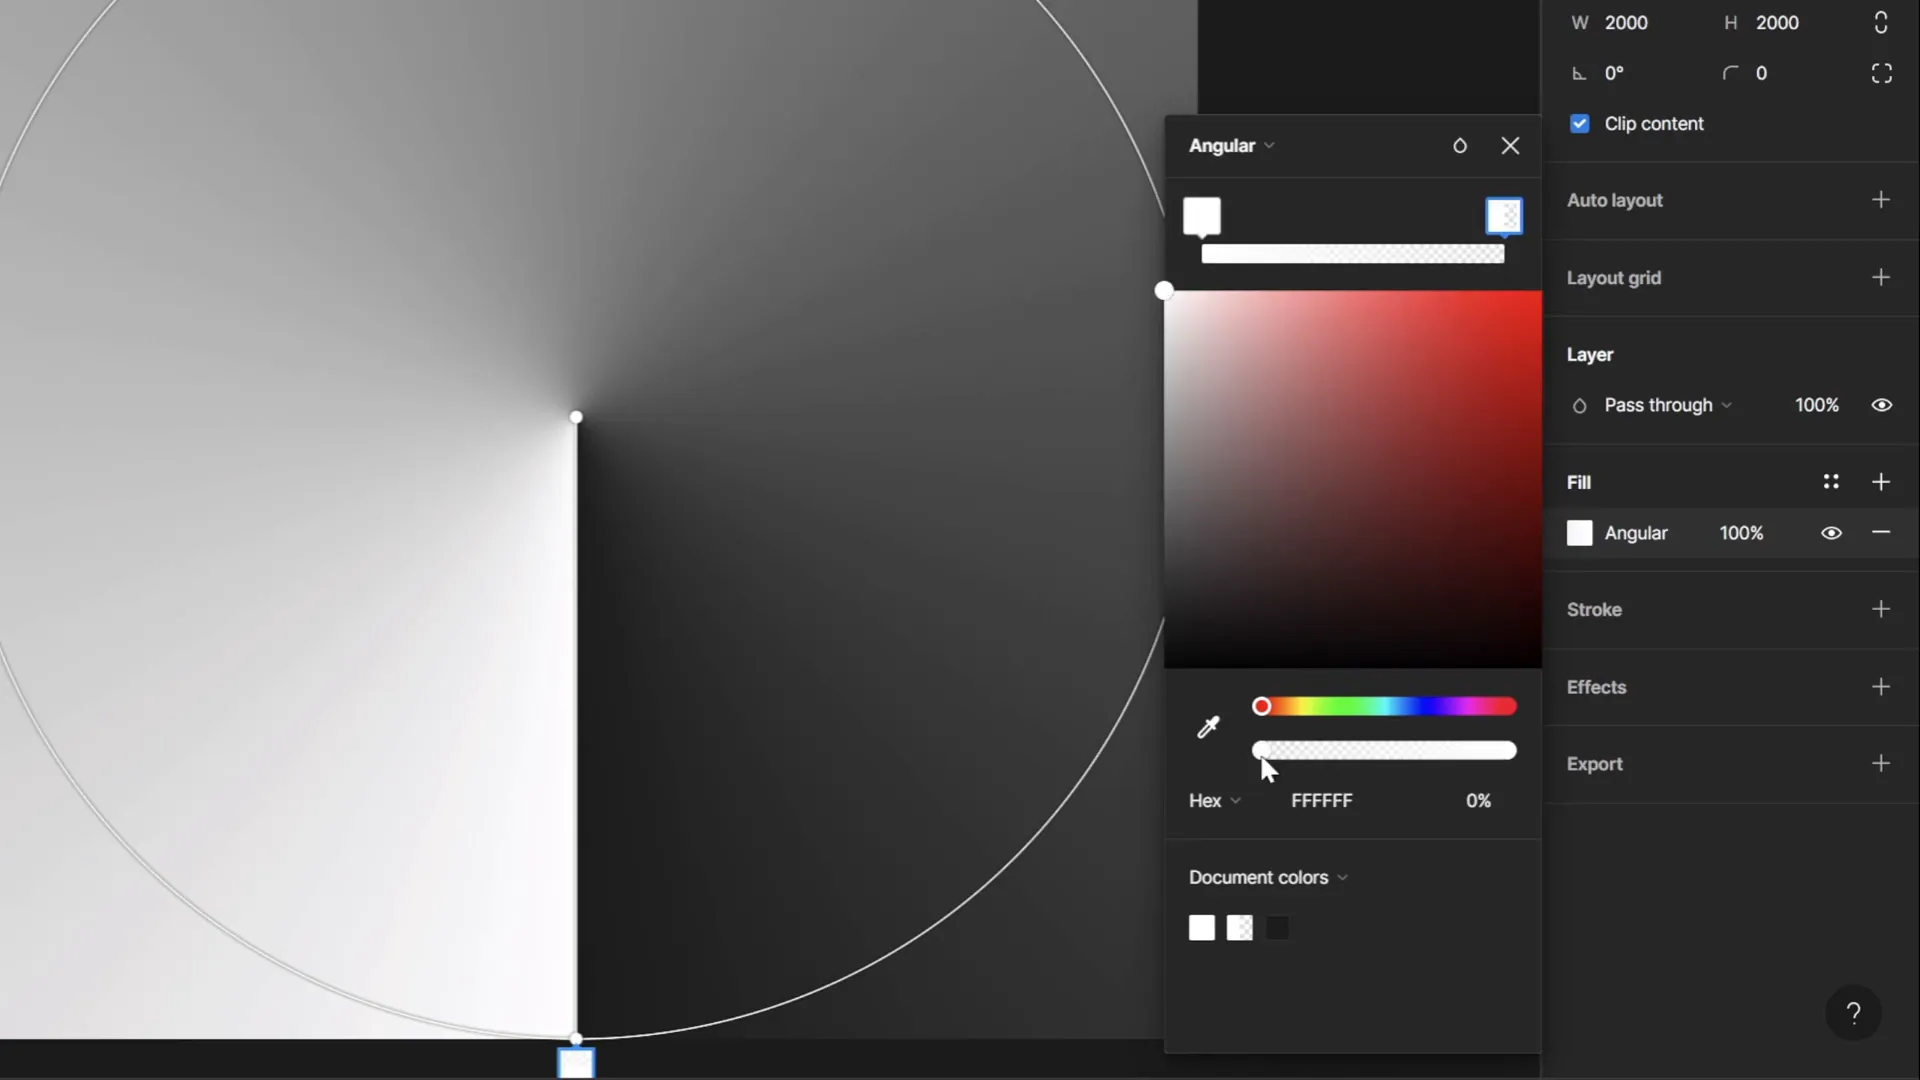
- Set Frame Dimensions: Instead of the default 1920×1080 pixels, change the frame size to 2000×2000 pixels. This larger square makes it easier to work with the gradient and ensures better quality when importing into PowerPoint.
- Apply an Angular Gradient: Select the frame, then click on the “Fill” option on the right panel. Choose “Angular Gradient” (this is Figma’s term for conic gradient).
- Customize Colors: By default, the gradient will have white on one end and transparent white on the other. This setup is ideal because it allows you to change the background color later in PowerPoint, giving you flexibility over the gradient’s appearance.
- Export as PNG: Rename your frame “conic gradient” for clarity. Then, export it as a PNG image to your computer.
This process is straightforward and free, and it gives you a high-quality conic gradient image that you can easily use in your PowerPoint slides.
Importing and Preparing the Conic Gradient in PowerPoint
Now that you have your conic gradient PNG file, it’s time to bring it into PowerPoint and prepare it for animation:
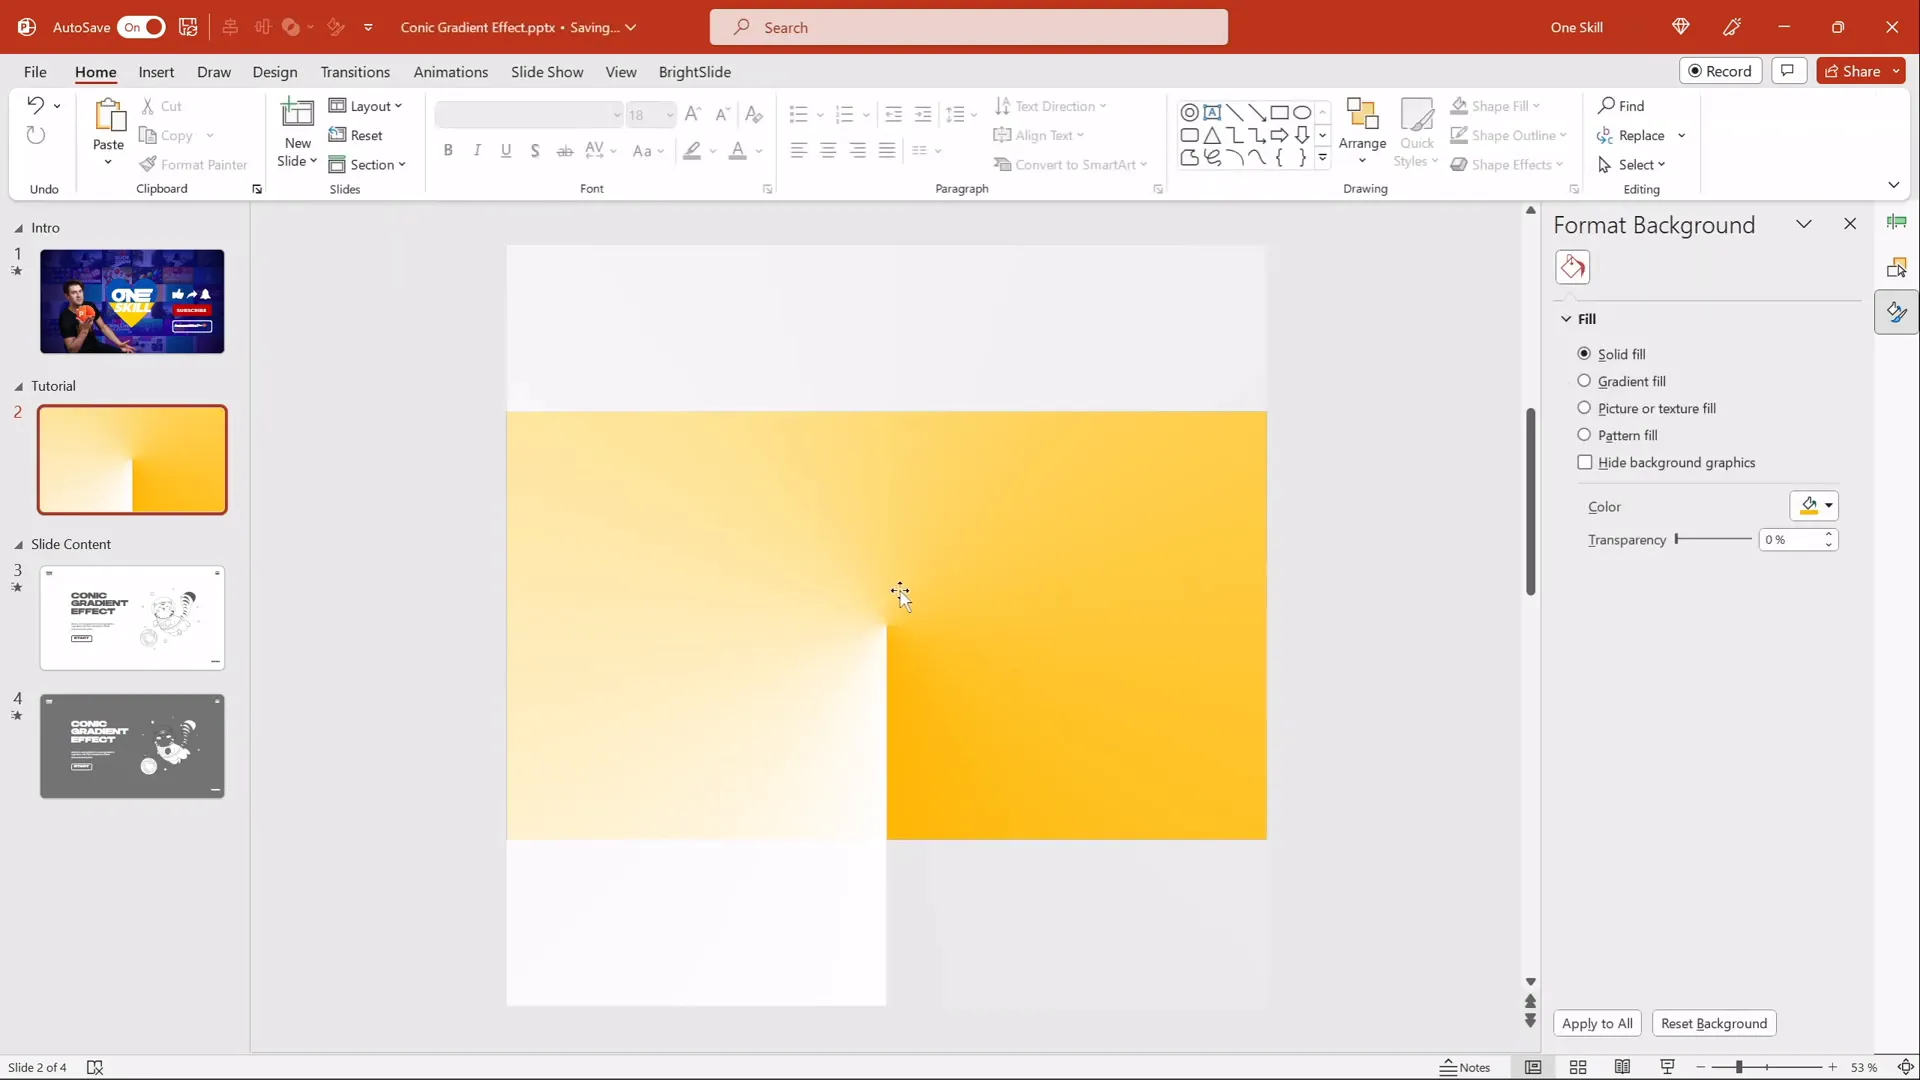
- Add a Background Color: Before inserting the gradient image, change your slide’s background color to something other than white. This step is essential because the gradient has white and transparent areas, and a white background would make parts of the gradient invisible.
- Insert the Gradient Image: Go to the “Insert” tab, select “Pictures,” and choose your exported conic gradient PNG.
- Resize the Image: Hold down Ctrl + Shift and drag a corner handle to scale the gradient image proportionally until it covers the entire slide.
- Check Fullscreen Appearance: Preview the slide in full screen to ensure the gradient covers the entire background beautifully.
Fixing Gradient Coverage with Shape Cropping
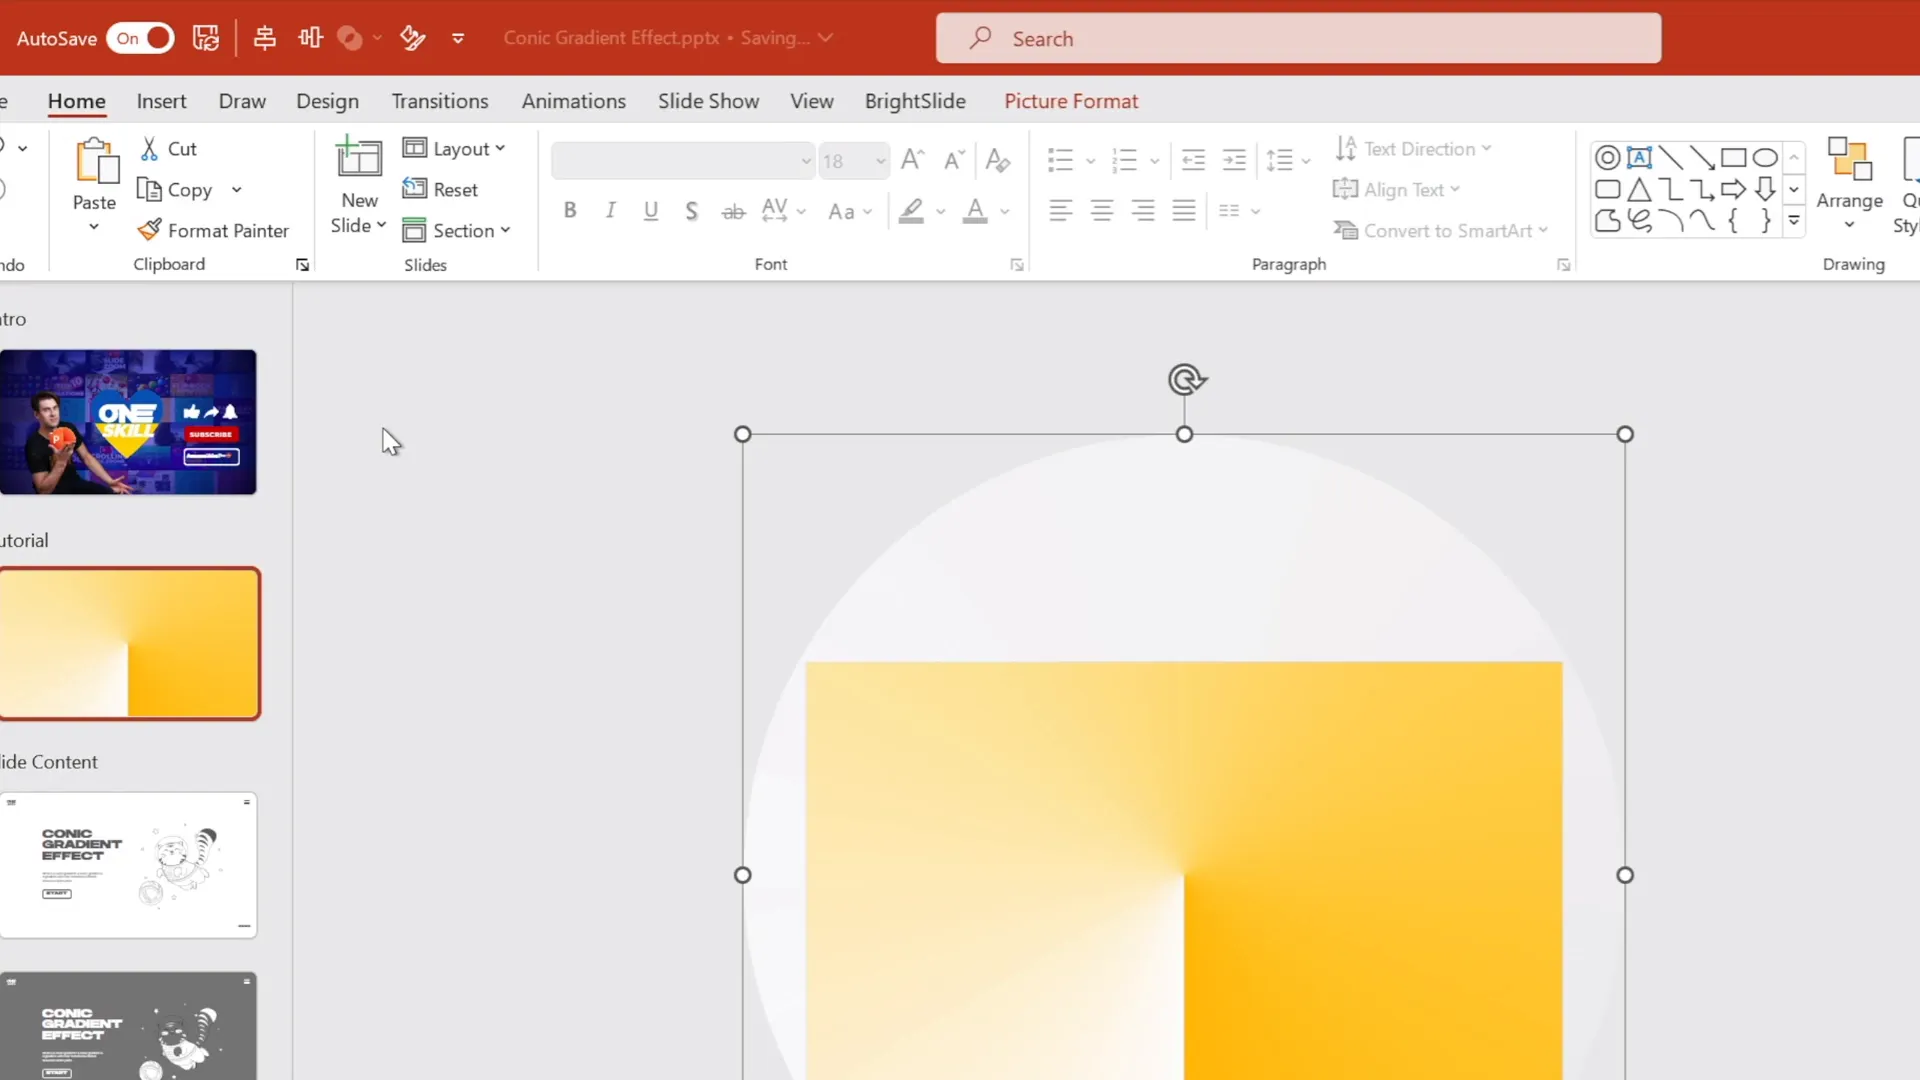
When you animate the gradient to spin, you might notice some corners of the slide aren’t fully covered by the gradient image during rotation. To fix this, we need to crop the gradient to a circular shape slightly larger than the slide, ensuring complete coverage as it spins.
- Insert a Circle: Use the “Insert Shapes” tool to draw a perfect circle by holding the Shift key while dragging.
- Center the Circle: Align the circle exactly to the center and middle of the slide.
- Make Fill Transparent: Set the circle’s fill to 100% transparent so you can see behind it.
- Resize Circle: Scale the circle so it’s a bit larger than the slide dimensions.
- Resize Gradient: Increase the gradient image size to be slightly larger than the transparent circle.
- Crop Gradient to Circle: Select the gradient image, then hold Shift and select the circle. Go to “Shape Format” → “Merge Shapes” → “Intersect.” This crops the gradient to the circle’s shape.
Now, when the gradient spins, it will always fully cover the slide without revealing any empty corners. This is a simple yet effective trick to maintain a clean, polished look.
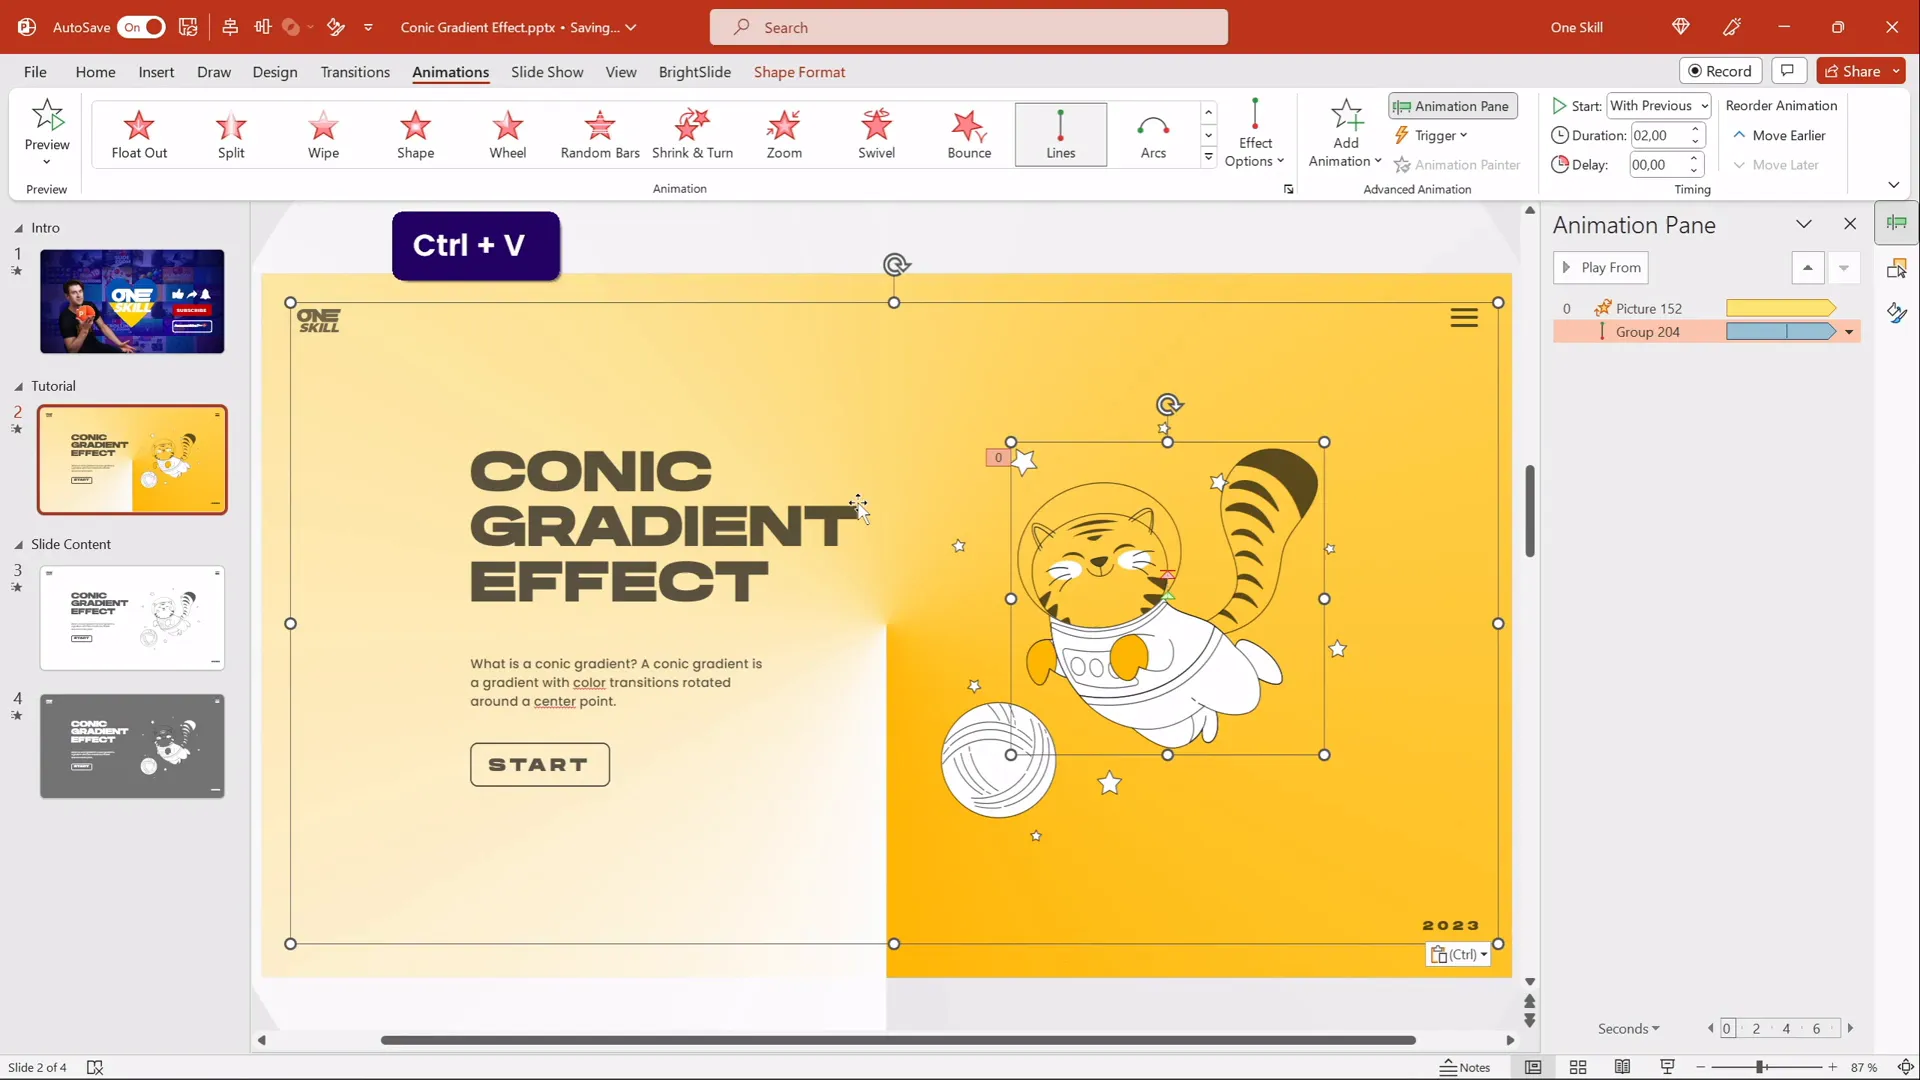
Animating the Spinning Conic Gradient
With the gradient image cropped and ready, the next step is to add the spinning animation that brings this effect to life:
- Select the Gradient Image: Click on the cropped gradient to select it.
- Add Spin Animation: Go to the “Animations” tab and choose the “Spin” animation.
- Configure Animation Settings:
- Set the rotation direction to clockwise.
- Choose “Full Spin” for the amount of rotation.
- Set it to start “With Previous” so it begins as soon as the slide appears.
- Adjust the duration to 10 seconds for a smooth, slow spin.
- Enable “Repeat” until the end of the slide so the spin continues indefinitely.
- Disable “Smooth Start” and “Smooth End” for a consistent speed.
- Preview the Animation: Run the slideshow to see your gradient spinning beautifully!

Adding Content and Fun Elements to Your Slide
To demonstrate how this spinning gradient can enhance your presentations, I added some content and playful elements:
- Text Boxes: I created several text boxes aligned on the left side of the slide, using the stylish Hands On font. This font adds a friendly and approachable vibe to the text.
- Animated Illustration: On the right side, I added a flying cat illustration from Storyset. These illustrations are downloadable in SVG format, which makes them easy to use and animate in PowerPoint.
These additions show how the dynamic background works well with slide content, providing energy without overpowering the message.
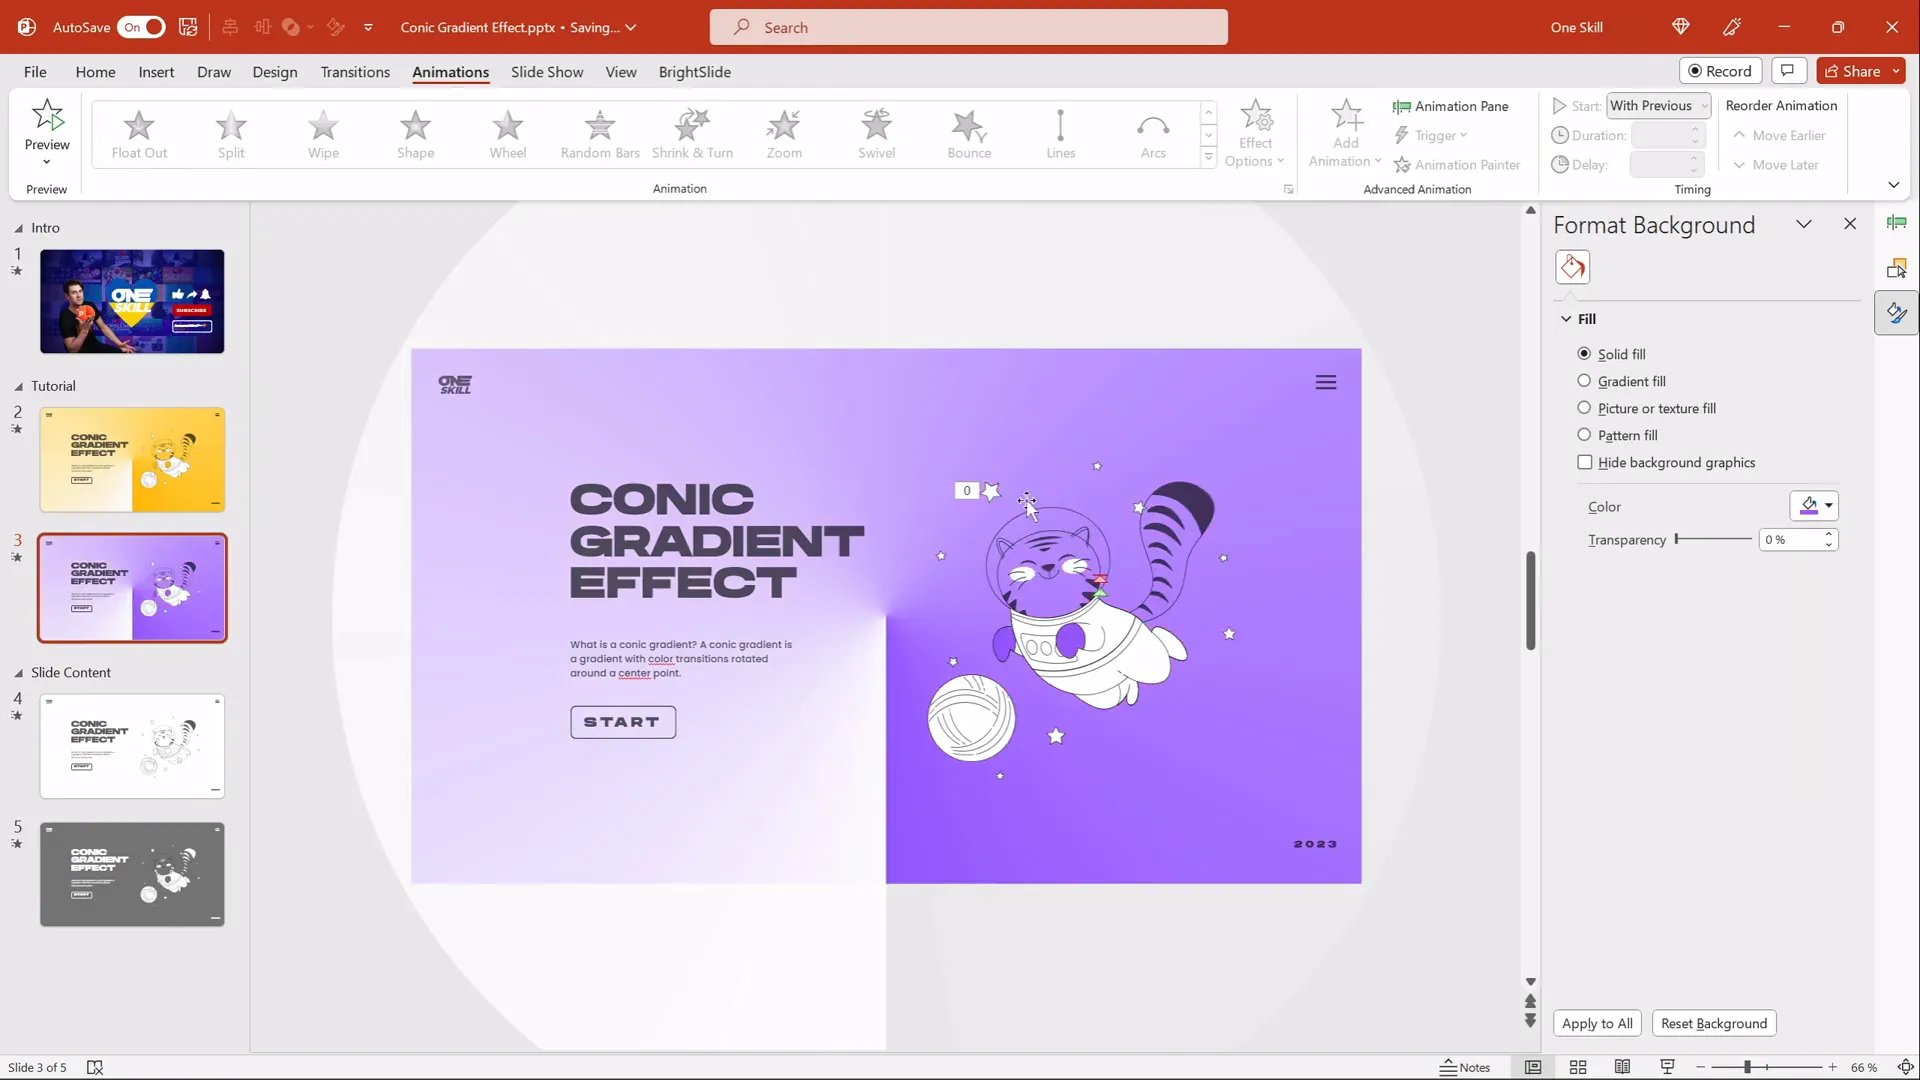
Changing Background Colors to Customize the Gradient
One of the coolest features of our conic gradient setup is how flexible it is when changing the slide’s background color. Because the gradient image uses white and transparent white colors, the gradient’s visible color changes dynamically based on the slide background.

Here’s how to customize it:
- Duplicate Your Slide: Make a copy of your slide to experiment without losing your original design.
- Change Slide Background: Select any color you want for the slide background. For example, a soft light purple looks fantastic.
- Observe Gradient Effect: Notice how the gradient colors adapt, blending with the new background color to create a fresh look.
This approach means you can create multiple versions of your presentation with different moods simply by changing the background color — no need to recreate the gradient every time.
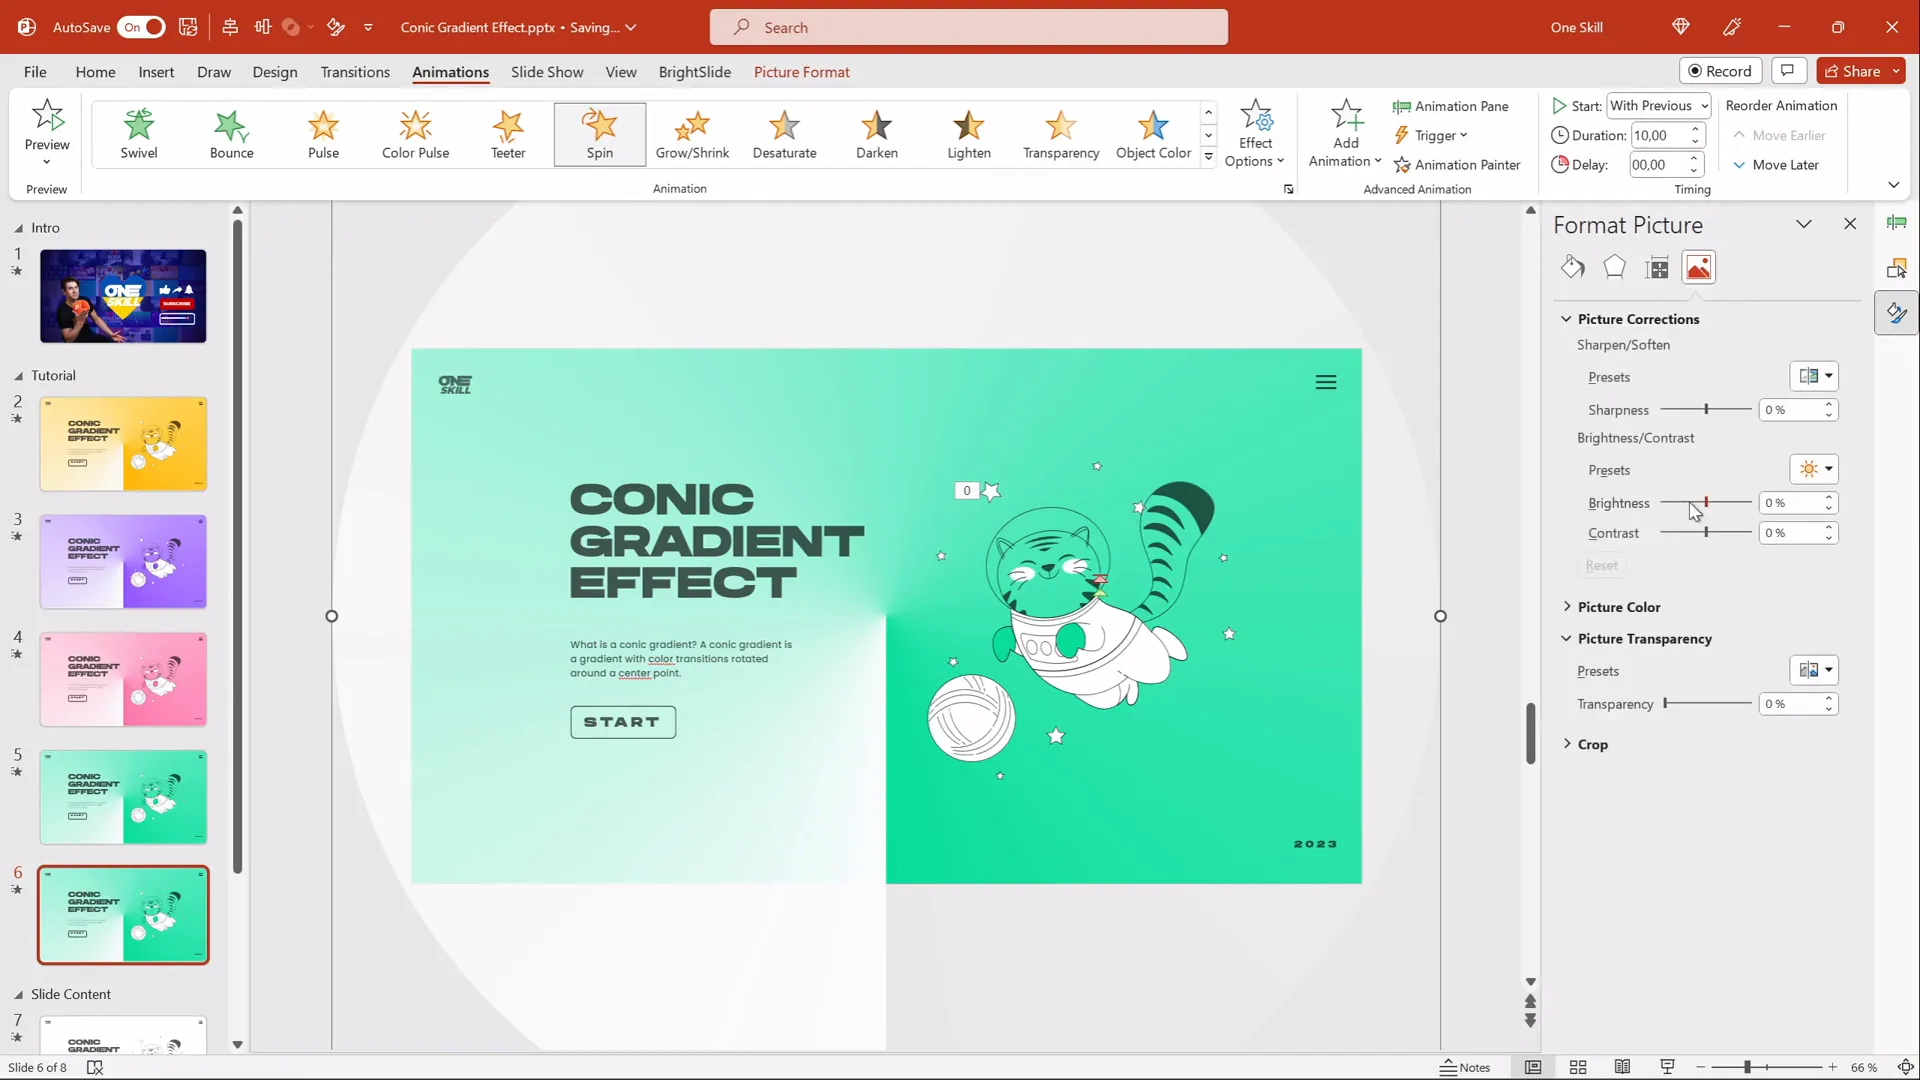
Turning the Gradient From Light to Dark
If you want to switch things up and create a dark-themed gradient, you can easily adjust the brightness of the gradient image in PowerPoint:
- Select the Gradient Image: Click the gradient picture on your slide.
- Open Picture Correction Options: Under “Picture Format,” find the “Corrections” menu.
- Adjust Brightness: Move the brightness slider to the left to darken the gradient. This transforms the light gradient into a darker, moodier version.
- Tweak Transparency: If the dark effect is too strong, adjust the transparency slider to soften it.
- Change Background Colors: Try different slide background colors to see how they interact with your dark gradient for even more customization.
For dark backgrounds, remember to change your text color to white or light shades for readability.
Summary and Final Thoughts
Congratulations! You now know how to create a mesmerizing spinning conic gradient effect in PowerPoint that can dramatically enhance the look and feel of your presentations. By combining the power of Figma’s angular gradient creation with PowerPoint’s animation and image correction tools, you unlock a new realm of design possibilities.
This technique is:
- Versatile: Easily change colors and brightness to match your presentation’s theme.
- Dynamic: The spinning animation adds subtle movement to keep your audience engaged.
- Fun: You can add playful elements like animated illustrations to create a friendly and approachable atmosphere.
- Accessible: Uses free tools (Figma) and standard PowerPoint features, so anyone can try it.
Plus, the tutorial slides are available for free on my Patreon page (link in the video description), so you can jump straight into experimenting with this effect.

Frequently Asked Questions (FAQ)
What versions of PowerPoint support this conic gradient effect?
This technique works best with PowerPoint in Office 365 or recent versions that support image animation and shape merging. However, since the gradient is imported as a PNG image, most modern versions of PowerPoint should be able to handle it.
Is Figma free to use for creating the gradient?
Yes! Figma offers a free tier that allows you to create and export designs, including conic gradients. You just need to sign up or log in with a Google account.
Can I change the colors of the conic gradient after importing it into PowerPoint?
Directly changing the colors inside PowerPoint is not possible since it’s an image. However, by designing the gradient with white and transparent white in Figma, you can change the slide background color in PowerPoint to influence the gradient’s appearance dynamically.
How do I add animations to illustrations like the flying cat?
You can import SVG illustrations into PowerPoint and animate them using PowerPoint’s animation pane. For detailed guidance, check out tutorials on animating illustrations in PowerPoint.
Can I use this effect for professional presentations?
Absolutely! The spinning conic gradient adds a modern and polished look that can make your presentations stand out. Just ensure that the animation and colors align with your brand and presentation goals.
Are the tutorial slides really free?
Yes, you can access the tutorial slides for free on my Patreon post. The link is provided in the video description, allowing you to practice and customize the effect easily.
Additional Resources
- Figma – Free Design Tool
- Hands On Font Download
- Storyset – Free Animated Illustrations
- Free Tutorial Slides on Patreon
If you enjoyed this tutorial and want to see more creative PowerPoint techniques, consider subscribing to One Skill PowerPoint. Together, we can make your presentations more engaging, dynamic, and fun!
Thank you so much for reading, and I wish you wonderful holidays and a happy new year. Peace!
Check out the full video: IMPRESSIVE PowerPoint Design Idea 😍 Conic Gradient Effect


