
Welcome, my dear friends! If you’re looking to elevate your PowerPoint presentations with eye-catching animations, you’re in the right place. Today, I’ll walk you through creating a beautiful animated timeline in PowerPoint using simple tools and techniques. This tutorial is inspired by a detailed step-by-step process from a PowerPoint expert, and by the end of this article, you’ll be able to craft a professional-looking animated timeline that captivates your audience.
Whether you’re a seasoned designer or a beginner looking to add some flair to your slides, this guide will cover everything from creating custom shapes in Figma to bringing your timeline to life with PowerPoint’s animation features. Let’s dive right in!
Table of Contents
- Why Use an Animated Timeline in PowerPoint?
- Getting Started: Setting Up Your PowerPoint Slide
- Creating the Wavy Timeline Shape with Figma
- Creating a Masked Background for the Timeline
- Designing Timeline Bubbles with Emojis
- Animating the Timeline Fill Effect
- Animating the Emoji Bubbles
- Taking Your Timeline Animation to the Next Level
- Summary: What You’ve Learned
- Frequently Asked Questions (FAQ)
- Final Thoughts
Why Use an Animated Timeline in PowerPoint?
Timelines are a powerful way to present chronological information clearly and engagingly. Adding animation to your timeline not only grabs attention but also helps in pacing your presentation, guiding your audience through each phase or milestone step by step.
Instead of static visuals, an animated timeline adds a dynamic element that can emphasize progress, changes over time, or sequential events in a visually appealing manner. This tutorial will teach you how to create such an interactive timeline using a combination of free tools and PowerPoint features.
Getting Started: Setting Up Your PowerPoint Slide
Before we jump into the animation magic, the first step is to prepare your slide. Starting with a clean, visually appealing background sets the tone for your timeline.
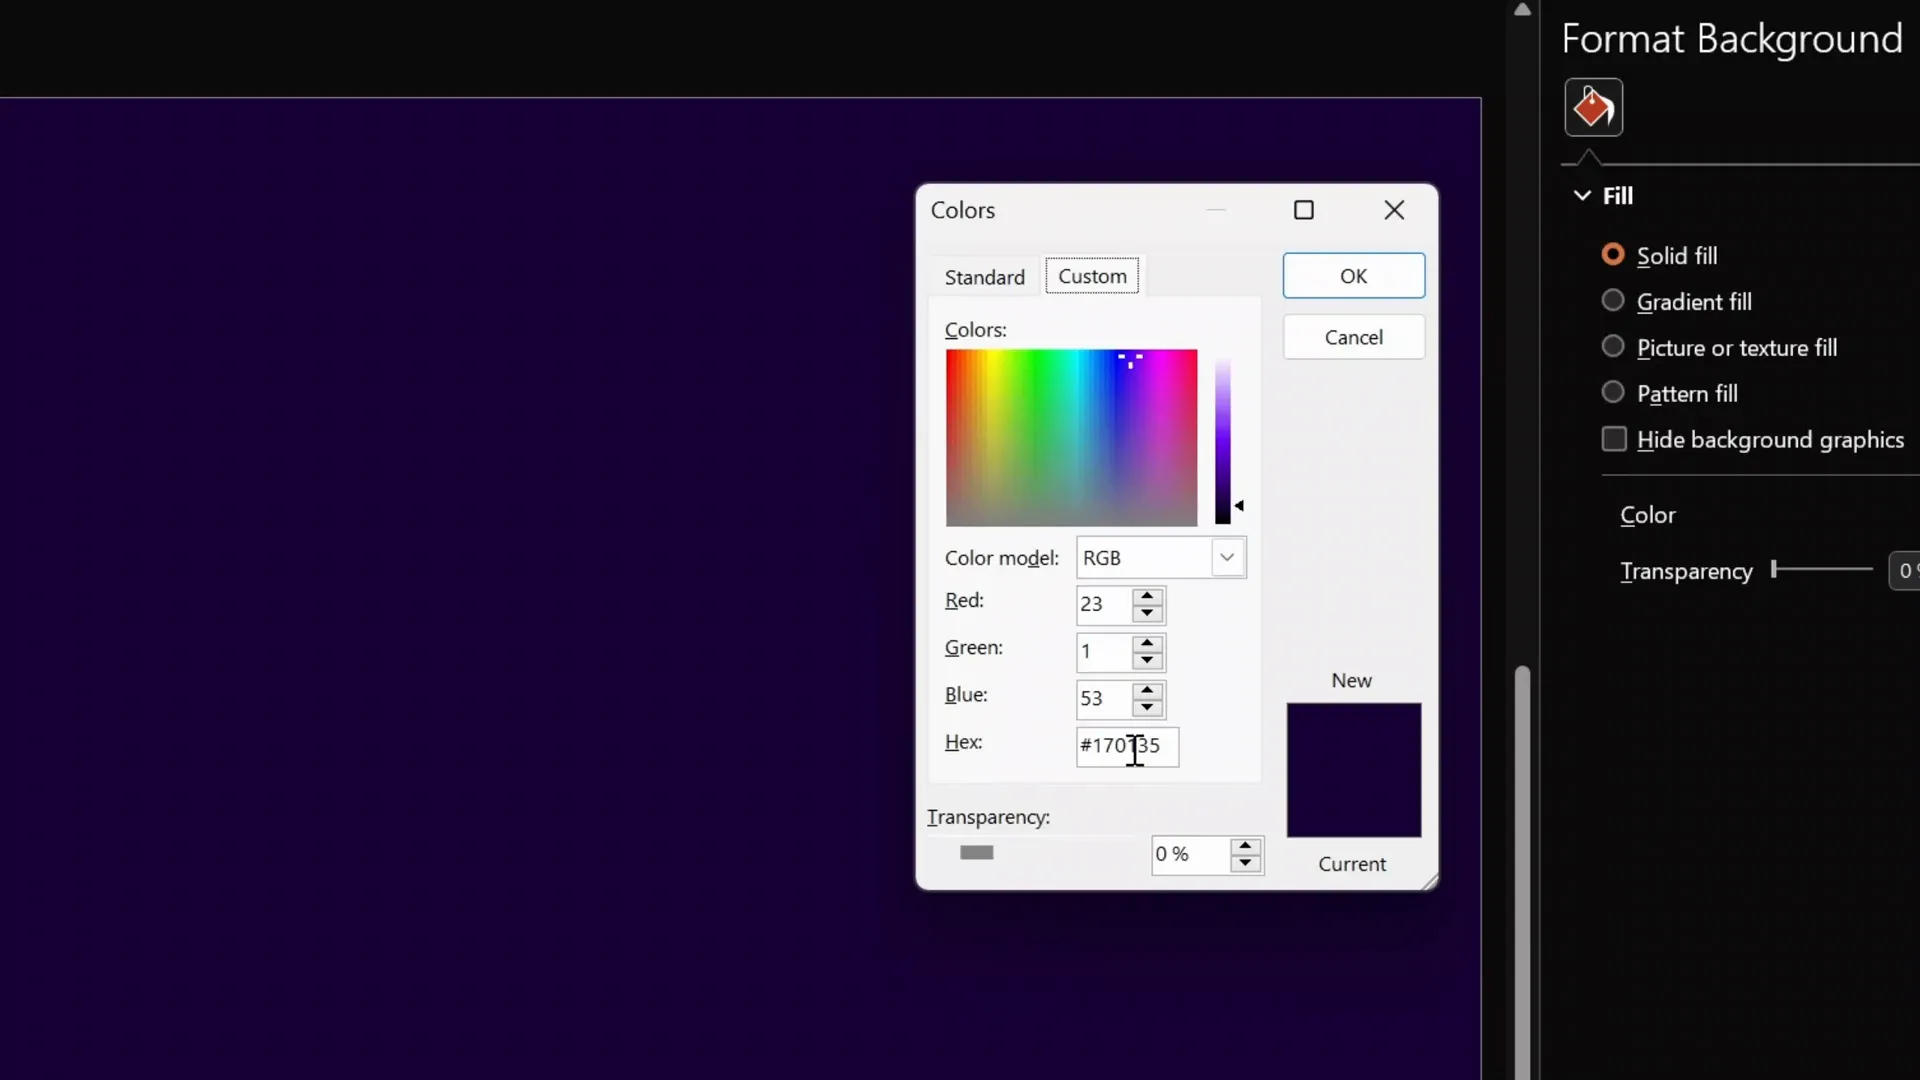
1. Choose a Background Color
Open a new blank slide in PowerPoint 365. Go to Format Background and select Solid Fill. For this tutorial, I chose a beautiful dark purple to create a sleek and modern look. You can use the exact shade by entering the hex code #3B1E5F in the color picker.
Having a consistent and attractive background color enhances the overall aesthetic and helps the timeline elements pop.
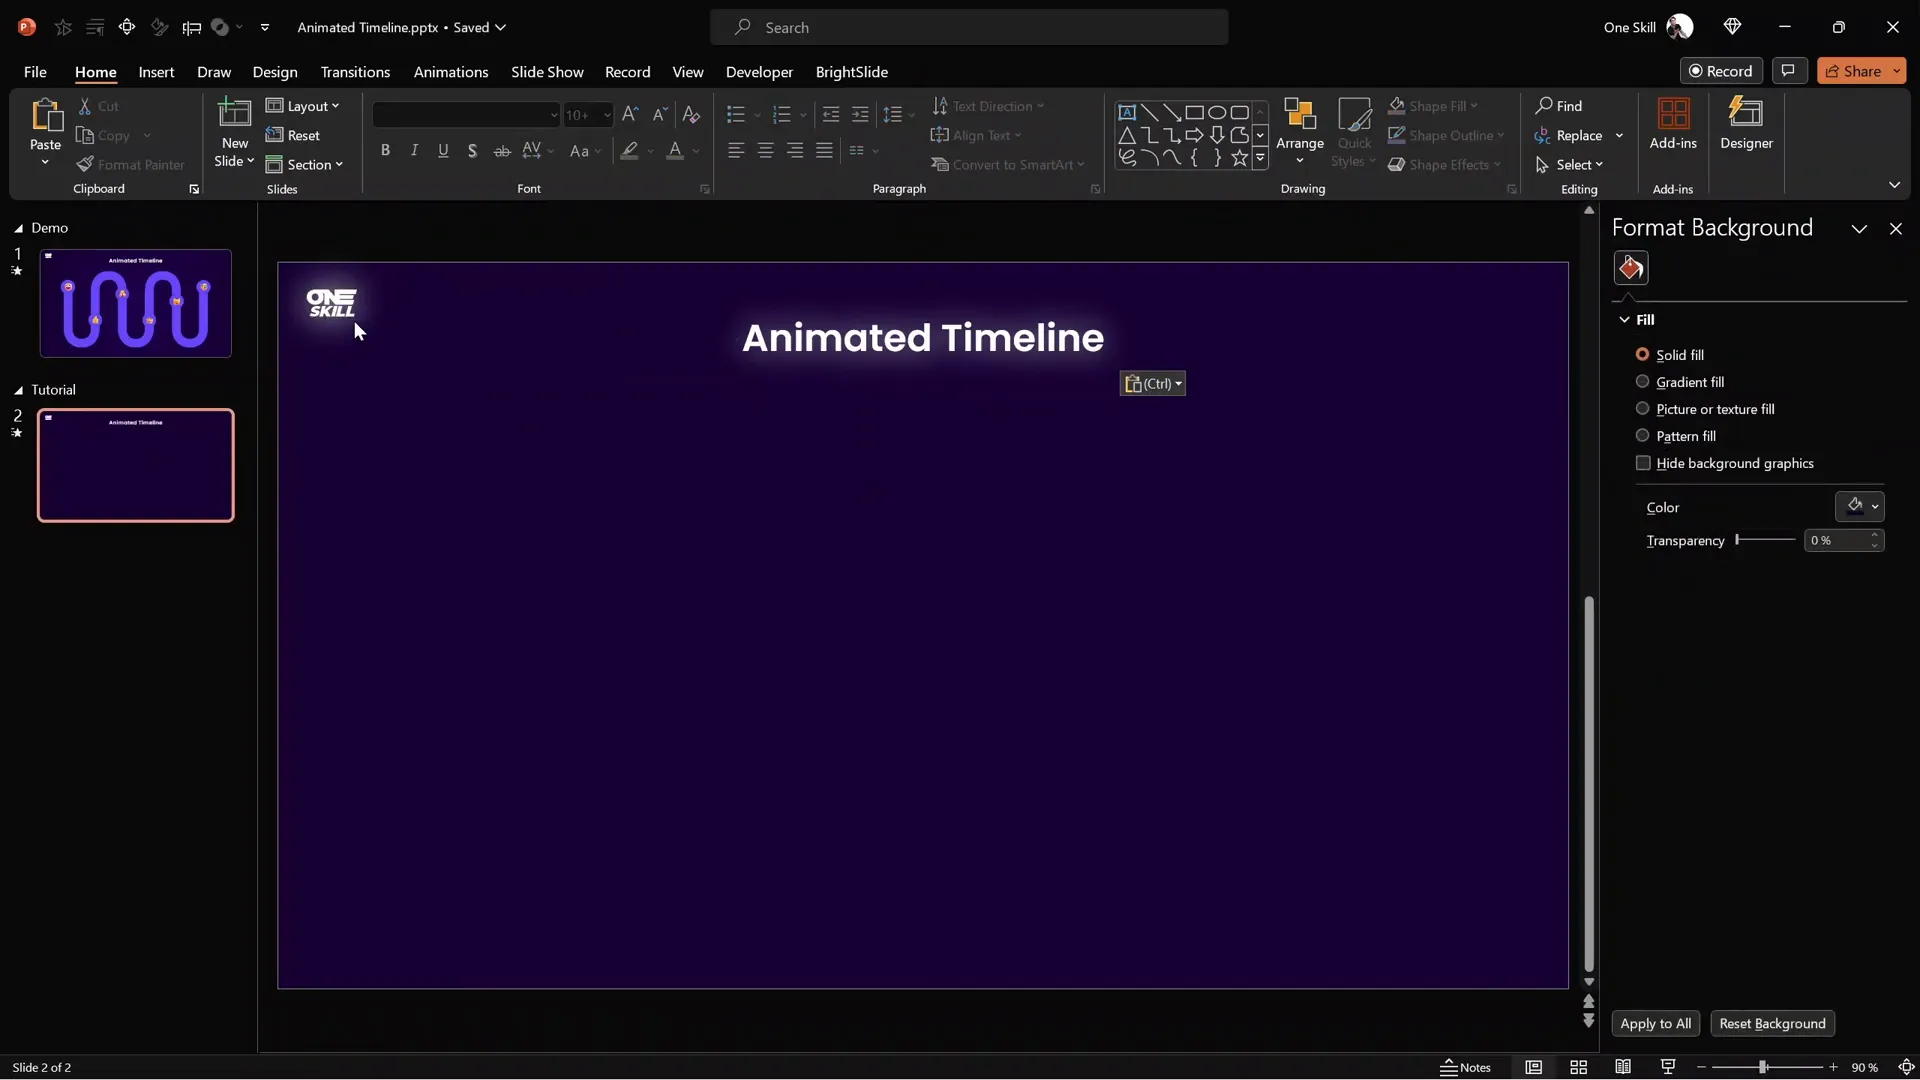
2. Add Branding Elements
If you have a logo or slide title from a previous slide, copy and paste them onto your new slide to maintain branding consistency. This saves time and keeps your presentation cohesive.
Creating the Wavy Timeline Shape with Figma
One of the standout features of this timeline is its smooth, wavy shape that acts as the path for the animation fill. While PowerPoint has shape tools, creating complex custom shapes like this can be tricky. That’s where Figma comes in—a free, powerful online design tool perfect for crafting custom vector shapes.
Why Use Figma?
Figma lets you create precise shapes using a pixel grid and pen tool, and you can export your shapes as SVG files, which PowerPoint can import and edit. This makes it seamless to create unique, smooth curves that would be difficult to draw directly in PowerPoint.
Step-by-Step: Drawing the Timeline Shape in Figma
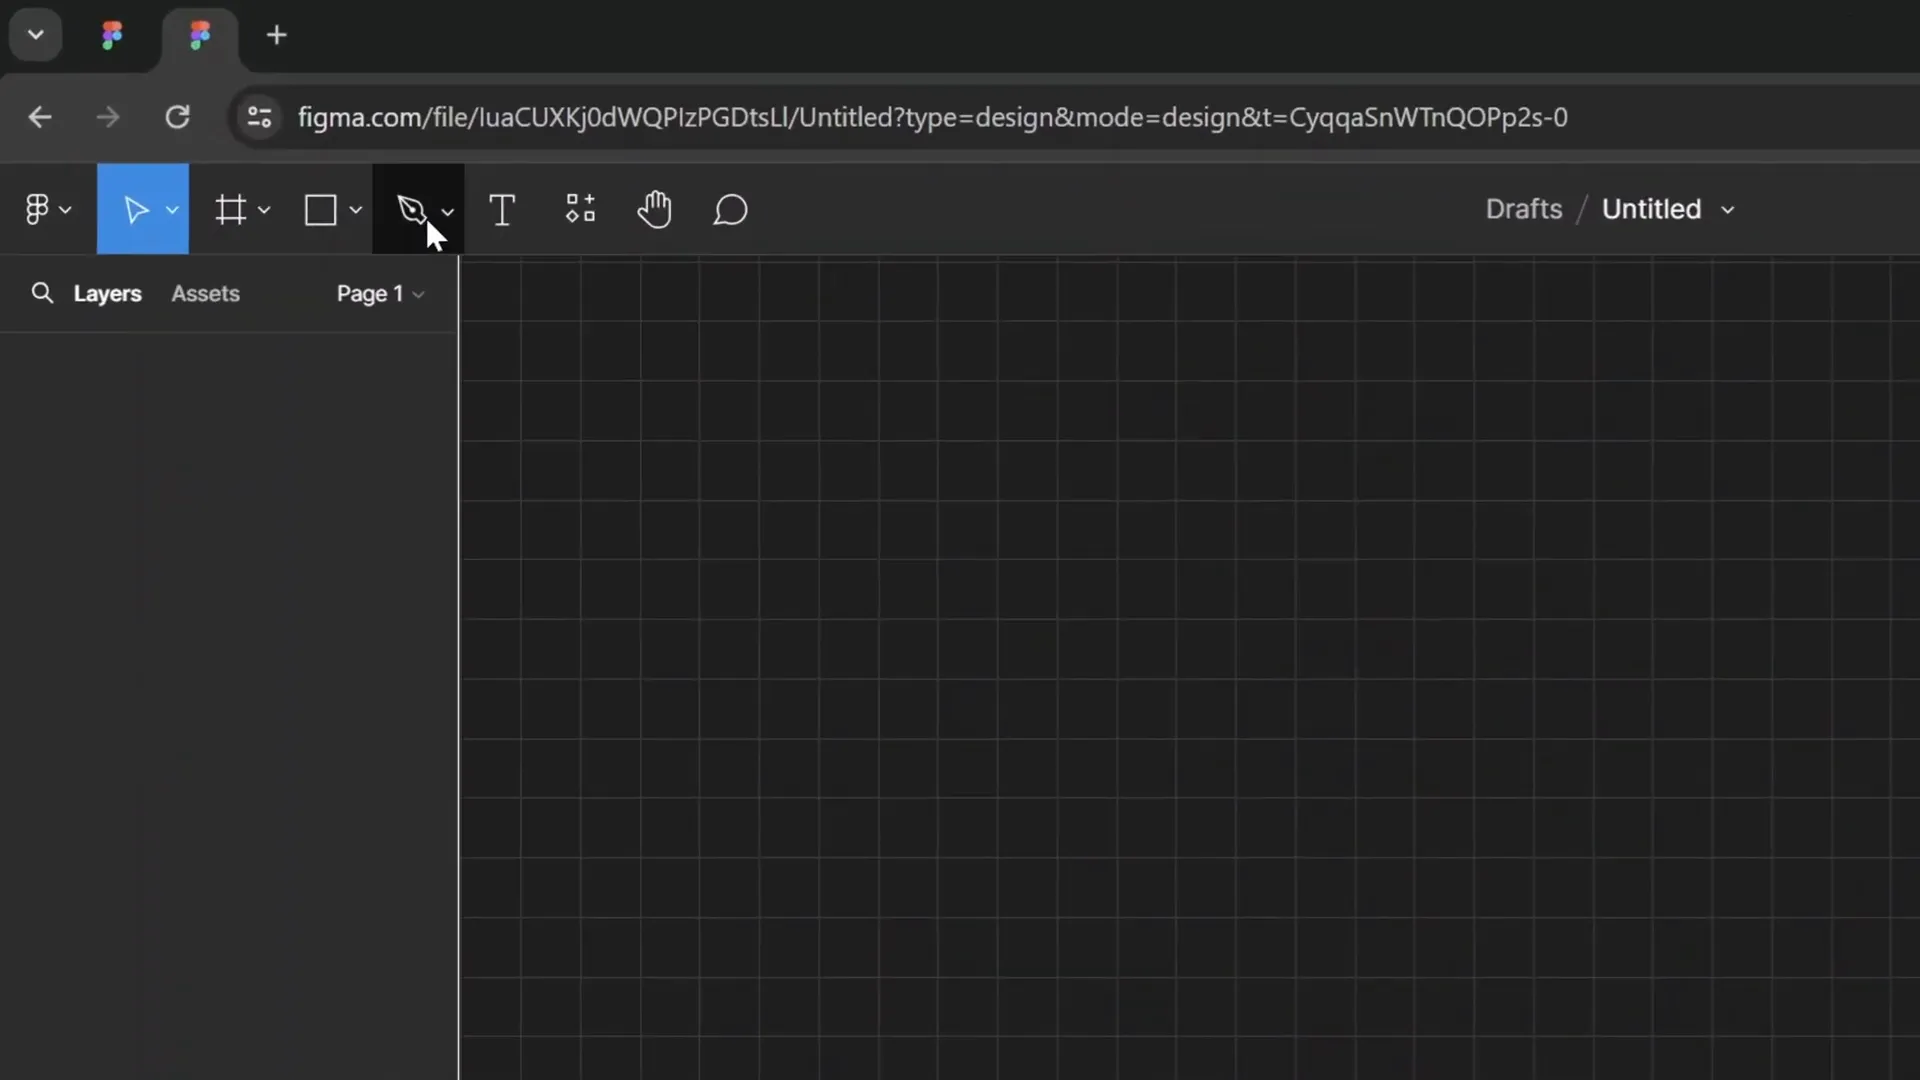
- Go to figma.com and log in with your Google account.
- Create a new design file by clicking Design File.
- Zoom in until you see the pixel grid clearly. If the grid isn’t visible, enable it from the View menu, and also activate Snap to Grid.
- Select the Pen Tool to start drawing your shape.
- Click once to start the shape, then follow a pattern of moving down nine squares, then drawing a series of zig-zag sharp points by going three squares right and three squares up/down alternately.
- Continue this zig-zag pattern to create as many waves as you like for your timeline.
At this point, your shape will look jagged with sharp points. Don’t worry—we’ll smooth them out next.
Smoothing the Timeline Shape Using the Bend Tool
To transform the sharp edges into smooth curves, select the Bend Tool in Figma. Click on each sharp vertex to activate smoothing handles, then drag these handles horizontally to create gentle waves.
This process turns the zigzag into a flowing, elegant timeline path.

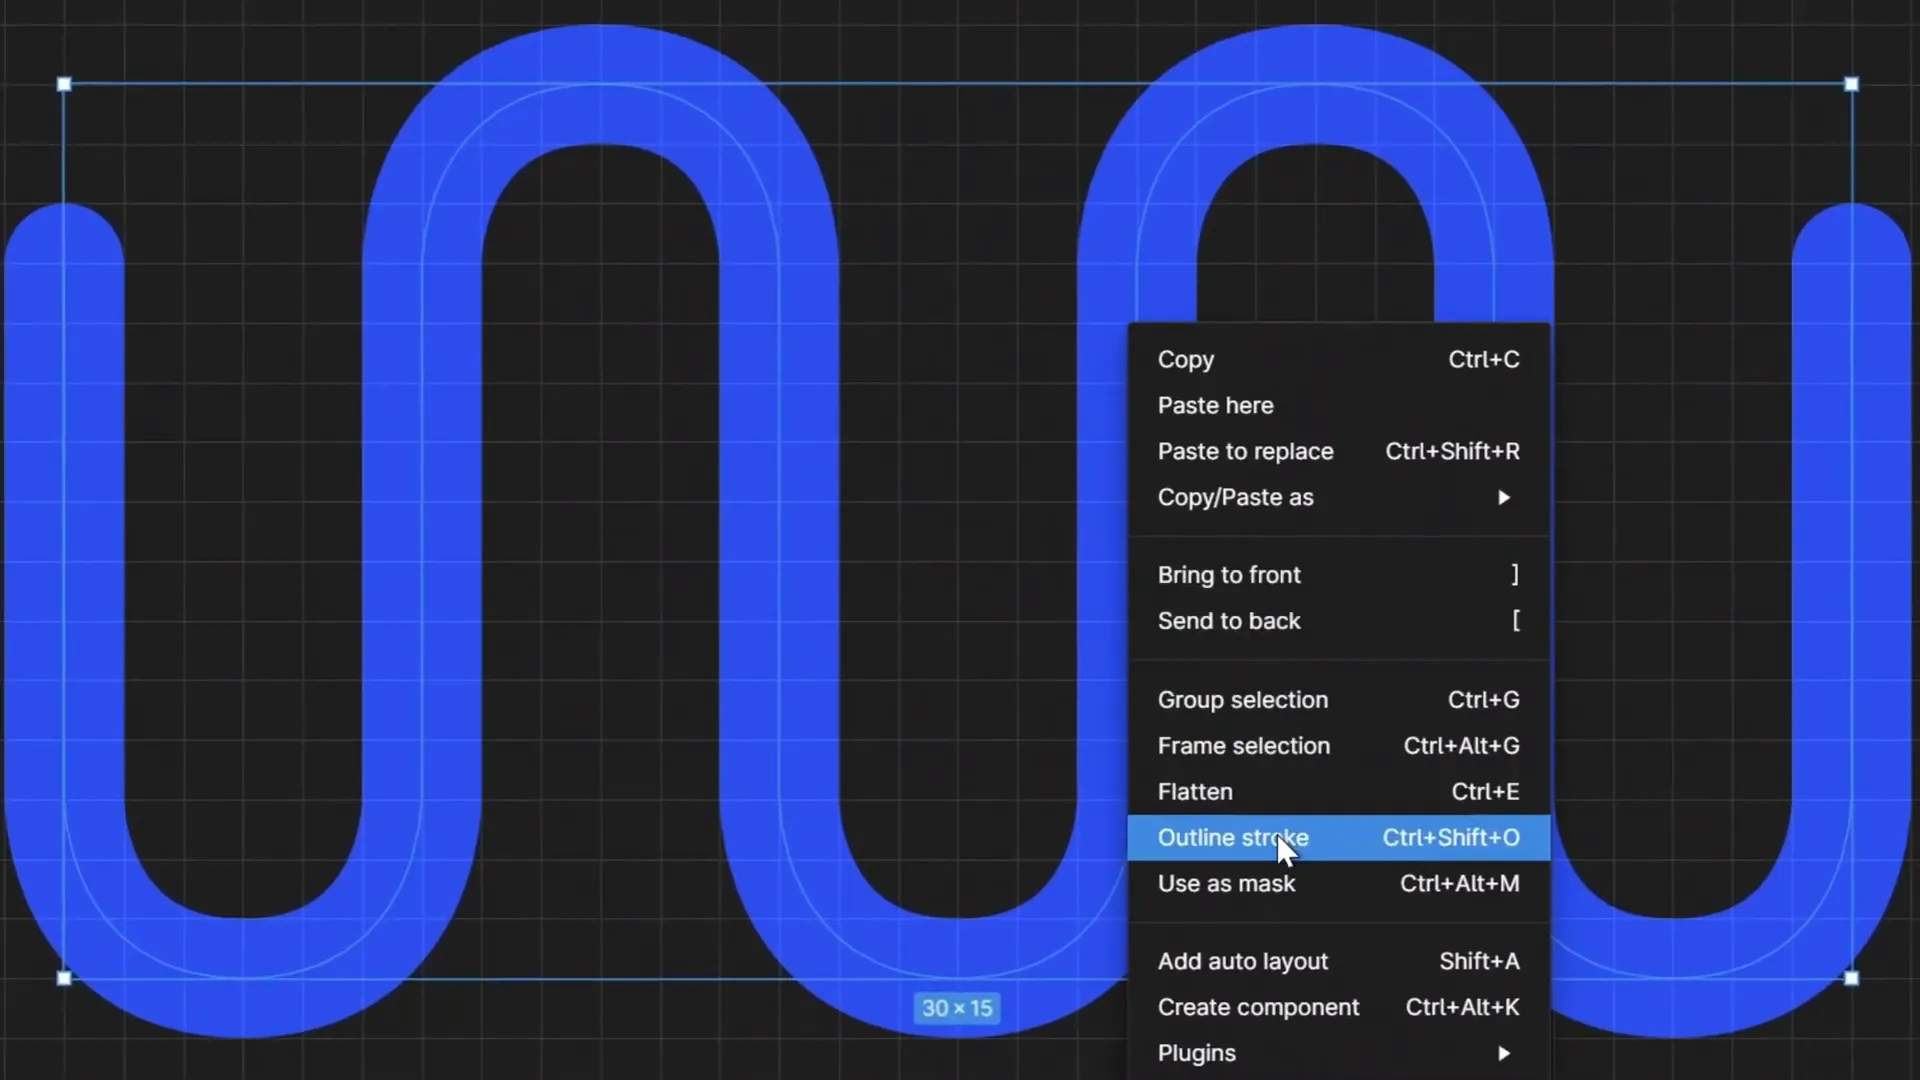
Adjusting Stroke Width and Converting to Shape
Before exporting, increase the stroke width to make the timeline line a bit thicker—try a width of 2 pixels. Also, set the line caps to Round for a polished look.
Right-click on the shape and select Outline Stroke. This converts the line into a filled shape, which is necessary for exporting it as an SVG file that PowerPoint can manipulate.
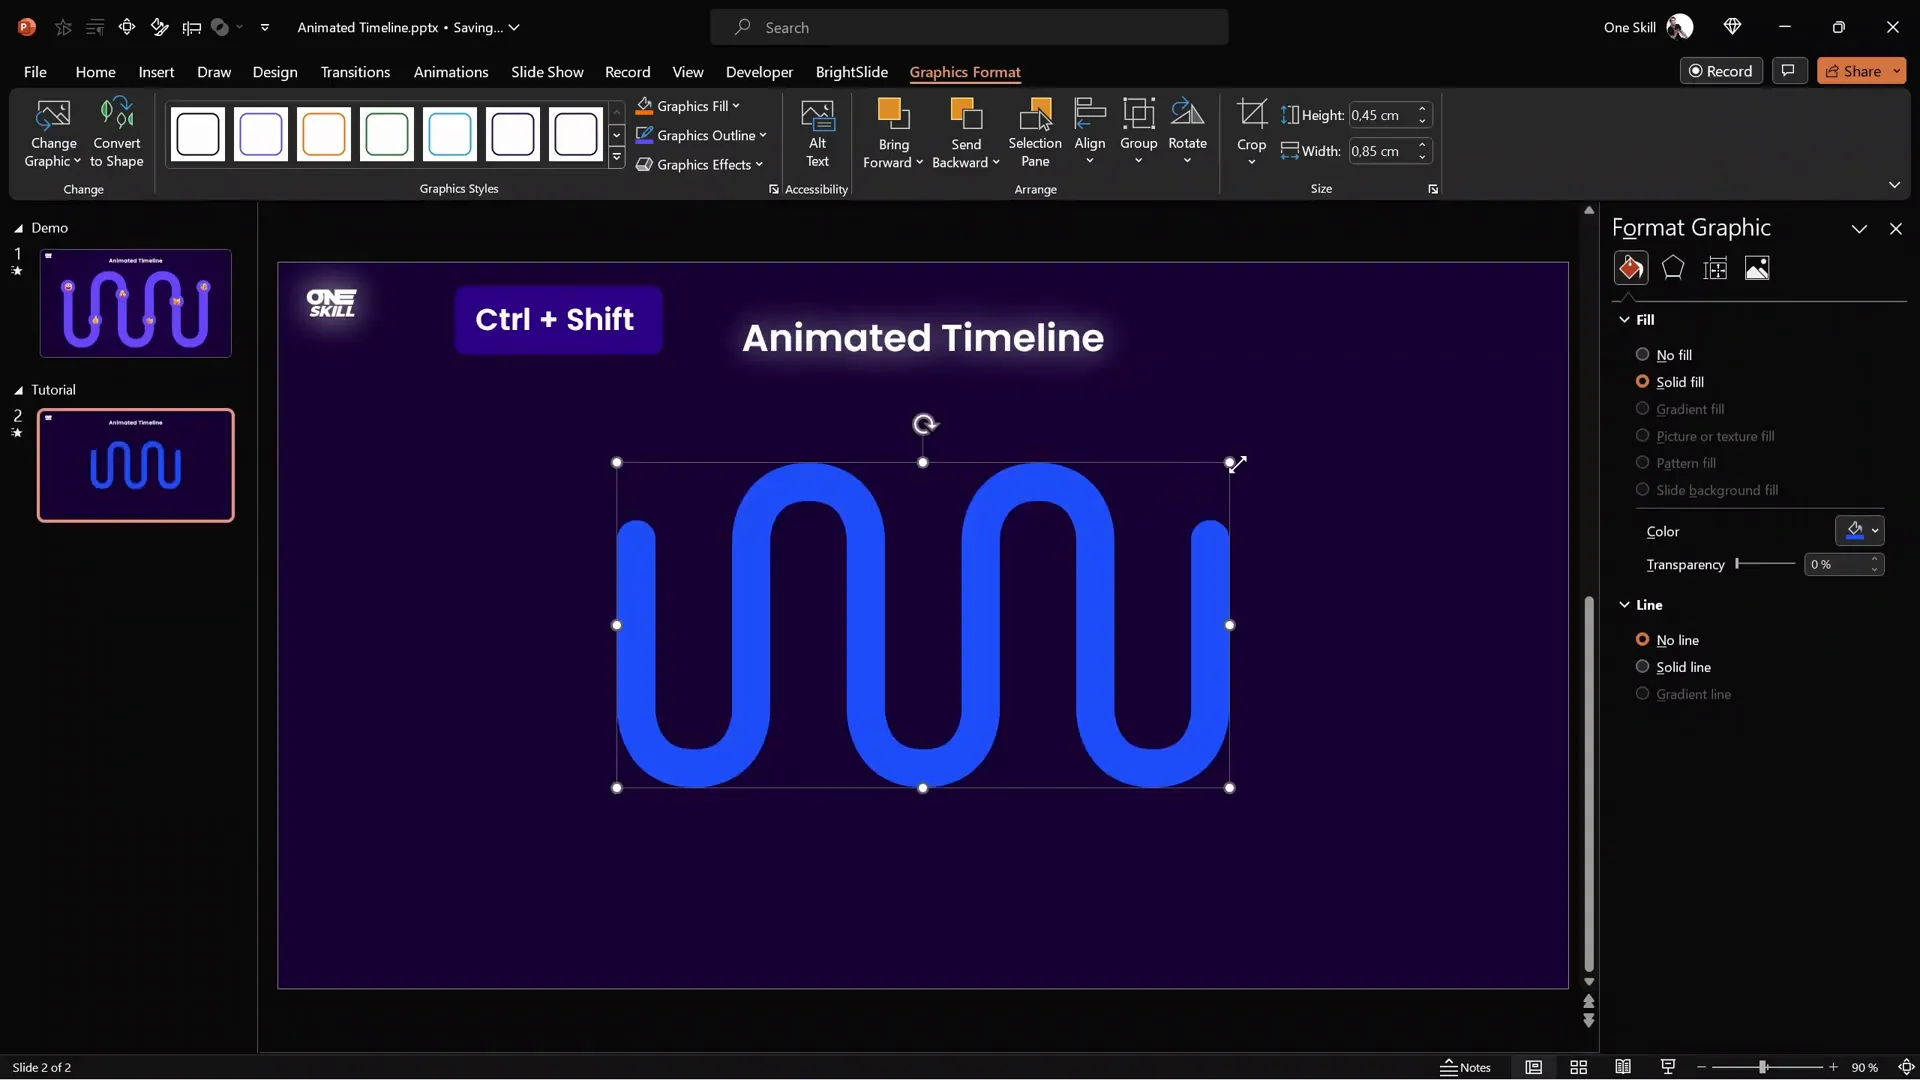
Exporting and Importing the Timeline Shape
- Export the shape as an SVG file from Figma.
- Switch back to PowerPoint and insert the SVG file via Insert > Pictures.
- Resize the SVG by dragging its corner, holding Ctrl + Shift to scale proportionally from the center.
- Position it just below your slide title.
- Right-click the SVG in PowerPoint and select Convert to Shape to make it editable.
- Use Edit Points to fine-tune if needed.
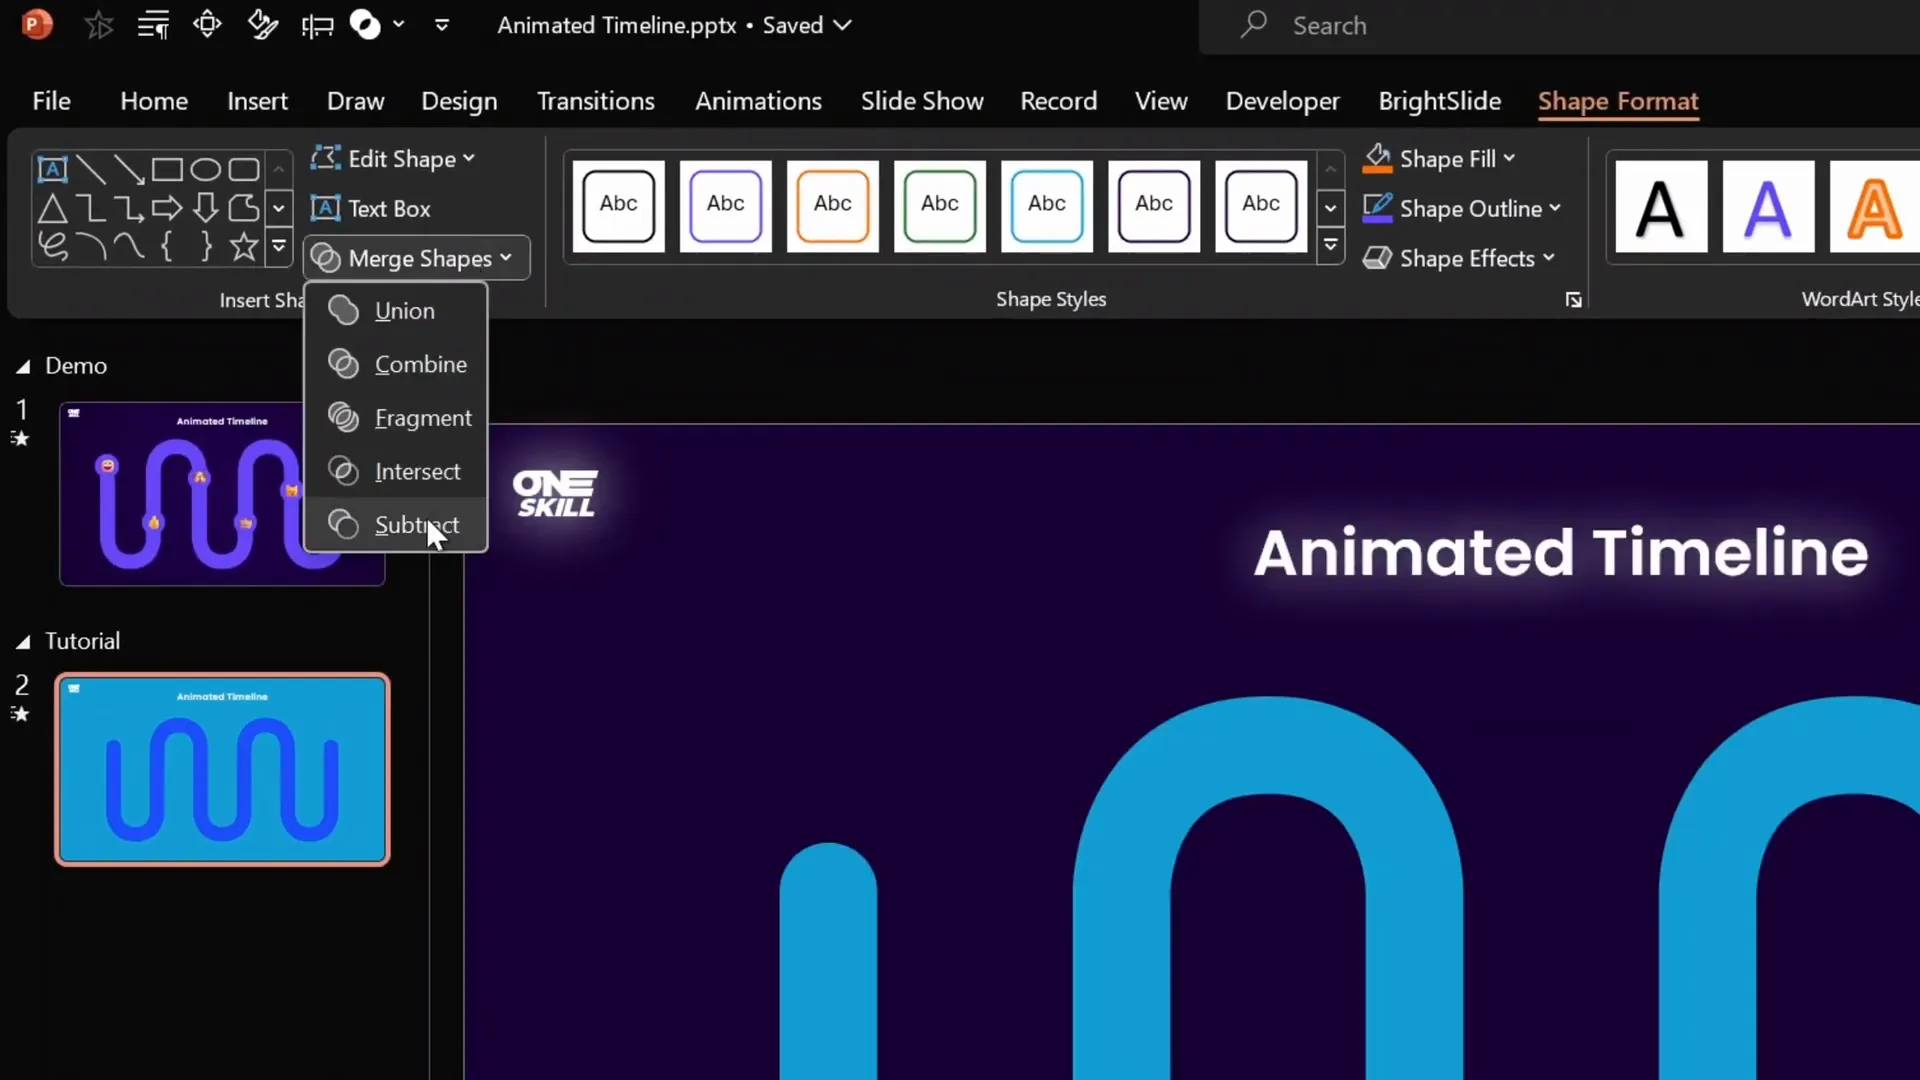
Creating a Masked Background for the Timeline
Next, we’ll create a mask to allow the timeline fill animation to appear through the wavy shape, giving a dynamic “fill” effect.
Building the Mask
- Insert a full-screen rectangle shape covering the entire slide.
- Send this rectangle to the back of the slide elements.
- Select the rectangle, hold Shift, and then select the timeline shape.
- Go to Shape Format > Merge Shapes > Subtract. This punches a hole in the rectangle in the shape of your timeline.
- Center this new mask on the slide.
This creates a see-through window in the shape of the timeline.
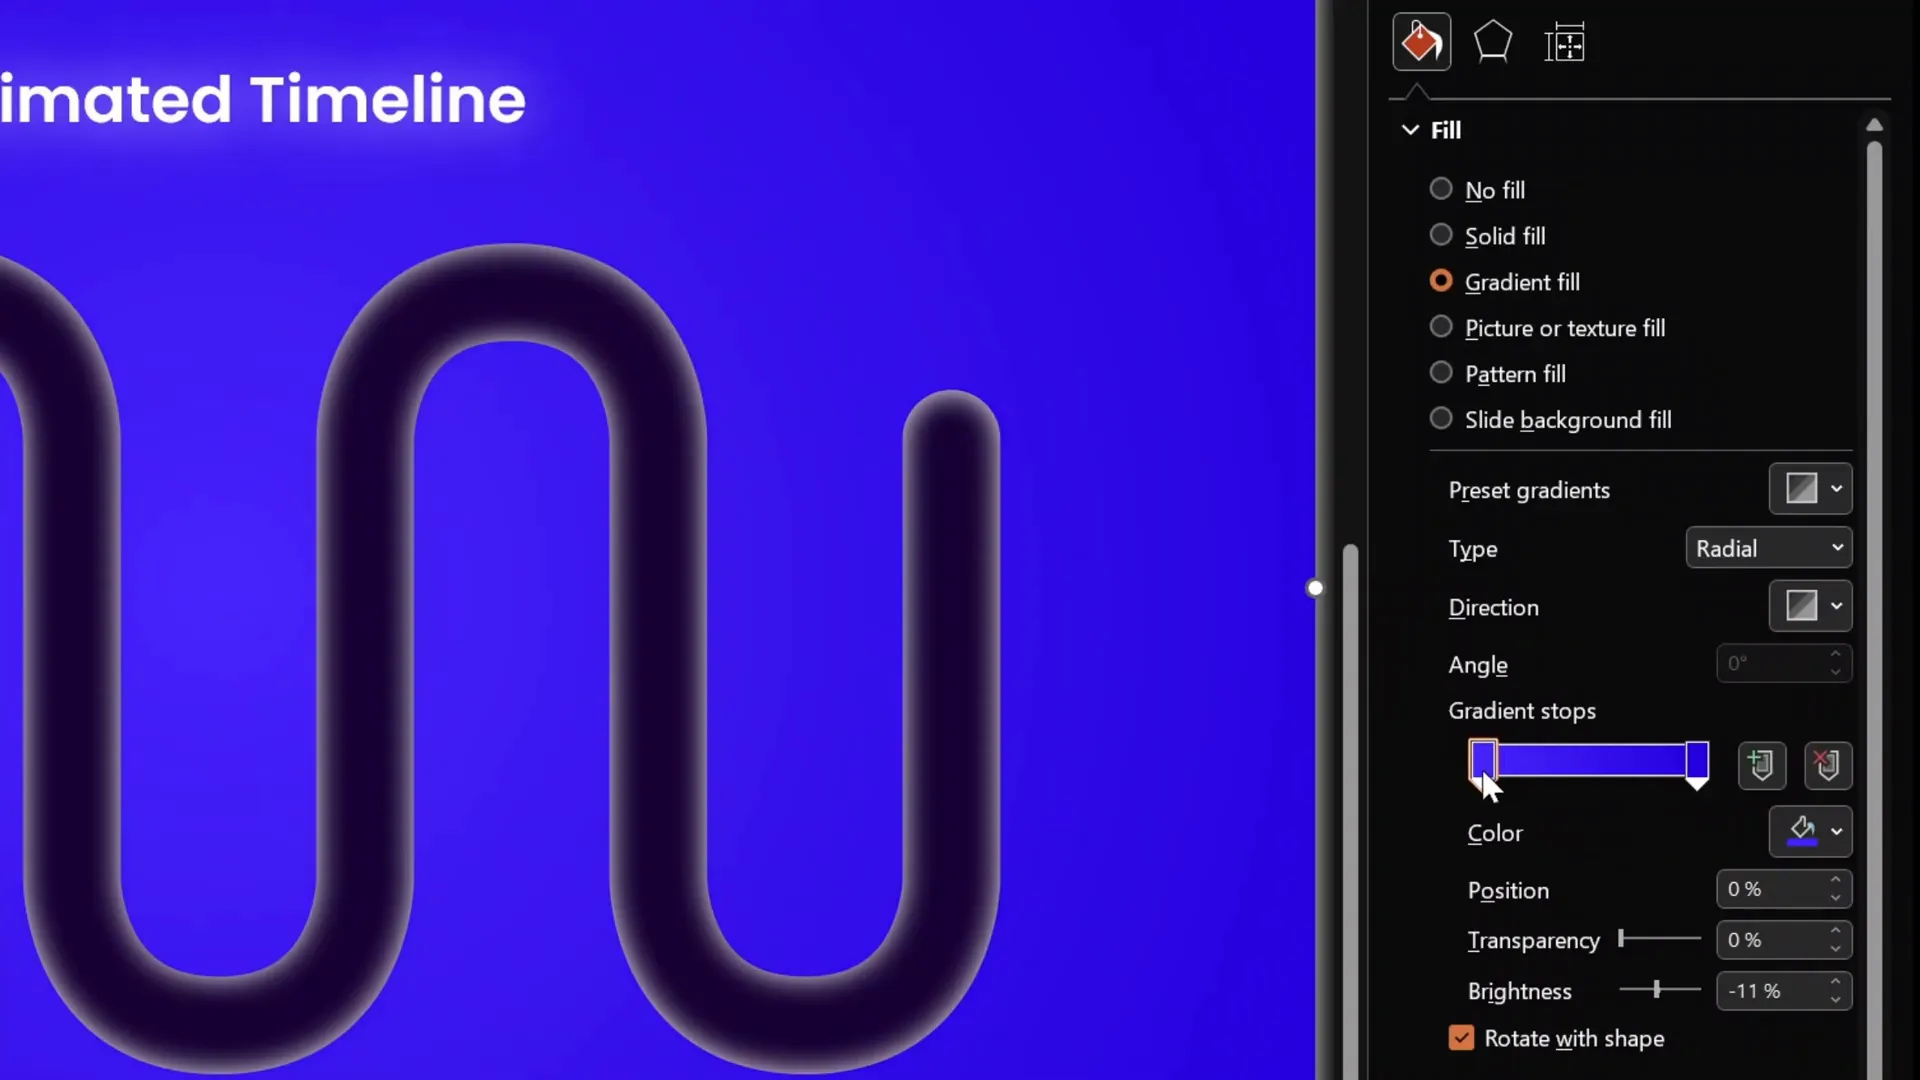
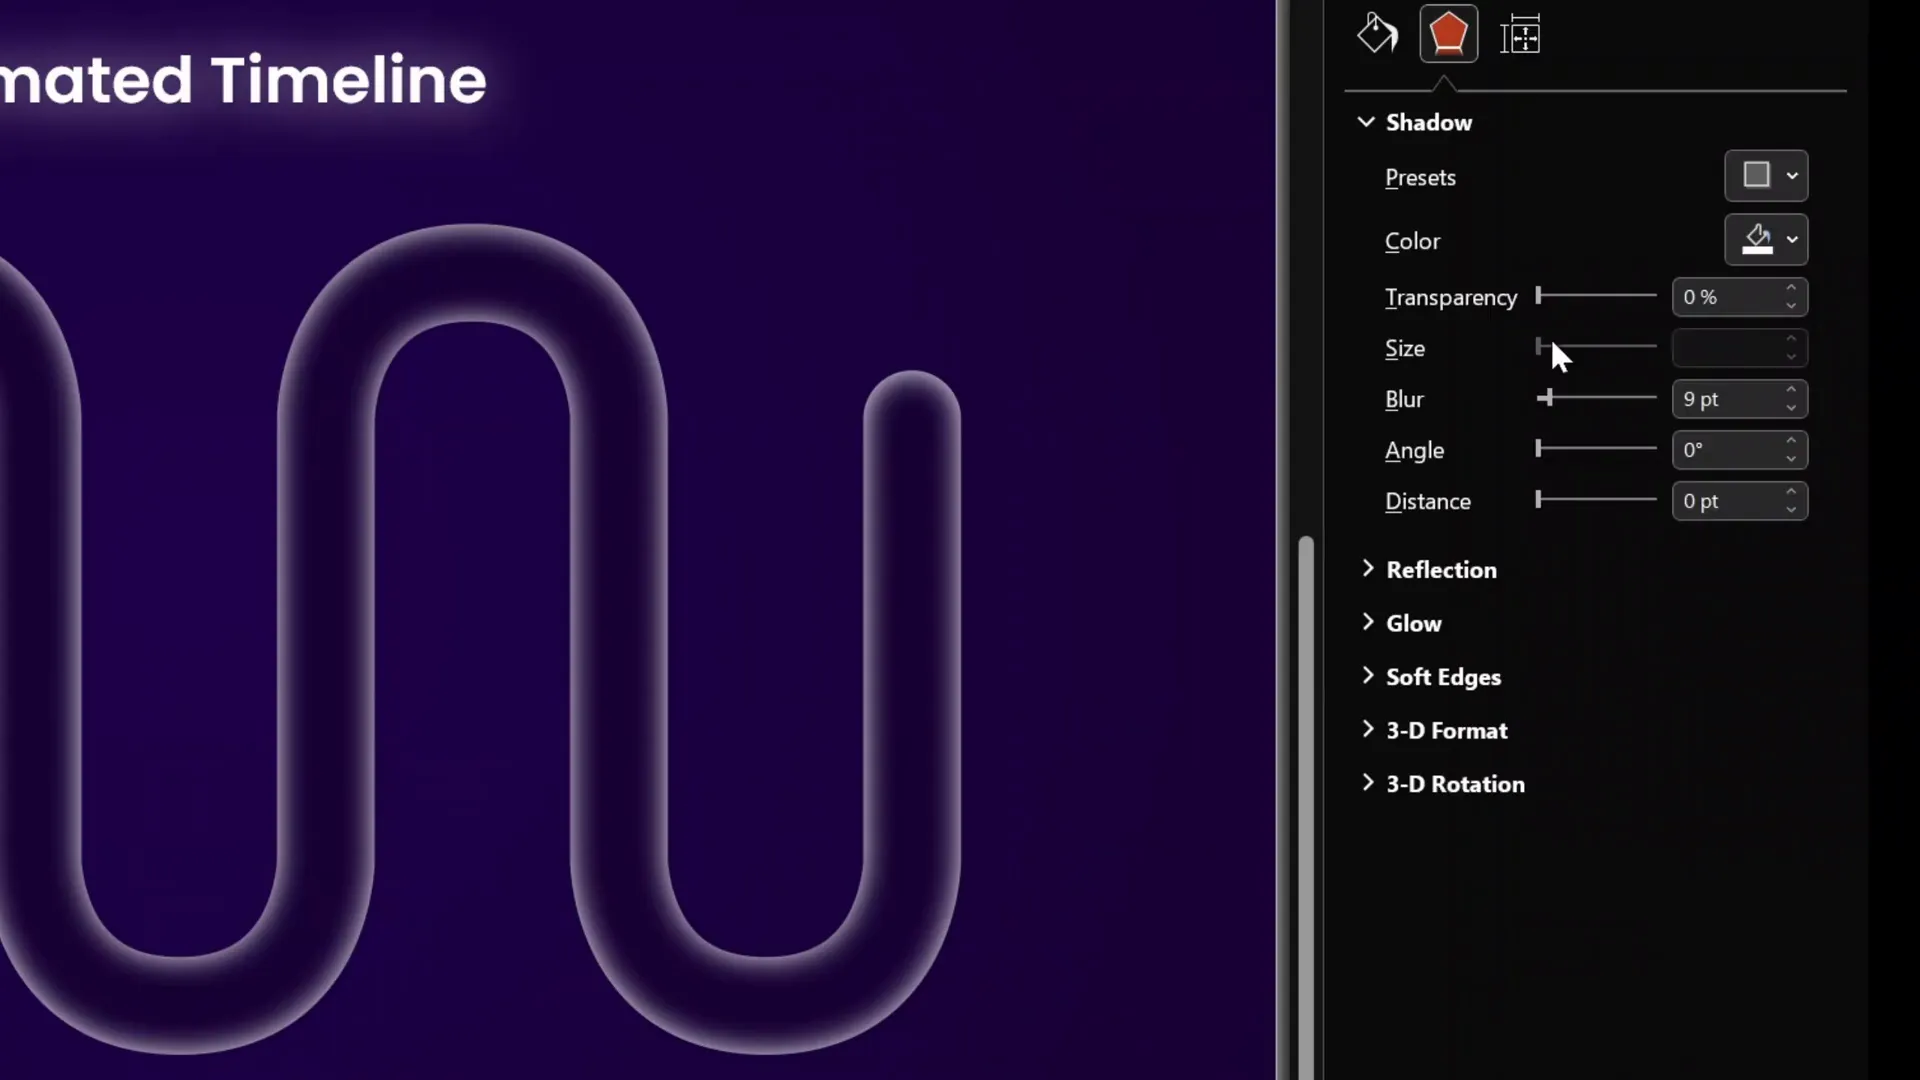
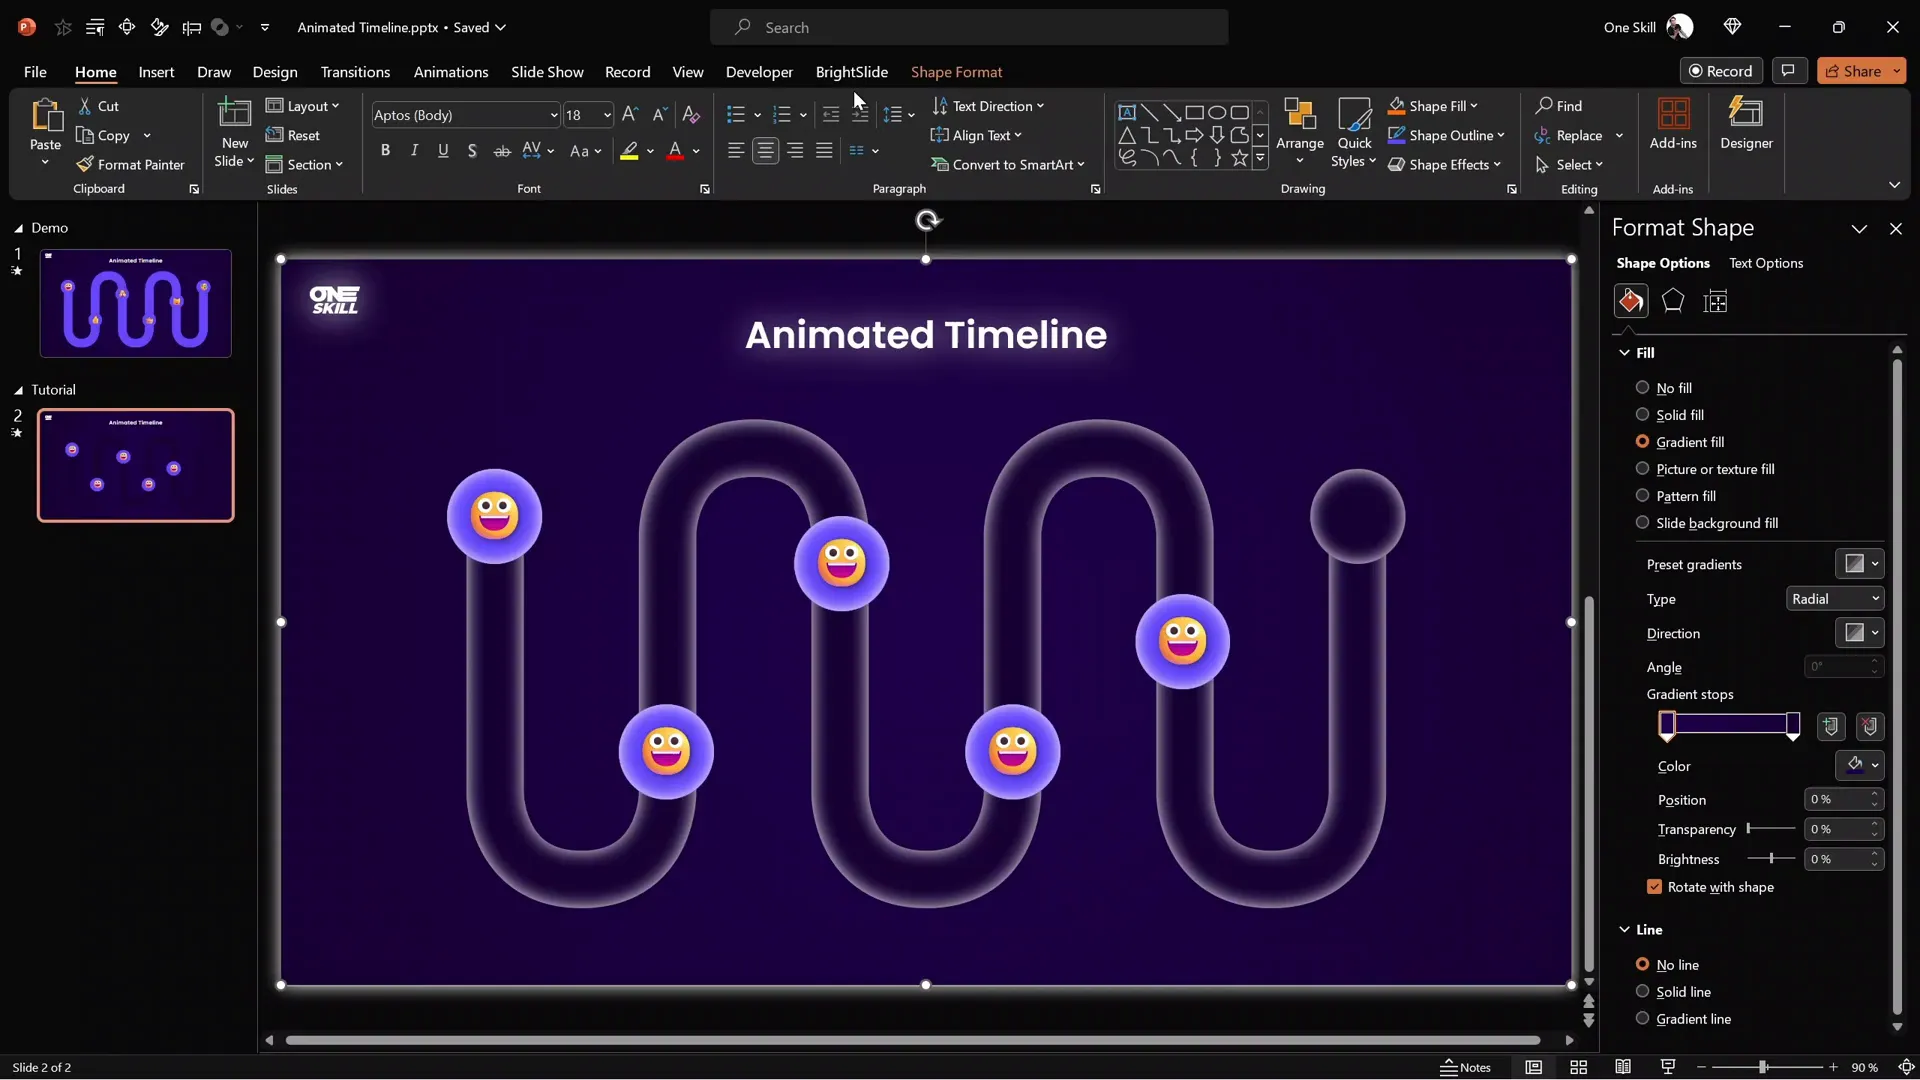
Adding a White Glow and Gradient Fill to the Mask
To enhance the mask’s appearance:
- Select the mask rectangle.
- Go to Shape Format > Shadow Settings.
- Apply a centered shadow preset with white color, zero transparency, size 100, and blur 15 points.
- Change the fill of the mask to a radial gradient.
- Remove extra gradient stops so only two remain.
- Set the left and right color stops to different shades of purple for a subtle glow effect.
This glow adds depth and emphasis to your timeline, making it visually appealing.
Designing Timeline Bubbles with Emojis
To mark milestones or events on the timeline, we’ll create circular bubbles. These bubbles can contain numbers, icons, or—as in this tutorial—cute emojis to add personality.
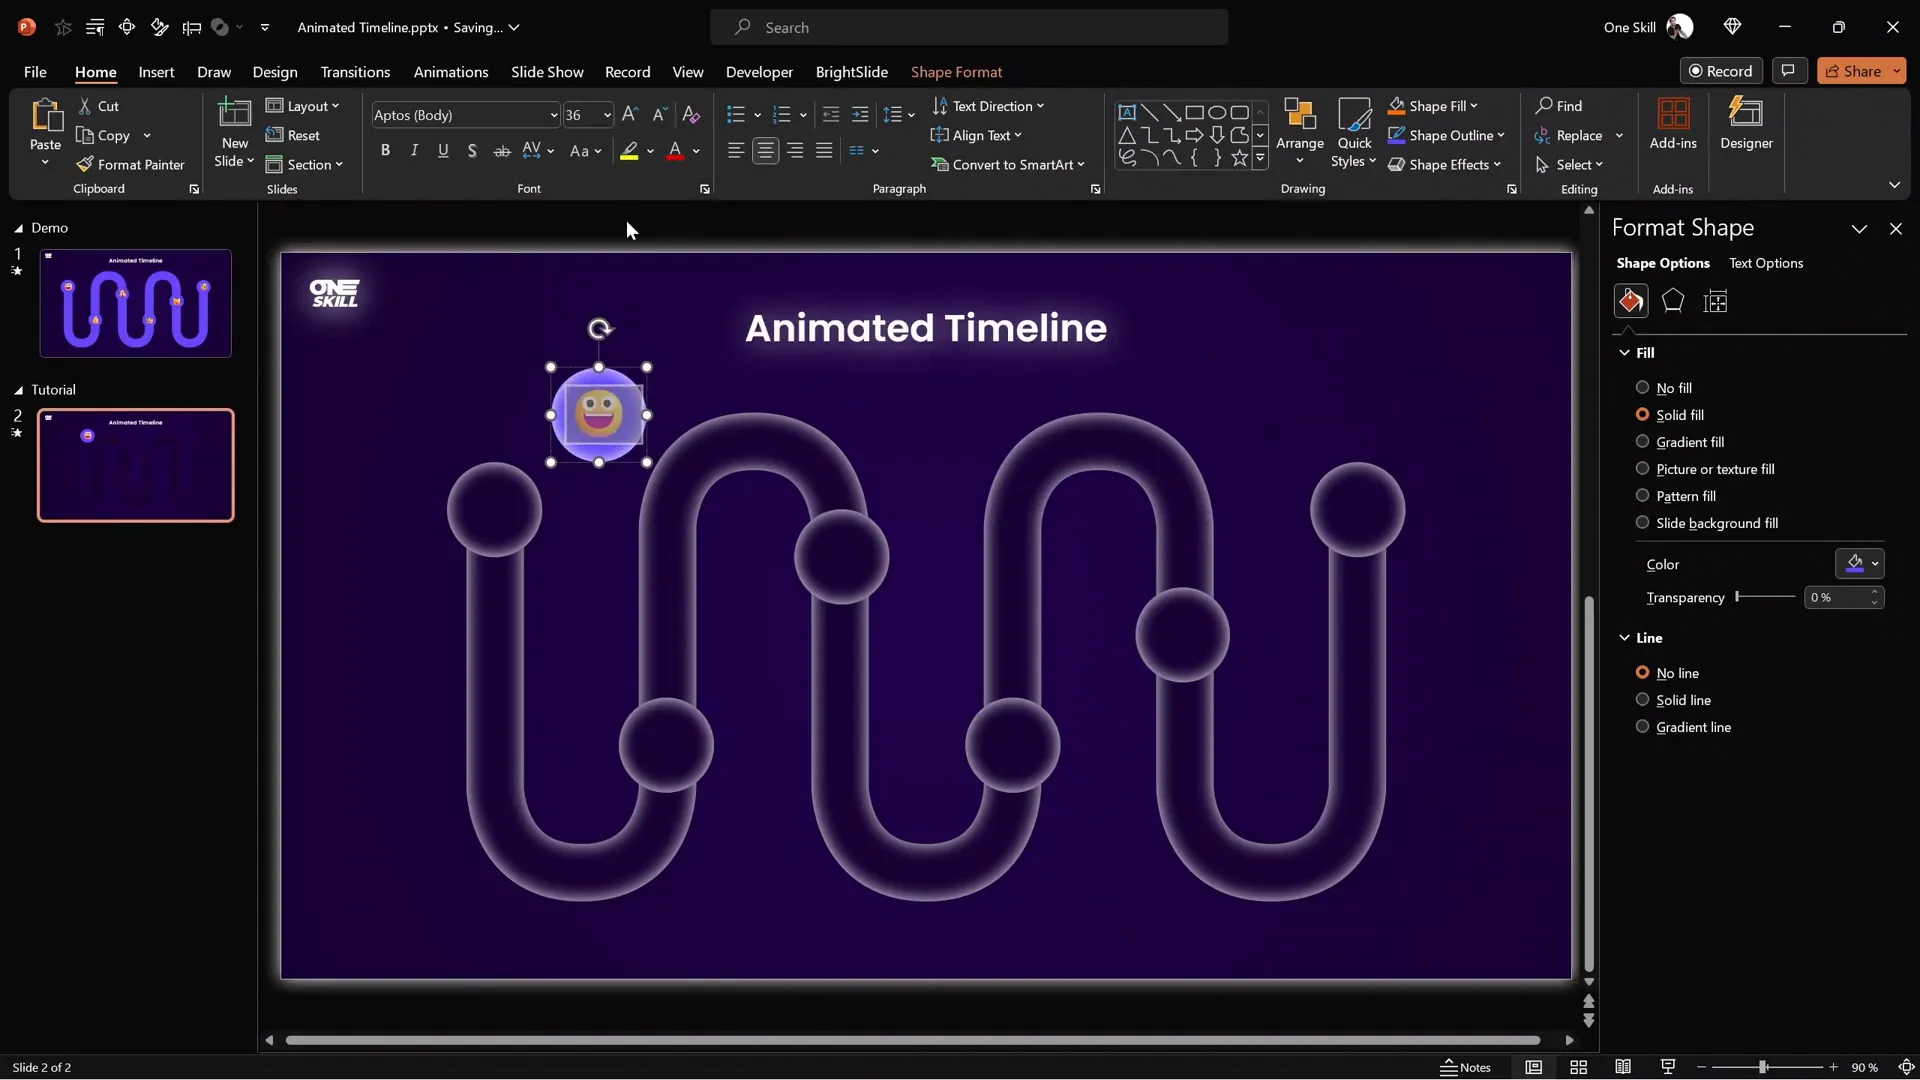
Creating the Inactive Bubbles
- Insert a perfect circle by holding Shift while drawing.
- Set the circle size to 2.5 cm for both height and width.
- Fill the circle with the same dark purple used in the background.
- Add a white inside shadow with zero transparency and 15 points blur.
This gives you the “inactive” bubble style: subtle but distinct.
Creating the Active Bubbles
- Duplicate the inactive bubble.
- Change the fill color to a bright purple (hex code #A43AFF).
- Double-click the bubble to add an emoji or text inside. On Windows, press Windows + . to open the emoji picker.
- Increase the emoji size and center-align the text.
- Add a subtle shadow to the emoji with 50% transparency and 10 points blur for better visibility.
- Align the active bubble exactly on top of the inactive one.
- Repeat this process to create pairs of inactive and active bubbles for all timeline points.
These active bubbles will visually indicate the current milestone as the timeline animates.
Duplicating and Aligning Bubbles
To speed up the layout process, duplicate your bubble pairs and position them evenly along the timeline path. You can use productivity add-ins like BrightSlide to quickly align and distribute shapes perfectly. It’s a free PowerPoint add-in that boosts your workflow with handy shortcuts.
Feel free to customize the emojis or replace them with numbers or icons that suit your presentation.

Animating the Timeline Fill Effect
Now comes the exciting part: animating the timeline fill using PowerPoint’s Draw Replay animation combined with the mask we created earlier.
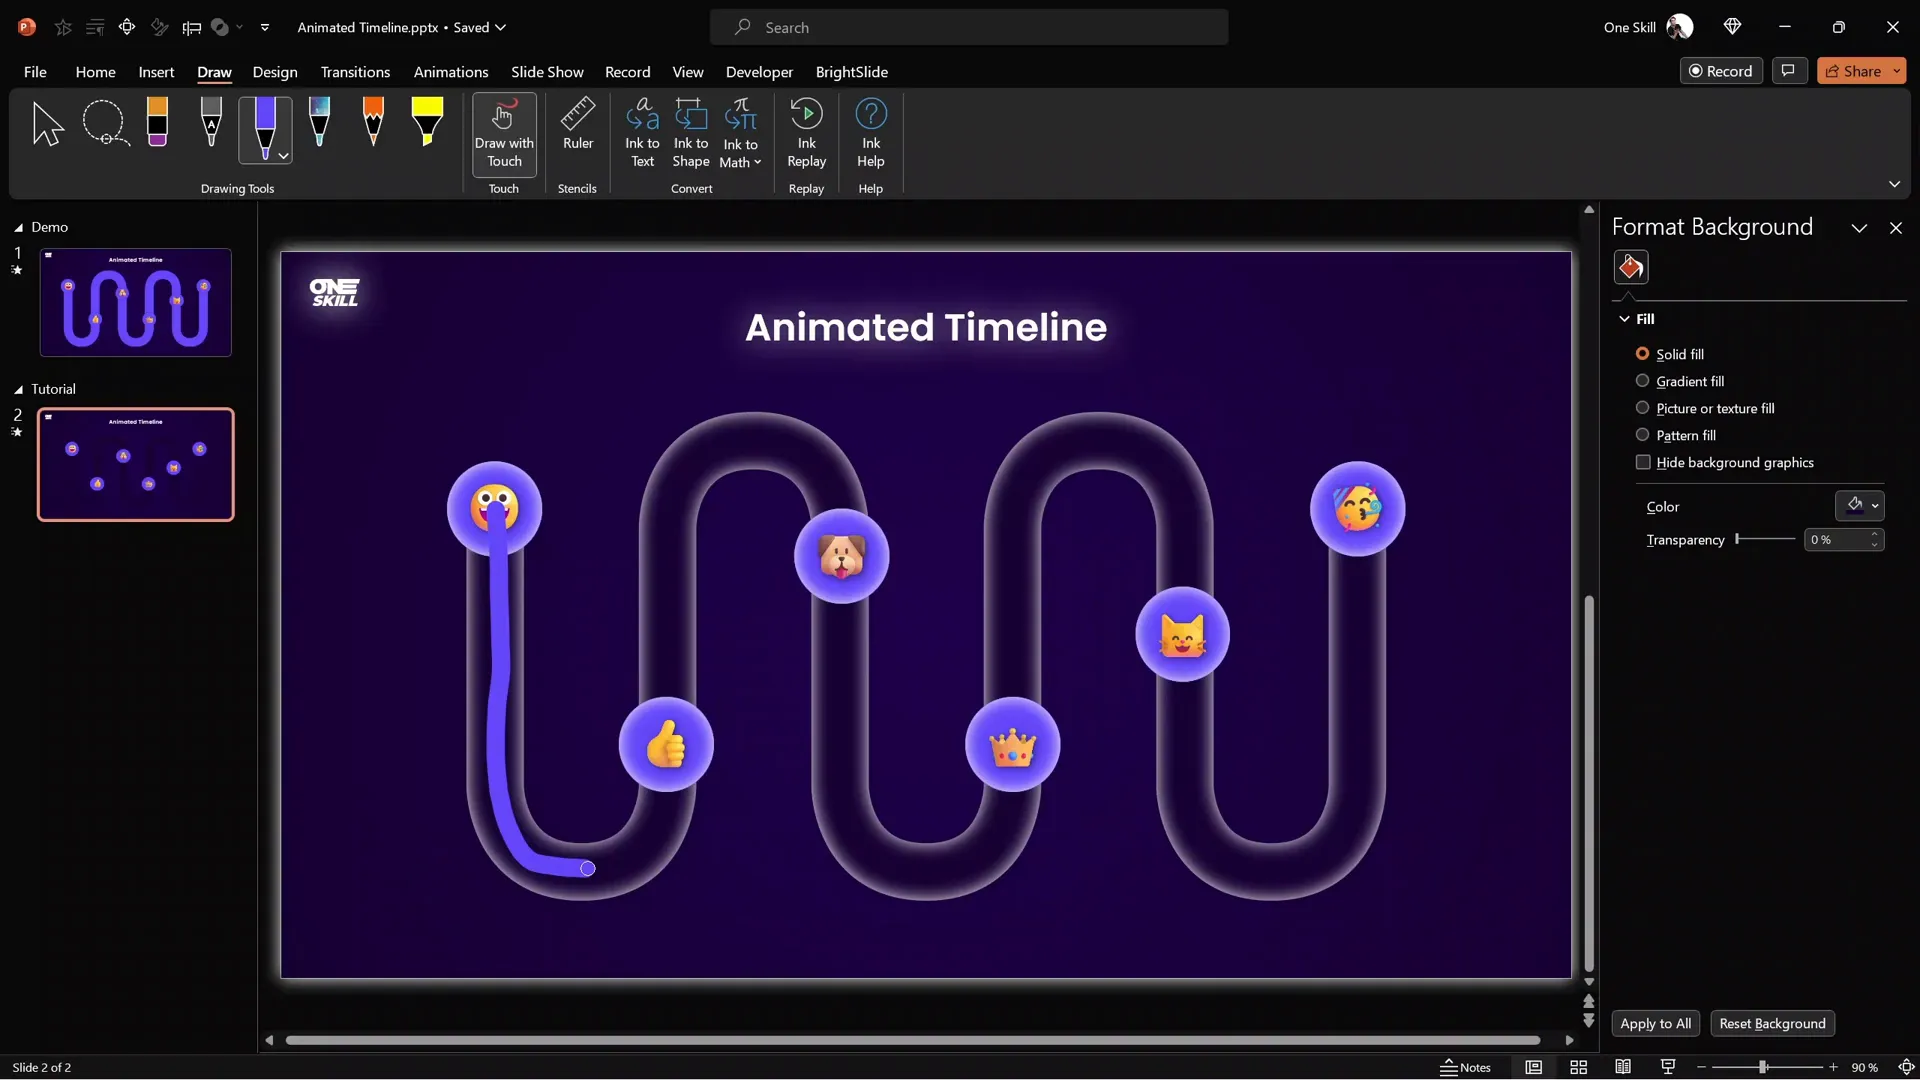
Drawing the Animated Path Segments
- Use the Draw Tool (found under the Draw tab) and select the pen.
- Set the pen color to the same bright purple as the active bubbles (hex #A43AFF).
- Draw a freehand line closely following the first segment of the timeline path between two bubbles.
- If you’re unhappy with the line, use Ctrl + Z to undo and try again.
- Select the drawn path, increase the width to 45 points so it covers the timeline path fully.
- Send the path to the back behind the bubbles.
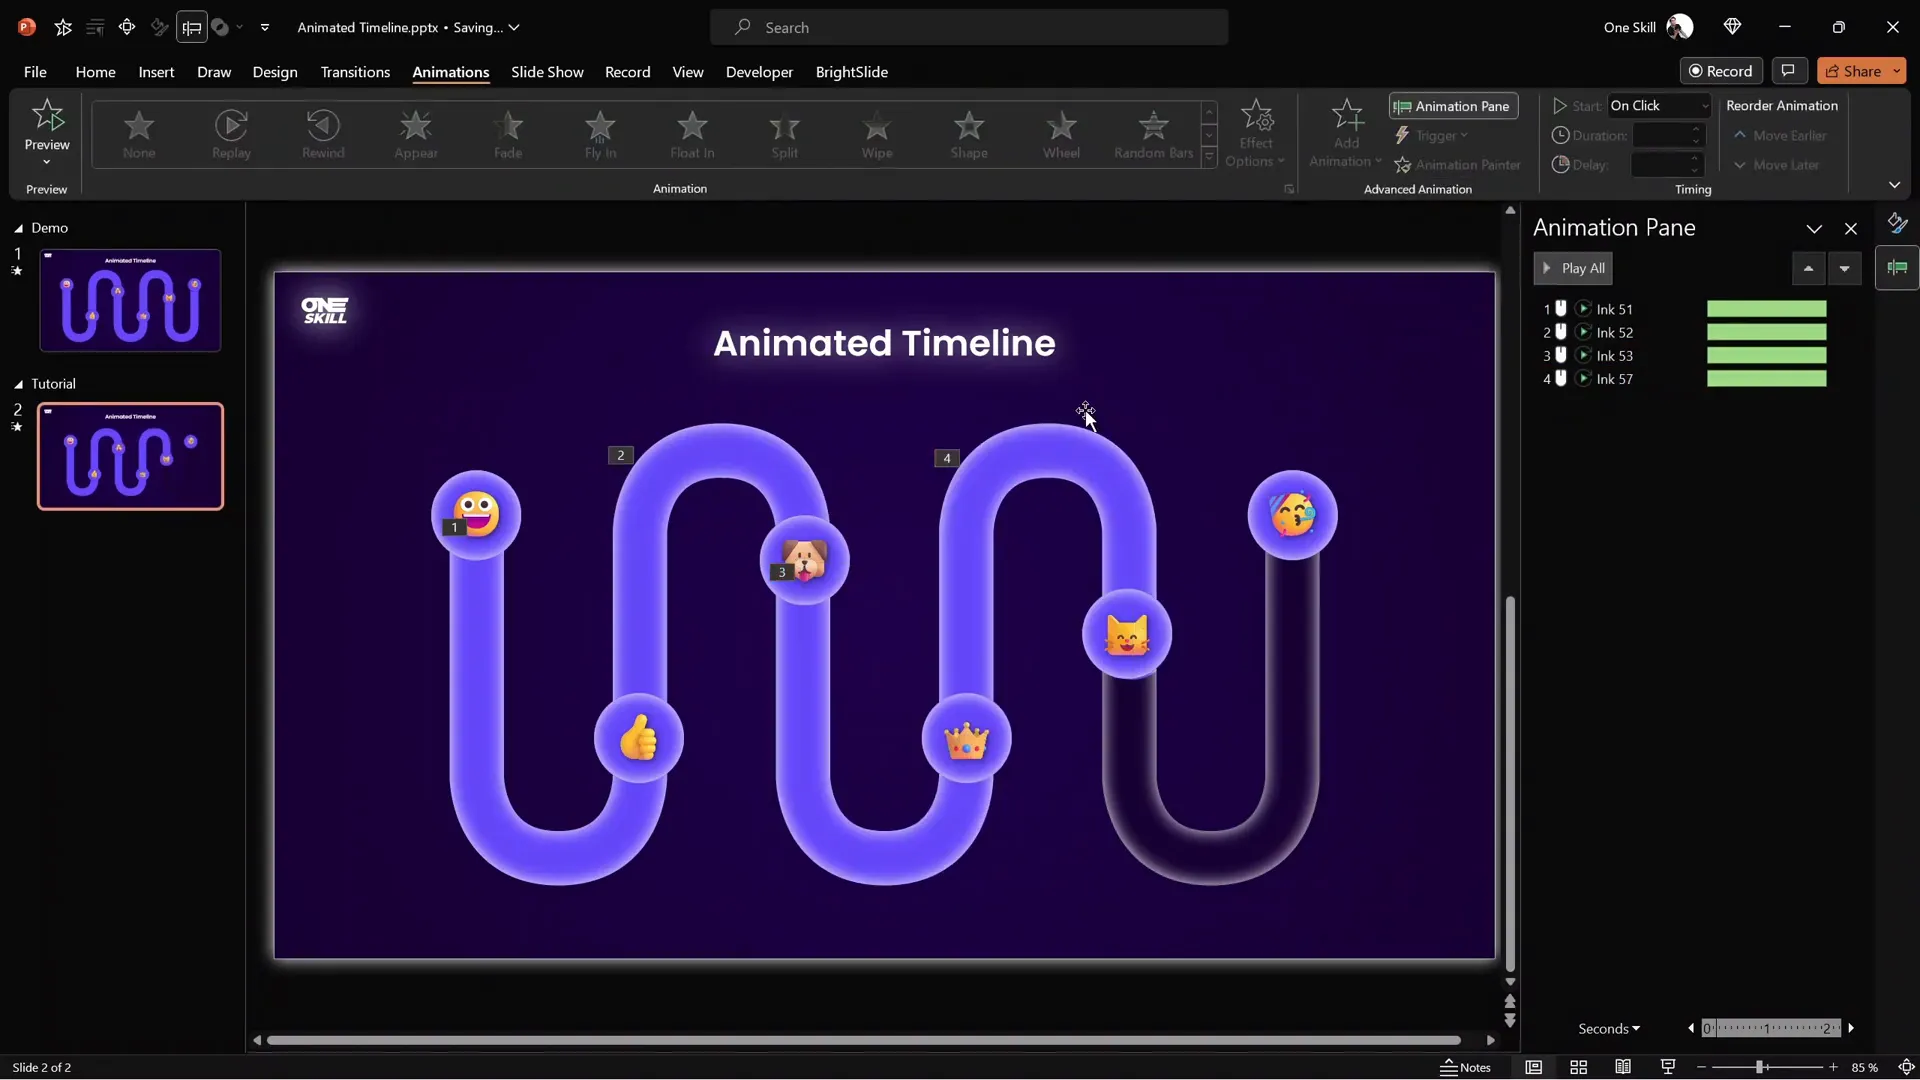
Applying the Draw Replay Animation
- With the path selected, go to the Animations tab.
- Add a Draw Replay animation.
- Set the duration to 2 seconds for a smooth fill effect.
- Preview the animation to see the bright purple fill “drawing” itself along the timeline.
This animation, combined with the mask, creates the illusion of the timeline filling up dynamically.

Duplicating Animation for Remaining Segments
Repeat the drawing and animation process for each segment of the timeline:
- Draw the next segment path using the same pen color.
- Copy the formatting of the first path (Ctrl + Shift + C) and paste it to the new path (Ctrl + Shift + V).
- Send the new path to the back.
- Use the Animation Painter to copy the animation effect from the first path to the new one.
This workflow saves time and keeps all timeline segments consistent.
Animating the Emoji Bubbles
To complete the interactive feel, let’s animate the bright emoji bubbles with entrance animations.
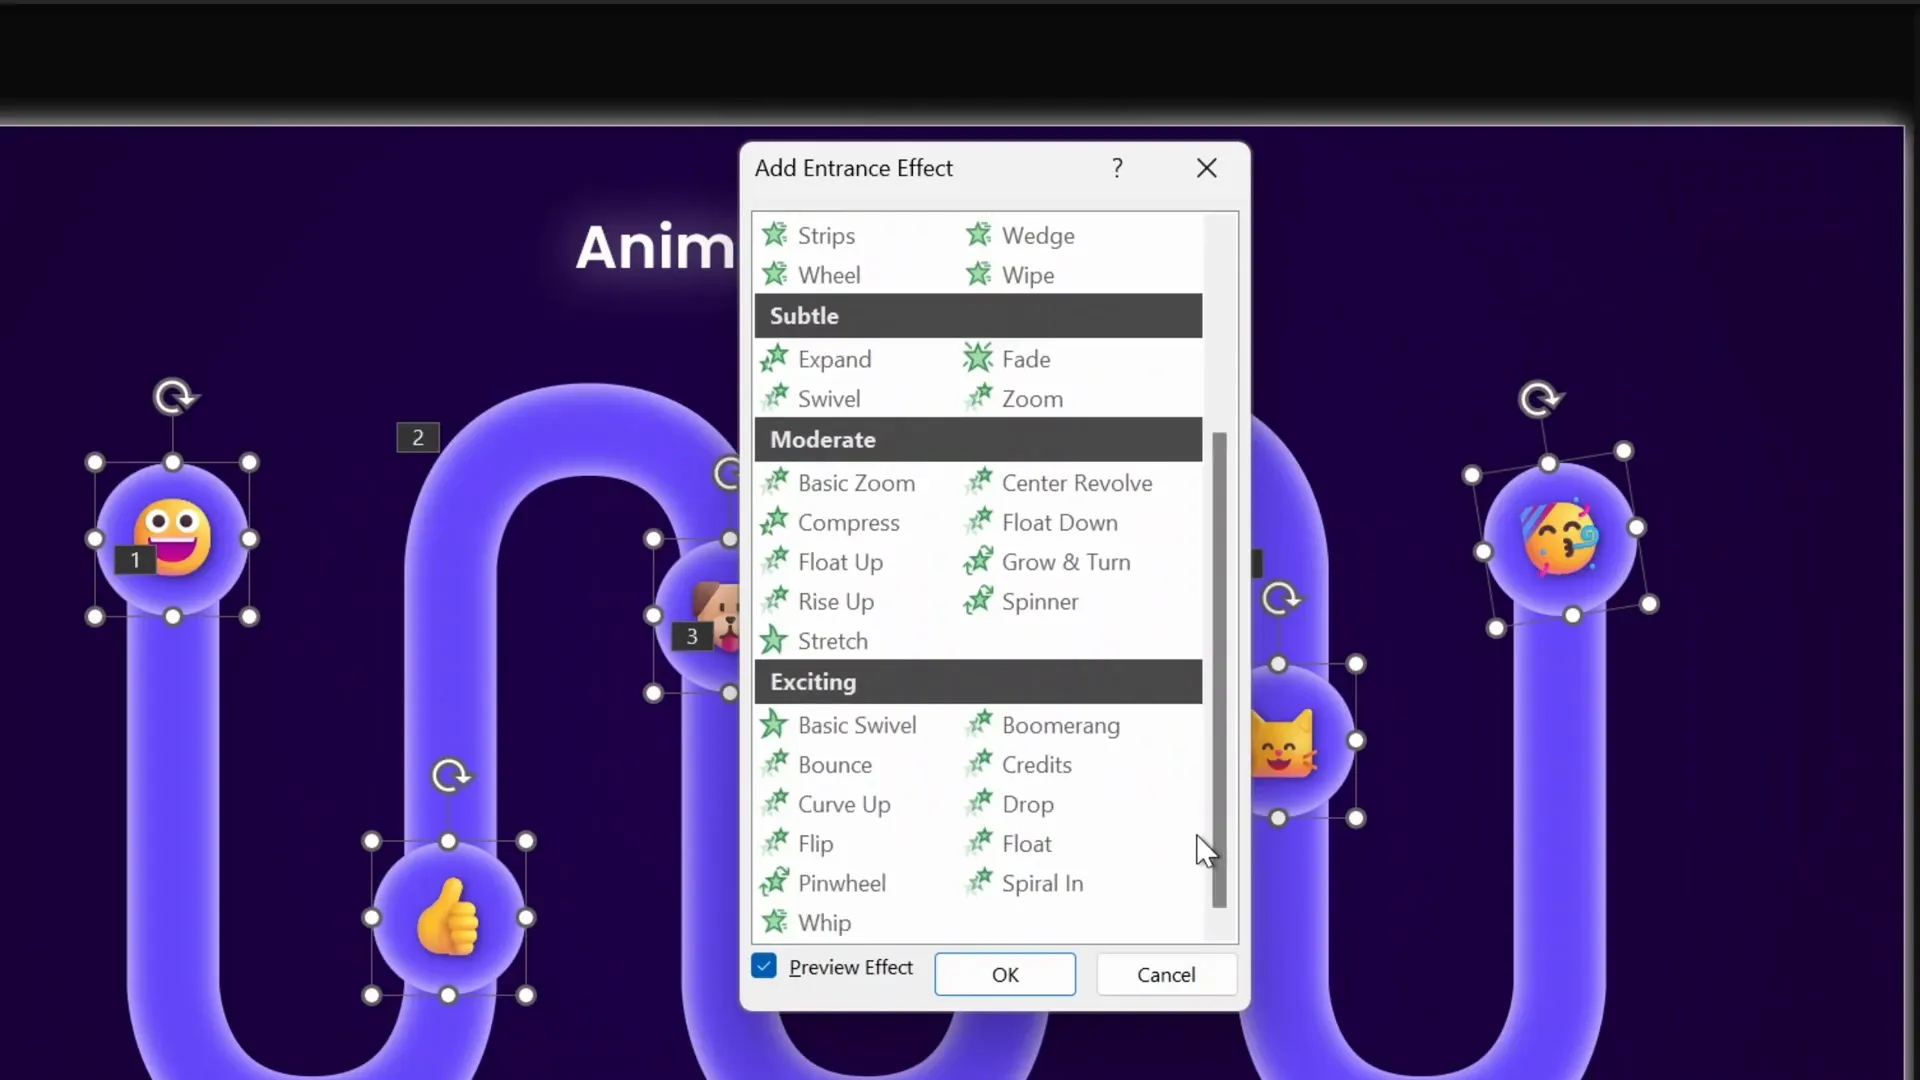
Adding Spinner Entrance Animations
- Select all the active bright bubbles with emojis.
- Go to Add Animation > More Entrance Effects.
- Choose the Spinner animation and click OK.
- Set the animation duration to a fast 0.4 seconds.
- Arrange the animations so the first spinner starts at the top of the animation pane.
- Set the rest to start With Previous and place them between the timeline fill animations for smooth sequencing.
- Align spinner animations to end with the corresponding timeline fill animations for synchronized effect.
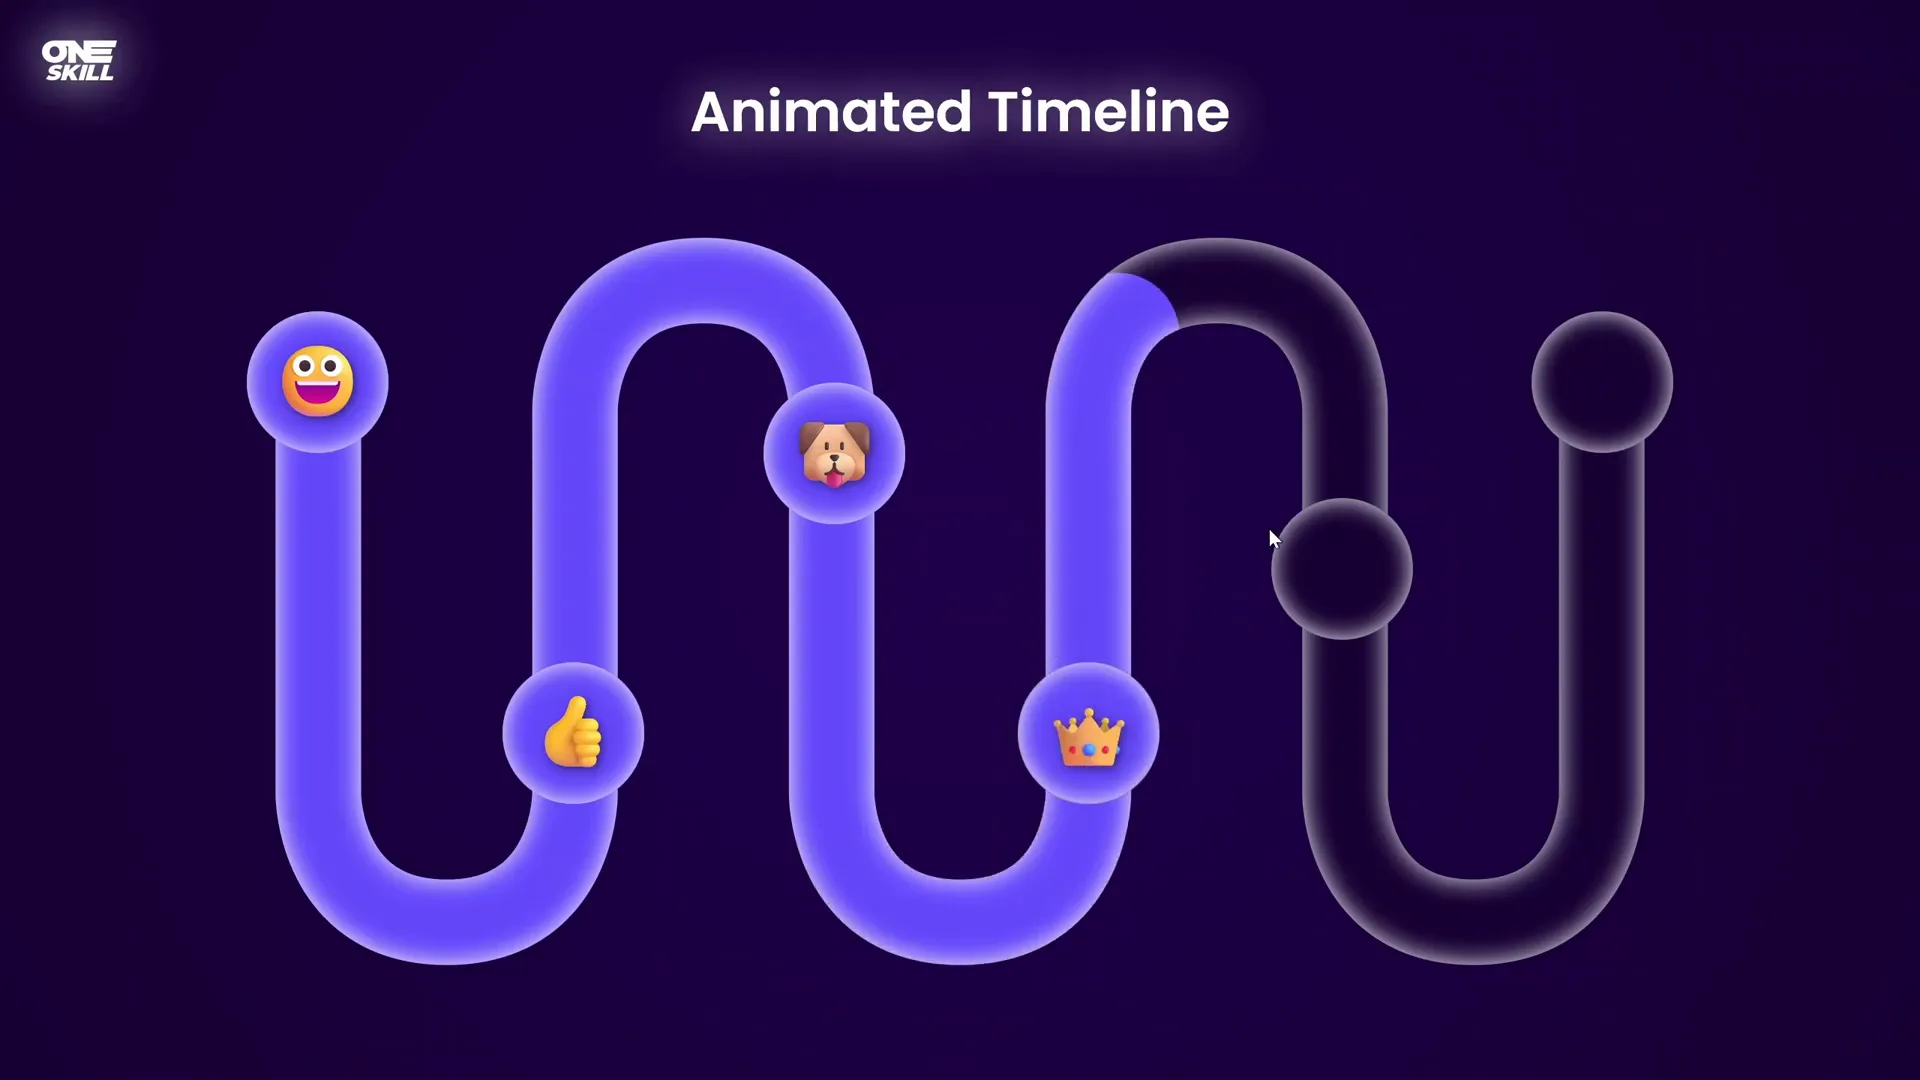
Previewing the Full Animation Sequence
Run your slideshow and test the animation sequence:
- Click once: the first emoji bubble appears with a spin effect.
- Click again: the first timeline segment fills with bright purple, and the second emoji bubble appears.
- Subsequent clicks continue this pattern until the entire timeline is filled and all bubbles are revealed.
The result is a smooth, engaging animated timeline that guides your audience through each step effortlessly.
Taking Your Timeline Animation to the Next Level
If you’re feeling adventurous and want to make your timeline interactive, you can use Animation Triggers in PowerPoint. This advanced technique allows you to trigger timeline fill animations by clicking specific emoji bubbles, creating a highly interactive experience.
While this tutorial doesn’t cover triggers in depth, mastering them can significantly enhance your PowerPoint skills.
For those eager to become PowerPoint animation pros, I highly recommend the Parpone Animation Mastery Course—a comprehensive step-by-step program to unlock all animation secrets. Use coupon code oneskill100 to save $100 during checkout!
Summary: What You’ve Learned
- How to set up a visually appealing PowerPoint slide with a custom background.
- Using Figma to create a smooth, wavy timeline shape and importing it into PowerPoint.
- Creating a mask with a white glow and gradient fill to serve as the timeline window.
- Designing inactive and active timeline bubbles with emojis and shadows for depth.
- Animating the timeline fill using Draw Replay animations for dynamic filling effects.
- Adding spinner entrance animations to emoji bubbles for lively milestones.
- Tips on speeding up workflow using PowerPoint add-ins like BrightSlide.
- Ideas for making your timeline interactive with animation triggers and further learning resources.
With these steps, you can now create stunning animated timelines that not only look professional but also engage your audience with smooth, synchronized animations.
Frequently Asked Questions (FAQ)
Can I create the wavy timeline shape directly in PowerPoint without using Figma?
While it is possible to create custom shapes in PowerPoint, complex smooth wavy shapes are challenging and time-consuming to make. Using Figma simplifies this process by allowing precise control with the pen and bend tools. You can then export the shape as an SVG and import it into PowerPoint for editing.
Is Figma free to use?
Yes! Figma offers a free plan that is perfect for individual users. You can create, edit, and export shapes without any cost.
What is the purpose of converting the SVG stroke to an outline shape?
Converting the stroke to an outline shape changes the timeline from a simple line path to a filled shape. This is necessary to create the mask effect and to manipulate the shape points in PowerPoint.
How do the Draw Replay animations work?
The Draw Replay animation animates the drawing of a freeform path or line. By drawing thick colored lines along the timeline path and applying this animation, it creates the illusion that the timeline is filling up progressively.
Can I customize the emojis or use other icons in the bubbles?
Absolutely! You can insert any text, numbers, icons, or emojis inside the bubbles to suit your presentation style and content.
What is BrightSlide, and how does it help?
BrightSlide is a free PowerPoint add-in that adds dozens of productivity shortcuts for aligning, distributing, and formatting objects quickly. It helps speed up tasks like aligning bubbles evenly along your timeline.
How can I make this timeline interactive?
By using animation triggers in PowerPoint, you can make timeline segments animate only when clicking specific bubbles. This advanced technique adds interactivity but requires a good understanding of PowerPoint’s animation pane.
Where can I learn more about advanced PowerPoint animations?
The Parpone Animation Mastery Course is an excellent resource that teaches animation techniques step by step, from basics to advanced tricks. Using the coupon oneskill100 gives you a $100 discount.
Final Thoughts
Creating an animated timeline in PowerPoint is a fantastic way to add professionalism and engagement to your presentations. By combining free tools like Figma with PowerPoint’s animation features, you can build visually stunning timelines that tell your story effectively.
Remember, the key to mastering these techniques is practice and experimentation. Try customizing colors, shapes, and animations to match your brand and presentation style.
Happy designing, and may your presentations always captivate and inspire!
Check out the full video: Create a STUNNING Animated Timeline in PowerPoint! ✨ Step-by-Step


