A Step-by-Step Tutorial
If you are looking to elevate your presentations with captivating visuals, mastering PowerPoint video effects is a game-changer. In this comprehensive tutorial, you’ll learn how to create an epic video effect where text appears to rise from behind mountains in a video background, then disappears behind those mountains—all inside Microsoft PowerPoint.
This effect combines video layering, custom masking, and animations to create an immersive and professional presentation experience. Whether you’re a PowerPoint enthusiast or a professional presenter, this guide will walk you through every step to achieve this effect seamlessly.
Table of Contents
- Getting Started: Preparing Your PowerPoint and Video
- The Secret Behind the Effect: Layering Two Videos
- Method 1: Masking the Video Using PowerPoint’s Freeform Shape Tool
- Method 2: Precise Masking Using Photopea and SVG Vector Shapes
- Adding and Styling Text Between Video Layers
- Animating Text to Rise from Behind the Mountains
- Final Touches and Tips for a Polished Presentation
- Frequently Asked Questions about PowerPoint Video Effects
Getting Started: Preparing Your PowerPoint and Video
Before diving into animations and effects, the foundation of this tutorial is a well-chosen video and a blank PowerPoint slide to build upon.
Step 1: Open PowerPoint and Create a Blank Slide
Start by launching Microsoft PowerPoint (Office 365 is recommended for best compatibility). Create a new blank slide where you will build your effect from scratch.
Step 2: Find a Suitable Video Background
The key to this effect is using a video where the foreground (mountains) is static and the background (sky) changes over time. For this example, the presenter sourced a stunning time-lapse video of mountains and sky from Pexels.com. The video is about 17 seconds long, which is ideal for looping and animation.
Choose a video resolution that fits your slide size; Full HD (1920×1080) works well for most presentations.
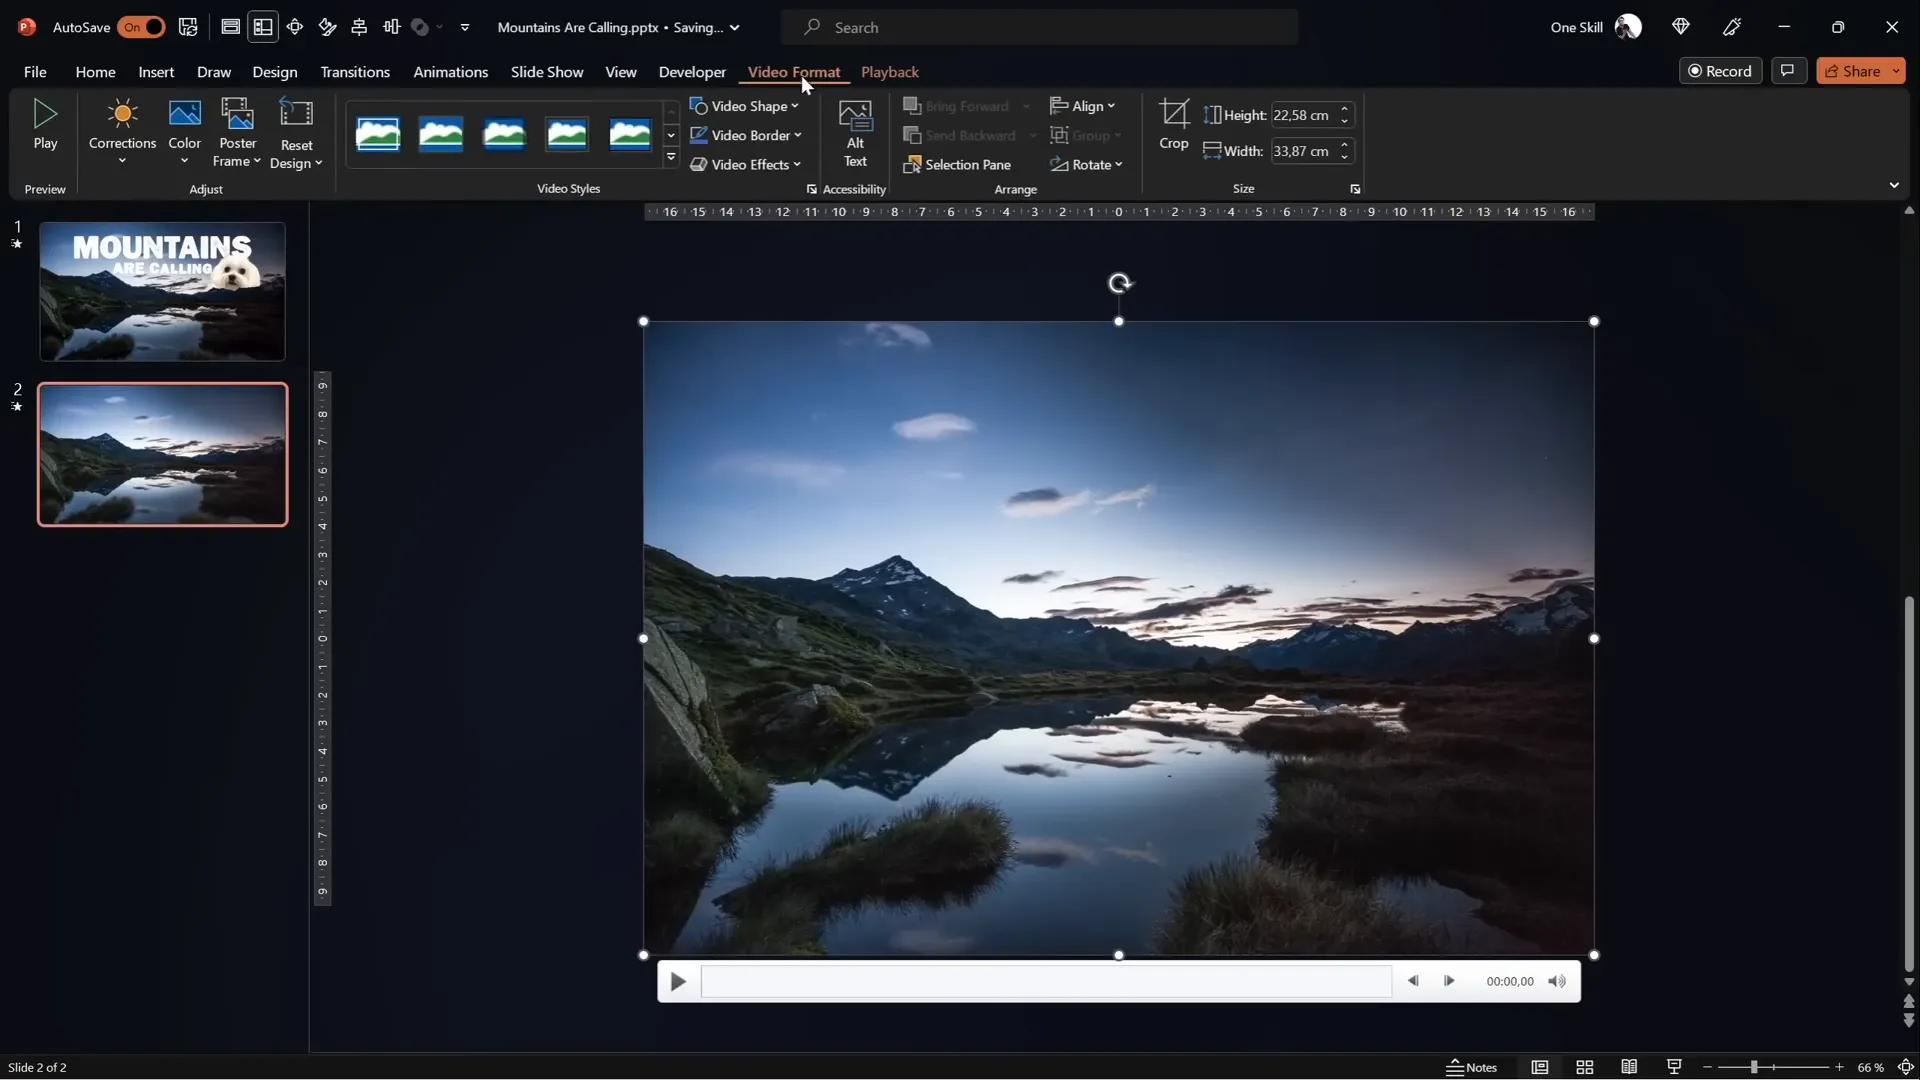
Step 3: Insert and Resize the Video in PowerPoint
Drag and drop your video file onto the blank slide. Center it both horizontally and vertically. To cover the entire slide:
- Hold down the Ctrl and Shift keys while dragging a corner handle of the video to resize from the center.
- Crop the video’s top and bottom edges to match the slide’s aspect ratio using the Crop tool.
- Finalize cropping by clicking outside the video.
Step 4: Adjust Video Brightness for Better Text Contrast
To make white text stand out against the video, reduce the brightness slightly:
- Open the Format Video panel.
- Set brightness to -5% (adds a subtle darkening effect).
Step 5: Set Video Playback Options
Configure the video to play automatically and loop indefinitely:
- Set Start to Automatically.
- Enable Loop until Stopped.
This ensures your video plays smoothly during your presentation without manual intervention.
Step 6: Clean Up Animation Triggers
PowerPoint automatically adds play animations and triggers when inserting videos. In the Animation Pane:
- Remove any unnecessary triggers.
- Set the play animation to start With Previous to play automatically.
The Secret Behind the Effect: Layering Two Videos
The magic of the rising and disappearing text effect comes from using two identical video clips stacked on top of each other. Here’s how it works:
- Background Video: This plays the full video, including sky and mountains.
- Front Video: This is a duplicate of the background video but cropped or masked to show only the mountains (no sky).
By placing text between these two video layers, the text appears to rise from behind the mountains and then disappear behind them again.
Step 1: Duplicate the Video
Duplicate your background video by copying and pasting it directly on the slide. Align the duplicate perfectly over the original.
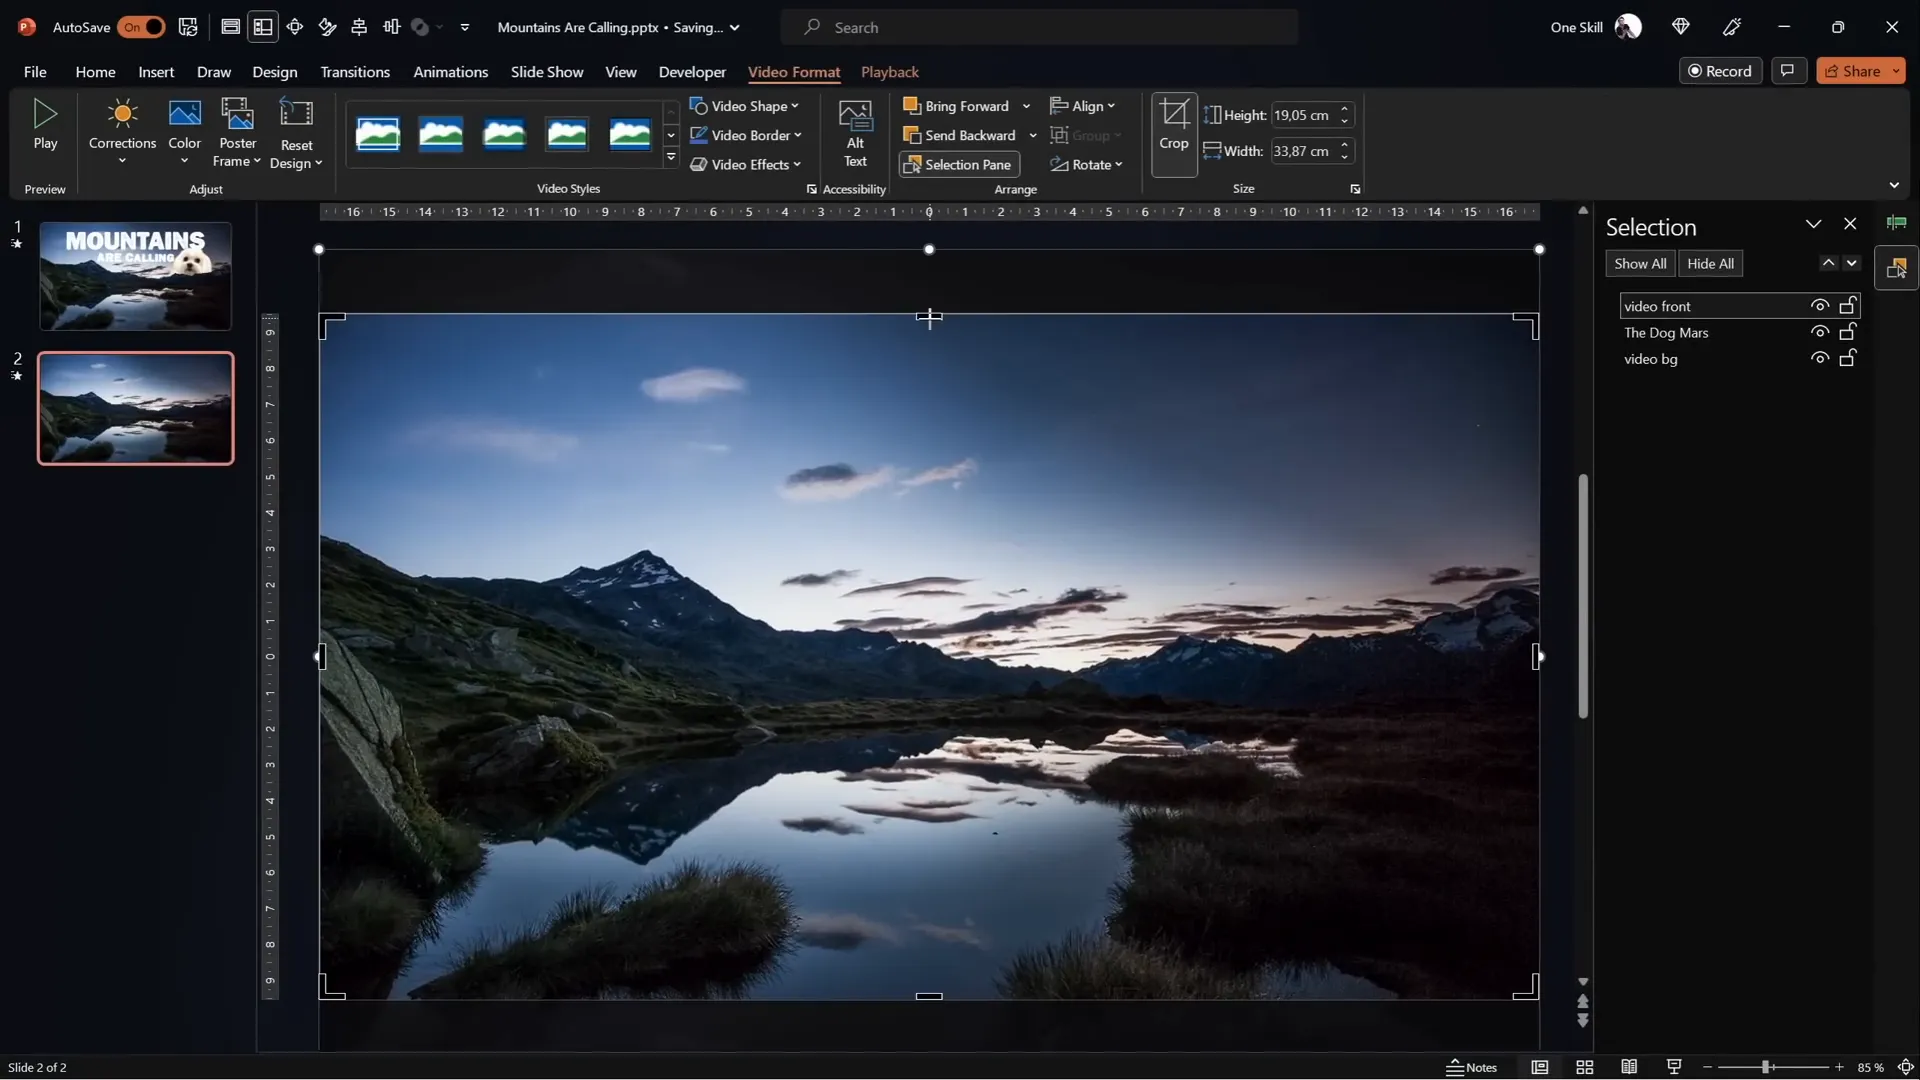
Step 2: Rename the Videos for Clarity
- Name the bottom video Video Background.
- Name the top video Video Front.
Step 3: Crop the Front Video to Remove the Sky
Initially, crop the top straight off the front video to remove the sky, revealing the mountains. This creates a basic layered effect with text sandwiched in between.
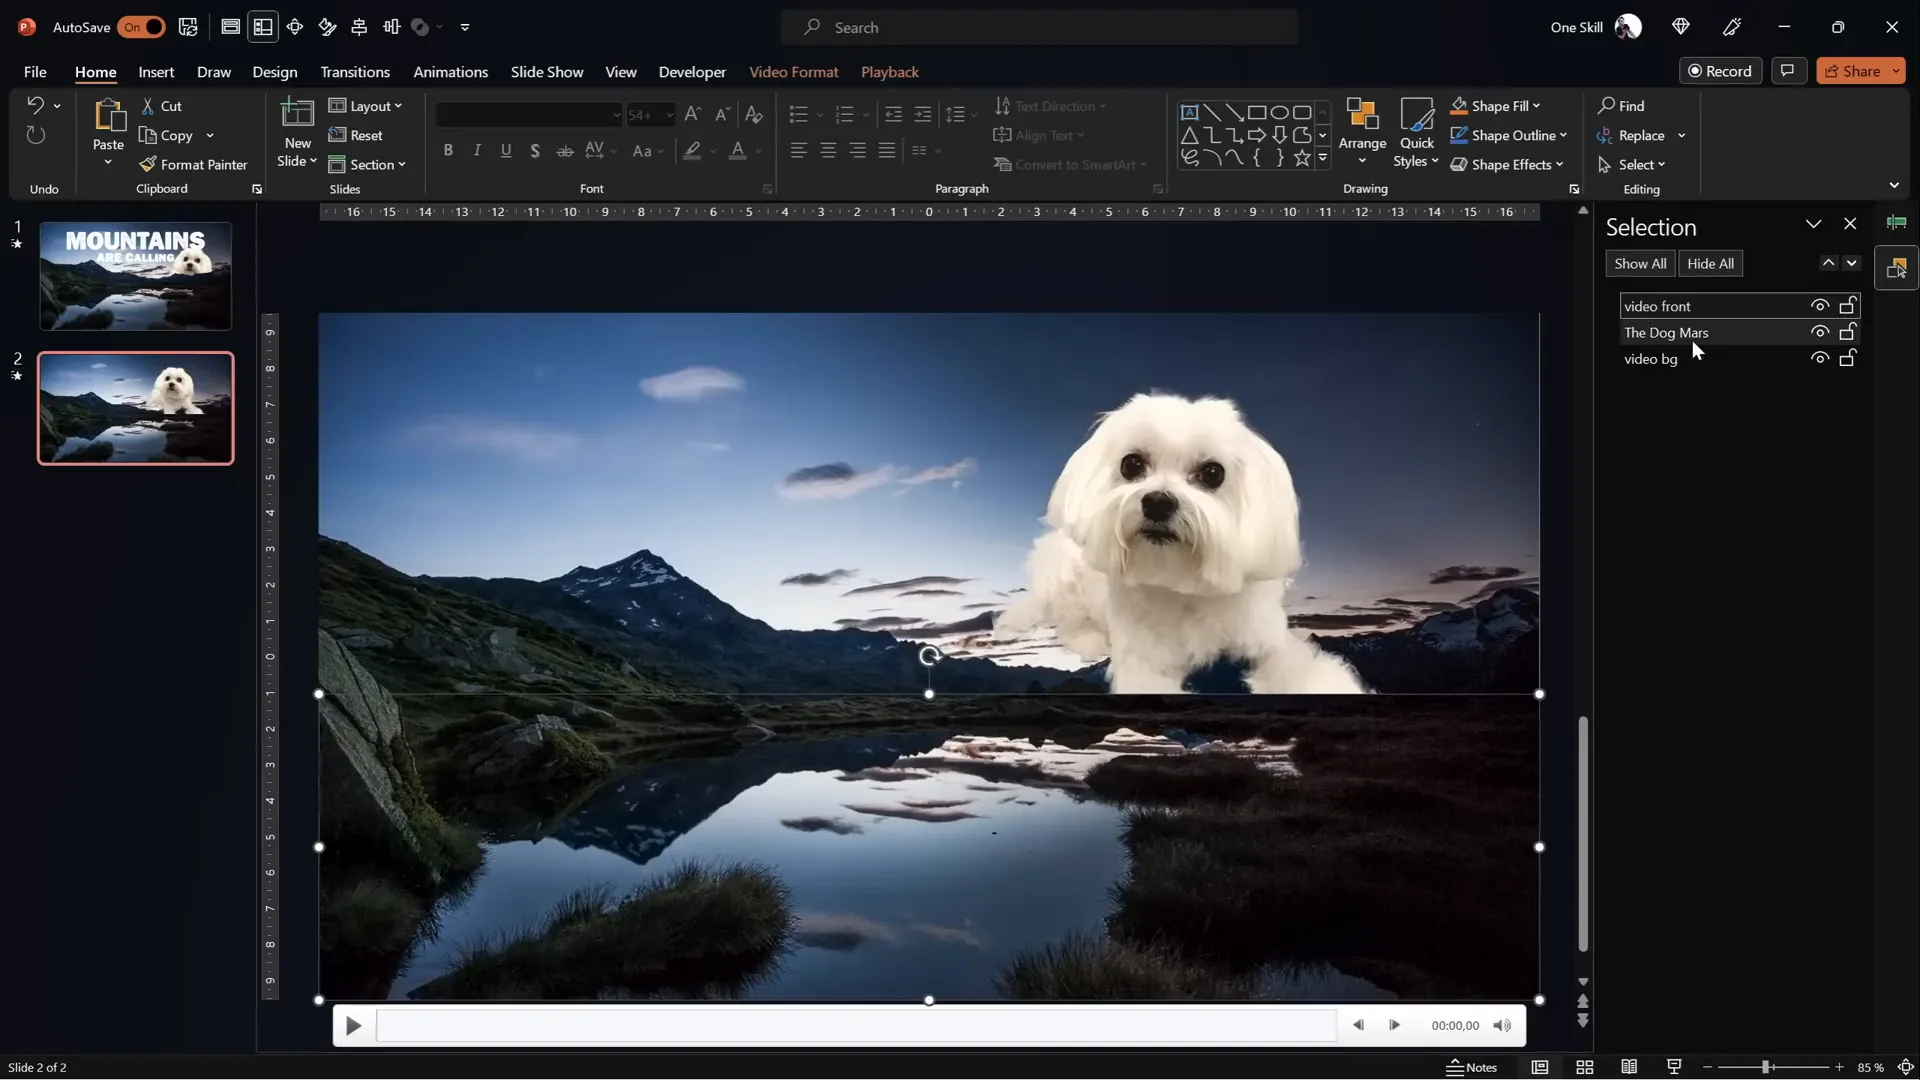
Example: Inserting an Object Between Layers
Insert any object (like an image of a dog or text) between the two videos to test the layering effect. The object should appear behind the front video but in front of the background video, creating a 3D visual impression.
Method 1: Masking the Video Using PowerPoint’s Freeform Shape Tool
While cropping with a straight line works, it lacks precision. For a more natural effect, you want the front video to be cropped exactly along the mountain line.
Step 1: Create a Custom Shape with the Freeform Tool
Use PowerPoint’s Freeform Shape tool to draw a custom shape that traces the mountain silhouette:
- Insert a new shape using the Freeform tool.
- Click multiple points to trace the mountain edges as precisely as possible.
- Close the shape by connecting the last point to the first.

Step 2: Use Merge Shapes to Subtract the Sky
With the front video selected, hold the Shift key and select your custom shape. Then:
- Go to the Shape Format tab.
- Click Merge Shapes and choose Subtract.
This will remove the sky part from the front video, leaving only mountains visible.
Note About Merge Shapes
If you don’t see the Merge Shapes button, add it to your Quick Access Toolbar. The video description has a link to a tutorial on how to do this.
Pros and Cons of Method 1
| Pros | Cons |
|---|---|
| Fully contained within PowerPoint | Time-consuming to trace mountains accurately |
| No need for external tools | Less precise for complex mountain shapes |
Method 2: Precise Masking Using Photopea and SVG Vector Shapes
For pixel-perfect masking, you can use a free online photo editor called Photopea to create an SVG vector shape of the mountain outline, which you then import into PowerPoint.
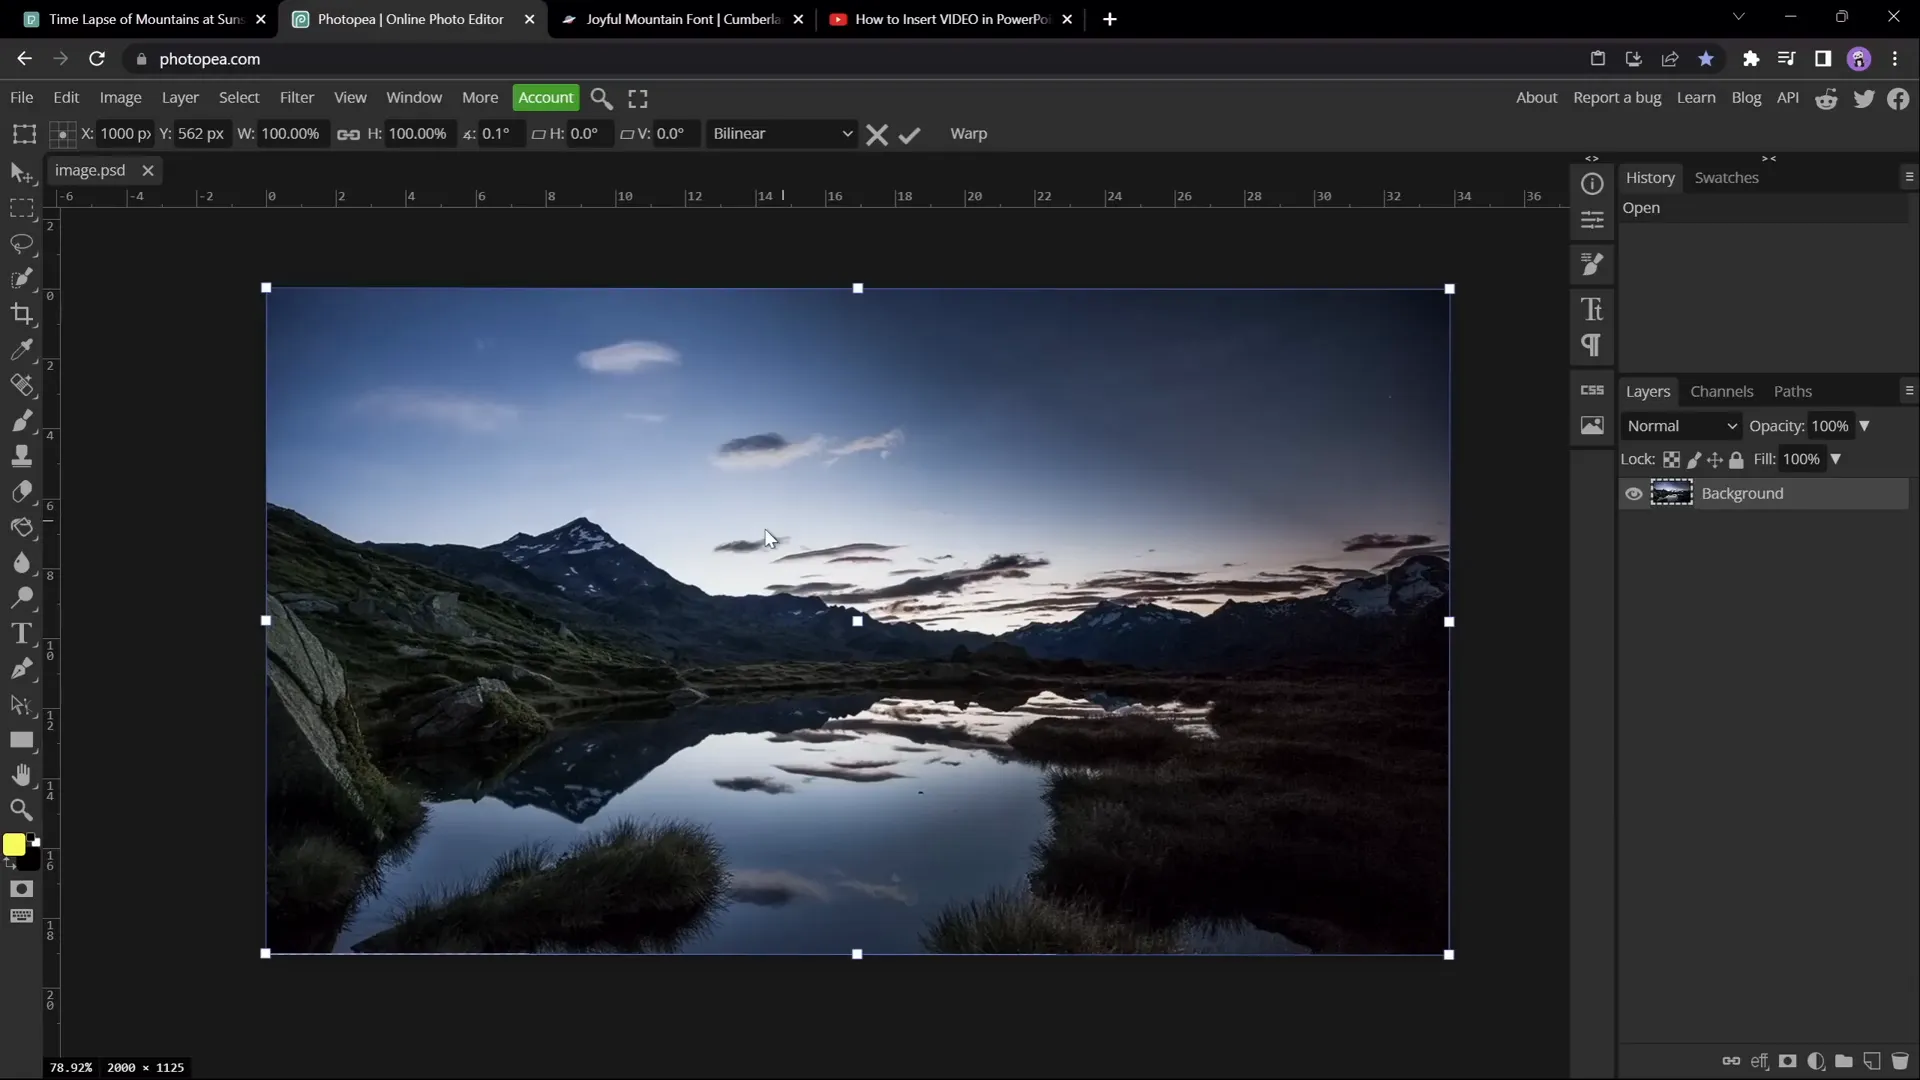
Step 1: Capture a Screenshot of the Video Frame
Copy the front video and paste it into Photopea (Ctrl + V). This will paste a screenshot of the video frame, which is sufficient for creating the mask.
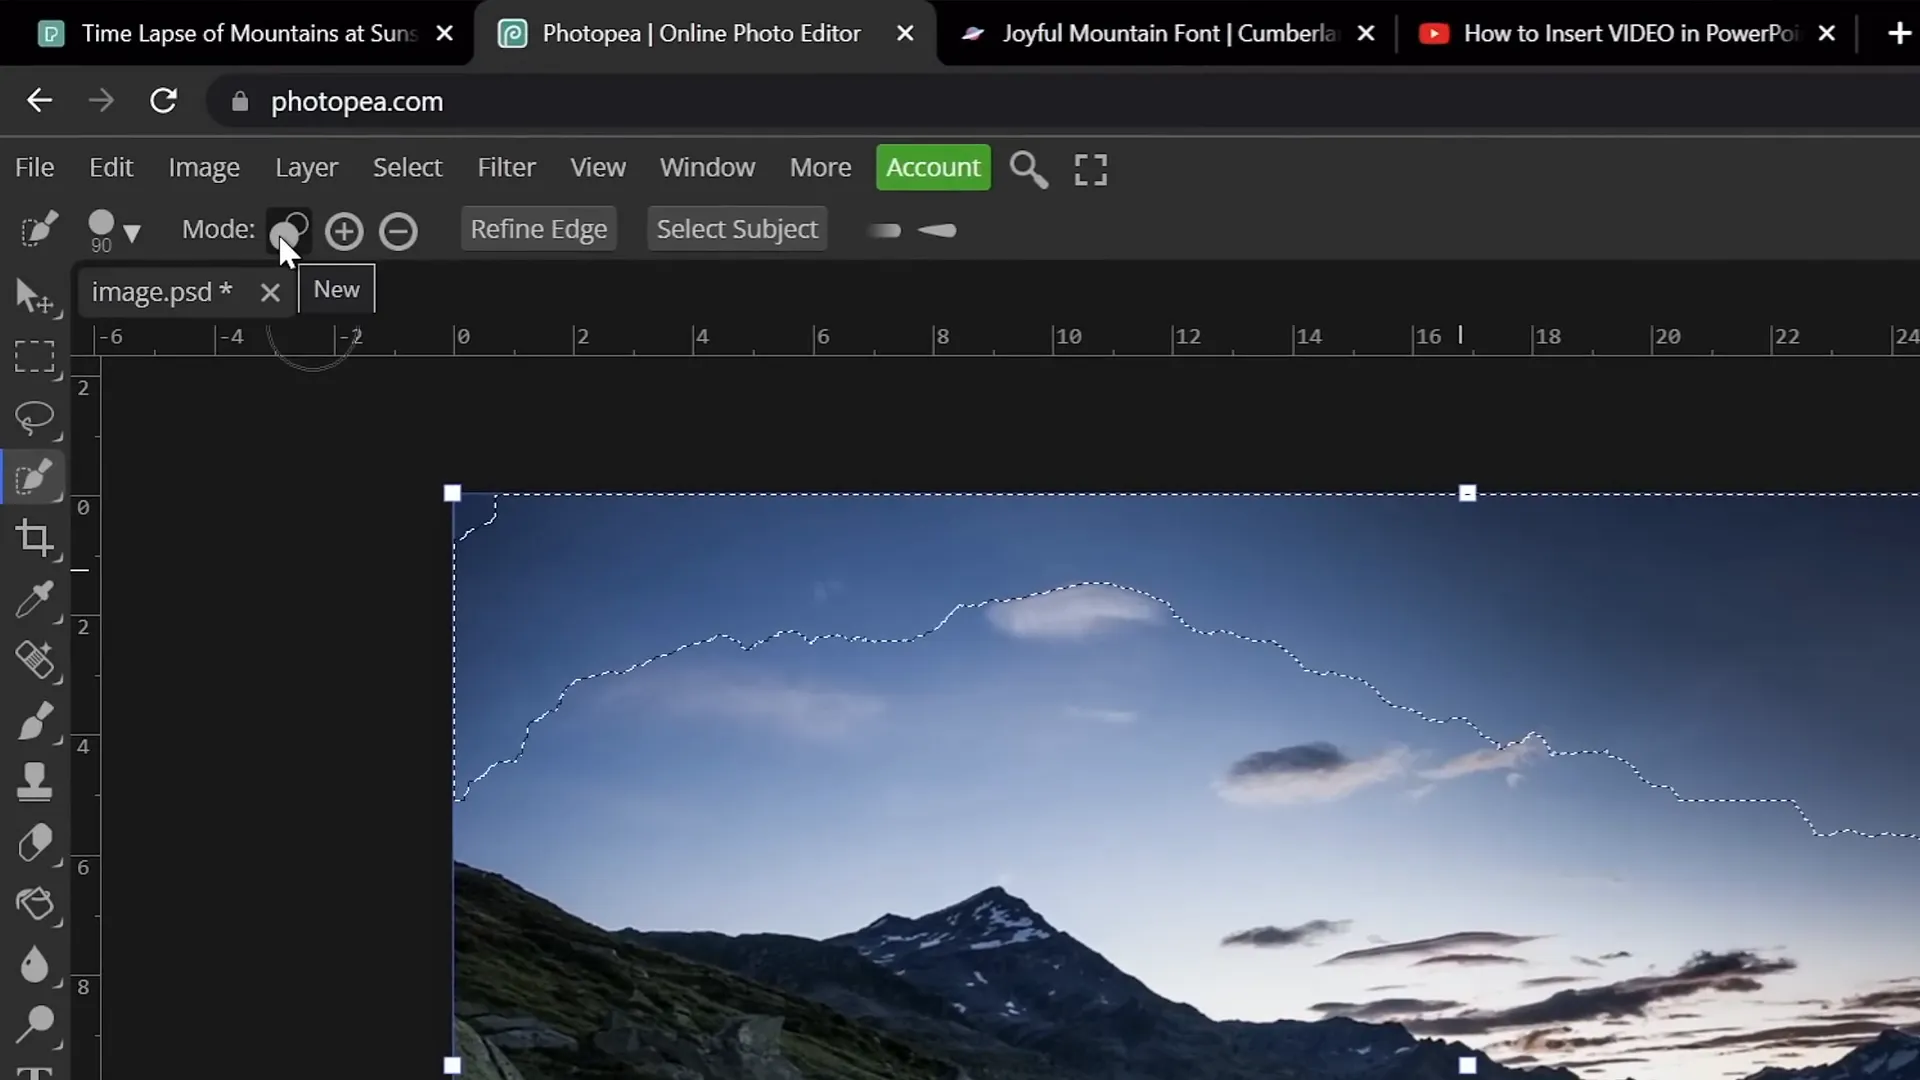
Step 2: Select the Sky Using Quick Selection Brush
- Use the Quick Selection Brush tool to select the sky area.
- Adjust brush size with the square brackets keys ([ and ]).
- Press Q to toggle Quick Mask mode and visualize selection.
- Refine selection using the Lasso Tool in subtract mode to remove unwanted areas.
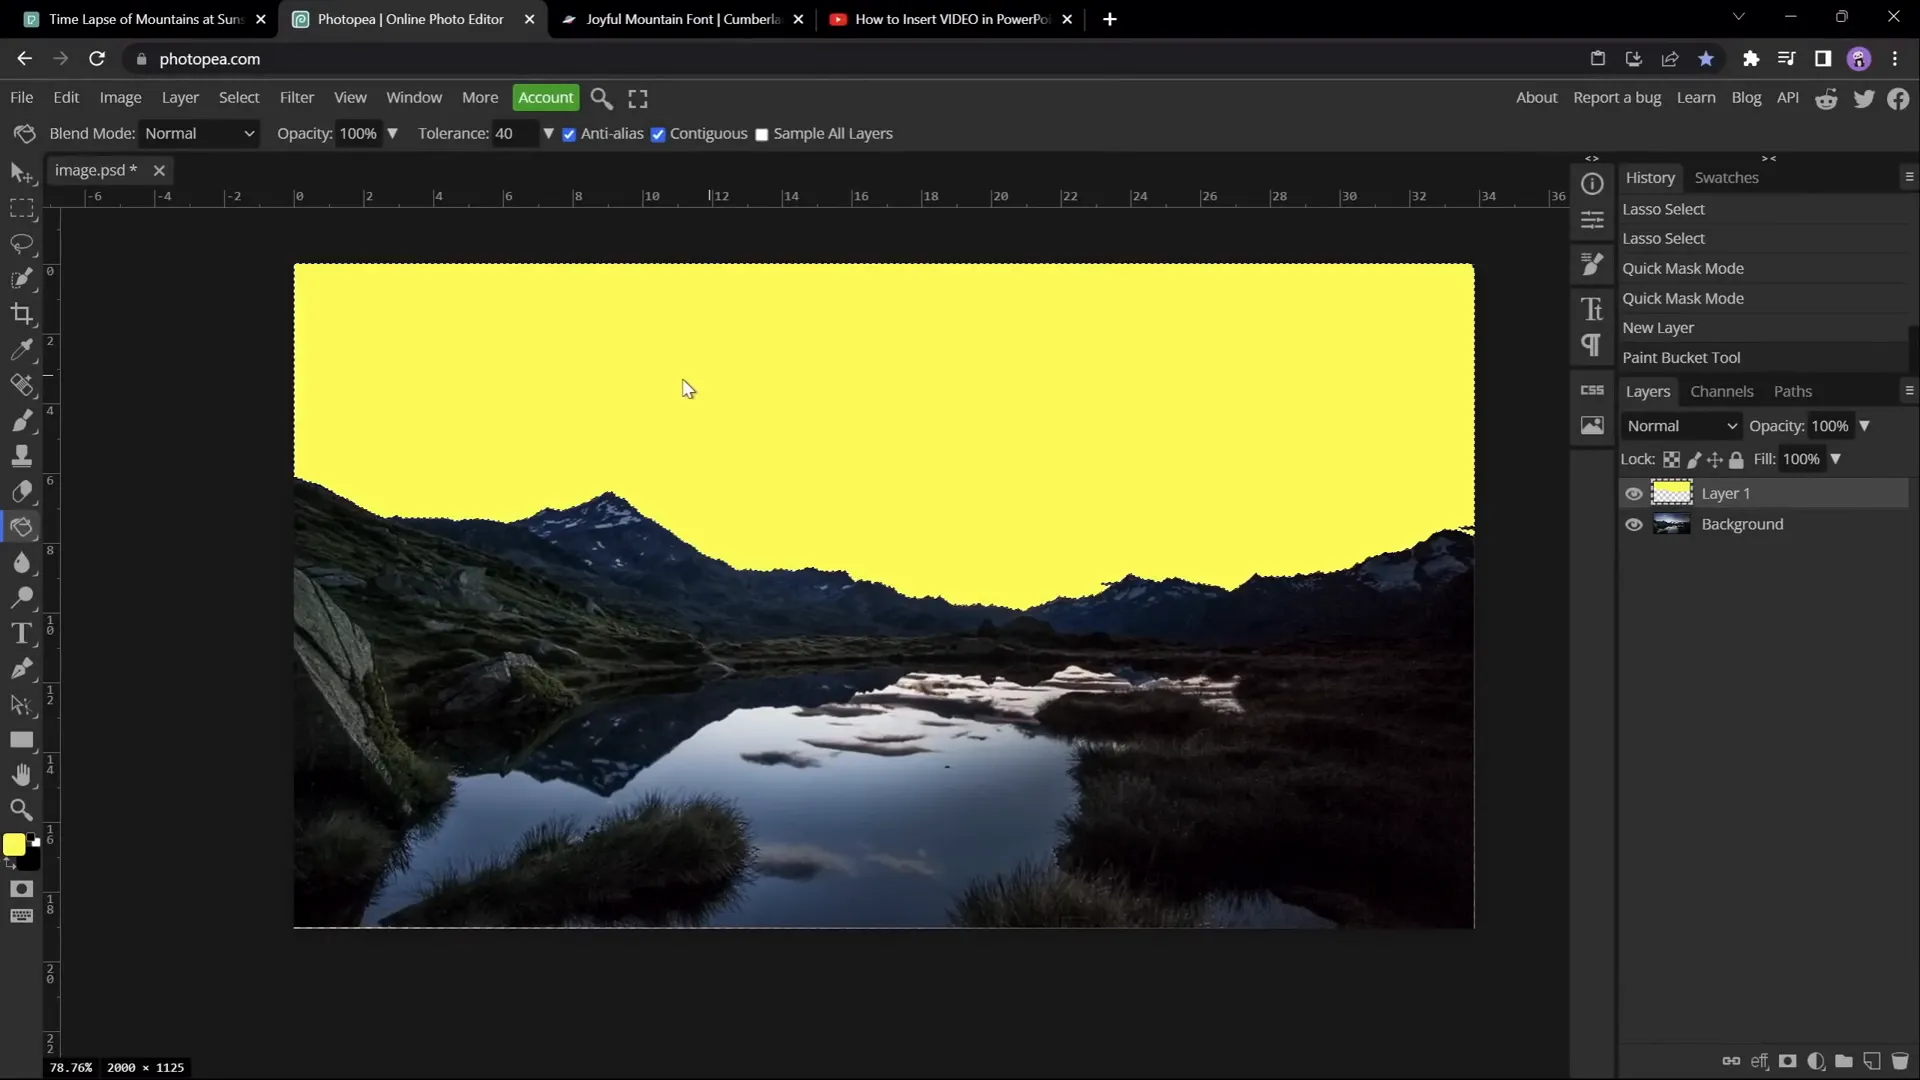
Step 3: Fill Selection with Color on New Layer
- Create a new blank layer.
- Fill the selected sky area with any color (yellow is used for visibility).
- Hide the background photo layer for clarity.
Step 4: Vectorize the Sky Layer
- With the colored sky layer selected, go to Image > Vectorize Bitmap.
- Choose Photo Mode and check Polygon.
- Click OK to convert the sky into a vector shape.

Step 5: Export as SVG and Import into PowerPoint
- Export the vectorized sky as an SVG file.
- Drag and drop the SVG file into your PowerPoint slide.
- Convert the SVG into a shape by right-clicking and selecting Convert to Shape to access vector points.
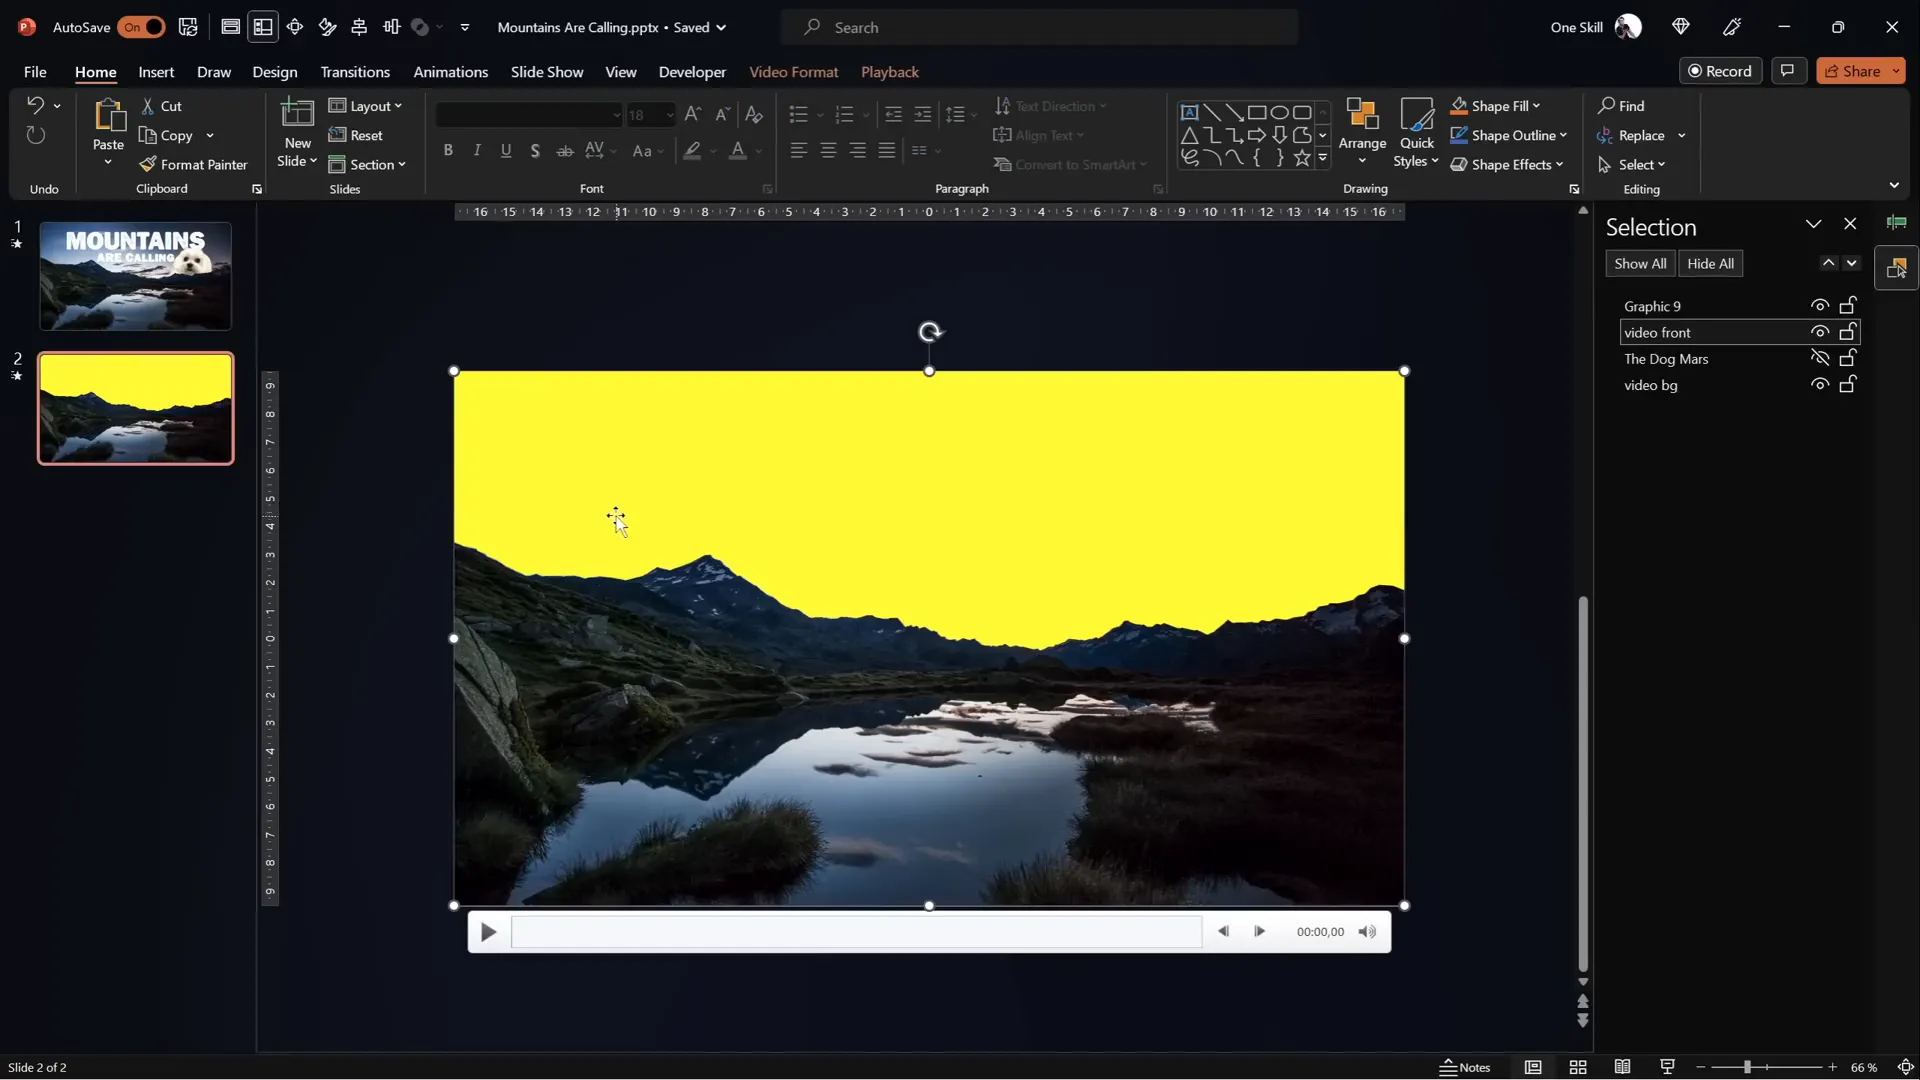
Step 6: Subtract the Sky Shape from the Front Video
- Select the front video and the imported sky shape (hold Shift to multi-select).
- Use Merge Shapes > Subtract to precisely crop the sky from the front video.
Pros and Cons of Method 2
| Pros | Cons |
|---|---|
| Highly precise masking | Requires use of external tool (Photopea) |
| Cleaner and more professional look | Additional steps for exporting and importing SVG |
Adding and Styling Text Between Video Layers
With the two video layers set up, you can now insert text or other objects between them to achieve the desired effect of the text rising from behind the mountains.
Step 1: Insert Text Box
- Insert a text box and type your desired text.
- Use a font that complements the mountain theme; the tutorial uses Joyful Mountain.
Step 2: Apply Text Formatting
To save time, copy text formatting from a previous slide or example using Ctrl + Shift + C (copy formatting) and Ctrl + Shift + V (paste formatting).
Step 3: Position Text Between Video Layers
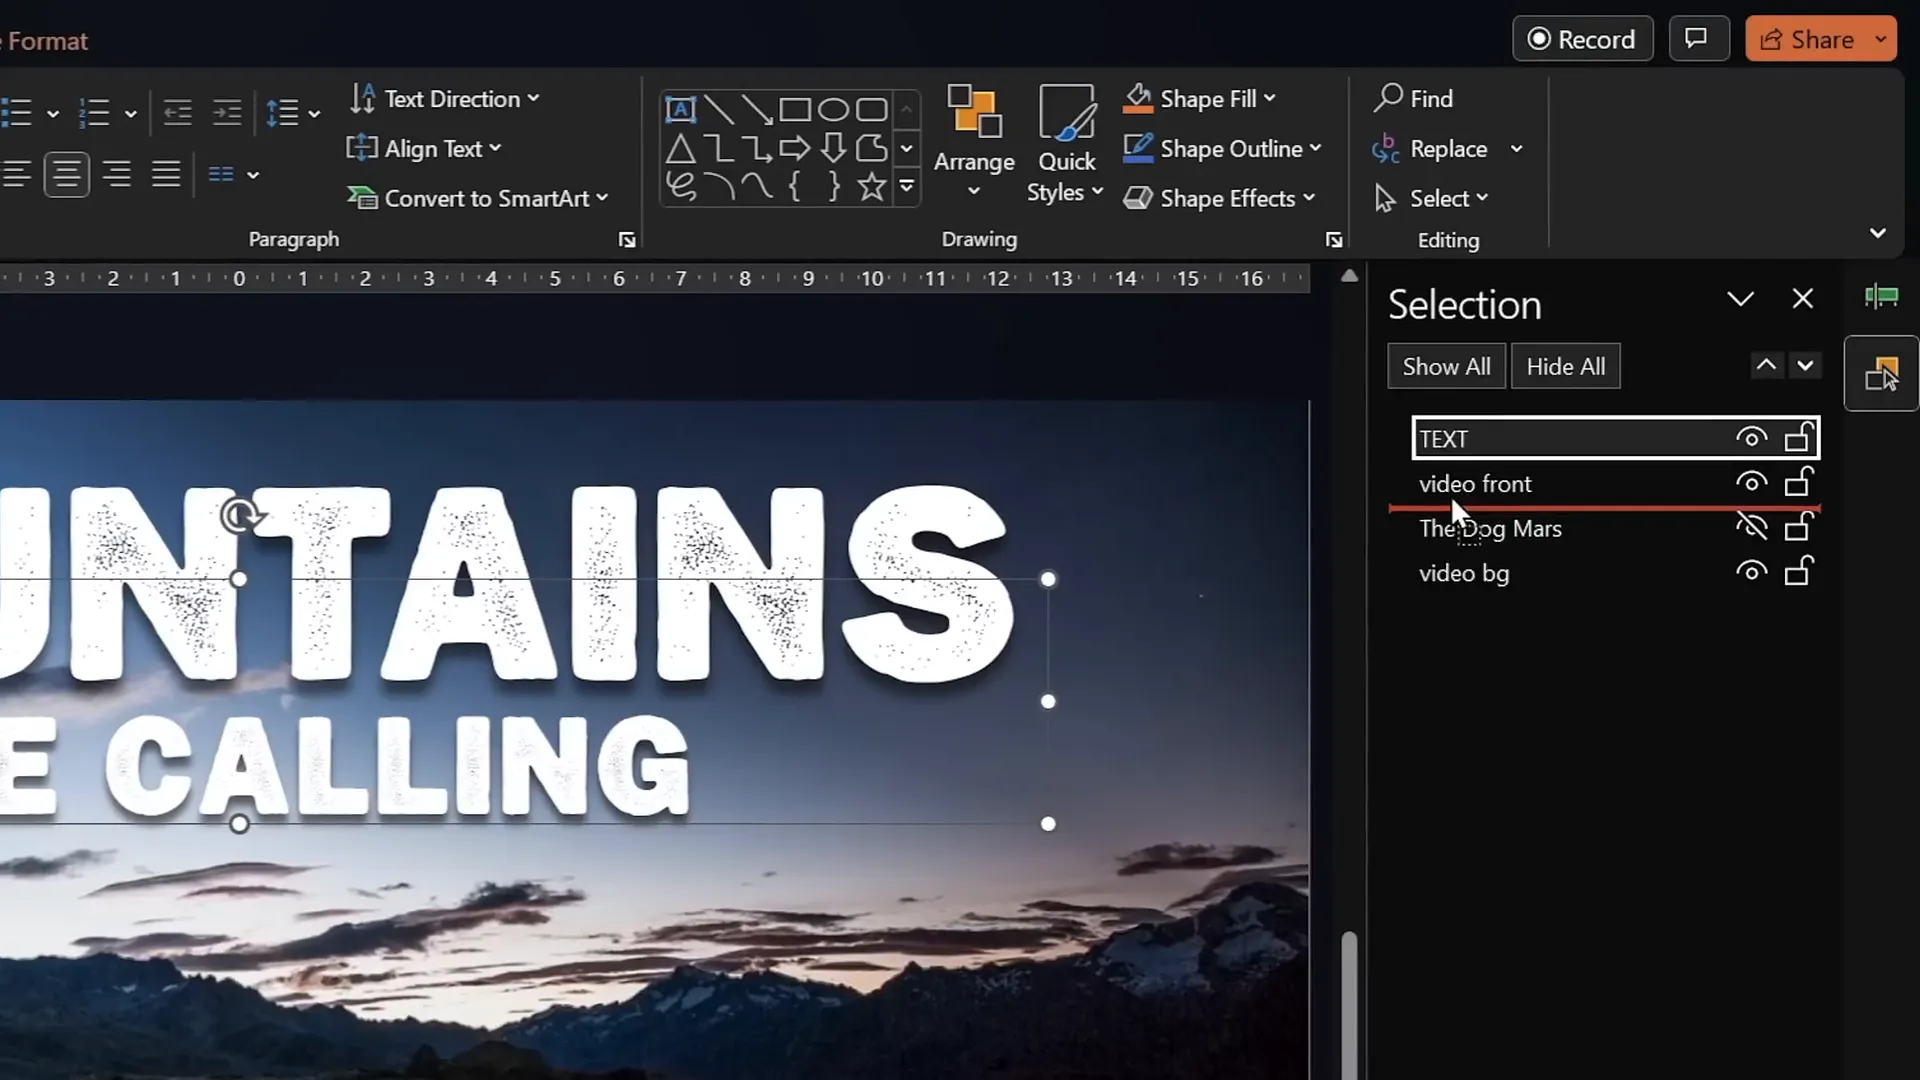
- Open the Selection Pane (Home > Select > Selection Pane).
- Rename your text box for clarity.
- Move the text box below the front video layer so it is hidden behind the mountains but above the background video.
Animating Text to Rise from Behind the Mountains
Animating your text brings the effect to life by making it appear to rise from behind the mountains and then disappear again.
Step 1: Add Entrance Animation – Fly In
- Select the text box.
- Go to the Animations tab and choose Fly In.
- Set the animation to start With Previous.
- Set duration to 5 seconds.
- In Effect Options, select Maximum Smooth End.
- Animate text by letter with a delay of 5% between letters.
This creates a smooth effect as each letter flies in sequentially.
Step 2: Add Entrance Animation – Zoom In
- With the text box still selected, add another entrance animation: Basic Zoom.
- Set it to start With Previous and duration of 5 seconds.
- Set letter delay to 5% for a dynamic zoom effect.
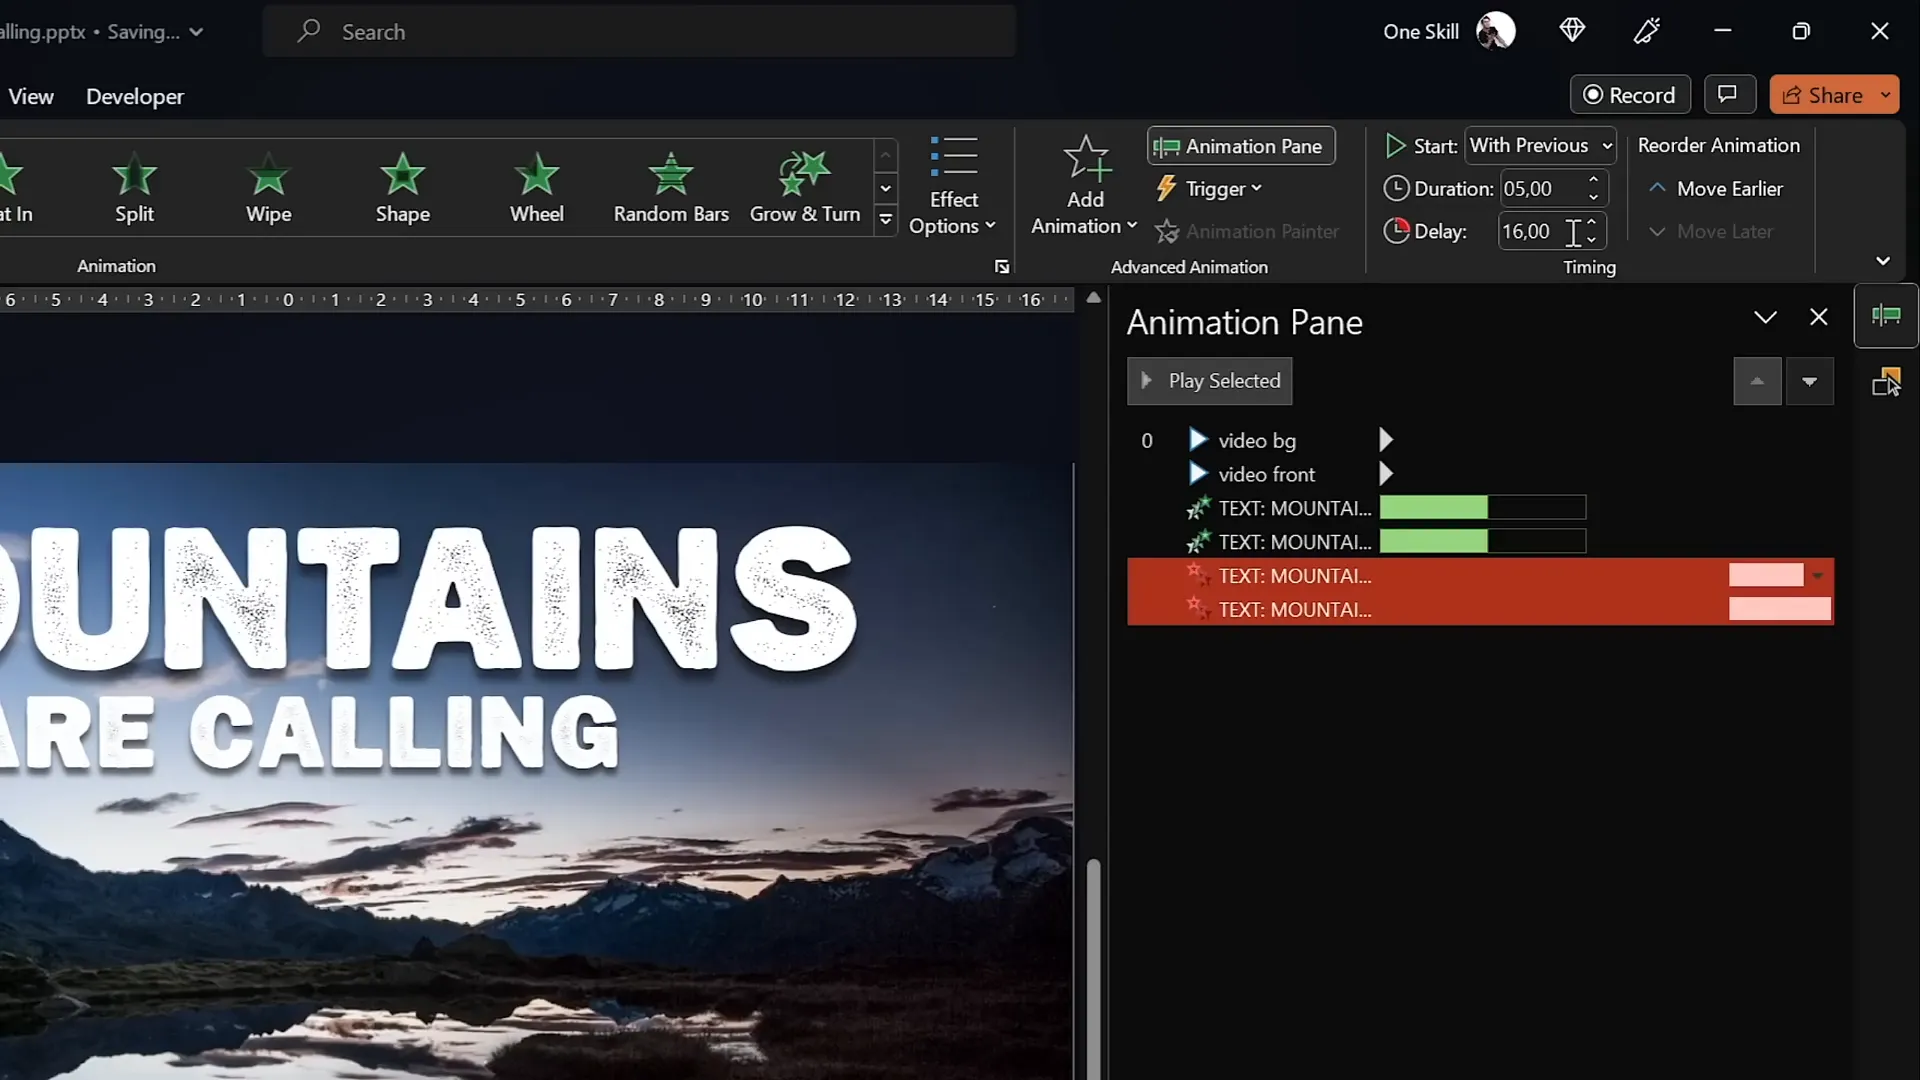
Step 3: Add Exit Animations
- Add a Fly Out exit animation with these settings:
- Start: With Previous
- Duration: 5 seconds
- Effect Options: Maximum Smooth Start
- Letter delay: 0%
- Add a Basic Zoom Out exit animation with these settings:
- Start: With Previous
- Duration: 5 seconds
- Letter delay: 0%
- Set a delay of approximately 11 seconds on the exit animations to allow the text to remain visible before disappearing.
Step 4: Preview the Animation
Run the slide show to see the text fly in letter by letter, zoom in, then fly out and zoom out behind the mountains.
Final Touches and Tips for a Polished Presentation
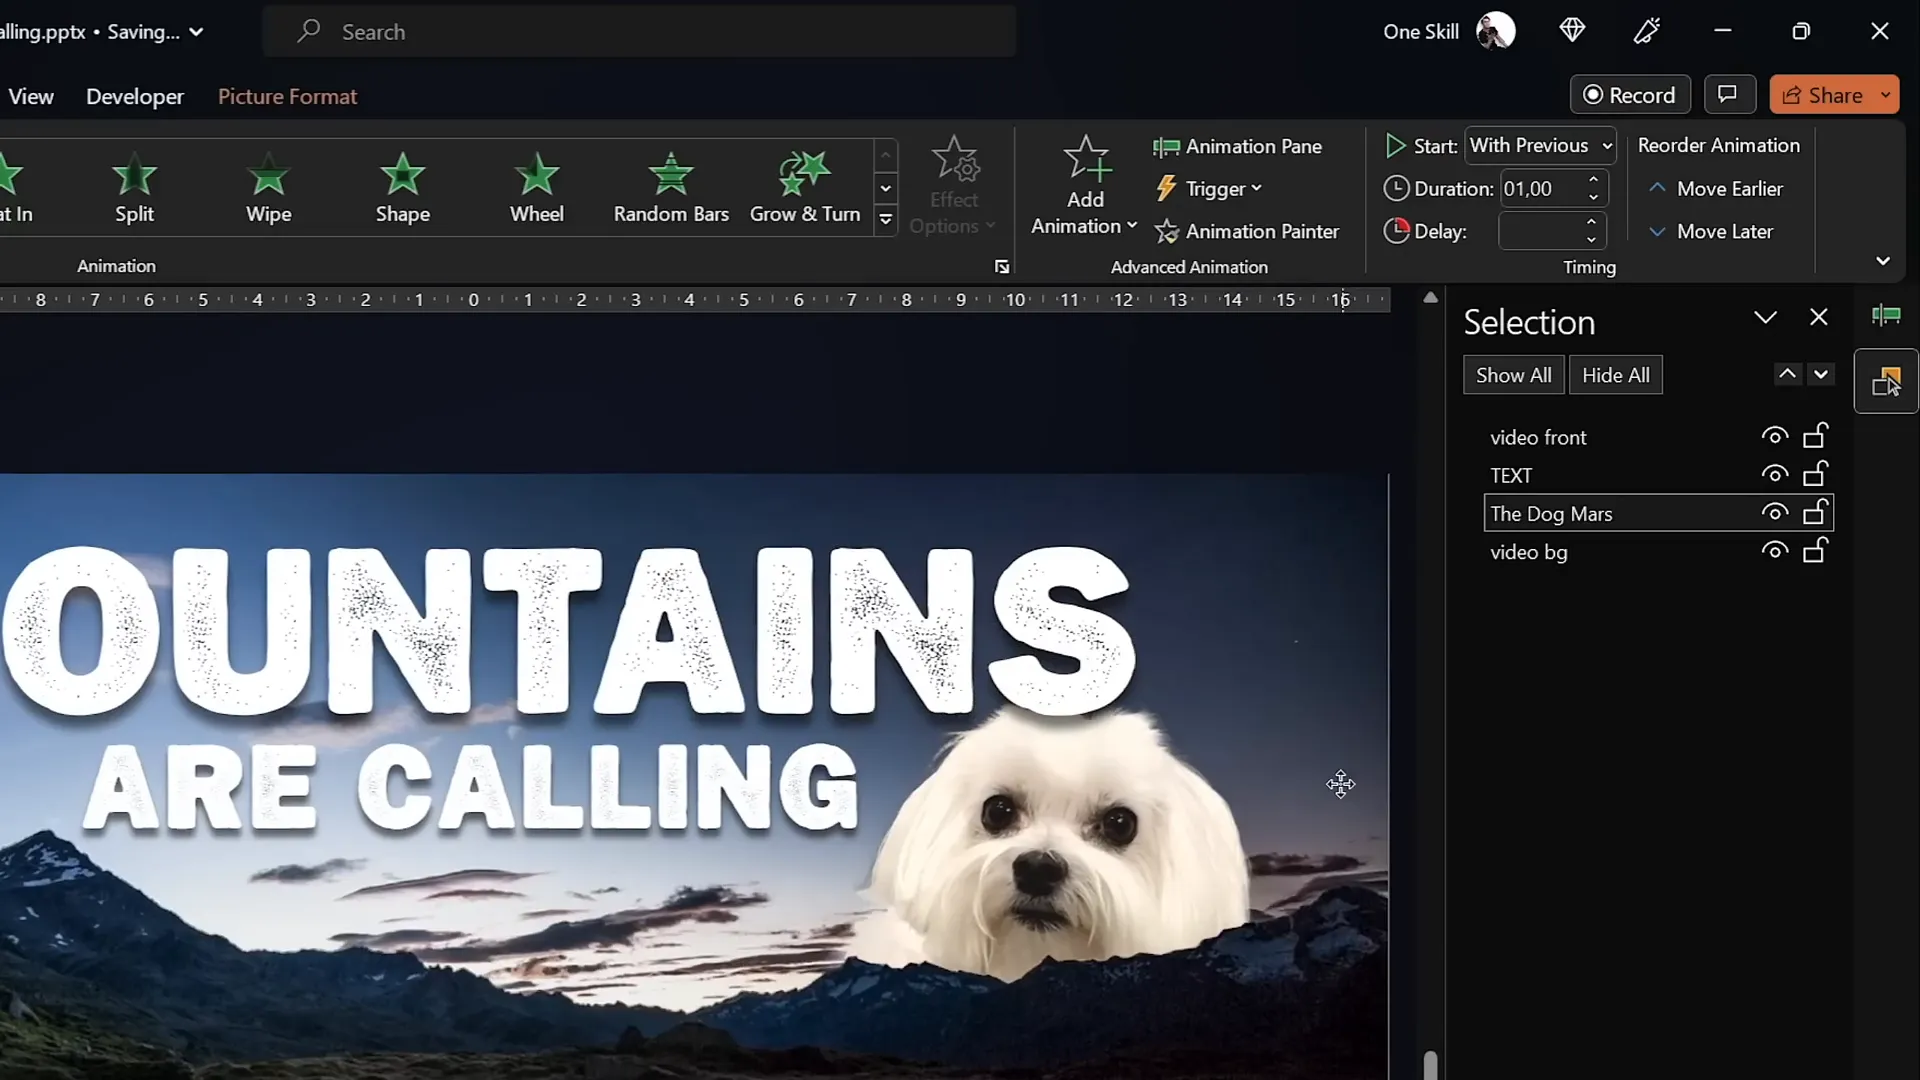
Adding Animated Objects Behind the Mountains
You can add other objects or images between the two video layers for extra flair. For example, the presenter added a dog image named “Mars,” which appears to sit between the mountain layers with its own animations.
Synchronizing Video Playback Animations
- Add a play animation to the front video, set to start With Previous.
- Ensure there is no delay on either video’s play animation so they play in sync.
Tips for Smooth Playback
- Trim your video within PowerPoint if needed to shorten or loop the clip.
- Keep the video resolution consistent with your slide size for the best appearance.
- Adjust video brightness to ensure readability of overlaid text.
Explore More Creative Video Effects
If you enjoyed this tutorial, check out the creator’s other channel, Interstellar PowerPoint, which offers 10 more creative ways to use video in your presentations.
Frequently Asked Questions about PowerPoint Video Effects
Q1: Can I use any video for this effect?
Yes, but it’s best to choose a video where the foreground is static (like mountains) and the background changes (like the sky). This makes masking easier and the effect more convincing.
Q2: Do I need PowerPoint Office 365 to follow this tutorial?
While some features like Merge Shapes work best in Office 365, you can attempt this in other recent versions. However, the availability of certain tools may vary.
Q3: What if I don’t want to use an external tool like Photopea?
You can use the Freeform Shape tool inside PowerPoint for masking, but it requires patience and may be less precise.
Q4: How do I add Merge Shapes to my Quick Access Toolbar?
The video description includes a link to a tutorial on adding Merge Shapes to your toolbar. This makes it easier to access shape operations like Subtract.
Q5: Can I use this effect with other types of content besides text?
Absolutely! You can insert images, icons, or even animated objects between the video layers for creative effects.
Q6: How do I ensure the two videos stay perfectly aligned?
Align the duplicate video precisely by selecting both videos and using the Align tools (Align Center and Align Middle) in PowerPoint.
Conclusion
Mastering PowerPoint video effects like the mountain text reveal takes some creativity but is surprisingly achievable with PowerPoint’s built-in tools combined with free external resources. By layering two identical videos and masking the front one carefully, you can create immersive effects that make your presentations stand out.
This tutorial covered everything from preparing your video and slide to precise masking techniques and advanced text animations. With these skills, you can impress your audience with professional-looking visuals that go beyond the typical PowerPoint experience.
Remember, practice makes perfect. Experiment with different videos, fonts, and animations to find the style that best suits your message. And don’t forget to check out the additional resources and templates linked in the video description to speed up your workflow.
Happy presenting!


