If you’re looking to elevate your PowerPoint presentations with dynamic and captivating effects, mastering PowerPoint Animation is a game-changer. Animations not only add visual interest but also help you emphasize key points and keep your audience engaged. In this detailed guide, we’ll explore five genius ways to create custom animations in PowerPoint that are easy to replicate and guaranteed to impress.
Whether you’re a presenter, educator, marketer, or designer, these animation ideas will empower you to transform your slides from static to spectacular. Follow along as we break down each animation step-by-step, complete with tips, tricks, and best practices to make your animations smooth and professional.
Table of Contents
- 1. Cyber Text Animation
- 2. Scrolling Grid Animation
- 3. Floating Image Animation
- 4. Horizon Parallax Effect
- 5. Button Shine Effect
- Bonus: PowerPoint Animation Pack
- Frequently Asked Questions
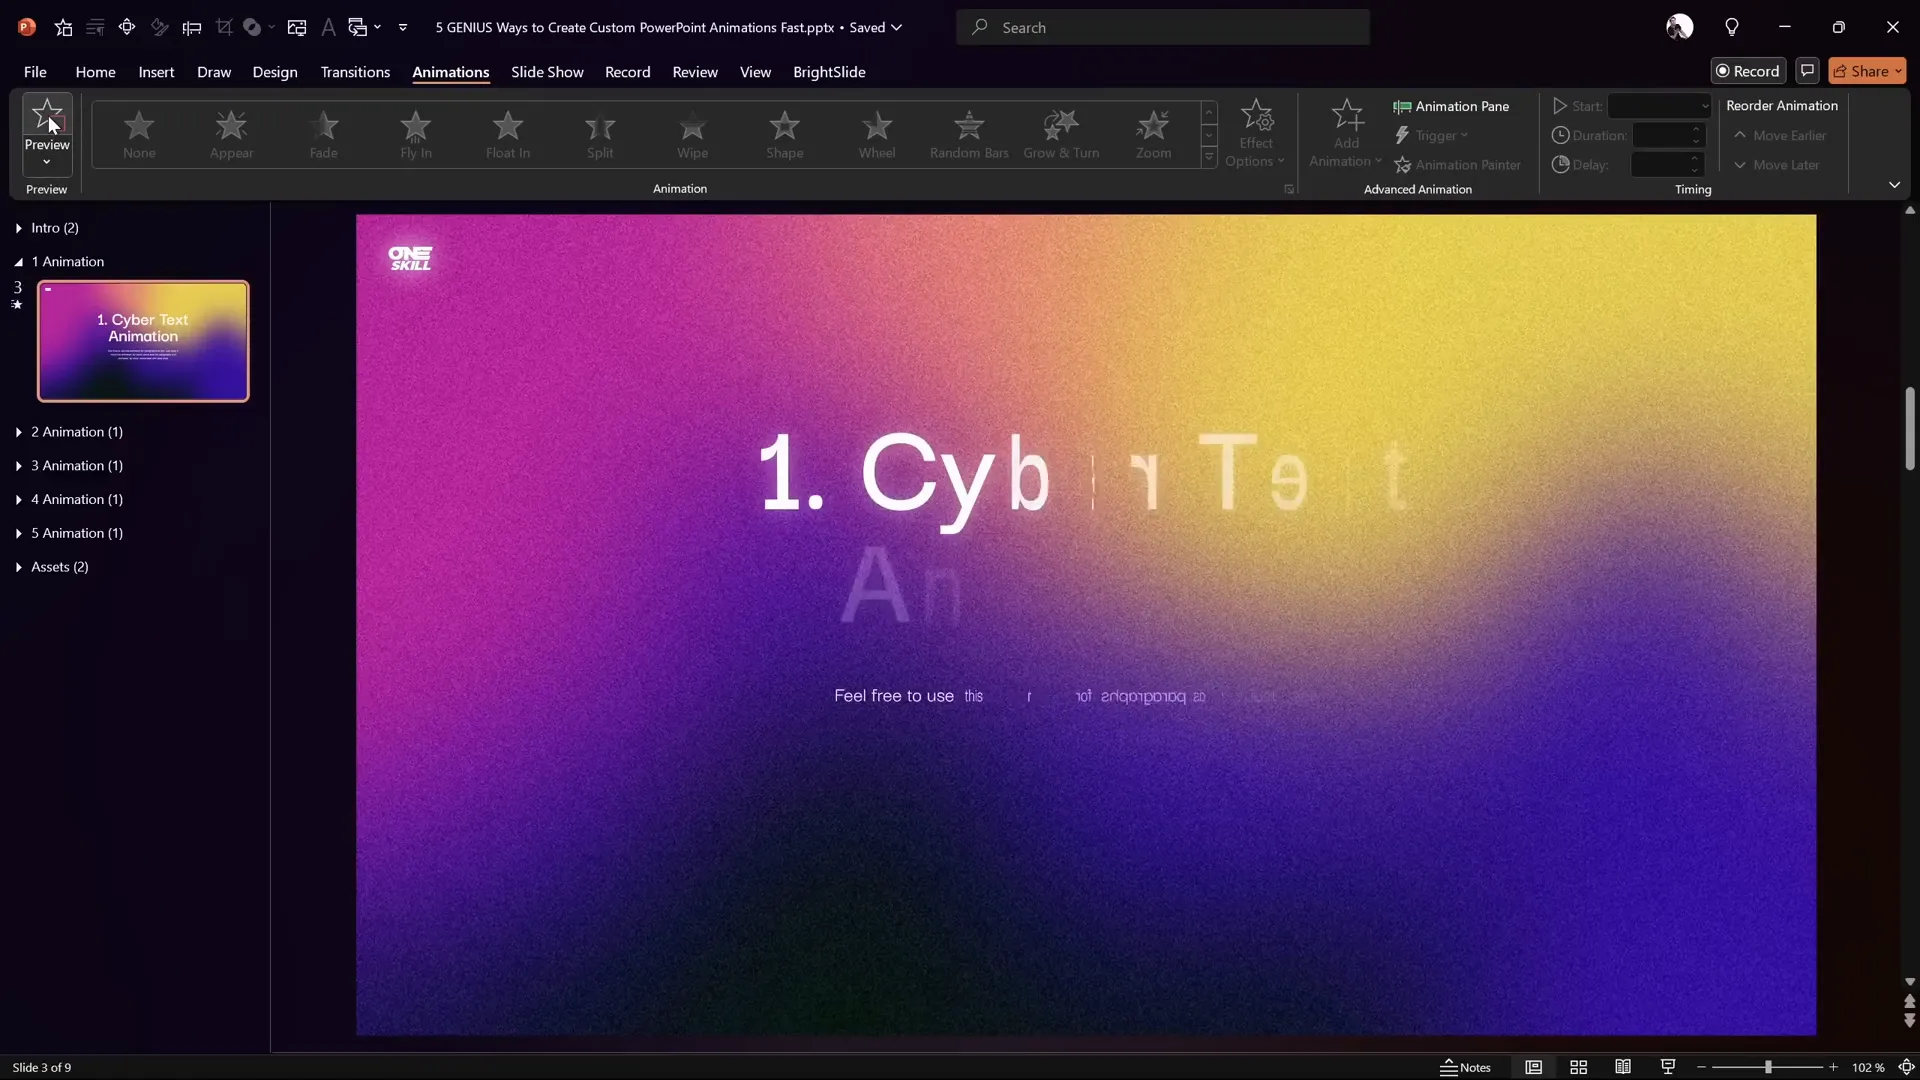
1. Cyber Text Animation
The first animation we’ll explore is what I like to call the Cyber Text Animation. This effect animates each letter of your text flickering in one by one, creating a futuristic and eye-catching look reminiscent of cyber or sci-fi aesthetics.
How to Create the Cyber Text Animation
- Duplicate your slide: Start by duplicating the slide where you want this effect.
- Clear existing animations: Open the animation pane and delete any existing animations to start fresh.
- Select your title text box: Click on the slide title or any text you want to animate.
- Add the Swivel entrance animation: Go to More Entrance Animations and choose Swivel. Click OK.
- Adjust animation settings: Open the animation options and set the effect to animate by letter. Set a delay between letters to 10% and a short duration like 0.2 seconds.
- Apply animation to other text: Use the Animation Painter tool to copy this animation to other text boxes or paragraphs.
- Customize further: For paragraphs, you may want to animate by word instead of letter for a varied effect.
- Set animation order: Set the first animation to start With Previous and the second to start After Previous for smooth sequencing.
Once done, preview your slide in full-screen mode to see the cyber text effect in action — letters swirling in with a slick, futuristic vibe.
Tips for Cyber Text Animation
- Adjust the delay percentage to speed up or slow down letter appearance.
- Use this effect sparingly for titles or key messages to avoid overloading your slide.
- Pair it with a dark or tech-themed slide background for maximum impact.
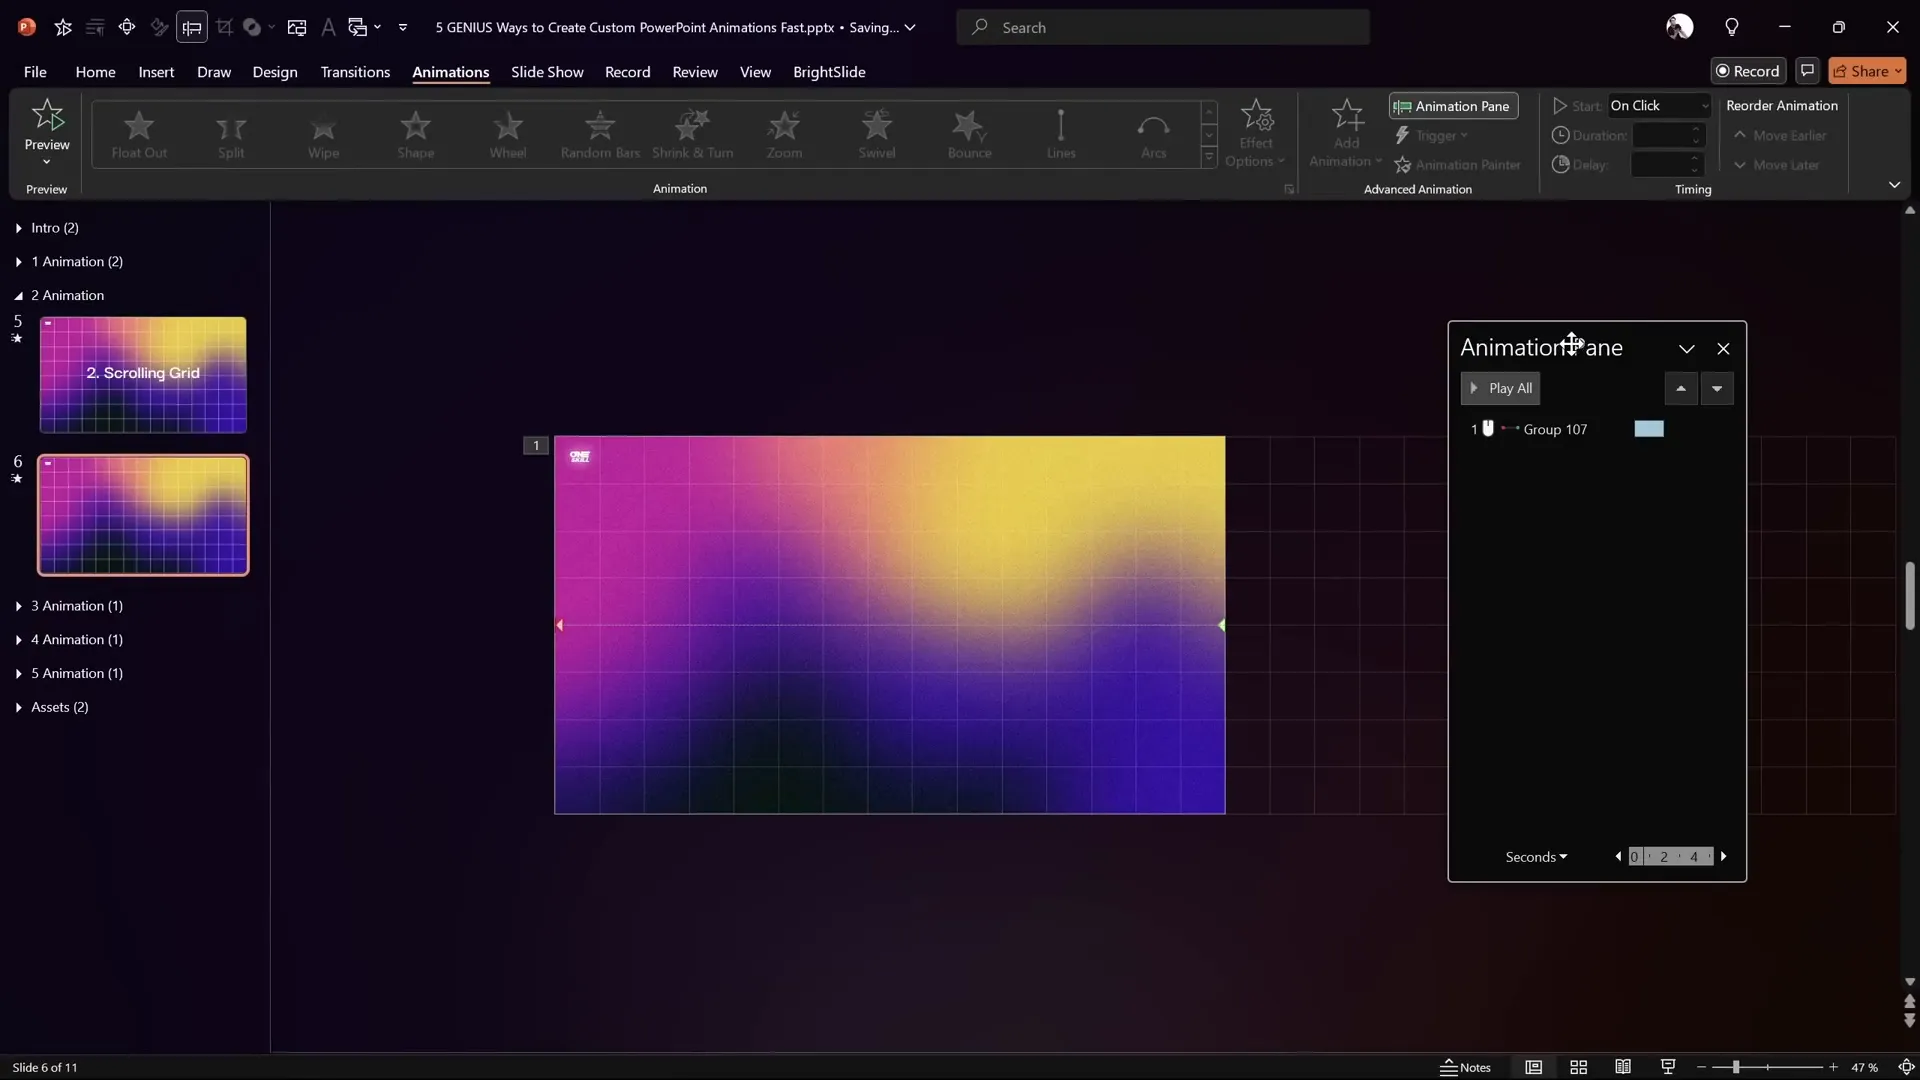
2. Scrolling Grid Animation
Next up is the Scrolling Grid Animation, a fantastic way to add a subtle, animated background to your slides. This effect creates a grid of lines that scrolls horizontally, giving your presentation a sleek, modern look without distracting the audience.
Step-by-Step Guide to Create the Scrolling Grid
- Duplicate the slide: Work on a copy to avoid losing your original content.
- Create vertical grid lines: Insert a rectangle shape matching the slide height and position it on the left edge.
- Duplicate for columns: Press
Ctrl + Dfourteen times to create a total of 15 vertical columns. - Group and stretch columns: Select all columns, group them, and stretch to cover the slide width.
- Create horizontal grid lines: Copy one column, paste it, then rotate it to become a horizontal row covering the slide width.
- Duplicate rows: Duplicate this row seven more times to get 8 horizontal rows total.
- Group rows and stretch: Group all rows and stretch them to cover the slide height.
- Group columns and rows: Position rows and columns correctly, then group both groups into one big grid.
- Format grid lines: Set fill to No Fill and adjust line transparency to 80% and width to 0.5 pt for a subtle look.
- Duplicate grid for scrolling: Duplicate the grid and move the copy to the right side, effectively doubling the grid length.
- Group both grids: Group the two grids into one large group that spans twice the slide width.
- Add motion path animation: Apply a motion path line animation moving left, adjusting the red endpoint to align with the left slide edge.
- Set animation timing: Remove smooth start and end for constant speed, set duration to 17 seconds, and repeat until the end of the slide.
- Add fade-in effect: Add a fade-in animation at the start to smoothly introduce the grid.
- Adjust animation sequence: Make sure the fade-in and motion animations start With Previous.
Now, when you run the slide, the grid will scroll seamlessly from right to left, creating a continuous loop that adds depth and interest to your background.
Pro Tips for Scrolling Grid
- Adjust the number of rows and columns to control grid density.
- Use subtle line colors and transparency to avoid overpowering slide content.
- Pair with minimalistic slide designs for a modern professional look.
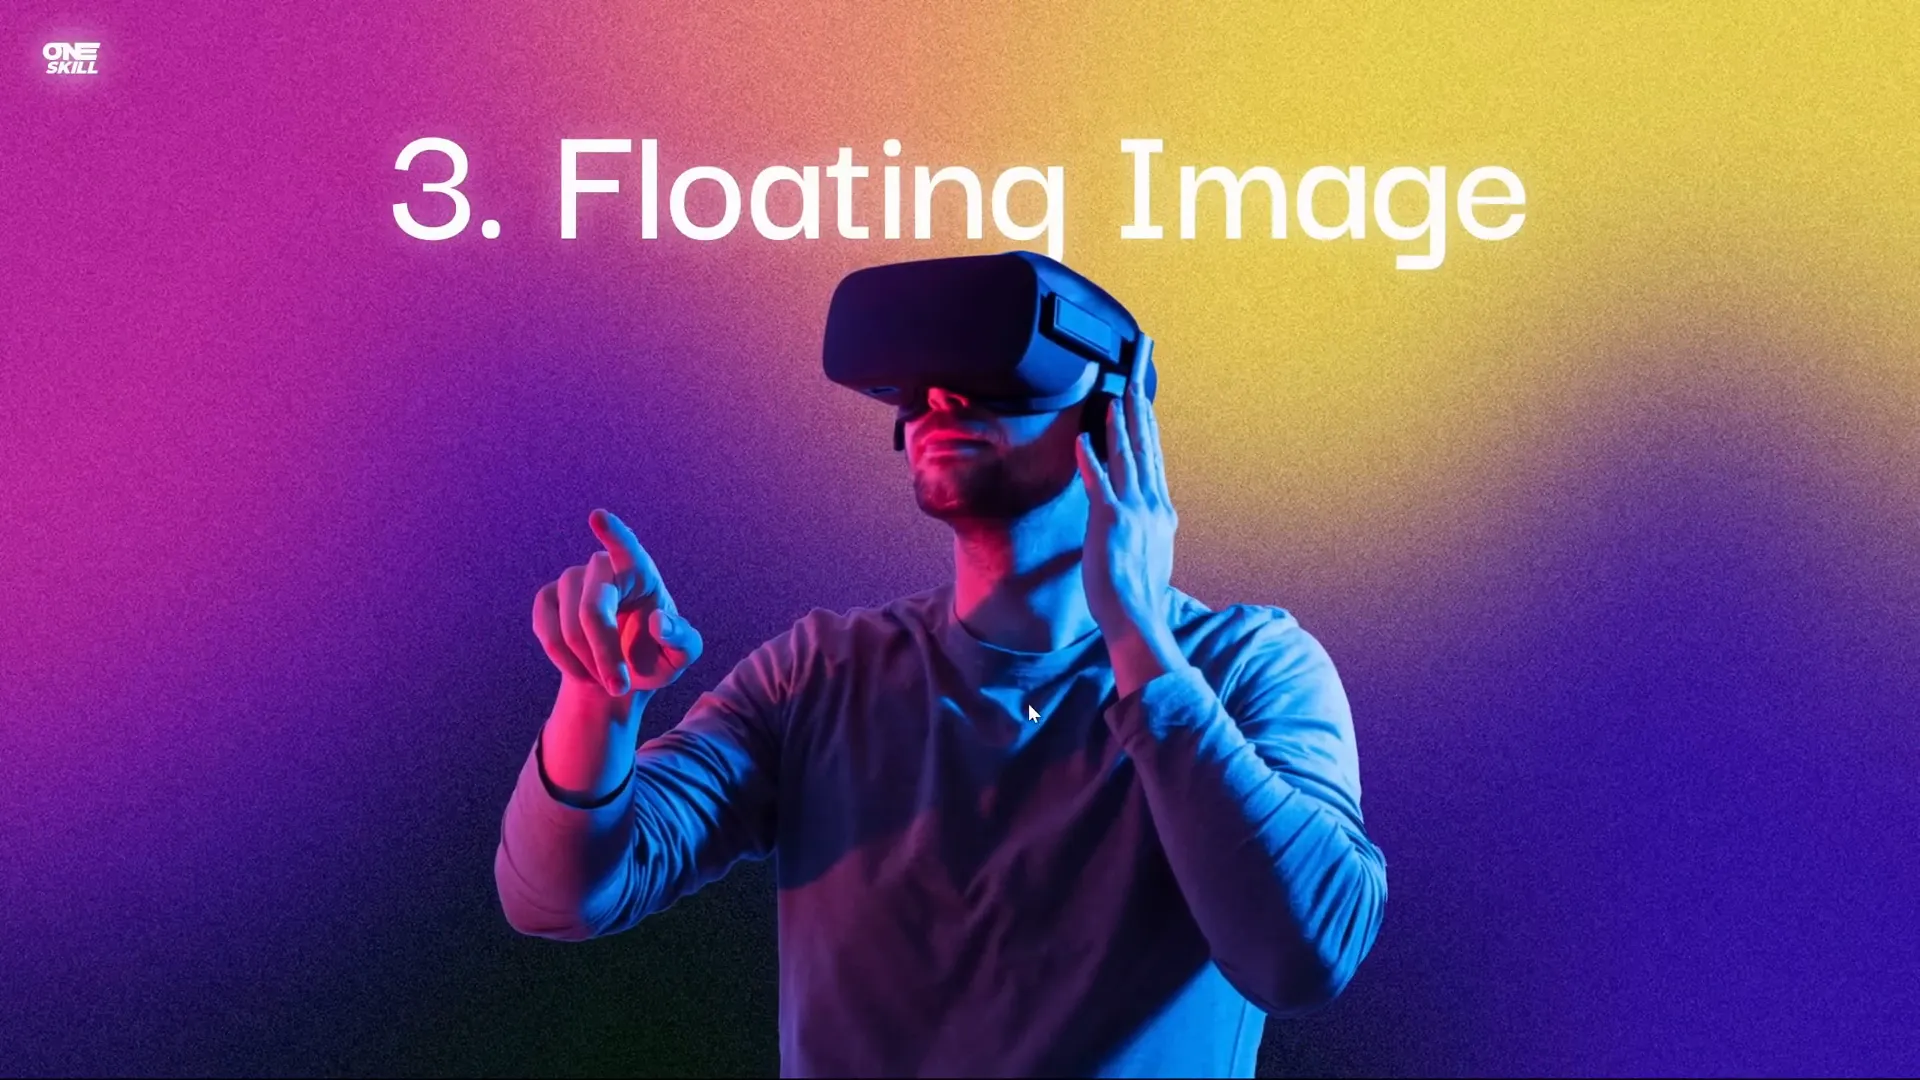
3. Floating Image Animation
Have you ever wanted to make images float or gently move around your slide? The Floating Image Animation is perfect for this. It creates a smooth circular motion combined with a slight spin, giving your images a lively, dynamic feel.
How to Animate Floating Images
- Duplicate your slide: Work on a copy to maintain your original setup.
- Add fade-in animation: Select the image and add a fade-in animation starting With Previous and set duration to 0.5 seconds.
- Add motion path animation: Add a motion path animation and choose the circle shape.
- Adjust motion path: Zoom into the motion path, flip it if needed to clockwise direction, and resize the circle to control the floating radius.
- Remove smooth start/end: For constant speed, disable smooth start and end in the animation options.
- Set animation duration: Set the motion path animation duration to 6 seconds and repeat it until the end of the slide.
- Add spin animation: Add a spin animation starting With Previous with duration 3 seconds, rotation 5 degrees clockwise, and enable auto-reverse with smooth start/end.
- Synchronize animations: Ensure the spin animation repeats until the end of the slide to match the motion path duration.
Play your slide to see the image fade in, gently float in a circle, and subtly spin back and forth — creating an elegant, attention-grabbing effect.
Tips for Floating Images
- Use this animation for logos, product images, or any visuals you want to highlight.
- Adjust the circle size and spin degree for more or less dramatic motion.
- Combine with other subtle animations to enrich your slide.
4. Horizon Parallax Effect
One of the most visually stunning animations is the Horizon Parallax Effect. This effect simulates depth by layering multiple copies of a background image and moving them at different speeds and scales, creating a 3D-like parallax movement that brings your slides to life.
Creating the Horizon Parallax Animation
- Prepare layers: Insert four rectangles named Layer 1, Layer 2, Layer 3, and Layer 4, with Layer 4 covering the entire slide.
- Set slide background: Apply a background image or picture fill to the slide.
- Apply soft edges: Add 30 points of soft edges to Layers 1, 2, and 3, making them slightly extend beyond the slide edges for smooth blending.
- Layer order: Arrange layers so that Layer 1 is on top, followed by Layer 2, Layer 3, and Layer 4 at the bottom.
- Add motion path animation: To Layer 1, add a downward motion path animation with distance adjusted to a subtle travel.
- Animation settings: Set duration to 5 seconds, enable smooth start and end of 1 second, auto-reverse, and repeat until the end of the slide.
- Add grow/shrink animation: Also, add a grow/shrink animation to Layer 1 with 175% growth, duration 5 seconds, smooth start/end of 1 second, auto-reverse, and repeat.
- Copy animations: Use Animation Painter to apply these two animations to Layers 2, 3, and 4.
- Adjust growth percentages: Gradually reduce growth size for each layer:
- Layer 1: 175%
- Layer 2: 150%
- Layer 3: 125%
- Layer 4: 110%
- Set fill for layers: Select all layers and set their fill to Slide Background Fill so they all reflect the slide’s background image.
Preview your slide to see a subtle but beautiful parallax effect where layers gently move and scale at different rates, simulating depth and adding sophisticated motion to your background.
Tips for Horizon Parallax
- Use high-quality landscape or abstract images for best results.
- Experiment with growth percentages and motion distances for desired effect intensity.
- Keep animations smooth and subtle to avoid distraction.
5. Button Shine Effect
Finally, let’s create a Button Shine Effect — a glowing, trailing highlight that moves around your buttons or shapes to add polish and interactivity to your slides.

How to Create the Button Shine Animation
- Prepare shapes: Insert a rounded rectangle as your button and add multiple circles for highlights.
- Duplicate and format: Duplicate the button shape and change fill color for contrast. Resize and position the duplicate behind the original.
- Create mask shape: Insert a large rectangle covering both button shapes, send it to back, then select it and the duplicate button shape, and use Subtract to punch out a hole.
- Position highlight circles: Place the circles near the button corners, add 50% transparency initially for visibility.
- Add custom motion path: For one circle, add a custom motion path that traces around the button edges, connecting points to form a loop.
- Animation settings: Set duration to 2 seconds, start With Previous, remove smooth starts for constant speed, and repeat until the end of the slide.
- Enhance circle appearance: Remove transparency and add 30 points of soft edges, then send the circle behind other shapes.
- Duplicate animation: Use Animation Painter to copy the animation from the first circle to the other highlight circles.
- Align highlights: Position all highlight circles precisely on top of each other for a layered shine effect.
- Bring mask shape to top: Ensure the mask shape is on top to properly mask the highlight circles.
- Add animation delays: Add slight delays between each circle’s animation (e.g., 0.1s, 0.2s, 0.3s) for a trailing shine effect.
- Set fill for button shapes: Set the button fill to Slide Background Fill for seamless integration with your slide background.
When you preview, the circles will loop around your button, creating a beautiful, colorful trailing shine that draws attention without overwhelming the slide.
Tips for Button Shine Effect
- Use multiple colors for a vibrant, dynamic shine.
- Adjust motion path points to customize the shine route.
- Combine with clickable buttons for interactive presentations.
Bonus: PowerPoint Animation Pack
All five of these custom animations, along with many more, are part of a comprehensive PowerPoint Animation Pack created by One Skill PPT. This pack serves as your personal animation library, allowing you to quickly apply professionally designed animations to your presentations without recreating them from scratch.
The pack includes:
- Text Animations
- Text Highlight Animations
- Animated Backgrounds
- Shape Animations
- Button Animations
It’s regularly updated based on user feedback and is available exclusively for Patreon Superhero level members. With the pack, you can copy animated text boxes or use the animation painter tool to transfer animations easily between slides and presentations.
For more information and to download the pack, visit the creator’s Patreon page linked in the video description.
Frequently Asked Questions About PowerPoint Animation
Q1: Can I use these animations in any version of PowerPoint?
Most of these animations are compatible with PowerPoint 2016 and later versions. Some advanced features like motion path customization may vary depending on your PowerPoint version.
Q2: How do I avoid slowing down my presentation with too many animations?
Use animations sparingly and purposefully. Limit complex animations to key slides or elements and keep animation durations short for smooth playback.
Q3: Can I customize the timing and speed of these animations?
Yes! PowerPoint allows you to adjust duration, delays, and repetition settings for each animation to fit your specific presentation needs.
Q4: How can I efficiently copy animations to other objects?
Use PowerPoint’s Animation Painter tool to copy and paste animations between text boxes, shapes, or slides quickly.
Q5: Are these animations suitable for professional business presentations?
Absolutely! These animations add polish and engagement while maintaining professionalism when used appropriately.
Q6: What if I want to disable animations when sharing slides?
You can save your presentation as a PDF to remove animations or disable animations in PowerPoint’s Slide Show settings.
Conclusion
Mastering PowerPoint Animation is a powerful way to make your presentations stand out and keep your audience engaged. These five genius animation ideas—from cyber text flickers to dynamic parallax backgrounds and shiny buttons—are just the beginning of what’s possible with PowerPoint’s animation tools.
With step-by-step instructions, you can easily recreate these effects and customize them to fit your unique presentation style. And if you want to save time and access a library of ready-made animations, consider exploring the PowerPoint Animation Pack by One Skill PPT for even more creative options.
Start experimenting today, and watch your slides come alive with professional-quality animations that captivate and impress.
Happy animating!


