
If you’re eager to elevate your PowerPoint presentations with stunning visual effects, you’ve come to the right place. This comprehensive guide will walk you through creating an epic video effect in PowerPoint where text rises from behind mountains and then disappears behind them—an eye-catching technique that adds dynamic flair to your slides. Using only PowerPoint and a bit of creativity, you can produce professional, cinematic results without needing advanced video editing software.
In this tutorial, you’ll learn how to use two instances of the same video clip combined with clever masking techniques to create a layered “video sandwich” effect. We’ll also cover how to animate text so it seamlessly interacts with the video, making it appear as if it’s flying out from behind mountain peaks.
Whether you’re a seasoned PowerPoint user or just getting started, this article will provide you with actionable steps and tips to create jaw-dropping PowerPoint video effects that captivate your audience.
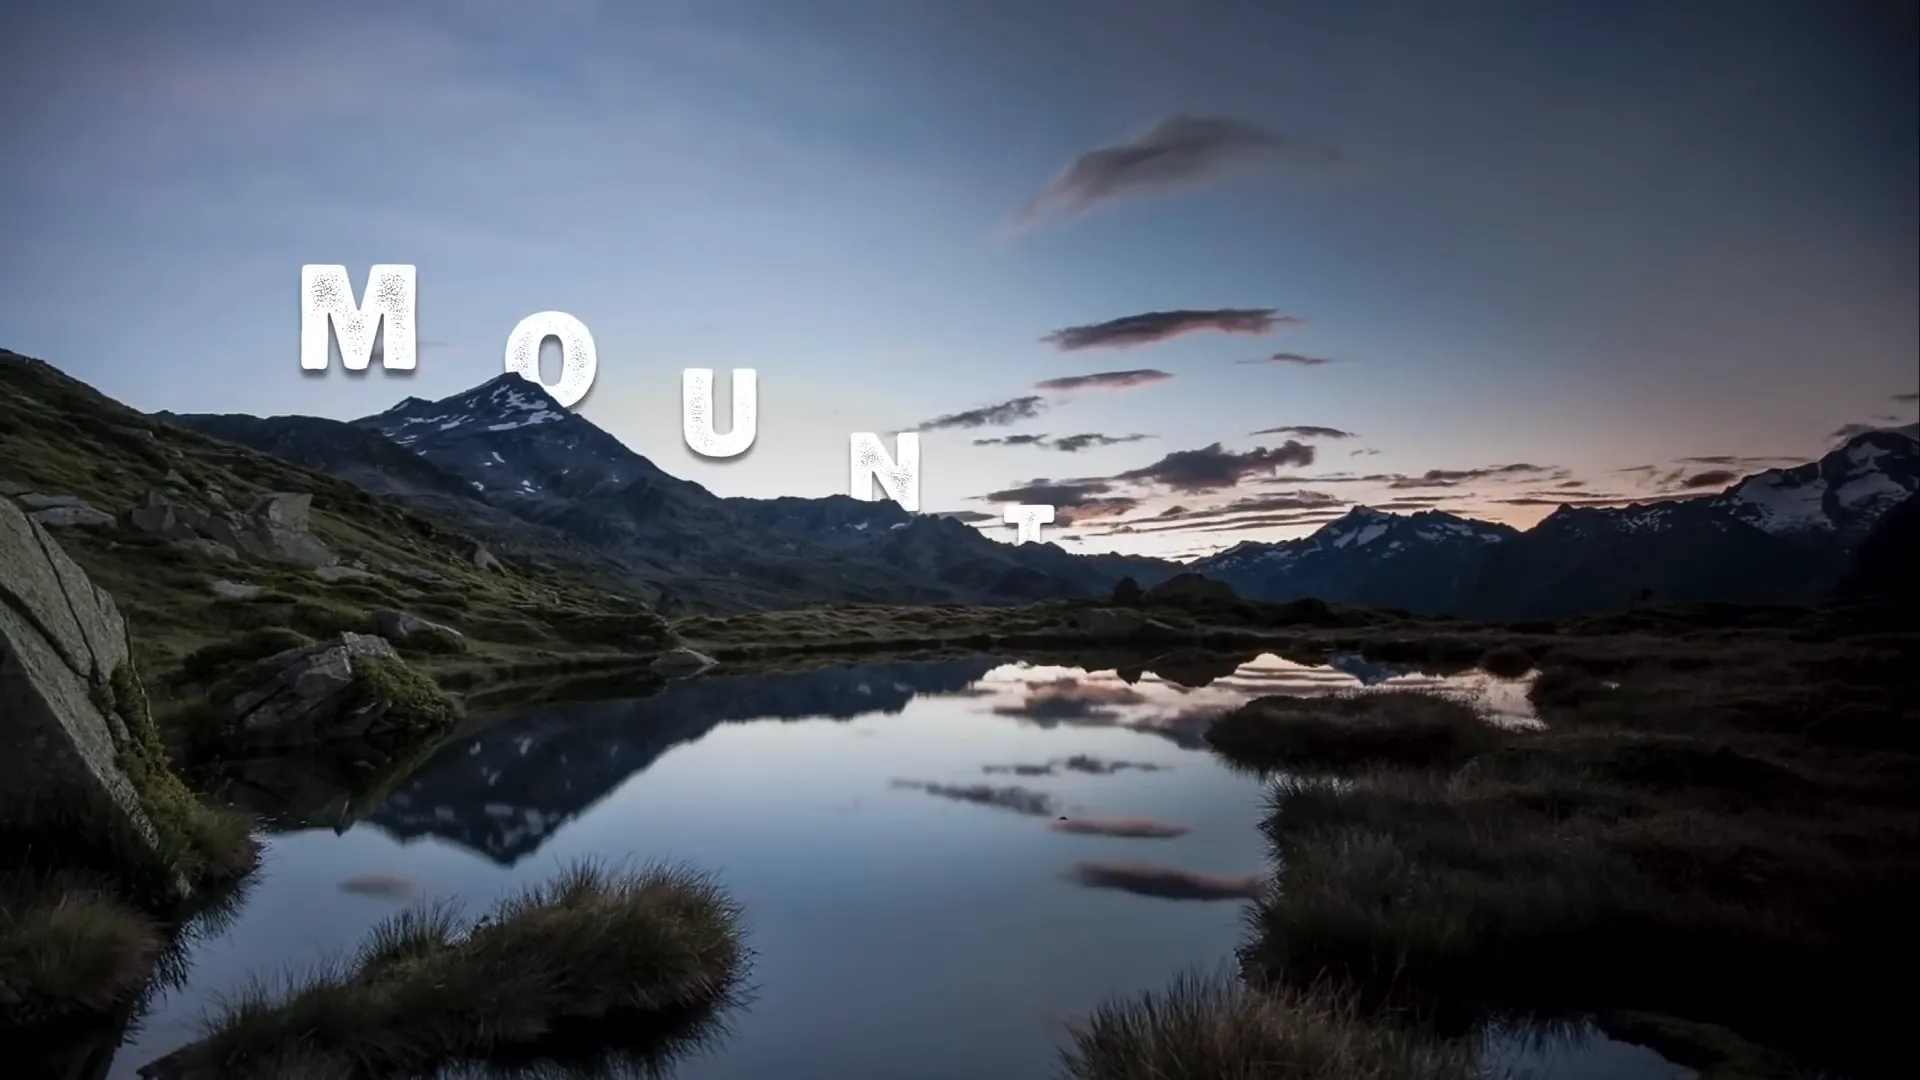
Table of Contents
- Getting Started: Preparing Your PowerPoint Slide and Video
- The Big Secret: Creating Two Video Layers
- Masking the Video: How to Crop the Sky Away
- Advanced Masking with Photopea: Precise Vector Shapes
- Animating Text to Rise from Behind Mountains
- Final Touches and Tips for Seamless Playback
- Frequently Asked Questions
Getting Started: Preparing Your PowerPoint Slide and Video
The first step in creating this stunning PowerPoint video effect is to set up your slide and import the video you’ll work with. Here’s how:
- Create a new blank slide: Open PowerPoint (Office 365 recommended for best features) and insert a new blank slide to serve as your canvas.
- Find a suitable video: For this effect, you want a video featuring a static mountain range with a dynamic sky—such as a time-lapse sunset or sunrise. I recommend using this free video from Pexels by Eberhard. It’s 17 seconds long and available in full HD.
- Insert the video into PowerPoint: Drag and drop the downloaded video onto your slide.
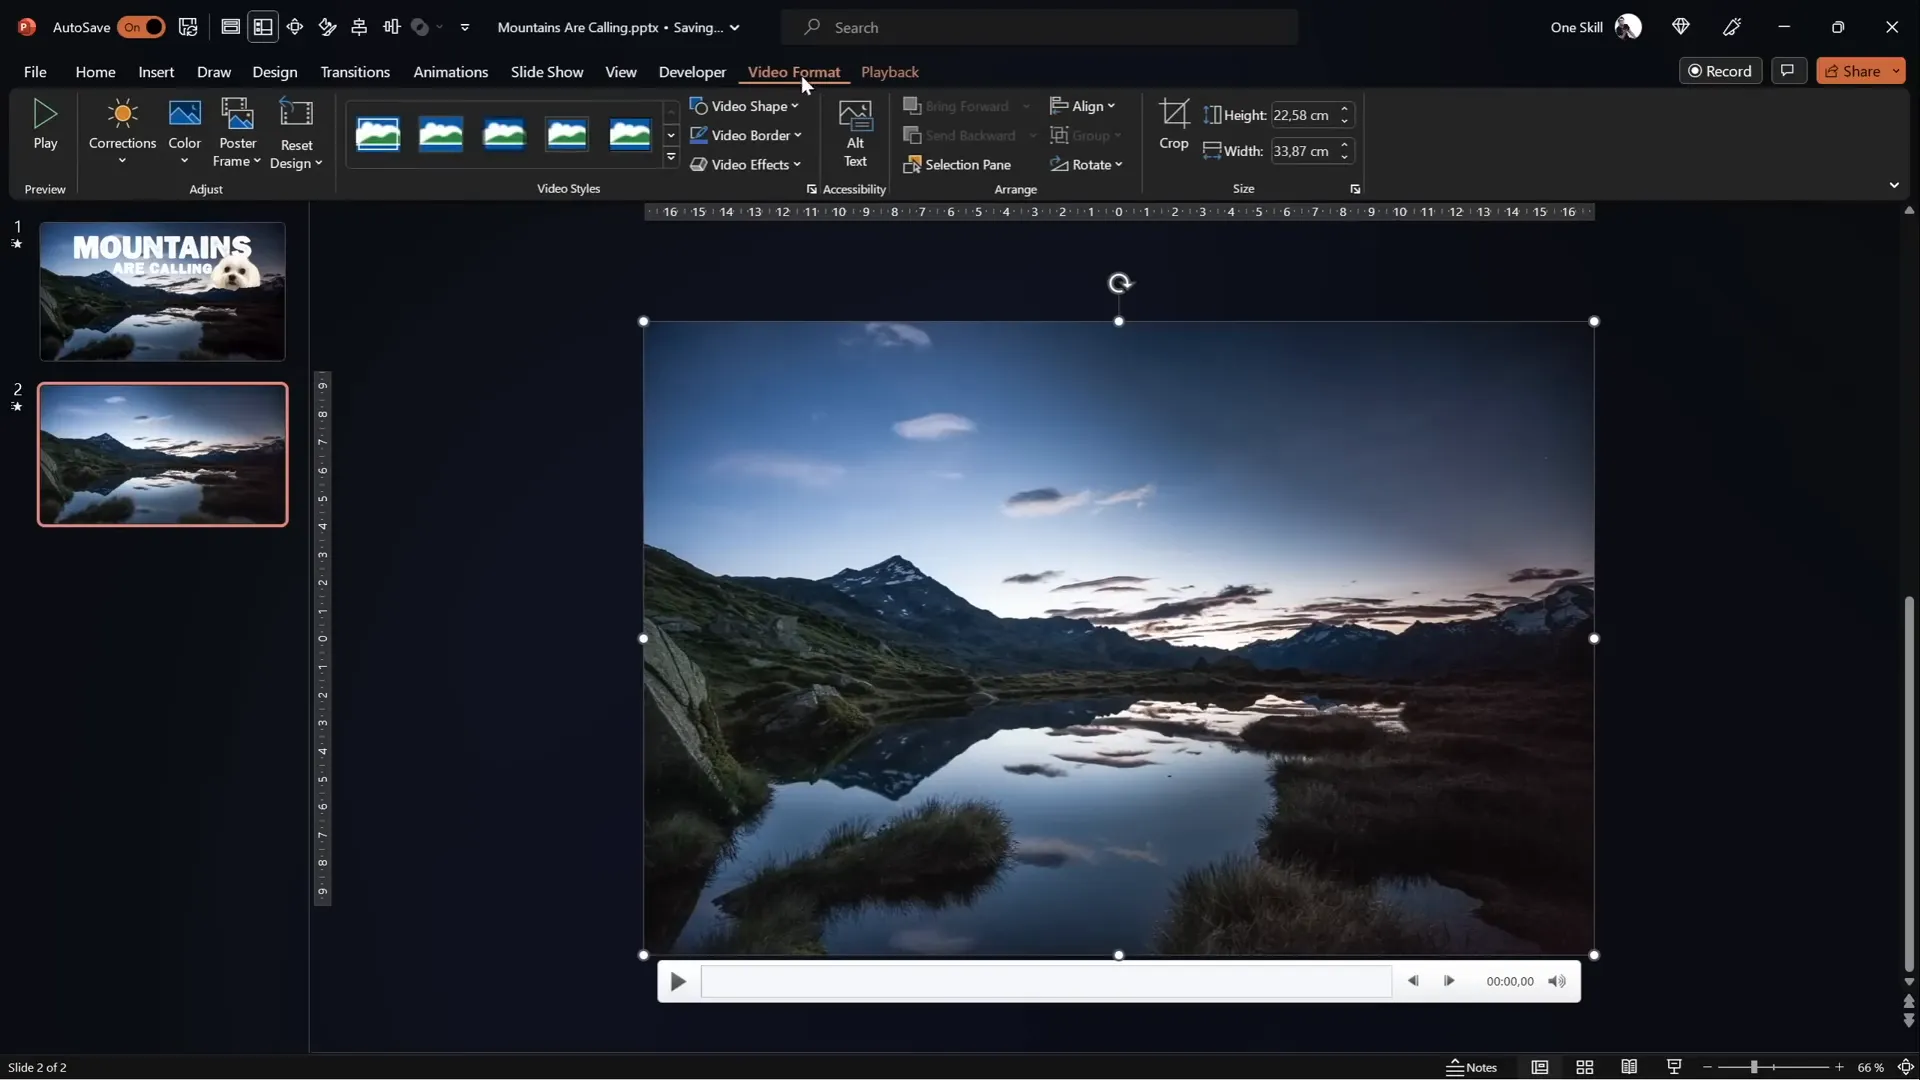
- Resize and center the video: Hold down Ctrl + Shift while dragging a corner handle to resize the video from the center, ensuring it covers the entire slide without distortion. Then crop the top and bottom edges to match your slide’s aspect ratio.
- Adjust video brightness: To make white text stand out later, reduce the video brightness by 5% (adding a slight dark overlay) via the Format Video panel.
- Set video playback options: Configure the video to start automatically and loop continuously using the Playback tab.
Once your video is perfectly positioned and configured, test your slide in presentation mode to confirm the video plays smoothly and loops without interruption.
The Big Secret: Creating Two Video Layers
The heart of this effect lies in layering two identical video clips and strategically masking the top one to reveal content behind the mountain peaks.
Here’s the secret formula:
- Duplicate the video: Copy your original video clip and paste it onto the same slide. You now have two identical videos stacked.
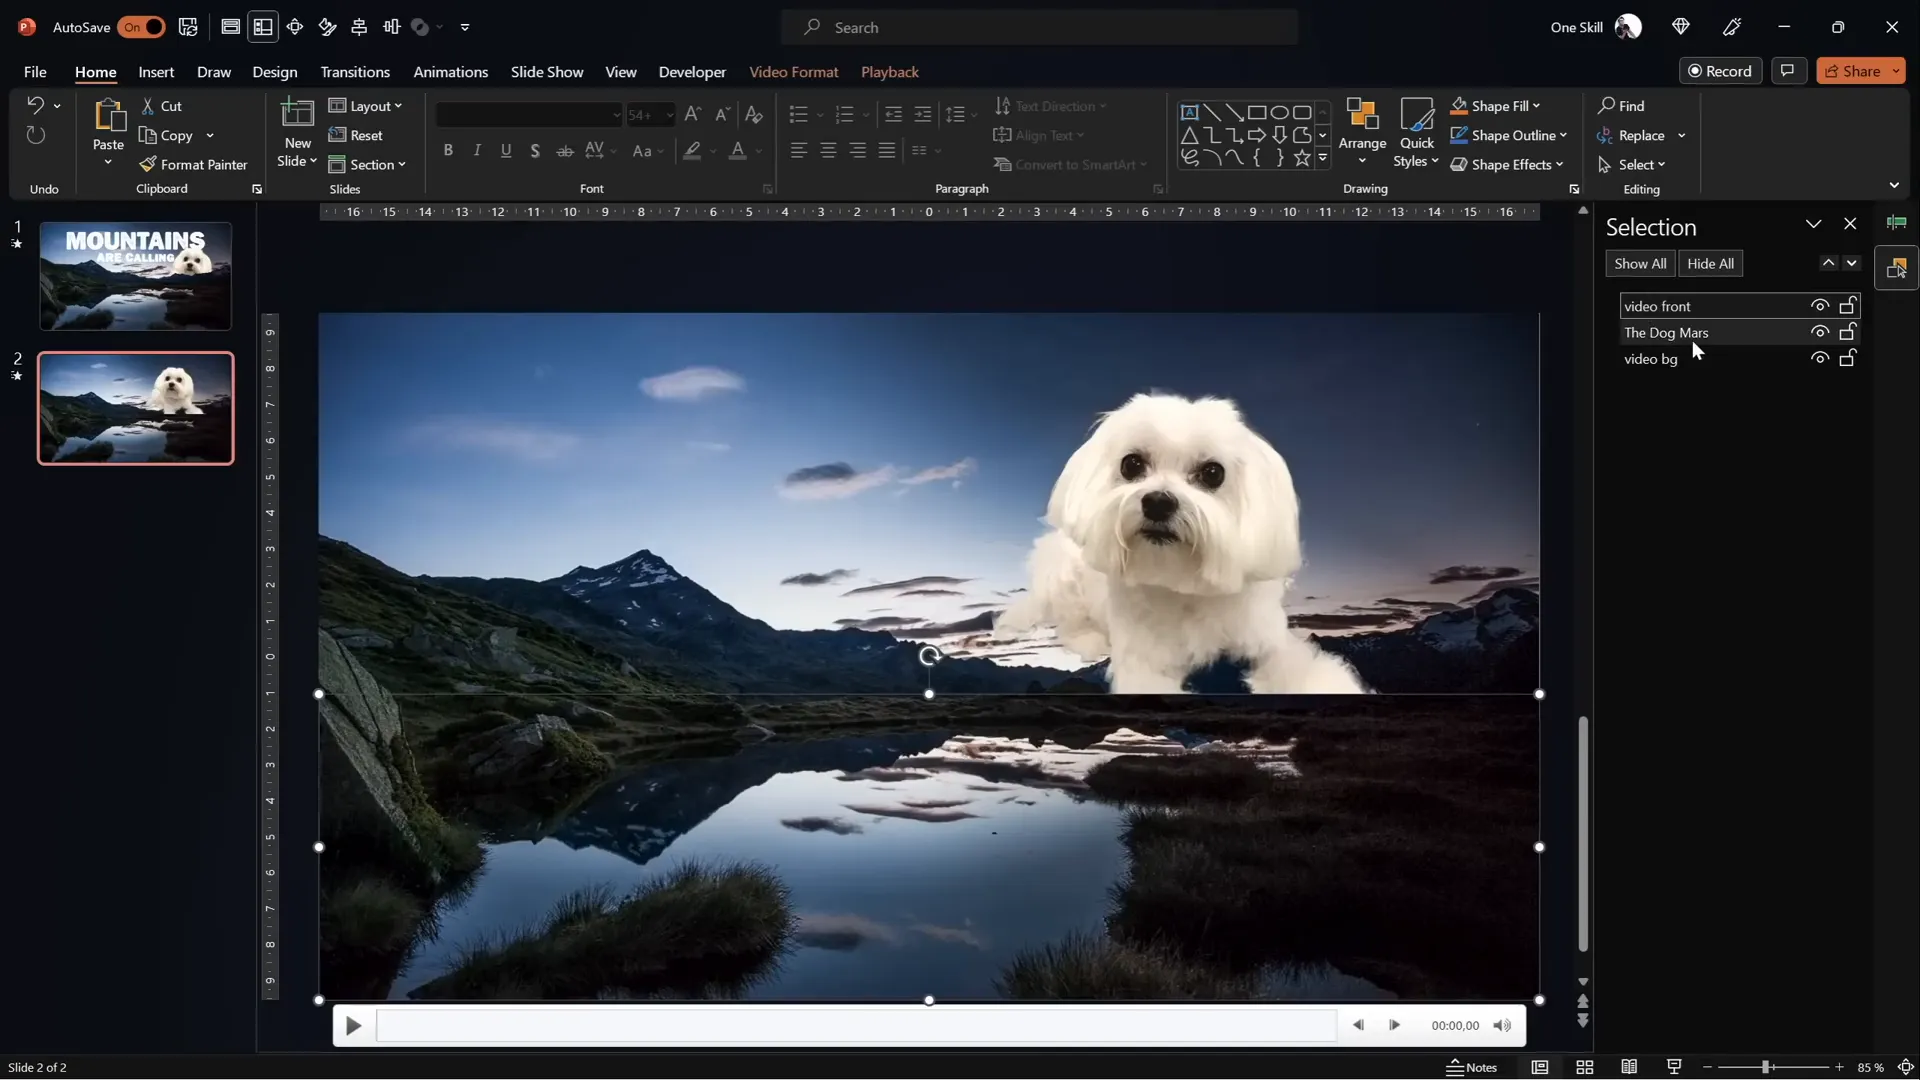
- Name your videos for clarity: Rename the bottom video to Video Background and the top copy to Video Front.
- Align both videos: Make sure both videos are perfectly centered and aligned on the slide.
- Crop the sky from the top video: Use cropping or masking techniques (explained in detail below) to remove the sky from the top video, so only the mountains remain visible.
- Insert any object between layers: Now you can place text, images, or even your adorable dog Mars between the two videos to make it appear as if the object is nestled behind the mountains.
This layering technique creates the illusion that the text or object interacts dynamically with the video, rising from behind the mountains and then disappearing behind them.
Masking the Video: How to Crop the Sky Away
Simply cropping the top of the video in a straight line won’t do justice to the natural mountain contours. To achieve a professional look, you need to crop the sky following the jagged mountain line. There are two main methods to do this within PowerPoint:
Method 1: Using the Freeform Shape Tool
- Insert a Freeform shape by navigating to Insert > Shapes > Freeform.
- Click multiple points tracing the mountain peaks as closely as possible, making sure to close the shape by clicking the starting point last.
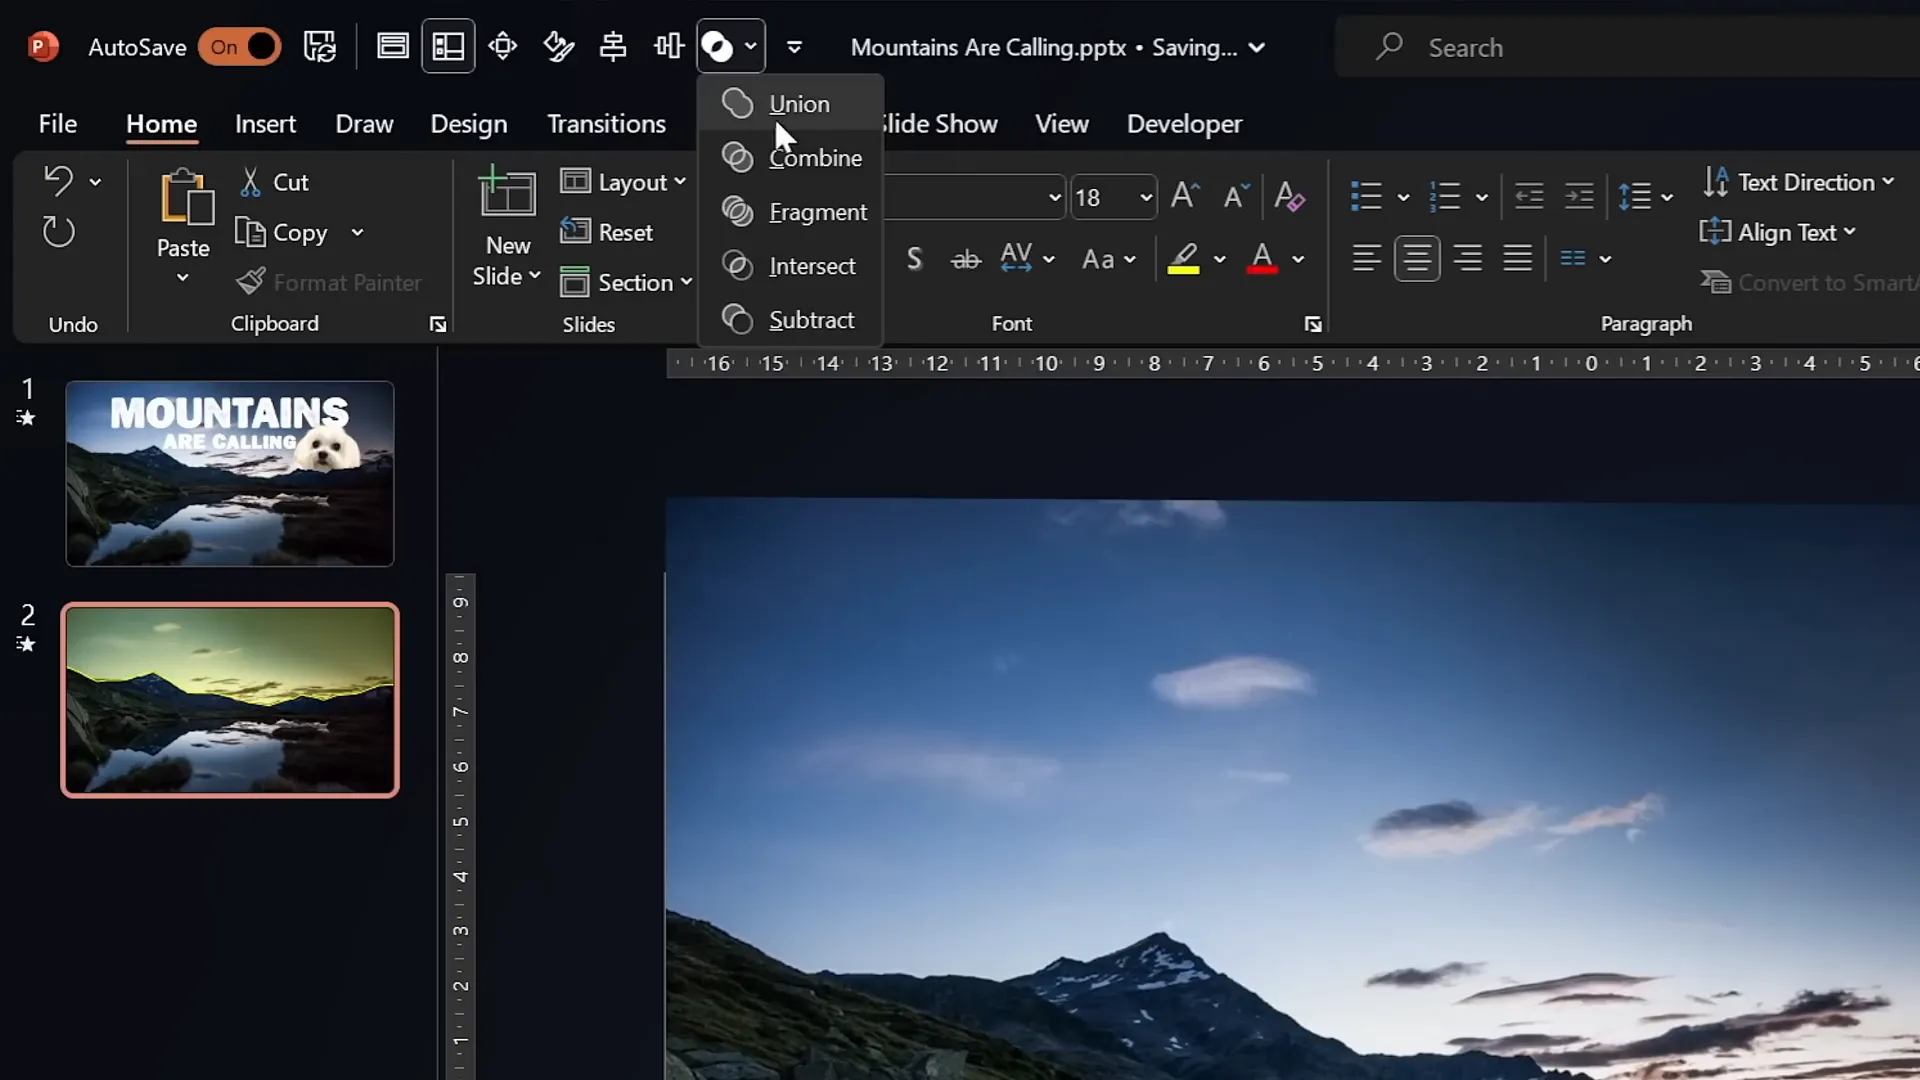
- Select the top video (Video Front), then hold Shift and select your freeform shape.
- Use the Merge Shapes > Subtract option (found under the Shape Format tab) to cut out the sky from the top video.
Tip: If you don’t see the Merge Shapes button, you can add it to your Quick Access Toolbar by following tutorials online.
This approach is effective but requires patience and precision to closely follow the mountain line.
Method 2: Using Photopea for Precise Vector Masking
For a more precise cutout, you can use the free online photo editor Photopea to create an SVG vector mask of the sky:
- Copy a screenshot of your video frame from PowerPoint (Ctrl + C).
- Go to Photopea.com and paste the screenshot (Ctrl + V).
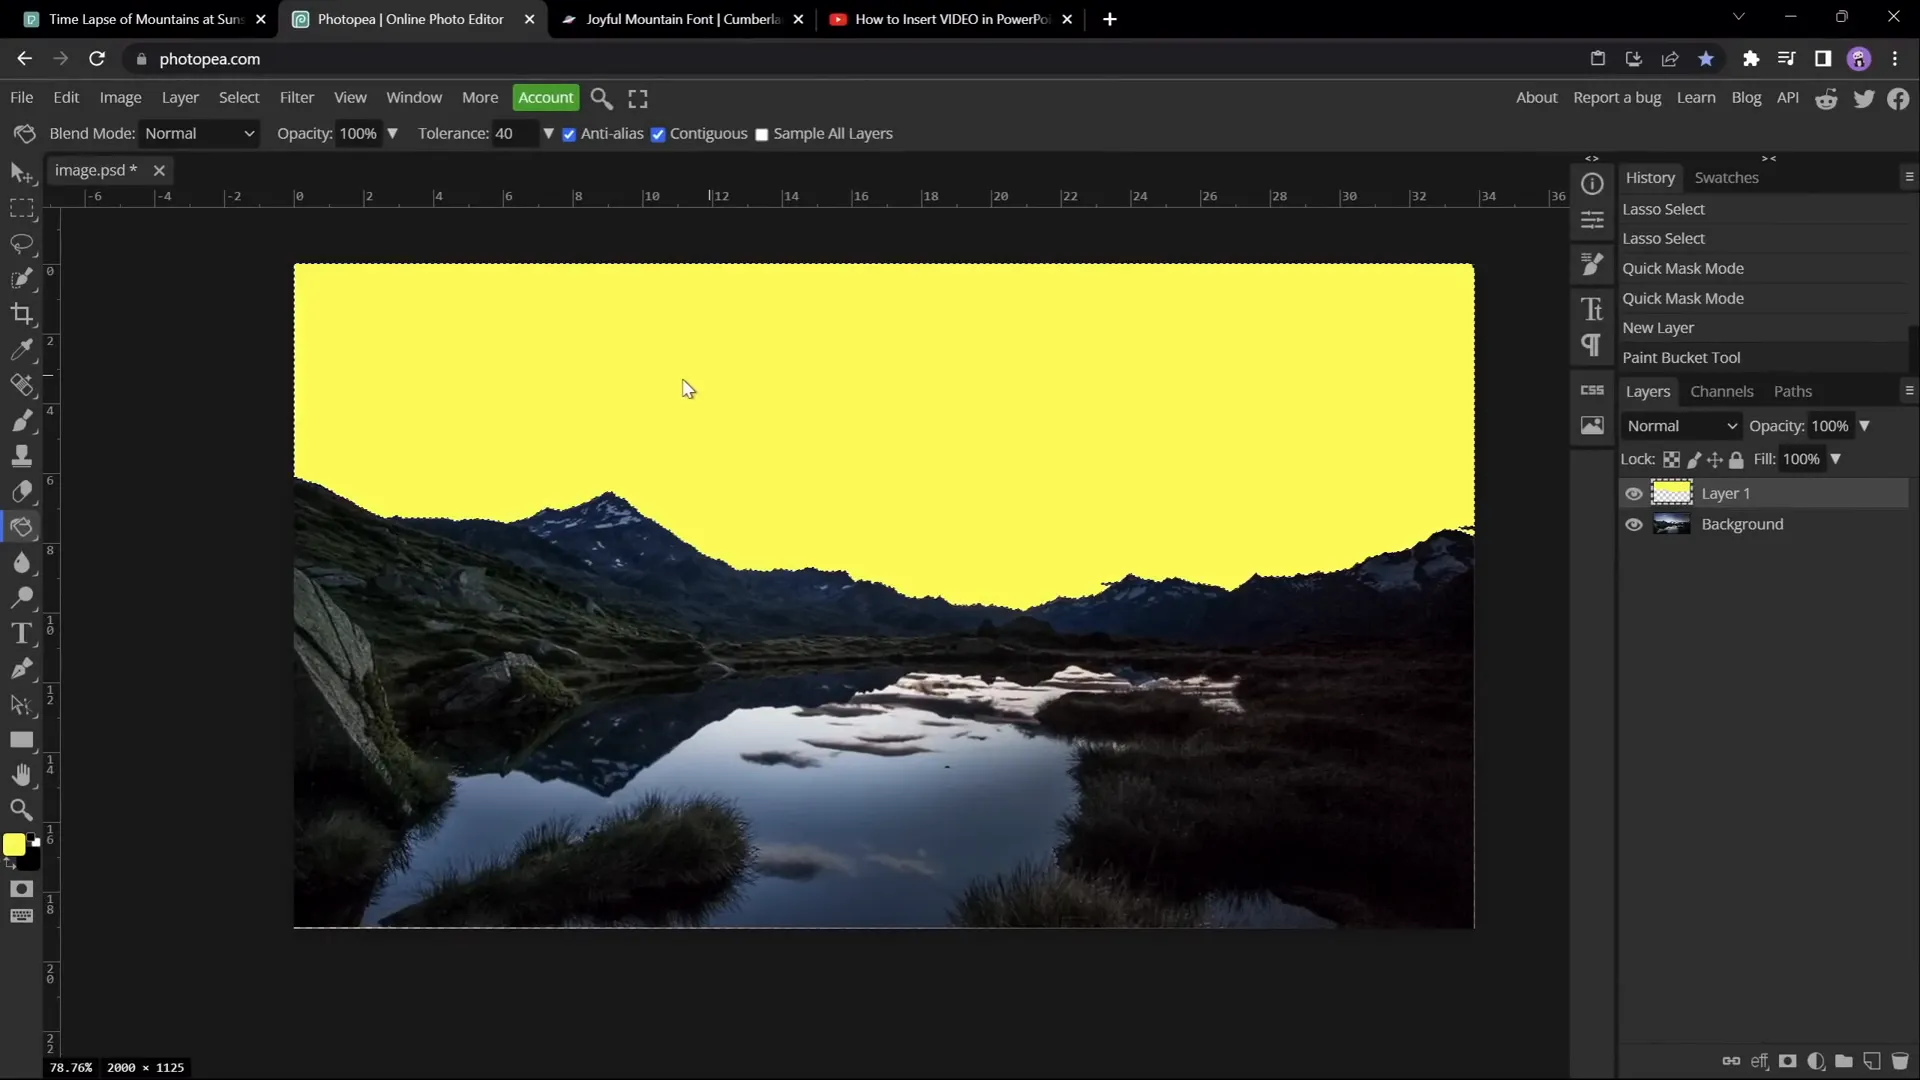
- Use the Quick Selection Brush to select the sky area. Adjust brush size with square brackets [ ].
- Enter Quick Mask mode (Q) to review and refine your selection.
- Use the Lasso tool to subtract unwanted areas from the selection (e.g., parts of mountains mistakenly included).
- Create a new blank layer and fill the selected sky area with a solid color (e.g., yellow) using the bucket tool.
- Hide the original image layer temporarily.
- Go to Image > Vectorize Bitmap, select Photo mode and Polygon option, and click OK to convert the colored sky into a vector shape.
- Export the vector shape as an SVG file.
- Import the SVG into PowerPoint by dragging it onto your slide.
- Convert the SVG to a PowerPoint shape to see the vector points.
- Select the front video, hold Shift, select the imported vector shape, and use Merge Shapes > Subtract to cut out the sky precisely.
This method yields a much cleaner and more accurate mask and is ideal for complex mountain lines.
Animating Text to Rise from Behind Mountains
Now that you have your video layers arranged perfectly, the next step is to add and animate text so it appears to rise from behind the mountains. Here’s how to do it effectively:
- Insert your text box: Use a font that complements the mountain theme—for example, Joyful Mountain works beautifully.
- Style your text: Adjust font size, color (white works well on a darkened video), and spacing to your liking. To save time, you can copy formatting from previous text boxes using Ctrl + Shift + C and apply it with Ctrl + Shift + V.
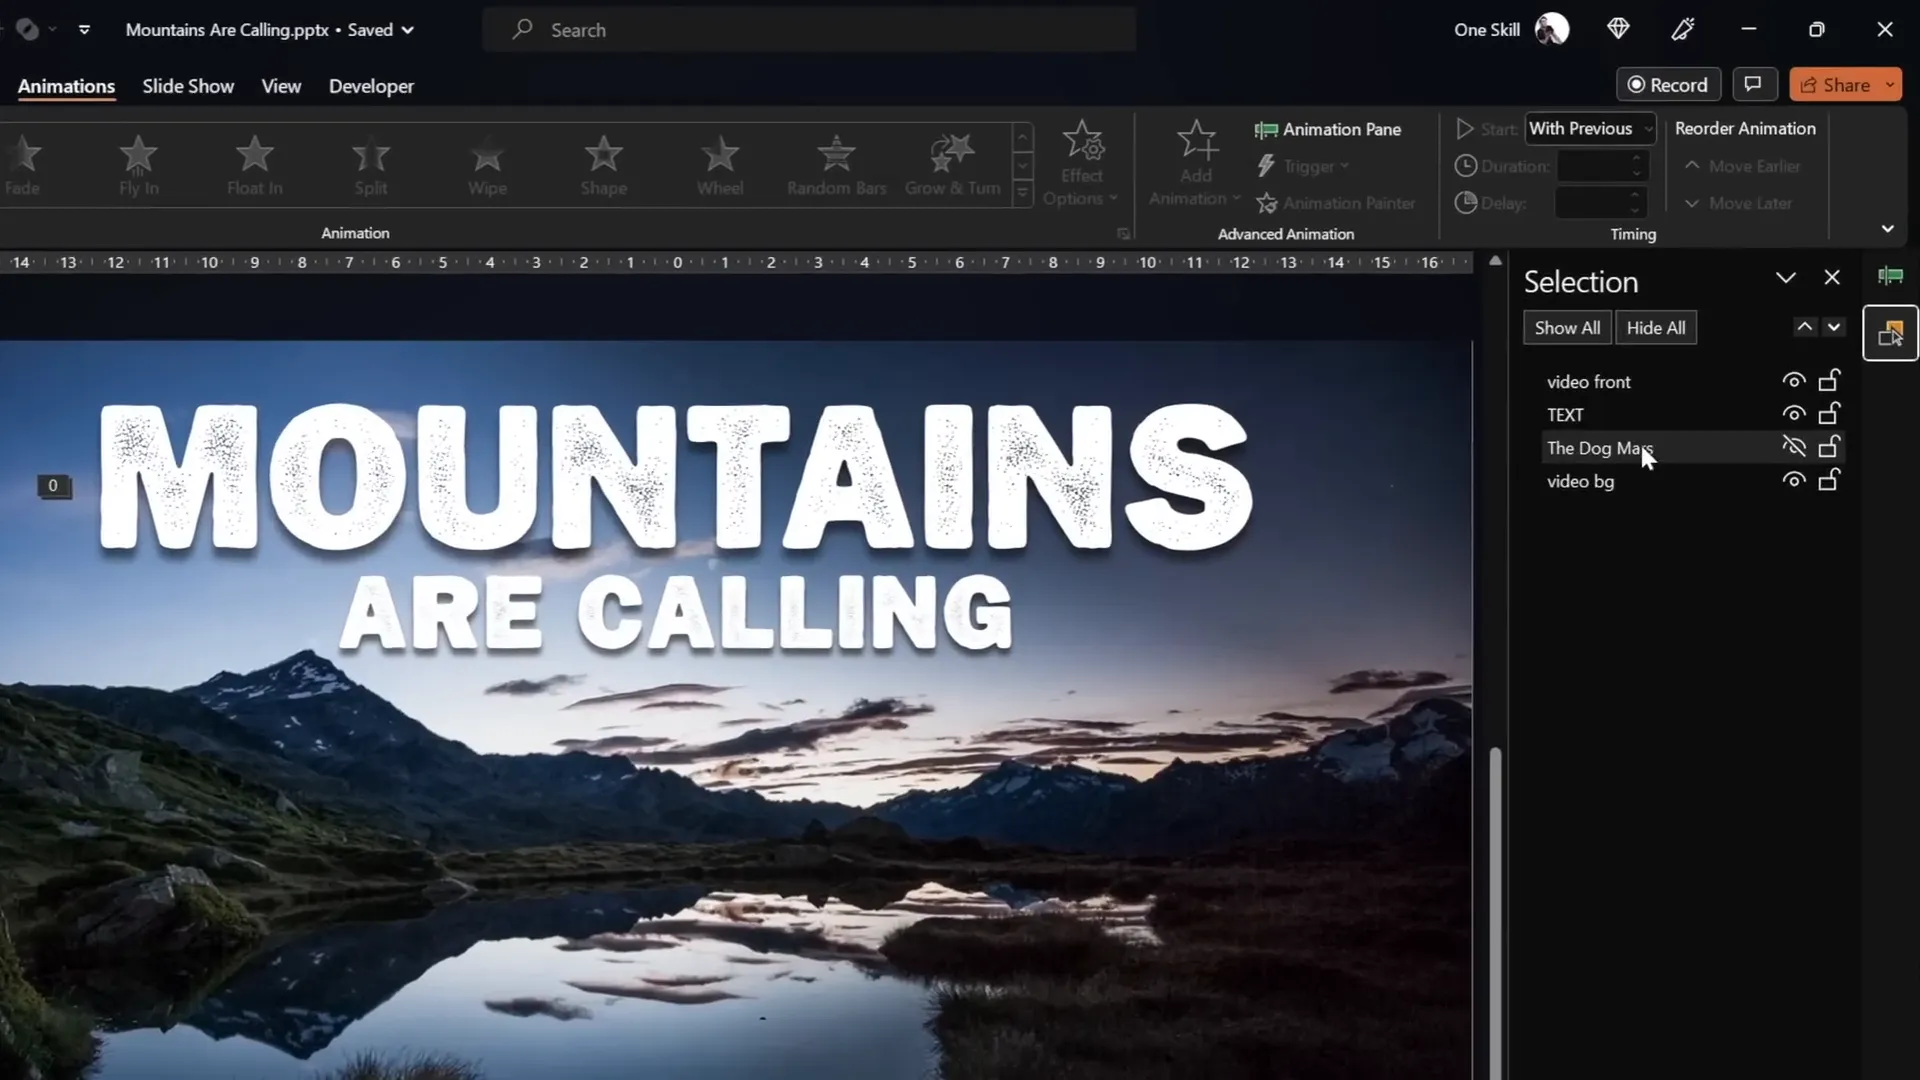
- Position your text: Place the text box below the front video layer in the Selection Pane. This placement ensures the text will appear behind the mountains when animated.
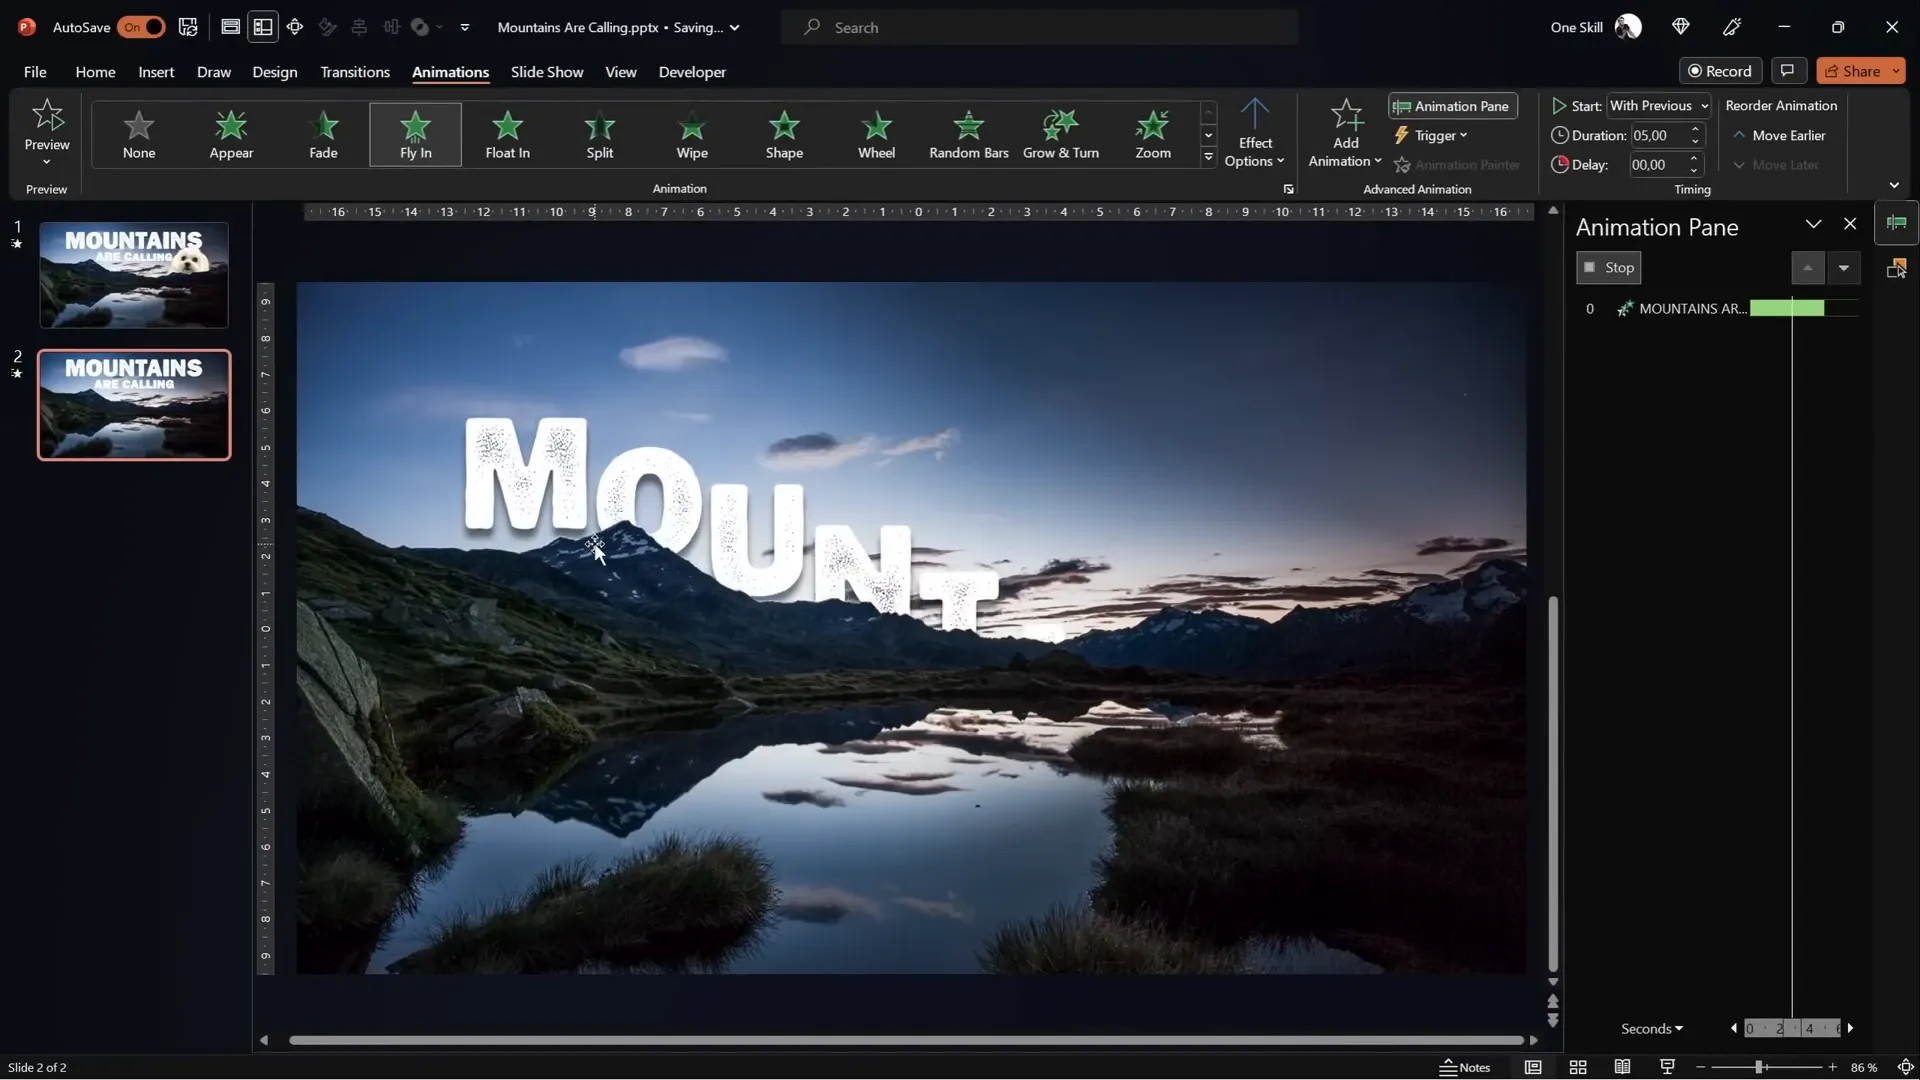
- Add entrance animations: Use the Fly In animation with the following settings:
- Start: With Previous
- Duration: 5 seconds
- Effect Options: Maximum Smooth End
- Animate Text: By Letter
- Delay Between Letters: 5%
- Add a second entrance animation: Apply Basic Zoom animation:
- Start: With Previous
- Duration: 5 seconds
- Animate Text: By Letter
- Delay Between Letters: 5%
- Add exit animations: To make the text fly away smoothly, add these in sequence:
- Fly Out animation with Maximum Smooth Start, 5 seconds duration, starting With Previous, no delay.
- Basic Zoom Out animation, 5 seconds duration, starting With Previous, no delay.
- Adjust animation timings: Add a delay of approximately 11 seconds to the exit animations to ensure the text remains visible long enough before flying away.
When you play the slideshow, the text will fly in letter by letter, zoom in for added dynamism, then after a pause, zoom out and fly out, all while interacting with the mountain video layers.

Final Touches and Tips for Seamless Playback
To polish your presentation and ensure smooth playback, keep these final tips in mind:
- Synchronize video playback: Add a play animation to both video layers and set them to start With Previous with zero delay. This makes sure both videos play perfectly in sync, maintaining the illusion of a single layered video.
- Organize your animation pane: Use the Animation Pane to manage the order and timing of your animations. You can drag animations to reorder or add delays as needed.
- Use the Selection Pane: Rename and organize objects for easier management, especially when dealing with multiple layers and animations.
- Insert additional objects: Feel free to add images, shapes, or even videos between the two video layers to create more complex compositions. For example, you can insert a photo of your dog Mars to appear nestled behind the mountains.
- Test your slide thoroughly: Always preview your slide in full-screen presentation mode to check the timing and smoothness of all animations and video playback.
With these steps, your PowerPoint slide will deliver a captivating visual story that blends video, text, and animation seamlessly.
Frequently Asked Questions About PowerPoint Video Effects
Can I use any video for this effect?
Yes! However, videos with a clear foreground (like mountains) and a contrasting background (like sky) work best. Time-lapse or stationary landscape videos are ideal because the background movement adds visual interest while the foreground remains static for masking.
Do I need advanced video editing software to create this effect?
No! This entire effect can be created within PowerPoint using its built-in tools, along with free online editors like Photopea for vector masking. No expensive or complicated software is required.
What versions of PowerPoint support these features?
PowerPoint Office 365 or PowerPoint 2019 and later support the necessary video and shape editing features such as Merge Shapes and video playback animations. Earlier versions may lack some functionality.
How do I add the Merge Shapes button if it’s not visible?
You can add it to your Quick Access Toolbar manually. Search online for tutorials on adding Merge Shapes to Quick Access Toolbar for step-by-step instructions to enable this powerful feature.
Can I use other fonts besides Joyful Mountain?
Absolutely! Choose any font that fits your presentation style. Joyful Mountain is a great thematic choice for mountain scenes, but feel free to use fonts that suit your brand or message.
Is this effect suitable for professional presentations?
Yes! When done tastefully, this effect adds polish and engagement to your slides without distracting your audience. It’s perfect for marketing, educational, or creative presentations.
Where can I find more creative ideas for using videos in PowerPoint?
Explore dedicated PowerPoint tutorial channels and resources that showcase innovative uses of video, including cropping, masking, and animation techniques to enhance your presentations.
Summary Table: Steps to Create the Epic Mountain Text Video Effect in PowerPoint
| Step | Action | Key Tips |
|---|---|---|
| 1 | Insert and resize your landscape video | Use Ctrl + Shift to resize from center; crop to match slide ratio |
| 2 | Duplicate video to create two layers | Rename layers as Video Background and Video Front |
| 3 | Crop sky from Video Front layer | Use Freeform shape or Photopea vector mask for precision |
| 4 | Insert text or objects between video layers | Position text below Video Front in Selection Pane for masking |
| 5 | Animate text with Fly In and Zoom effects | Animate by letter with delays for dynamic appearance |
| 6 | Add exit animations to text | Use Fly Out and Zoom Out with timed delays |
| 7 | Synchronize video playback animations | Start both videos With Previous and zero delay |
| 8 | Preview and adjust timings | Ensure smooth animation flow and seamless video looping |
Conclusion
Creating captivating PowerPoint video effects like the epic rising text behind mountains is easier than you might think. By layering two synchronized videos and using either PowerPoint’s built-in Freeform shape tool or the free online editor Photopea for precise vector masking, you can achieve professional and polished results.
Animating your text to fly in and out with smooth zoom effects adds a dynamic storytelling element that will surely impress your audience. These techniques not only enhance the visual appeal but also help you communicate your message more effectively.
Remember, the key to mastering these effects lies in practice, patience, and attention to detail. Experiment with different videos, masks, fonts, and animations to find the perfect combination for your presentation style.
Ready to take your PowerPoint skills to the next level? Dive in, try these steps, and watch your presentations come alive with stunning video and animation effects!
Check out the full video: EPIC PowerPoint Video Effect Tutorial


