
Welcome to a comprehensive guide where you will discover how to create and export stunning videos using just Microsoft PowerPoint. This step-by-step tutorial, inspired by the expert insights from One Skill PowerPoint, will walk you through the process of editing video clips, crafting animated video titles with a captivating “video in text” effect, and adding seamless background music that plays across your slides. Whether you’re a beginner or someone looking to enhance your PowerPoint skills, this guide will empower you to produce professional-quality videos without the need for complicated software.
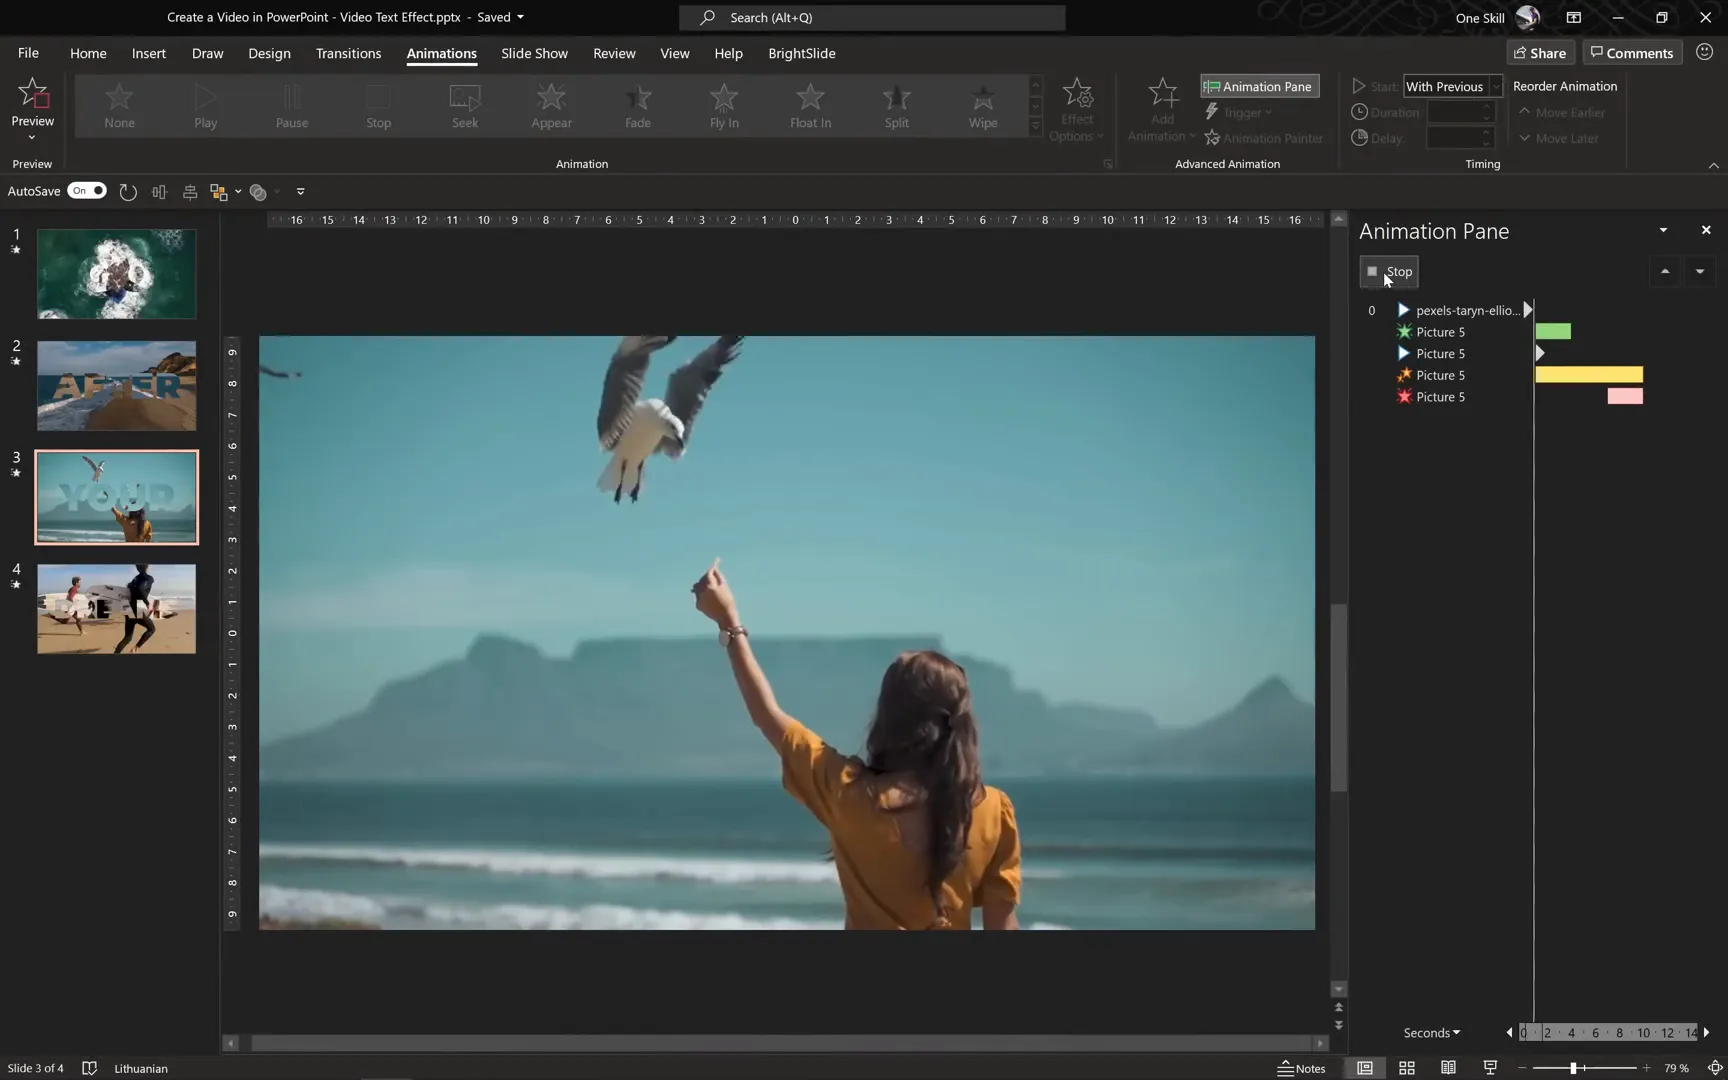
Table of Contents
- Introduction: Unlocking Video Creation in PowerPoint
- Step 1: Inserting and Preparing Video Clips
- Step 2: Duplicating and Editing Videos for a Dynamic Effect
- Step 3: Creating the Video-in-Text Effect
- Step 4: Adding Animations for Dynamic Visuals
- Step 5: Creating Multiple Scenes for Your Video
- Step 6: Adding Background Music Across Slides
- Step 7: Exporting Your PowerPoint as a Video
- Tips and Tricks for Video Creation in PowerPoint
- Frequently Asked Questions (FAQ)
- Conclusion: Mastering Video Creation with PowerPoint
Introduction: Unlocking Video Creation in PowerPoint
PowerPoint is often seen as a presentation tool, but did you know you can use it to create fully animated videos? With the right techniques, you can transform simple slides into dynamic video content that captivates your audience. This tutorial is built around using Microsoft 365‘s PowerPoint version, which offers powerful features for video editing and animation.
By the end of this guide, you will know how to:
- Insert and edit video clips within PowerPoint slides.
- Create an eye-catching video-in-text animation effect.
- Add and synchronize background music across multiple slides.
- Export your PowerPoint presentation as a high-quality video file.
Let’s dive right into the creative process!
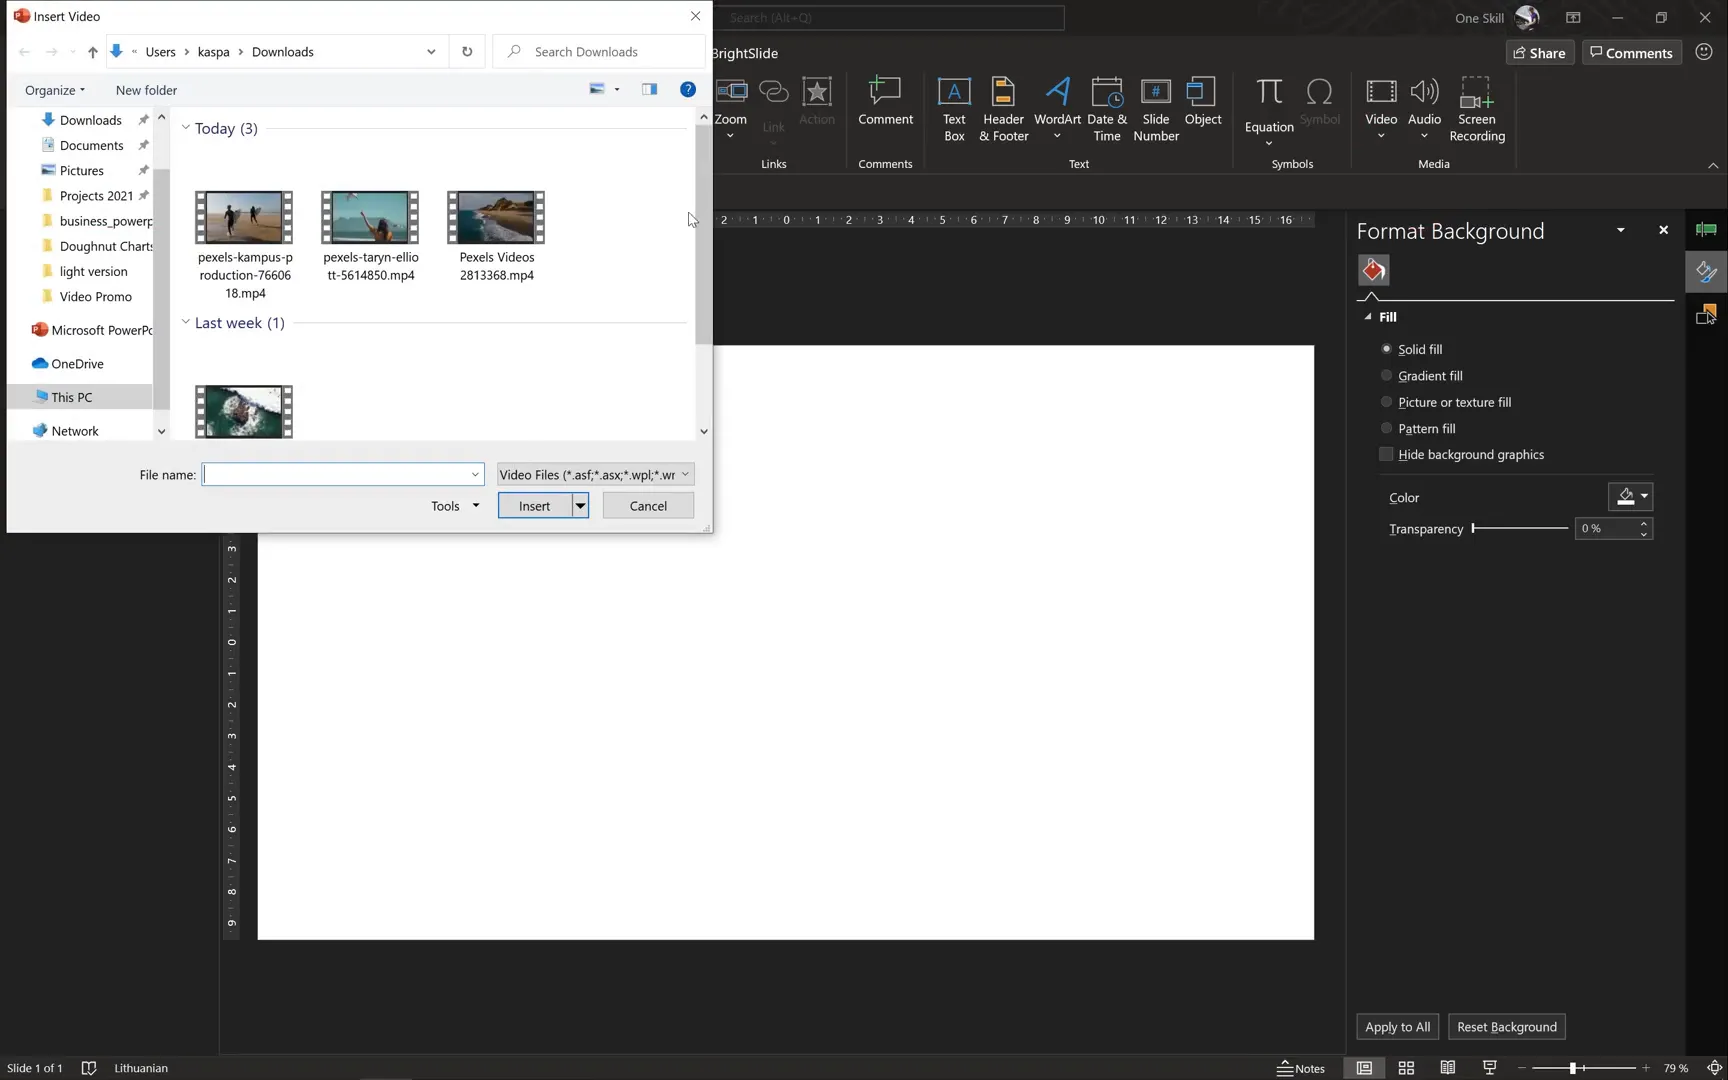
Step 1: Inserting and Preparing Video Clips
The first step in your video project is to insert your chosen video clips into PowerPoint. You can find excellent free videos on platforms like Pexels, which offers a variety of high-quality clips perfect for your projects.
Here’s how to get started:
- Open PowerPoint and navigate to the slide where you want your video.
- Go to the Insert tab and select Video, then choose Video on My PC or from an online source.
- Pick your video file and insert it.
- Resize the video so it covers the entire slide. To do this precisely, hold down the Ctrl and Shift keys while dragging the corner to resize from the center.
- If the video extends beyond the slide edges, use the Crop tool to adjust it to a 16:9 aspect ratio, which is standard for widescreen displays.
Keep in mind that PowerPoint automatically adds some animations to inserted videos. For now, remove these animations so you can customize them later.

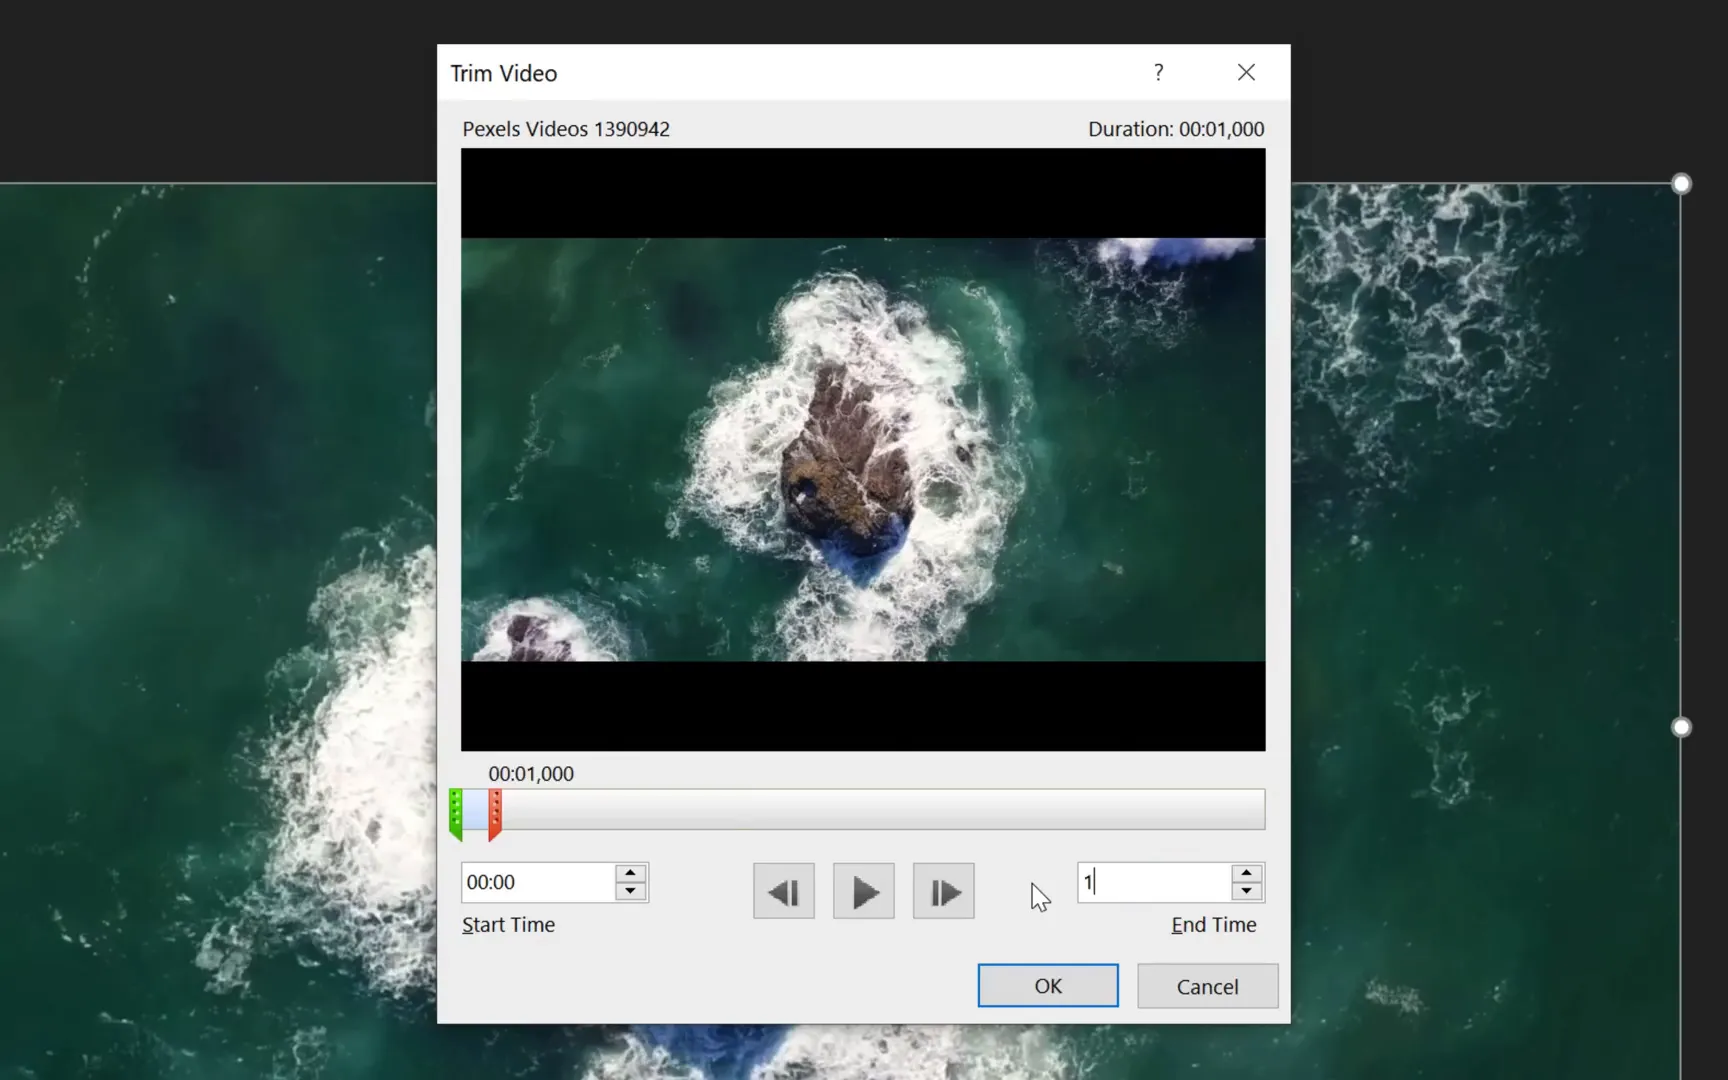
Trimming Video Length
Decide how long you want your video clip to play. For example, to keep your video short and engaging, you might want to trim it to 10 seconds:
- Select the video and go to the Playback tab.
- Click Trim Video.
- Set the duration to 10 seconds and confirm.
This trimming ensures your video fits perfectly within your slide’s timing and keeps your presentation smooth and professional.
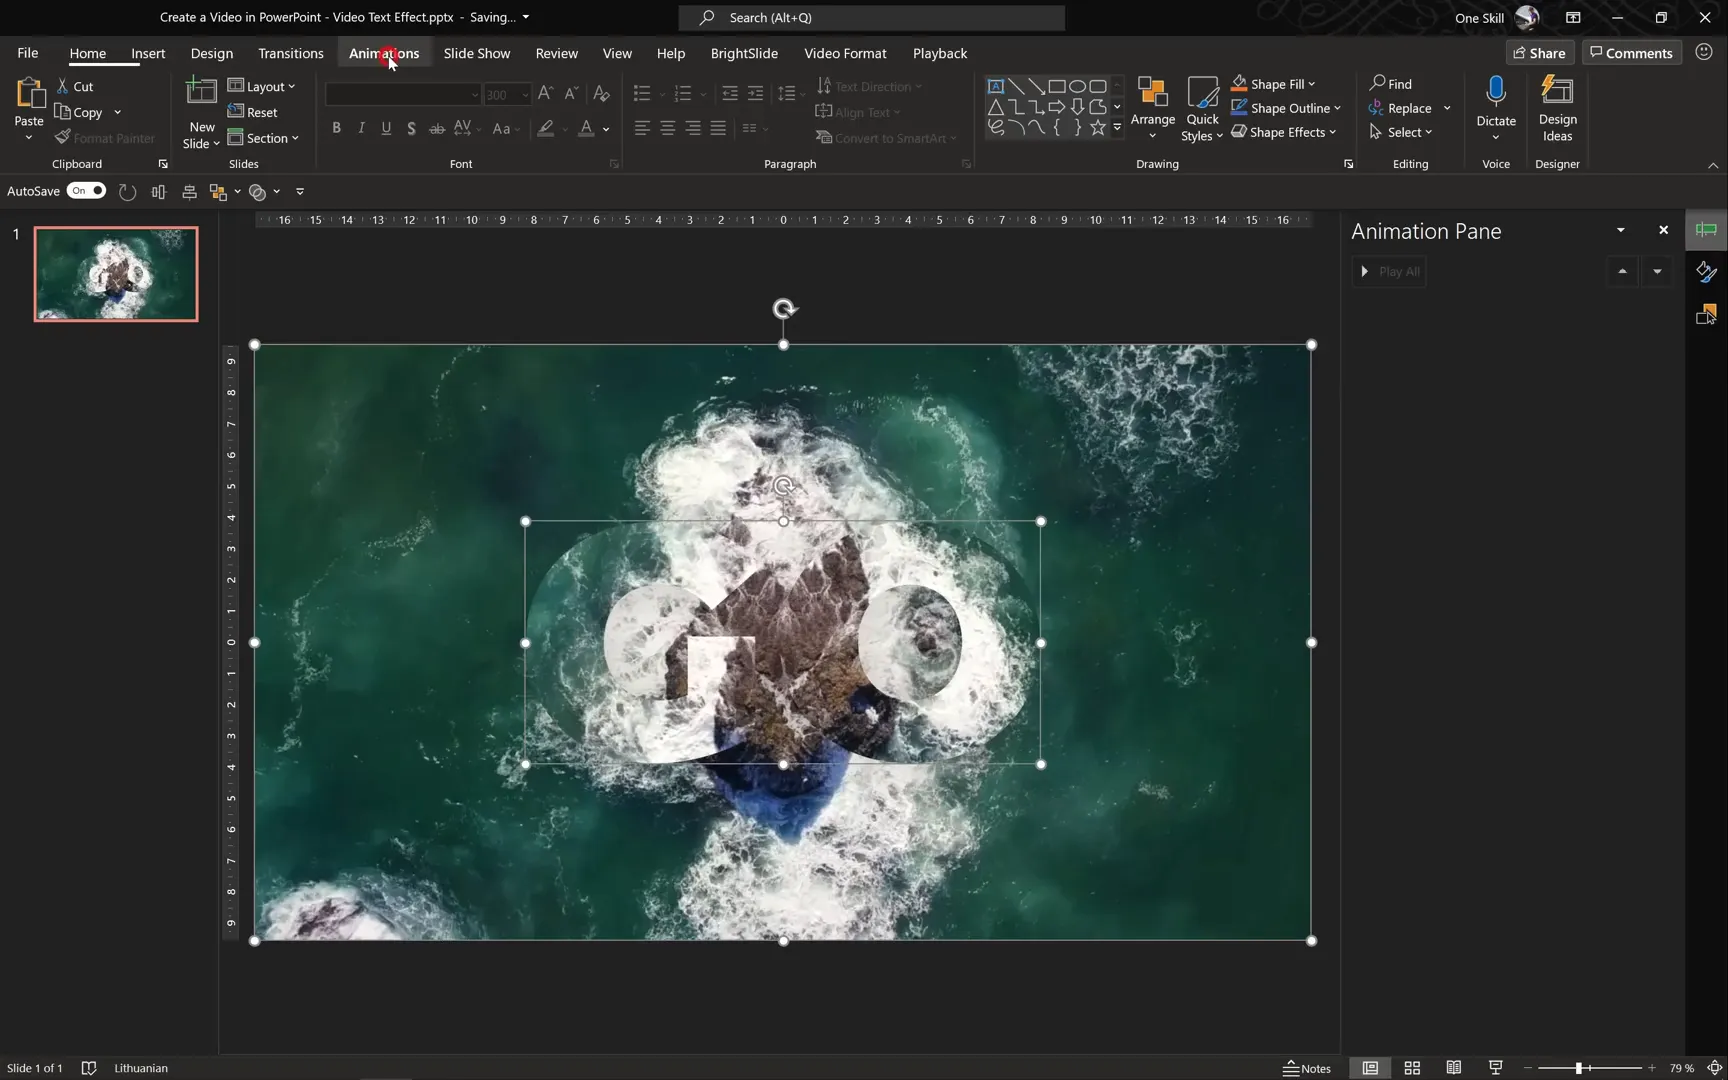
Step 2: Duplicating and Editing Videos for a Dynamic Effect
To create a visually appealing effect, duplicate your video clip and apply transformations to the second copy. This technique will later help you achieve the “video in text” animation effect.
- Select your video clip and press Ctrl + D to duplicate it.
- Rename the first video to Video One and the duplicate to Video Two for easier management.
- Align both videos to the center of the slide for symmetry.
- Flip the second video horizontally by selecting it, then going to the Format tab, choosing Rotate, and selecting Flip Horizontal.

This flipping adds contrast between the two videos, setting the stage for a unique visual effect in your title animation.
Step 3: Creating the Video-in-Text Effect
Now, let’s add some text that will display your video clip inside the letters themselves, creating a highly engaging video-in-text effect.
- Insert a text box by going to Insert > Text Box and clicking anywhere on your slide.
- Type your desired word or phrase. For example, type GO.
- Center-align the text box on the slide.
- Customize the font style and size. I use Montserrat Black with a font size of 300 for a bold and striking look.
- Choose a yellow color for the text with some transparency, allowing you to see the video behind the text.

Using Merge Shapes to Insert Video Inside Text
To place the flipped video inside the text:
- Select Video Two first.
- Hold down the Shift key and select the text box.
- Go to the Shape Format tab and find the Merge Shapes button.
- If you don’t see this button, add it to your Quick Access Toolbar via File > Options > Quick Access Toolbar, then add Merge Shapes from the list of commands.
- Click Merge Shapes and select Intersect.
This operation effectively clips the video to the shape of your text, making the video visible only inside the letters.

To further enhance the visual appeal, add a subtle shadow to Video Two:
- Go to Video Format > Video Effects > Shadow.
- Select a preset shadow and adjust transparency to 80% and blur to 80 points.
This shadow helps the video-in-text stand out against the background video, creating a layered, professional look.

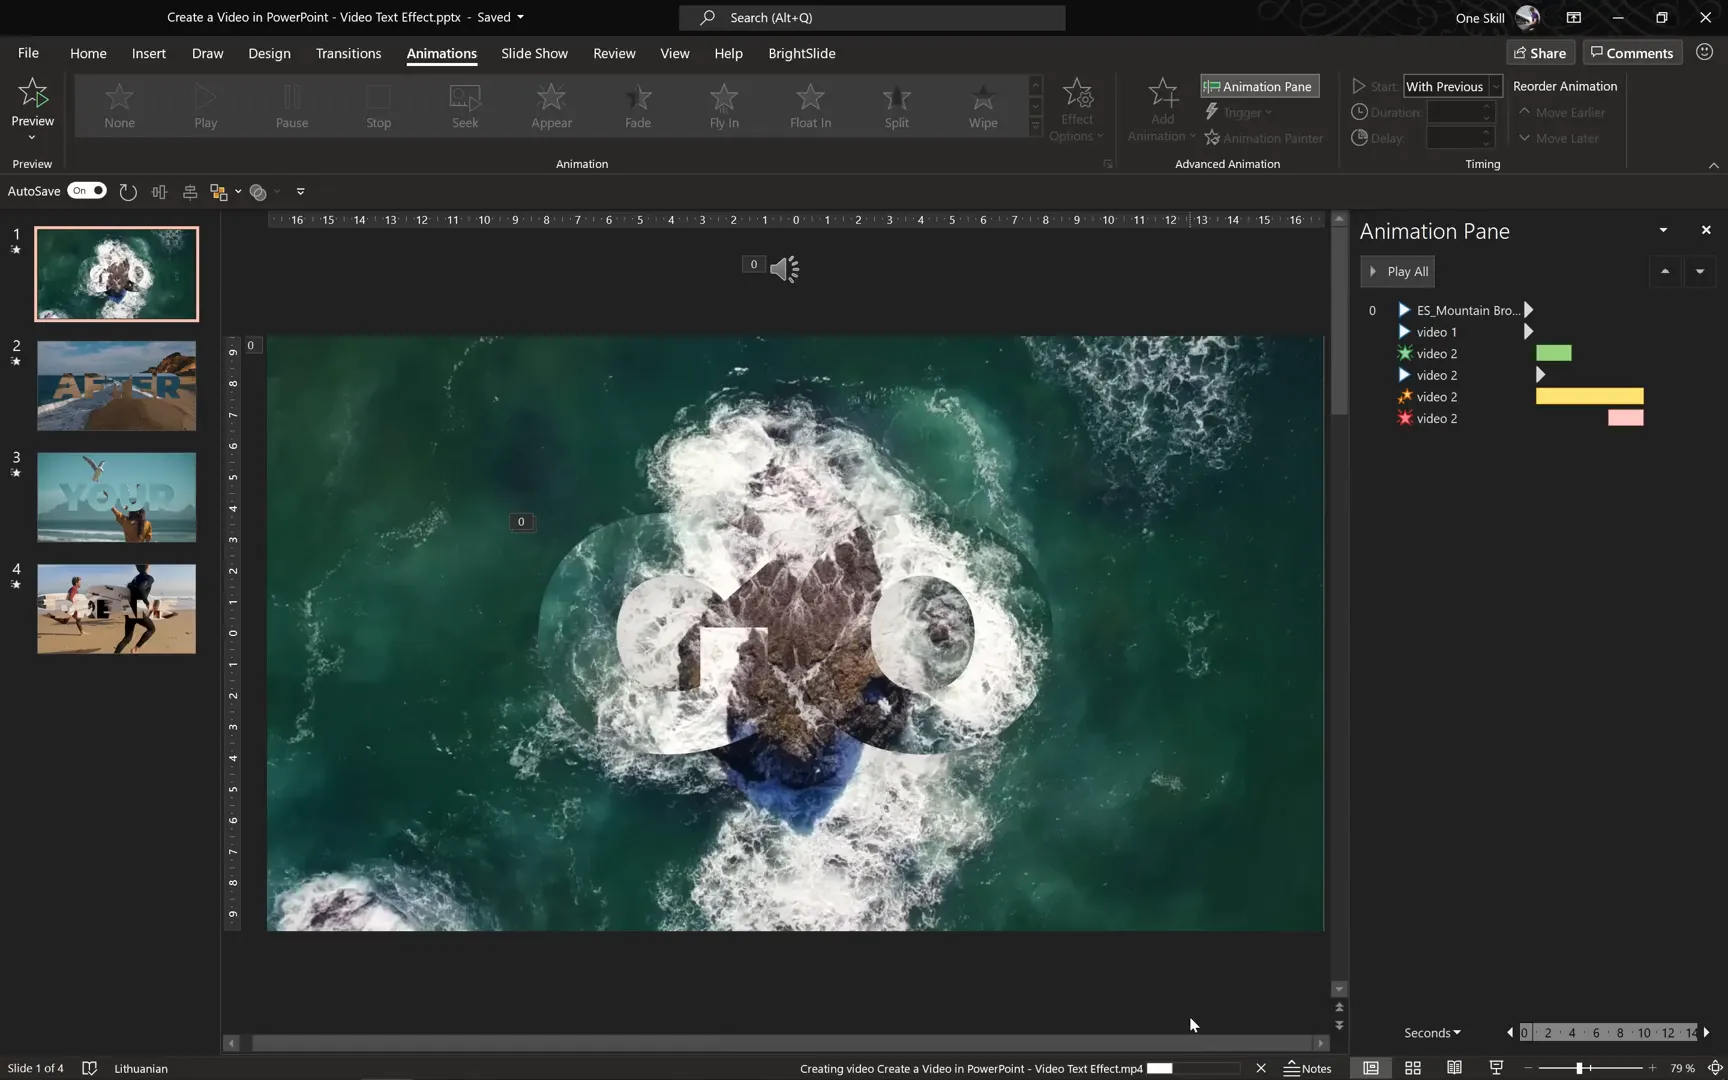
Step 4: Adding Animations for Dynamic Visuals
The magic of your video title comes alive with animations. Here’s how to animate both video clips and the text for a smooth, captivating effect.
- Select both Video One and Video Two.
- Go to the Animations tab and choose the Play animation.
- Set both animations to Start With Previous so they play automatically when the slide appears.
Fading in the Video Text
To make the “GO” video text appear gradually:
- Select Video Two again.
- Click Add Animation and choose Fade.
- Set the fade animation to Start With Previous, with a duration of 3 seconds and a delay of 1 second.
- Adjust the animation order in the Animation Pane to ensure the delay is correctly set.
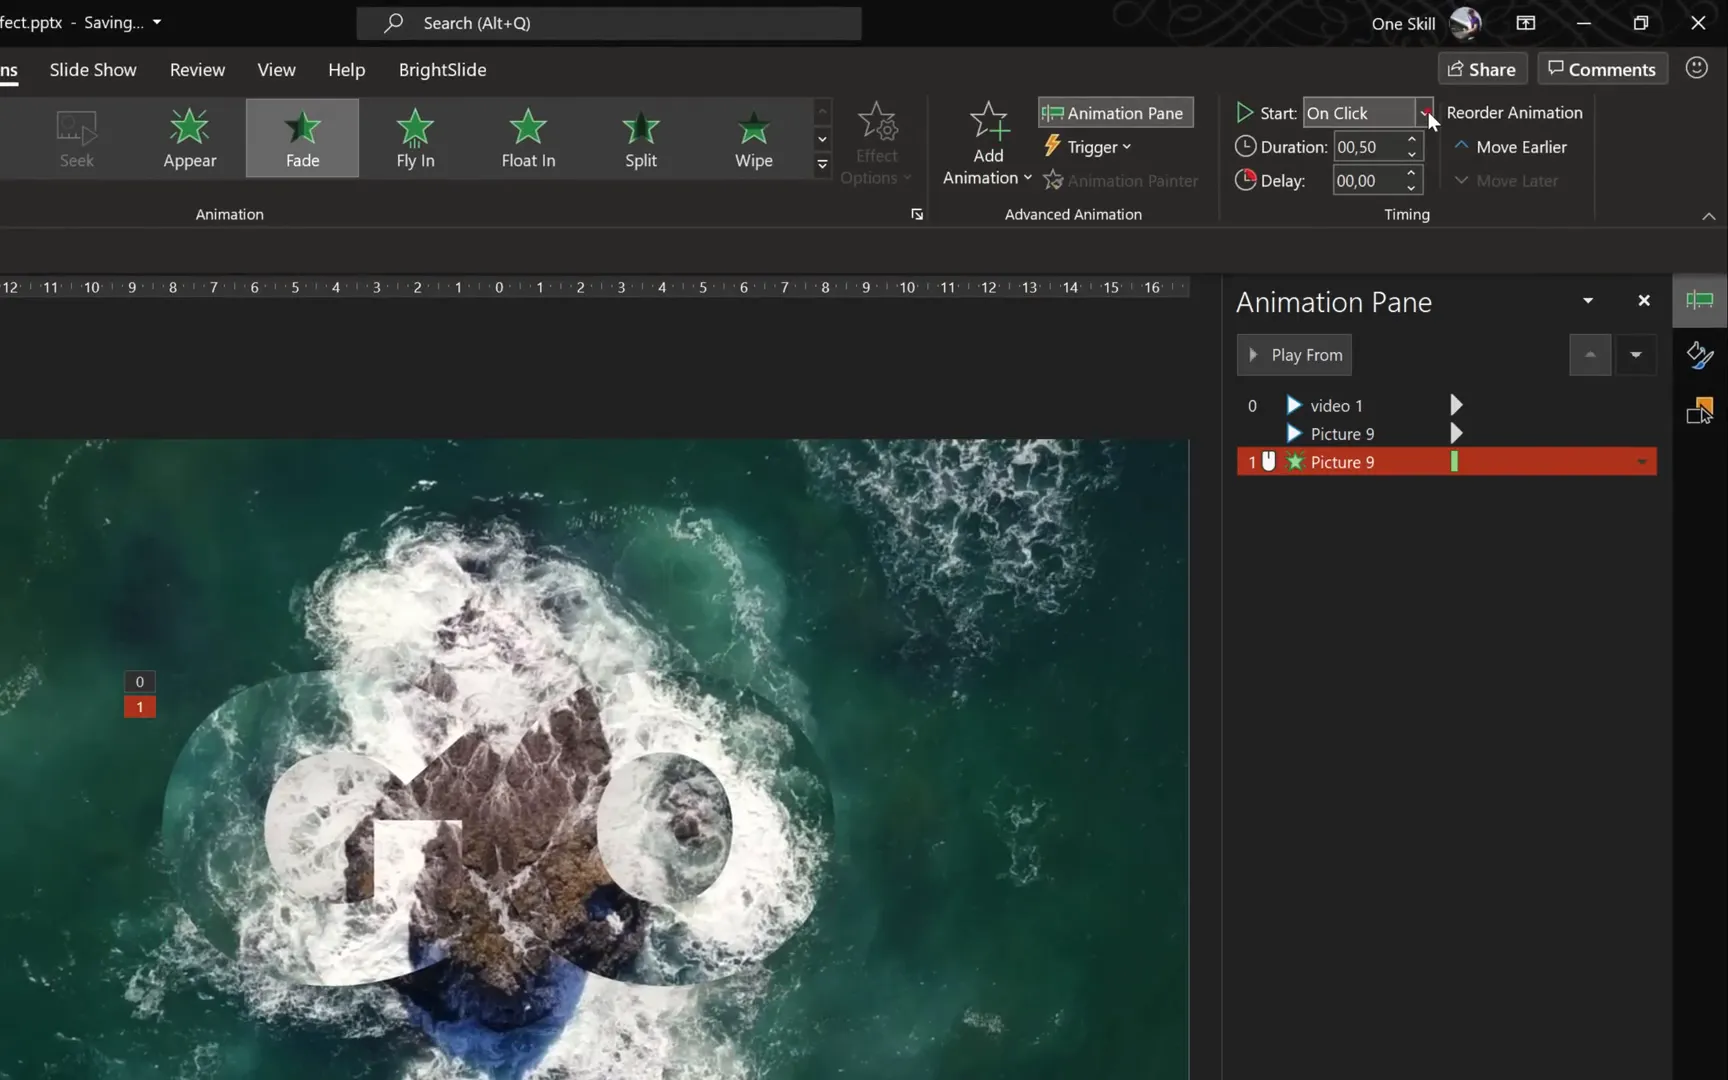
Also, add a 1-second delay to the play animation of Video Two to synchronize the fade effect perfectly.
Animating Growth and Exit
To add more life to the text animation, apply a grow and shrink effect followed by a fade-out exit:
- Select Video Two.
- Add the Grow/Shrink animation, set to Start With Previous.
- Set the duration to 9 seconds, considering the 1-second delay, so it grows smoothly over time.
- In effect options, increase the size to 150%.
- Finally, add a Fade Exit animation with a duration of 3 seconds and a delay of 7 seconds to fade out the text.
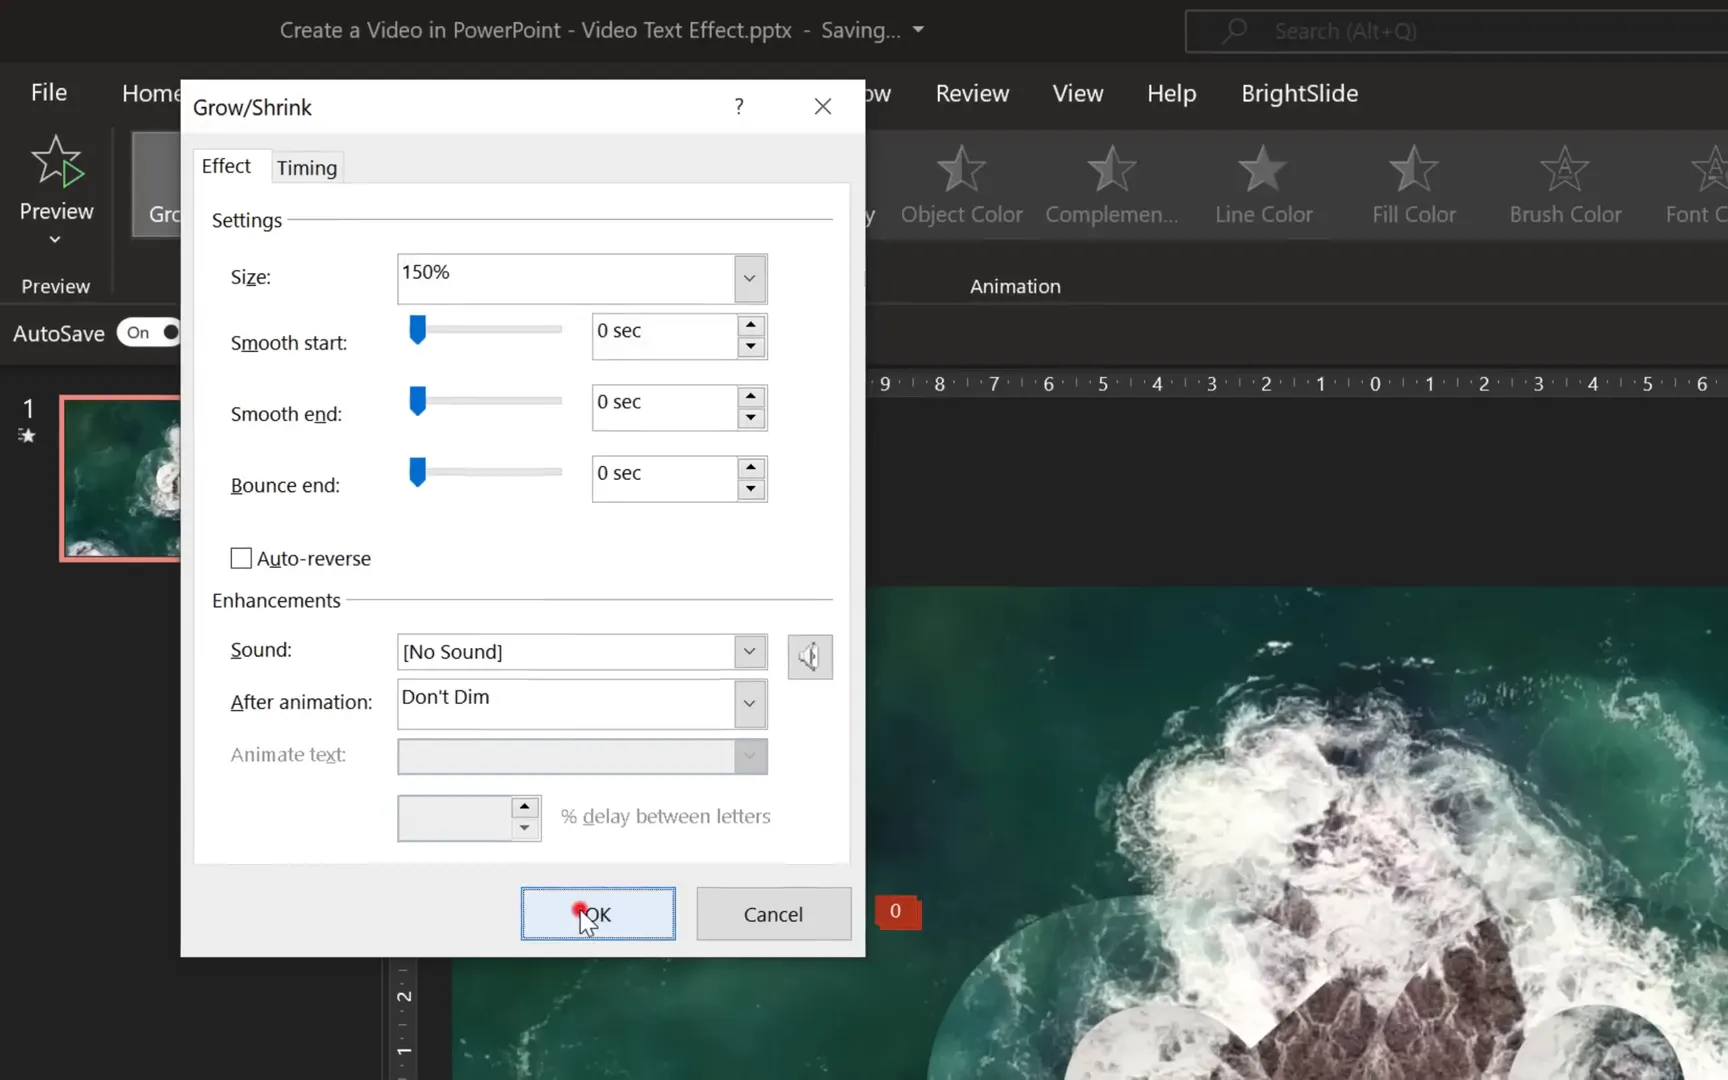
Watch as your text smoothly fades in, grows, and then fades out, creating a dynamic and professional video title.

Step 5: Creating Multiple Scenes for Your Video
Your video will consist of several scenes, each with similar effects but different text to convey your message. For example, the phrase “Go After Your Dreams” can be split into four scenes:
- Scene 1: GO
- Scene 2: AFTER
- Scene 3: YOUR
- Scene 4: DREAMS
Since the process is identical for each scene, you can duplicate slides and replace the text accordingly. Remember to trim each main video clip to 10 seconds and the video-in-text clips to 9 seconds, considering the animation delays.
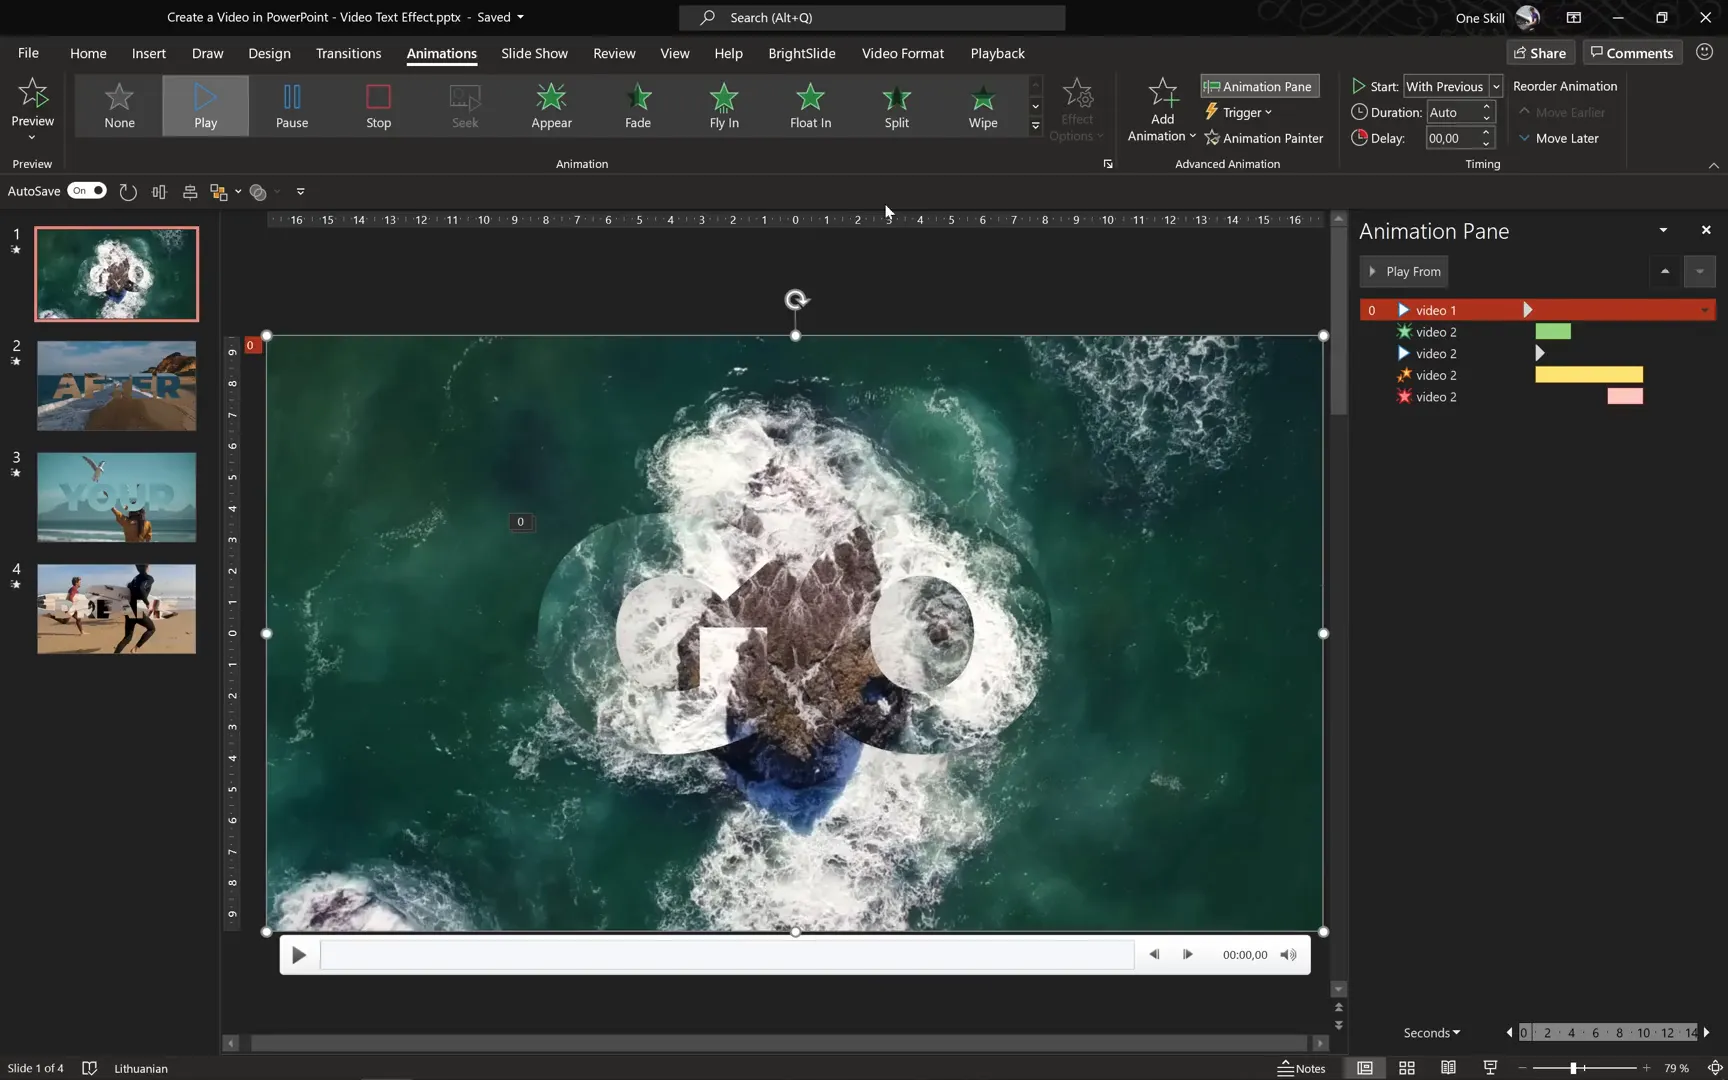
Ensure that each slide is set to auto-transition after 10 seconds, so the video plays continuously without manual intervention. This setting is found in the Transitions tab under Advance Slide.
Step 6: Adding Background Music Across Slides
Music adds emotion and engagement to your video. Here’s how to add a music track that plays seamlessly across all your slides:
- Go to Insert > Audio > Audio on My PC and select your audio file.
- In the Playback tab, check Play Across Slides so the music continues playing throughout your presentation.
- Trim the audio to fit the total length of your video. For example, if you have 4 slides of 10 seconds each, trim the audio to 40 seconds.
- Add a 5-second fade-out to the audio for a smooth ending.
- In the Animation Pane, move the audio play animation to the top and set it to Start With Previous.
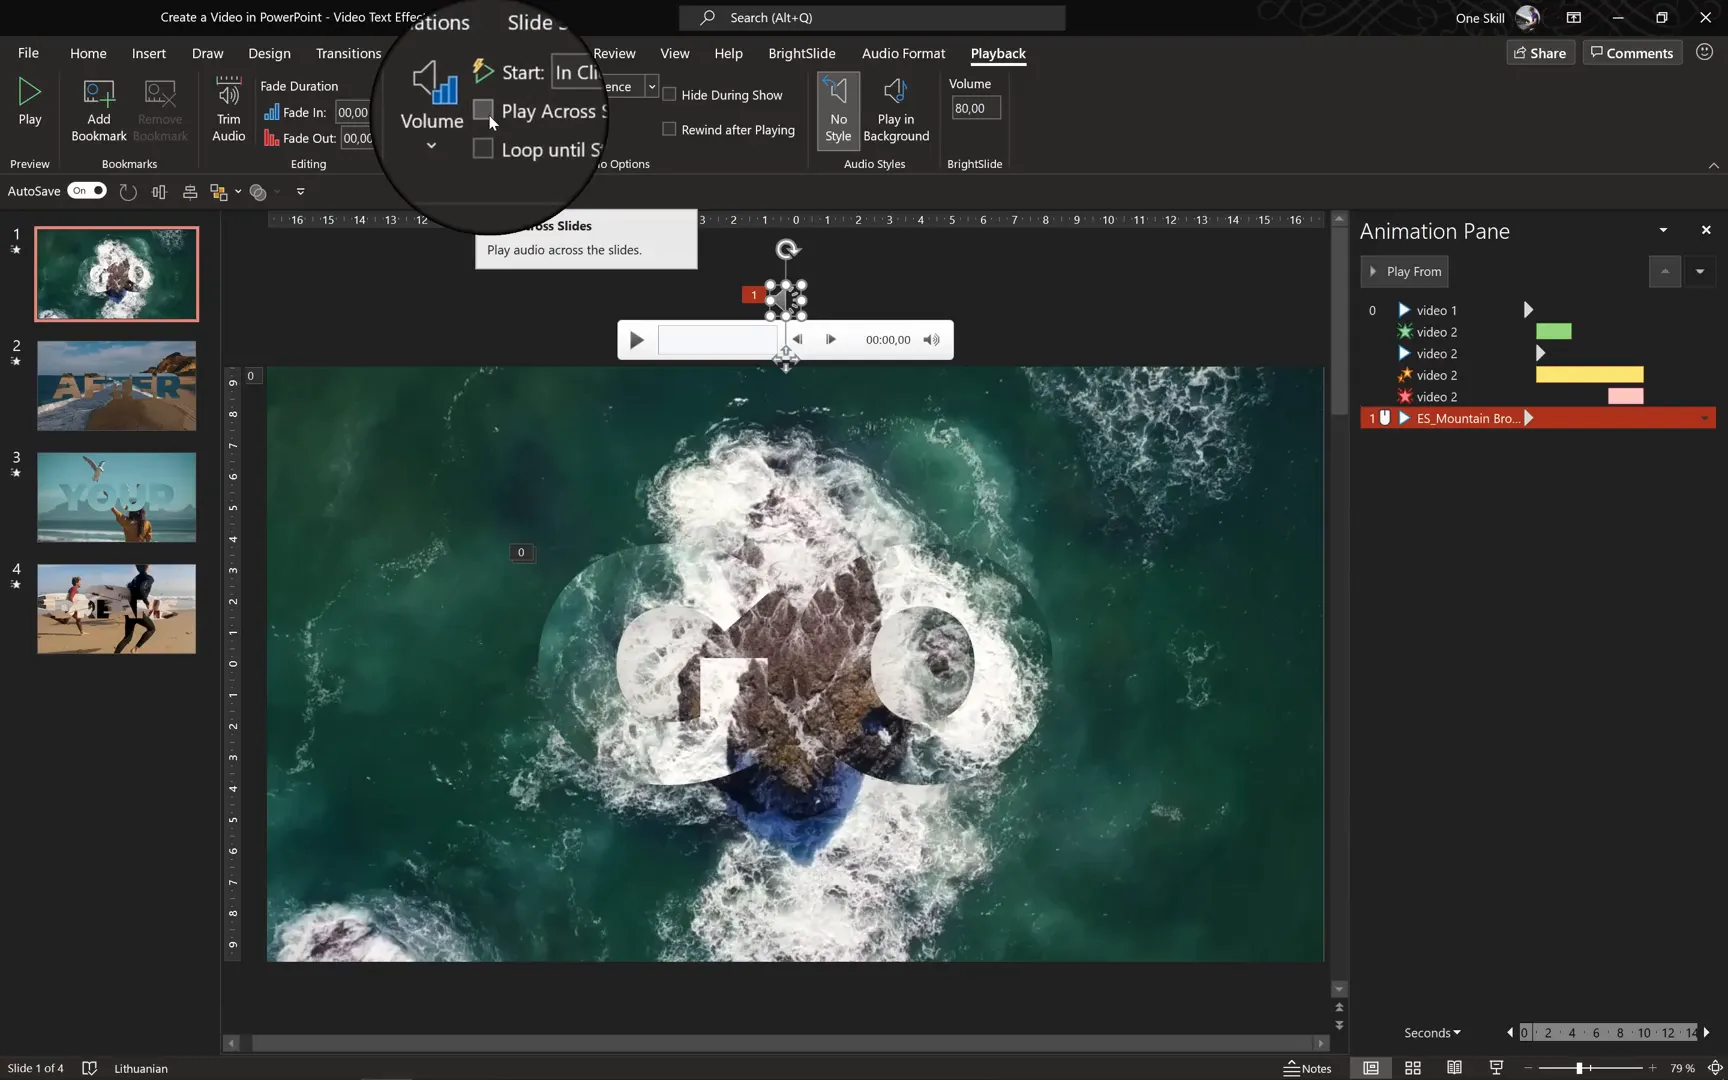
Using royalty-free music from sources like Epidemic Sound ensures your video is both professional and legally safe.
Step 7: Exporting Your PowerPoint as a Video
Once you have your slides, animations, and audio perfectly synchronized, it’s time to export your project as a video file:
- Navigate to File > Export > Create a Video.
- Select the video resolution. For high quality, choose Full HD (1080p).
- Set the duration for each slide. Since your videos are trimmed to 10 seconds, set the slide duration to 10 seconds.
- Choose your destination folder and filename, then click Save.
- Wait for PowerPoint to process and export your video. This might take several minutes depending on the length and complexity.
After exporting, you will have a polished video file ready to share on social media, embed on websites, or use in presentations.
Tips and Tricks for Video Creation in PowerPoint
- Use High-Quality Videos: Start with HD video clips to ensure your final product looks professional.
- Consistent Timing: Keep video clips and slide durations consistent for smooth transitions.
- Customize Fonts and Colors: Choose bold fonts and contrasting colors to make your video-in-text effect pop.
- Experiment with Animations: Combine different animation effects to create unique visual styles.
- Save Frequently: Video projects can be resource-intensive; save your work frequently to avoid losing progress.
Frequently Asked Questions (FAQ)
Can I use any version of PowerPoint to create videos?
While most versions of PowerPoint support basic video insertion and export, using Microsoft 365 or PowerPoint 2019 and later is recommended for full access to advanced animation and video editing features.
Do I need prior experience with video editing to follow this tutorial?
No prior video editing experience is necessary. This guide is designed to be beginner-friendly, using only PowerPoint‘s built-in tools.
Where can I find free video clips to use in my PowerPoint videos?
Websites like Pexels offer a wide range of free, high-quality video clips that can be downloaded and used royalty-free.
Is it possible to add background music that plays continuously across multiple slides?
Yes! You can insert audio and set it to “Play Across Slides” in the Playback options, allowing your music to play seamlessly throughout the presentation.
How long does it take to export a PowerPoint presentation as a video?
The export time depends on the length of your presentation and the complexity of animations. It can range from a few minutes to longer for detailed projects.
Can I customize the “video in text” effect with different fonts and colors?
Absolutely! You can use any font and color for your text box. Just ensure the text is bold enough to showcase the video inside effectively.
Is the exported video compatible with popular video platforms?
Yes, PowerPoint exports videos in MP4 format, which is compatible with YouTube, Vimeo, social media platforms, and most modern video players.
Conclusion: Mastering Video Creation with PowerPoint
Creating videos using PowerPoint is a powerful skill that combines creativity with accessibility. By following this guide, you can produce professional-looking animated videos featuring dynamic video-in-text effects and synchronized music backgrounds—all without needing expensive or complex video software.
Remember the key steps: insert and trim your videos, duplicate and flip clips for visual contrast, use merge shapes to create the video-in-text effect, animate your clips for smooth transitions, add background music that spans your entire presentation, and finally, export your masterpiece as a high-quality video file.
With practice, these techniques will become second nature, allowing you to produce engaging video content for presentations, marketing, social media, and beyond. So go ahead—experiment, create, and let your PowerPoint skills shine!
Stay creative, stay inspired, and happy video making!
Check out the full video: How to Create a Video in PowerPoint 🔥 VIDEO in TEXT 🔥


