Creating a visually stunning and engaging presentation is an art form that can captivate your audience and elevate your message. Inspired by an innovative tutorial from Luis Urrutia, this comprehensive guide will walk you through the process of designing a creative history presentation in PowerPoint that mimics the sleek style of a magazine. Whether you’re a student aiming to impress your classmates or a professional seeking to wow your audience, this step-by-step approach will equip you with the skills to transform your slides into a magazine-inspired masterpiece.
In this article, you will learn how to format backgrounds with gradient effects, use shapes and images creatively, apply text effects and shadows, incorporate animations, and utilize transitions that add a polished, professional feel to your presentation. Join me as I guide you through the process of blending history with captivating aesthetics, using Einstein’s story as a case study for this creative presentation technique.
Table of Contents
- Setting Up the Background with Gradient Effects
- Creating a Magazine Border Using Shapes
- Inserting and Cropping Images for the Cover
- Adding Text Elements: Titles and Subtitles
- Designing the Inner Slides: Expanding the Layout
- Adding White Content Boxes and Text Descriptions
- Enhancing Transitions for a Magazine Feel
- Creating a Dramatic Second Slide with Black Background
- Formatting Text with Special Effects
- Adding Iconography: Nobel Prize Image and Details
- Incorporating Additional Images and Animations
- Embedding Video and Synchronizing Animations
- Final Slide: Adding Quotes and Polished Design Elements
- Adding Content Text and Decorative Lines
- Inserting Decorative Images and Animations
- Conclusion: Bringing It All Together
- Frequently Asked Questions (FAQ)
Setting Up the Background with Gradient Effects
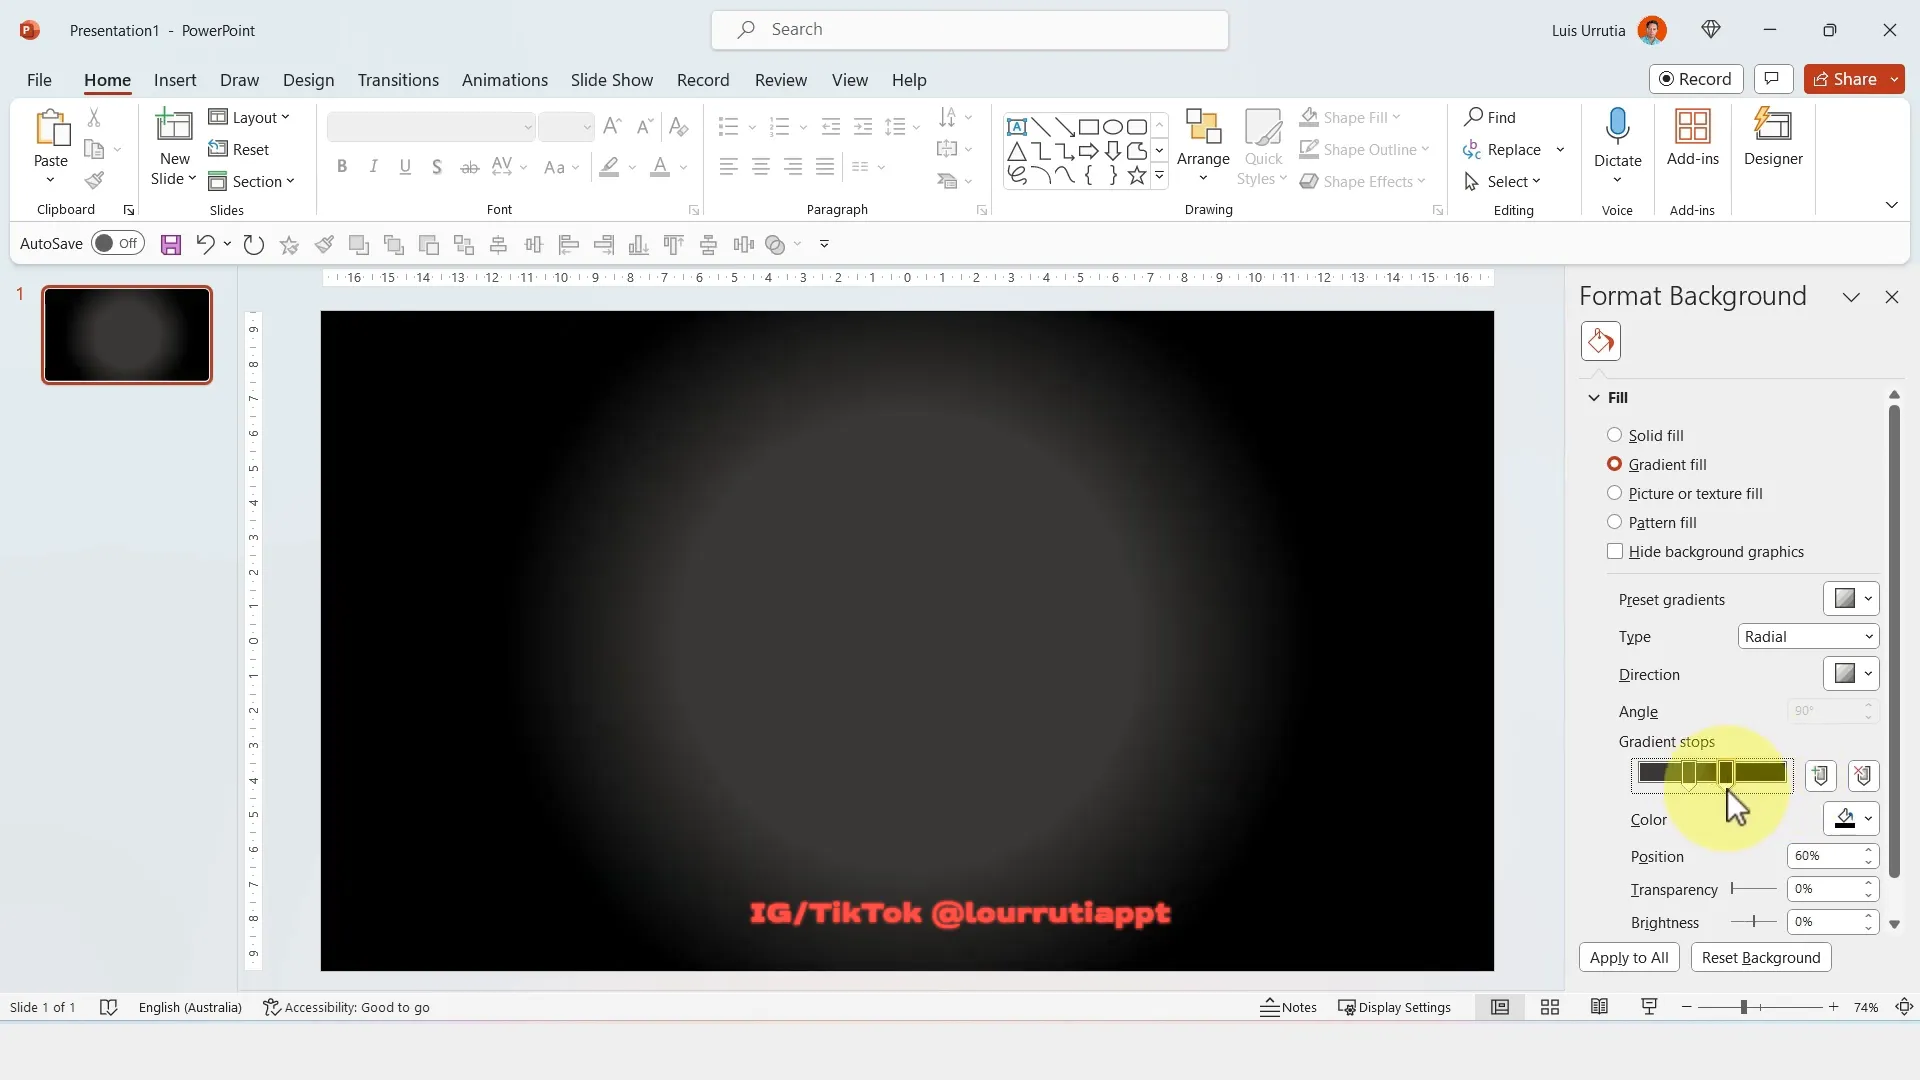
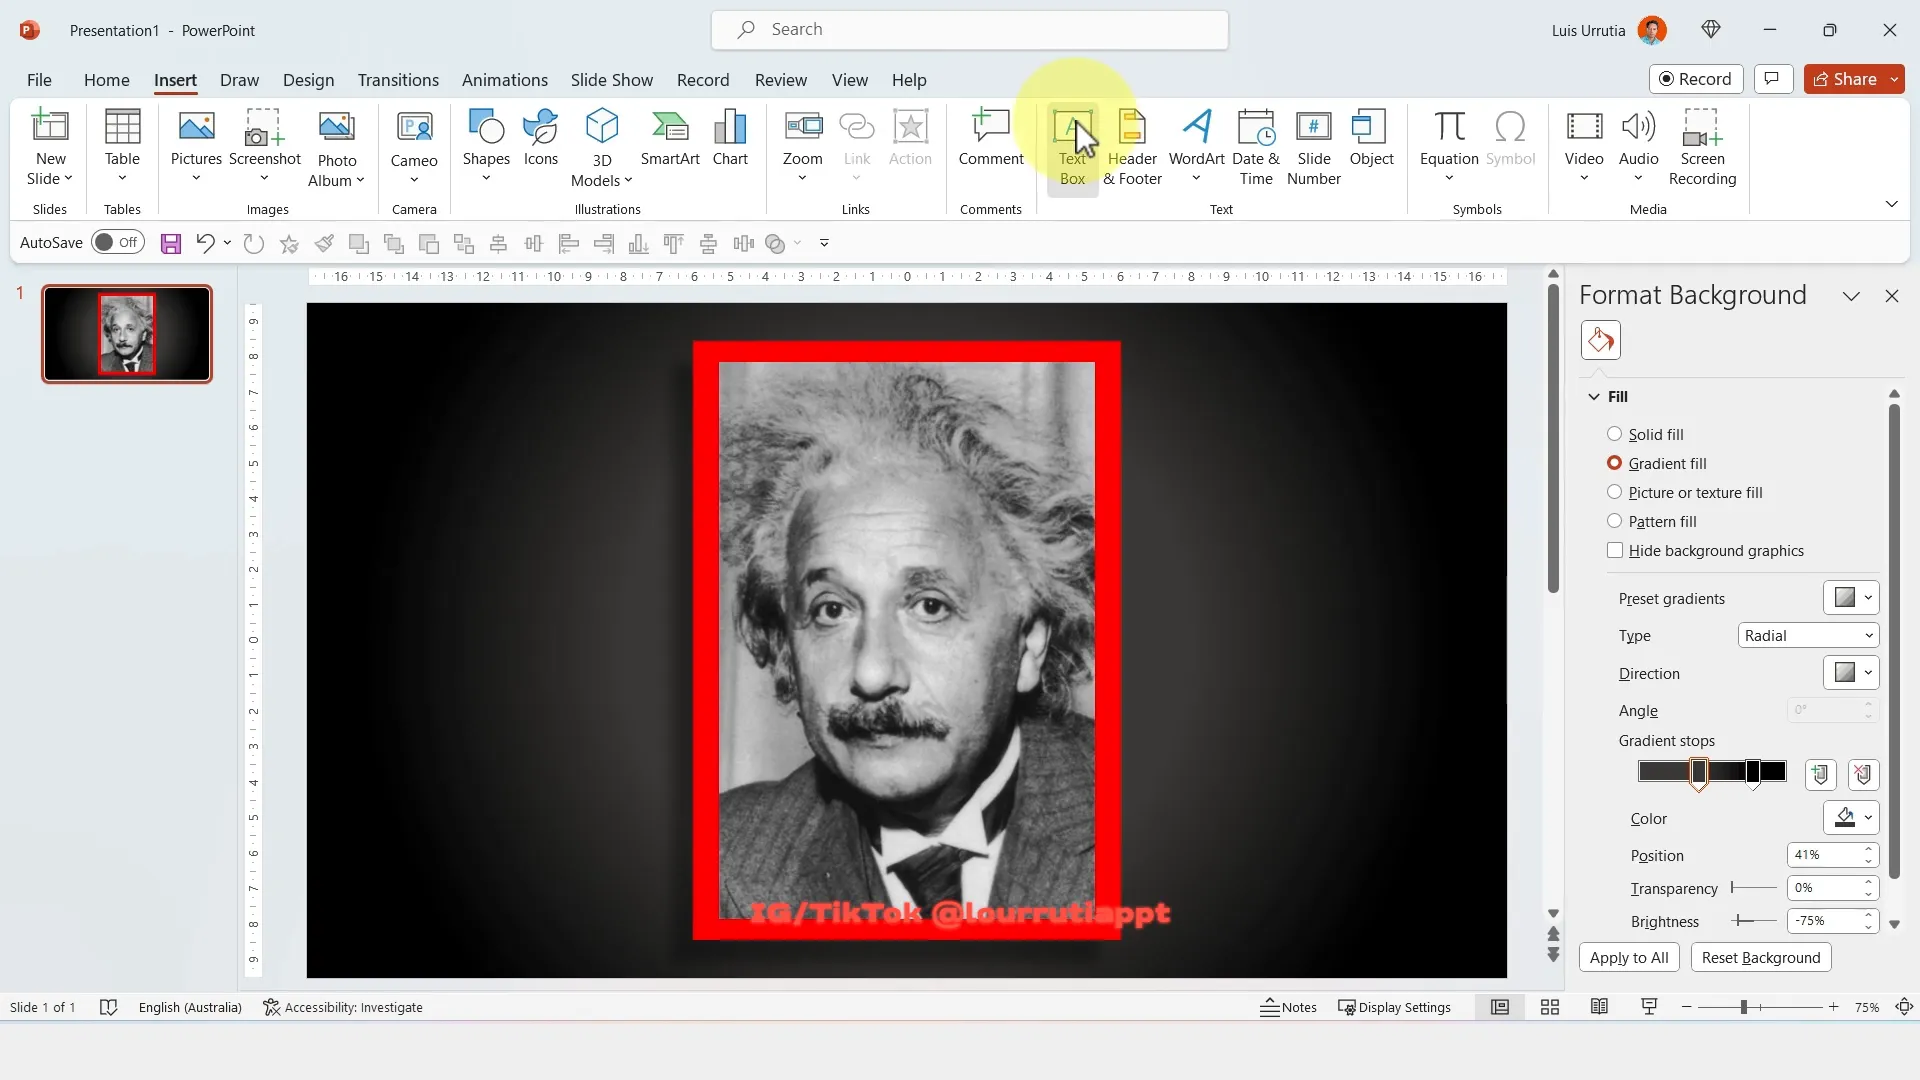
The foundation of a professional-looking presentation starts with an effective background. Rather than settling for a plain color or default PowerPoint background, you can create depth and focus by applying a radial gradient fill.
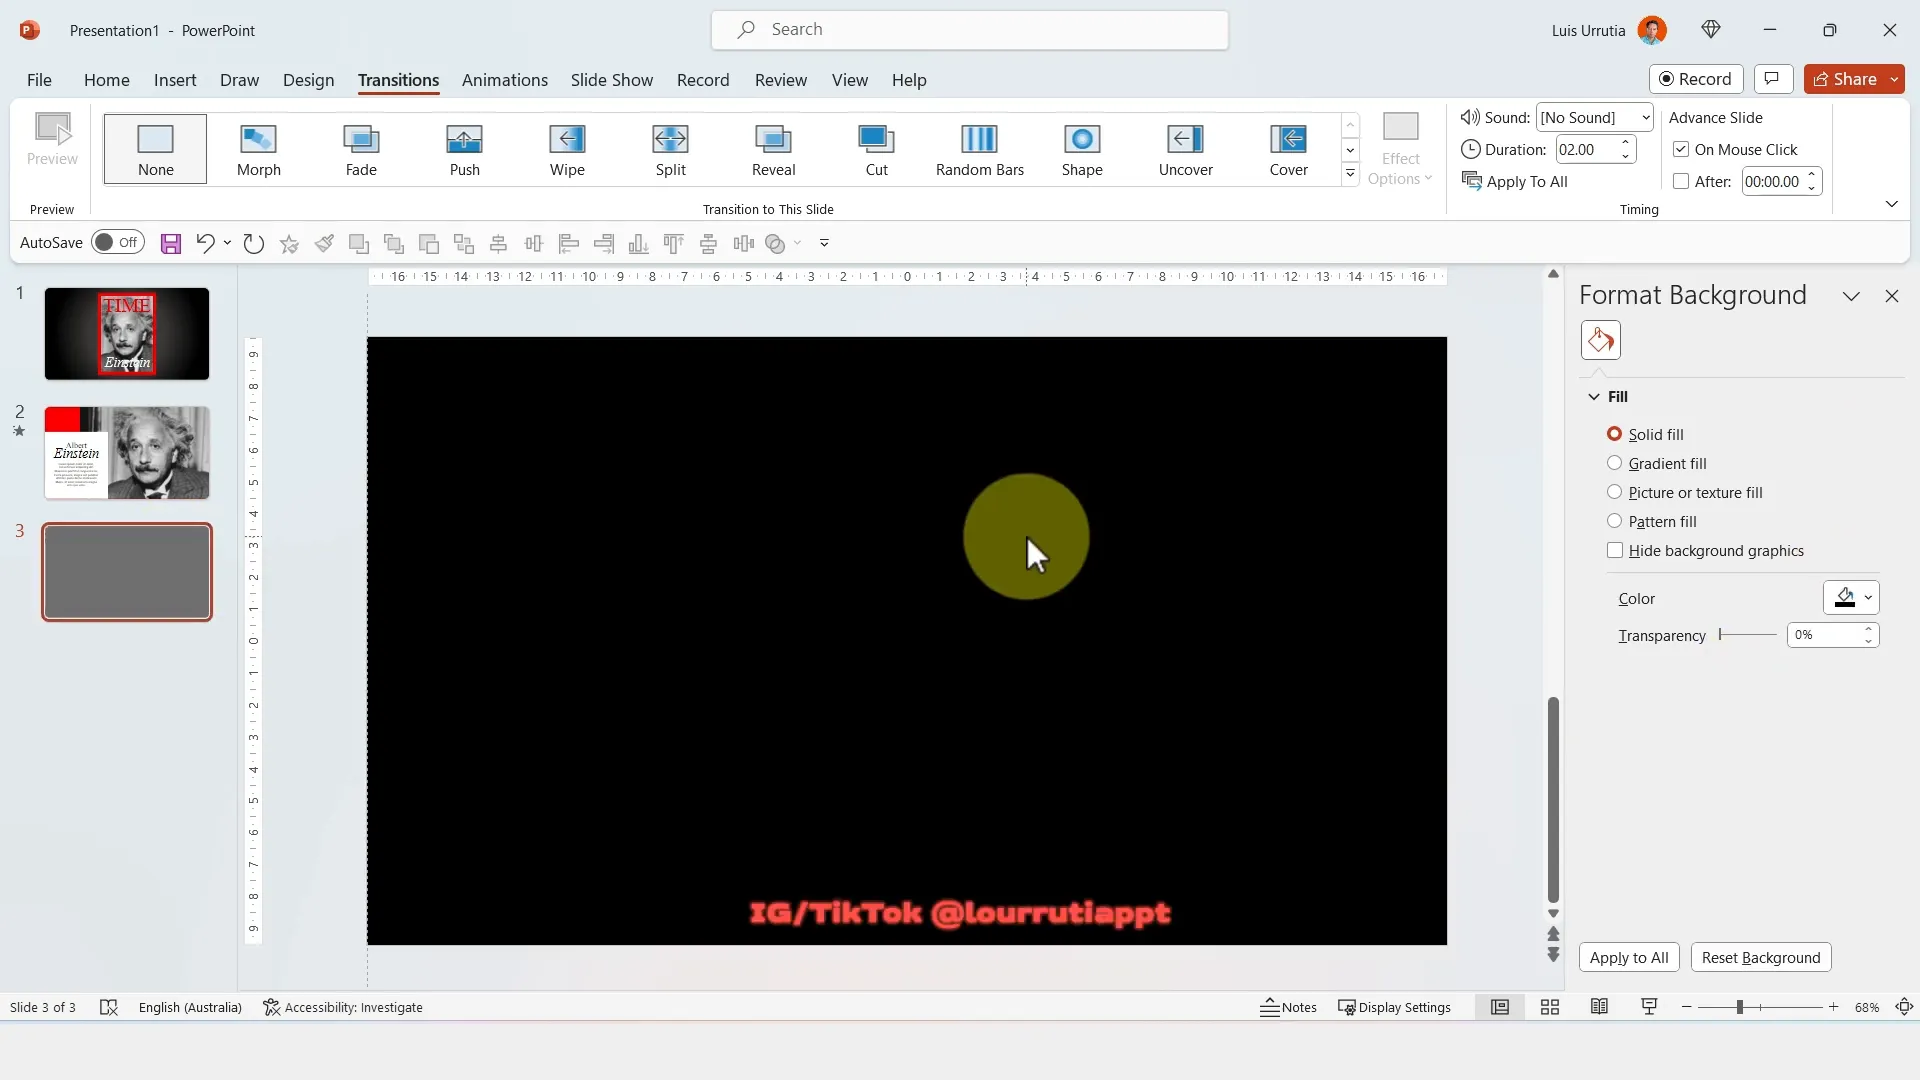
To begin, right-click on the slide background and select Format Background. Then, choose Gradient Fill and select the Radial gradient type. This type of gradient radiates from the center outward, which helps create a spotlight effect that naturally draws attention to the center of the slide.
Adjust the gradient handles to control the spread and intensity of the effect. Change the gradient Direction to a preset that suits your design (for example, the one with the center focused). For the color stops, pick black for the handle on the right and a dark gray for the one on the left. Moving these handles closer together intensifies the radial effect, creating a smooth transition between the two colors.
This simple yet effective background technique adds a subtle but powerful visual interest, setting the tone for the magazine-inspired layout to come.
Creating a Magazine Border Using Shapes
Next, insert a rectangle shape that will serve as the border or frame of your magazine cover. Place it centrally on the slide, and use the alignment tools in PowerPoint to center it both horizontally and vertically. Holding Control and Shift while resizing allows you to scale the rectangle proportionally, avoiding any distortion.
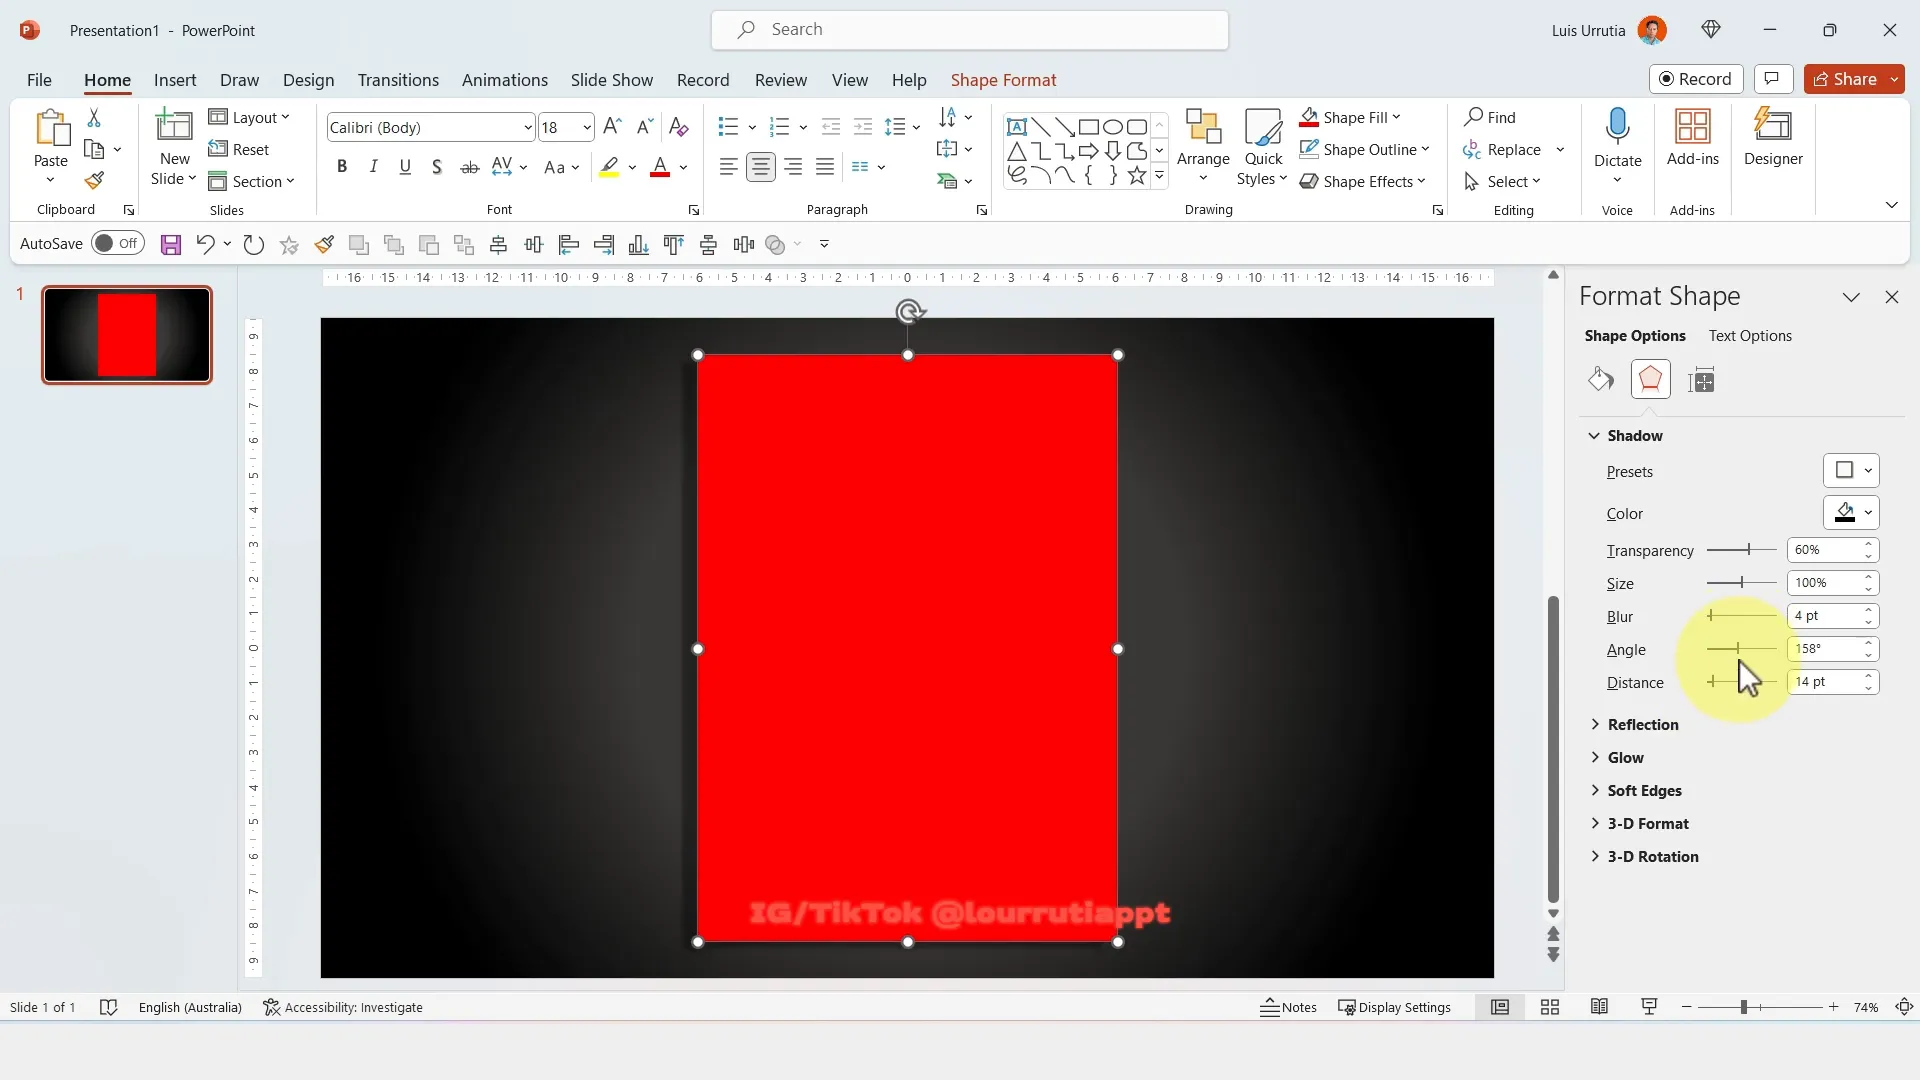
Remove the shape’s outline by selecting No Outline in the Shape Outline menu, and fill it with a rich red color to make it vibrant and eye-catching.
To add depth and a more authentic magazine look, return to the gradient settings on the background and adjust the middle circle to show more prominently, enhancing the spotlight effect around the rectangle. Then, slightly reduce the rectangle’s size to prepare for adding a shadow effect.
From the Shape Effects panel, add a shadow to the rectangle. Increase the shadow’s distance and tweak the blur and angle settings until you see a subtle shadow appearing on the left side, giving the rectangle a three-dimensional look. This shadow adds realism and helps the magazine border “pop” from the background.
Inserting and Cropping Images for the Cover
A magazine cover is incomplete without a striking image. For this example, grab a relevant image from the internet—such as a portrait of Albert Einstein—to complement the historical theme.
Paste the image onto your slide, then select it and go to the Picture Format tab to crop it. Adjust the crop handles to fit the image perfectly within the red rectangle border, ensuring it looks framed.
You can reposition the image within the crop area to highlight the most important part of the photo. After cropping, resize the image proportionally while holding Control and Shift to maintain its aspect ratio. Additionally, crop the top and bottom edges slightly more to enhance the framed effect.
This method ensures your image fits seamlessly into the magazine layout, creating a polished and professional appearance.
Adding Text Elements: Titles and Subtitles
Text is a crucial component of any magazine cover. For the title, use a classic font like Times New Roman to evoke a sense of sophistication and history. Type the word “Time” in red, making it large and placing it prominently near the top of the rectangle.
Duplicate this text box by holding Control and dragging it down, then replace the text with “Einstein,” positioning it near the bottom of the rectangle. This creates a balanced, magazine-style title and subtitle.
To enhance the text’s visual appeal, apply a shadow effect from the text effect options. Adjust the shadow transparency to ensure it complements the background without overpowering the text. This subtle shadow adds depth and makes the text stand out.
Designing the Inner Slides: Expanding the Layout
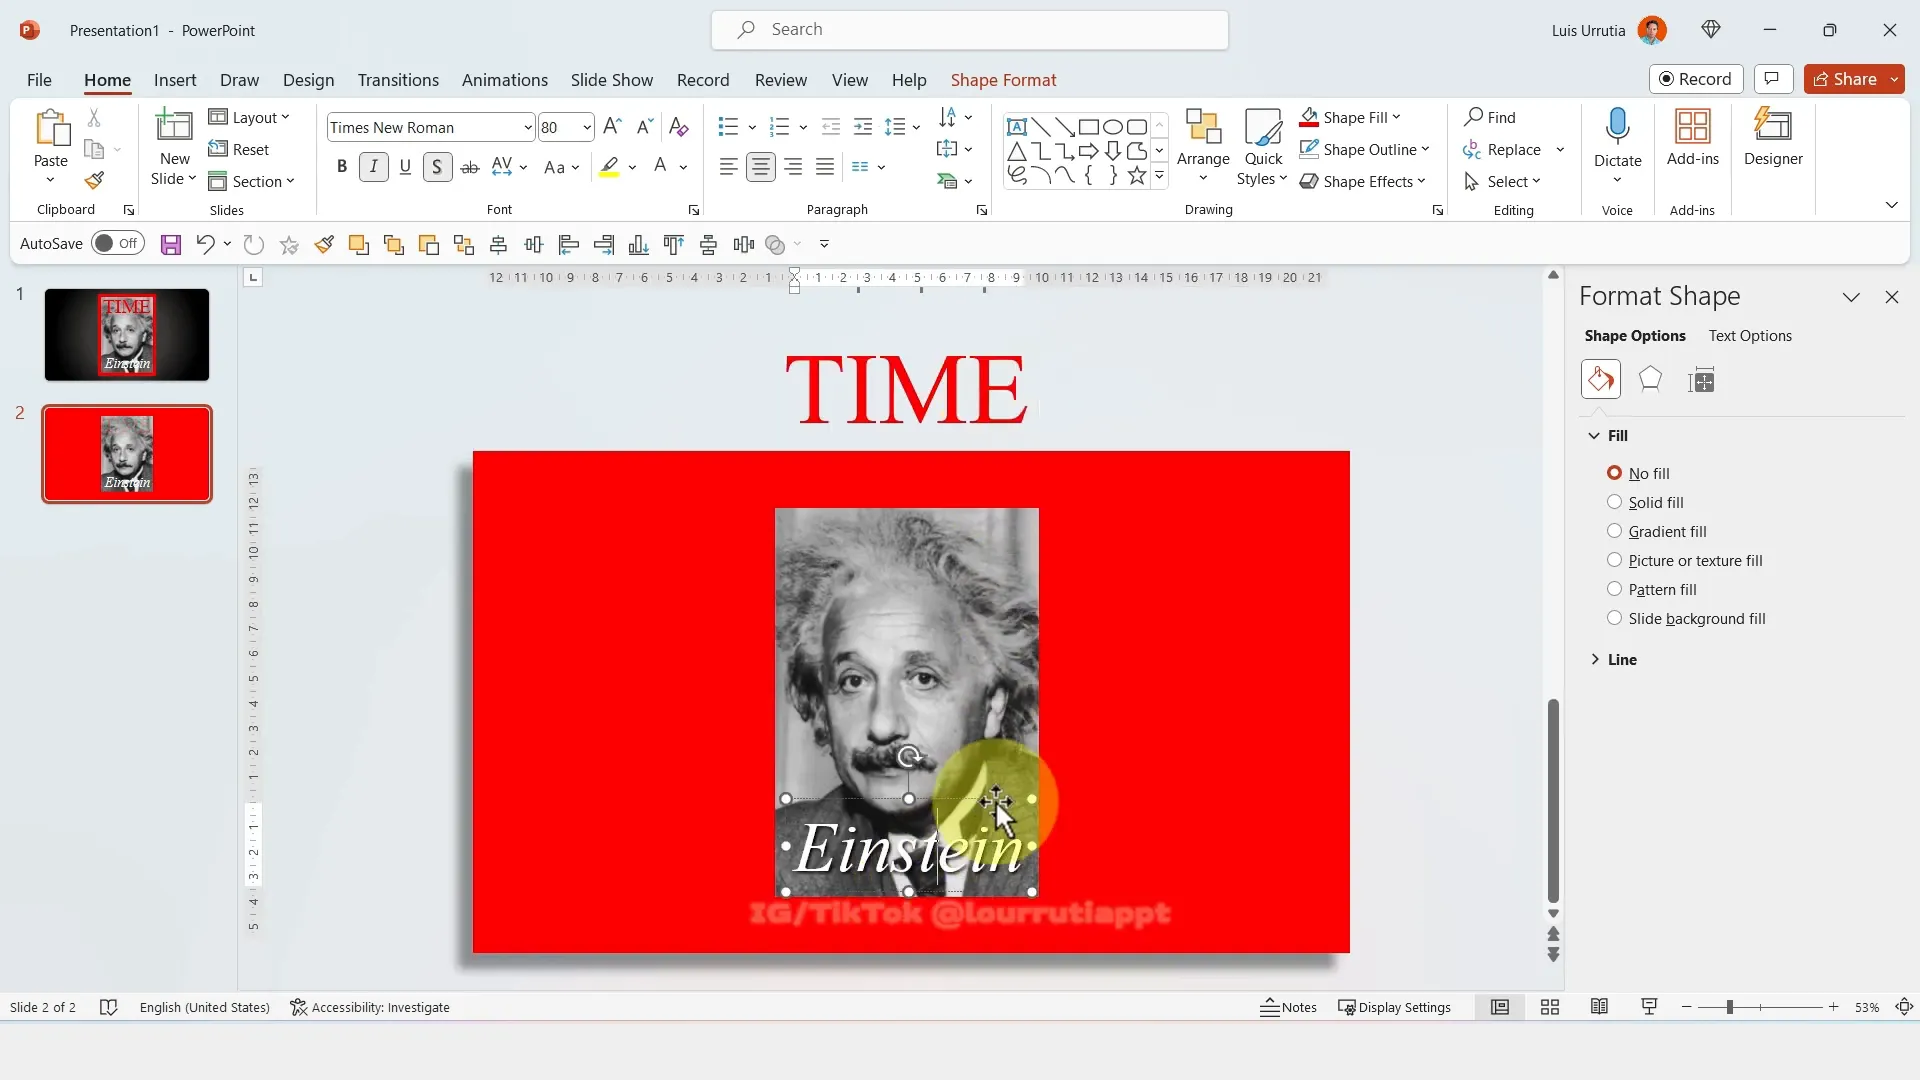
Duplicate the cover slide to maintain consistency in style. On the duplicated slide, enlarge the red rectangle so it fills the entire slide area, providing a bold, unified background color.
Move the title and subtitle text boxes out of the slide frame—one upwards and one downwards—to prepare for introducing new content.
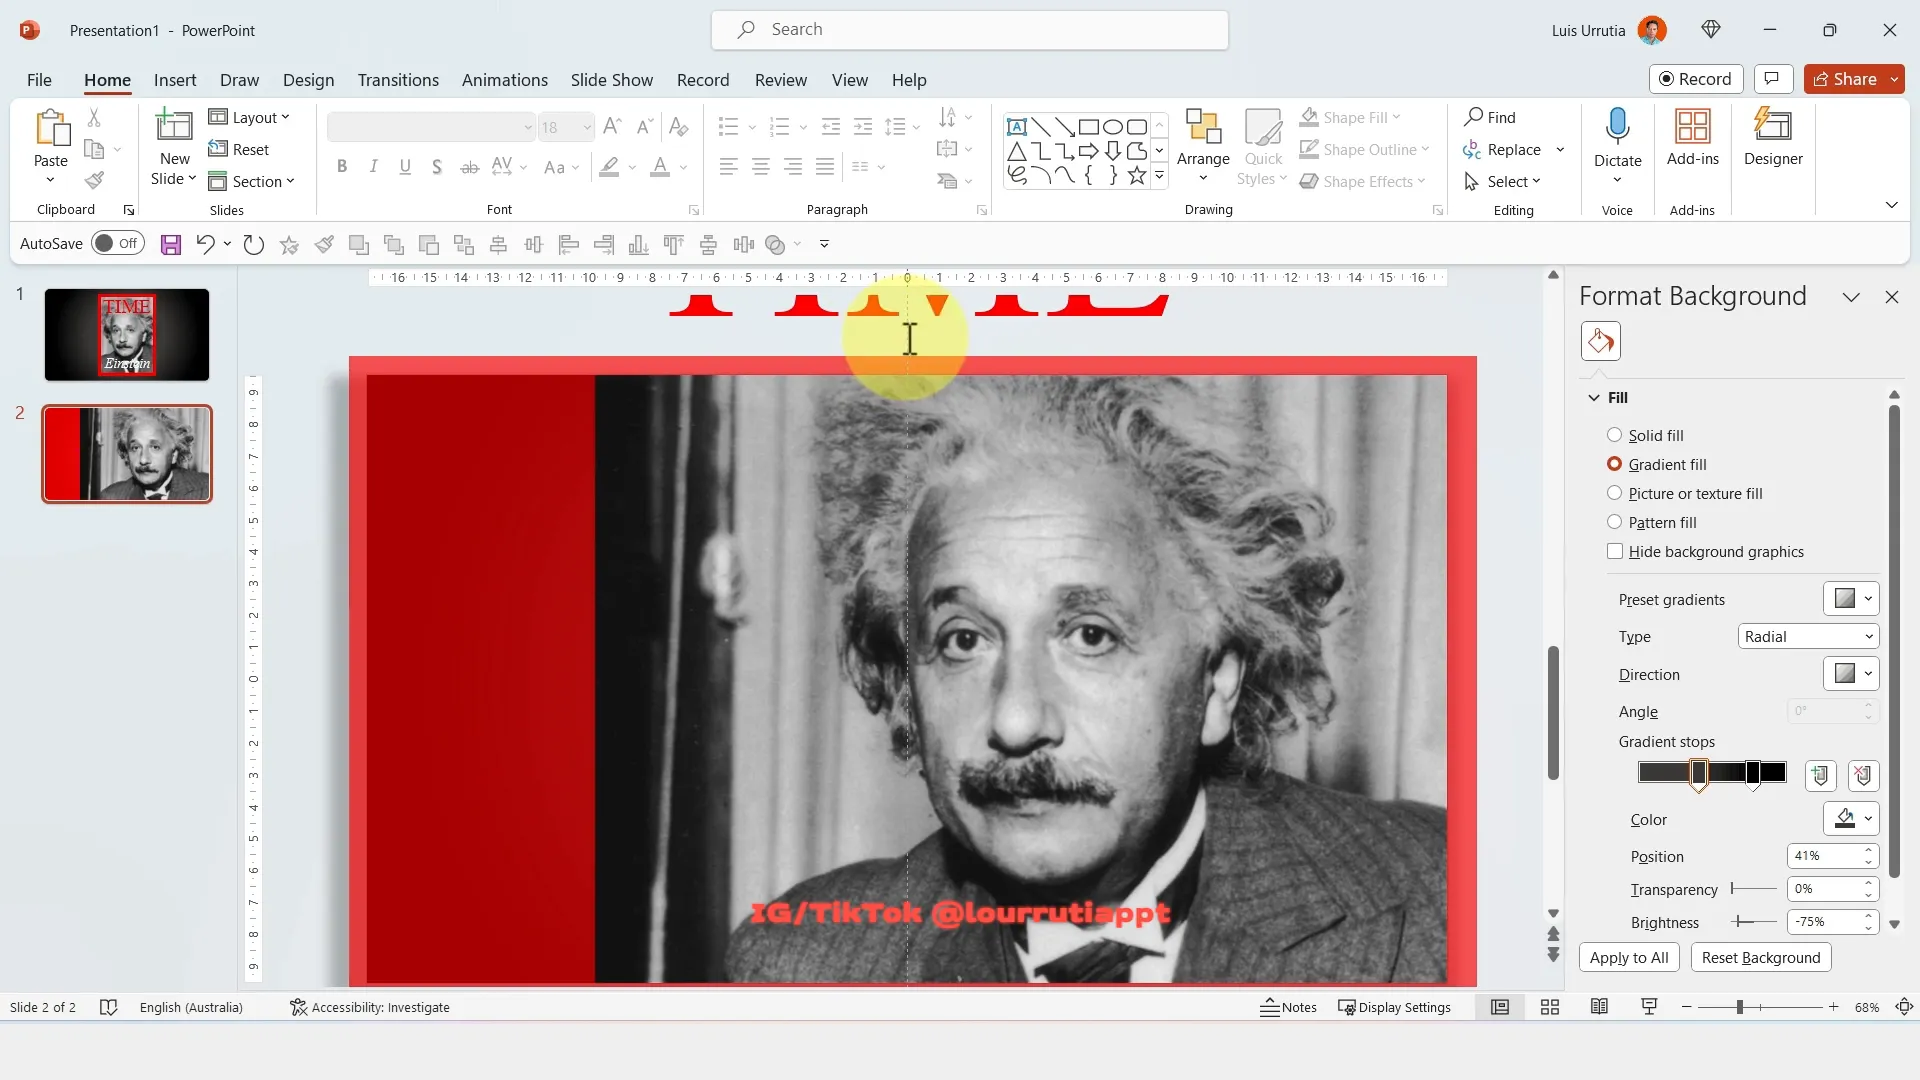
Zoom out to gain a better overview and temporarily reduce the red rectangle’s transparency. This helps you see the edges of the slide and aids precise placement of the image and other elements.
Select the image and crop it to extend all the way to the edges of the slide, filling the dark area behind the red shape. Then, use the Fill option to ensure the image occupies the entire space without distortion. Resize and reposition the image slightly to the right for better composition.
For precise layout control, add a vertical guide on the left edge of the slide. This visual aid helps align elements accurately.
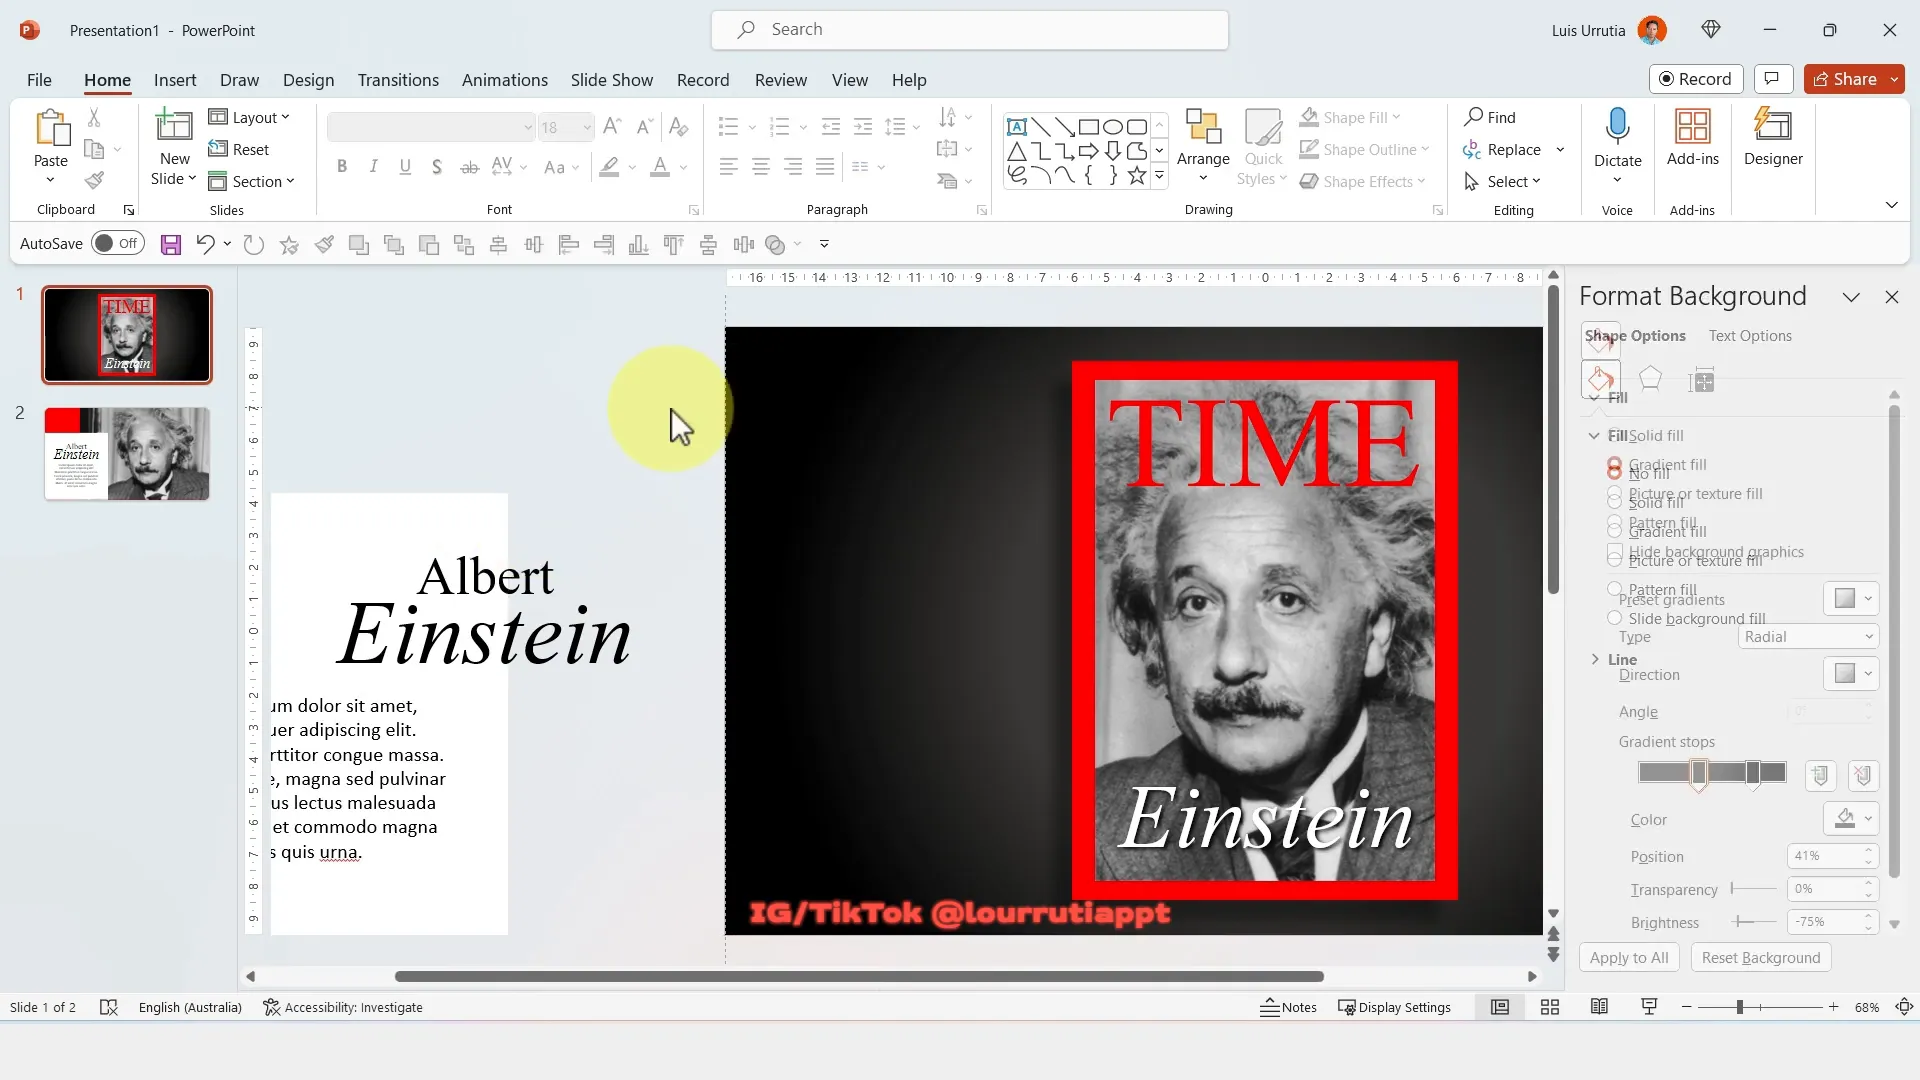
Adding White Content Boxes and Text Descriptions
Add a new white rectangle on the slide to serve as a content box. Make it large enough to hold text comfortably, then remove its outline for a clean look.
Copy and paste the title text box into this slide to maintain font consistency and save time. Remove the shadow effect from the text and change its color to black for contrast against the white box.
Duplicate the text box for the first name, placing it appropriately, then insert another text box for the description. Initially, use placeholder text, center-align it, and position it within the white rectangle.
Select all elements within this content box and copy them back to the first slide, placing them just outside the left edge. This arrangement sets up a smooth visual transition when moving between slides.
Enhancing Transitions for a Magazine Feel
PowerPoint offers various transitions that can make your presentation feel more dynamic and engaging. One standout is the Page Curl transition, which simulates the turning of a magazine page.
Apply this transition between slides to evoke the sensation of flipping through a real magazine. This effect enhances the overall theme and keeps your audience visually engaged.
Creating a Dramatic Second Slide with Black Background
For the second slide, change the background color to black, which helps create contrast and focus on the content.
Copy the relevant text from previous slides and move it aside for editing. This step helps maintain consistency in font and style across your presentation.
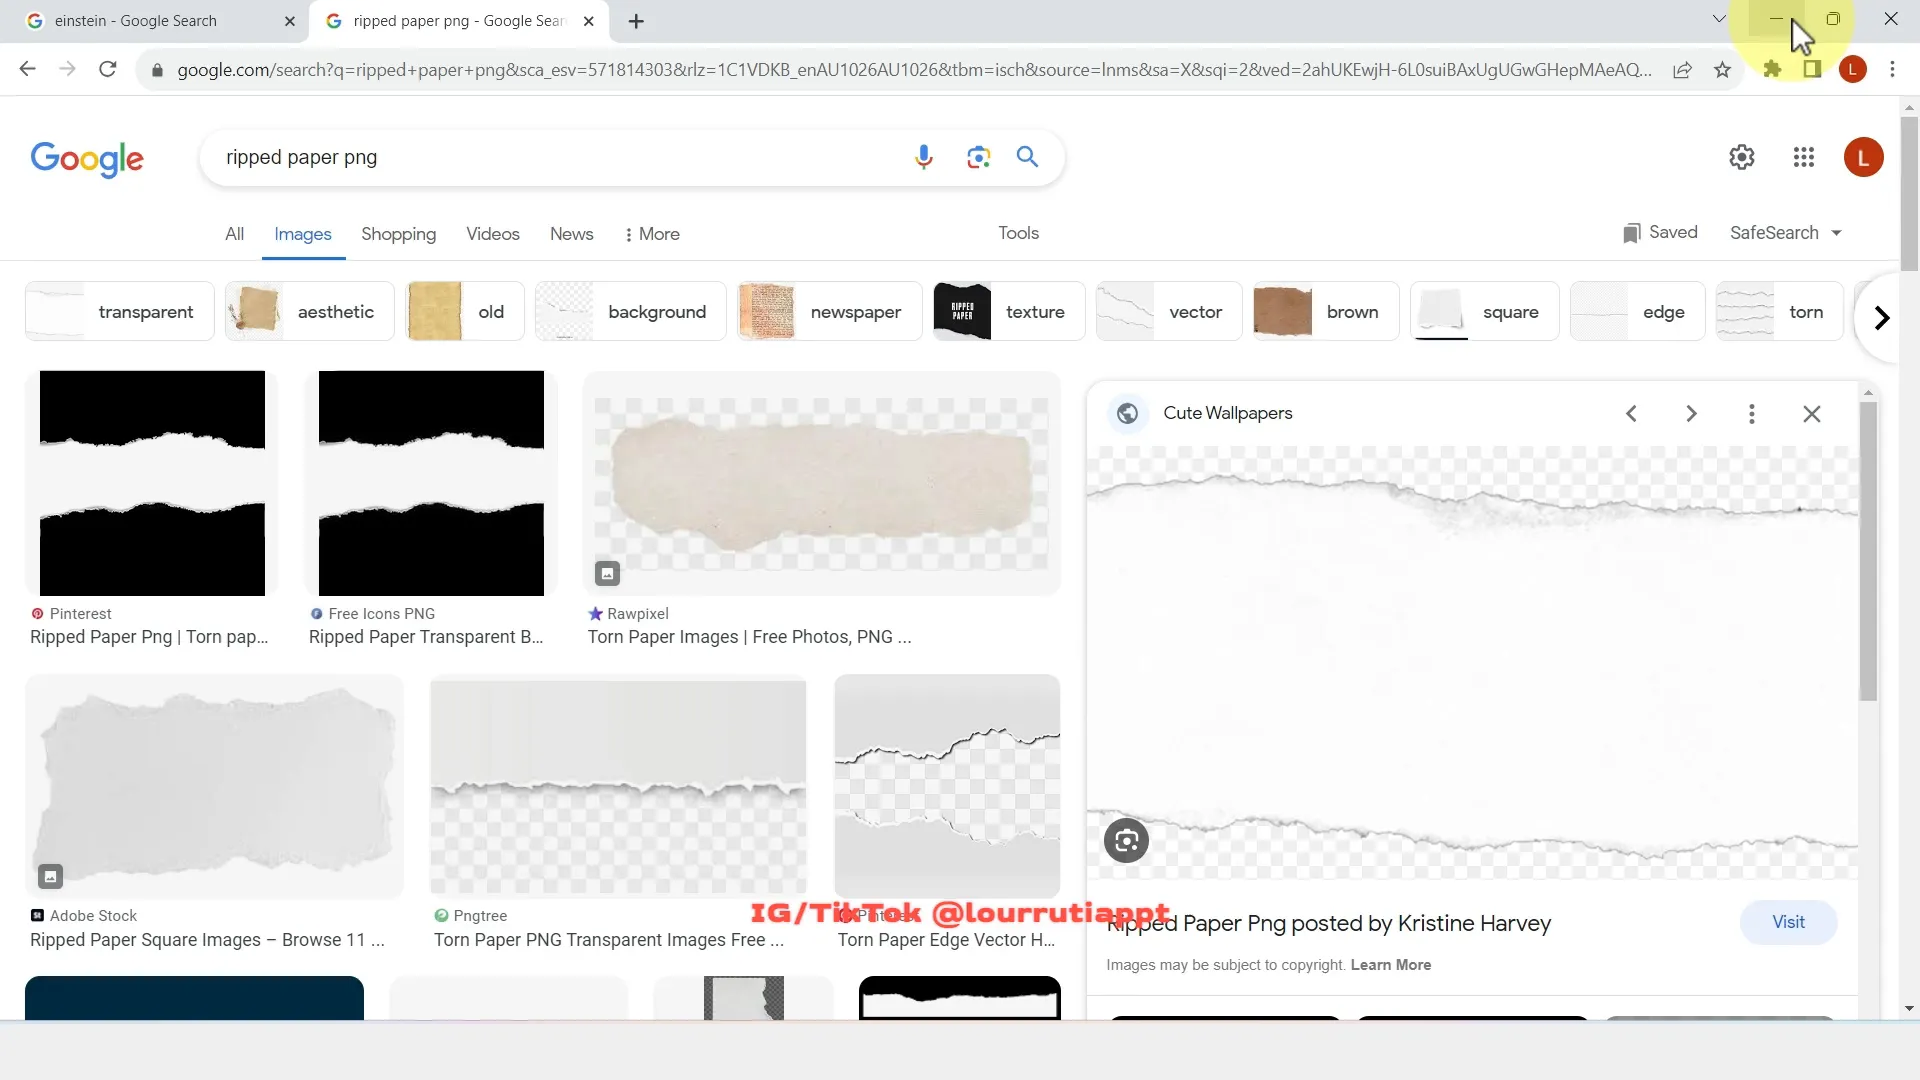
To add a creative touch, search for a “ripped paper PNG” image with a transparent background. Paste this image on your slide and adjust its size to fit nicely near the text area. Bringing the text box to the front ensures readability and layering balance.
Use this ripped paper effect to simulate a torn paper edge, adding a tactile, authentic magazine vibe to your slide.
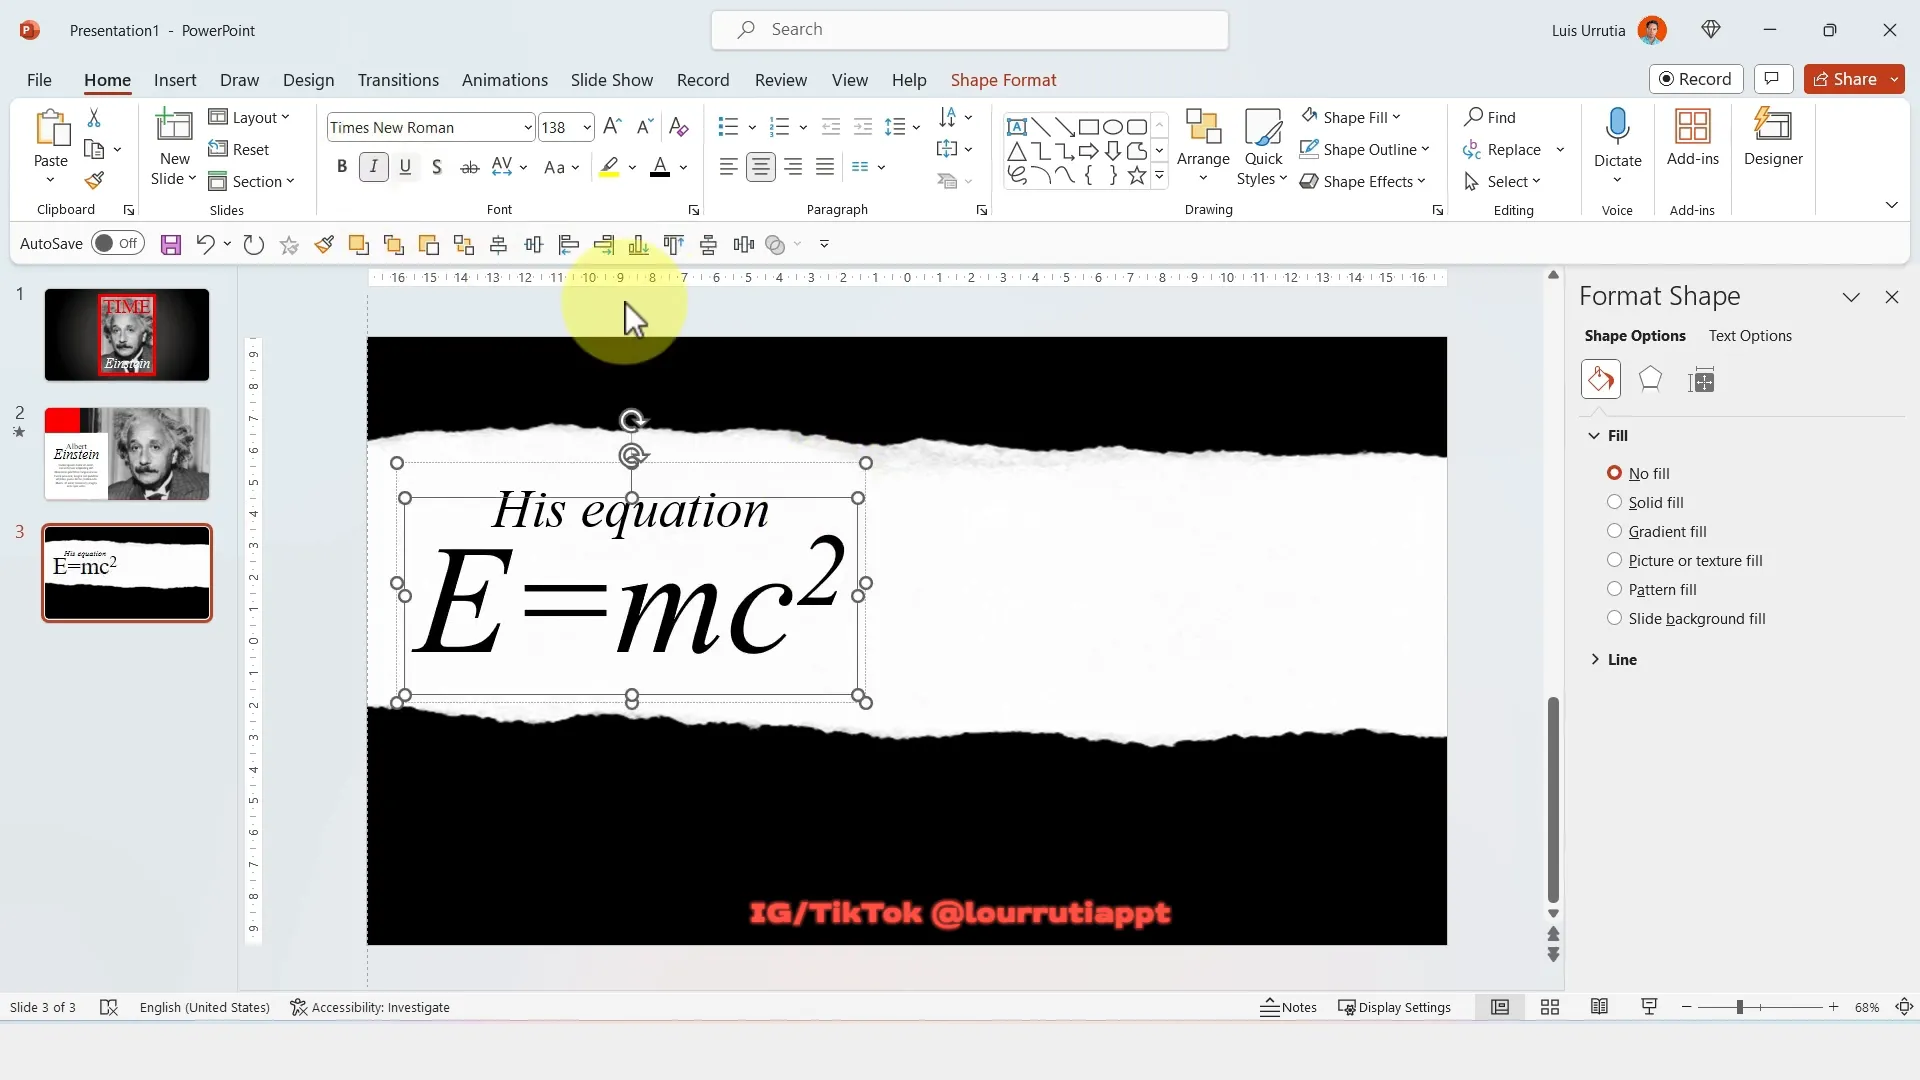
Formatting Text with Special Effects
Add a headline like “His Equation” using the same font style. To format mathematical notation properly, such as superscripting the square in “E = mc²,” select the square, click on the superscript icon, and apply the effect. This attention to detail enhances professionalism and readability.
Adjust spacing between text elements to prevent clutter and improve visual hierarchy.
Adding Iconography: Nobel Prize Image and Details
Search for and insert a PNG image of the Nobel Prize to add thematic relevance to your slide. Resize and position it strategically to avoid overcrowding.

Copy the description text from previous slides, paste it here, and change its color to white for legibility against the black background. Align all elements neatly within the slide to maintain a clean, organized look.
Add a small red rectangle as an accent or highlight to balance the color scheme and draw attention to key areas.

Incorporating Additional Images and Animations
To further enhance the slide, add relevant images found online, such as a photo related to the Nobel Prize. Resize and position it near the prize icon, and bring it to the front to ensure visibility.
Use the crop tool to adjust image placement within the frame as needed.
Animations bring slides to life. Select the Nobel Prize image and apply the Spin animation. Customize the animation to rotate only 15 degrees, smooth the end with a reverse effect, and set it to repeat until the slide ends. This subtle spin adds a dynamic yet unobtrusive visual interest.
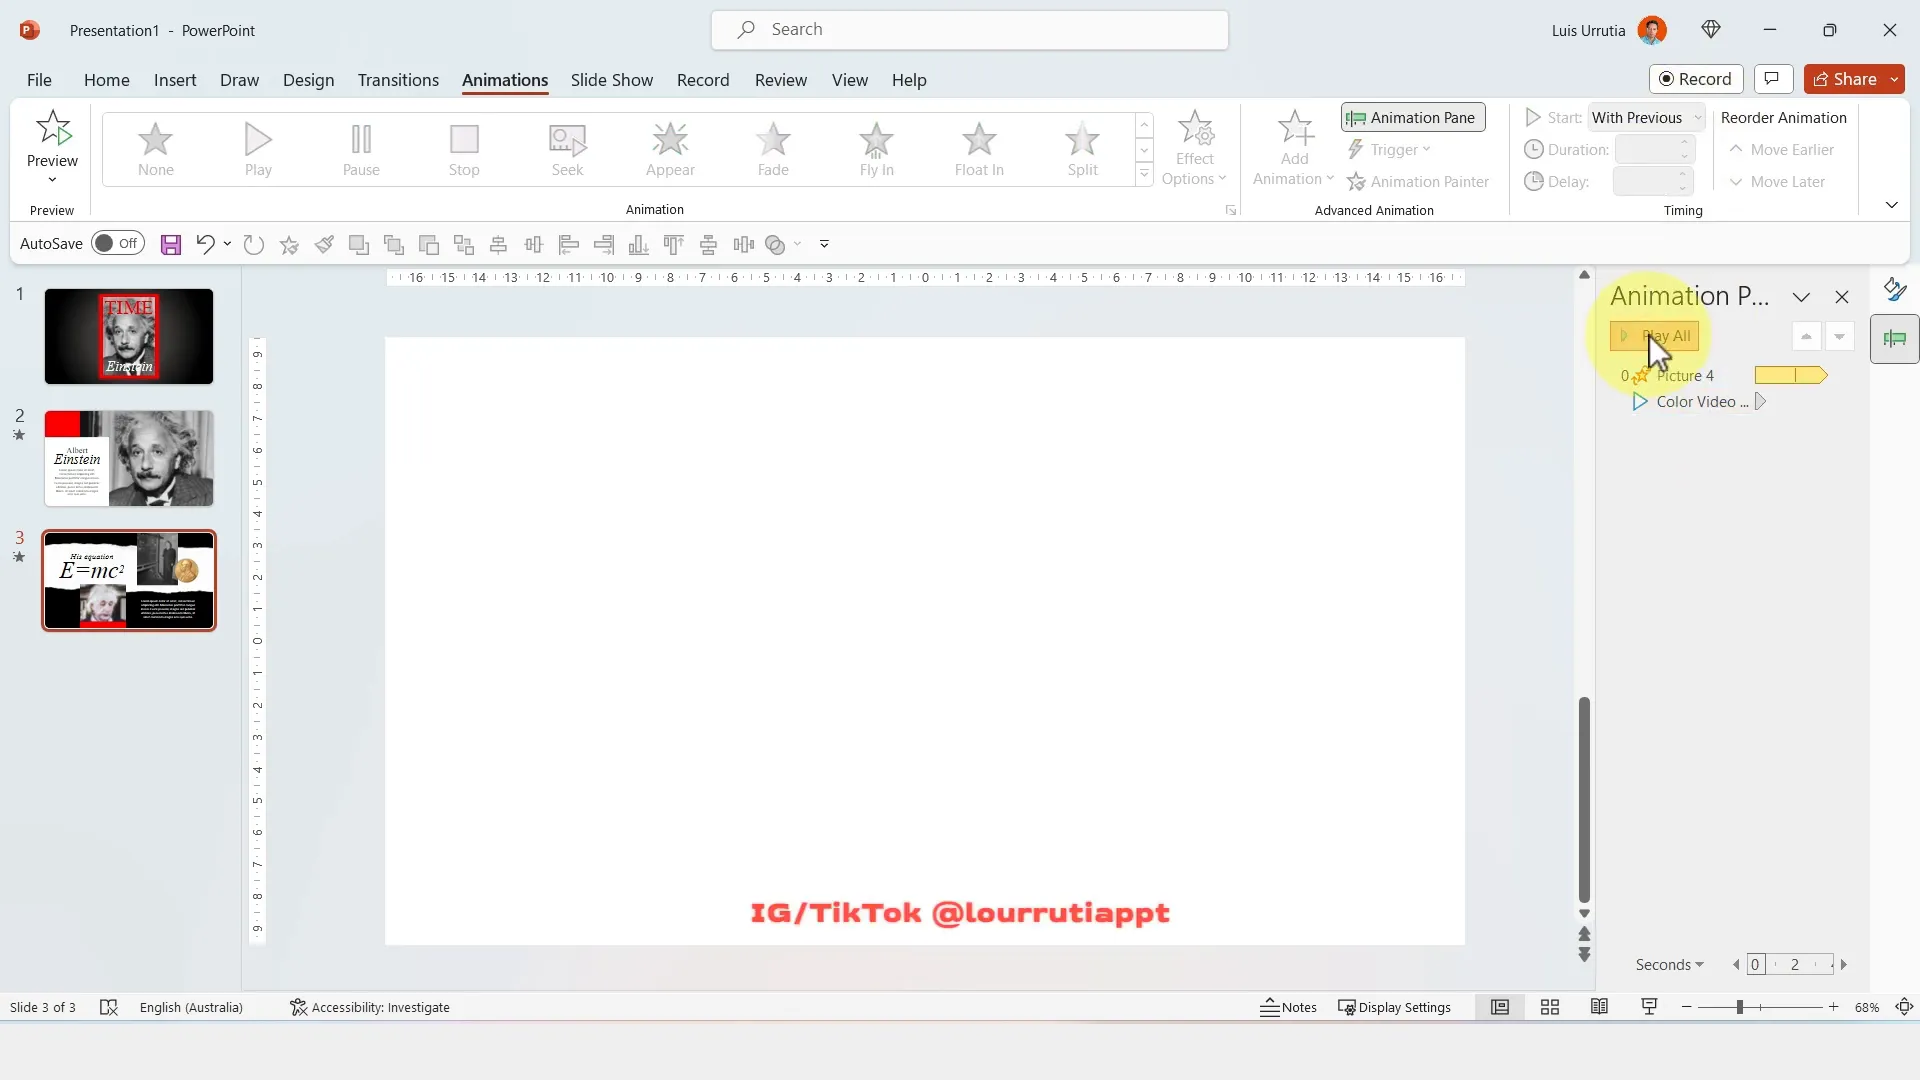
Embedding Video and Synchronizing Animations
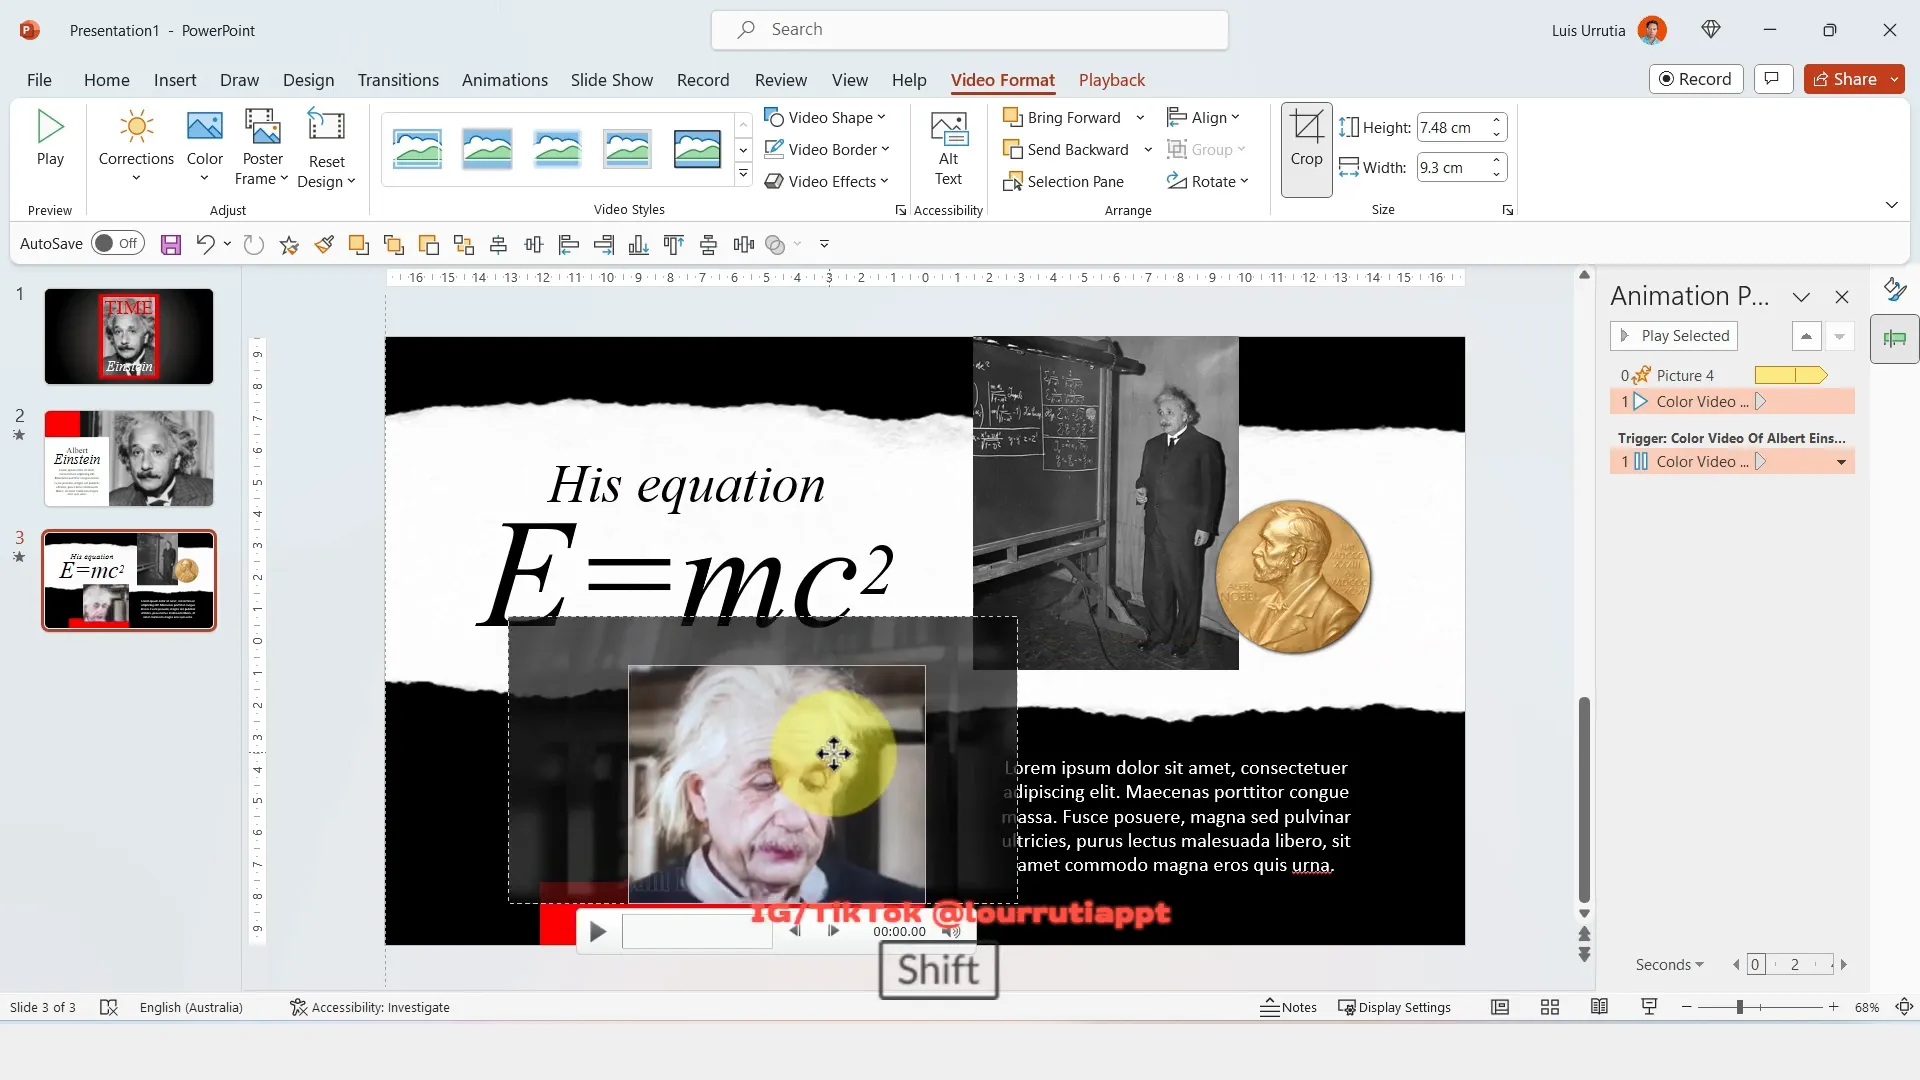
Embedding videos can elevate your presentation by providing multimedia content. Drag a previously downloaded video into the slide, then crop it to a square format for uniformity.
Align the red rectangle border to match the video crop, ensuring a cohesive layout.
Remove any pause button overlays from the animation pane and set the video playback to start automatically with other animations.
Play all animations simultaneously to synchronize the video and spinning Nobel Prize icon, creating a seamless multimedia experience.
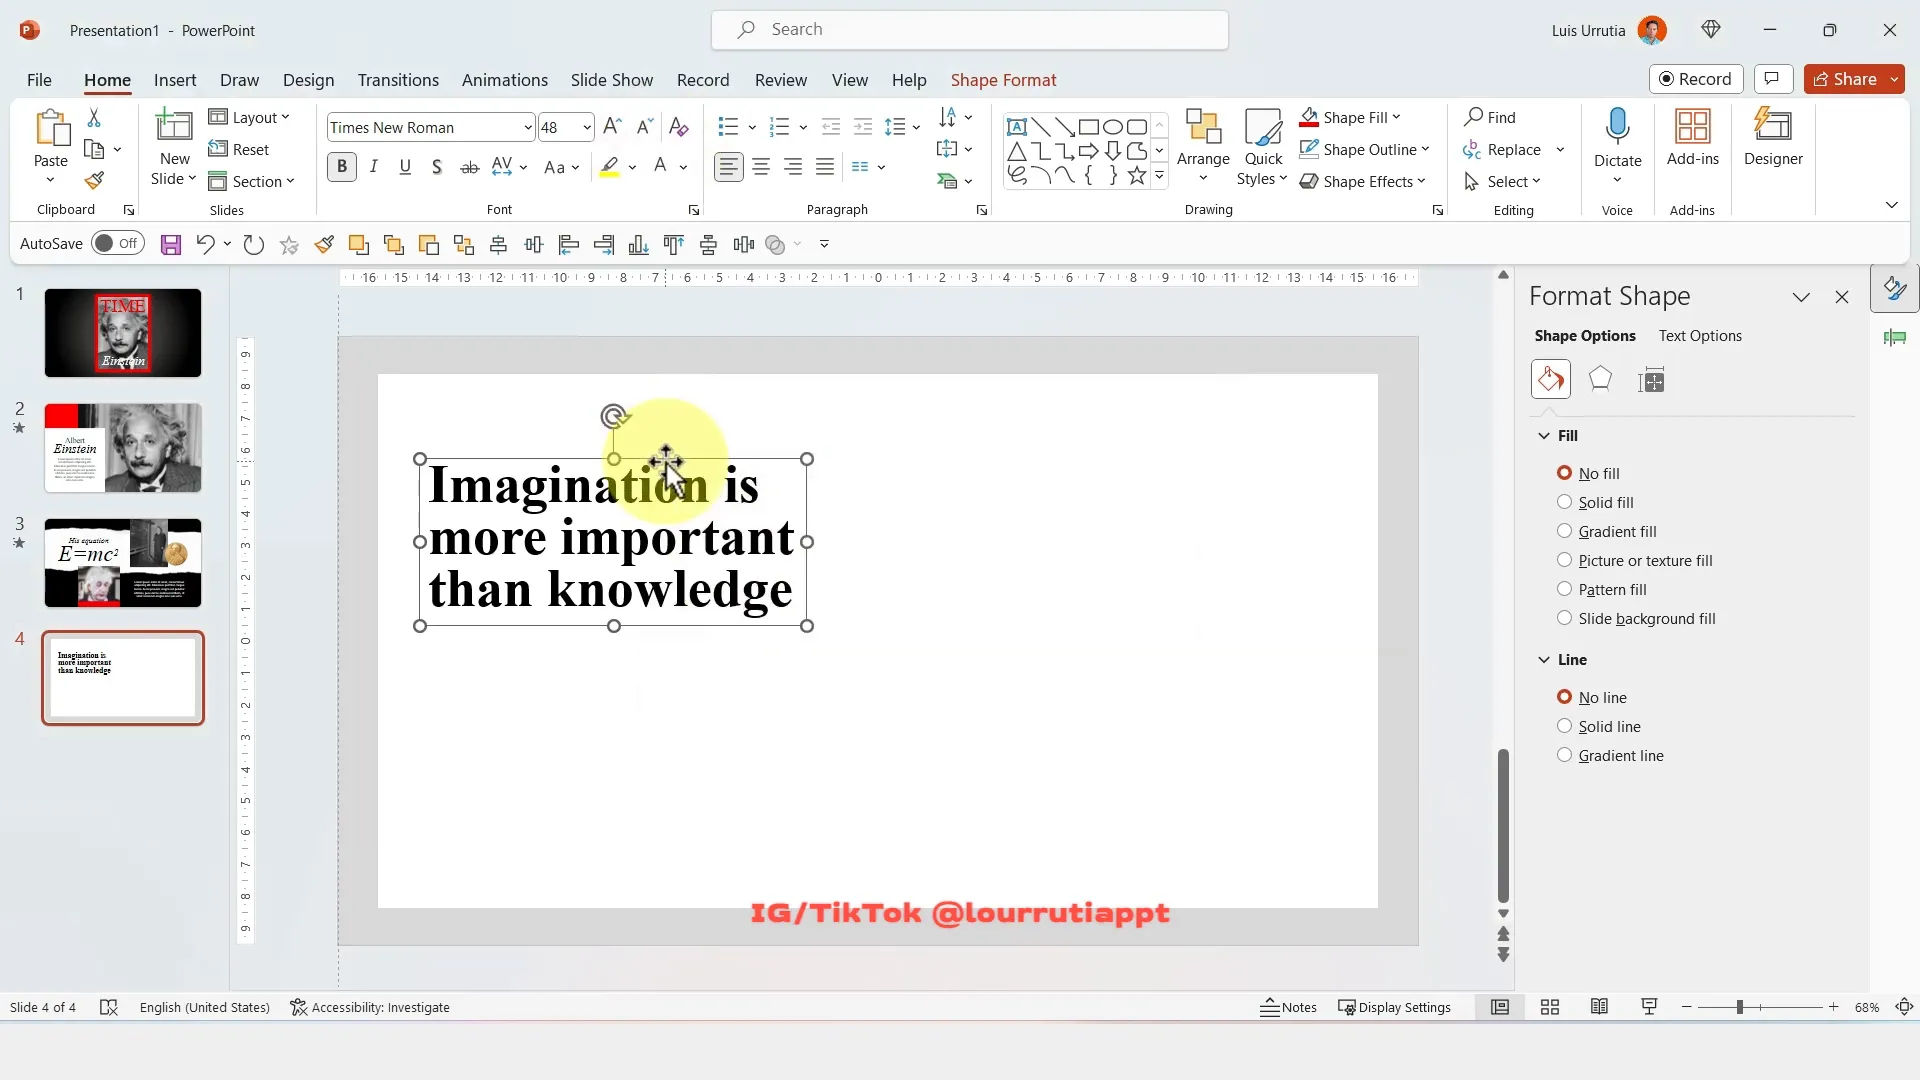
Final Slide: Adding Quotes and Polished Design Elements
For the last slide, switch the background color to a light gray to soften the mood and prepare for concluding content.
Insert a white rectangle centered on the slide, sized appropriately to hold text and images, and remove its outline for a minimalist aesthetic.
Add a meaningful quote to inspire your audience. For example, “Imagination is more important than knowledge,” a favorite quote by Einstein, fits perfectly with the theme. Adjust the line spacing for readability.
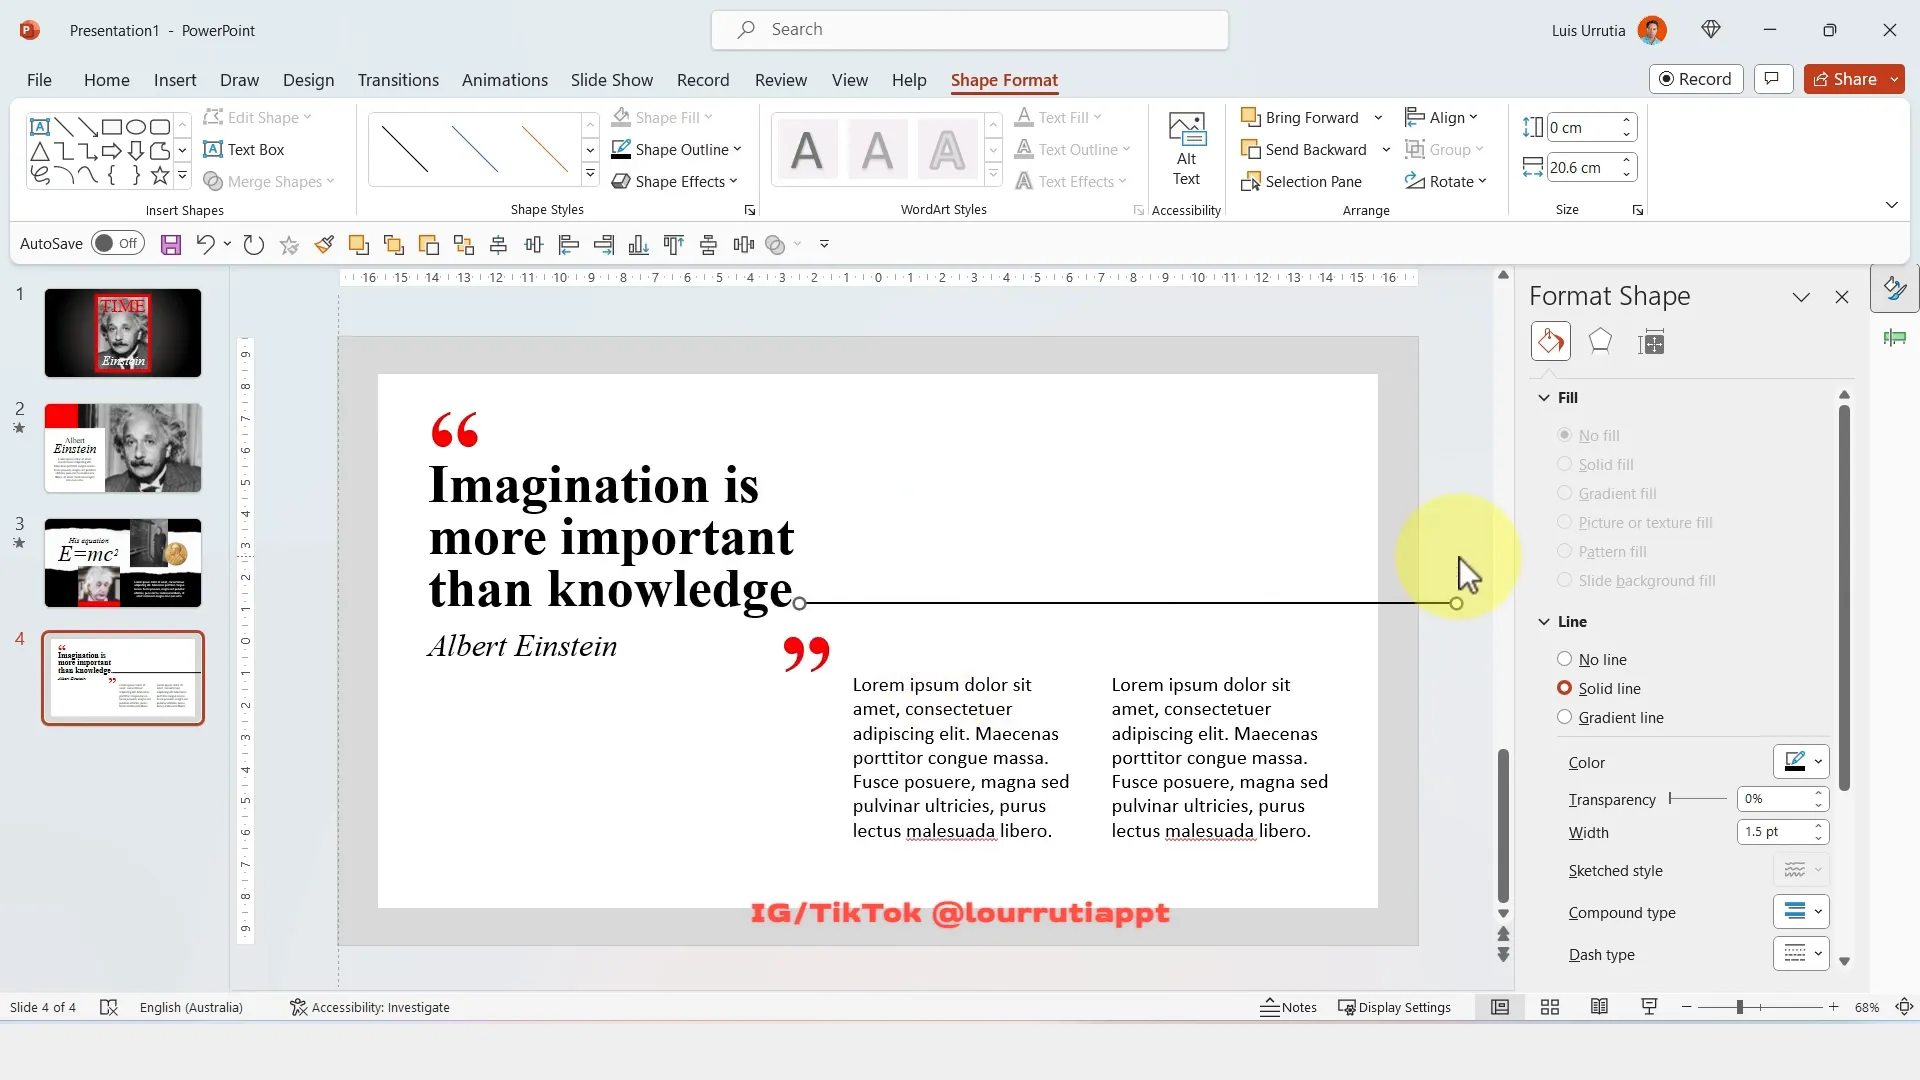
Create large red quotation marks using the same font, duplicating and rotating one to form the pair, adding visual flair to the quote.
Include the author’s name beneath the quote in a smaller font, maintaining respect and clarity.
Adding Content Text and Decorative Lines
Copy and paste a text box from previous slides to serve as a guide for the amount of content text needed. Adjust the text color to black and align it within the white rectangle.
Duplicate the text box and position it to maintain balance and symmetry. Add a full stop at the end of the paragraph and draw a horizontal line extending to the left margin. Change the line color to black and increase the stroke weight to emphasize the design.
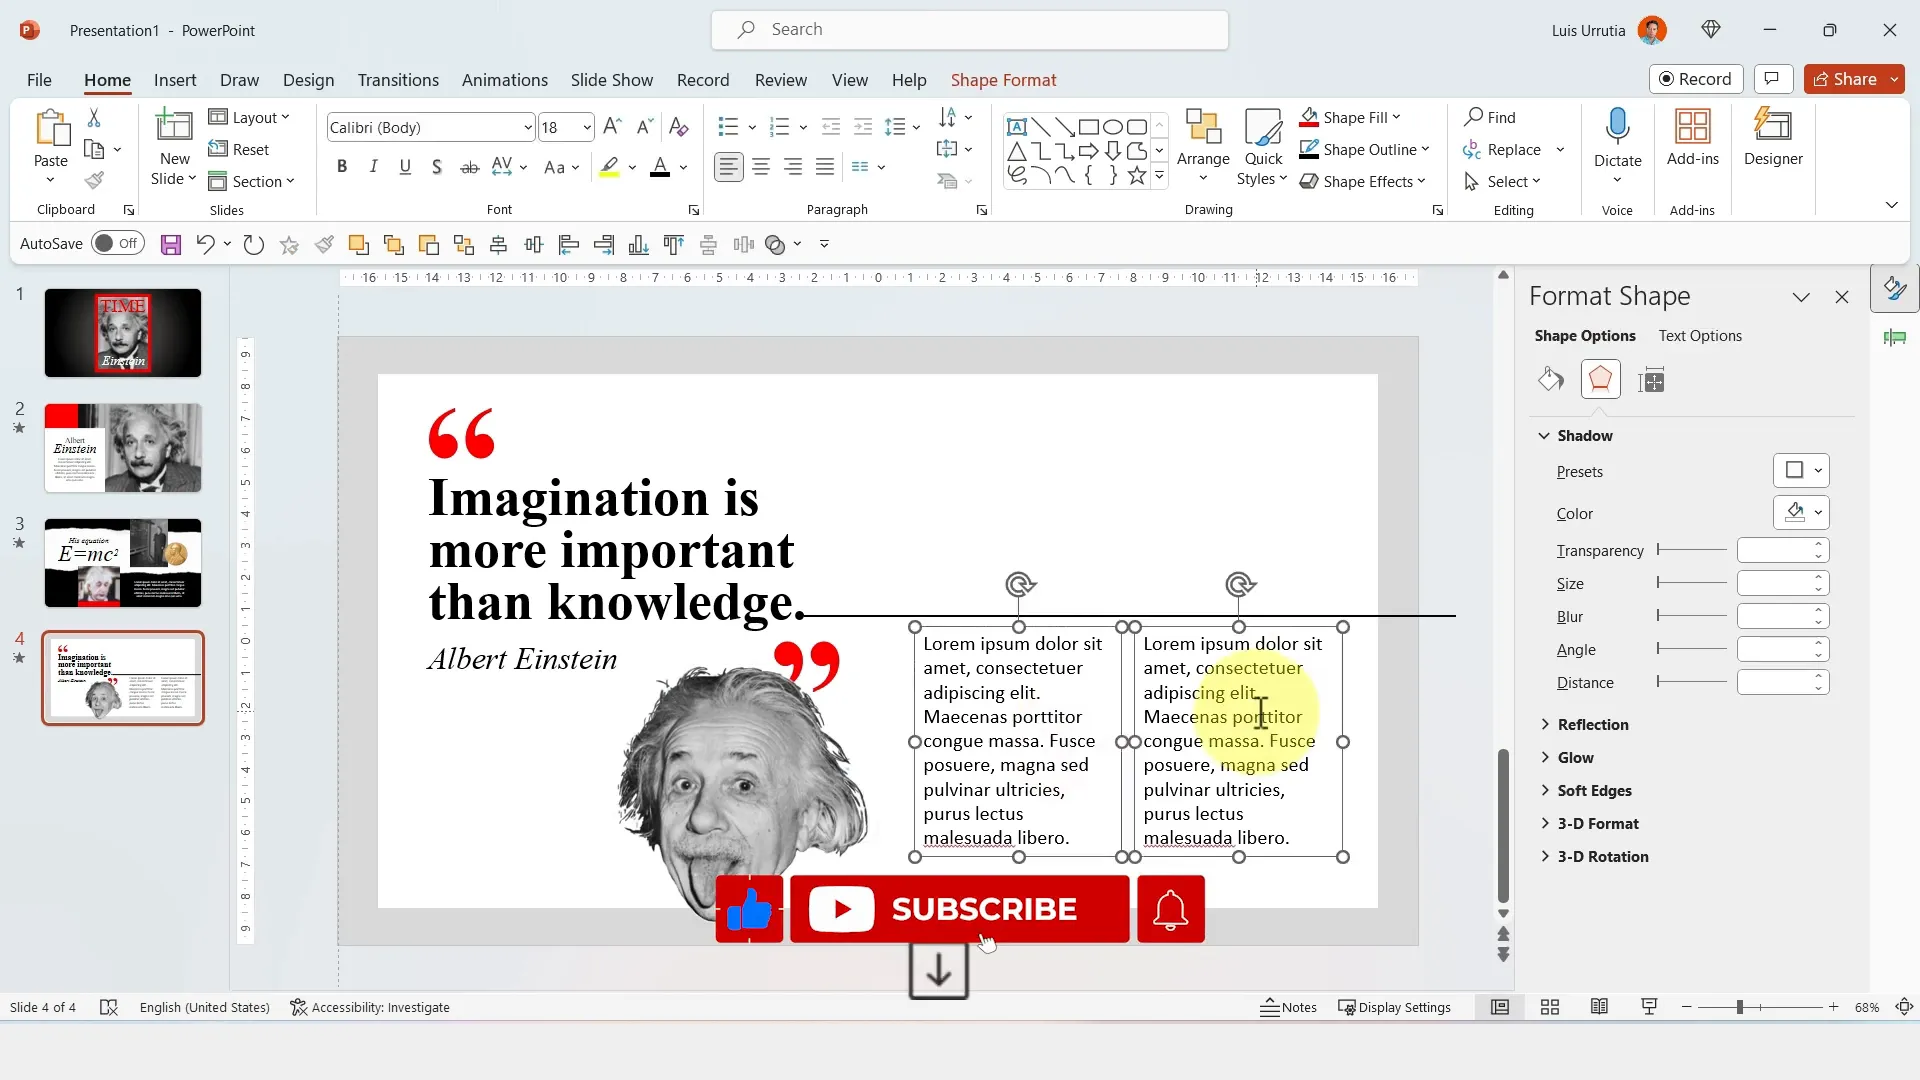
Inserting Decorative Images and Animations
Find and insert a PNG image of a floating head or other thematic graphic to complement the slide’s content. Resize and position it carefully within the layout.
Use the animation painter tool to copy the spin animation from the Nobel Prize image and apply it to this new graphic, adding consistent motion and visual interest.
Finish by applying the Page Curl transition to this slide to maintain the magazine effect throughout the presentation.
Conclusion: Bringing It All Together
This step-by-step guide demonstrates how to create a creative PowerPoint presentation that looks like a magazine, combining thoughtful design elements, animations, and multimedia to tell a compelling story. Using tools within PowerPoint—such as gradient fills, shapes, text effects, image cropping, animations, and transitions—you can dramatically elevate your presentations and engage your audience like never before.
Remember, the key to success lies in attention to detail, consistency in design, and creative use of PowerPoint’s features to replicate the aesthetic of professional print media.
For those interested in exploring more templates and tutorials, visiting Luis Urrutia’s website and following his social media channels can provide ongoing inspiration and resources.
Frequently Asked Questions (FAQ)
1. What is the best font to use for a magazine-style PowerPoint presentation?
Classic serif fonts like Times New Roman work well as they evoke professionalism and readability. However, depending on your theme, you can experiment with other fonts that suit your content’s tone.
2. How do I create a radial gradient background in PowerPoint?
Right-click the slide background, select Format Background, choose Gradient Fill, then select Radial. Adjust the gradient stops and directions to achieve the desired spotlight effect.
3. Can I add animations to images in PowerPoint?
Yes, PowerPoint allows you to add a variety of animations to images, such as spin, fade, or zoom. Customize the animation timing and effects in the Animation Pane for seamless integration.
4. How do I crop images to fit shapes in PowerPoint?
Select the image, go to the Picture Format tab, click on Crop, and adjust the handles to fit the desired shape or area. You can also reposition the image within the crop frame.
5. What transition effect can make my presentation look like a magazine?
The Page Curl transition in PowerPoint simulates the turning of a magazine page and adds a professional, tactile effect to your presentation.
6. How can I embed videos into my PowerPoint slides?
Drag and drop a video file into your slide or use the Insert tab and select Video. Crop and resize the video as needed, and set playback options in the Animation Pane.
7. How do I add superscript text in PowerPoint?
Select the text you want to superscript, right-click, choose Font, and check the Superscript box, then click OK.
8. Where can I find transparent PNG images suitable for presentations?
You can search Google Images using keywords like “PNG transparent” or visit free image sites such as PNGTree, PngImg, or Pixabay to find high-quality transparent PNGs.
9. How important is alignment and guides in slide design?
Alignment and guides are crucial for maintaining a clean, professional layout. They help ensure that text, images, and shapes are evenly spaced and visually balanced.
10. Can I reuse the design elements created in this tutorial for other presentations?
Absolutely! Once you create these design elements, you can save them as templates or master slides in PowerPoint and reuse or adapt them for future projects.
Check out the full video: CREATIVE POWERPOINT PRESENTATION that looks like a MAGAZINE. 🤯 Step-by-Step Guide.


