
If you’re eager to elevate your PowerPoint presentation skills and add a professional touch to your slides, learning to create engaging animations is a game-changer. Today, we’ll dive into a fascinating tutorial on how to create a fully customizable 3D laptop opening animation using nothing but PowerPoint’s built-in tools. This technique does not rely on complex 3D models but cleverly uses simple shapes, photos, and PowerPoint’s 3D formatting and morph transitions to create a captivating effect.
This article will guide you step-by-step through the process, from setting up your slide background and shapes to adding text, pictures, and even videos inside the animated laptop screen. Along the way, you’ll pick up valuable tips on using PowerPoint’s 3D rotation tools and morph transitions to breathe life into your presentations. Whether you’re a beginner or someone looking to add advanced effects to your decks, this tutorial will enhance your PowerPoint presentation skills and inspire your creativity.
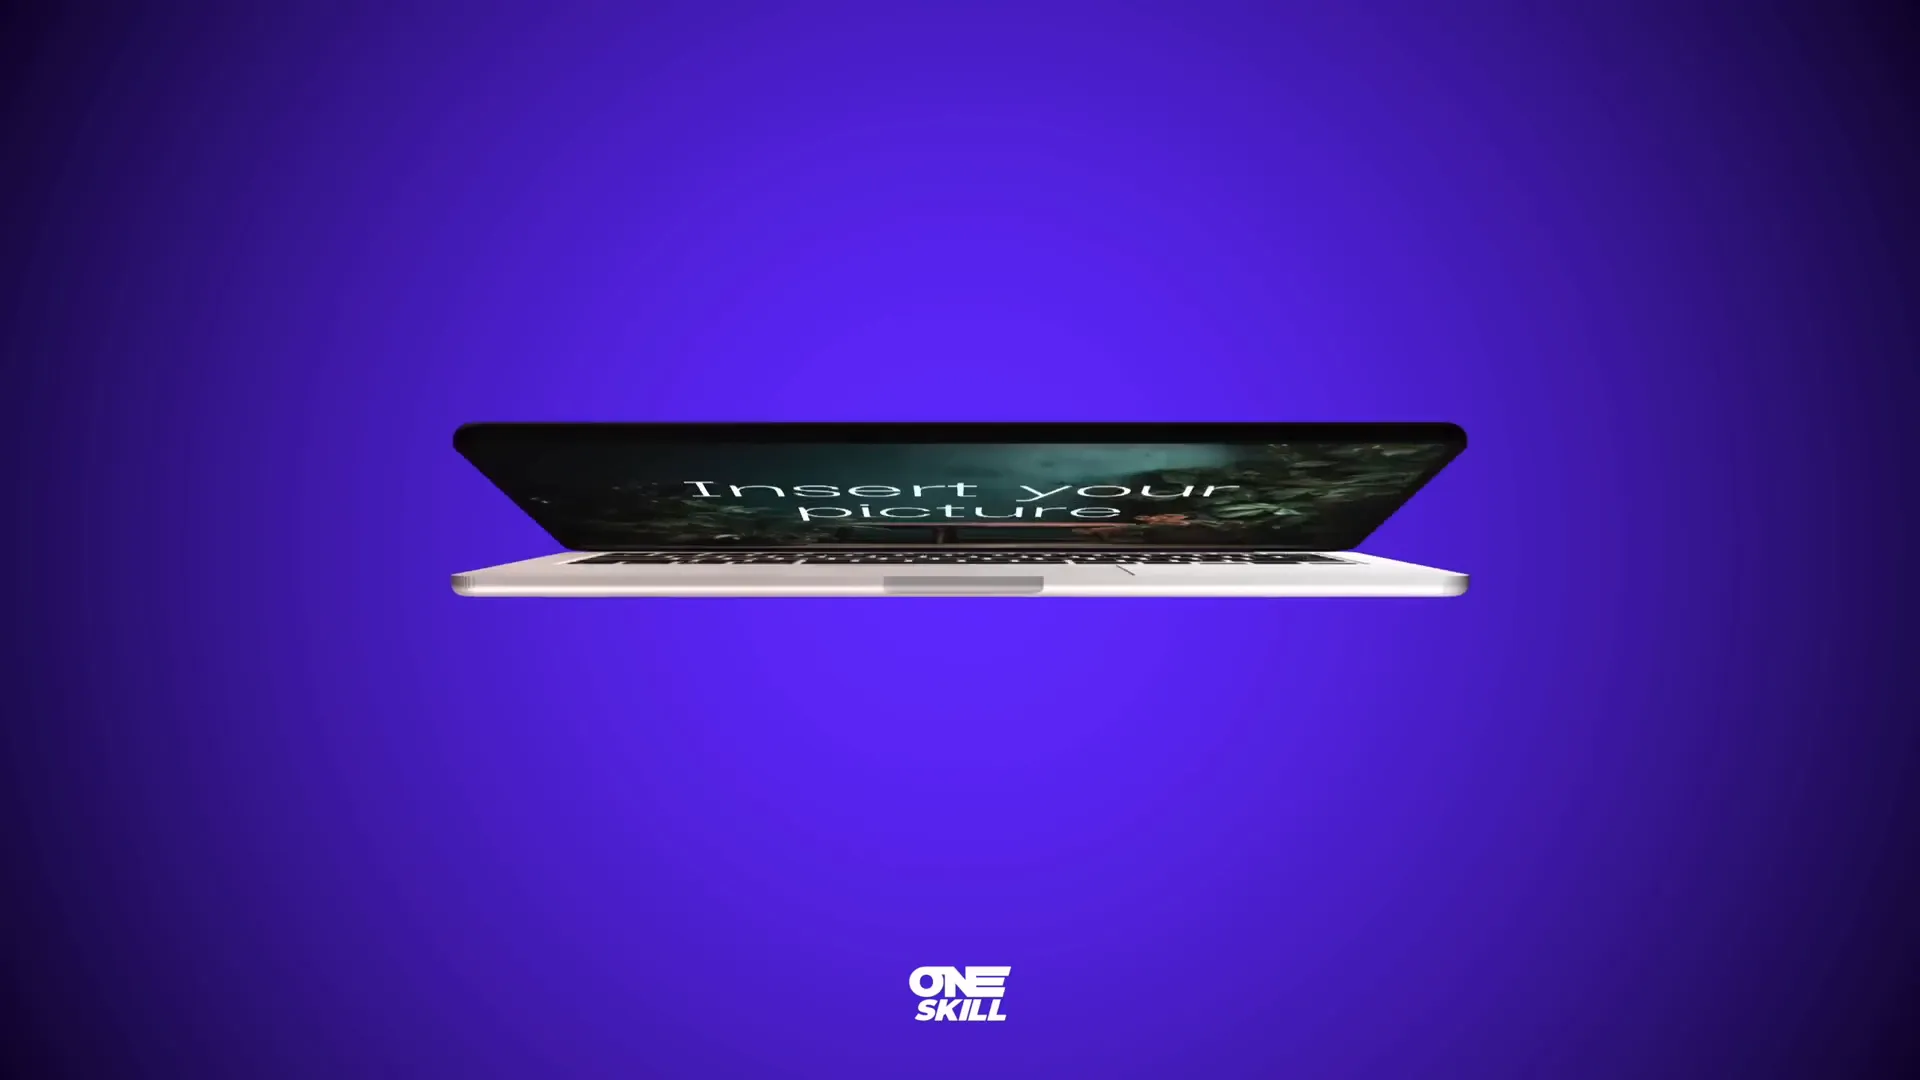
Table of Contents
- Setting Up Your Slide Background
- Creating Basic Laptop Shapes
- Applying 3D Rotation and Adjusting Rotation Centers
- Enhancing Shapes with 3D Depth and Bevel Effects
- Aligning Components and Closing the Laptop
- Animating with Morph Transition
- Using a Realistic Laptop Image
- Inserting Text, Pictures, and Videos Inside the Laptop
- Conclusion and Next Steps
- Frequently Asked Questions
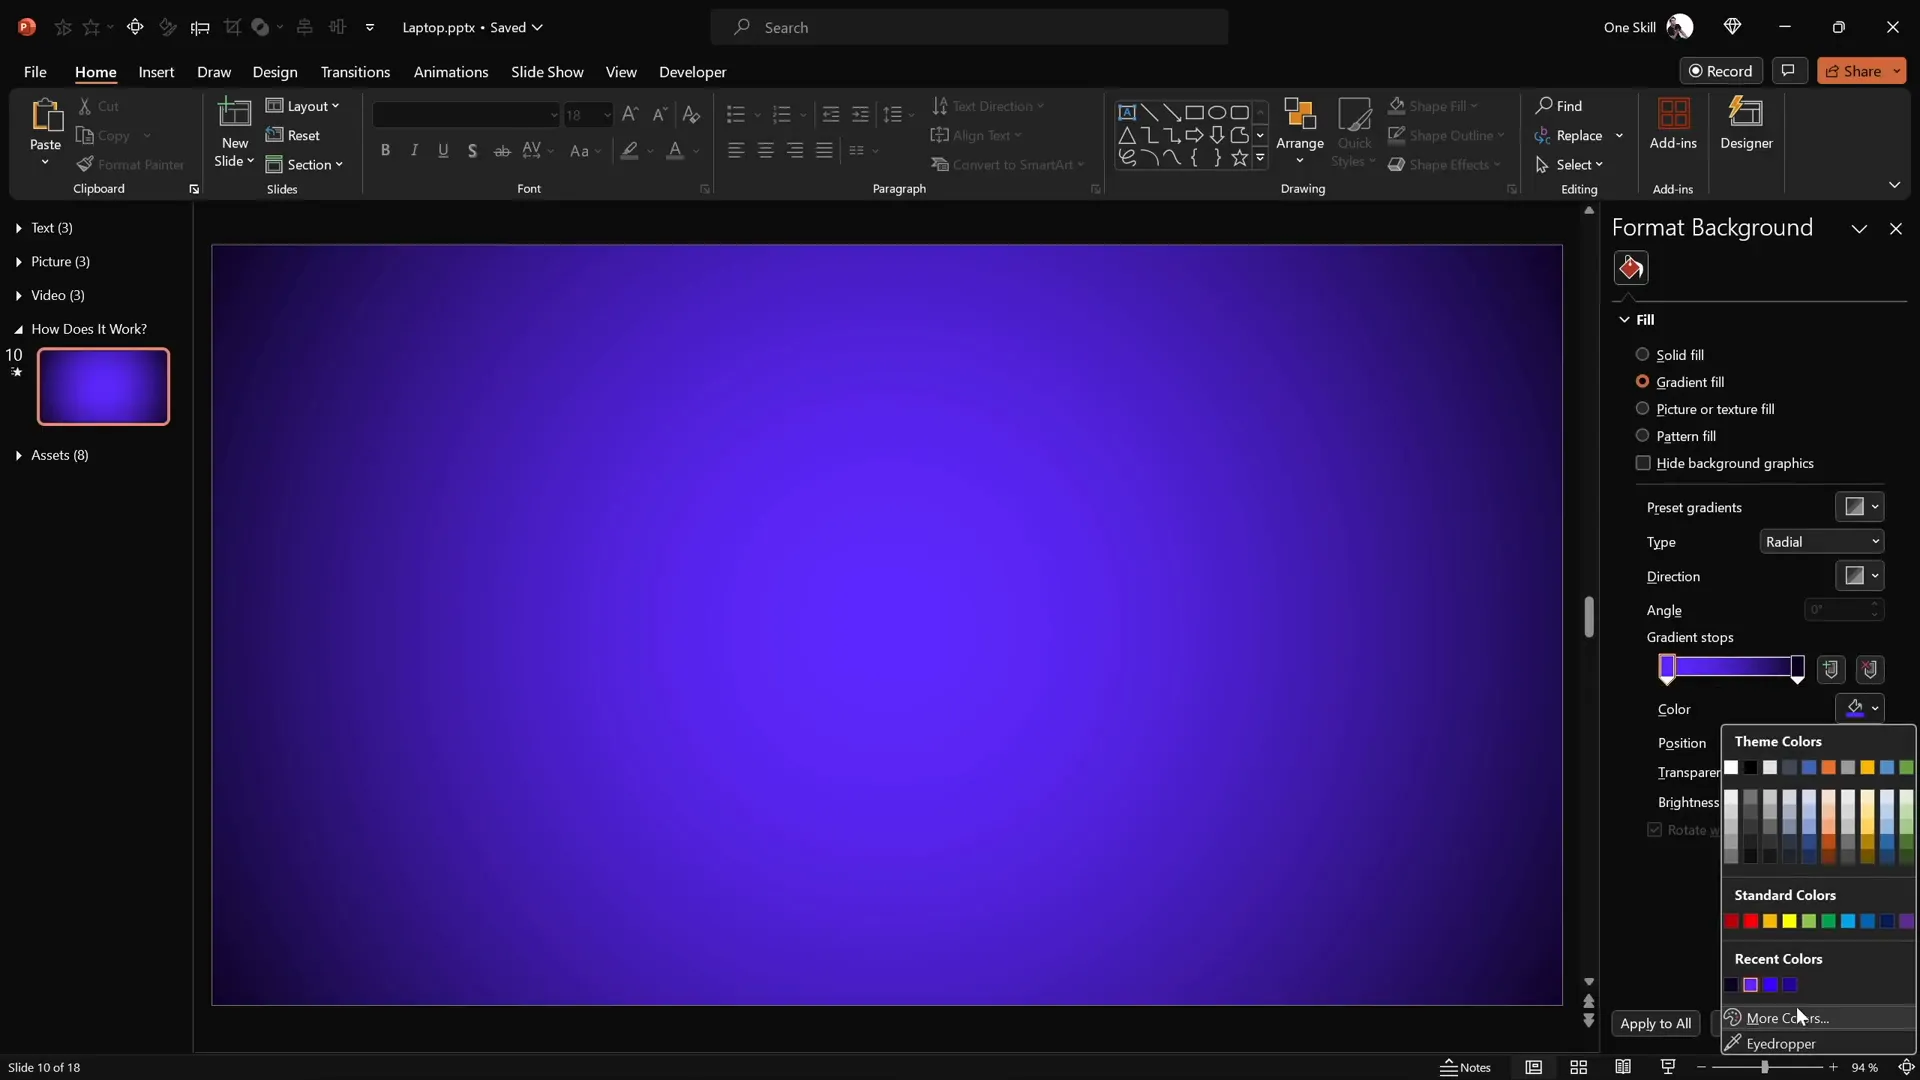
Setting Up Your Slide Background
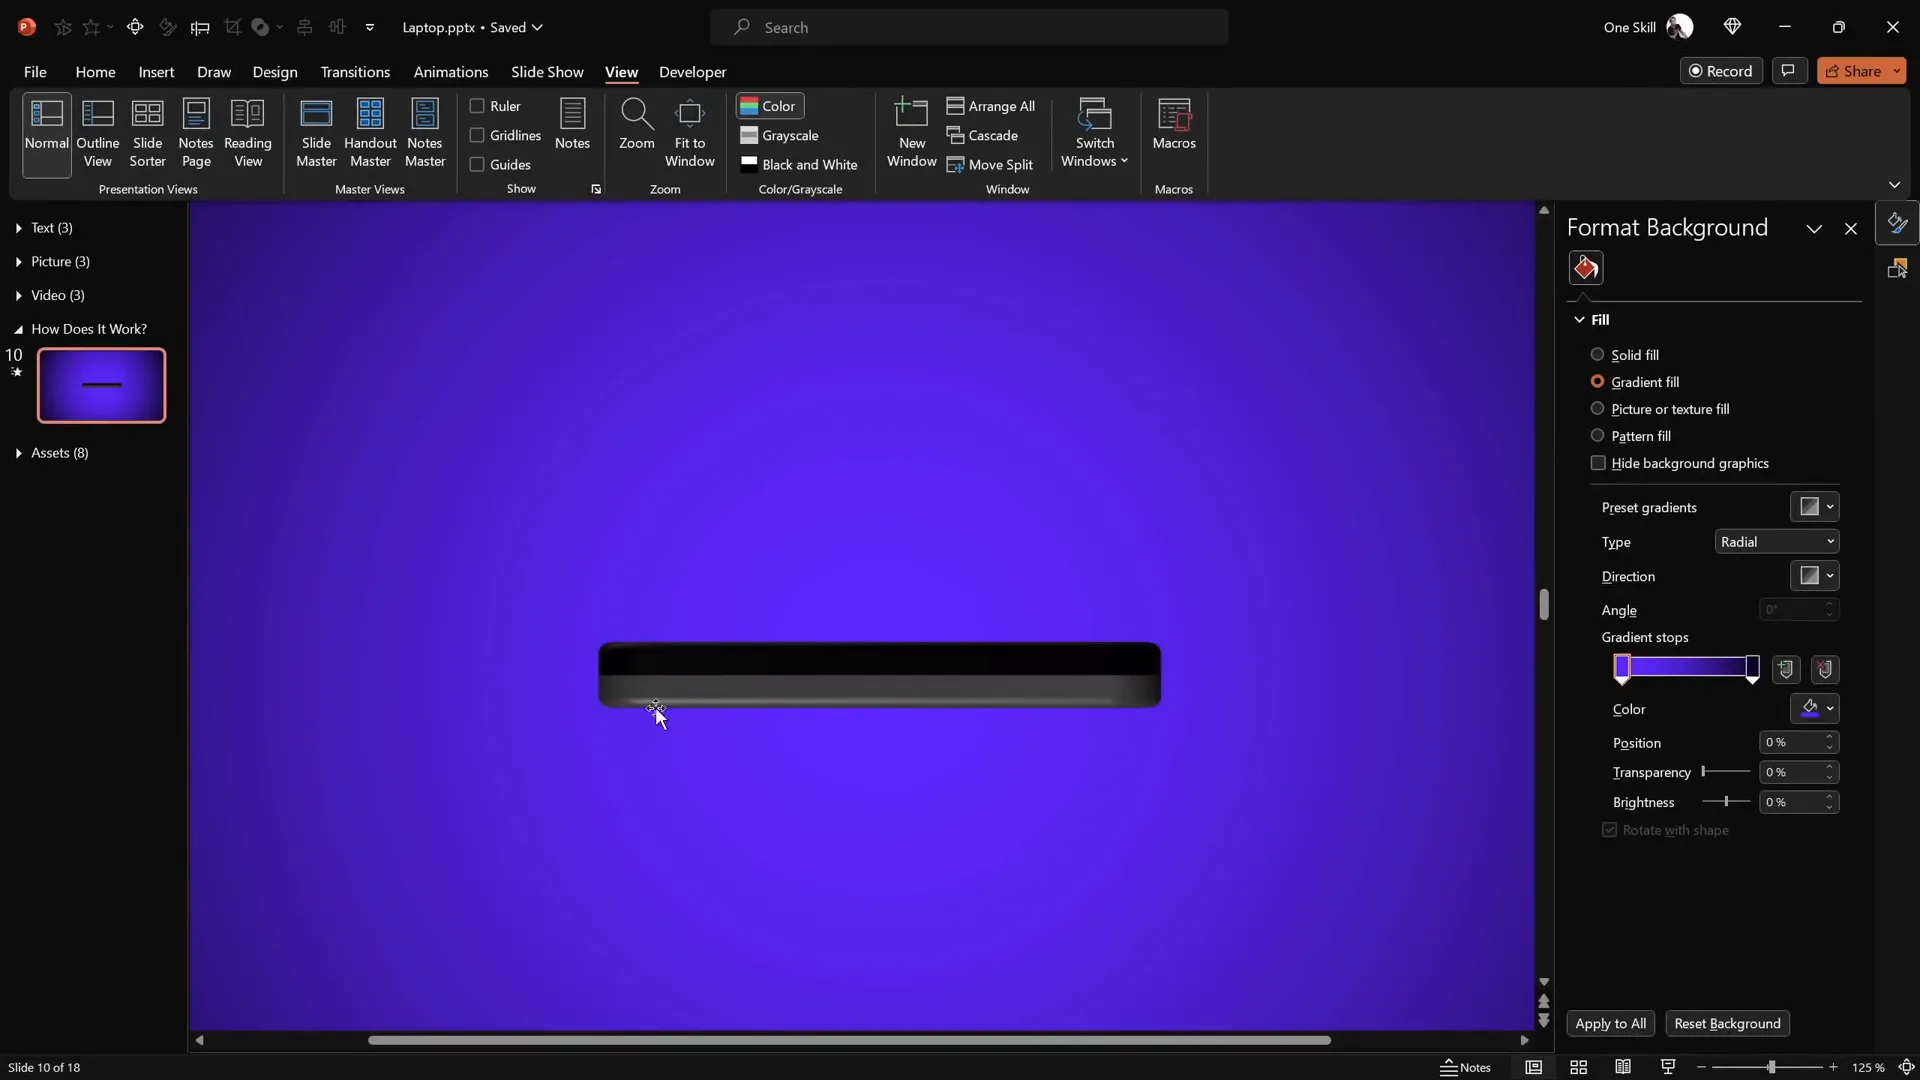
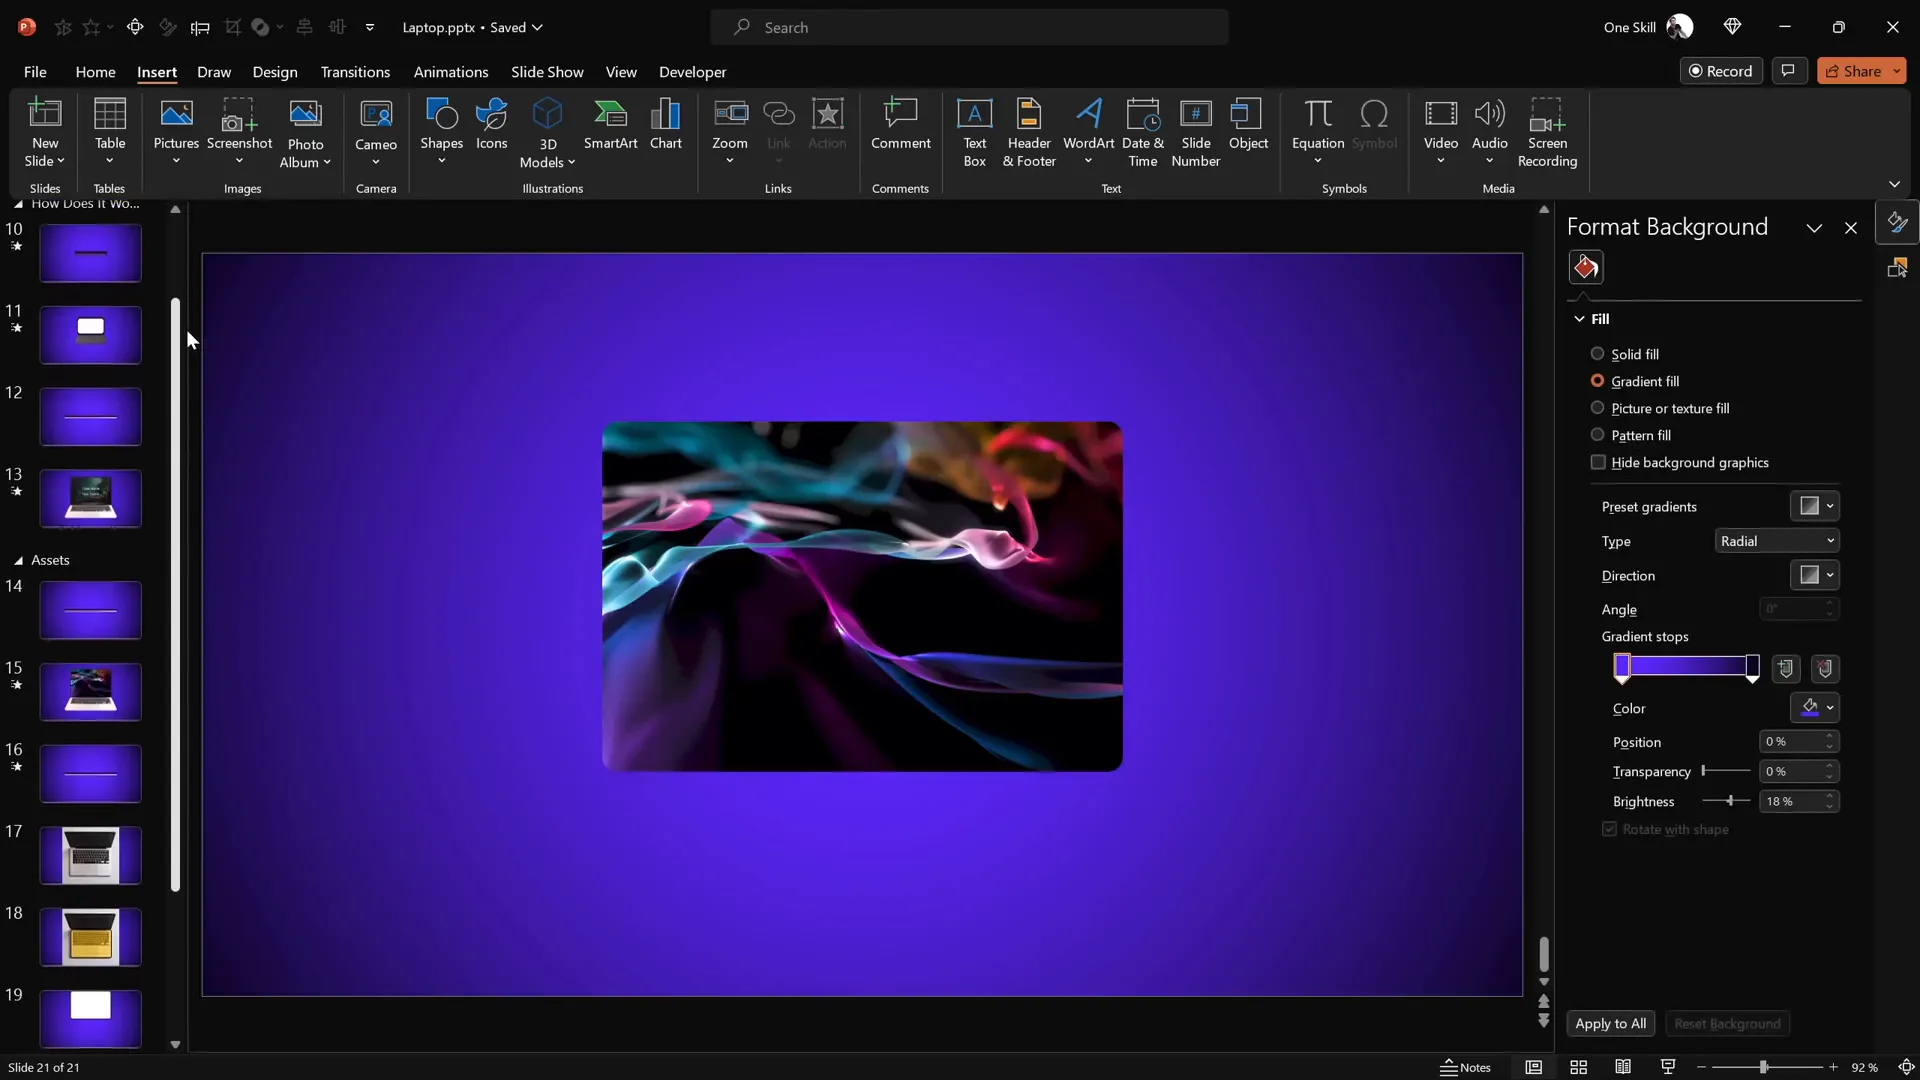
Before we jump into crafting the laptop animation, it’s important to set a visually appealing backdrop for your slide. A beautiful gradient background enhances the overall aesthetic and gives your animation a polished look.
To set up the gradient background:
- Right-click anywhere on the slide and select Format Background.
- Choose Gradient Fill as the background type.
- Set the gradient colors using these hex codes for a smooth blend:
- First color:
#692DFF - Second color:
#0D0002C
- First color:
While the gradient is optional for the animation to work, it adds a refined touch that can elevate your presentation’s design.
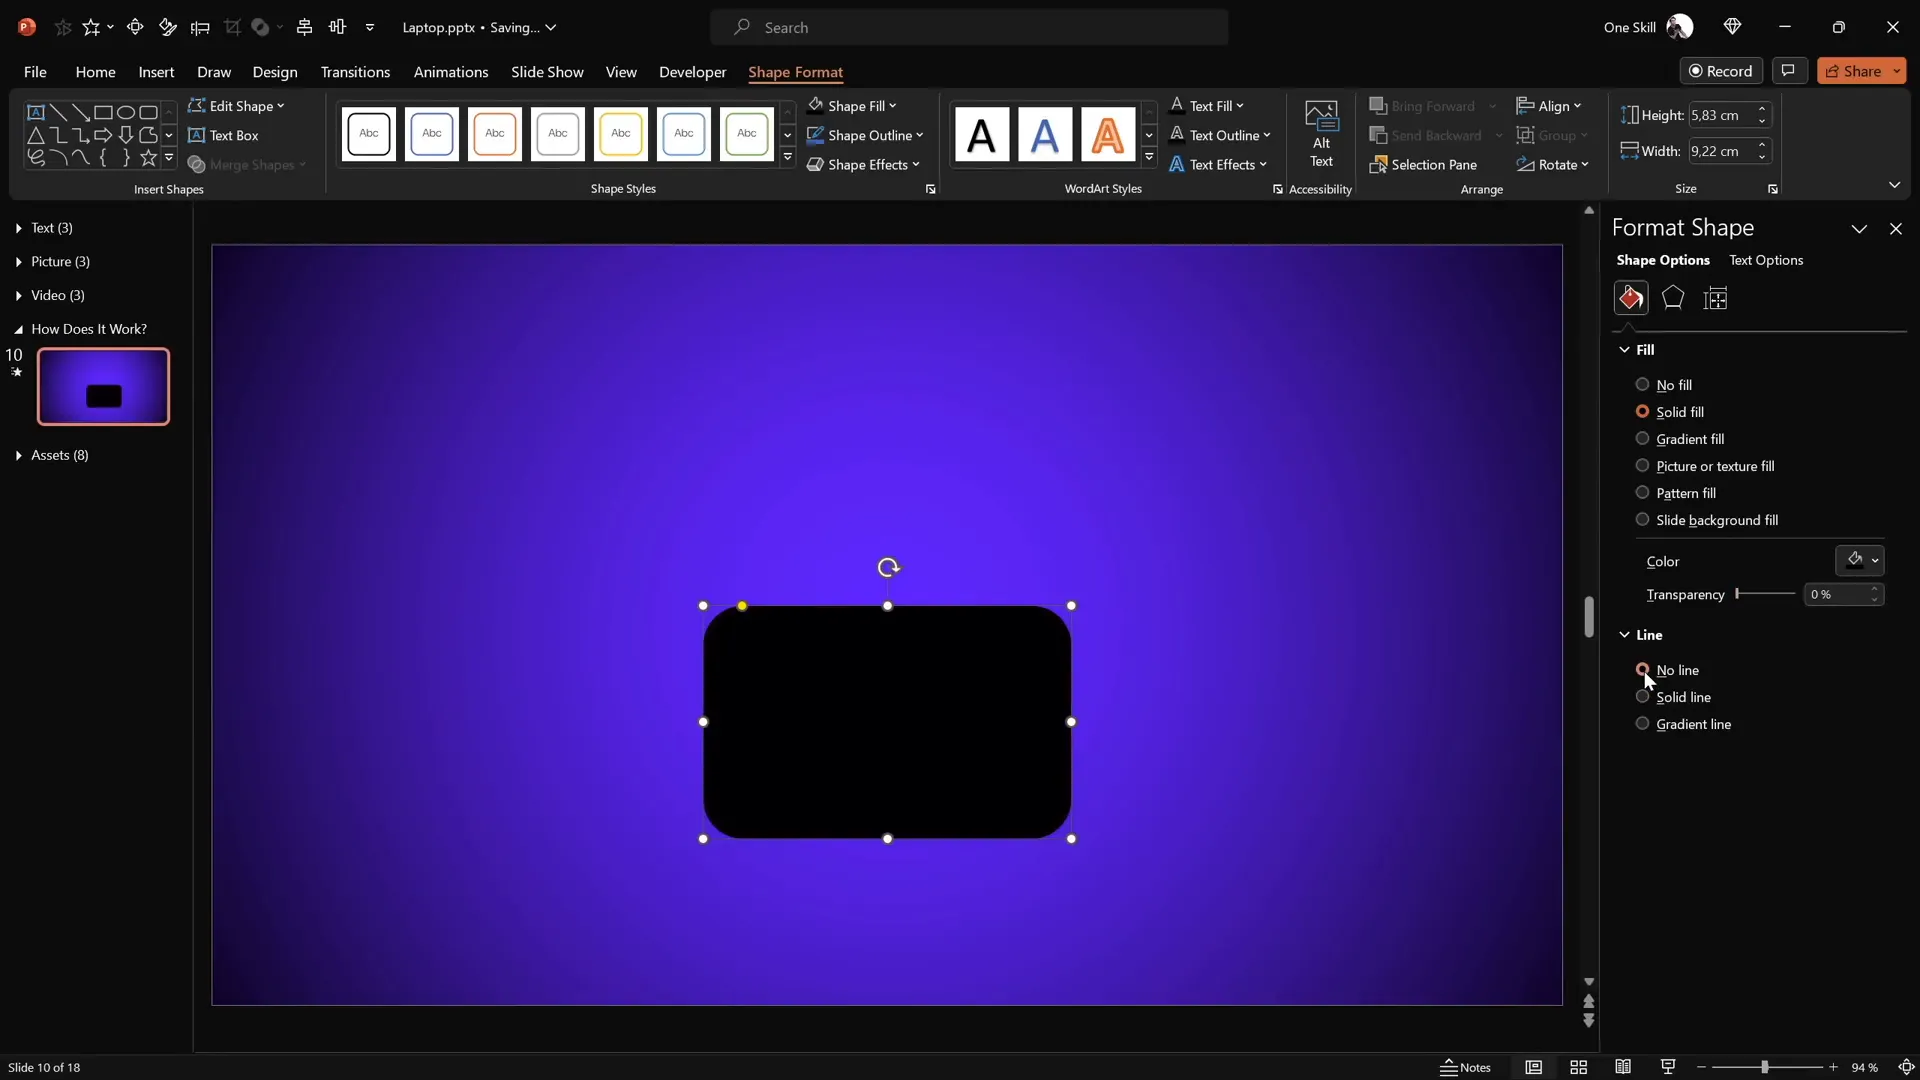
Creating Basic Laptop Shapes
The core of this animation lies in simple shapes that represent the laptop’s keyboard and screen. Here’s how to create them:
- Go to Insert > Shapes and select the Rounded Rectangle tool.
- Draw a rounded rectangle on your slide – this will be your laptop’s keyboard.
- Center-align the rectangle horizontally on the slide using the alignment tools.
- Format the shape:
- Remove any outline (No Line).
- Fill with a dark gray color.
- Duplicate this shape by holding
Ctrl + Shiftand dragging upwards to create the laptop screen. - Change the fill color of the screen shape to black.
- Attach the screen shape just above the keyboard rectangle so they touch.
- Duplicate the screen shape (Ctrl + drag) and change the fill color to white.
- Resize the white shape slightly smaller and center it inside the black screen shape to simulate the laptop screen border.
- Select both screen shapes (black and white) and group them together (Ctrl + G).
At this point, you have the keyboard and screen shapes ready to be animated.
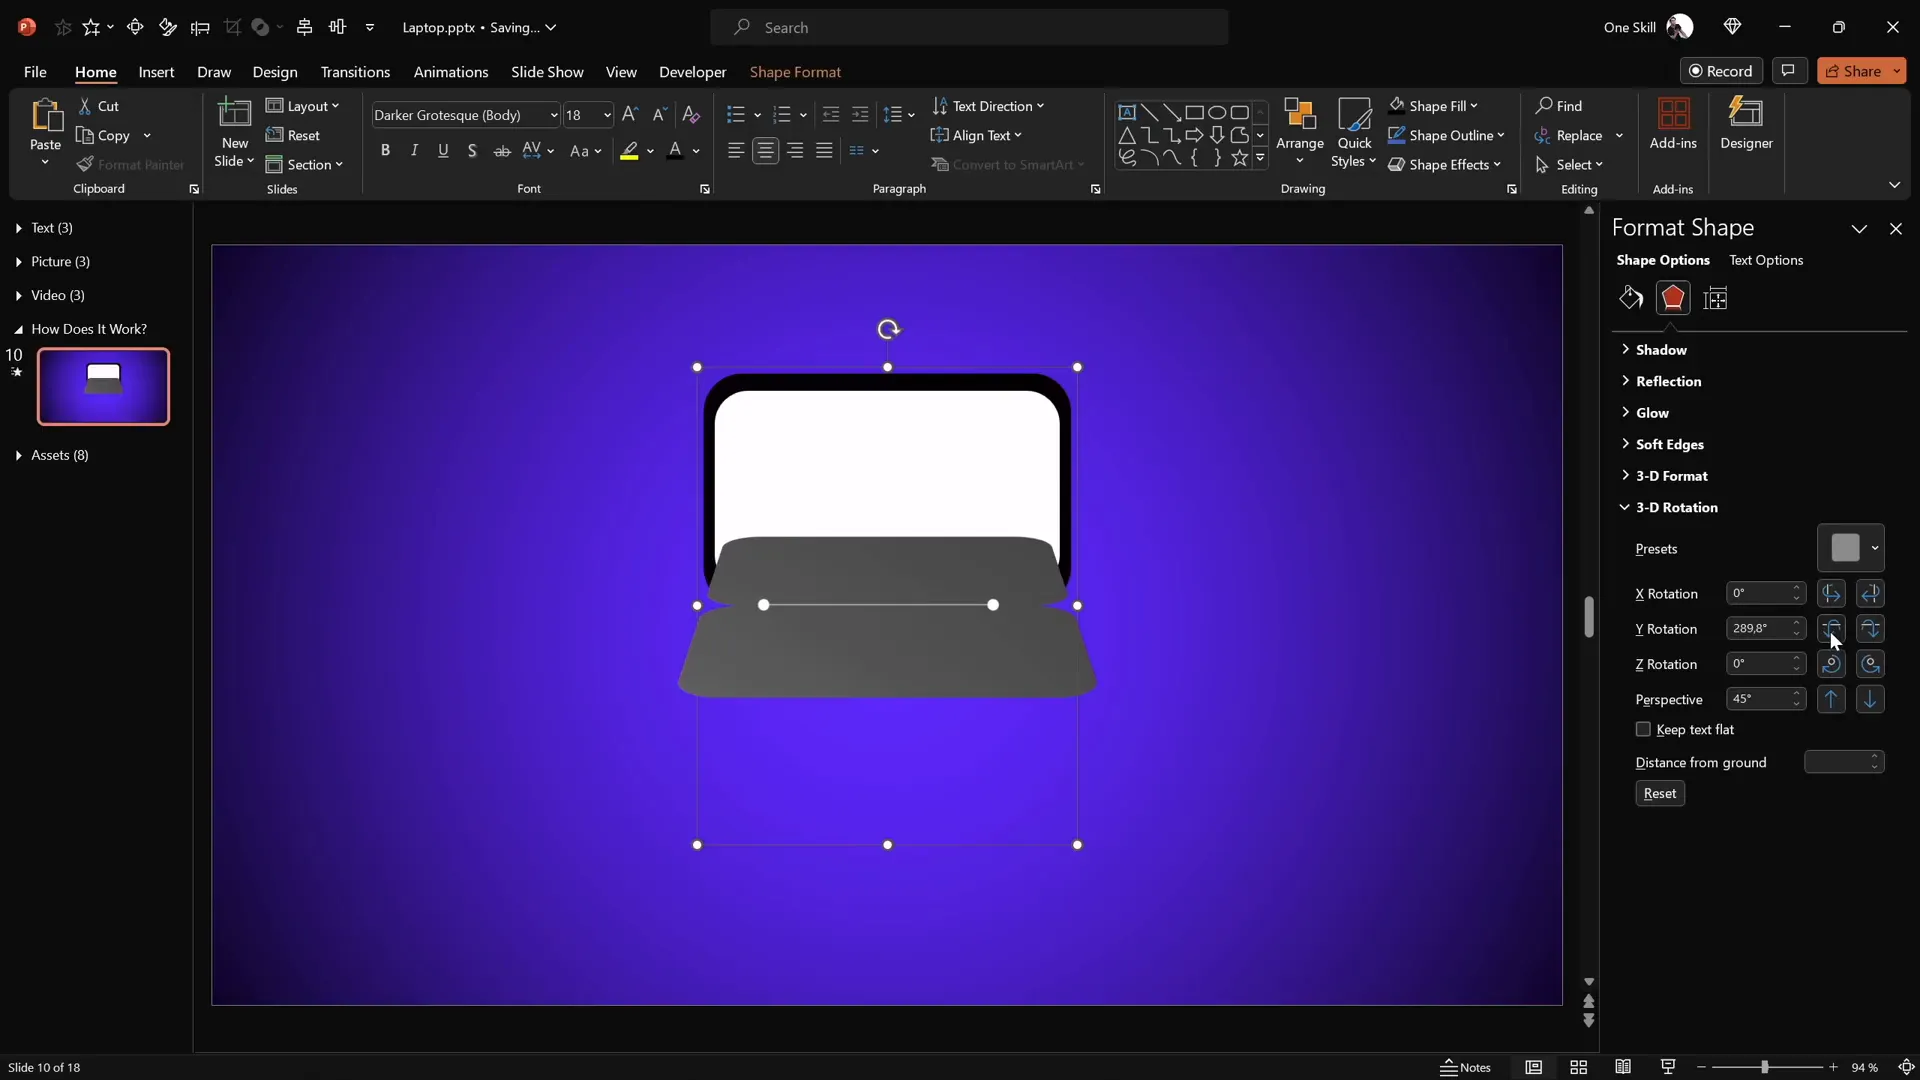
Applying 3D Rotation and Adjusting Rotation Centers
To create the laptop opening and closing effect, we’ll apply 3D rotation to the keyboard and screen shapes. But first, it’s crucial to understand that rotating shapes by default occurs around their center, which won’t give a realistic hinge effect for this laptop animation.
Steps to apply 3D rotation and adjust rotation centers:
- Select the keyboard shape.
- Go to Format Shape > 3D Rotation.
- Choose any Perspective Rotation preset (e.g., “Perspective Relaxed and Moderately”).
- Notice the keyboard flips around its center, which is not what we want.
- Reset the rotation to zero.
- To change the rotation center, duplicate the keyboard shape and place the copy directly below the original.
- Select both shapes and group them. This new group changes the rotation axis to the bottom edge, mimicking a hinge.
- Make the duplicated (bottom) keyboard shape invisible by setting its fill to “No Fill” so it doesn’t show during rotation.
- Apply the same perspective rotation preset to the grouped shape again and test rotating on the Y-axis to see the keyboard flip realistically along the hinge edge.
This technique cleverly tricks PowerPoint into rotating the shape around a custom pivot point, essential for realistic animations.
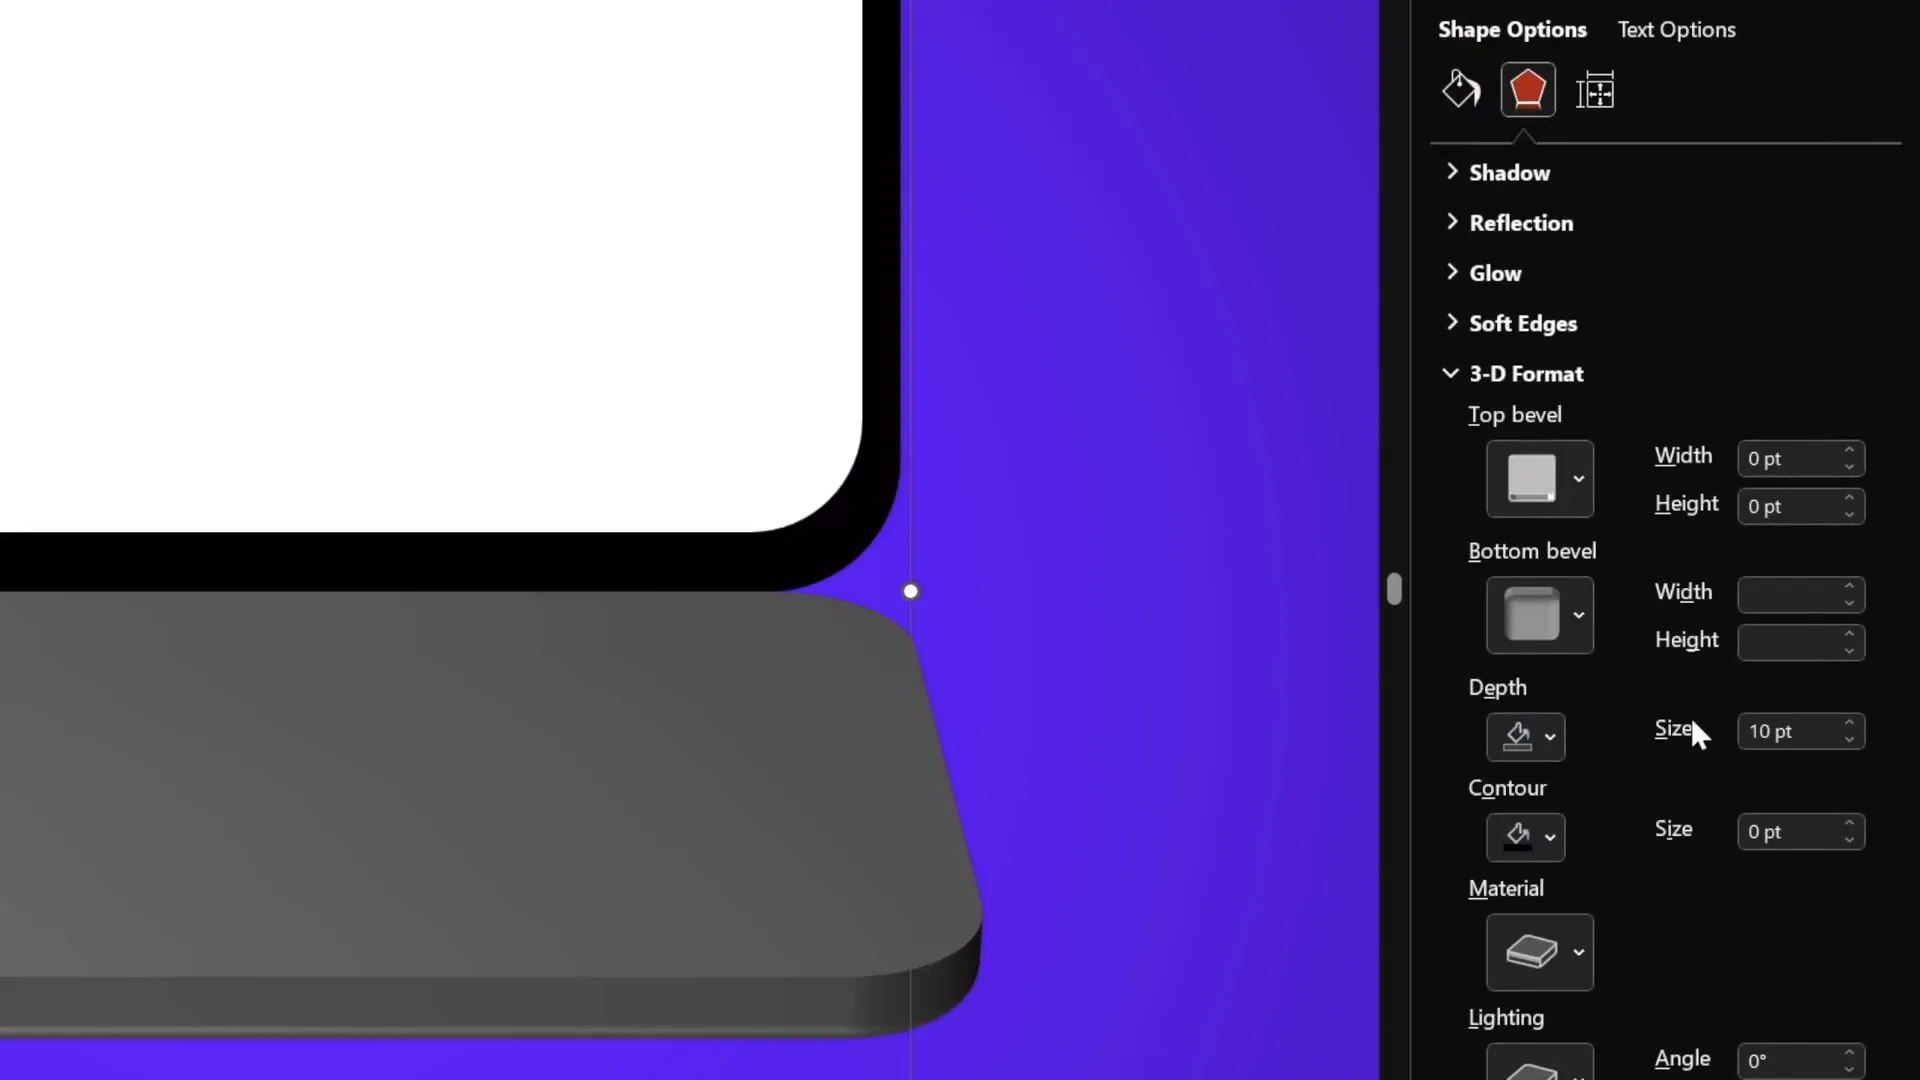
Enhancing Shapes with 3D Depth and Bevel Effects
While the rotation gives movement, adding 3D depth and bevels to the shapes creates a more tangible, real-world look. Here’s how to add these effects:
- Select the keyboard shape group.
- Navigate to Format Shape > 3D Format options.
- Add Depth (e.g., 10 points) to give thickness to the shape.
- Add a Bottom Bevel with width and height set to 5 points each to soften edges and create a rounded appearance.
- Rotate the keyboard shape slightly upward in 3D rotation settings to preview the bevel effect clearly.
- Repeat the same process for the screen shape group, ensuring it has the same dimensions as the keyboard for consistency.
These subtle 3D effects greatly enhance the visual quality of the laptop parts, making the animation more convincing.
Aligning Components and Closing the Laptop
Proper alignment is key to making the laptop animation look seamless. Use PowerPoint’s alignment guides to center both the keyboard and screen groups perfectly on the slide.
After alignment, set the laptop to its closed state by adjusting 3D rotation values:
- Set the screen’s Y rotation to 90 degrees (rotated vertically closed).
- Set the keyboard’s Y rotation to 270 degrees (rotated downward).
These settings position the laptop as fully closed, ready to animate open on the next slide.
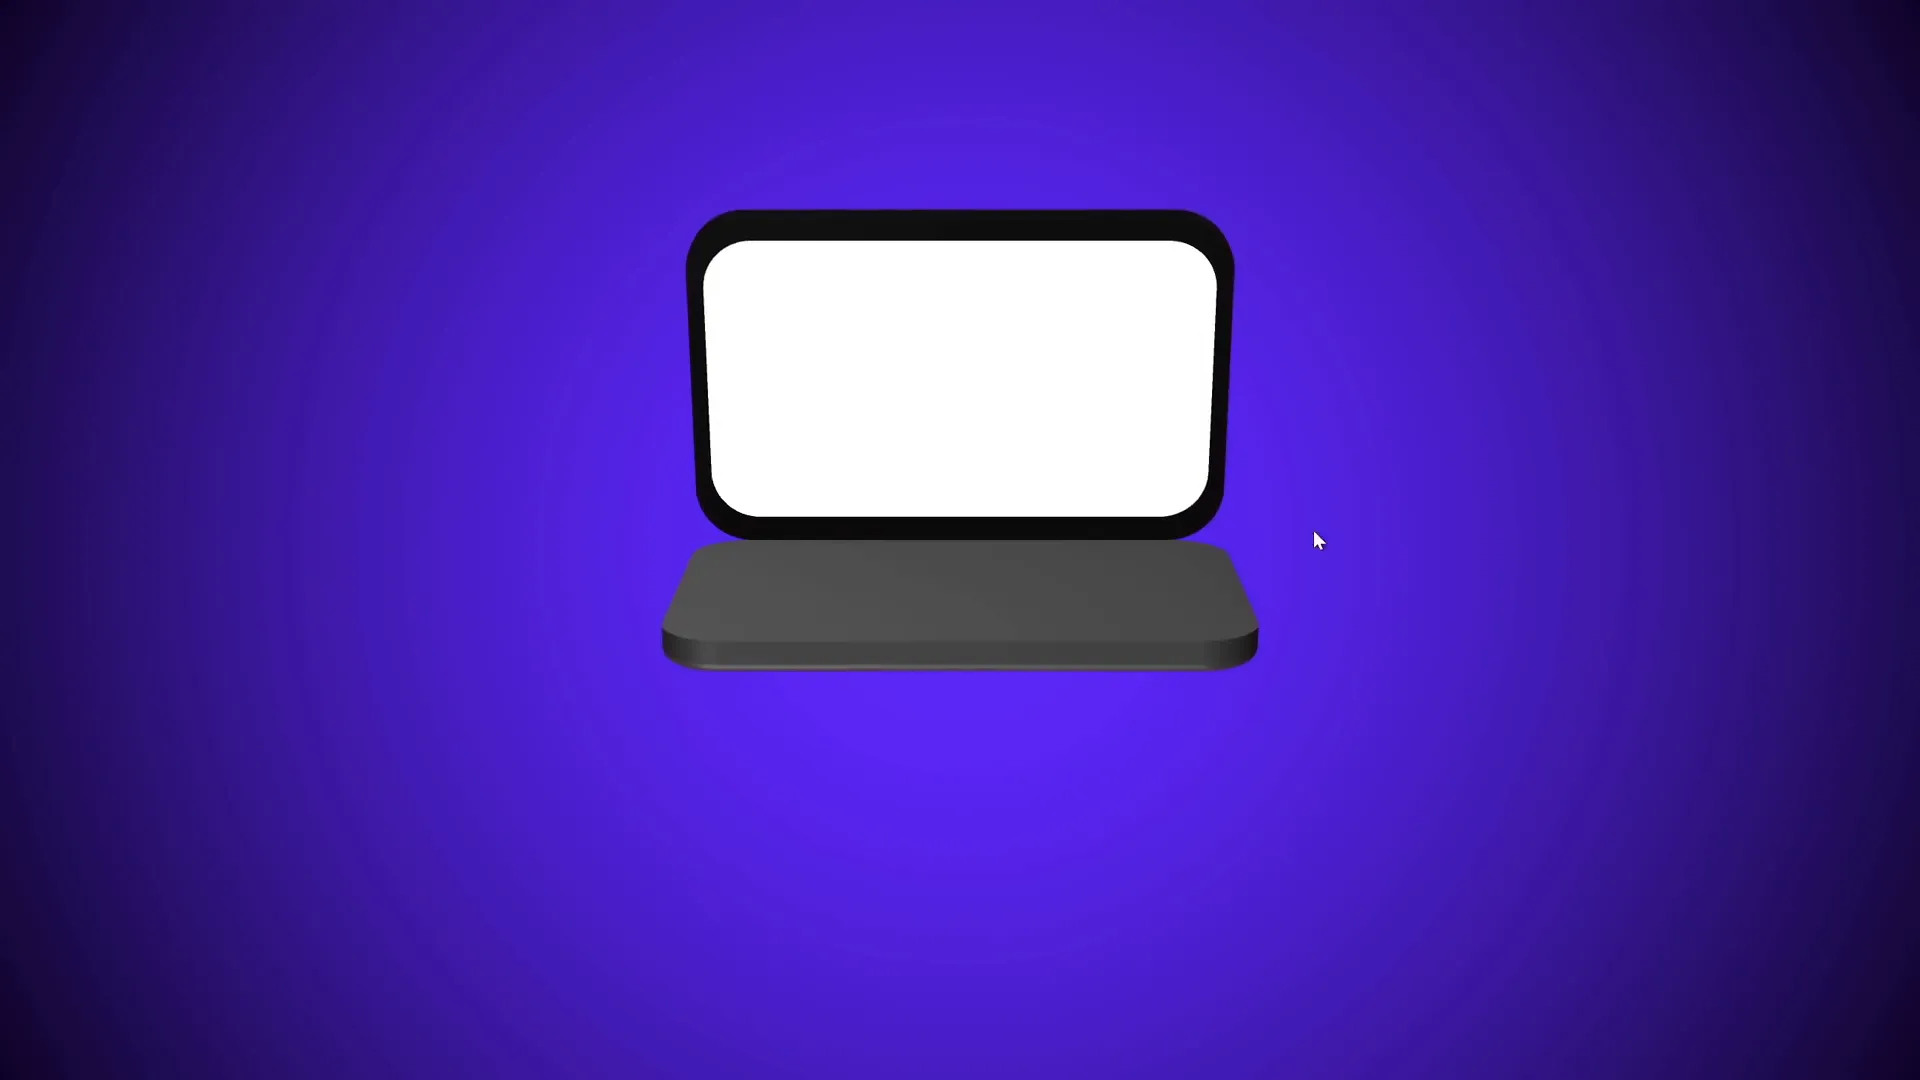
Animating with Morph Transition
The magic of the laptop opening animation comes from PowerPoint’s Morph transition. This transition automatically animates changes between two slides, including position, size, and rotation of objects.
To animate the laptop opening:
- Duplicate the slide with the closed laptop.
- Apply the Morph transition to the duplicate slide with a duration of 2 seconds.
- On the duplicate slide, select the screen group and set its Y rotation to 0 degrees (open position).
- Select the keyboard group and set its Y rotation to 290 degrees to slightly lower it for a natural open effect.
- Play the slideshow and watch the laptop smoothly open as the transition animates between the two slides.
This technique leverages PowerPoint’s powerful transition to create professional animations without complex timelines or coding.
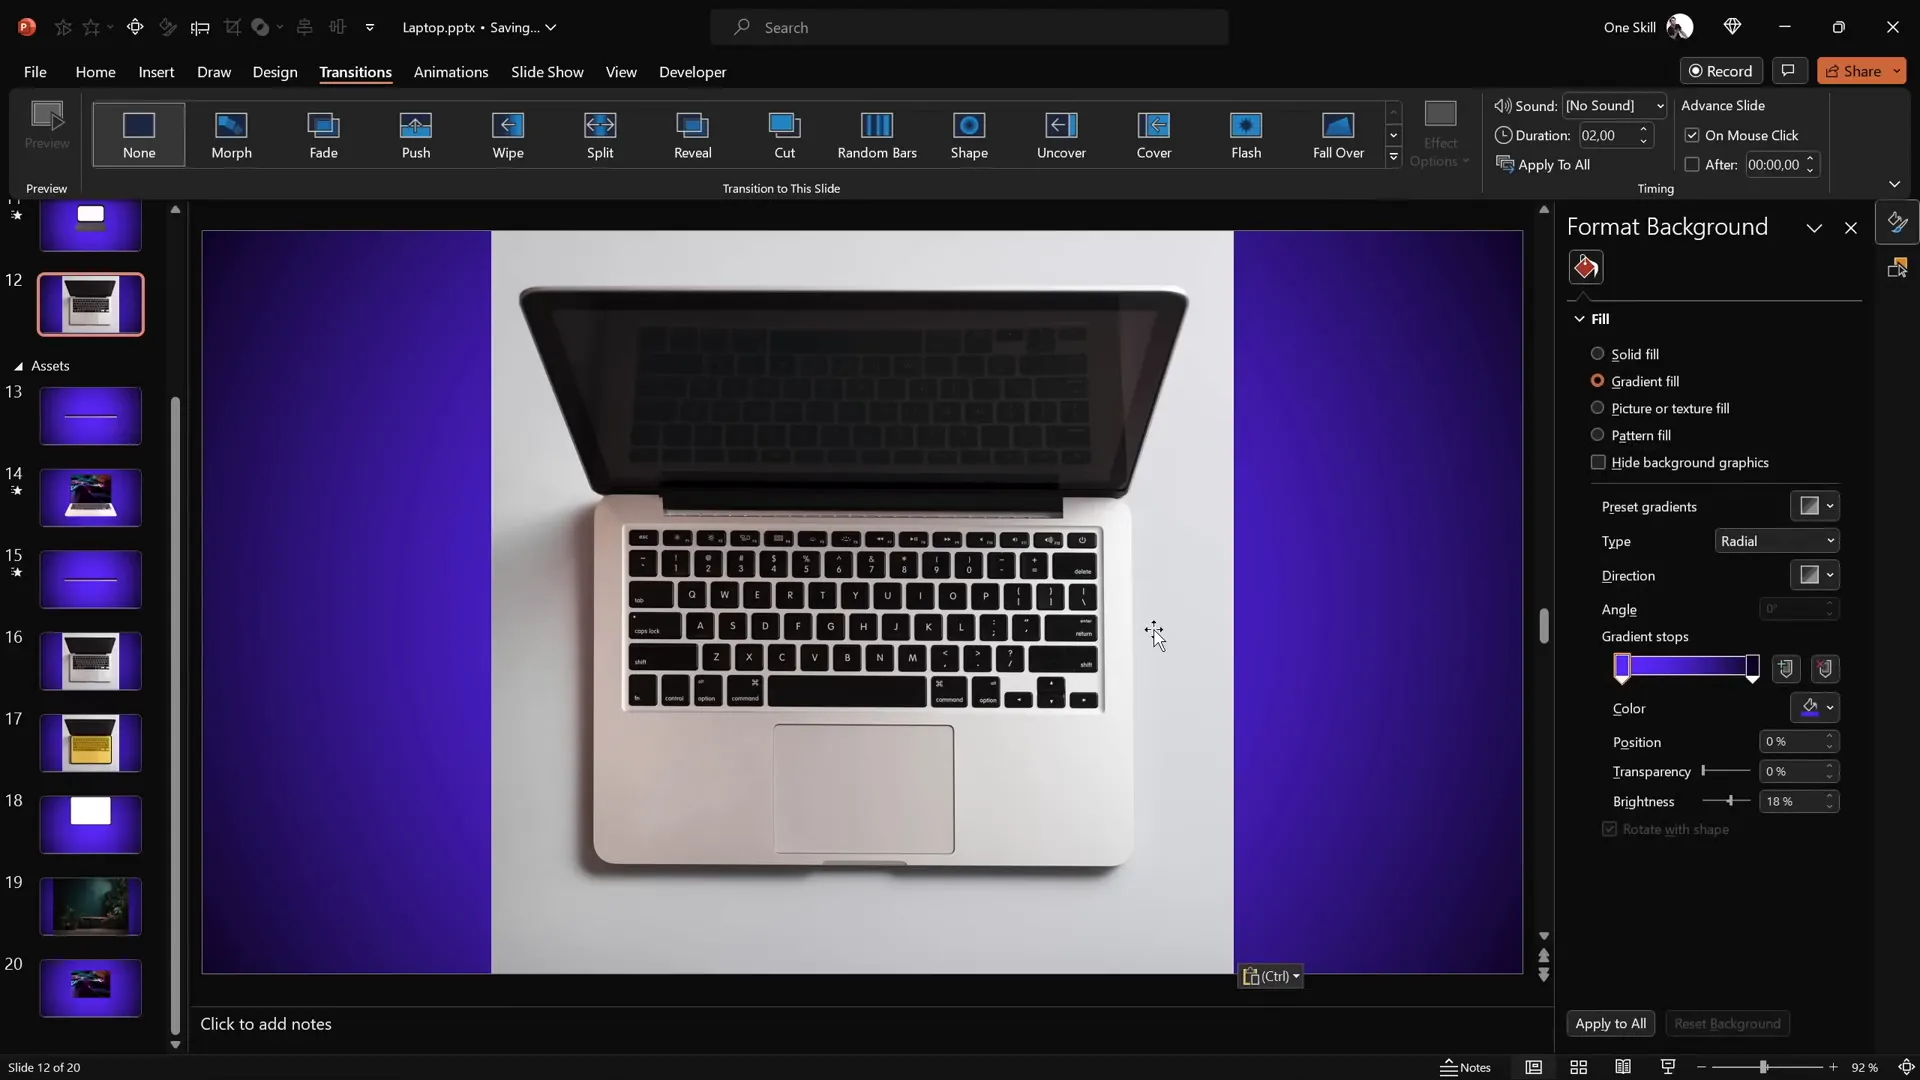
Using a Realistic Laptop Image
While the basic shapes are great for conceptual animations, you might want to use a realistic laptop image for more professional presentations. Here’s how to incorporate a photo of a laptop:

- Find a top-view laptop photo (e.g., from Freepik).
- Insert the photo onto your slide.
- Use the Rounded Rectangle shape to cover the keyboard area.
- Select both the photo and the shape, then go to Shape Format > Merge Shapes > Intersect to cut out just the keyboard portion.
- Align the keyboard cutout with the middle of the slide and create a transparent shape matching its size to set a new rotation center (similar to the earlier keyboard rotation technique).
- Group the keyboard image and the transparent shape, then apply the same 3D rotation and depth formatting as before.
- Repeat the process for the laptop screen using simple shapes to create the black and white screen borders, grouping them and applying rotation similarly.
This method blends photo realism with PowerPoint’s 3D effects, making your animation visually rich and engaging.
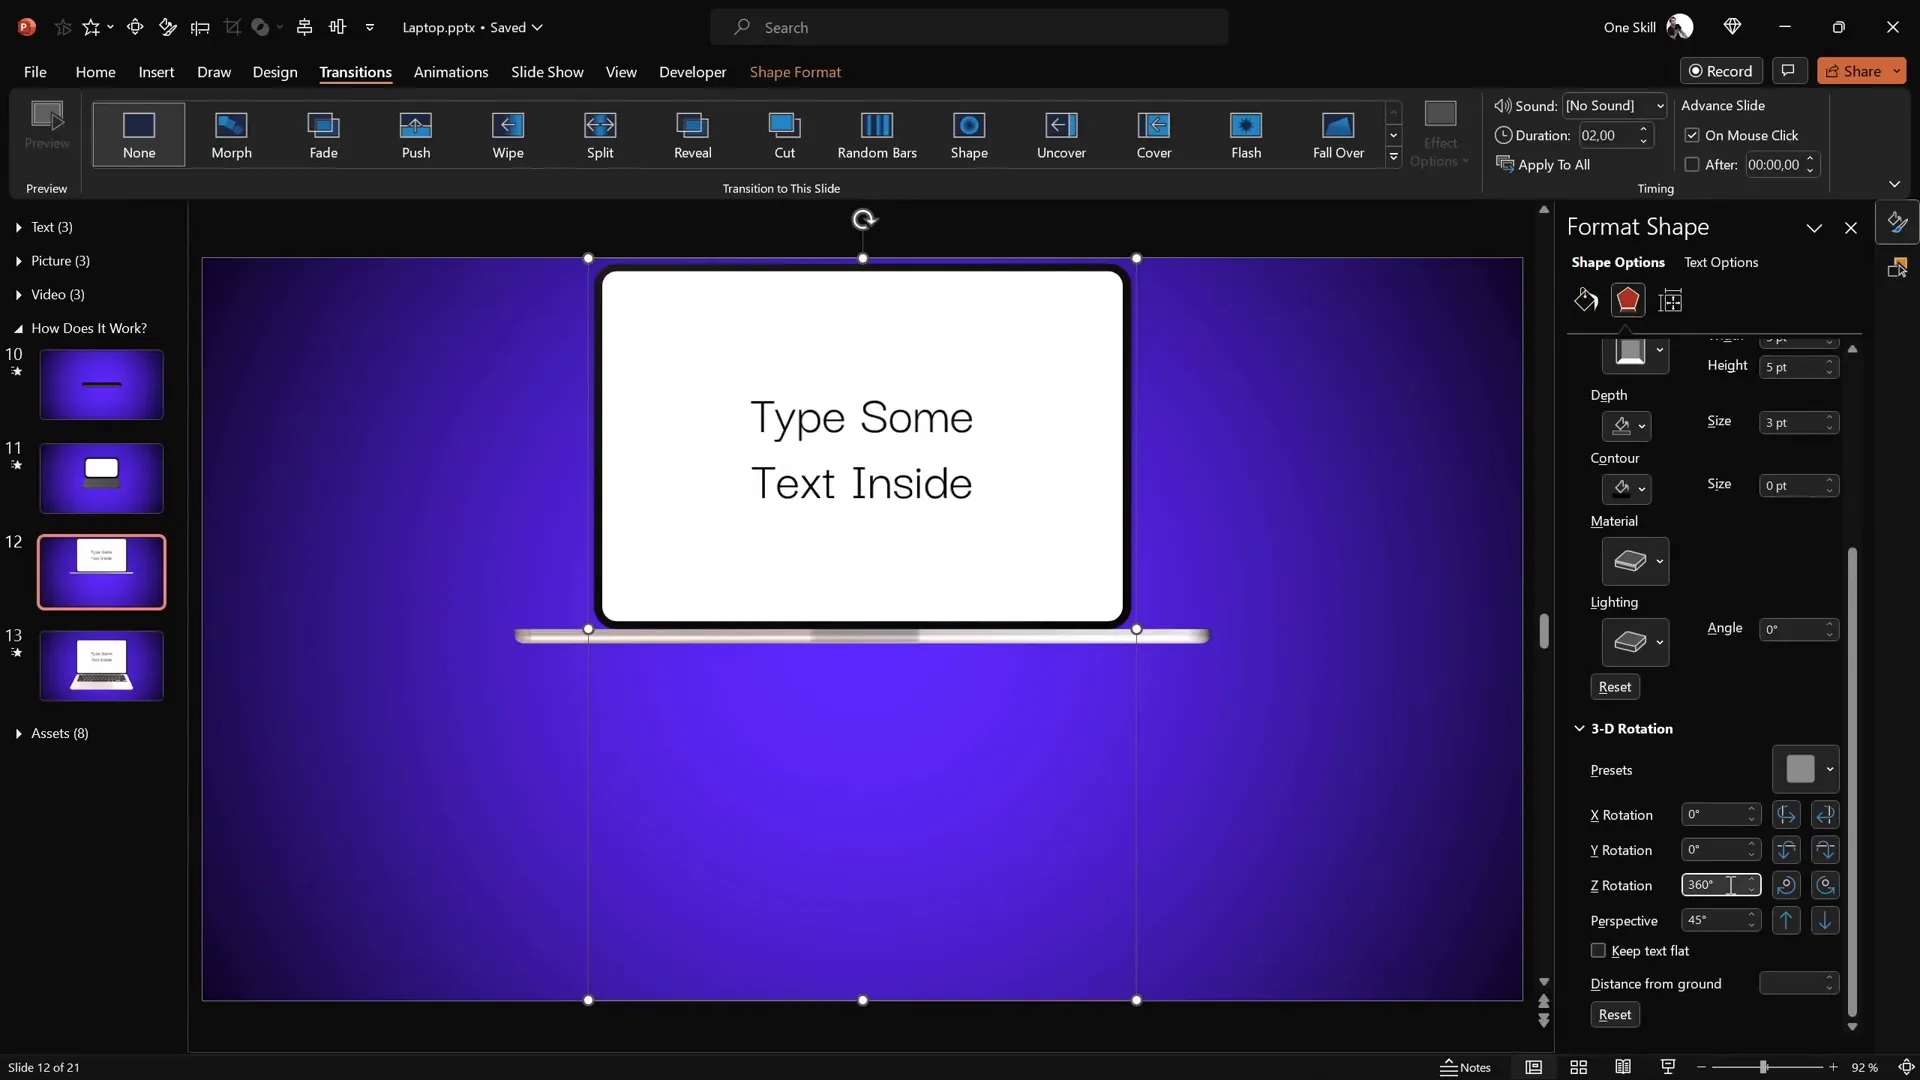
Inserting Text, Pictures, and Videos Inside the Laptop
One of the best parts of this animation is its customizability. You can insert your own text, pictures, or even videos inside the laptop screen, making it ideal for showcasing content dynamically.
Adding Text
The laptop screen is essentially a shape, so you can type directly inside it or add text boxes:
- Double-click the white screen shape to type text.
- Format the text with your preferred font, size, and color (white text works well on a black background).
- Copy the text and paste it onto both the open and closed laptop slides to keep content consistent during the animation.
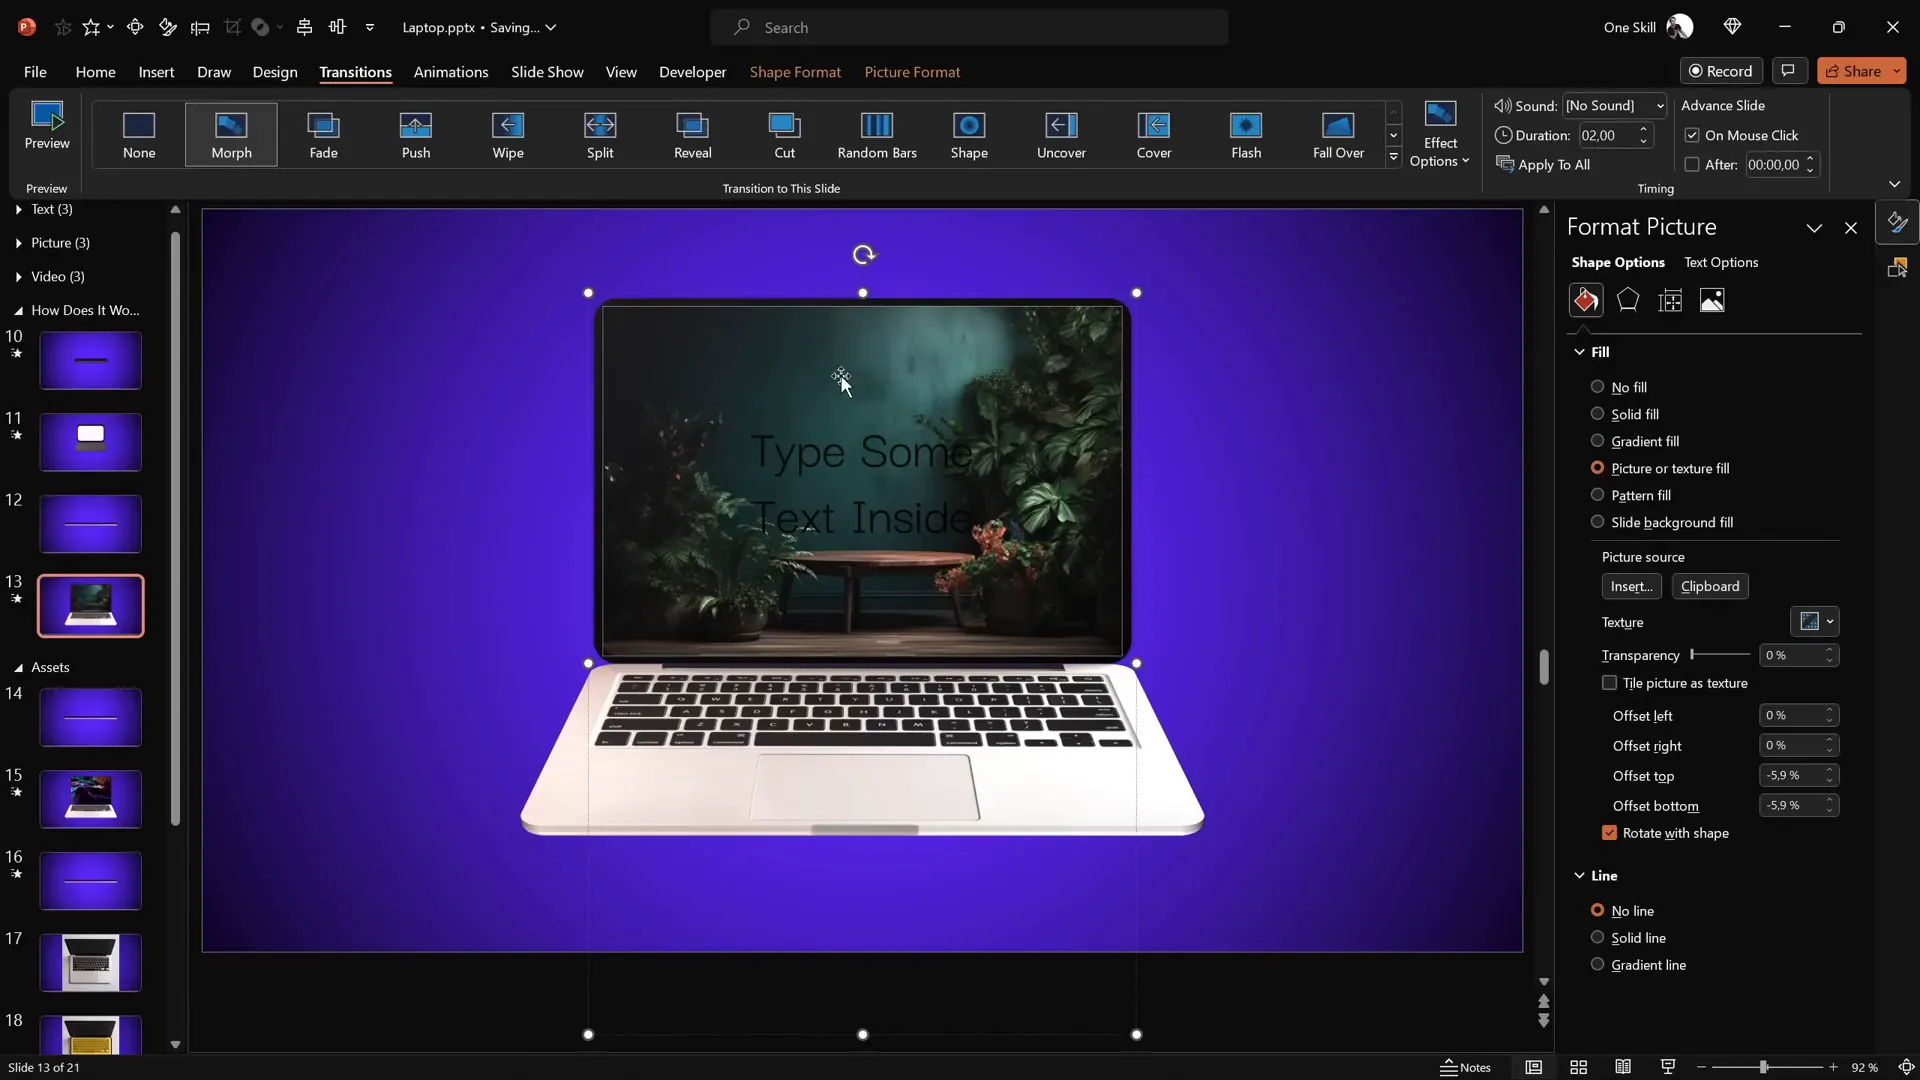
Adding Pictures
To add a picture:
- Copy your image to the clipboard.
- Select the white screen shape.
- Go to Format Shape > Fill > Picture or Texture Fill and select clipboard to insert the image into the shape.
- Copy the screen shape’s style and apply it to the corresponding screen shape on the other slide to maintain consistency.
Adding Videos
For video insertion:
- Insert a stock video via Insert > Video > Stock Videos (available in the latest PowerPoint versions).
- Copy the white screen shape and paste it over the video.
- Align both the shape and video to the center of the slide.
- Use Merge Shapes > Intersect to crop the video perfectly to the laptop screen shape.
- Copy the cropped video and paste it as a picture fill in the screen shape on the slide.
- Add animations to the video:
- Fade in animation set to start with previous, duration 1 second.
- Play video animation also set to start with previous.
This approach allows you to showcase dynamic video content inside your animated laptop, making presentations more engaging and interactive.
Conclusion and Next Steps
Congratulations! You’ve learned how to create a stunning 3D laptop opening animation using just PowerPoint’s native tools. This animation is not only visually impressive but also highly customizable — you can insert text, images, and videos to tailor it to your presentation needs.
Mastering these animation techniques significantly boosts your PowerPoint presentation skills and allows you to create professional-grade presentations that stand out. The key takeaways include:
- Using simple shapes and photos instead of complex 3D models.
- Applying 3D rotation with customized rotation centers for realistic movement.
- Adding 3D depth and bevel effects to enhance visual appeal.
- Leveraging Morph transitions for smooth, automatic animations.
- Incorporating multimedia content inside animated shapes for dynamic presentations.
If you want to take your PowerPoint skills further, consider exploring structured courses that delve deep into animation mastery, helping you unlock all of PowerPoint’s secrets and become a true animation pro.

Frequently Asked Questions
Can I create 3D animations in PowerPoint without using 3D models?
Yes! By using simple shapes, photos, and PowerPoint’s 3D rotation and morph transitions, you can simulate 3D animations without importing or creating complex 3D models.
What is the Morph transition, and why is it useful?
The Morph transition automatically animates changes between slides, including position, size, and rotation of objects. It’s a powerful tool to create smooth animations like the laptop opening effect with minimal effort.
How do I change the rotation center of a shape in PowerPoint?
PowerPoint does not allow direct manipulation of rotation pivots, but you can create a new rotation center by grouping the shape with another invisible shape positioned where you want the pivot. This tricks PowerPoint into rotating the group around the new axis.
Can I insert videos inside shapes in PowerPoint?
Yes, you can crop videos to fit inside shapes using the Merge Shapes > Intersect feature and then add animations to control playback and appearance.
Is this laptop animation compatible with older versions of PowerPoint?
The animation relies on the Morph transition and 3D rotation features available in PowerPoint 365 and newer versions. Older versions may not support these features fully.
Where can I find free laptop images and videos for my presentations?
Websites like Freepik offer free photos and videos that you can use for your projects, often requiring attribution.
How can I ensure my animations run smoothly during presentations?
Always test your animations in slideshow mode before presenting. Keep transitions timed appropriately and avoid overly complex animations that can slow down your presentation.
Check out the full video: PowerPoint Presentation Skills: Creating 3D Laptop Animation ✨


