If you’re looking to create stunning, interactive presentations that captivate your audience, then mastering the PowerPoint Interactive Morph feature is a game-changer. This tutorial will guide you through building an impressive interactive morph animated slide design in PowerPoint, inspired by the sleek UI of Filmora’s website. Along the way, you’ll also discover how to leverage Filmora’s AI-powered audio-to-video feature to enhance your multimedia projects.
Table of Contents
- Overview: What is PowerPoint Interactive Morph?
- Using Filmora’s AI Audio to Video Feature
- Gathering Design Assets for Your Slide
- Setting Up Background and Text Styles
- Creating Interactive Buttons with Icons
- Masking Photos with Rounded Rectangle Shapes
- Grouping and Aligning Photos for Smooth Scrolling
- Adding a Glowing Edge Effect to the Mask
- Making Buttons Clickable with Hyperlinks
- Using Morph Transition for Animated Effects
- Finalizing Your Interactive Morph Slide Design
- Frequently Asked Questions
Overview: What is PowerPoint Interactive Morph?
The PowerPoint Interactive Morph feature allows you to create smooth animated transitions between slides that give the illusion of objects moving or transforming seamlessly. By combining clever slide design with morph transitions, you can build interactive slide decks that feel dynamic and engaging—perfect for business presentations, portfolios, or educational content.
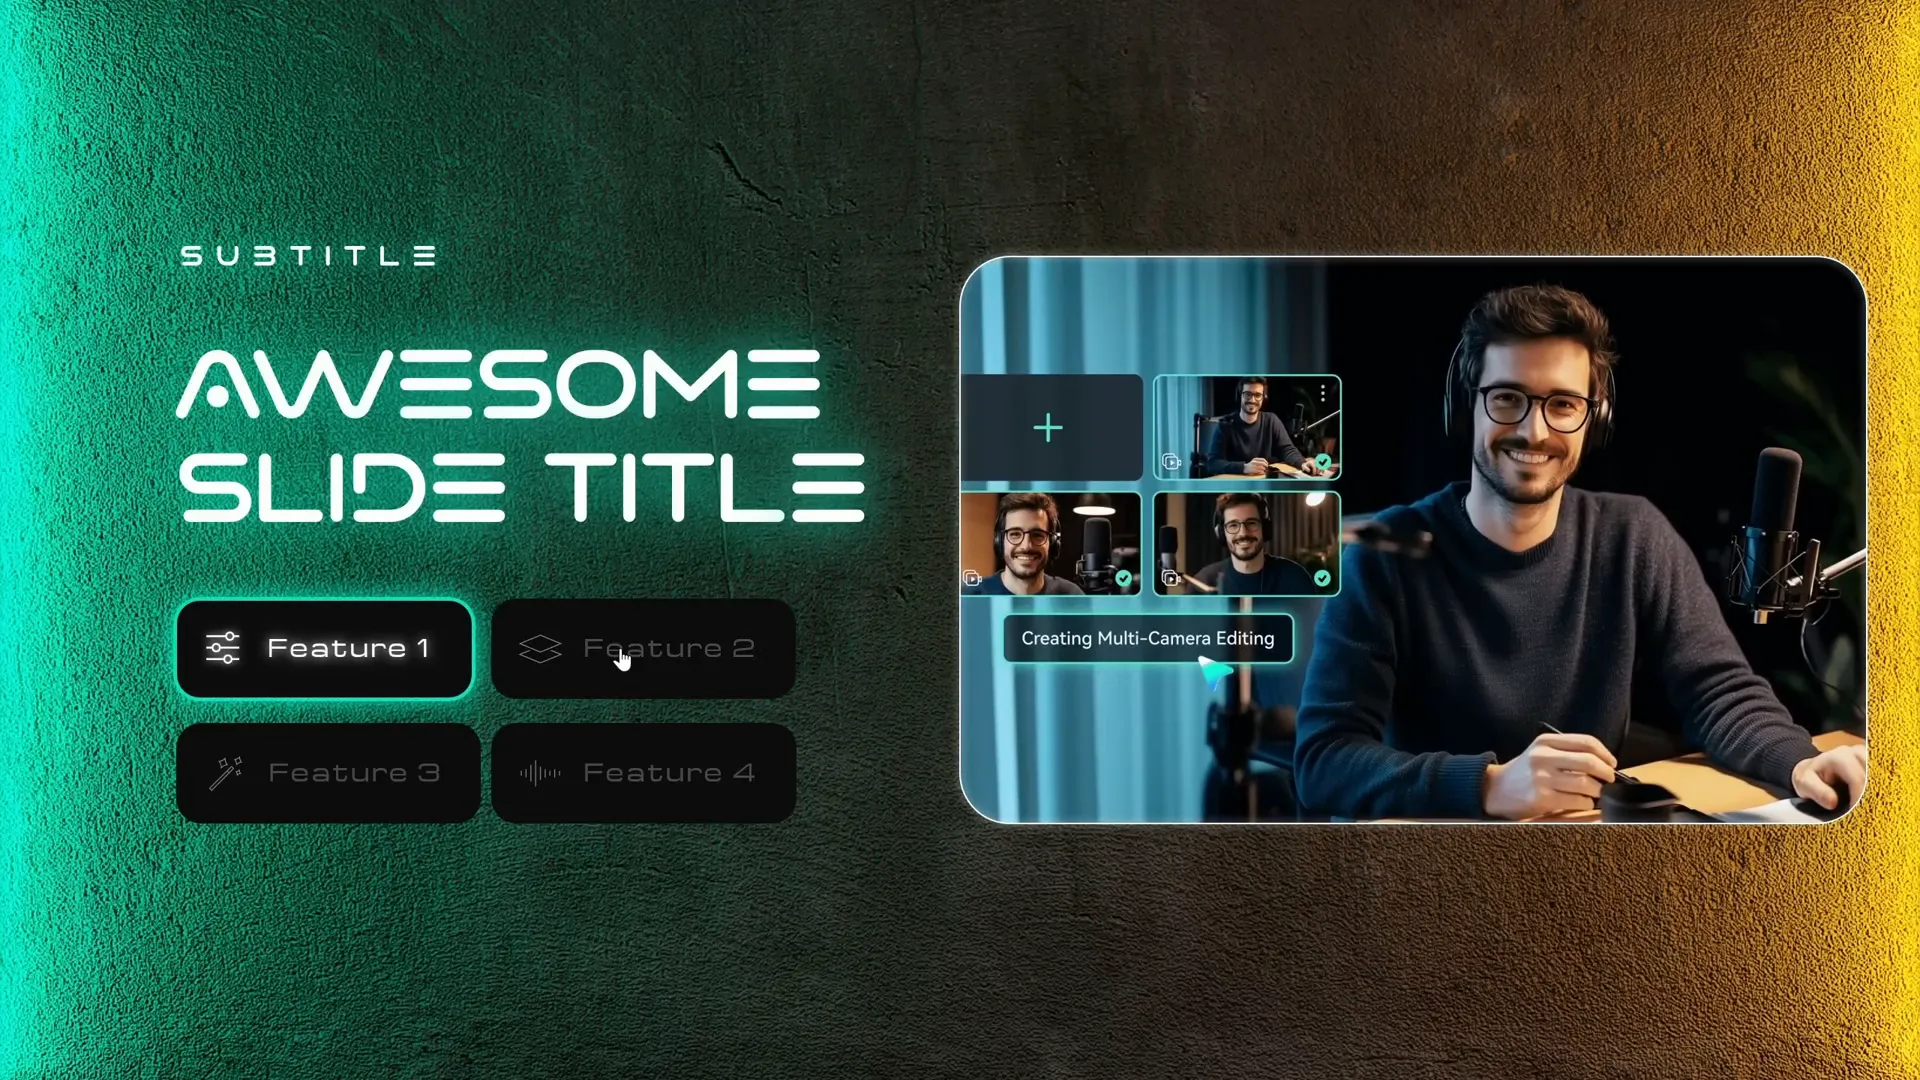
In this tutorial, you’ll learn how to create an interactive menu with clickable buttons that scroll through different photos on the right side of the slide. This design is inspired by the Filmora website’s interactive menu and leverages Morph transitions for a polished animated effect.

Using Filmora’s AI Audio to Video Feature
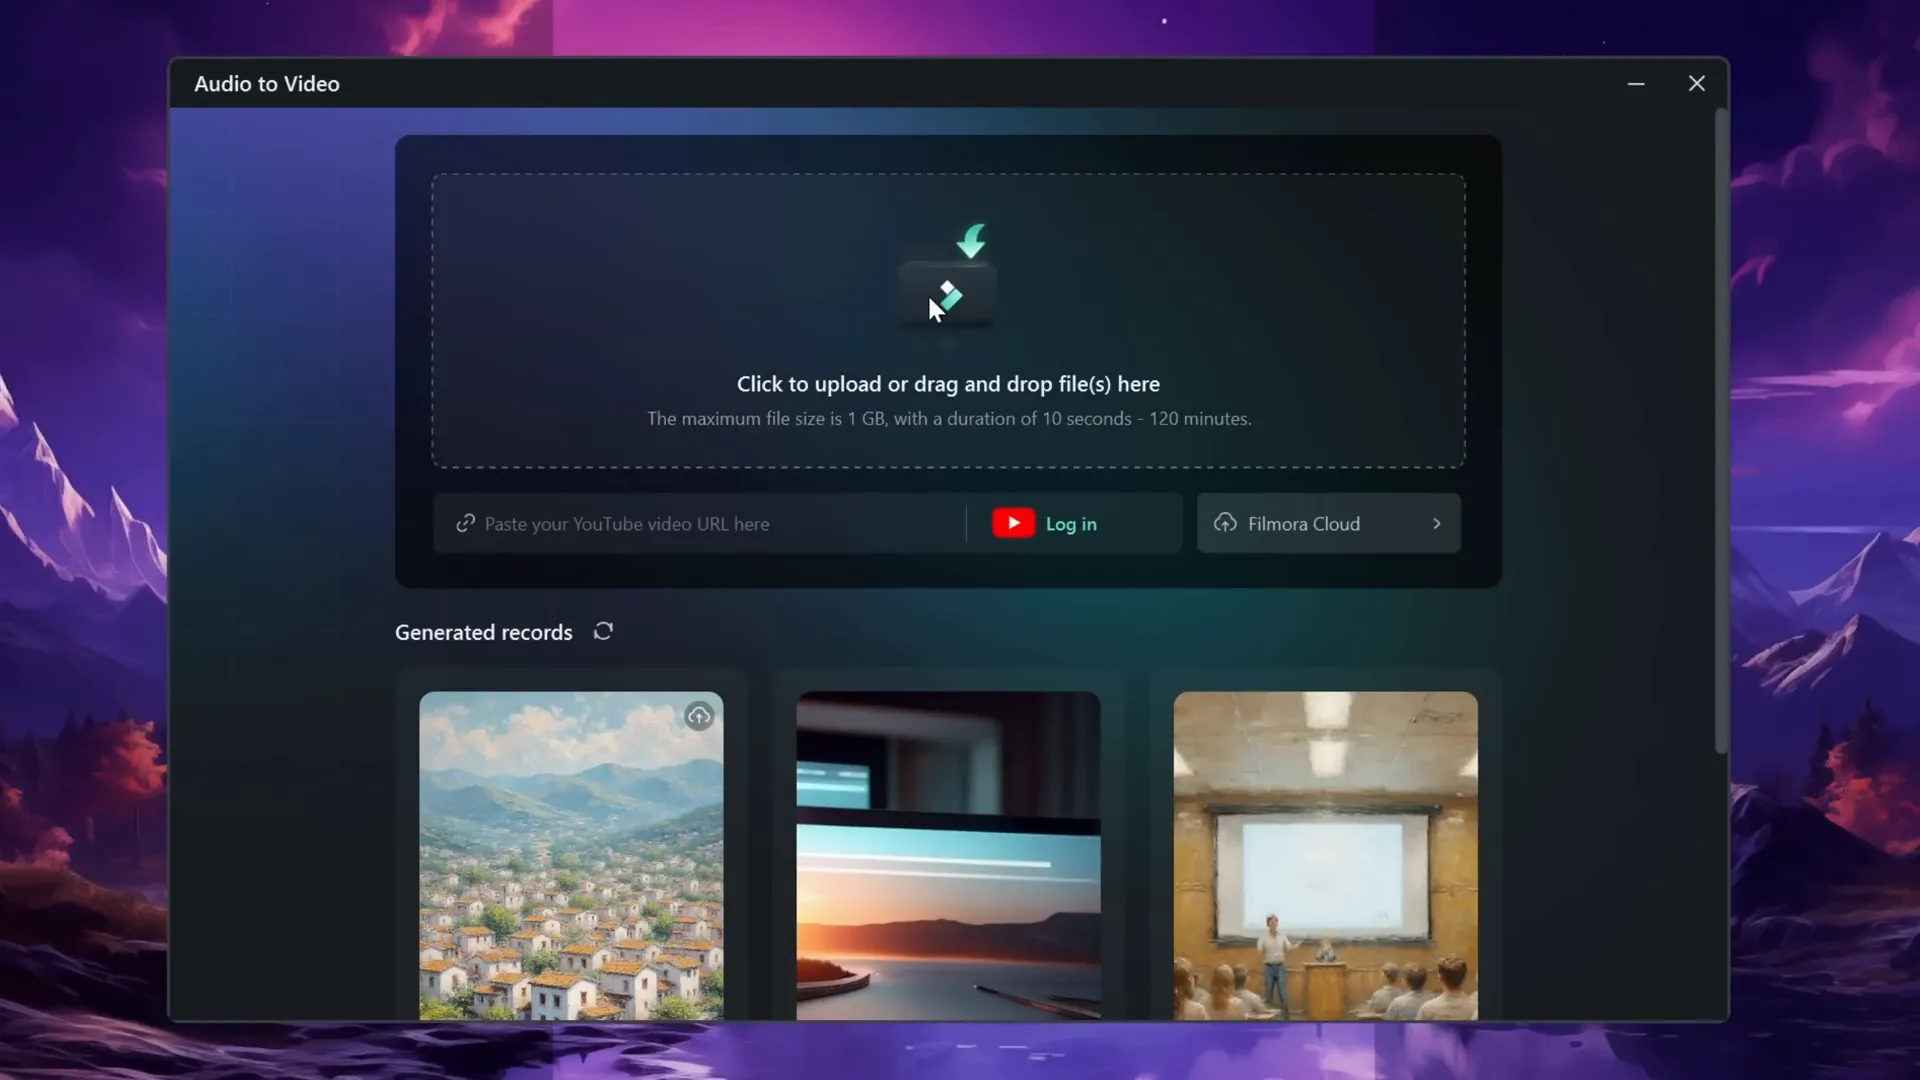
Before diving into PowerPoint, the tutorial introduces Filmora’s exciting AI-powered Audio to Video tool. This feature allows podcasters, storytellers, and content creators to convert audio files into engaging videos quickly and easily.
Here’s how to use Filmora’s Audio to Video:
- Open Filmora and locate the Audio to Video button, usually found in the Toolbox section.
- Upload an audio file ranging from 10 seconds to 120 minutes, or import audio directly from your YouTube account.
- Select the language of the audio (e.g., English, United States).
- Choose the content type (e.g., History) and video ratio (e.g., 16:9).
- Select a video style such as flat illustration or watercolor sketch, or leave it on auto.
- Pick a material template that defines how captions and transitions appear.
- Generate your video and preview the results.
- If satisfied, export directly or continue editing within Filmora.
This feature is particularly useful if you want to add visual storytelling elements to your audio content without spending hours on video editing.
Gathering Design Assets for Your Slide
Now let’s jump back to PowerPoint to start building the slide design. The tutorial uses several assets to create a futuristic and sleek look.
- Background Image: A neon light-themed photo from Freepik.com sets the mood. The slide’s background color is set to solid black for contrast.
- Fonts: The Marino font is used for both the slide title and subtitle. The subtitle size is 14 pt, and the title size is 48 pt.
- Buttons: Four rounded rectangle buttons form the interactive menu. Each button contains text and an icon.
- Icons: Inserted directly from PowerPoint’s icon library or imported SVG icons if unavailable.
- Photos: A set of four photos (from Filmora’s website) displayed on the right side scroll through when buttons are clicked.
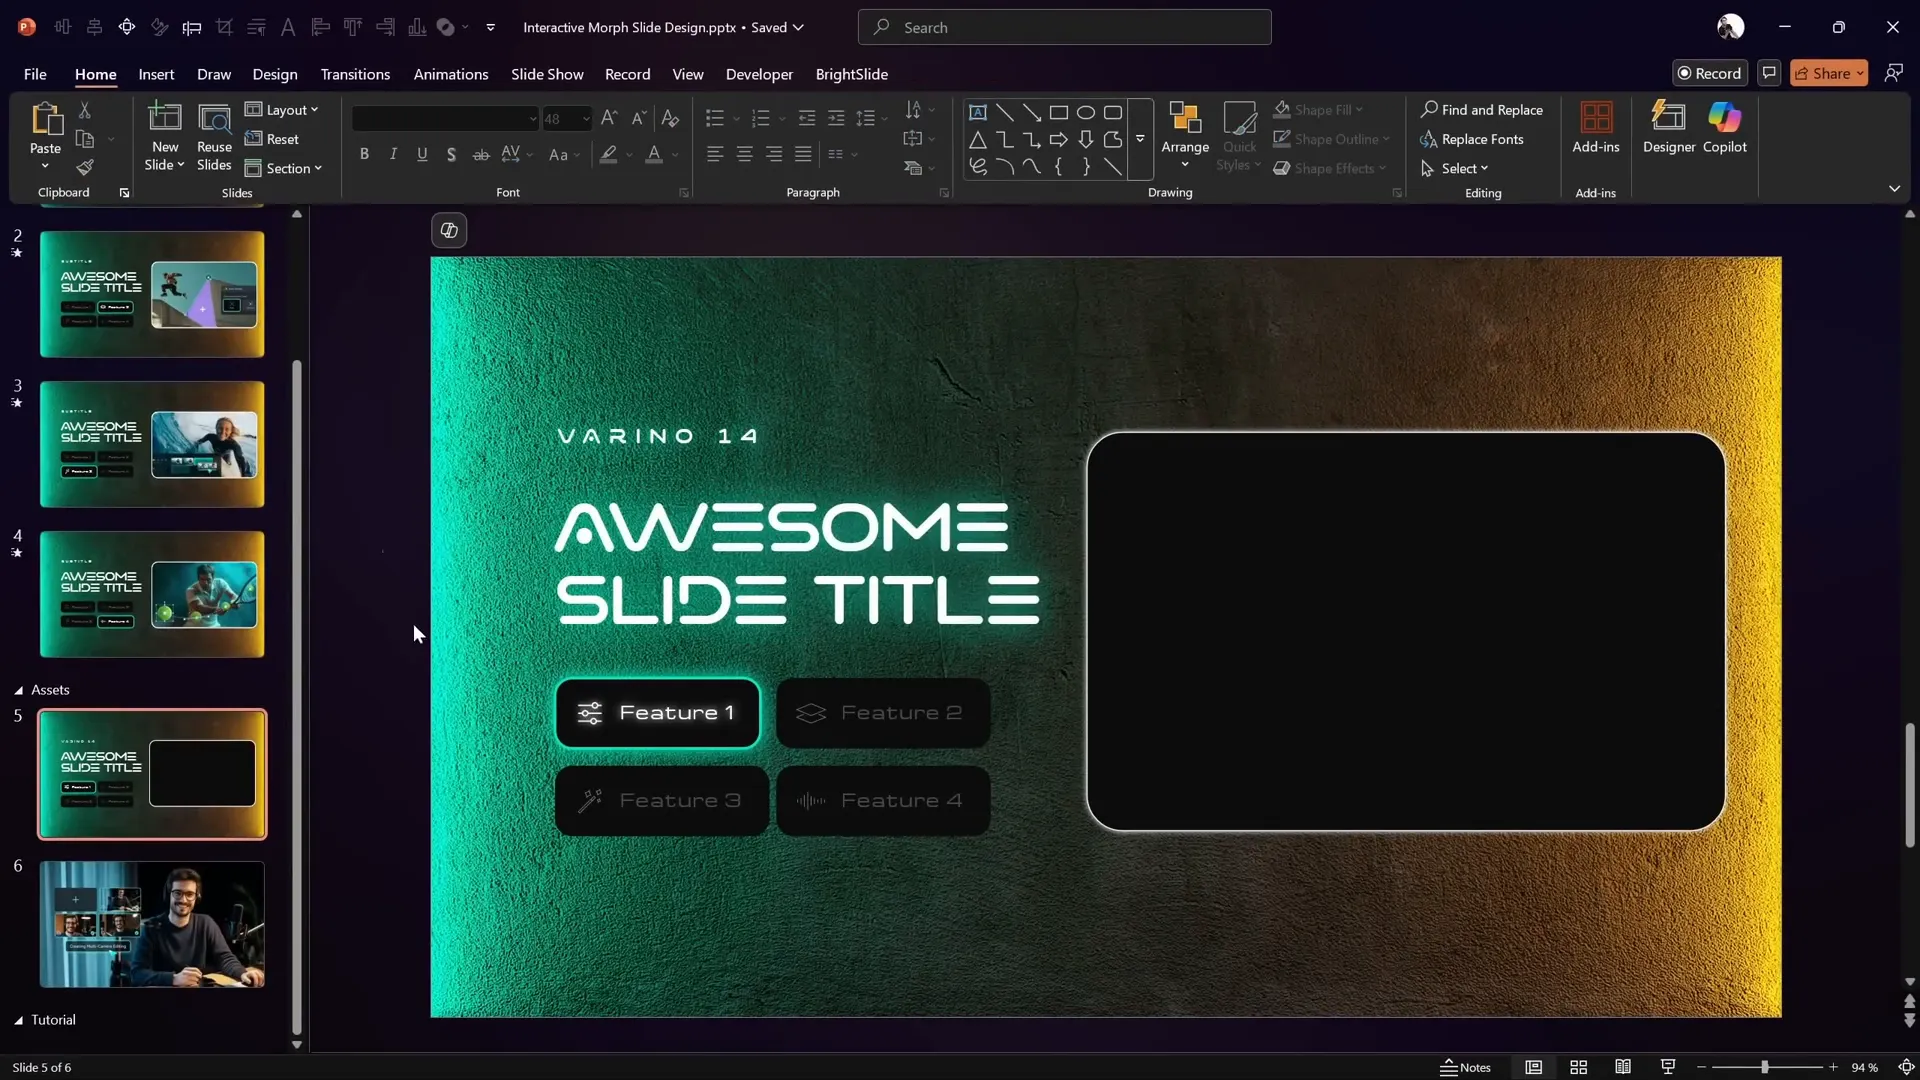
Setting Up Background and Text Styles
Here’s a quick step-by-step guide to configuring your slide background and text elements:
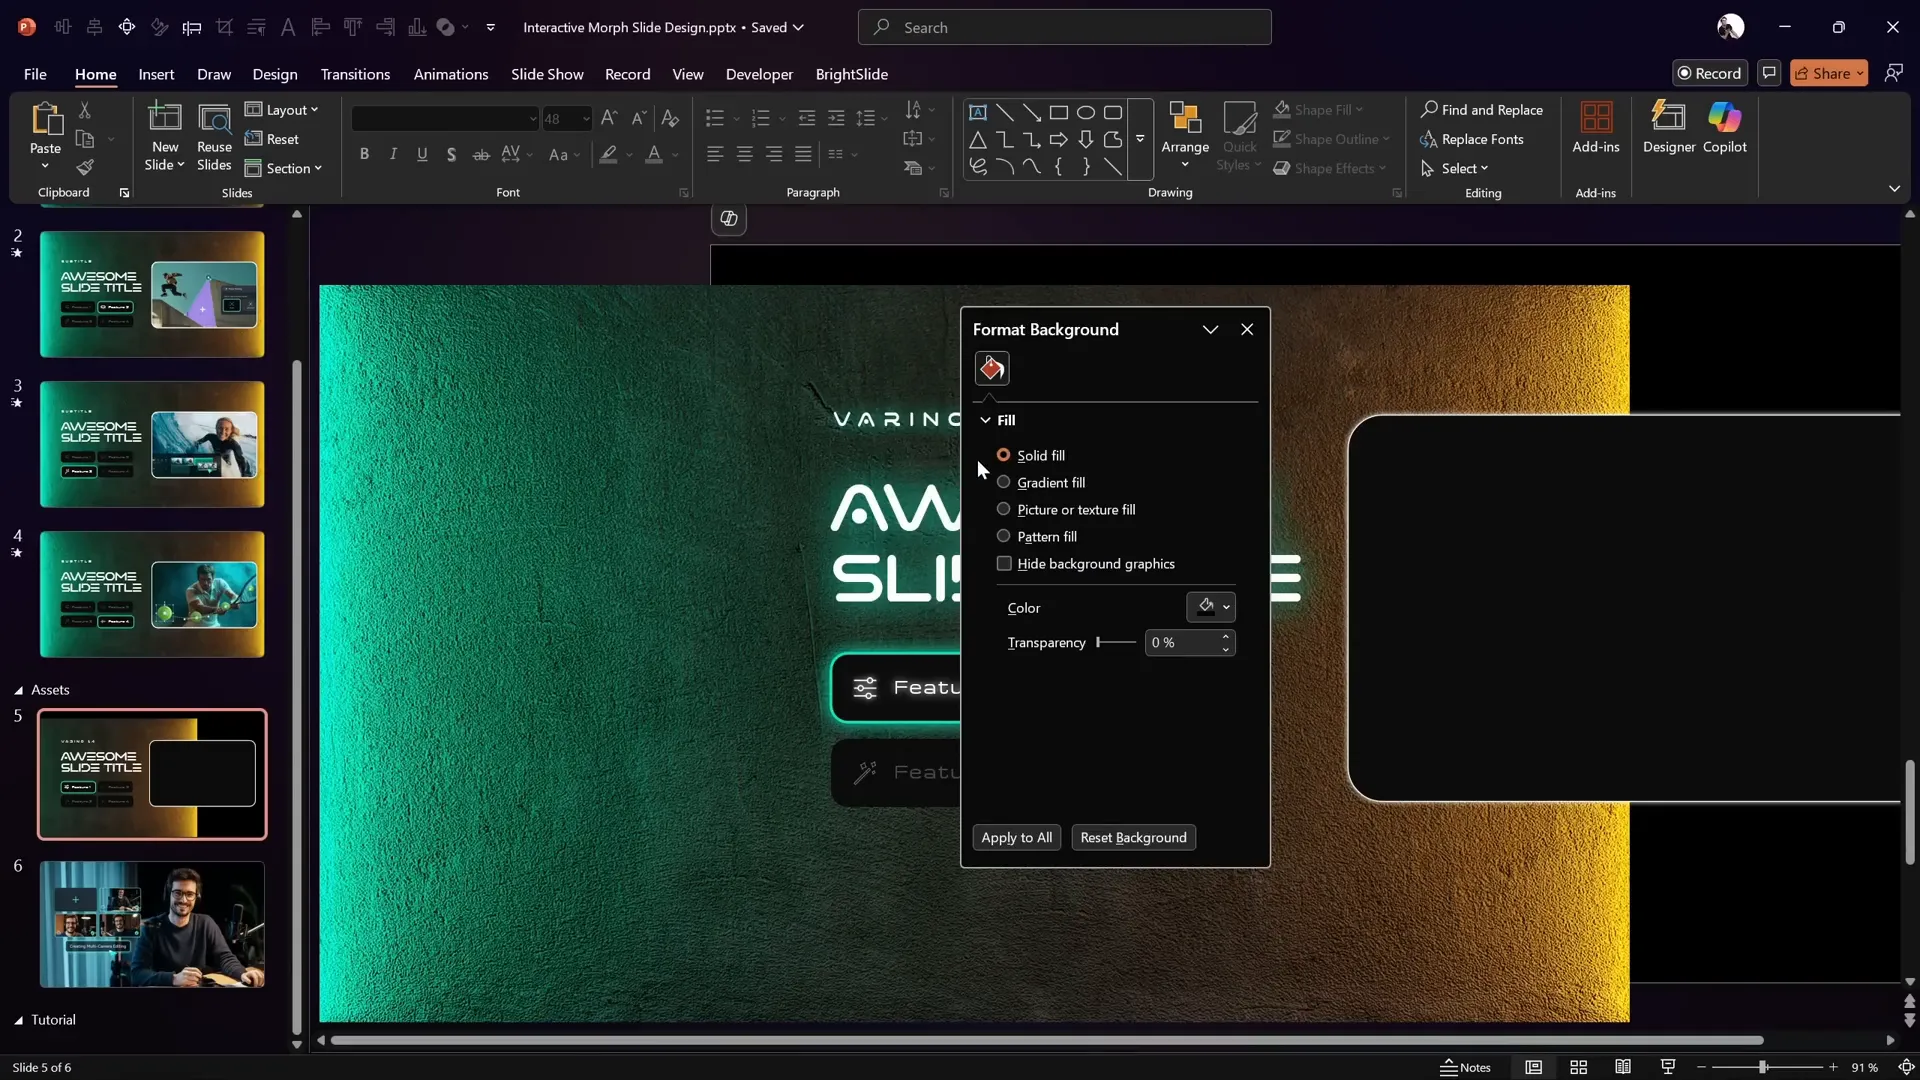
- Set Slide Background: Right-click on the slide, select Format Background, and choose a solid black fill.
- Insert Background Photo: Place the neon light photo at the center of the slide.
- Add Title and Subtitle: Use the Marino font, setting subtitle size to 14 pt and title size to 48 pt.
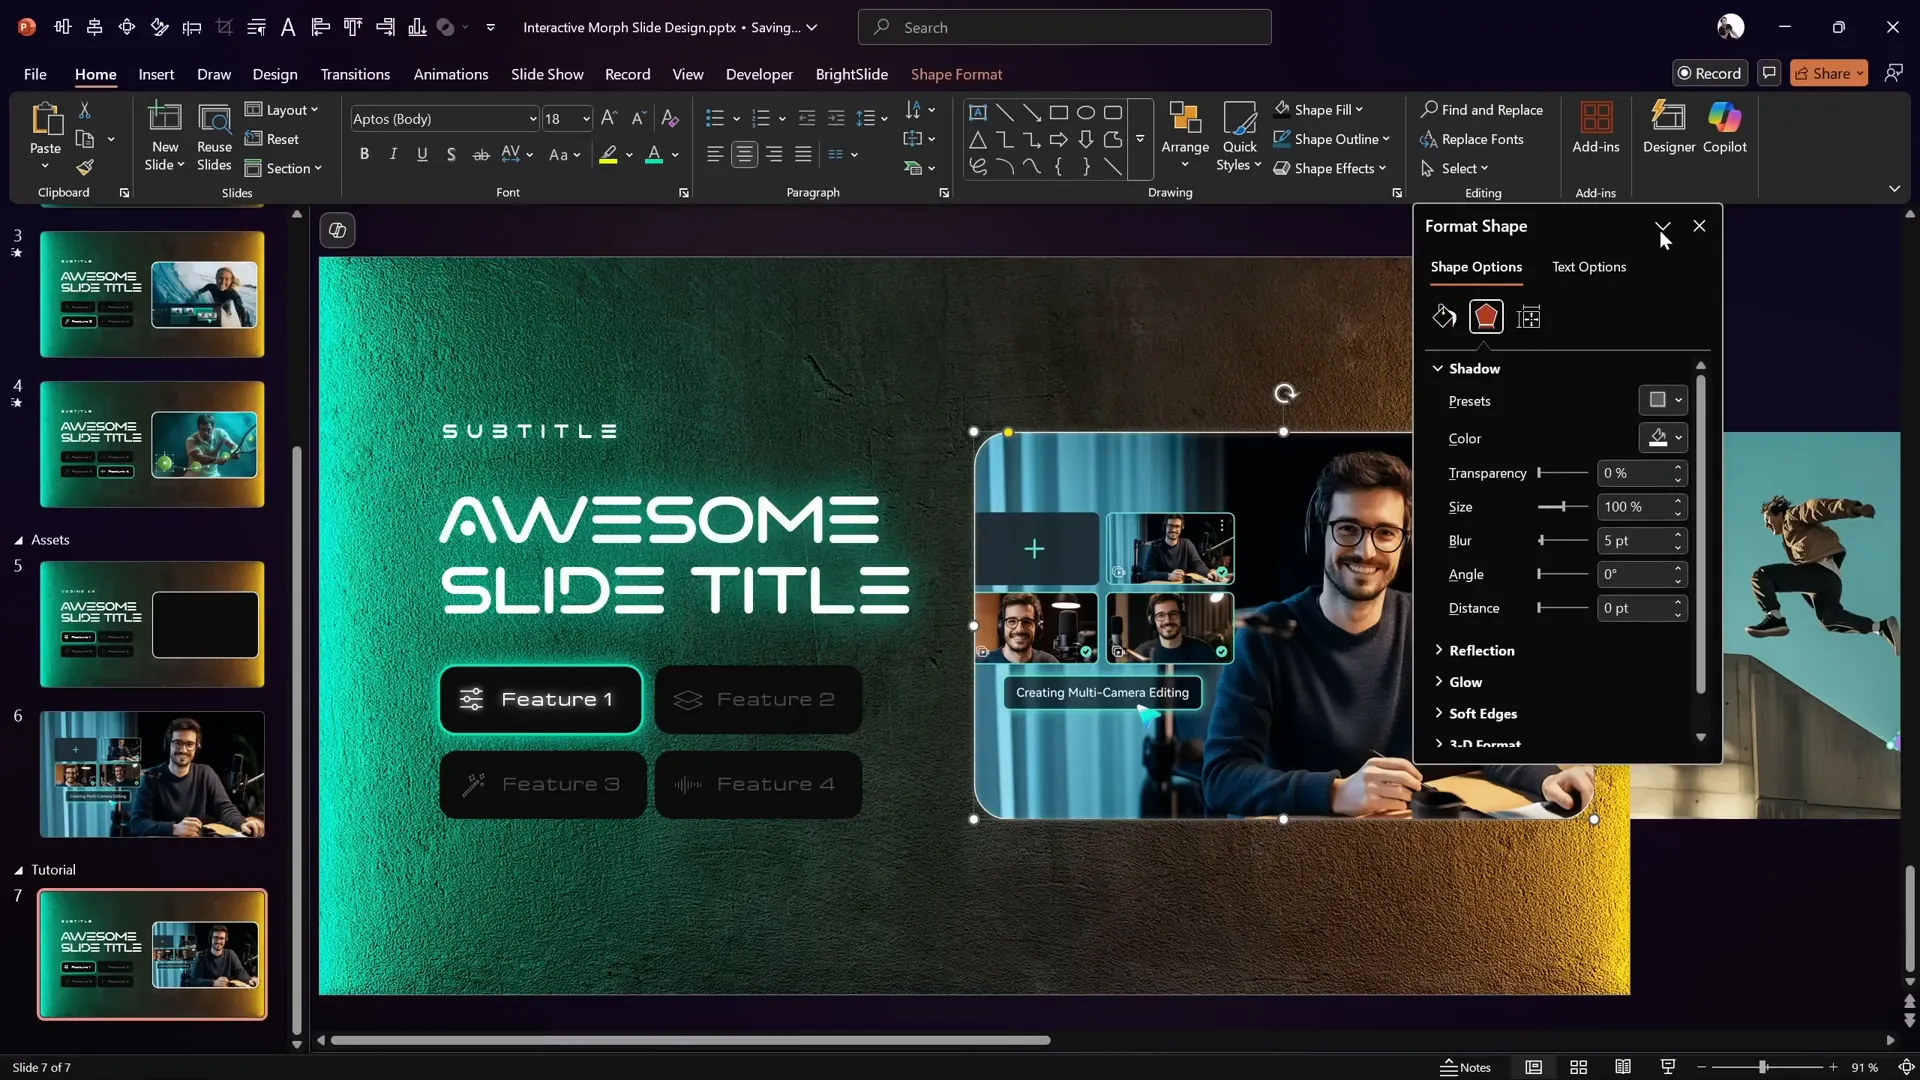
- Apply Text Shadow: Add a greenish text glow effect by right-clicking the text box, selecting Format Shape → Text Options → Shadow. Use the hex code sampled from the background photo, set transparency to 0%, size 100%, and blur 4-5 points.
These steps help create a visually cohesive and futuristic vibe for the slide.
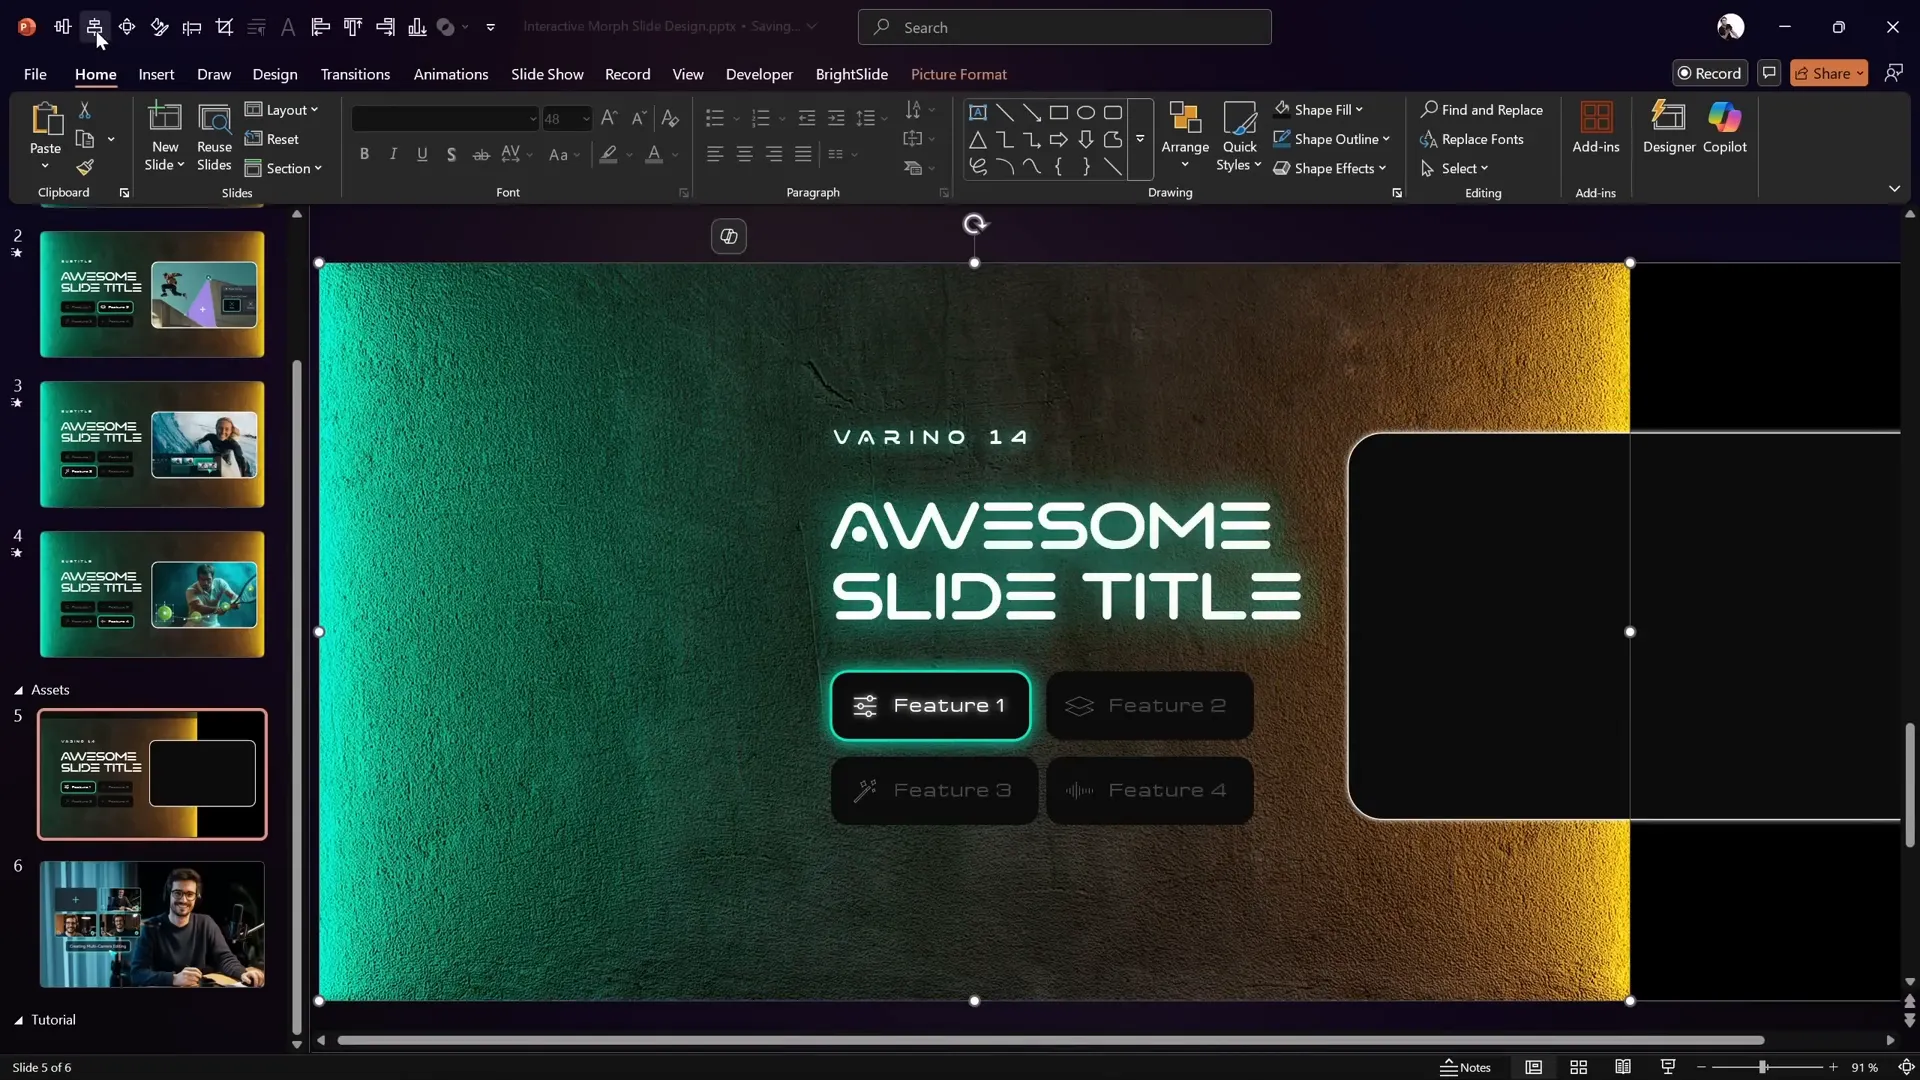
Creating Interactive Buttons with Icons
The interactive menu consists of four rounded rectangle buttons, each containing text and an icon. Here’s how to create and style them:
- Create Rounded Rectangles: Use the Insert → Shapes menu to draw rounded rectangles for buttons.
- Add Text: Type button labels inside each rectangle.
- Insert Icons: Use PowerPoint’s built-in icon library or import SVG icons from free sources.
- Adjust Text Margins: Right-click button → Format Shape → Text Options → Margins. Set left margin to 1.5 cm to create space for icons, and other margins to 0.5 cm.
- Style Active vs. Inactive Buttons: For active buttons, keep font transparency at 0% (full brightness). For inactive buttons, increase font transparency to 75% to dim the text and icons.
This styling visually distinguishes which menu item is currently active.
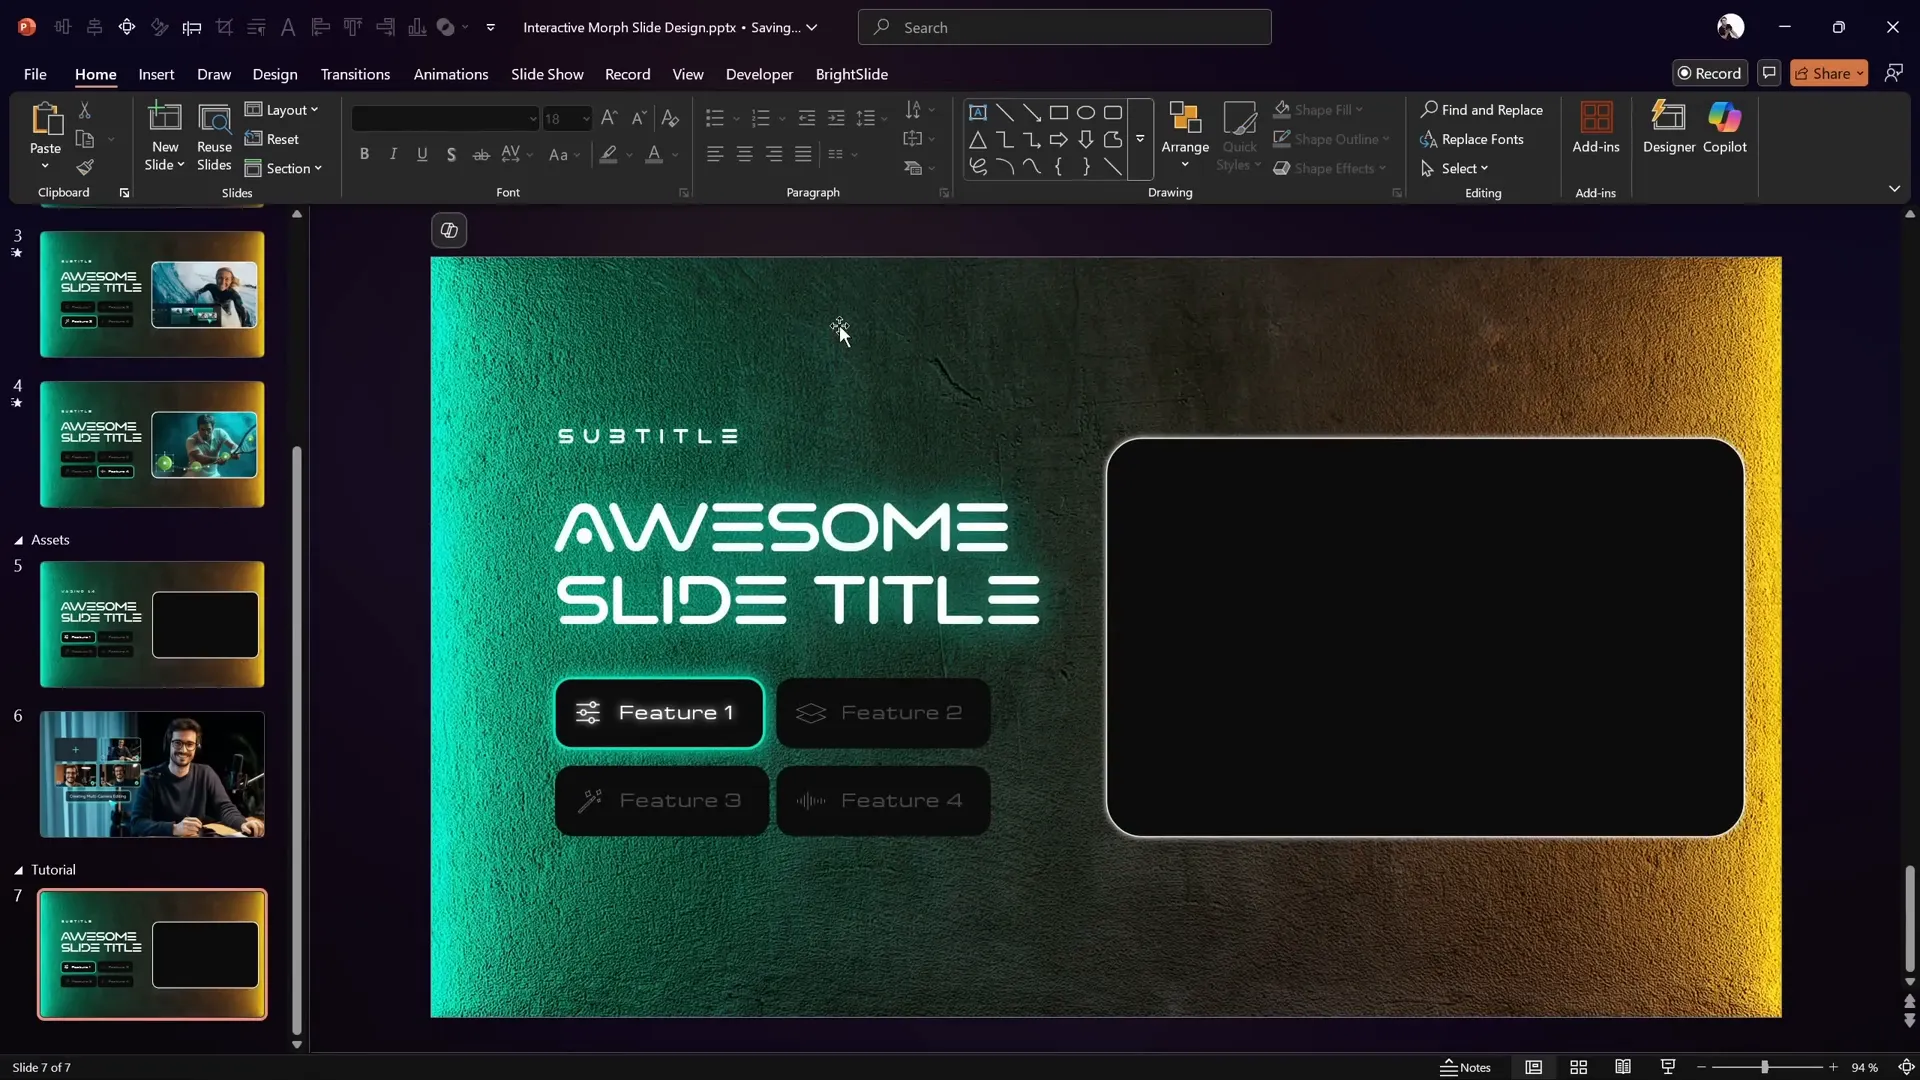
Masking Photos with Rounded Rectangle Shapes
To display photos on the right side with a neat “window” effect, we use a rounded rectangle as a mask. Here’s how to do it:
- Insert a rounded rectangle shape where you want the photo window.
- Select the background photo first, then hold Shift and select the rounded rectangle.
- Go to Shape Format → Merge Shapes → Subtract. This punches a hole in the background photo in the shape of the rounded rectangle.
- Center the masked background photo on the slide.
This technique creates a stylish cut-out effect where photos can scroll behind the mask.
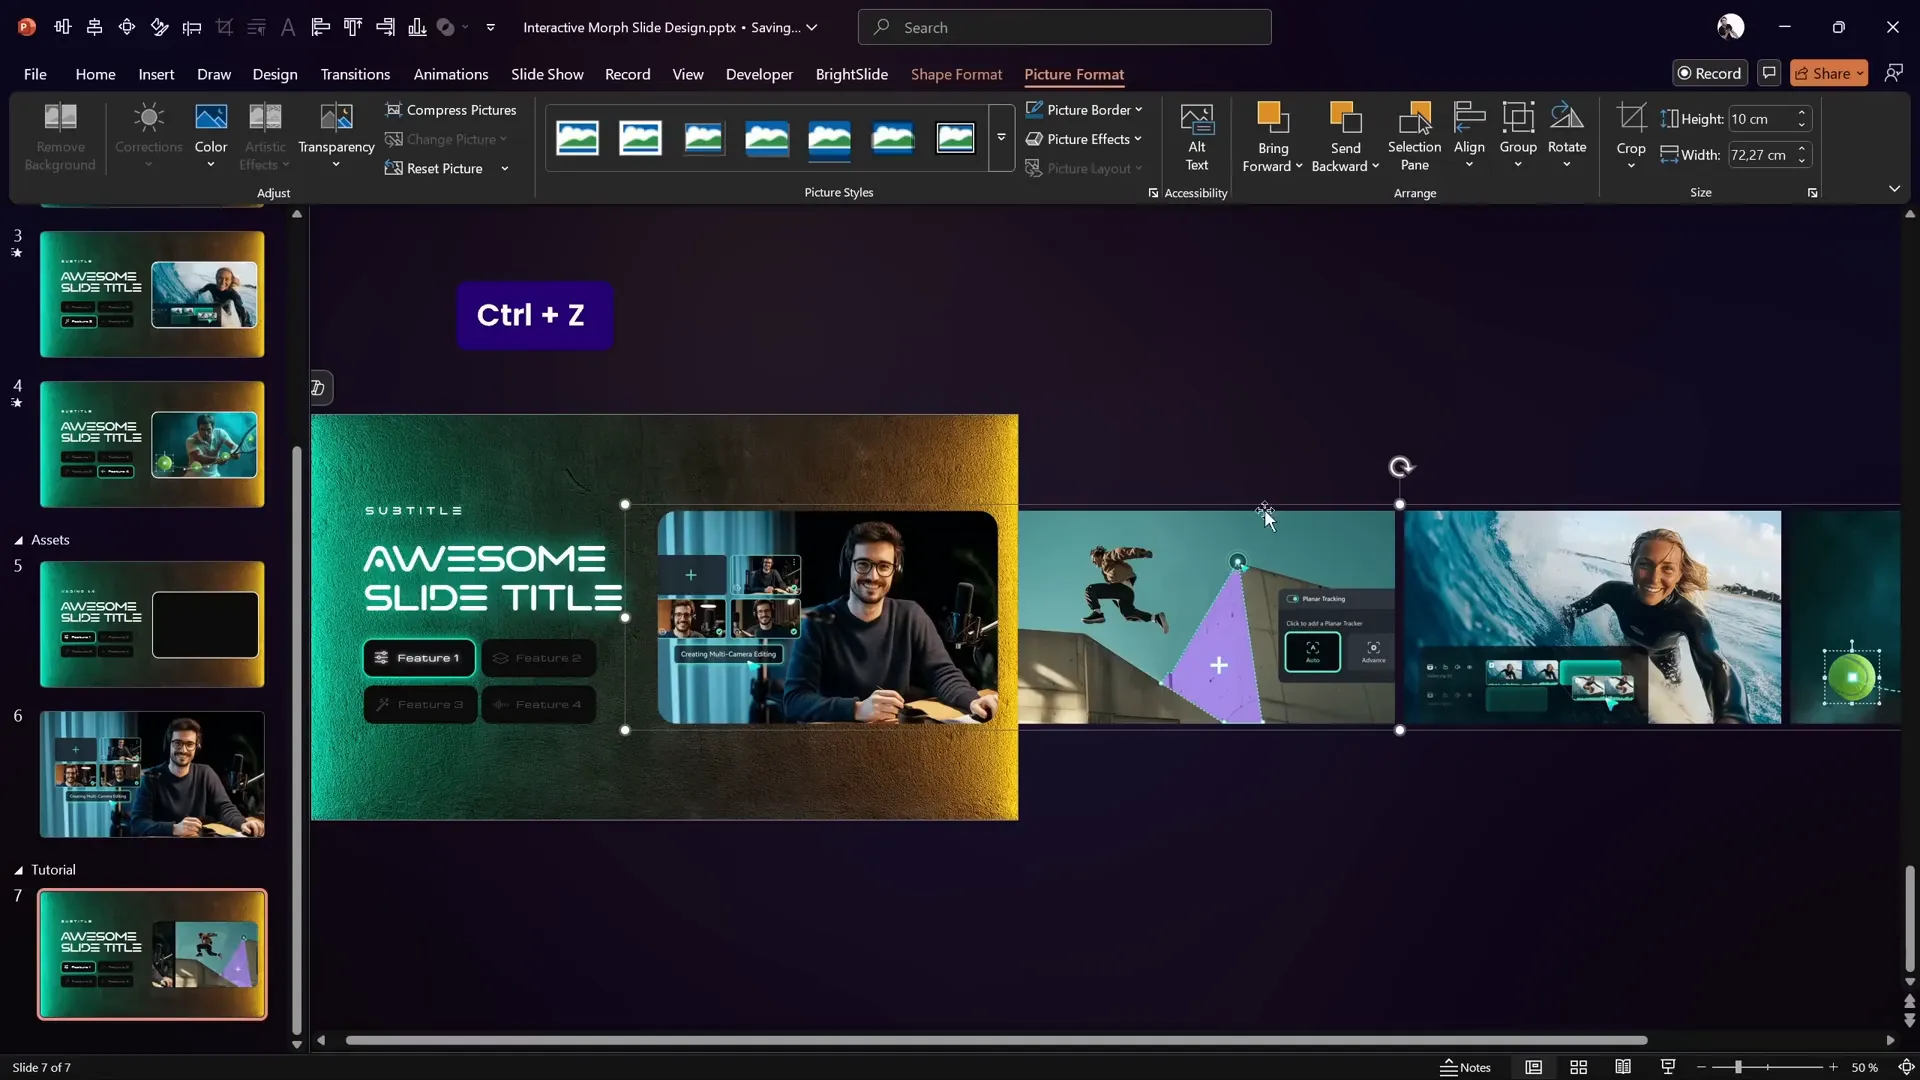
Grouping and Aligning Photos for Smooth Scrolling
Next, arrange the photos that will scroll inside the mask:
- Copy all the photos you want to display and paste them on the slide.
- Resize all photos to the height of the rounded rectangle mask (e.g., 10 cm) while keeping aspect ratio locked.
- Position the photos in a single horizontal row with small gaps between them for spacing.
- Make sure the photos are aligned to the top and spaced evenly horizontally.
- Select all photos, right-click and choose Group to make them a single object.
- Right-click the group and Send to Back so the photos appear behind the mask.
Now you can smoothly slide the photo group left or right to simulate scrolling inside the mask.
Adding a Glowing Edge Effect to the Mask
To add a modern glowing edge around the photo mask, follow these steps:
- Copy the rounded rectangle shape used for the mask.
- Paste it on top of the mask area.
- Remove its fill color and apply a white shadow to create a glowing effect.
This subtle glow enhances the futuristic look of the slide.
Making Buttons Clickable with Hyperlinks
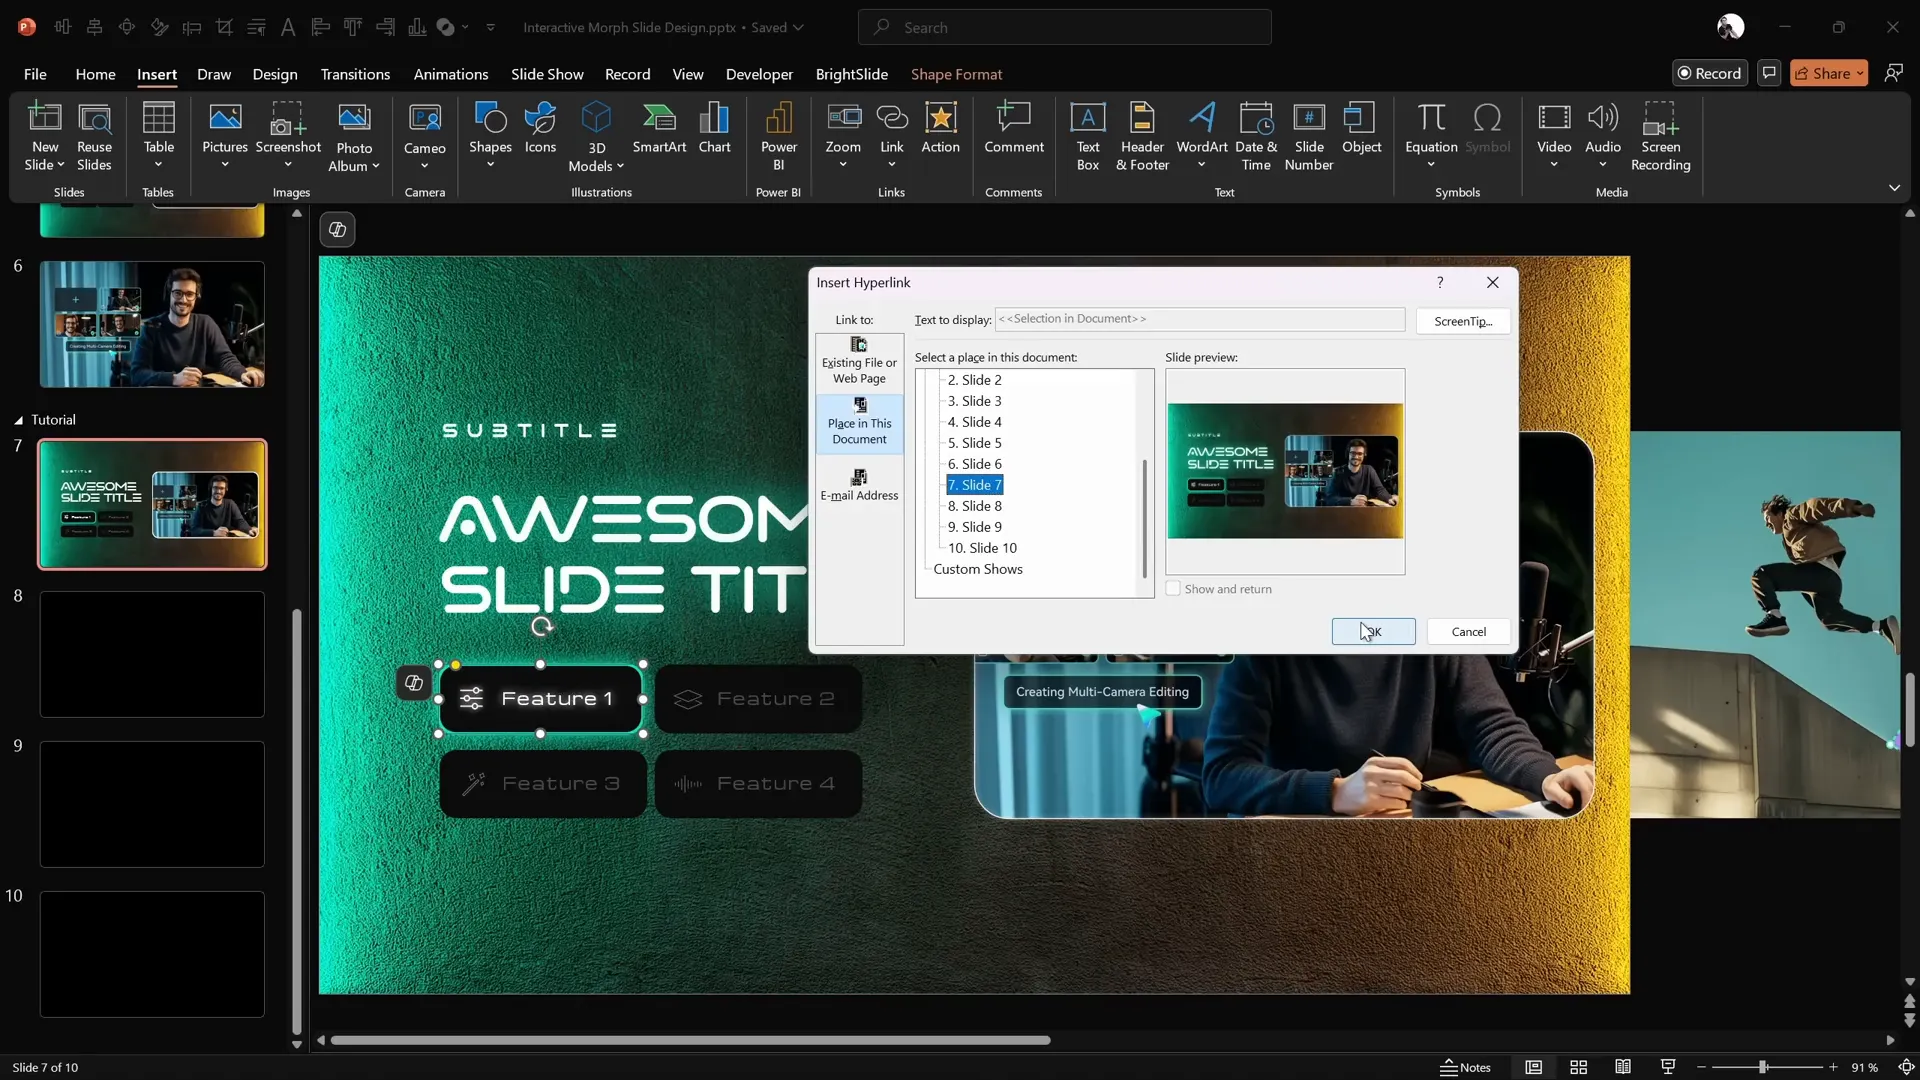
To make the interactive menu functional, assign hyperlinks to each button that navigate to different slides:
- Add three additional slides after your main slide (e.g., slides 7 to 10).
- Select the first button, go to Insert → Link, and link it to slide 7.
- Repeat for the second, third, and fourth buttons linking to slides 8, 9, and 10 respectively.
- Group each button with its icon to keep them as one object for smooth morph transitions (Ctrl + G).
This setup allows users to click buttons and jump to corresponding content slides.
Using Morph Transition for Animated Effects
The magic behind the smooth interactive effect is the Morph Transition in PowerPoint.
Here’s how to apply and optimize it:
- Apply the Morph transition to all content slides (slides 7 to 10).
- Set the transition duration (e.g., 2 seconds) for a smooth animation.
- Copy all elements from the previous slide to the next, then adjust the photo group’s position to simulate scrolling.
- Use the Format Painter (Ctrl + Shift + C and Ctrl + Shift + V) to toggle button active states between slides.
When playing the slide show, clicking buttons triggers the morph animation, highlighting the active button and sliding photos seamlessly.
Finalizing Your Interactive Morph Slide Design
Once all slides are prepared with buttons, photos, hyperlinks, and morph transitions, test your presentation in full-screen mode.
Click each button to ensure:
- The corresponding photo slides into view within the mask.
- The correct button lights up as active.
- The morph transition animates smoothly without glitches.
This interactive morph slide design is now ready to impress your audience with its modern look and seamless usability.
Feel free to download the free template used in this tutorial to explore and customize it further.
Frequently Asked Questions
What is the PowerPoint Morph transition?
The Morph transition is a feature in PowerPoint that creates smooth animations by transitioning objects’ position, size, rotation, and formatting from one slide to the next, giving the illusion of movement and transformation.
Can I use Morph transitions on all versions of PowerPoint?
The Morph transition is available in PowerPoint 2019, PowerPoint for Microsoft 365, and PowerPoint Online. Older versions do not support this feature.
How do I make buttons clickable in PowerPoint?
You can add hyperlinks to buttons by selecting the button, going to Insert → Link, and choosing the slide, URL, or file you want to link to. Group the button with any icons to keep them together.
Can I use this interactive morph design for other types of presentations?
Absolutely. This technique is versatile and can be adapted for product demos, portfolios, educational content, or any presentation that benefits from interactive menus and smooth animations.
Where can I find the fonts and images used in this tutorial?
The Marino font can be downloaded from daFont.com. Background photos and images are sourced from Freepik.com and Filmora’s official website.
Is the template used in this tutorial free?
Yes! The tutorial creator provides a free downloadable template so you can follow along and customize it for your own presentations.
Conclusion
The PowerPoint Interactive Morph technique is a powerful way to craft engaging, professional presentations with interactive menus and smooth animations. By combining well-chosen design assets, thoughtful layout, and PowerPoint’s Morph transition, you can elevate your slide decks to a new level of interactivity and polish.
Additionally, exploring tools like Filmora’s AI Audio to Video feature can expand your multimedia toolkit, letting you create compelling video content from audio files with minimal effort.
With the detailed steps and free template shared here, you’re well-equipped to start creating your own interactive morph slides today. Dive in, experiment, and watch your presentations come alive!
Thanks for reading, and happy designing!


