

Table of Contents
- Introduction
- What you’ll build
- Assets and preparation
- Step-by-step design: background and person
- Step-by-step design: creating the modern screen
- Adding the chart and aligning the finger
- Adding the touch highlight (ovals and lines)
- Animating the Employee Pointing Finger Slide PowerPoint
- Timing, looping, and polishing
- Customization ideas and variations
- Exporting and sharing
- Troubleshooting common issues
- Resources and downloads
- FAQ
- Conclusion
Introduction
Welcome — in this complete guide I’ll walk you through how to recreate the Employee Pointing Finger Slide PowerPoint exactly like the one I demonstrate on my channel. I designed this walkthrough so you can build a clean, modern slide featuring an office background, a translucent colorful screen, an employee image pointing at the screen, and a dynamic chart that highlights the company’s year-on-year growth.
This tutorial is based on the PowerPoint techniques I use at POWERPOINT UNIVERSITY. If you’re preparing a business presentation, pitch deck, or a training slide, the Employee Pointing Finger Slide PowerPoint is a versatile layout: it communicates data while keeping the look professional and engaging. Throughout this article I’ll share every step, practical tips, and animation timing settings so you can build the same slide from scratch and customize it for your brand.

What you’ll build
By the end of this guide you’ll have a polished Employee Pointing Finger Slide PowerPoint composed of:
- A full-slide office background image
- A rounded-corner translucent screen with a colorful gradient edge
- An image of an employee pointing towards the screen with the background removed
- A chart (line chart in the example) placed on the screen
- A subtle touch highlight at the fingertip made from layered ovals and dotted arcs
- Coordinated entrance animations so the person, screen, and chart appear in sequence
The Employee Pointing Finger Slide PowerPoint is perfect for illustrating metrics, highlighting a KPIs spike, or introducing a key data point.
Assets and preparation
Before you begin building the Employee Pointing Finger Slide PowerPoint, gather the following:
- A high-resolution office background image (landscape orientation works best)
- An image of a person pointing (ideally with their arm extended toward camera or screen)
- PowerPoint (Office 2016 or later recommended for the built-in Remove Background and animation features)
- Your chart or data — a sample line chart for “year-on-year growth” if you want to match the example
Notes about the images:
- Choose a person image where the finger is clearly visible and mostly unobstructed.
- Prefer images with simple backgrounds so the Remove Background tool can work cleanly.
- If you plan to distribute the file, ensure your images are licensed correctly (stock or owned).
Step-by-step design: background and person
We’ll start by placing and preparing the two base images: the office background and the person pointing. These two elements create depth and context for your Employee Pointing Finger Slide PowerPoint.
1. Insert and size the background
- On a blank slide, click Insert > Pictures and add your office background image.
- Right-click the image and choose Send to Back to set it as the slide backdrop.
- Drag the corners to cover the entire slide. Use the corner handles to maintain aspect ratio.
Tip: If the image does not perfectly fit, use Format Picture > Crop and adjust so the composition focuses on the area you want visible.
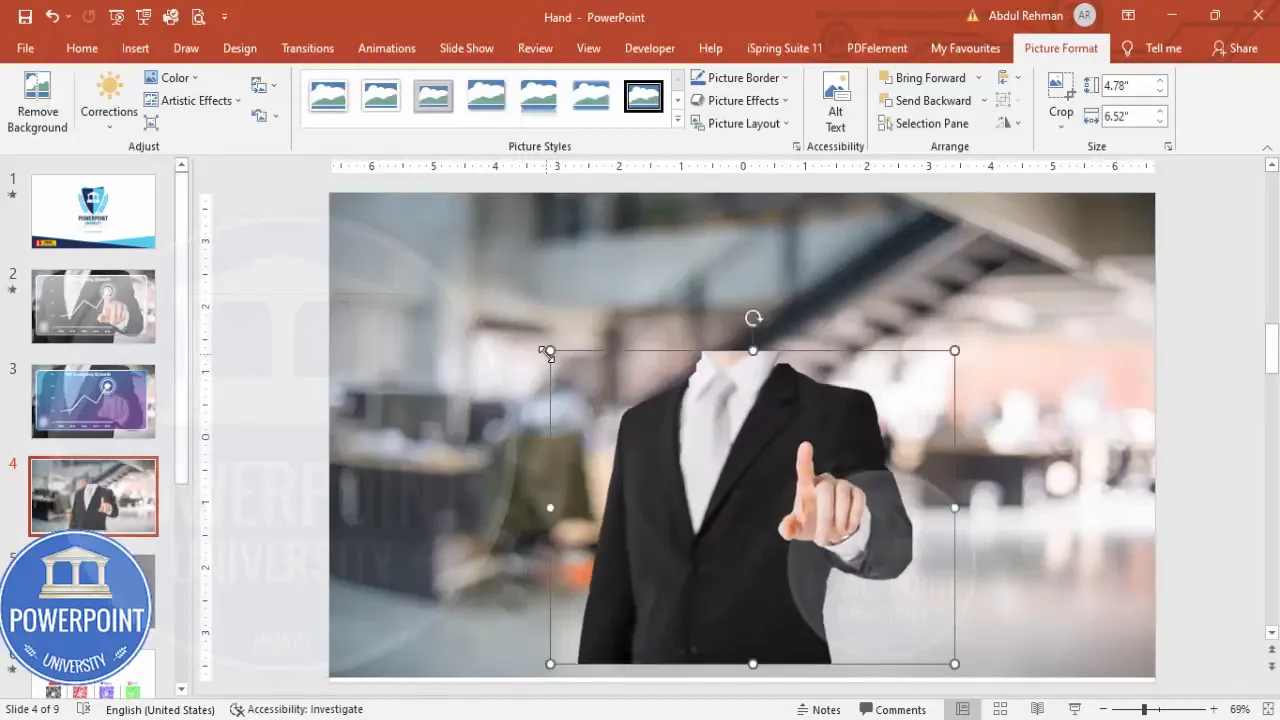
2. Insert the person image and remove the background
- Insert the person image: Insert > Pictures.
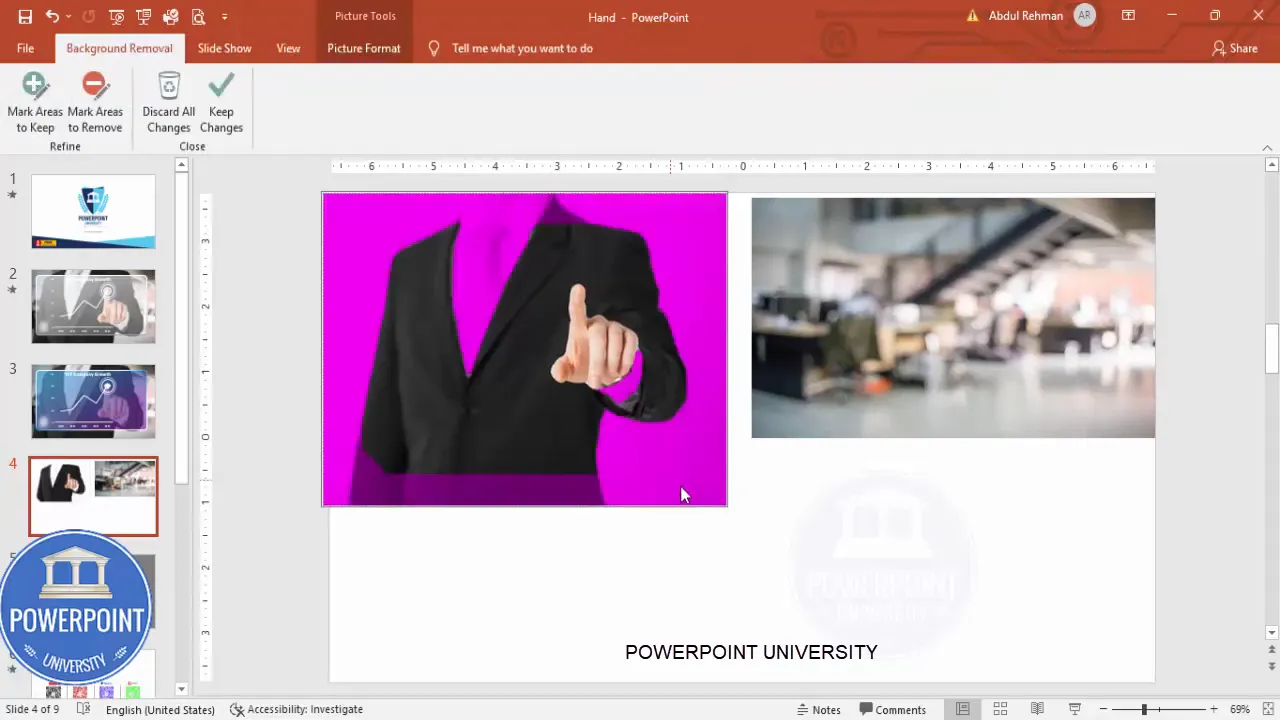
- Select the image and go to Picture Format > Remove Background.
- PowerPoint will auto-detect the subject and shade removed areas in magenta. Use Mark Areas to Keep to paint over any areas that were removed incorrectly, such as a tie, hair strands, or the arm.
- Similarly, use Mark Areas to Remove if the tool kept background fragments you don’t want.
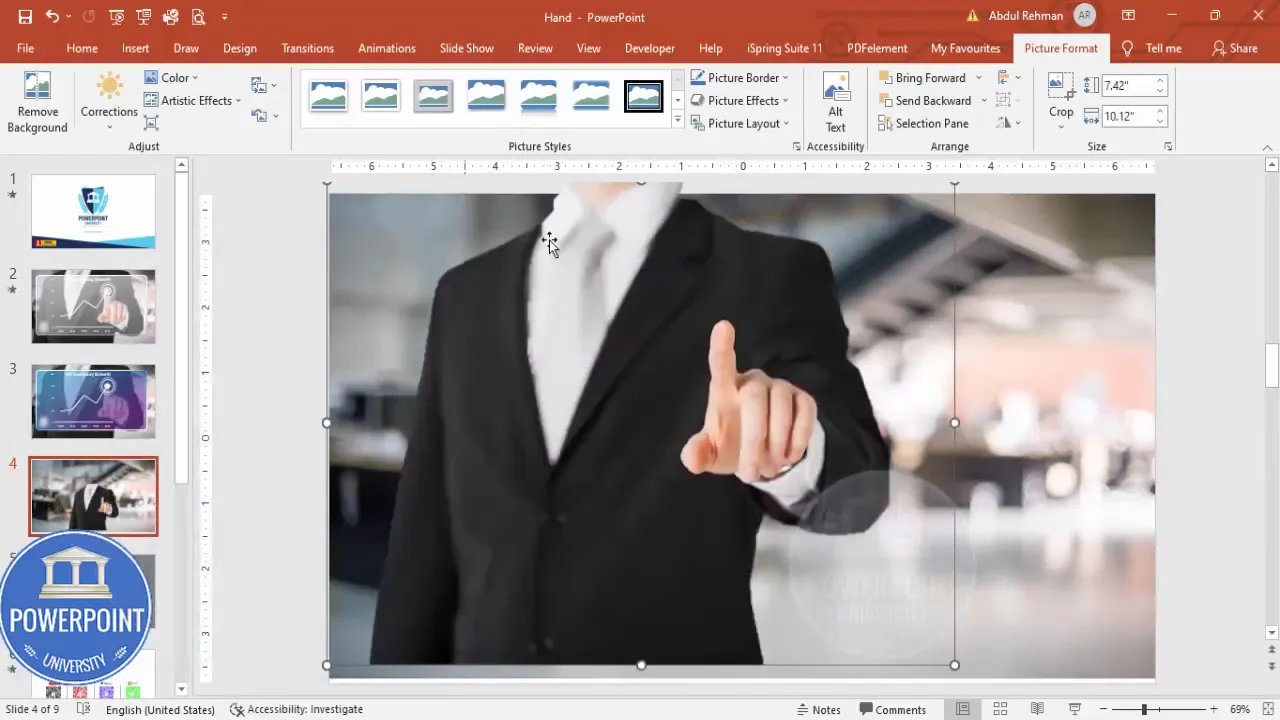
- Click Keep Changes when satisfied.
The Remove Background tool is fast and effective for clear foreground images. For complex edges (e.g., flyaway hair), you can refine in an external editor, but most pointing poses work fine directly inside PowerPoint.
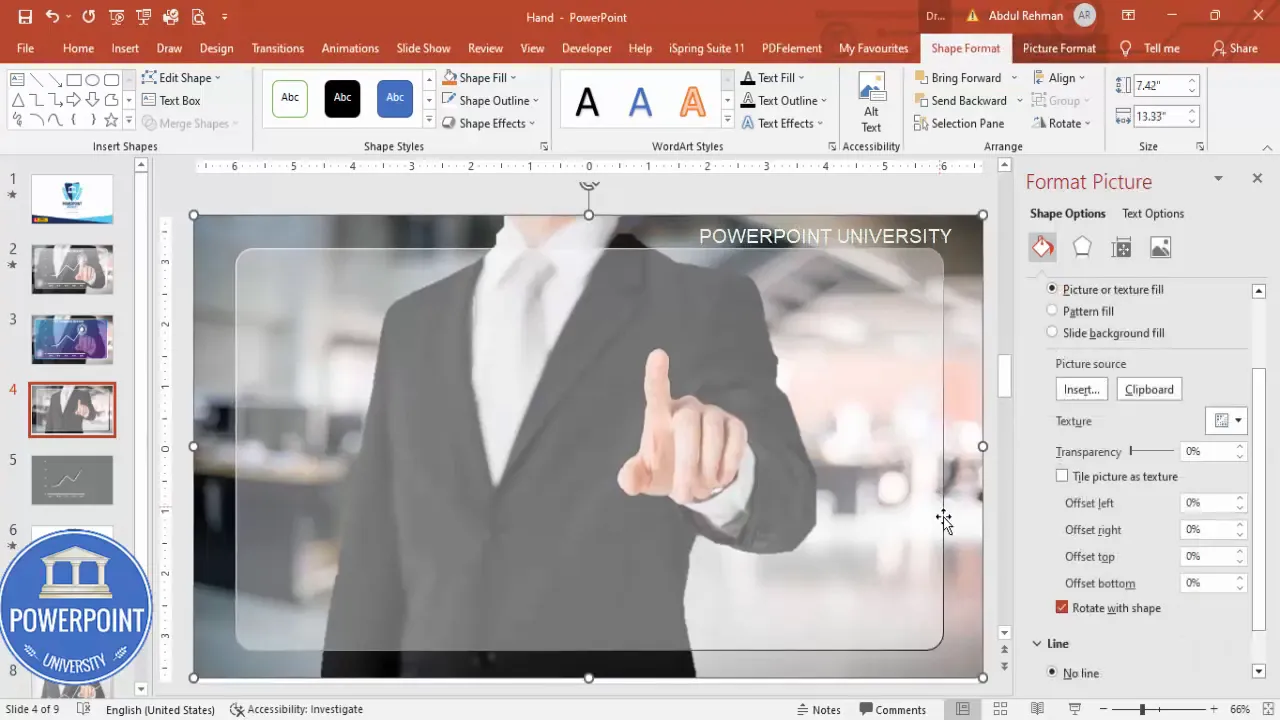
3. Position the person
- With the background set, drag the person image so they sit to one side of the slide — in the example, the person is on the right side, pointing left toward the screen.
- If needed, resize the person by dragging corner handles while holding Shift to maintain proportions.
- Right-click and choose Bring Forward or Send to Back as needed for layering.
Tip: For realistic depth, keep the person slightly overlapping the edge of the translucent screen (created in the next section) to make the finger appear to interact with screen content.
Step-by-step design: creating the modern screen
Next we’ll create the colorful translucent screen that looks like a glass panel. The screen will be a rounded rectangle with a gradient fill and a colored outline that suggests a modern UI device or hologram.
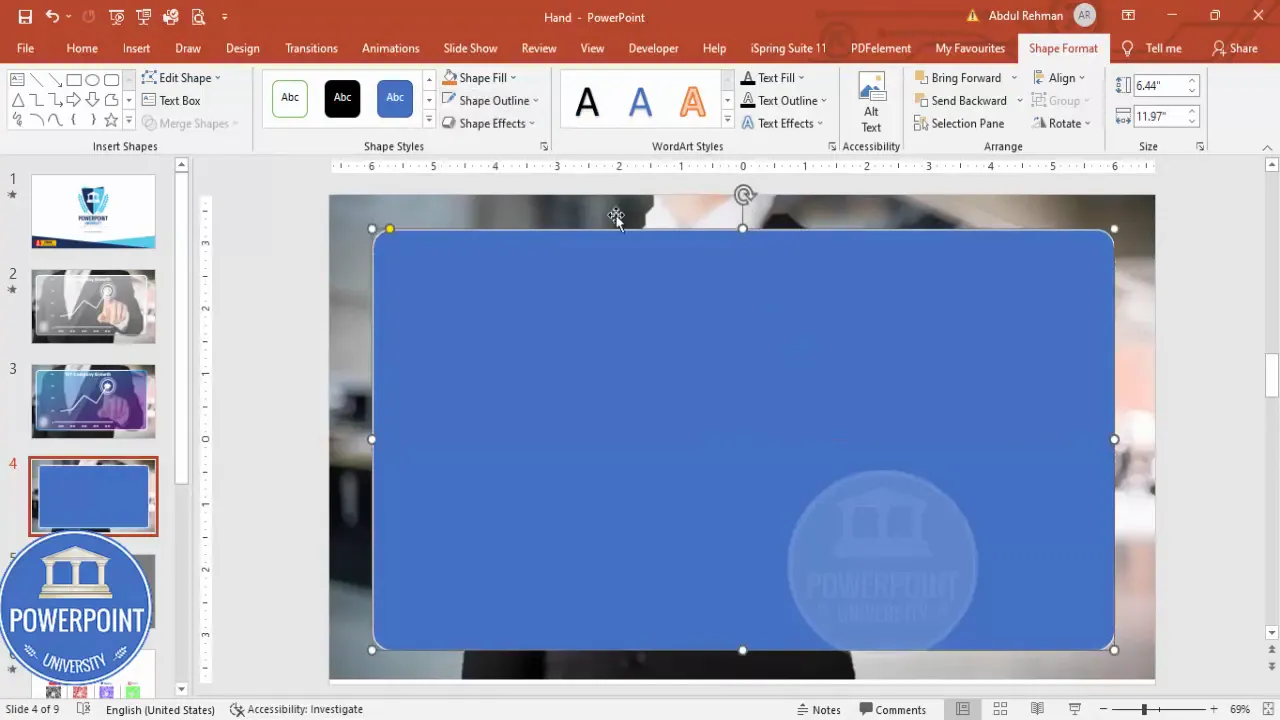
1. Draw the rounded rectangle
- Go to Insert > Shapes and select the Rounded Rectangle.
- Draw the rectangle where you want the screen to sit, making sure it’s large enough to hold your chart.
- Adjust the corner radius by dragging the yellow handle on the shape to get the desired roundness.
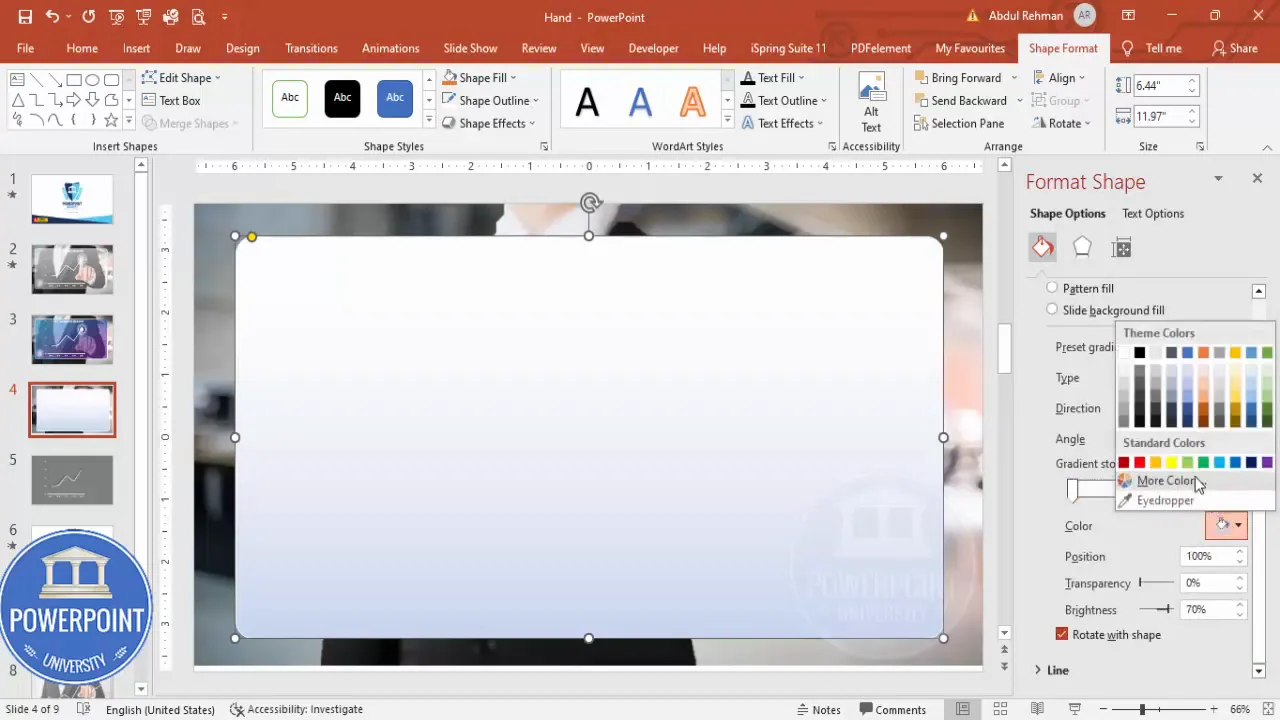
2. Create the translucent fill
- Right-click the rectangle and choose Format Shape.
- Under Fill, choose Gradient Fill. PowerPoint will show multiple gradient stops by default.
- Delete two of the default stops so you’re left with two stops (left and right).
- Set both stops to white but vary their transparency: set the first stop’s transparency to 60% and the second to 65% (or adjust to taste).
Result: a subtle translucent white panel that allows the background image to show through — perfect for a modern dashboard look in your Employee Pointing Finger Slide PowerPoint.
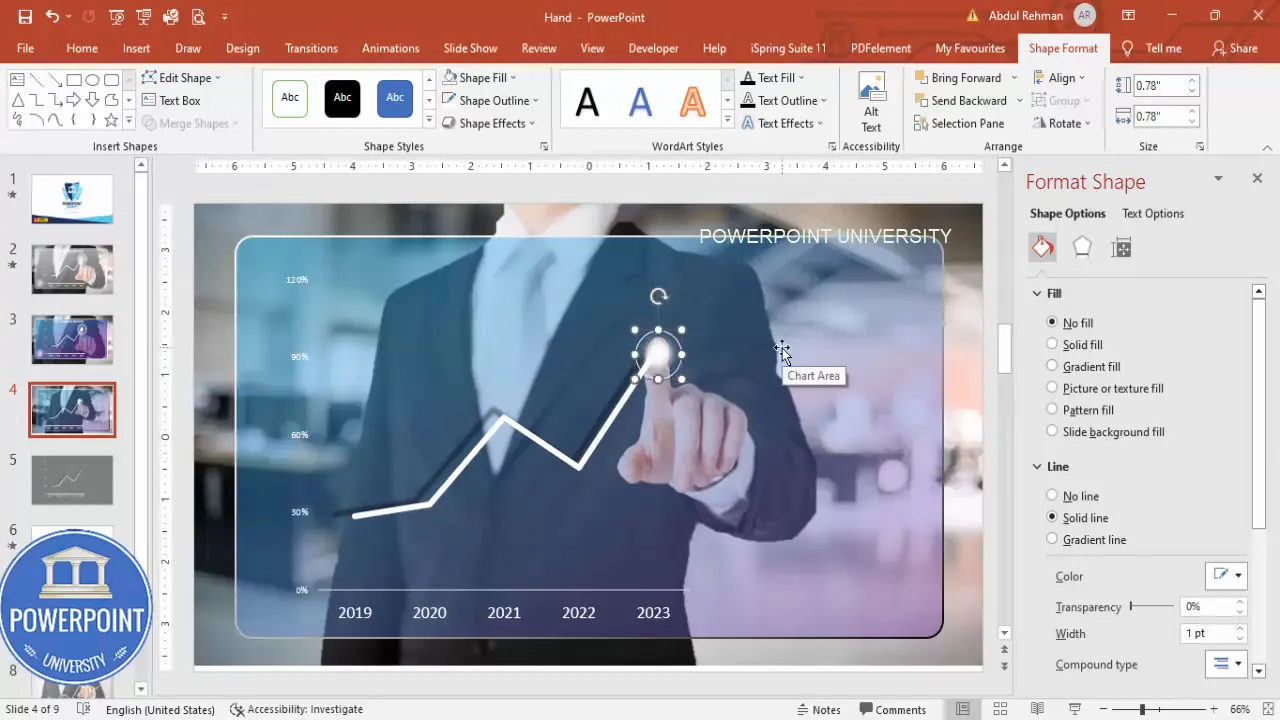
3. Style the outline
- Stay in the Format Shape pane and switch to Line settings.
- Choose a gradient line: for example, a left-to-right gradient from light blue to purple for a colorful edge.
- Increase the line width to 2 pt or greater to make the border visible against the background.
- Change gradient direction and angle until the border complements the slide palette.
Tip: If you prefer a monochrome look, use a black-to-white gradient for the outline. If you have brand colors, substitute those to keep slides on-brand.
Adding the chart and aligning the finger
A core function of the Employee Pointing Finger Slide PowerPoint is to present a data point with emphasis. You’ll place a chart on the screen and align the employee’s finger to point at the key data marker.
1. Insert or paste your chart
- Option A: Build a chart in PowerPoint: Insert > Chart and pick a line chart (or bar, column, etc.).
- Option B: Copy a chart you already made in Excel or another presentation and paste it onto the slide (Ctrl+C and Ctrl+V).
- Resize the chart to fit comfortably within the rounded rectangle screen. Use handles to scale without distortion.
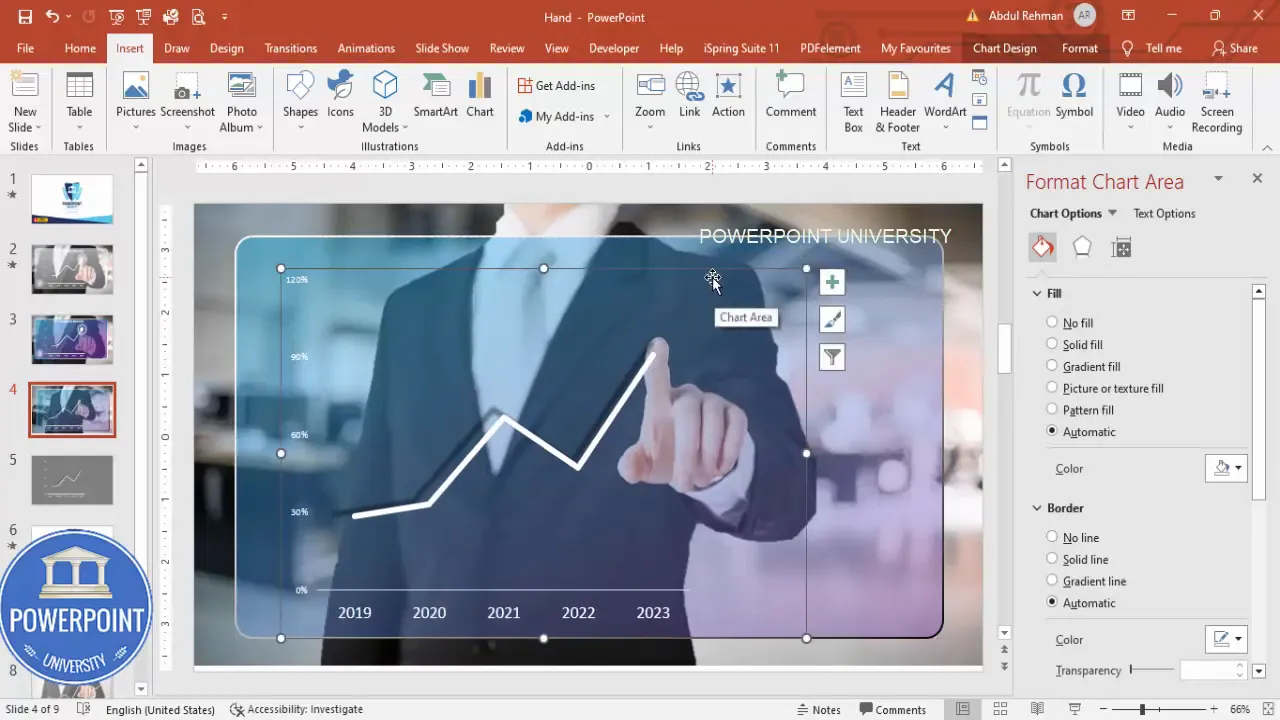
2. Align the finger to the key point
- Move the chart horizontally or vertically so the index finger visually aligns with the important data point (for example, the highest growth spike on your year-on-year chart).
- If needed, nudge the person image or slightly rotate the chart group to improve the visual alignment.
- Ensure the finger overlaps the screen edge slightly for the most realistic interaction.
This small alignment step is key for the visual narrative: viewers instantly link the presenter (the person) with the data being emphasized.
Adding the touch highlight (ovals and lines)
To sell the illusion of touch interaction we’ll add a small soft highlight (a glowing oval) at the fingertip and a couple of concentric outlines to create a ripple/dotted arc effect. This is a simple but powerful detail in the Employee Pointing Finger Slide PowerPoint.
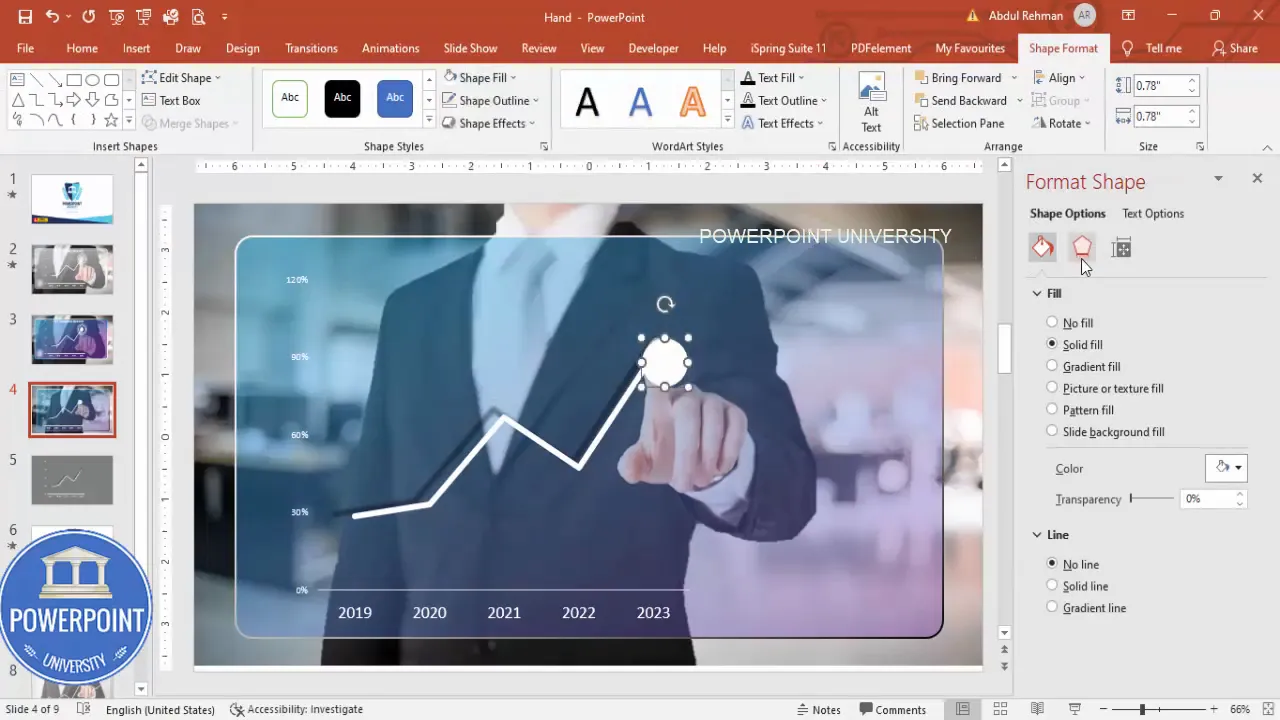
1. Create the fingertip glow
- Insert an oval: Insert > Shapes > Oval. Hold Shift to create a perfect circle.
- Set the shape fill to white and the outline to No Outline.
- With the shape selected, go to Shape Effects > Soft Edges and increase soft edges to create a glow effect.
- Position the oval directly over the fingertip.
2. Add concentric rings
- Duplicate the oval (Ctrl+D), remove the fill on the duplicates and keep a white outline.
- Resize each duplicate slightly larger than the previous to create concentric rings.
- For one of the rings, change the line style to dotted (format shape > line > dash type) to add a subtle digital/ripple feel.
- Align all rings centrally around the fingertip glow.
These layered shapes create a polished touch effect that draws attention to the data point.
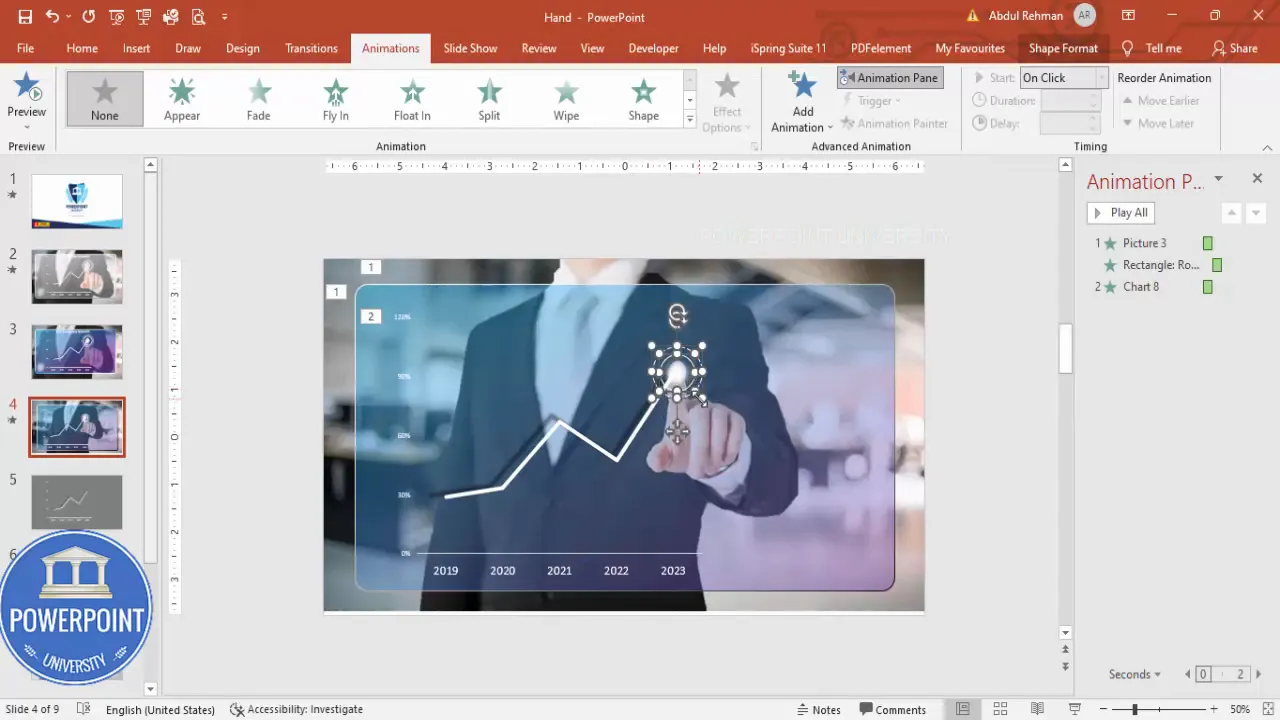
Animating the Employee Pointing Finger Slide PowerPoint
Now for the animation — the final piece that brings the slide to life. The goal is to choreograph the entrance of the person, the screen, and the chart so they appear in a logical, visually pleasant sequence.
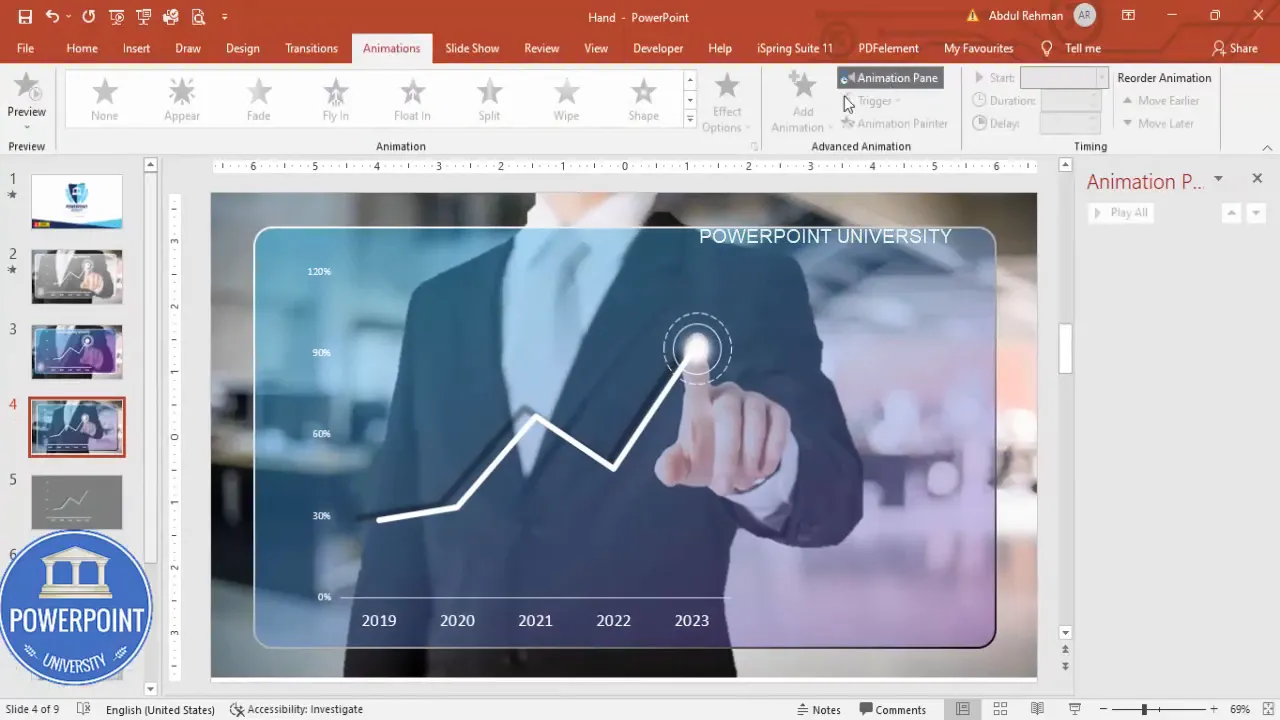
1. Open the Animation Pane
- Go to Animations on the ribbon and click Animation Pane to open the right-side panel.
- This pane is essential for sequencing multiple objects and fine-tuning timings.
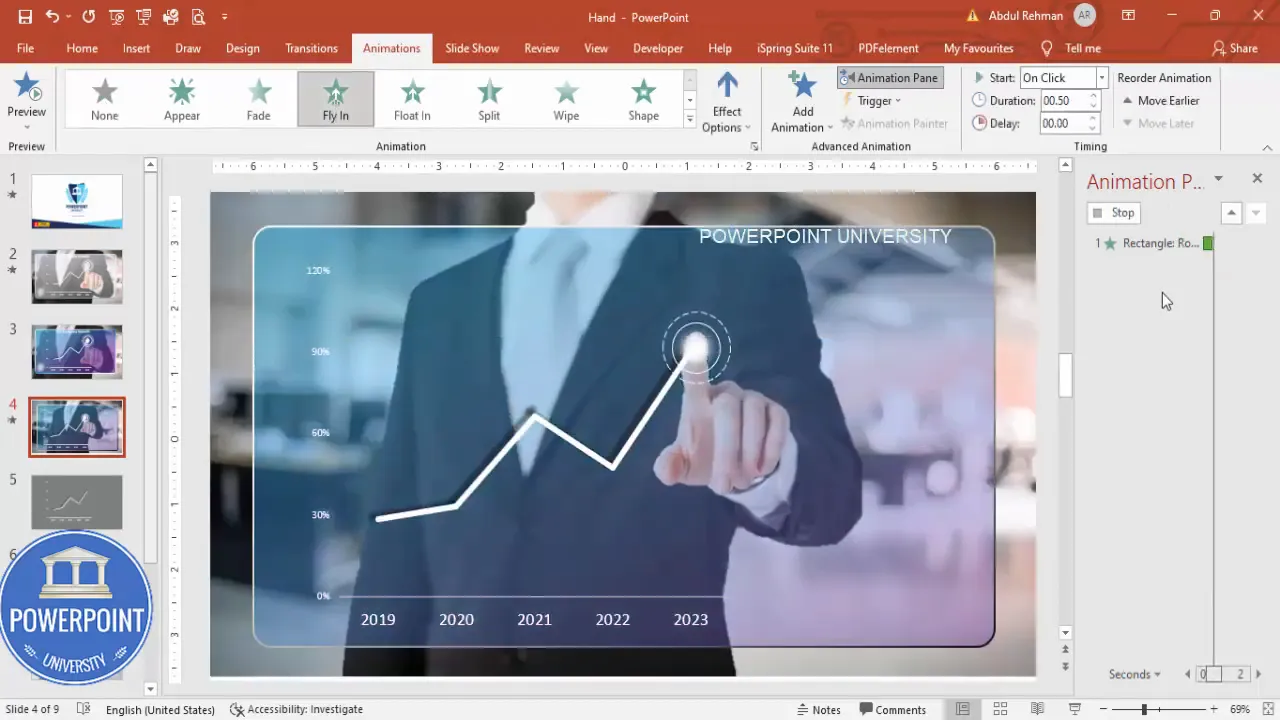
2. Animate the person
- Select the person image and choose Add Animation > Entrance > Fly In.
- Set the direction to From Right (or whichever side makes sense based on where the person sits).
- Change the start to On Click or After Previous depending on whether you want the presenter to trigger the movement.
In the example Employee Pointing Finger Slide PowerPoint I use Fly In from the right so the person enters smoothly onto the stage.
3. Animate the screen
- Select the screen (rounded rectangle) and add a Fly In or Wipe entrance.
- Set the screen’s animation to happen After Previous so it follows the person’s entrance automatically.
- If using Wipe, choose direction From Left to make the screen wipe into place from the center outward.
Timing suggestion: use 0.5–0.75 seconds for each entrance to keep a snappy pace without feeling rushed.
4. Animate the chart and fingertip highlights
- Select the chart and choose Add Animation > More Entrance Effects > Zoom for a gentle focus effect; set it to After Previous.
- Select the fingertip glow and rings. Add a subtle Appear or Fade and set the start to After Previous.
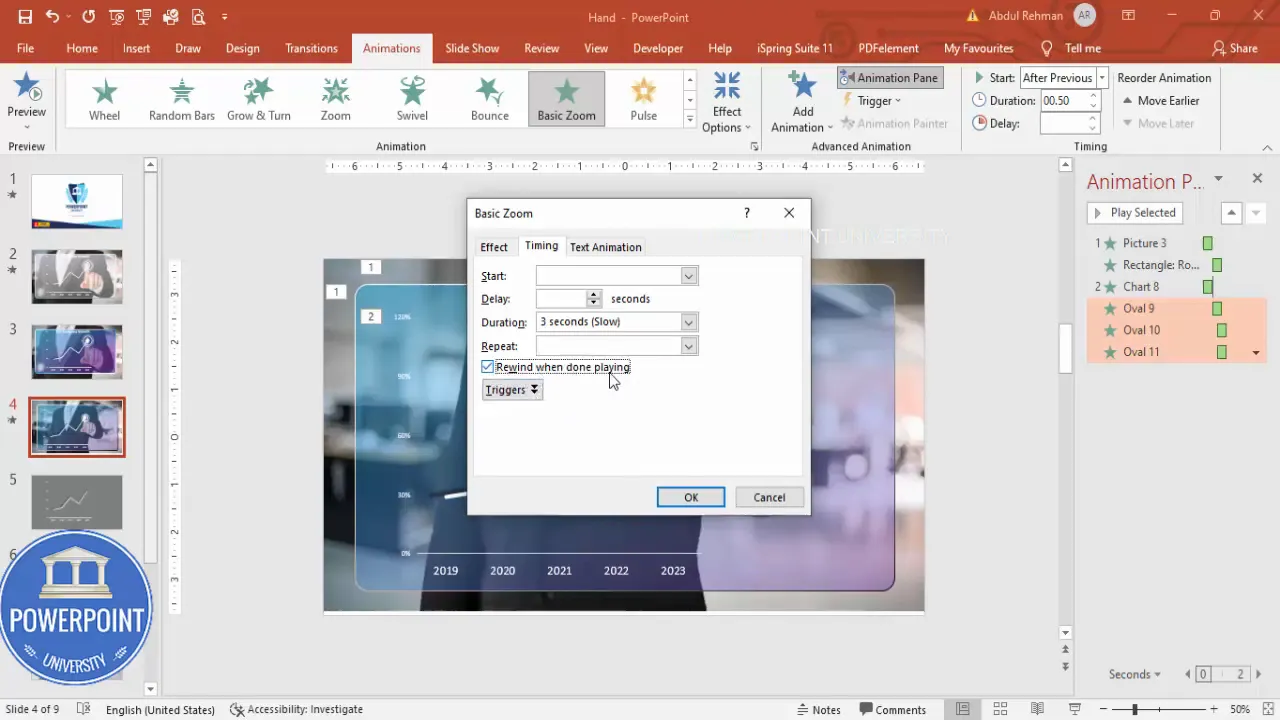
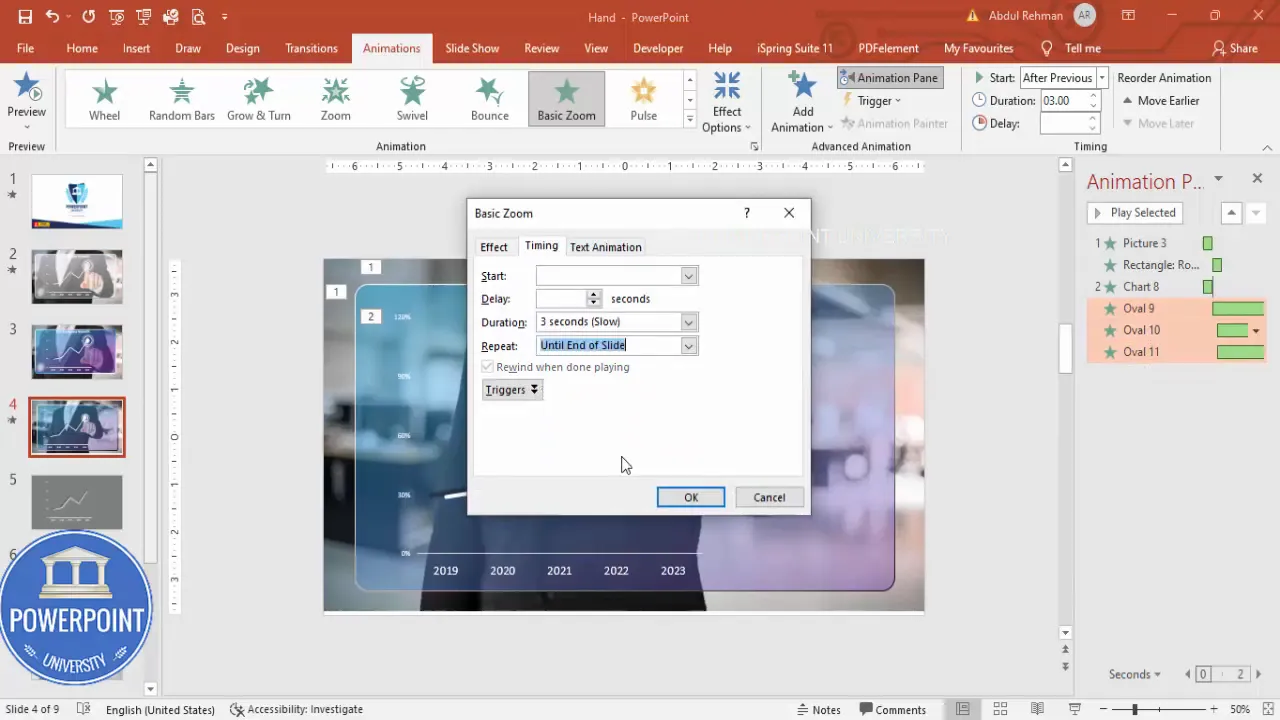
- To make the fingertip glow appear to vibrate or pulse, add emphasis animations (like Grow/Shrink) with a small scale change and set them to Repeat > Until End of Slide or Repeat 3 times.
Combining entrance and emphasis animations makes the Employee Pointing Finger Slide PowerPoint both informative and visually interesting without distracting from the data.
Create Slides in Seconds with ExpertSlides AI |
|
Generate AI Presentations today: |
| TRY NOW! |
Timing, looping, and polishing
Fine-tuning the animation timings and repetition is important for a polished final result. Here are best-practice settings for timing and sequencing:
- Sequence: Person > Screen > Chart > Fingertip glow
- Start options: Person set to On Click (or With Previous) depending on presenter control; subsequent items set to After Previous
- Durations: 0.4–0.8 seconds for entrance animations; 0.5–1.0 seconds for emphasis animations
- Delays: small delays (0.1–0.3s) between items create a stepping effect
- Looping: For emphasis effects (pulsing glow), set Repeat: Until End of Slide if you want the pulse to continue while the slide is displayed
To change these, right-click an animation in the Animation Pane, choose Timing, and adjust Start, Duration, Delay, and Repeat settings.
Customization ideas and variations
The Employee Pointing Finger Slide PowerPoint is highly adaptable. Below are practical customization ideas split by visual, data, and storytelling variations:
Visual customizations
- Change the screen gradient to match your brand palette (use brand hex codes for exact matches).
- Change the outline from solid to neon-style by using bright colors and thicker strokes (3–5 pt).
- Use different image crops: place the person on the left and the screen on the right to vary visual flow.
- Replace the office background with a blurred gradient to reduce distraction and focus attention more on the chart.
Data and chart variations
- Swap the line chart for a bar chart, column chart, or an infographic element (icons, KPI numbers).
- Use an overlay text box (semi-transparent) to call out the highest growth point with a short sentence.
- Animate individual data points to emphasize change over time (appear or fade on click).
Storytelling variations
- Use the slide as an “intro” to a segment: animate the person and screen, then click to bring in the dashboard or dataset.
- Turn the finger into a cue for audience interaction: “Which metric would you prioritize?” and pause for discussion.
These variations keep the Employee Pointing Finger Slide PowerPoint fresh across different audiences and contexts.
Exporting and sharing
When your slide is finished, consider how you’ll export and share it depending on your needs:
- Save the presentation (.pptx) to preserve animations and editable objects.
- Export as a PDF for a static version without animations — useful for handouts.
- Export as a video (File > Export > Create a Video) to preserve animation timing for platforms that support video playback.
- Package the presentation with embedded fonts and linked media if you’ll move the file across computers: File > Export > Package for CD (or manually zip the folder with linked assets).
Note: Animated highlights and entrance sequences only appear when presenting or exporting to video. PDFs will flatten these effects.
Troubleshooting common issues
Below are common problems you might encounter when building the Employee Pointing Finger Slide PowerPoint and how to fix them.
1. Background removal left jagged edges
- Solution: Reopen Remove Background and manually mark areas to keep/remove. Zoom in for finer control. If necessary, touch up in an image editor with a soft eraser.
2. The person image looks flat against the background
- Solution: Add a very slight drop shadow to the person (Format Picture > Effects > Shadow) using subtle settings: transparency 70–80%, distance 5–10 px, blur 10–20 px.
3. Gradient border not visible on bright backgrounds
- Solution: Increase line width to 3–4 pt or change the gradient to include a darker color on one end to create contrast.
4. Animations don’t play in presenter mode
- Solution: Check that each animation has a start option set (On Click / With Previous / After Previous) and that overlap timings don’t conflict. Run a test slideshow locally instead of in edit mode.
5. Chart alignment is awkward
- Solution: Group the chart and the screen temporarily and nudge them together so the finger lines up with the target data point. Ungroup if you need to edit the chart further.
Resources and downloads
If you prefer to start from a template instead of building from scratch, I’ve provided a free downloadable PowerPoint template version of this exact design so you can plug in your own data and images.
- Free template (example): Pointing-Finger-Slide.pptx — available from my shared Dropbox for quick use and editing.
- Recommended images: stock sites like Unsplash, Pexels, or paid services such as Shutterstock (look for “pointing person” or “gesture pointing” queries).
- PowerPoint features referenced: Remove Background, Format Shape, Animation Pane, Chart Tools.
Using a template saves time and ensures the animation timings are preconfigured for the Employee Pointing Finger Slide PowerPoint.
FAQ
Q: What should I name this slide template for easy reuse?
A: Name it something simple and searchable like “Employee Pointing Finger Slide PowerPoint Template” so you can find it quickly when assembling presentation decks.
Q: Can I use a different animation than Fly In for the person?
A: Absolutely. Replace Fly In with Fade or Float In if you want a more subtle entrance, or use Zoom for a more dramatic entry. Whatever you choose, keep the sequence consistent: person first, screen second, chart third.
Q: How can I make the fingertip glow look more realistic?
A: Use a white oval with soft edges for the center glow, then add a colored duplicate with very high transparency (10–20%) beneath it to imply light. Apply a gentle Grow/Shrink emphasis animation at a small scale (e.g., 105%) to simulate a pulse.
Q: Will animations work if I export to PDF?
A: No. PDF is a static format. If you need to preserve animation, export as a video (MP4) or present directly from PowerPoint.
Q: My Remove Background cut out part of the finger. How can I fix that?
A: Reopen Remove Background, use Mark Areas to Keep to paint over the missing finger section, and click Keep Changes. For very fine edits, export the image to Photoshop or another raster editor and refine edge masks there.
Q: Is the Employee Pointing Finger Slide PowerPoint appropriate for all audiences?
A: Yes, when used professionally. It works best in business contexts where highlighting a data point with a human touch increases comprehension. For very formal presentations, tone down colors and effects to maintain a conservative look.
Q: How can I adapt the layout for mobile-friendly slides?
A: Increase font sizes and space between elements, reduce animation complexity, and ensure the main data point sits centrally. Consider cropping the slide to a 9:16 aspect ratio and resizing elements for portrait display.
Conclusion
The Employee Pointing Finger Slide PowerPoint is a compact, effective layout that blends human presence with data emphasis. When you combine a clean background, a translucent screen, a carefully positioned person image, and a well-timed animation sequence, you create a slide that guides audience attention to the insight you want to emphasize.
Recap of core steps:
- Gather a background and a pointing person image.
- Use Remove Background to isolate the person.
- Create a rounded rectangle screen with gradient fill and outline.
- Insert and align the chart so the finger points to the key data point.
- Add fingertip glow and concentric rings for interaction cues.
- Animate in sequence: person, screen, chart, fingertip glow — refine timings.
If you want to save time, start with a template and customize colors, images, and chart data for your audience. The Employee Pointing Finger Slide PowerPoint is flexible — it works for sales decks, quarterly reviews, training slides, and more.
Happy designing — and if you’d like the exact template I used to build this slide, download the free PowerPoint file and replace the placeholder content with your own metrics and imagery. Use the Employee Pointing Finger Slide PowerPoint to make your next data point unmistakable and memorable.

Check out the full video: Employee Pointing Finger Slide in PowerPoint. Tutorial No.: 978


