

- Table of Contents
- Introduction: Why the Morph Transition Effect in PowerPoint Works
- What You’ll Build (Overview)
- Step 1 — Build the Ramp Shape
- Step 2 — Layering and Coloring the Ramp
- Step 3 — Add Background Images
- Step 4 — Place and Style the Photo and Title
- Step 5 — Duplicate Slides and Prepare for Morph
- Step 6 — How to Make the Morph Transition Work Flawlessly
- Step 7 — Speed, Timing, and Polish
- Advanced Tips & Variations
- Common Problems and Troubleshooting
- Exporting and Sharing
- Accessibility, File Size, and Image Rights
- Resources and Where to Get the Template
- FAQ
- Final Thoughts
Introduction: Why the Morph Transition Effect in PowerPoint Works
The Morph Transition Effect in PowerPoint is a deceptively simple tool that can transform static slides into a fluid, cinematic experience. In this tutorial-style guide, I’ll walk you through how I create a “family photos ramp” animation using the Morph Transition Effect in PowerPoint. You’ll learn how to craft custom shapes, layer photos and backgrounds, and configure slide duplication and object naming so the Morph transition behaves exactly as you expect.
Throughout this walkthrough I’ll explain the small techniques that make the Morph Transition Effect in PowerPoint feel polished: editing freeform points to shape a “ramp,” using off-slide copies to control entrance and exit motions, naming objects via the Selection Pane, and choosing transition durations for rhythm. Each step is practical so you can adapt the technique to your own photos, corporate content, or event slides.
What You’ll Build (Overview)
By the end of this tutorial you’ll have a reusable slide setup that shows a sequence of photos traveling along a ramp, with the background changing to match each location and the title text updating smoothly. This is a great effect for travel slideshows, portfolio slides, company timelines, or to highlight case studies.
- Animated ramp made from layered freeform shapes
- Photo cards that slide in and out using Morph
- Gradient-filled title text that moves with the Morph Transition Effect in PowerPoint
- Tips for making the movement smooth and fast
Step 1 — Build the Ramp Shape
Start with a clean slide. We’ll construct the ramp using PowerPoint’s Freeform Shape tool, available on Insert > Shapes.
- Insert a new blank slide (Home > New Slide).
- Go to Insert > Shapes > Lines > Freeform Shape.
- Click to create corner points that roughly trace the ramp’s outline. Don’t worry about curves yet; create the polygon first.
- Right-click the shape > Edit Points. Click and drag points or convert corner points to curve handles to smooth the ramp edges.
When you edit points, convert a few line points to curves so the ramp looks organic rather than mechanical. Spend time shaping the ramp until you’re happy — small adjustments go a long way to making the Morph animation feel natural.
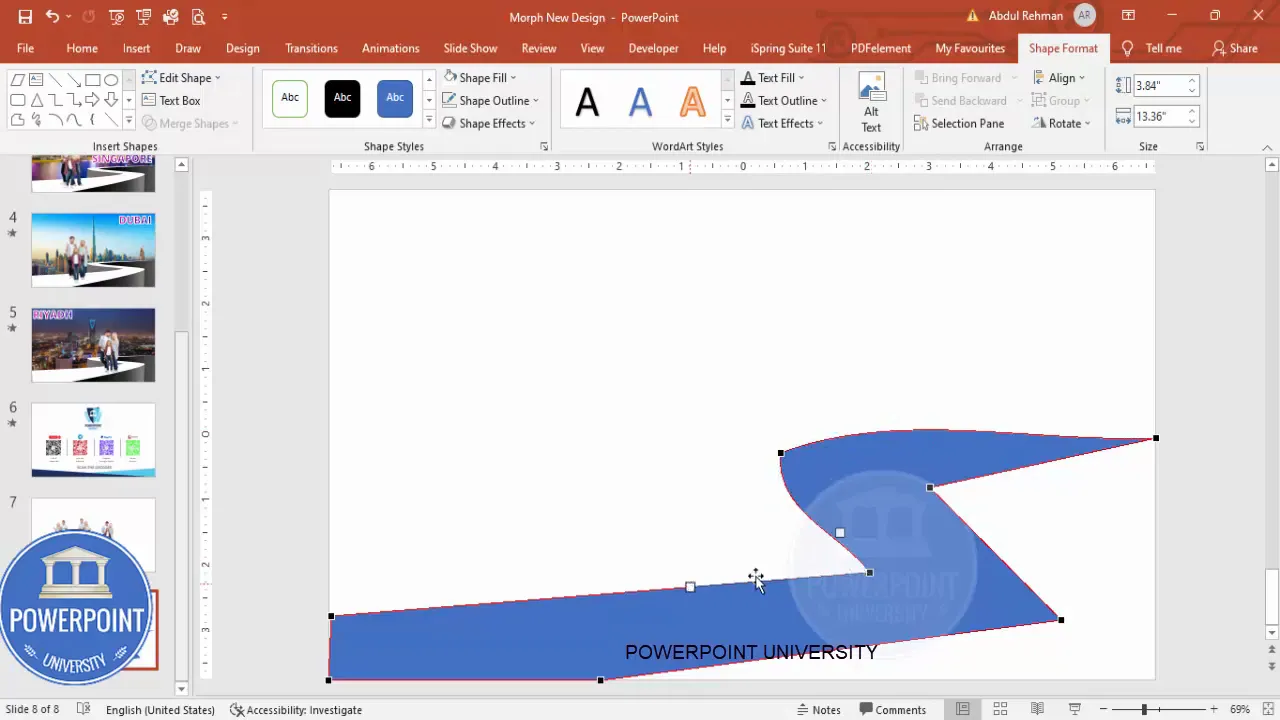
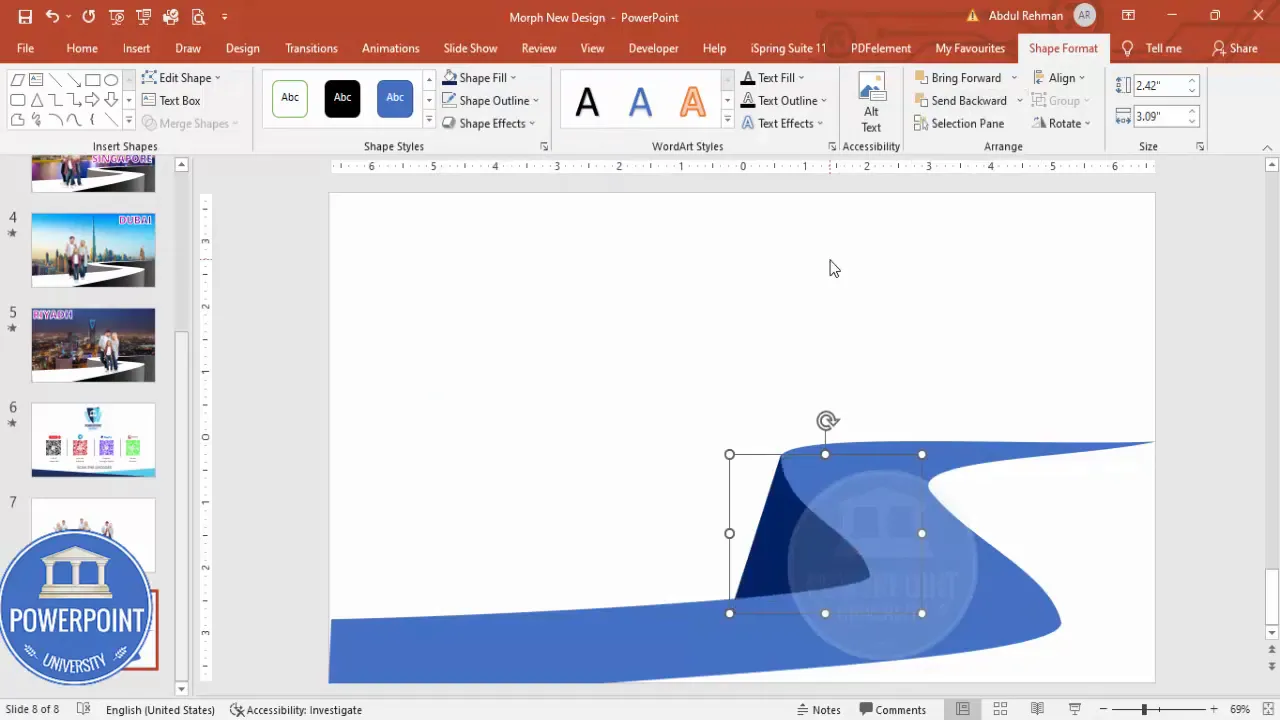
Step 2 — Layering and Coloring the Ramp
My ramp is actually multiple stacked shapes with varying shades. Layering gives a simple 3D suggestion of depth. Build 2–3 freeform shapes that cover the ramp area, send them behind the top-most shape, and assign slightly different colors for depth.
- Insert two or three more freeform shapes to create layers over the ramp.
- For each shape: Shape outline > No Outline.
- Right-click each shape and choose Send to Back for the correct stacking order.
- Temporarily choose different fills to see each layer; later you can change them to a consistent scheme (white, gray gradients, etc.).
Group these shapes (Ctrl+A to select, then Ctrl+G) so you can scale the entire ramp without losing the relative shape alignment. If you need the ramp higher or lower on the slide, move the group as one object.
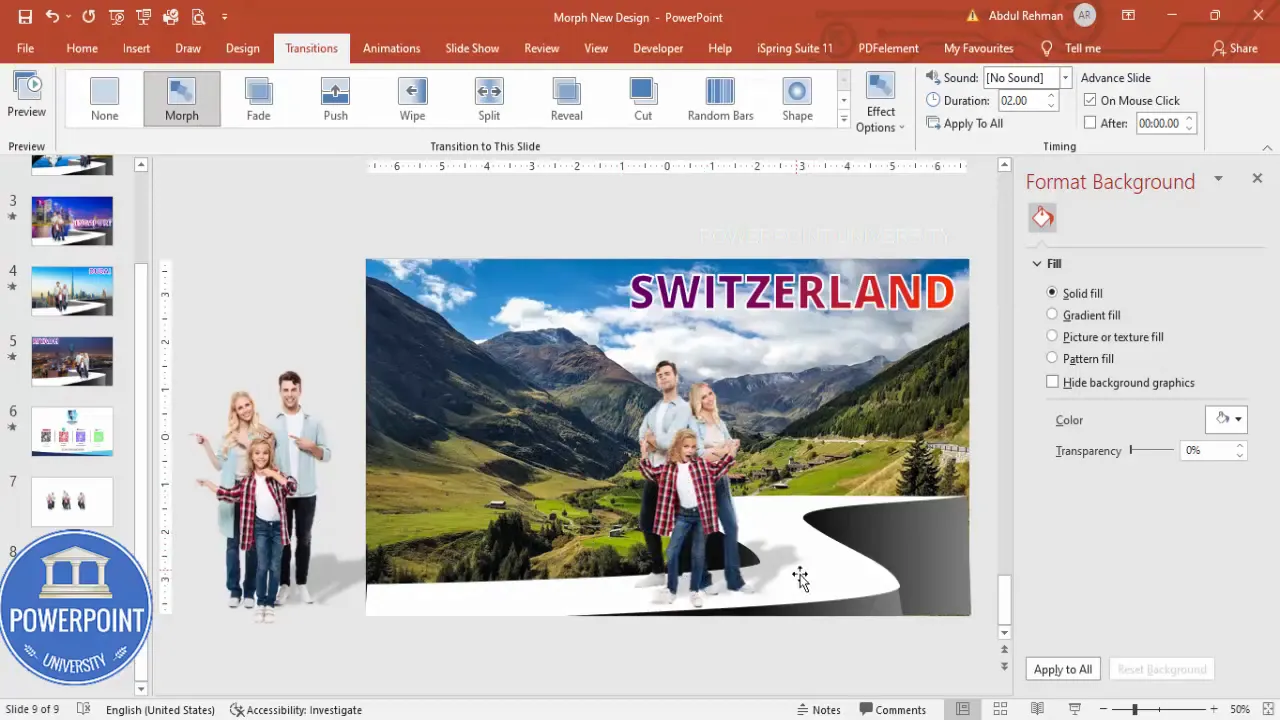
Step 3 — Add Background Images
A clean background image gives context to each slide. I recommend using a full-slide rectangle with a picture fill rather than inserting the photo directly on top — this makes swapping backgrounds easier.
- Insert > Shapes > Rectangle. Draw it to cover the entire slide.
- Shape outline > No Outline.
- Right-click > Format Shape > Fill > Picture or texture fill > Insert picture from > Online Pictures (or your local file).
- Select a background photo (for example: city or landscape image) and Insert > Send to Back.
Choose high-quality images that don’t compete with the ramp or the photo card. If the background is busy, reduce contrast or apply a subtle blur in an image editor or lower the brightness in PowerPoint using the format picture tools.

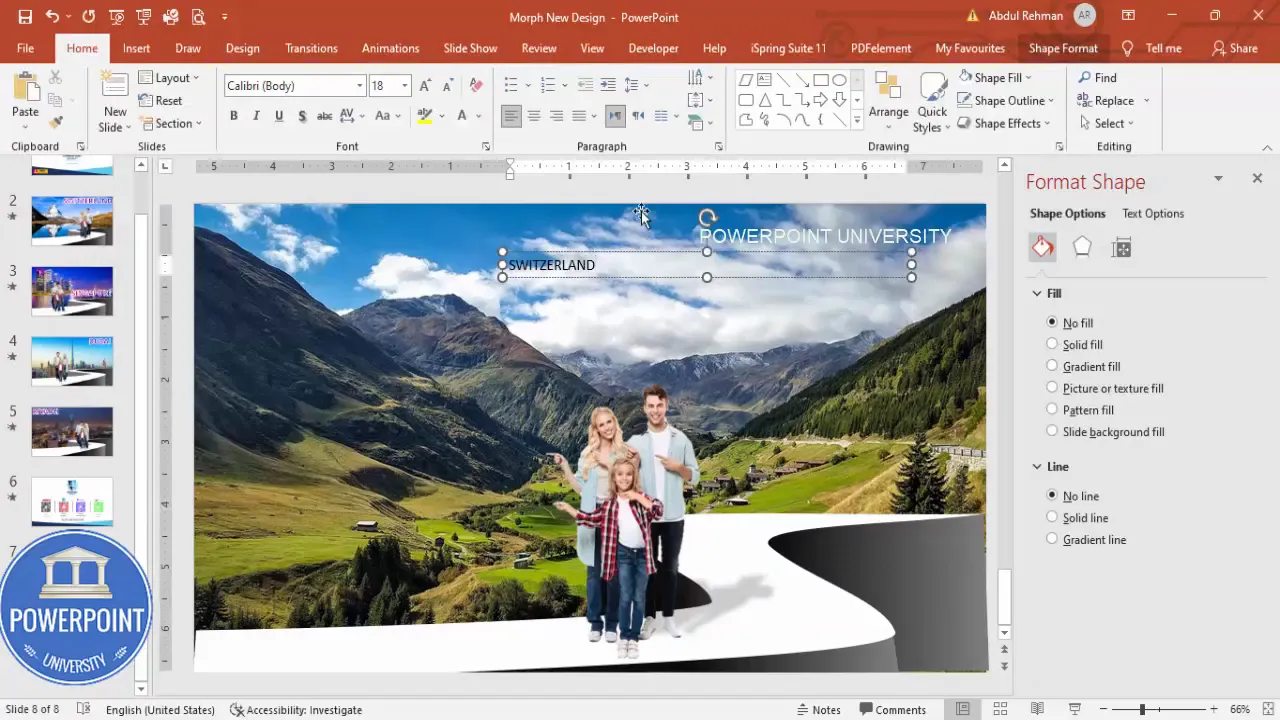
Step 4 — Place and Style the Photo and Title
Now place the photo card (family photo) on the ramp and create a title text box above it. The title is styled with a gradient fill and an outline so it reads against various backgrounds.
- Copy a photo from your image library or Insert > Pictures > Online Pictures. Resize it to fit the ramp area and place it centered on the ramp.
- Insert > Text Box. Type the location name (for example, “Switzerland”).
- Font: I typically use Open Sans Extra Bold for readability. Increase font size to match slide scale.
- Text formatting: Go to Text Options > Text Fill & Outline > Gradient fill. Choose two coordinated colors for a clean look.
- Text Outline: Make it Solid, choose white (or contrasting color), and increase width slightly to make the title pop.
Placement matters. Right-align or left-align the title according to visual balance; on my slides I place the title above the ramp so the viewer’s eye follows the photo into the scene.
Step 5 — Duplicate Slides and Prepare for Morph
The Morph Transition Effect in PowerPoint works by interpolating differences in object properties between sequential slides. That means we set up Slide 1 and Slide 2 so objects look related but are in different positions or sizes. Then Morph animates between them.
- Right-click the current slide > Duplicate Slide.
- On the new slide, move/resize objects to create the “after” state. For example: move the current photo card partially out of the slide and bring a new photo card from outside the slide into place.
- Insert the new photo for the second slide (Ctrl+C from the library, Ctrl+V on the slide), resize and position it on the ramp.
Important detail: the image you want to animate in on the second slide must also exist on the first slide — but outside the slide area (off-screen) and sized appropriately smaller. PowerPoint matches objects by their IDs and names. If an object exists only on the second slide and not the first, Morph will treat it as a new object and it will fade or pop instead of sliding in the way you want.
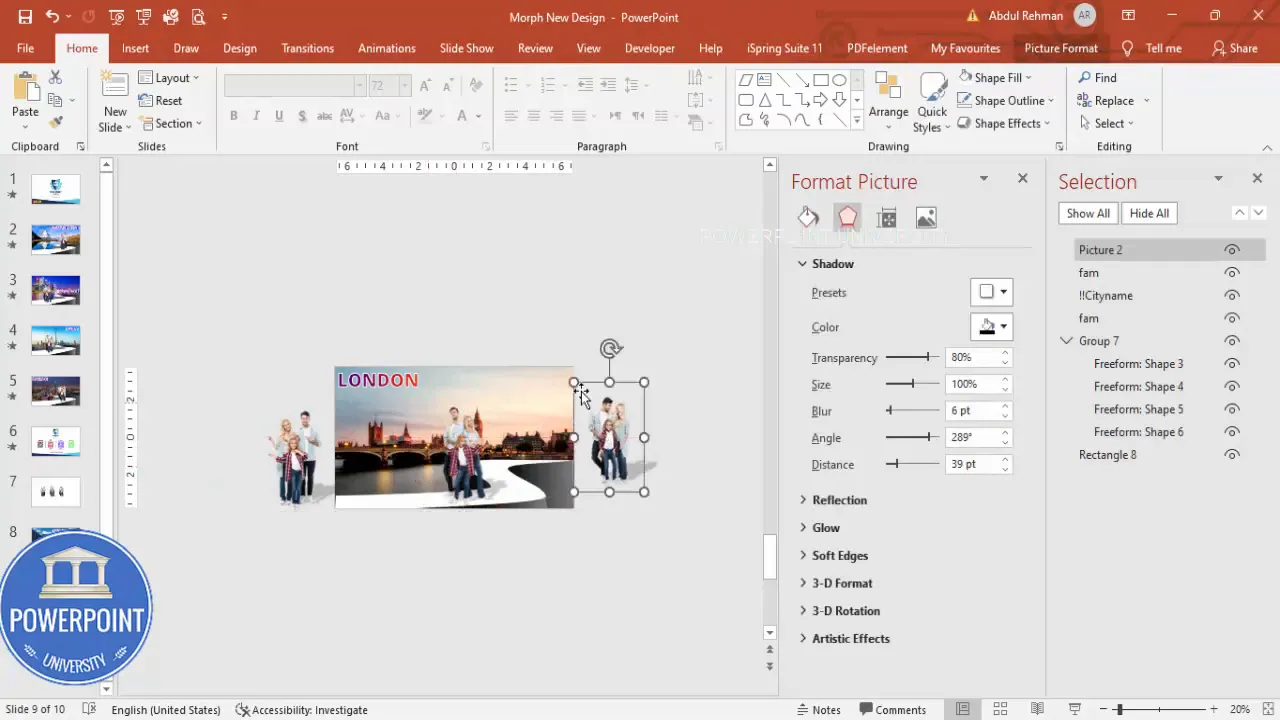
Step 6 — How to Make the Morph Transition Work Flawlessly
Getting smooth results from the Morph Transition Effect in PowerPoint requires attention to three things: object presence across slides, object names/IDs, and precise placement. Follow these rules:
- Only add the Morph transition starting from the second slide onward. The first slide should not have the transition or it will be ignored for the initial view.
- Every object you want to animate between states should exist on both slides. If an object is meant to slide into view on Slide 2, place a small/hidden copy of it on Slide 1 outside the slide boundary.
- Use the Selection Pane to name objects consistently. PowerPoint is more likely to match objects with identical names.
Naming in Selection Pane: I use a trick — prefixing the text box name with two exclamation marks (!!) so it appears at the top of the Selection Pane. This also guarantees consistent naming across slides. For example, name your title text “!!CityName” or “!!Title”. Then copy that text box into each slide. PowerPoint will then clearly match the text boxes and Morph will animate their position, color, or size cleanly.

Step 7 — Speed, Timing, and Polish
Once your slides are prepared and objects exist on both slides, add the Morph Transition:
- Select Slide 2 (or the slide you want the transition to start from).
- Go to Transitions > Morph.
- Adjust Duration — I recommend 1 second for a snappy effect; 2 seconds can be used for a slower cinematic feel.
- Preview (Slide Show > From Current Slide or use the Preview button).
If movement seems off, check this checklist:
- Is the incoming image present on the previous slide off-screen and properly sized?
- Are text boxes named identically in the Selection Pane?
- Are grouped objects consistent across slides (grouped objects should be copied as a group between slides)?
When everything is set, the Morph Transition Effect in PowerPoint will create the illusion that the photo is moving along the ramp into place while the background changes and the title text slides as well.
Advanced Tips & Variations
The Morph Transition Effect in PowerPoint is flexible. Below are practical extensions and alternate uses.
1. Use Masks for Photo Cards
Instead of a free-floating photo, mask images using cropped shapes so the photo conforms to the ramp — this creates a tight composition. Use Format > Crop > Crop to Shape to do this quickly.
2. Add Drop Shadows and Subtle Reflections
To anchor the photo, add a soft drop shadow (Format Picture > Effects). Keep shadows subtle to avoid competing with the Morph motion.
3. Combine Fade and Morph
For complex scenes, apply Fade to some objects and Morph to others. Just remember fade-only objects won’t participate in the Morph interpolation.
4. Use Off-Slide Positioning for Directional Motion
Place an incoming image far off the left or right side of the slide on Slide 1. On Slide 2 move it into place. Morph will create a smooth glide-in. The same applies to exit animations — move objects off-slide on the following slide.
5. Animate Multiple Objects Simultaneously
Multiple images can be animated into different locations by making sure every object exists on both slides (off-slide on the “before” slide) and by naming them individually. Keep names short and descriptive.
6. Export as Video
Export your presentation as a video (File > Export > Create a Video) to preserve the Morph Transition Effect in PowerPoint for sharing on social platforms or for embedding in websites.
Common Problems and Troubleshooting
Here are typical issues you may face with the Morph Transition Effect in PowerPoint and how to fix them.
Create Slides in Seconds with ExpertSlides AI |
|
Generate AI Presentations today: |
| TRY NOW! |
- Object flickers or pops instead of moving: Ensure the same object exists on the previous slide. If only present on slide two, it will not morph.
- Text boxes don’t align during morph: Use Selection Pane to give identical names (or ensure the objects are similar enough for PowerPoint to match). I recommend adding the double-exclamation prefix (!!) for titles to appear at the top of the pane and ensure consistency.
- Images change size unexpectedly: Check the object’s scale on both slides — set the starting size off-slide and the final size in position so the morph has clear endpoints.
- Performance lag or stutter: Reduce image resolution, avoid an excessive number of animations, or increase system resources. Consider trimming very large images.
- Morph doesn’t animate the background change: Background images inserted as shape fills behave differently. Use full-slide rectangles with picture fills consistently, and ensure the rectangle exists (with the new picture) on both slides if you want Morph to crossfade or animate it.
Exporting and Sharing
After you’re happy with the sequence and timing, export your presentation as a video for broad sharing. This preserves the Morph Transition Effect in PowerPoint animation across devices.
- File > Export > Create a Video.
- Choose quality: Full HD is usually sufficient (1080p).
- Select “Use Recorded Timings and Narrations” if you recorded them; otherwise choose default timings.
- Click Create Video, name the file, and save.
Note: Embedded fonts and large images can increase the exported video file size. If you plan to upload to social networks, you might need to compress the video afterward.
Accessibility, File Size, and Image Rights
A few practical considerations before you share a Morph-based slideshow:
- Image rights: Use photos you own or those with proper licensing. If you use Creative Commons images, follow the attribution guidelines.
- File size: Large photos increase the PPTX file size. Compress pictures in PowerPoint (File > Options > Advanced > Image Size and Quality) or compress individual images via Format Picture > Compress Pictures.
- Accessibility: Add alt text to images (right-click > Edit Alt Text) so screen readers can describe the content. Provide captions in your video export if narration is used.
Resources and Where to Get the Template
If you want to skip building the structure from scratch, I’ve provided a downloadable template that contains the ramp setup and an example family-photo sequence. Use it as a starting point: copy slides, swap your images, update titles, and tweak morph timings to fit your pacing.
You can also find professionally designed templates and extra design tips by exploring template libraries. Using a template saves time and ensures consistent design across your slides.
FAQ
Below are frequently asked questions about the Morph Transition Effect in PowerPoint and this ramp-style photo sequence. The answers are designed to fix common pitfalls and help you apply this technique to many scenarios.
Q: What version of PowerPoint do I need for the Morph Transition Effect in PowerPoint?
A: Morph was introduced in Office 2016 and became widely available in newer Office 365 / Microsoft 365 updates. If you don’t see Morph in the Transitions tab, update Office or use Office 365. The Morph Transition Effect in PowerPoint is present in the desktop versions of PowerPoint (Windows and Mac in recent releases) and in PowerPoint for the web for many features, but desktop offers the most stable behavior.
Q: Why does my image appear on the second slide but not move smoothly?
A: Most likely the object doesn’t exist on the previous slide. Add a copy of the image into the previous slide, place it off the slide area (outside the visible bounds), and ensure it’s sized appropriately. The Morph Transition Effect in PowerPoint will then interpolate the motion between the off-screen and on-screen positions.
Q: How do I ensure text moves smoothly with Morph?
A: Use the Selection Pane to give text boxes consistent names across slides. I recommend using a prefix like “!!” to make the text layer stick to the top of the pane and ensure you copy-paste the same named object to maintain the ID. The Morph Transition Effect in PowerPoint relies on matching objects; identical names help PowerPoint match them correctly.
Q: Can I animate multiple photos at the same time?
A: Yes. Make sure each photo exists on both slides (off-screen on Slide 1). Name them clearly in the Selection Pane (e.g., “Photo_1”, “Photo_2”). Then position them on Slide 2 and apply Morph. All named objects will animate simultaneously according to their start and end positions.
Q: Should I group objects before using Morph?
A: If you want grouped objects to move together, group them and copy the group between slides. Grouping keeps the relative positions inside the group intact. But be aware: if you need to animate individual pieces inside a group separately, don’t group them.
Q: How do I control morph speed?
A: Select the slide with the Morph transition and change the Duration setting in the Transitions ribbon. I usually use 1 second for a tight effect, 1.5–2 for slower cinematic transitions.
Q: Can I combine Morph with object animations like Grow/Shrink?
A: Morph is a slide transition, and it often conflicts or overlaps with built-in animations. You can use entrance/exit animations on objects, but their behavior might not sync with Morph perfectly. For predictable results, rely primarily on Morph for position/scale/rotation changes and use simple entrance fades sparingly.
Q: Does Morph work in exported video?
A: Yes. When you export to video (File > Export > Create a Video), Morph animations are exported and preserved.
Q: How do I keep file sizes reasonable?
A: Compress images (Format Picture > Compress pictures) and remove unused data. Convert very large PNGs/JPEGs to optimized formats and reduce dimensions if full-screen resolution isn’t necessary. This reduces the PPTX and the exported video size while keeping the Morph Transition Effect in PowerPoint intact.
Q: Are there licensing concerns for images used with Morph?
A: Yes. Always use images you own or that have the correct usage rights. If you share or publish the slideshow publicly, attribution or licensing requirements may apply.
Final Thoughts
The Morph Transition Effect in PowerPoint is one of those features that makes simple slides feel professional and cinematic. The secret to success is planning: copy objects off-slide, name them consistently, and use duplicates of slides to create clear “before” and “after” states. With those steps in place, the Morph Transition Effect in PowerPoint will give you smooth movement, controlled pacing, and a memorable way to present photos or content.
To recap the essential workflow in three bullets:
- Create your ramp and background using freeform shapes and picture fills.
- Place the outgoing/entering images on consecutive slides, ensuring the incoming image already exists on the previous slide (off-screen).
- Name objects consistently in the Selection Pane (I use “!!” for text) and apply Morph starting from the second slide.
If you want to speed up the process, use the provided template as a starting point, swap in your photos and location titles, and adjust timing to taste. With practice you’ll be able to create sequences where photos glide in and out of frame that look like they took hours to craft.

Happy designing — and remember that small details like consistent naming and off-slide copies are what make the Morph Transition Effect in PowerPoint look polished. If you’d like, download the template, try a practice run with your vacation photos, and tweak durations until you’ve found the rhythm that feels right for your story.
Quick checklist for the Morph Transition Effect in PowerPoint:
- Duplicate slides for each state (before/after).
- Place copies of incoming objects off-slide on the previous slide.
- Name objects consistently in the Selection Pane.
- Apply Morph on Slide 2 and tune Duration.
- Compress images before exporting as video.
Extra Tips — A Short Troubleshooting Table (as a list)
- Symptom: Image pops into place instead of sliding. — Fix: Add the image copy on the preceding slide off-screen.
- Symptom: Title jumps or doesn’t move. — Fix: Name the title the same across slides (use Selection Pane) and copy/paste instead of recreating.
- Symptom: Slow playback on export. — Fix: Reduce image sizes and export at 1080p instead of 4K.
- Symptom: Shadows or effects look odd. — Fix: Keep effects subtle and consistent across both slides.
Closing
Use the Morph Transition Effect in PowerPoint to move from static to dynamic storytelling. With carefully layered shapes, off-slide copies, and consistent naming, you can create a clean family-photo sequence that feels modern and professional. The approach scales — you can use the exact same technique for product shots, case studies, timelines, and more.
Want the starting template? The sample file used in this tutorial includes the ramp and three example slides (Switzerland, London, Riyadh) so you can swap in your own photos and text immediately. Try it, and you’ll see how quickly a little planning turns Morph into a powerful storytelling tool.
Check out the full video: This is How I Show Family Photos using Morph Transition in PowerPoint. Tutorial No.: 982


