 Creating engaging presentations that captivate your audience is an art—and PowerPoint offers many tools to help you do just that. One of the most visually appealing and interactive effects you can add to your slides is the “Flip on Click” effect. This animation allows you to click on a picture to reveal its explanation, and then click the explanation to flip back to the picture. The seamless toggling between visual and textual content keeps your audience engaged and focused, making your presentations much more dynamic.
In this comprehensive guide, I’ll walk you through the step-by-step process of creating this beautiful flip on click effect in PowerPoint, starting from scratch. Along the way, I’ll share tips on design harmony, animation triggers, grouping objects, and creative examples to inspire your own presentations. Whether you are a beginner or an experienced presenter looking to spice up your slides, this tutorial will add a powerful interactive element to your toolkit.
Table of Contents
- Why Use the Flip on Click Effect?
- Step 1: Creating the Prototype
- Step 2: Naming Elements for Easy Reference
- Step 3: Applying Animations and Triggers
- Step 4: Testing and Positioning
- Creative Examples and Inspiration
- Unlock More PowerPoint Creativity with Our Template Bundle
- Further Learning and Resources
- Frequently Asked Questions (FAQ)
- Conclusion
Why Use the Flip on Click Effect?
Before diving into the tutorial, let’s talk about why the flip on click effect is so effective:
- Interactive Engagement: Instead of passively viewing a slide, your audience gets involved by clicking to reveal more information.
- Space Efficiency: You can show both images and explanations in the same space without cluttering your slide.
- Focus Control: By toggling between picture and explanation, you control what your audience focuses on at any moment.
- Professional Appeal: This polished animation adds sophistication to your presentation, impressing bosses, clients, and colleagues.
Now, let’s get started on building this effect step-by-step.
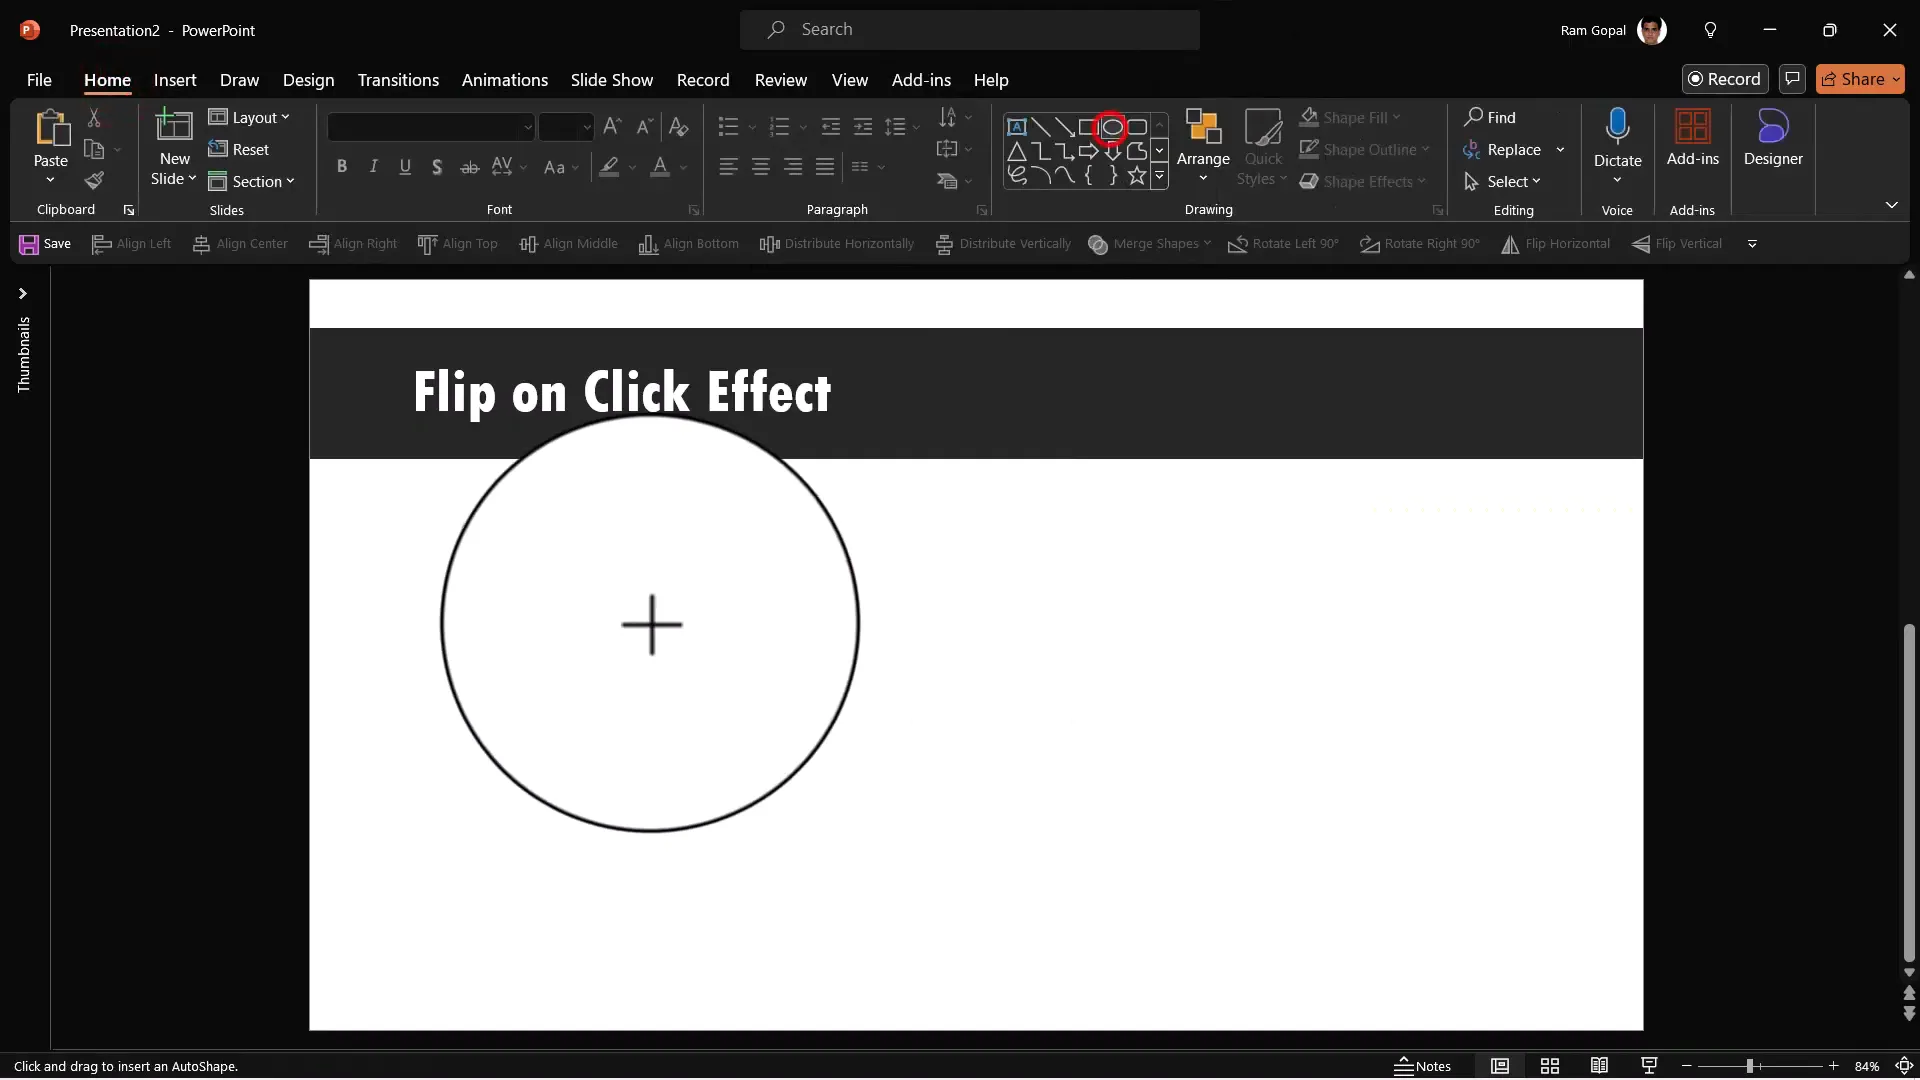
Step 1: Creating the Prototype
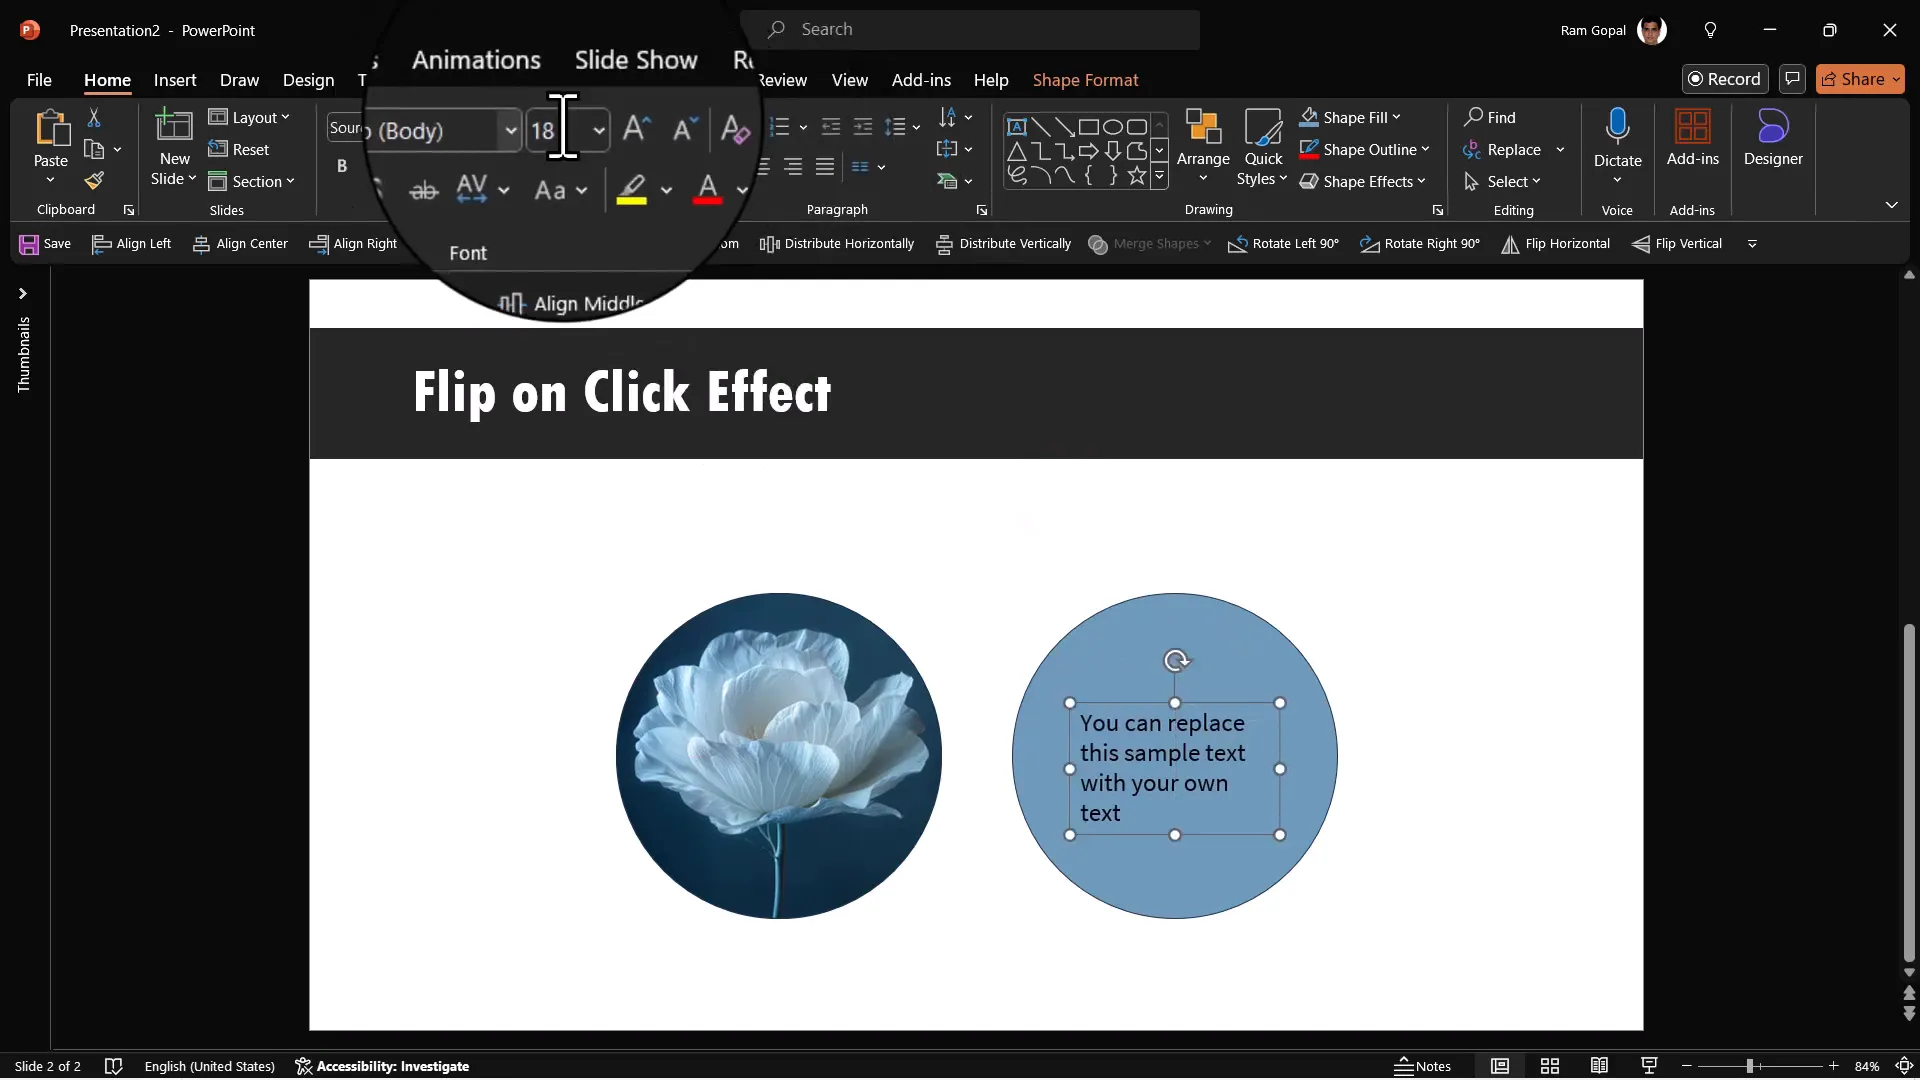
The first step is to create the basic shapes that will serve as placeholders for your picture and explanation. I recommend using the Oval shape as it has a soft, appealing look that works well for images and text alike.
- Go to the Autoshapes gallery in PowerPoint.
- Select the Oval tool and draw an oval shape on your slide. This will be your picture placeholder as well as your text placeholder.
- Make a copy of this oval by pressing Ctrl + D (Cmd + D on Mac) and move the copy to the side for now.
Next, let’s fill the first oval with a picture:
- Select the first oval.
- Go to Shape Fill > Picture.
- Choose to insert a picture either from stock images or your own files. For this example, I select an image from my files and click Insert.
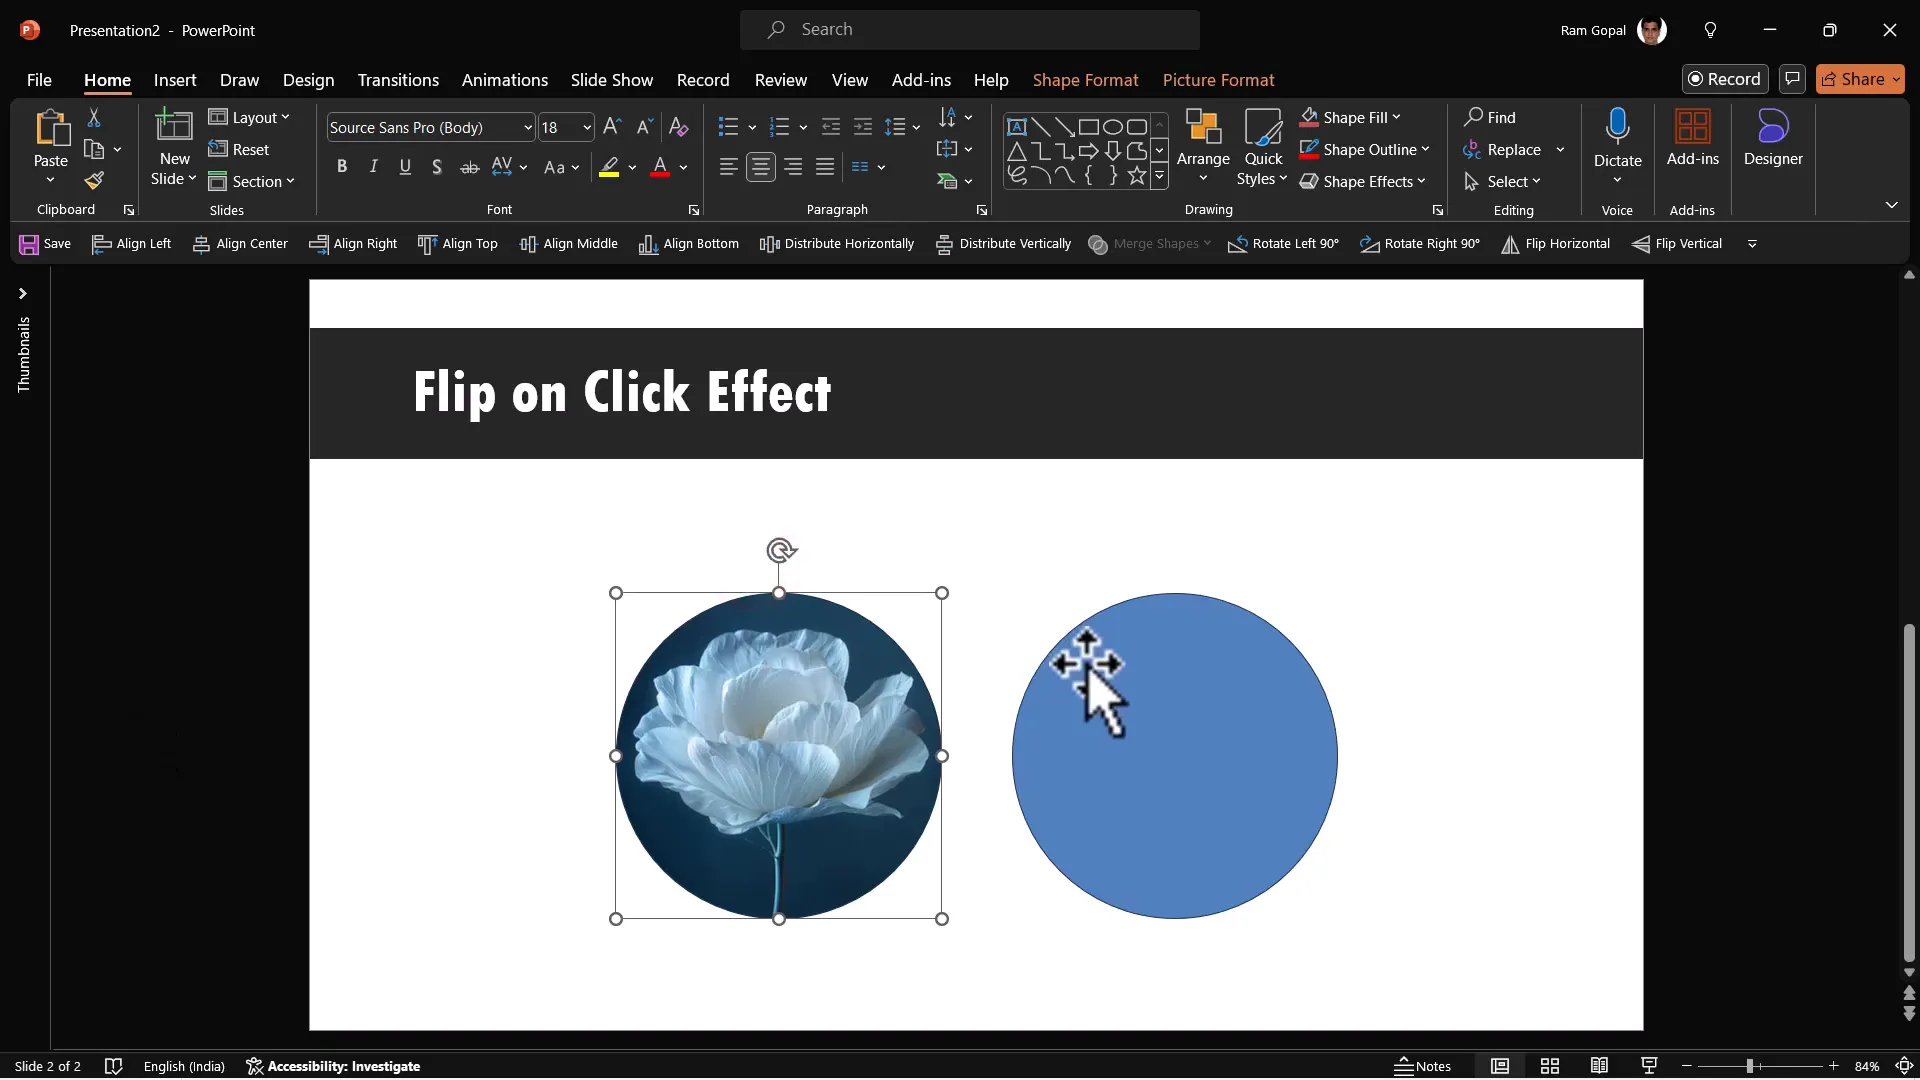
Once the picture is in place, it’s important to create visual harmony between the image and the explanation box. To do this, you can use the Eyedropper tool:
- Select the second oval (the copy you made earlier).
- Go to Shape Fill > Eyedropper and pick a color from inside the picture. This ensures your explanation box’s background color complements the image.
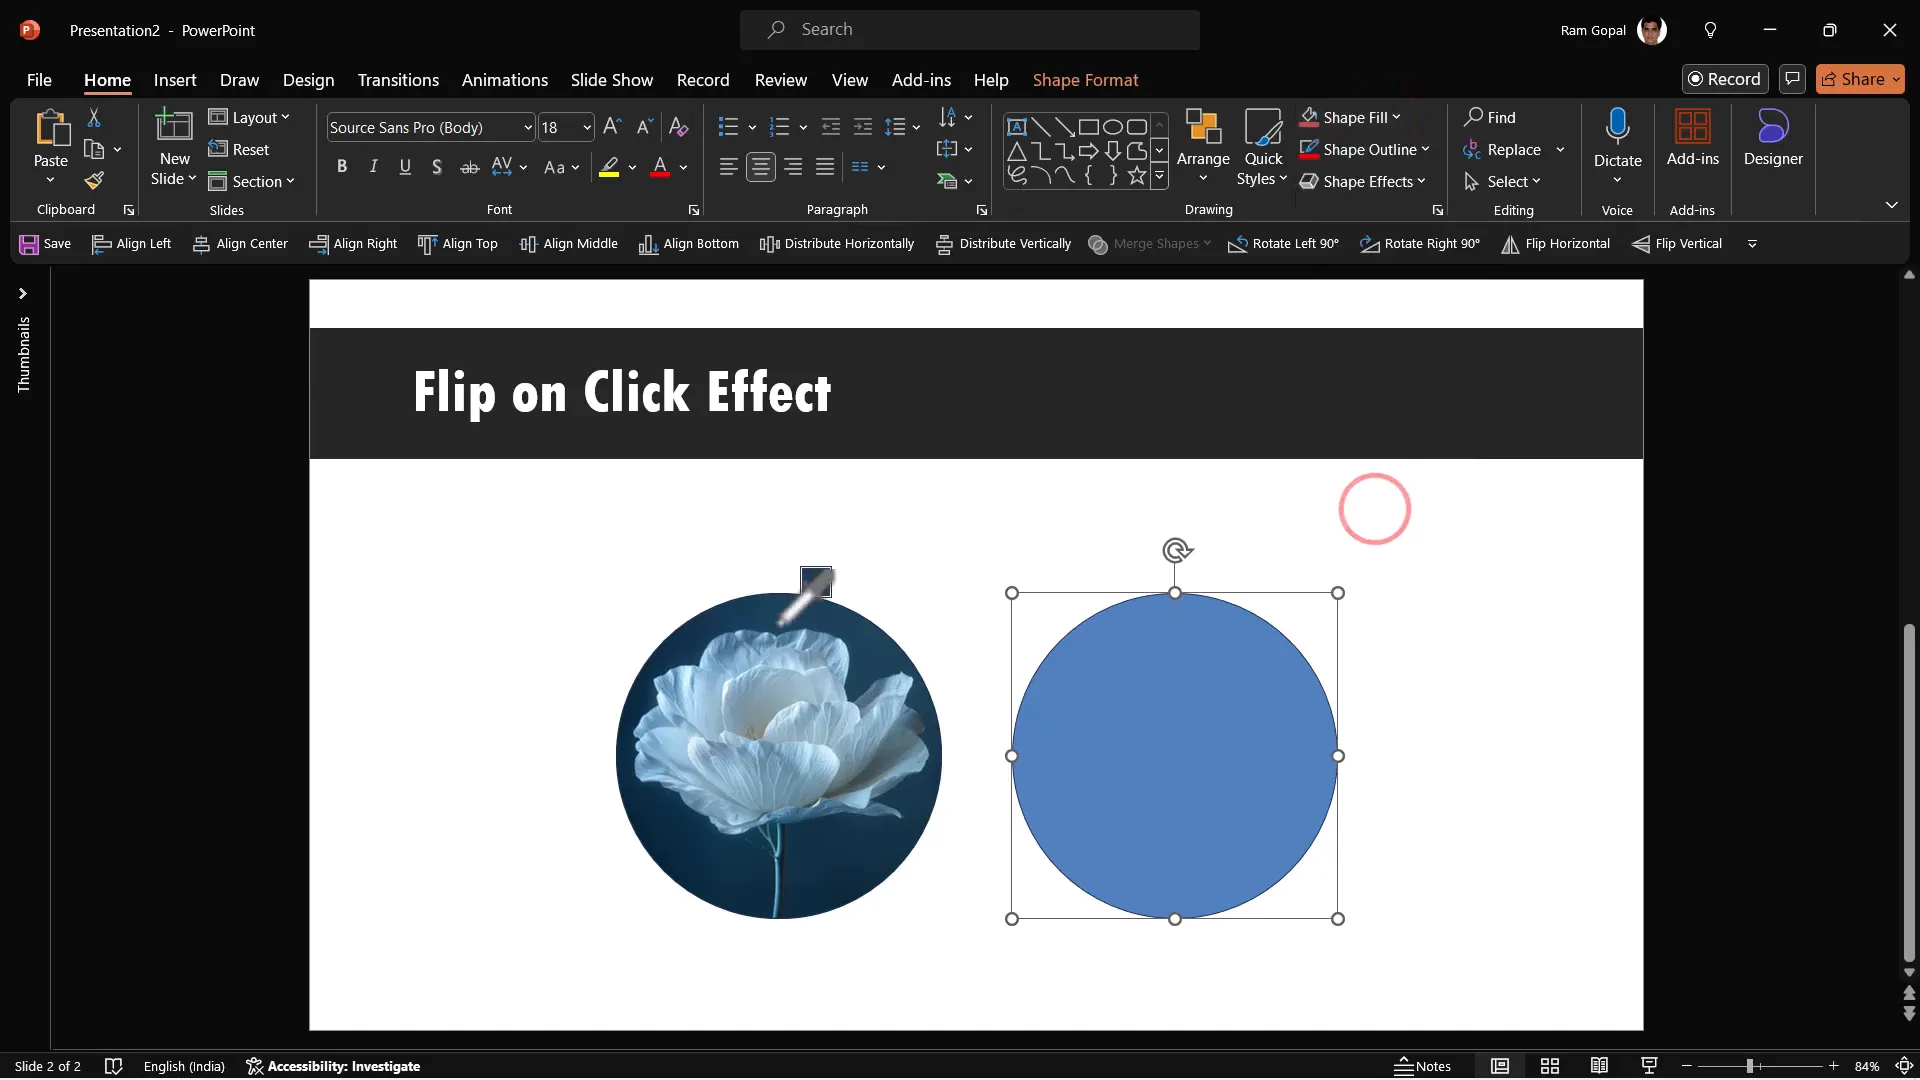
Now, add your explanation text inside the colored oval. While you can type directly into a shape, I prefer using a separate Text Box for better control over placement and formatting:
- Insert a text box inside the colored oval.
- Type your explanation text.
- Increase the font size for readability and choose an attractive font. For this tutorial, I am using Amasis MT Pro.
- Center align and adjust the text box size and position so it looks balanced within the oval.
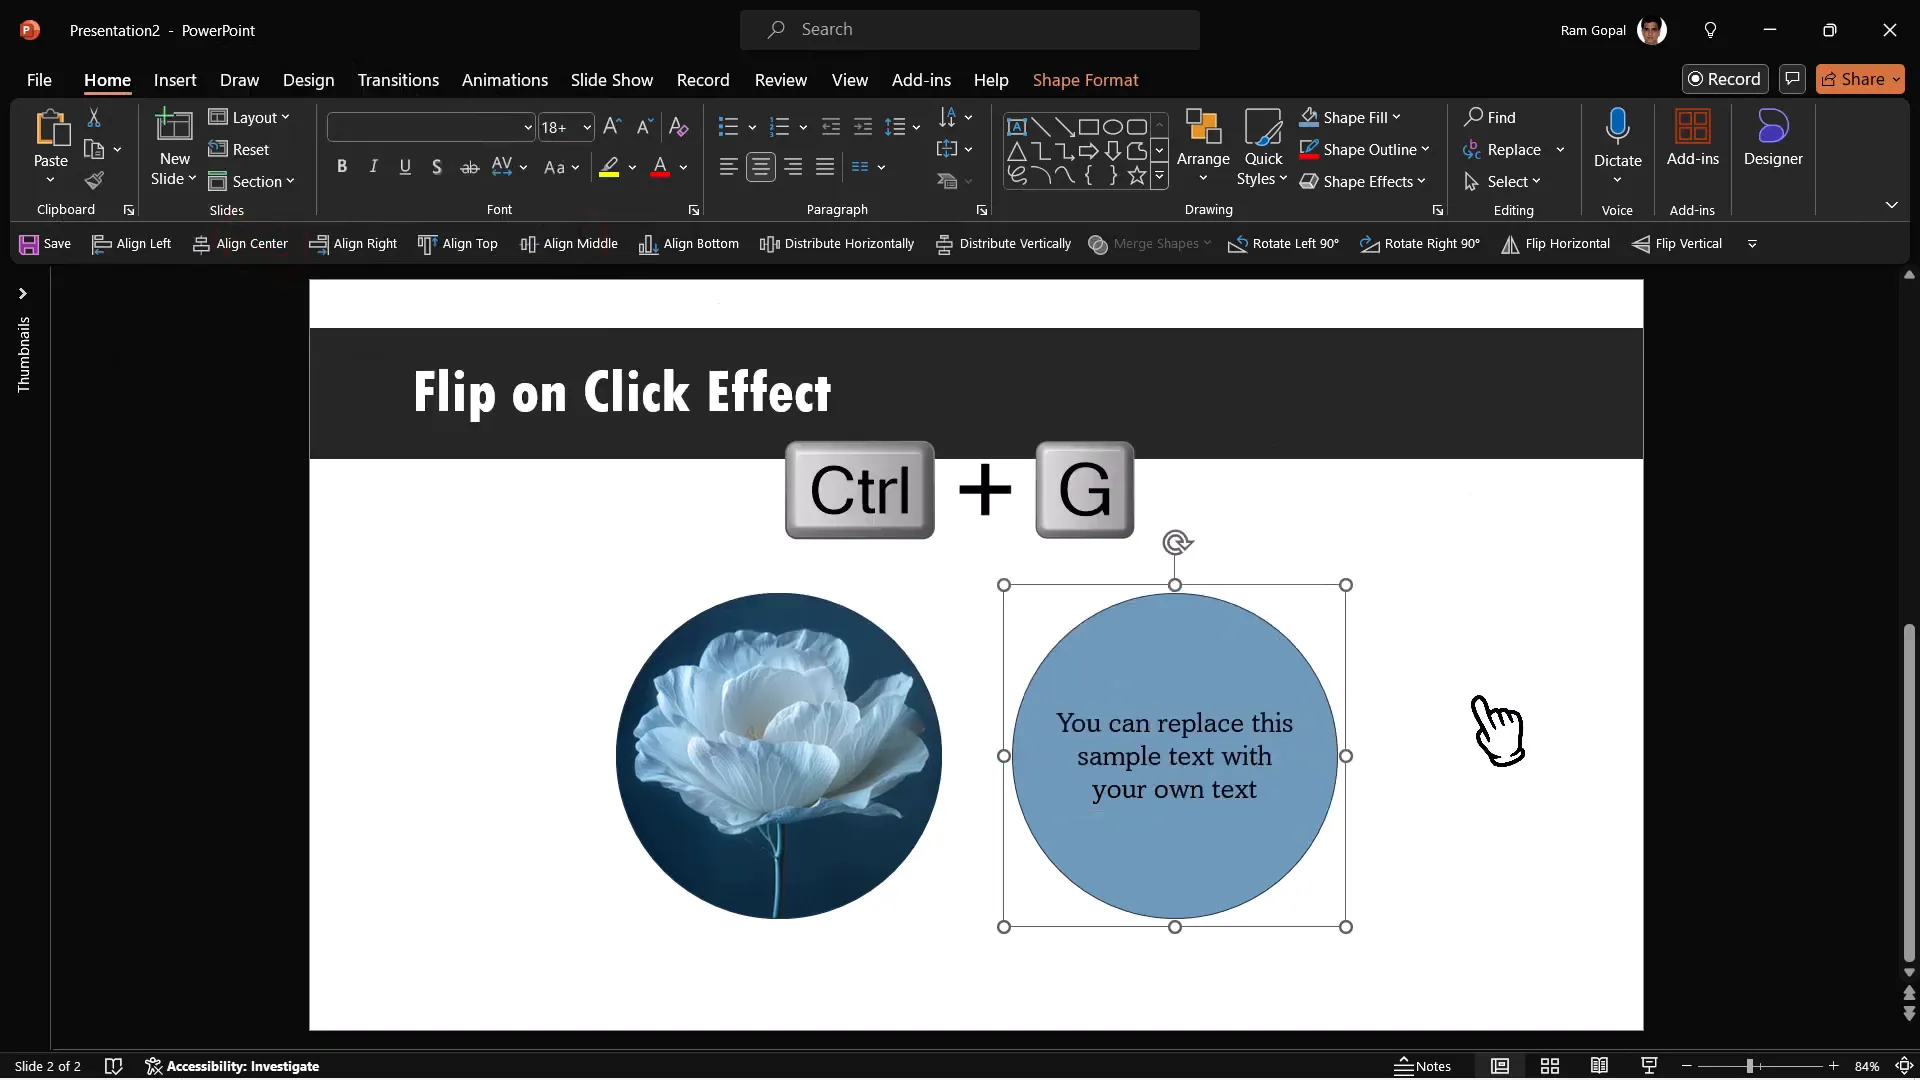
Once you have the text box positioned perfectly over the colored oval, group these two elements together:
- Select both the colored oval and the text box.
- Use Align Middle and Align Center to ensure perfect alignment.
- Press Ctrl + G to group them into a single object.
Grouping makes it easier to animate and move these elements as one.
Step 2: Naming Elements for Easy Reference
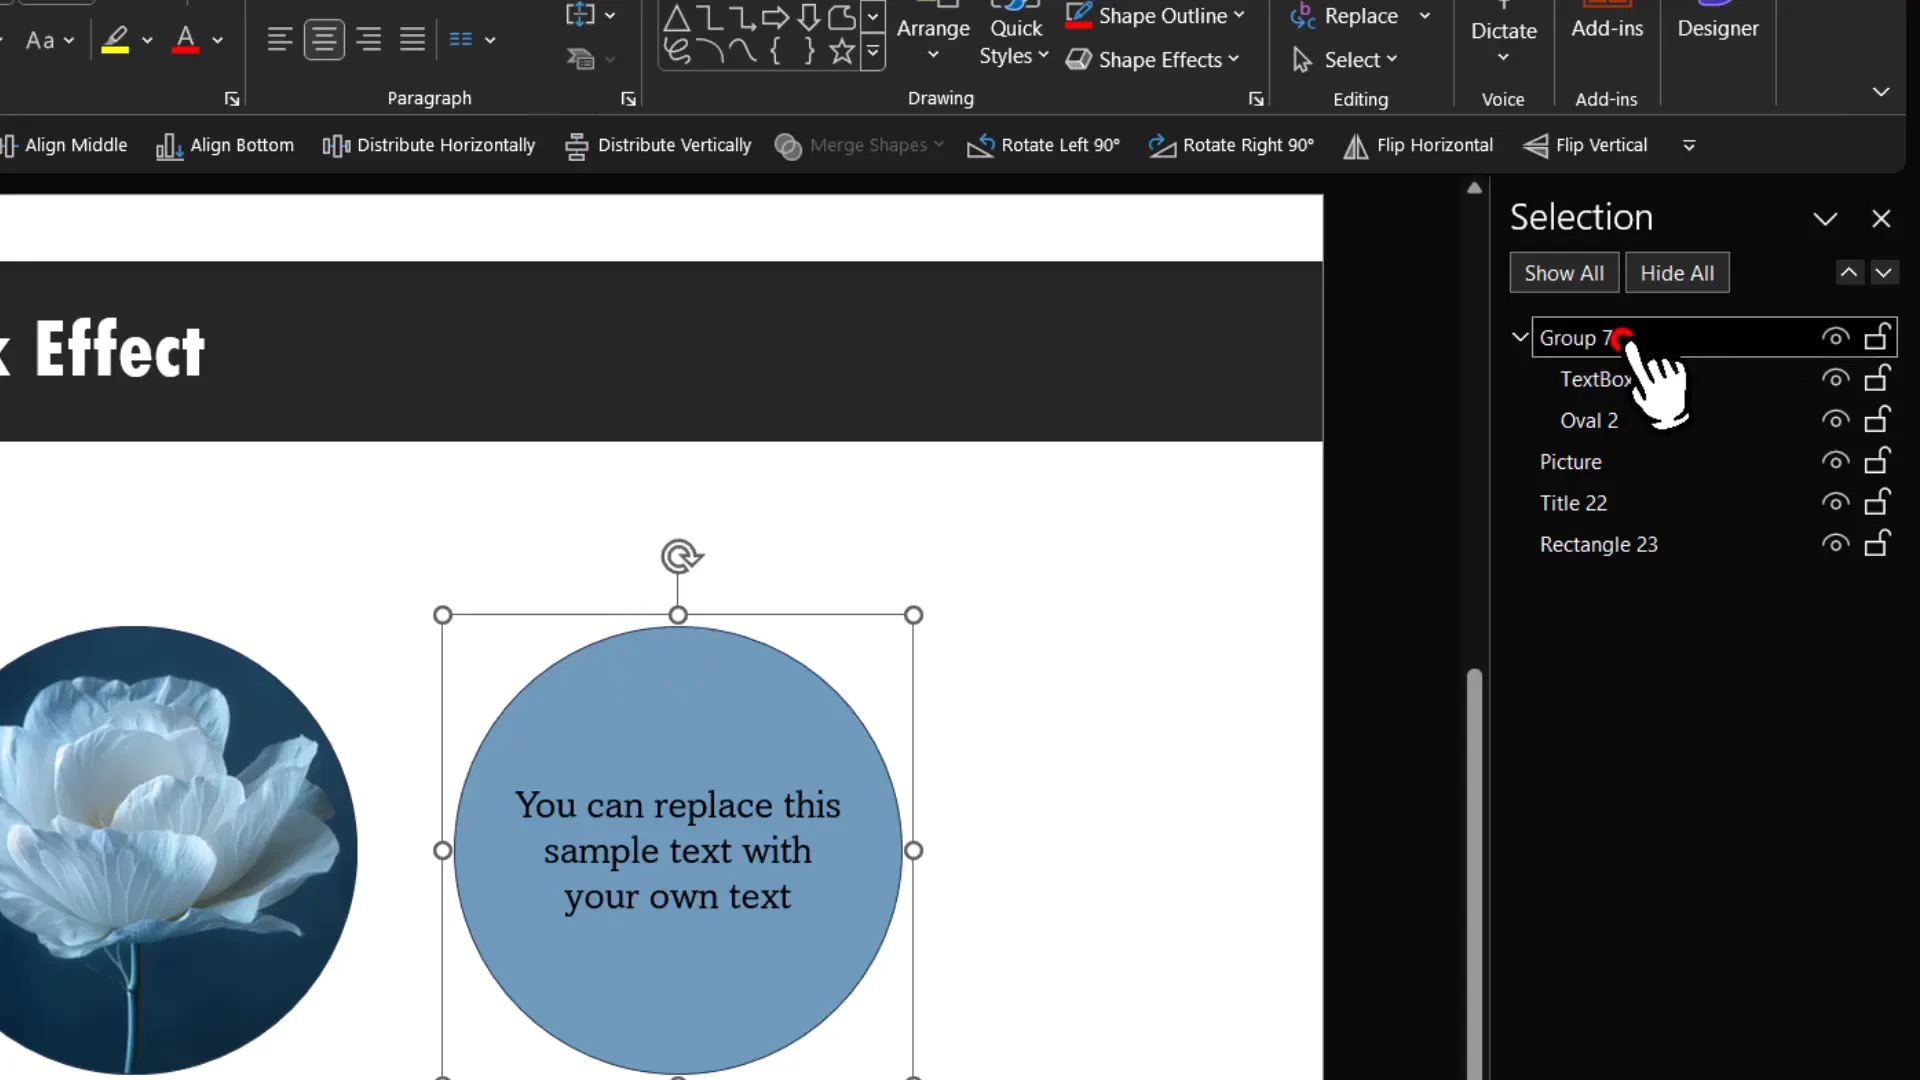
Before applying animations, it’s crucial to give clear, descriptive names to your objects. This will help you manage animations easily, especially when working with multiple triggers.
- Open the Selection Pane by going to Home > Select > Selection Pane.
- Rename the picture oval from its default name (e.g., Oval 1) to Picture.
- Rename the grouped explanation object from its default name (e.g., Group 7) to Explanation.
- Close the Selection Pane once done.
Step 3: Applying Animations and Triggers
Now comes the exciting part—adding animations that create the flip effect. The idea is simple:
- When you click the picture, it collapses (disappears), and the explanation expands (appears).
- When you click the explanation, it collapses, and the picture expands back.
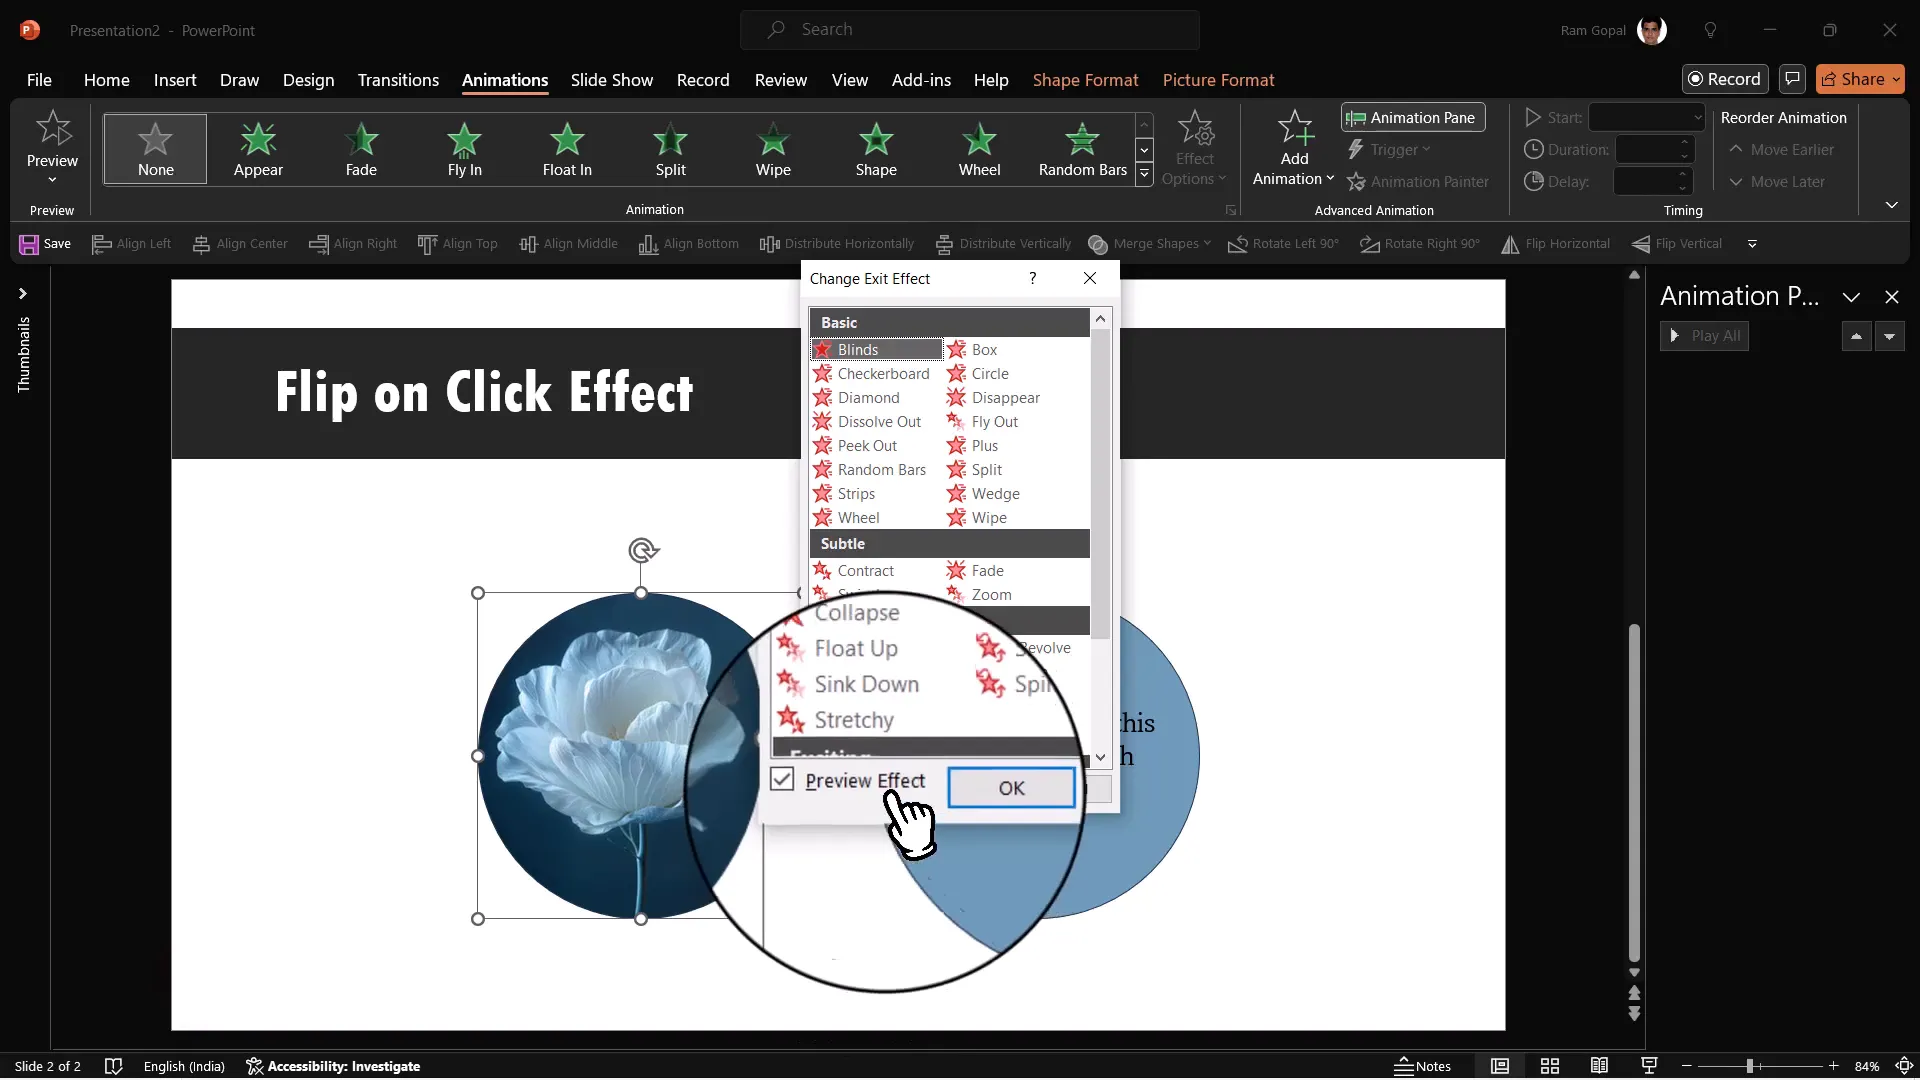
Animating the Picture to Disappear
- Select the picture oval.
- Go to the Animations tab and open the Animation Pane for better control.
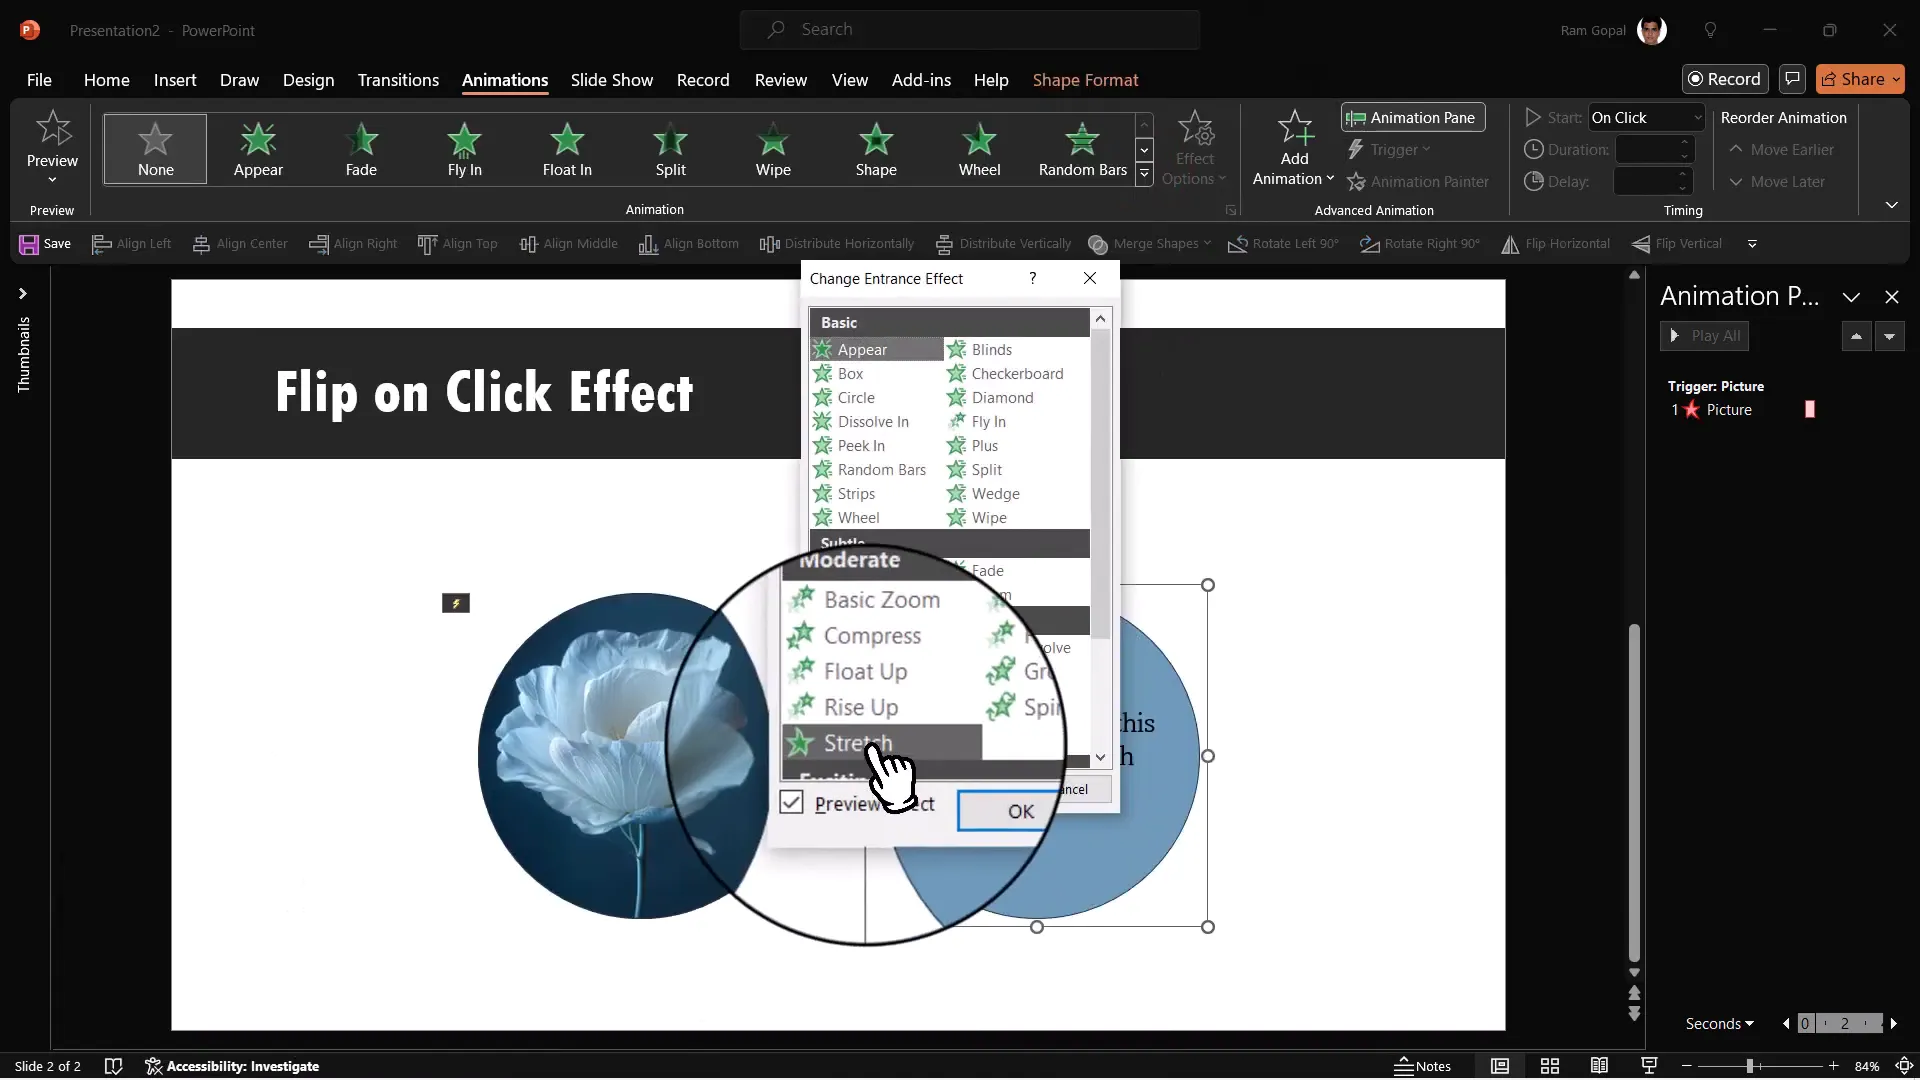
- Choose an Exit Animation. Click on More Exit Effects and select Collapse under the Moderate category.
- Click OK to apply the animation.
- By default, the animation starts on click, but we want it to be triggered specifically by clicking the picture itself.
- In the Animation Pane, click on the arrow next to the animation and select Timing.
- Under Triggers, select Start effect on click of and choose Picture.
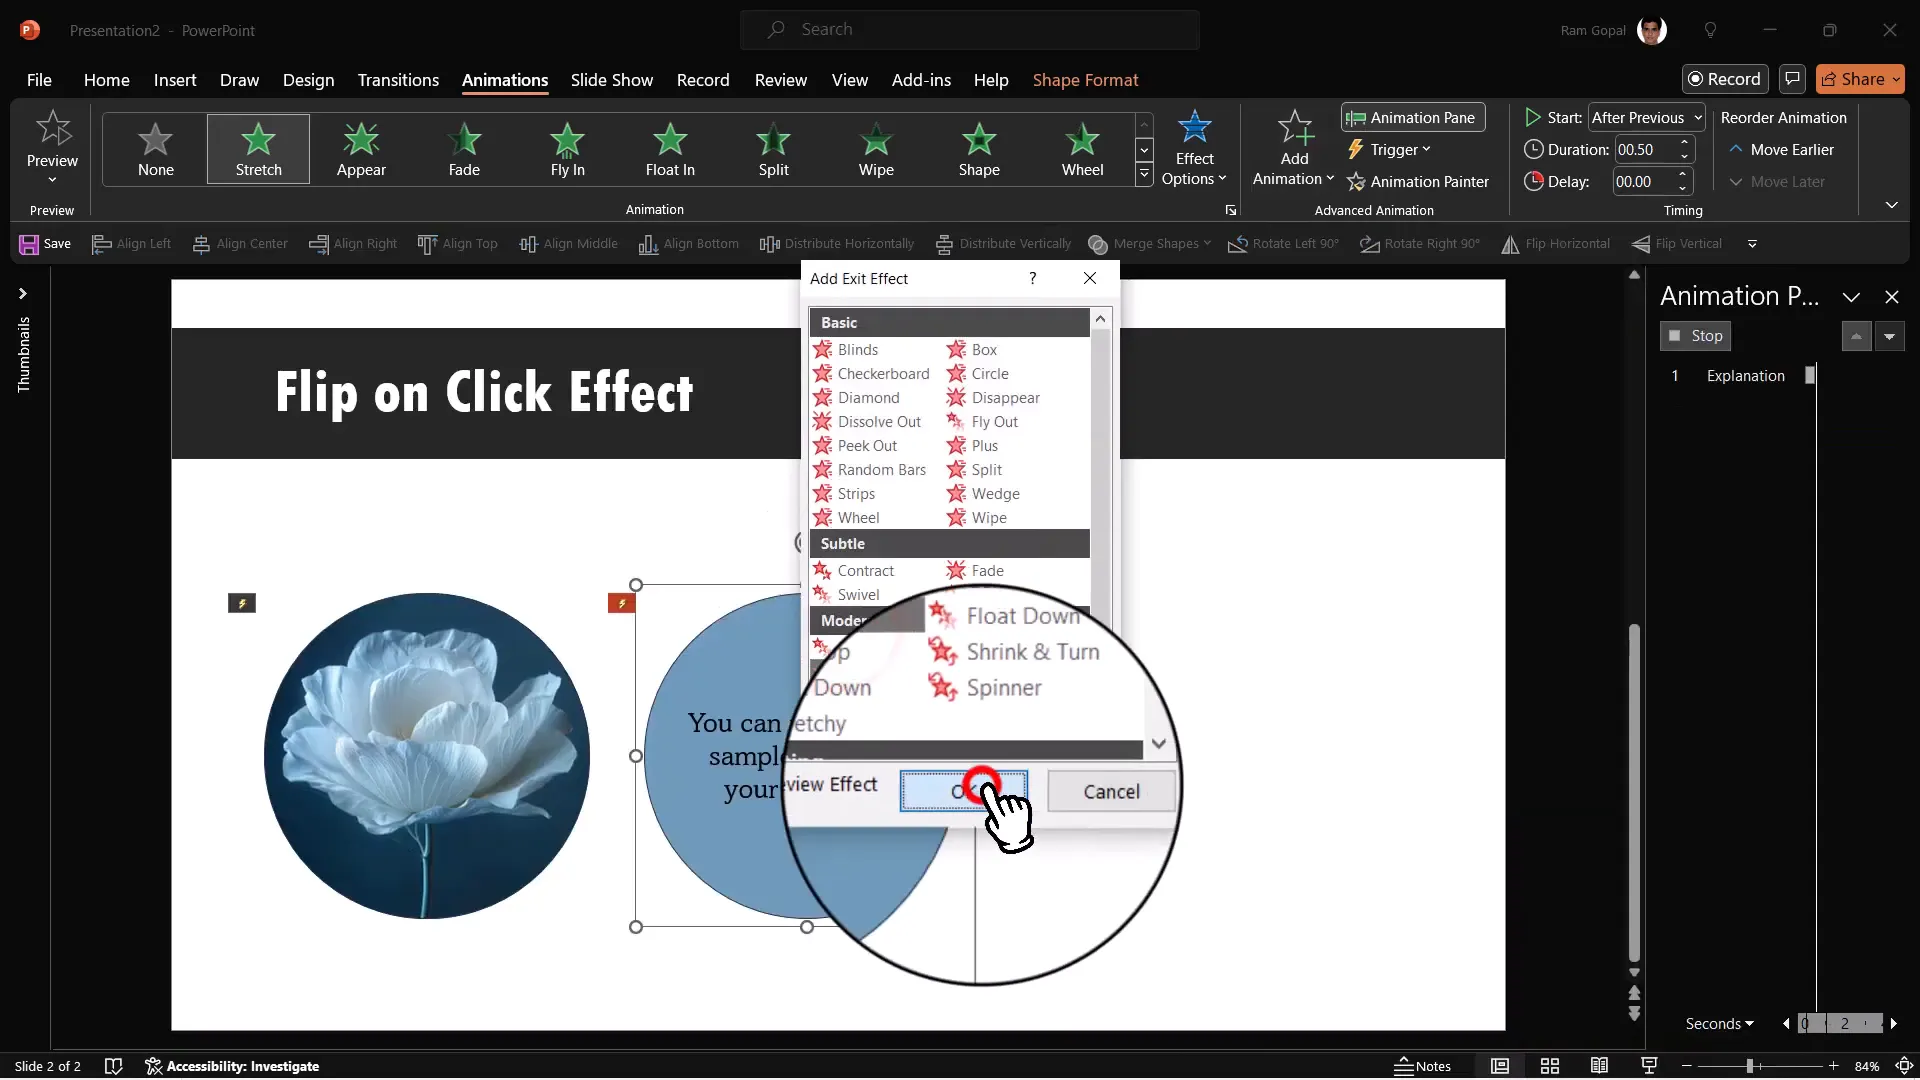
Animating the Explanation to Appear
- Select the explanation group.
- Go to Animations > More Entrance Effects.
- Select the Stretch entrance effect under Moderate and click OK.
- In the Animation Pane, drag this animation just below the picture’s collapse animation.
- Change the start setting to After Previous so it plays immediately after the picture collapses.
- Ensure this animation is also triggered by clicking the picture.
Now, when you click on the picture, it collapses and the explanation stretches into view smoothly. This is half of the flip effect.
Animating the Explanation to Disappear and Picture to Reappear
To complete the flip effect, you want to be able to click the explanation and flip back to the picture. This requires adding two more animations:
- Select the explanation group again.
- Click Add Animation (important to add a second animation, not replace the first).
- Choose the Collapse exit animation again.
- Set this animation’s trigger to On Click of Explanation.
- Select the picture oval.
- Add an entrance animation: Stretch.
- Set this animation to start After Previous so it plays right after the explanation collapses.
- Make sure this animation is triggered by clicking on the explanation.
With this setup, clicking the explanation collapses it and stretches the picture back into view, completing the flip on click effect.
Step 4: Testing and Positioning
Place the explanation group directly on top of the picture oval. You might want to send it to back or forward as needed to ensure the layers interact smoothly and look clean.
Now, enter Slide Show mode and test the effect:
- Click the picture oval: it should collapse, and the explanation should appear.
- Click the explanation: it should collapse, and the picture should reappear.
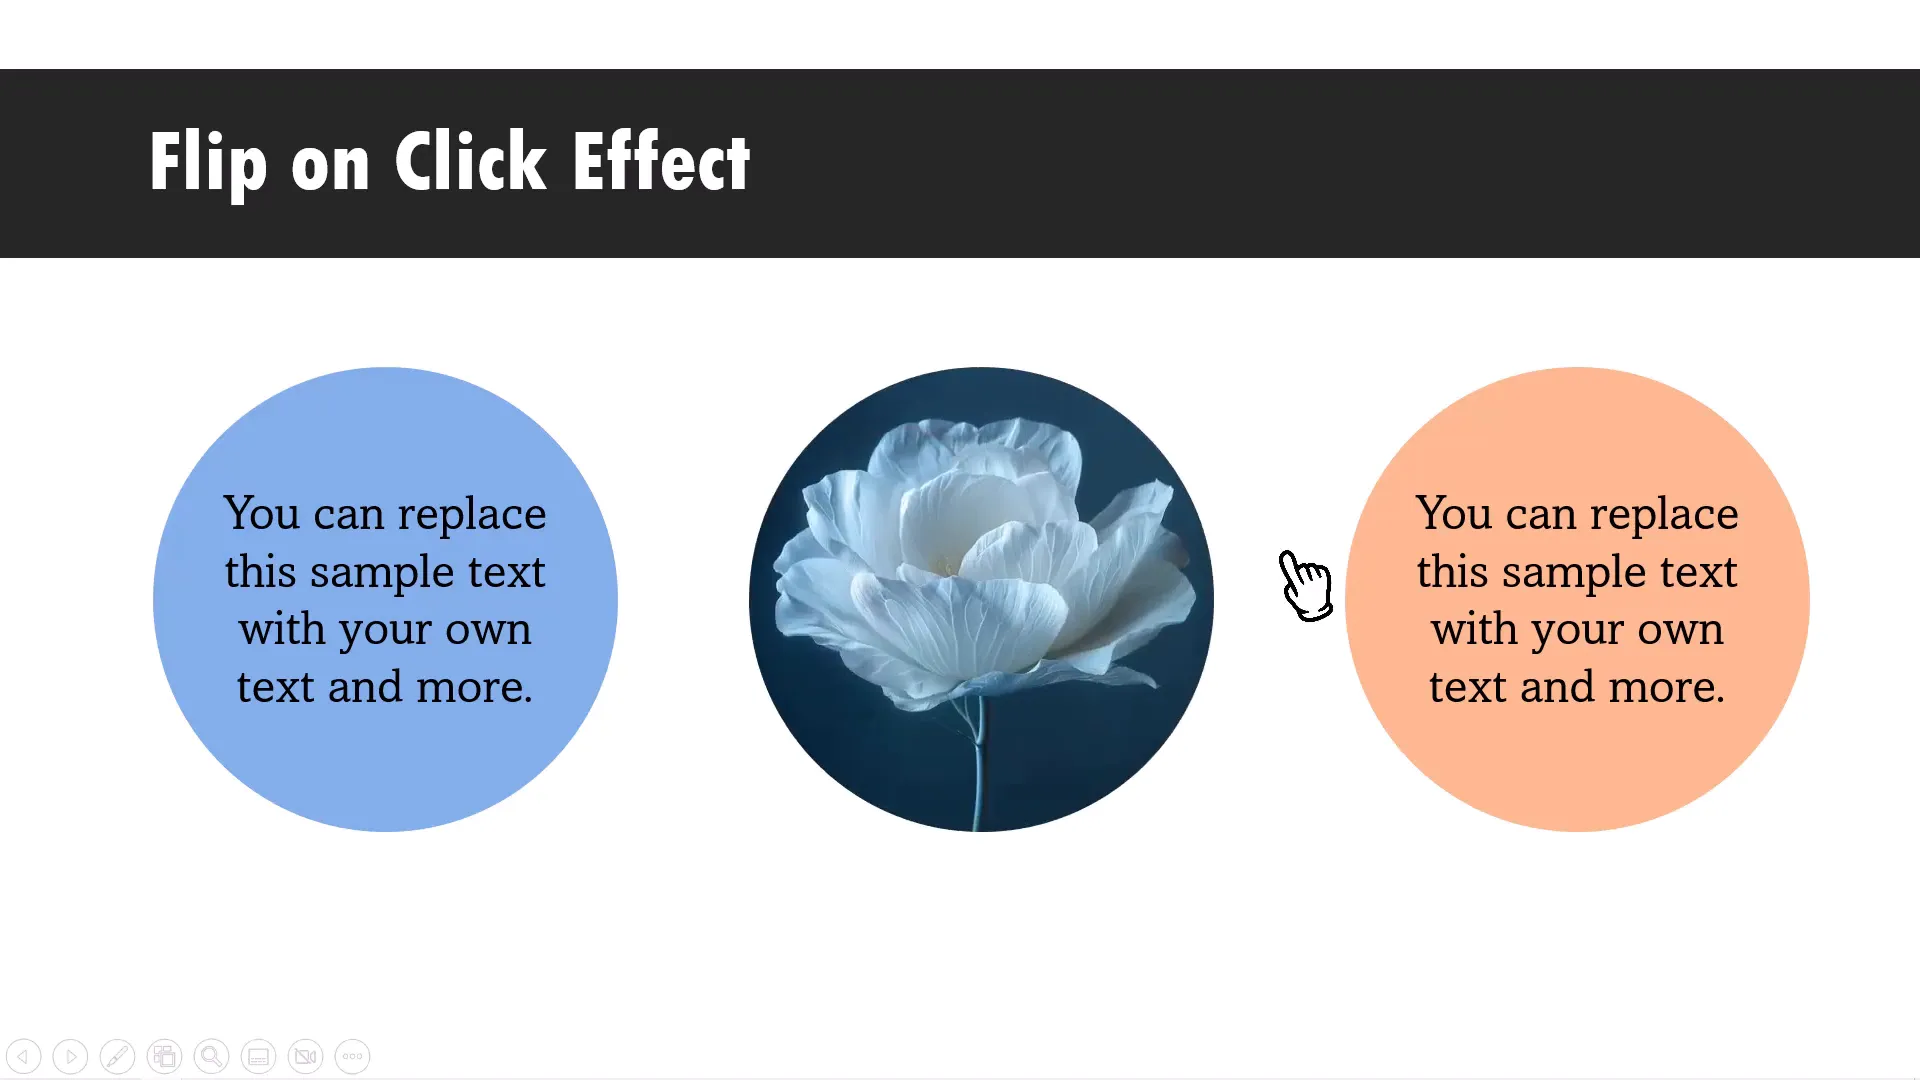
This interactive flip effect is simple yet visually impressive and can be duplicated multiple times on your slides to showcase different images and their explanations.
Creative Examples and Inspiration
To give you an idea of how you can extend this concept, here are some creative examples inspired by our comprehensive PowerPoint template bundle:
Carousel Effect with Multiple Images
Imagine a platform where clicking reveals a carousel of images with their explanations. Each image slides in with a smooth animation, and the previous one moves away. You can replace all images with your own, making this an adaptable and visually rich presentation style.

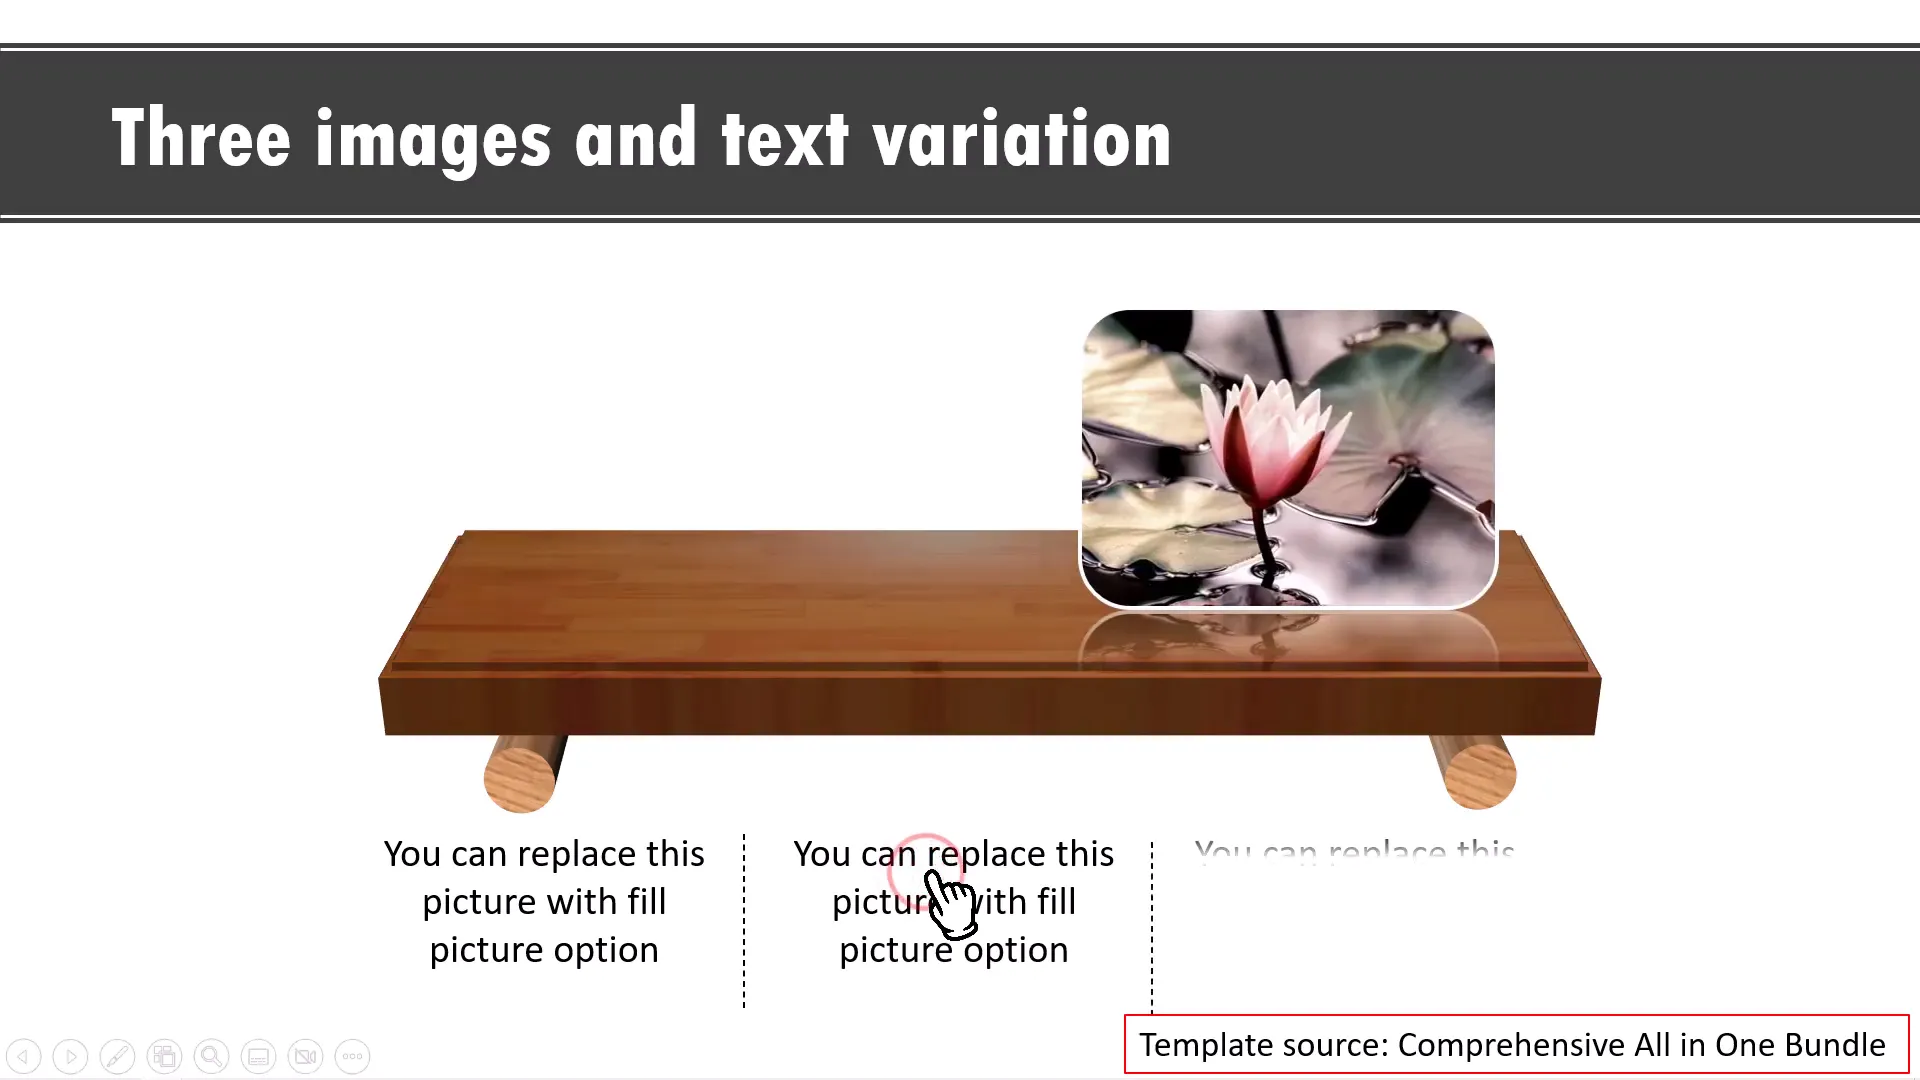
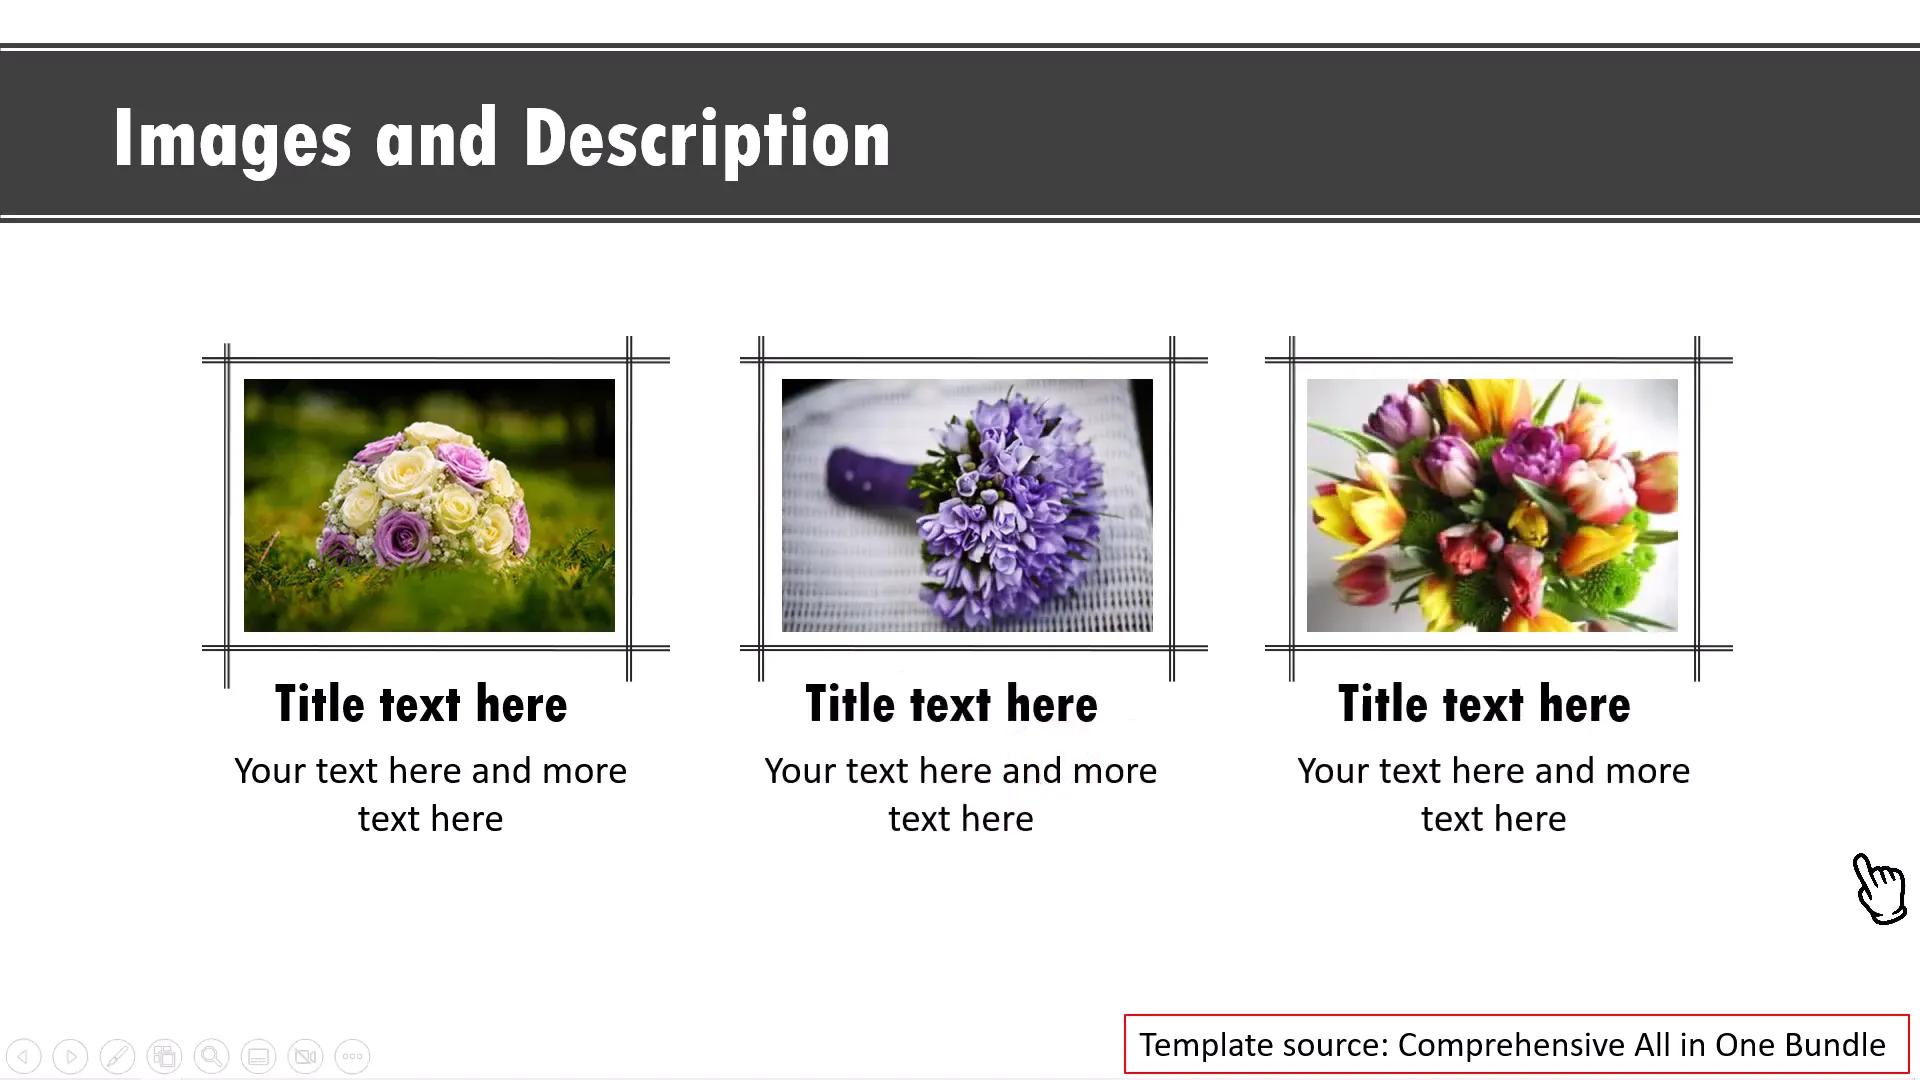
Showcasing Multiple Images with Explanation
Another example involves showing three images side by side, each with its own explanation that appears on click. This layout is clean and allows your audience to focus on one image and its details at a time.
Hand-Drawn Style Reveal
For a more artistic touch, you can use images drawn with a hand-like effect, revealing the images and explanations dramatically. This adds a personal and creative flair to your presentations.
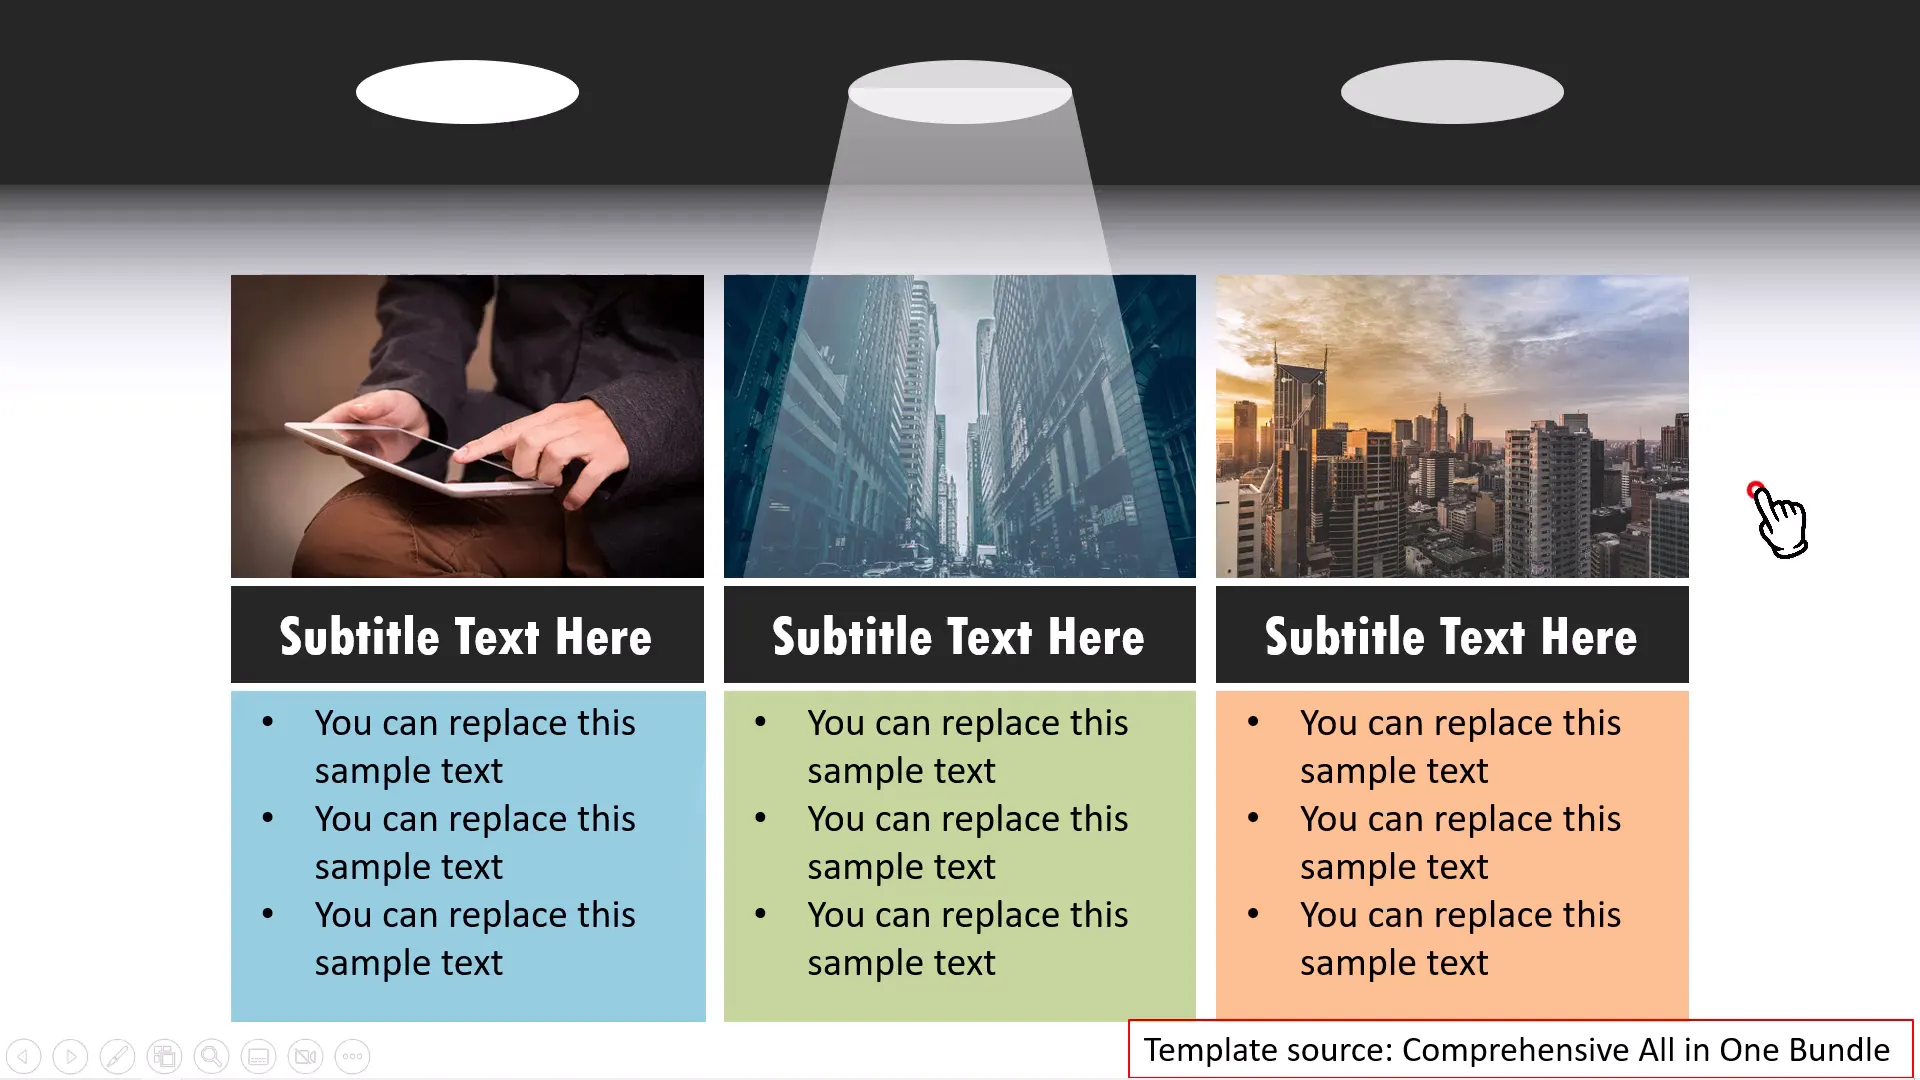
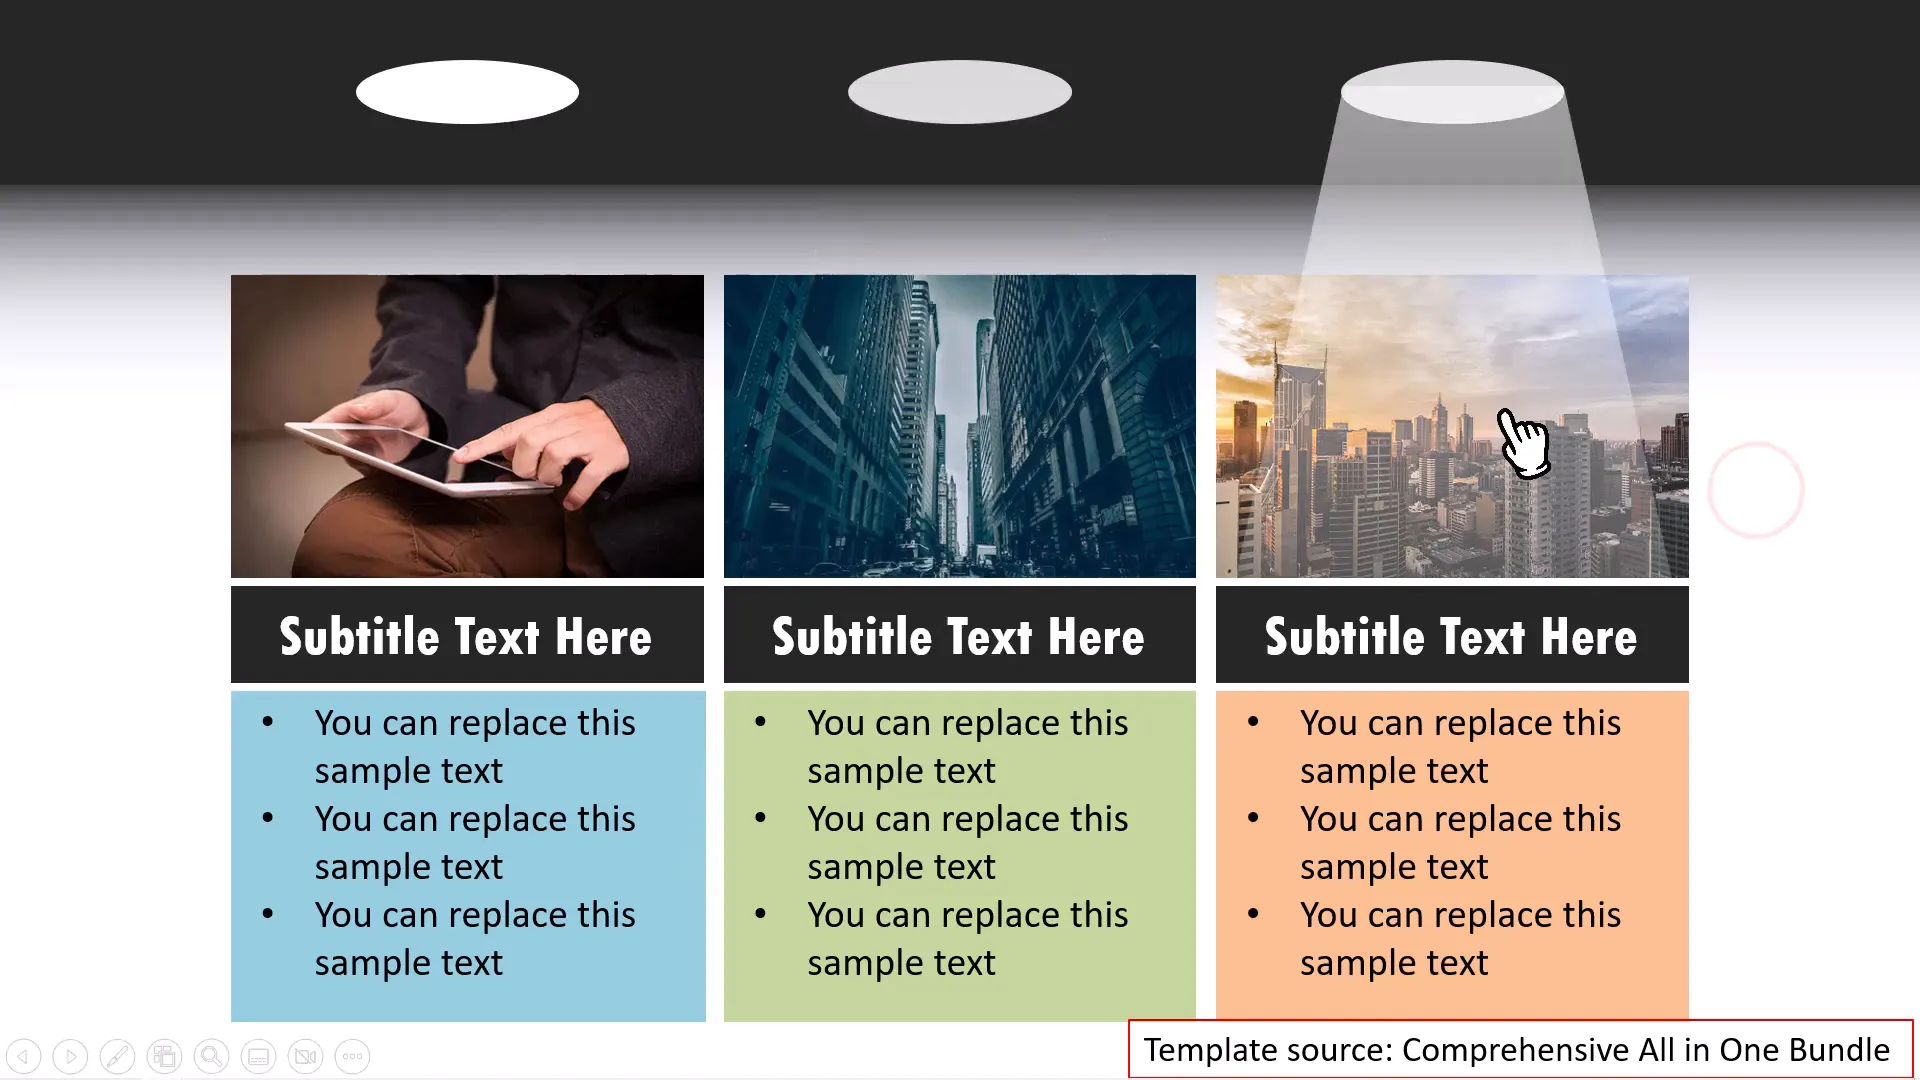
Spotlight Effect to Guide Attention
In this approach, you have several images and explanations on one slide, but only one is highlighted at a time. Clicking cycles the spotlight from one image and explanation to the next, drawing the viewer’s attention effectively.
Unlock More PowerPoint Creativity with Our Template Bundle
If you want to speed up your presentation creation while adding professional polish, check out our Comprehensive All In One PowerPoint Bundle. It offers more than 4,500 premium templates, including interactive animations like the flip on click effect, creative layouts, icons, and more. These templates can save you hours and help you impress your audience effortlessly.
Explore the bundle here: Comprehensive All In One PowerPoint Templates Bundle 2.0
Further Learning and Resources
If you enjoyed learning about the flip on click effect, you might also love my tutorial on how to convert static pictures into animated images in PowerPoint. This tutorial shows you how to use free vector images and animate them to bring your slides to life.
You can watch that tutorial next by clicking the link on your screen or following this link: Convert Static Pictures into Animated Images in PowerPoint.
Additionally, for ongoing creative inspiration, I invite you to join our free mini-course, 25 Creative PowerPoint Ideas. This five-day email course delivers simple, practical tips to make your presentations stand out.
Sign up here: 25 Creative PowerPoint Ideas Mini Training.
Frequently Asked Questions (FAQ)
Q1: Can I use this flip on click effect with shapes other than ovals?
Absolutely! While ovals provide a soft and aesthetic look, you can use rectangles, rounded rectangles, or any custom shape as your picture and explanation placeholders. Just ensure the shapes are consistent for a polished look.
Q2: Can I add this flip effect to multiple images on the same slide?
Yes, you can duplicate the entire flip effect setup multiple times on one slide. Just make sure to rename objects uniquely for each set to avoid animation conflicts.
Q3: Is this flip effect compatible with all versions of PowerPoint?
This effect works best in PowerPoint 2010 and later versions, including Office 365. Some older versions might not support all animation triggers or effects.
Q4: Can I customize the animation speed and direction?
Yes, you can adjust the animation duration and direction in the Animation Pane settings to suit your presentation style.
Q5: How do I replace the pictures in the flip effect?
Simply select the picture oval, go to Shape Fill > Picture, and choose a new image from your files or stock images. The animation and triggers will remain intact.
Conclusion
The flip on click effect is a powerful way to create interactive, engaging presentations that keep your audience’s attention and convey information clearly. By following the steps outlined here, you can create your own flip animations in PowerPoint from scratch, customizing shapes, colors, fonts, and animations to match your brand and message.
Remember, the key to effective animation is subtlety and purpose. Use this effect to highlight key points, reveal explanations, and add a dynamic touch without overwhelming your audience. With practice, you’ll master these techniques and elevate your presentations to a professional level.
Happy presenting!
Check out the full video: Easy Flip on Click Effect in PowerPoint ( Interactive Animation}


