
Welcome to the magical world of PowerPoint presentations! Today, I’m excited to share with you an incredible tutorial on how to create a stunning and interactive section zoom presentation using PowerPoint. This innovative approach allows you to click on beautiful bubbles on your main slide and zoom into different sections of your presentation, giving your audience a dynamic and engaging experience. Best of all, the template we’ll create is absolutely free!
Whether you’re pitching a product, showcasing services, or delivering any form of presentation, this Pitch Zoom Template is versatile and designed to impress. In this comprehensive guide, I’ll walk you through every step—from designing the main slide with clickable buttons to adding smooth transitions and section zooms that make your presentation truly interactive.
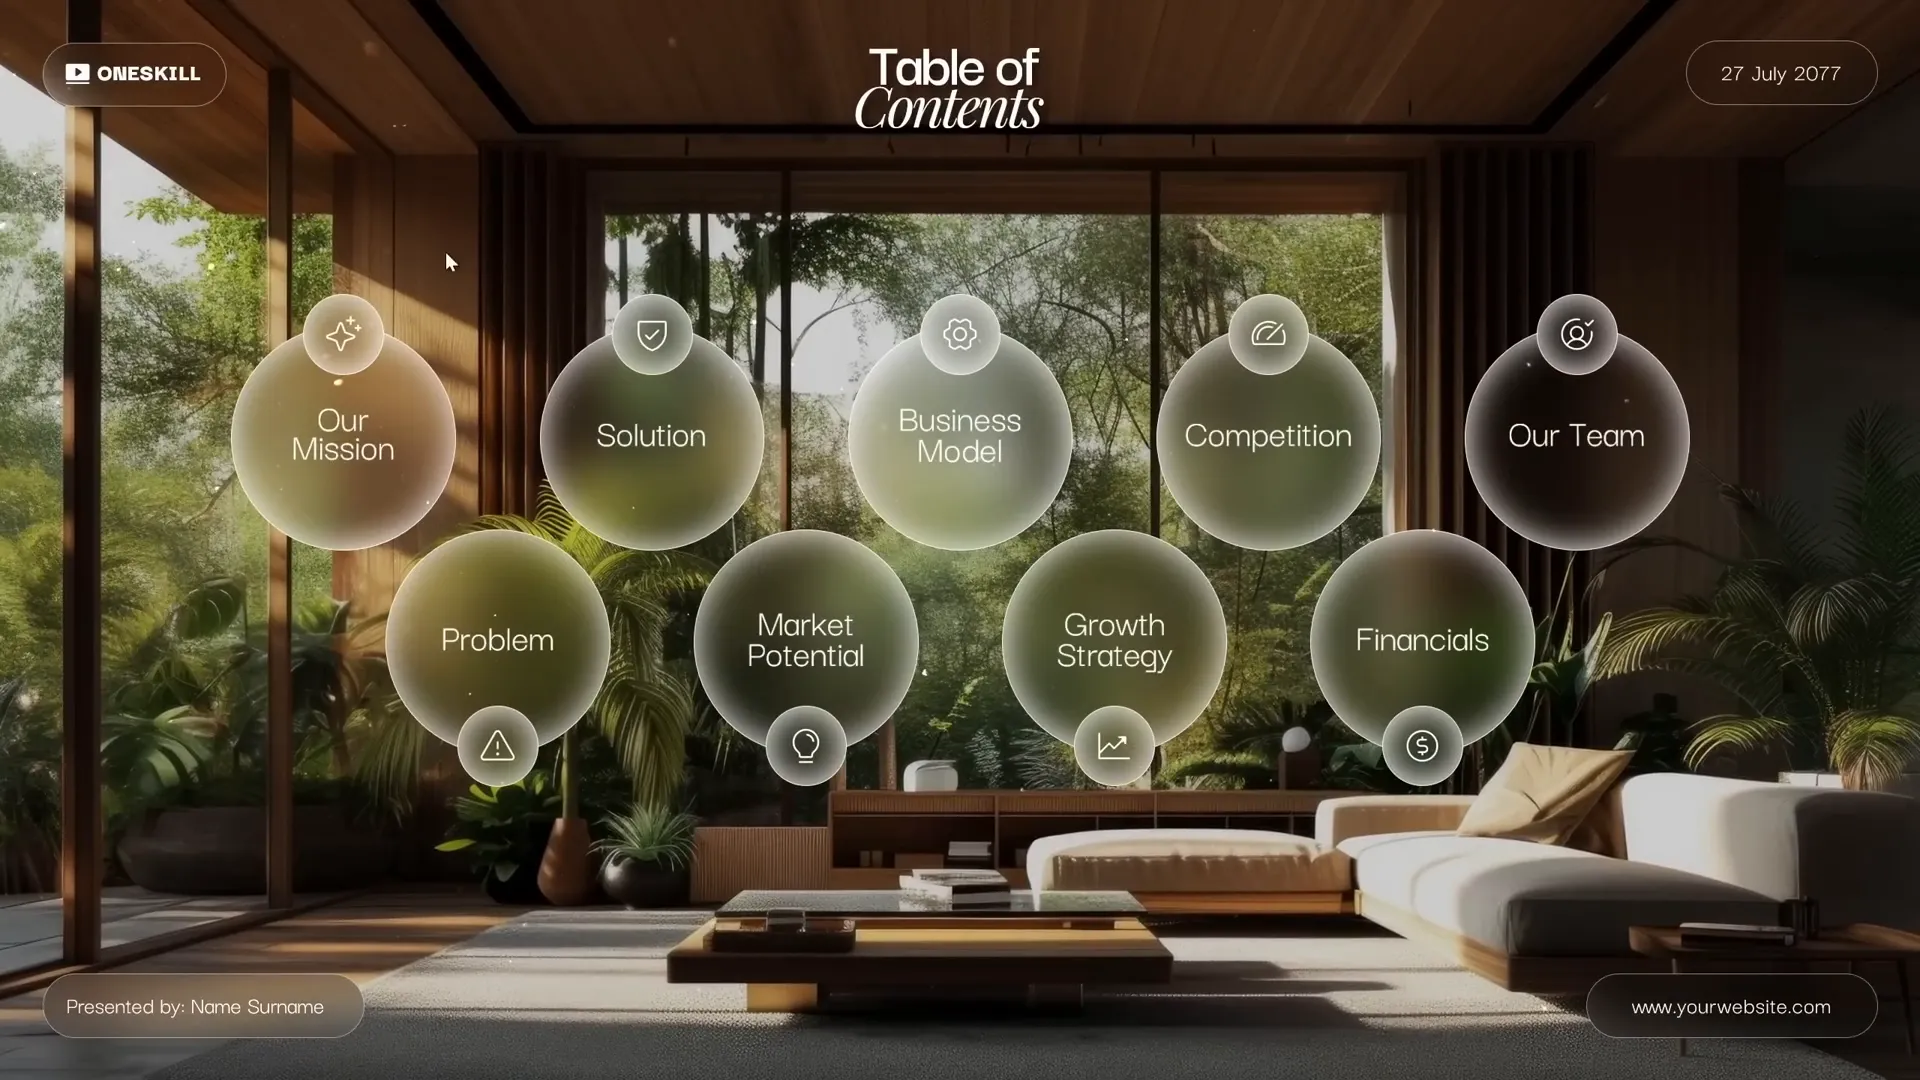
Table of Contents
- Introduction to Section Zooms in PowerPoint
- Step 1: Designing the Main Slide with a Glass Morphic Effect
- Step 2: Adding and Naming Presentation Sections
- Step 3: Creating the Content Slides for Sections
- Step 4: Inserting Section Zooms to Create Interactivity
- Step 5: Final Touches and Additional Design Elements
- Step 6: How to Get This Free Pitch Zoom Template
- Frequently Asked Questions (FAQ)
- Conclusion
Introduction to Section Zooms in PowerPoint
Section Zooms in PowerPoint provide a fresh way to navigate through your slides. Instead of a linear progression, you can allow your audience or yourself to jump between sections seamlessly. Imagine a home slide with several bubbles, each representing a different section of your presentation. Clicking on any bubble zooms into that section, creating a smooth and professional flow.
This tutorial is designed to help you build exactly that: a main slide with clickable bubbles that act as section zoom buttons. We will design the slide, create the glass morphic effect for a modern look, add sections, and link everything together using PowerPoint’s zoom features.
Step 1: Designing the Main Slide with a Glass Morphic Effect
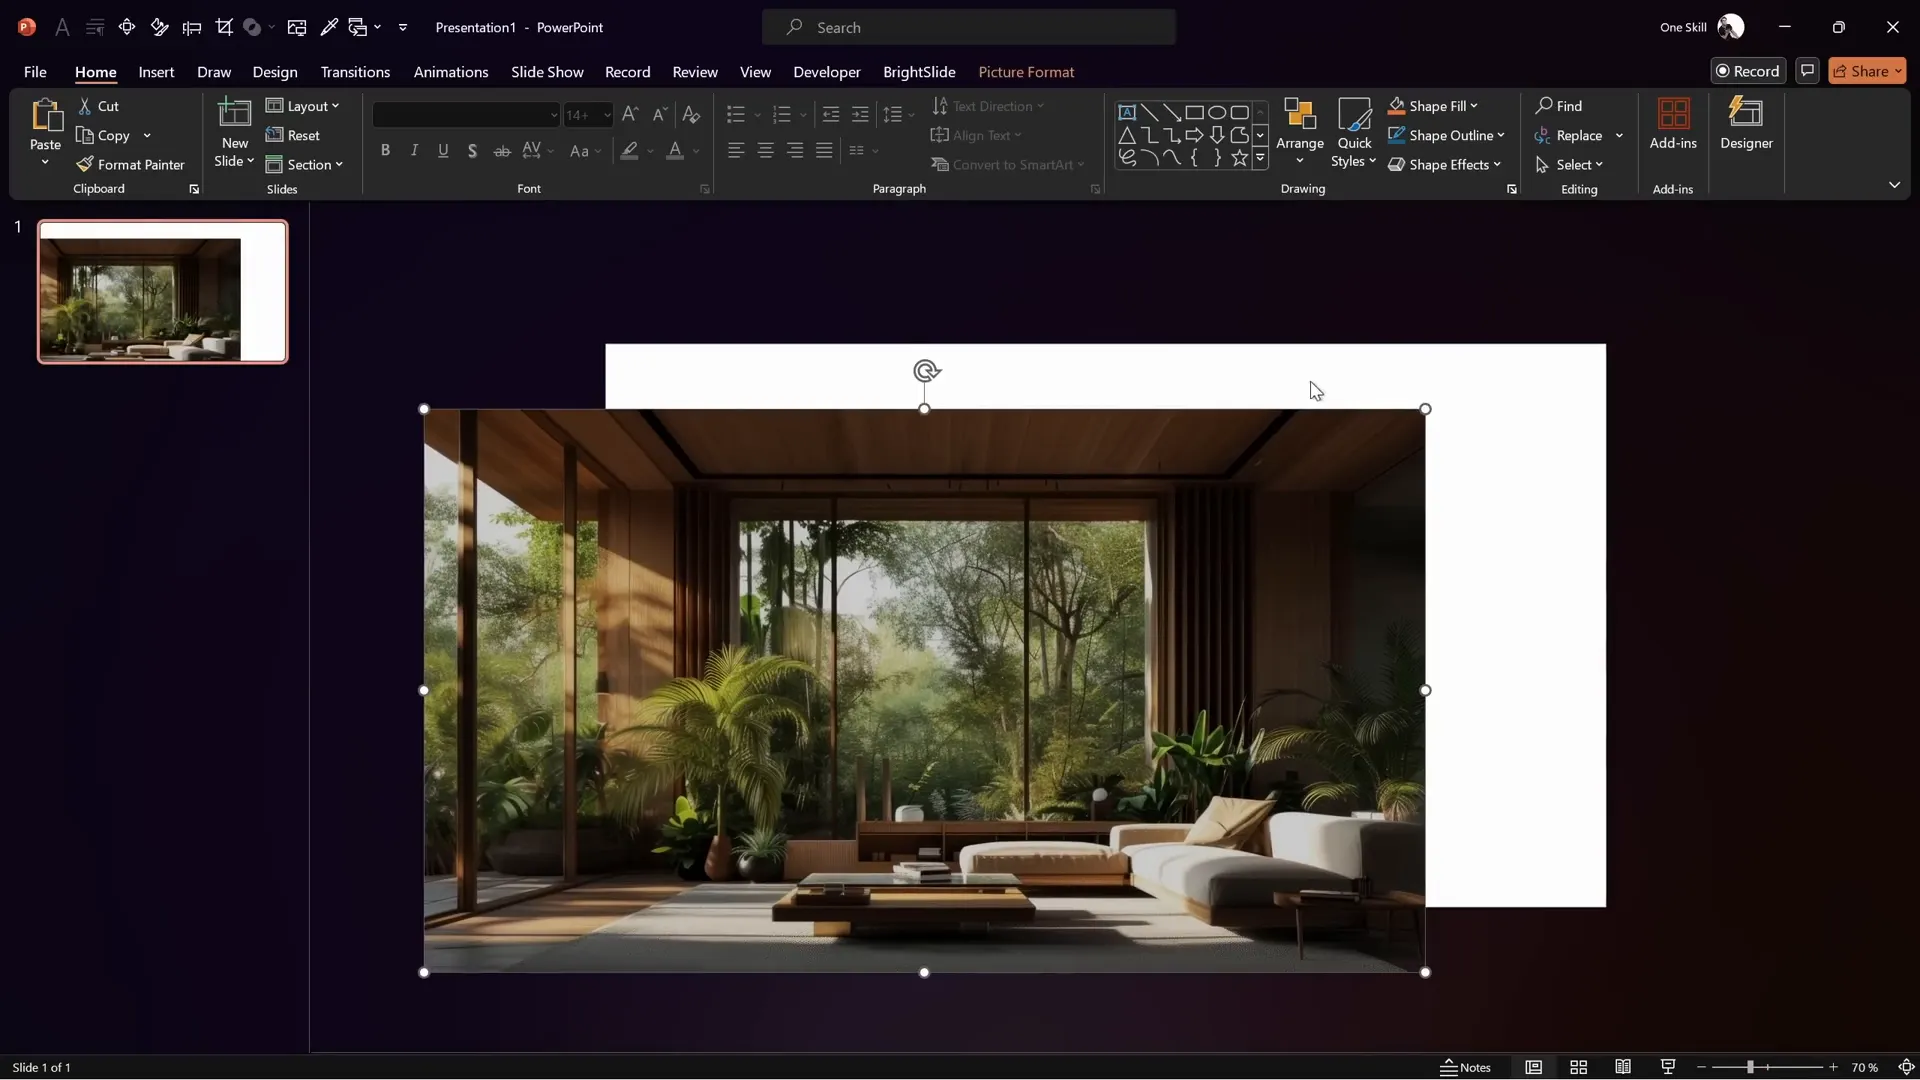
Let’s begin by opening a fresh PowerPoint presentation and choosing a blank slide layout. We want a clean canvas without any placeholders getting in the way.
For the background, we’ll use a beautiful image that I sourced from Freepik. This image sets a warm, inviting tone and will enhance the glass morphic effect we are about to create.
Copy the image from your previous presentation or download it, then paste it on the blank slide with Ctrl + V. This image will serve as the sharp, vibrant background layer.
Creating the Blur for the Glass Morphic Look
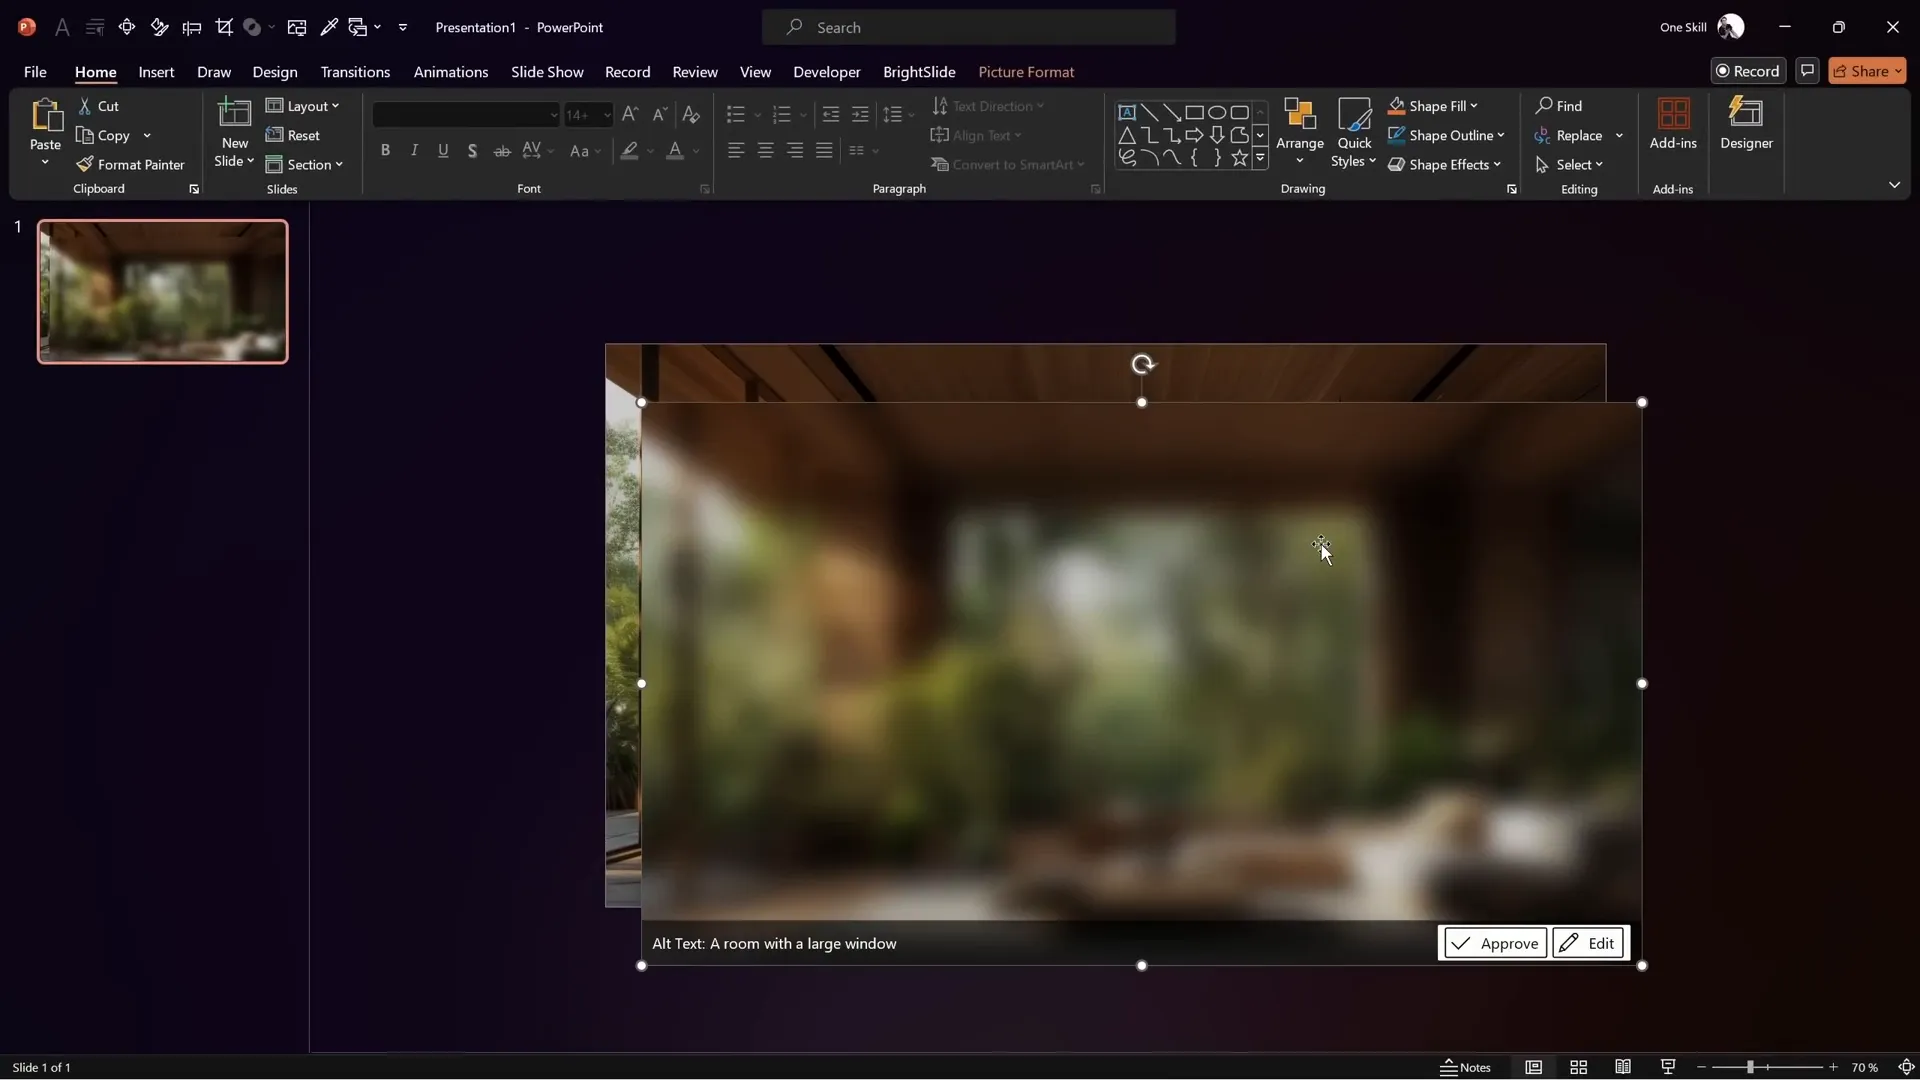
Next, duplicate the image and apply a 100% blur effect to the duplicate. To do this:
- Right-click the duplicated image and select Format Picture.
- Navigate to Artistic Effects and select the Blur effect.
- Set the blur to 100% and allow PowerPoint a moment to process.
Once blurred, copy this image to your clipboard, delete the duplicate, and then format the slide background:
- Right-click on the slide background and choose Format Background.
- Select Picture or texture fill and paste the blurred image from the clipboard.
This sets the blurred image as a light background fill, creating a subtle frosted glass effect.
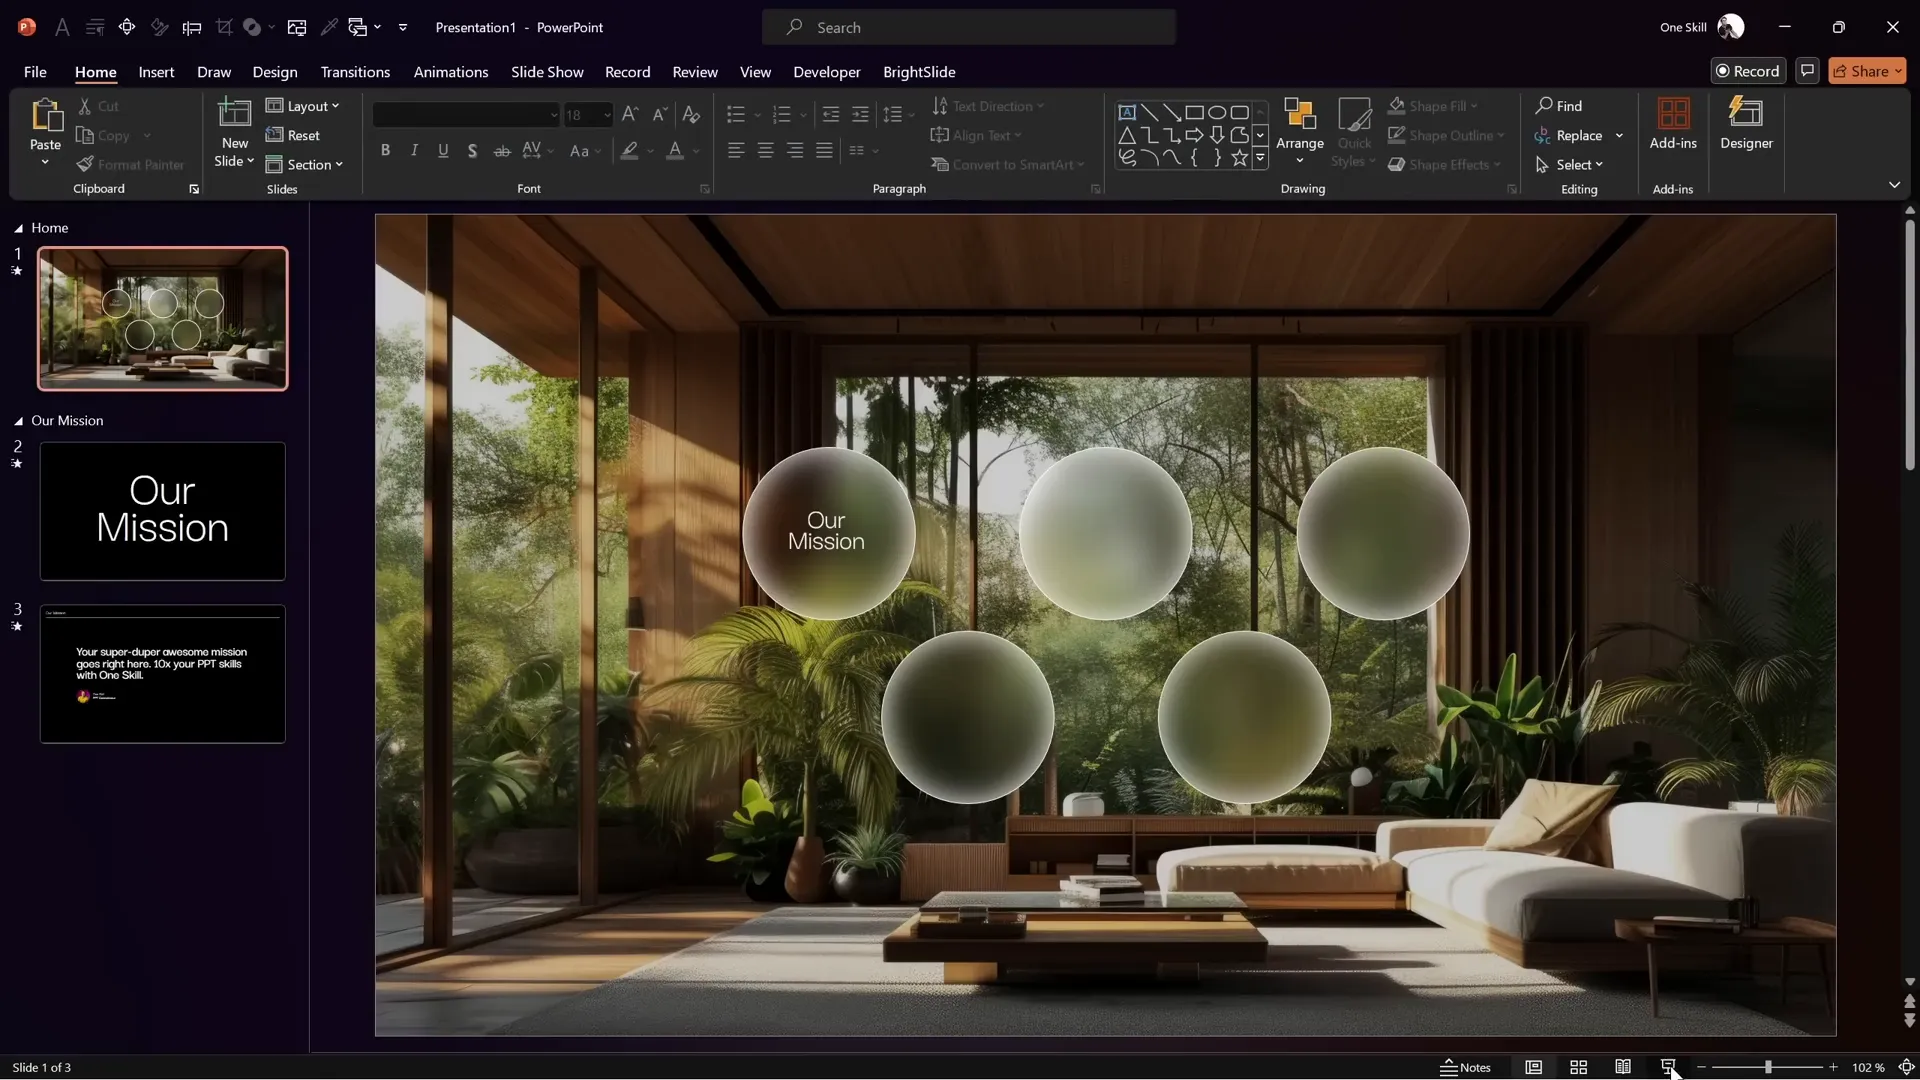
Now, bring the original sharp image back on top, aligning it perfectly over the blurred background. This layering is essential for the glass morphic effect to work on shapes we add next.
Adding Glass Morphic Bubbles
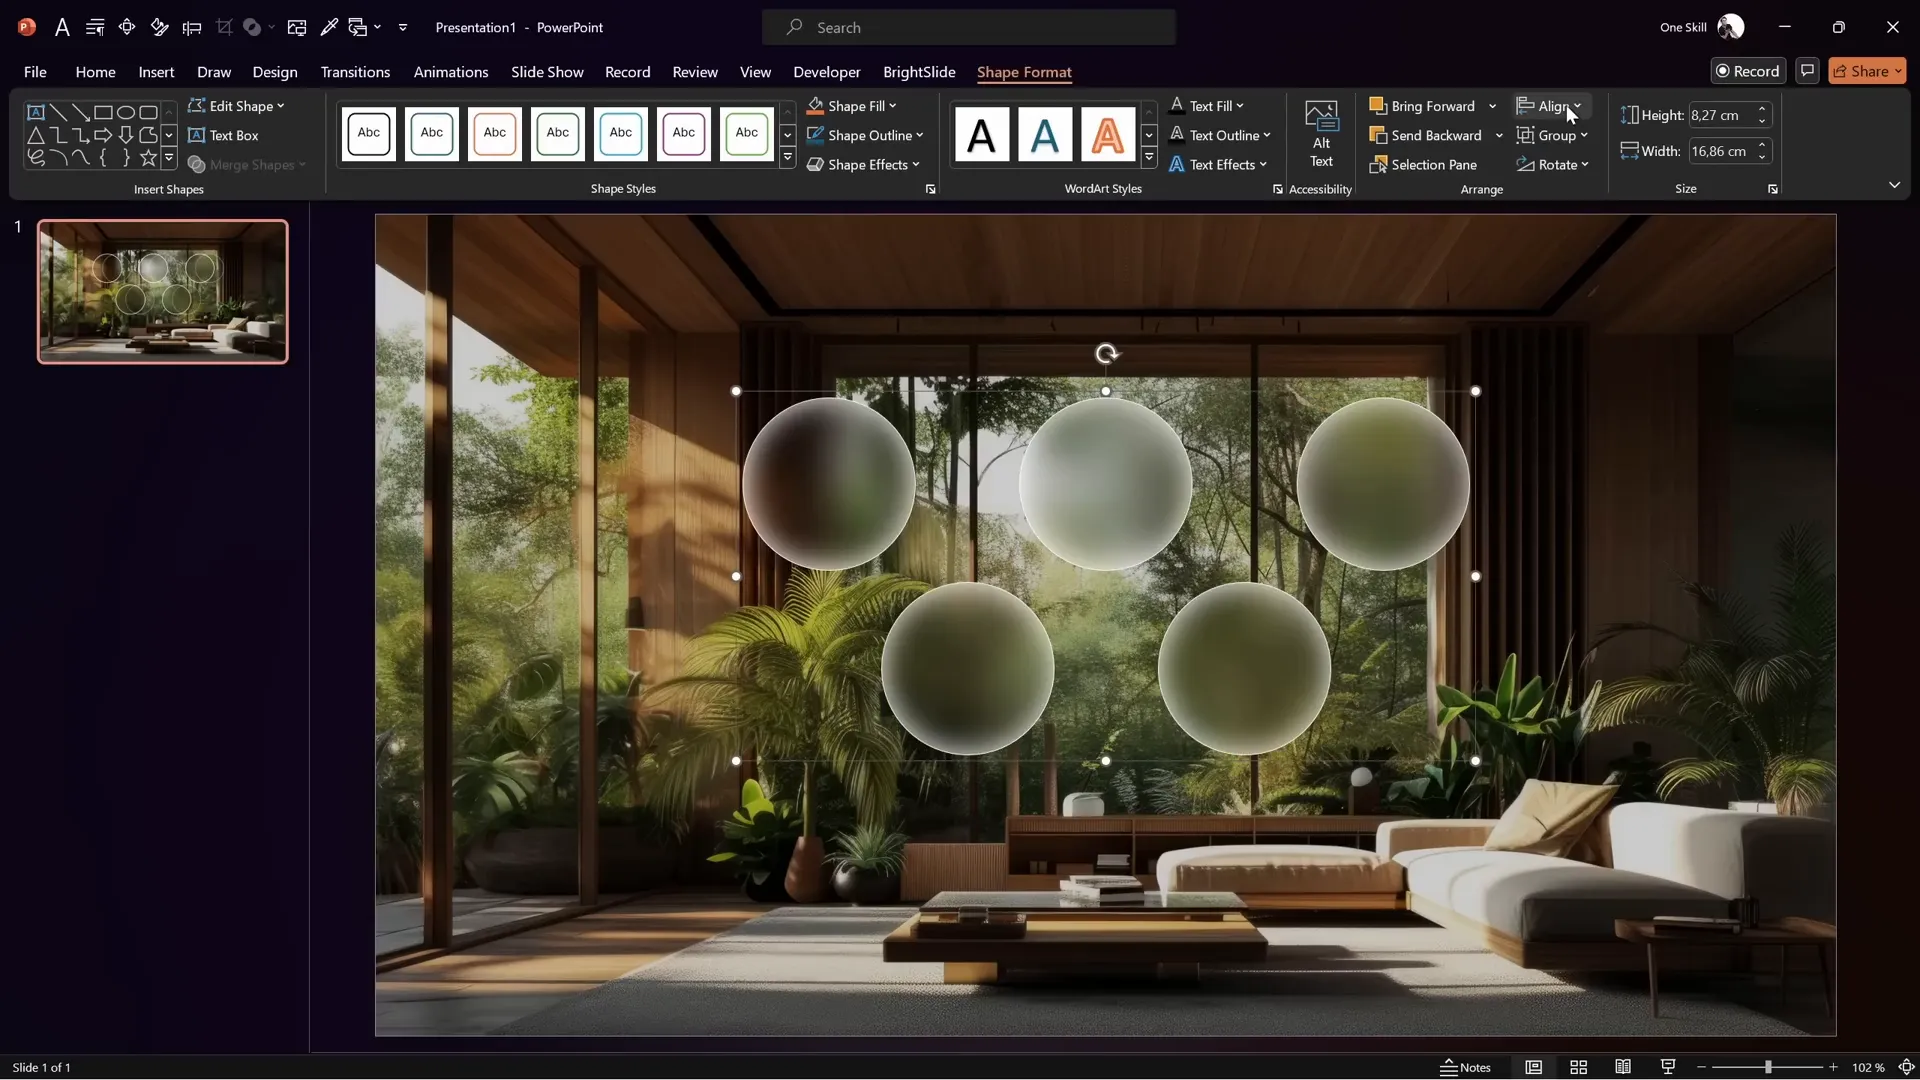
Insert a circle shape on the slide. To enhance the glass morphic feel:
- Set the fill to Background fill so it reveals the blurred background beneath.
- Change the line color to white with zero transparency and reduce the thickness to 0.5 pt.
- Add an Inside Center white shadow with a blur of 25 points to simulate light reflection.
Resize the circle to about 4 cm in height and width and position it where you want the first button.

Hold down the Ctrl key and duplicate this circle to create as many bubbles as the number of sections you want in your presentation. Align and distribute them evenly horizontally, then group and center the group on the slide. Ungroup afterward so you can edit individual bubbles later.
Step 2: Adding and Naming Presentation Sections
Sections in PowerPoint help organize your presentation into logical parts and are essential for section zooms to work.
Right-click above the first slide in the slide sorter and select Add Section. Name this section Home. This will be your main landing slide where all bubbles live.
After the first slide, add another section called Our Mission. This section will contain slides related to your company’s mission or any other content you want to feature.
Step 3: Creating the Content Slides for Sections
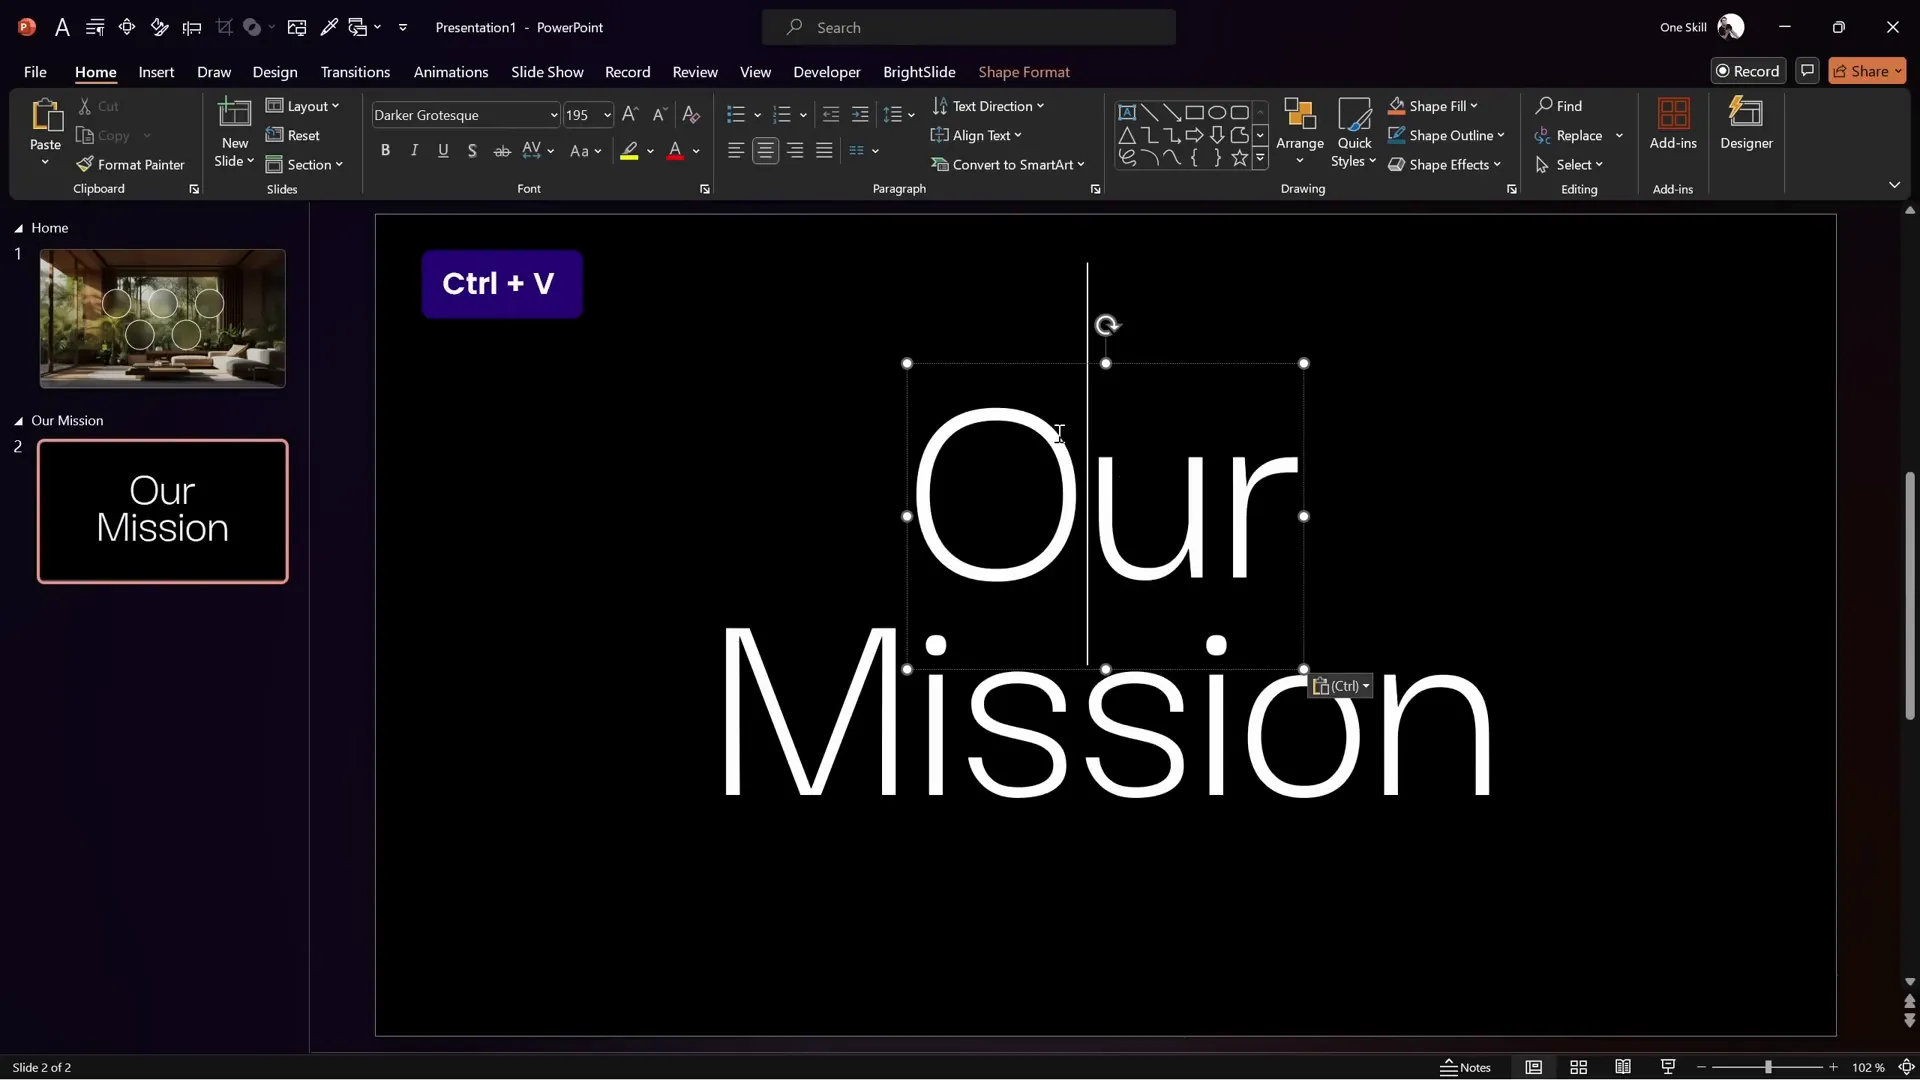
For the Our Mission section, insert a new slide and set its background to black to create contrast with white text.
Add two large text boxes with the words you want to highlight. For example, “Our Mission.” Use the Darker Grotesque font at size 195. Using two separate text boxes allows you to animate and transition them individually with the Morph transition later.
Applying Transitions for a Smooth Flow
Set the transition for this slide to Fade and enable After 0 Seconds to auto-advance seamlessly to the next slide.
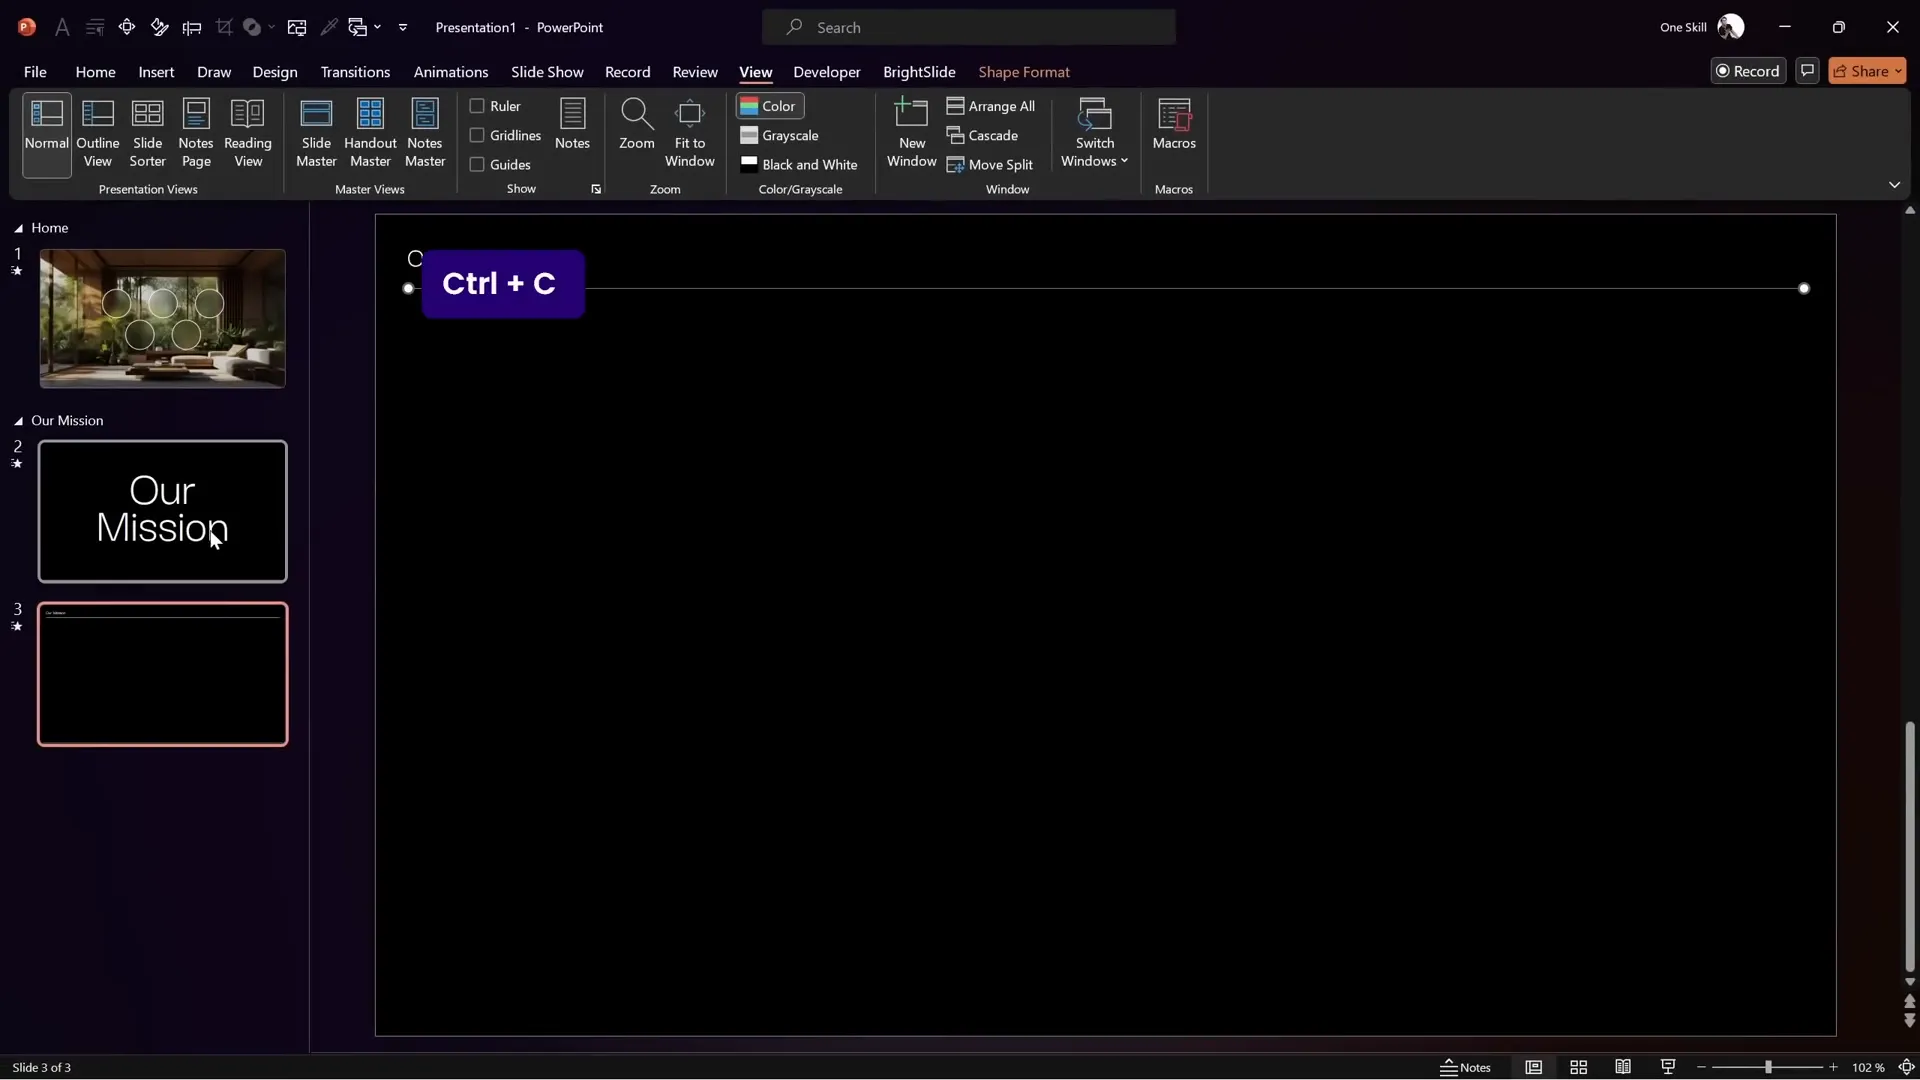
Add another slide with the same black background, and paste the two text boxes again but resize them to 18 points and align them side by side in the top-left corner. This slide will serve as a mini header or navigation element.
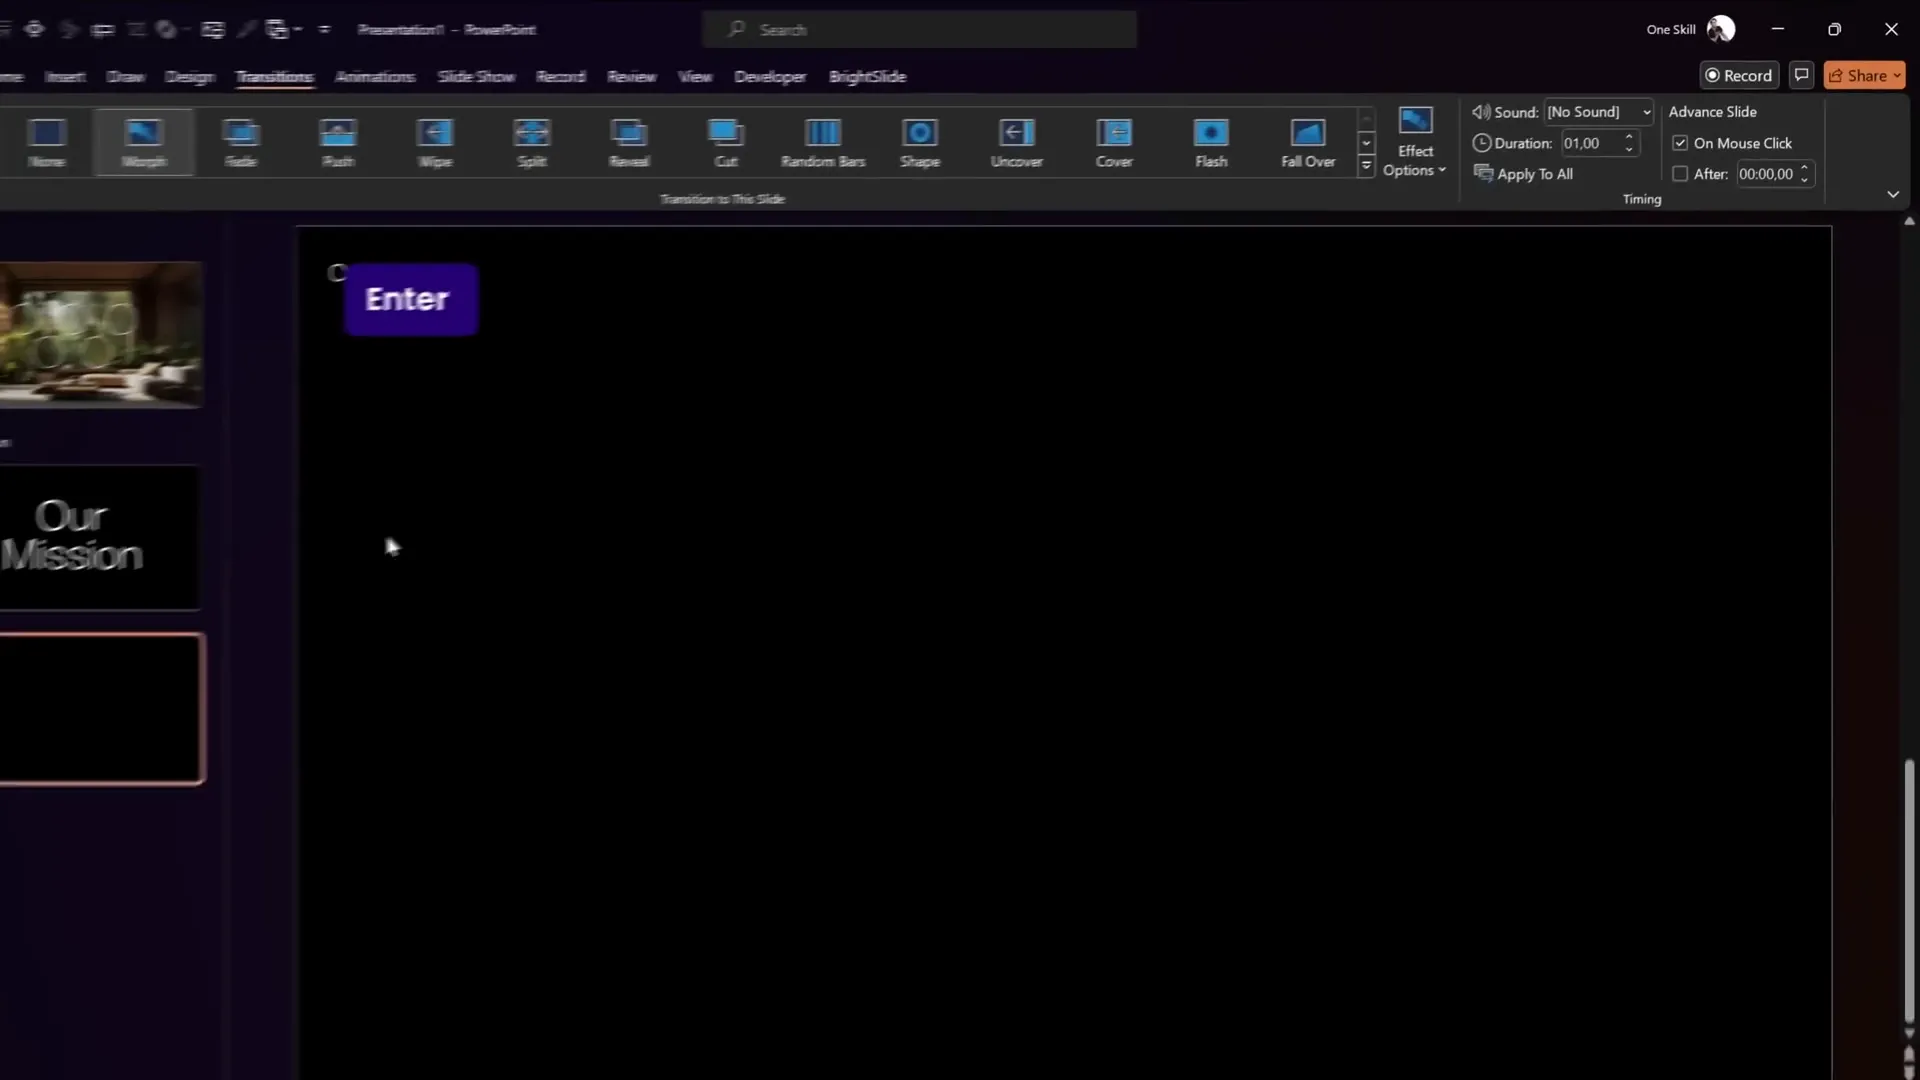
Apply the Morph transition to this slide with a duration of 1 second. This creates a smooth shrinking and repositioning effect of the text when transitioning from the previous slide.
Enhancing the Slide with Additional Elements
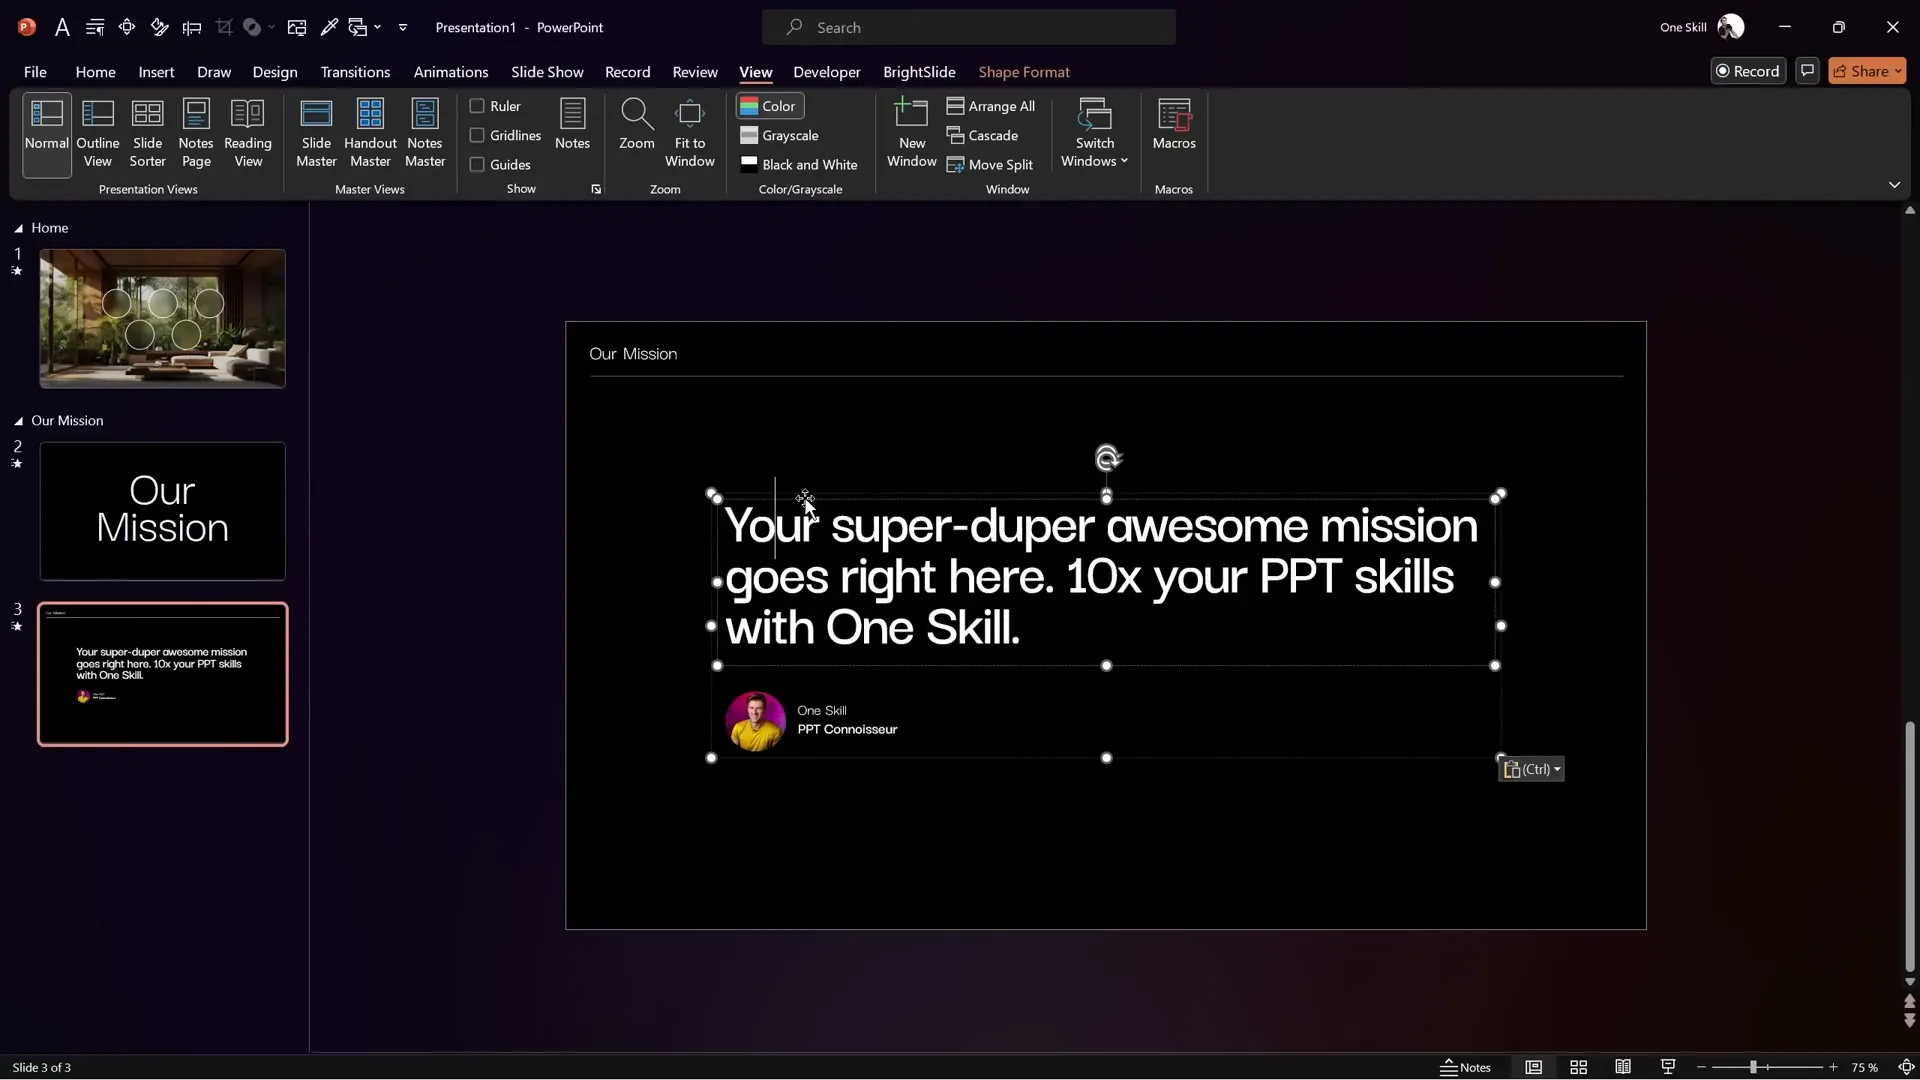
To add more depth, insert a thin white line with 50% transparency below the text boxes. Use slide guides for precise alignment. You can draw a perfect horizontal line holding Shift while dragging.
Copy this line to the previous slide as well to maintain consistency during the morph transition.

Add further content such as smaller text boxes or images, for example, a circular photo of a team member or product, positioned below the main content. Copy these elements onto the previous slide but place them outside the visible slide area to create an entrance effect during the morph transition.
Step 4: Inserting Section Zooms to Create Interactivity
Now comes the magic: linking the bubbles on the home slide to their respective sections using Section Zooms.
Go to the Insert tab, click on Zoom, and select Section Zoom. Choose the section you want to link to, for example, Our Mission, and insert it onto the home slide.
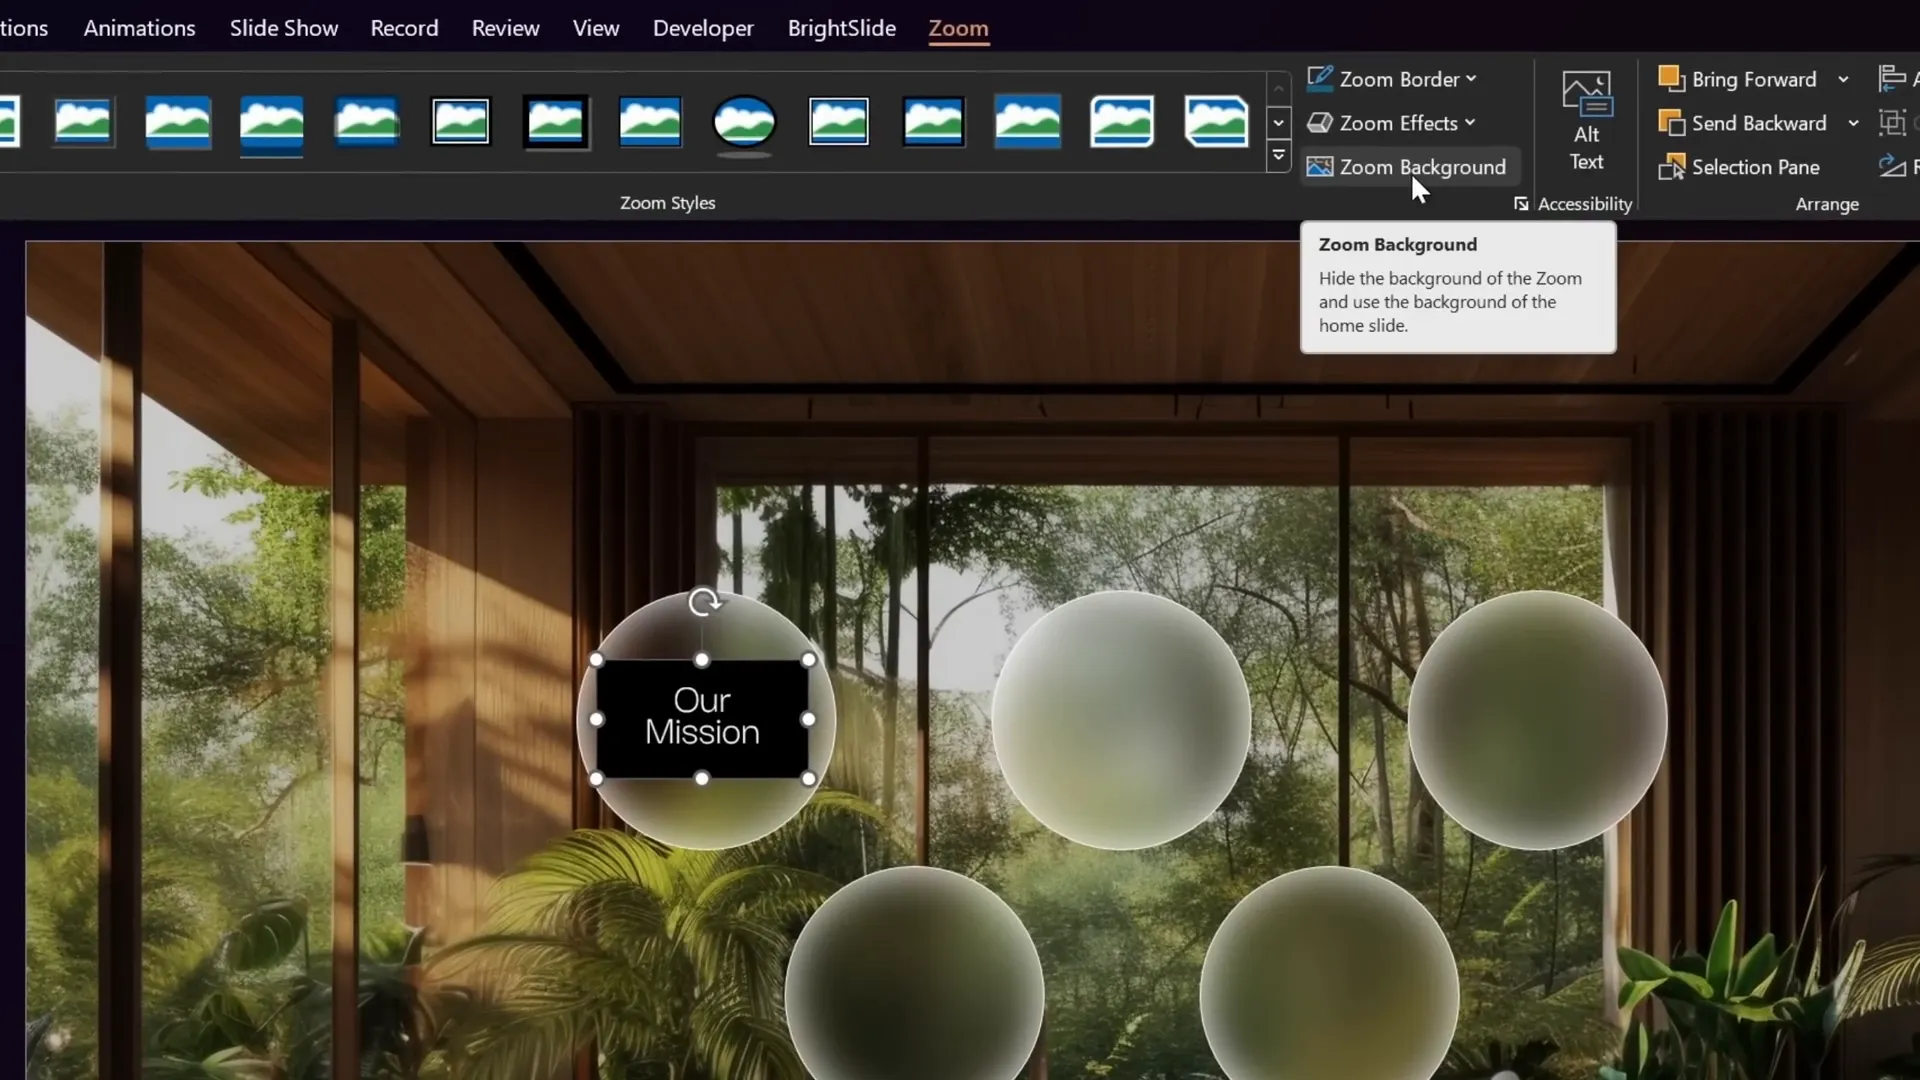
Resize the section zoom to fit perfectly inside the glass morphic circle bubble. Then, with the zoom selected, go to the Zoom tab and activate the Zoom Background option. This makes the zoom background transparent, allowing the blurred glass morphic background to show through instead of the black slide background.
Testing the Zoom and Transitions
Run your slideshow and click on the bubble. You should zoom into the section’s first slide, which will auto-transition to the next slide with the smooth morph effect. When finished, the presentation will zoom back to the home slide automatically.

Step 5: Final Touches and Additional Design Elements
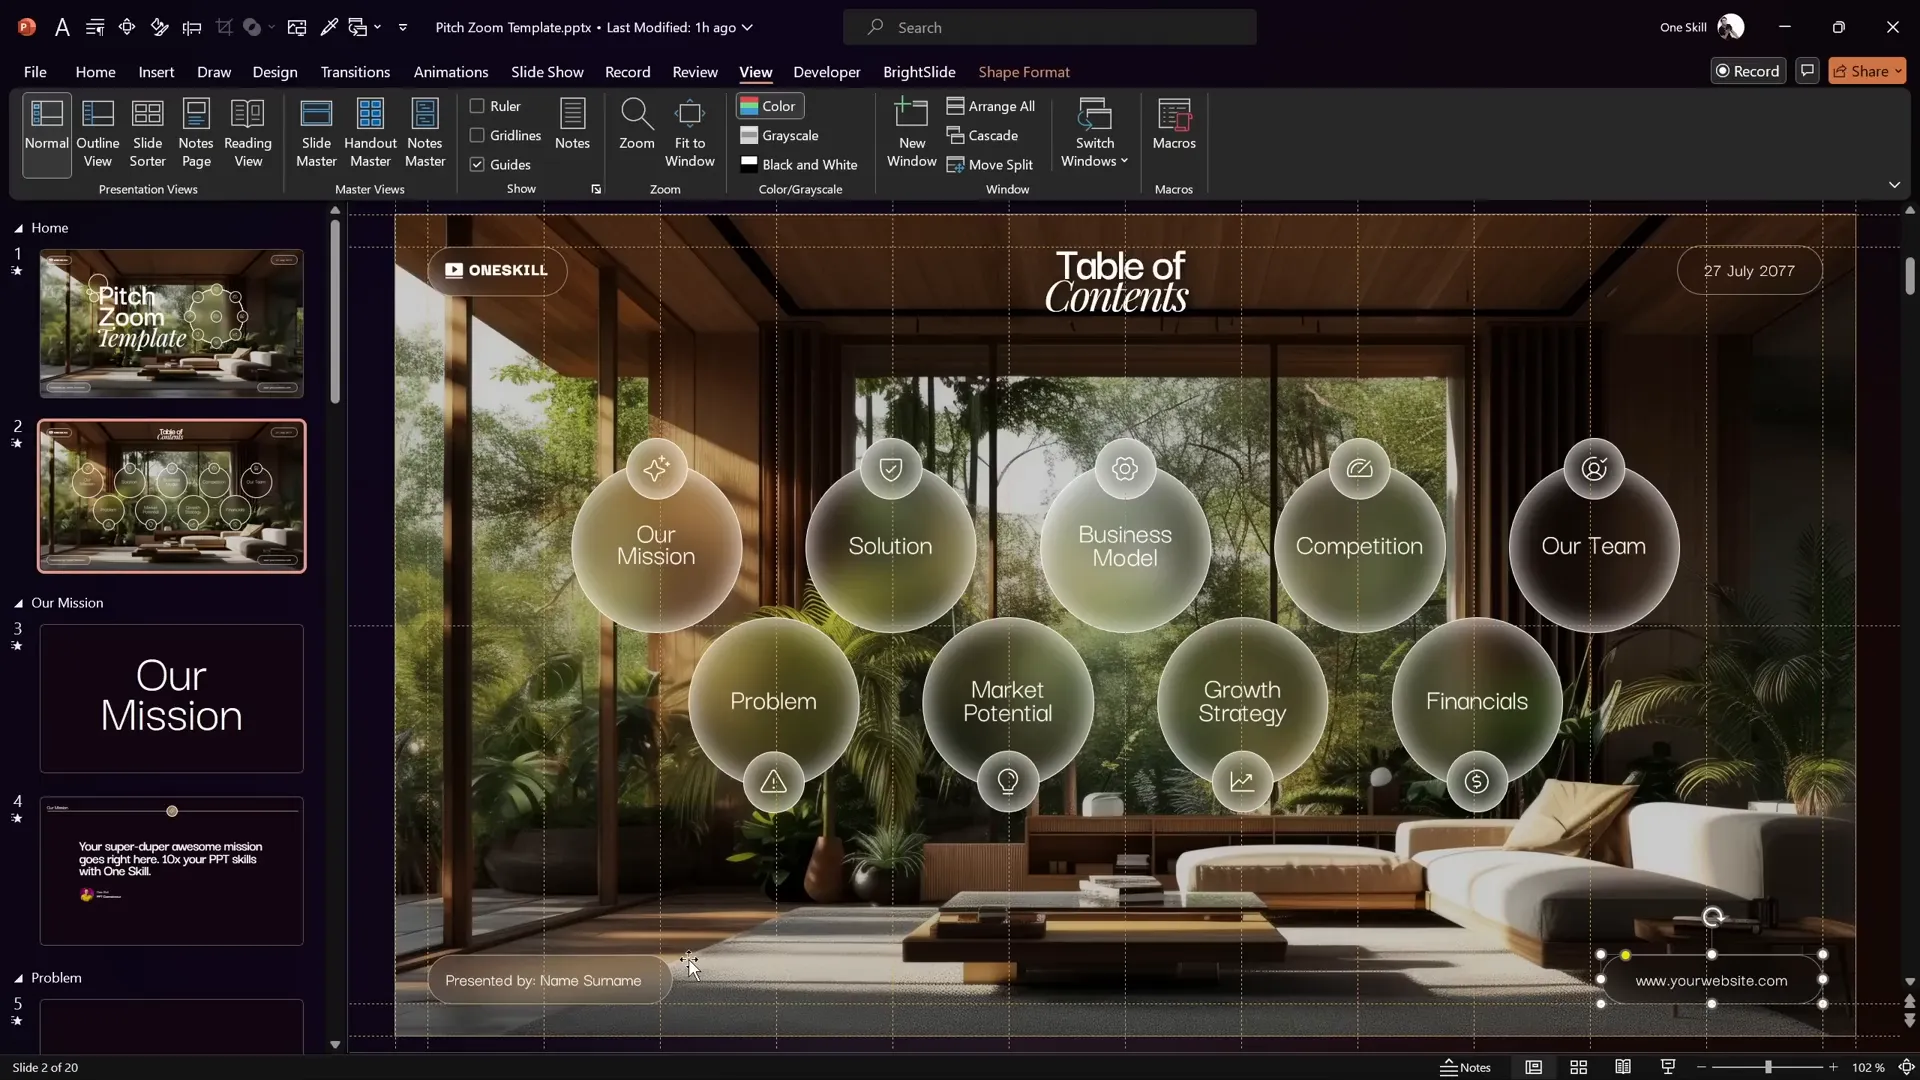
To complete the design, add extra elements such as your company logo, date, and website in the corners of the home slide. Use rounded rectangles with semi-transparent fills for a modern look and add a title like “Table of Contents” at the top center.
Adding Decorative Icons
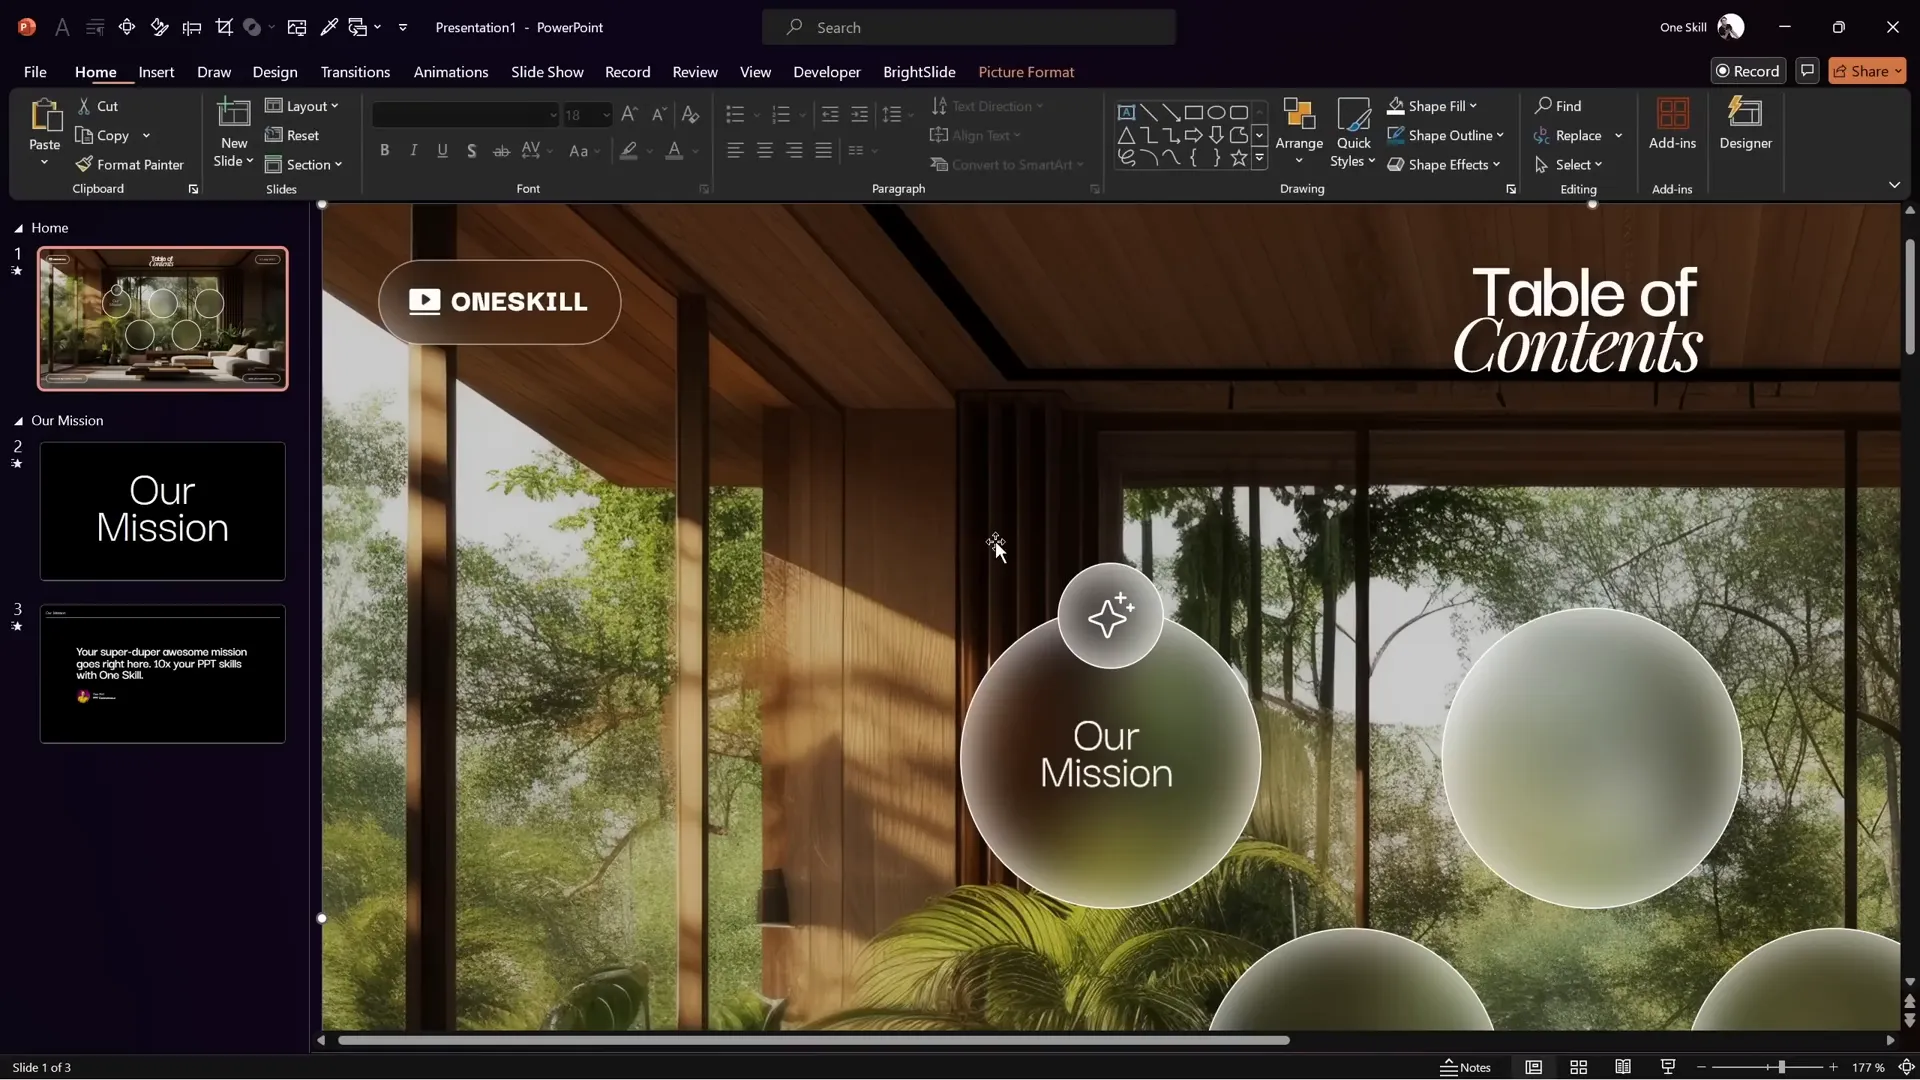
One subtle detail I love is adding a small sparkling star icon inside a tiny glass morphic circle. Duplicate a circle shape, resize it to about 1.4 cm, and insert an SVG icon from Phosphor Icons.
Resize the icon to about 0.7 cm and set its color to white. Group the circle and icon together and place it near a line or element on the slide for a sparkling accent.
Make sure to match the fill color of the small circle to your theme by copying and pasting the style from another circle.
Paste this icon element onto both the home slide and the zoomed section slide to maintain design consistency during transitions.
Step 6: How to Get This Free Pitch Zoom Template
Ready to get your hands on this beautiful Pitch Zoom Template for free? Here’s how:
- Visit pptskill.com.
- Scroll down to the Slide Zoom Animation section.
- Look for the Free New Lesson Bonus Slide Pitch Zoom Template.
- Click on any of the buttons to join the free lessons of the PowerPoint Animation Mastery course.
- Once logged in, scroll down to the slide zoom animation section and expand it.
- Download the bonus slide pitch zoom template PPTX file for free.
Make sure you have the two fonts used in the template installed on your computer:
With these fonts installed, the template will look and function exactly as intended.
Frequently Asked Questions (FAQ)
What is the advantage of using Section Zooms over Slide Zooms?
Section Zooms allow you to link to an entire section of slides rather than a single slide, enabling you to zoom into a group of related slides. This is perfect for presentations with multiple thematic sections, offering a more organized and interactive navigation experience.
Can I customize the bubbles and icons in the Pitch Zoom Template?
Absolutely! The bubbles are simple PowerPoint shapes with a glass morphic effect applied. You can resize, recolor, or replace the icons inside the bubbles to match your branding or presentation style.
Do I need any special software or add-ins to create these effects?
All effects can be created using standard PowerPoint features. However, I recommend using the BrightSlide PowerPoint add-in for managing slide guides and alignment more efficiently.
Is the Pitch Zoom Template compatible with all versions of PowerPoint?
The template works best with PowerPoint 2019 or later, or PowerPoint for Microsoft 365, as these versions support the Morph transition and Section Zoom features.
Can I use this template for presentations other than pitch decks?
Yes! The template is versatile and can be adapted for any presentation type, such as portfolios, educational content, or corporate reports.
Conclusion
Creating an interactive and visually captivating presentation in PowerPoint is easier than you think. By combining the power of Section Zooms, Morph transitions, and creative design elements like the glass morphic effect, you can elevate your presentations to a professional and engaging level.
This tutorial has shown you how to build a Pitch Zoom Template from scratch, complete with clickable bubbles that zoom into sections, smooth transitions, and stylish design accents. Remember, the key is in layering your blurred and sharp images, using section zooms with transparent backgrounds, and applying the Morph transition for dynamic movement.
Don’t forget to download the free template from pptskill.com and experiment with it yourself. With practice, you’ll master these techniques and create presentations that truly stand out.
Happy presenting, my dear friends!
Check out the full video: I’ve Made a PowerPoint Template with Section ZOOMS ✅ 100% Free!


