
Welcome, my friends! If you want to elevate your PowerPoint presentations with stunning, interactive animated slides, you’ve come to the right place. In this comprehensive guide, you will learn how to create an awesome clickable and scrollable animated slide design in Microsoft PowerPoint 365. This tutorial will walk you through every step, from setting up a gradient background to cutting out image elements and applying morph transitions to achieve smooth animations that captivate your audience.
This tutorial is inspired by the expert techniques shared by One Skill PowerPoint, and I’ll guide you through the process in a clear, friendly, and detailed manner so you can replicate these effects and make your presentations stand out.
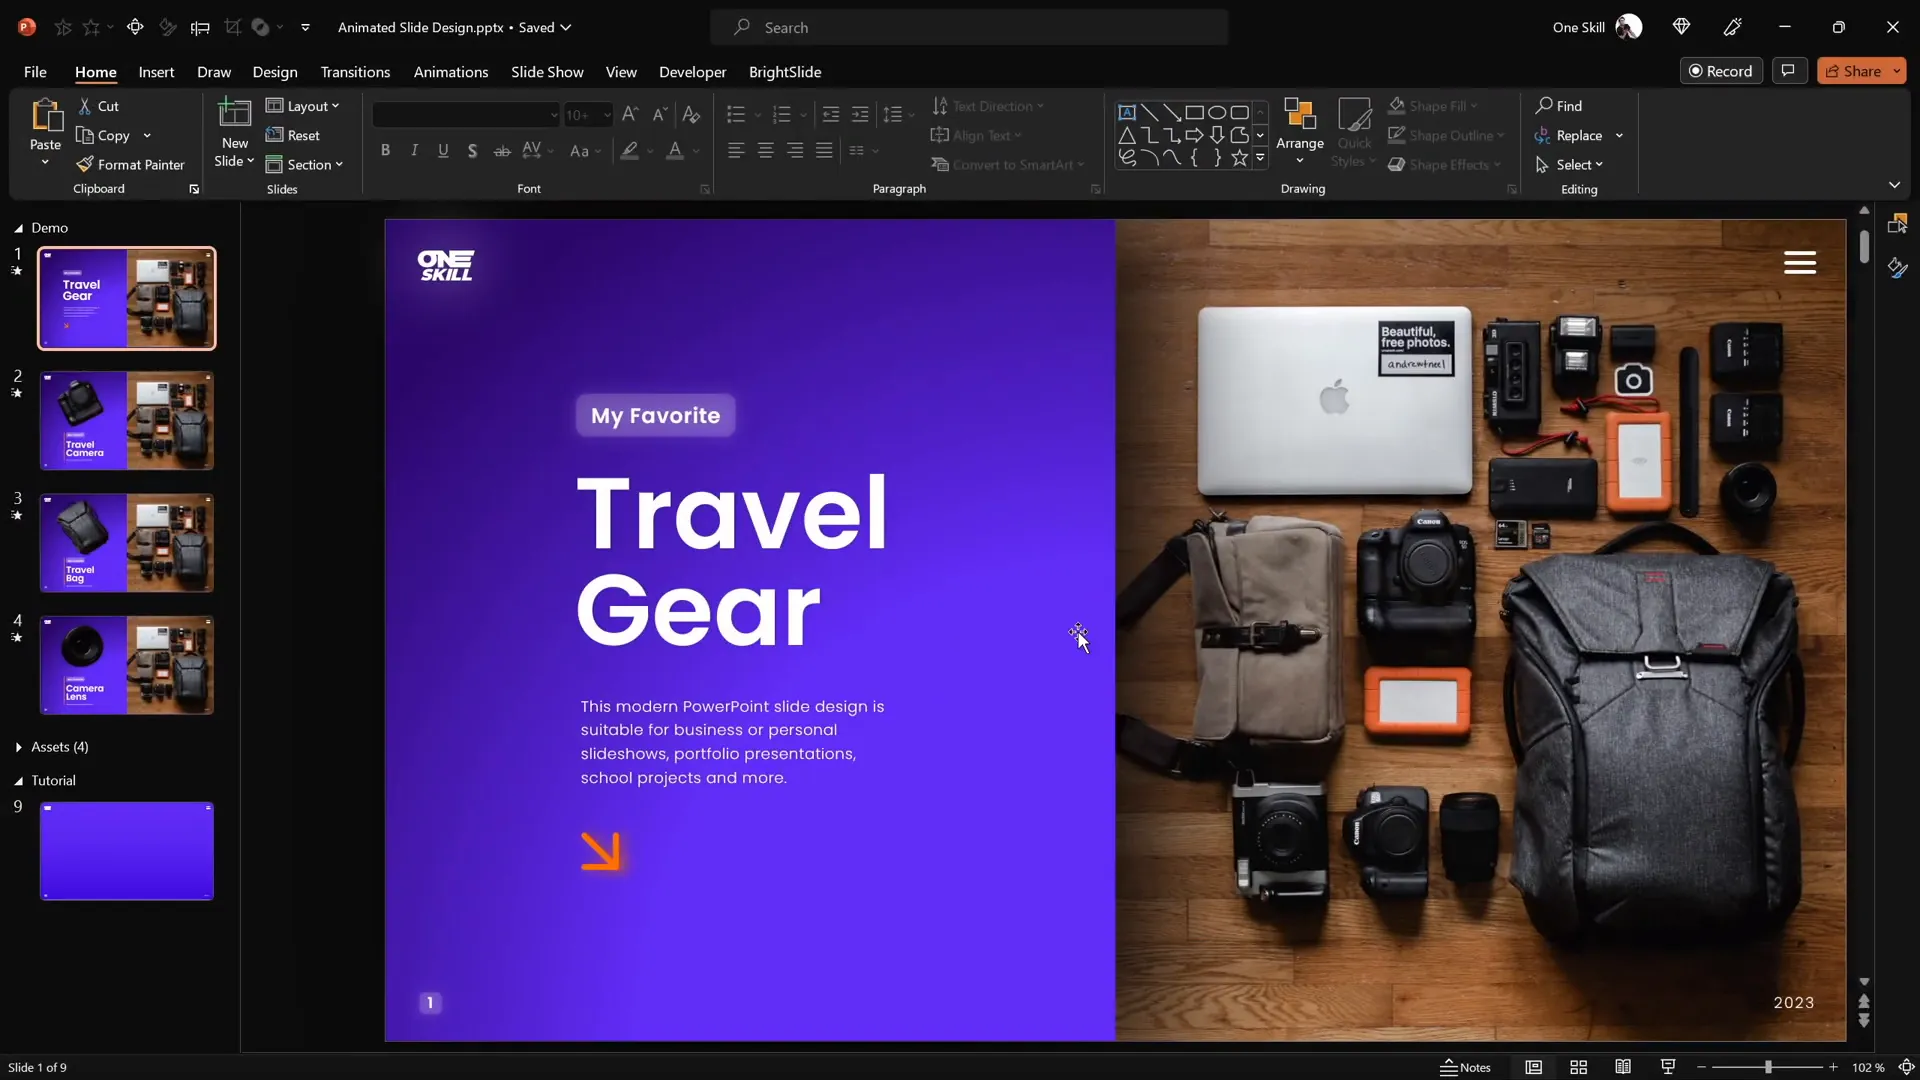
Table of Contents
- Table of Contents
- Creating a Beautiful Gradient Background
- Inserting and Cropping Photos for the Slide
- Adding Stylish Text Boxes
- Cutting Out Objects from the Photo for Animation
- Matching Photo Cutouts Precisely
- Creating Clickable Elements with Hyperlinks
- Applying Morph Transitions for Smooth Animation
- Final Slide Design and Adjustments
- Fixing Morph Transition Issues
- Frequently Asked Questions
- Conclusion
Table of Contents
- Creating a Beautiful Gradient Background
- Inserting and Cropping Photos for the Slide
- Adding Stylish Text Boxes
- Cutting Out Objects from the Photo for Animation
- Matching Photo Cutouts Precisely
- Creating Clickable Elements with Hyperlinks
- Applying Morph Transitions for Smooth Animation
- Final Slide Design and Adjustments
- Fixing Morph Transition Issues
- Frequently Asked Questions
- Conclusion
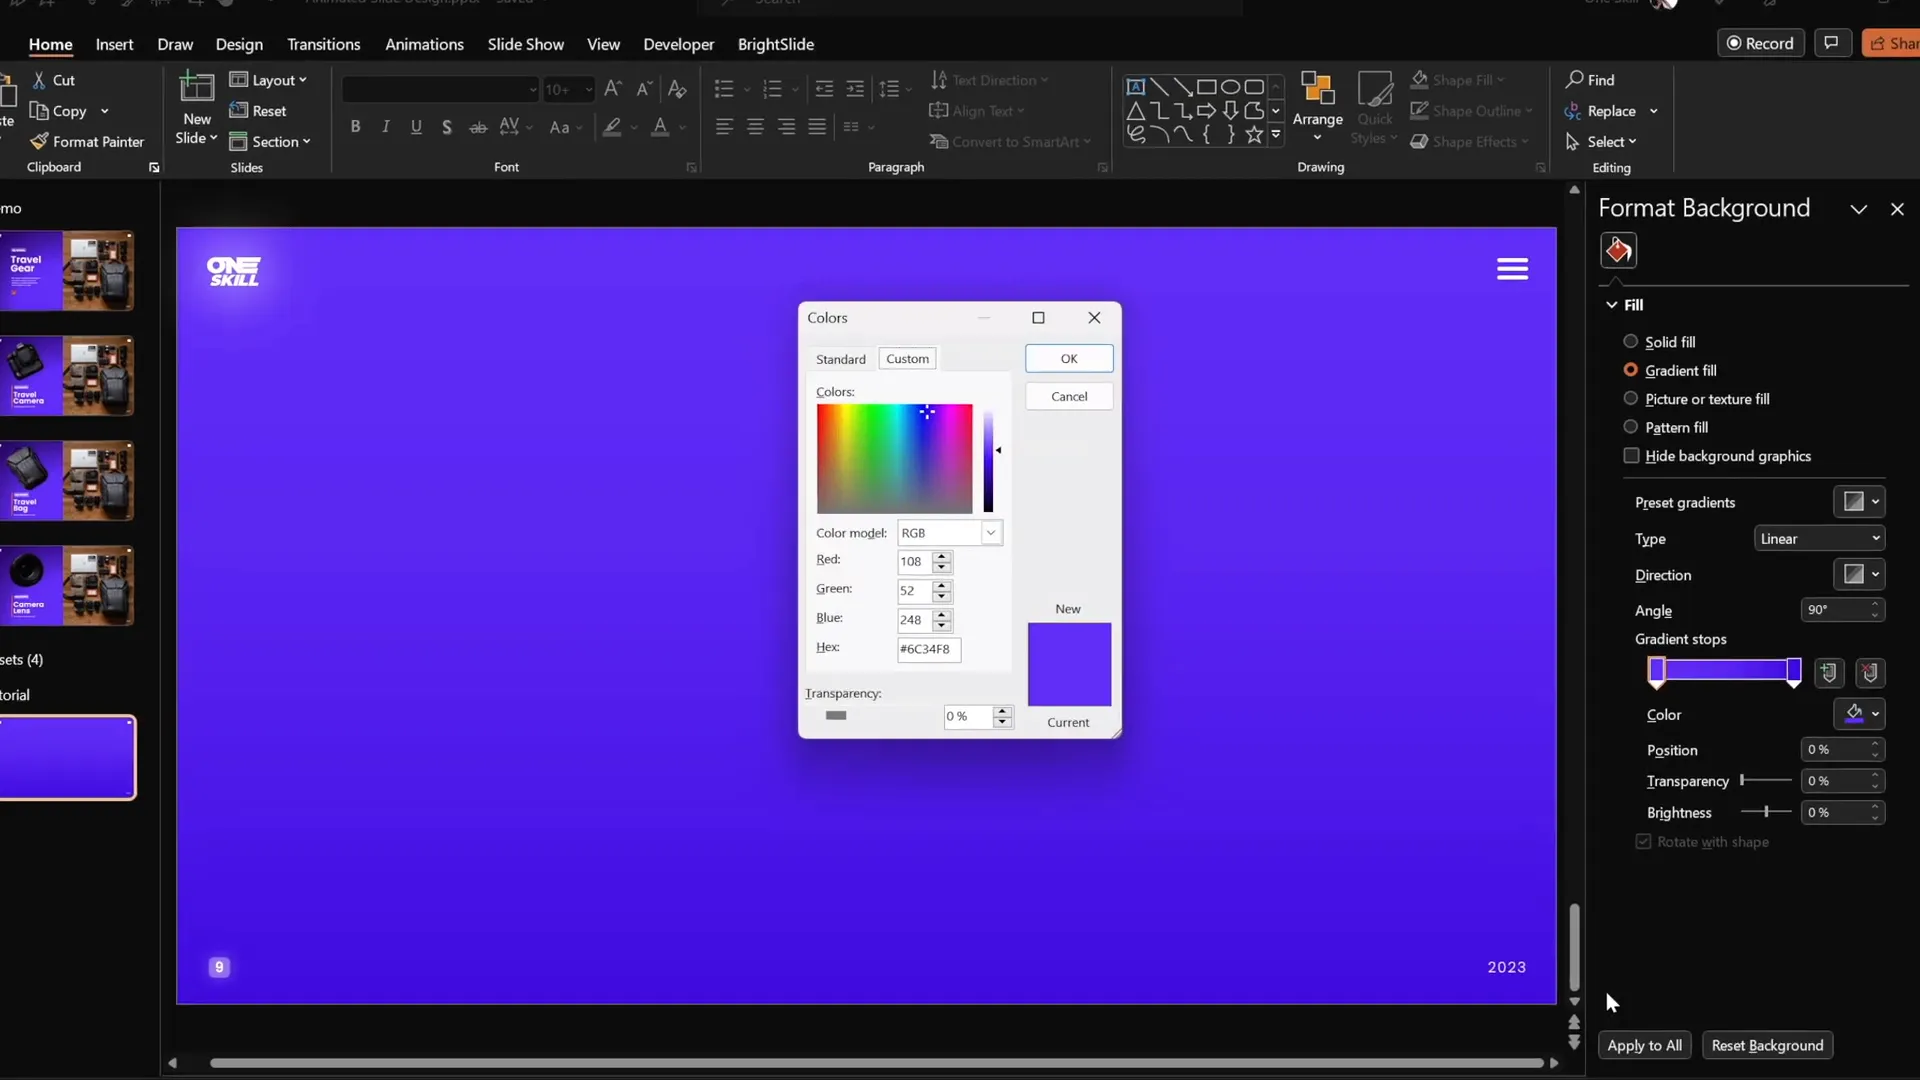
Creating a Beautiful Gradient Background
Let’s begin by setting the stage with a visually appealing gradient background that enhances the overall look of your slide. Start with a blank slide in Microsoft PowerPoint 365. To create a gradient fill that looks professional and modern, follow these steps:
- Open the Format Background pane.
- Select Gradient Fill.
- Add two color stops to the gradient slider.
- Use the hex color codes for precision:
- First color stop:
#4A90E2(a calm blue shade) - Second color stop:
#50E3C2(a fresh minty green shade)
- First color stop:
- Set the gradient type to Linear to create a smooth transition from one color to the other.
Once you have applied these colors, hide the format pane to gain more workspace. You should now have a vibrant and inviting slide background that will serve as the canvas for your design.
Inserting and Cropping Photos for the Slide
Next, add the hero photo that will be the centerpiece of your slide. For this tutorial, I recommend using a beautiful travel-themed photo from Unsplash, a great source of free high-quality images.
To insert the photo:
- Go to the Insert tab and choose Pictures from your device.
- Select the downloaded photo and click Insert.
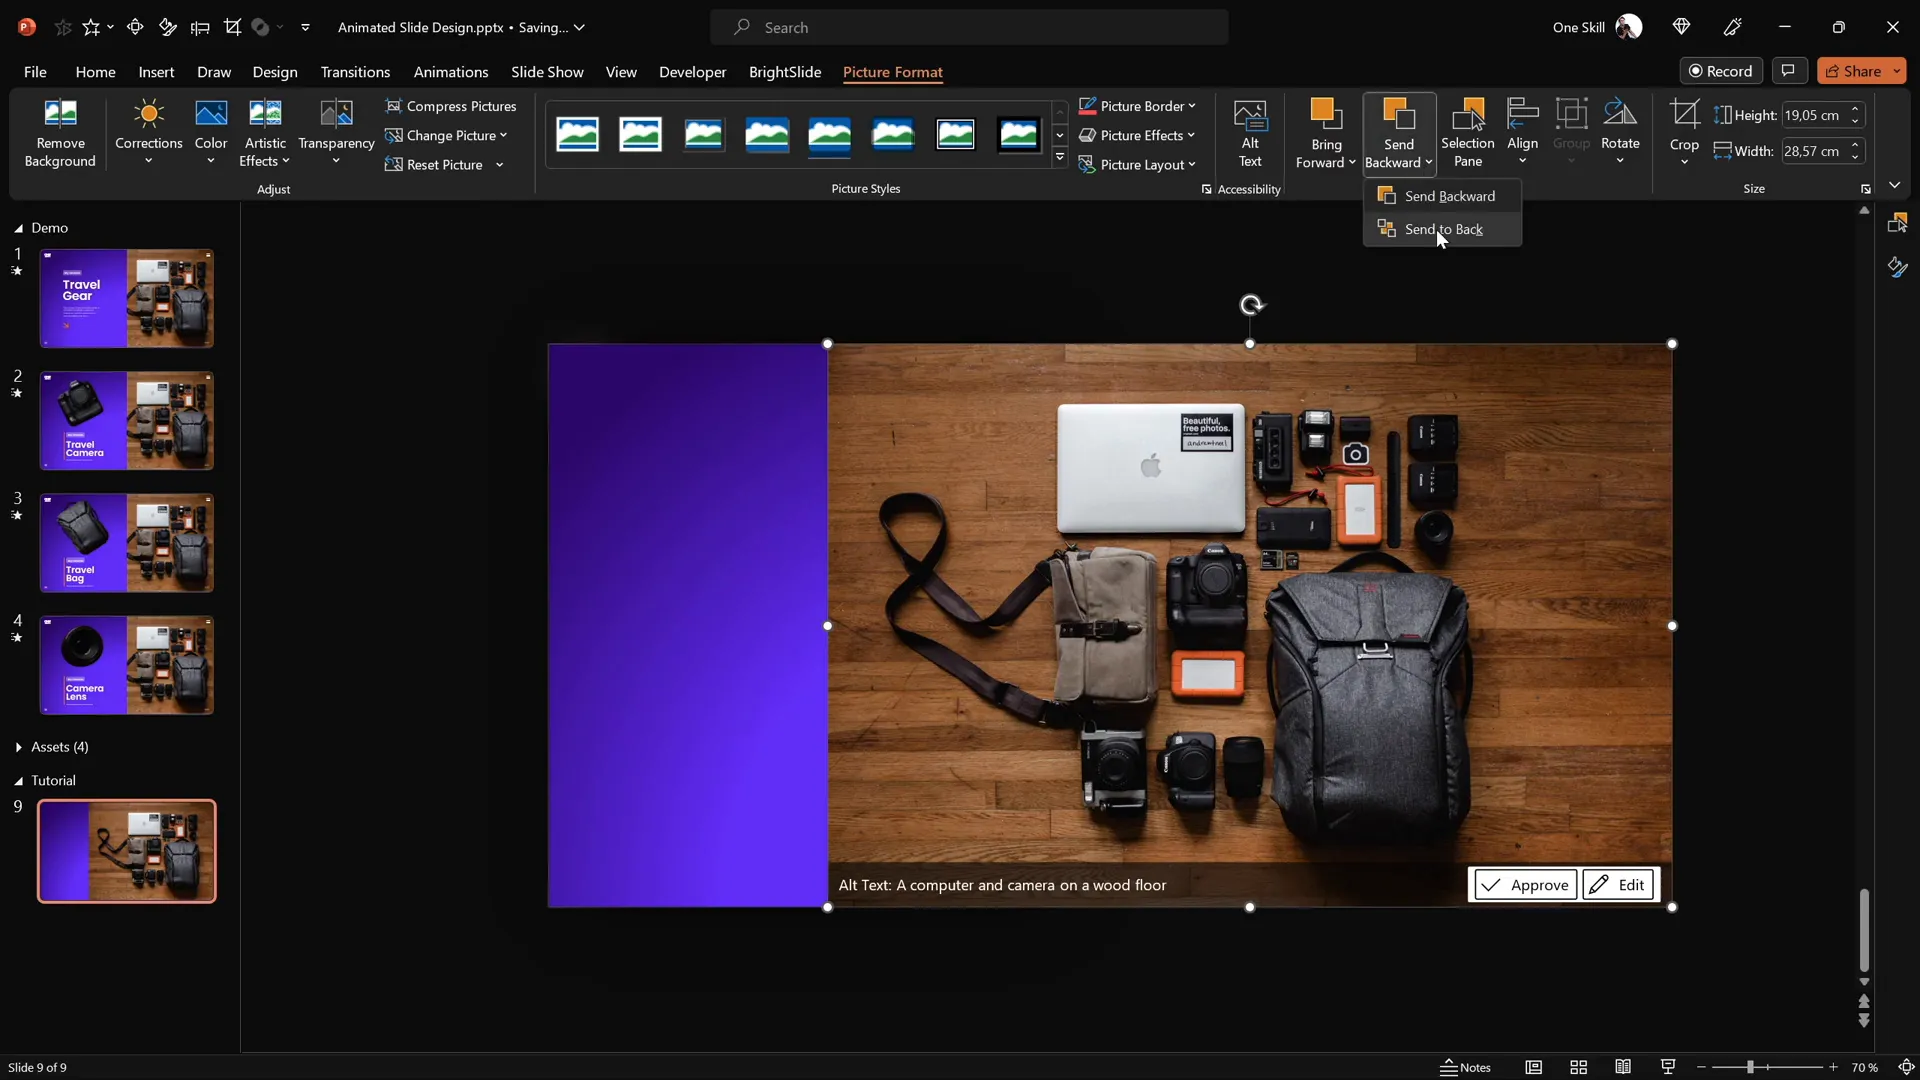
- Resize and position the photo to the right side of the slide.
- Send the photo to the back so that other elements such as text or shapes can appear in front.
- Crop the right edge of the photo so it fits neatly within the slide boundaries without spilling over.
This placement balances the slide by leaving space on the left side for text and interactive elements.
Adding Stylish Text Boxes
Now, let’s add some eye-catching text boxes to complement the photo and provide context for the clickable elements. I suggest using the Poppins font family, specifically the Semi Bold and Light weights, for a modern and clean look.
To streamline your workflow, prepare your text boxes in advance and group them to facilitate easy copying and alignment.
Here’s how to add and align your text boxes:
- Copy your grouped text boxes and paste them onto your slide.
- Align the text boxes inside the rectangle on the left side of the slide.
- If you have the BrightSlide add-in, use its alignment shortcuts for quick centering and middle alignment.
- Alternatively, manually align by selecting both the rectangle and text boxes, then using the Shape Format > Align options to center horizontally and vertically.
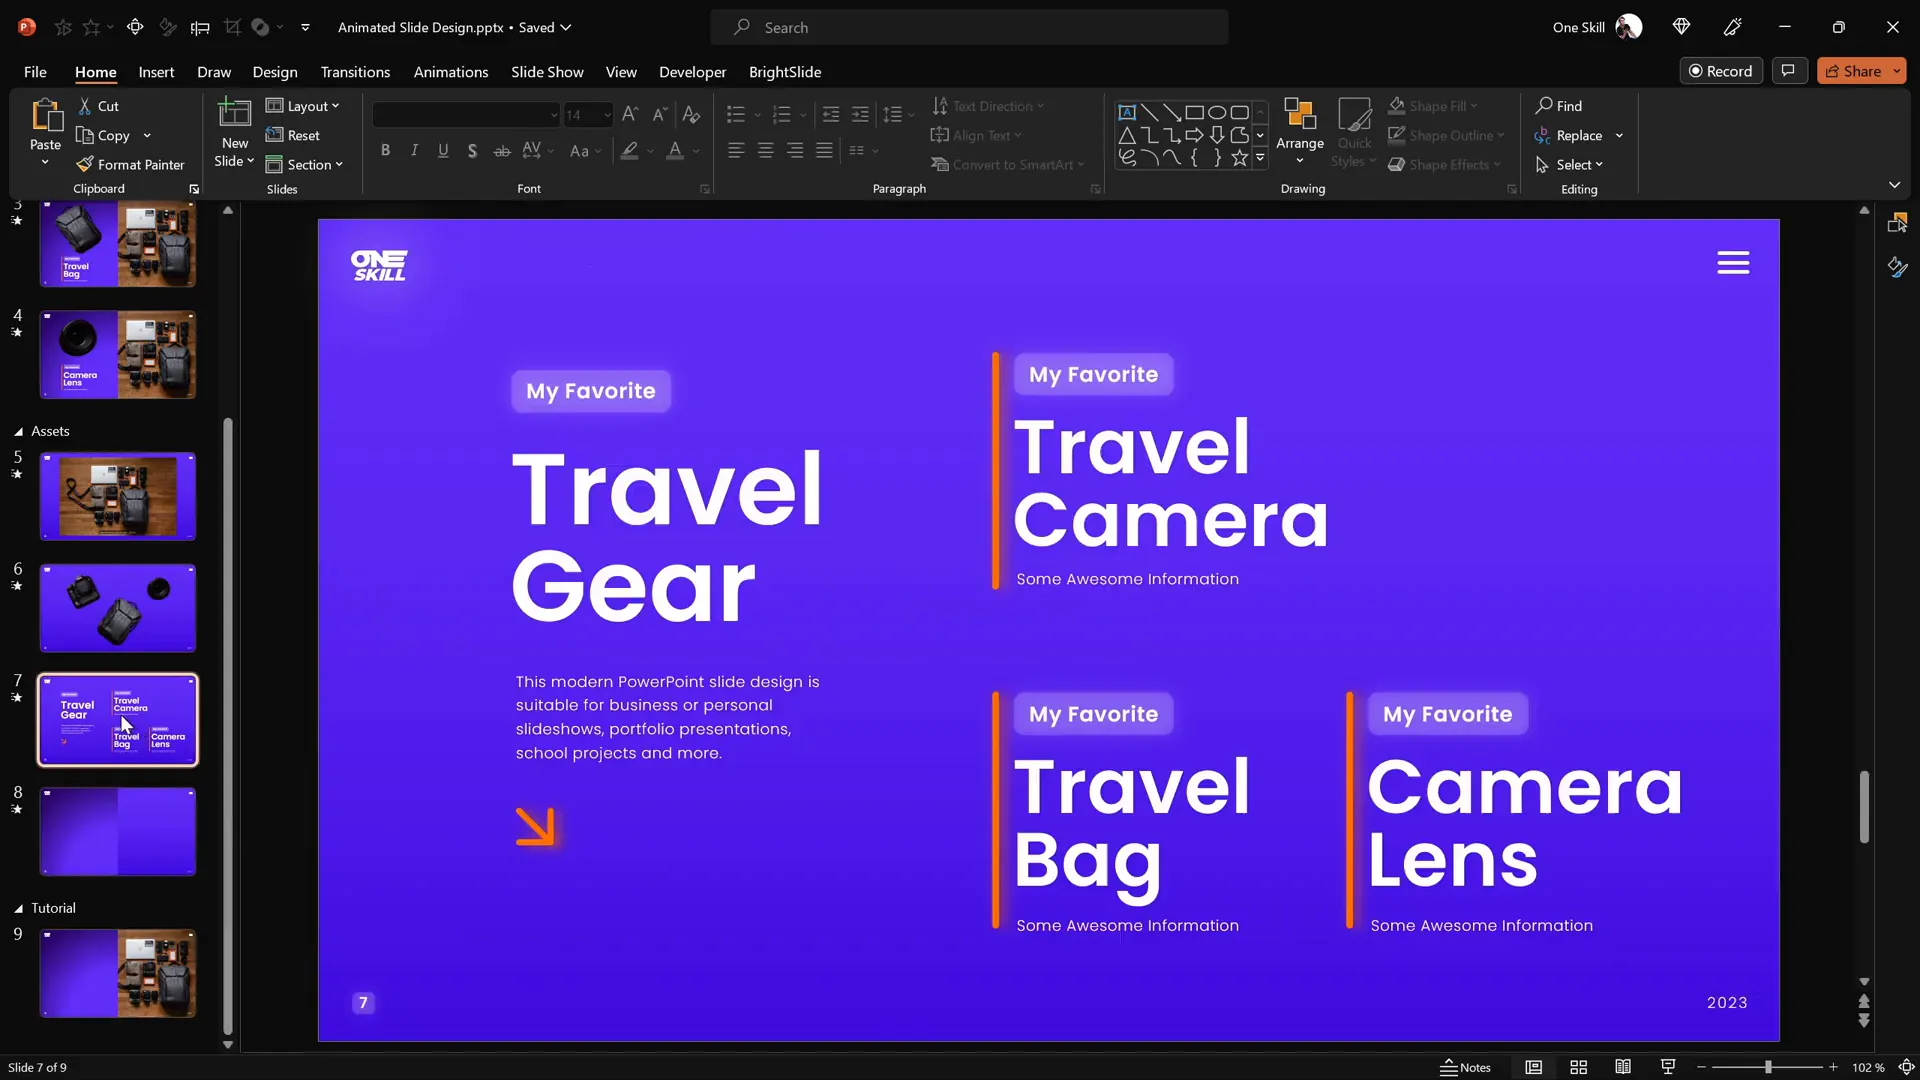
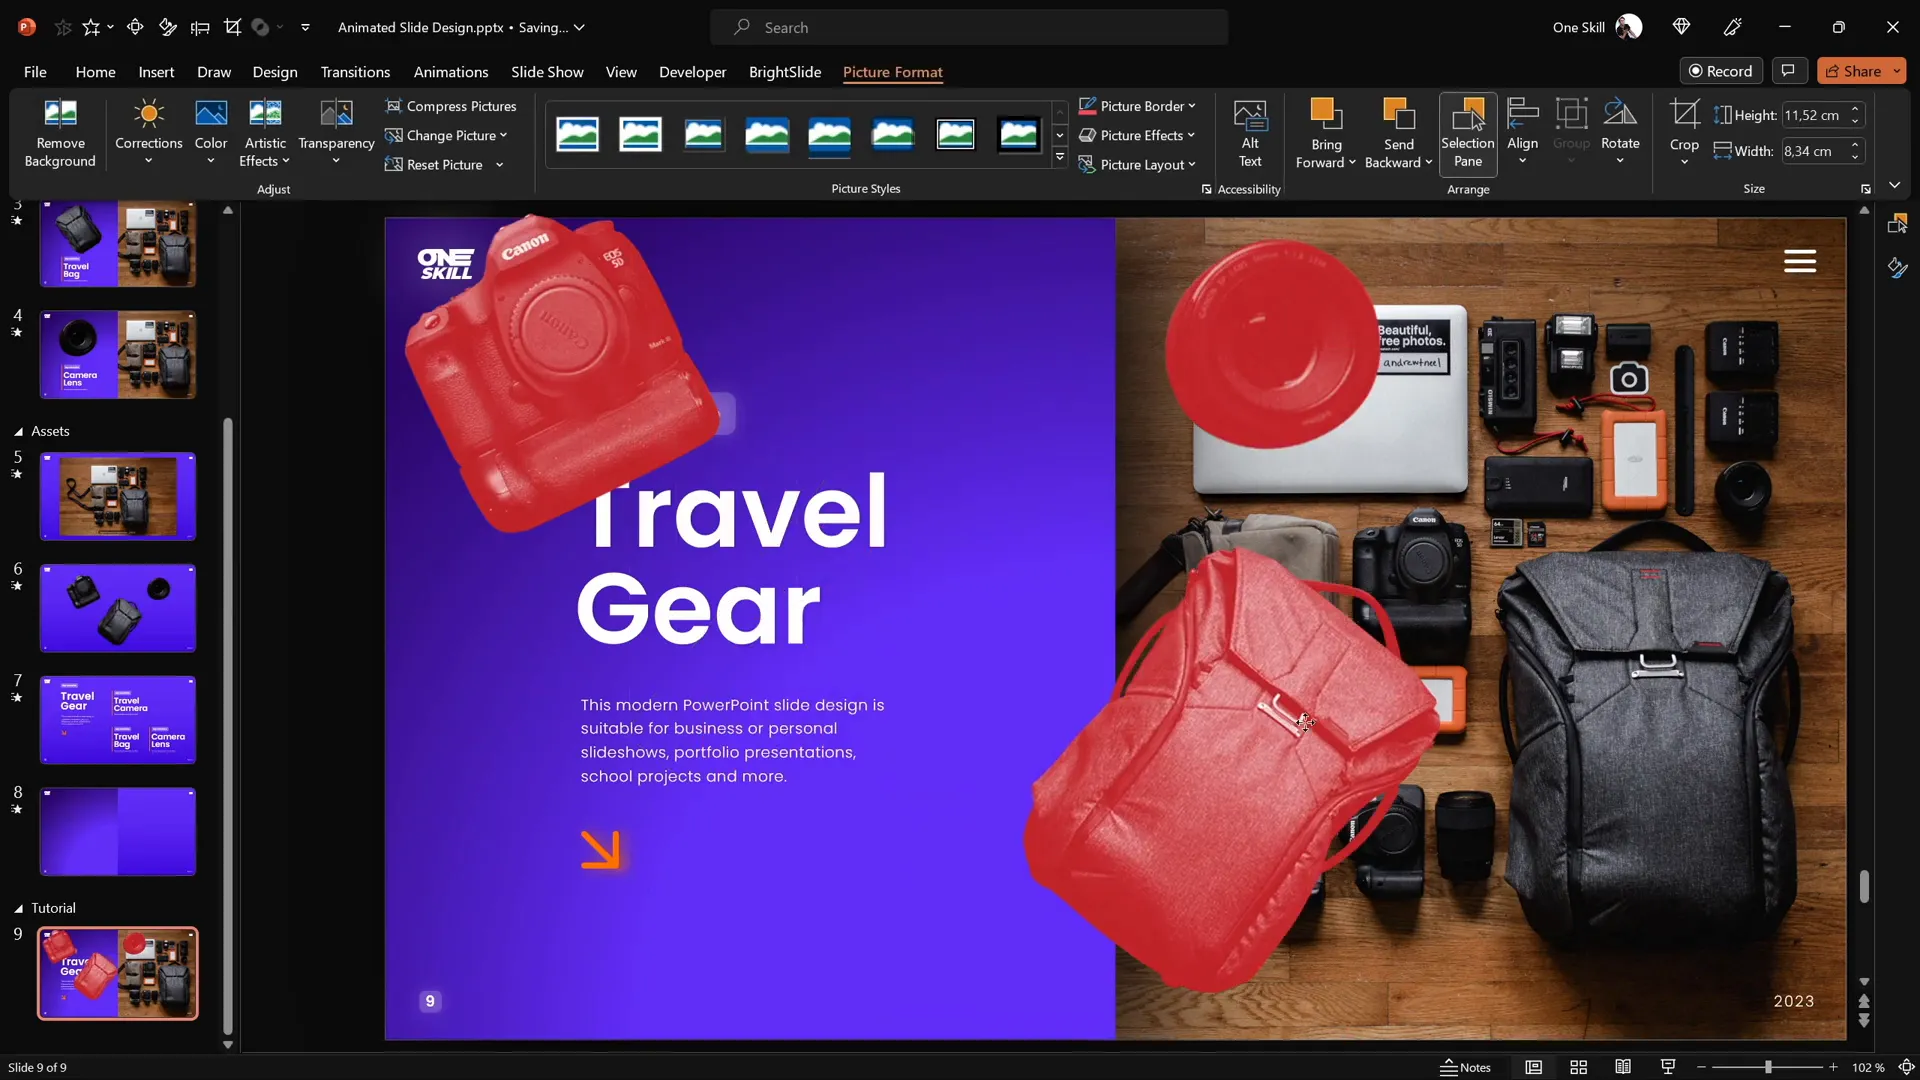
Add a group of text boxes for each clickable item you plan to animate on the photo, such as the travel camera, travel bag, and camera lens. Make sure these groups are neatly aligned and spaced evenly on the left side.
Cutting Out Objects from the Photo for Animation
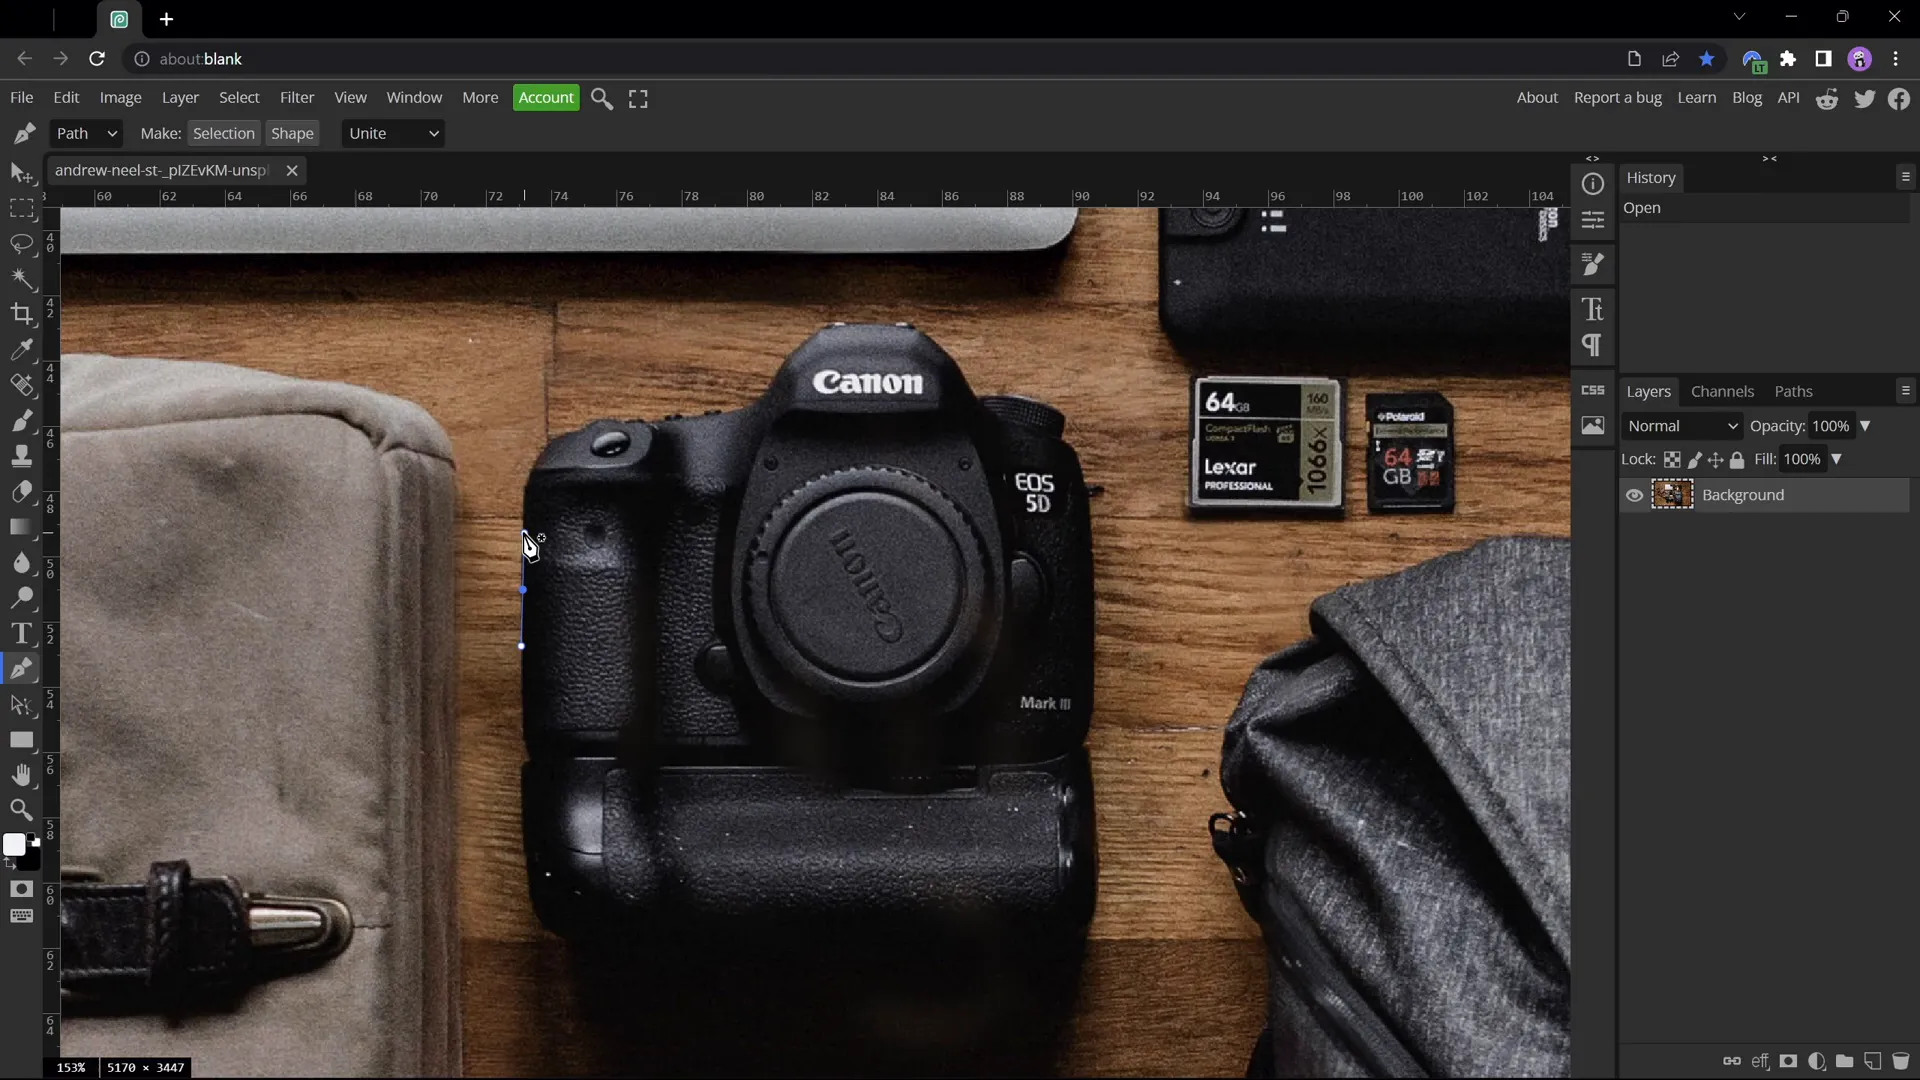
To create the clickable and animated effect, you need to separate the key objects in your photo—such as the camera, bag, and lens—into individual layers. While PowerPoint offers basic cropping tools, for more precision, I recommend using Photopea, a free online photo editor similar to Photoshop.
Here’s a step-by-step guide to cutting out an object (e.g., the camera) using Photopea:
- Open your photo in Photopea.
- Zoom in close to the object by holding the Alt key and scrolling your mouse wheel.
- Select the Pen Tool from the toolbar.
- Ensure the tool is set to Path Mode.
- Click points around the edges of the object to trace its outline. Use the Alt key to create sharp corners where needed.
- If you make a mistake, press the space bar to adjust the last point.
- Once the path is complete, click near the starting point and then press Create Selection.
- Confirm the selection in the pop-up window.
- Apply a mask by clicking the mask button to hide everything except the selected object.
- Trim the image by going to Image > Trim to remove excess transparent space.
- Export the cut-out object as a PNG with a transparent background.
Repeat this process for each object you want to animate separately. To save time, you can prepare these cutouts ahead of time.
Matching Photo Cutouts Precisely
After importing your cutouts back into PowerPoint, the next challenge is to position them exactly over their original locations on the photo. This alignment is critical for the morph animation to look seamless.
To assist with matching:
- Select all cutout images and temporarily recolor them to a bright red using the Picture Color options. This makes it easier to see if they’re properly placed.
- Move and rotate each cutout using arrow keys and rotation handles to align perfectly on top of the corresponding object in the background photo.
- Resize each cutout proportionally by holding Ctrl + Shift while dragging a corner handle.
- Once the positioning is perfect, reset the picture color to remove the red recolor effect.
At this point, your slide should feature the original photo in the background with three precisely positioned cutouts layered on top.
Creating Clickable Elements with Hyperlinks
To make the cutouts interactive, you need to create hyperlinks that navigate to different slides showing the animated zoom-in effect on each object.
Follow these steps:
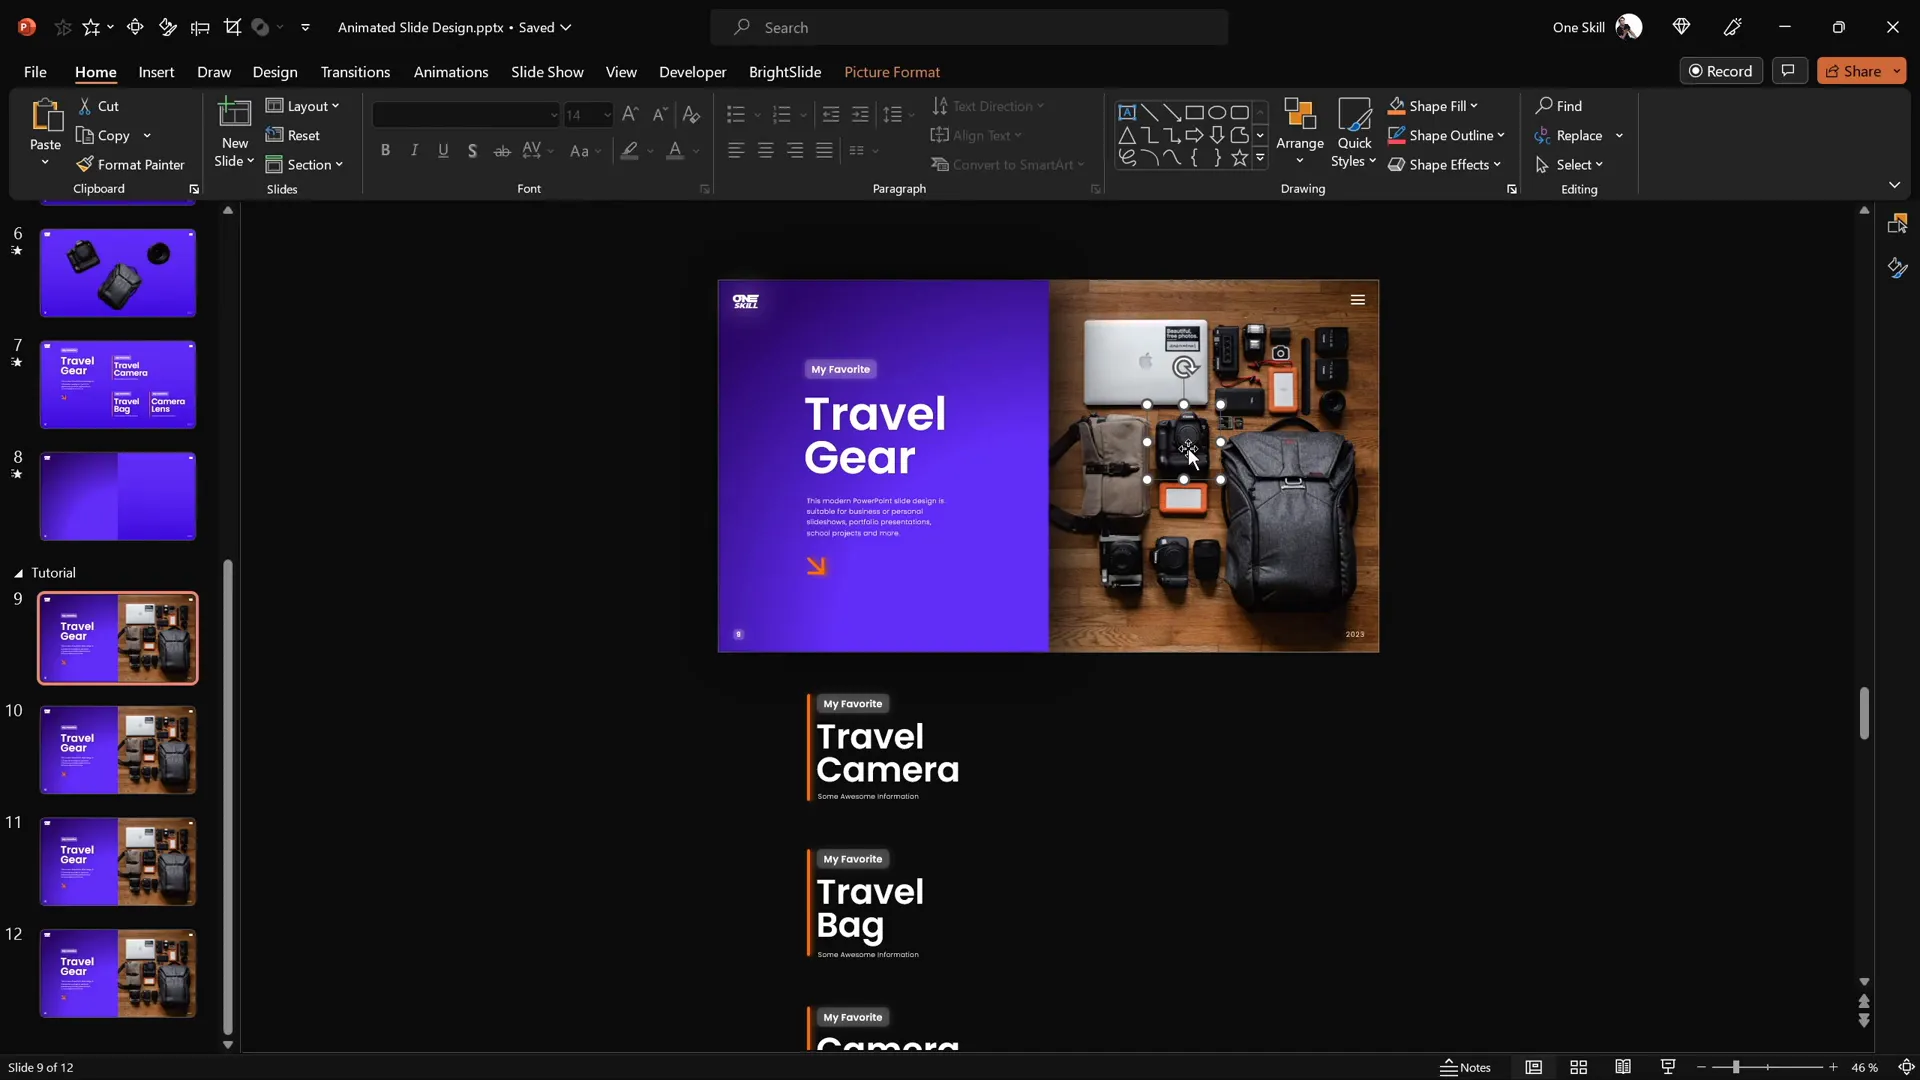
- Duplicate your current slide three times, so you have four slides total:
- Slide 1: Introduction slide with the full photo and clickable elements.
- Slide 2: Zoomed-in camera slide.
- Slide 3: Zoomed-in travel bag slide.
- Slide 4: Zoomed-in camera lens slide.
- On the introduction slide, select each cutout and press Ctrl + K to add a hyperlink.
- Link the camera cutout to Slide 2, the travel bag cutout to Slide 3, and the lens cutout to Slide 4.
- Copy the cutouts with hyperlinks and paste them onto the corresponding zoom-in slides, deleting the old cutouts without links.
These hyperlinks will allow you to click on any object in the photo and jump to the detailed slide for that object.

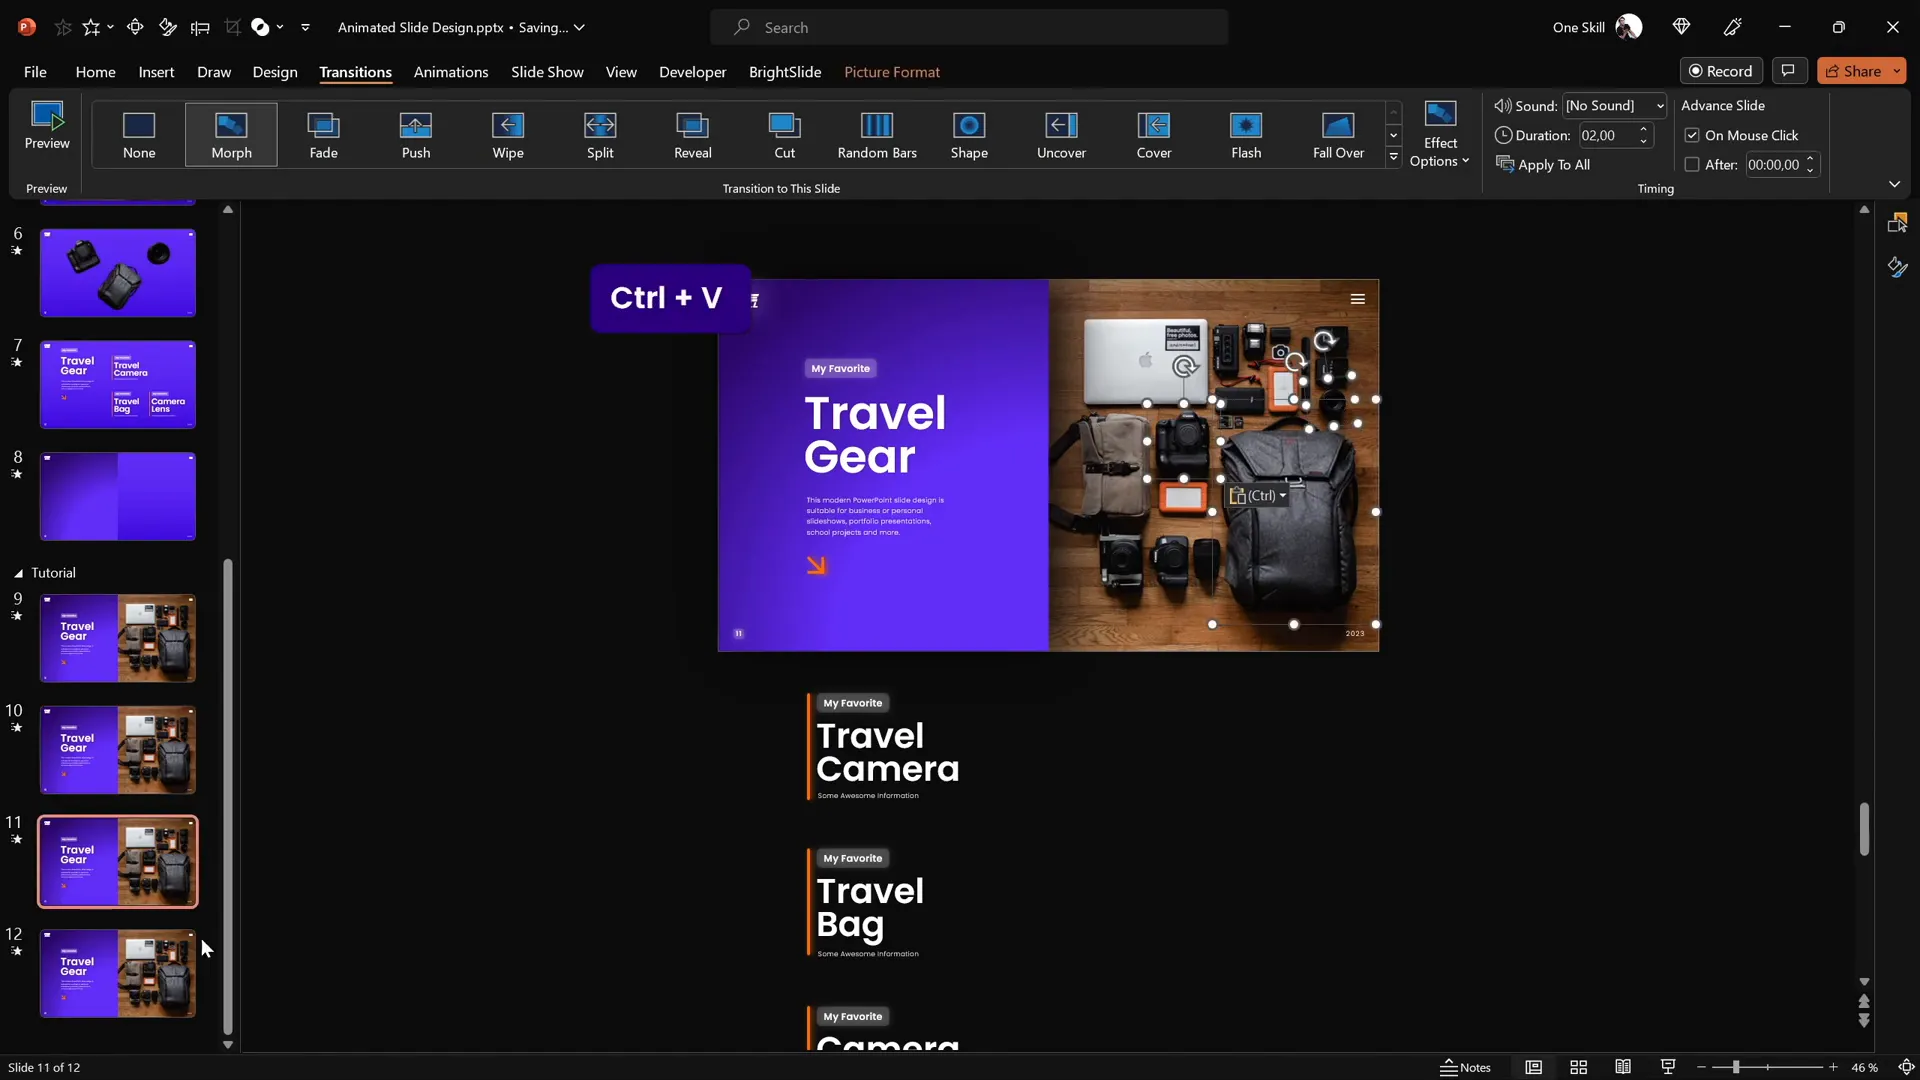
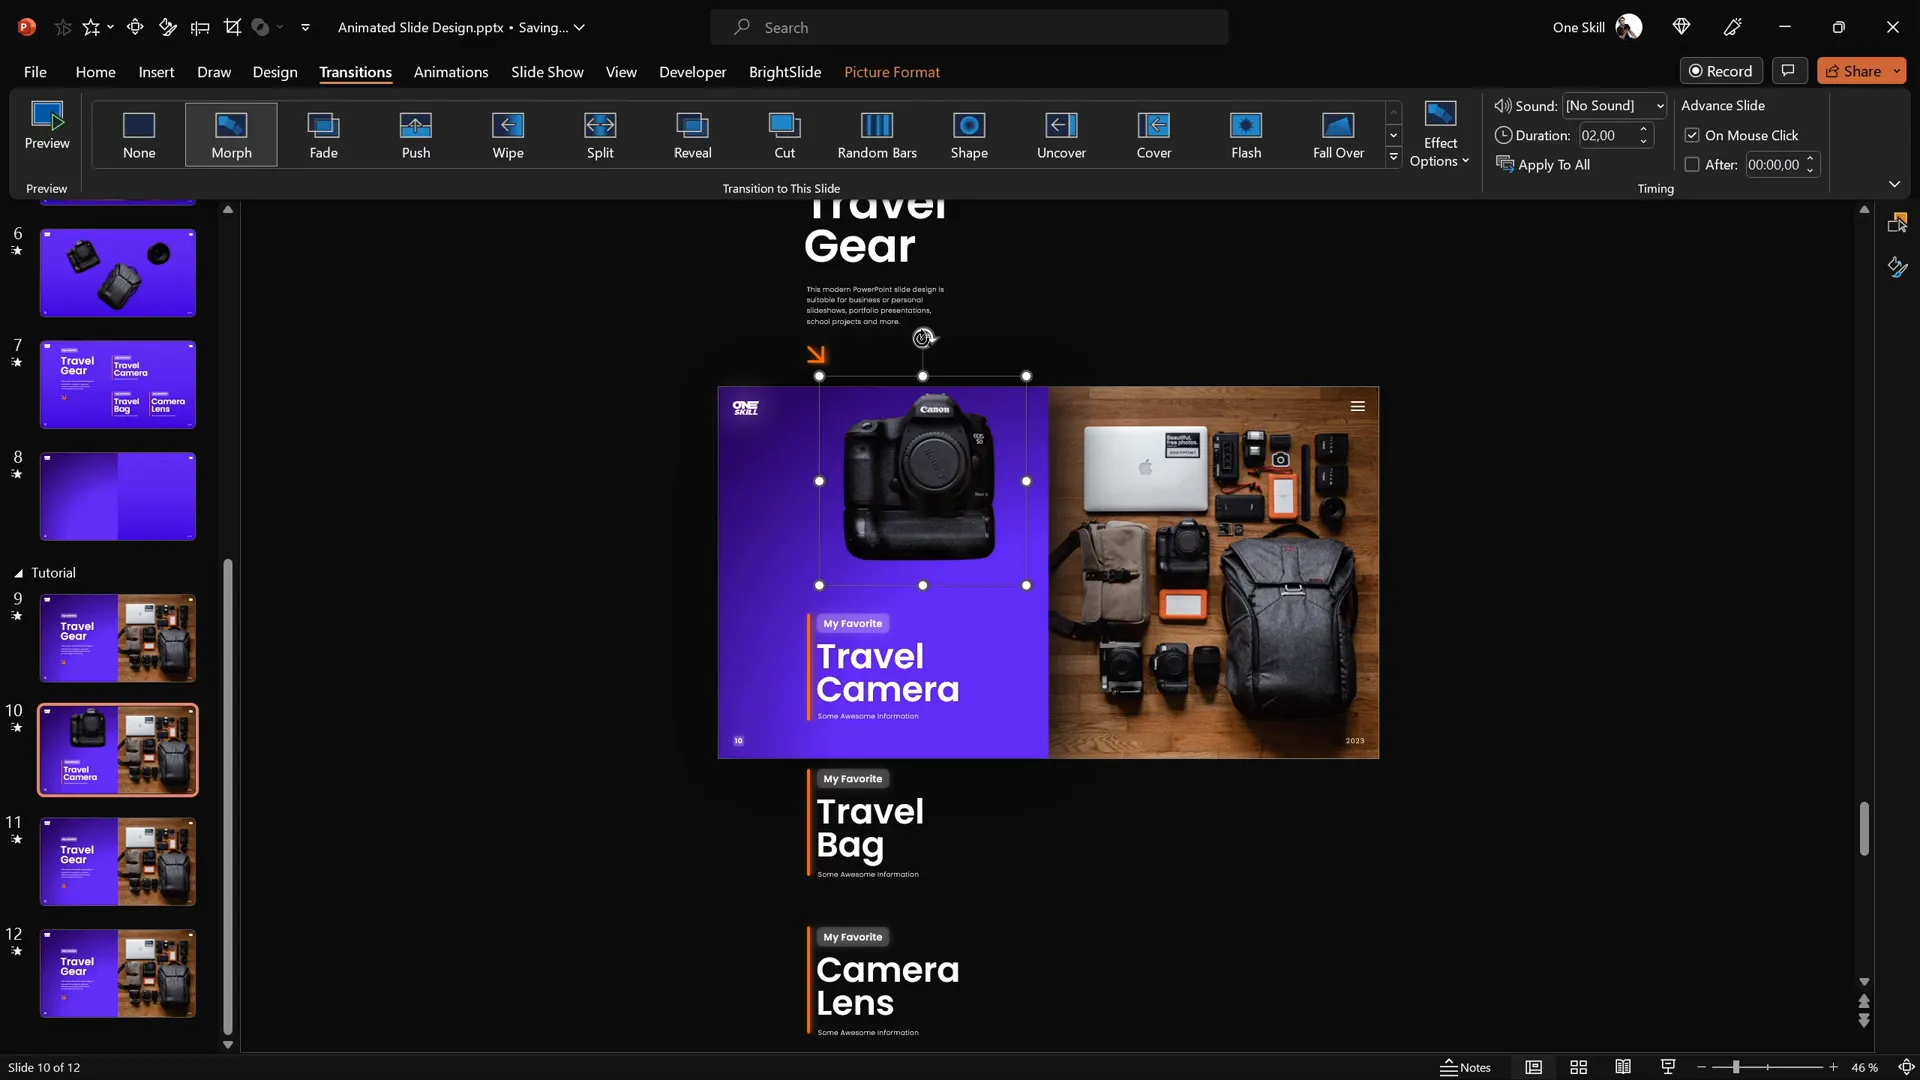
Applying Morph Transitions for Smooth Animation
To create smooth, professional animations between slides, use the PowerPoint Morph Transition. This transition animates the movement, resizing, and rotation of objects from one slide to the next, creating a captivating zoom and pop-out effect.
Here’s how to apply it:
- Select all four slides in slide sorter or the slide pane.
- Go to the Transitions tab and choose Morph.
- Adjust the duration and effect options as desired for a smooth animation.
Now, when you run the slideshow, clicking on an object will transition to the zoomed-in version with a beautiful morph effect.
Final Slide Design and Adjustments
Each zoomed-in slide requires some layout adjustments to highlight the selected object and its text box group:
- Camera Slide: Move the travel gear text box upwards to make room. Enlarge and reposition the camera cutout to be front and center.
- Travel Bag Slide: Bring the text box groups closer together and move them upwards to hide the other groups. Resize and rotate the travel bag cutout for emphasis.
- Camera Lens Slide: Adjust text boxes and cutout similarly to focus attention on the lens.
These adjustments ensure that each slide clearly highlights the selected item and maintains a clean, professional look.
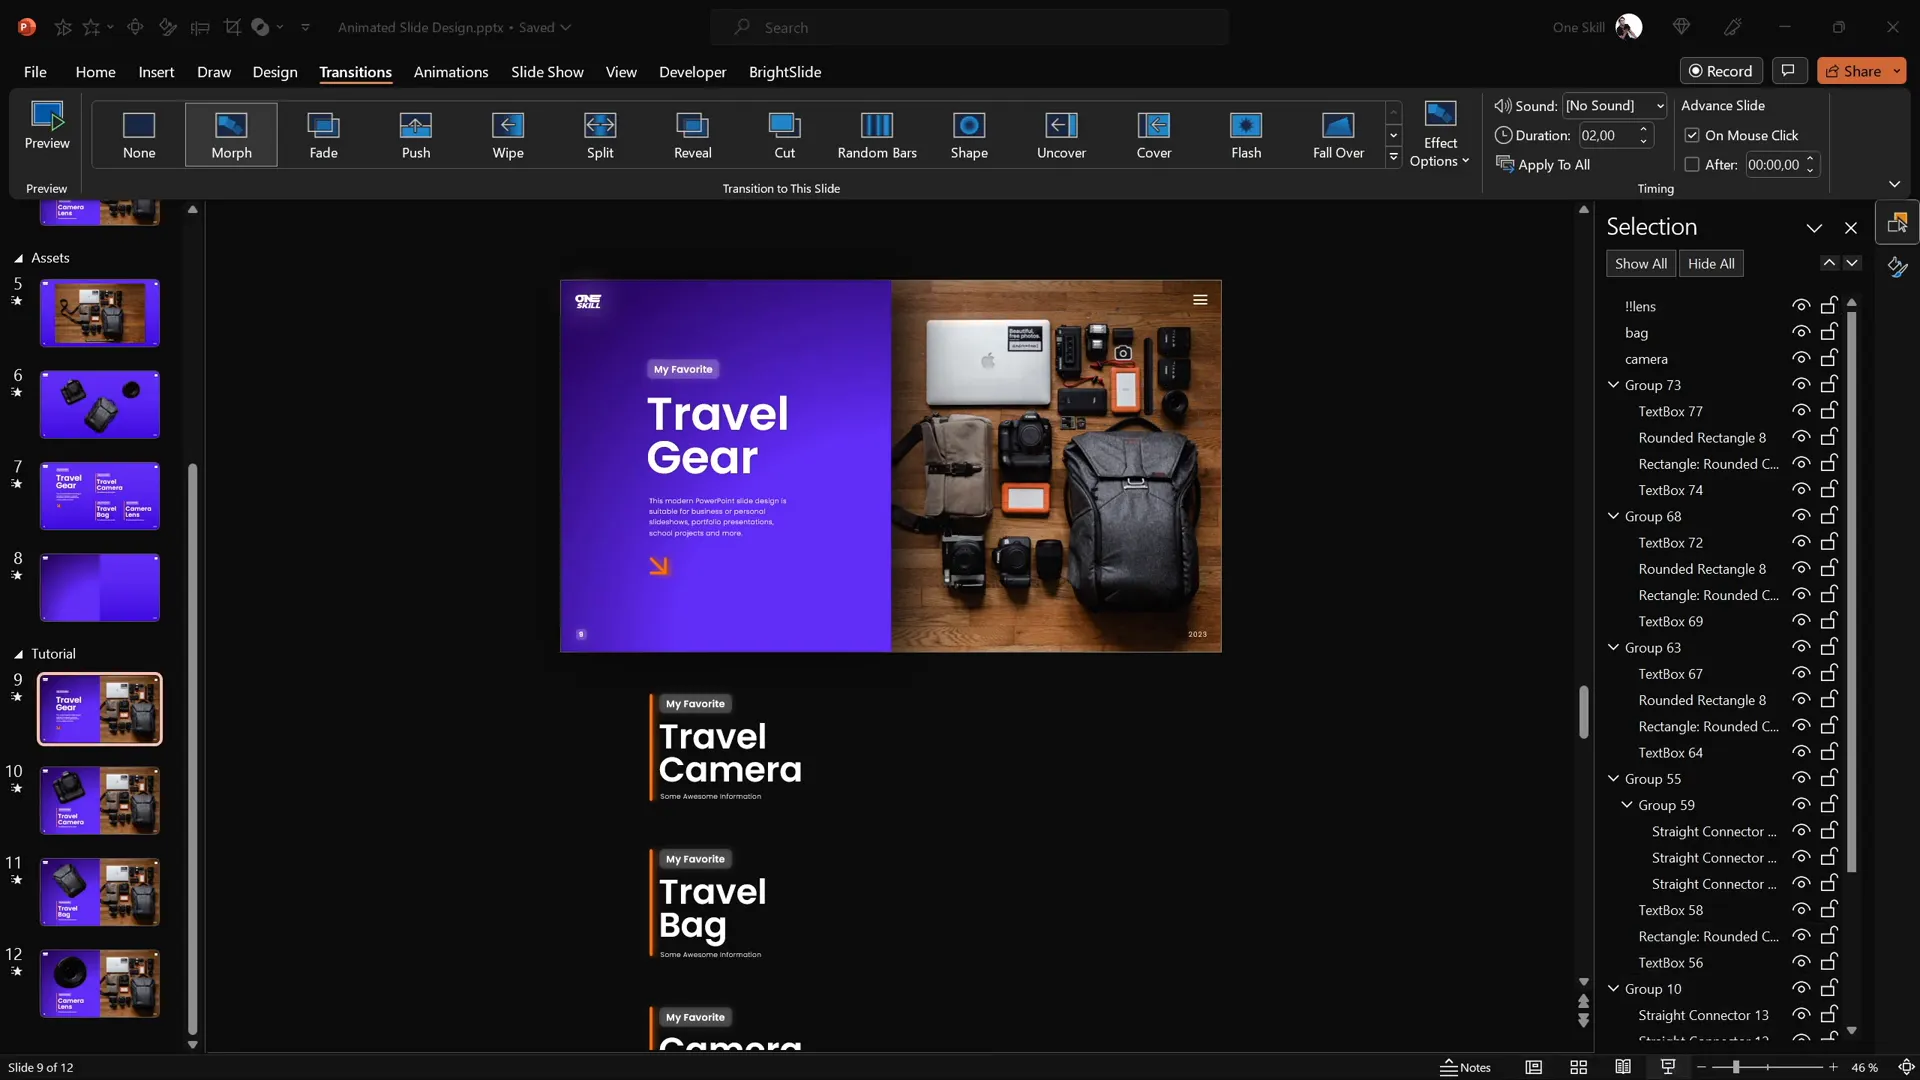
Fixing Morph Transition Issues
Sometimes, Morph transitions can behave unexpectedly when two objects have similar shapes or names, causing animations to glitch or morph incorrectly. For example, the camera lens animation might morph from the camera picture instead of the lens.
To fix this issue:
- Open the Selection Pane (under the Home tab, select Select > Selection Pane).
- Rename all lens objects to include double exclamation marks, e.g.,
!!Lens, to make their names unique. - Ensure the same naming convention is consistent across all slides.
This technique helps PowerPoint distinguish between similar objects and apply the morph transition correctly.
Frequently Asked Questions
Can I use any photo for this animated slide design?
Absolutely! You can use any photo you like, but for best results, choose a photo with distinct objects that you want to animate separately. High-resolution photos with clear edges work best for cutting out objects.
Do I need the BrightSlide add-in to align objects?
No, BrightSlide is optional but highly recommended for productivity. You can always use PowerPoint’s native alignment tools by selecting the objects and using the Shape Format > Align options to center and distribute elements.
Is Photopea free to use, and do I need to download software?
Photopea is a free, online photo editor that works directly in your web browser, so there is no need to download or install anything. It’s a powerful tool similar to Photoshop and perfect for precise object cutouts.
What if Morph transition doesn’t work smoothly?
Ensure that objects you want to morph have consistent names across slides and are positioned similarly. If objects look too similar, rename them uniquely in the Selection Pane to avoid confusion. Also, verify that the cutouts are aligned precisely on each slide.
Can I use this technique with older versions of PowerPoint?
Morph transition is available only in PowerPoint 2019, Microsoft 365, and PowerPoint 2021. If you have an older version, you might need to use alternative animations or upgrade your PowerPoint to access Morph.
Conclusion
Creating engaging and interactive PowerPoint slides has never been easier with the combination of precise photo editing, smart text arrangement, clickable hyperlinks, and the Morph transition. By following the steps outlined in this guide, you can produce a professional clickable and scrollable animated slide design that impresses your audience and elevates your presentations.
From setting a gorgeous gradient background to cutting out photo elements in Photopea, matching them perfectly, and applying smooth morph animations, every step is designed to be approachable and effective. This technique is perfect for showcasing products, travel gear, or any scenario where you want to zoom in on details dynamically.
Remember to experiment with your own photos and text styles to customize the design to your brand or presentation theme. And don’t hesitate to explore additional PowerPoint features and add-ins like BrightSlide to boost your productivity even further.
Stay creative, keep practicing, and enjoy making your slides come to life!
Check out the full video: ANIMATED PowerPoint Slide Design ✨FREE✨


