If you’re looking to elevate your PowerPoint skills and impress your audience with a sleek, interactive, and animated presentation, you’re in the right place. In this comprehensive guide, we’ll walk through how to create an Interactive Morph Presentation using PowerPoint’s powerful Morph transition feature. This tutorial is inspired by the innovative design found on the Filmora 14 website, an AI-powered video editor, and will show you how to replicate a futuristic slide design with clickable buttons and smooth animations.
Whether you’re a presenter, educator, or designer, this tutorial will help you build an engaging slide deck that offers interactivity and polished transitions. Plus, we’ll introduce you to Filmora’s amazing AI audio to video feature that can complement your presentations by turning audio files into captivating videos in minutes.
Table of Contents
- Introduction to Interactive Morph Presentations
- Using Filmora’s AI Audio to Video Feature
- Gathering Design Assets for Your Slide
- Setting Up Your Slide Background
- Formatting Titles and Subtitles
- Creating Interactive Buttons with Icons
- Using a Mask to Showcase Scrolling Images
- Arranging and Grouping Photos for Scrolling
- Adding a Glowing Edge to the Mask
- Making Buttons Clickable with Hyperlinks
- Applying Morph Transition for Smooth Animation
- Final Testing and Tips
- Frequently Asked Questions
- Conclusion
Introduction to Interactive Morph Presentations
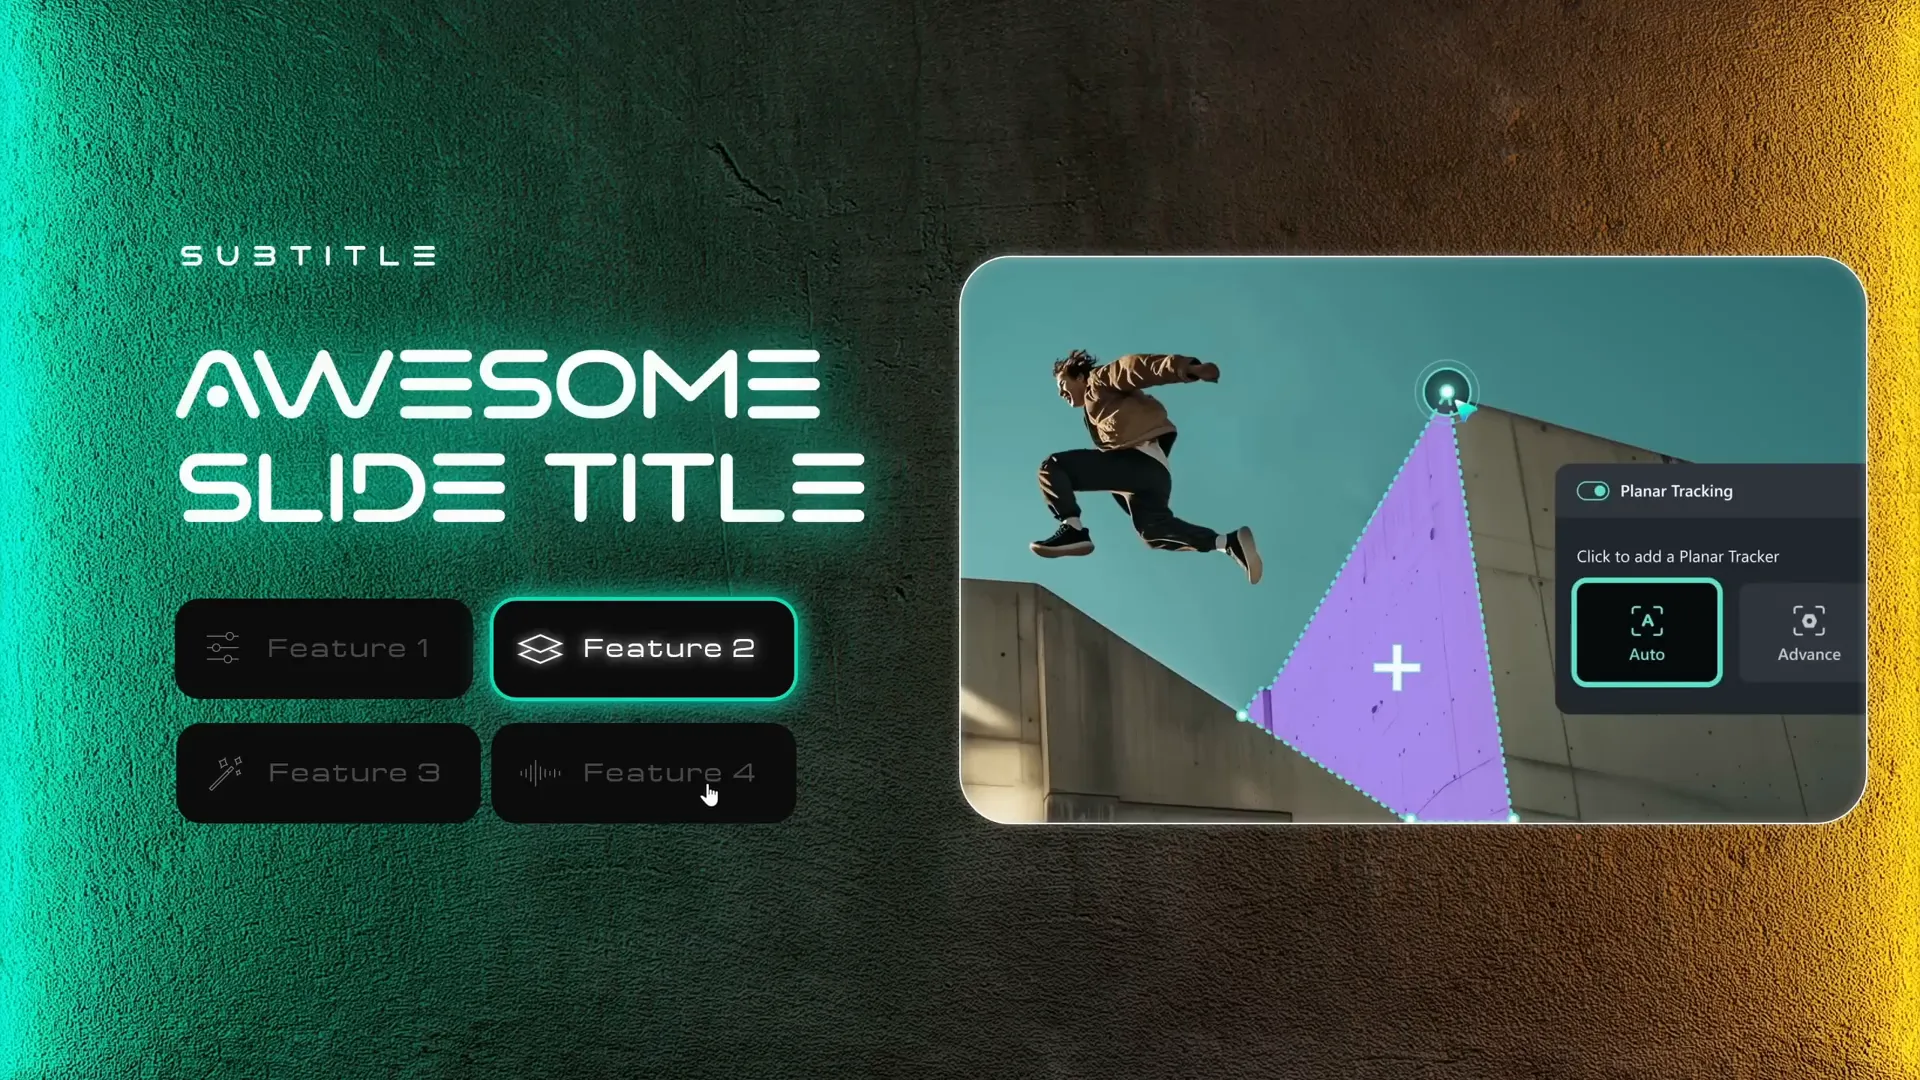
PowerPoint’s Morph transition unlocks the ability to create dynamic, animated presentations that feel more like interactive websites than static slides. This tutorial focuses on building an interactive morph slide design that features clickable buttons, animated scrolling images, and a futuristic aesthetic inspired by Filmora 14’s website interface.
By combining Morph animations with strategically placed hyperlinks and layered shapes, you can create presentations that allow users to navigate between sections seamlessly. This is ideal for product demos, portfolios, storytelling, and educational content.
Using Filmora’s AI Audio to Video Feature
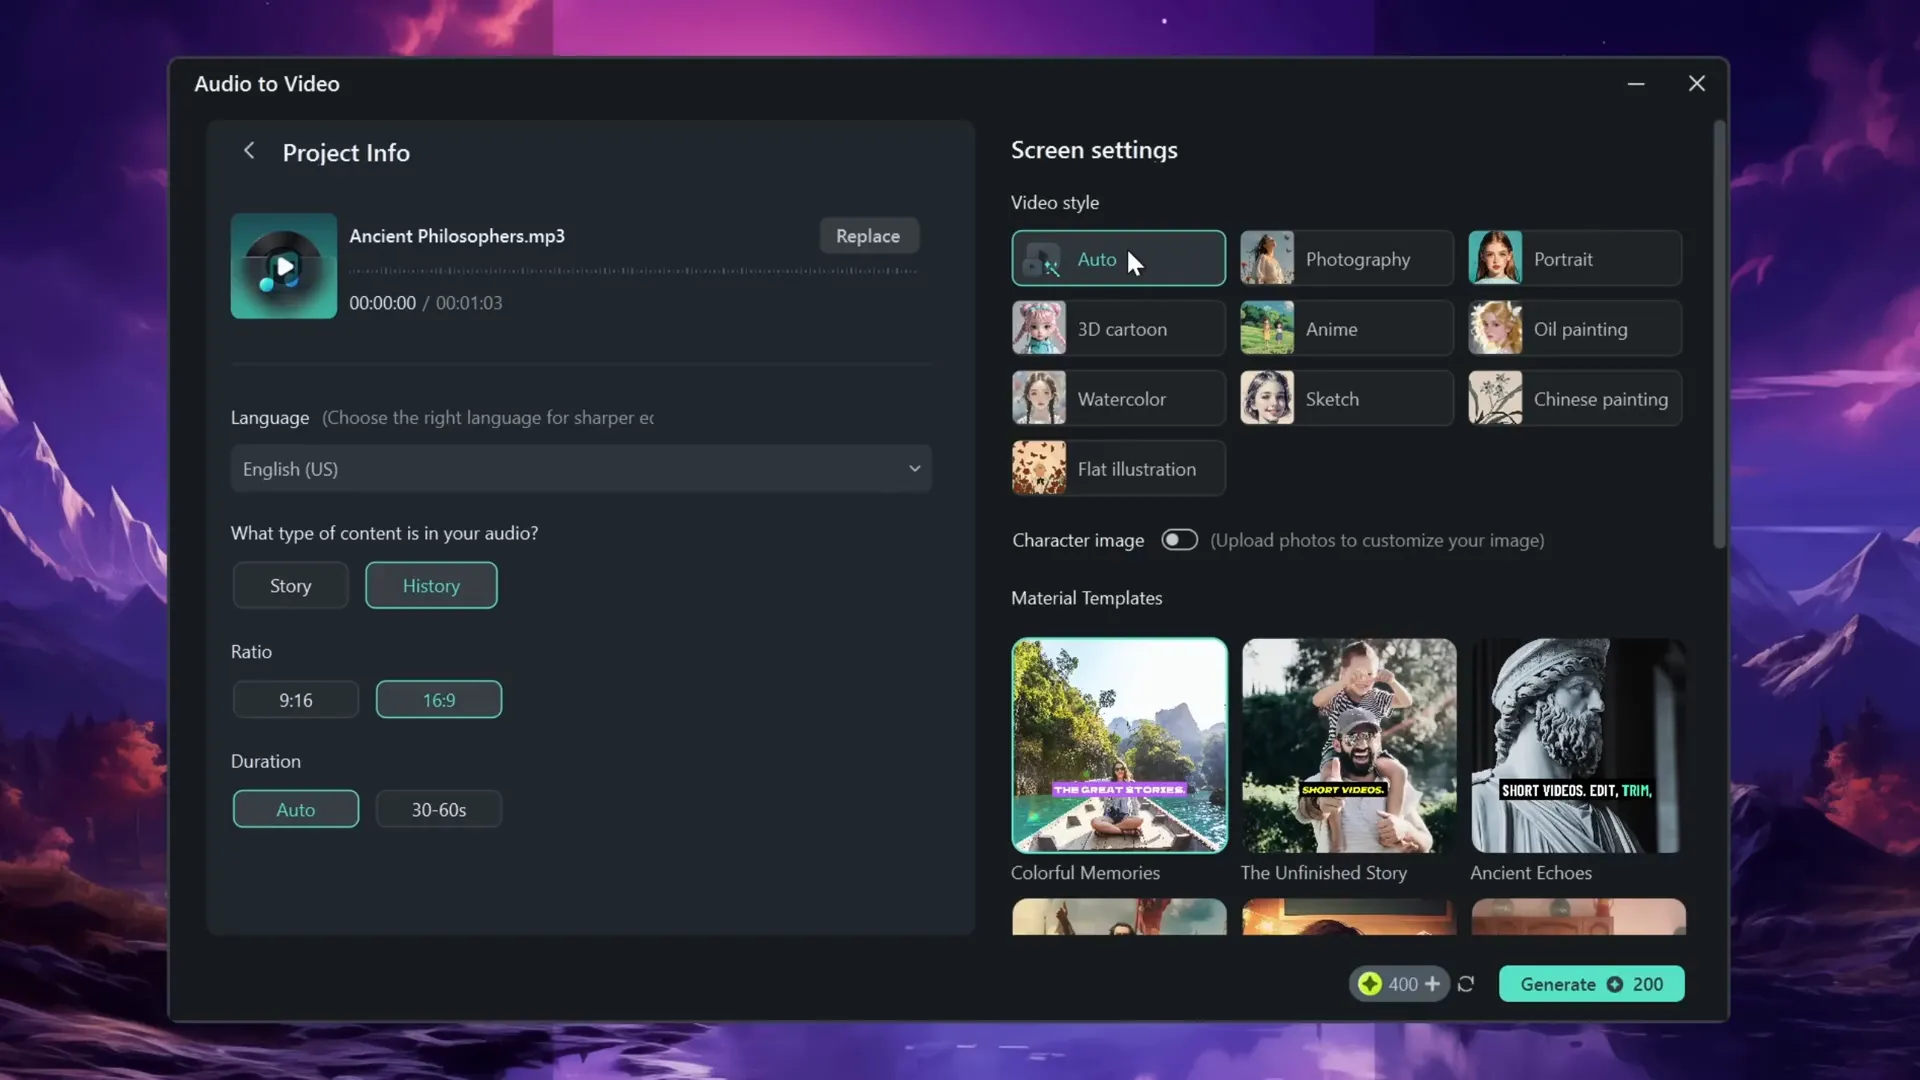
Before diving into PowerPoint, the video highlights Filmora 14’s AI Audio to Video feature, which is a fantastic tool for podcasters, storytellers, and anyone wanting to convert audio files into engaging videos quickly. Here’s a quick overview of how it works:
- Open Filmora and locate the Audio to Video button, either on the main interface or under the toolbox.
- Upload your audio file, which can range from 10 seconds to 120 minutes, or even import audio directly from your YouTube account.
- Choose the audio language and content type (e.g., history, education).
- Select the video ratio (16:9 is common) and duration settings (auto is recommended).
- Pick a video style such as flat illustration or watercolor sketch, or leave it on auto to let Filmora decide.
- Choose a material template that defines the style of captions and transitions.
- Generate the video and preview it. You can export it immediately or continue editing clips and transitions for a custom touch.
This tool is a game-changer if you want to add visual elements to your audio content fast, and it pairs well with interactive PowerPoint presentations for a multimedia experience.
Gathering Design Assets for Your Slide
To create the interactive morph slide, you’ll need several key assets:
- Background Image: A striking photo to set the futuristic vibe. The tutorial uses a neon light background from Freepik.
- Fonts: The Varino font is used for both the slide title and subtitle. You can download it for free from DaFont.
- Icons: PowerPoint’s built-in icons are utilized for buttons. If your version doesn’t have icons, you can download SVG icons from the web and import them.
- Photos for Scrolling: Images sourced from Filmora’s website showcase features or products and will scroll interactively.
Having these assets prepared will make the design process smoother and help you focus on the interactive elements.

Setting Up Your Slide Background
Start by setting your slide background to black for a sleek, modern look:
- Right-click on the slide and select Format Background.
- Choose Solid Fill and set the color to black.
- Insert the background image and center it on the slide.
Positioning the background image centrally helps anchor your design and ensures your interactive elements stand out.
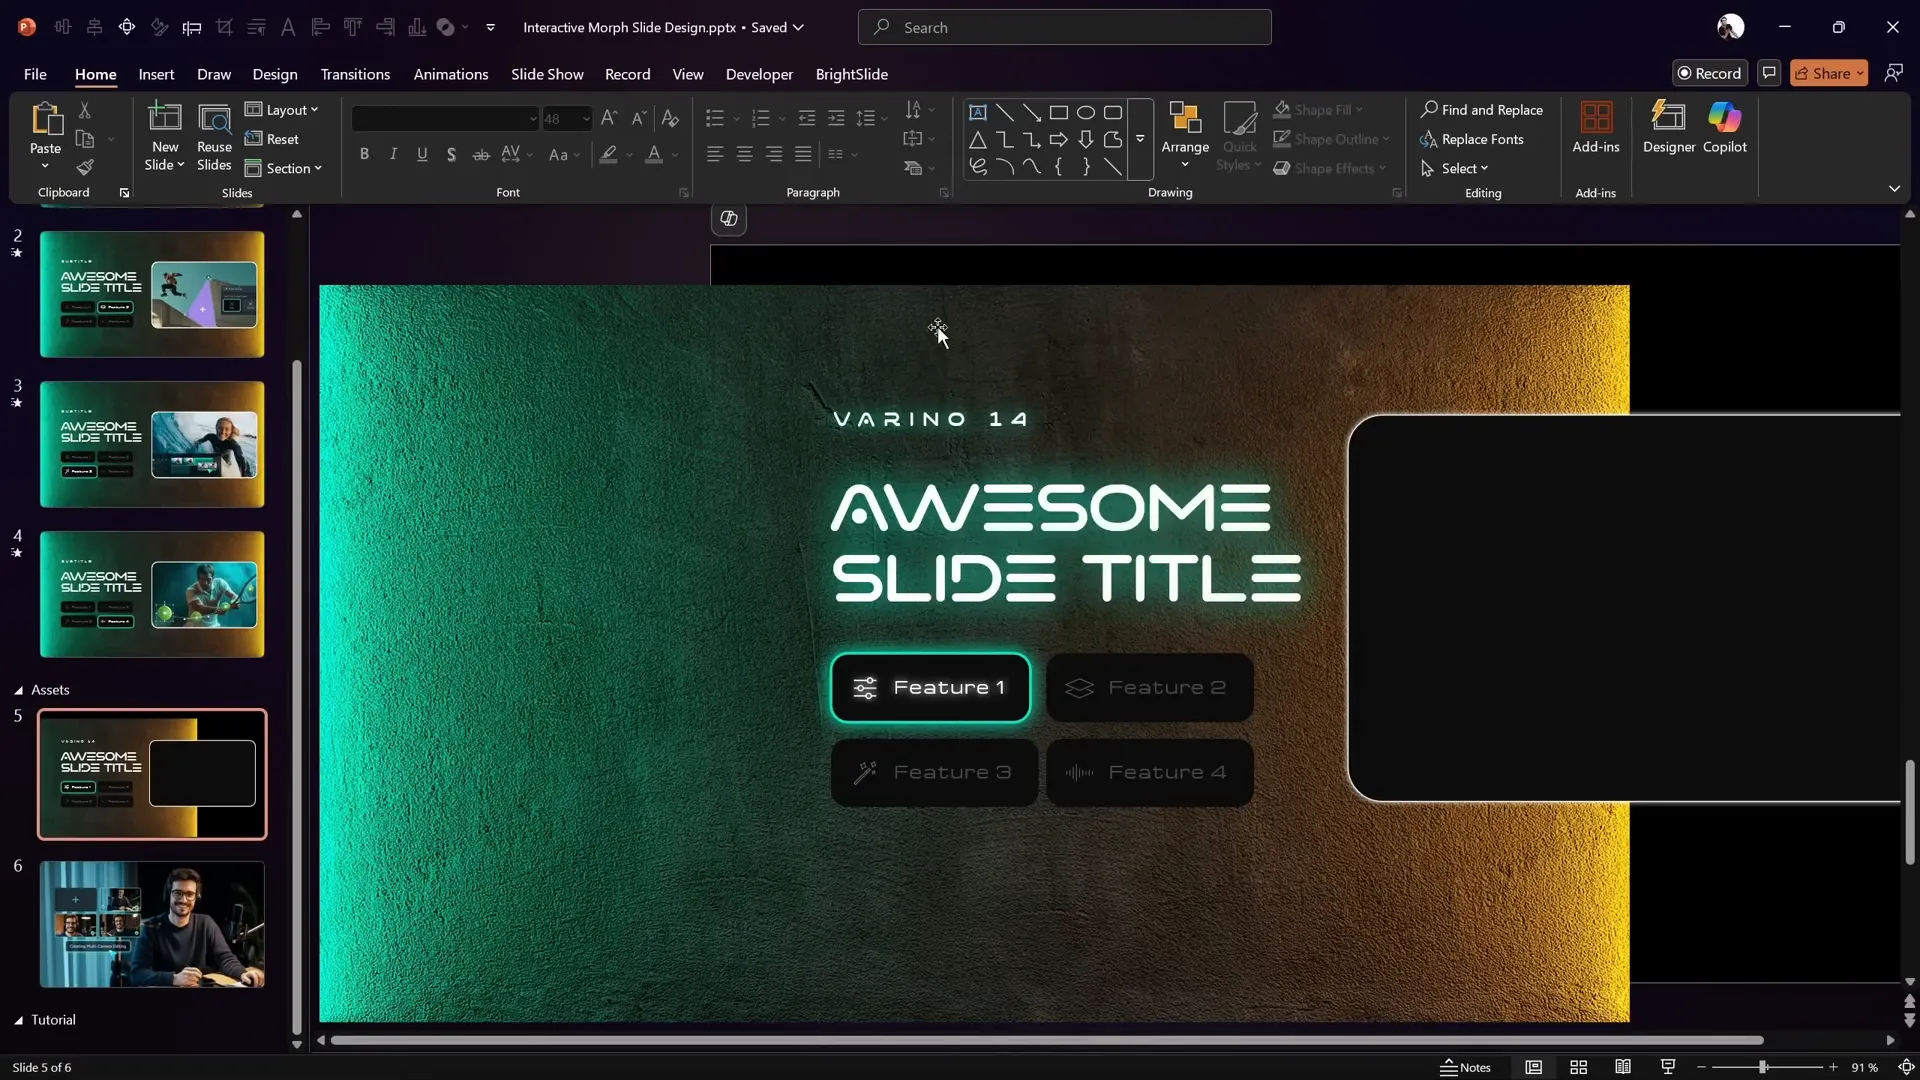
Formatting Titles and Subtitles
The slide title and subtitle add context and style to your design. Here’s how to format them:
- Font: Use Varino for both.
- Font Sizes: Subtitle at 14 pt; slide title at 48 pt.
- Text Effects: Add a subtle greenish glow or shadow to the text to make it pop against the dark background.
To add the text shadow effect:
- Right-click the text box and select Format Shape.
- Go to Text Options → Shadow settings.
- Use a green color sampled from the background image (exact hex code provided in the tutorial).
- Set transparency to 0%, size to 100%, and blur to 45 points.
This creates a vibrant, futuristic glow around your text, enhancing readability and style.

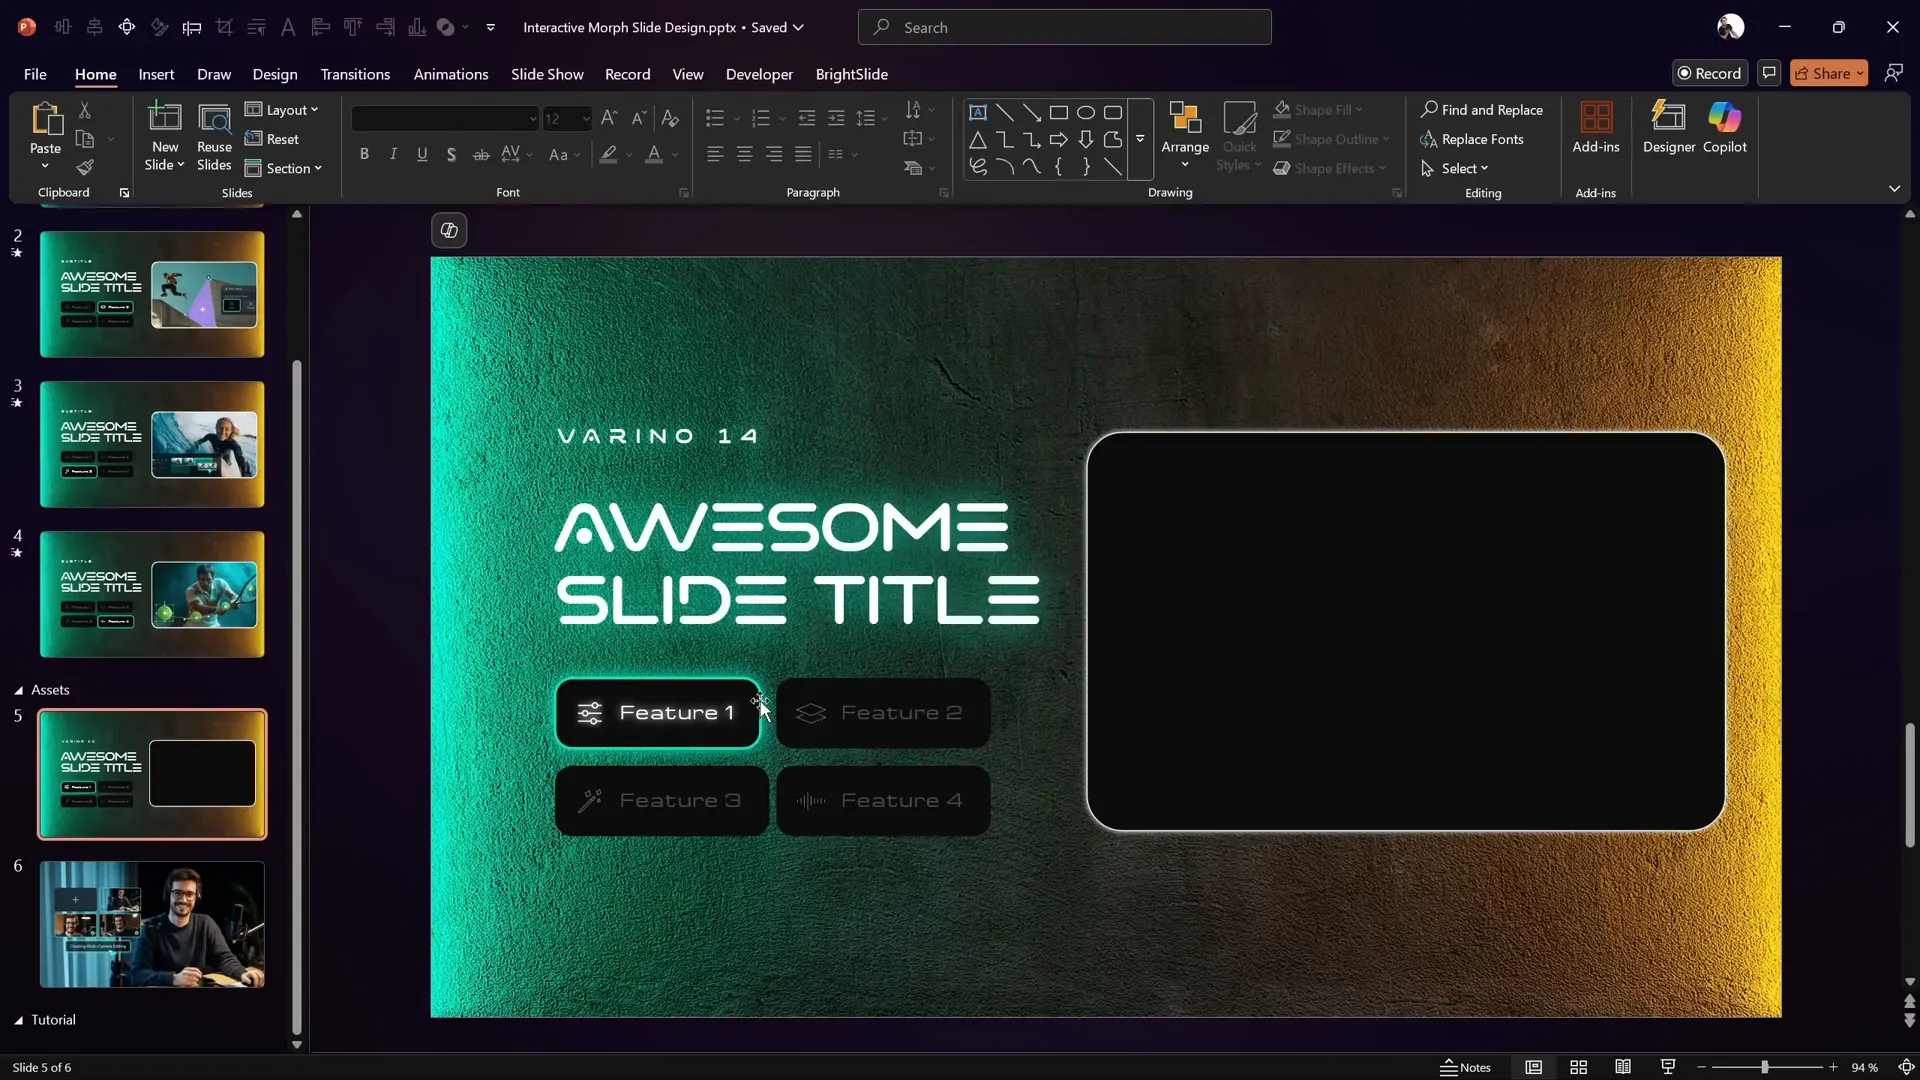
Creating Interactive Buttons with Icons
Below the title, you’ll create four rounded rectangle buttons representing different interactive features. Here’s how to design them:
- Shape: Use rounded rectangles for a modern button look.
- Text: Add descriptive text inside each button.
- Icons: Insert icons from PowerPoint’s icon library or import SVG icons if unavailable.
- Text Margin: Adjust the left margin inside the button to 1.5 cm to make space for the icon, and set the other margins to 0.5 cm.
- Inactive vs Active State: For inactive buttons, reduce the font transparency to 75% to give a faded look. Active buttons have full brightness.
Grouping the icon and button together will be important later when adding interactivity and animations.
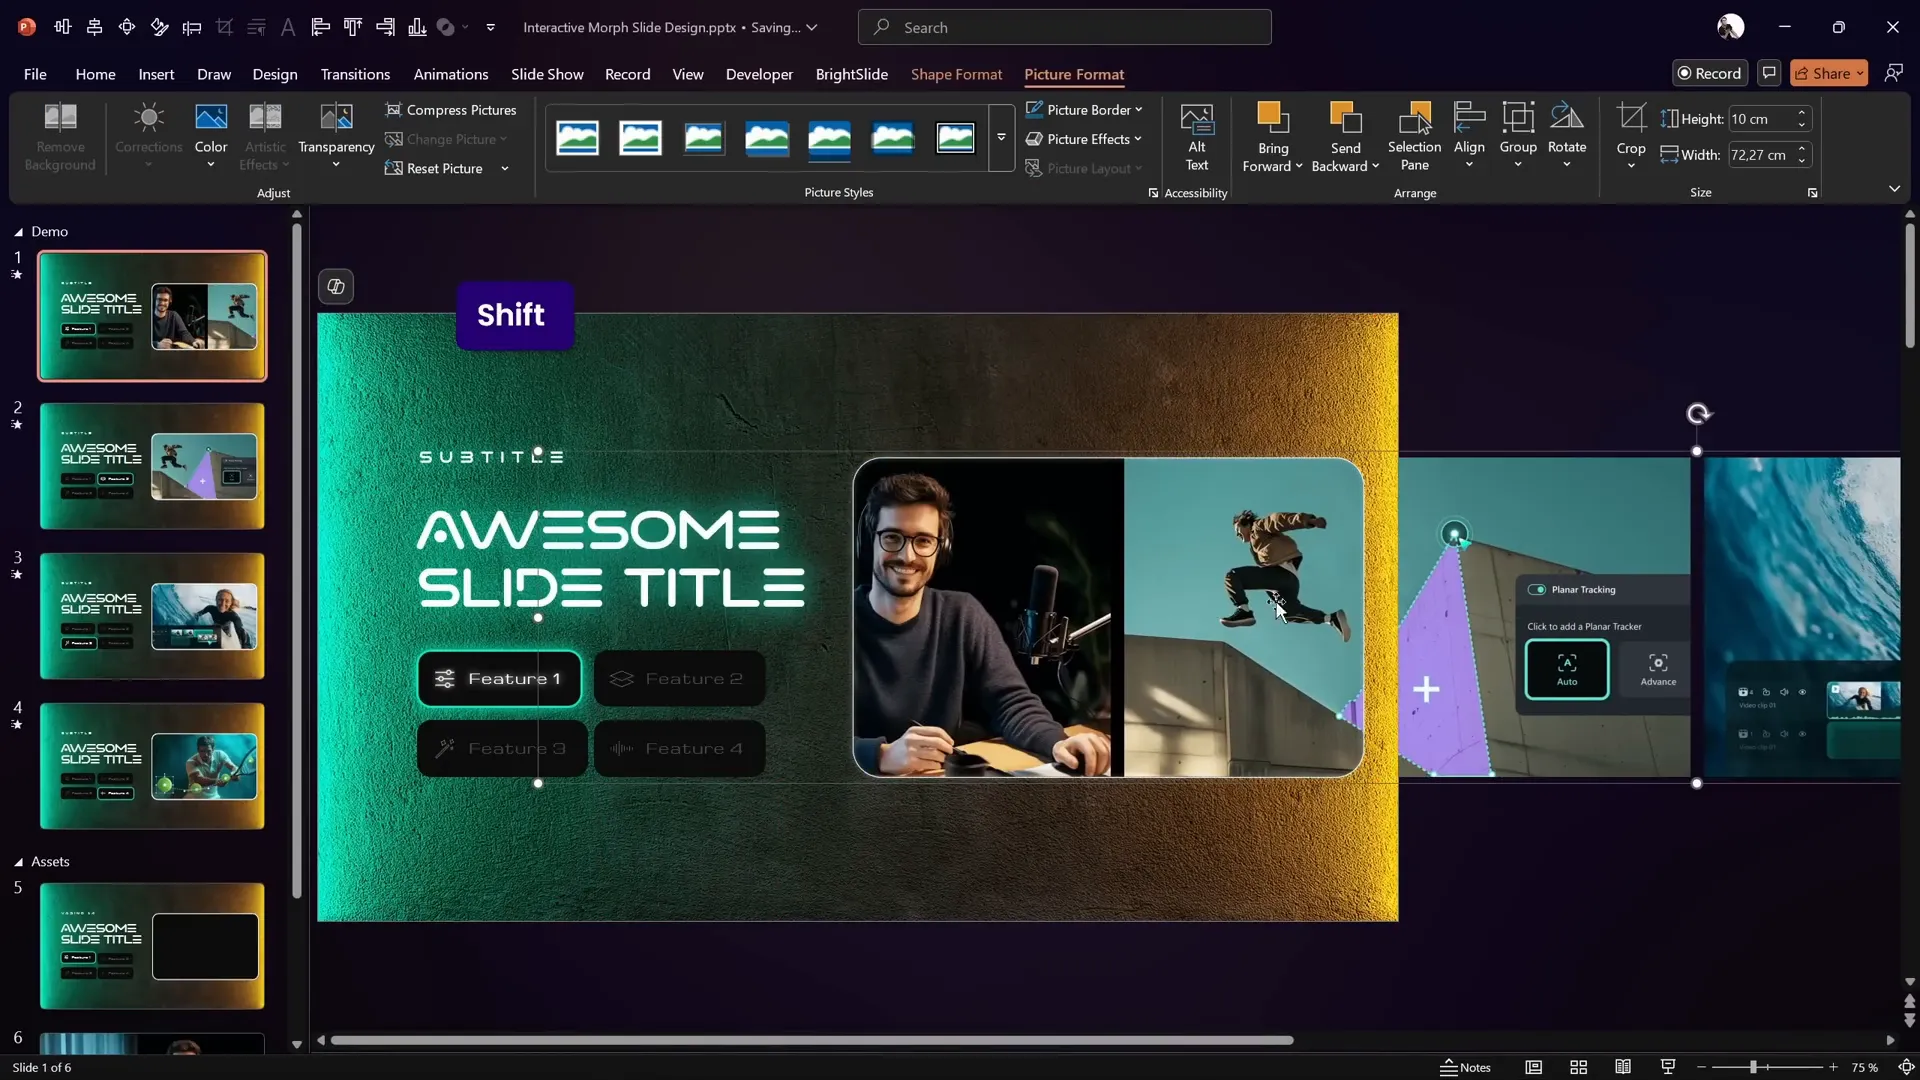
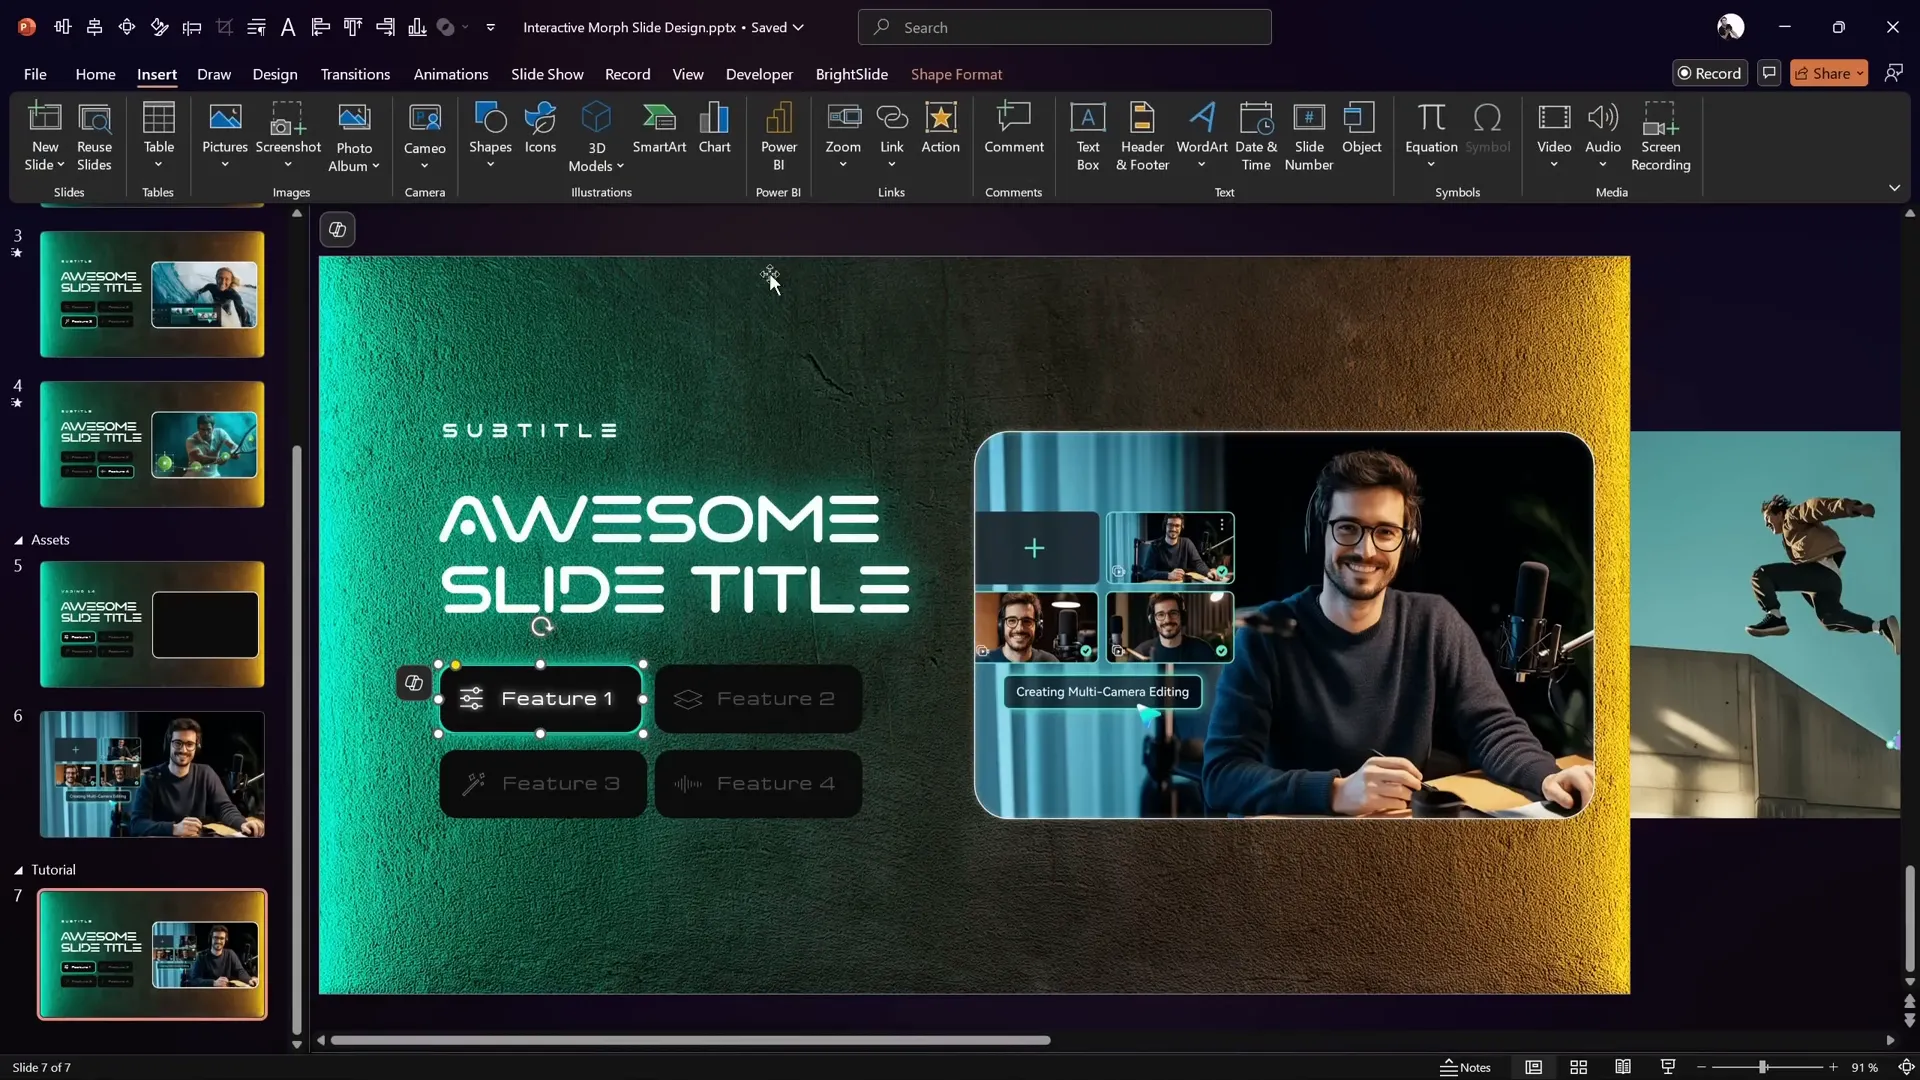
Using a Mask to Showcase Scrolling Images
On the right side of the slide, a rounded rectangle shape is used to create a “hole” or mask inside the background image, allowing photos to scroll through it.
To create this effect:
- Select the background photo.
- Hold down the Shift key and select the rounded rectangle mask shape.
- Go to Shape Format → Merge Shapes → Subtract.
- This punches a hole in the background image, revealing the area inside the rounded rectangle.
- Center the modified background image back on the slide.
This clever use of shape subtraction acts as a viewport through which the scrolling photos will be visible.
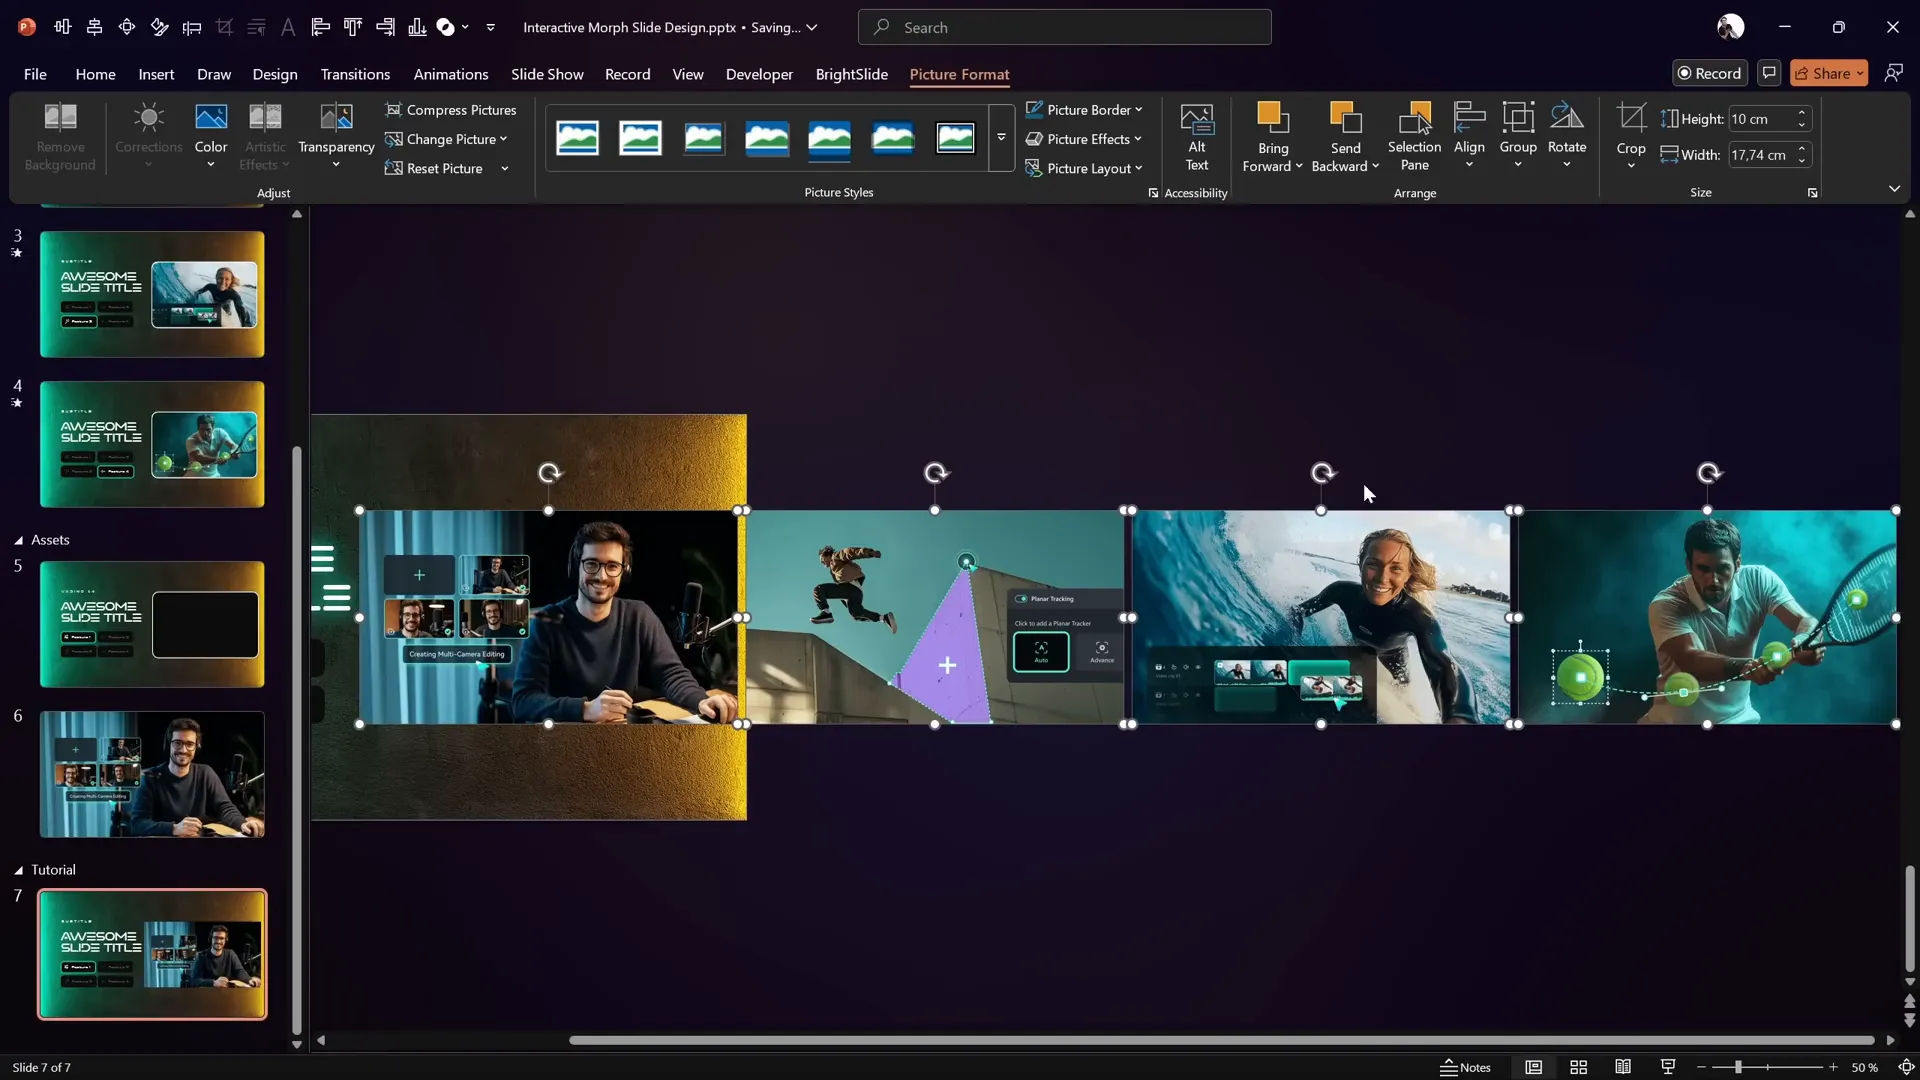
Arranging and Grouping Photos for Scrolling
Next, add the series of photos that will scroll within the mask area. Here’s the step-by-step process:
- Copy all the photos you want to use for scrolling and paste them onto the slide.
- Check the height of the mask shape (e.g., 10 cm) and adjust all photos to match this height while keeping their aspect ratio locked.
- Arrange the photos horizontally in a single row with small gaps between them to provide breathing room.
- Align all photos to the top to keep them uniform.
- Select all photos and group them into a single object for easy movement.
- Send the group behind the mask shape so photos appear through the hole.
Now, you can simulate scrolling by moving the grouped photos left or right behind the mask.
Adding a Glowing Edge to the Mask
For an extra visual touch, add a glowing line around the mask shape:
- Copy the rounded rectangle mask shape used to punch the hole.
- Paste it onto the slide and remove its fill color, leaving only the outline.
- Add a white shadow effect to the outline to create a soft glowing edge.
This subtle glow enhances the futuristic feel and makes the masked area stand out more vividly.
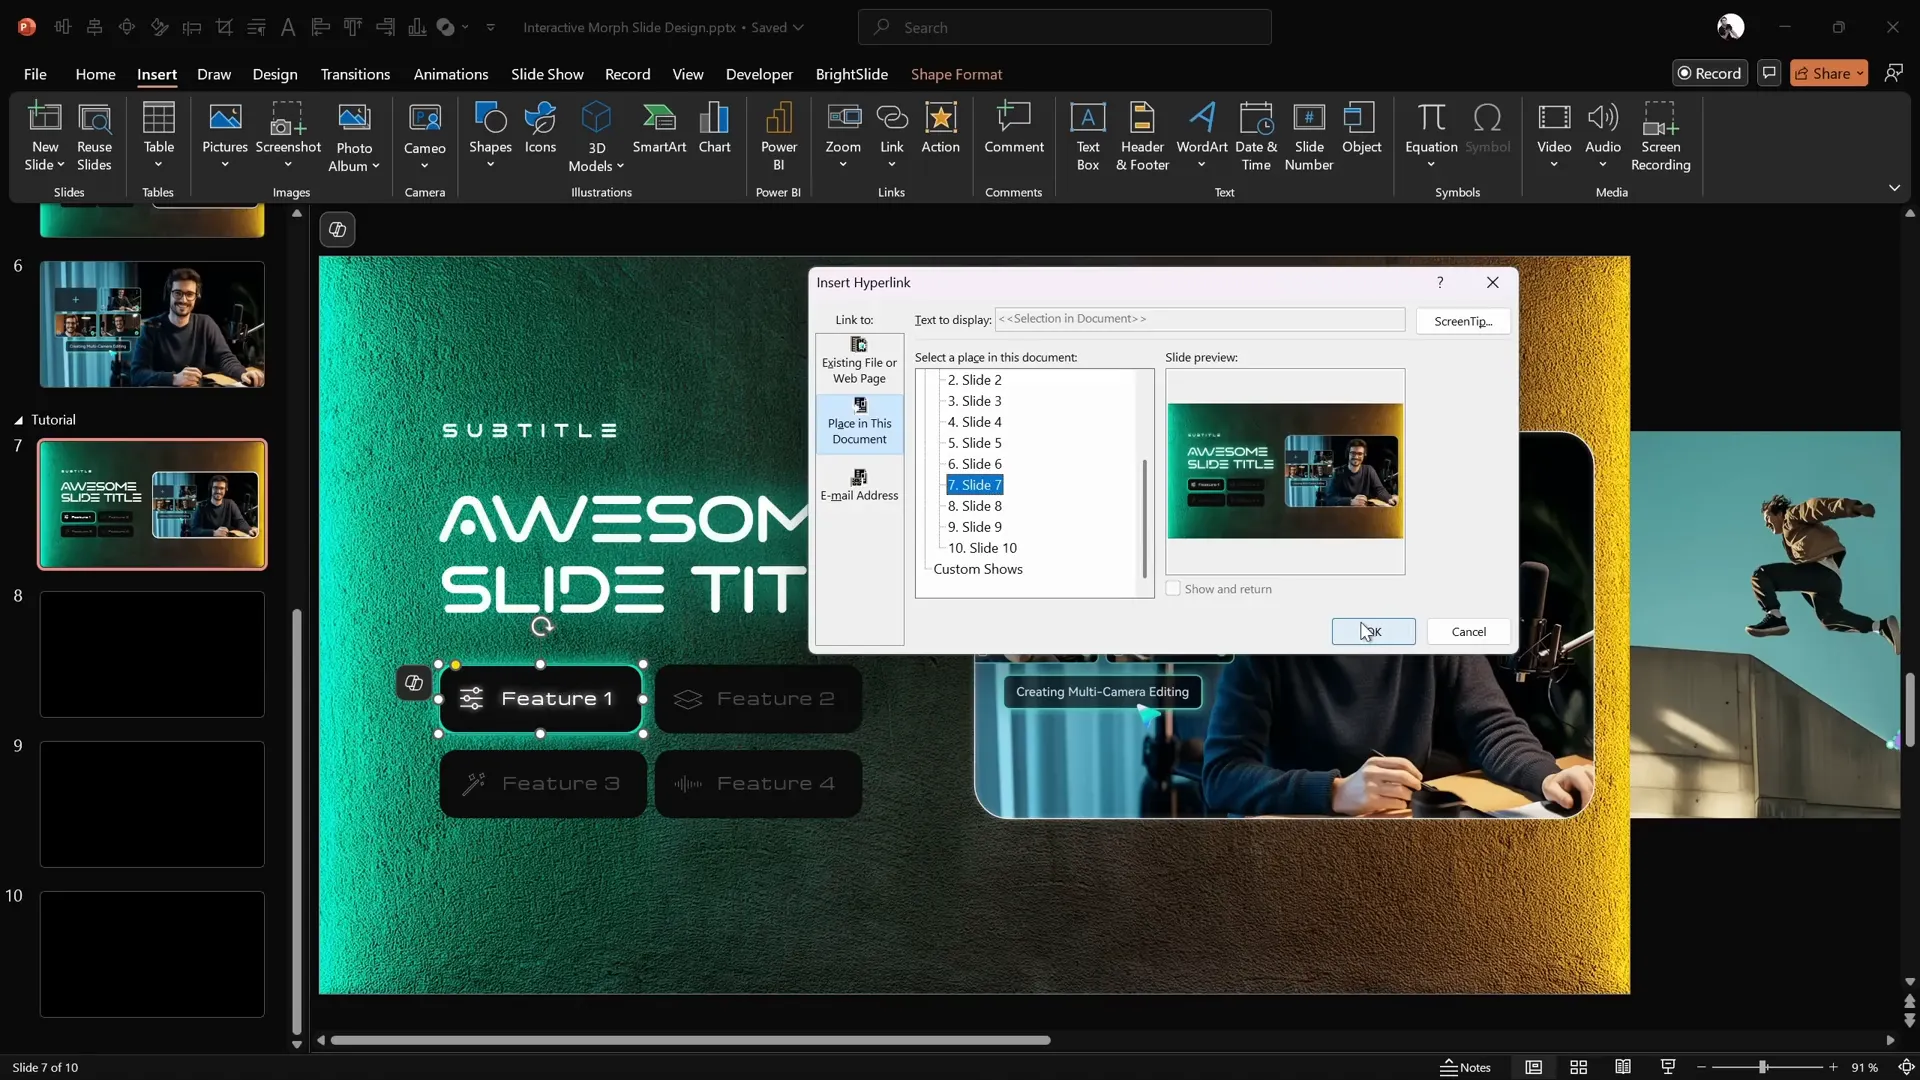
Making Buttons Clickable with Hyperlinks
Interactivity comes from linking each button to different slides that highlight various photos and features. Follow these steps to add clickable buttons:
- Insert three additional slides after your main slide to correspond to the four buttons.
- Select the first button, go to Insert → Link, and link it to the first of the new slides.
- Repeat for the other buttons, linking them to the respective slides.
- Group each button together with its icon to ensure smooth Morph animations later.
- Make sure the hyperlink remains active after grouping.
This setup allows users to click buttons and jump to the corresponding slide seamlessly.
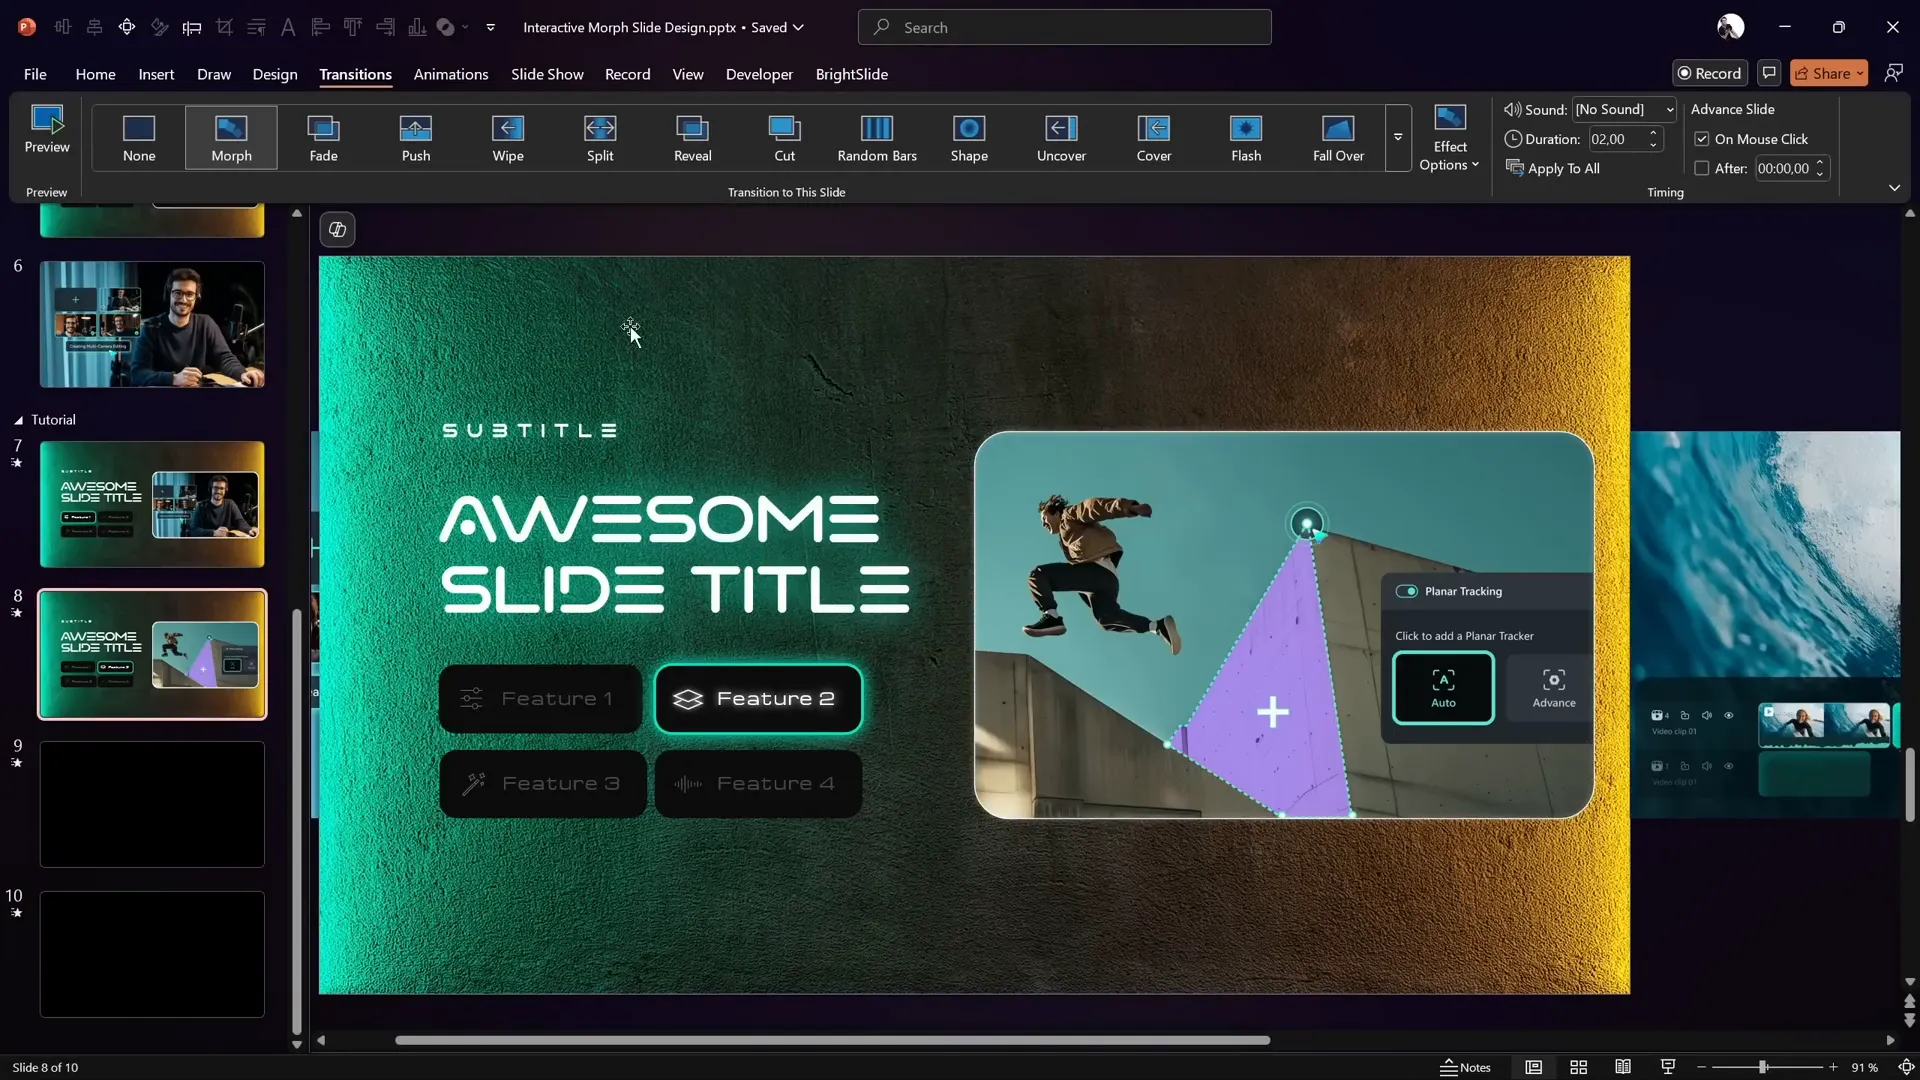
Applying Morph Transition for Smooth Animation
The magic of this interactive presentation lies in the Morph transition, which animates the movement of photos and button states between slides:
- On each slide, adjust the grouped photos’ position to simulate scrolling (e.g., shift photos to the left for the second slide, further left for the third, etc.).
- Use the Format Painter tool to toggle the active/inactive button styles on each slide.
- Apply the Morph transition to all slides, setting the duration to around 2 seconds for smooth animation.
- Test the slide show and click buttons to observe the photos scrolling and buttons lighting up interactively.
This approach creates an engaging user experience where the presentation feels dynamic and responsive.
Final Testing and Tips
After setting up your interactive morph presentation, it’s crucial to test it thoroughly:
- Run the slide show and click through all buttons to ensure hyperlinks work correctly.
- Verify that the Morph transition animates photos and buttons smoothly.
- Check the alignment and spacing of all elements on each slide.
- Make sure grouped objects maintain their integrity during transitions.
- Adjust animation timings if necessary for a natural flow.
With these checks, your presentation will be polished and ready to impress your audience.
Frequently Asked Questions
What is an Interactive Morph Presentation?
An Interactive Morph Presentation uses PowerPoint’s Morph transition combined with clickable elements (like buttons with hyperlinks) to offer a dynamic, user-driven slide experience where content animates smoothly based on user interaction.
Do I need a specific version of PowerPoint to use Morph?
Yes, Morph is available in PowerPoint 2019, Microsoft 365, and later versions. Older versions like PowerPoint 2016 or earlier do not support Morph.
Can I use this technique on Mac and Windows?
Yes, Morph and hyperlinks work on both Mac and Windows versions of PowerPoint, but make sure you’re using a version that supports Morph (Office 365 or PowerPoint 2019+).
How do I add icons if my PowerPoint doesn’t have built-in icons?
You can download free SVG icons from websites like Flaticon or The Noun Project and insert them into your slides. PowerPoint supports SVG files, allowing you to resize and recolor the icons.
Can I customize the scrolling photos in the mask?
Absolutely! You can replace the photos with your own images. Just ensure they are resized consistently to fit within the mask area and grouped properly for smooth scrolling.
Is the template used in this tutorial available for download?
Yes! The creator offers a free downloadable template with all assets and settings configured. Check the video description or the creator’s Patreon page for the download link.
Conclusion
Creating an Interactive Morph Presentation in PowerPoint elevates your slide decks from static to engaging, allowing your audience to interact with content seamlessly. By leveraging Morph transitions, clickable buttons, and clever shape masking, you can design futuristic, polished presentations that capture attention and communicate effectively.
This tutorial walked you through each step—from setting up backgrounds and formatting text, to creating interactive buttons, arranging photos behind a mask, and applying Morph transitions for smooth animations. We also explored Filmora 14’s AI audio to video feature, a complementary tool to add video content to your audio files quickly.
Whether you’re showcasing product features, telling a story, or creating an educational resource, this approach adds professionalism and interactivity to your presentations.
Ready to try it yourself? Download the free template, gather your assets, and start building your own interactive morph slide design today!