
When you have numerous images to showcase in a PowerPoint presentation, a cluttered and disorganized layout can quickly lose your audience’s interest. But what if you could transform your slides into a visually captivating and interactive experience? By integrating a sleek image display effect combined with top navigation buttons, you can create a presentation that not only looks professional but also allows you to engage your audience by navigating directly to the images you want to discuss.
In this comprehensive guide, I will walk you through the entire process of creating such an interactive navigation system in PowerPoint. This method involves preparing your images, animating them smoothly, beautifying your slides with thoughtful design elements, and adding intuitive navigation buttons that enhance interactivity. While the process requires some patience and attention to detail, the results are well worth the effort.
Let’s dive into the step-by-step breakdown of this tutorial, originally crafted by Dream Liu, to elevate your PowerPoint skills and deliver presentations that truly stand out.
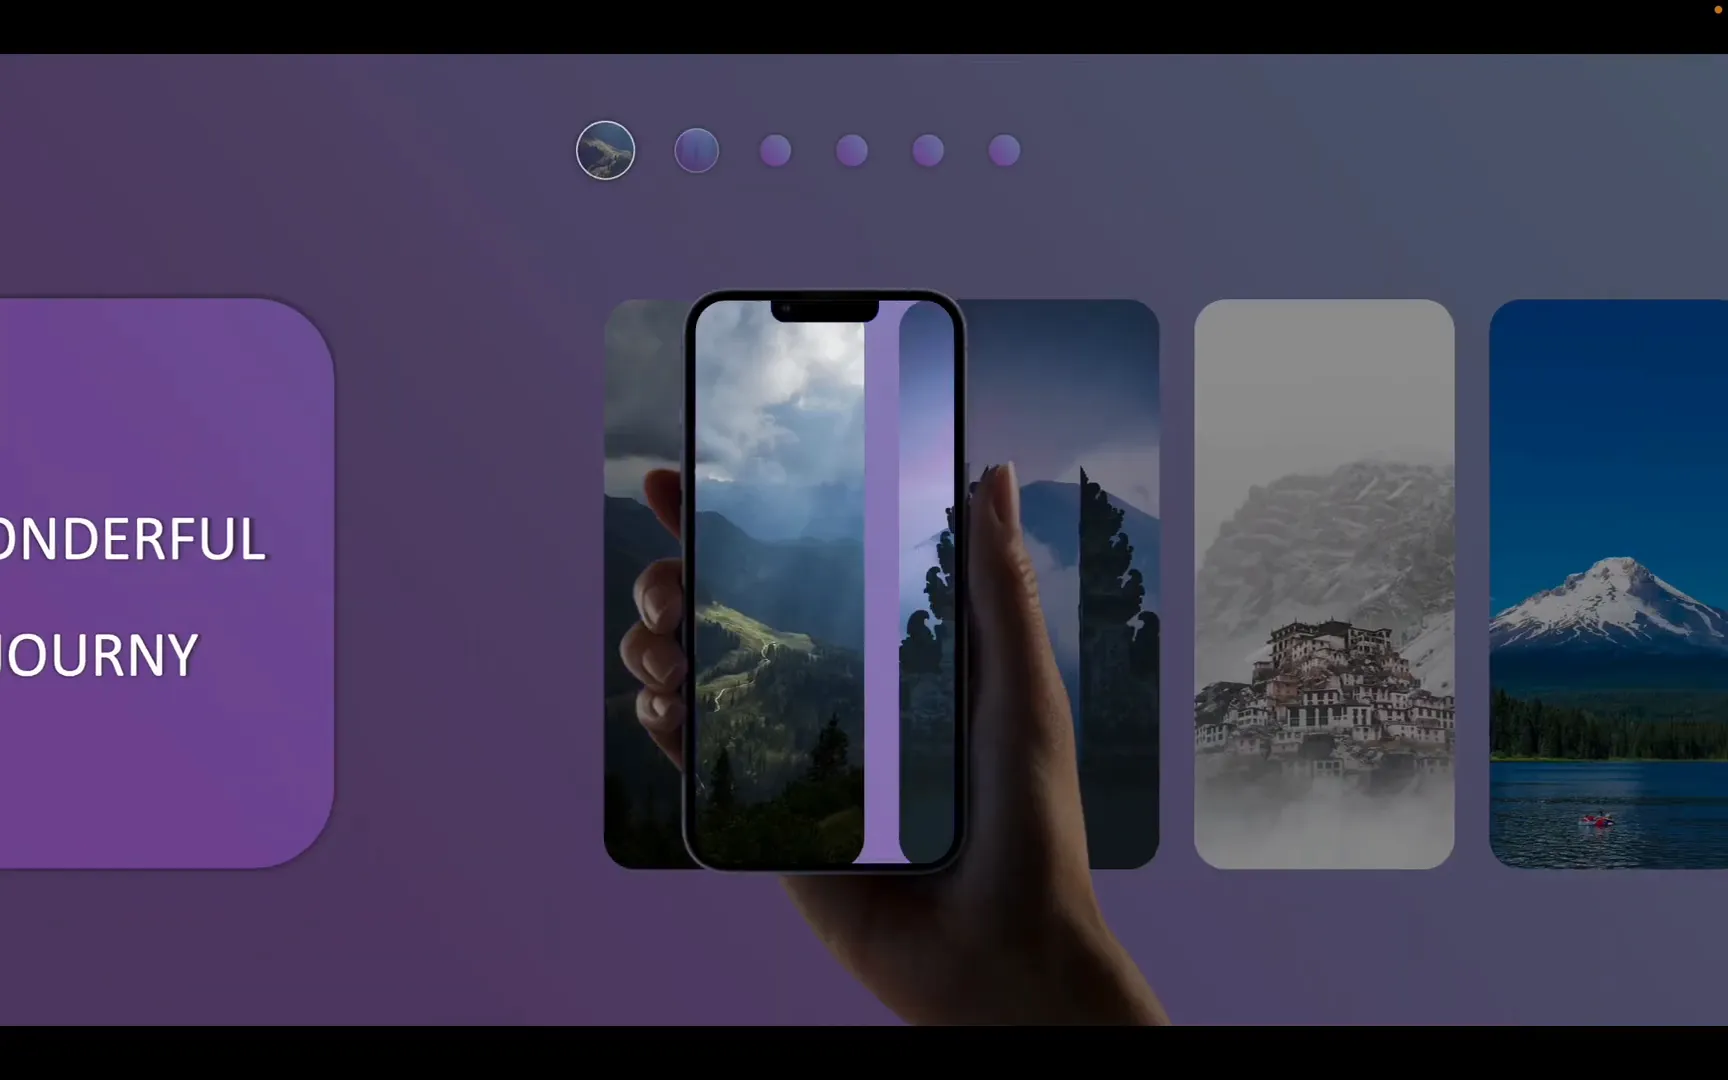
Table of Contents
- Step 1: Image Preparation
- Step 2: Creating Image Animation Effects
- Step 3: Beautifying the Pages and Adding Title Boxes
- Step 4: Creating Navigation Buttons
- Final Preview and Results
- Conclusion
- Frequently Asked Questions (FAQ)
Step 1: Image Preparation
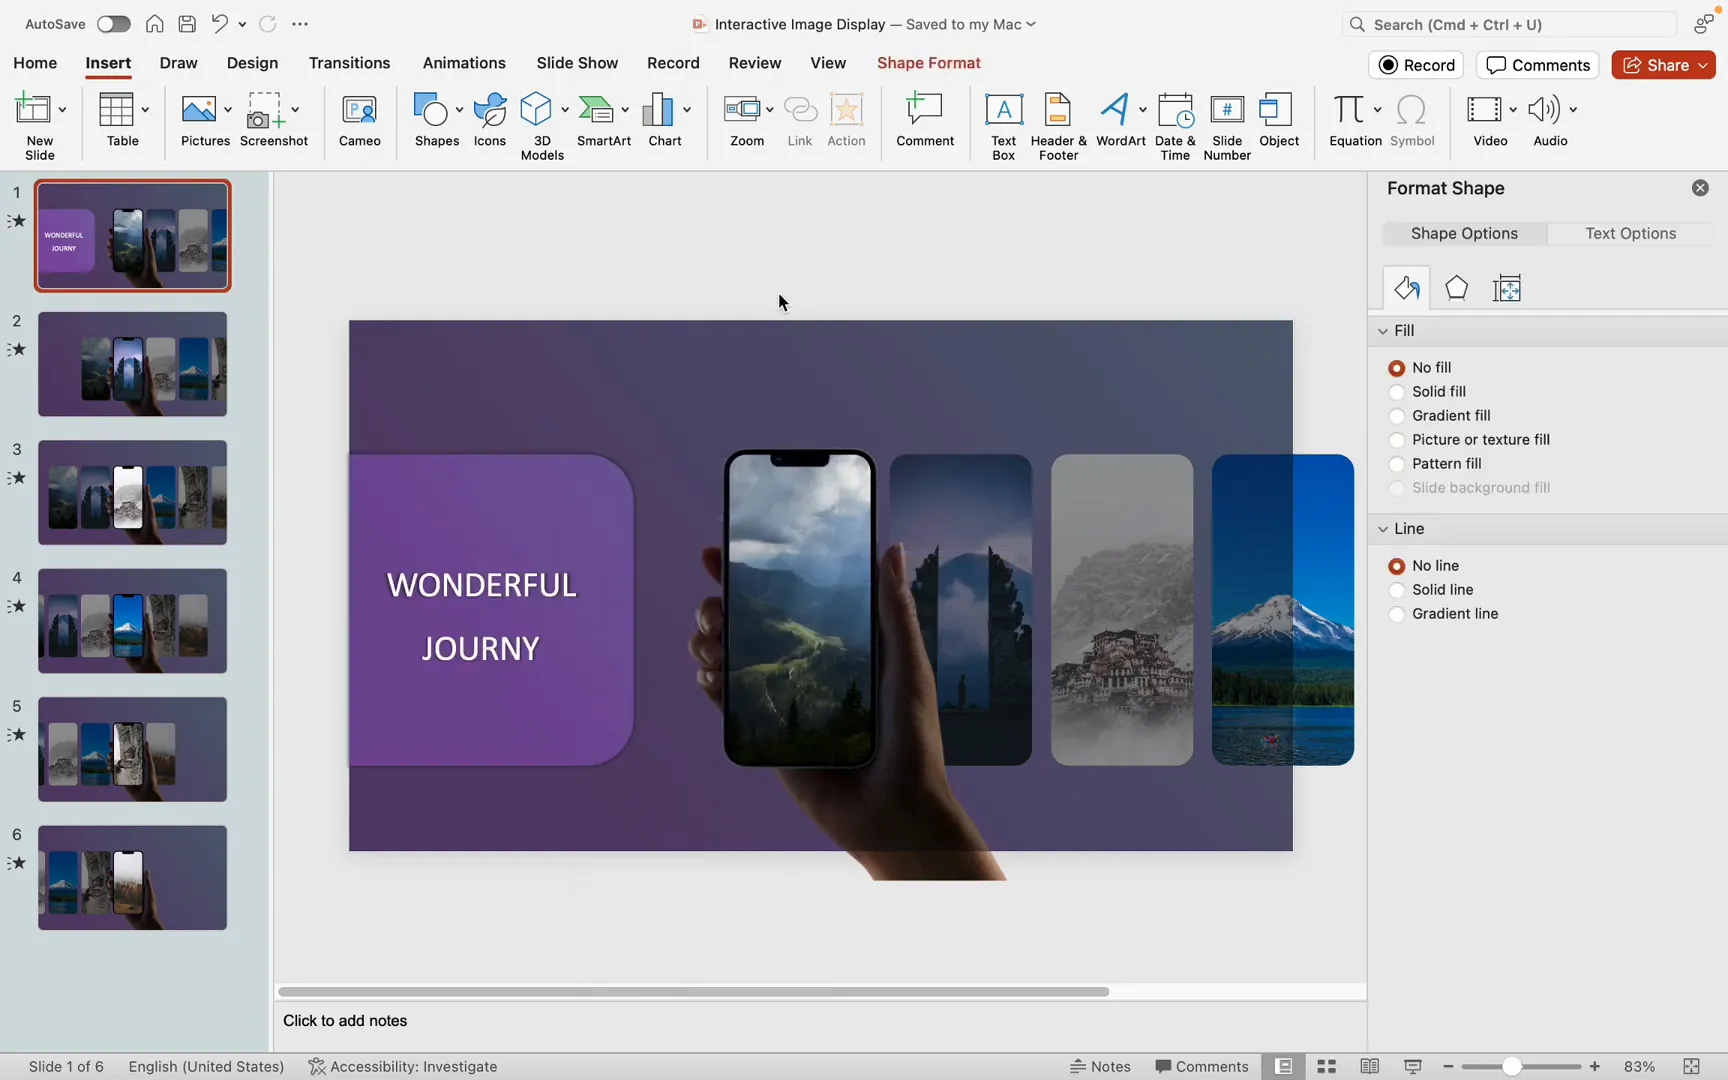
The foundation of an effective interactive presentation lies in preparing your images properly. This step ensures that each image fits perfectly within a designated display area—in this case, an iPhone mockup screen—giving your slides a polished and modern look.
Downloading and Setting Up the iPhone Mockup
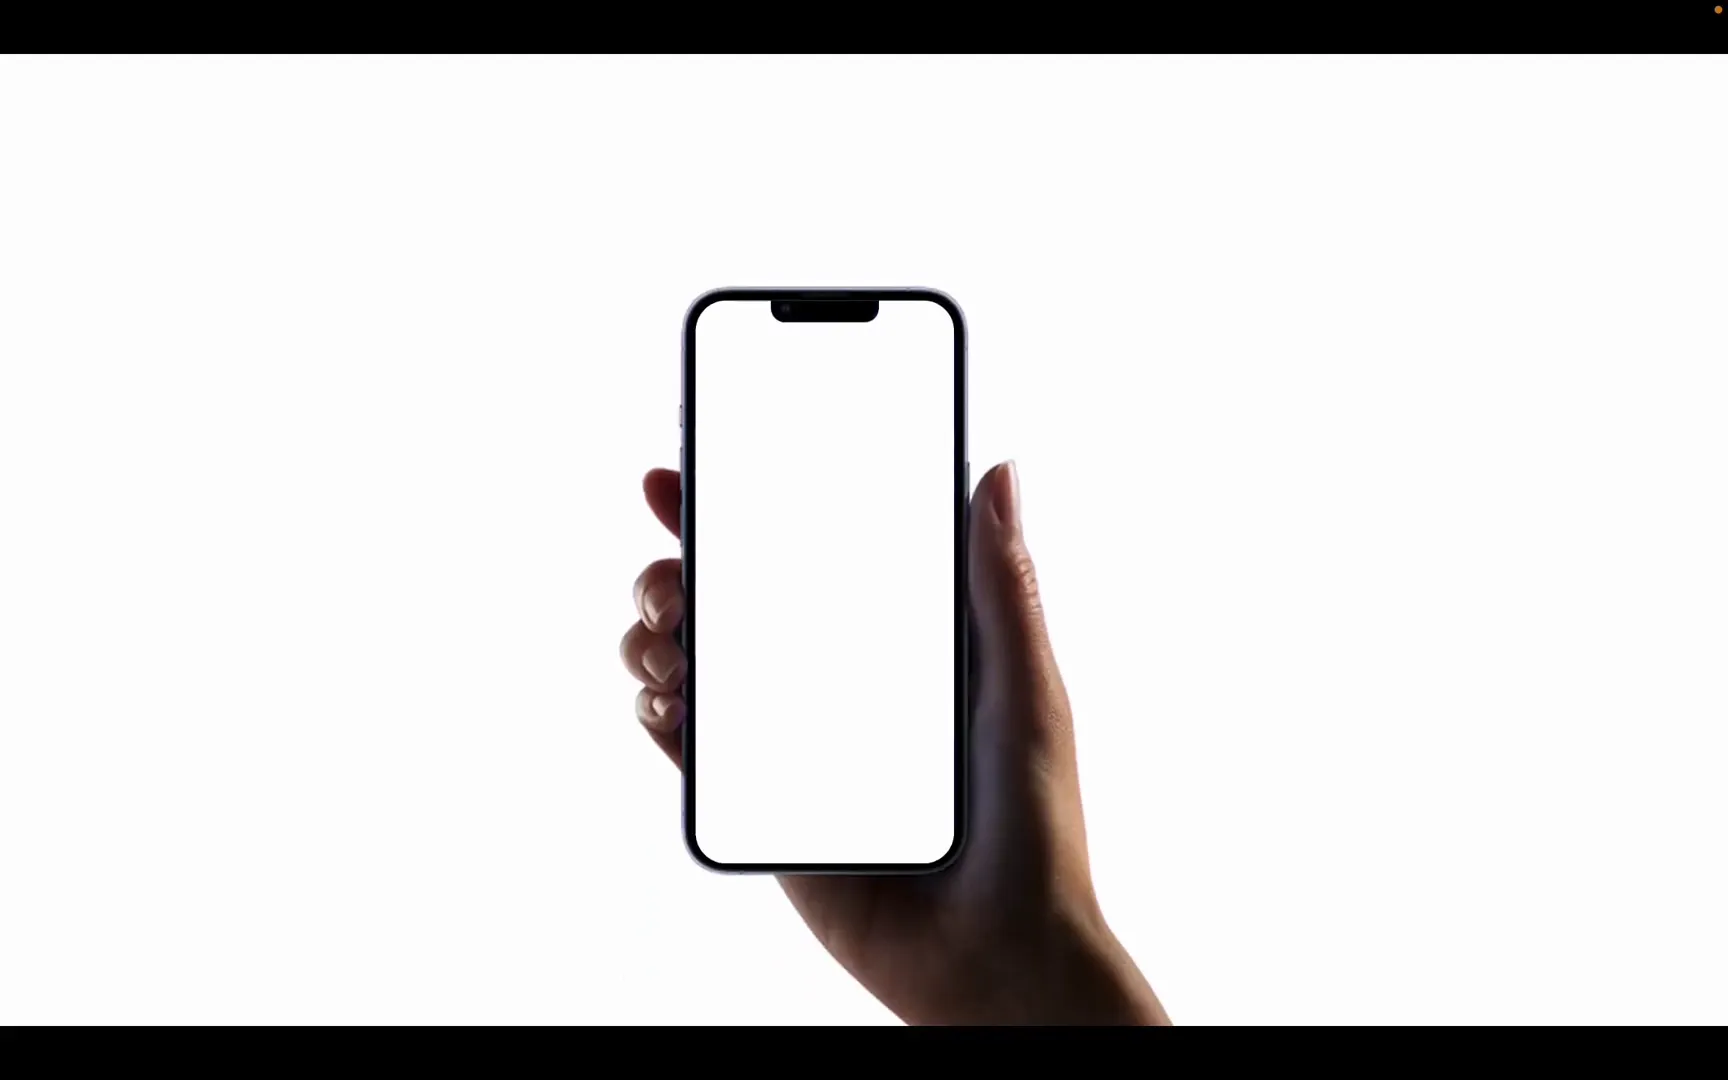
The key visual element for this project is an iPhone mockup with a transparent screen area. This transparency allows the images you want to display to show through seamlessly, creating a realistic handset display effect.
Begin by downloading an iPhone mockup image that has a transparent middle section. This will be your frame for displaying each image.
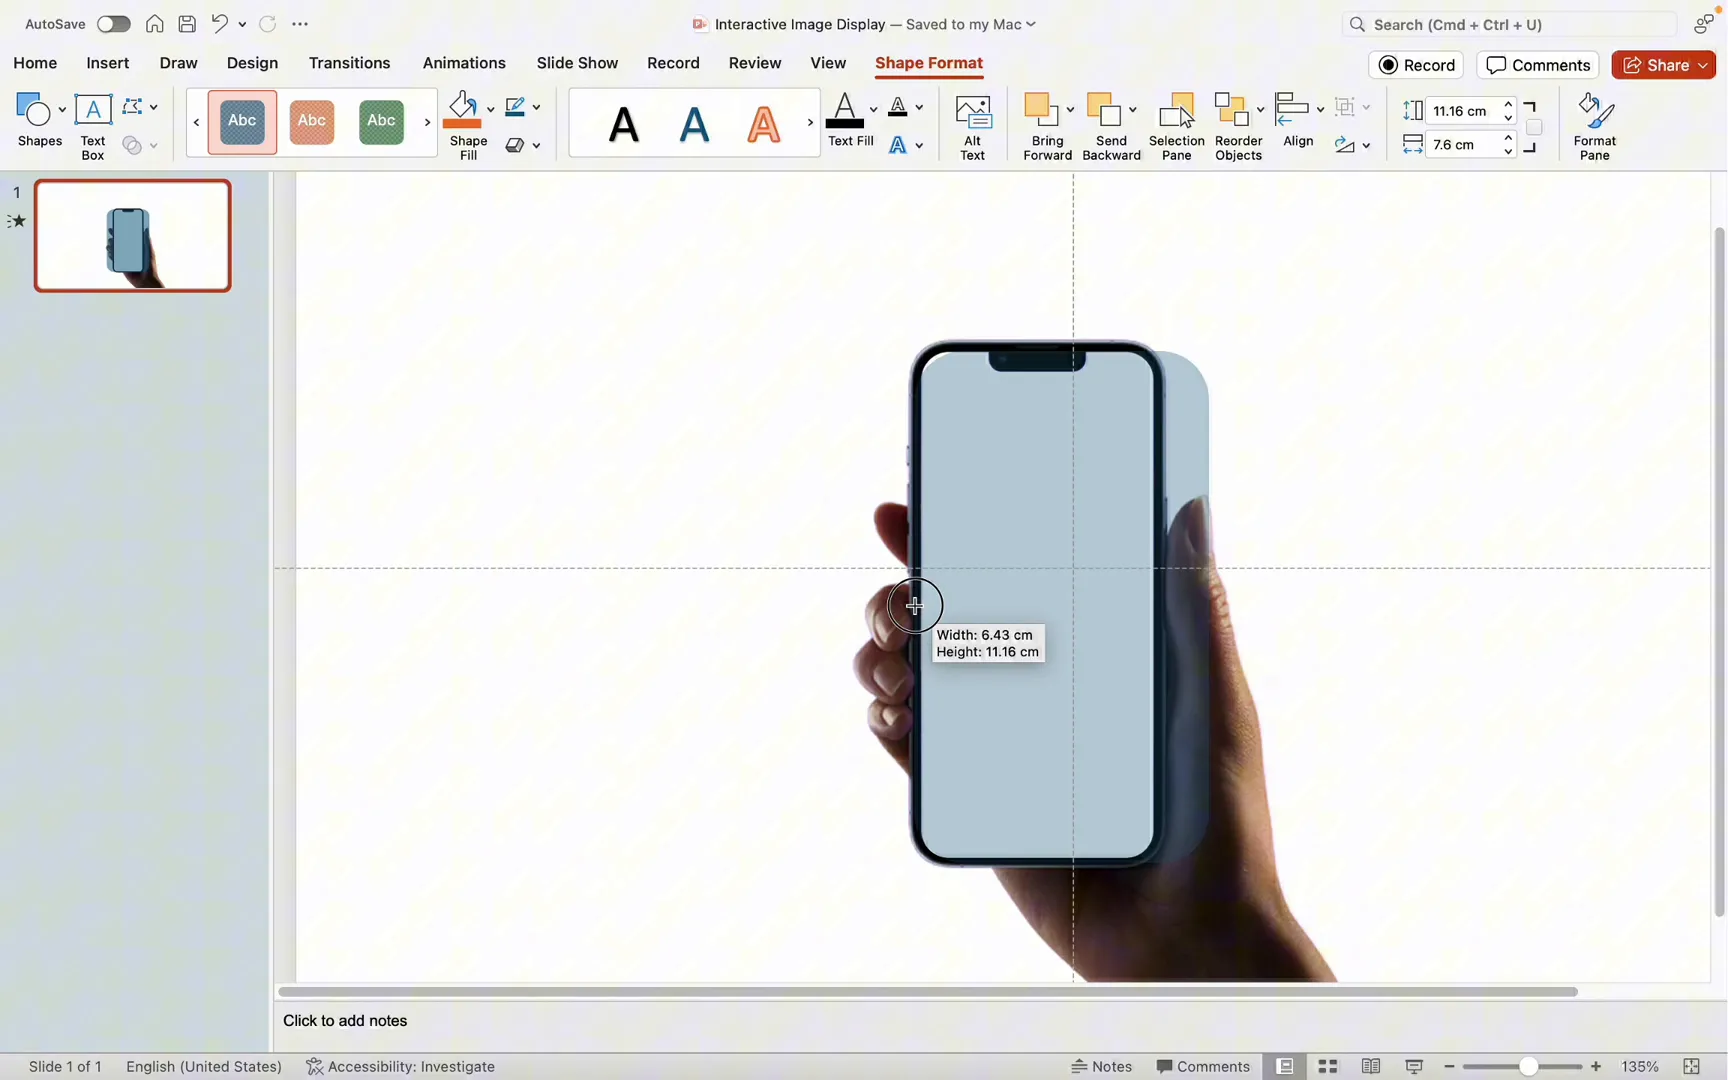
Creating the Screen Crop Area Using a Rounded Rectangle
Next, insert a rounded rectangle shape in PowerPoint. This rectangle will act as a clipping mask to crop your images to fit perfectly inside the phone screen area.
- Set the transparency of the rectangle to 50% to help you align it precisely.
- Make sure the rectangle has no border to keep the edges clean.
- Position and resize the rounded rectangle so it matches the size and curvature of the iPhone screen, adjusting the yellow control points to align corners perfectly.
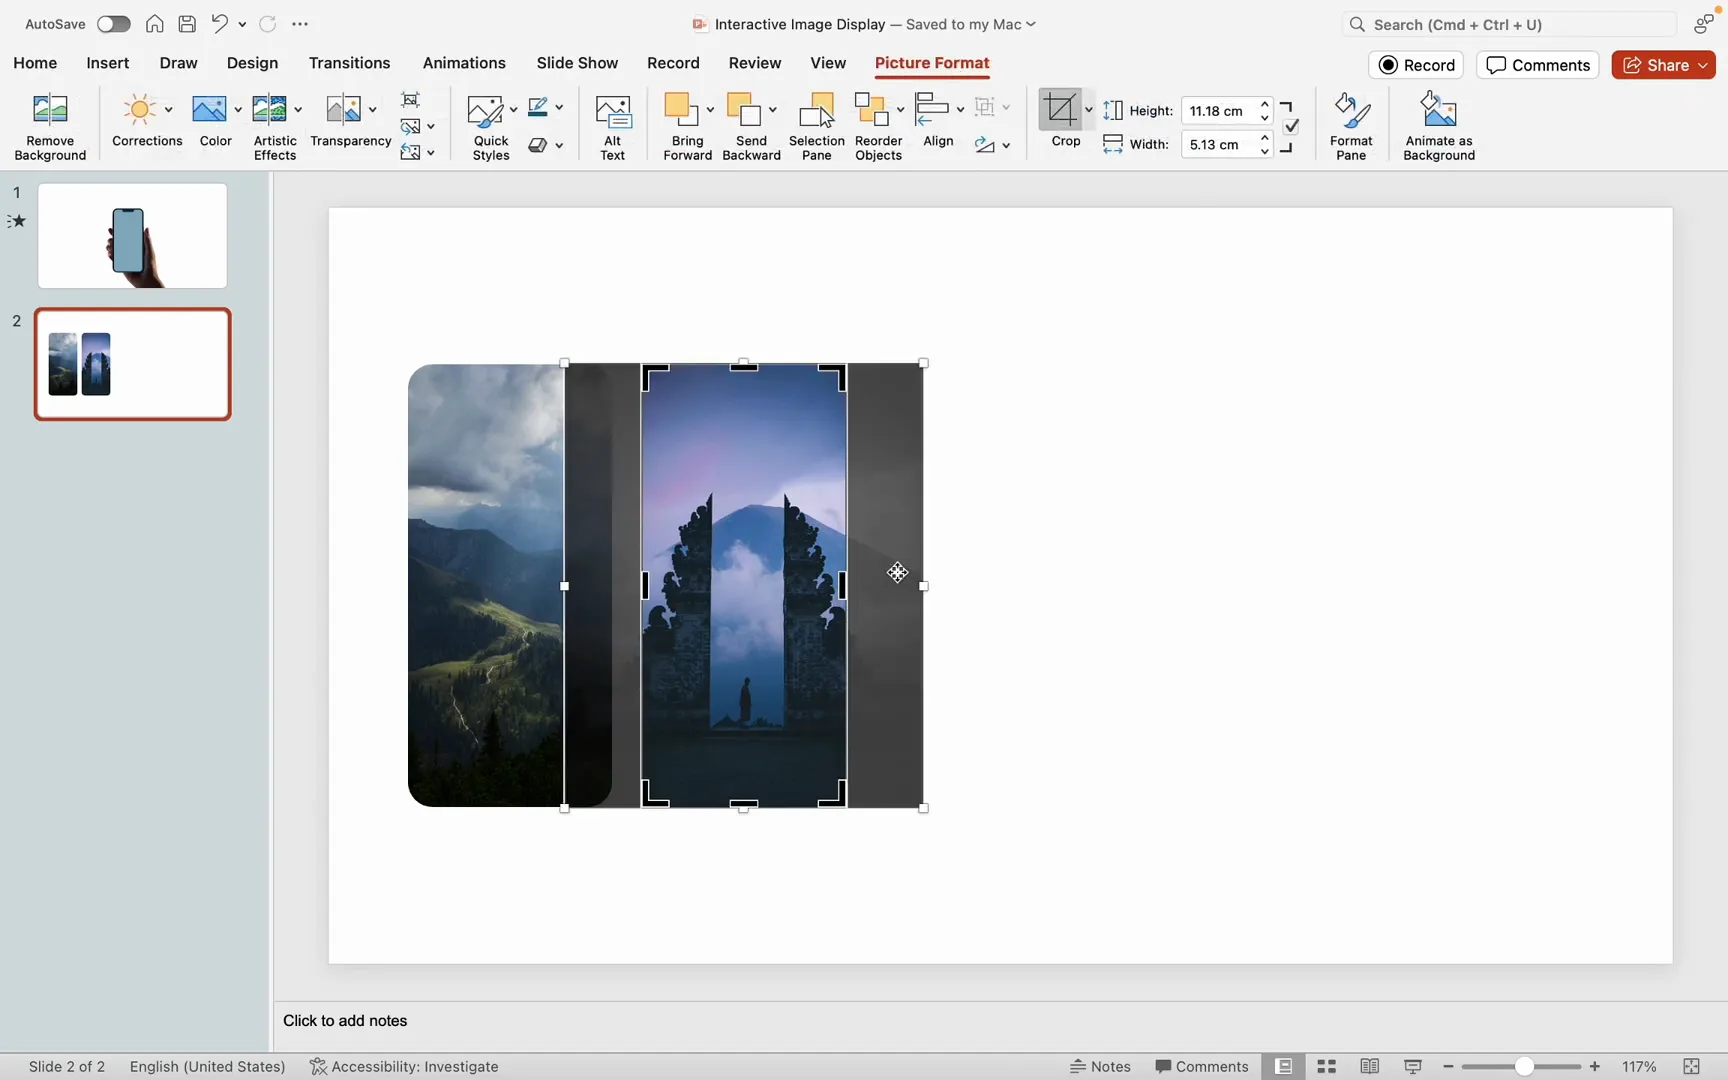
Cropping Images to Fit the Screen
With the rounded rectangle in place, import your images one by one into PowerPoint. For each image:
- Resize the image so its height matches the rounded rectangle.
- Place the rounded rectangle on top of the image, positioning it over the best part of the image you want to display.
- Select the image first, then the rounded rectangle.
- Go to the Shape Format tab, click Merge Shapes, and select Intersect. This crops the image to the shape of the rounded rectangle.
This technique ensures all your images perfectly fit the phone screen with the correct rounded corners.
Replacing Images and Fine-Tuning the Crop
To create multiple images for your interactive presentation, you can duplicate the cropped image and replace the picture content:
- Right-click the duplicated image and select Change Picture.
- Choose a new image to replace the background.
- If the display area isn’t perfect, use the Crop and Picture Format options to adjust the visible portion until you’re satisfied.
Repeat this process for all images you want to include. The goal is to have six perfectly cropped images that will be displayed in the phone mockup.
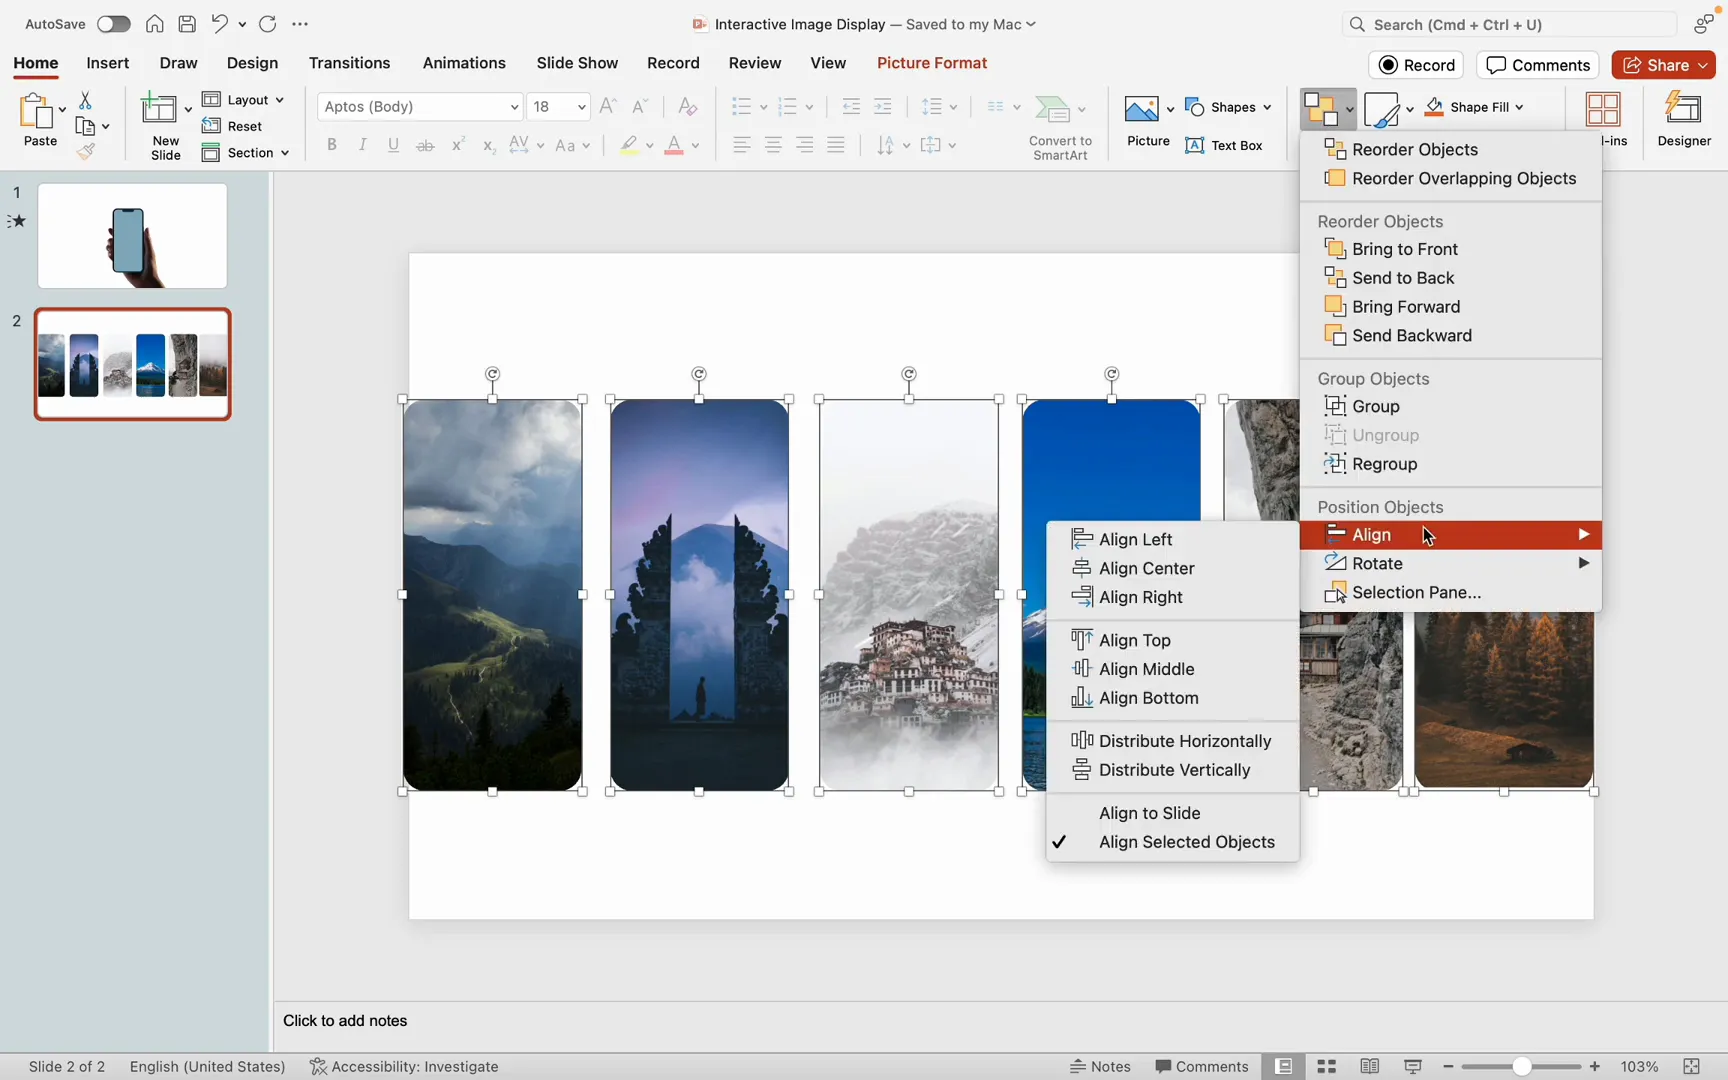
Aligning and Grouping Images
Once all images are processed, select them all and:
- Align them horizontally.
- Distribute them evenly across the horizontal axis.
- Group them together into one object.
This grouping will make it easier to animate and manage the images in the next steps.
Step 2: Creating Image Animation Effects
Now that your images are prepared and grouped, the next stage is to create smooth animation effects that simulate scrolling or switching between images on the phone screen.
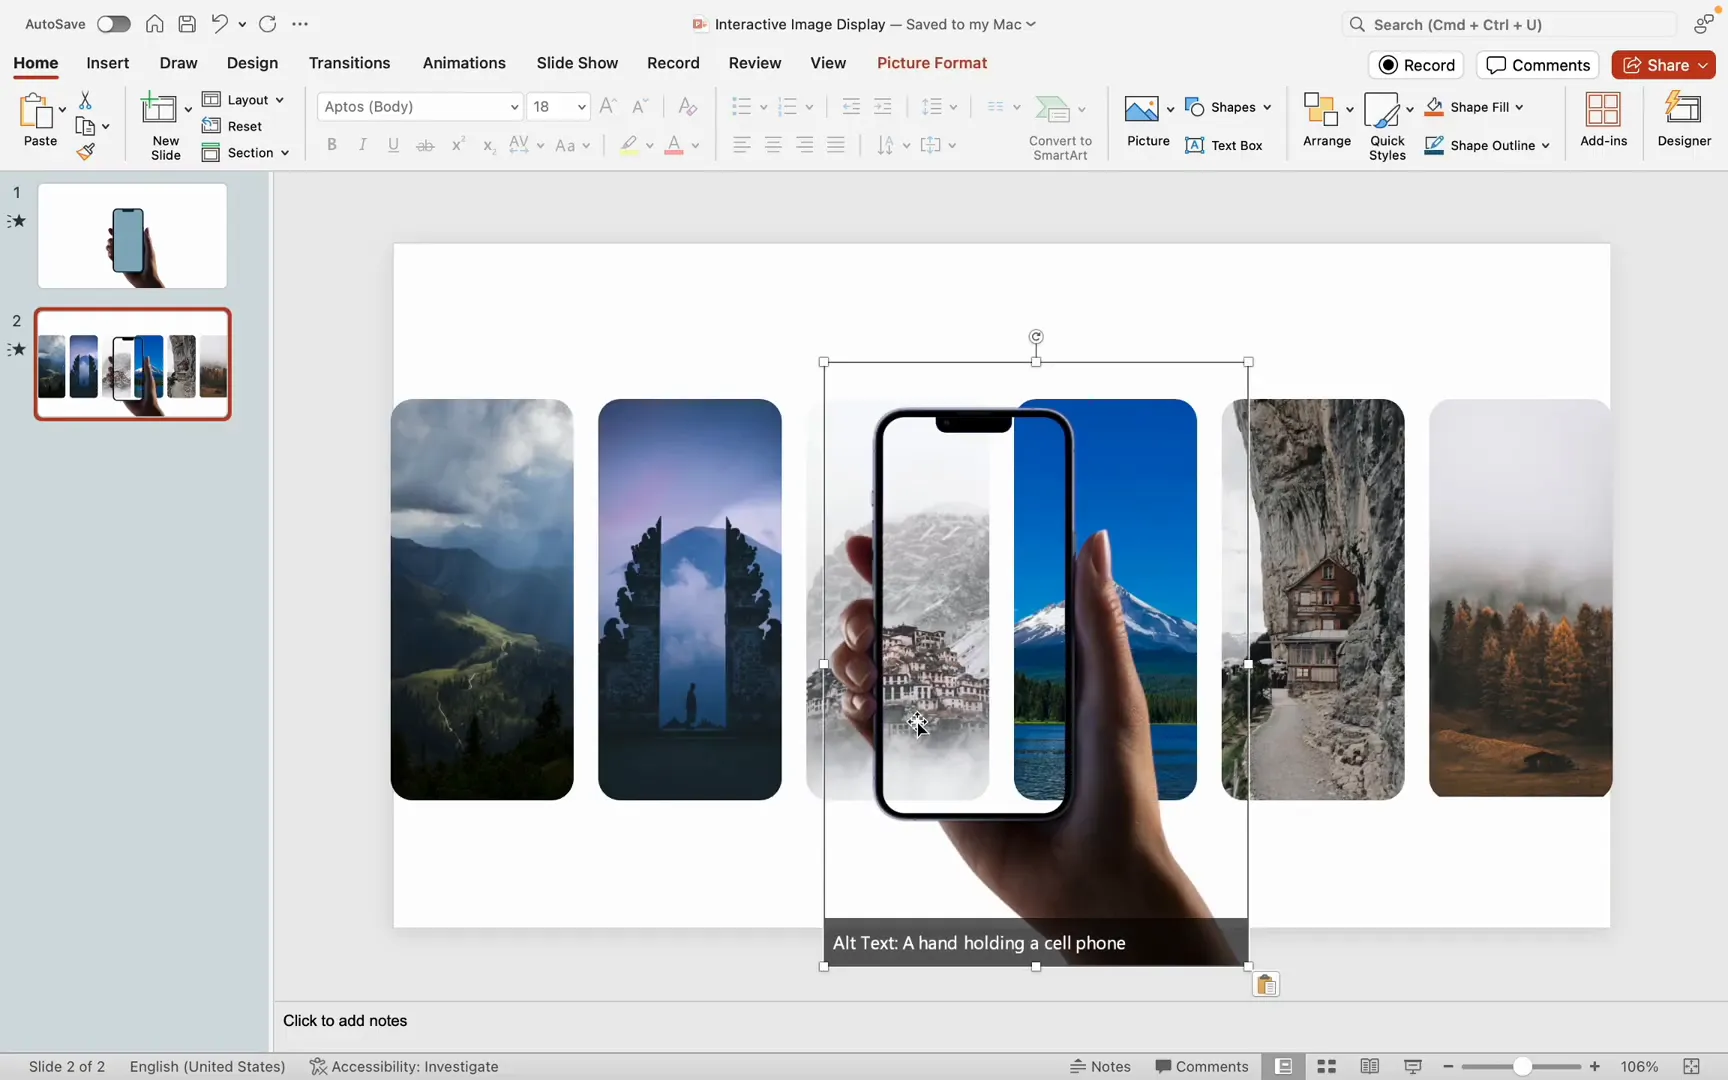
Aligning Images with the Phone Screen
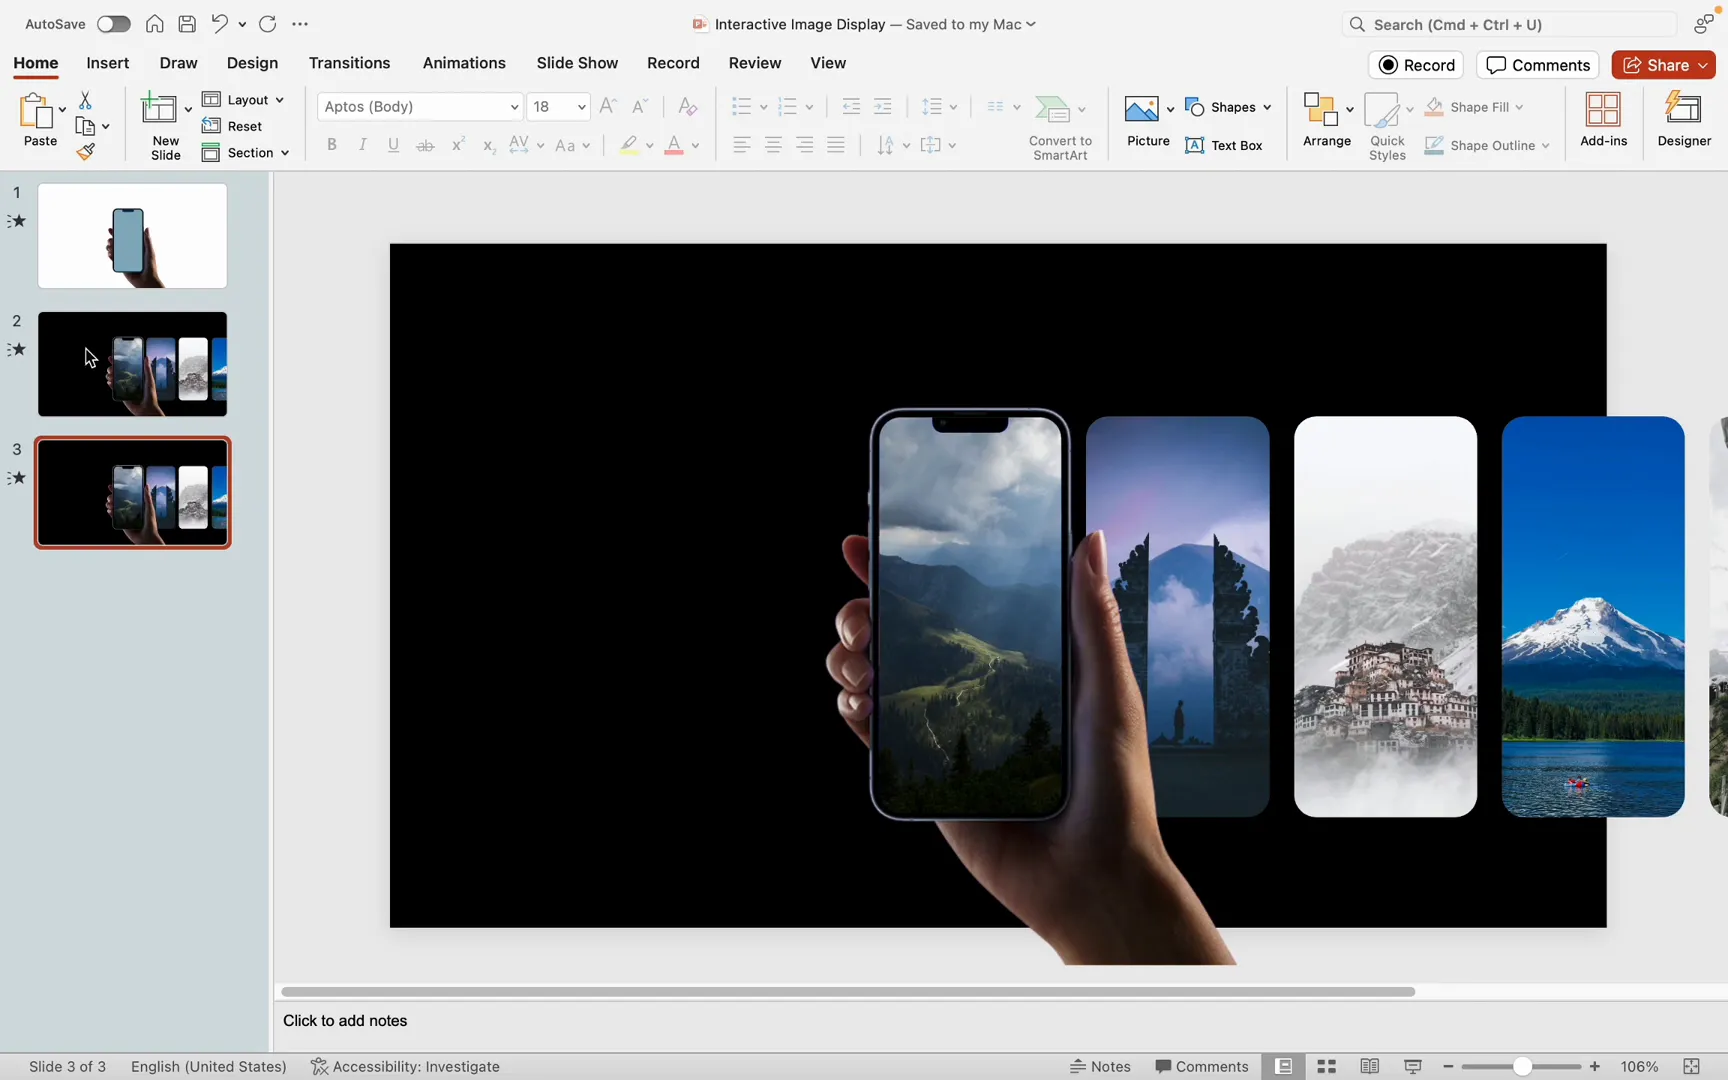
Copy the phone mockup and position the first cropped image so that it perfectly aligns with the phone screen.
Important: Ensure the phone mockup is on the top layer; otherwise, it may be hidden behind the images.
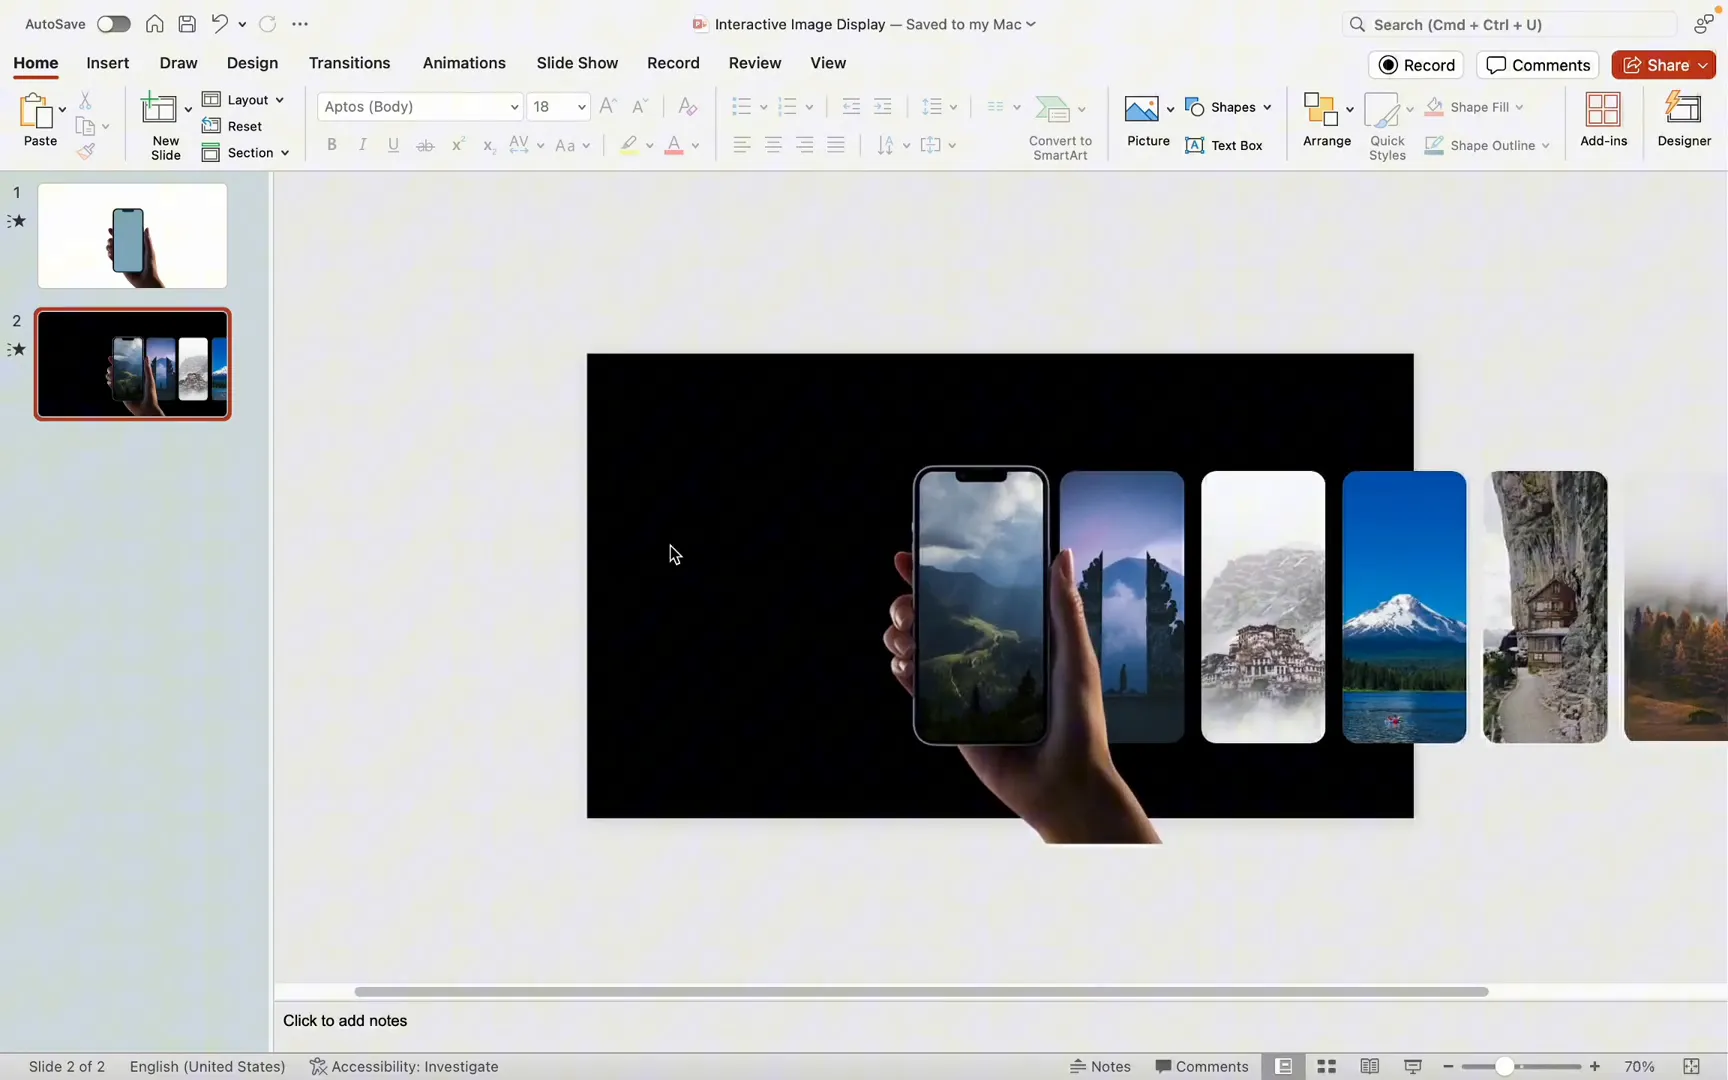
Adjusting Background for Better Visibility
To make the images and phone mockup stand out, change your slide background color to black. This contrast enhances visibility and focus on the content.
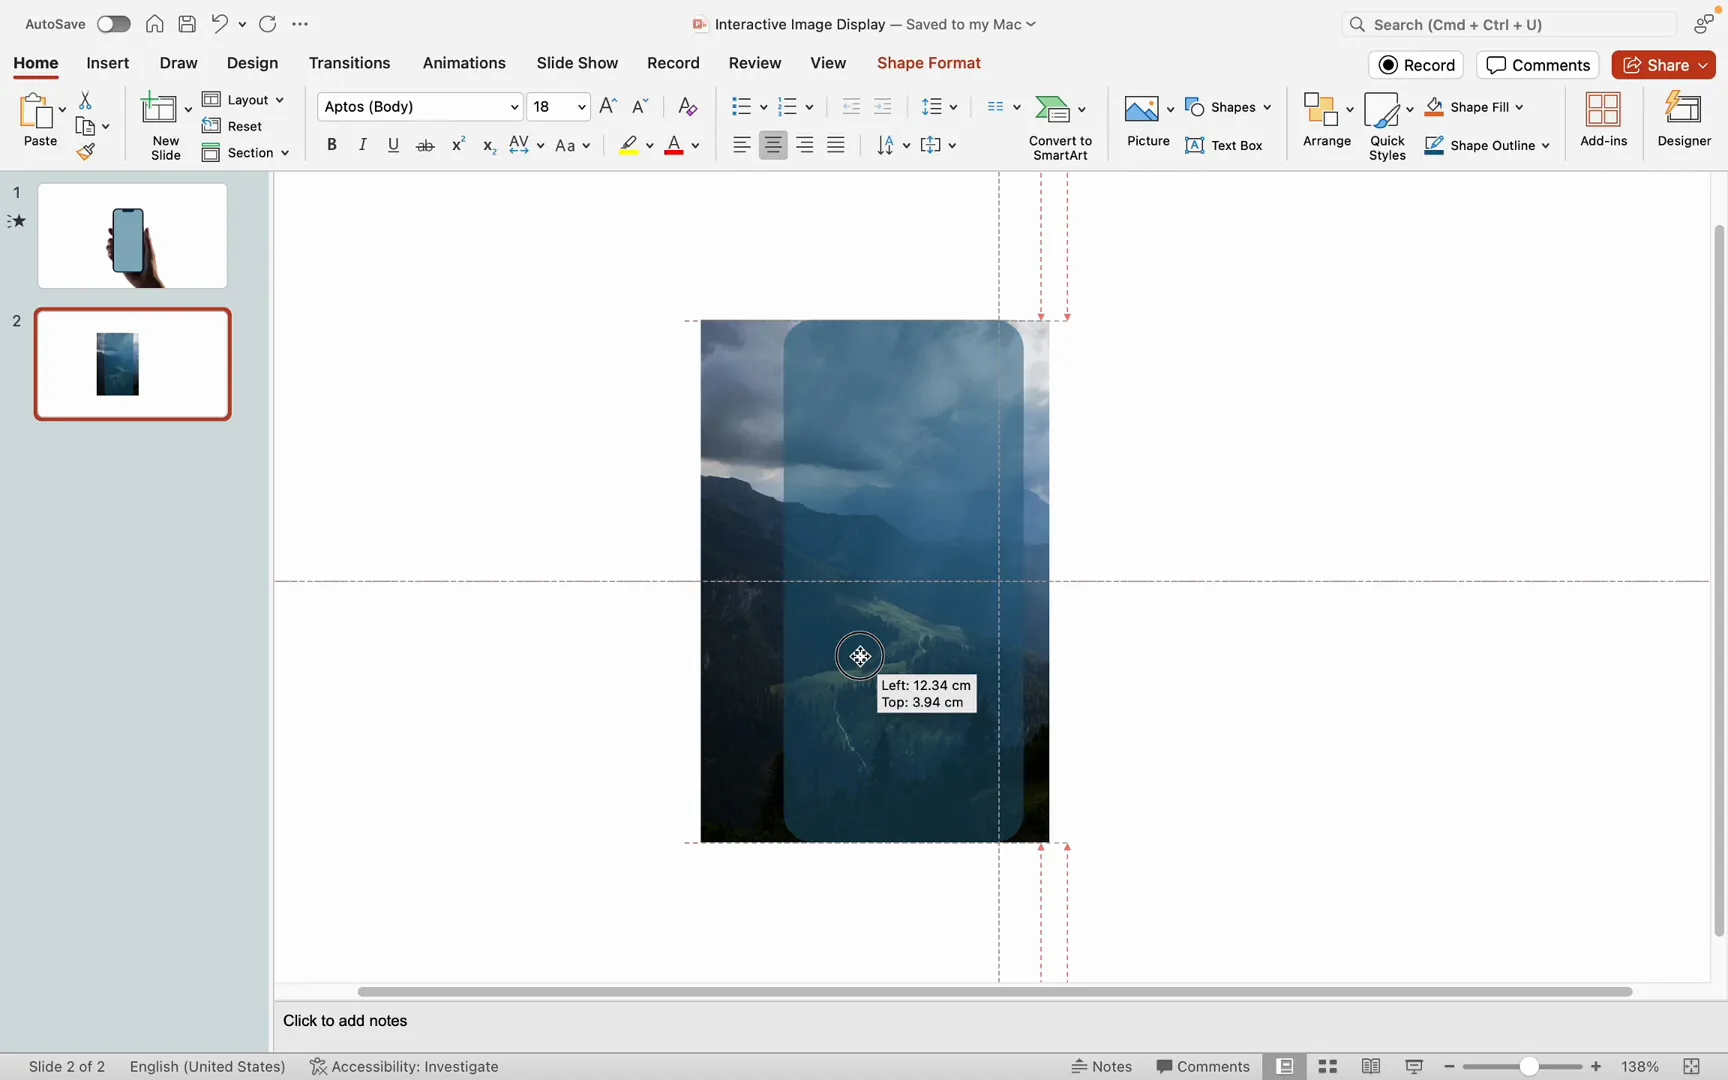
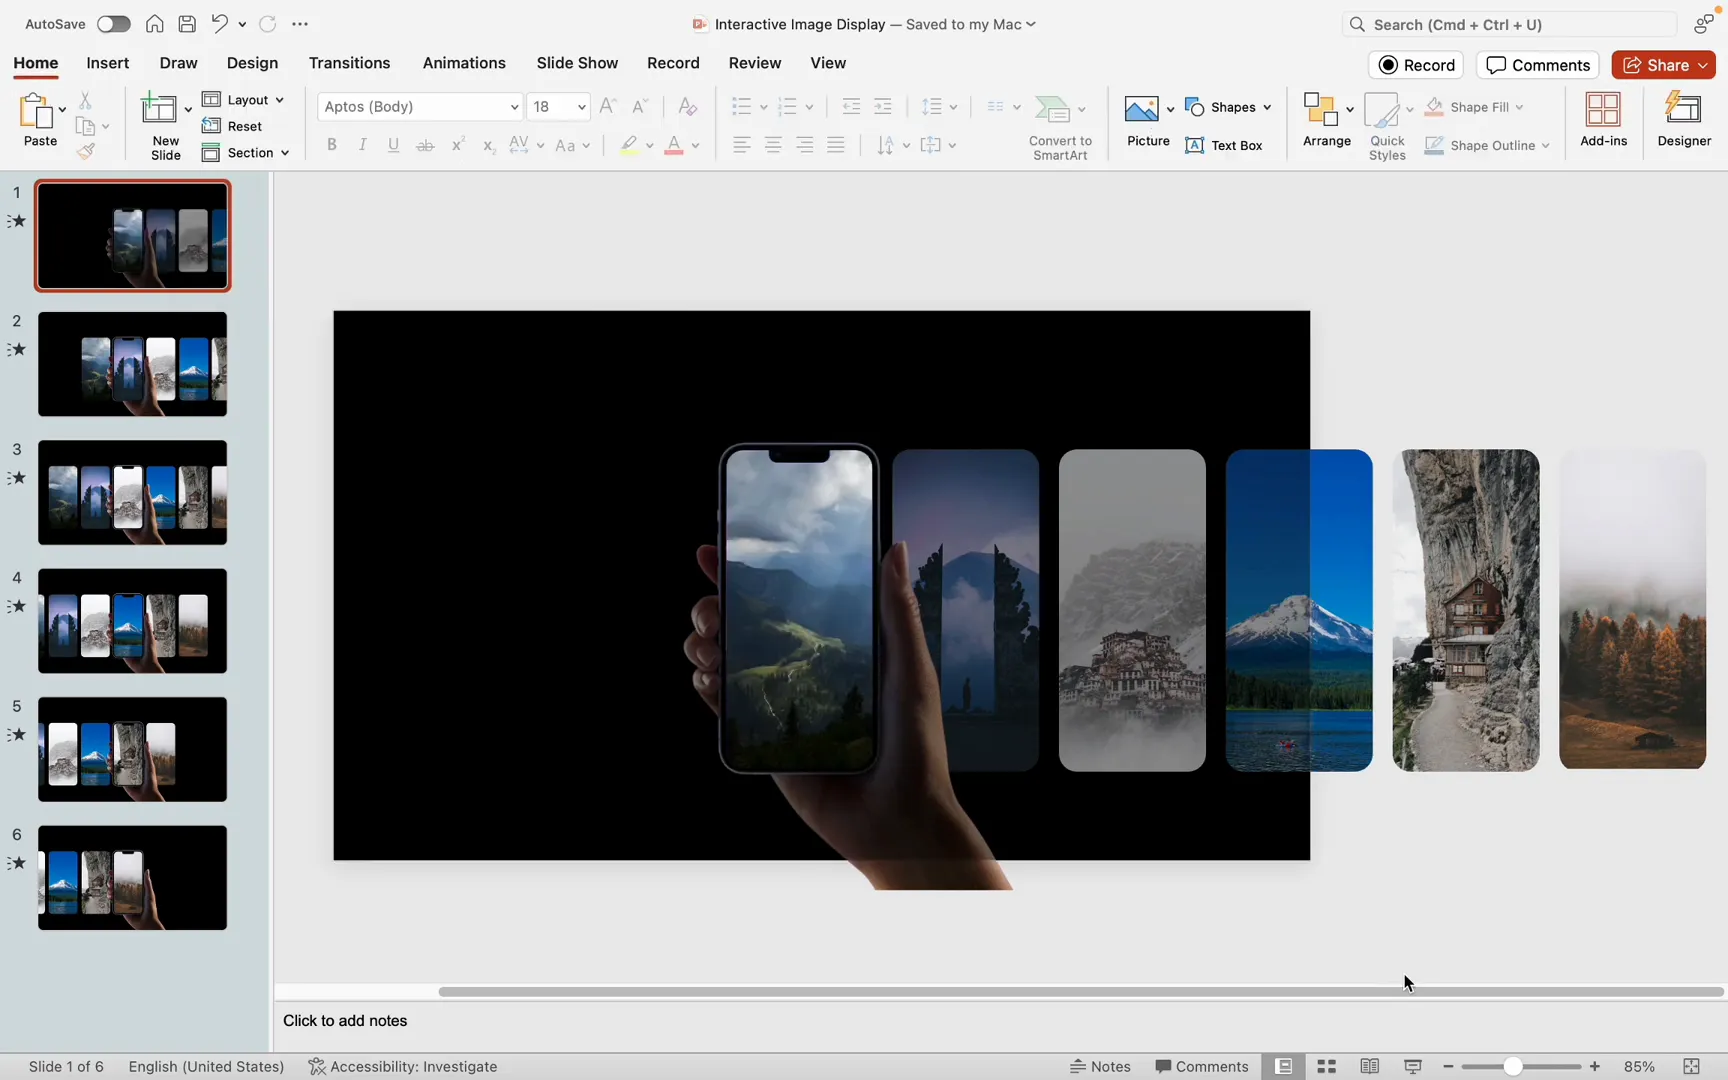
Duplicating Slides and Positioning Images
Duplicate the slide multiple times—once for each image you want to display.
- On each duplicated slide, move the grouped images horizontally to bring the next image into the phone screen’s view.
- Double-check that the images are aligned correctly on each slide in the order you want them to appear.
Applying Morph Transitions for Smooth Animation
Select all the slides containing the repositioned images and apply the Morph transition effect. Morph creates seamless, fluid animation between slides, giving the illusion of smooth image scrolling within the phone screen.
Once applied, preview your slides to see the smooth transition effect in action.
Step 3: Beautifying the Pages and Adding Title Boxes
With your images animating beautifully, it’s time to enhance the overall look of your slides by adjusting brightness, adding a stylish title box, and refining the background.
Highlighting the Phone Screen Image
The goal is to make the image displayed in the phone screen bright and vibrant while dimming the surrounding images to reduce distraction.
- Add a rectangle shape that covers the entire slide.
- Remove its border.
- Set the fill color to black with 60% transparency to darken the slide.
- Duplicate any cropped image and place it over the phone screen area.
- Select the rectangle first, then the duplicated image, go to Shape Format and choose Subtract from merge shapes.
This creates a cutout in the rectangle matching the phone screen size, allowing the screen image to shine brightly while the rest of the slide is subtly darkened.
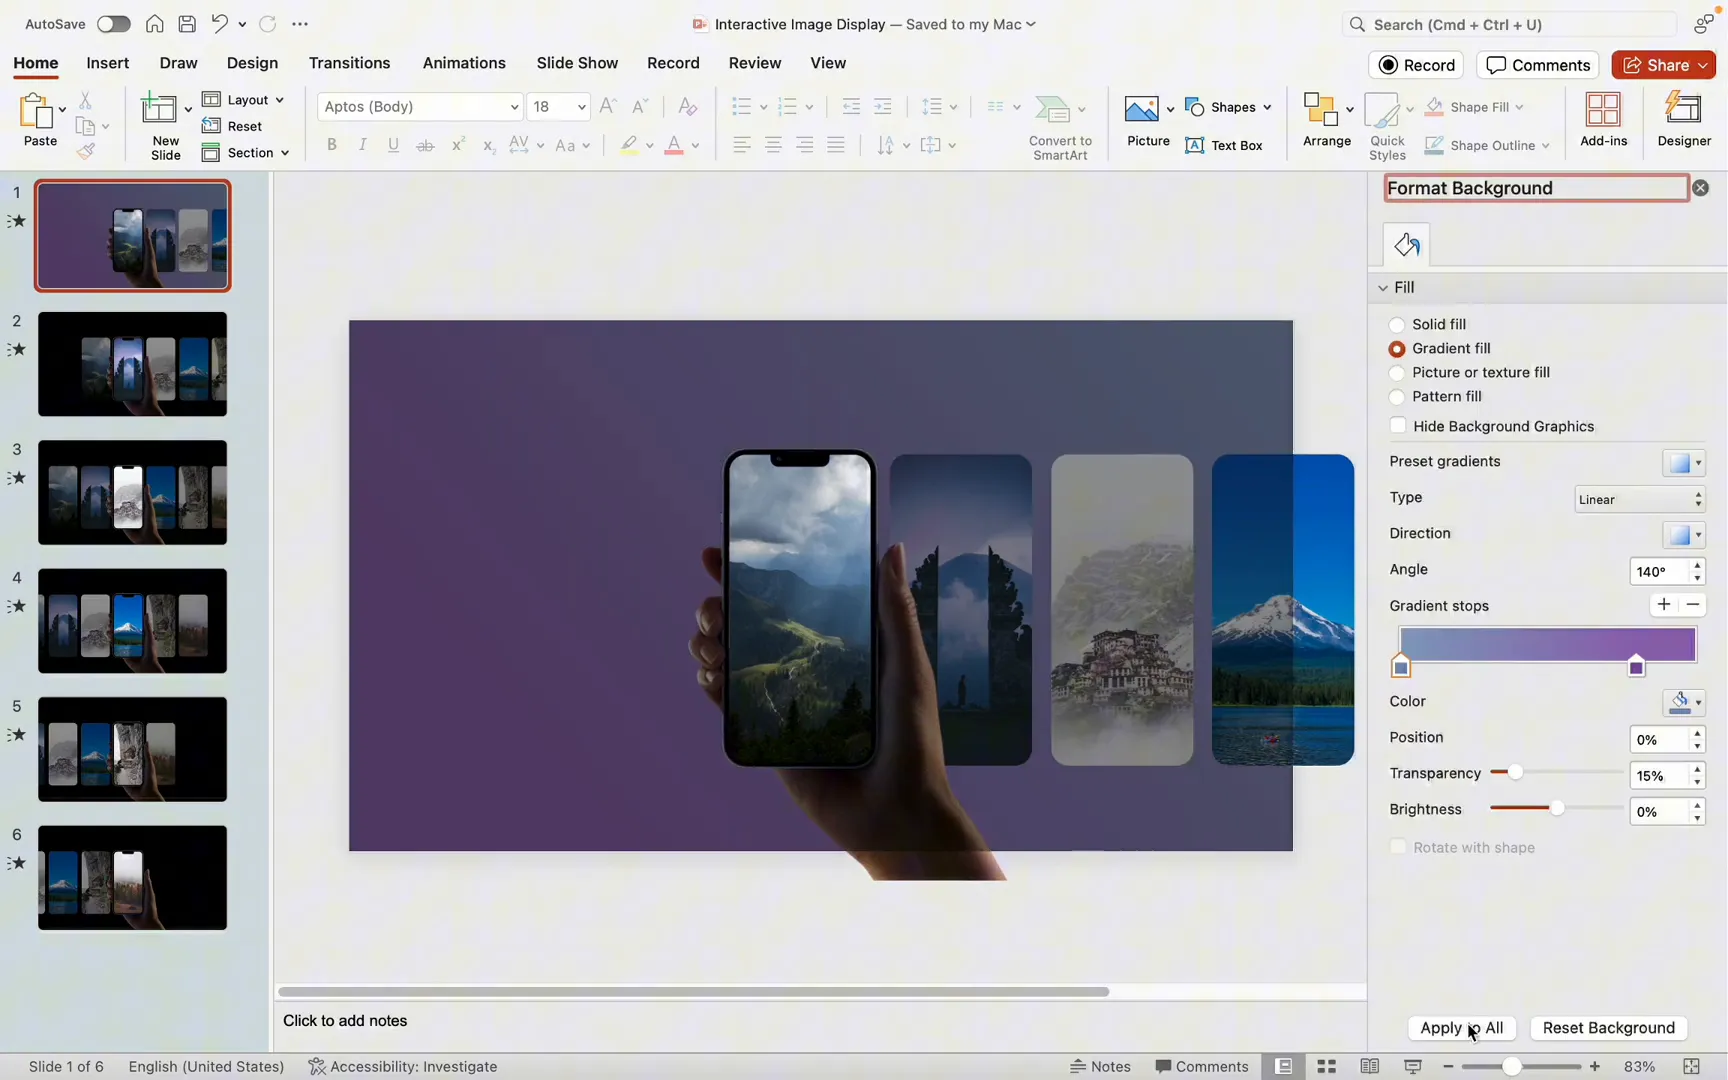
Adding a Gradient Background for Texture
To add visual interest to the slide background, apply a gradient fill using light blue and light purple colors. This gradient complements the overall design and adds depth to your presentation.
Creating a Stylish Title Box
On the first slide, the left side of the screen is often empty and can be used effectively as a title bar.

- Insert a rounded rectangle with rounded top corners on the left side of the slide.
- Adjust the height to match the phone image height.
- Remove the border and set the fill to slide background fill, ensuring it inherits the gradient color.
- Add a subtle shadow effect to give the shape texture and depth.
- Add descriptive text inside the shape, then group the text and shape together to form a cohesive title box.
Animating the Title Box with Morph
Copy the title box to subsequent slides, moving it slightly off the slide on the second slide to create a collapsing effect using Morph transition.
On the last slide, rotate the title box horizontally (mirror flip) and modify the text for variety. Similarly, copy the title box to the penultimate slide and move it out to the right to create a flying-in effect.
These subtle animations add polish and professionalism to your presentation.

Step 4: Creating Navigation Buttons
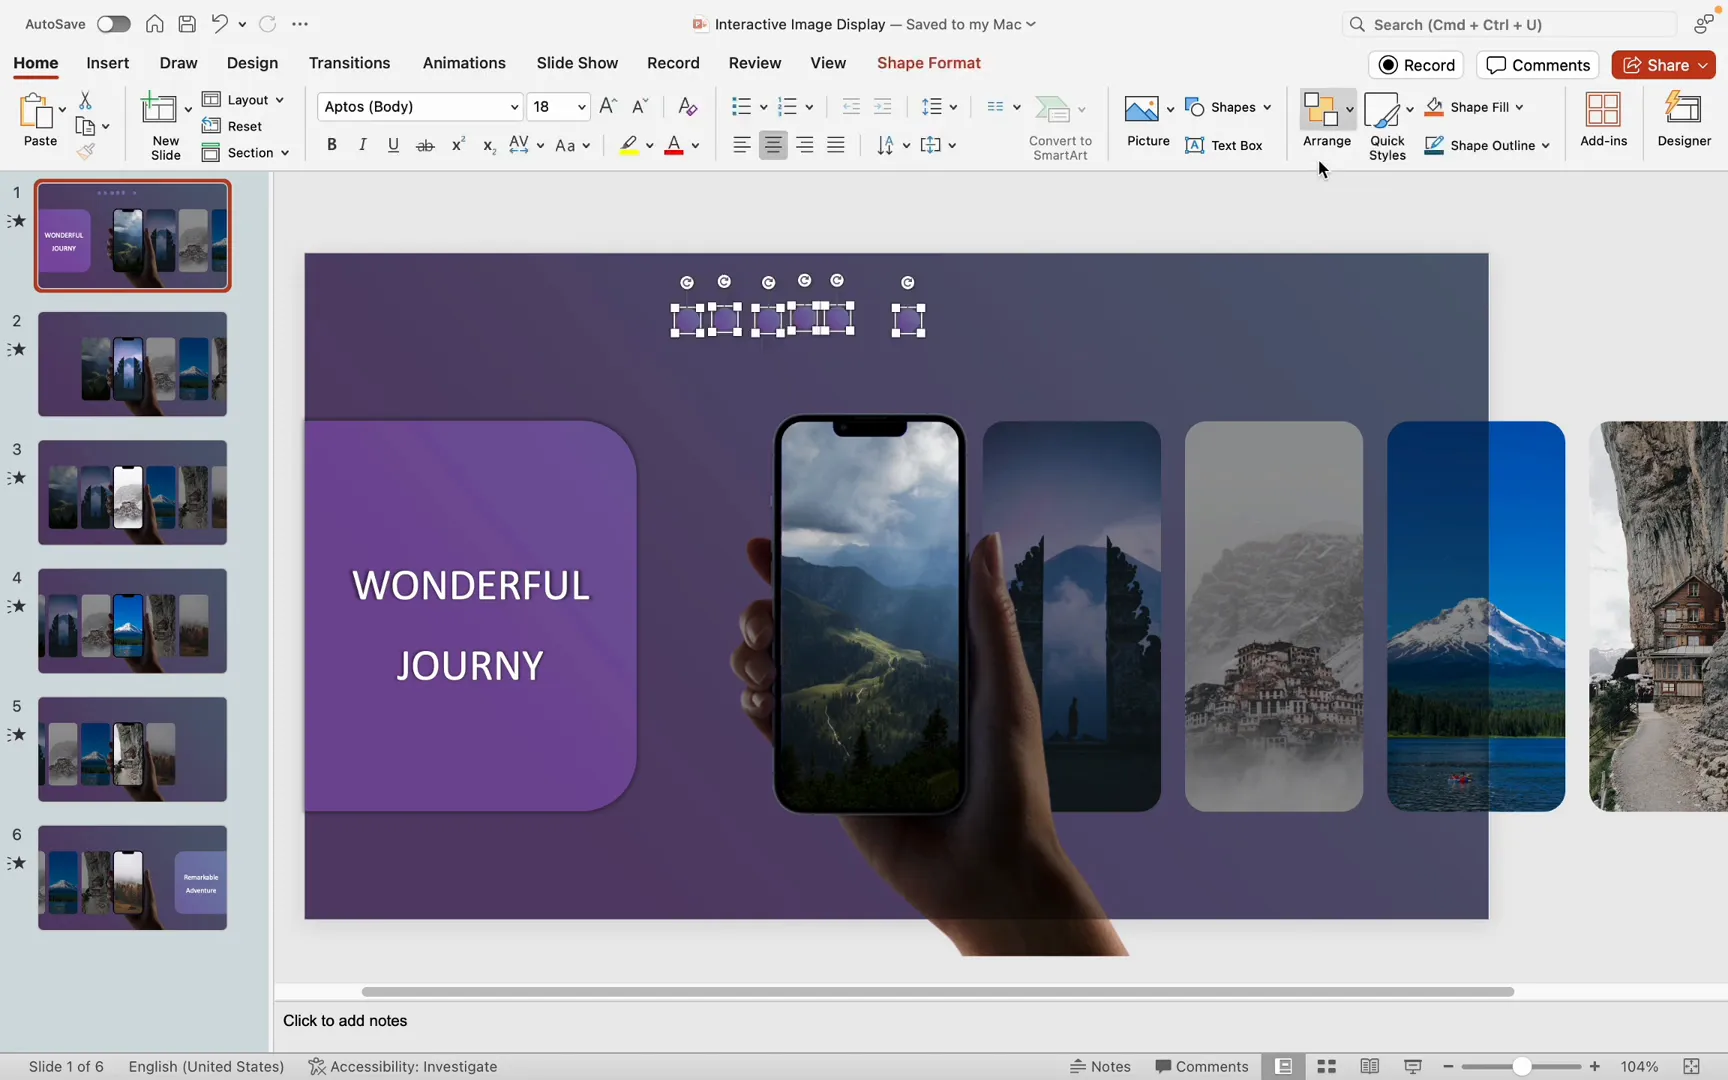
To enhance interactivity, add navigation buttons at the top of the slide that allow you to jump directly to any image slide.
Designing Circular Navigation Buttons
- Insert a circular shape above the phone screen.
- Remove the border.
- Fill the shape with a gradient matching the slide background for consistency.
- Add a central shadow effect to give the button depth.
- Copy this button five times and distribute them evenly horizontally.
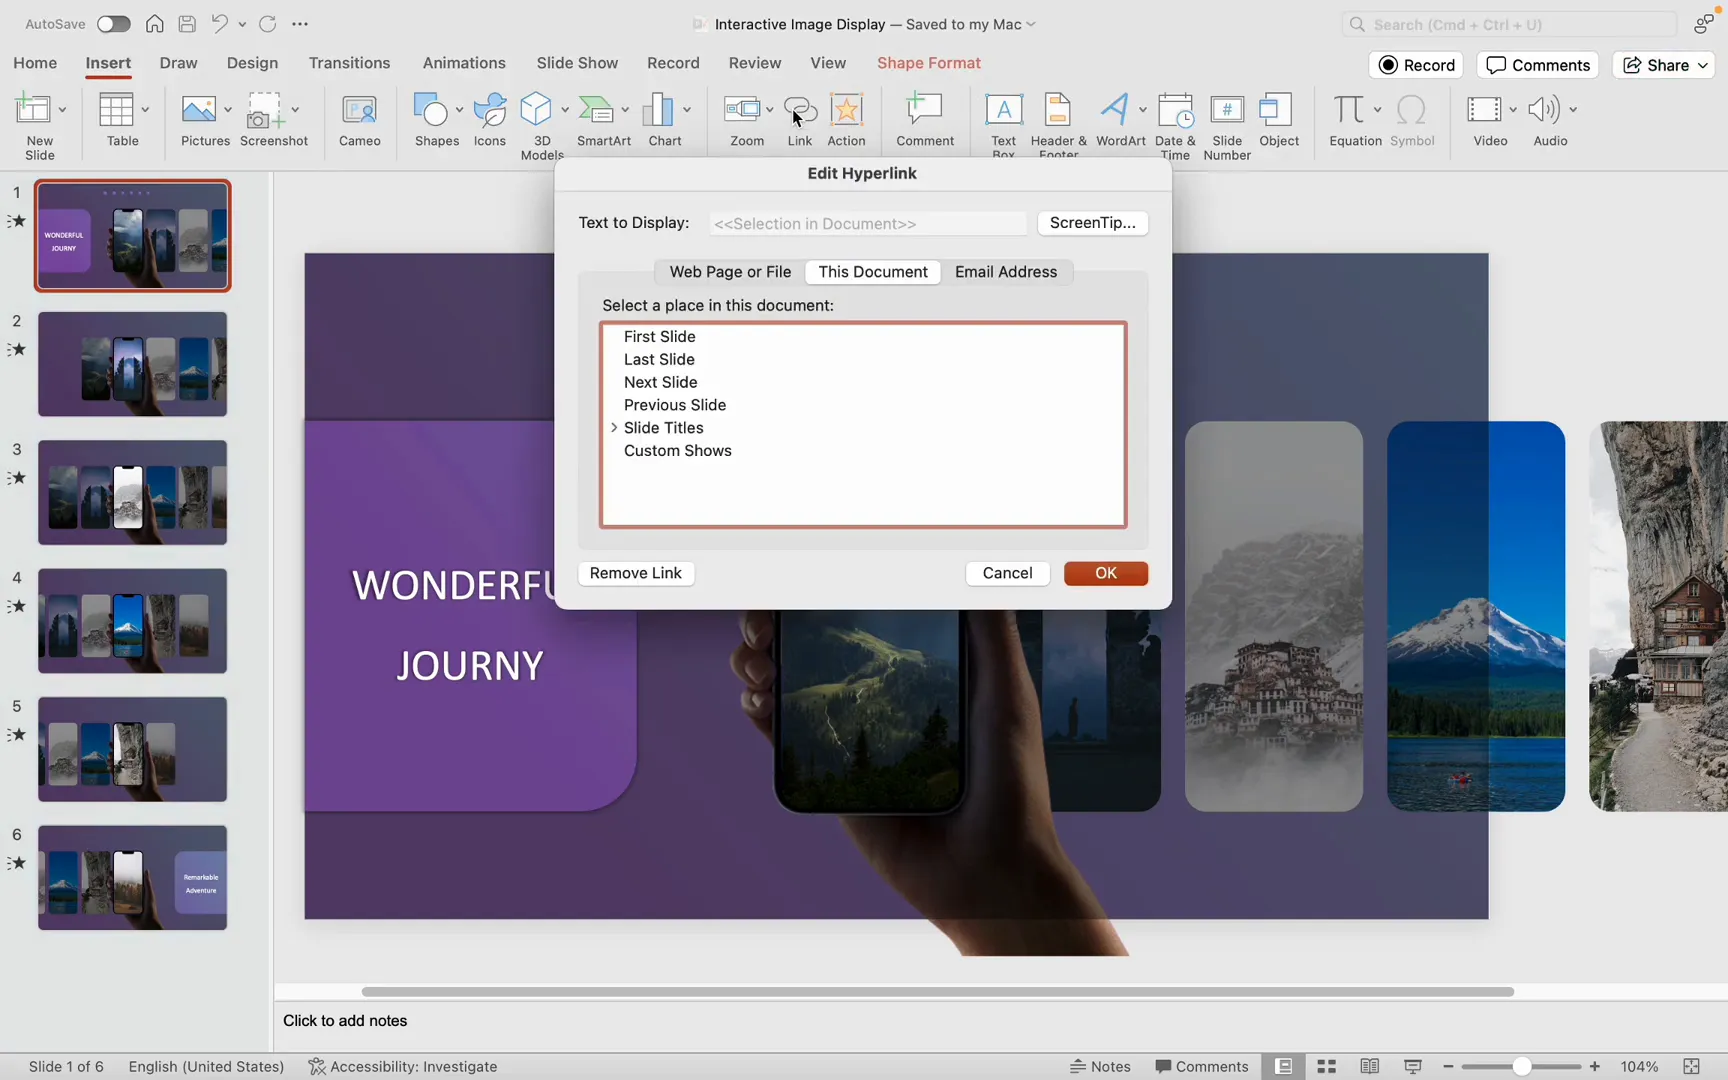
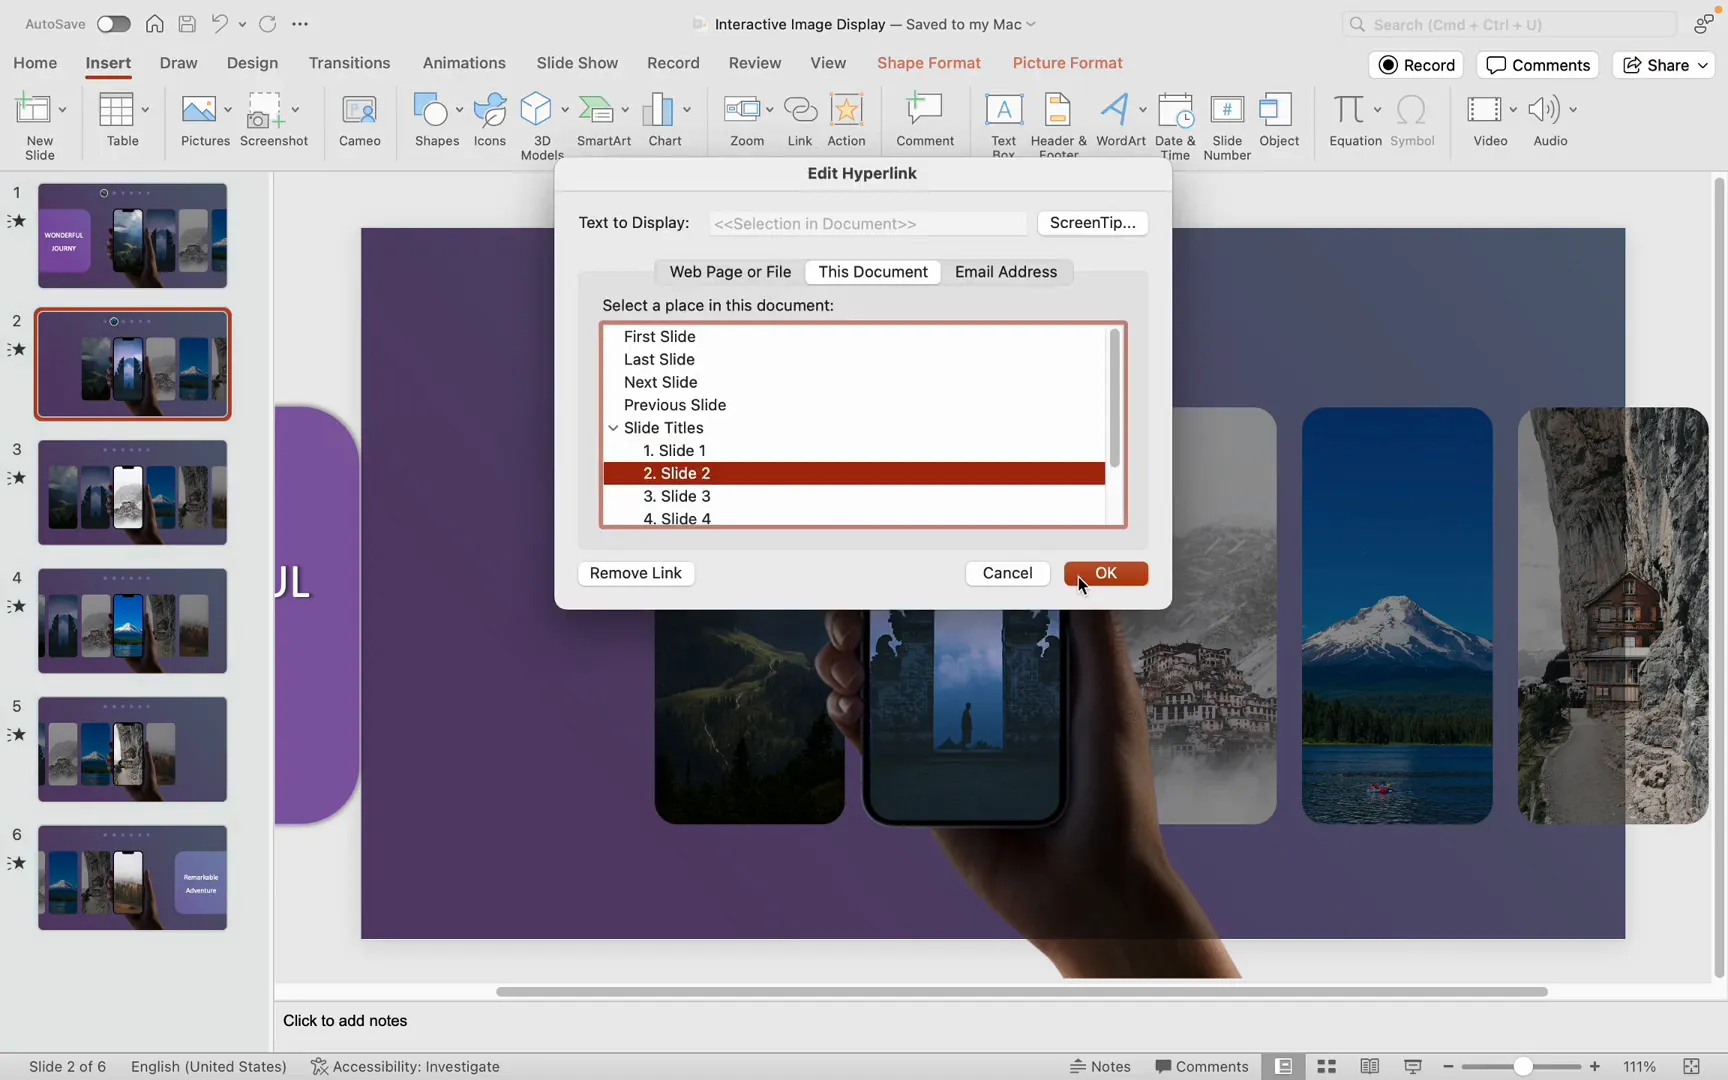
Linking Buttons to Slides
For each button:
- Select the button.
- Go to the Insert tab and choose Link.
- Link it to the corresponding slide number you want the button to navigate to.
This setup allows you to click any button during your presentation and instantly jump to the corresponding image slide.
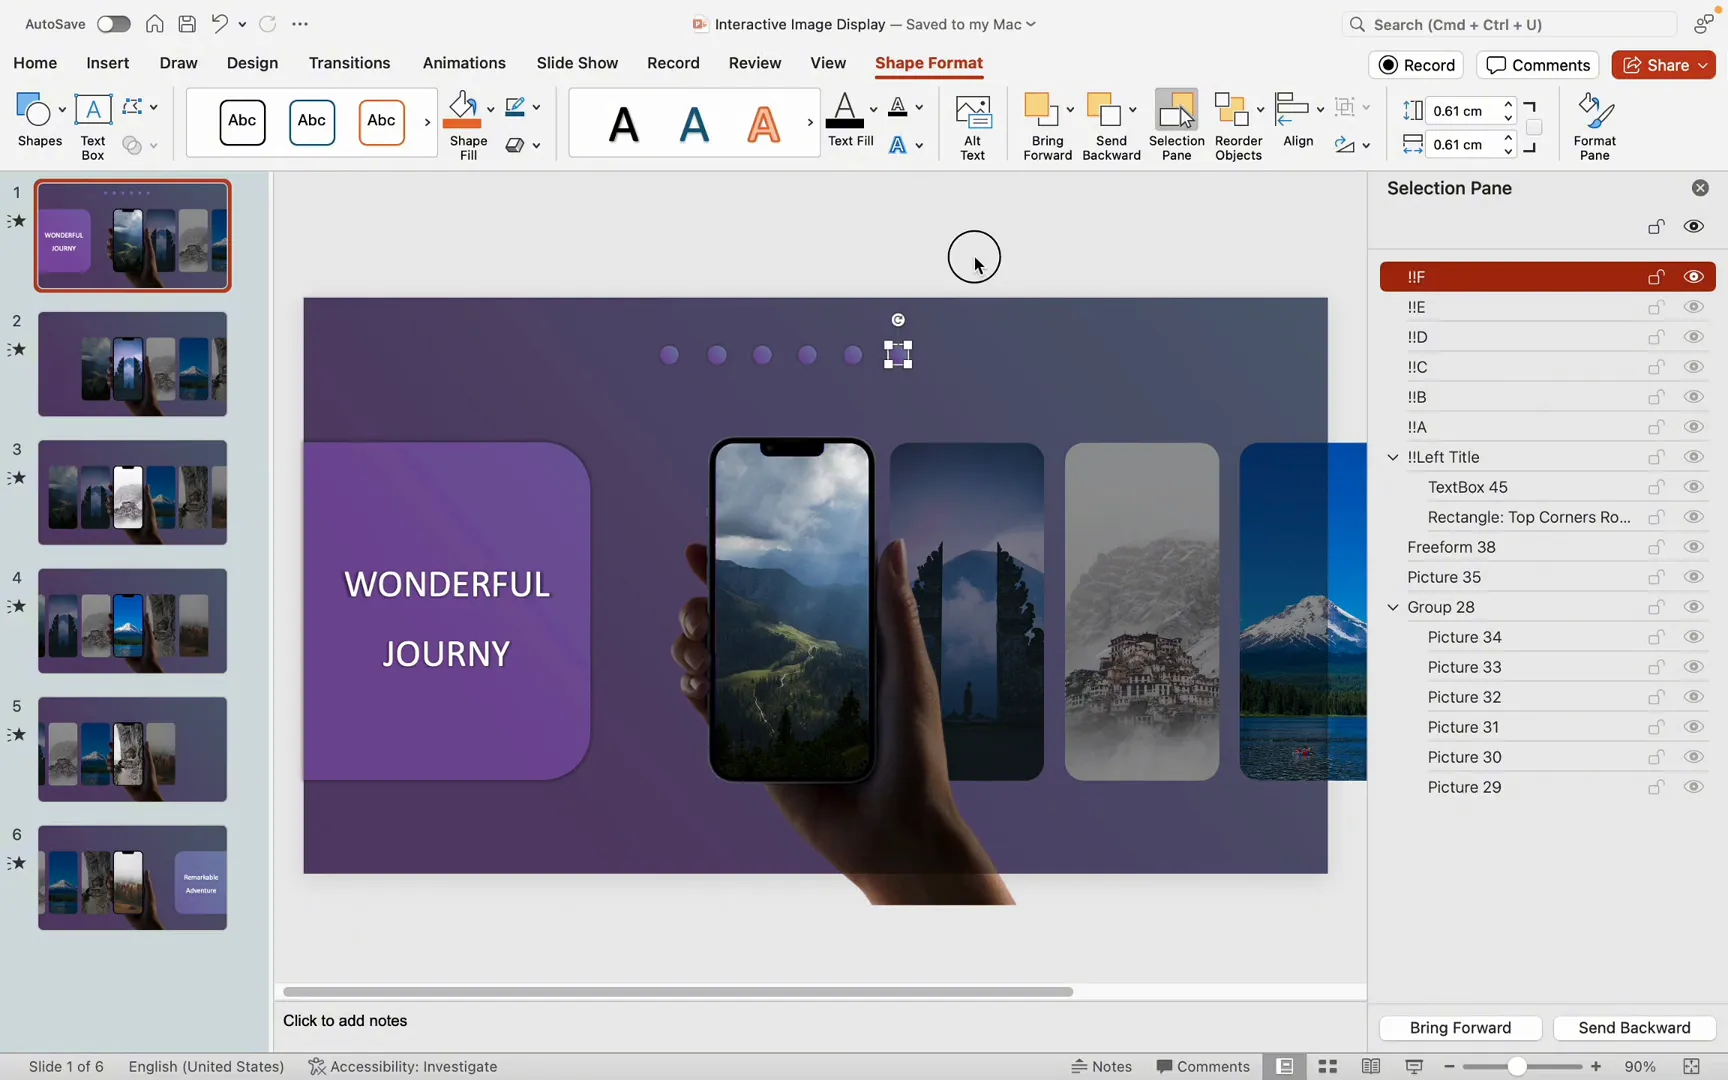
Naming Buttons for Morph Consistency
A crucial step is to rename each button sequentially in alphabetical order, prefixing each name with two exclamation marks (e.g., “!!A”, “!!B”, etc.). This naming convention forces PowerPoint to recognize the buttons as the same shape across slides, which is essential for smooth Morph transitions.
After renaming, copy the buttons to all slides to maintain consistent navigation throughout the presentation.
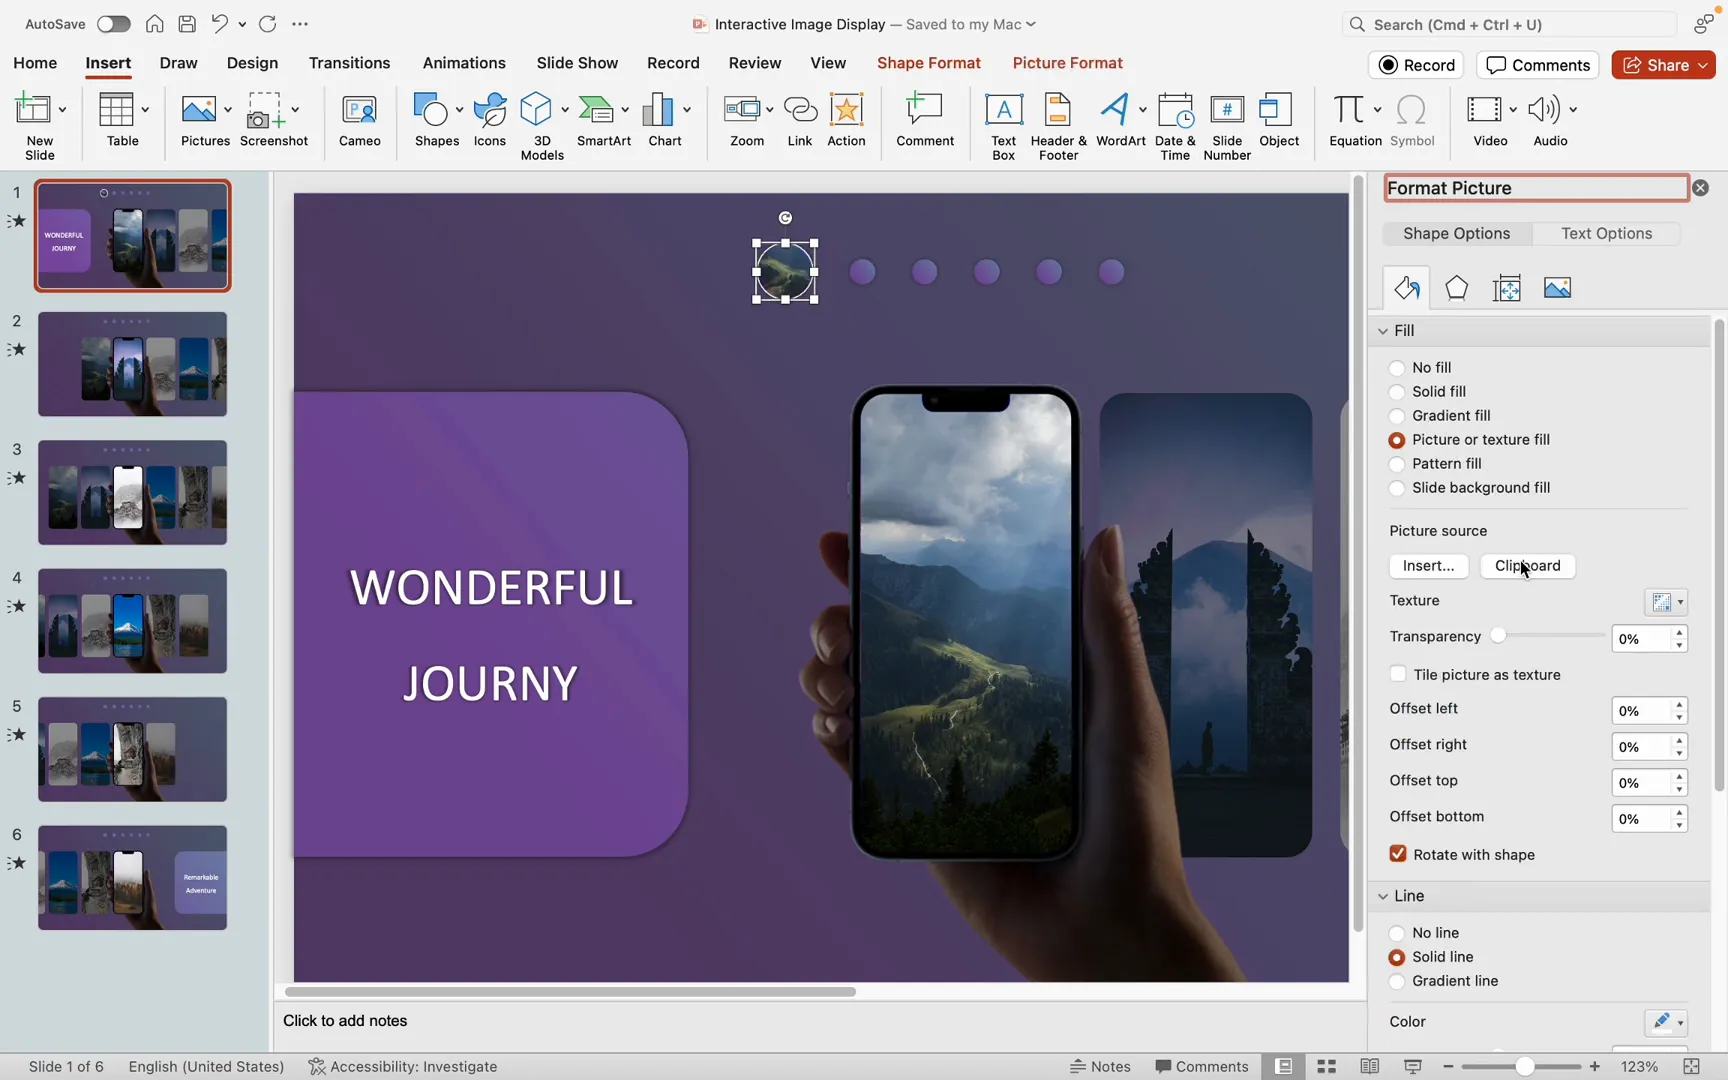
Adding Button Enlargement Effects
To help users identify the current slide, add an effect where the corresponding button enlarges and highlights:
- Select the button for the current slide and enlarge it slightly.
- Align it horizontally with the other buttons and adjust spacing.
- Add a white border with 1-pixel width to make it stand out.
- Copy the core part of the current slide’s image to the clipboard.
- Set the button’s fill to Picture or Texture Fill using the clipboard image.
Repeat this process for each slide, ensuring the enlarged button reflects the current image.
Relinking Buttons to Avoid Errors
Since copying buttons can sometimes change the links, always double-check and relink each button to its respective slide to prevent navigation errors during your presentation.
Patience and precision during this step are key to creating a flawless interactive navigation system.
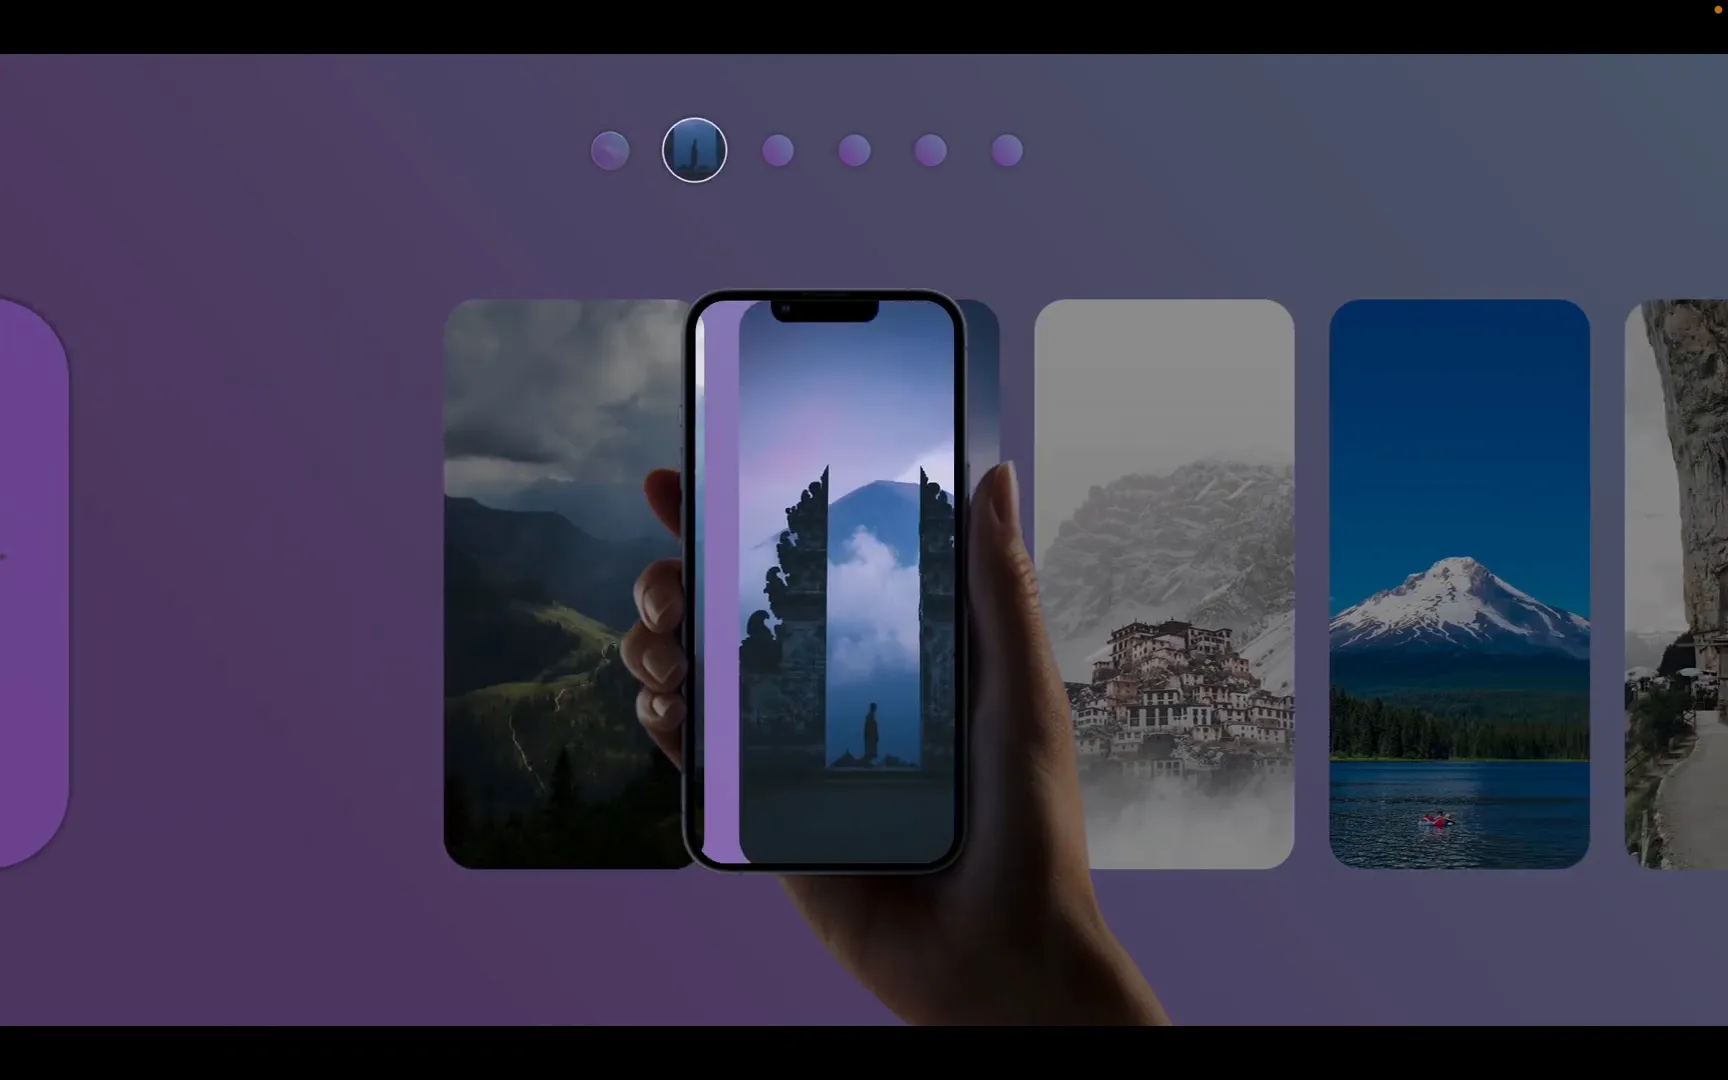
Final Preview and Results
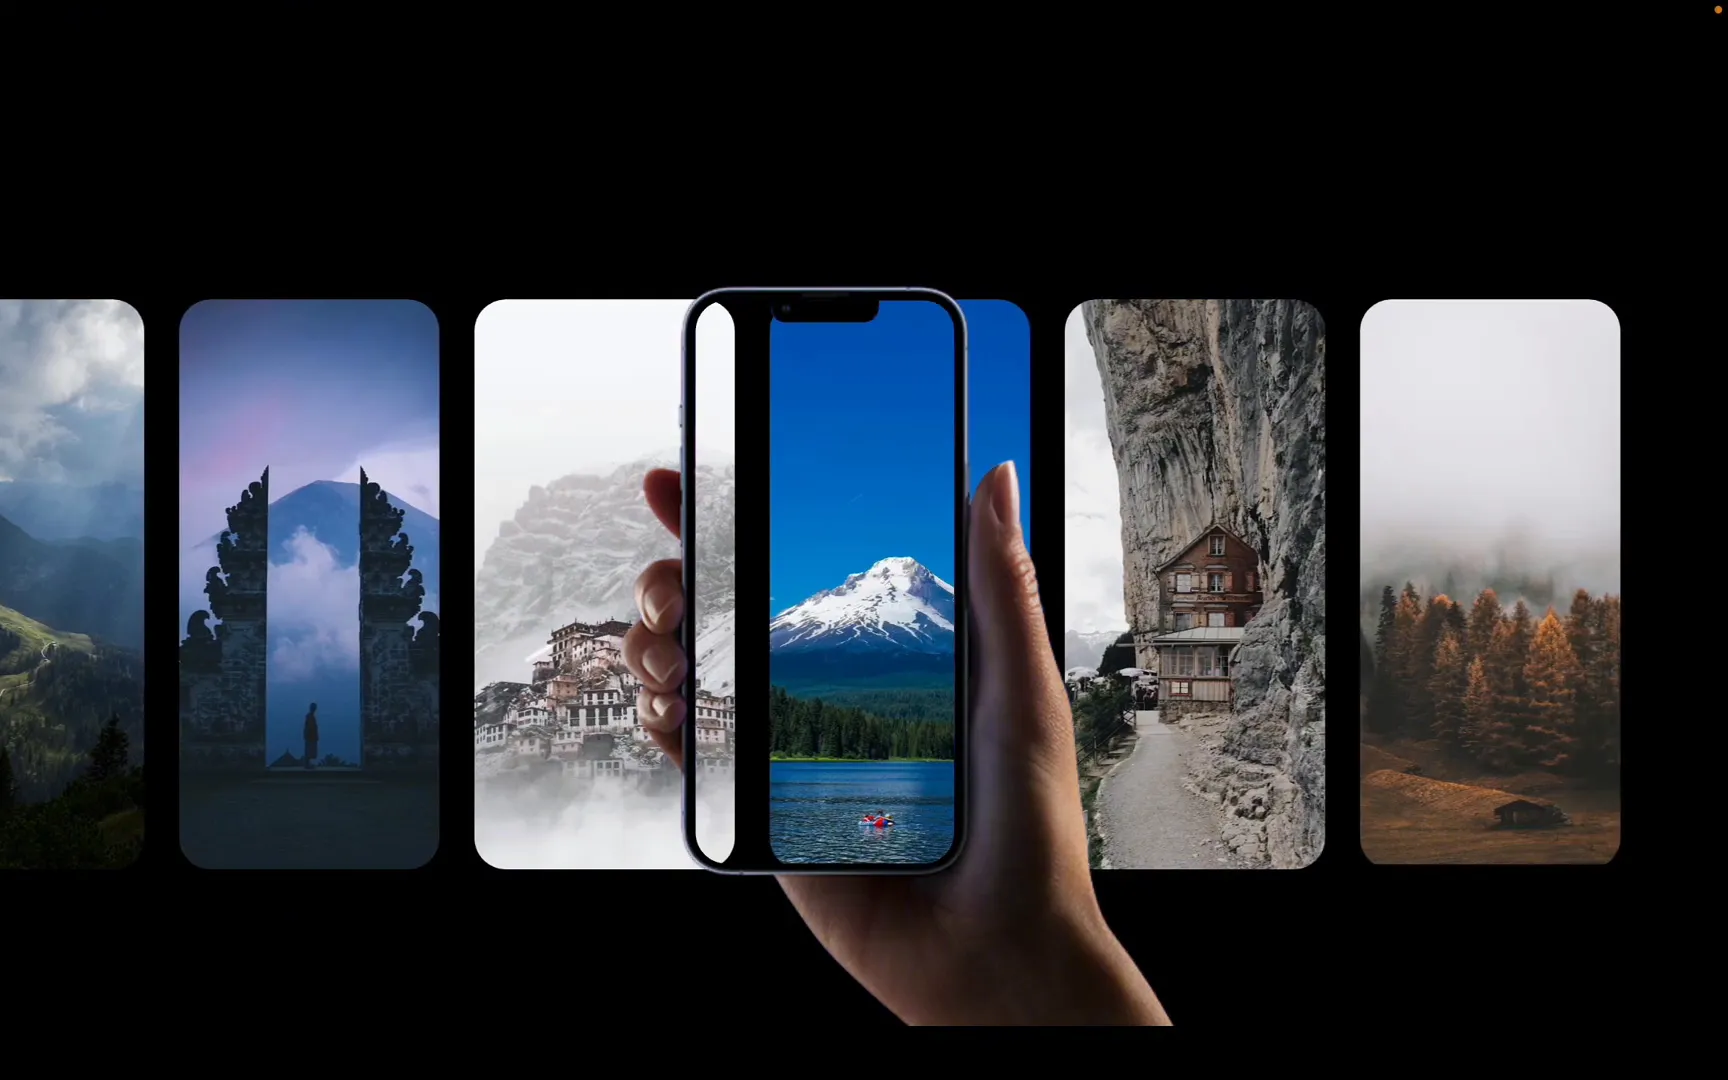
Once all steps are complete, preview your entire presentation. You should observe smooth transitions between slides thanks to the Morph effect, vibrant images displayed within the phone mockup, and functional navigation buttons that allow effortless switching between images.
This interactive navigation system transforms your PowerPoint into a dynamic, professional presentation that captivates and engages your audience.
Conclusion
Creating an interactive image navigation display in PowerPoint is a rewarding process that combines creativity with technical skills. Although it can be a bit lengthy, the step-by-step approach ensures you achieve a polished, user-friendly presentation that stands out.
By preparing your images carefully, applying smooth animations through Morph transitions, beautifying your slides with thoughtful design elements, and adding intuitive navigation buttons, you can elevate your presentations to a new level of professionalism and engagement.
Feel free to try out this technique yourself and experiment with different designs and images. With practice, you’ll master the art of creating interactive PowerPoint presentations that leave a lasting impression.
Happy presenting!
Frequently Asked Questions (FAQ)
Q1: What is the purpose of using an iPhone mockup in this tutorial?
The iPhone mockup acts as a stylish frame for your images, simulating a phone screen display. Its transparent middle section allows your images to show through, creating a modern and professional look for your presentation.
Q2: How does the Morph transition enhance the presentation?
The Morph transition creates smooth, fluid animations between slides by seamlessly moving and transforming objects. In this tutorial, it is used to animate the images sliding within the phone screen and to animate the title box and navigation buttons, resulting in a polished user experience.
Q3: Why is it necessary to rename navigation buttons with two exclamation marks?
Renaming buttons with two exclamation marks (e.g., “!!A”) forces PowerPoint to recognize these buttons as the same shape across slides. This recognition is essential for the Morph transition to work correctly on these objects, which ensures smooth animations and consistent button behavior.
Q4: Can this interactive navigation technique be applied to other devices or shapes?
Absolutely! While this tutorial uses an iPhone mockup, the same principles can be applied to other device frames or custom shapes. Just ensure your clipping shapes and images are adjusted accordingly to fit your chosen design.
Q5: What should I do if the navigation buttons don’t work during the presentation?
Double-check that each button is correctly linked to the corresponding slide and that the buttons are properly named and copied to every slide. If links are broken, relink them manually to fix navigation issues.
Check out the full video: Creating Interactive Navigation in PowerPoint: Step-by-Step Tutorial


