
Welcome, dear friends! If you’re eager to elevate your PowerPoint presentations with stunning, cinematic animations that captivate your audience from the very first slide, you’re in the right place. In this comprehensive guide, I’ll walk you through creating an impressive looping animation in PowerPoint that brings your slides to life with smooth, elegant motion. This tutorial is perfect for anyone wanting to add a professional touch to their presentation intros or any slide that needs a dynamic visual boost.
This step-by-step tutorial is inspired by the engaging style of One Skill PowerPoint, who has mastered the art of PowerPoint animations and generously shared these secrets to help you become a PowerPoint animation pro. Let’s dive in and create a cinematic animated slide design that will wow your viewers!

Table of Contents
- Setting the Stage: Preparing Your Slide Background
- Designing Dynamic Pointy Arrows Using PowerPoint Shapes
- Adding Style: Gradient Fill and Outlines to Your Arrow
- Positioning the Arrow on the Slide
- Animating the Arrow: Motion Path and Zoom
- Creating a Looping Arrow Animation
- Designing a Stunning Slide Title with Outline and Glow
- Adding Depth with Text Shadows for a 3D Effect
- Animating the Slide Title for Cinematic Movement
- Final Preview: Your Stunning Cinematic PowerPoint Slide
- Mastering PowerPoint Animations: Take Your Skills Further
- Frequently Asked Questions (FAQ)
- Conclusion
Setting the Stage: Preparing Your Slide Background
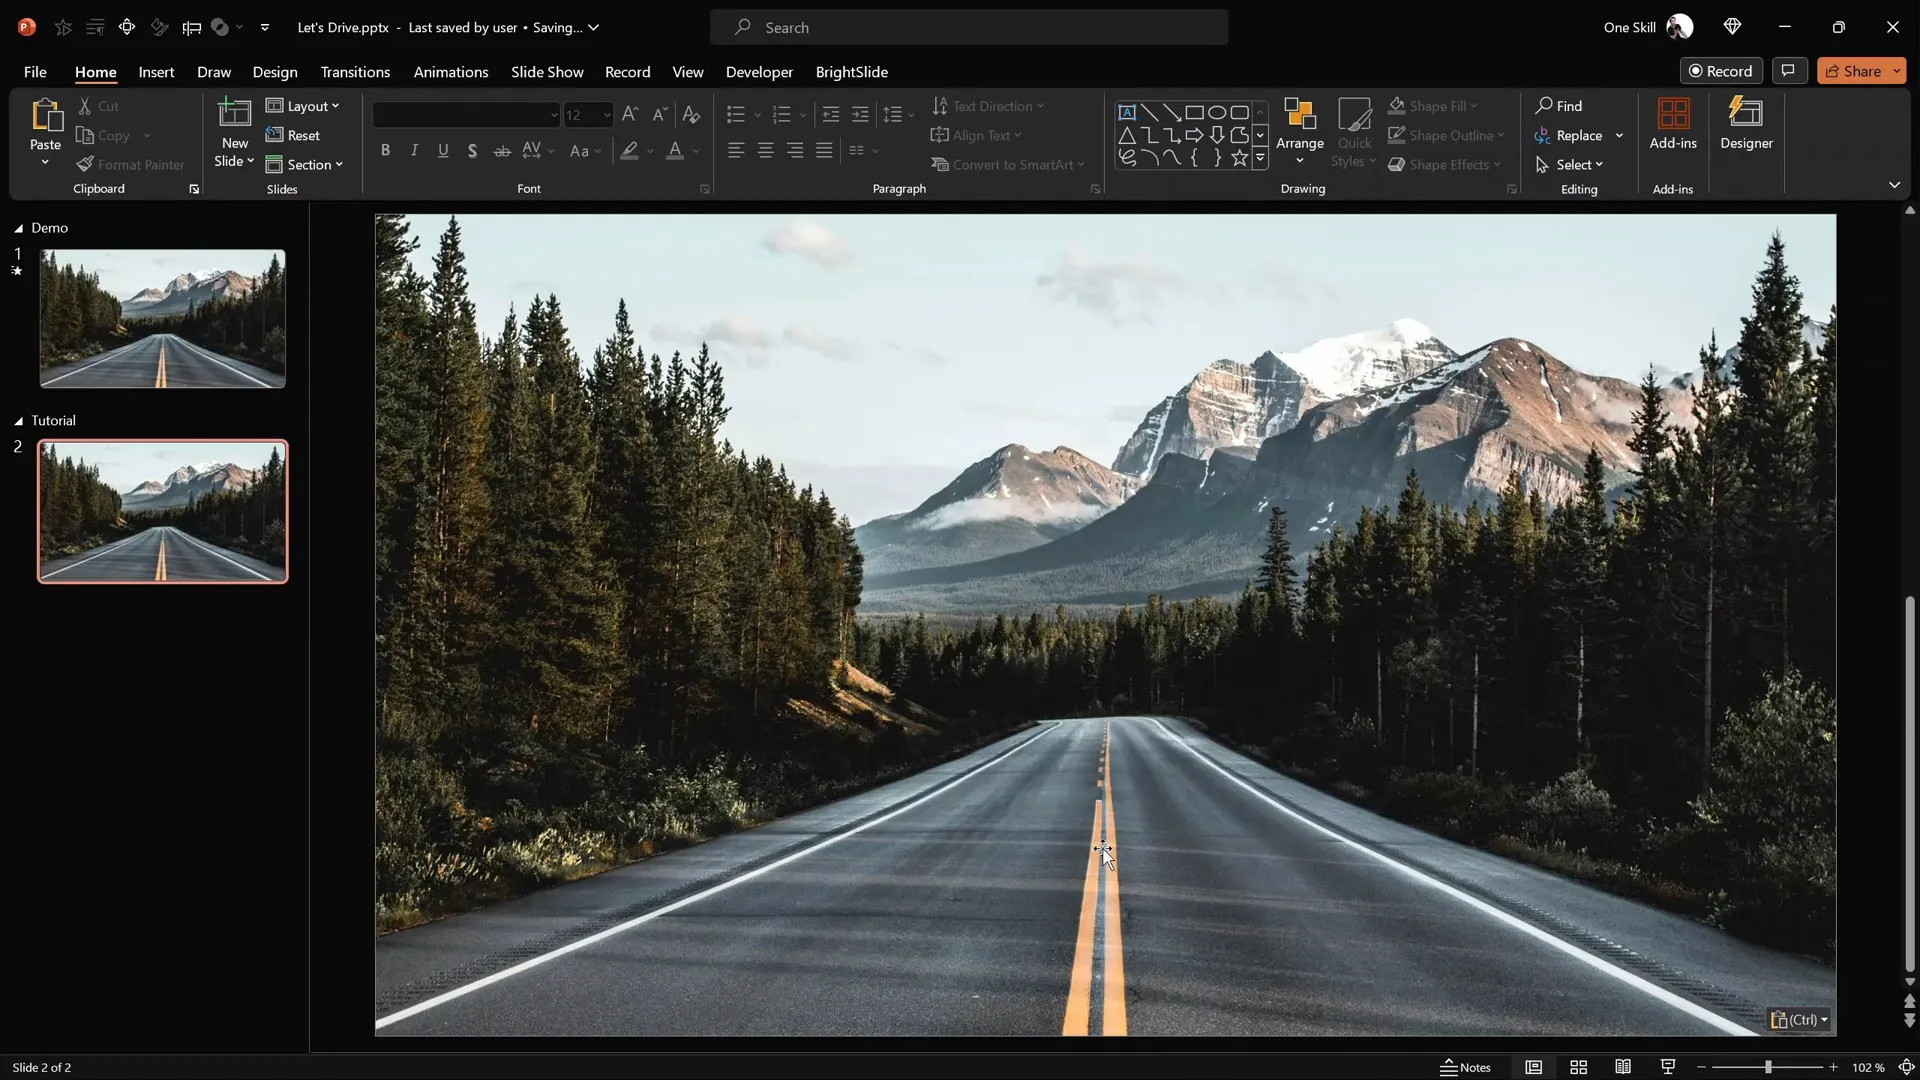
The first step in crafting a cinematic animation is to set a strong visual foundation with a beautiful background image. For this project, I recommend using a high-quality photo that complements your animation theme. I’m using a striking road image from Unsplash.com, a fantastic free resource for stunning photos.
To begin:
- Start with an empty slide in PowerPoint.
- Copy the chosen photo from your previous slide or insert it directly onto the slide.
- Resize and position the photo so it fills the entire slide, creating a perfect cinematic backdrop.
Using a scenic road image gives a natural perspective that works beautifully with directional animations like arrows moving along the road, which we’ll create next.
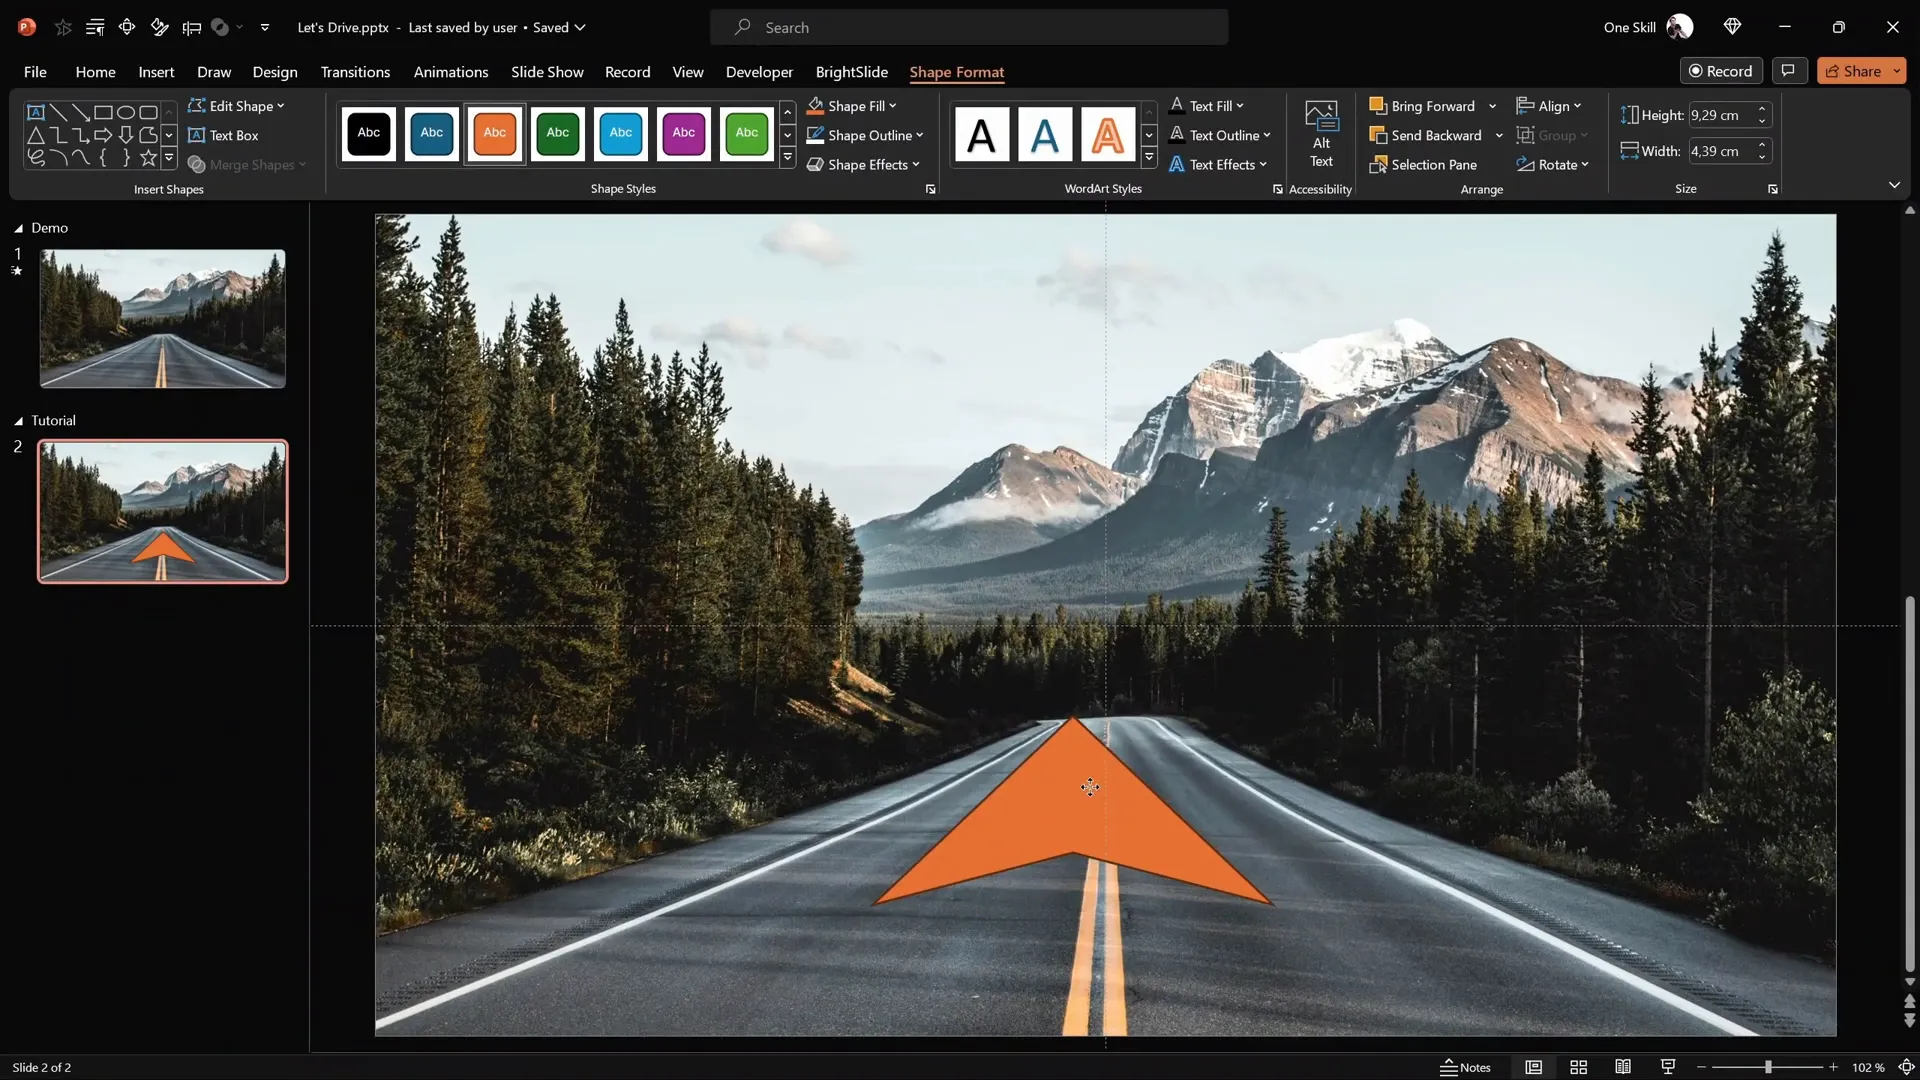
Designing Dynamic Pointy Arrows Using PowerPoint Shapes
Now let’s create the key animated elements — the pointy arrows that will glide across the road. The best part? You don’t need any external graphics software because PowerPoint’s built-in shapes and editing tools are powerful enough to design these arrows from scratch.
Follow these steps to craft your arrows:
- Turn on Light Guides: Navigate to the View tab and enable Guides. This helps you find the exact center of the slide for precise alignment.
- Insert a Triangle Shape: Go to Insert > Shapes and select the triangle tool. Hold the Shift key while drawing to create a perfect equilateral triangle.
- Color and Flip: Fill the triangle with an orange color to make it visible while editing. Then flip it horizontally to face left.
- Adjust Shape Handles: Drag the yellow handle at the top of the triangle downward to elongate the tip, making the arrow point sharper.
- Edit Points: Right-click the triangle, select Edit Points, and drag the top point even lower to refine the arrow shape.
- Squish the Triangle: Slightly compress the shape vertically to give the arrow a sleeker look.
- Duplicate and Mirror: Press Ctrl + D to duplicate the triangle and flip the copy horizontally to create the right side of the arrow.
- Merge Shapes: Select both triangles, go to Shape Format > Merge Shapes > Union to combine them into one solid arrow shape.
Once merged, you have a perfectly symmetrical, sharp arrow ready for styling and animation.
Adding Style: Gradient Fill and Outlines to Your Arrow
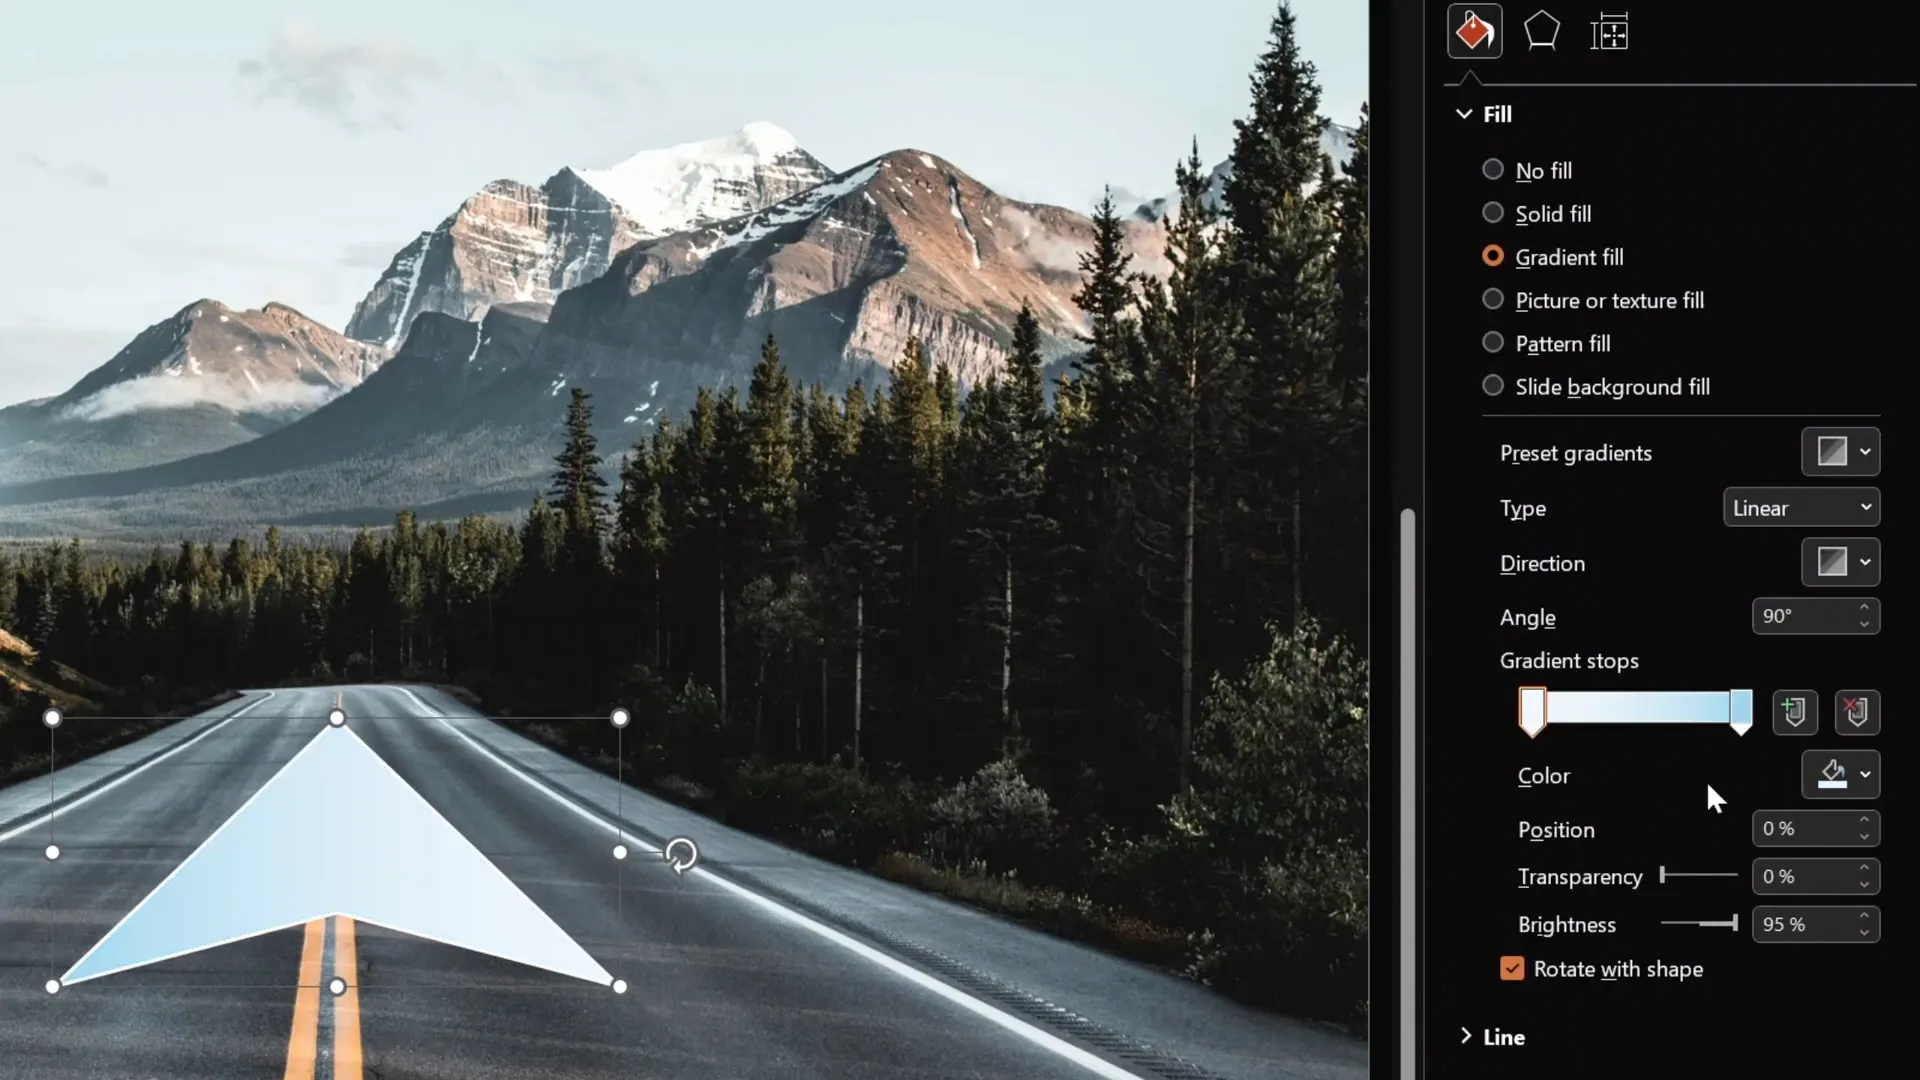
Styling your arrow gives it depth and a polished look that stands out against the background. Here’s how to add a gradient fill and a crisp outline:
- Remove Guides: After finishing the shape, disable the slide guides to clear the workspace.
- Add White Outline: Go to Shape Format > Shape Outline and select white. Set the outline width to about 3 points for clarity.
- Apply Gradient Fill: Under Format Shape > Fill > Gradient Fill, configure the gradient stops:
- Remove the middle color stops to keep only two: one solid white and one solid black.
- Set the white color stop at the top and the black at the bottom (or vice versa depending on your preference).
- Adjust the black color stop to white but make it fully transparent by setting transparency to 100%.
- Position the gradient stops to create a subtle fade effect, for example, 20% and 80% positions.
This gradient adds a sleek shine to your arrow, enhancing the cinematic feel.
Positioning the Arrow on the Slide
Next, place your arrow strategically to match the perspective of the road in the background:
- Move the arrow shape below the light source on the road image to create a natural shadow effect.
- Resize the arrow to be wider, matching the road’s width and angle.
- Use the guides to ensure the arrow is centered on the road’s middle lane.
- Rotate the arrow slightly to align with the road’s angle for a realistic effect.
Take your time here as proper alignment sets the stage for a believable animation.
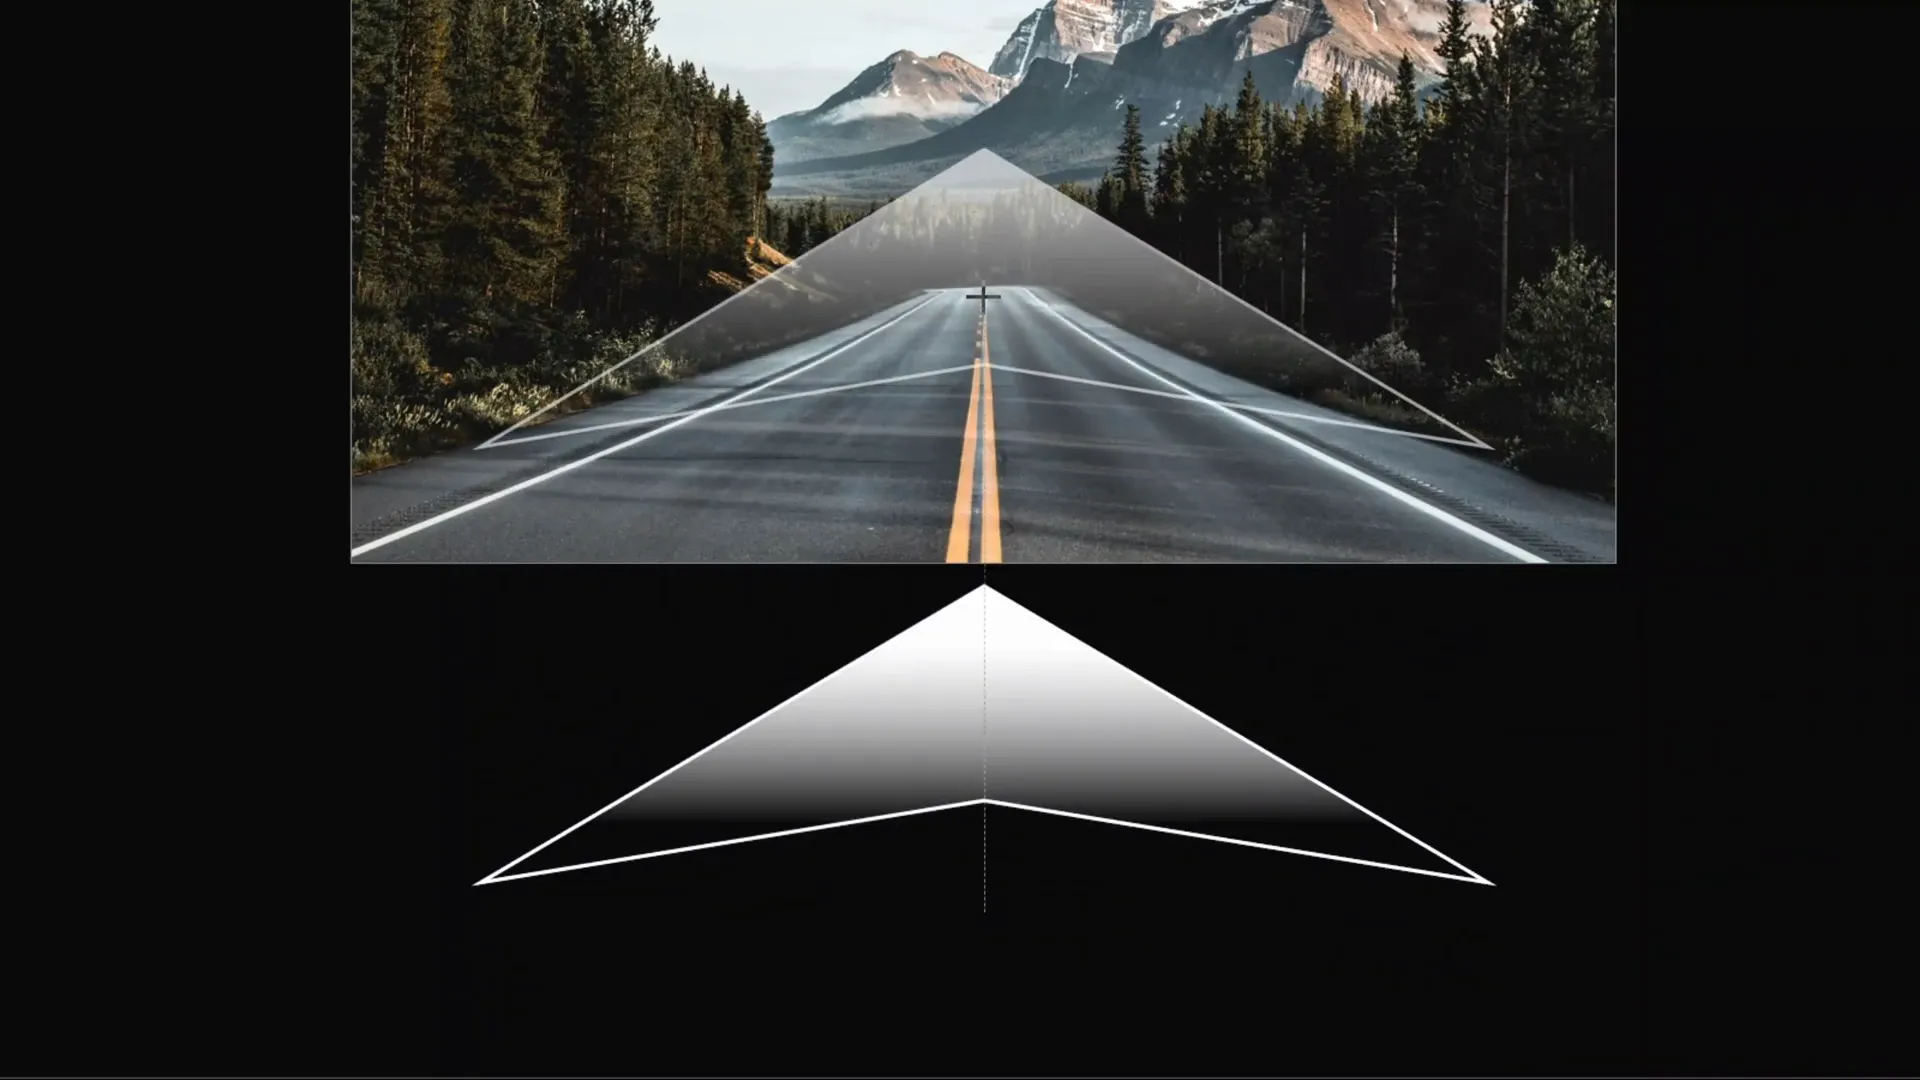
Animating the Arrow: Motion Path and Zoom
Now comes the exciting part — animating the arrow so it moves smoothly along the road and shrinks as it goes, creating a sense of depth and motion.
Here’s a breakdown of the animation process:
- Add Motion Path Animation: Select the arrow, go to Animations, and choose Motion Path > Line.
- Adjust Motion Path: Click and drag the red endpoint bubble upward to set the arrow’s final position.
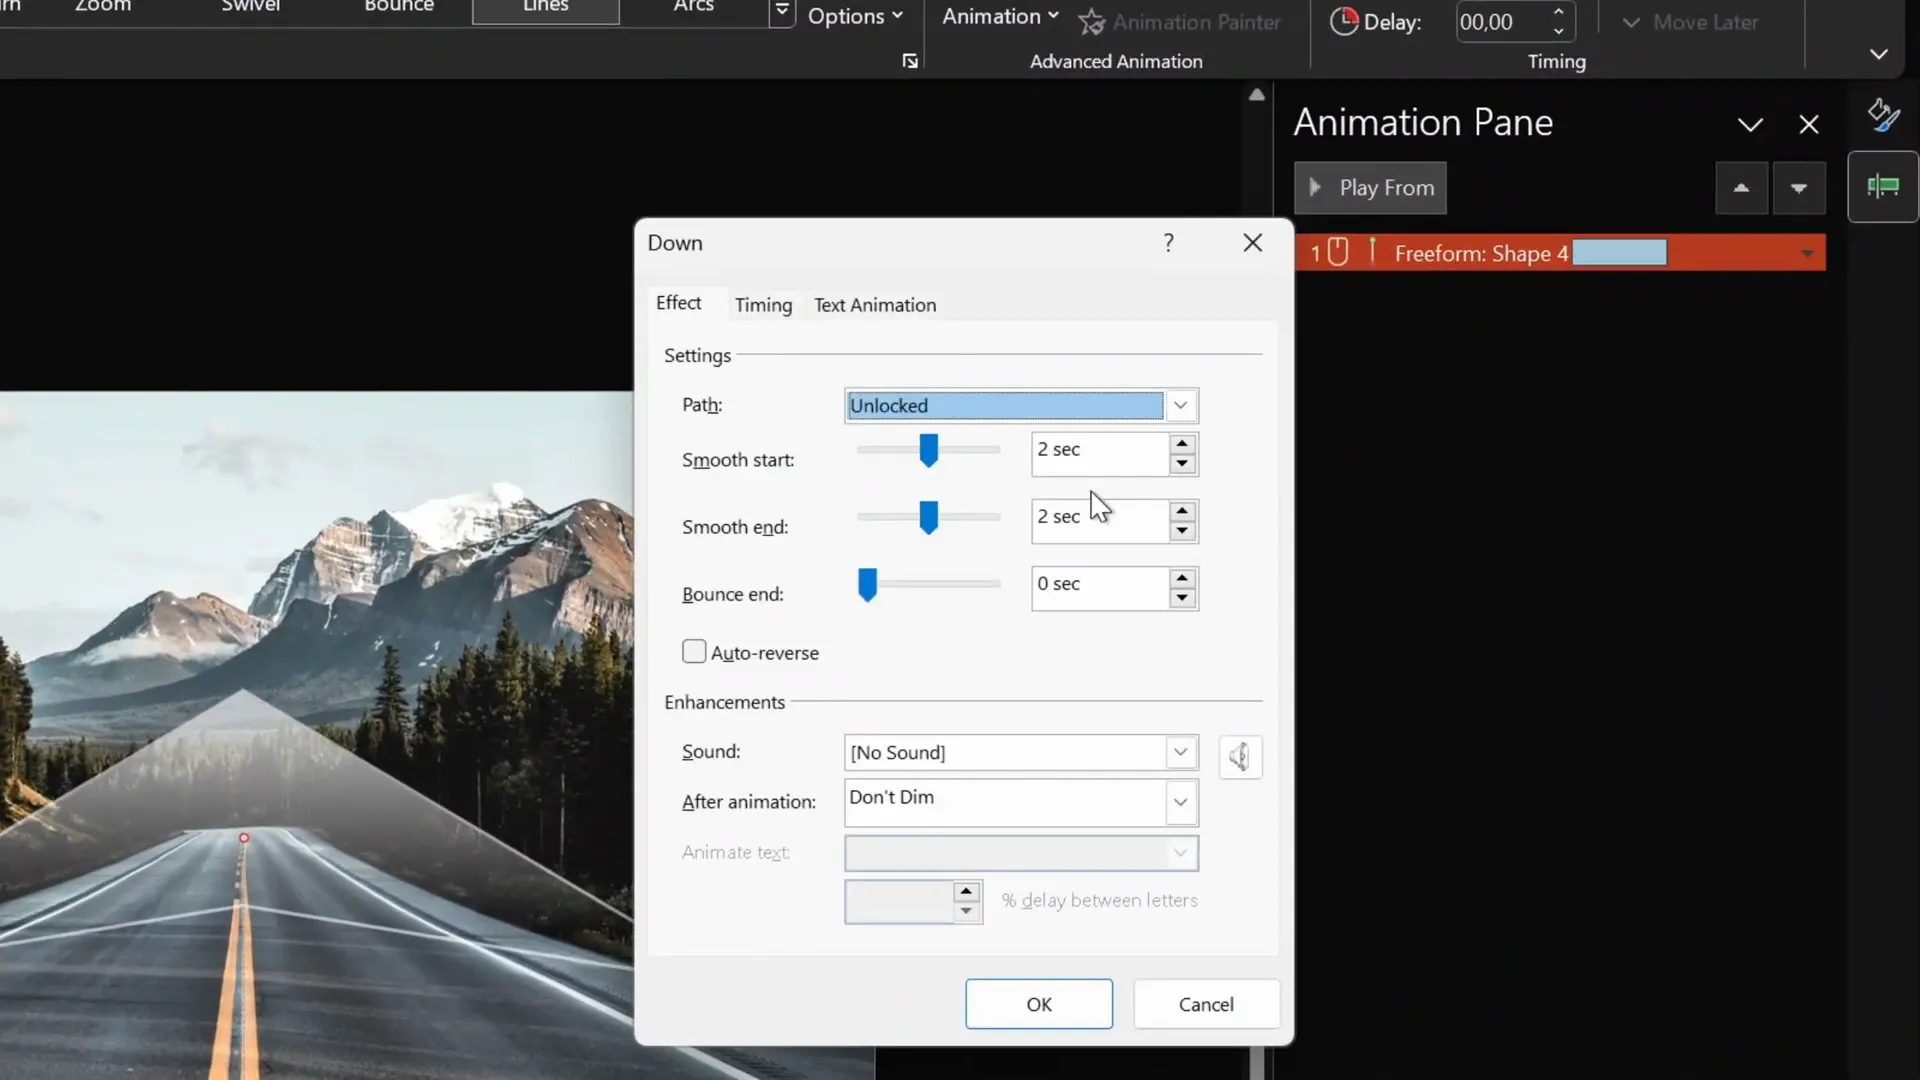
- Set Duration: Open the Animation Pane and set the motion path duration to about 4 seconds for smooth movement.
- Add Zoom Exit Animation: To make the arrow shrink as it moves, add a Zoom exit animation.
- Synchronize Animations: Set the zoom animation to start With Previous and match the duration with the motion path (4 seconds).
When played, the arrow will move upward while simultaneously shrinking, creating a dynamic cinematic effect.
Creating a Looping Arrow Animation
To enhance the visual impact, we’ll create multiple arrows moving in sequence, looping indefinitely to simulate continuous motion along the road.
Steps to achieve this:
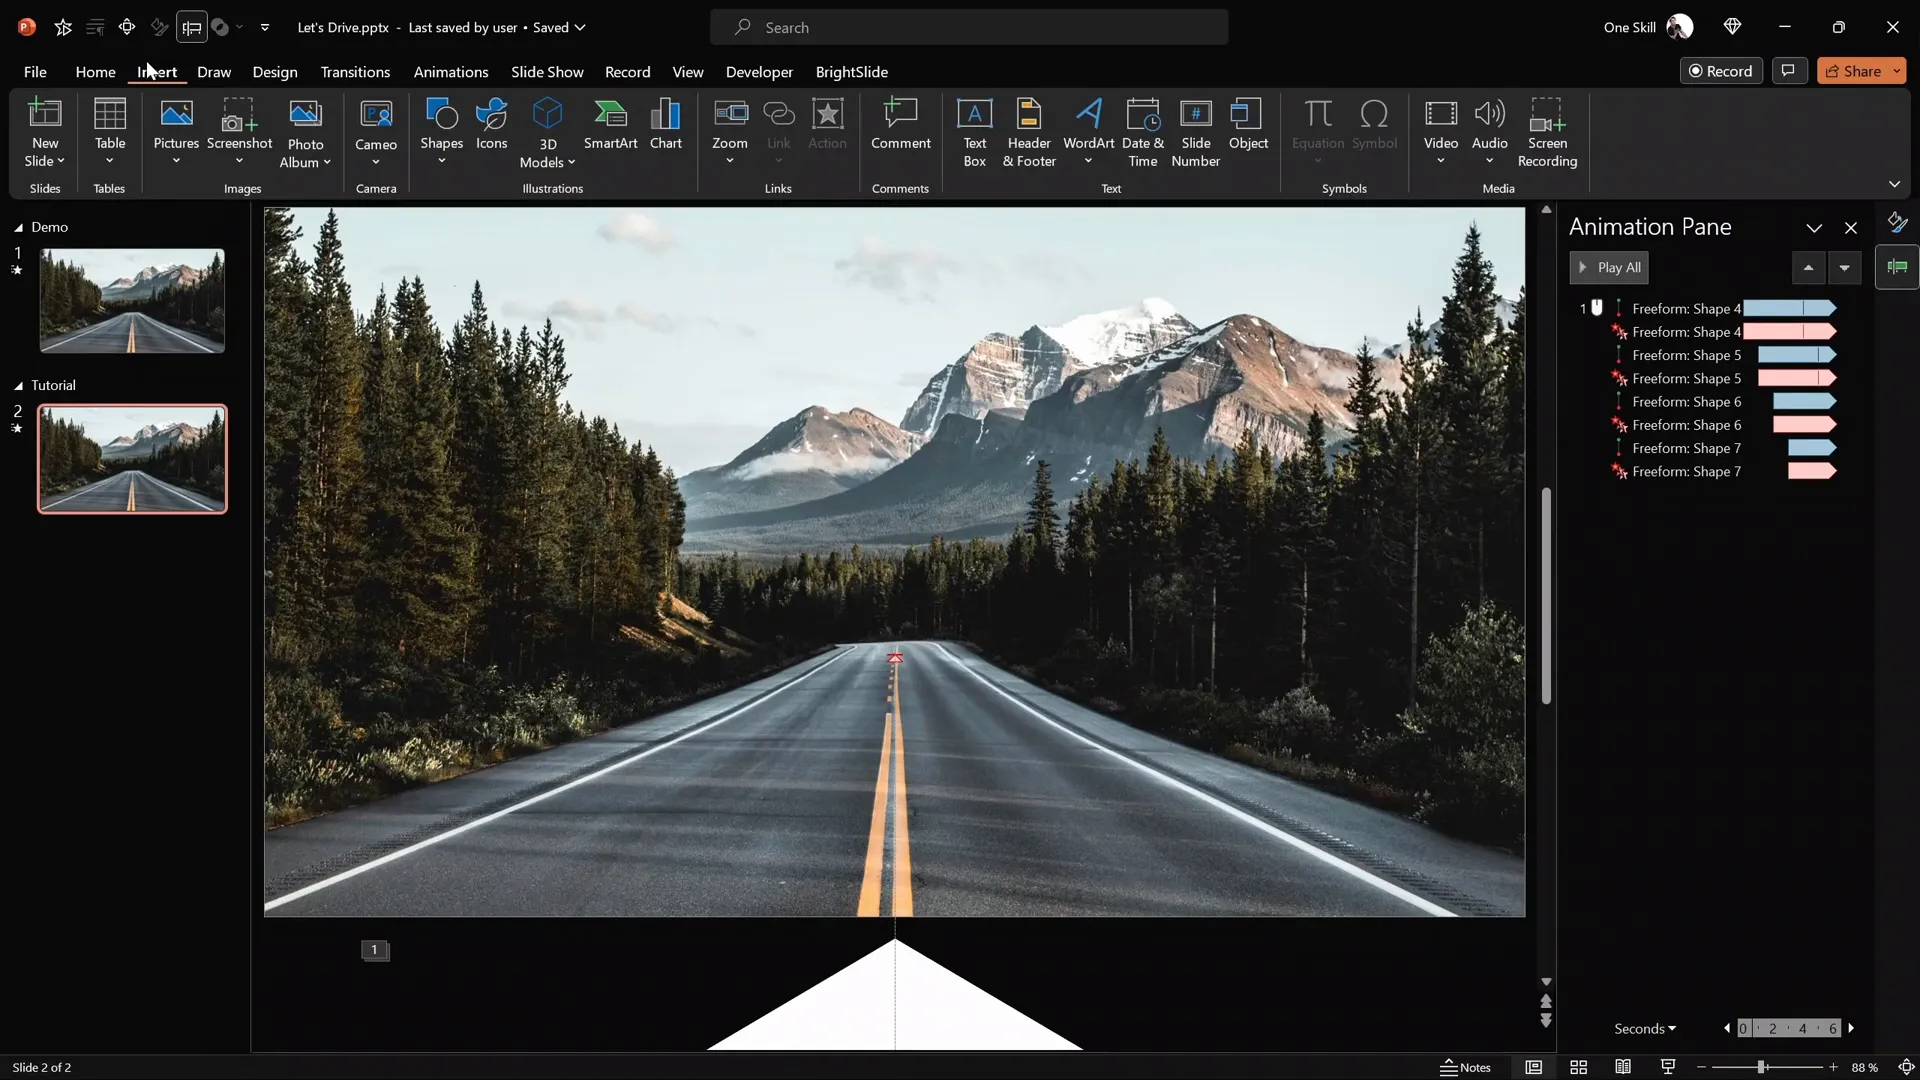
- Duplicate Arrows: Duplicate the original arrow three times to have four arrows total.
- Align Arrows: Use the Align tools to stack all arrows perfectly on top of each other at the center of the slide.
- Set Animation Start: In the Animation Pane, set all animations to start With Previous.
- Add Delays: Add incremental delays to the animations to stagger the arrows’ movement:
- First two arrows: 1-second delay
- Next two arrows: 2-second delay
- Last two arrows: 3-second delay
- Enable Looping: Select all animations, go to Timing options, and set repetition to Until End of Slide.
This setup results in a seamless, continuous flow of arrows moving and shrinking along the road, adding a professional cinematic touch.
Designing a Stunning Slide Title with Outline and Glow
Complement your animated arrows with a captivating slide title that stands out. Here’s how to create a stylish, outlined, and glowing text effect in PowerPoint:
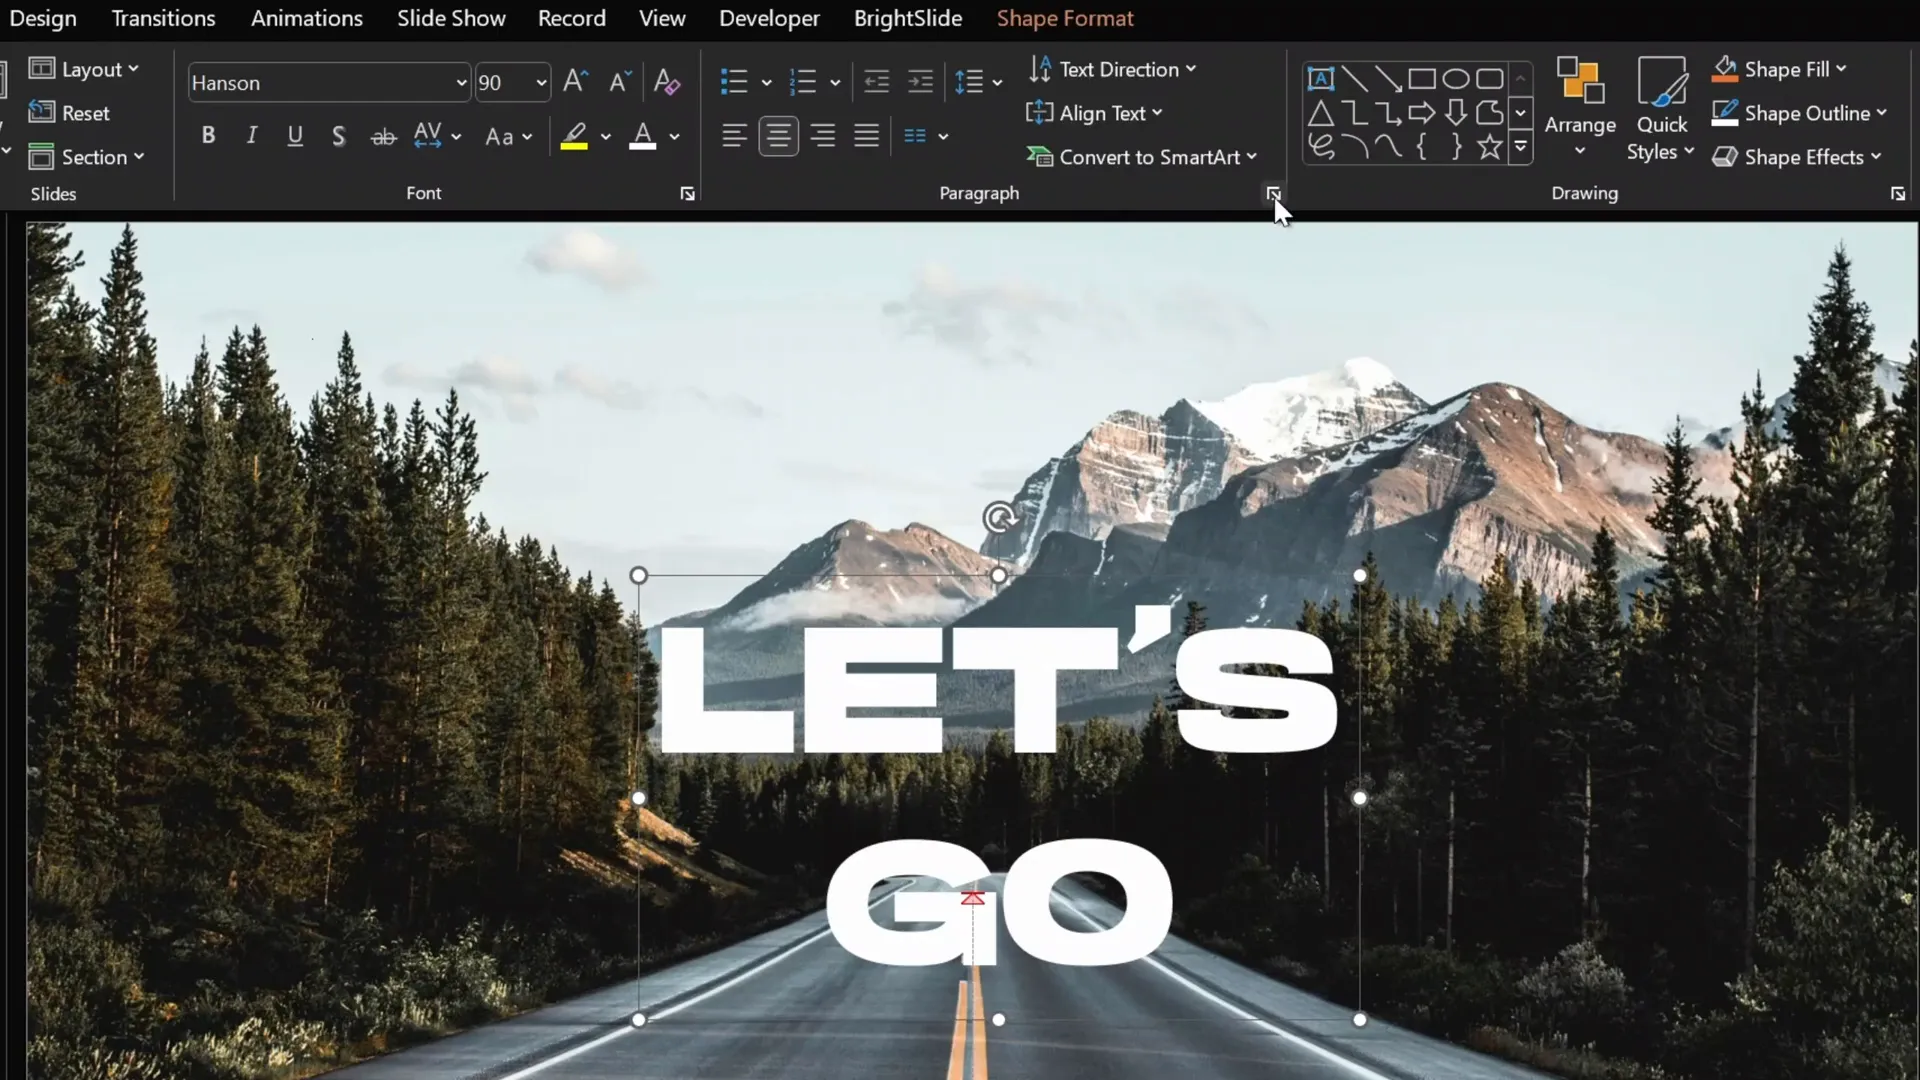
- Insert Text Box: Go to Insert > Text Box, click on the slide, and type your title text (e.g., “Let’s Go”).
- Customize Font: Increase font size to something large like 90pt for impact.
- Choose Font and Color: Use the Hanson font for a bold look and set the font color to white.
- Center Text: Align the text center both horizontally and vertically.
- Adjust Line Spacing: Open paragraph settings and set line spacing to multiple 0.7 for a narrow gap between lines.
- Duplicate Text Box: Press Ctrl + D to duplicate the text box for outlining.
- Add Outline to Bottom Text: Select the bottom text box, go to Text Outline, use the eyedropper tool to pick a dark green color from your slide, and set outline width to 10pt.
- Align Text Boxes: Select both text boxes and align them perfectly on top of each other.
This technique creates a thick outline around your text, but since PowerPoint text outlines grow both inside and outside, duplicating the text box helps simulate an outside-only outline, making the title crisp and clear.

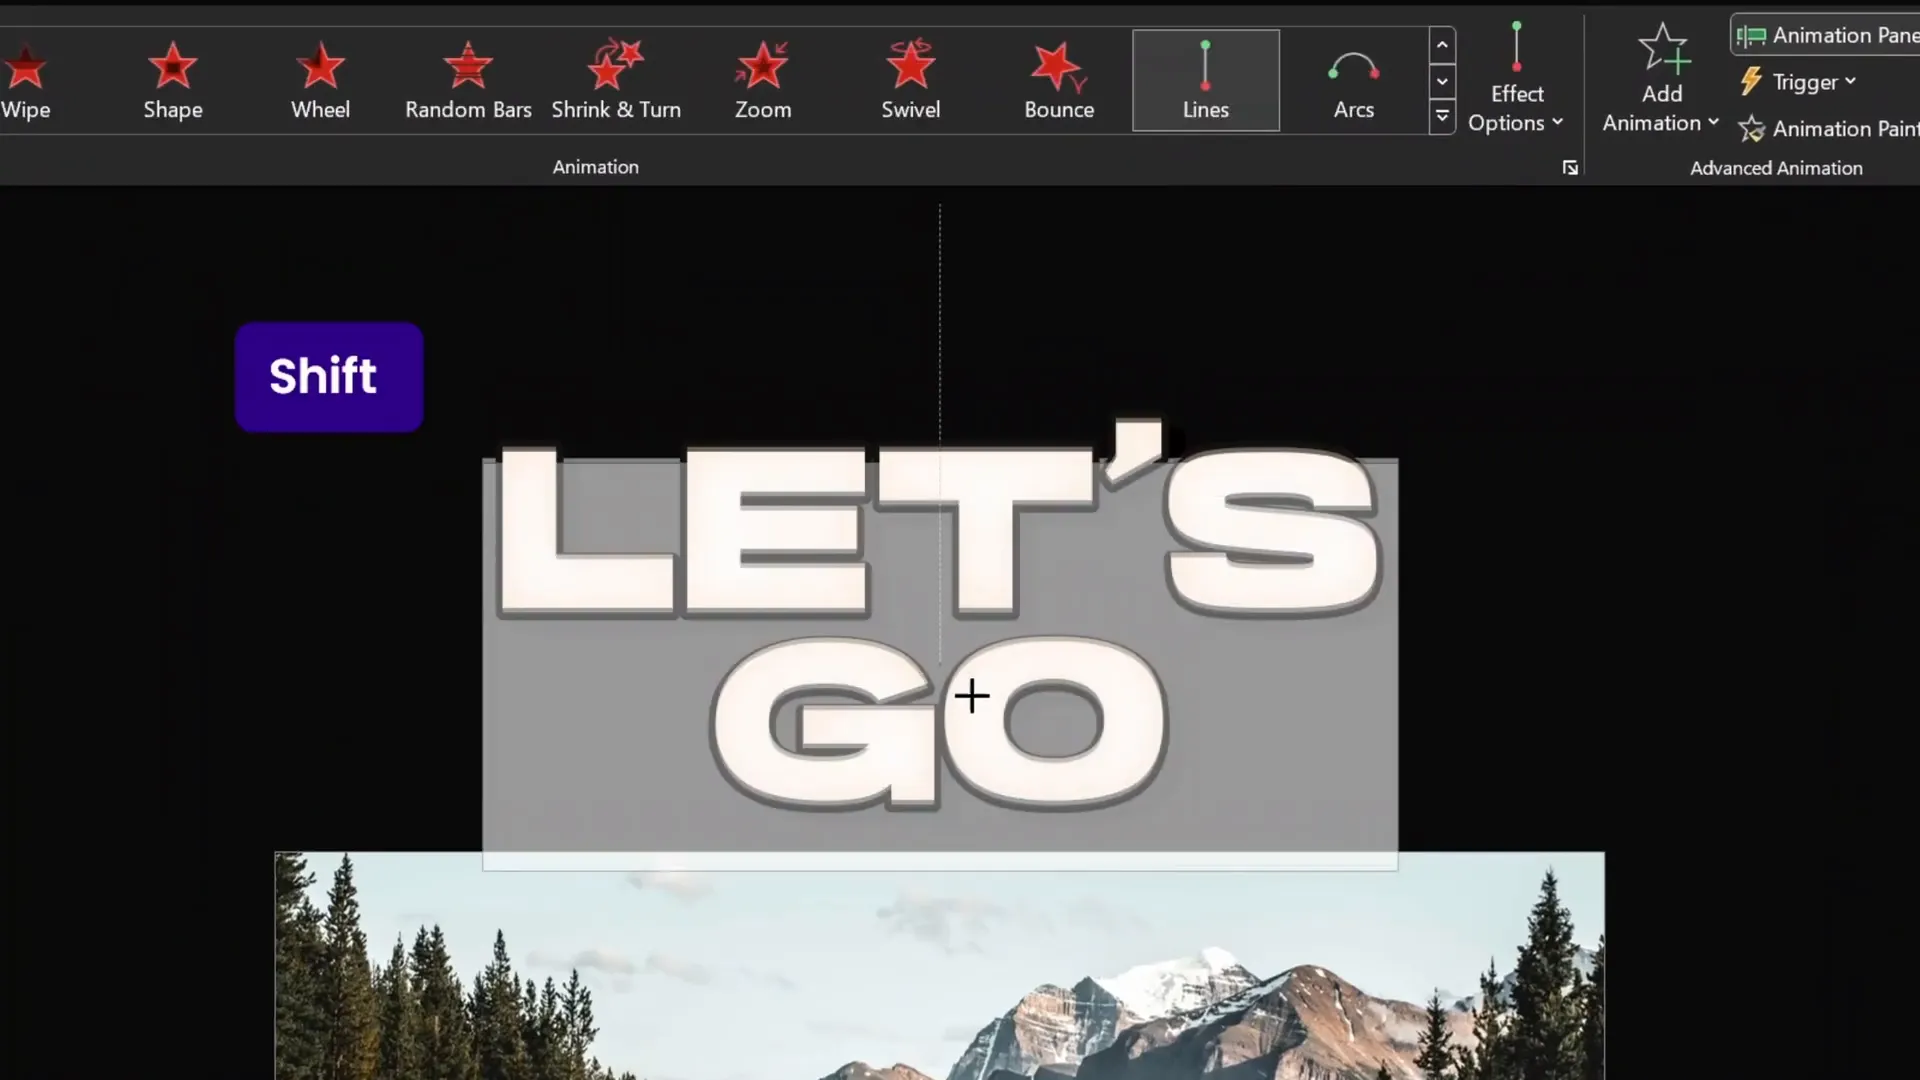
Adding Depth with Text Shadows for a 3D Effect
To further enhance the title’s visual appeal, add shadows to create a subtle 3D effect and warm glow:
- Shadow on Outline Text: Select the outline text box and apply a shadow preset that casts shadow on the right edge.
- Adjust Shadow Settings: Set shadow transparency to 0%, remove blur, and increase distance for a sharp shadow effect.
- Inside Shadow on White Text: Select the white (top) text box and add an inside shadow.
- Colorize Shadow: Instead of black, use the eyedropper tool to pick a warm orange color from the slide to create a glowing effect.
- Fine-Tune Blur: Adjust the blur slider to your liking for a soft warm glow.
These shadow effects add dimension and warmth, making your slide title pop beautifully against the background.

Animating the Slide Title for Cinematic Movement
To keep the title engaging and consistent with the cinematic style, animate it to move across the slide in a smooth, looping fashion:
- Group Text Boxes: Select both text boxes (white and outline) and group them to animate as one object.
- Position Off-Slide: Move the grouped title outside the slide boundary to the right to start.
- Copy Arrow Animation: Select one of the animated arrows, use the Animation Painter tool, and apply its animations to the grouped title.
- Adjust Motion Path: Modify the motion path endpoint so the title moves just above the road, matching the scene’s perspective.
- Organize Animation Order: In the animation pane, move the title animations below the first two arrow animations for smooth sequencing.
- Set Duration: Set the title animation duration to 8 seconds, slower than the arrows (4 seconds) to create contrast in movement speed.
- Duplicate Title Group: Duplicate the grouped title to create a second instance for continuous looping.
- Delay Second Title: Add a 4-second delay to the second title’s animations in the animation pane.
- Align Titles: Ensure both title groups are perfectly aligned on top of each other.
The result is a smooth, cinematic slide title that moves slowly across the slide, complementing the faster-moving arrows below, both looping infinitely for a mesmerizing effect.
Final Preview: Your Stunning Cinematic PowerPoint Slide
Now that all elements are in place — the beautifully styled background, dynamic looping arrows, and animated glowing title — it’s time to preview your slide in full-screen mode.
Click once to start the animations and watch as the arrows travel up the road, shrinking elegantly, while the slide title glides gracefully above, all looping seamlessly. This cinematic animation creates a powerful impression, perfect for presentation intros or any slide needing a professional animation boost.

Mastering PowerPoint Animations: Take Your Skills Further
If you enjoyed this tutorial and want to master PowerPoint animations like a pro, I highly recommend checking out the PowerPoint Animation Mastery course. This course dives deep into animation techniques, guiding you step-by-step to create professional-quality animations for all your presentations.
Plus, use the coupon oneskill100 at checkout to save $100 on the course price — a fantastic deal to level up your skills!
With mastery over animations, you can create engaging, cinematic presentations that captivate any audience.
Frequently Asked Questions (FAQ)
Q1: Can I use any background photo for this animation?
Absolutely! While I used a scenic road photo for this tutorial, you can choose any background that fits your presentation theme. Just ensure the perspective aligns well with your arrow animations for the best effect.
Q2: Do I need any special software to create these animations?
Nope! All animations and shapes are created entirely within PowerPoint using built-in tools like shapes, gradient fills, and motion path animations. This makes it accessible to anyone with PowerPoint installed.
Q3: How do I ensure my animations loop infinitely?
In the Animation Pane, select your animations, open the timing options, and set the Repeat or Repetition setting to Until End of Slide. This makes your animations play continuously.
Q4: Can I customize the colors and fonts used in this design?
Definitely! Feel free to adjust arrow colors, gradient stops, font styles, and sizes to match your branding or presentation style. I used the Hanson font for a bold look, which you can download here.
Q5: How can I make my animations smoother?
Adjust animation durations and easing options in the animation settings. Longer durations generally create smoother, more cinematic movements. Experiment with the Start, Duration, and Delay settings to find what looks best.
Q6: What if I want to add more arrows or different animated elements?
PowerPoint’s flexibility allows you to duplicate and customize shapes and animations as much as you want. You can create additional arrows, vary their speeds, or add other animated objects like text or icons to enrich your slide.
Conclusion
Creating cinematic animated slide designs in PowerPoint is easier than you might think, especially with the right techniques and a bit of creativity. By following this detailed guide, you can craft a professional, looping animation with dynamic arrows and a glowing title that will elevate your presentations to new heights.
Remember, the key to impressive animations is attention to detail — from precise shape design and gradient styling to synchronized motion paths and thoughtful animation timing. With these skills, you can transform ordinary slides into captivating cinematic experiences.
Keep experimenting, and don’t forget to check out advanced courses and tutorials to continually refine your PowerPoint skills. Happy animating!
Check out the full video: Create CINEMATIC Animated Slide Design in PowerPoint! ✨ Step-by-Step


