
Are you ready to transform your PowerPoint presentations from dull and uninspiring to dynamic and eye-catching? Whether you’re a student, professional, or anyone looking to impress an audience, mastering the art of visually compelling slides can make all the difference. In this comprehensive guide, I will walk you through a step-by-step process to create a set of dynamic and hollowed-out image groups paired with circular thumbnails and highlighted text displays in PowerPoint. This technique will instantly grab your audience’s attention and elevate the quality of your presentations.
This tutorial is inspired by the expert tips from PowerPoint Wizard, who brilliantly shows how to accomplish this in just 7 minutes. Follow along as we dive deep into the details and nuances of this powerful design method.
Table of Contents
- Why Use Dynamic Image Groups and Circular Thumbnails?
- Step-by-Step Guide to Creating the Design
- Tips for Making Your PowerPoint Presentations Stand Out
- Frequently Asked Questions (FAQ)
- Conclusion
Why Use Dynamic Image Groups and Circular Thumbnails?
Before we jump into the how-to, let’s understand why this approach is so effective.
- Engagement: Dynamic image groups break the monotony of traditional slides and keep your audience visually engaged.
- Focus: Circular thumbnails help highlight key images, guiding the viewer’s attention to important parts of your presentation.
- Professionalism: The hollowed-out effect combined with staggered shapes and shadows adds a polished, modern look that stands out.
- Versatility: This technique can be adapted to various presentation topics, from business pitches to educational content.
By incorporating these elements, your slides won’t just communicate information—they’ll tell a compelling visual story.
Step-by-Step Guide to Creating the Design
Now, let’s get hands-on and build this design from scratch using Microsoft PowerPoint. The process is straightforward but requires attention to detail to achieve the best effect.
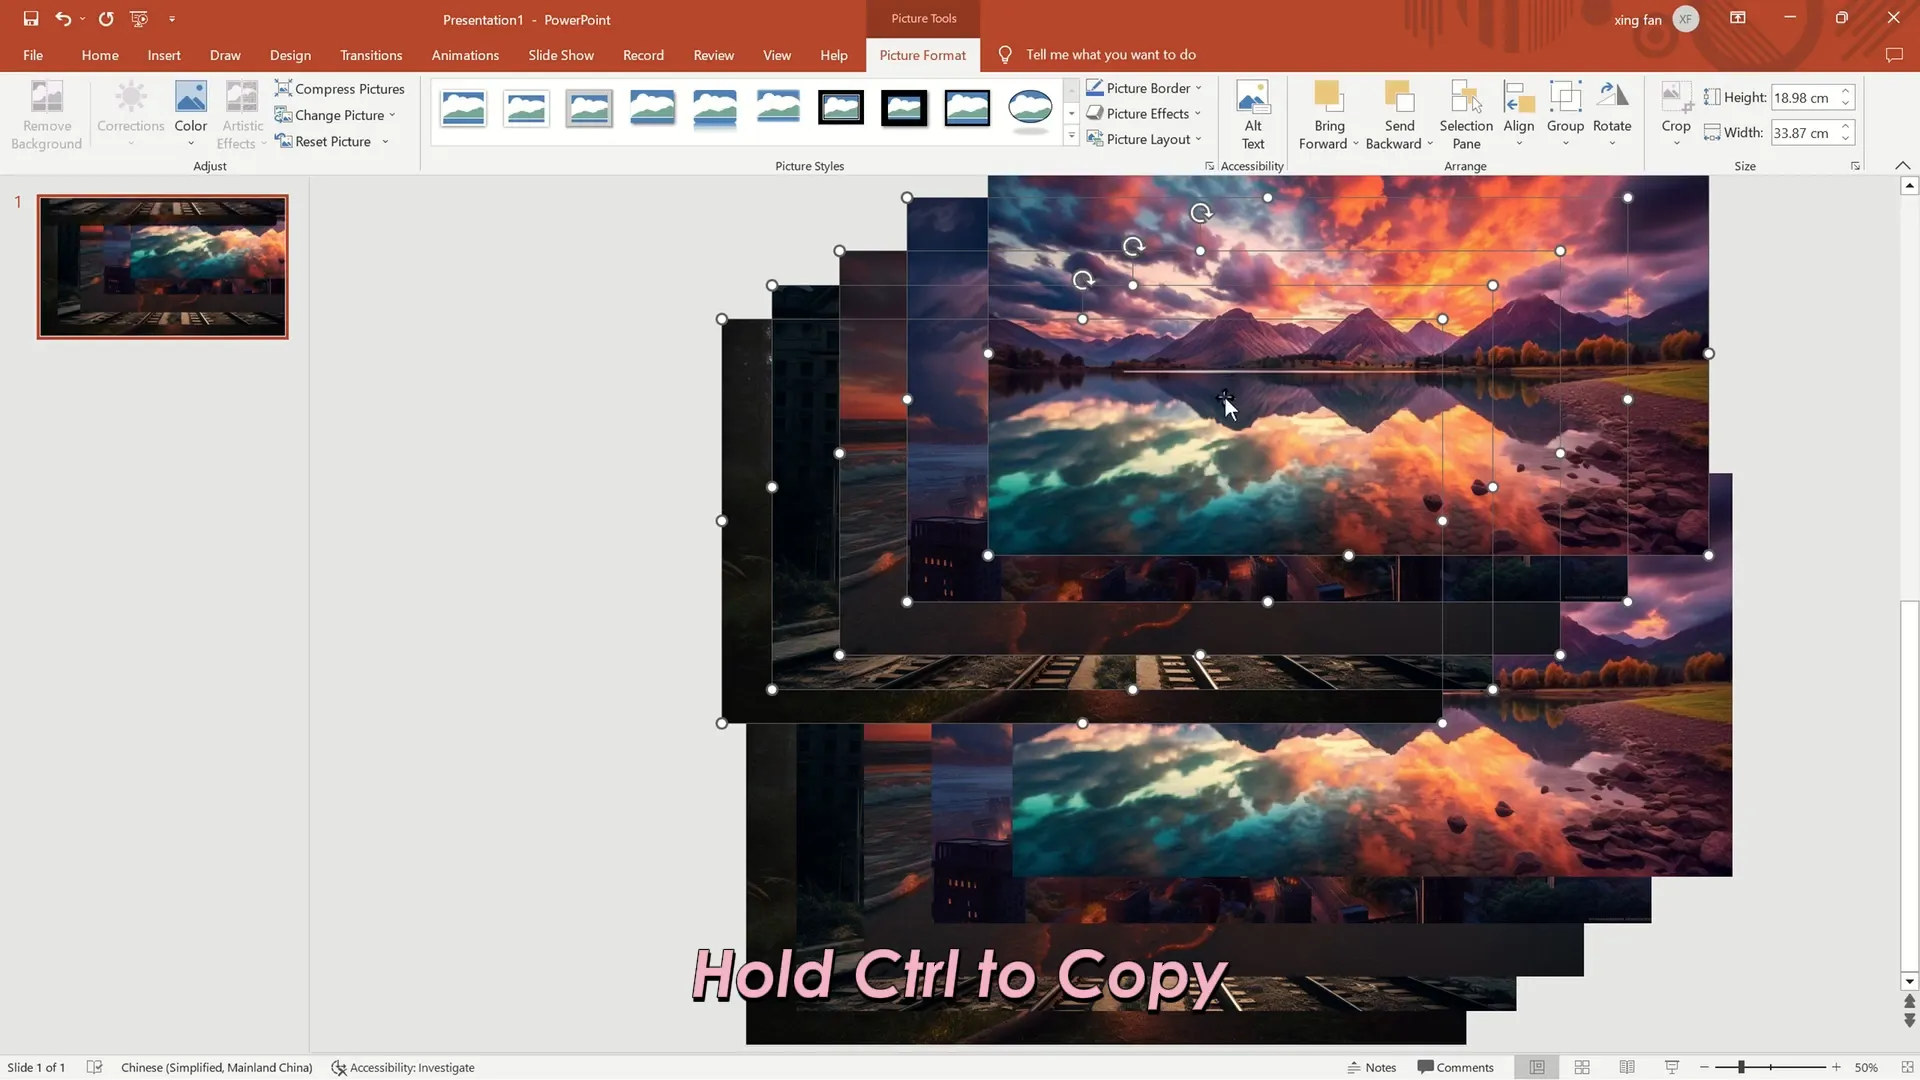
1. Insert and Duplicate Your Images
Start by inserting five images that you want to feature in your presentation. These could be photos relevant to your topic, product images, or any visual content that complements your message.
Once inserted, select all five images and copy them. You’ll be working with two sets of these images:
- Background Group: One set will serve as the background images for your slides.
- Thumbnail Group: The other set will be transformed into circular thumbnails.
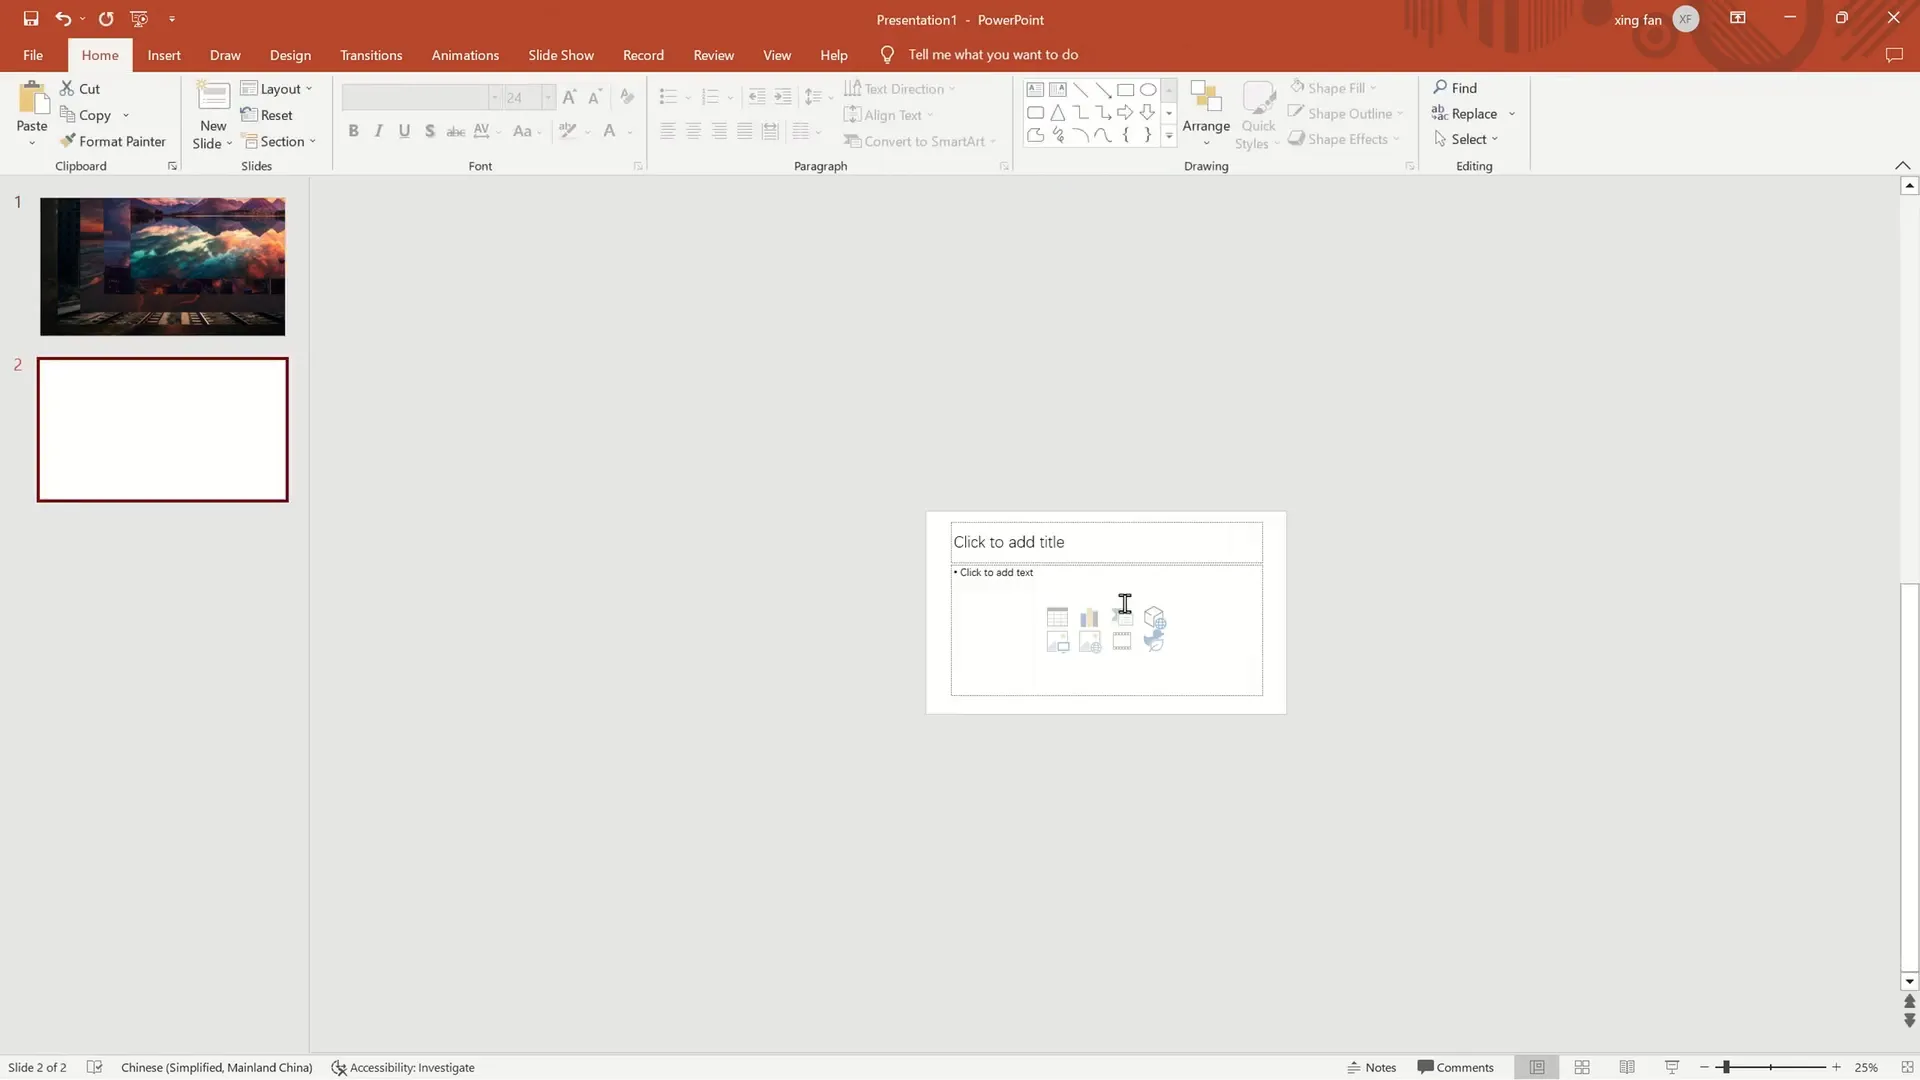
2. Create and Prepare Additional Slides
Next, create four blank slides in addition to your first slide, so you have a total of five slides. Copy these blank slides so you can apply the image backgrounds consistently across all slides.
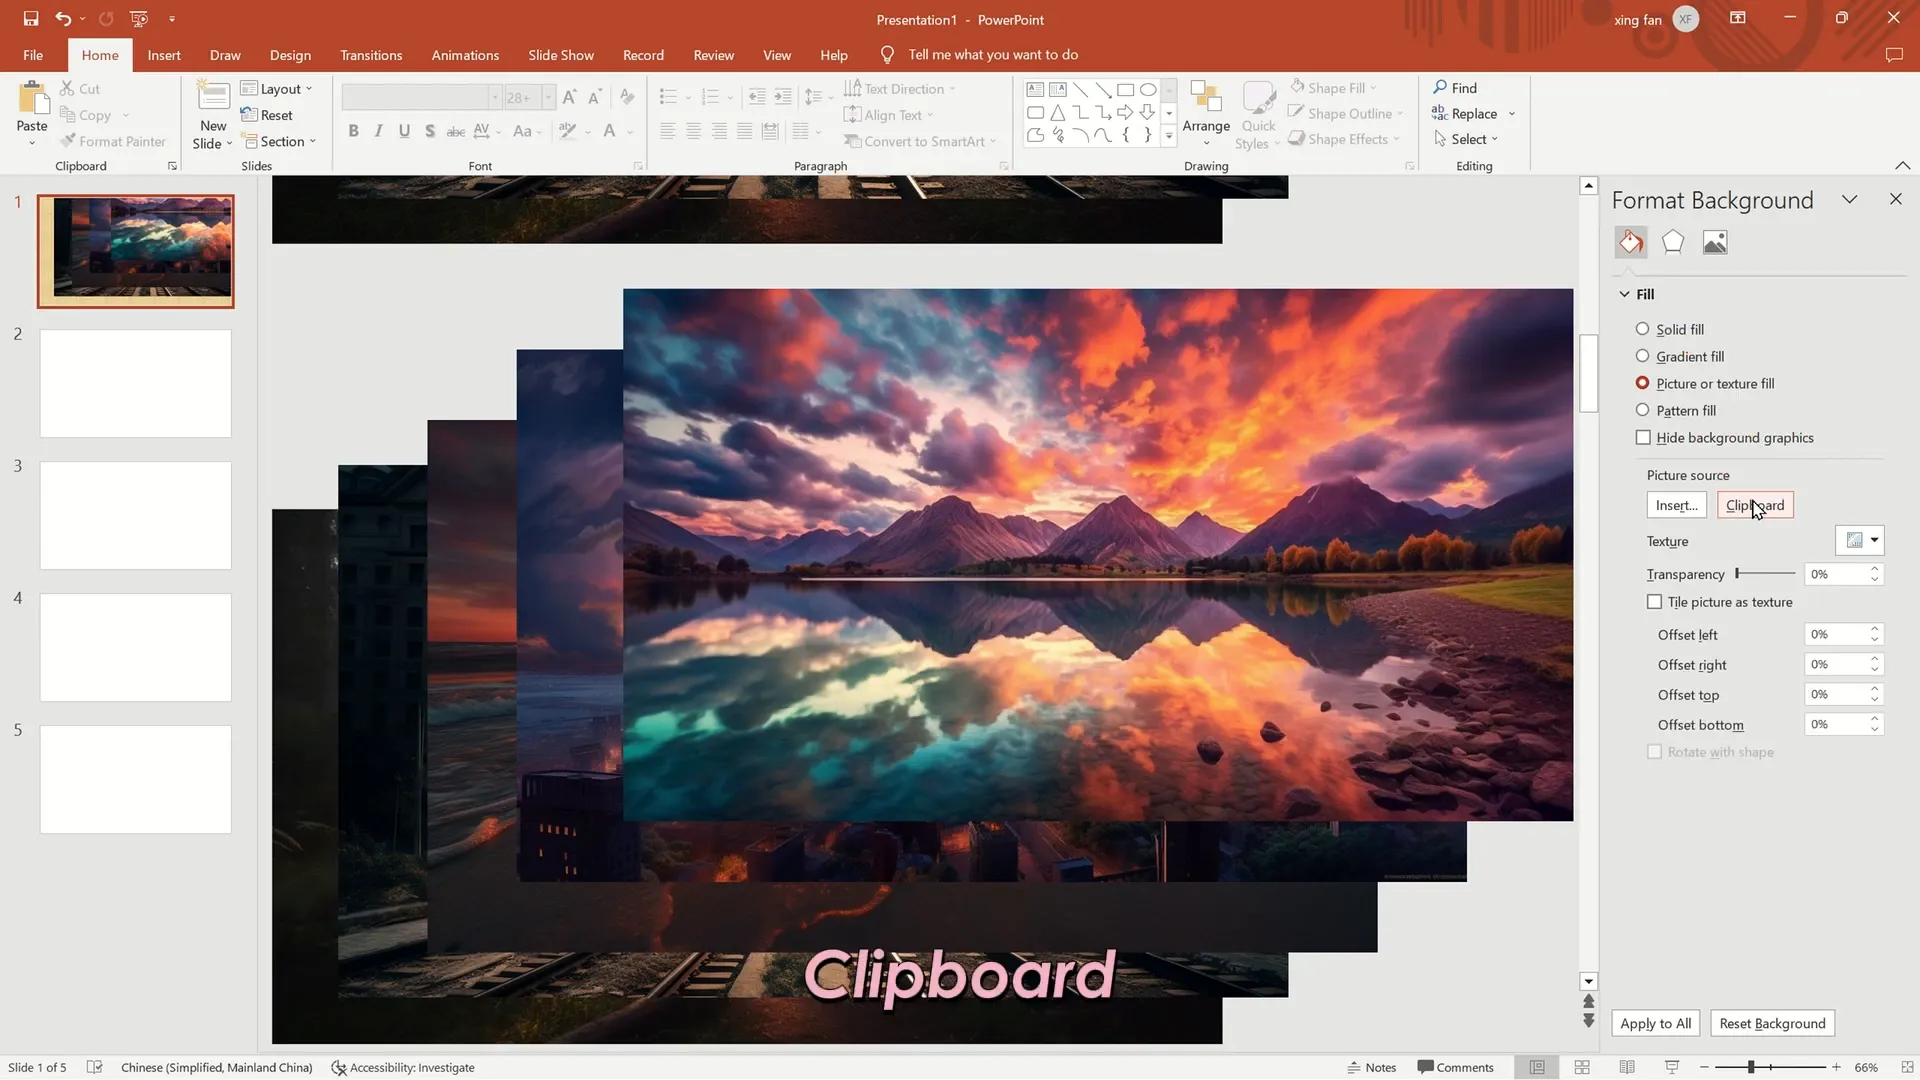
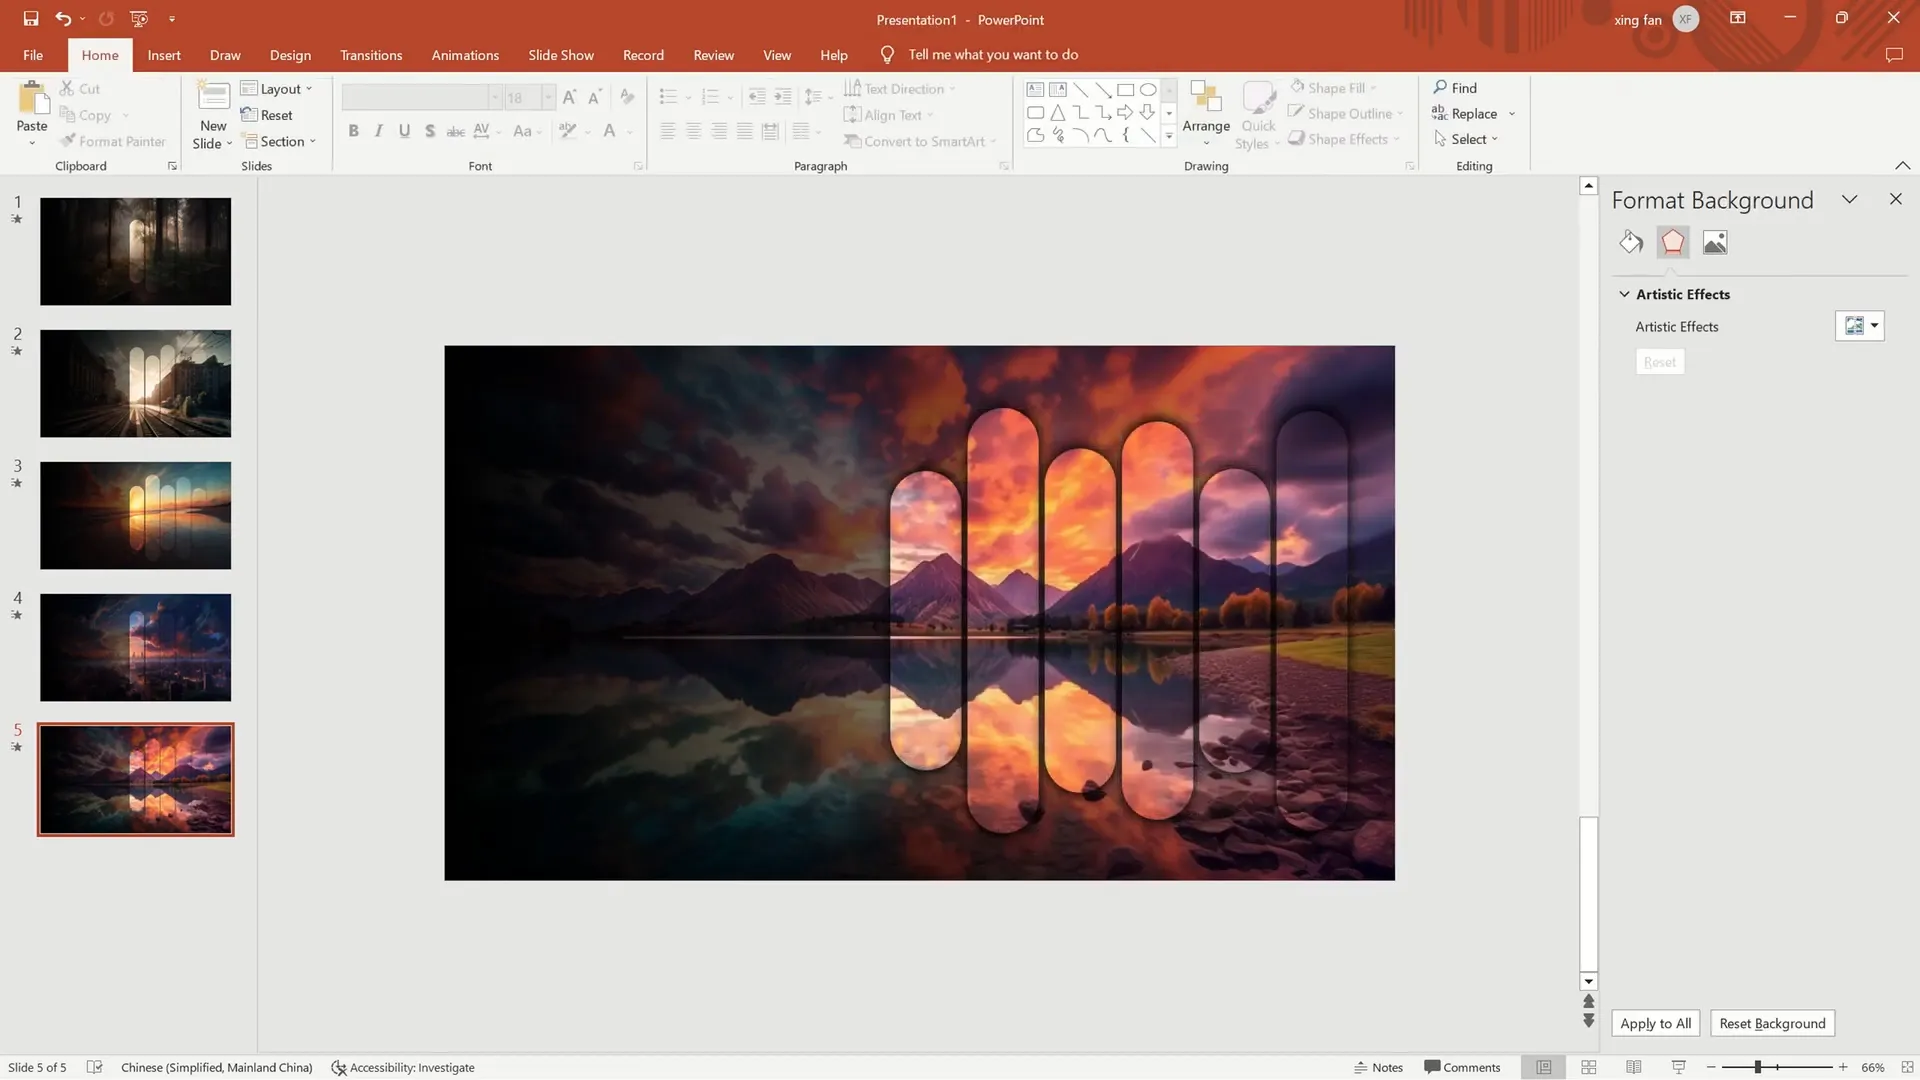
3. Apply Images as Slide Backgrounds
Return to your first slide. Right-click on the first image and select Cut to remove it from the slide but keep it in your clipboard. Then, right-click anywhere on the slide background and choose Format Background.
In the Format Background pane on the right, select Picture or Texture Fill, then click on Clipboard. This action sets your cut image as the slide’s background.
Repeat this process for each slide, cutting the next image and setting it as the background for the corresponding slide. This step ensures each slide has a unique image background.
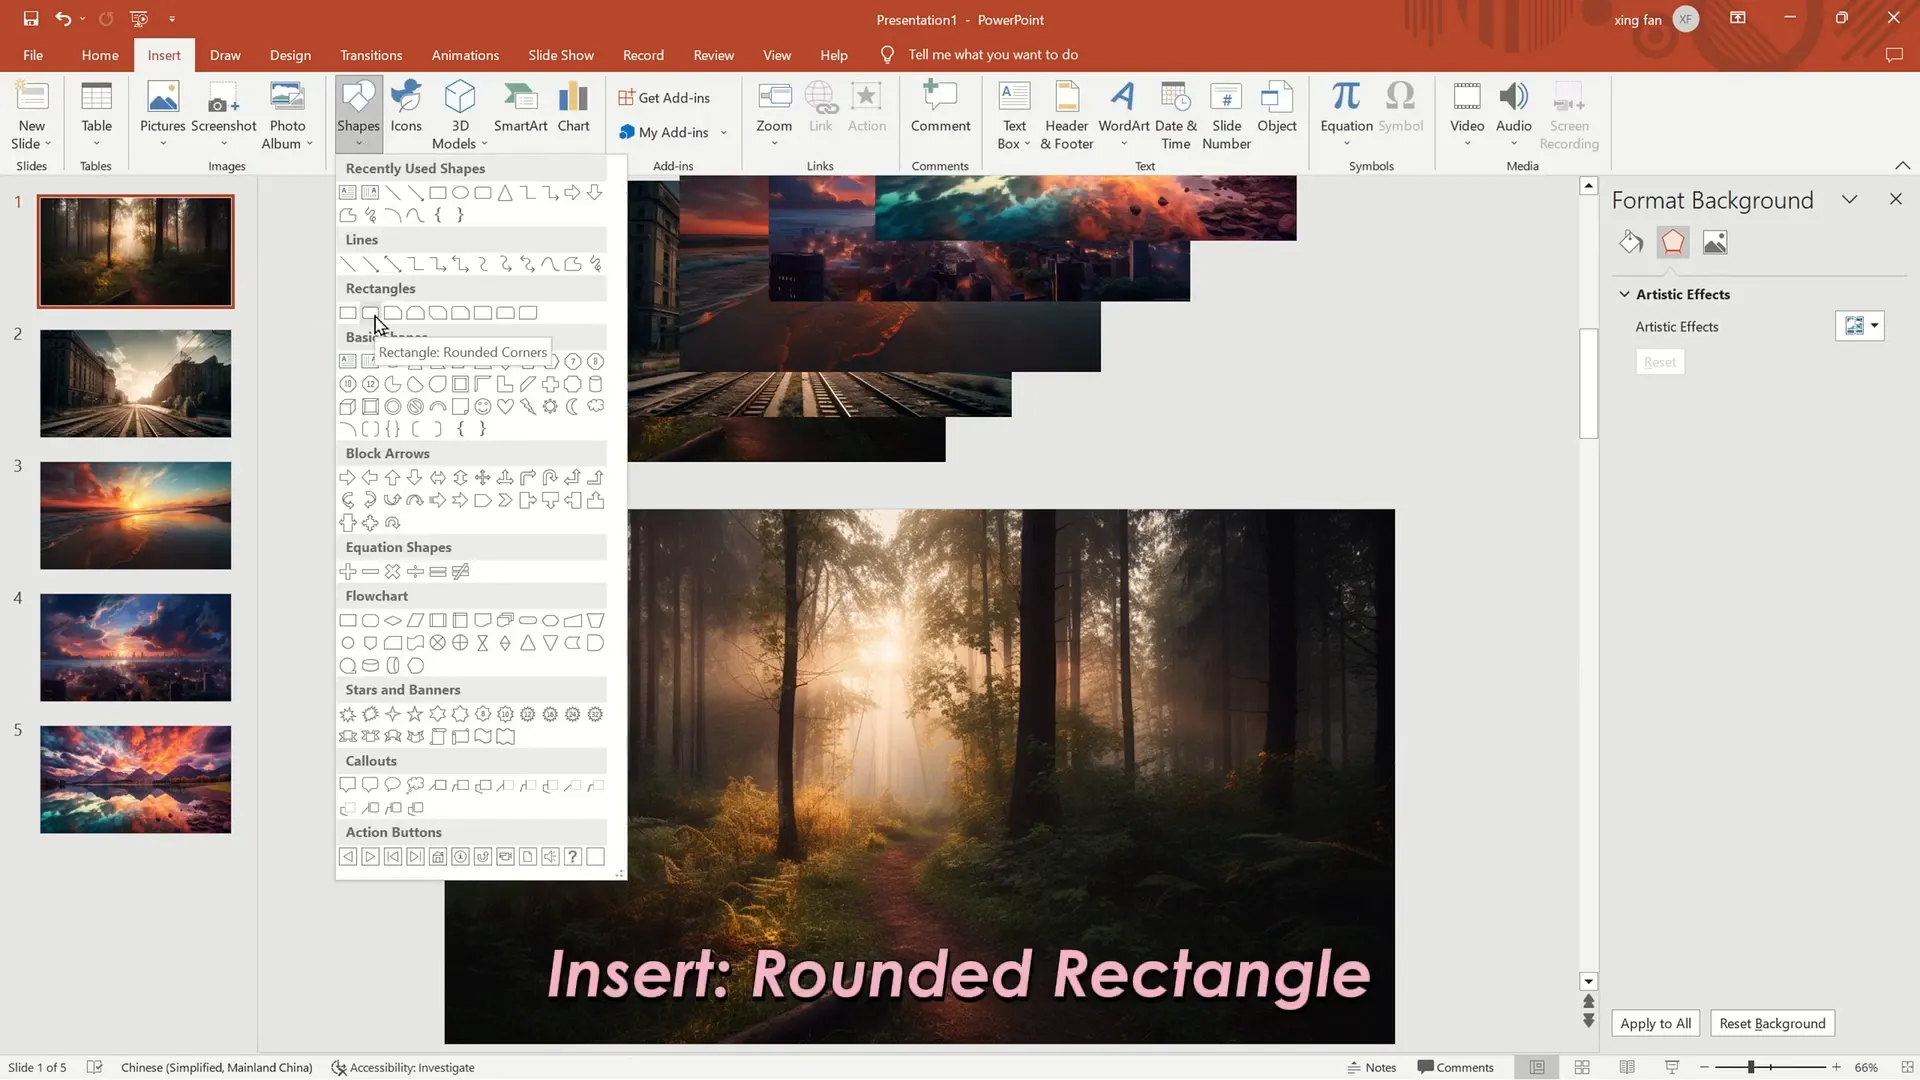
4. Create Rounded Rectangles for the Hollowed-Out Effect
Go back to your first slide and insert a rounded rectangle shape. To make it perfectly rounded, adjust the corner radius to the maximum setting.
Copy this rounded rectangle shape five times so you have a total of five identical shapes.
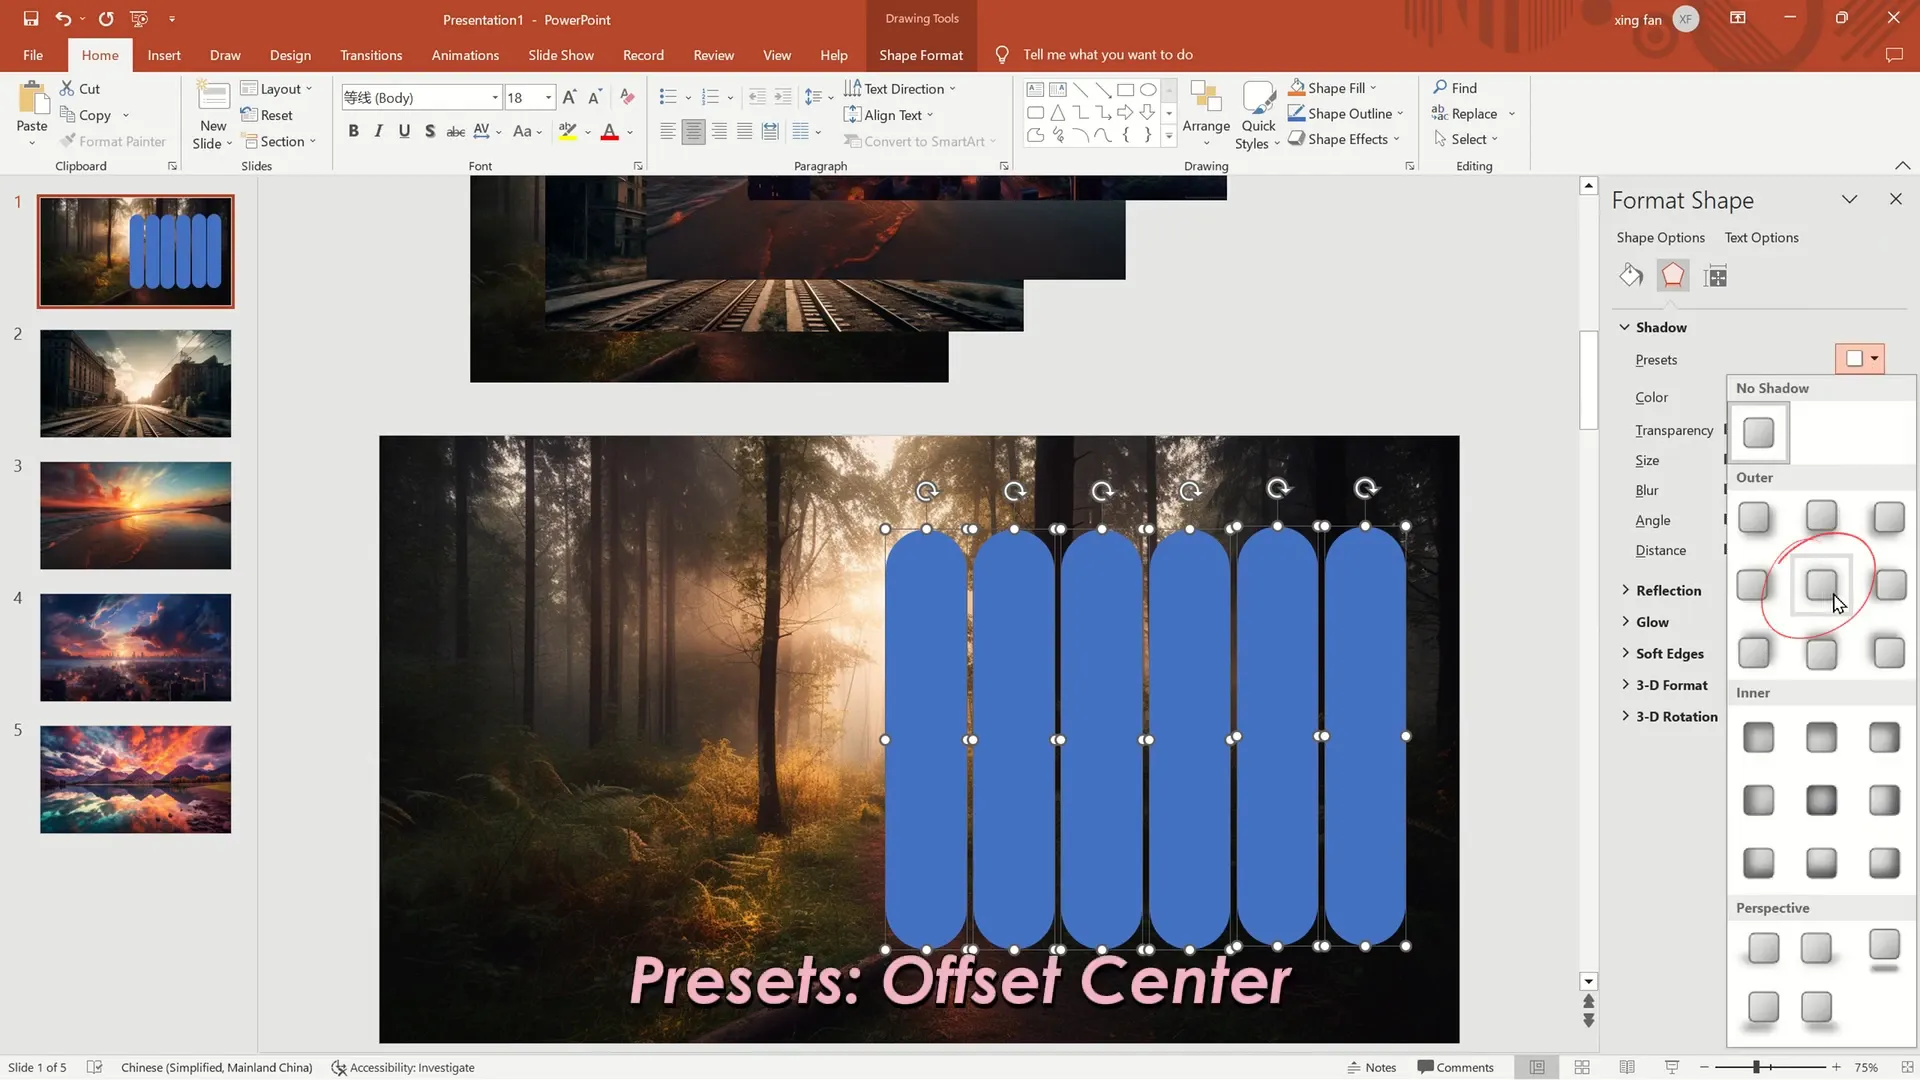
5. Customize Rounded Rectangles for Depth
Select all five rounded rectangles together. In the Format Shape pane, set the following:
- No Line: Remove the outline from the shapes.
- Shadow Presets: Choose Offset Center to add a subtle shadow.
- Shadow Transparency: Set to 0% for a solid shadow effect.
- Shadow Blur: Increase to 15 to soften the shadow edges.
After setting the shadows, adjust the length of each rounded rectangle to create a staggered effect. This layering gives the shapes a dynamic, hollowed-out appearance that adds depth to your slide.
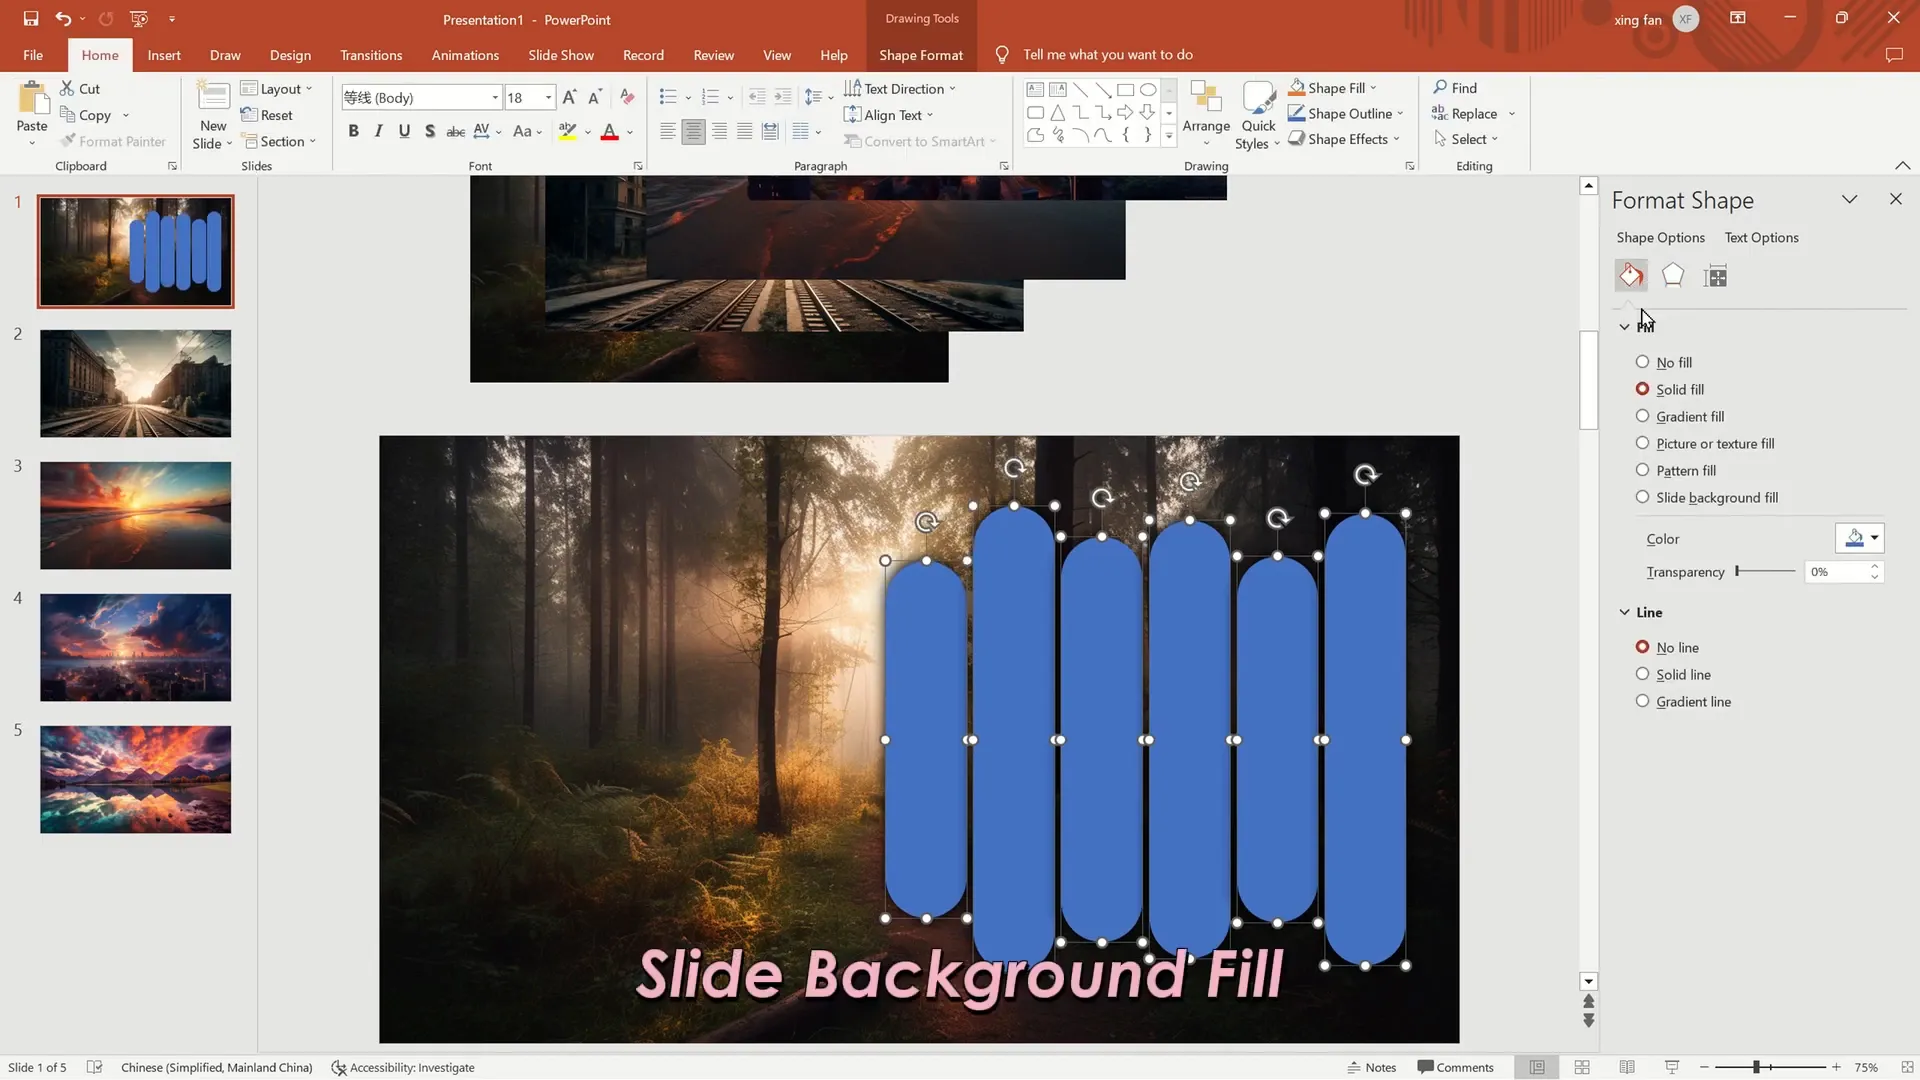
6. Align and Fill Rounded Rectangles with Background
With all rounded rectangles still selected, use the Align Middle option under the Shape Format tab to align them perfectly along the vertical axis.
Next, set the fill of the rounded rectangles to Slide Background Fill. This step makes the shapes appear hollowed out, revealing the slide’s background image through the shapes.
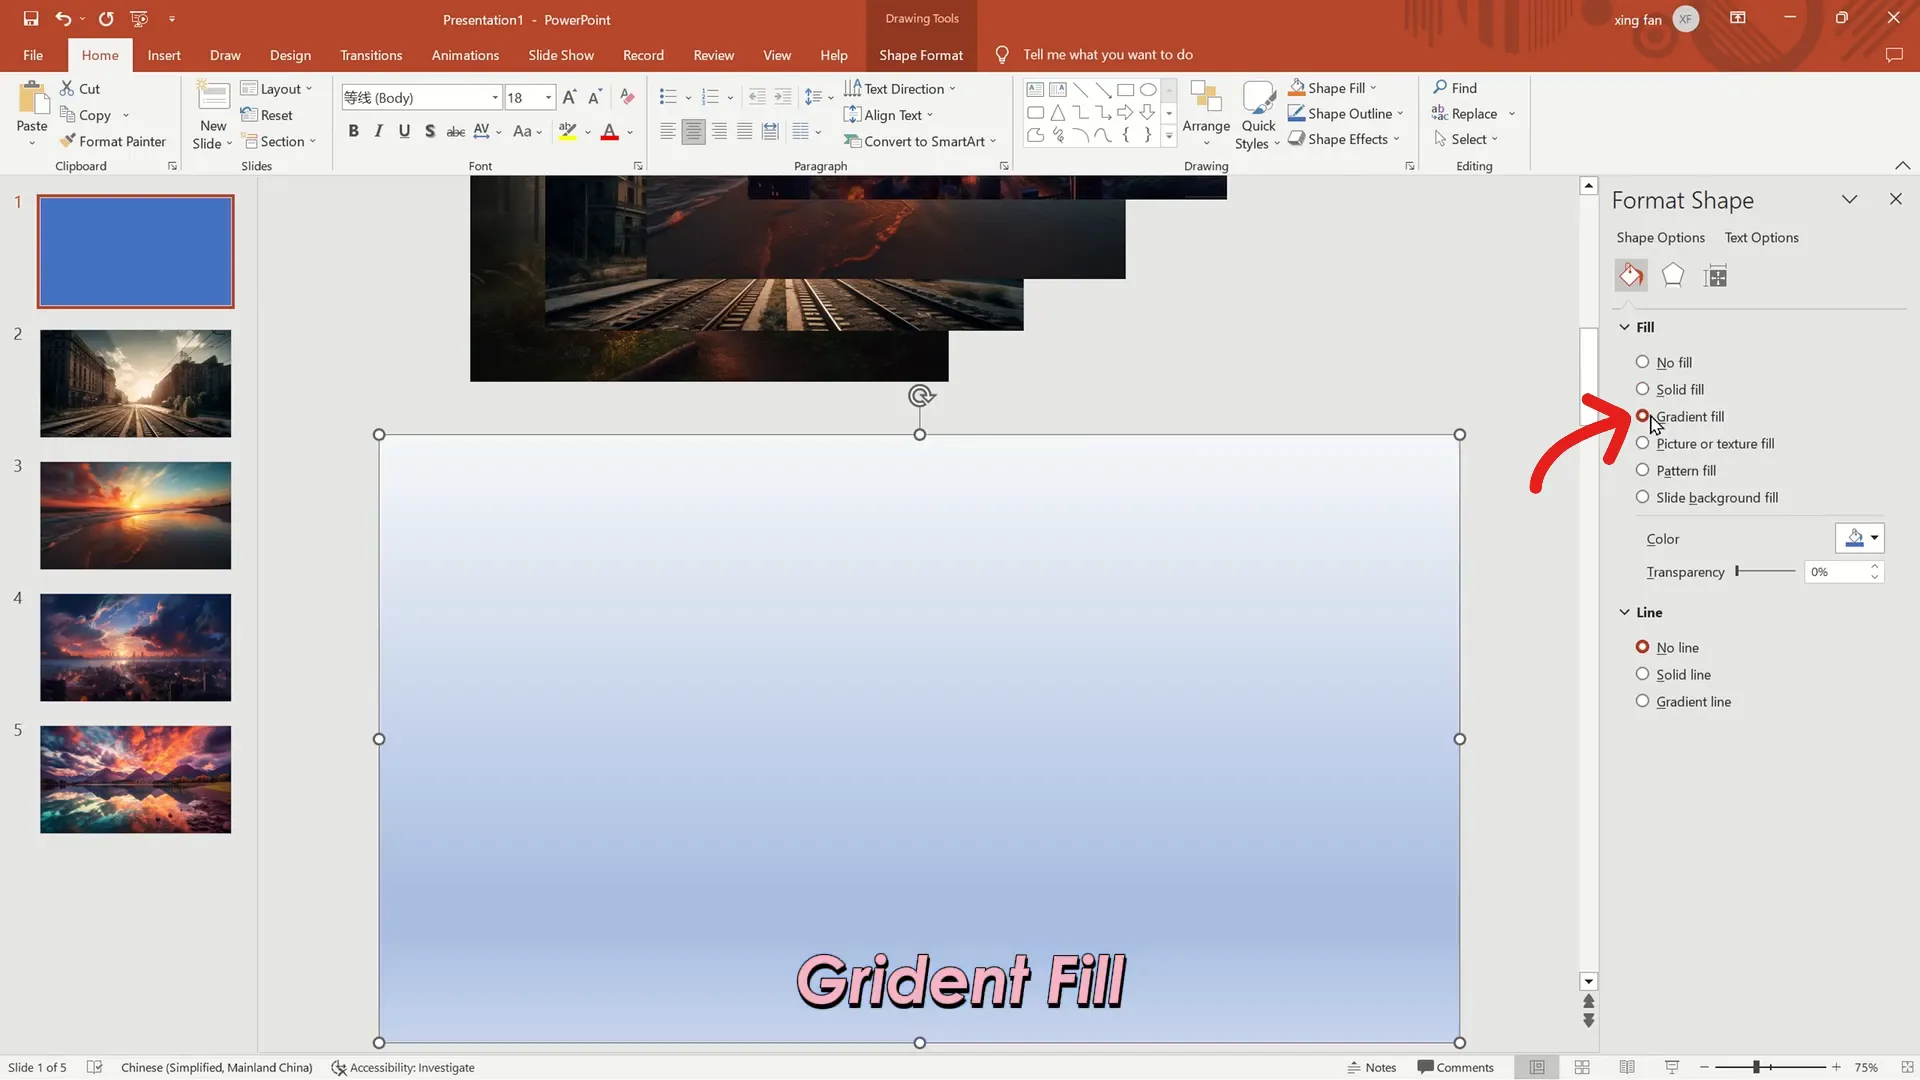
7. Add Gradient Overlay for Contrast
Insert a rectangle shape and stretch it to cover the entire slide background. Remove its outline by selecting No Line in the Format Shape pane.
Apply a Gradient Fill and delete the two middle gradient stops so only the left and right stops remain.
Set both stops to black. For the right stop, increase the transparency to 100%. Set the gradient direction to Linear Right.
Finally, right-click the rectangle and choose Send to Back to place it behind all other elements.

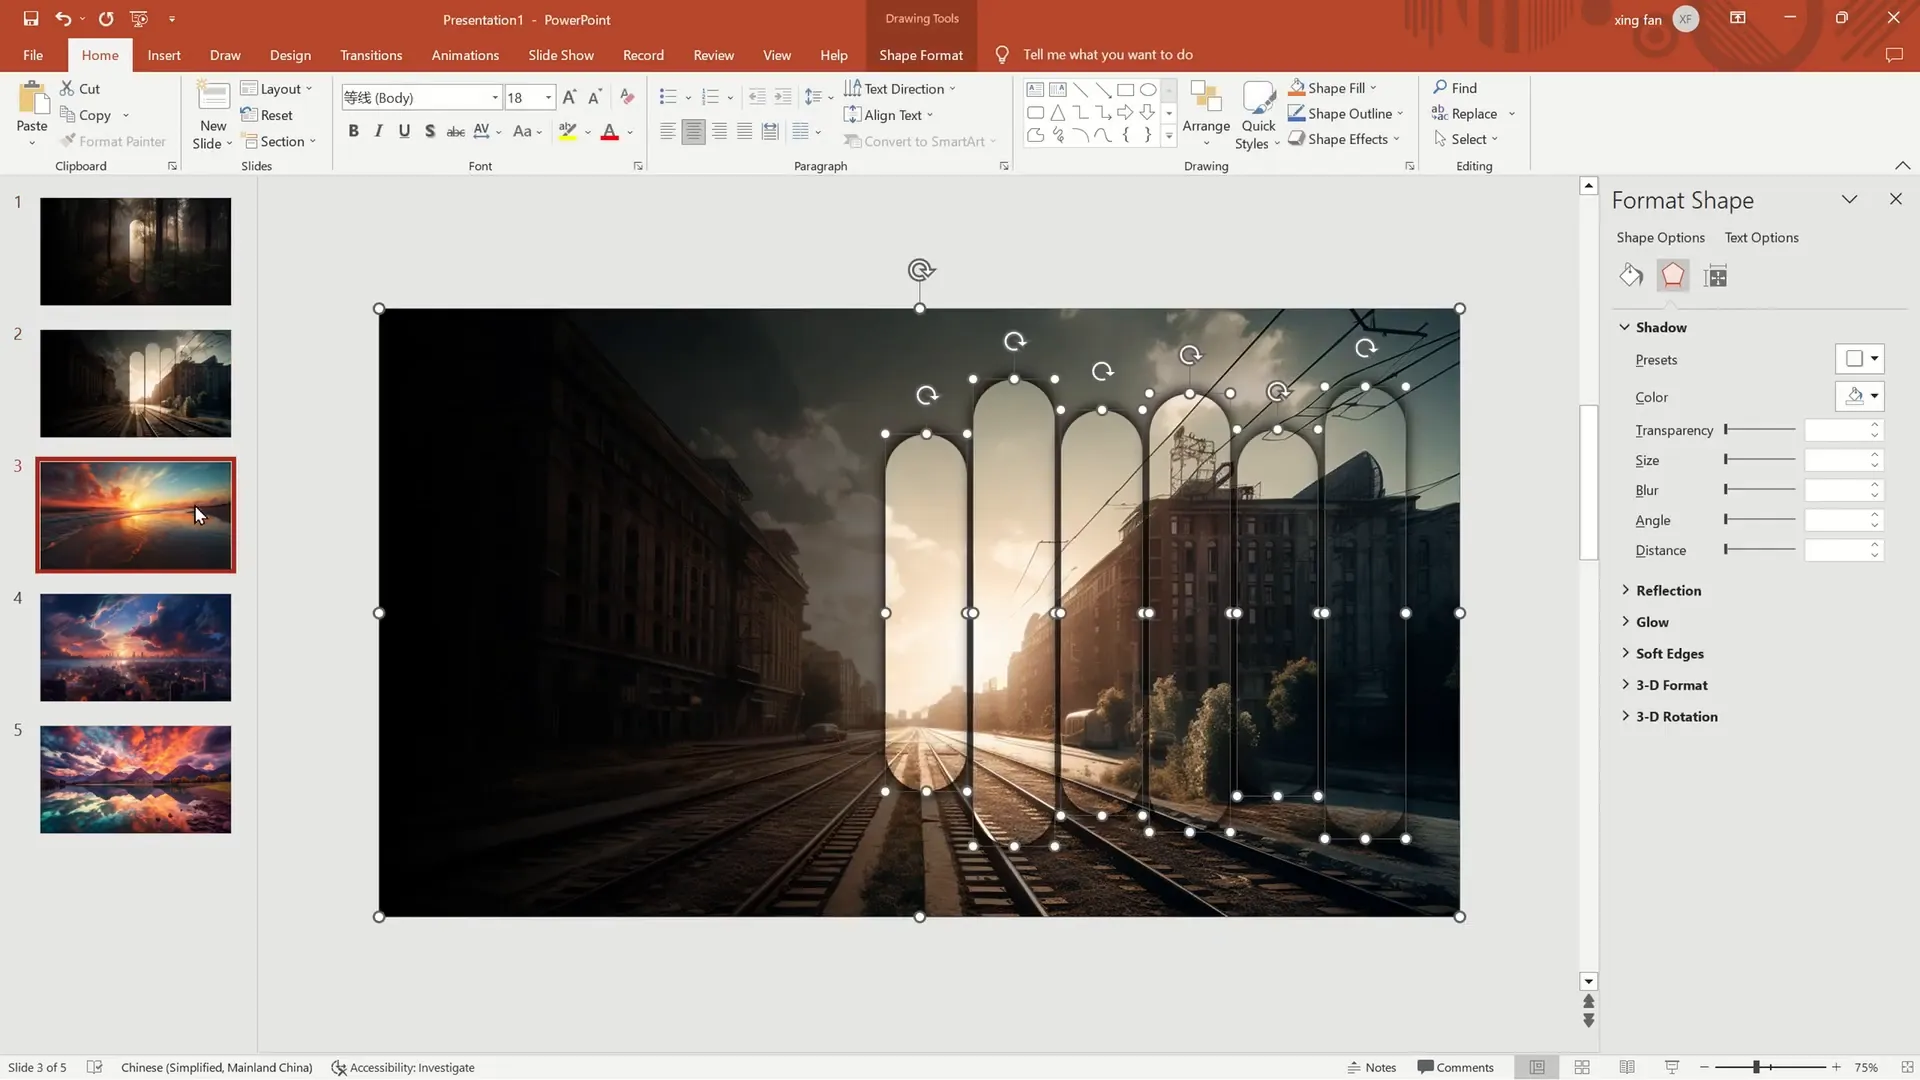
8. Copy and Adjust the Design Across Slides
Select all the rounded rectangles and gradient overlay together and copy them to the other four slides. On each slide, adjust the length of the rounded rectangles to create unique staggered patterns, maintaining visual interest throughout the presentation.
Again, align all rounded rectangles to the middle on each slide for consistency.
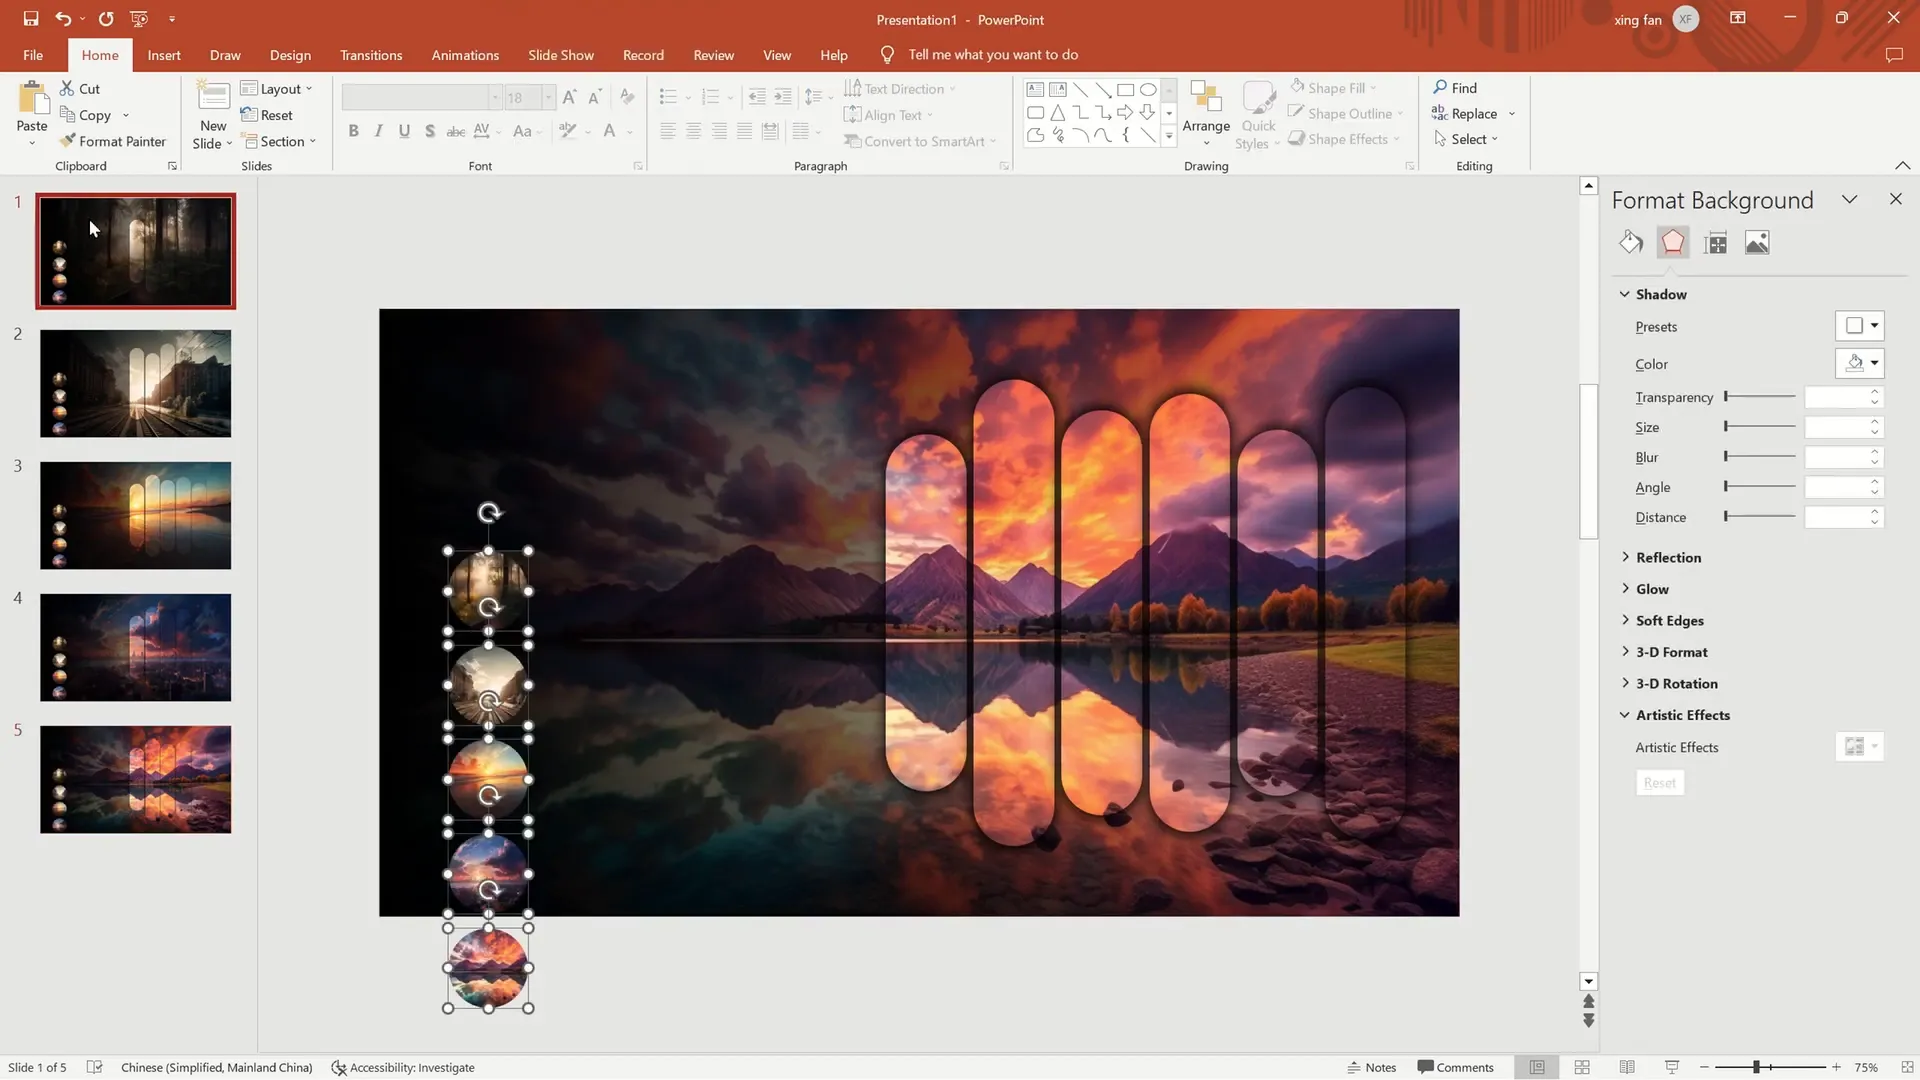
9. Prepare Circular Thumbnails
Return to your second group of images (the duplicates you copied earlier). On the first slide, select all these images and change their aspect ratio to 1:1 under the Picture Format tab. This step ensures the images are perfectly square, ready to be cropped into circles.
Next, crop each image to an oval shape using the Crop to Shape option and set their size to 2.5 centimeters.
Arrange these circular thumbnails on the left side of the slide and adjust their positions for a balanced layout.
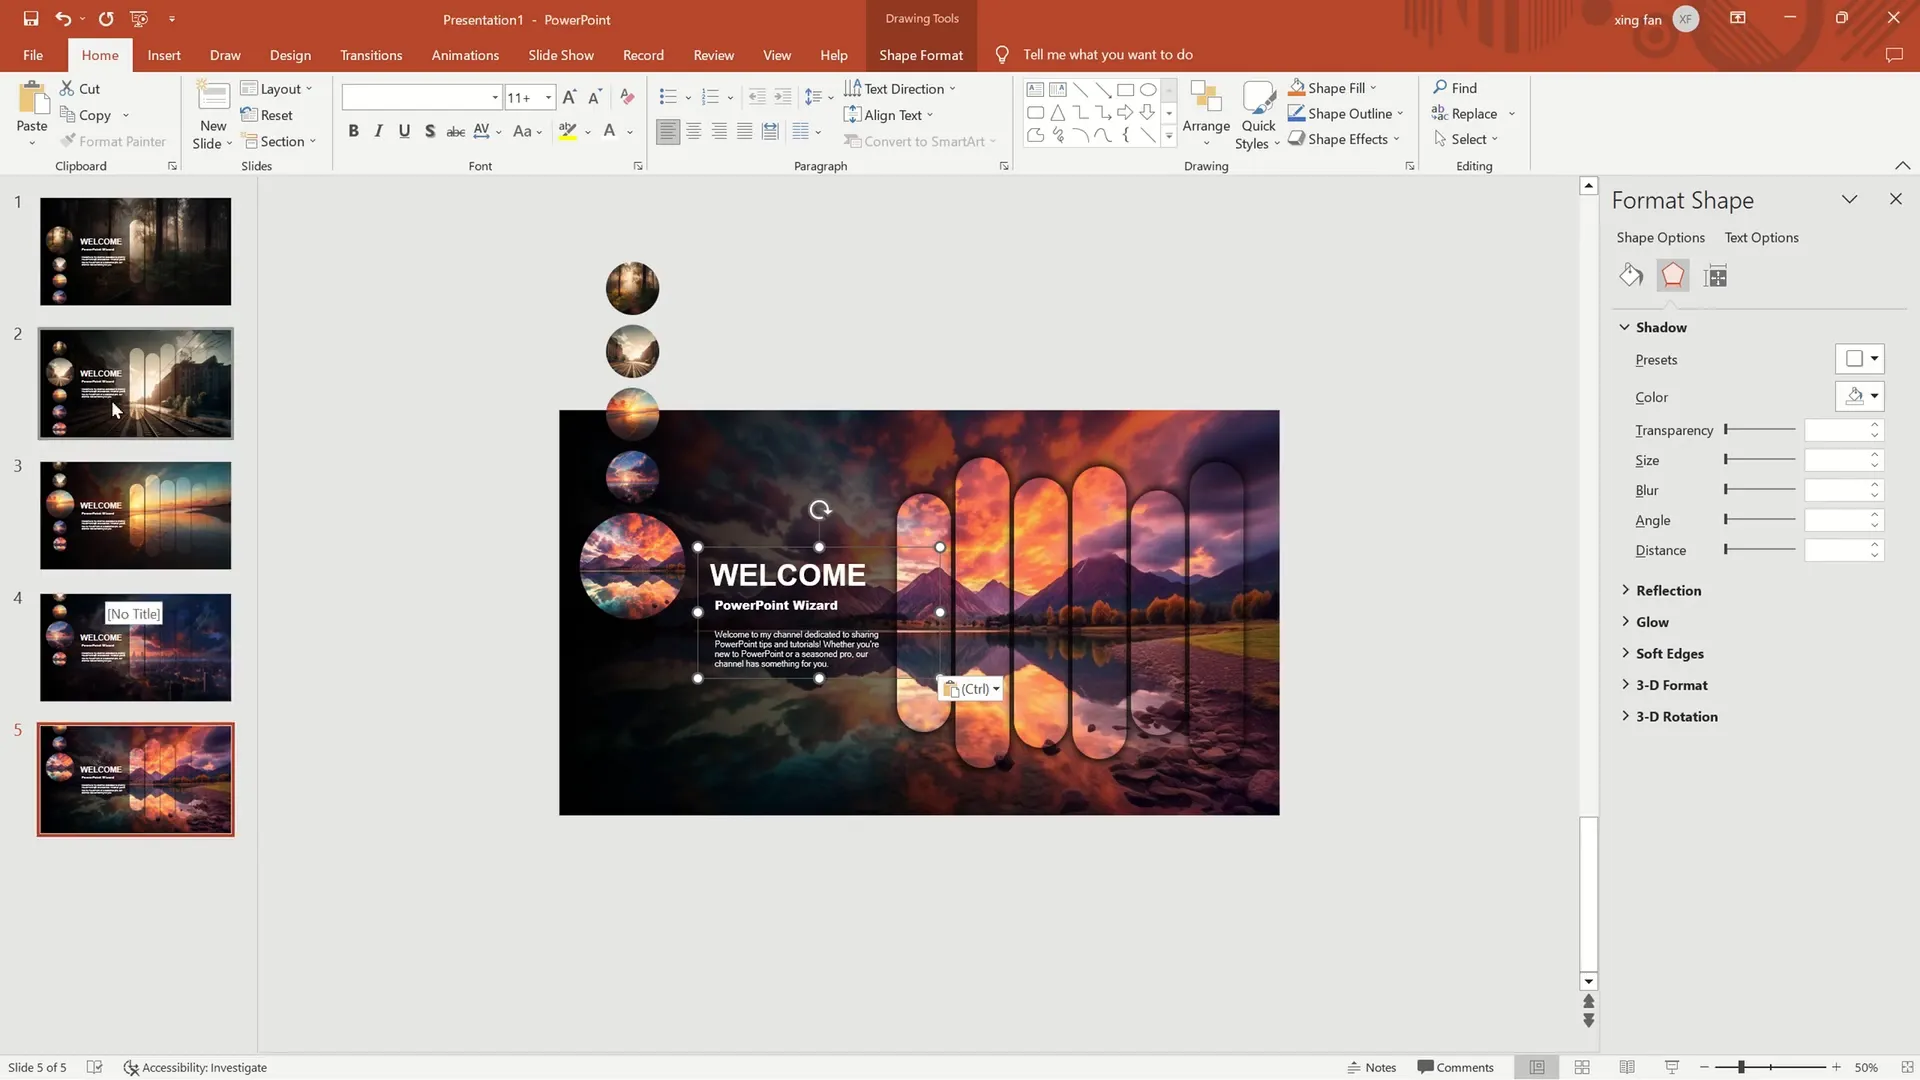
10. Copy and Resize Thumbnails on Each Slide
Select all circular thumbnails and copy them to the remaining slides. On the first slide, resize the thumbnails to 5 centimeters to make them more prominent and adjust their positions accordingly.
Repeat this resizing and positioning process on the other slides to keep a consistent and polished look throughout your presentation.
11. Add Text for Context and Emphasis
Now, insert the necessary text on each slide to complement your images. Whether it’s titles, bullet points, or brief descriptions, make sure the text is clear and enhances the overall message of your slides.
12. Apply Smooth Morph Transition
Select all slides and apply the Morph transition. This effect will animate the smooth movement of your images, shapes, and text between slides, creating a professional and engaging flow throughout your presentation.

Tips for Making Your PowerPoint Presentations Stand Out
Beyond the technical steps, here are some additional tips to maximize the impact of your presentation design:
- Choose High-Quality Images: Crisp, clear images make a big difference in professional-looking slides.
- Maintain Consistency: Use the same style of thumbnails, fonts, and colors throughout your presentation.
- Keep Text Concise: Avoid overcrowding slides with too much text; let visuals tell the story.
- Use Contrast Wisely: The gradient overlay technique helps text and images pop against backgrounds.
- Practice Your Delivery: Great visuals paired with confident speaking create a memorable presentation.
Frequently Asked Questions (FAQ)
Q1: Can I use this technique with more or fewer than five images?
Absolutely! While five images work well for this design, you can adjust the number based on your content. Just ensure you maintain balance and consistency in your layout.
Q2: Is the Morph transition available in all versions of PowerPoint?
The Morph transition is available in PowerPoint 2019, Microsoft 365, and PowerPoint Online. If you’re using an older version, consider upgrading to access this powerful feature.
Q3: Can I customize the size of the circular thumbnails?
Yes, you can resize the thumbnails to fit your design preferences. Just keep them consistent across slides for a cohesive look.
Q4: How do I ensure the hollowed-out effect works with different background images?
The hollowed-out effect relies on matching the rounded rectangles fill to the slide background. Make sure your background images have enough contrast and that the rectangles are properly aligned to avoid visual glitches.
Q5: Can I add animations to the thumbnails or text?
Yes, you can add entrance or emphasis animations to thumbnails and text to further enhance engagement. However, use animations sparingly to avoid distracting your audience.
Conclusion
Mastering PowerPoint design techniques like dynamic hollowed-out image groups paired with circular thumbnails and highlighted text can transform your presentations from ordinary to extraordinary. This method not only enhances the visual appeal but also directs your audience’s attention effectively, making your message more memorable.
By following this detailed guide, you’ll gain practical skills to create professional-looking slides quickly and efficiently. Remember, the key to a great presentation is combining compelling visuals with clear, concise content—and this technique helps you do just that.
Embrace these design tips, experiment with your own images and text, and watch as your presentations captivate and inspire your audience every time.
Enjoy your creation and happy presenting!
Check out the full video: PowerPoint Tutorial | Presentation Design | Pictures | To be Expert of PowerPoint in 7 Mins!


