Welcome to an exciting journey into the magical world of PowerPoint animation! If you’ve ever wanted to impress your audience with dynamic, eye-catching slides, you’re in the right place. Today, you’ll learn how to create a vibrant looping animation slide themed around summer, but don’t worry — this technique is versatile and can be adapted to showcase your favorite travel destination, country, or any theme you desire.
In this comprehensive guide, you will discover how to combine a beautiful video background with animated summer-themed illustrations and wavy text effects to create a truly captivating presentation slide. We will explore how to make videos play automatically and loop seamlessly, add motion path animations to illustrations, and apply sophisticated text animations that bring your slide title to life.
This tutorial is based on techniques demonstrated by the talented One Skill PowerPoint, who expertly uses Microsoft PowerPoint 365 to craft this animation. Additionally, we’ll feature stunning summer illustrations by the gifted digital artist Raminta, whose hand-drawn PNG images with transparent backgrounds make it effortless to add charm and personality to your slides.
Ready to dive in? Let’s get started!
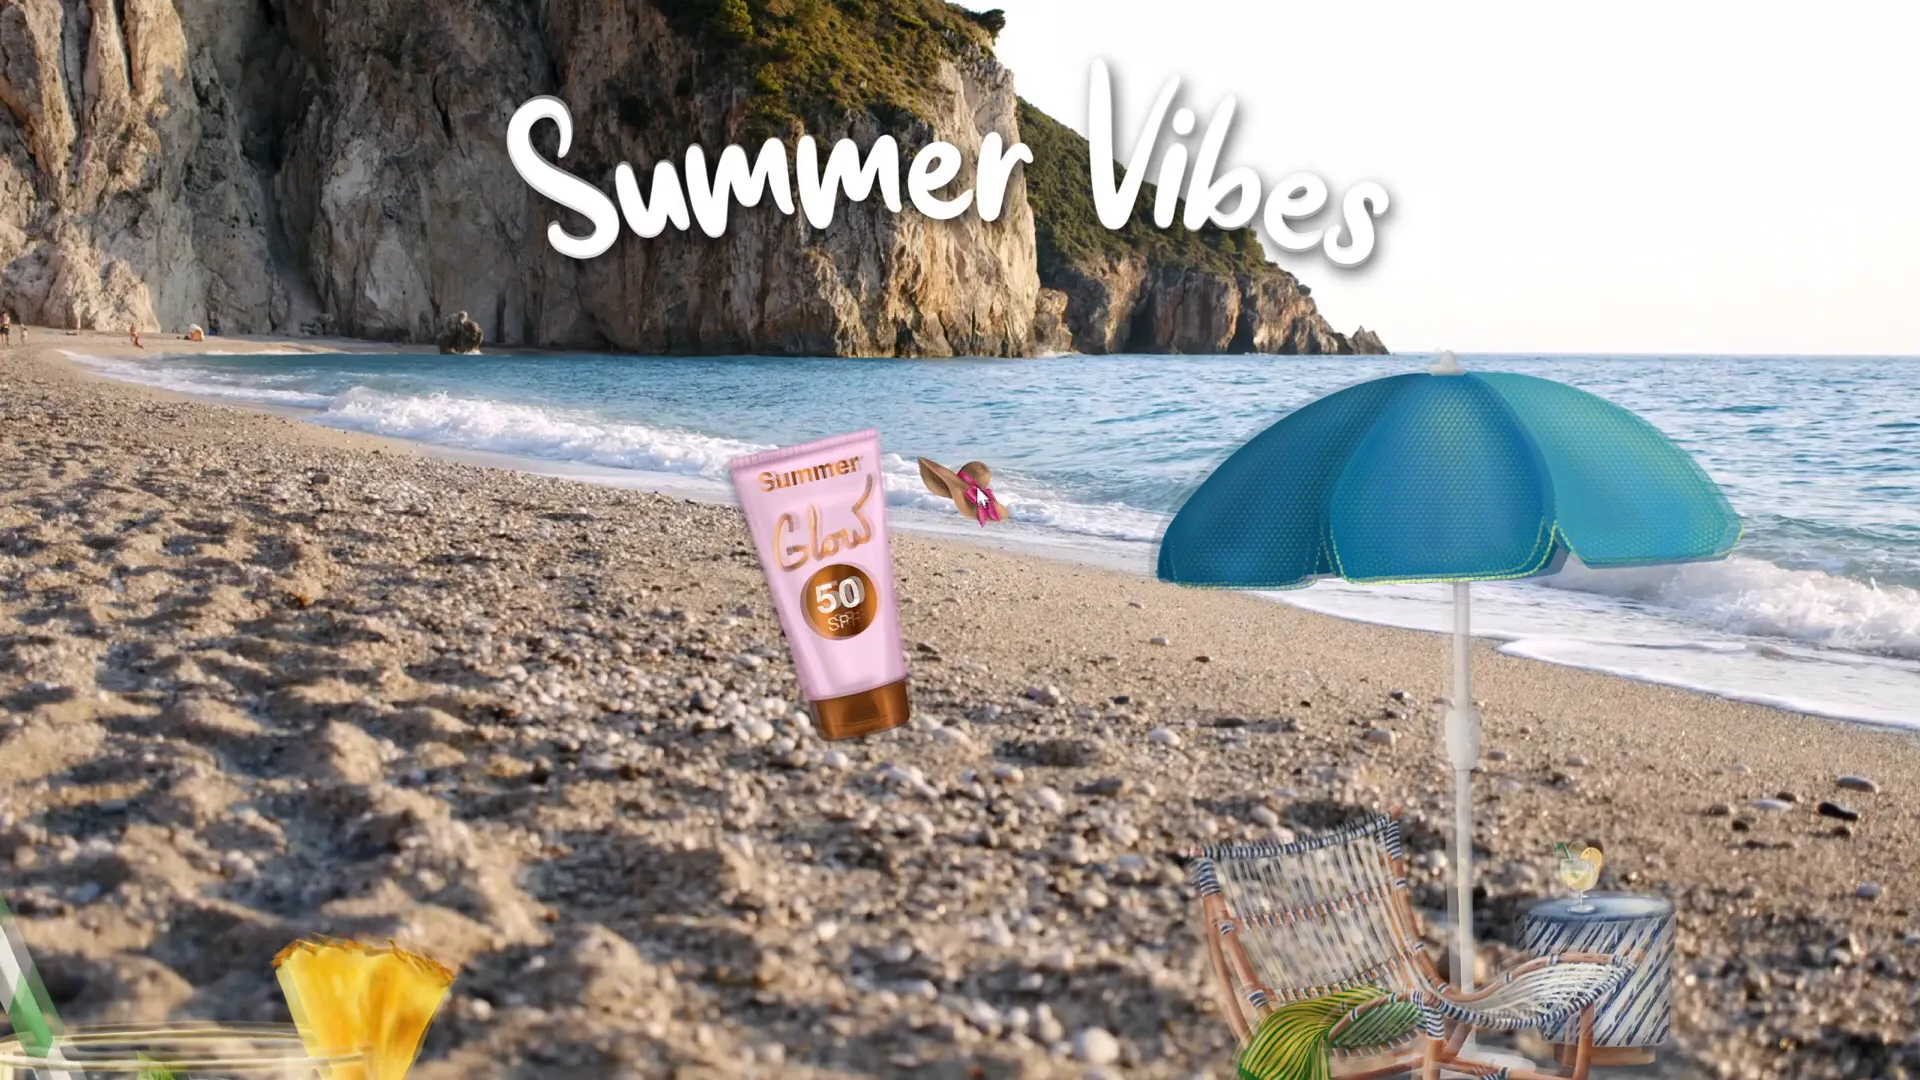
Table of Contents
- Gathering Your Assets: Summer Illustrations and Video Background
- Creating a Beautiful Video Background That Loops Automatically
- Animating the Slide Title with a Wavy Text Effect
- Bringing Summer Illustrations to Life with Looping Motion Path Animations
- Final Touches and Previewing Your Animated Slide
- Why Use Looping Animations and Video Backgrounds in PowerPoint?
- Tips for Creating Your Own Looping Animated Slides
- Frequently Asked Questions (FAQ)
- Conclusion
Gathering Your Assets: Summer Illustrations and Video Background
Before we jump into PowerPoint, it’s important to prepare the assets you’ll need. The magic of this animation lies in the combination of a looping video background and beautiful, hand-drawn summer illustrations. Here’s what you need to know:
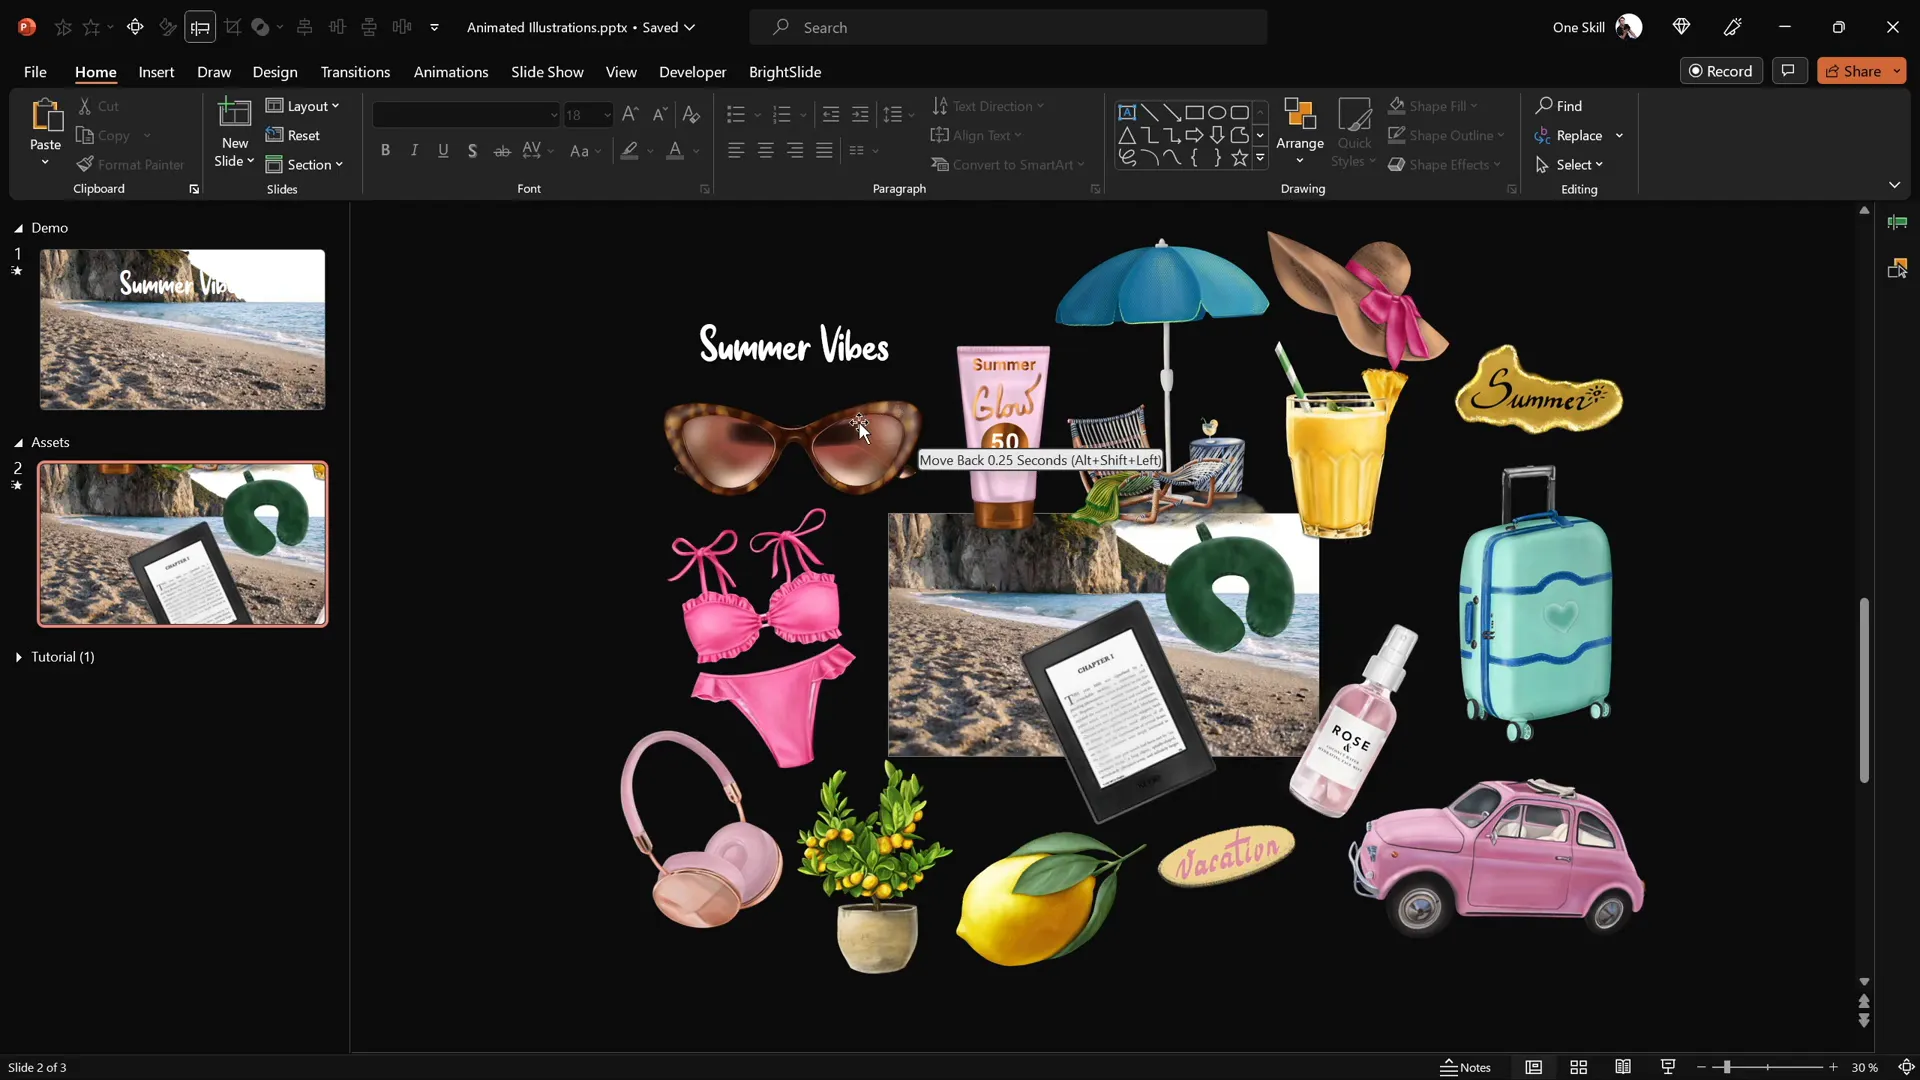
- Summer Illustrations: The tutorial uses a collection of vibrant PNG images, including sunglasses, headphones, lemons, stickers, luggage cars, a Kindle reader, cocktail glasses, sunscreen bottles, and umbrellas.
- Artist Credit: All these delightful illustrations were created by Raminta, a talented digital artist. You can find her work on Etsy, and the link to her store is provided for you to explore and purchase these assets easily.
- Format Benefits: The illustrations come in PNG format with transparent backgrounds, meaning you can layer them seamlessly over any slide without worrying about unsightly boxes or backgrounds.
Now is the perfect time to grab these illustrations and elevate your presentations. Their affordability and quality make them a fantastic investment for anyone looking to add flair to their slides.
Creating a Beautiful Video Background That Loops Automatically
The first step in bringing your slide to life is setting an engaging video background. The video used in this tutorial is a serene beach shoreline clip downloaded from Artlist.io, a popular source for royalty-free stock footage. Here’s how to set up your video background:
- Insert the Video: Copy and paste your chosen video onto a fresh, blank PowerPoint slide. The video will serve as the dynamic backdrop for your animations.
- Set Video to Play Automatically: Select the video, then add a Play animation from the animations tab.
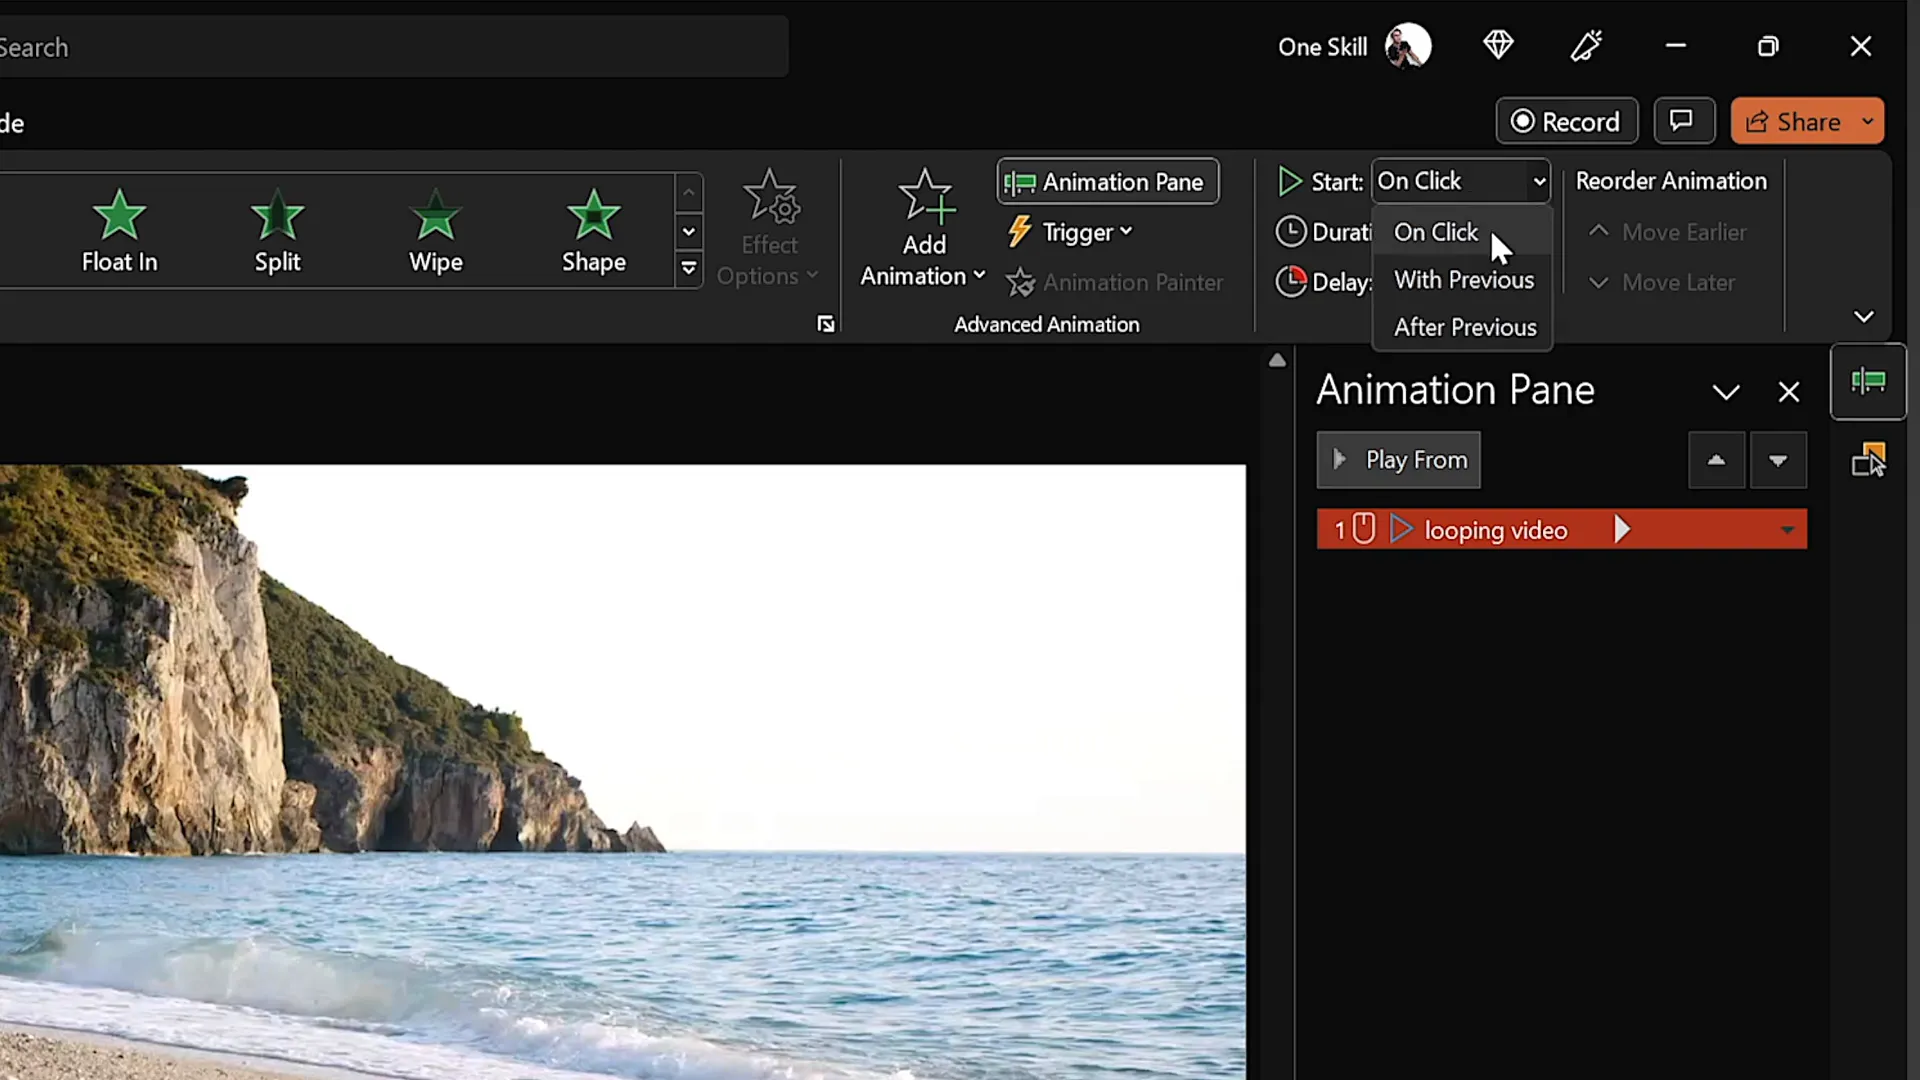
- Configure Playback: In the animation settings, set the play animation to start With Previous, so the video begins playing as soon as the slide loads.
- Enable Looping: In the playback tab, check the option to loop the video until stopped. This ensures the background stays alive throughout your presentation without interruption.
To maintain a clean look, you can hide the default video player controls by going to the Slideshow tab and unchecking Show media controls. This results in a sleek, distraction-free background that enhances your slide’s aesthetic.
One important tip: the video may be clickable by default, causing it to reset when clicked during the slideshow. To prevent this, insert a transparent rectangle shape covering the entire slide. Remove its border and fill, then set its transparency to 100%. This invisible layer blocks clicks on the video, ensuring smooth playback without accidental interruptions.
Animating the Slide Title with a Wavy Text Effect
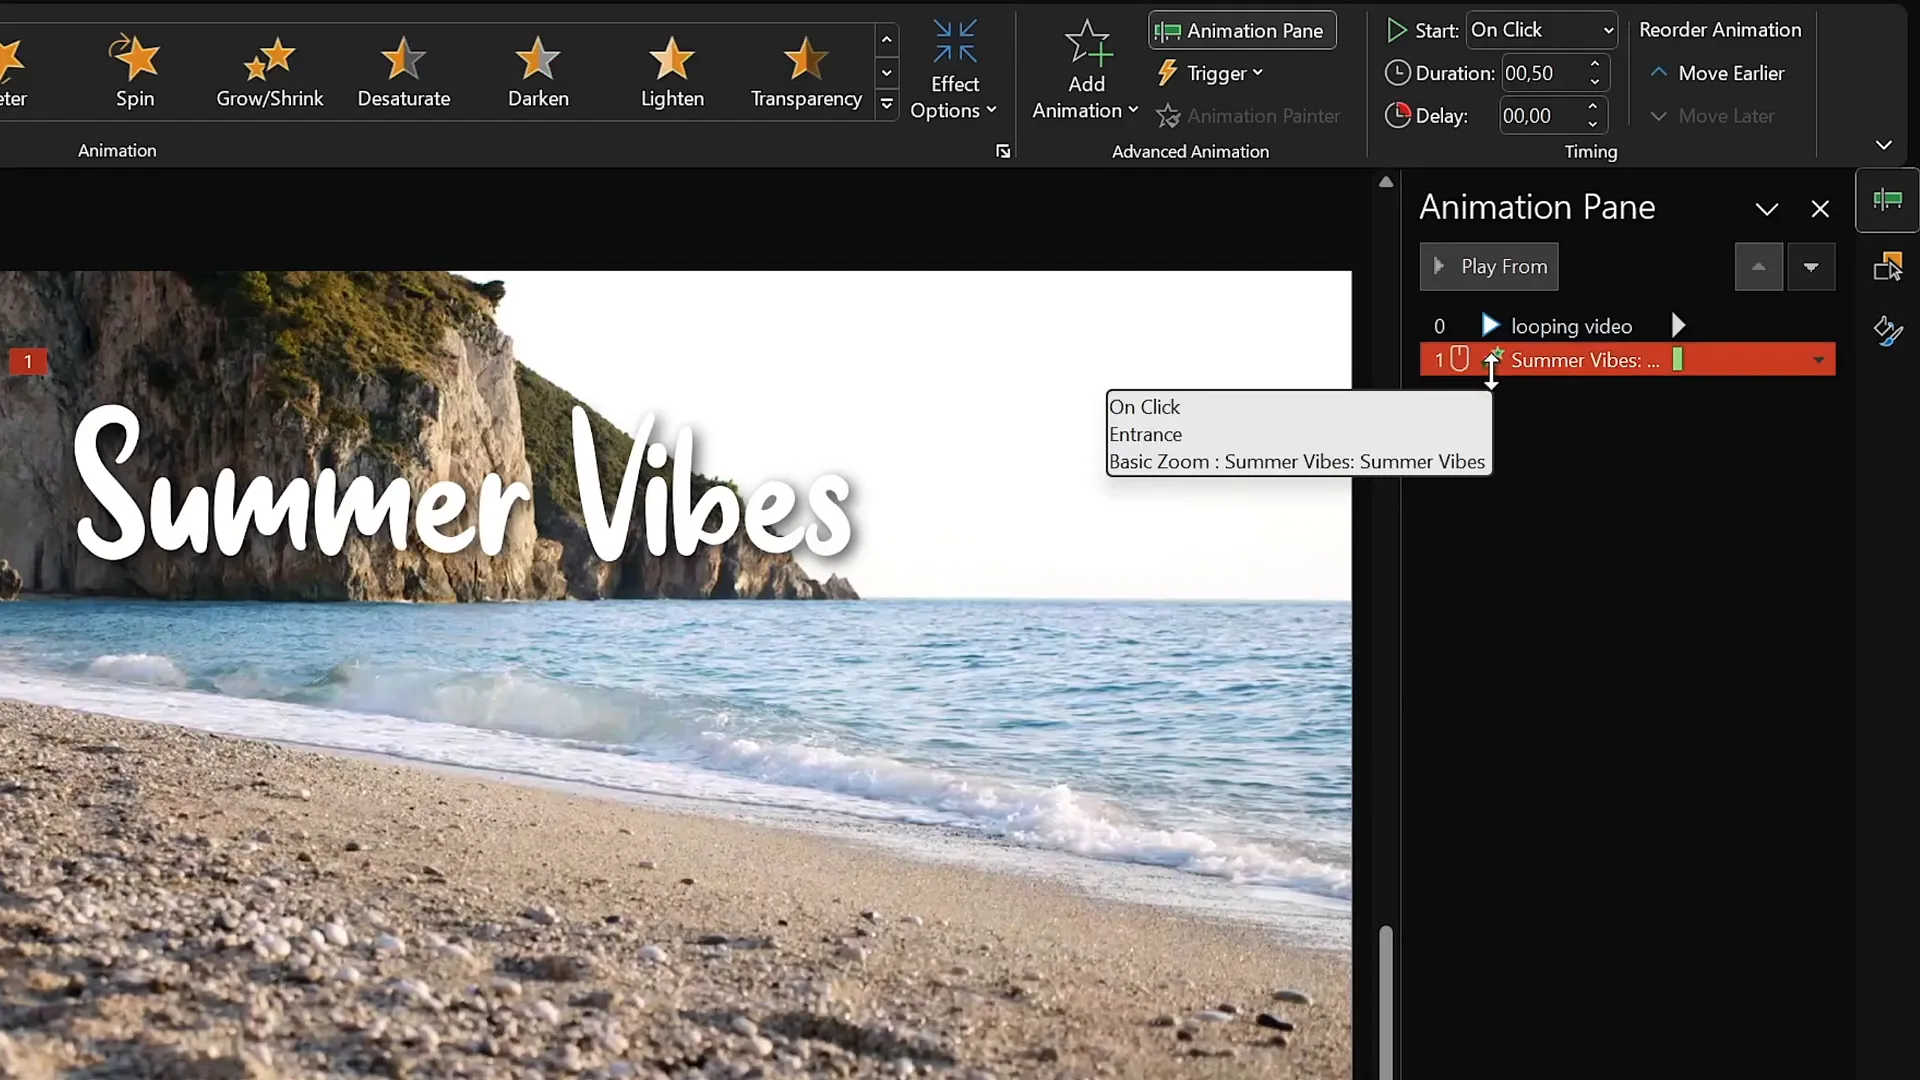
Next, let’s focus on animating the slide title, which adds a captivating focal point to your presentation. The text uses the beautiful Sweet Purple font at a large size to stand out prominently. Here’s how to create the wavy text animation:
- Insert Your Title: Add a text box with your slide title and position it above the video background, ideally centered near the top of the slide.
- Apply Basic Zoom Animation: From the animations tab, add the Basic Zoom entrance effect to your text box.
- Animate by Letter: In the effect options, set the animation to happen by letter with a slight delay (around 10%) between each letter, creating a dynamic zoom-in effect where letters appear one by one.
- Add Wave Animation: Add a second animation to the text box called Text Wave. Configure this to animate by letter with a 5% delay, and set it to start With Previous so it plays immediately after the zoom.
- Loop the Wave: In the timing tab, set the wave animation to repeat until the end of the slide, giving the title a continuous, gentle waving motion.
This combination results in a title that first zooms into view letter by letter, then gently waves continuously, adding a playful and engaging motion that matches the summer theme.
Bringing Summer Illustrations to Life with Looping Motion Path Animations
Now, let’s animate the summer illustrations themselves. The goal is to have these objects float and move subtly across the slide in a looping fashion, enhancing the lively summer vibe. Here’s the step-by-step process:
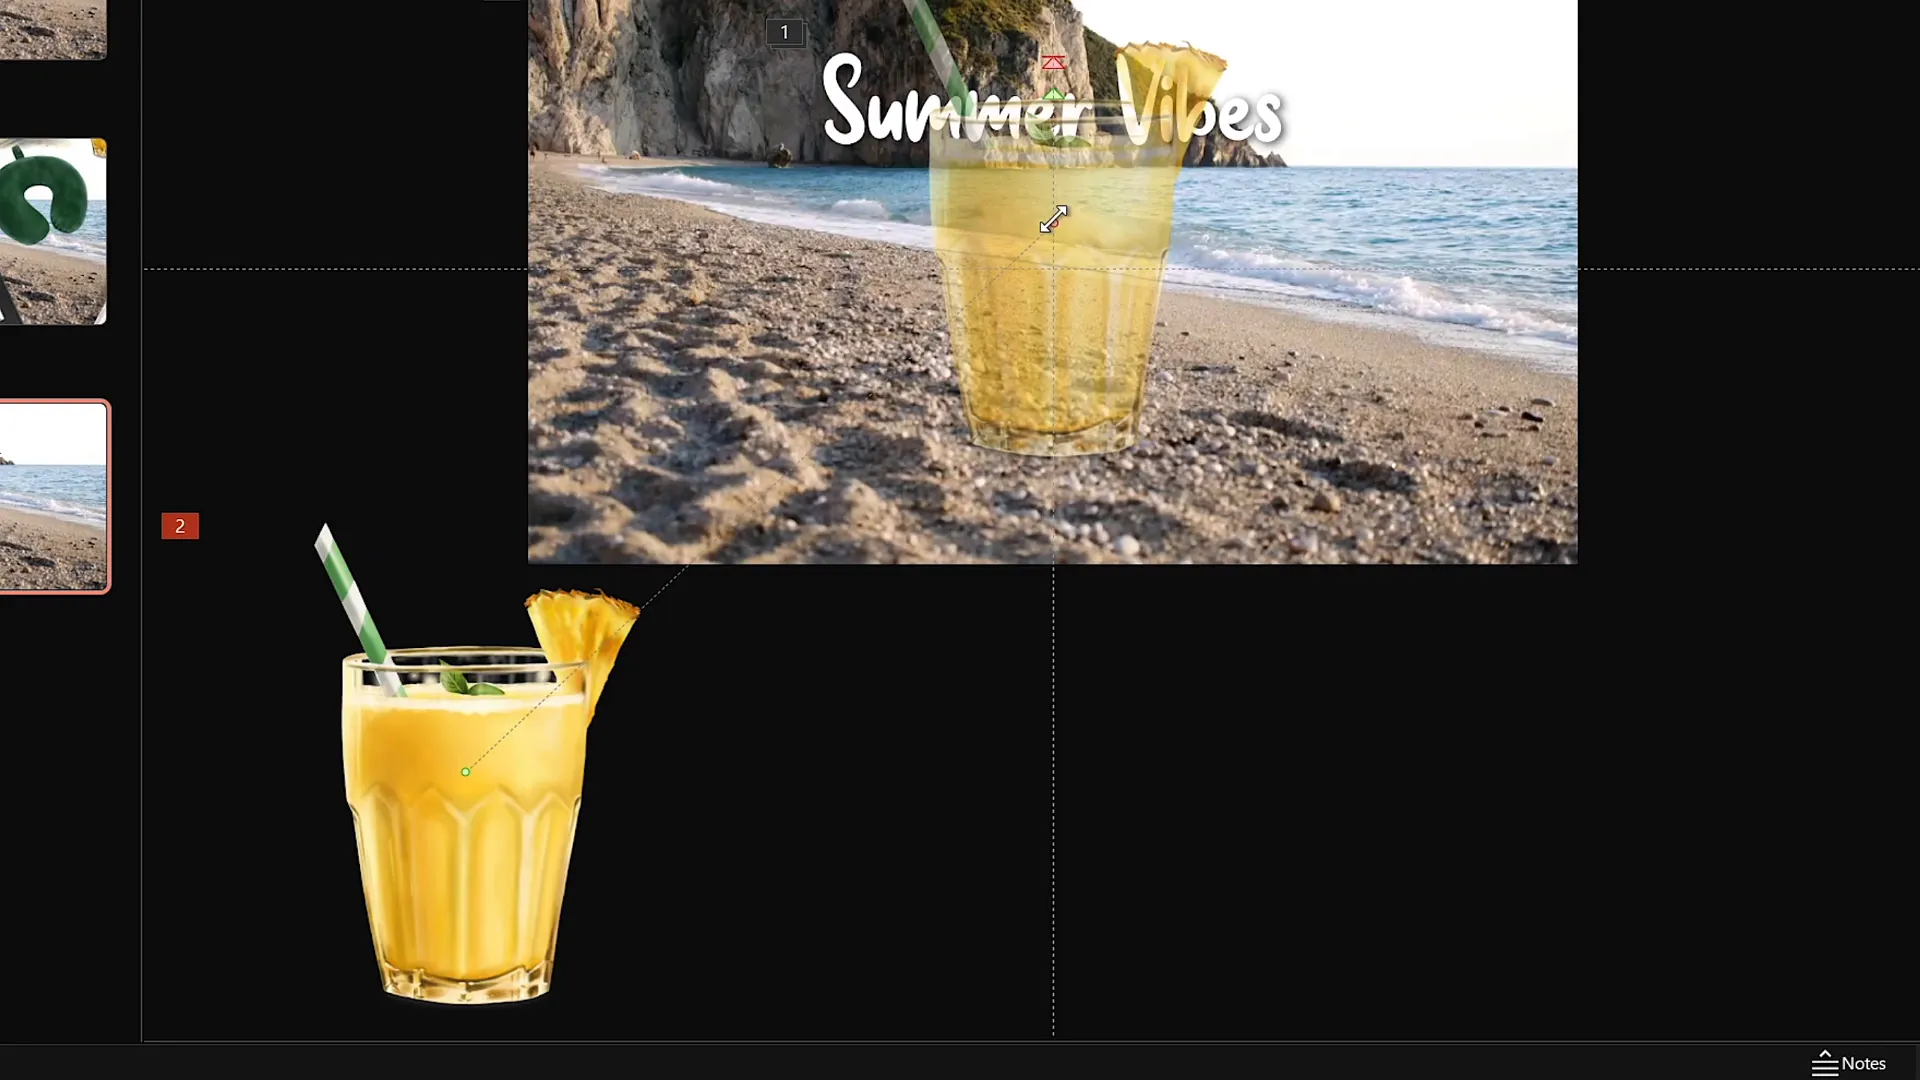
- Choose an Illustration: Copy an illustration from your collection and paste it onto your slide. For example, start with the cocktail glass.
- Position the Illustration: Place the object near the bottom left corner of the slide to create a natural starting point for its movement.
- Add Motion Path Animation: Go to the animations tab and add a Motion Path animation. Choose the Line option.
- Adjust Path Direction: Move the endpoint of the motion path to somewhere near the center of the slide, just above the waterline or central area.
- Reverse Path if Needed: If the motion path starts where you want the endpoint to be, use the reverse path option to flip the starting and ending points, ensuring the illustration begins near the center and moves outward.
- Set Animation Timing: Configure the motion path to start With Previous and last about 4 seconds for smooth movement.
- Add Smooth Start: In the animation options, apply a maximum smooth start to make the motion flow naturally.
- Loop the Animation: Set the animation to repeat until the end of the slide for continuous motion.
- Enhance with Zoom: Because the illustration may appear too large or static, add a Basic Zoom entrance animation to the object. Set it to start With Previous and last the same 4 seconds, looping indefinitely. This creates a subtle growth effect that complements the motion path.
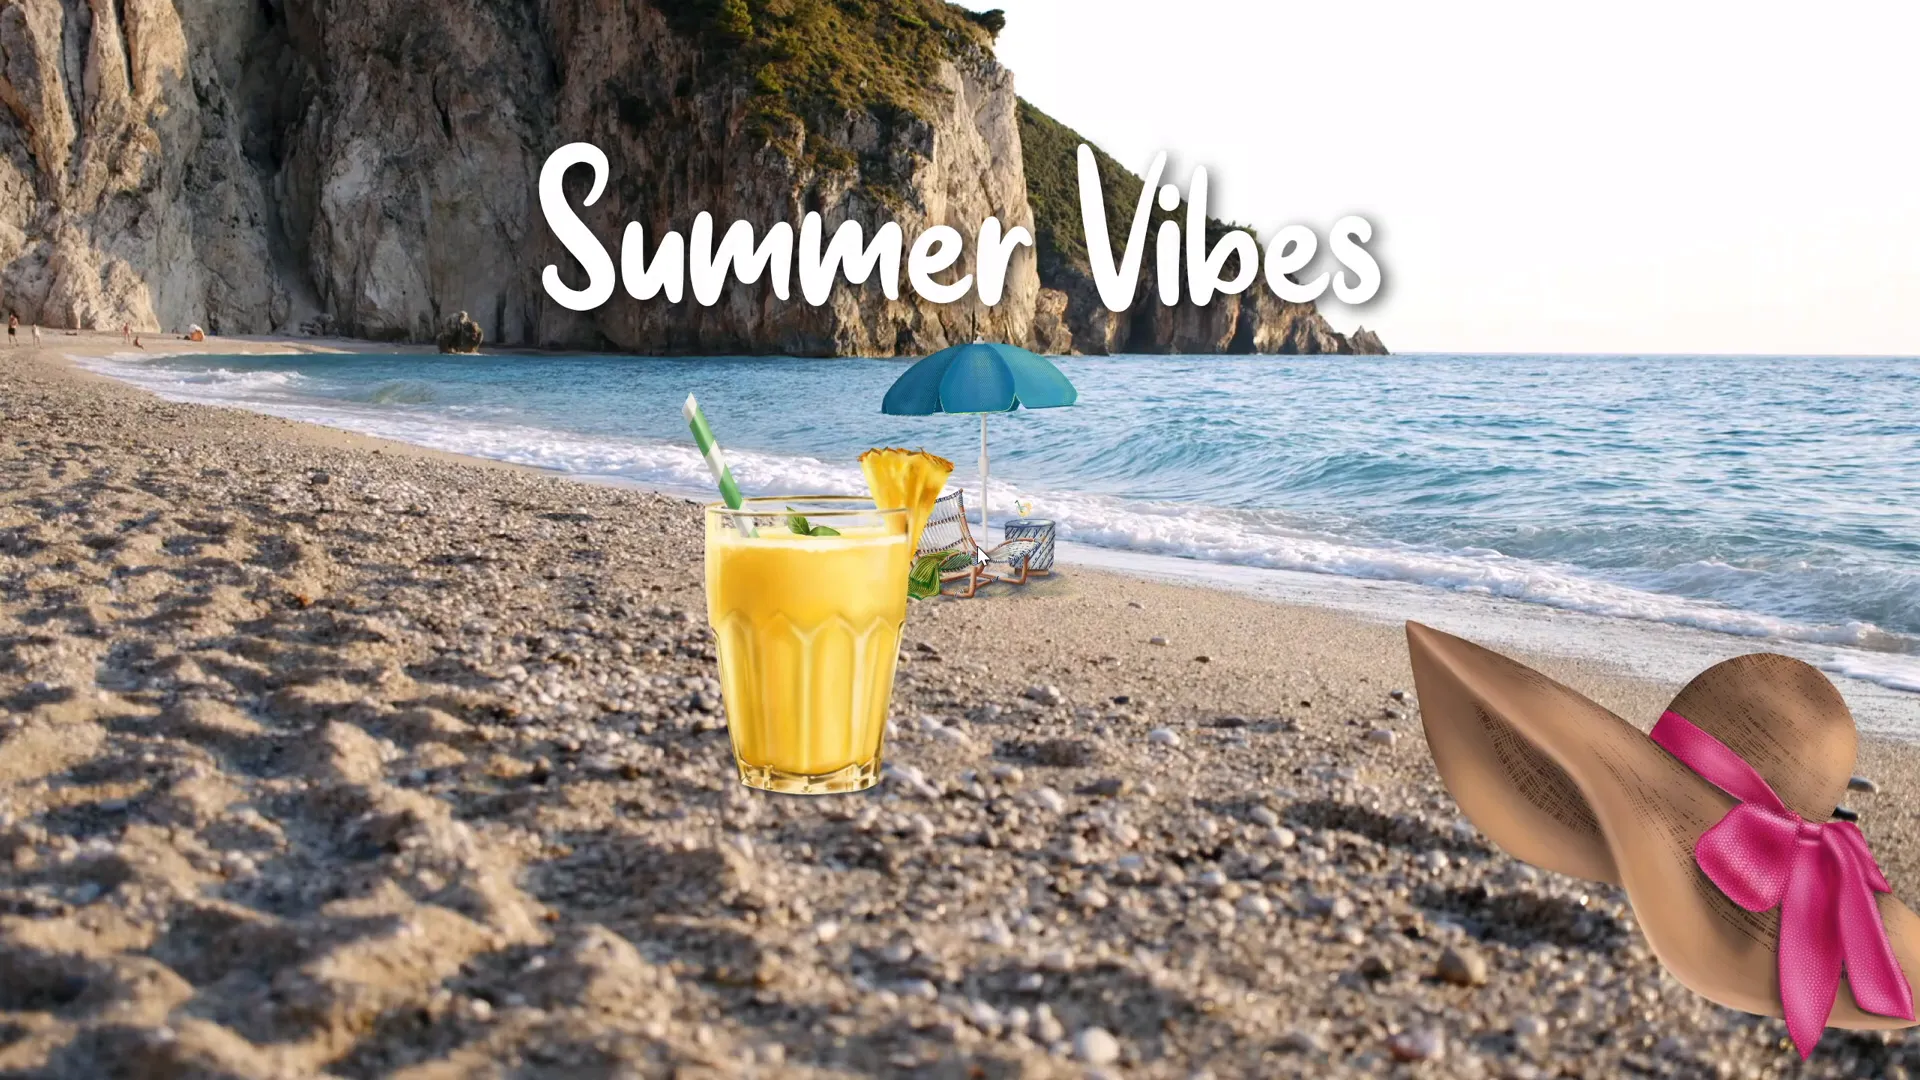
Repeat this process for other illustrations such as the umbrella, sunscreen bottle, and hat. Use the Animation Painter tool to quickly copy animations from one object to another, saving time and ensuring consistency.
To add variety, stagger the start times of each illustration’s animations by adding delays (e.g., 1 second, 2 seconds, 3 seconds). This prevents all objects from moving simultaneously, creating a more natural and pleasing animation sequence.
Finally, arrange the layering order in the Selection Pane to ensure objects overlap correctly and the composition looks balanced.
Final Touches and Previewing Your Animated Slide
Once all your animations are in place, it’s time to preview your work and make any final adjustments:
- Test the Slide: Run the slideshow to confirm the video background plays automatically and loops smoothly without displaying controls or becoming clickable.
- Trigger Text Animation: On mouse click, watch the slide title zoom in letter by letter and start waving continuously.
- Observe Illustration Animations: See the cocktail glass, umbrella, sunscreen bottle, and hat gracefully moving along their motion paths with synchronized zoom effects, looping indefinitely.
- Adjust Timing and Positioning: If any animation feels too fast, slow, or out of place, tweak the duration, delay, or motion path accordingly for the best visual impact.
With these steps, you’ve transformed a simple PowerPoint slide into a vibrant, professional-quality animated presentation that will surely impress your audience.
Why Use Looping Animations and Video Backgrounds in PowerPoint?
Looping animations and video backgrounds bring several benefits to your presentations:

- Engagement: Moving elements naturally draw the viewer’s attention, keeping them engaged and interested.
- Professionalism: Well-crafted animations demonstrate your skill and dedication to quality, enhancing your credibility.
- Visual Appeal: Dynamic backgrounds and animations add depth and richness that static slides lack.
- Flexibility: Using transparent PNG illustrations and motion paths allows you to customize animations for any theme or topic.
- Memorability: Unique animations help your message stick in the minds of your audience.
Tips for Creating Your Own Looping Animated Slides
Here are some additional tips to keep in mind when creating looping animations in PowerPoint:
- Keep It Subtle: Avoid overly complex or rapid animations that distract rather than enhance.
- Use Consistent Style: Choose illustrations and fonts that complement each other and the overall theme.
- Test on Different Devices: Make sure your animations run smoothly on various computers and projectors.
- Optimize Video Size: Large video files can slow down your presentation—choose compressed yet high-quality clips.
- Plan Animation Sequence: Stagger animations with delays to create a natural, flowing effect.
Frequently Asked Questions (FAQ)
Q1: Can I use this animation technique for other themes besides summer?
Absolutely! The method of combining a looping video background, animated PNG illustrations, and wavy text animations can be adapted to any theme or topic. Just swap the summer illustrations and background video with assets that suit your subject.
Q2: What version of PowerPoint do I need to create these animations?
This tutorial uses Microsoft PowerPoint 365, which supports advanced animation features and video playback options. While some features may be available in earlier versions, for the best experience and compatibility, PowerPoint 365 is recommended.
Q3: How do I ensure my video background loops seamlessly?
In the video playback options, select the loop option so the video repeats until stopped. Also, choose a video clip that naturally loops well, such as calm water or a repeating pattern, to avoid visible jumps.
Q4: Can I add sound from the video background to my presentation?
Yes, but consider whether the audio enhances or distracts from your presentation. You can mute the video or adjust sound settings in PowerPoint’s playback options.
Q5: How do I prevent the video from being clickable during the slideshow?
Insert a transparent shape over the video that covers the entire slide and set its transparency to 100%. This invisible layer blocks mouse clicks on the video, preventing it from resetting or pausing accidentally.
Q6: Where can I find the summer illustrations and font used in this tutorial?
The summer illustrations are created by the artist Raminta and are available for purchase on Etsy. The font used for the slide title is called Sweet Purple and can be downloaded from Dafont.
Q7: How do I copy animations from one object to another in PowerPoint?
Use the Animation Painter tool, which lets you quickly copy animations and their settings from one object and apply them to another, saving time and ensuring consistency.
Q8: Can I adjust the speed and height of the wavy text animation?
Yes, in the animation effect options, you can customize the wave height and delay between letters to create the desired waving intensity and speed.
Q9: What if my illustrations appear too large or small?
Resize your illustrations before or after inserting them onto the slide, and use zoom animations to create subtle scaling effects that add interest without overwhelming the slide.
Q10: How do I make animations loop indefinitely?
In the animation timing options, set the repeat count to Until End of Slide. This makes animations continue looping as long as the slide is displayed.
Conclusion
Mastering looping animations and video backgrounds in PowerPoint opens up a world of creative possibilities for your presentations. By combining a carefully chosen video backdrop with animated illustrations and dynamic text effects, you can create slides that not only convey your message but also captivate and delight your audience.
This tutorial has walked you through the entire process, from gathering assets and setting up your video background to animating text and illustrations with seamless loops. With practice and experimentation, you can adapt these techniques to fit any theme or style, enhancing your presentation skills and leaving a lasting impression.
Remember to credit talented artists like Raminta when using their work, and explore additional resources to expand your PowerPoint animation toolkit. Stay creative, keep learning, and enjoy the process of bringing your slides to life!
Happy presenting!
Check out the full video: PowerPoint Presentation Skills: Looping Sticker Animation! ✨


