
Welcome to an in-depth guide on mastering morph animations in PowerPoint, inspired by the expert techniques shared by The Ppt Pro. Whether you’re a beginner or looking to polish your presentation skills, this article will walk you through a detailed step-by-step tutorial on creating a stunning morph animation effect. We will cover everything from correcting common mistakes to advanced tips that make your slides dynamic and engaging. By the end, you’ll be able to create a professional picture wheel animation and much more, all within PowerPoint.
Let’s dive right in and transform your presentations with this powerful animation technique!
Table of Contents
- Getting Started: Creating the Base Wheel
- Shaping the Pie Segments with Merge and Subtract
- Inserting Pictures into Pie Segments
- Adding Titles and Text to Your Slides
- Enhancing Slides with Visual Elements
- Finalizing the Presentation with Morph Transition
- Bonus Tips and Resources
- Frequently Asked Questions (FAQs)
- Final Thoughts
Getting Started: Creating the Base Wheel
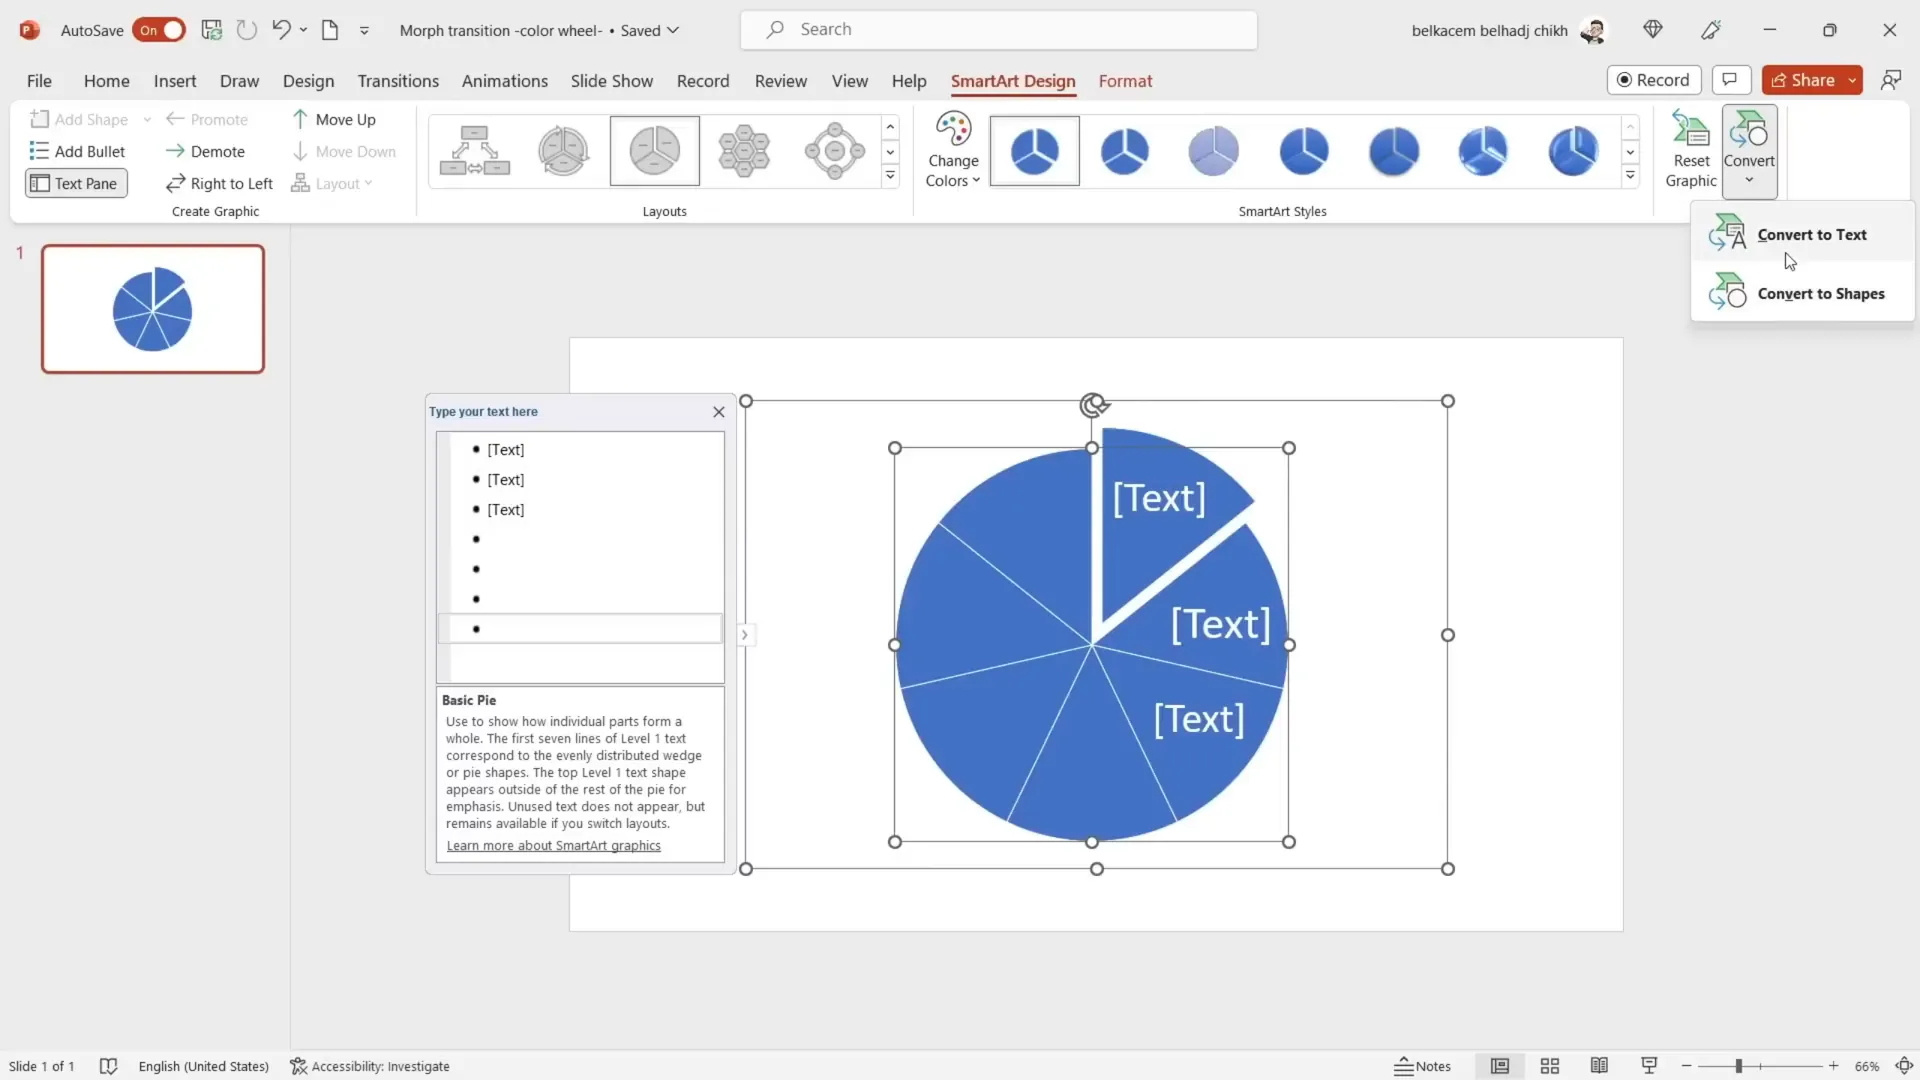
The foundation of this morph animation is a visually appealing circular wheel made of pie-shaped segments. The first step is to insert SmartArt and convert it into editable shapes, giving you full control over the design.
- Go to Insert > SmartArt.
- Select the Circle category, then choose the circle diagram that best fits your needs.
- Click OK to insert it into your slide.
- Add the maximum number of shapes allowed in this SmartArt to form your wheel base.
- Next, convert the SmartArt to shapes: select the SmartArt, then go to Convert > Convert to Shapes. This unlocks shape editing capabilities.
- Ungroup the pie chart shapes to separate each segment and remove any unwanted parts.
This approach might seem tricky initially, but it’s crucial as it allows you to customize each segment individually for your animation.
Adding and Aligning Circles
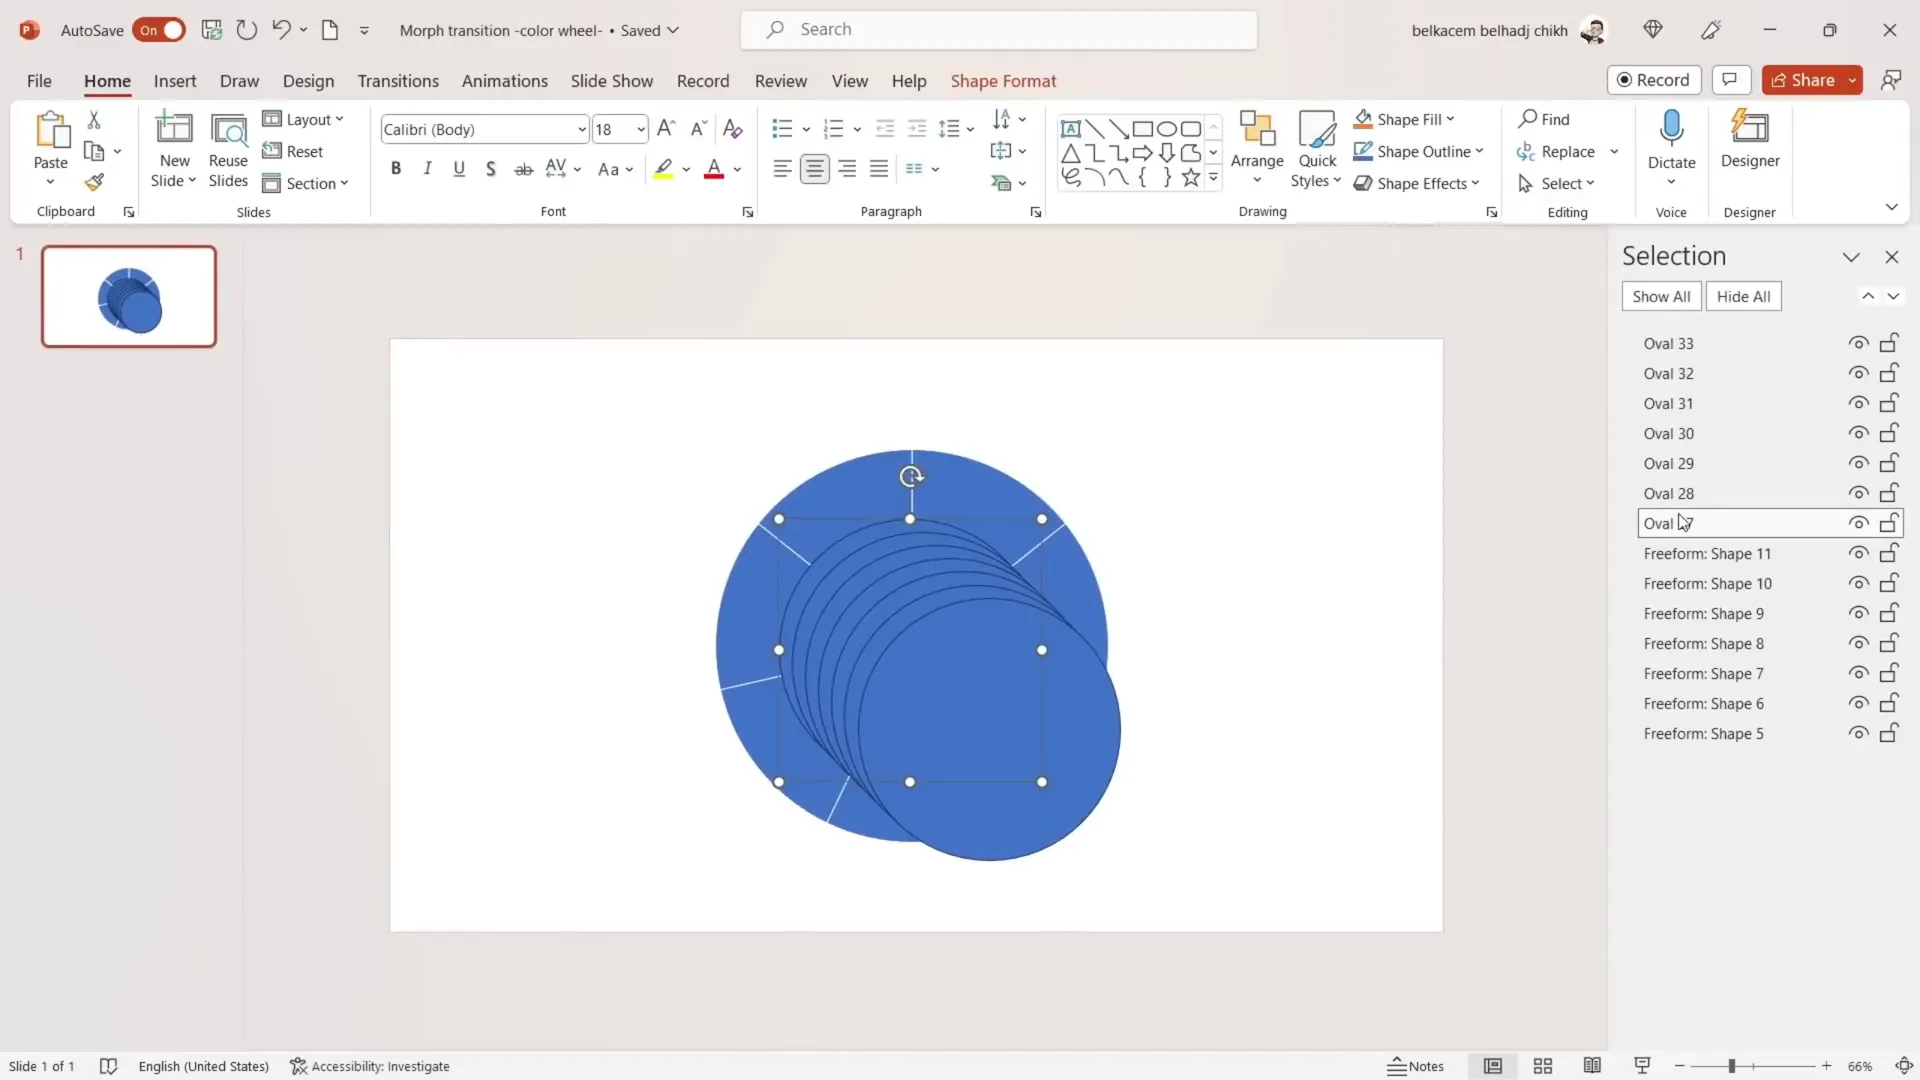
After setting the pie base, the next step is to add seven circles that will be used to cut the pie segments precisely. Here’s how to do it:
- Insert the first circle shape and enlarge it to the desired size.
- Ensure you select the perfect circle shape for accuracy.
- Center the circle on the slide to align it with your pie base.
- Duplicate the circle six times using Ctrl+D to have a total of seven circles.
- Open the Selection Pane from the Arrange menu, then hold Shift and select all seven circles.
- Use the Align options to align all circles both horizontally and vertically to the center.
- Make sure the circles are perfectly centered with your pie shape.
This precise alignment is essential to ensure the subsequent merging and subtraction steps work flawlessly.
Shaping the Pie Segments with Merge and Subtract
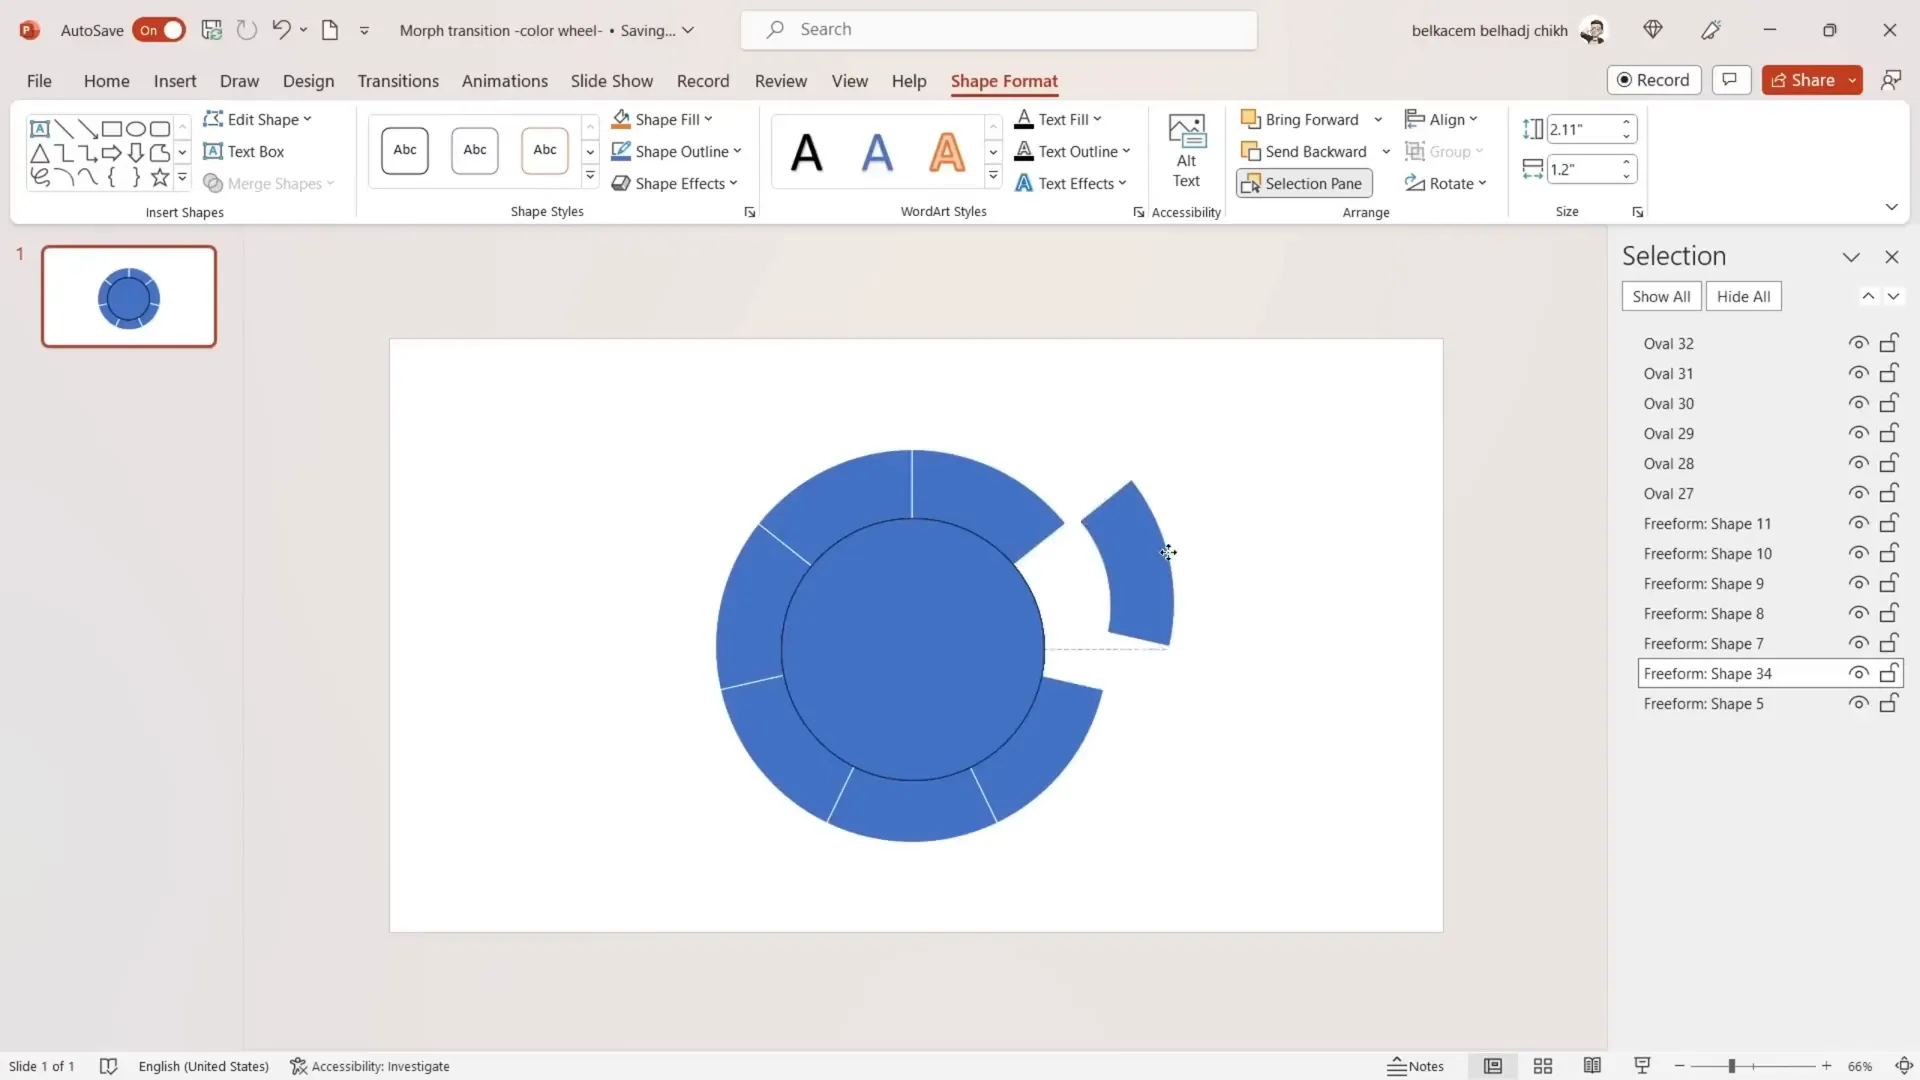
This part is often the most challenging, but with the right approach, it becomes straightforward. The goal here is to subtract each circle from the corresponding pie segment to create clean, distinct sections for your animation.
- Hold Shift and select one pie segment and one circle.
- Go to Shape Format > Merge Shapes > Subtract. This cuts the circle out of the pie segment.
- Repeat this process for each pie segment and corresponding circle.
Once complete, you will have seven neatly separated pie segments, which form the base of your picture wheel.
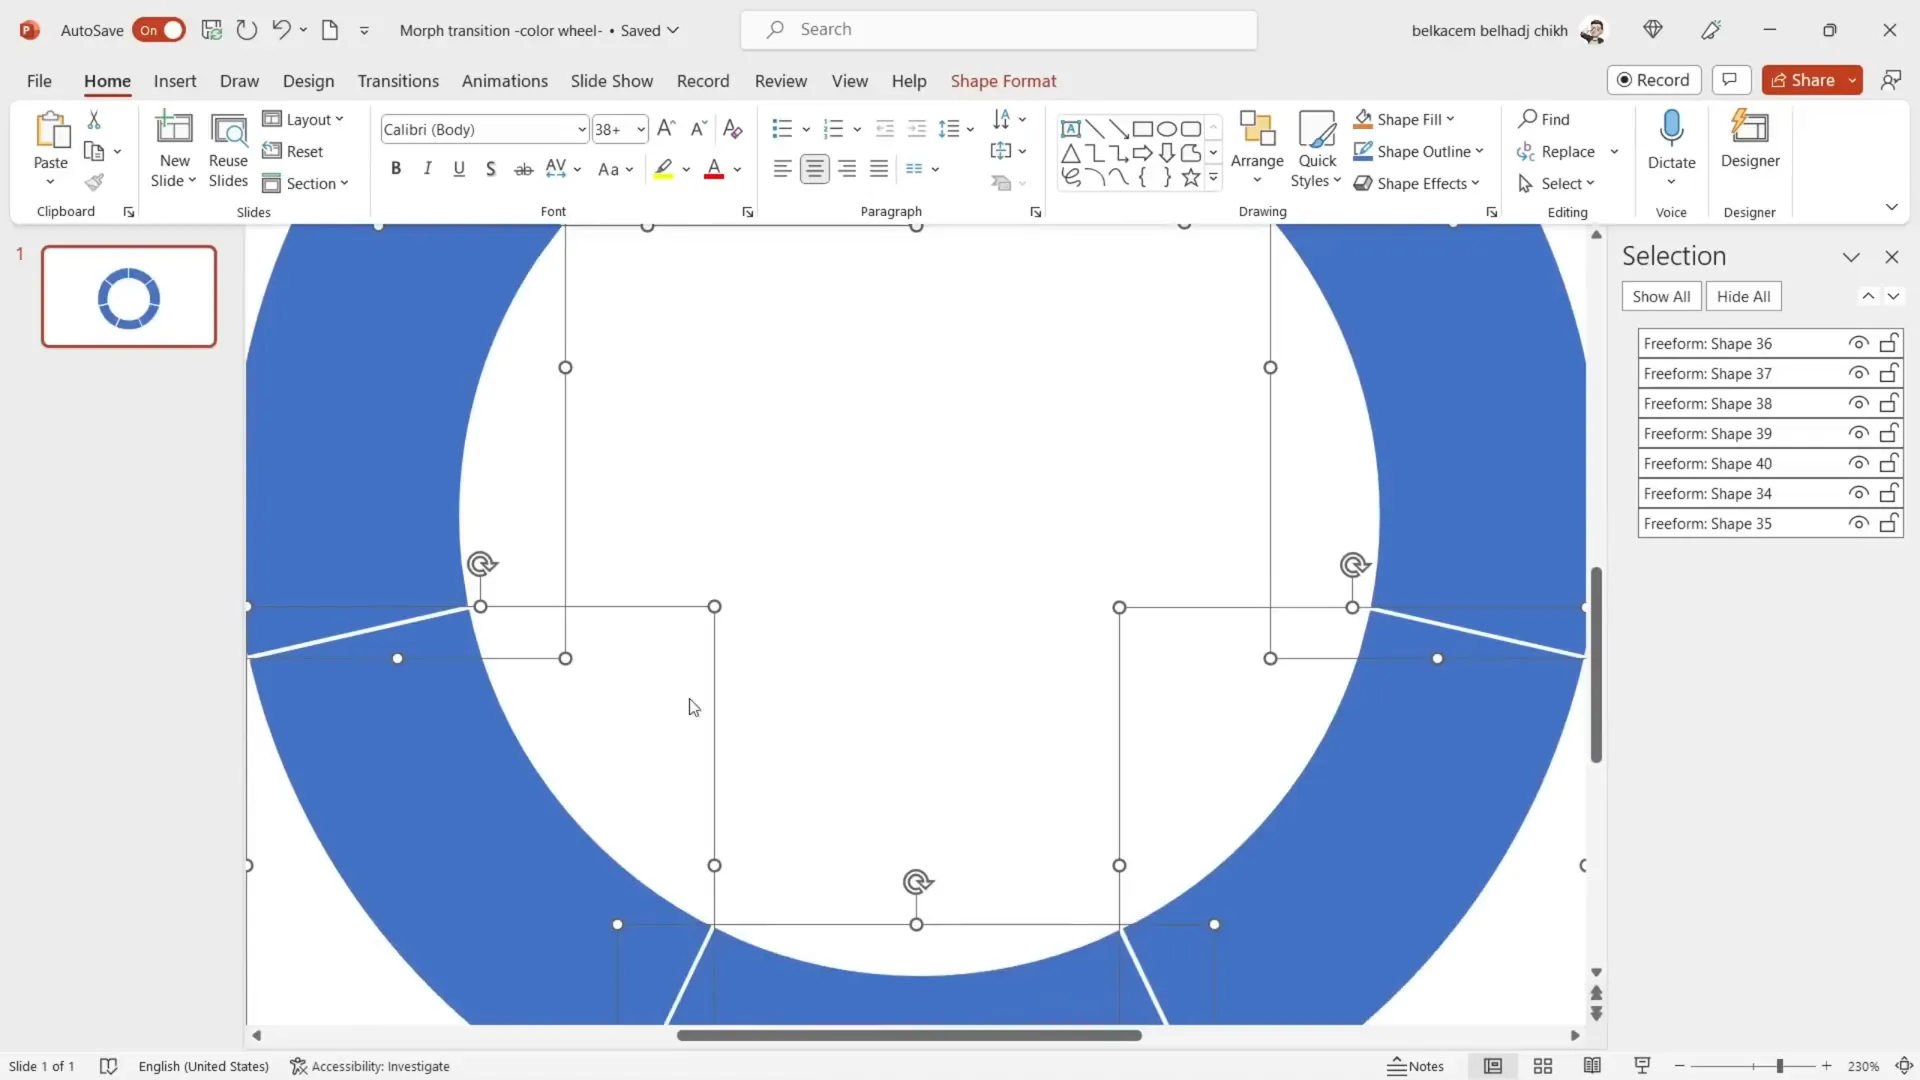
Adjusting the Pie Segments
To enhance the visual appeal, slightly reduce the size of each segment to create visible space between them. This spacing helps the animation look clean and professional.
- Select all pie segments.
- Zoom in for precision.
- Decrease the size of each segment uniformly.
These small details can dramatically improve the overall quality of your final animation.
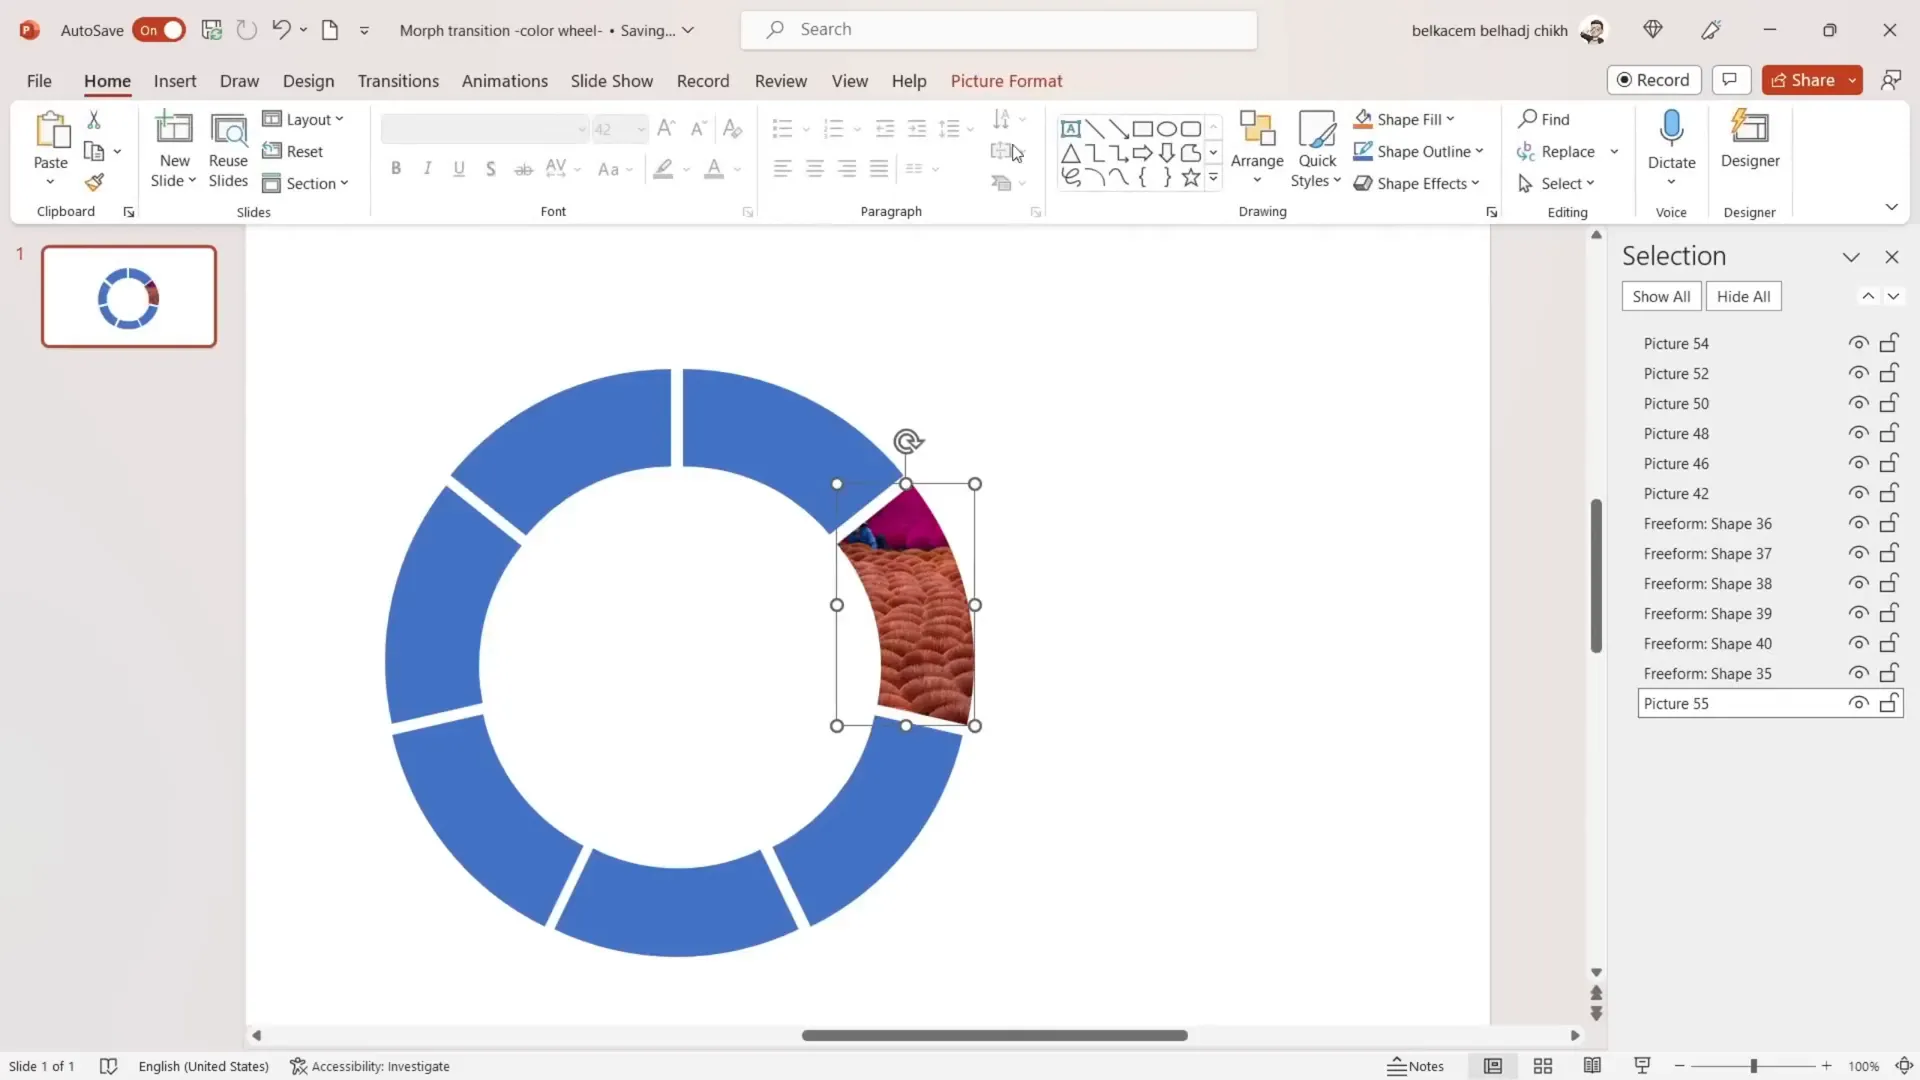
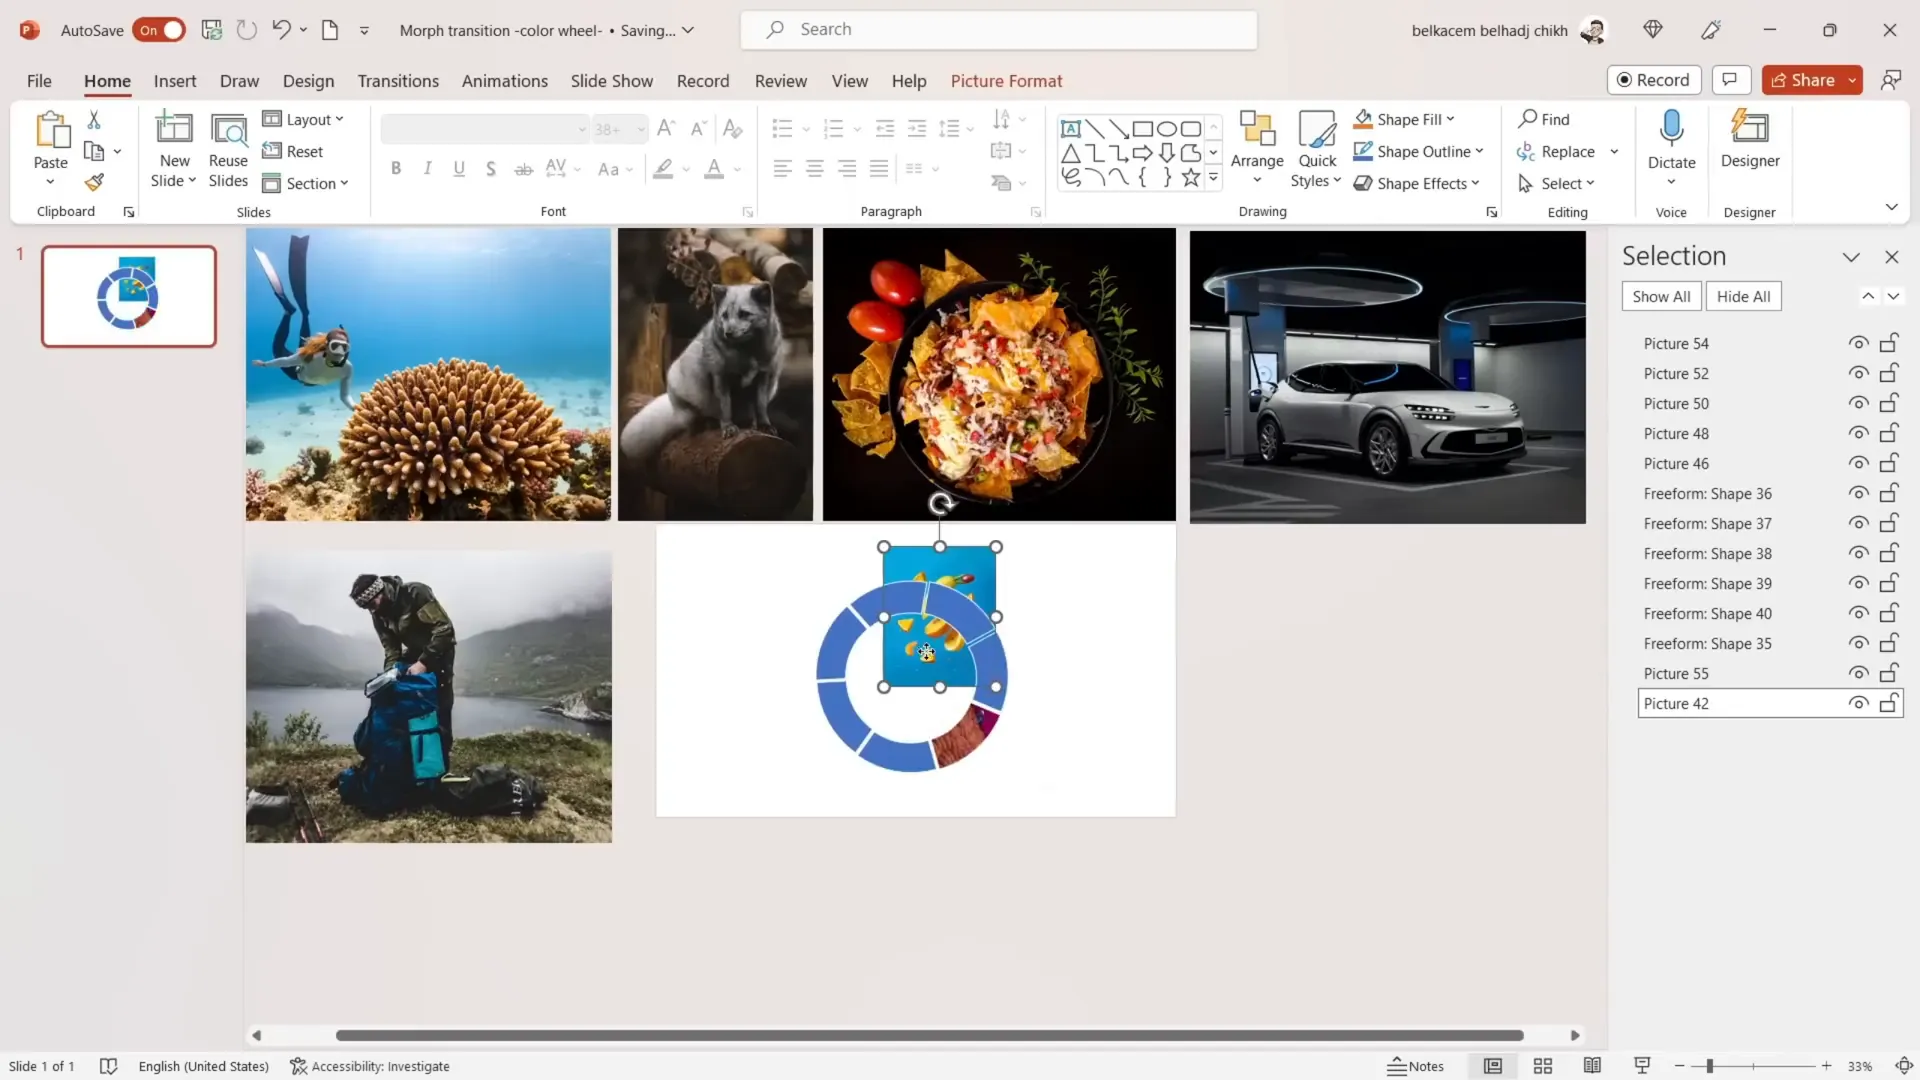
Inserting Pictures into Pie Segments
Now comes the exciting part: filling each pie segment with images to create a picture wheel. For this tutorial, I selected seven stunning pictures from Unsplash to use as examples.
Here’s the proper method to crop and fit pictures into each pie segment:
- Send the picture to the back (Right-click > Send to Back).
- Resize the picture to match the size of the pie segment.
- Hold Shift and select both the picture and the pie segment.
- Go to Shape Format > Merge Shapes > Intersect. This crops the picture to the shape of the pie segment.
- Adjust the picture crop to frame the desired part of the image using Picture Format > Crop.
Repeat the process for each pie segment and picture to complete your picture wheel.
Rotating and Grouping the Picture Wheel
To create dynamic effects, group all the pie segments with pictures and rotate them as needed:
- Select all pie segments and pictures.
- Press Ctrl+G to group them.
- Rotate the group to position the wheel for your animation.
This flexibility allows you to create engaging transitions and animations later.
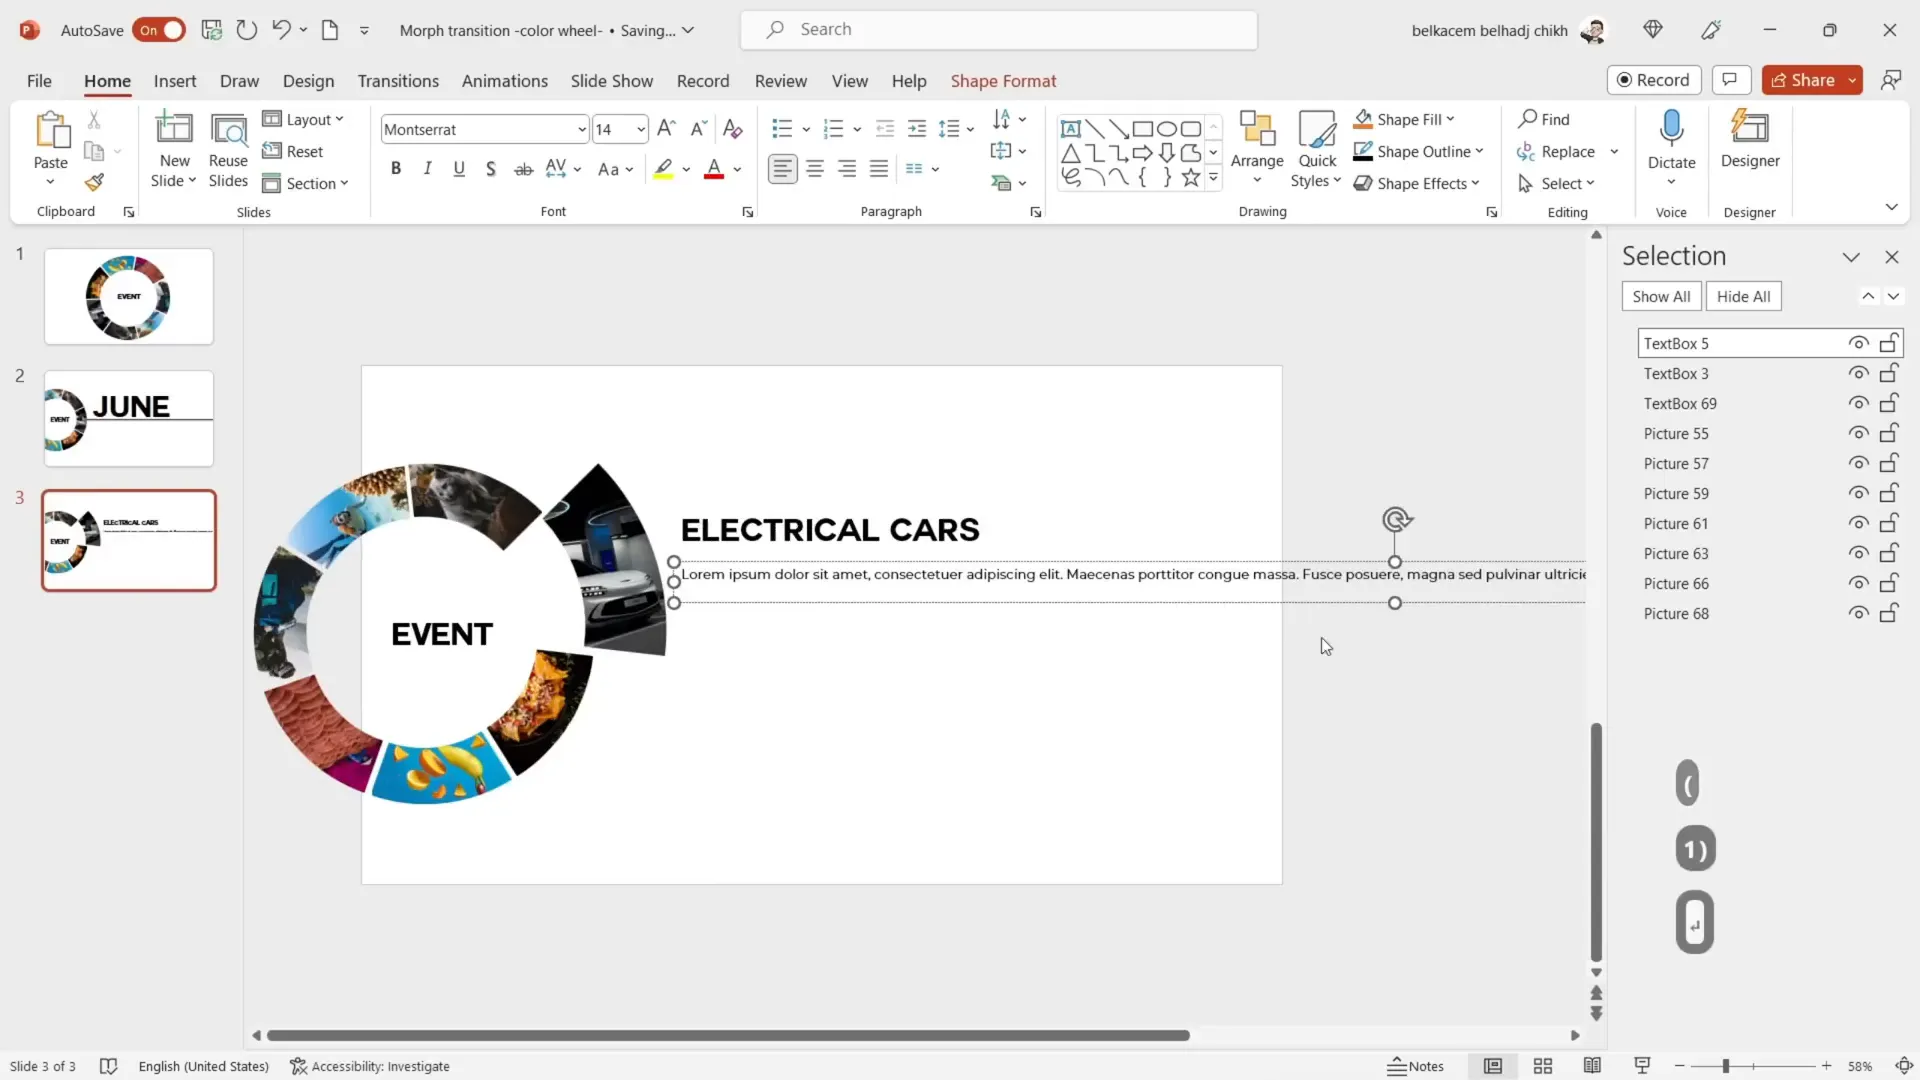
Adding Titles and Text to Your Slides
With the picture wheel ready, it’s time to add titles and descriptive text to enhance your presentation’s storytelling.
- Insert a title text box, for example, “Event”.
- Customize the font and size to suit your design and center it on the slide.
- Duplicate this slide to create multiple frames for different parts of your presentation.
- On duplicated slides, group the picture segments and move the title to the side.
- Rotate the picture wheel to create a dynamic effect.
- Adjust the title size and position for emphasis.
- Add a large title for sections, such as “June”, and underline it with a thick line for visual impact.
This layering of titles and visuals contributes significantly to an engaging and professional look.

Generating and Styling Body Text
For descriptive content below titles, use PowerPoint‘s built-in Lorem Ipsum generator:
- Duplicate the title text box and resize it smaller.
- Change the font to something clean and modern, such as Montserrat.
- Type
=lorem(1)in the text box to generate placeholder text automatically. - Adjust the text box size and position to fit within the frame.
This method saves time and helps you visualize how your final content will look.
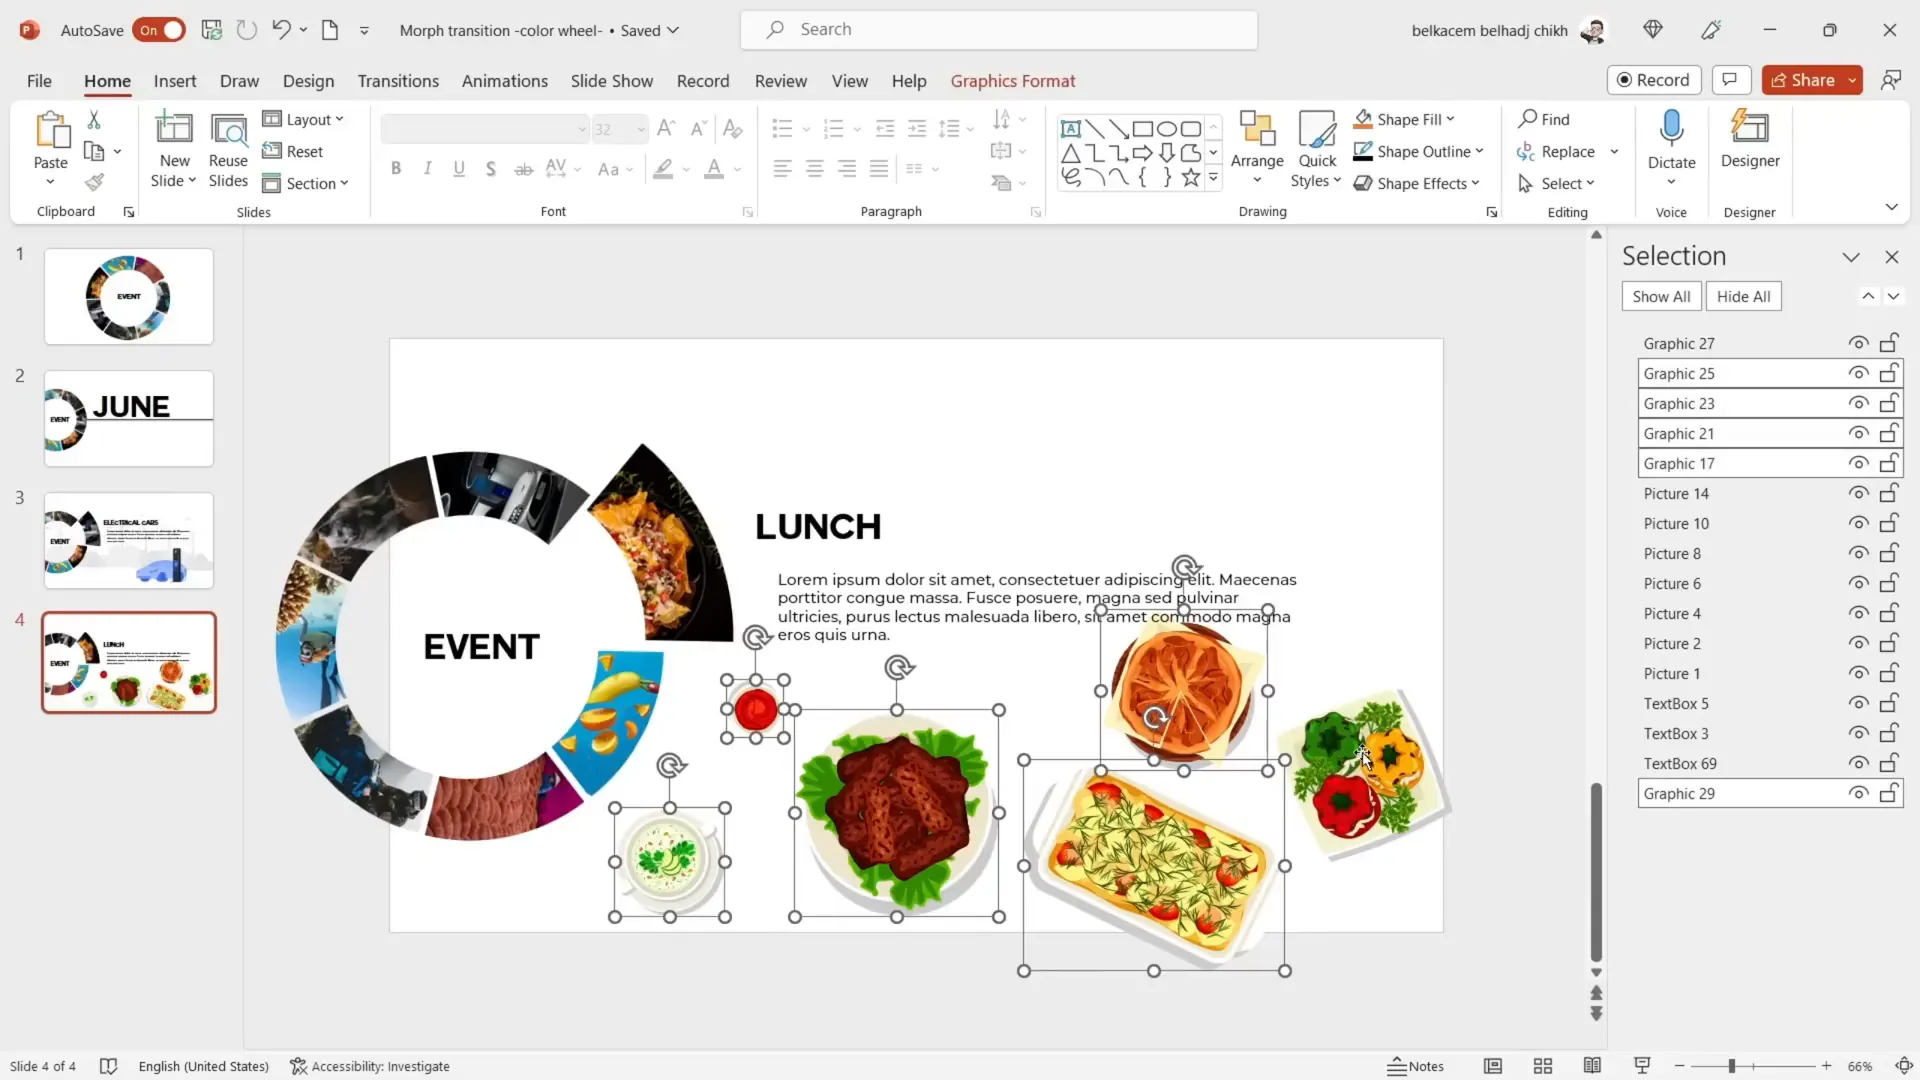
Enhancing Slides with Visual Elements
Visuals play a crucial role in making your presentation captivating. I added several custom visuals to complement the picture wheel and titles. These visuals include icons, shapes, and thematic graphics related to the slide topics.
Since the process of adding these visuals involves many detailed steps, I’ve prepared them for you in a downloadable presentation file available in the description box. Feel free to use them to elevate your slides quickly.

To use these visuals:
- Copy the visual elements from the provided slide.
- Paste them onto the corresponding slide in your presentation.
- Adjust their position and layering, sending them to the back if needed.
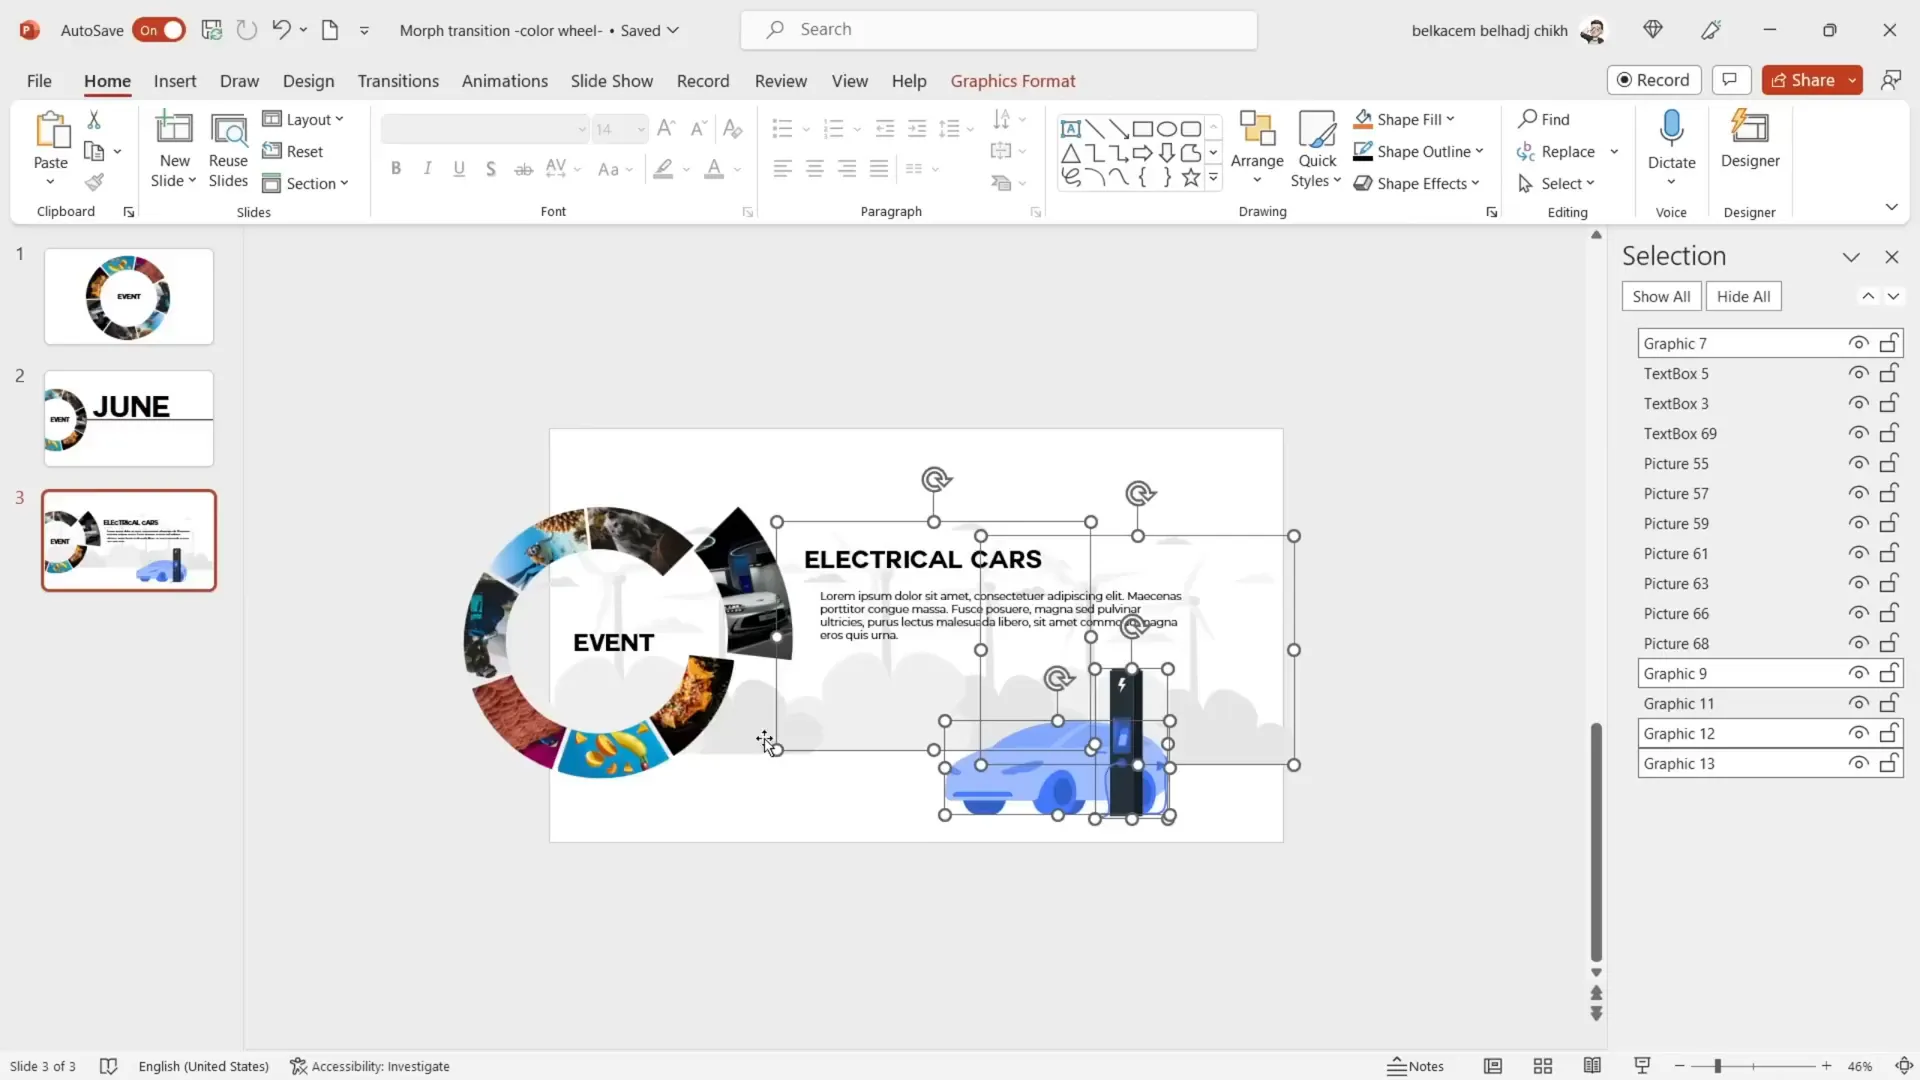
Customizing Visuals for Different Sections
Each section of the wheel corresponds to a different theme, such as:
- Electric Car
- Lunch (Food)
- Hiker/Adventurer
- Diver
For each theme, I duplicated slides, removed or added visuals accordingly, and rotated the picture wheel to highlight the current segment. This method keeps your presentation cohesive and visually interesting.
For example, when presenting the “Lunch” section:
- Remove previous visuals and pictures.
- Copy the appropriate pictures from the second slide and paste them onto the current slide.
- Group and rotate the pictures to align with the pie segment.
- Add thematic visuals related to food, such as plates or utensils.
- Adjust layering to ensure visuals complement the main images.
Finalizing the Presentation with Morph Transition
Now that your slides are designed and visually enriched, the magic happens with the Morph transition. This powerful PowerPoint feature animates smooth transitions between slides, creating a mesmerizing effect that looks professional and polished.
- Select all slides by pressing Ctrl+A.
- Go to the Transitions tab and choose Morph.
- Set the duration to 0.75 seconds for a smooth yet swift transition.
- Preview the slideshow to see your picture wheel rotate and animate seamlessly.
Congratulations! You have successfully created a dynamic morph animation in PowerPoint that will impress any audience.

Bonus Tips and Resources
If you want to save time and ensure your presentation looks professional, consider downloading the free presentation template I prepared. It includes all the visuals, slides, and animations demonstrated in this tutorial, ready for you to customize.
Additional resources and courses are also available to help you master PowerPoint skills from basics to advanced techniques, including:
- PowerPoint Masterclass and PUP Course
- Updated Morph Animation Template
- Side Pictures Animation Template
These tools are designed based on real client experiences and top brand presentation techniques, making them invaluable for anyone serious about improving their presentation game.
Frequently Asked Questions (FAQs)
What is the Morph transition in PowerPoint?
The Morph transition is a feature in PowerPoint that allows you to create smooth animations between slides by automatically moving, resizing, and transforming objects. It’s perfect for creating dynamic presentations without complex animation setups.
Can I use any pictures for the picture wheel?
Yes! You can use any images you like. Just ensure they are high quality and relevant to your presentation topic. Websites like Unsplash offer free, high-quality images that work great for this purpose.
Is it necessary to convert SmartArt to shapes?
Yes, converting SmartArt to shapes is essential because it allows you to ungroup and edit individual segments freely, which is crucial for creating the custom pie segments needed for this animation.
How do I adjust pictures after cropping them with merge shapes?
After cropping pictures using the Intersect merge shape option, you can adjust the visible part by selecting the picture, going to Picture Format > Crop, and moving the crop area to focus on the desired portion of the image.
Can I customize the size and spacing of pie segments?
Absolutely. After shaping your pie segments, you can resize and space them out slightly to create a more polished look. Just select all segments and uniformly adjust their size to maintain symmetry.
Is the downloadable presentation free?
Yes, the presentation template with all visuals and animations demonstrated is available for free download in the description box of the original tutorial.
Final Thoughts
Mastering morph animations in PowerPoint can elevate your presentations from basic to breathtaking. By carefully crafting a picture wheel with segmented images and applying the Morph transition, you create a seamless, engaging visual story that captivates your audience.
Remember, practice is key. Follow these steps closely, experiment with your own images and titles, and soon you’ll be delivering presentations that look like they were made by a professional designer.
If you found this guide helpful, consider exploring more tutorials and templates available from The Ppt Pro to continue enhancing your presentation skills.
Happy presenting!
Check out the full video: This is How I Did This Morph Animation On Powerpoint (UPDATED VERSION)


