
Welcome, my dear friends! If you’re passionate about designing stunning PowerPoint slides that captivate and impress, you’re in the right place. Today, I’m thrilled to share a detailed, step-by-step tutorial on how to create a super duper awesome aesthetic slide in PowerPoint, inspired by the brilliant work of Matthew on Dribbble. His art gallery website design sparked the idea, and I thought it would be a fun and creative challenge to replicate that style within PowerPoint. Ready to elevate your slide design skills? Let’s dive in!

Table of Contents
- Setting Up Your Slide Master: Fonts and Colors
- Creating Custom Shapes for a Unique Slide Design
- Filling Shapes with Pictures to Enhance Visual Appeal
- Designing a Bold Slide Title and Body Text
- Creating an Elegant Call to Action (CTA) Button
- Crafting a Custom Logo for Brand Identity
- Adding and Customizing Slide Numbers
- Adding Dynamic Spinning Circular Text for Visual Flair
- Enhancing Designs with Soft Edges and Shadows
- Final Touches and Review
- Why Use Slide Guides and BrightSlide Add-in?
- Summary
- Frequently Asked Questions (FAQ)
- Final Words
Setting Up Your Slide Master: Fonts and Colors
The foundation of any beautiful presentation lies in consistent fonts and harmonious colors. To get started, we jump into the Slide Master view, which is where you can set up global styles that apply across your slides.
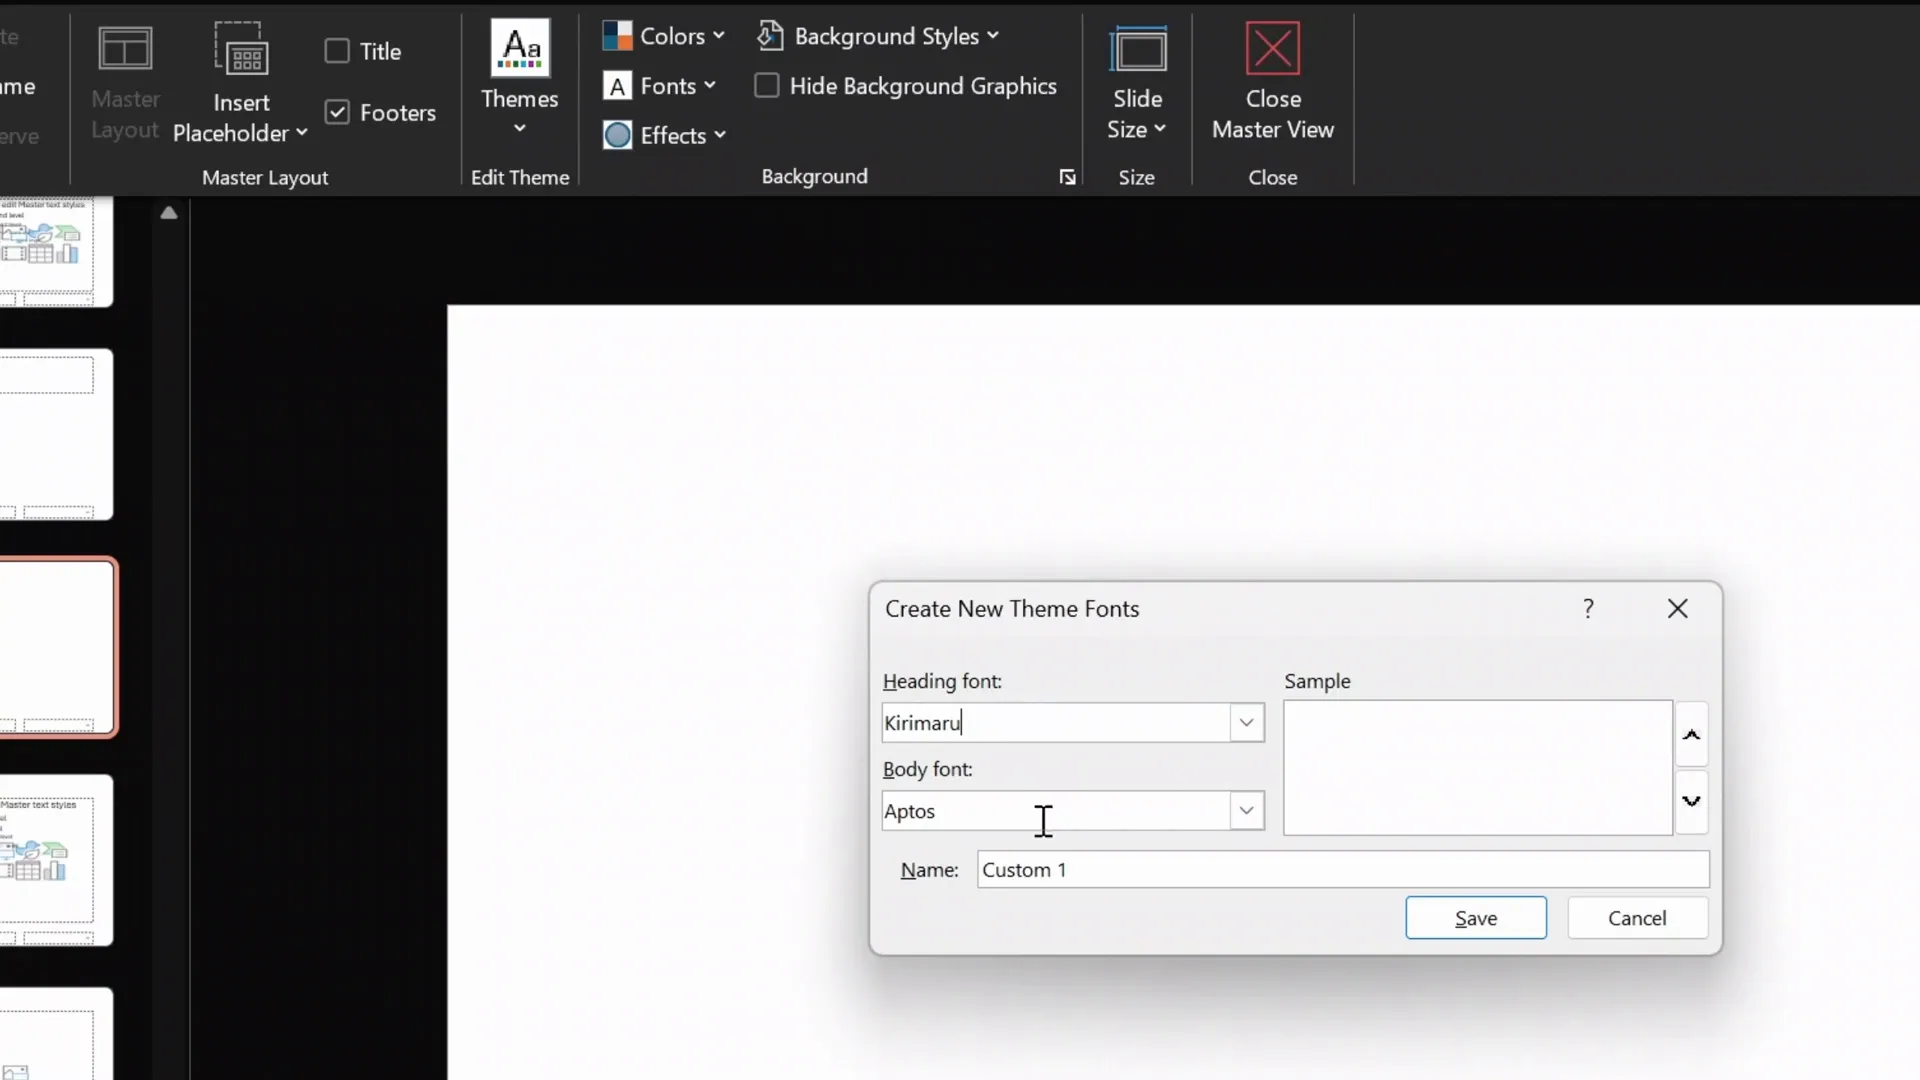
First up, let’s select the fonts. I recommend pairing two complementary fonts—one for headings and one for body text. For this design, I chose Kiramaro, a free elegant font perfect for headings, and Montserrat for the body text, which is clean and modern.
To set these, go to View > Slide Master > Fonts. Create a new font pair and name it something memorable; I called mine “One Skill Two” after testing a few options.
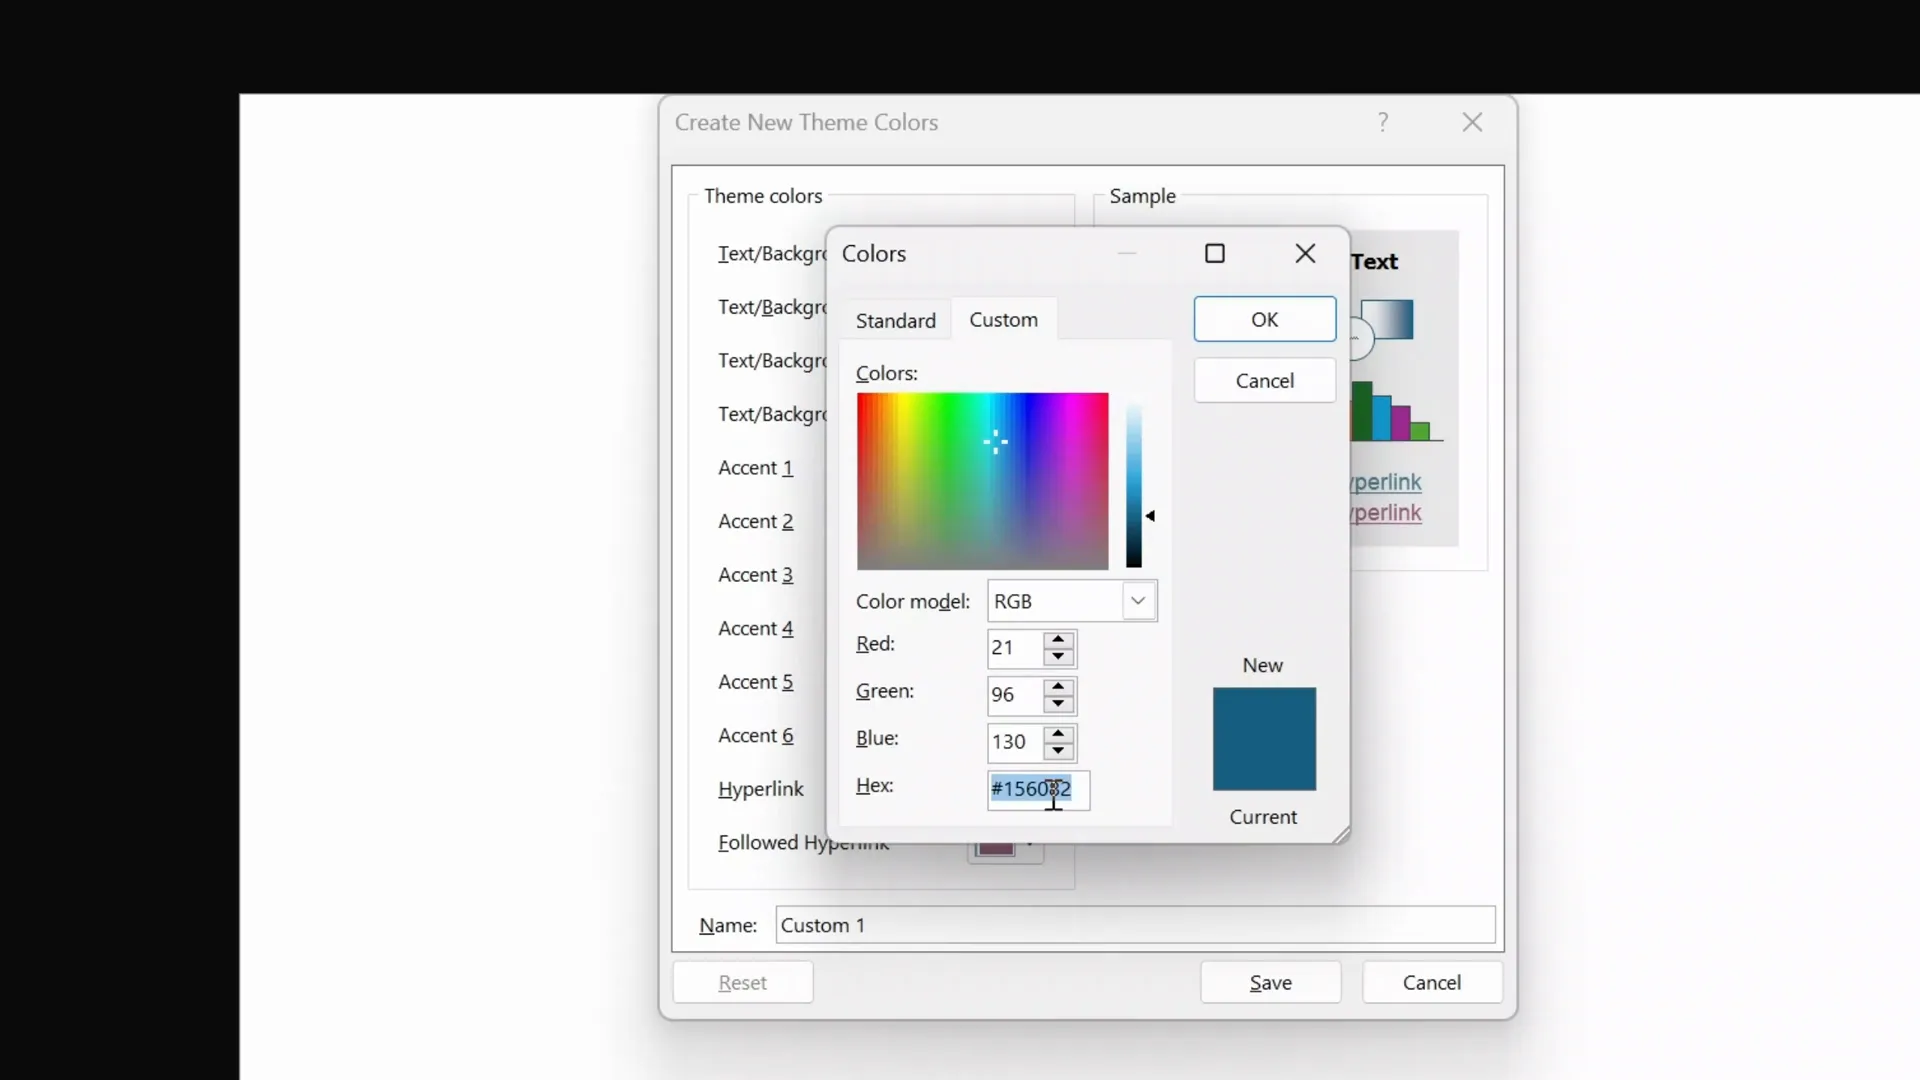
Next, let’s customize the color palette. PowerPoint lets you define six accent colors that you can reuse throughout your slides. For inspiration, I highly recommend using Coolors.co, a fantastic website that helps you generate and explore color schemes easily.
Pick your primary colors by copying their hex codes and pasting them into the accent color slots. For this design, I set three custom accent colors because I felt that was sufficient for the aesthetic style we’re aiming for. The rest of the colors can stay as default or be customized further depending on your preference.
By setting fonts and colors globally in the Slide Master, you ensure consistency and save time later on when creating or modifying slides.
Creating Custom Shapes for a Unique Slide Design
Now that our fonts and colors are ready, it’s time to add some personality to the slide with custom shapes. The goal is to create beautiful pointy star-like shapes on the right side of the slide, which will later be filled with images to add visual interest.
Here’s how to create these shapes:
- Turn on slide guides: This helps you see the center and edges, ensuring precise placement.
- Draw a rectangle: Hold down the Shift key while drawing to keep it perfect. Set its height and width to 6.35 cm for uniformity.
- Insert a circle: Again, hold Shift to make it a perfect circle and set the size to match the rectangle (6.35 cm).
- Position the circle: Place it at the top right corner of the rectangle.
- Duplicate the circle: Create copies for each corner of the rectangle.
- Union the circles: Select all circles, go to Merge Shapes > Union to make them one solid shape.
- Subtract the union from the rectangle: Select the rectangle first, then the circles, and choose Merge Shapes > Subtract. This creates the pointy star shape.
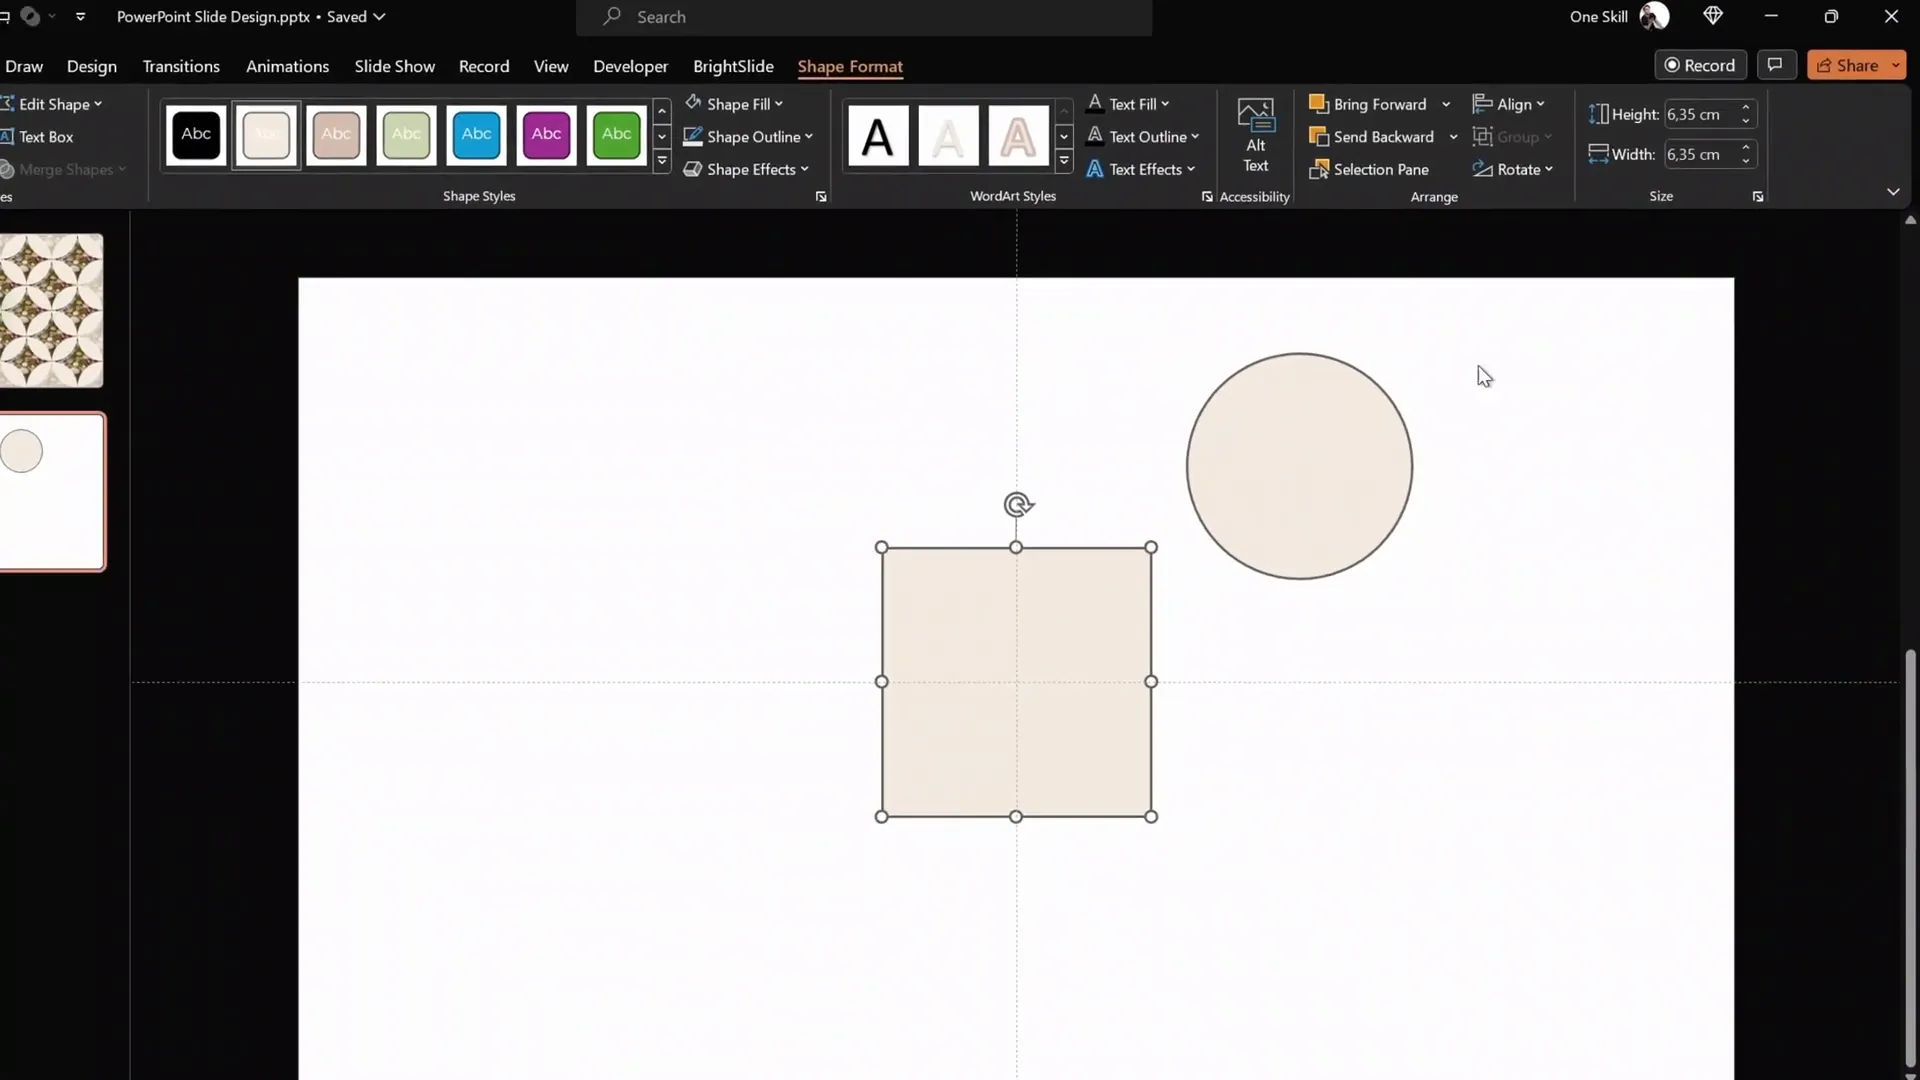
Once you have one shape, duplicate it multiple times and align all of them along the right side of your slide. This pattern adds a dynamic and modern touch to your design.
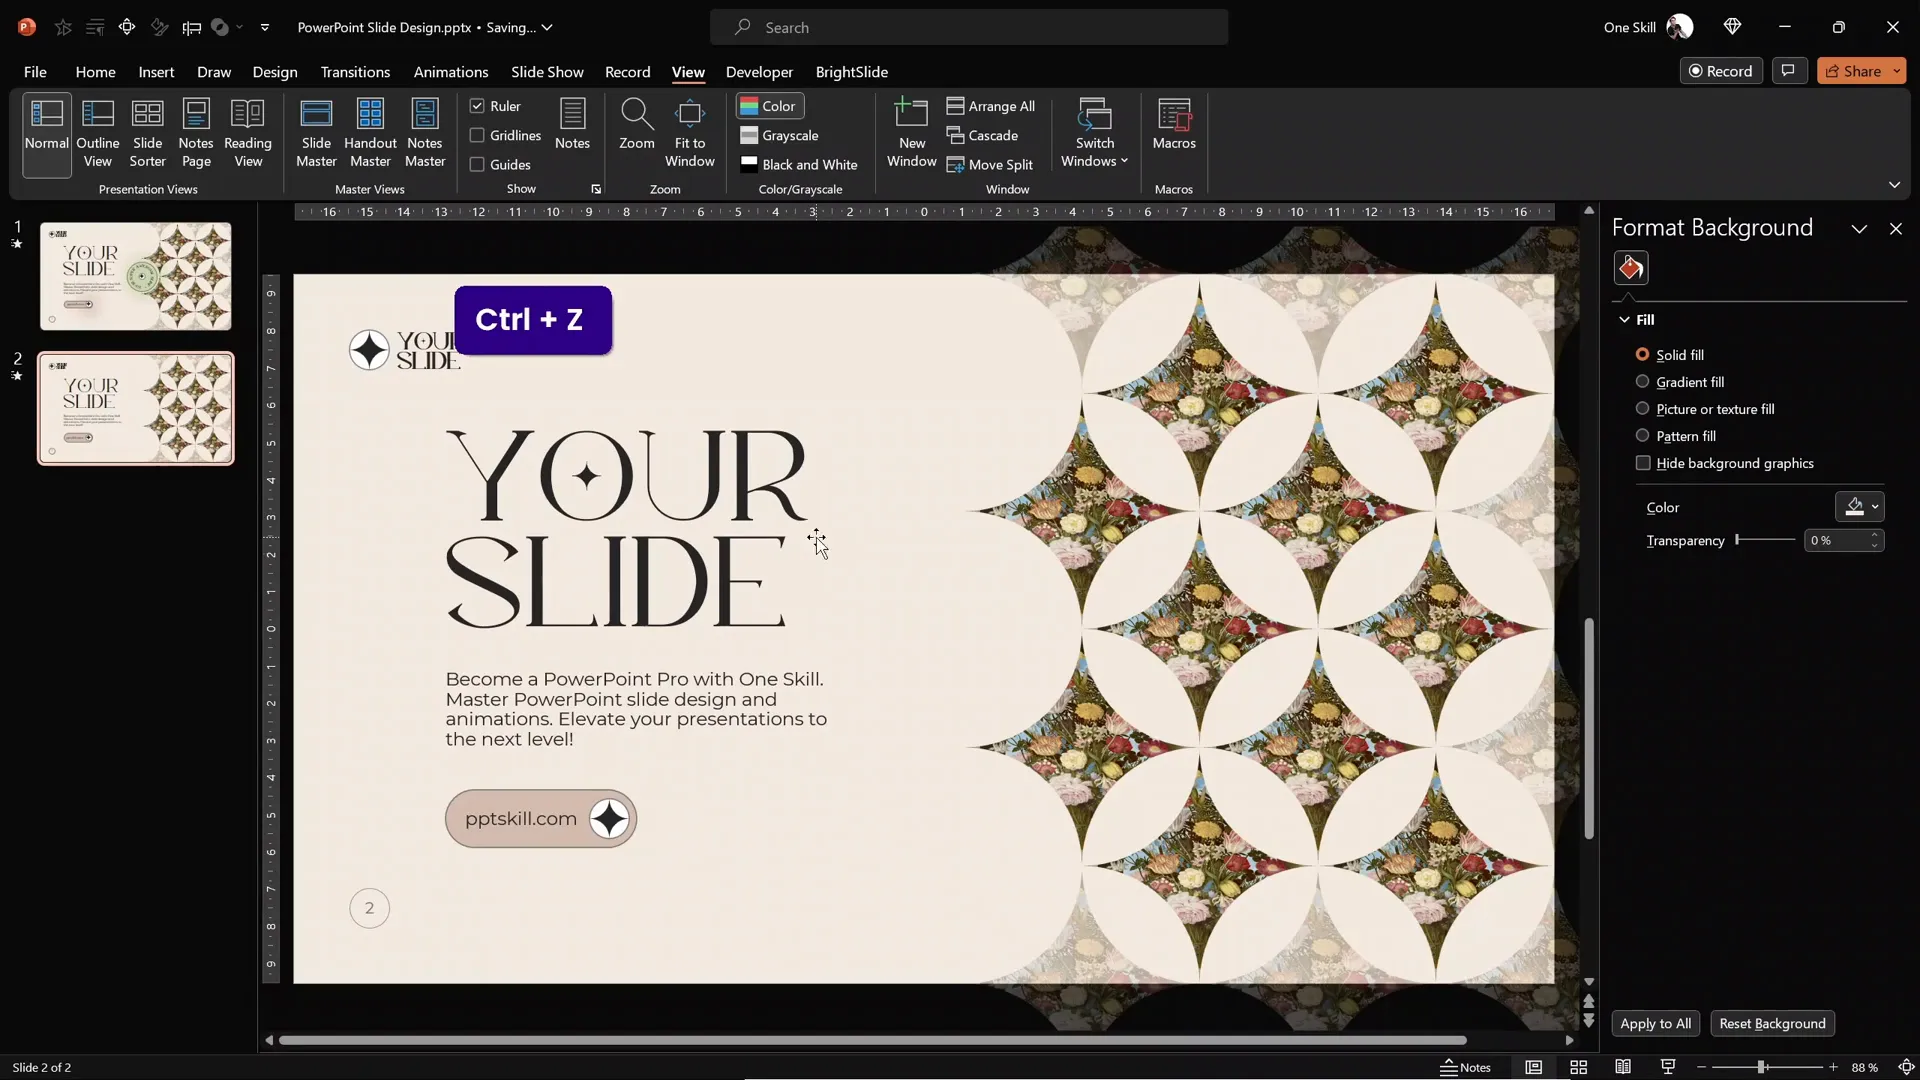
Don’t forget to set the slide background to one of your custom accent colors (accent one in this case) to ensure the shapes stand out beautifully.
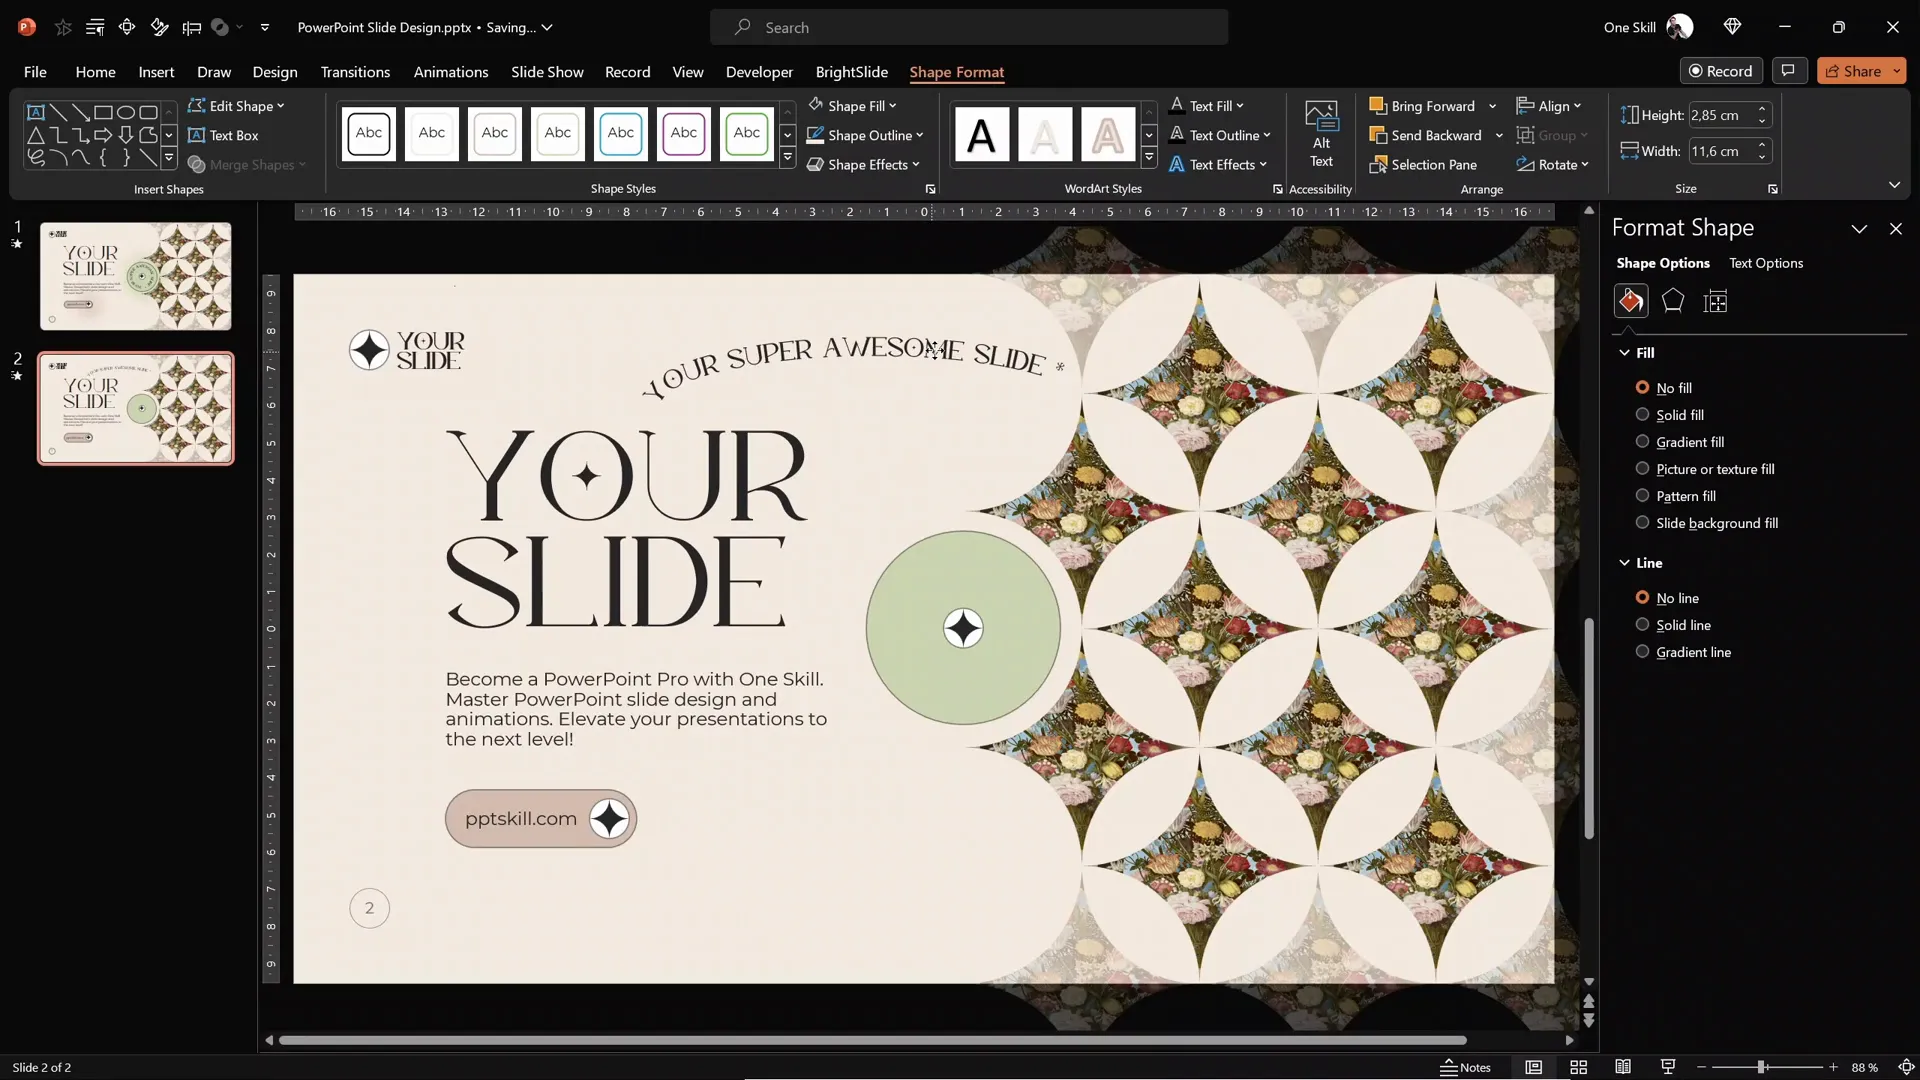
Filling Shapes with Pictures to Enhance Visual Appeal
Shapes alone look great, but filling them with images takes your slide to another level. For this, I recommend Unsplash, an excellent resource for free high-quality photos.
Here’s the process:
- Find a photo you love and zoom in on it.
- Copy the image to your clipboard.
- Back in PowerPoint, select all your pointy star shapes (Ctrl + A if they are the only objects).
- Go to Format Shape > Fill > Picture or texture fill and paste the image from the clipboard.
Now all your shapes are filled with the same image, creating a cohesive and intriguing visual effect.
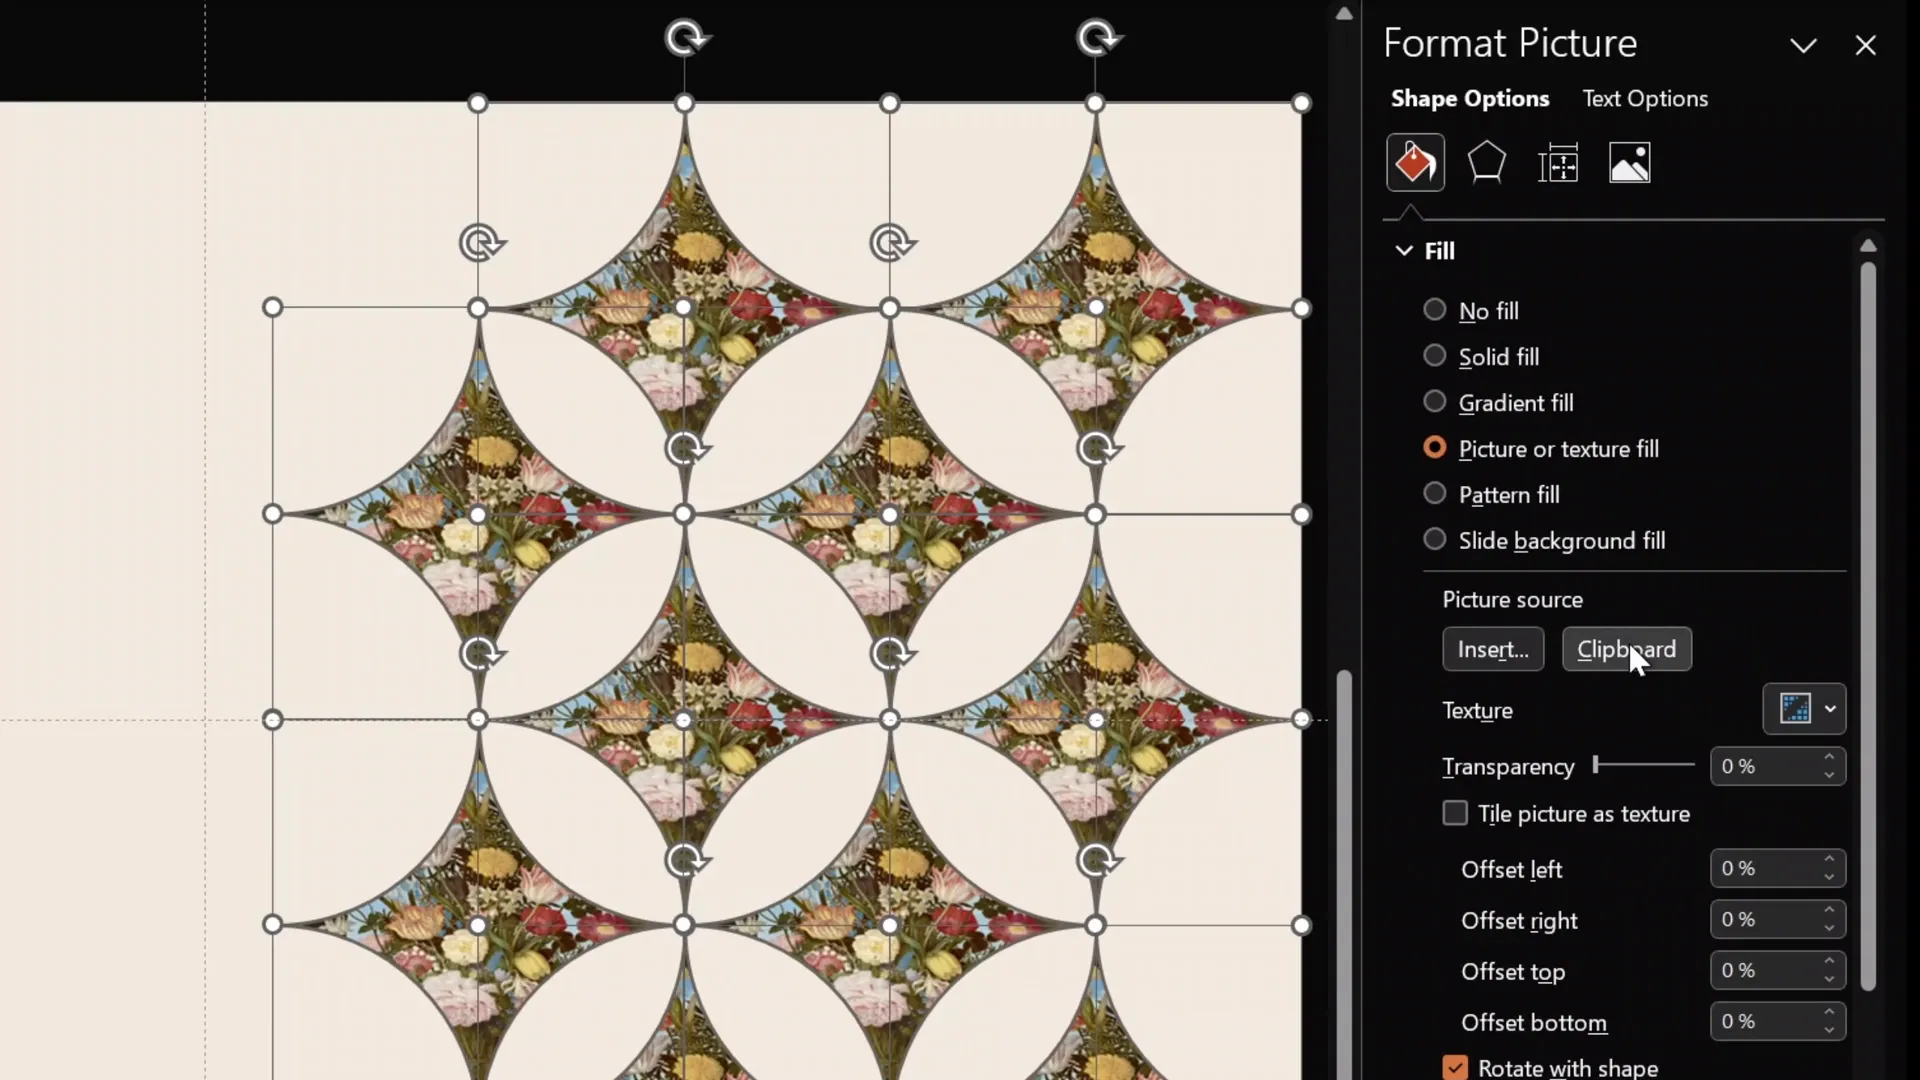
To add sophistication, duplicate one of these filled shapes and position it along the right edge of the slide. Then, add transparency—around 70% works well. This semi-transparent shape adds depth and a layered effect to the design.
Pro tip: If your images look squished or distorted, select the shape, go to Crop > Fill to make sure the image fills the shape properly without stretching.
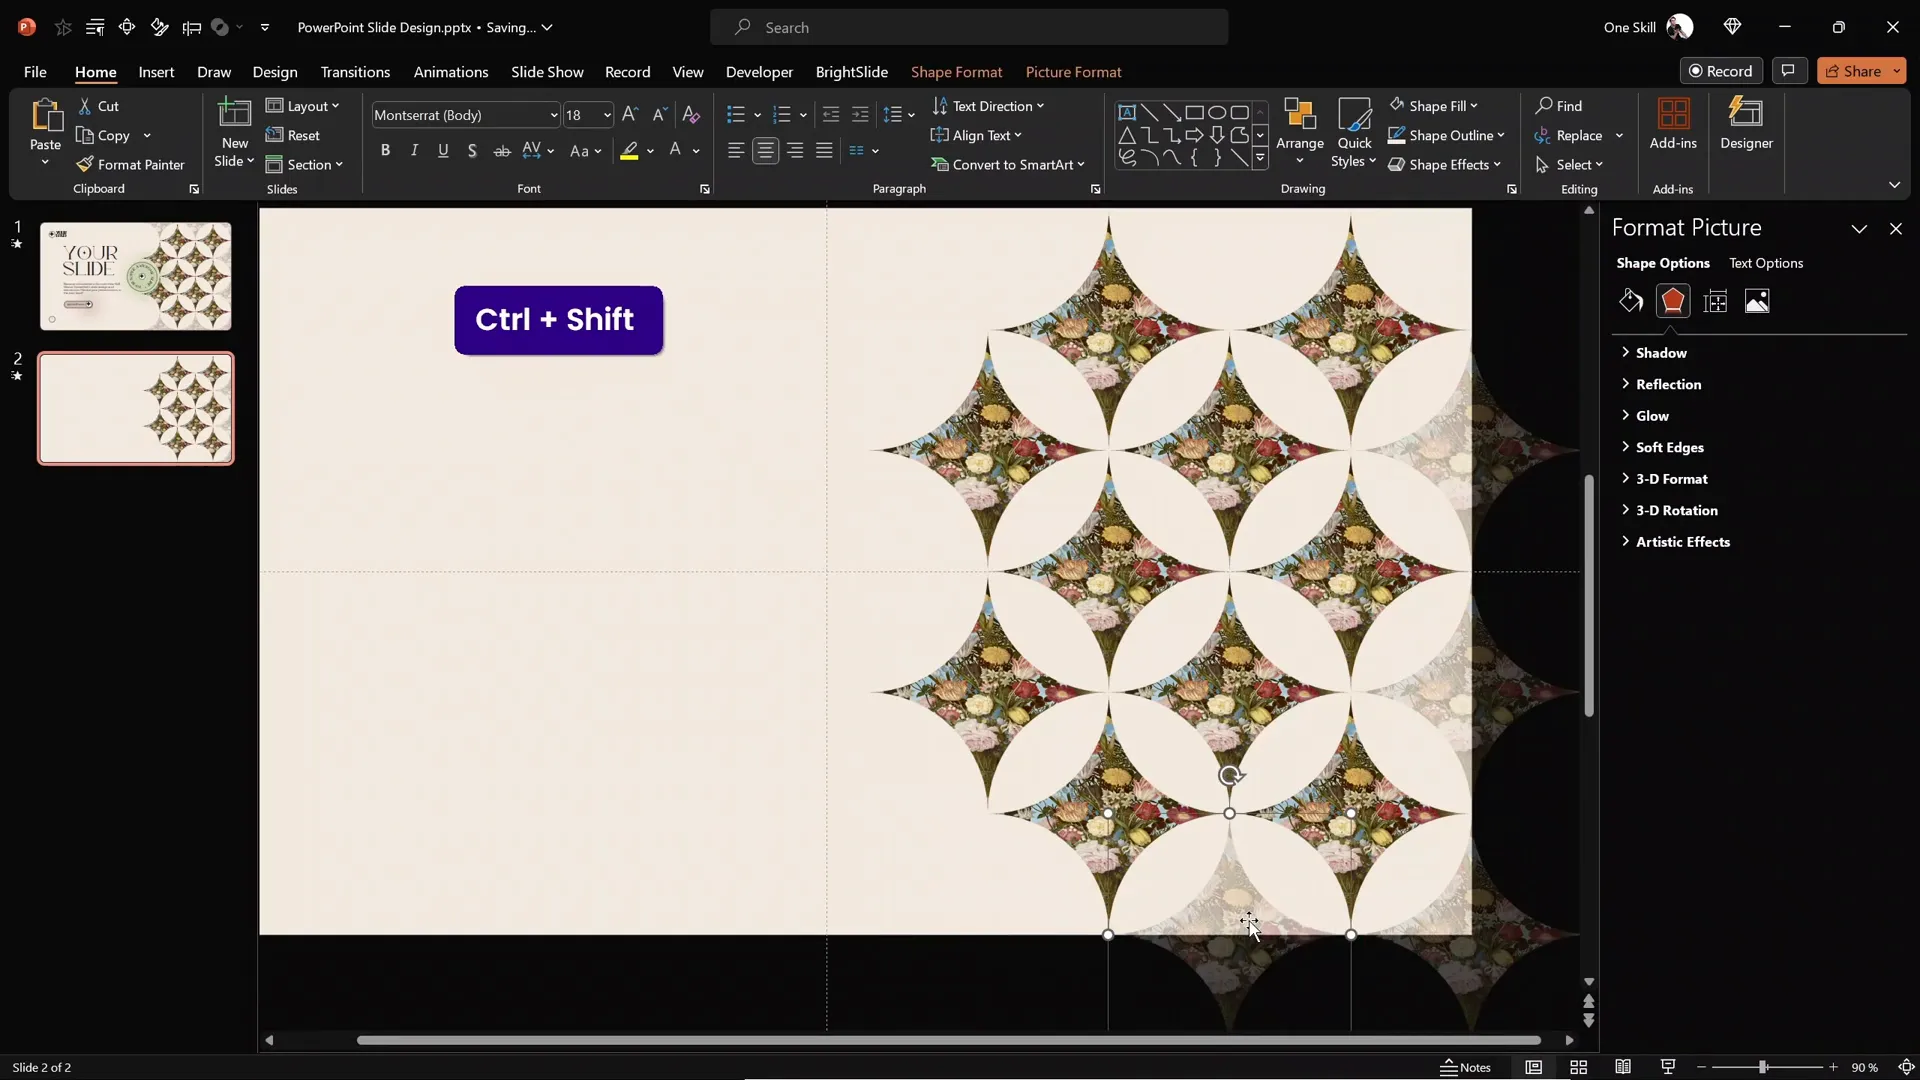
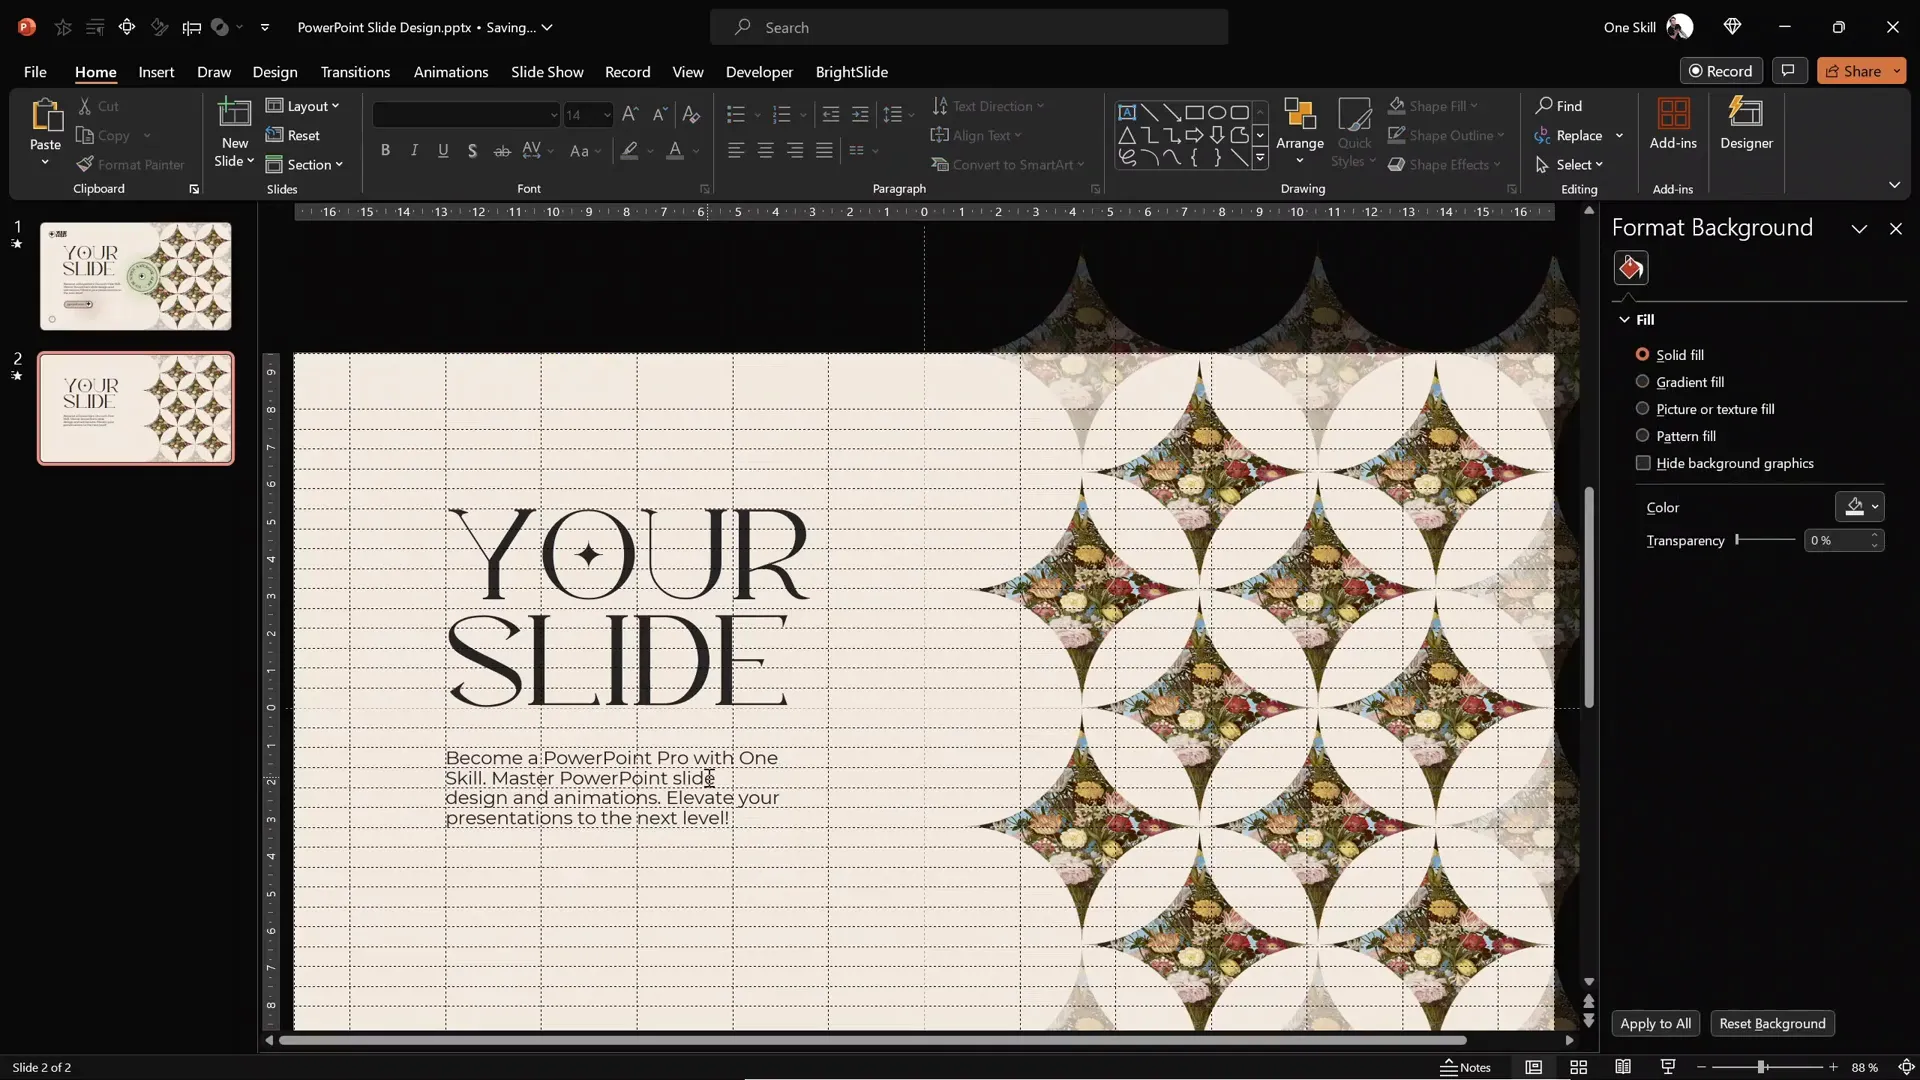
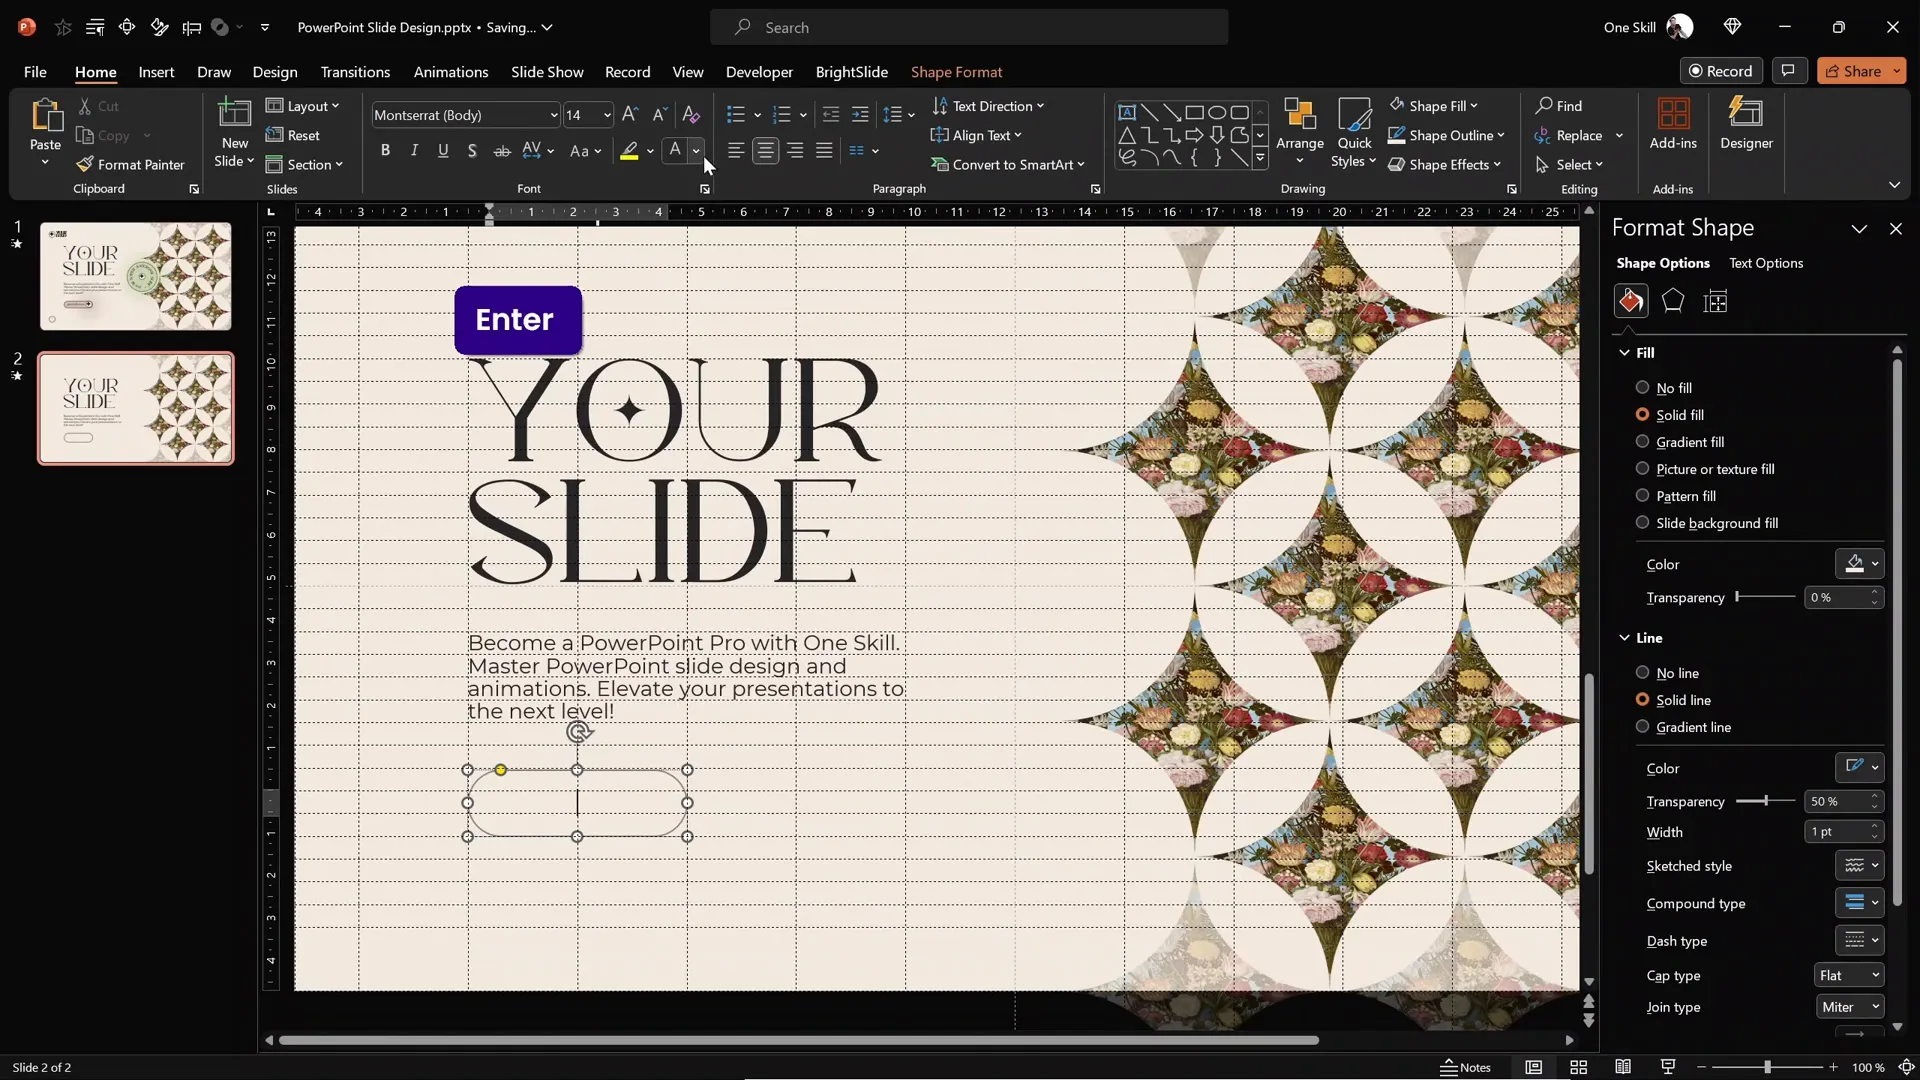
Designing a Bold Slide Title and Body Text
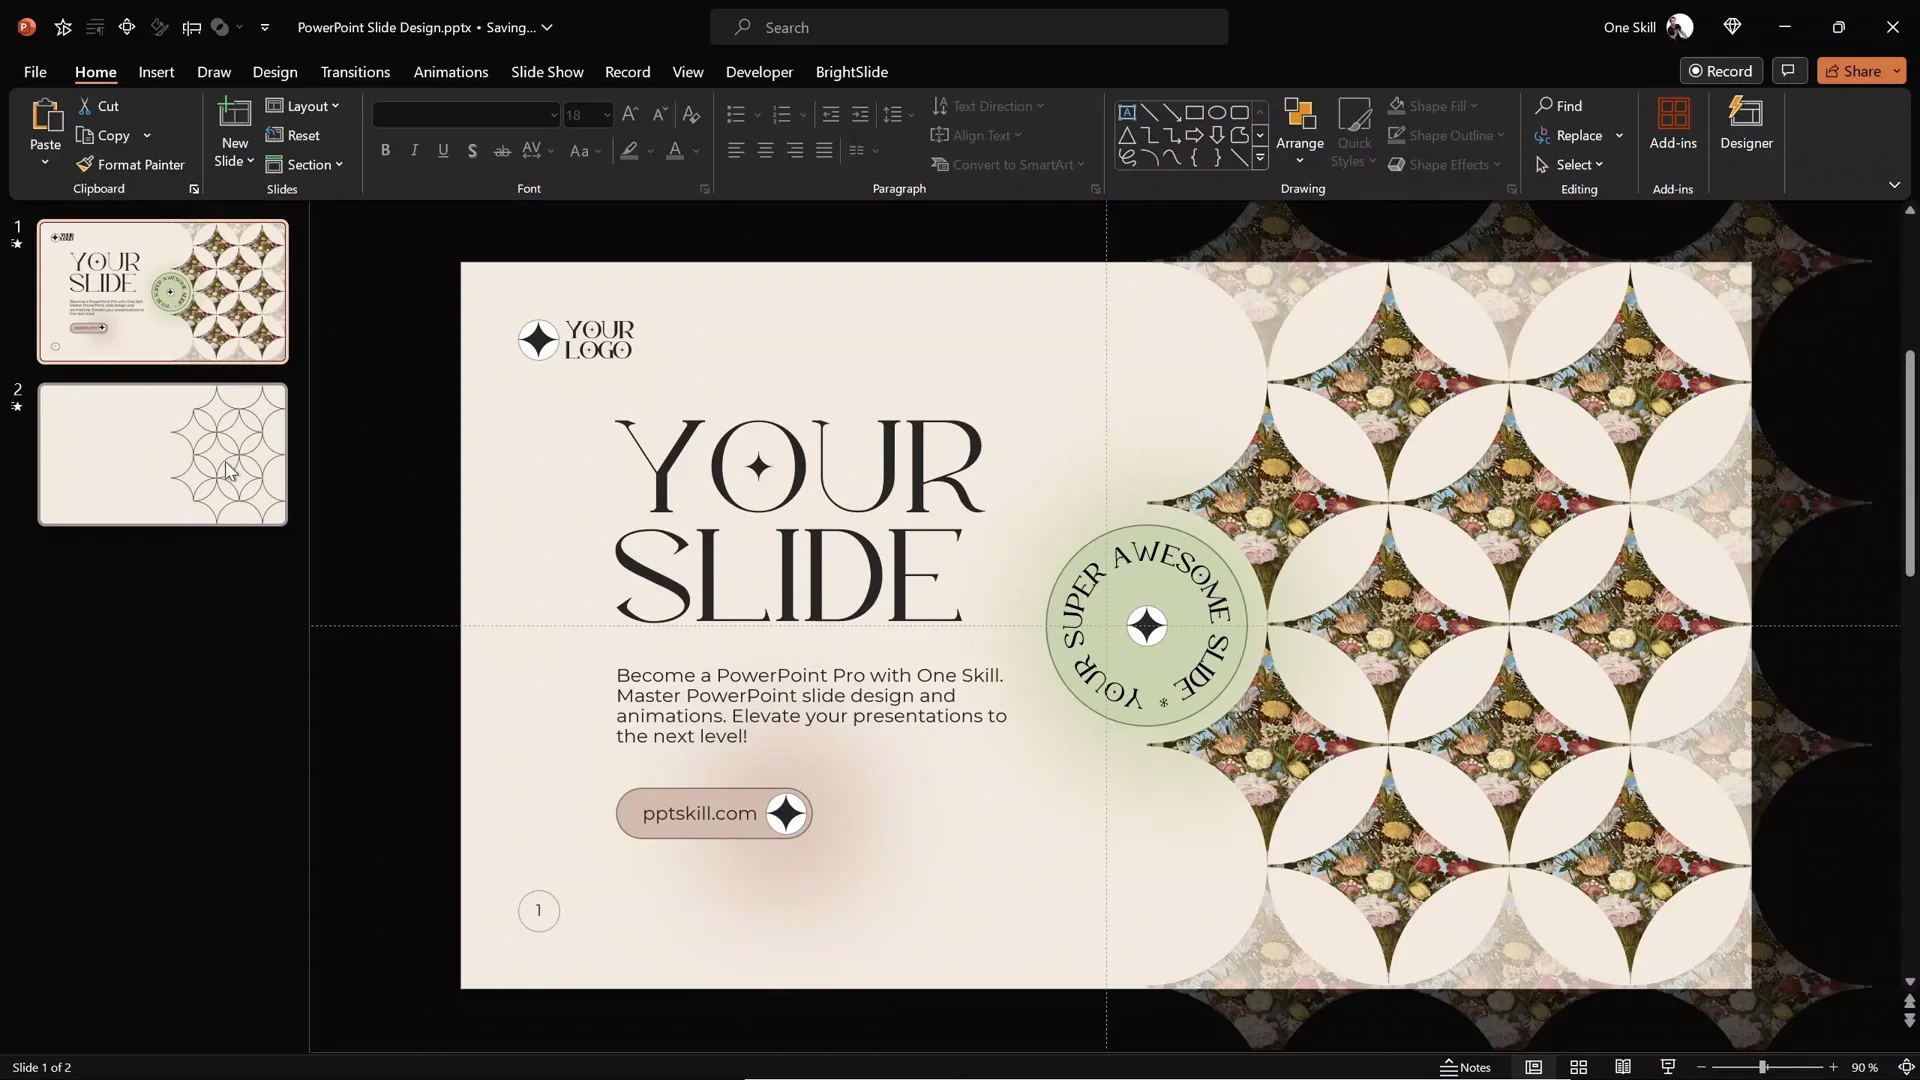
With the background and shapes set, it’s time to add your textual content. The title is the focal point, so it should be large, elegant, and well-positioned.
Steps to create the slide title:
- Insert a text box and type your title (e.g., “Your Slide”).
- Set the font to Kiramaro for an elegant look.
- Increase the font size to something huge, like 96 points.
- Adjust line spacing to multiple 0.7 to bring lines closer together for a cohesive look.
- Remove any text box margins for a cleaner appearance.
- Position the text box precisely using slide guides and rulers to ensure it aligns nicely with other elements.
For the body text, duplicate the title text box and switch the font to Montserrat for readability. Adjust the size and line spacing (multiple 0.9 is a good setting). Ensure the text color matches the title for harmony.
Using guides with multiple columns and rows (I use 12 columns and 30 rows) allows you to space elements evenly and maintain a clean layout. For example, keep exactly two rows of spacing between the title and body text.
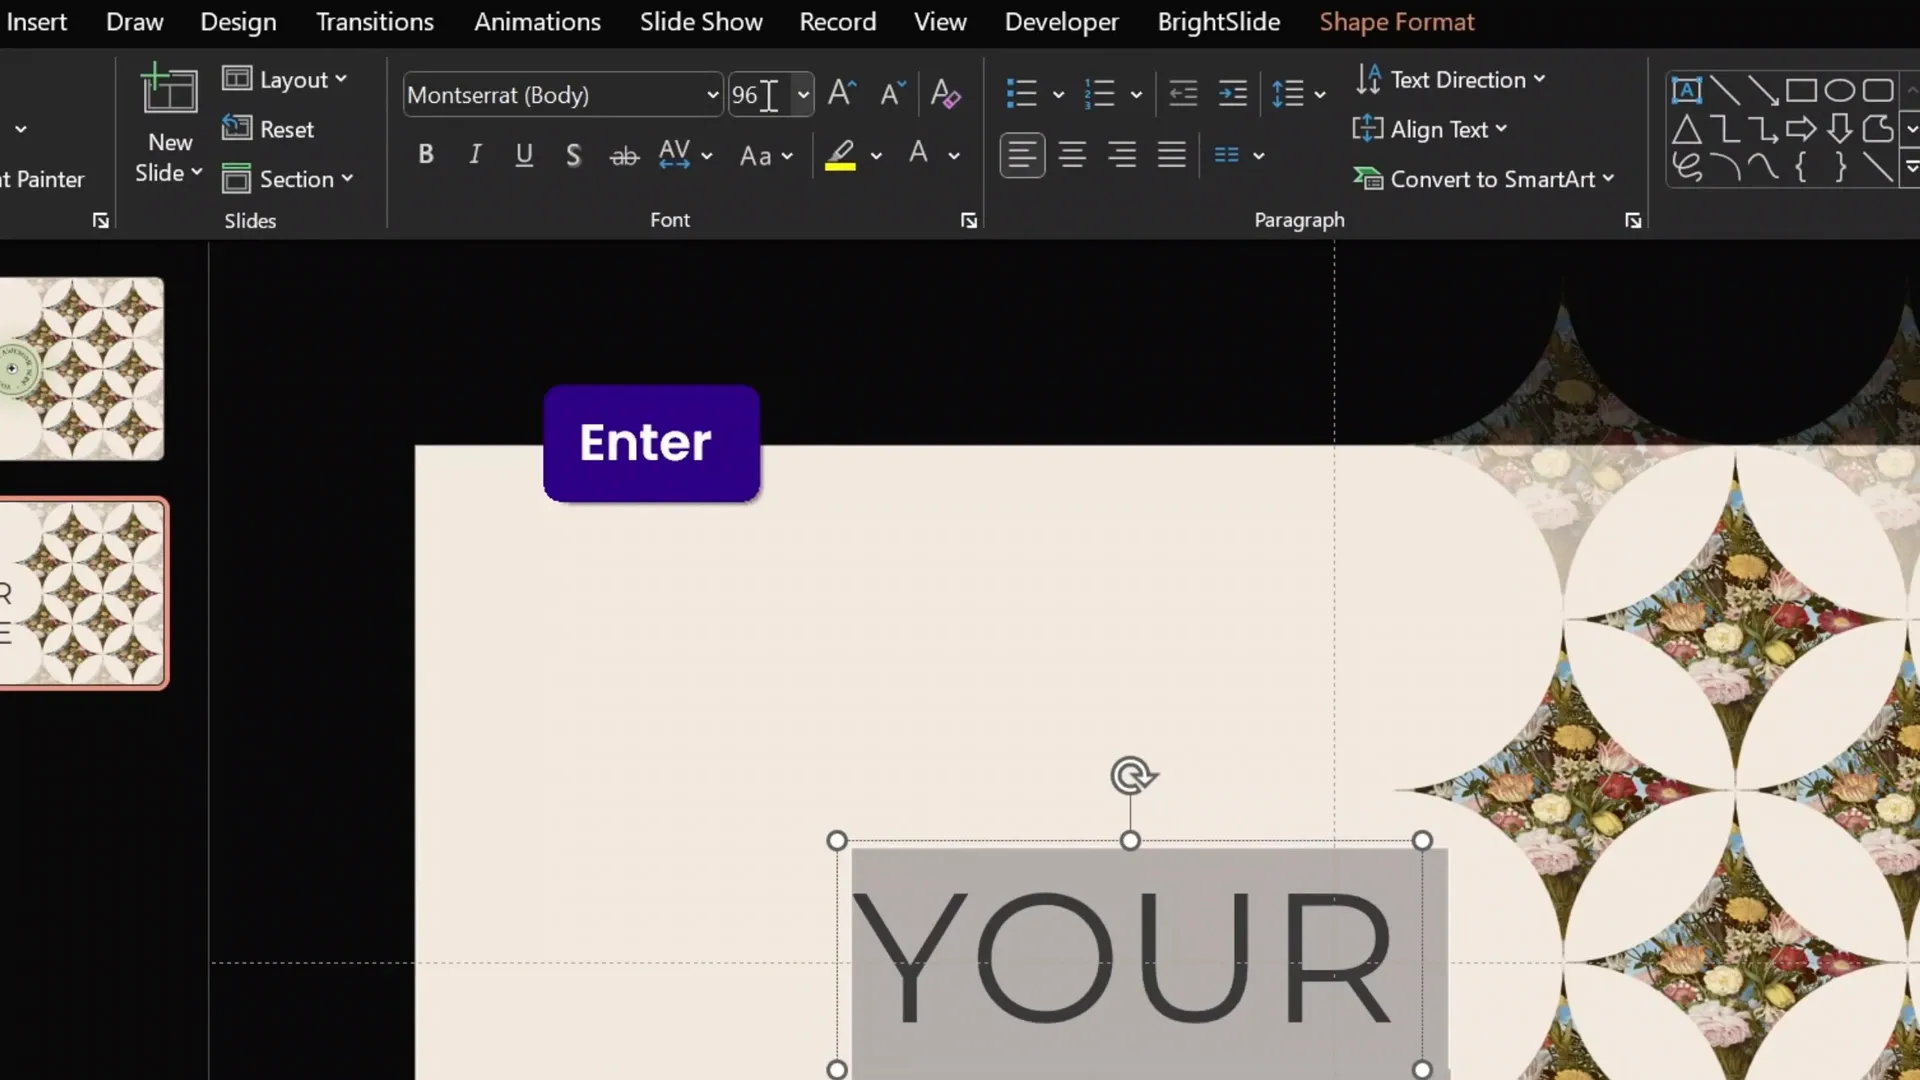
Creating an Elegant Call to Action (CTA) Button
Below the body text, add a call to action button to encourage engagement. Here’s how:
- Insert a rounded rectangle shape with fully rounded corners.
- Make it two columns wide and position it two rows below the body text for consistent spacing.
- Set the outline color to the same black shade used elsewhere and make it 1-point thick with 50% transparency for subtlety.
- Type the CTA text inside, e.g., “pbt skill dot com” – a great resource to master PowerPoint animations.
- Use a 14-point font size in the same black shade.
- Optionally, adjust the fill color of the button to one of your accent colors (accent two works beautifully), and move the text slightly to the right for balance.
Crafting a Custom Logo for Brand Identity
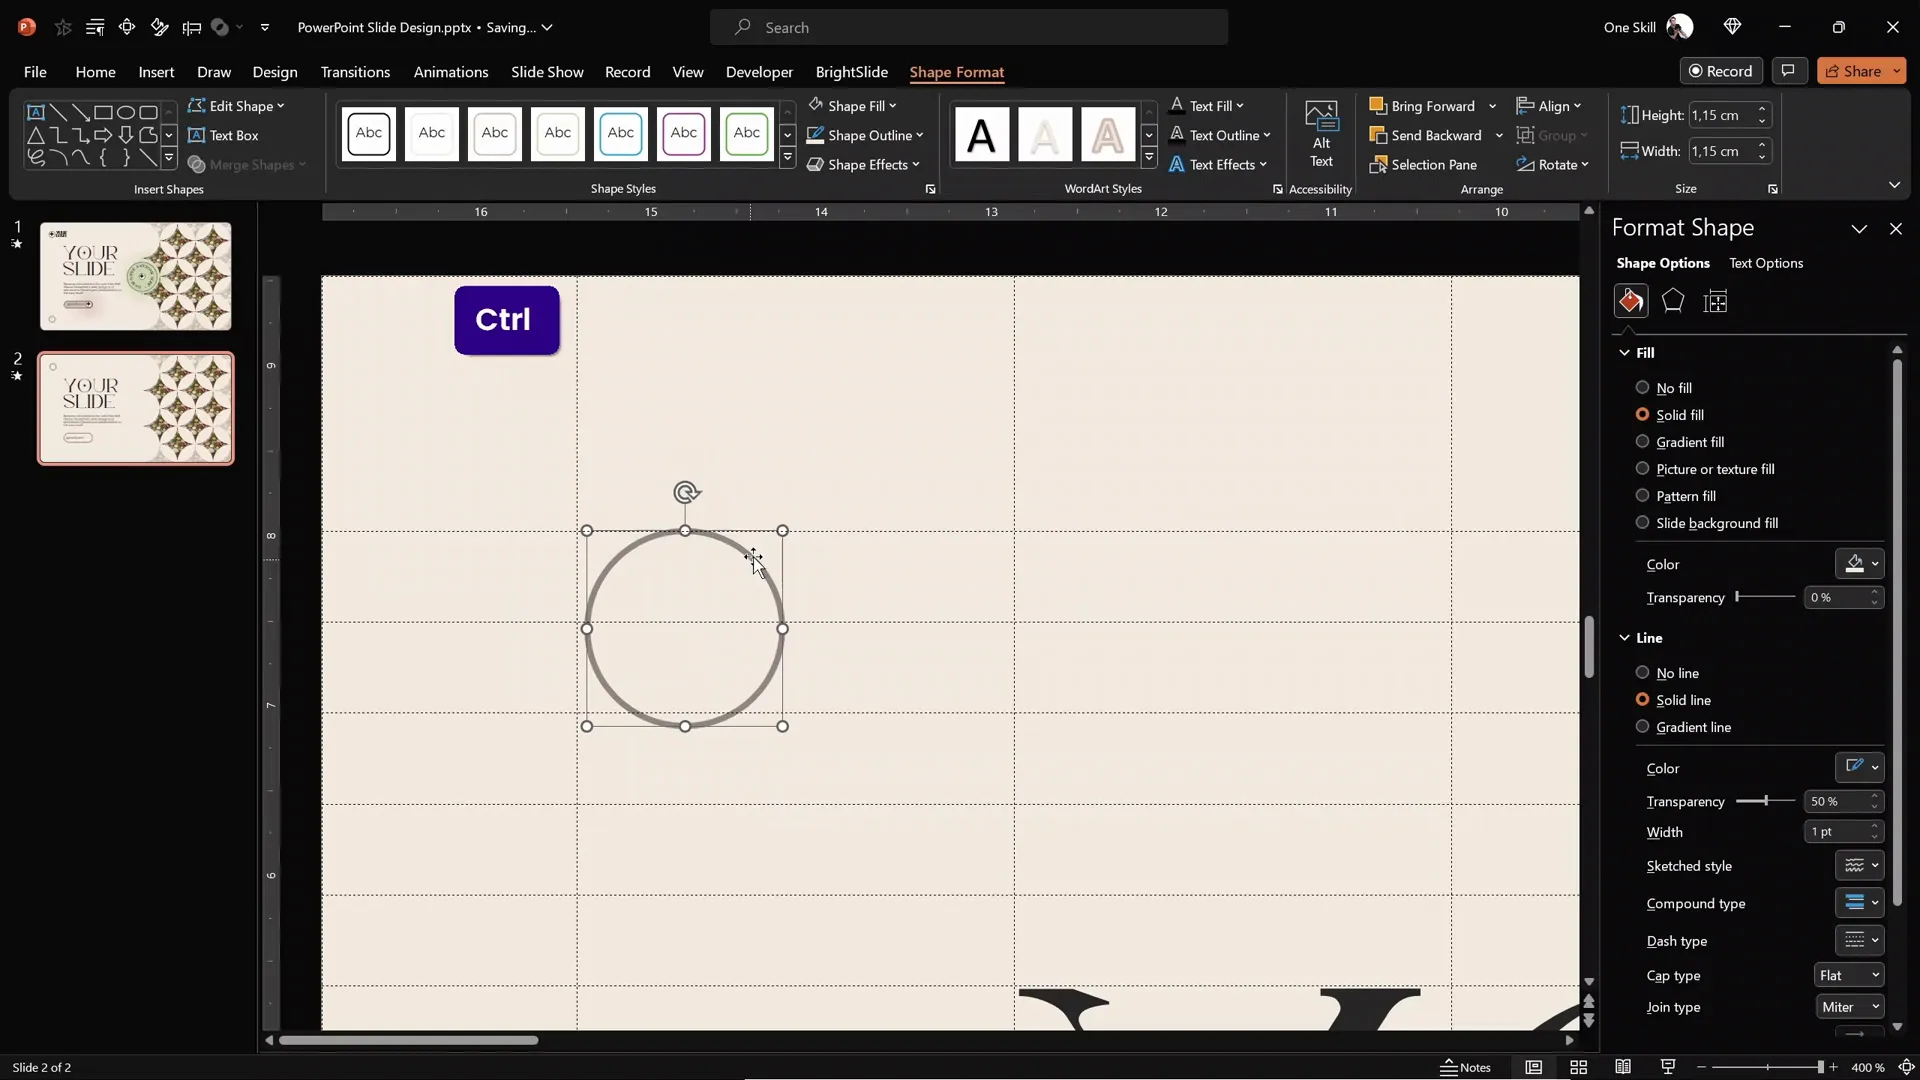
Branding your slide with a custom logo adds professionalism and polish. To create a simple yet stylish logo:
- Insert a small circle (about 1.07 cm in diameter) in the top-left corner of the slide.
- Style it with the same outline as your CTA button for consistency.
- Duplicate the pointy star shape you created earlier and fill it with solid black or your preferred color.
- Match the sizes of the circle and star shape using the “Match Size” button from the BrightSlide add-in for precision.
- Center-align and group these two shapes.
- Fill the circle with white for contrast, creating an elegant aesthetic logo.
- Duplicate this logo and place it inside the CTA button for a cohesive look.
Next, add your brand or slide name next to the logo using the Kiramaro font at 18–20 points. Align it carefully with the logo and group them together to keep everything tidy.
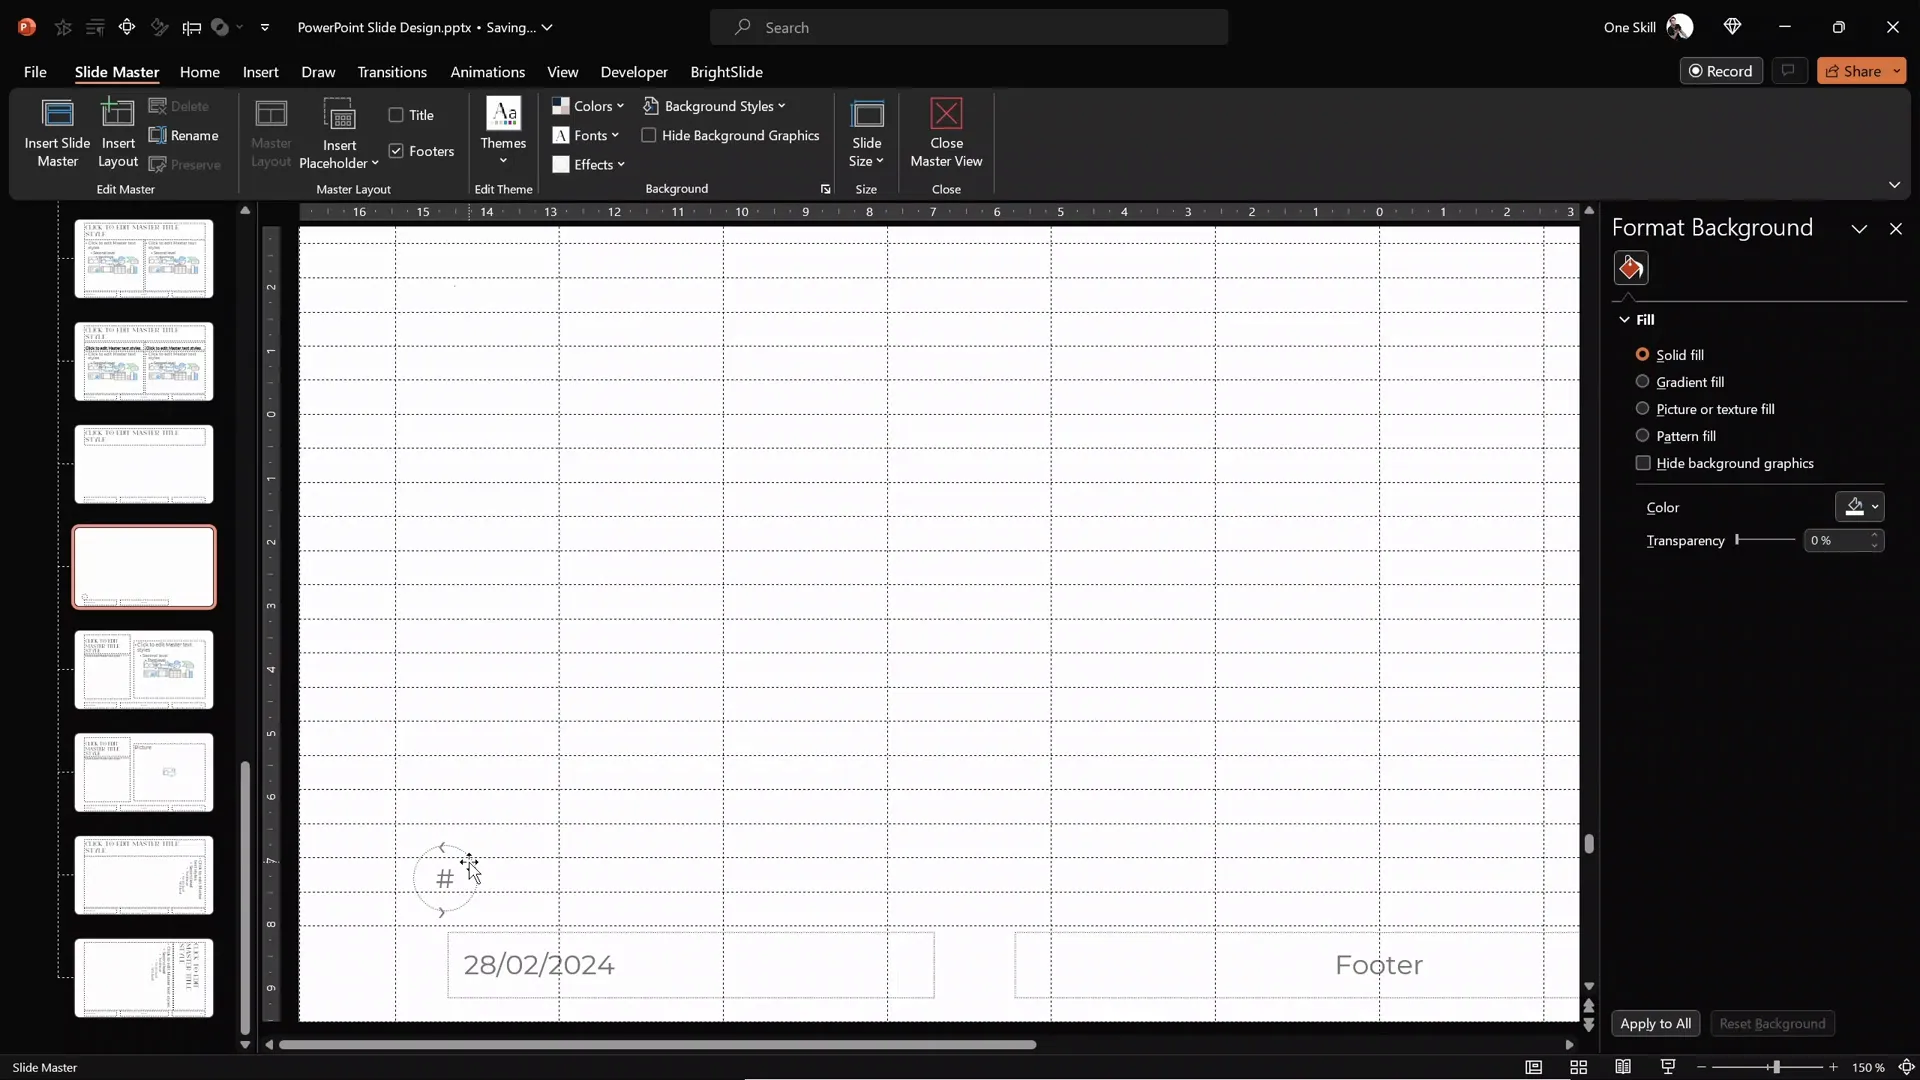
Adding and Customizing Slide Numbers
Slide numbers help your audience keep track during presentations and add a touch of professionalism. Here’s how to customize them:

- Go back to the Slide Master view.
- Locate the slide number text box and move it to the bottom-left corner of the slide.
- Center-align the text inside the box.
- Change the shape of the text box to a circle and set its size to 1.07 cm by 1.07 cm for a neat, proportional number badge.
- Uncheck “Wrap Text” in the text options to avoid odd symbols inside the circle.
- Apply a 1-point black outline with 50% transparency for subtle framing.
Back in normal view, enable slide numbers by going to Insert > Slide Number and checking the “Slide number” box. Click “Apply” and watch your slide numbers appear stylishly at the bottom left of each slide.
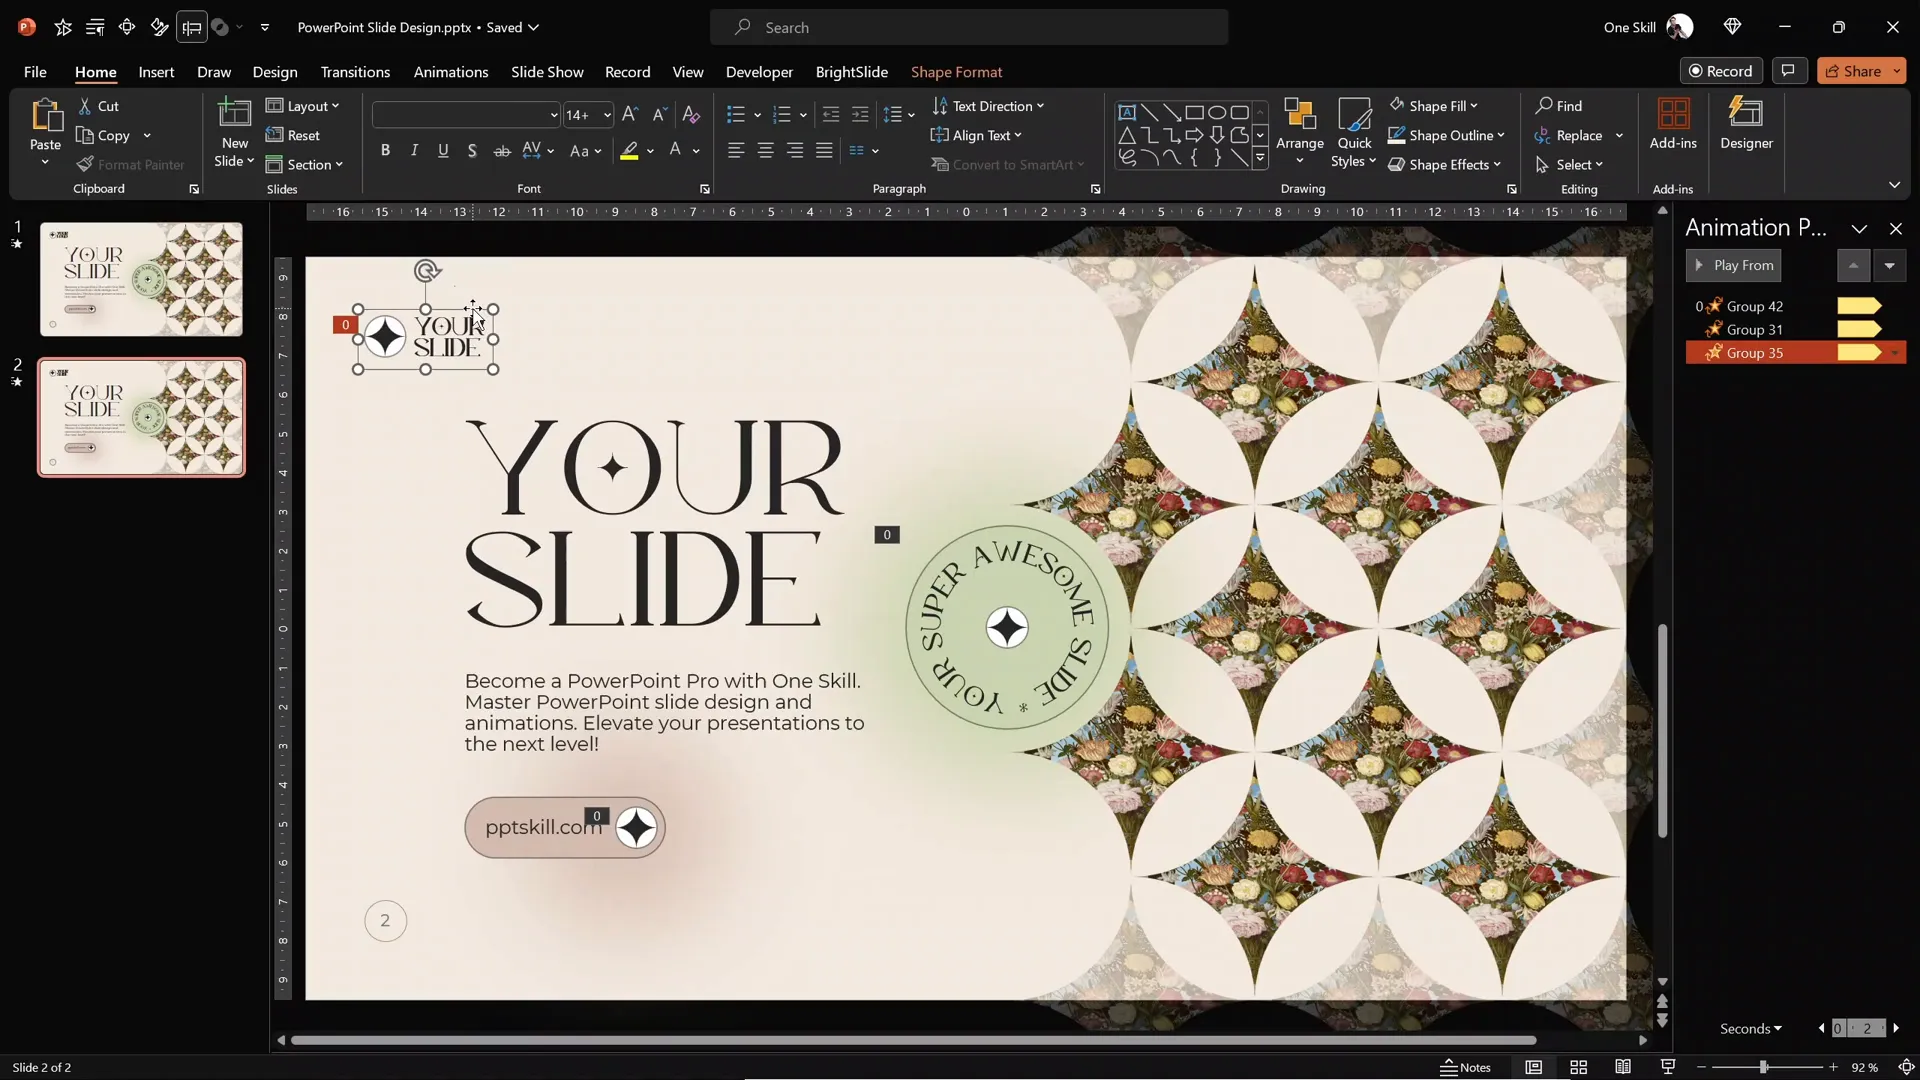
Adding Dynamic Spinning Circular Text for Visual Flair
To add an extra layer of sophistication and movement, create a spinning circular text element:
- Insert a green circle (accent three color) aligned within your pointy star shapes.
- Add a 1-point outline with 50% transparency.
- Duplicate your logo from the CTA button and center it inside this green circle.
- Duplicate your slide title text box and edit the text to something fun, like “Your Super Awesome Slide*”.
- Make the text bold and add an asterisk at the end for a playful touch.
- Apply a curved text effect by going to Shape Format > Text Effects > Transform and selecting a circular or curved preset.
- Resize the text box to about 4 cm in height and width for proportionality.
- Group the circle, logo, and curved text together.
- Add a spin animation set to start with previous, lasting 10 seconds, and repeat until the end of the slide.
Use the animation painter to apply the same spin effect to other elements if desired. Adjust the animation duration to speed things up or slow them down.
Enhancing Designs with Soft Edges and Shadows
Soft edges and subtle shadows can add depth and a polished look to your slide elements. Here’s how to add them:
- Insert a simple circle and fill it with the green accent color.
- Remove the outline to keep it soft.
- Increase the size slightly larger than the element it will shadow.
- Apply the “Soft Edges” effect from the Shape Effects menu, using the maximum softness setting.
- Position it behind the green circle and send it to back.
- Duplicate this shadow effect for the CTA button, using the accent two color for fill.
- Send the duplicate to back as well.
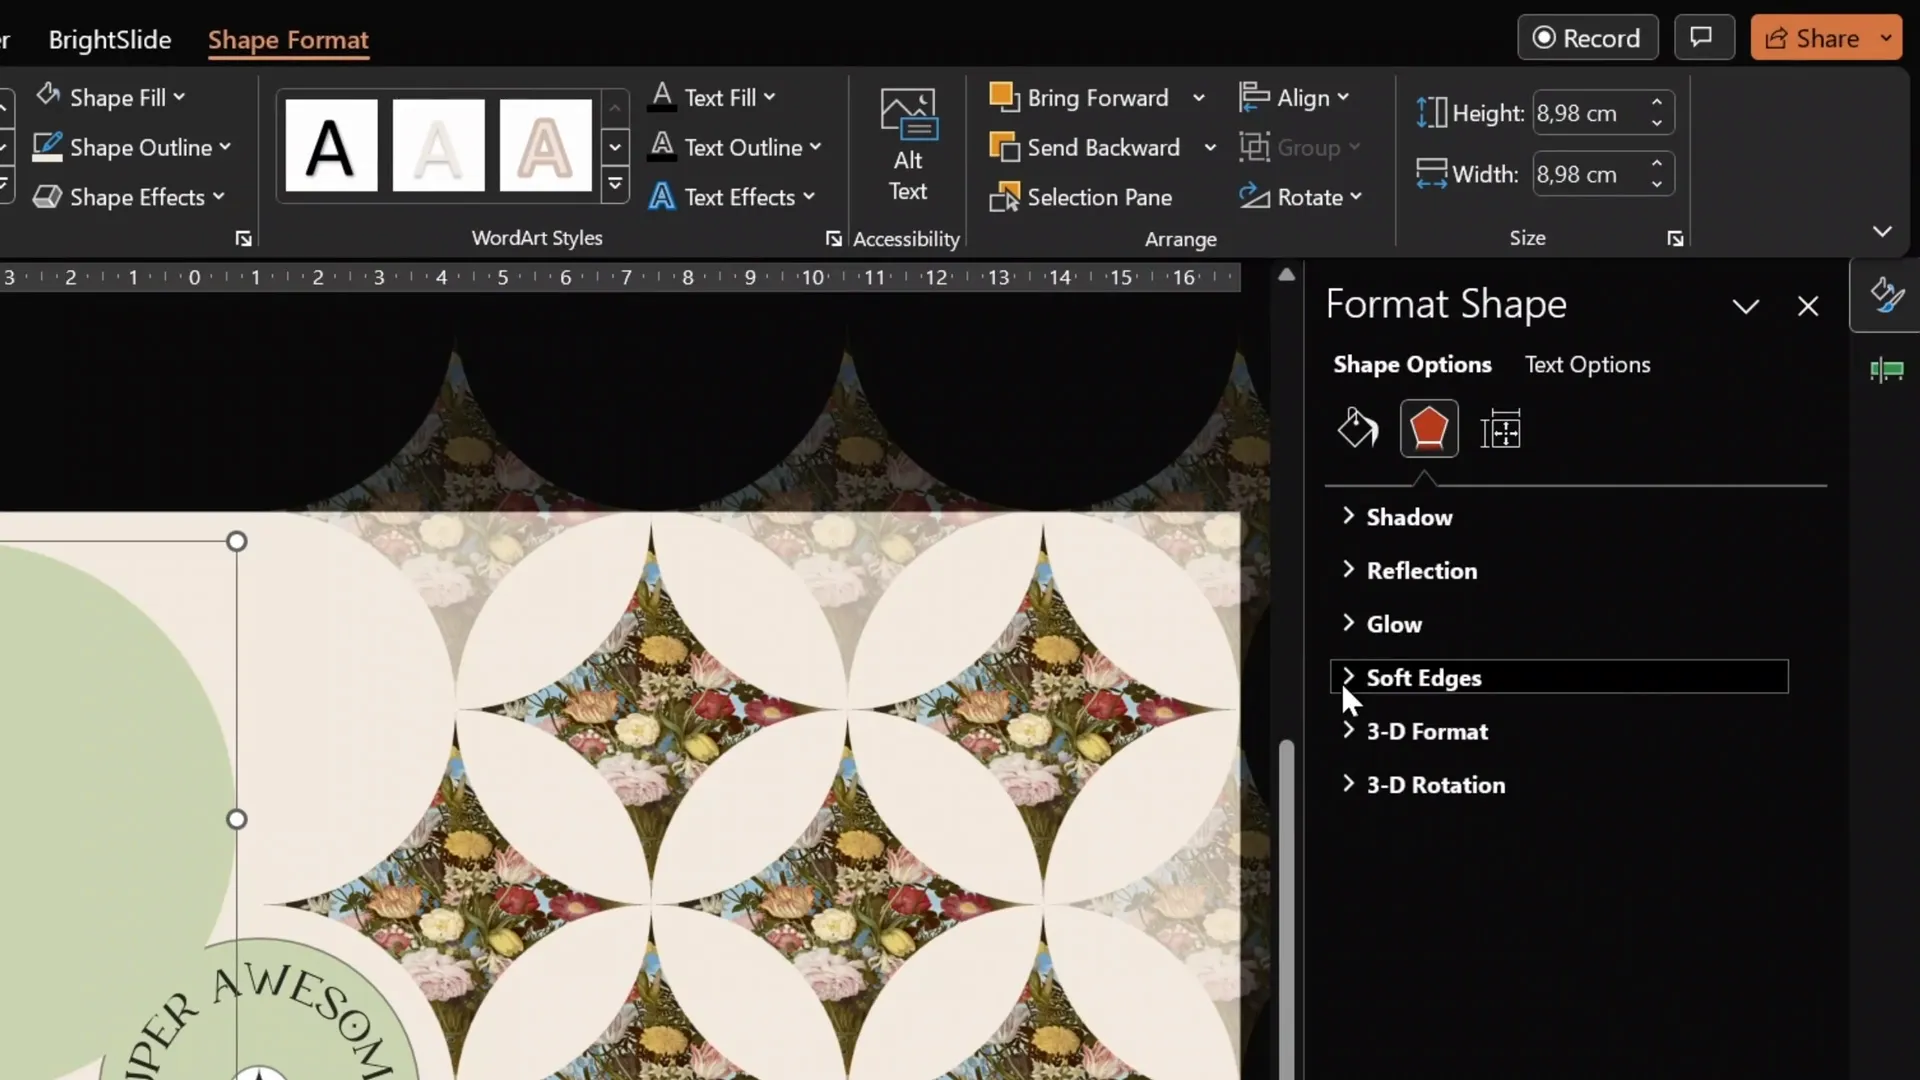
These glowing shadows create a subtle but effective visual lift for your shapes, making the slide feel more dynamic and layered.
Final Touches and Review
After assembling all these elements, take a moment to review your slide in full screen. Check that animations are working correctly—for example, the spinning logo should rotate smoothly without affecting the text.
If needed, ungroup elements and adjust animations individually. Use the animation painter to copy animations quickly and maintain consistency.
The result is a harmonious, elegant, and professional slide that balances bold typography, dynamic shapes, beautiful imagery, and engaging animations—all created within PowerPoint!
Why Use Slide Guides and BrightSlide Add-in?
Throughout the design process, I rely heavily on slide guides and the BrightSlide PowerPoint add-in. This free tool adds productivity shortcuts, such as easy alignment and size matching, which dramatically speed up your workflow and improve precision.
Creating a grid of 12 columns and 30 rows, plus setting 1.5 cm margins, helps you place every element with pixel-perfect accuracy, ensuring your slide looks clean and balanced.
Summary
To recap, here’s what we covered in this comprehensive tutorial:
- Setting up custom fonts and colors in the Slide Master for consistency.
- Creating unique geometric shapes by merging and subtracting basic shapes.
- Filling shapes with images from Unsplash to add visual texture.
- Designing large, elegant titles and readable body text with precise spacing.
- Creating a stylish call to action button with rounded corners and subtle transparency.
- Crafting a simple but effective logo using circles and custom shapes.
- Customizing slide numbers with circular backgrounds for a polished look.
- Adding spinning circular text animations for dynamic flair.
- Enhancing depth with soft edges and shadow effects.
- Utilizing slide guides and BrightSlide add-in for precision and efficiency.
By following these steps, you can create professional, aesthetic slides that stand out and impress your audience. Remember, the key is in the details—consistent fonts and colors, balanced spacing, and thoughtful use of shapes and animations.
Frequently Asked Questions (FAQ)
Q1: Where can I find the Kiramaro font used for the headings?
The Kiramaro font is a free elegant font available at DaFont.com. It’s perfect for stylish headings in your presentations.
Q2: How do I fix images that look squished when filling shapes?
If your images appear distorted, select the shape, go to the crop options, and choose “Fill.” This ensures the image fills the shape without stretching.
Q3: What is the BrightSlide add-in, and how does it help?
BrightSlide is a free productivity add-in for PowerPoint that provides helpful shortcuts like easy alignment, matching sizes, and creating guides. It makes designing faster and more precise. Download it from BrightCarbon.
Q4: How can I add spinning animations to elements?
Select the element, go to the animations tab, add a spin animation, set the duration (e.g., 10 seconds), and configure it to repeat until the end of the slide. Use the animation painter to copy the animation to other elements.
Q5: Can I use this slide design for other presentation topics?
Absolutely! This aesthetic slide design is versatile and can be adapted for various topics by simply changing the images, titles, and colors to suit your content.
Q6: Where can I get high-quality free images for my slides?
I recommend Unsplash. It offers a vast collection of free, high-resolution photos perfect for professional slide designs.
Q7: How do I enable slide numbers in my presentation?
Go to Insert > Slide Number, check the “Slide number” box, and click “Apply.” Customize its look in the Slide Master for consistency across slides.
Final Words
Designing professional and aesthetic slides in PowerPoint is not only possible but also enjoyable when you know the right techniques and tools. By combining thoughtful typography, custom shapes, image fills, and animations, you can create slides that are both beautiful and effective.
Keep experimenting with colors, fonts, and layouts, and don’t forget to utilize productivity tools like BrightSlide to speed up your workflow. I hope this guide inspires you to create your own stunning presentations. Stay happy, stay healthy, and keep designing amazing slides!
Check out the full video: Create Professional Aesthetic Slides in PowerPoint! ✨ Step-by-Step


