
Interactive and engaging presentations are what every presenter aims for, and PowerPoint’s Slide Zoom feature is a game-changer in creating dynamic, non-linear presentations. Developed by One Skill PowerPoint, these tips will help you unlock the full potential of Slide Zooms, transforming your presentations into captivating experiences for your audience.
In this comprehensive guide, I’ll share five essential tips to master Slide Zooms in PowerPoint, along with a bonus tip that elevates your slide animations and interactivity to a professional level. Whether you’re a beginner or looking to refine your skills, this article will walk you through practical steps and creative ideas to make your presentations stand out.

Table of Contents
- Understanding the PowerPoint Slide Zoom Feature
- Tip 1: How to Insert Slide Zooms Effectively
- Tip 2: Exploring Different Zoom Types – Slide, Section, and Summary Zooms
- Tip 3: Creating Transparent Slide Zoom Backgrounds for Depth Effect
- Tip 4: Using Custom Thumbnails for Slide Zooms to Control Slide Preview
- Tip 5: Using Animation Triggers with Slide and Section Zooms for Advanced Interactivity
- Conclusion: Become an Unstoppable PowerPoint Slide Zoom Creator
- Frequently Asked Questions (FAQ)
Understanding the PowerPoint Slide Zoom Feature
Slide Zooms allow you to zoom into specific slides or sections within your presentation, breaking free from the traditional linear slideshow format. Instead of moving slide by slide, you can jump directly to important content, making your presentation more interactive and engaging.
This feature adds a new zoom dimension to your presentations, giving you control over the flow and allowing your audience to focus on key points dynamically. It’s perfect for large presentations with multiple sections or when you want to revisit specific topics without scrolling through all slides.

Tip 1: How to Insert Slide Zooms Effectively
There are two easy ways to insert Slide Zooms into your PowerPoint presentation:
- Using the Insert Tab: Go to the Insert tab on the ribbon, click on the Zoom button, and select Slide Zoom. A window will appear showing all your slides. Choose the one you want to zoom into and click Insert. Voilà, your slide zoom is added!
- Drag and Drop from Slide Pane: On the left pane where all your slides are displayed, simply drag the slide you want and drop it onto your current slide. This automatically creates a Slide Zoom.
Once inserted, you’ll notice a thin outline around the slide zoom by default. To give it a cleaner look:
- Select the slide zoom(s).
- Go to the Zoom tab, click on Zoom Border, and select No Outline.
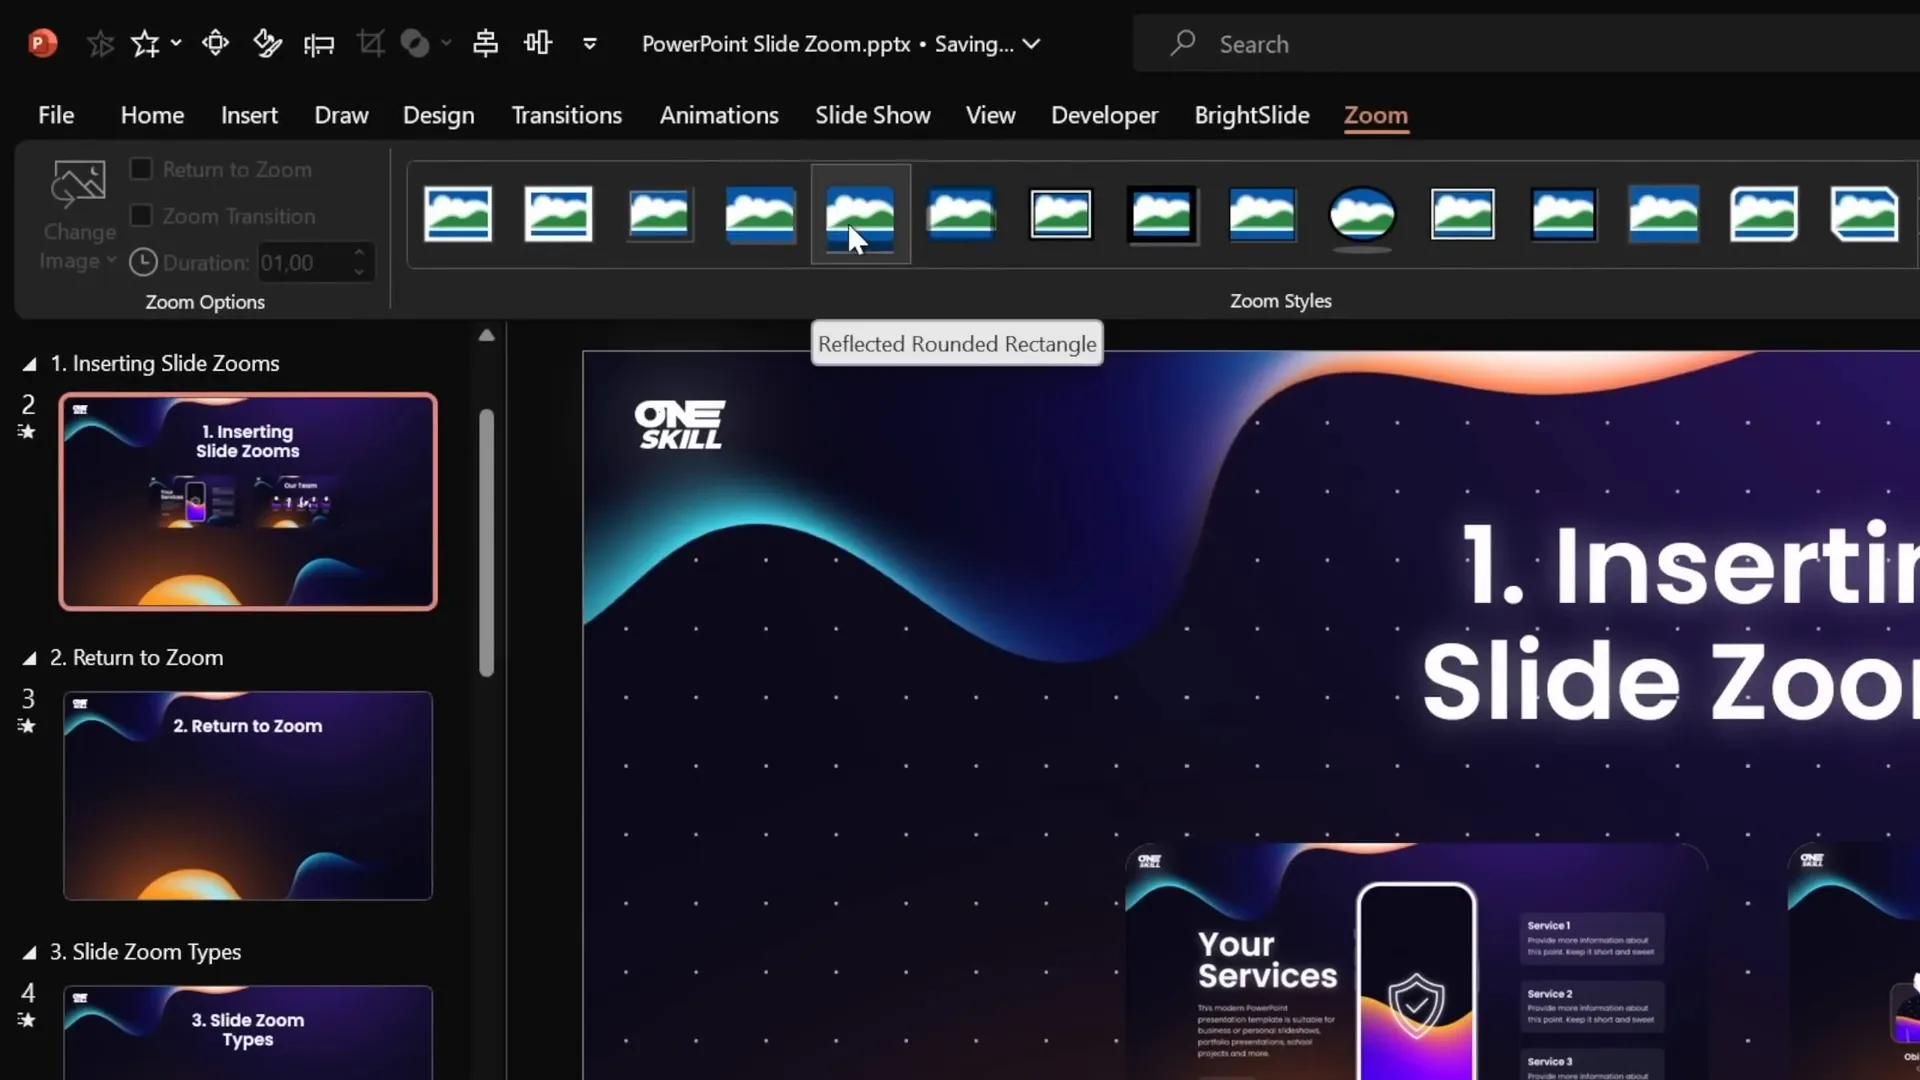
For a polished, modern look, add rounded corners and reflections:
- With the slide zoom(s) selected, apply the Reflected Rounded Rectangle style from the Format pane.
- If reflections are too much, disable them in the Format pane under Reflections by selecting None.
Now, when you run your slideshow and click on a Slide Zoom, it zooms into that slide beautifully. Clicking again moves to the next slide as usual. However, you’ll want to be able to return to the original slide or “home” slide after zooming in, which leads to the next essential setting.
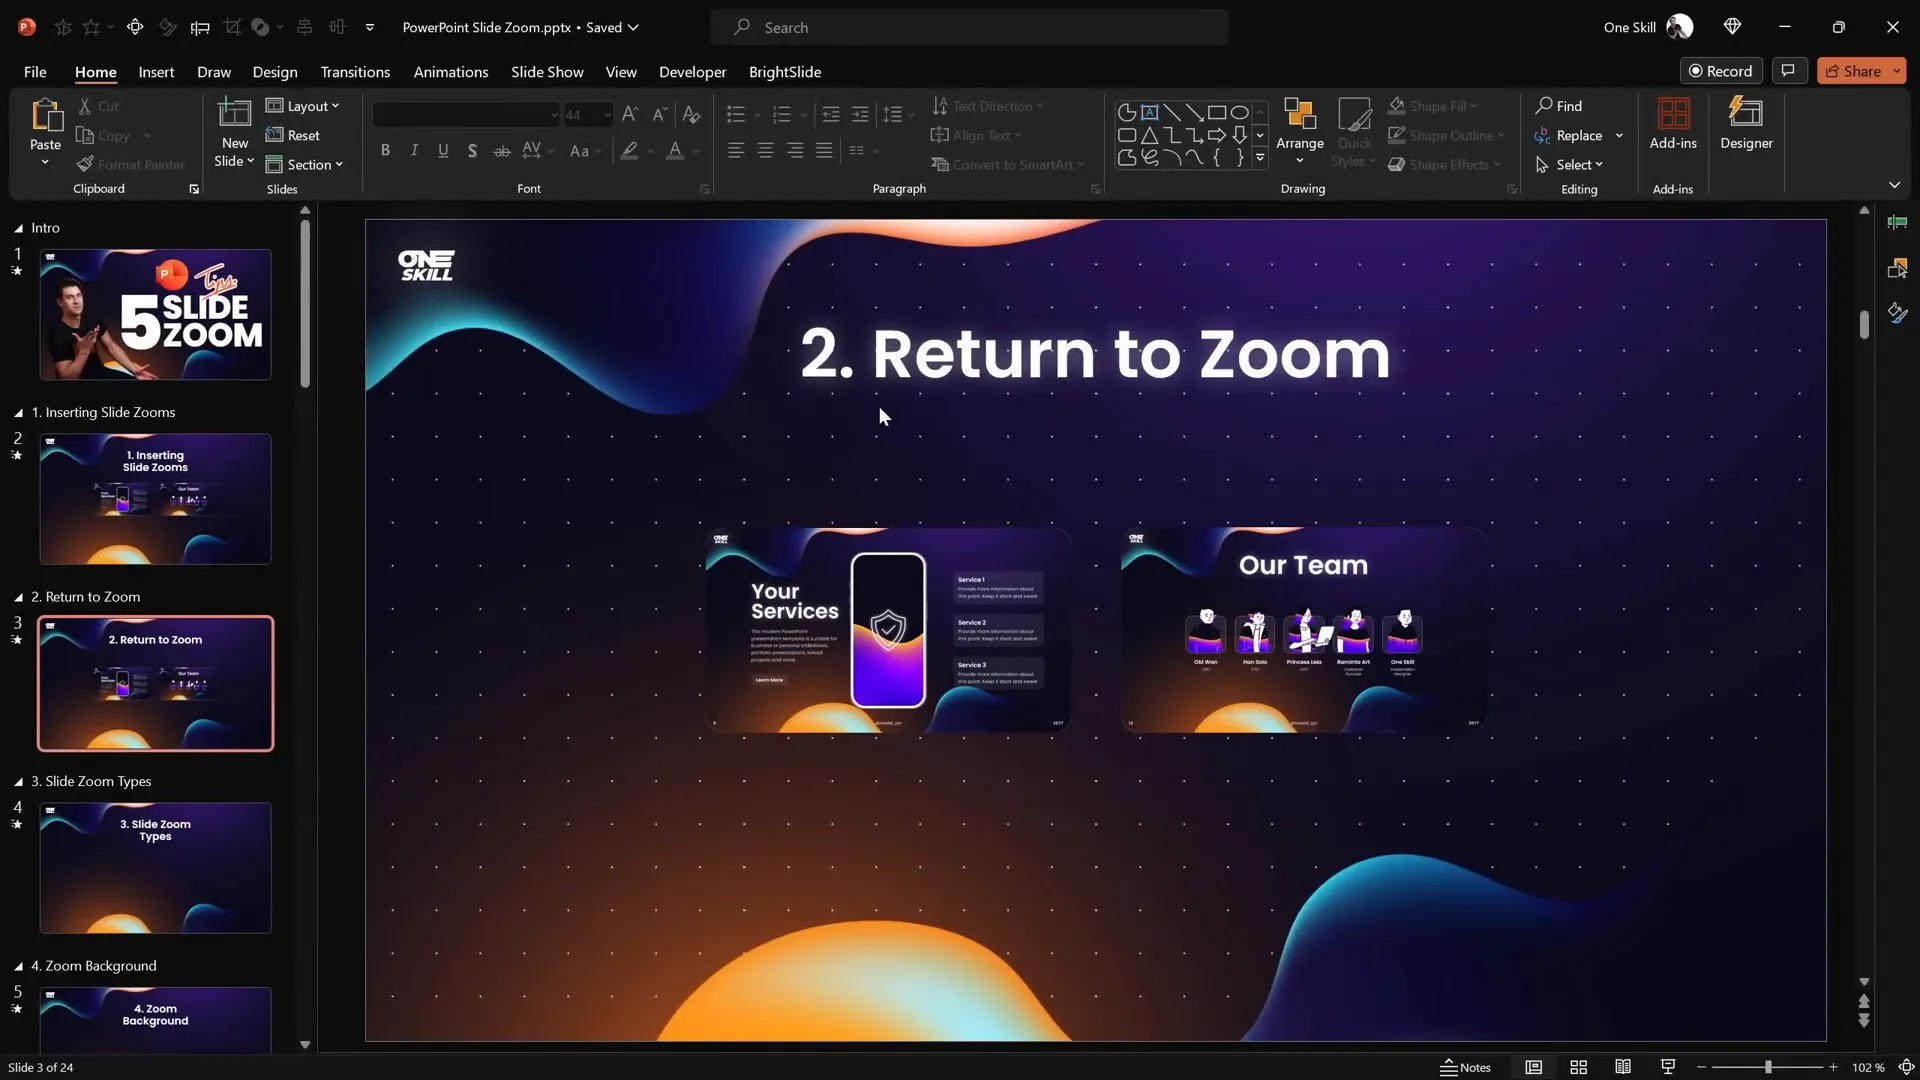
Return to Zoom Feature
To enable easy navigation back to your starting point, use the Return to Zoom option:
- Select the Slide Zoom.
- Go to the Zoom tab and check the box for Return to Zoom.
- Do this for all your Slide Zooms where you want this behavior.
Now, when you click to zoom in, clicking again will zoom back to the original slide, making your presentation flow seamless and interactive.
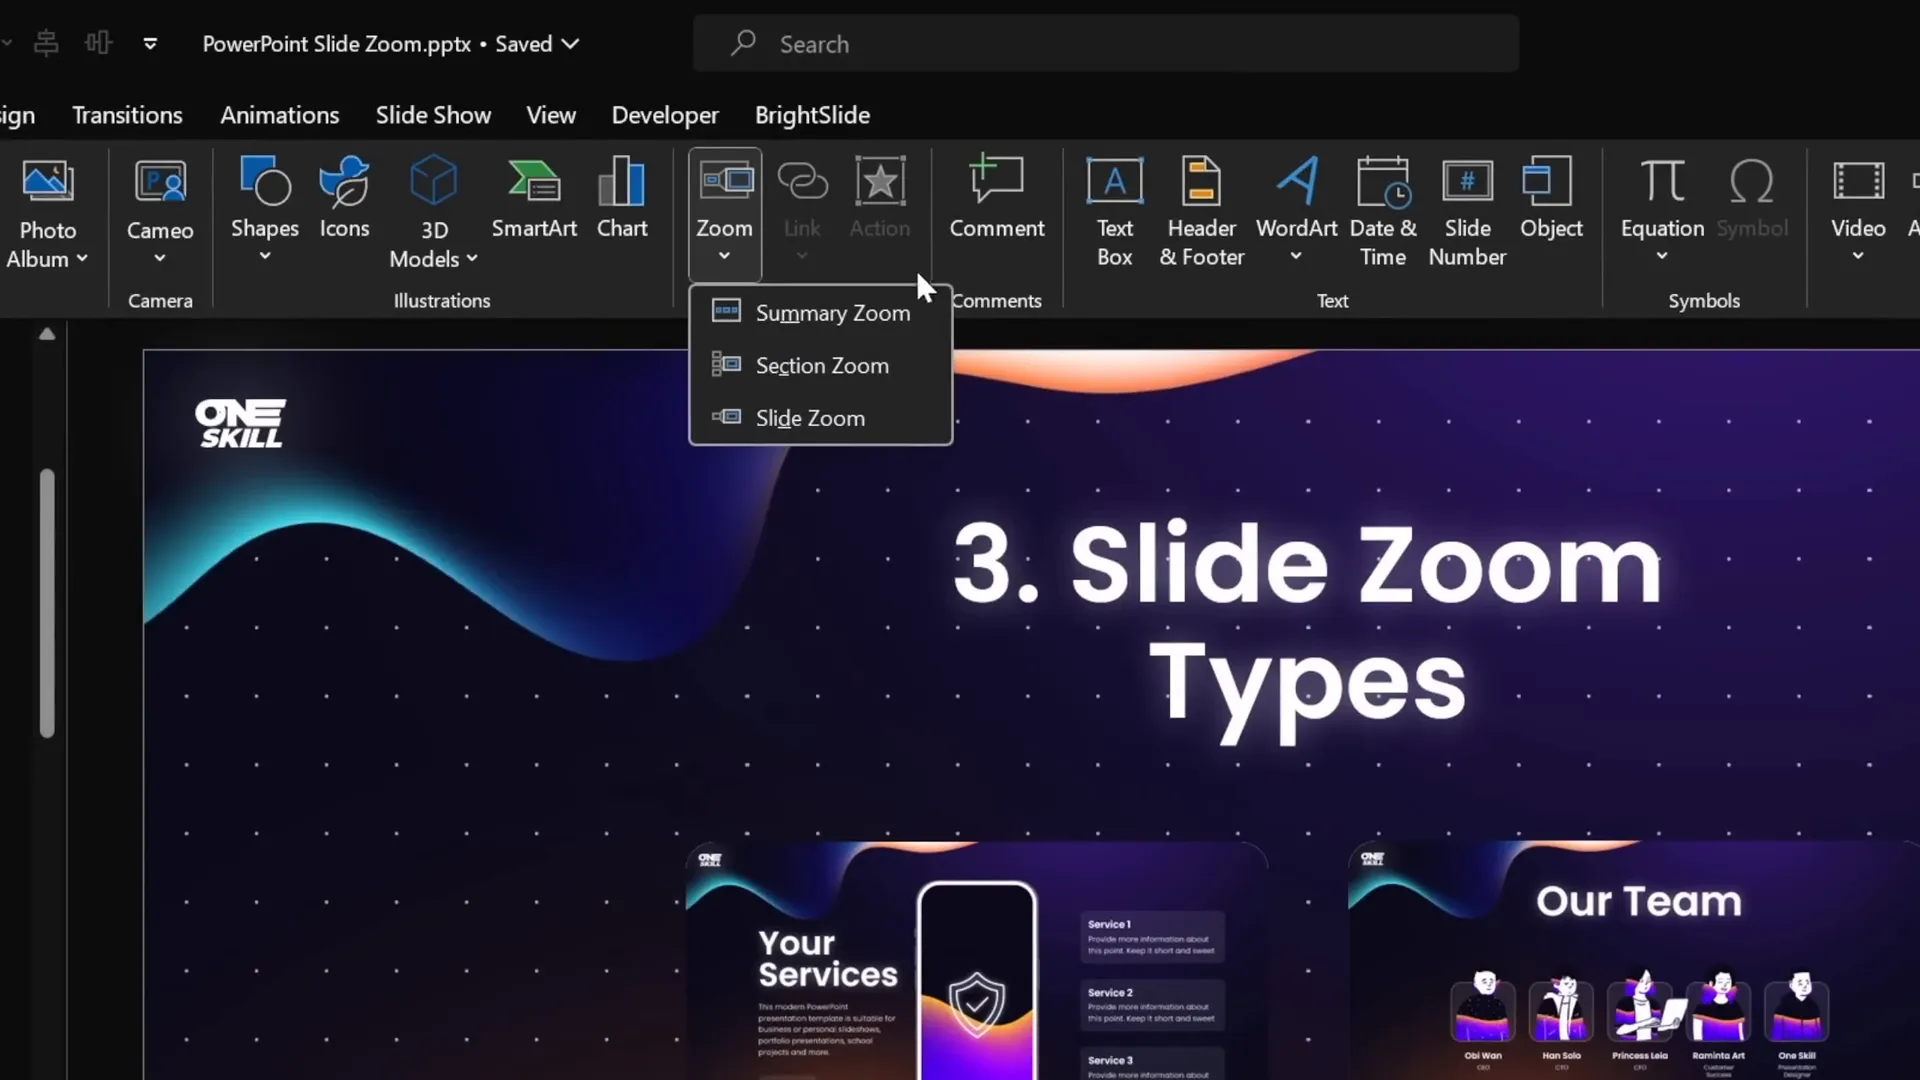
Tip 2: Exploring Different Zoom Types – Slide, Section, and Summary Zooms
PowerPoint offers three types of zooms, each designed for different navigation needs:
- Slide Zoom: Zooms into a single slide and then allows you to return to the previous slide.
- Section Zoom: Zooms into an entire section of slides, letting you navigate through multiple slides before returning.
- Summary Zoom: Creates a dashboard with clickable links to all sections, giving a bird’s eye view of your presentation.
Using Section Zooms
Section Zooms are perfect when you want to jump into a block of slides, such as a chapter or topic section:
- Make sure your presentation is divided into sections. You can add sections by right-clicking between slides in the left pane and selecting Add Section.
- Go to Insert > Zoom > Section Zoom.
- Select the desired section and insert it.
Similar to Slide Zooms, you can remove the border, add rounded corners, and disable reflections for a cleaner look. Don’t forget to enable the Return to Zoom option to allow smooth navigation back to the home slide.
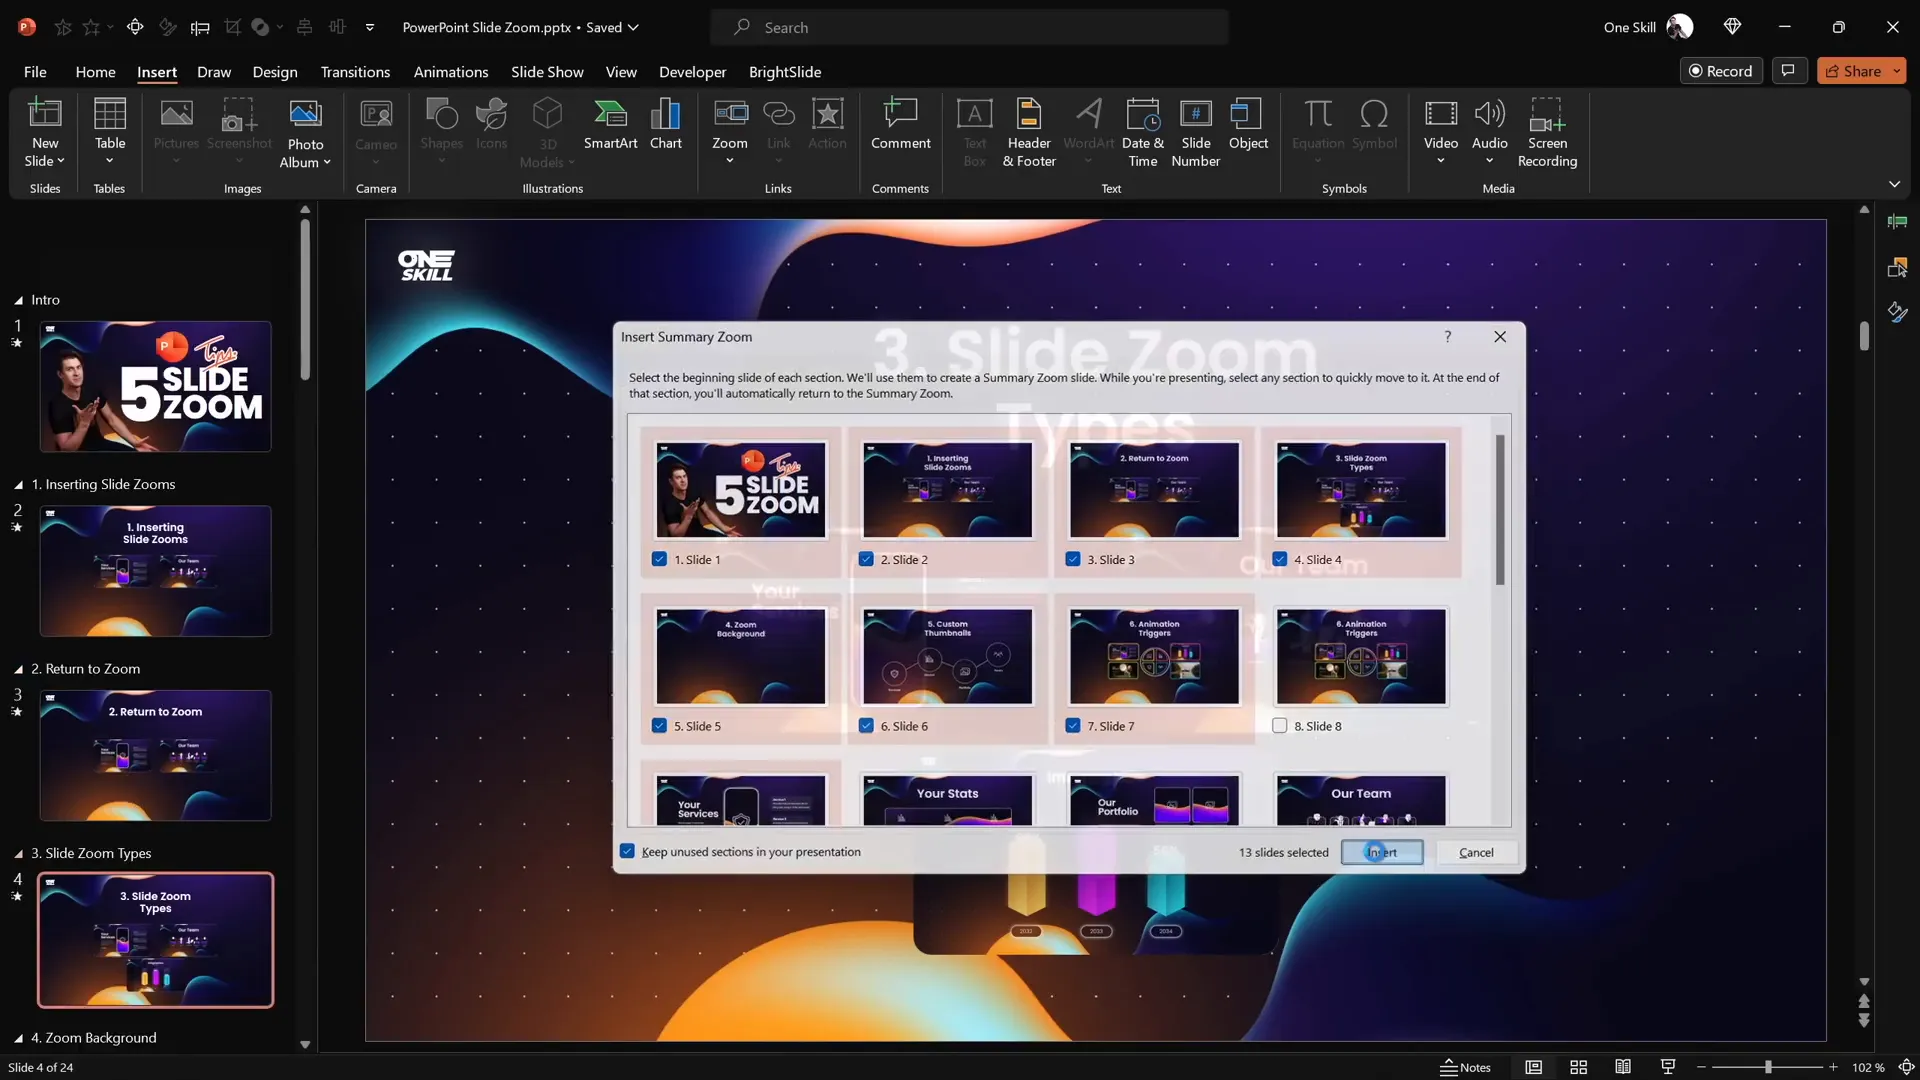
Using Summary Zooms
Summary Zooms are your navigational dashboard, collecting all section zooms into a single slide:
- Ensure your presentation has multiple sections.
- Go to Insert > Zoom > Summary Zoom.
- PowerPoint automatically creates a new summary section with all section zooms displayed in a grid.
- Customize the layout by resizing the zoom thumbnails for two or four columns.
- Add a title and format the zooms with no borders and rounded corners.
This slide becomes your interactive table of contents, letting you jump to any section and return seamlessly after finishing.
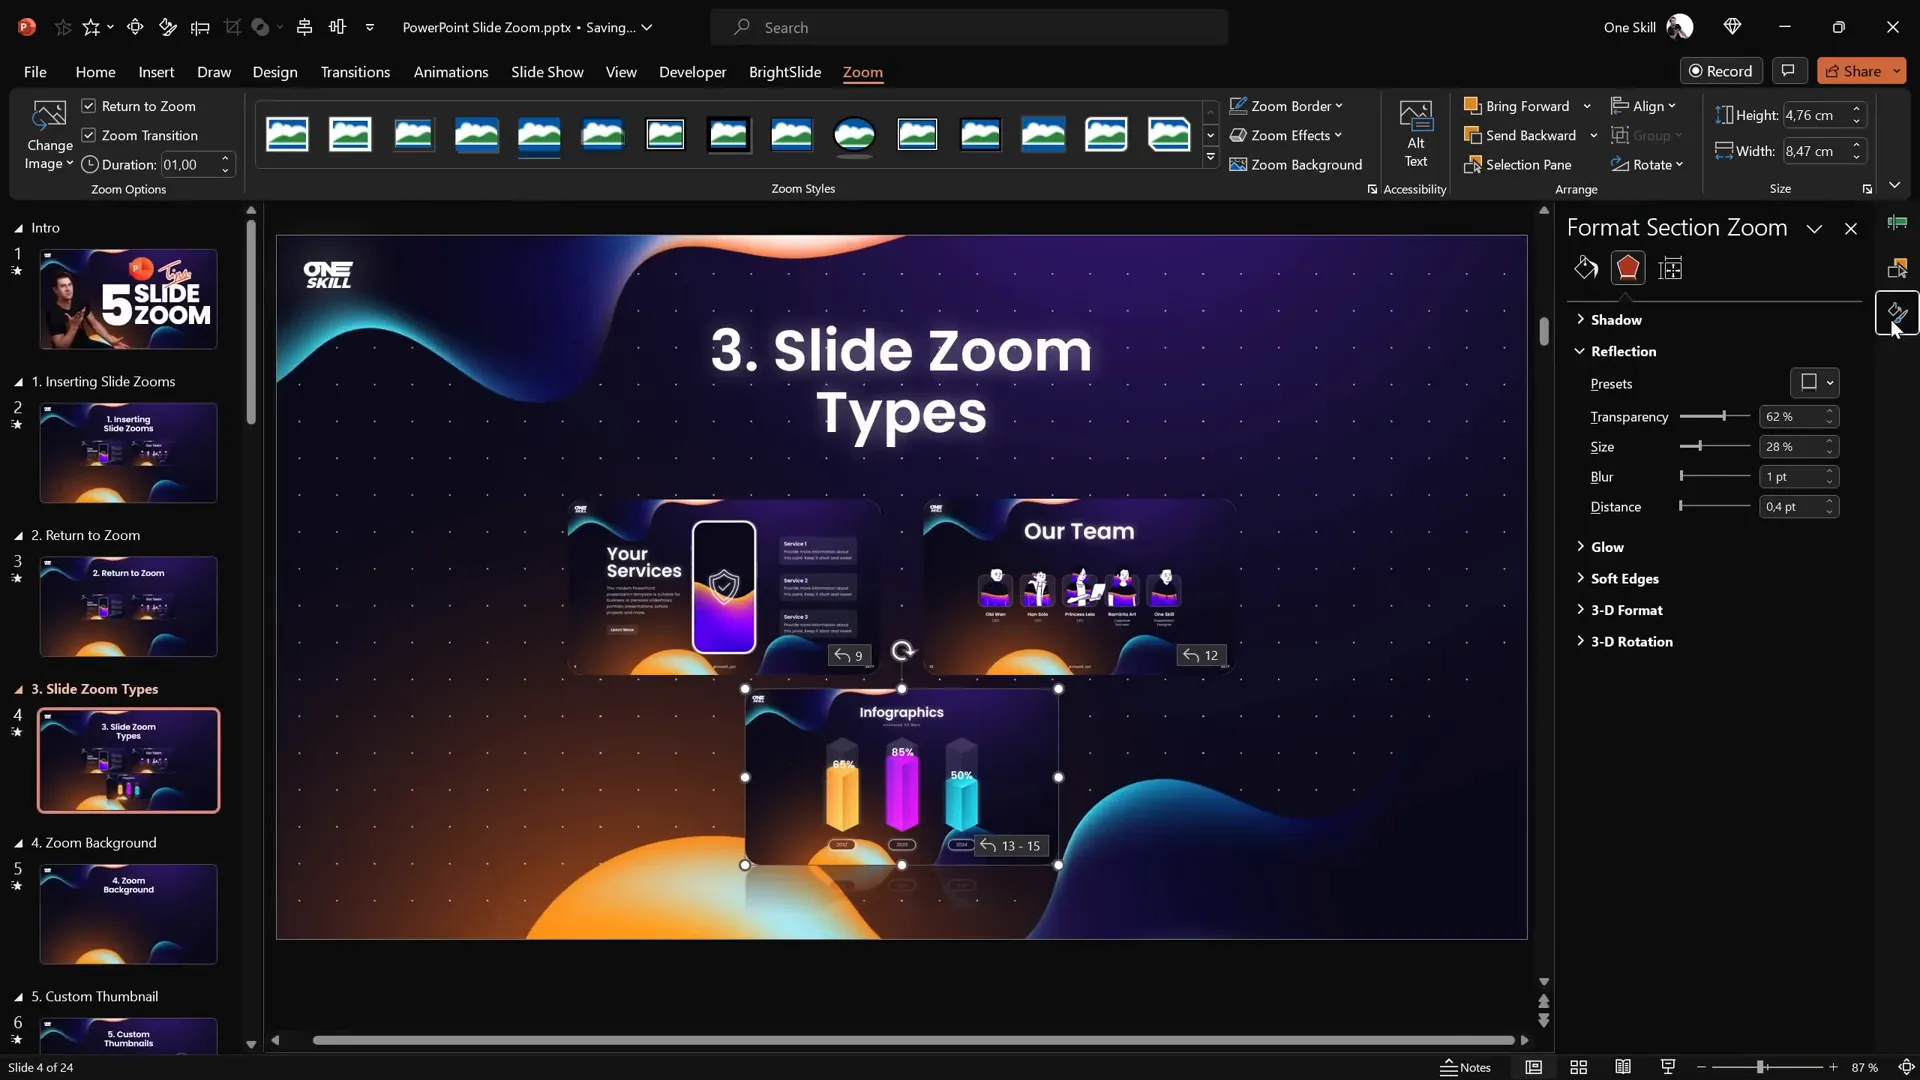
Tip 3: Creating Transparent Slide Zoom Backgrounds for Depth Effect
One fantastic visual effect you can apply to Slide Zooms is making their background transparent. This creates a sense of depth and unity across your slides, as if everything is on the same canvas but at different zoom levels.
Here’s how to enable transparent backgrounds:
- Select your Slide Zoom.
- Go to the Zoom tab.
- Click on Zoom Background to toggle transparency.
If your Slide Zoom background appears white instead of transparent, ensure the slide itself uses a picture fill or a solid/gradient fill. This guarantees the transparent setting works correctly.

When you test it in slideshow mode, the zoomed slide’s background blends with the home slide, enhancing the visual appeal and making transitions smooth and professional.

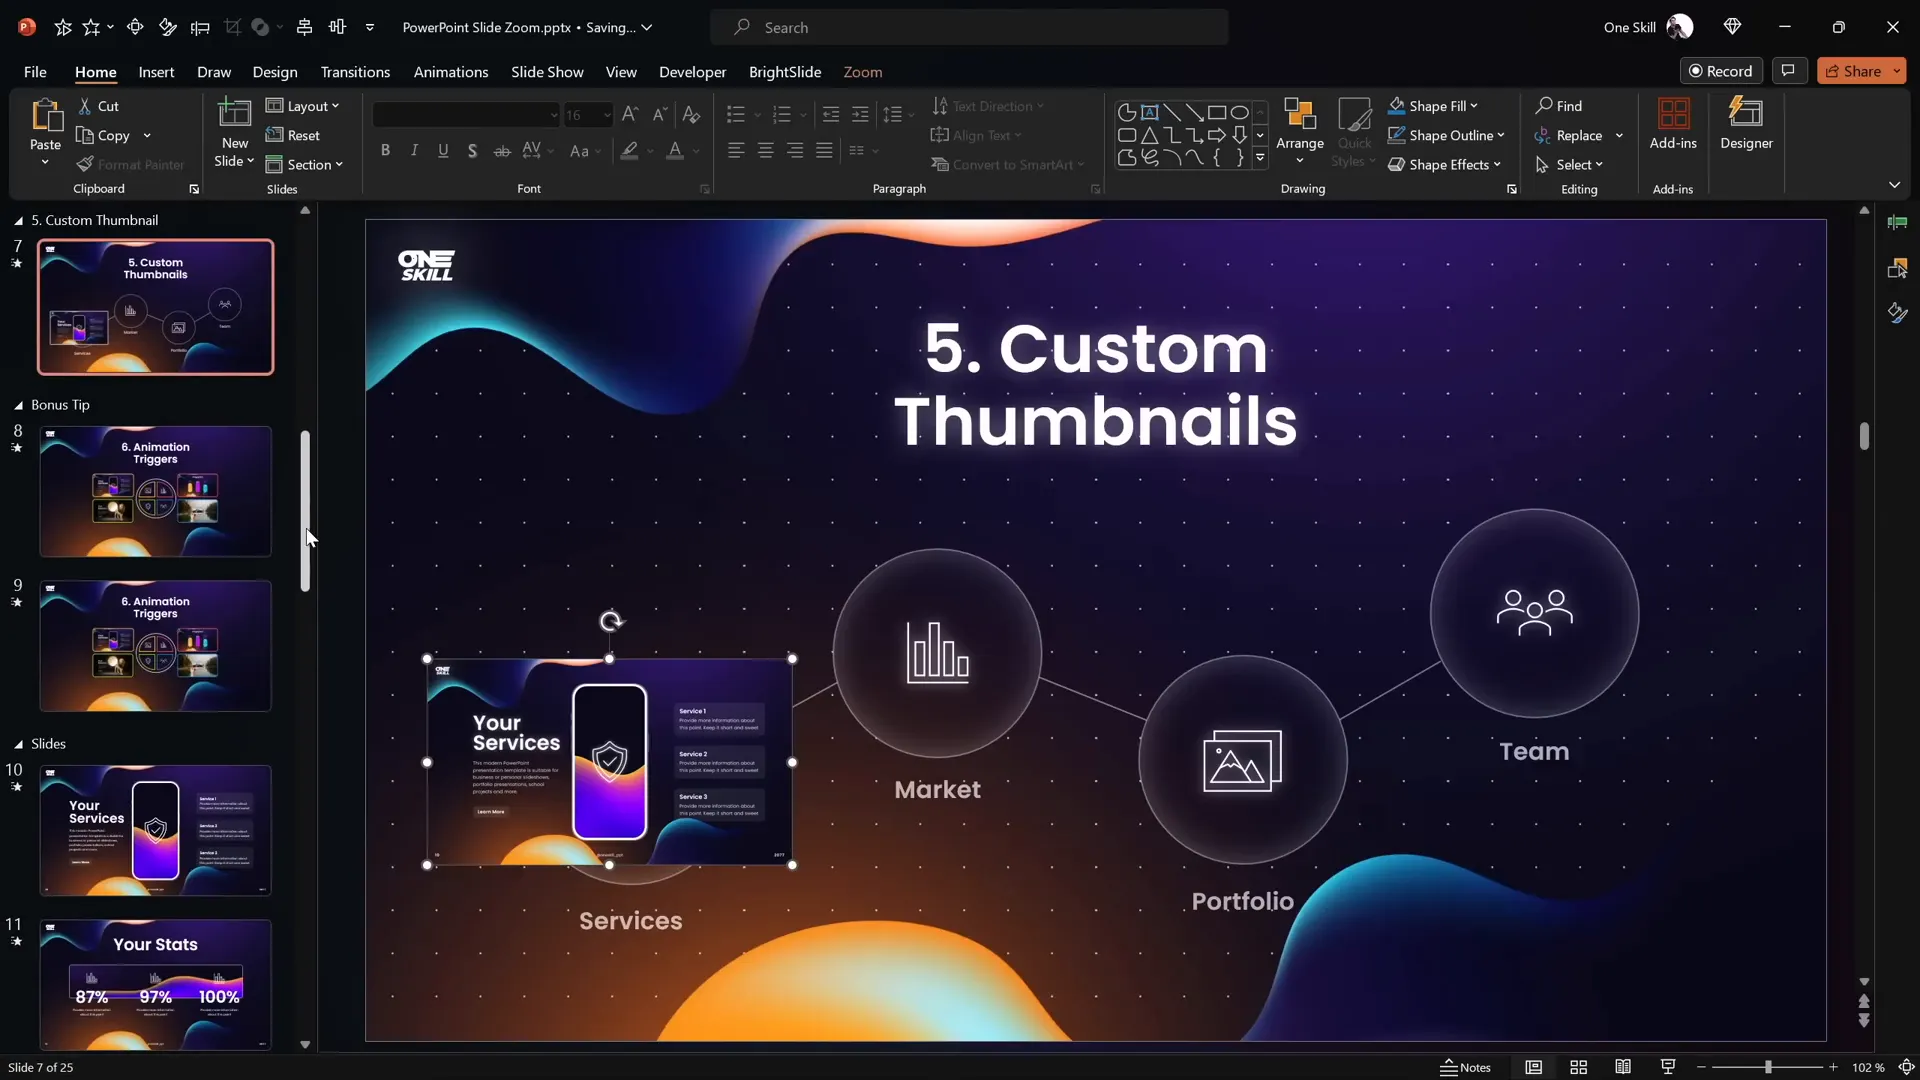
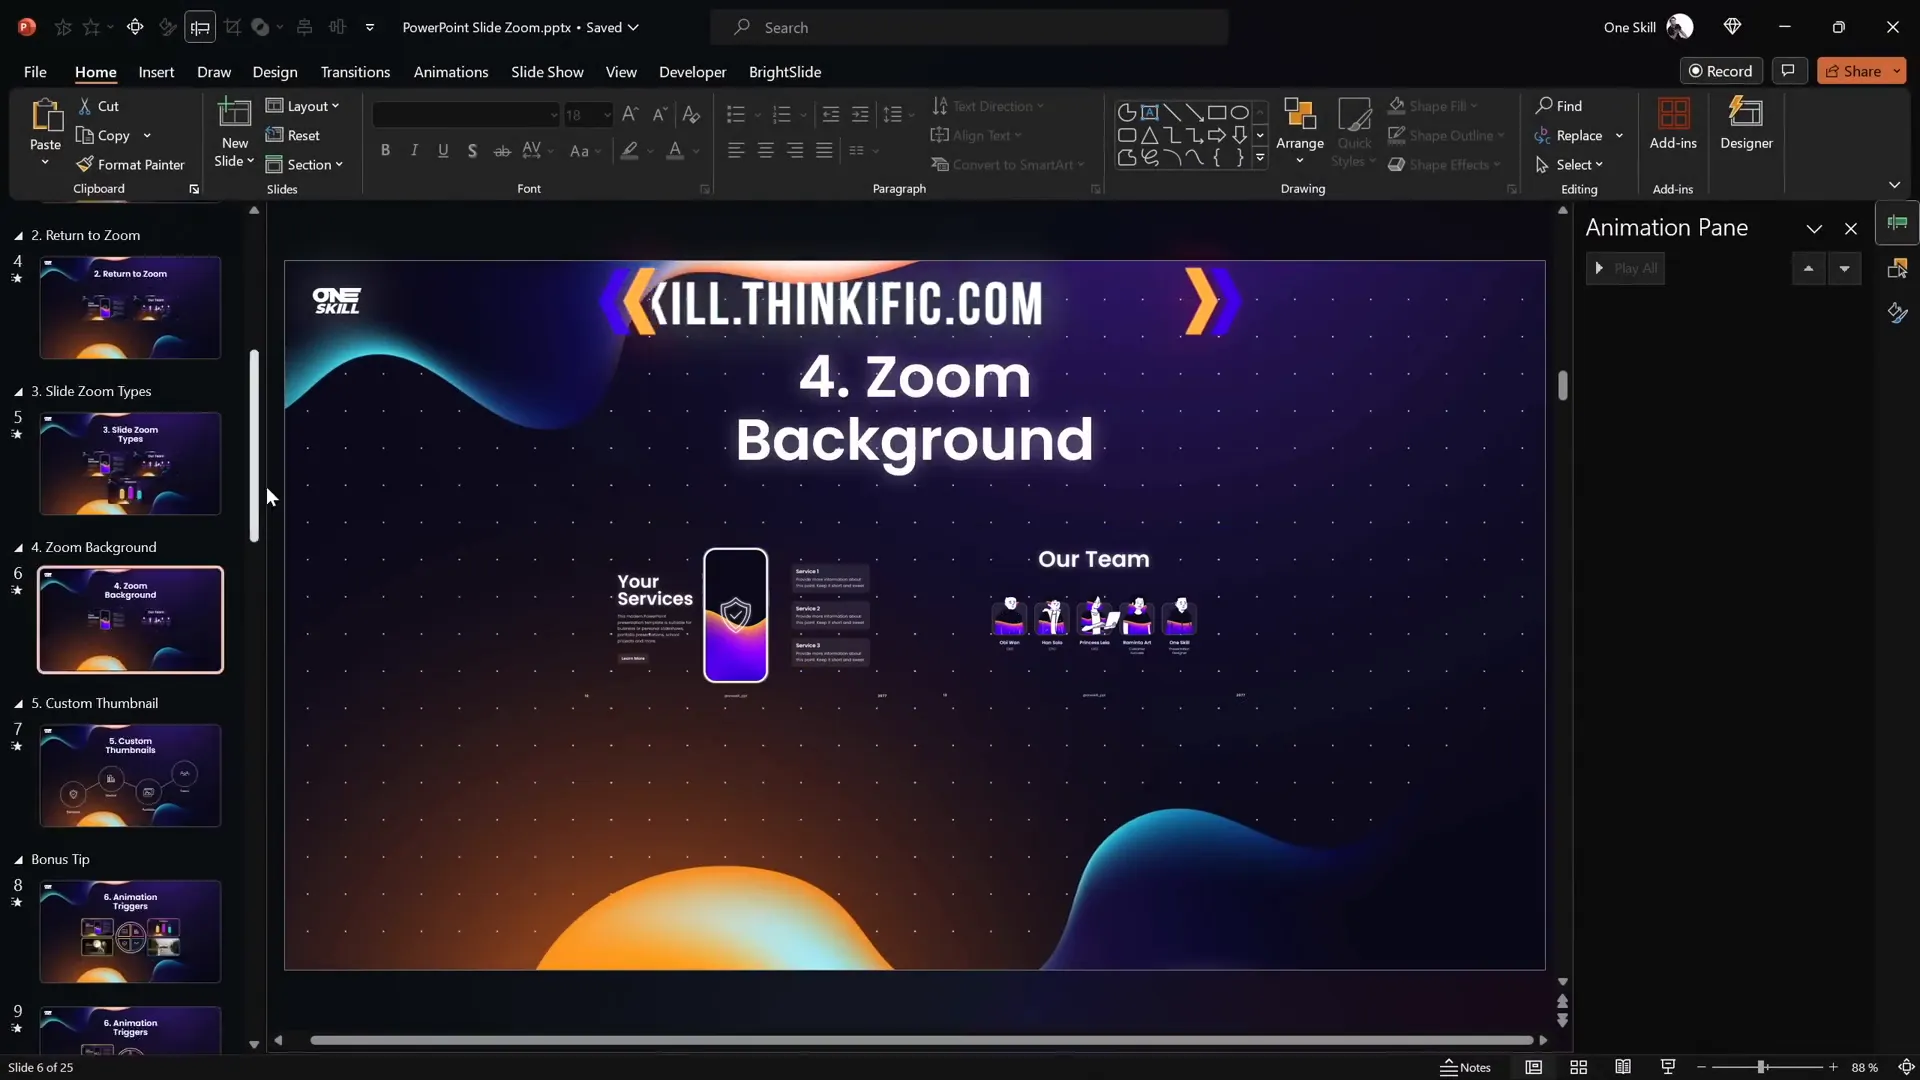
Tip 4: Using Custom Thumbnails for Slide Zooms to Control Slide Preview
By default, when you insert a Slide Zoom, the entire content of that slide is visible on the thumbnail. This means that any entrance animations or progressive reveals on the slide will not be hidden in the zoom thumbnail, which might reveal your content prematurely.
To maintain control over what your audience sees before zooming in, you can set custom thumbnails for your Slide Zooms:
- Select the Slide Zoom.
- In the Zoom tab, click Change Image.
- Insert any image you want as the thumbnail.
This feature is especially useful when you have a slide design involving icons or shapes that you want to keep visible and uncluttered, such as circles with connecting lines and icons inside.
Creating Transparent Thumbnails
To keep your icons visible while maintaining the zoom functionality, you can create a fully transparent thumbnail:

- Insert a rectangle shape on a slide.
- Fill it with a solid color and set its transparency to 100%.
- Right-click the rectangle and select Save as Picture, saving it as a PNG file to preserve transparency.
- Delete the rectangle from the slide.
- Select your Slide Zoom, go to Zoom > Change Image, and insert the transparent PNG.
Now your Slide Zoom thumbnail is invisible, allowing the icons beneath to show through, while the zoom functionality remains fully intact.
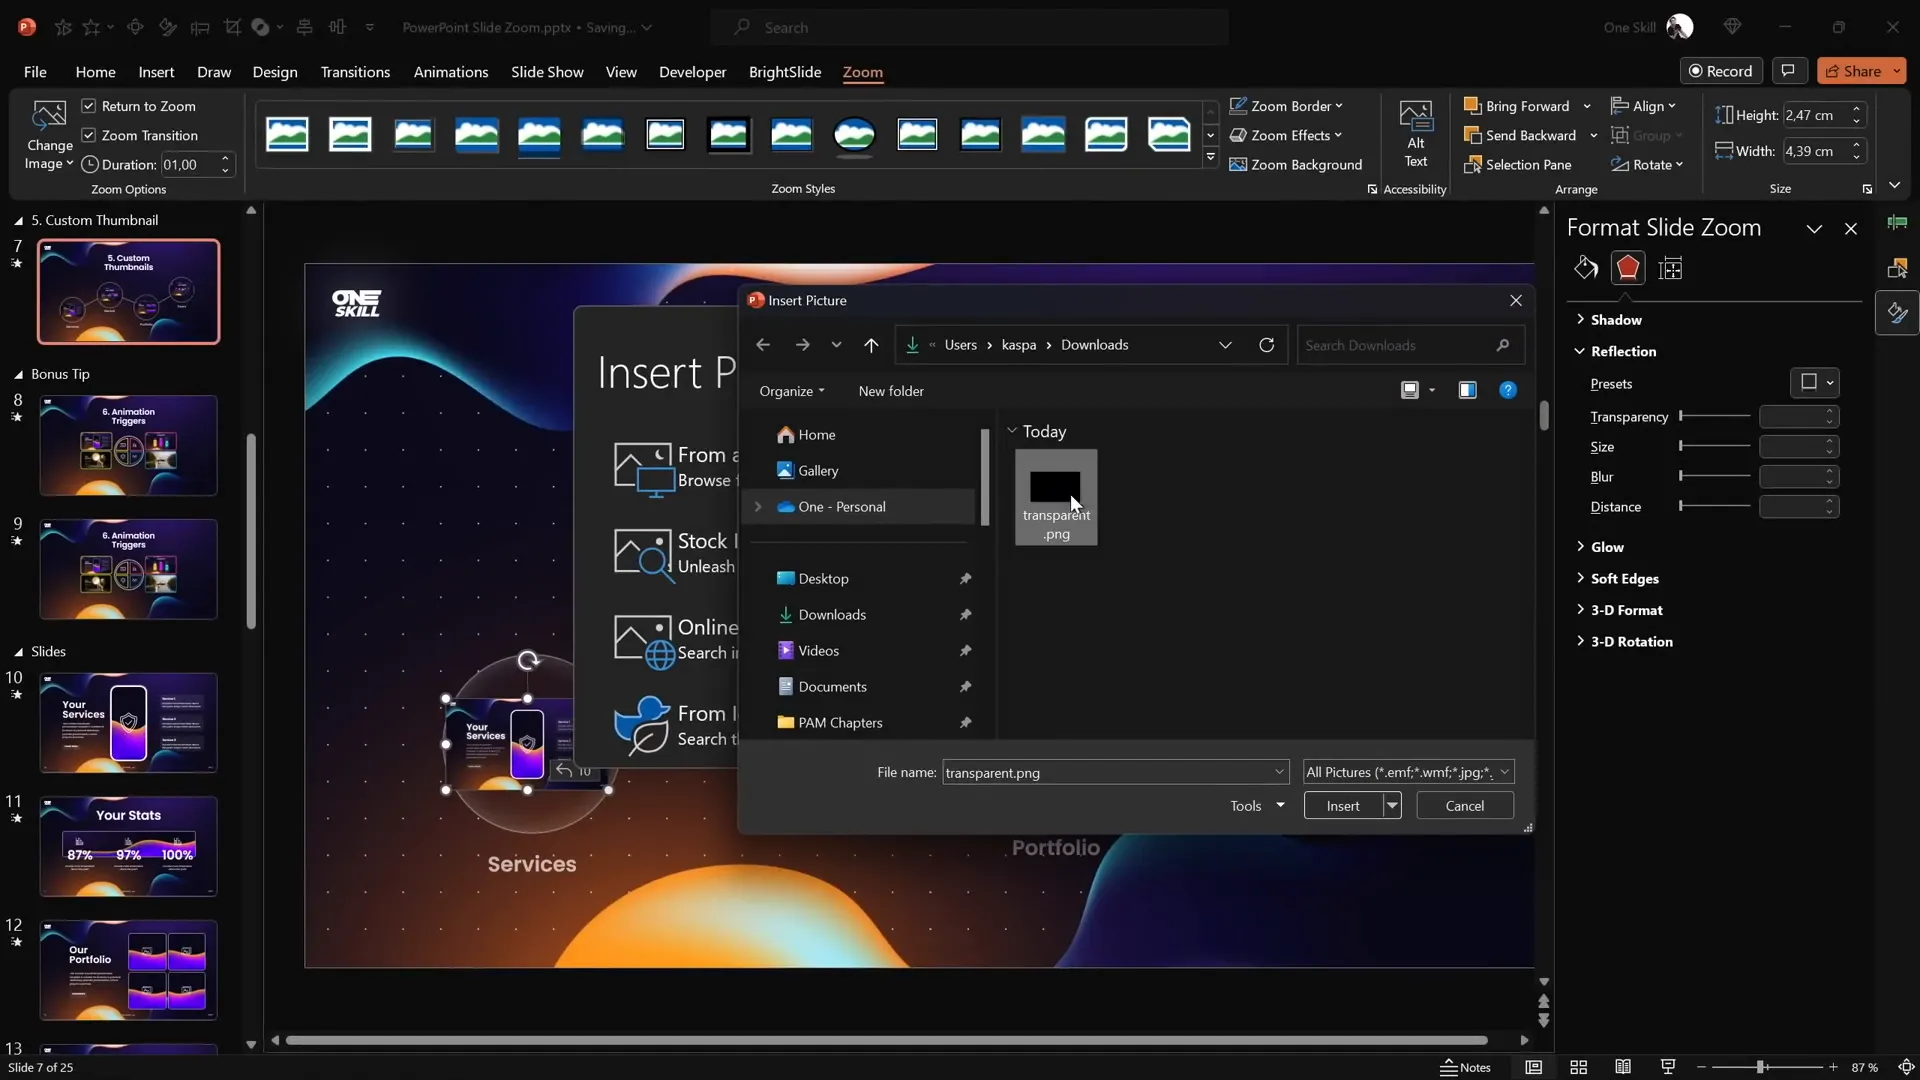
This technique lets you create visually clean navigation elements that don’t obstruct your slide design, enhancing both aesthetics and usability.
Tip 5: Using Animation Triggers with Slide and Section Zooms for Advanced Interactivity
For those ready to take their presentations to the next level, combining Slide or Section Zooms with animation triggers opens up a whole new world of interactivity.
Animation triggers allow you to start animations by clicking specific objects, such as buttons, rather than the entire slide. This means you can create buttons that open and close zooms, animate icons, and control your presentation flow precisely.

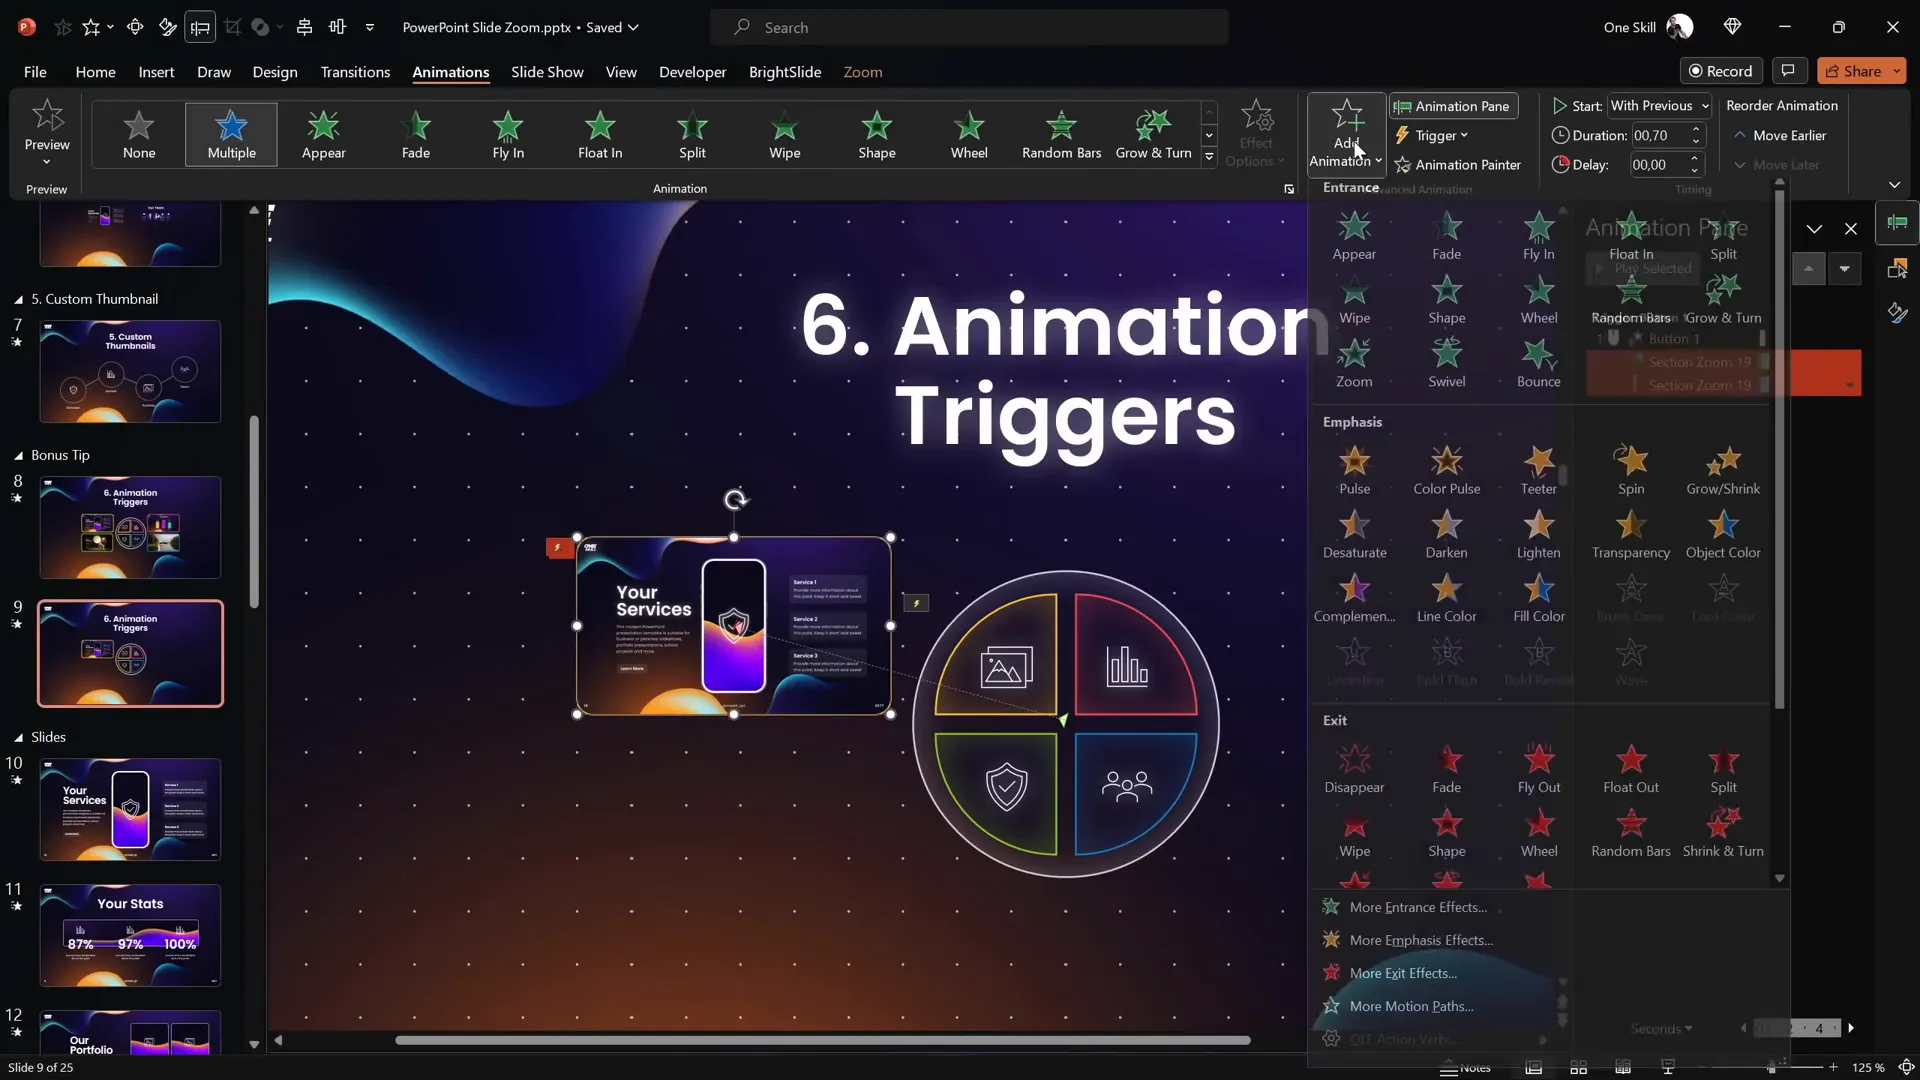
Example Setup: Buttons Controlling Section Zooms
Imagine a slide with four Section Zooms and four buttons in the center. Each button can open or close a section zoom, providing a smooth, interactive experience.
Here’s how to set it up:
- Identify Object Names: Use the Selection Pane to note the names of your section zoom (e.g., “Section Zoom 19”) and buttons (e.g., “Button 1”).
- Add Entrance Animation: Select the Section Zoom, open the Animation Pane, and add a Basic Zoom entrance animation. Set its duration to around 0.7 seconds for smoothness.
- Add Motion Path Animation: Add a Motion Path – Line animation moving from the button’s location to the section zoom’s position. Reverse the path so the animation starts at the button and ends at the zoom.
- Set Triggers: Select both animations, click Trigger, and assign the button as the trigger. This means the animations only play when the button is clicked.
- Animate the Button: Add a Grow/Shrink animation to the button to simulate a press effect. Adjust the shrink percentage to 90% and duration to 0.2 seconds with auto-reverse enabled.
- Add Exit Animation: Add a Basic Zoom exit animation to the Section Zoom with the same trigger button. Also, add a second Grow/Shrink animation to the button for the closing press effect.
- Add Reverse Motion Path: Add a second Motion Path animation for the Section Zoom to zoom out and move back toward the button. This time, do not reverse the path.
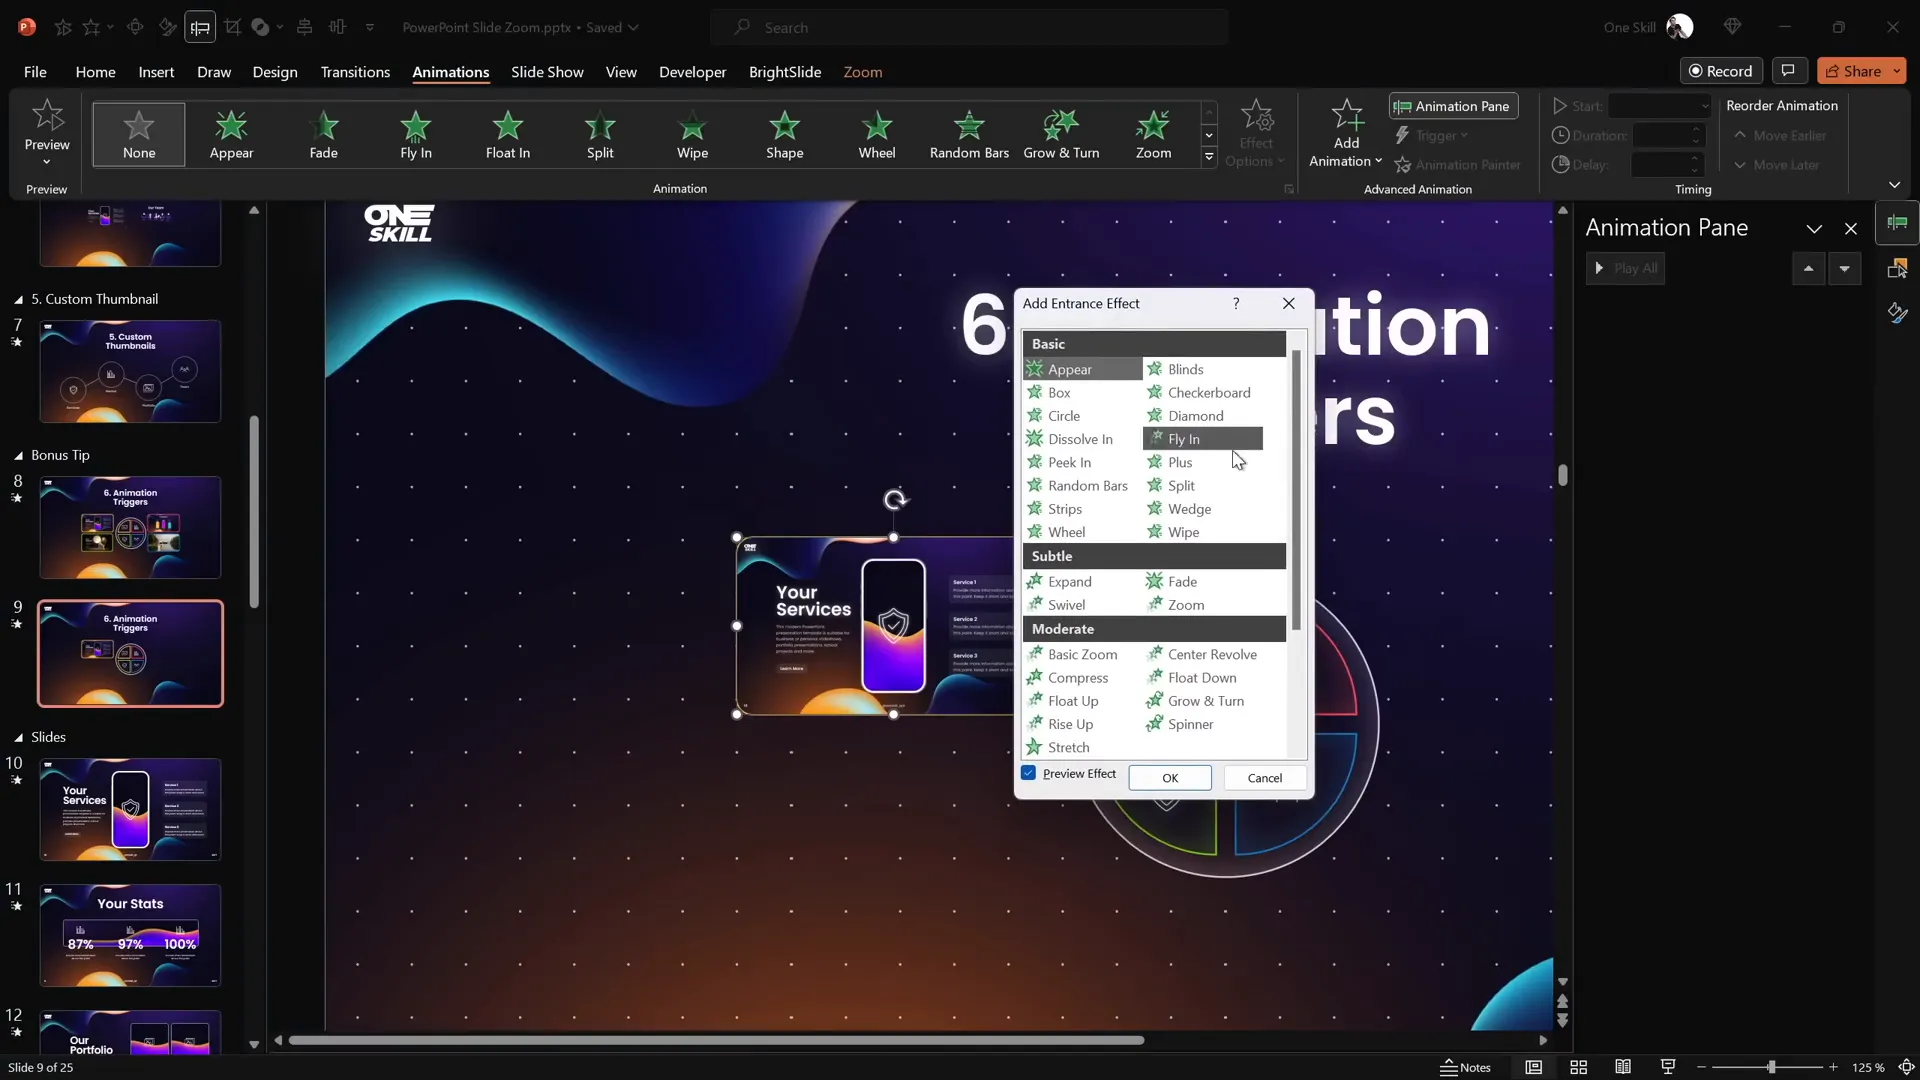
With these steps, clicking the button will open the section zoom with a smooth zoom and motion effect, and clicking again will close it, creating a highly interactive presentation.
If this sounds complex, don’t worry. Mastering PowerPoint animations can be a learning curve, but with practice and resources like the PowerPoint Animation Mastery course, you can become proficient quickly.
Conclusion: Become an Unstoppable PowerPoint Slide Zoom Creator
Mastering Slide Zooms in PowerPoint is a powerful way to create engaging, interactive, and professional presentations. By using the five essential tips covered here and the bonus tip on animation triggers, you can:
- Insert Slide Zooms efficiently and customize their appearance.
- Understand the differences between Slide, Section, and Summary Zooms for various presentation needs.
- Create transparent backgrounds for seamless depth effects.
- Use custom thumbnails to control what your audience sees before zooming.
- Add animation triggers for next-level interactivity with buttons and zooms.
These techniques not only enhance your presentation’s visual appeal but also improve navigation and audience engagement, making your message more memorable.
Remember, all these tips are designed to help you break free from the traditional, linear slide flow and add a dynamic zoom dimension to your presentations.
Frequently Asked Questions (FAQ)
1. What is the difference between Slide Zoom, Section Zoom, and Summary Zoom?
Slide Zoom zooms into a single slide and returns to the previous slide. Section Zoom zooms into a whole section of slides, allowing navigation through multiple slides before returning. Summary Zoom creates a dashboard of section zooms, offering a bird’s eye view of your entire presentation.
2. How do I make the Slide Zoom background transparent?
Select the Slide Zoom, go to the Zoom tab, and click on Zoom Background. Ensure the slide uses a picture or solid/gradient fill for the transparent background to work correctly.
3. Can I customize the thumbnail image for a Slide Zoom?
Yes! Select the Slide Zoom, go to Zoom > Change Image, and insert any image you want as the thumbnail. This is especially useful for controlling what your audience sees before zooming in.
4. What is the Return to Zoom feature?
Return to Zoom is a setting that allows you to zoom back to the original slide after viewing a zoomed slide or section. To enable it, select the zoom object and check the Return to Zoom box in the Zoom tab.
5. How can I add advanced interactivity with Slide Zooms?
You can use animation triggers to control Slide or Section Zooms with buttons. By setting animations and triggers, you can create open/close functionality and add motion effects for a highly interactive presentation.
6. Are there any resources to learn more about PowerPoint animations?
Yes! Courses like the PowerPoint Animation Mastery provide detailed lessons on animations, including Slide Zooms and morph transitions. These resources help you become a PowerPoint animation pro.
7. Can I use Slide Zooms in all versions of PowerPoint?
Slide Zooms are available in PowerPoint 2019, Microsoft 365, and later versions. If you don’t see the Zoom options, make sure your PowerPoint is updated to a recent version.
8. Do Slide Zooms work with animations on the target slides?
When you insert a Slide Zoom, all content on the target slide is visible immediately in the thumbnail, regardless of entrance animations. To control what’s visible, use custom thumbnails or animations triggered after zooming in.
9. Can I resize Slide Zooms on my slides?
Yes, Slide Zooms can be resized and repositioned like any other object on your slide. This helps fit them perfectly into your design layout.
10. How do I create sections in PowerPoint for Section and Summary Zooms?
Right-click between slides in the slide pane and select Add Section. Name your sections to organize your presentation. Sections are required to use Section and Summary Zoom features.
Check out the full video: PowerPoint Presentation Skills: Best Slide Zoom Tips! ✨


