
Welcome to this comprehensive guide on creating stunning PowerPoint slides featuring beautiful rounded hexagons and smooth animations. Designed to help you become an unstoppable PowerPoint creator, this tutorial walks you step-by-step through the process of designing eye-catching slides, leveraging both PowerPoint’s native features and external tools like Figma to elevate your presentations to the next level.
Whether you’re preparing a business presentation, educational content, or a creative portfolio, mastering these techniques will give your slides a polished, professional look that captivates your audience. Let’s dive in and explore how you can easily craft these impressive slides from scratch, add animations, and even customize your backgrounds for a fresh look every time.
Table of Contents
- Starting with a Fresh Slide and Adding a Background Image
- Adding a Semi-Transparent Overlay for Better Contrast
- Using Slide Background Fill for Shapes
- Creating Rounded Hexagons with Figma
- Importing and Editing Rounded Hexagons in PowerPoint
- Arranging Hexagons for a Cohesive Slide Layout
- Applying Slide Background Fill to Hexagons
- Grouping Hexagons for Easier Animation
- Adding Animations to Hexagon Groups
- Completing the Slide with Text and Additional Animations
- Customizing Your Slide Background for a Fresh Look
- Conclusion: Elevate Your PowerPoint Skills with Rounded Hexagon Slides
- Frequently Asked Questions (FAQ)
Starting with a Fresh Slide and Adding a Background Image
Every great slide begins with a clean slate. Start by opening a fresh, blank slide in your PowerPoint presentation. This blank canvas gives you the freedom to design without distractions or preset layouts interfering with your creative flow.
Next, enhance the visual appeal by filling the entire slide background with a beautiful, high-quality photo. For this tutorial, I used photos sourced from Unsplash, a fantastic resource for free, professional images. You can find the exact links to the photos I used in the video description.
To apply a photo as your slide background, follow these steps:
- Select the image you want to use and press Ctrl + C to copy it.
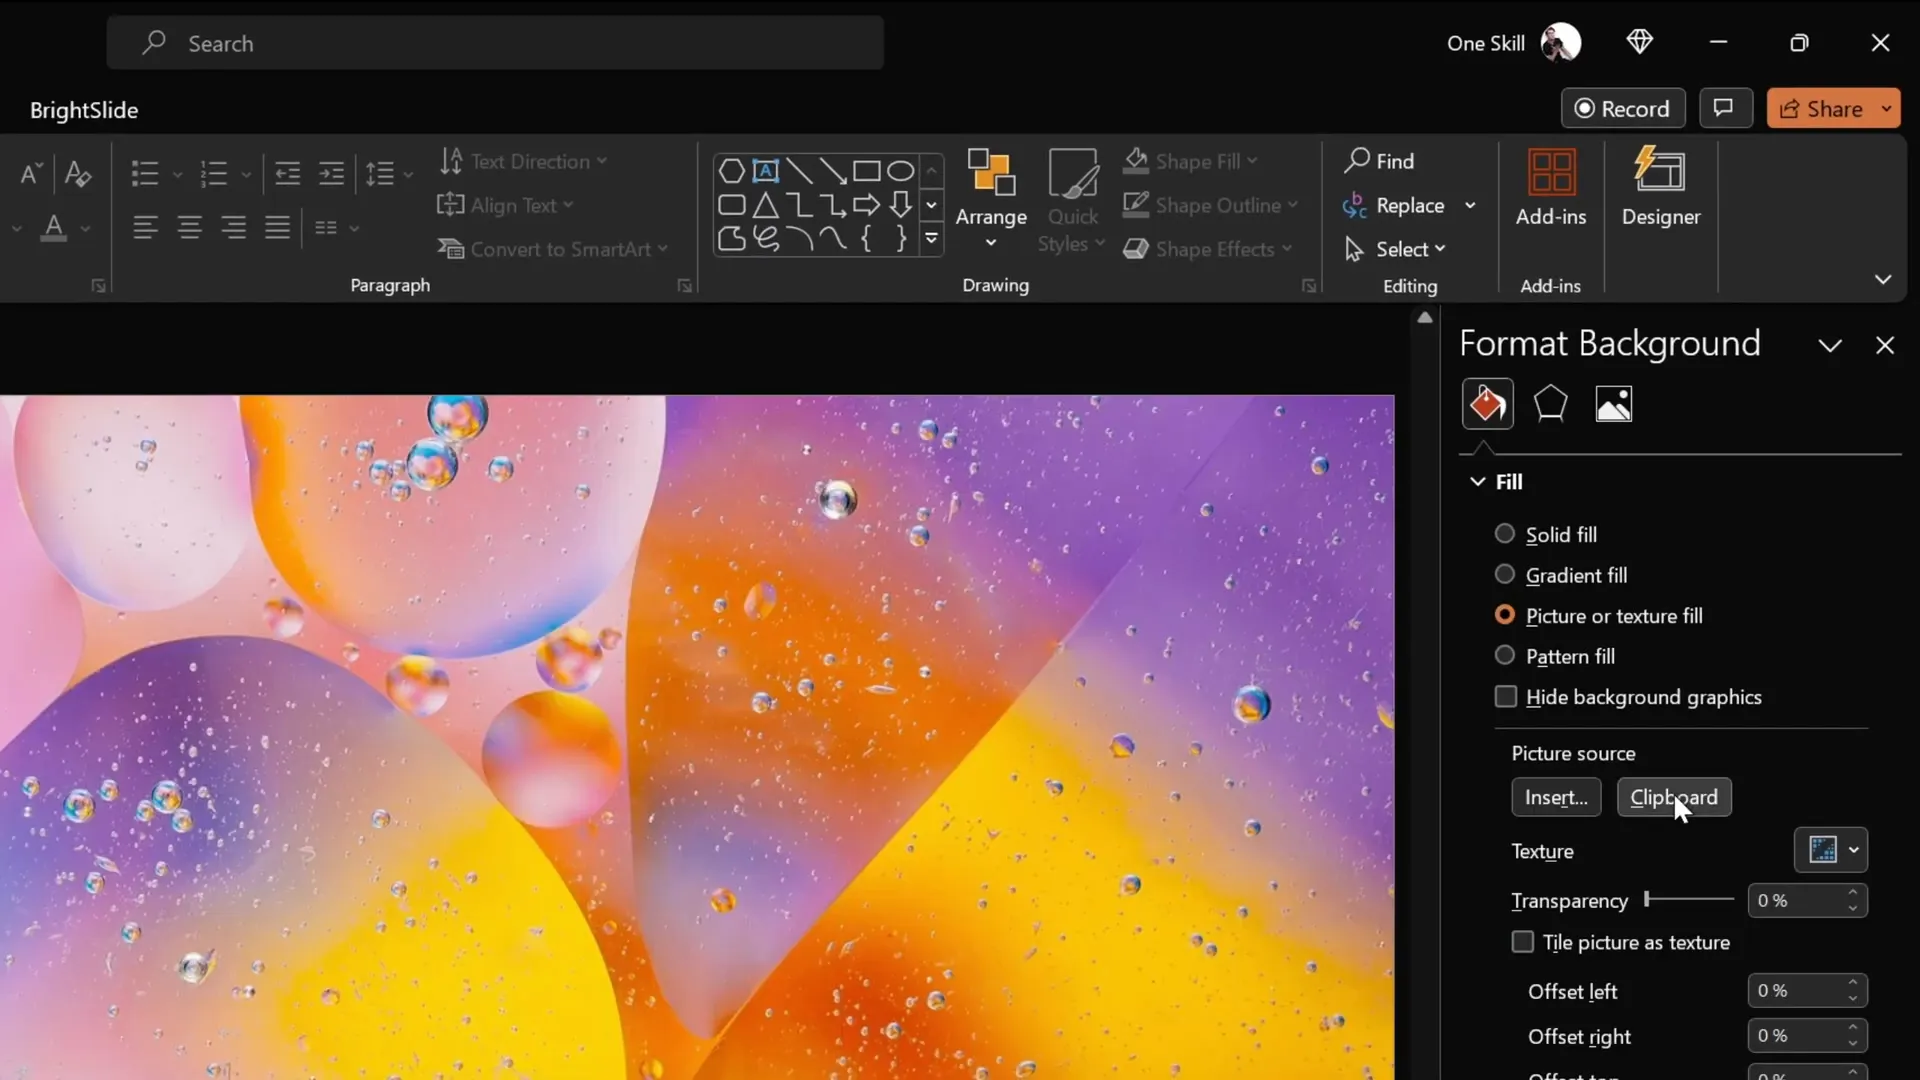
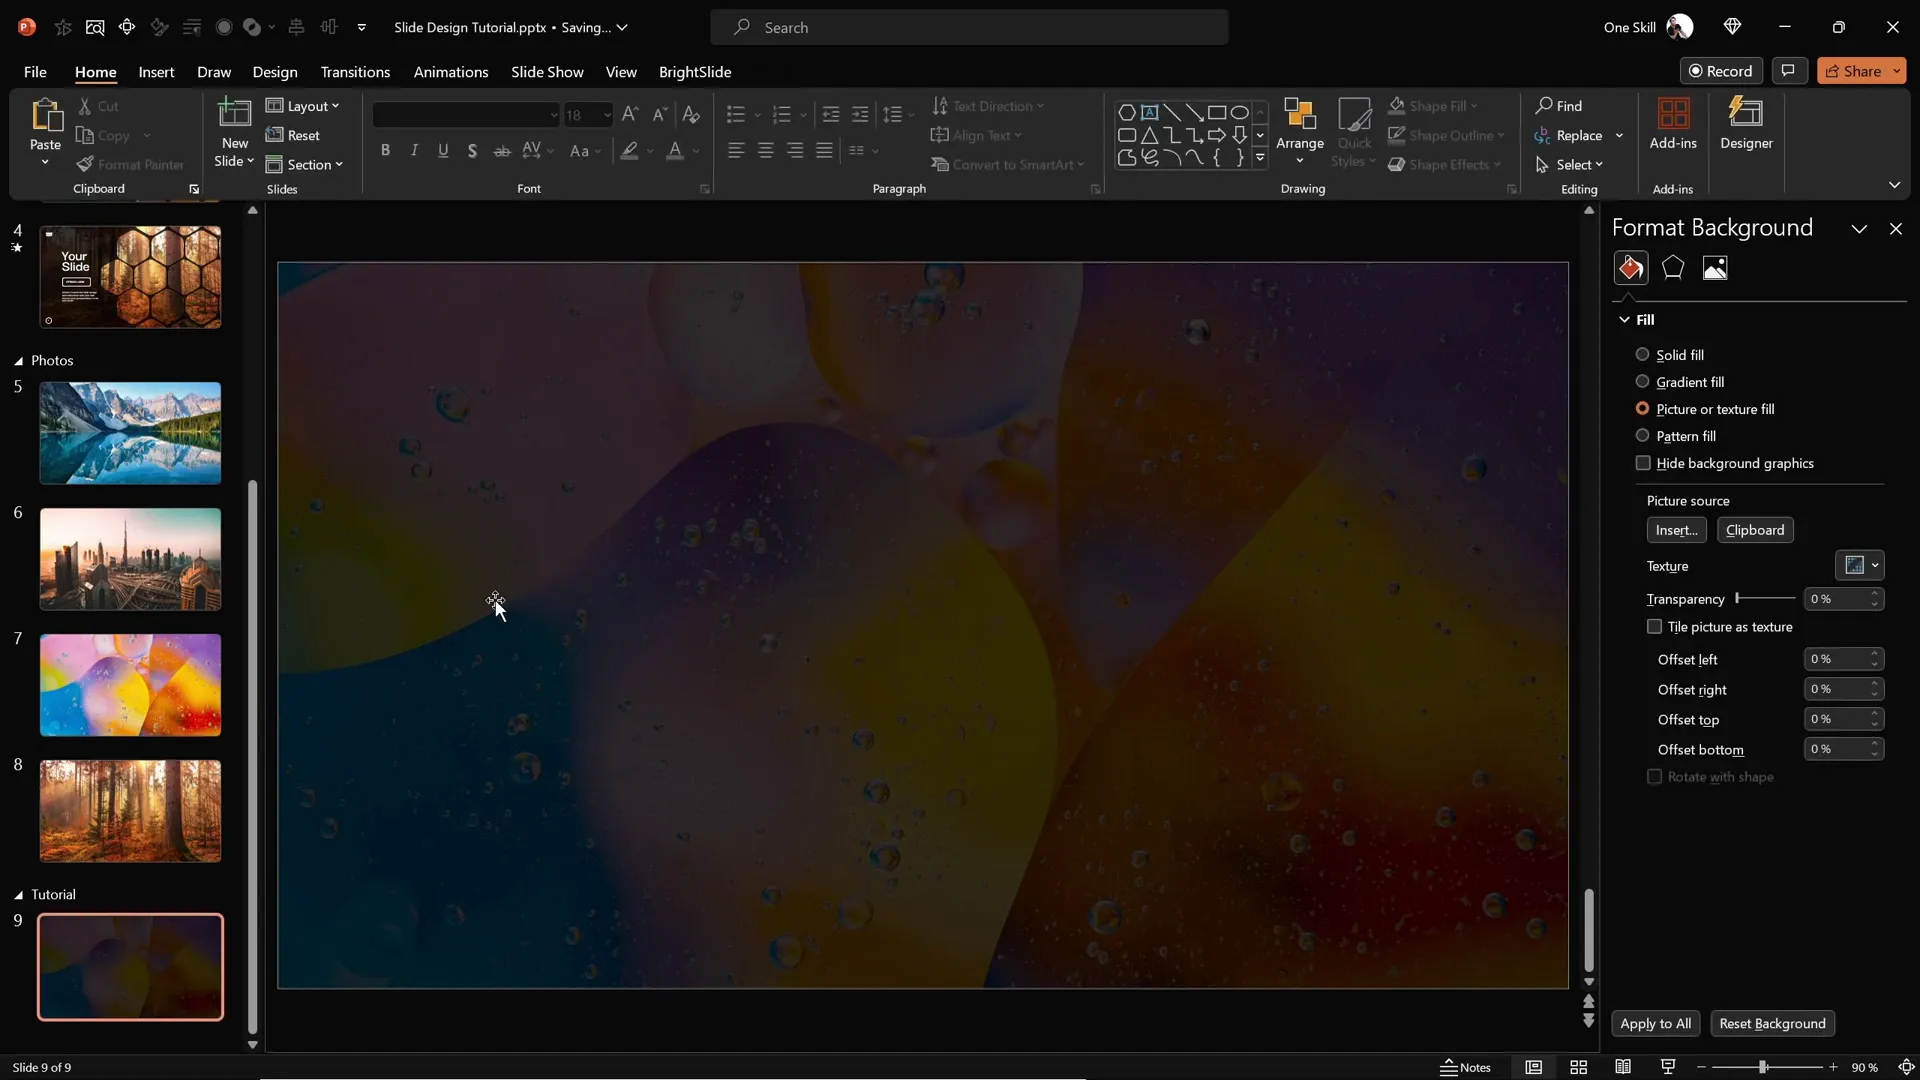
- Return to your blank slide, right-click anywhere on the slide, and choose Format Background.
- In the format background pane, select Picture or texture fill.
- Click on Clipboard to paste the copied image as the slide background.
This method embeds the image as a non-selectable background, which is perfect for layering other elements on top without accidentally moving the background image.
Adding a Semi-Transparent Overlay for Better Contrast
To ensure your slide content stands out against the background image, add a semi-transparent dark rectangle overlay. This technique improves text readability and adds depth to your design.
Here’s how to add the overlay:
- Go to the Insert tab and select Shapes.
- Choose the Rectangle tool and draw a rectangle covering the entire slide. Start by aligning it to the top-left corner and drag the bottom-right handle to cover the slide fully.
- Fill the rectangle with black color.
- Adjust the transparency to about 20% so the background image remains visible but muted enough for content to pop.
This subtle dark layer adds a professional touch and ensures your slide elements are easy on the eyes.
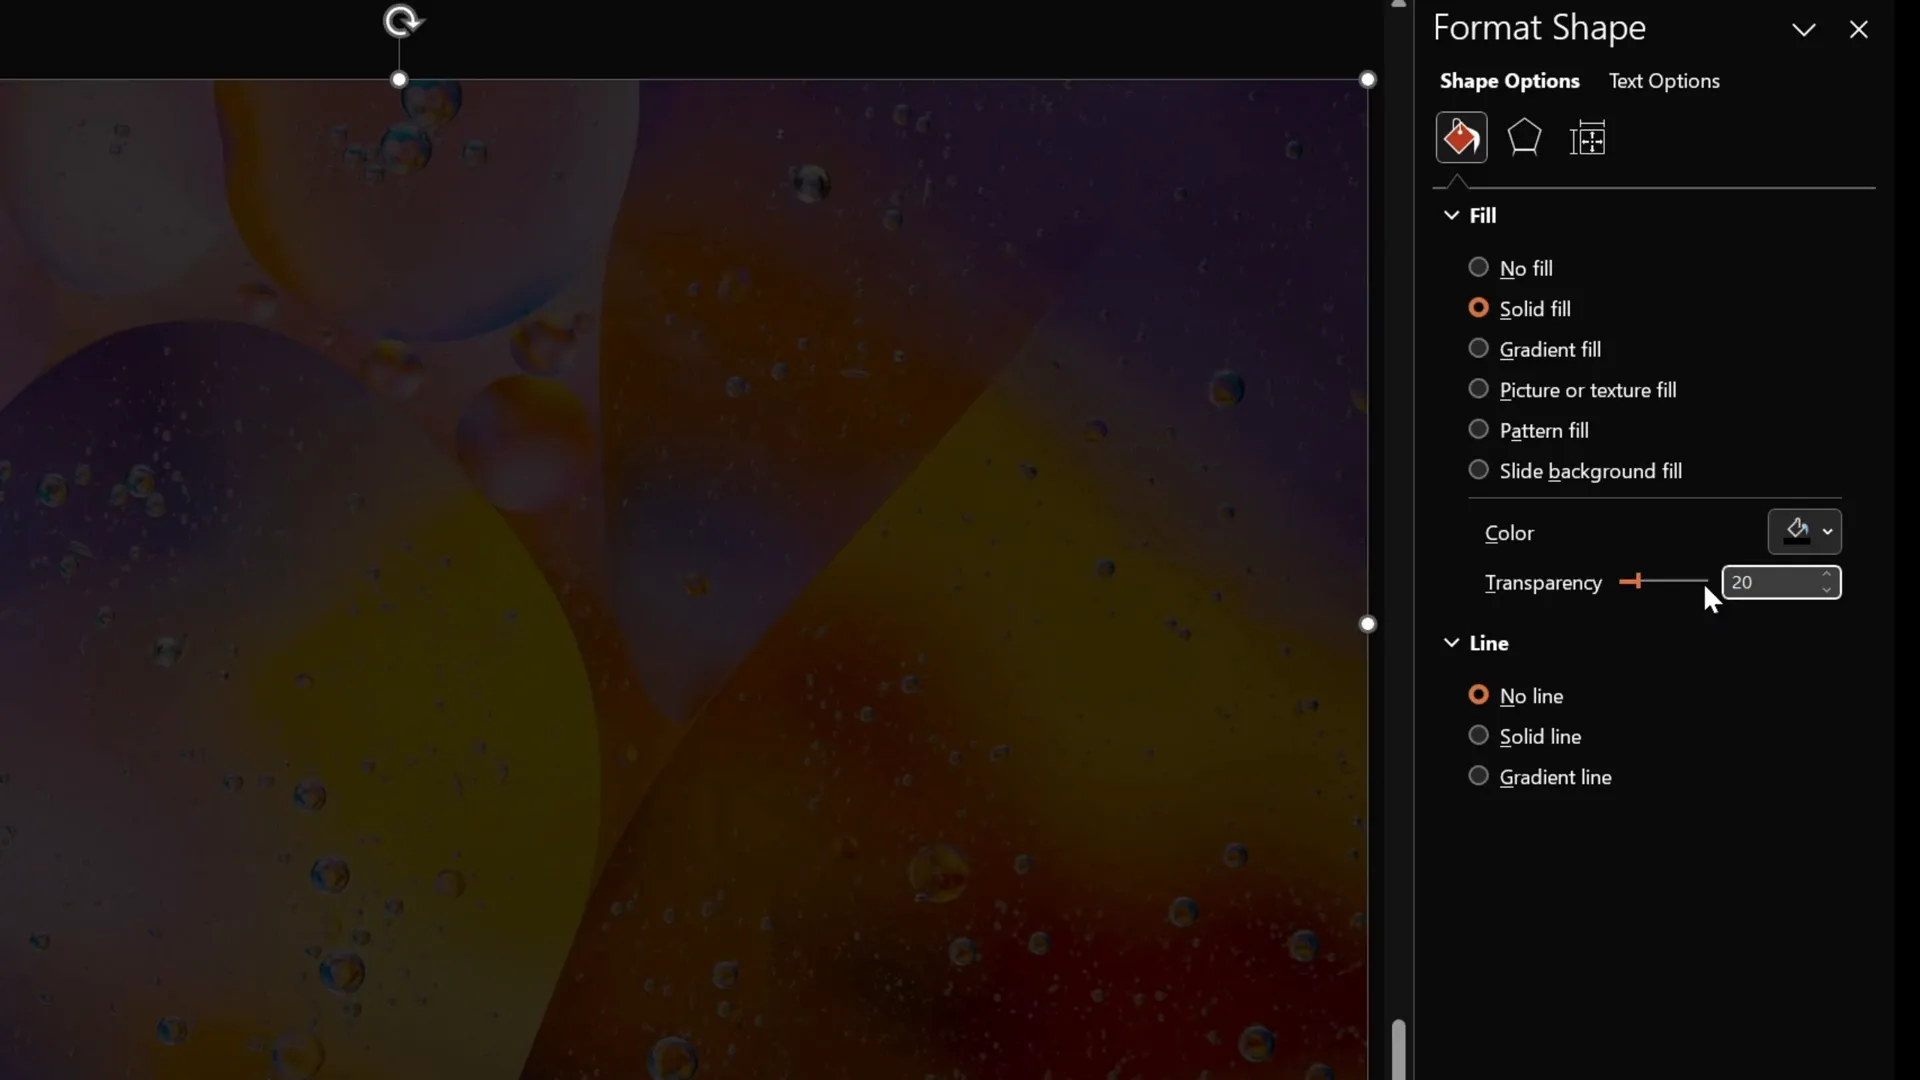
Using Slide Background Fill for Shapes
Now comes the magical part: inserting shapes that blend seamlessly with the background image. PowerPoint allows shapes to use the slide background as their fill, creating visually striking effects.
For example, insert a circle shape:
- Go to Insert > Shapes and select the Oval tool.
- Draw a circle anywhere on the slide.
- With the circle selected, go to the Shape Format tab and open the Shape Fill menu.
- Choose Slide Background Fill.
Suddenly, the circle takes on the exact portion of the background image behind it, giving an elegant and cohesive look to your design. This feature is a powerful way to create unique slide elements that are integrated with your background.
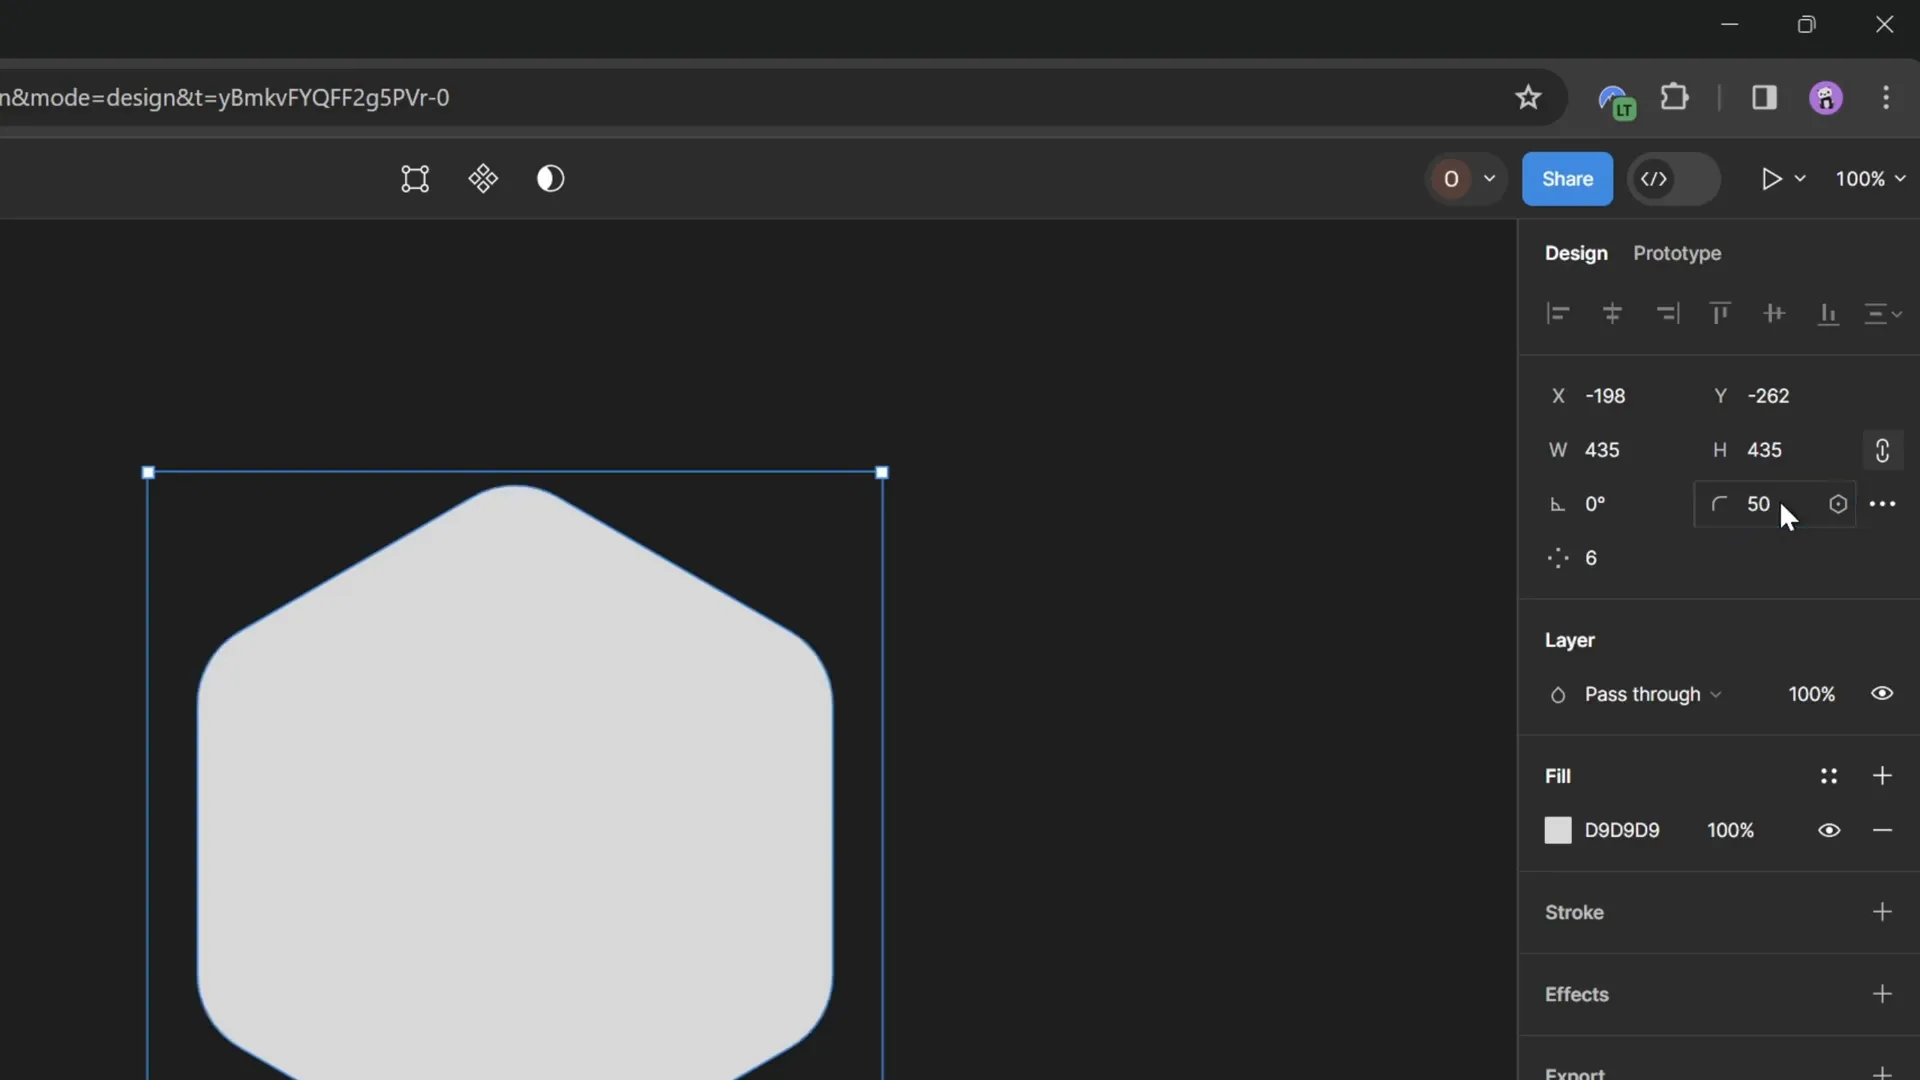
Creating Rounded Hexagons with Figma
While PowerPoint offers a variety of shapes, it lacks a native rounded hexagon shape, which is essential for our creative slide design. The closest default shape is a hexagon with sharp edges, but to achieve a softer, modern look, we’ll create rounded hexagons using an external free tool called Figma.
Figma is primarily a web-based design tool for websites and apps, but it’s perfect for creating custom shapes like rounded hexagons. Here’s how you can create one:
- Visit figma.com and sign up or log in with your Gmail account.
- Click the New Design File button to start a new project.
- From the toolbar, click the Rectangle Tool dropdown and select the Polygon Tool.
- Hold the Shift key and drag to draw a perfect polygon.
- In the polygon settings, change the number of sides to 6 to create a hexagon.
- Adjust the corner radius or roundness slider to around 50 to achieve rounded corners.
- Select the hexagon and click Export in the bottom right corner, choosing the SVG format.
- Download the SVG file to your device.
This method allows you to create a fully customizable rounded hexagon that can be imported back into PowerPoint.
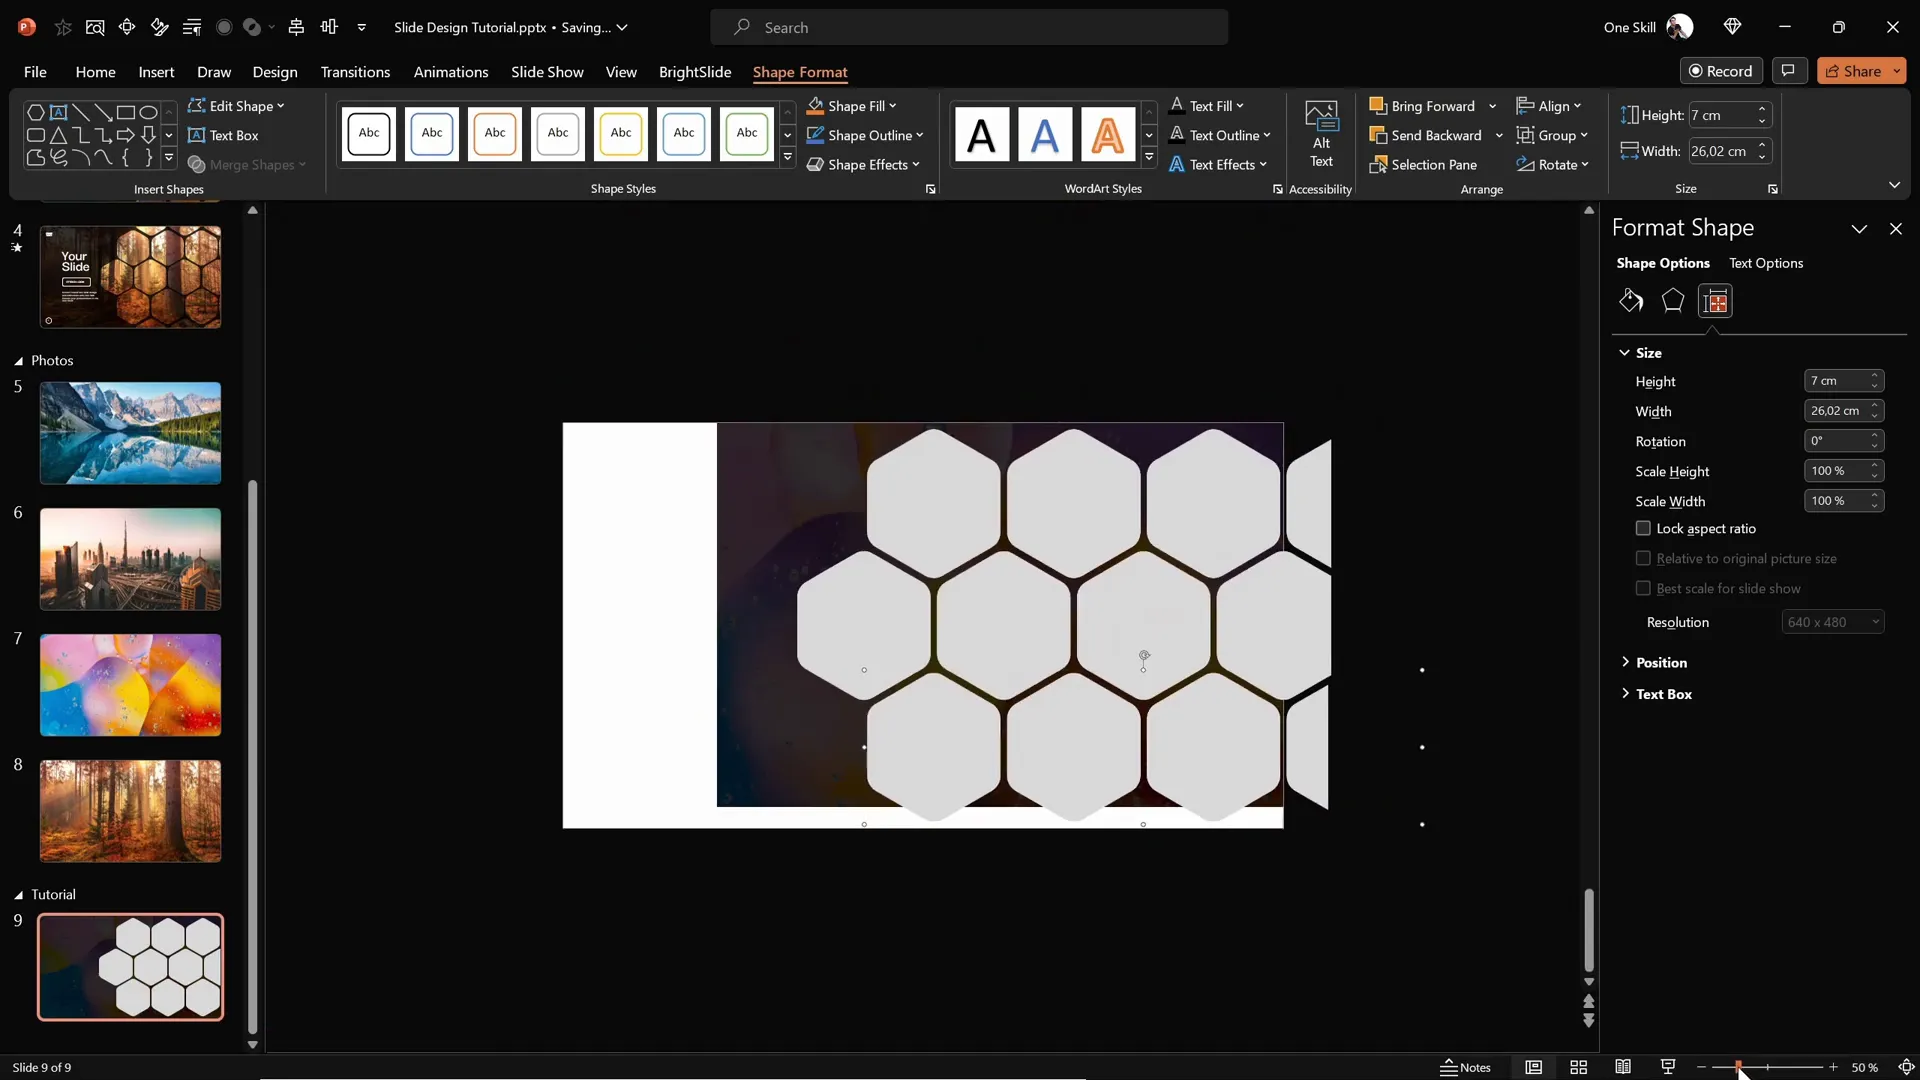
Importing and Editing Rounded Hexagons in PowerPoint
Once you’ve exported your rounded hexagon SVG from Figma, it’s time to bring it into PowerPoint and prepare it for your slide design:
- In PowerPoint, go to Insert > Pictures > This Device and select your downloaded hexagon SVG.
- Insert the hexagon onto your slide.
- Initially, some fill options might be grayed out because the SVG is treated as a graphic.
- To make it fully editable, select the hexagon, go to the Graphics Format tab, and click Convert to Shape.
- Now all fill options, including Slide Background Fill, will be available.
- Resize the hexagon by locking the aspect ratio and adjusting the height to about 7 centimeters for a balanced size.
This process gives you a versatile, editable shape that can seamlessly fit into your slide designs.

Arranging Hexagons for a Cohesive Slide Layout
To create a visually appealing pattern, duplicate and arrange the rounded hexagons across the slide:
- Hold Ctrl + Shift and drag the hexagon to create copies aligned in a straight line.
- Adjust the spacing between hexagons to your liking; a narrow gap creates a tight, modern grid.
- Add a fourth hexagon and select all four shapes.
- Drag the group towards the right so that the rightmost hexagon slightly extends out of the slide edge—a creative choice that adds visual interest.
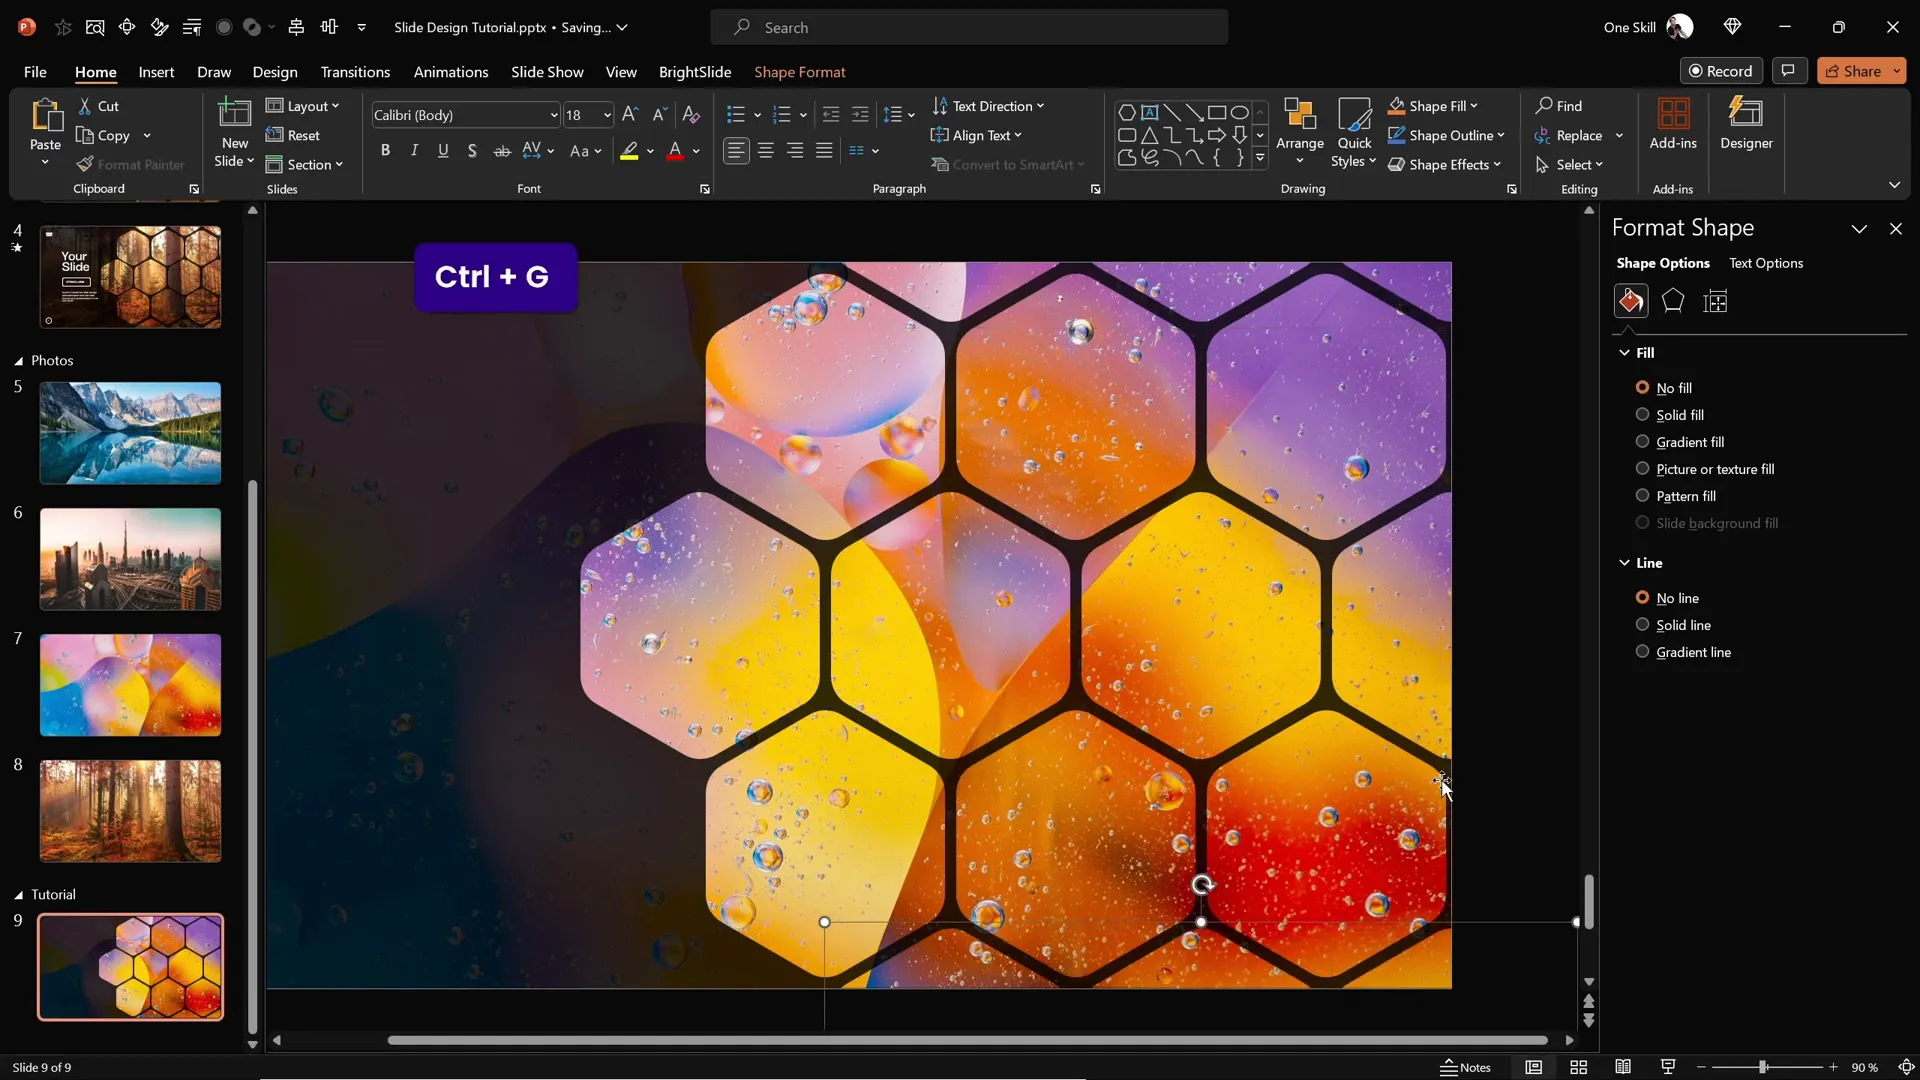
- Group these hexagons (Ctrl + G) for easier manipulation.
- Duplicate the group and align the copies vertically, maintaining consistent spacing.
- Add additional hexagons at the top and bottom edges of the slide to complete the pattern.
Once your pattern is in place, ungroup the hexagons to delete any that fall outside the visible slide area, ensuring a clean design.
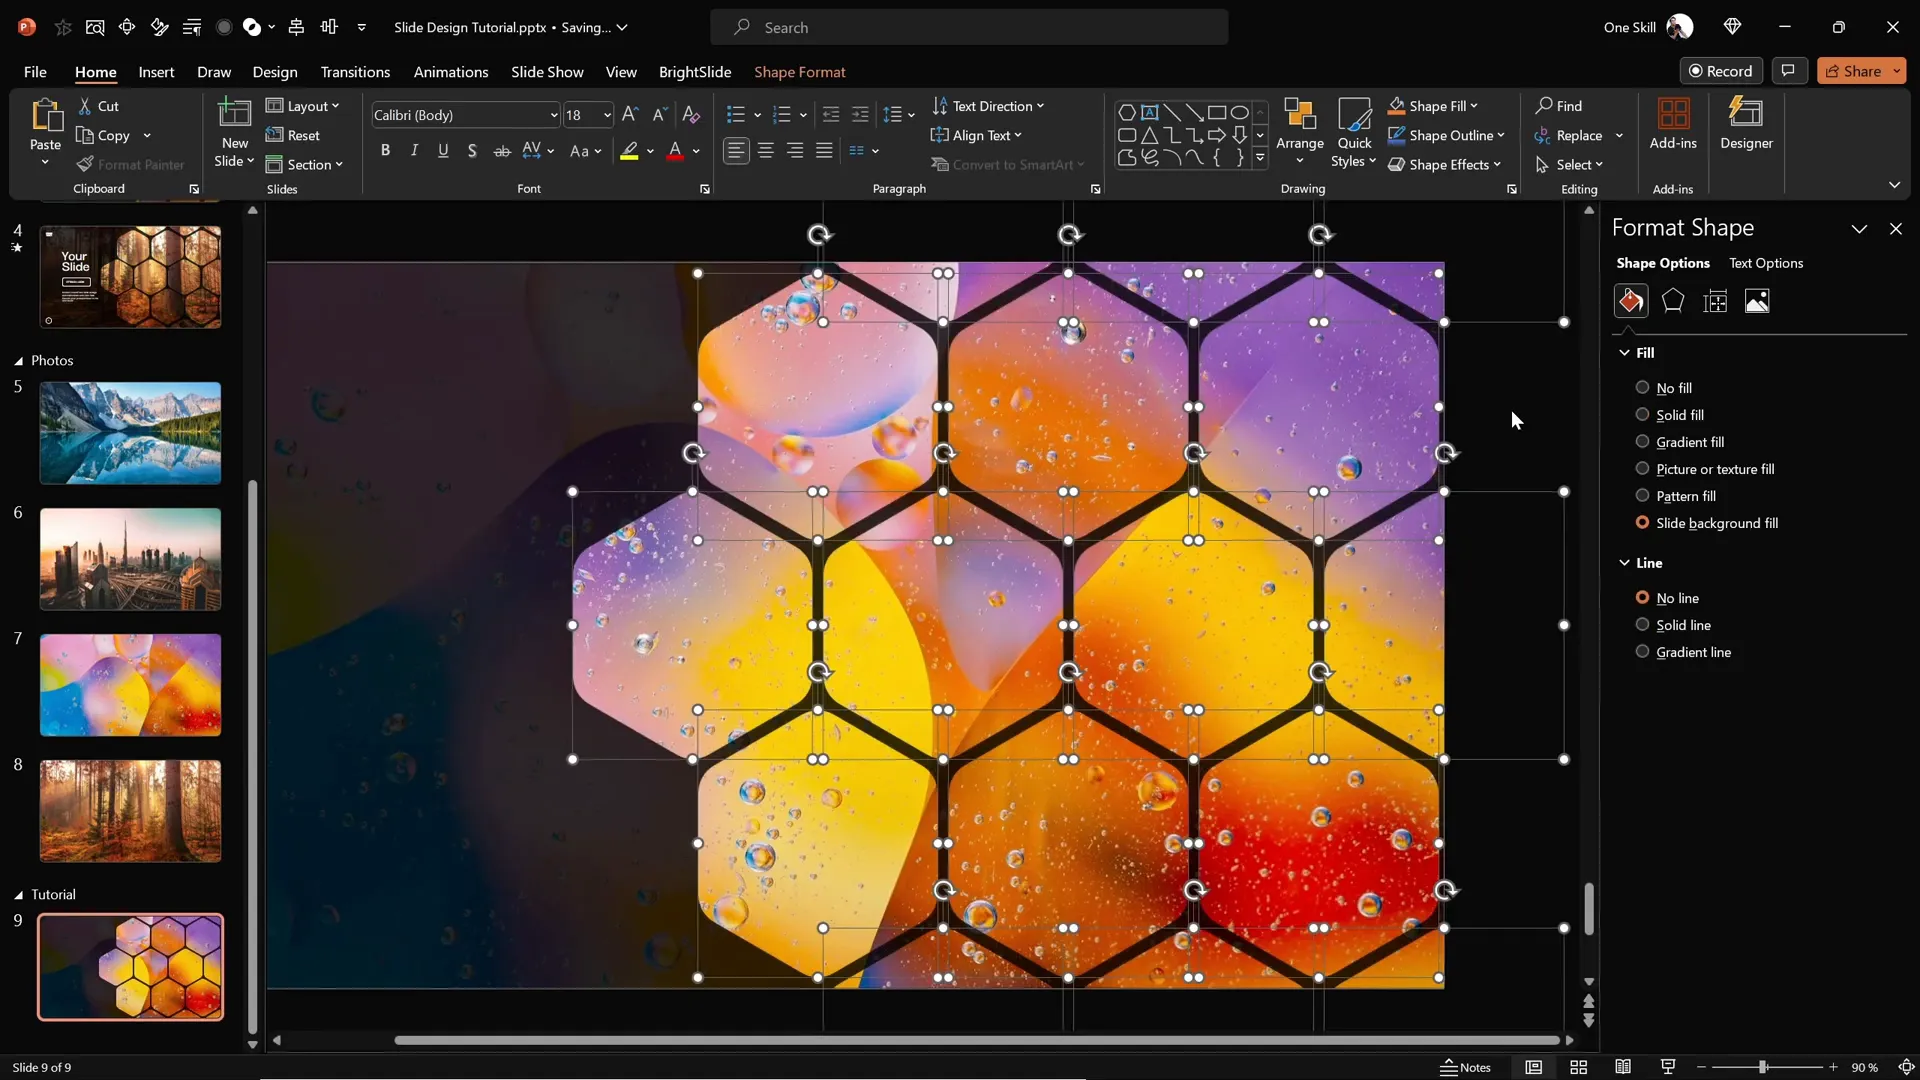
Applying Slide Background Fill to Hexagons
To unify your slide’s look, apply the Slide Background Fill to all visible hexagons. This makes each hexagon display the portion of the background image behind it, creating an integrated mosaic effect.
Simply select all hexagons and change their fill to Slide Background Fill. The effect is both subtle and striking, adding depth and texture to your slide.

Grouping Hexagons for Easier Animation
For smooth animation control, group your hexagons according to their placement on the slide:
- Group the middle row of hexagons into one group.
- Group the top row into another.
- Group the bottom row similarly.
- Additionally, group any other hexagon clusters as needed.
Having these groups allows you to animate each section independently, creating dynamic and professional slide transitions.
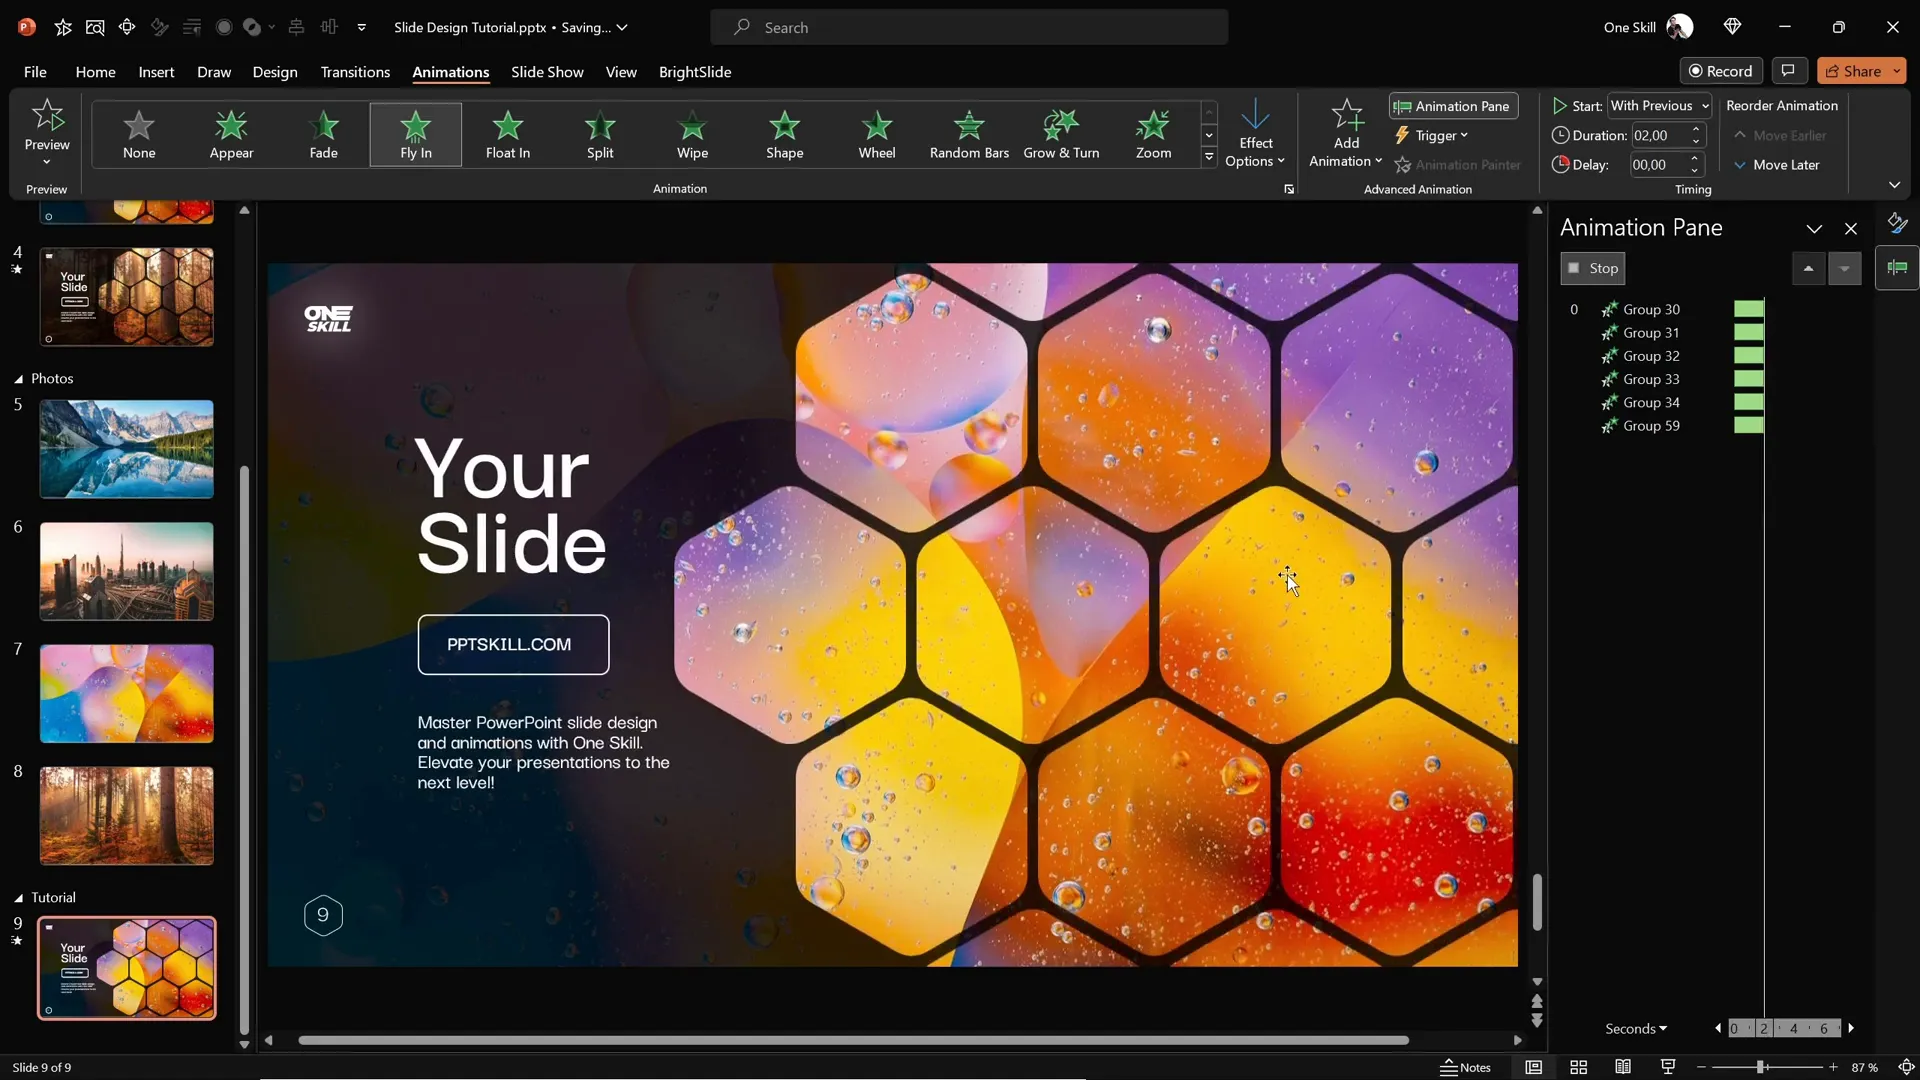
Adding Animations to Hexagon Groups
Animations breathe life into your slides and help guide your audience’s attention. Here’s how to animate your grouped hexagons:
- Open the Animation Pane to monitor your animations.
- Select all hexagon groups.
- Choose the Fly In animation effect.
- Set the direction to From Top for the top and middle groups.
- For the bottom groups, change the direction to From Bottom to create a balanced entrance.
- Set all animations to start With Previous for seamless flow.
- Adjust the duration to about 2 seconds for a smooth effect.
- In the animation options, select Maximum Smooth End for a soft landing.
To avoid overlapping issues, send the top and bottom groups to the back, keeping the middle row in front. Also, send the semi-transparent rectangle background behind all hexagons for optimal layering.

Completing the Slide with Text and Additional Animations
To finish your slide design, add text elements such as your logo, titles, and slide numbers:
- Copy the text boxes and logo from a previous slide or create new ones.
- Paste them onto your current slide and arrange them as desired.
- Group all text elements for easier animation.
- Add a Flame animation effect with a direction from the left.
- Set the animation to start With Previous and duration to 2 seconds.
- Use the bounce slider with a 1.5-second bounce to add a playful entrance.
This combination of flying hexagons and bouncing text creates a dynamic and engaging slide experience.
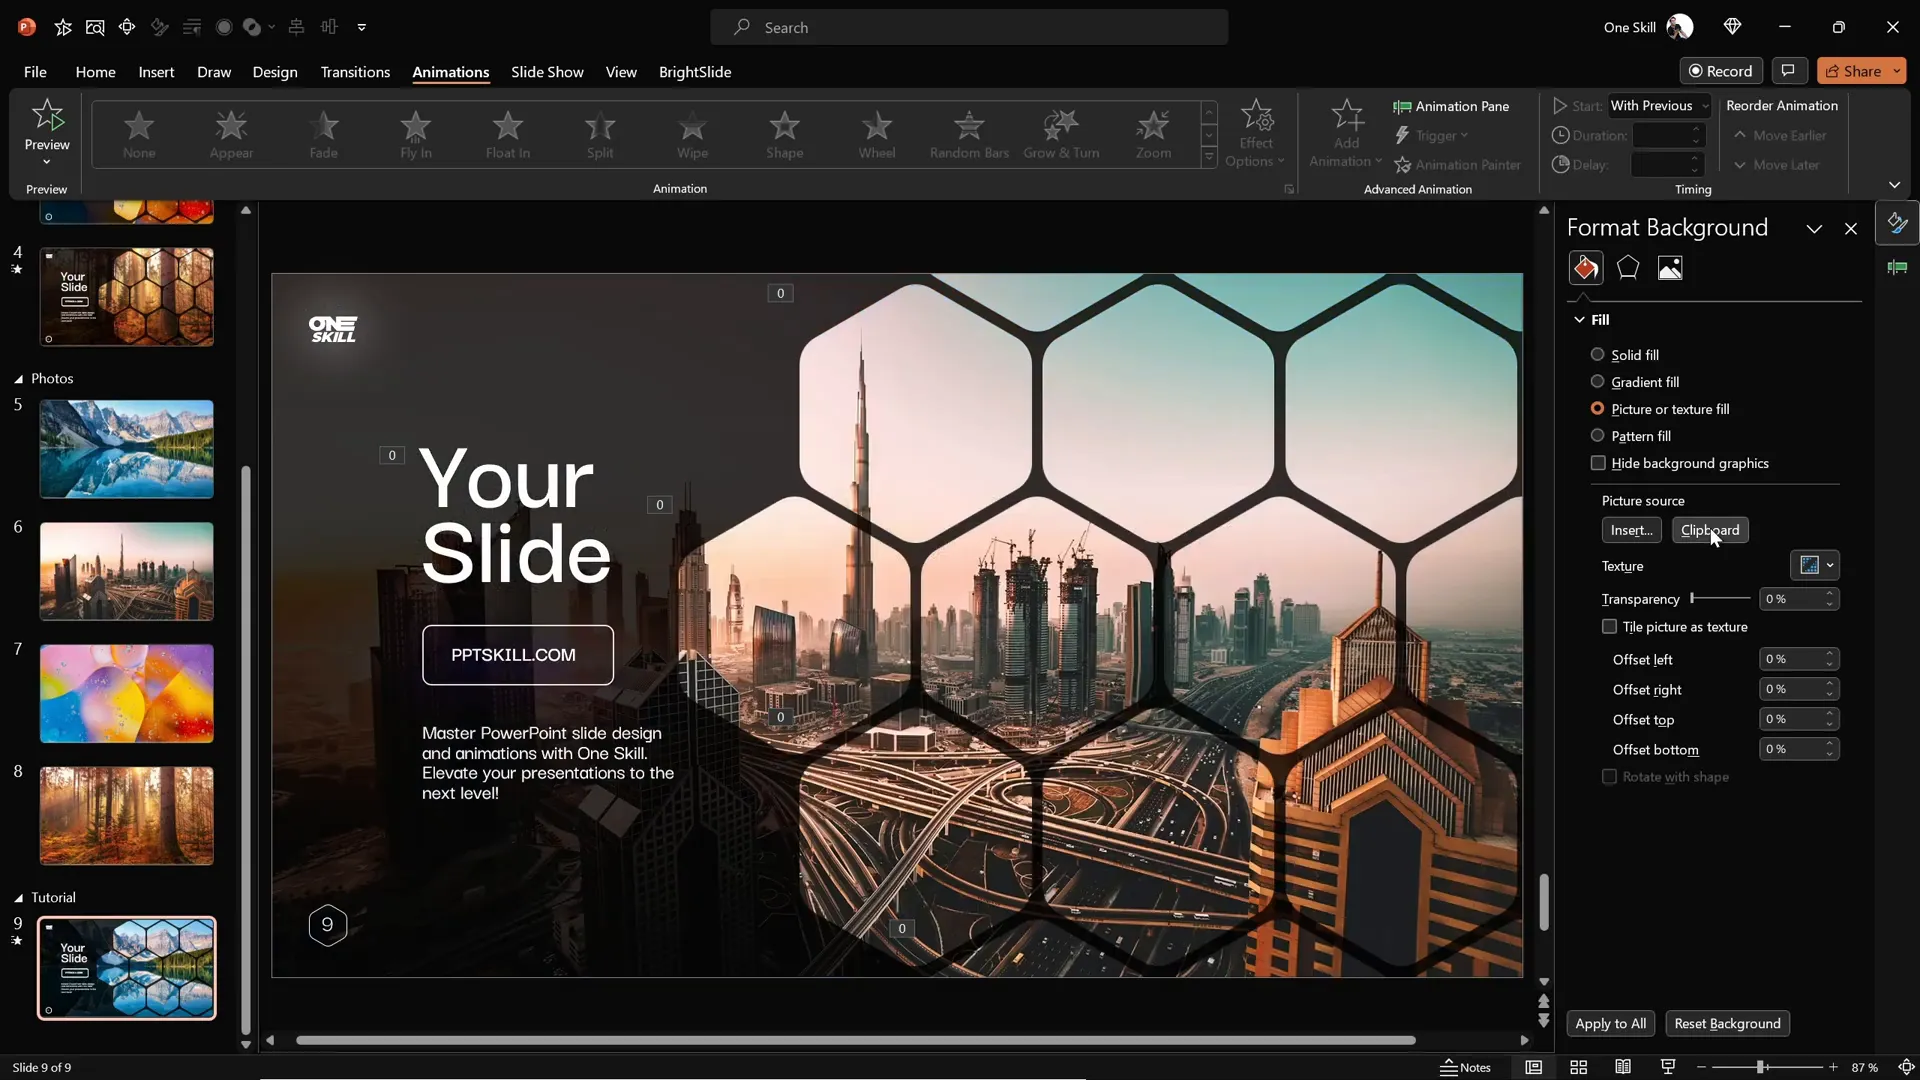
Customizing Your Slide Background for a Fresh Look
One of the most powerful features of this slide design is how quickly you can change the entire look by swapping the background image:
- Select a new photo and copy it (Ctrl + C).
- Return to your slide and select any shape or hexagon using Slide Background Fill.
- Go to the fill options and click Clipboard to replace the image fill.
- Watch as your entire slide instantly transforms with the new background image reflected in all hexagons and shapes.
This flexibility allows you to maintain your slide layout and animations while refreshing the visual theme for different presentations or topics.
Conclusion: Elevate Your PowerPoint Skills with Rounded Hexagon Slides
Congratulations! You now have the skills to create beautiful, animated PowerPoint slides featuring rounded hexagons that integrate seamlessly with your background images. By using PowerPoint’s native tools in combination with free online resources like Figma, you can elevate your presentations with professional designs and smooth animations.
Remember, the key steps include:
- Setting a high-quality background photo as your slide background.
- Adding a semi-transparent overlay for contrast.
- Creating custom rounded hexagons in Figma and importing them into PowerPoint.
- Arranging and grouping hexagons for visual appeal and animation control.
- Applying slide background fills to hexagons for a cohesive look.
- Adding thoughtful animations to engage your audience.
- Customizing the background image to quickly refresh your slide’s appearance.
This technique is not only visually impressive but also highly versatile, making it perfect for a variety of presentation types. If you ever find yourself short on time, consider exploring high-quality PowerPoint templates that incorporate similar design elements to speed up your workflow.
Keep practicing these skills, and soon you’ll be creating presentations that are both creative and impactful. Happy designing!
Frequently Asked Questions (FAQ)
Can I create rounded hexagons directly in PowerPoint without using Figma?
PowerPoint does not natively support rounded hexagons with smooth corner radii. The closest shape is a regular hexagon with sharp edges. Using external tools like Figma allows you to create perfectly rounded hexagons and import them as SVG files, which you can then convert to editable shapes within PowerPoint.
Is Figma free to use for creating shapes like rounded hexagons?
Yes! Figma offers a free plan that includes all the features needed to create custom shapes like rounded hexagons. You can sign up with your Gmail account and start designing without any cost.
How do I ensure the hexagons align perfectly with each other on the slide?
Use PowerPoint’s grid and snap-to-grid features to help align your hexagons precisely. Holding Ctrl + Shift while dragging copies ensures you move and duplicate shapes in straight lines. Also, grouping hexagons helps maintain consistent spacing when moving or duplicating them.
Can I use any image as the slide background for this design?
Absolutely! High-quality images with good contrast work best to make the slide visually appealing. Photos from sites like Unsplash are great because they are free and professional. Just make sure the image complements your slide content and isn’t too busy.
How can I customize the animations further?
PowerPoint offers a range of animation effects and timing options. After adding animations, open the Animation Pane to adjust start triggers, duration, delay, and easing options like “Smooth Start” or “Bounce” to create the desired effect. Experiment with different combinations to find what works best for your presentation style.
Are there templates available that use similar hexagon designs?
Yes! There are many high-quality PowerPoint templates that incorporate hexagon patterns and modern animations. If you’re short on time, using a template can be an excellent way to achieve a professional look quickly. Check out resources like Vixtion, Vibrance, and Monster Slides for inspiration and ready-to-use designs.
Check out the full video: CREATIVE PowerPoint Slide Design Tutorial! 2024 ✨


