
If you’ve ever wondered how to create eye-catching, viral PowerPoint slides that grab attention on platforms like Instagram and TikTok, you’re in the right place. In this comprehensive guide, I’ll walk you through the step-by-step process of making three of my latest viral PowerPoint slides using Microsoft PowerPoint from Microsoft 365. These slides utilize clever design techniques, animations, and some powerful tools to elevate your presentations to the next level.
Along the way, I’ll also introduce you to an amazing online design resource called Kittl.com that I use frequently to source templates, images, fonts, and graphic elements that can supercharge your slide designs. Whether you’re a student, educator, or professional, these tips and tricks will help you create visually stunning presentations that make an impact.
Table of Contents
- Discovering Kittl: The Ultimate Design Resource for Presentations
- Creating the First Viral Slide: The “Monet” Style with Morph Transition
- The Second Viral Slide: Dynamic Shape Masking with Animation (“India” Slide)
- The Third Viral Slide: Gradient Text Mask with Bold Typography (“Egypt” Slide)
- Summary: Bringing It All Together
- Frequently Asked Questions (FAQ)
- Final Thoughts
Discovering Kittl: The Ultimate Design Resource for Presentations
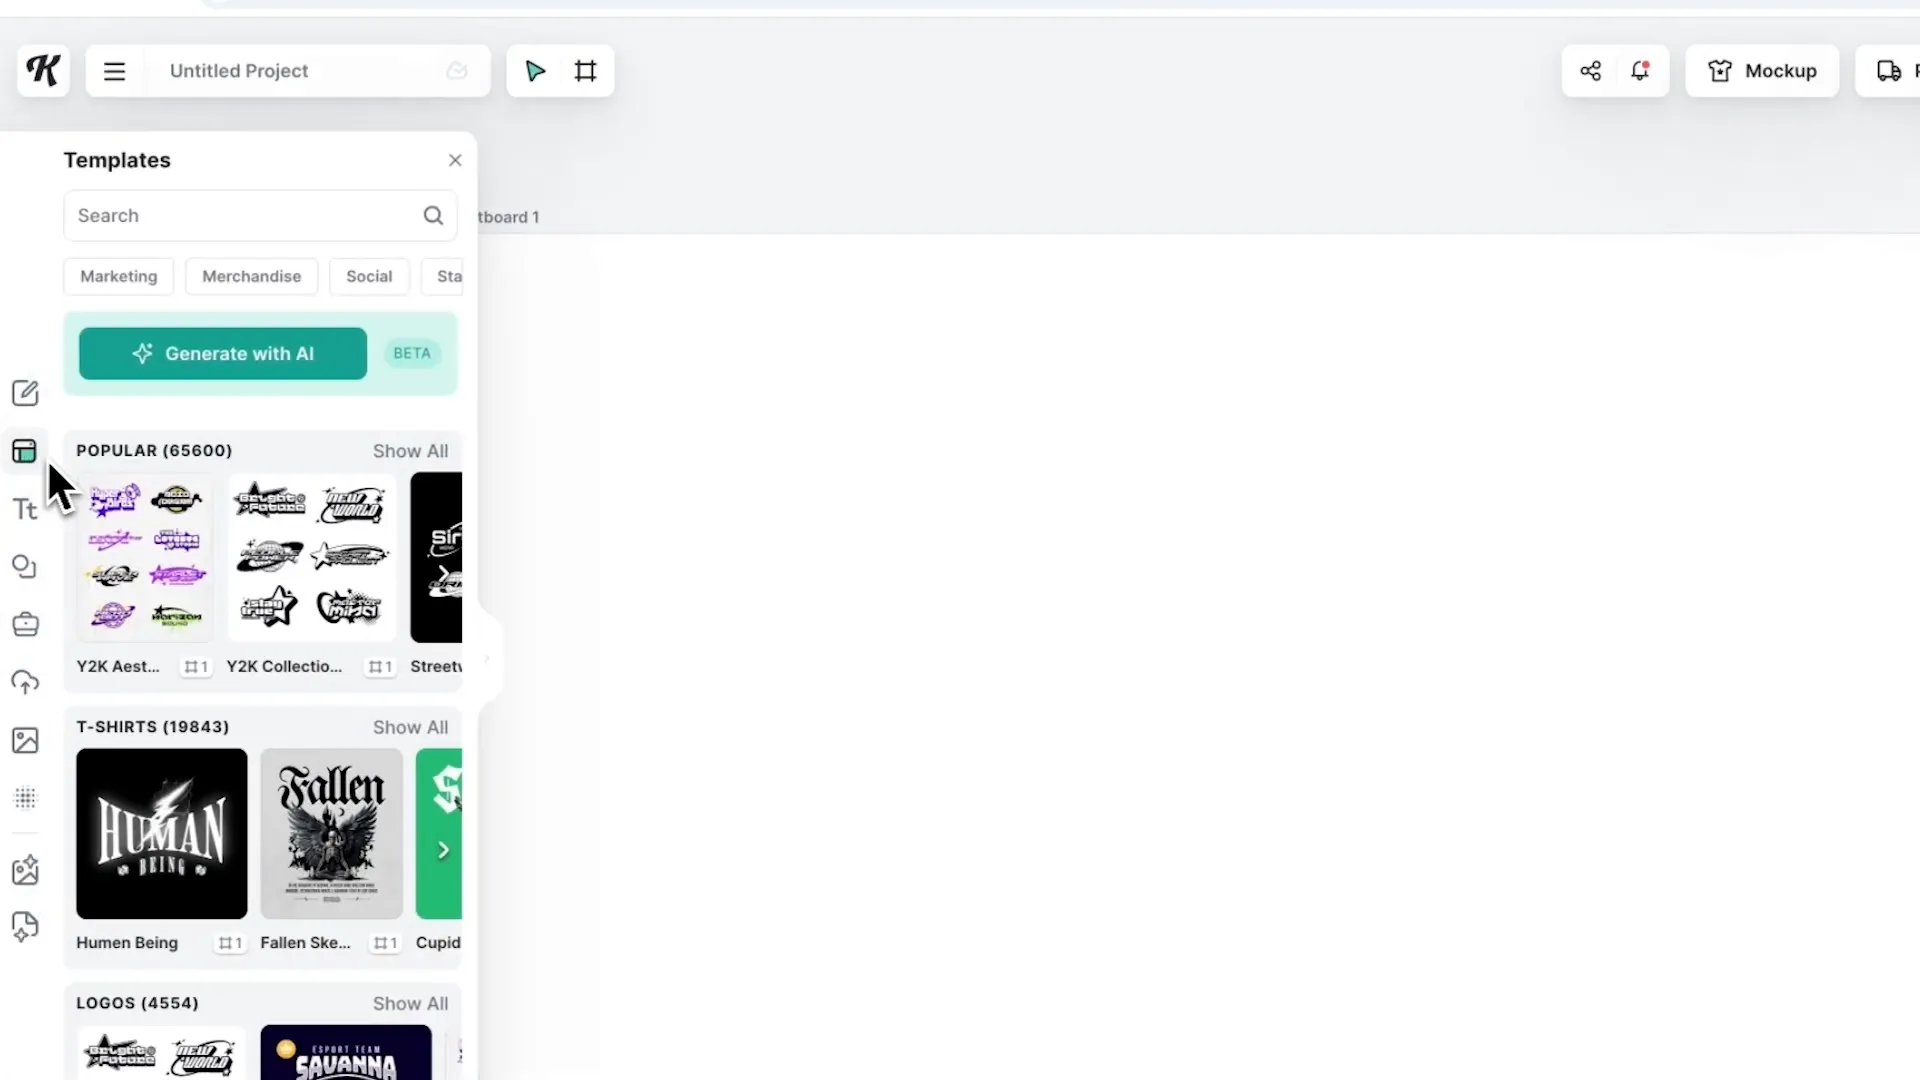
Before diving into the creation of the viral slides, I want to share a fantastic resource for finding high-quality design assets: Kittl.com. Many of my followers often ask where I get the fonts, images, and graphic elements that make my slides stand out. Kittl is a dynamic web-based design tool that offers a wide range of templates not only for presentations but also for logos, art prints, wallpapers, and more.
Here’s how you can use Kittl to enhance your presentation design workflow:
- Create a New Project: Start by defining your artboard size. For PowerPoint cover slides, I usually choose a resolution of 1920 by 1080 pixels, which matches the standard HD slide size.
- Explore Templates: On the left sidebar, there’s a “Templates” section filled with pre-made graphics and designs. You can browse through these and simply click on a template to insert it directly into your project.
- Customize Elements: Once inserted, you can copy and paste individual elements from the template onto your artboard. The fonts and text are fully editable within Kittl, and you don’t need to install any external fonts on your computer.
- Add Images: Kittl provides a library of photos as well as AI-generated images. If you want something highly specific, you can use the image generator by describing what you need, and Kittl will create an AI-generated image for you in seconds.
- Edit Images: When inserting images, a panel allows you to remove backgrounds using AI or vectorize the image, making it easy to change colors, adjust opacity, or add shadows quickly to match your design aesthetic.
- Download and Export: After finalizing your project, simply download it in your preferred format. Kittl offers a free plan with limitations on the number of projects, as well as paid plans starting at $10 a month that include commercial licenses and advanced AI features.
Using Kittl as part of your design toolkit can drastically reduce the time it takes to create professional-looking slides without needing complex software like Adobe Illustrator or Photoshop. Plus, I’ve got a special discount code LOURRUTIAYT that gives you 25% off any paid subscription on Kittl.com.
Creating the First Viral Slide: The “Monet” Style with Morph Transition
Now that you know about Kittl, let’s jump into making the first viral PowerPoint slide, which I affectionately call the “Monet” slide because of its artistic, transparent text overlay effect. This slide is a fantastic way to combine a powerful image background with bold typography and a smooth transition effect.
Step 1: Insert a Full-Slide Image
Start by inserting an image that fills the entire slide. This will serve as the vibrant background upon which the text effect will be applied.
Step 2: Create a Black Rectangle Overlay
Next, go to the Shapes menu and select a rectangle. Drag the rectangle so it covers the whole slide area. Remove the outline by setting the shape outline to “no outline,” then fill the shape with black. This black rectangle will act as the base for the text mask effect.
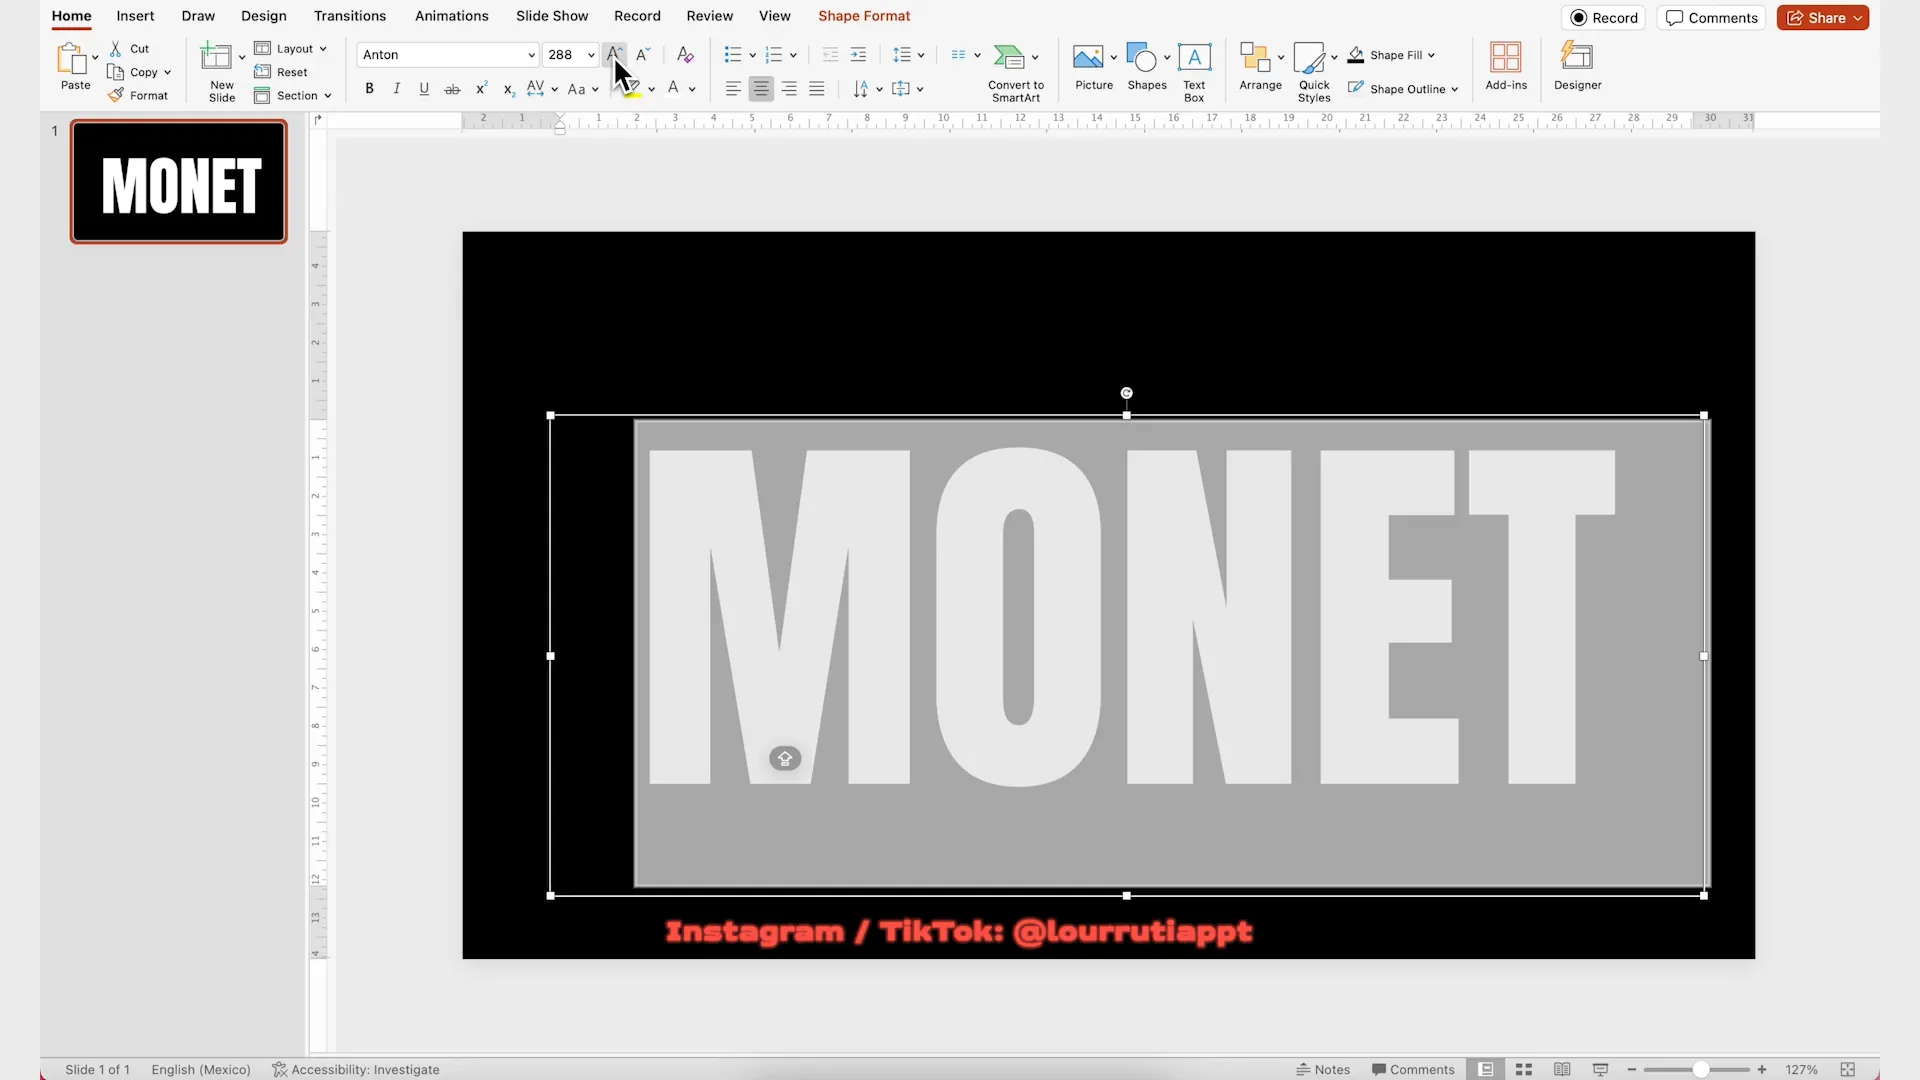
Step 3: Add Large Text Using the Anton Font
Insert a text box in the middle of the slide. I recommend using the Anton font, which is bold and condensed, perfect for impactful headlines. Center-align the text and increase the font size to a very large value—you can manually type in the font size for precise control. The goal is to have the text large enough to create a strong visual presence.
Step 4: Combine Text and Rectangle to Create a Cutout
Hold the Shift key and select the black rectangle first, then the text. Go to the Merge Shapes option and select Combine. This action will “cut out” the text shape from the black rectangle, creating a transparent text effect where the image will show through.
Step 5: Adjust Transparency
Right-click on the combined shape and select Format Shape. In the panel, go to the fill options and increase the transparency slightly. This softens the black overlay, allowing the image to subtly show through the black areas.
Step 6: Duplicate and Modify for Morph Transition
Duplicate the slide (Ctrl + D). On the second slide, zoom out and enlarge the combined shape so that all the text is outside the slide boundaries, leaving only a black overlay covering the slide. This setup will make the text “slide in” during the transition.
Step 7: Add Content and Apply Morph Transition
Add any additional content such as smaller text or images on the second slide in the uncovered areas. Copy this content and paste it into the first slide, positioning it just outside the slide boundaries. Finally, select the second slide, go to the Transitions tab, and apply the Morph transition. This creates a smooth animation where the text appears to slide in over the image with the black overlay.
The Second Viral Slide: Dynamic Shape Masking with Animation (“India” Slide)
The second viral slide uses shape merging and path animations to create a striking visual effect where an image slides into view behind a custom mask made from rounded rectangles. This technique adds movement and depth to your slide, making it more engaging.
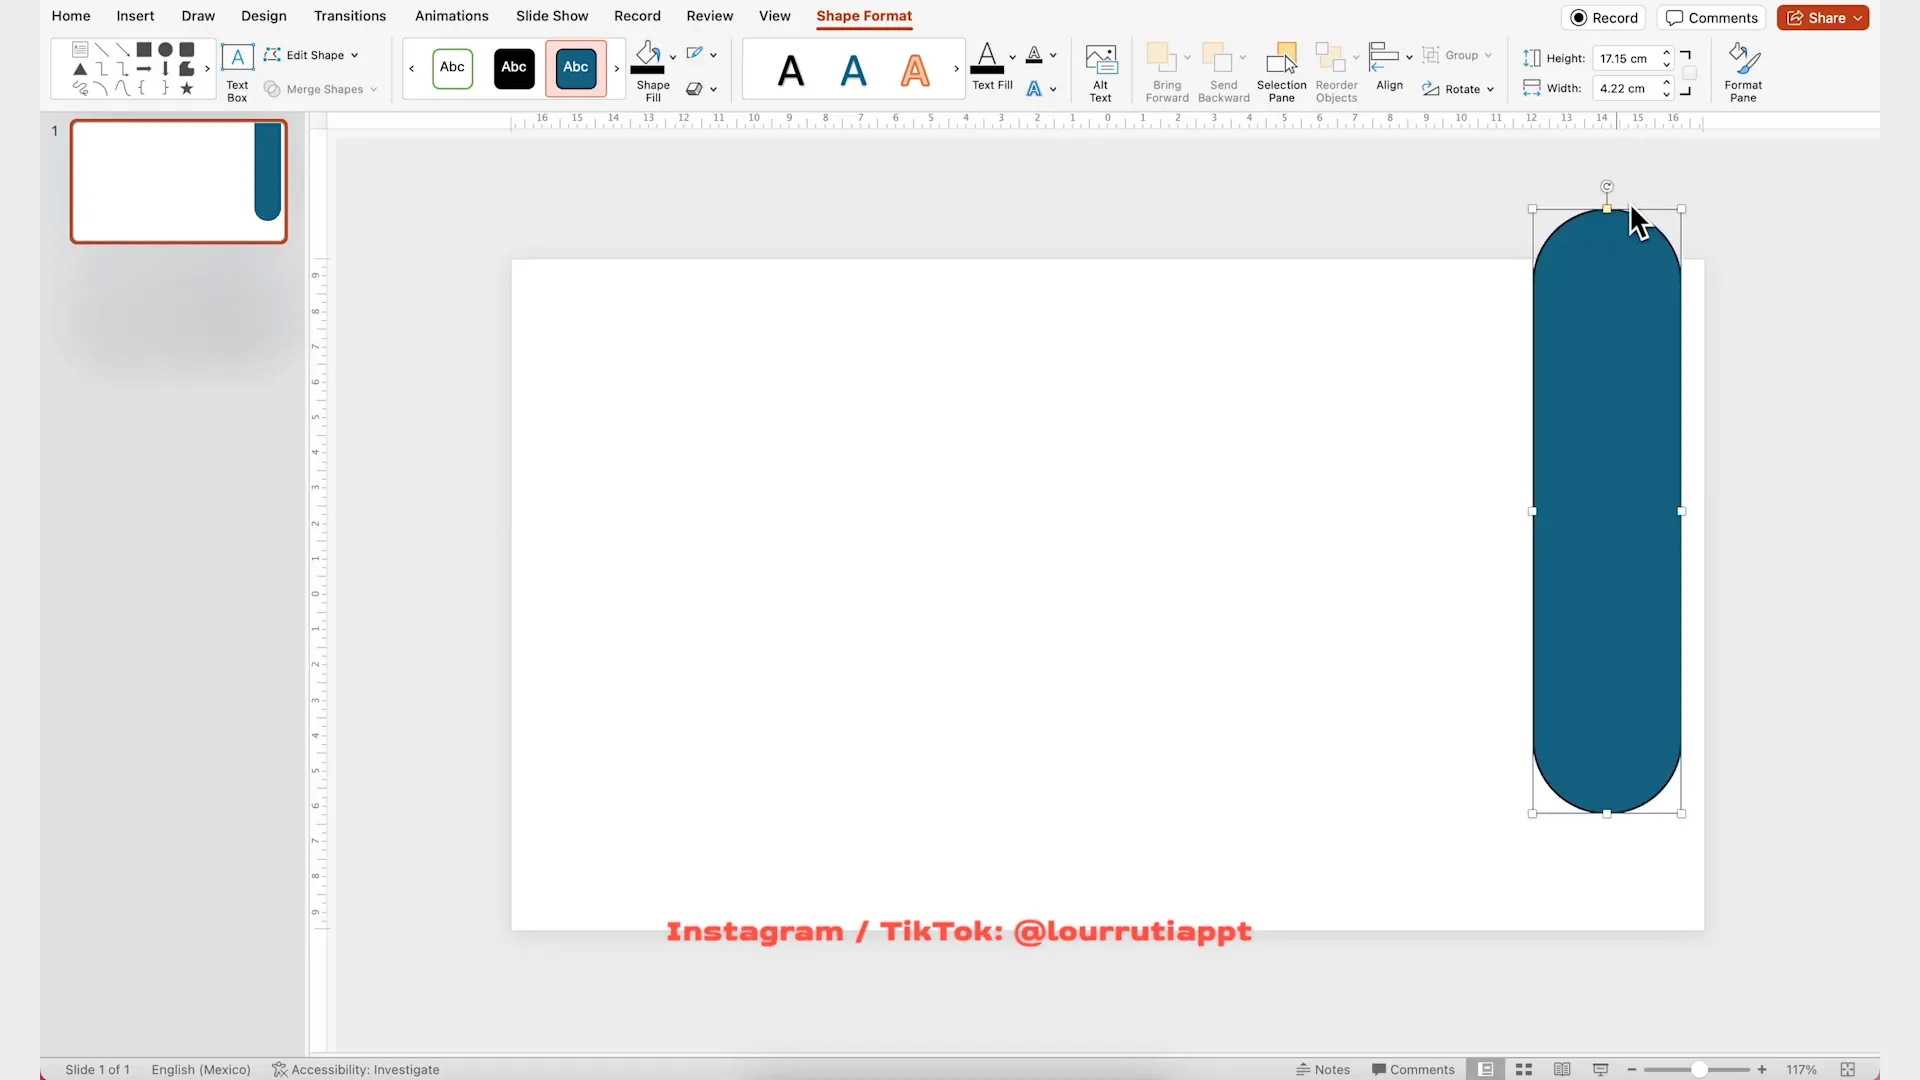
Step 1: Create Rounded Rectangles as Mask Elements
Go to the Shapes menu and select a rounded rectangle. Place it on the right side of the slide. Use the yellow adjustment handle at the top of the shape to round the corners further.
Hold the Ctrl key and drag the shape to the left to duplicate it. Repeat this process multiple times, varying the length of some rectangles to create an interesting pattern. This series of shapes will serve as the mask through which the image will be revealed.
Step 2: Distribute Shapes Evenly
Select all the rounded rectangles by holding Shift, then use the Align menu on the ribbon to distribute them evenly horizontally. This ensures the shapes are spaced uniformly across the slide.
Step 3: Create a White Rectangle to Subtract From Shapes
Insert a large rectangle covering the entire slide. Right-click it and choose Send to Back so this rectangle sits behind the rounded rectangles.
Step 4: Merge Shapes to Create the Mask
Select all shapes (rounded rectangles and the large rectangle), go to Shape Format, click on Merge Shapes, and choose Subtract. This subtracts the large rectangle from the rounded rectangles, effectively creating a mask with transparent “windows” in the shape of your rounded rectangles.
Remove the outline and fill the mask with white. Although this looks like a blank slide, you’ve actually created a powerful mask effect.
Step 5: Add Image and Animate
Paste an image that fills the entire right half of the slide behind the mask. Next, go to the Animations tab, add a Motion Path animation, and select the Align path. In the effect options, change the direction to Right and set the animation to start With Previous. This causes the image to slide right behind the mask shapes.
Step 6: Fine-Tune Animation Speed and Layering
If the animation feels too fast, open the Animation Pane, select the animation, and adjust the duration to 5 seconds or your preferred speed. Also, right-click the image and choose Send to Back so it sits behind the mask. Preview the animation to see the smooth reveal effect.
Step 7: Add Content to Left Side
Finally, add any textual or graphic content to the left side of the slide, balancing the composition and completing the design.

The Third Viral Slide: Gradient Text Mask with Bold Typography (“Egypt” Slide)
The third slide combines bold typography with gradient fills and subtractive masking to create a modern, stylish look. This slide is perfect for titles or focal points in your presentation.
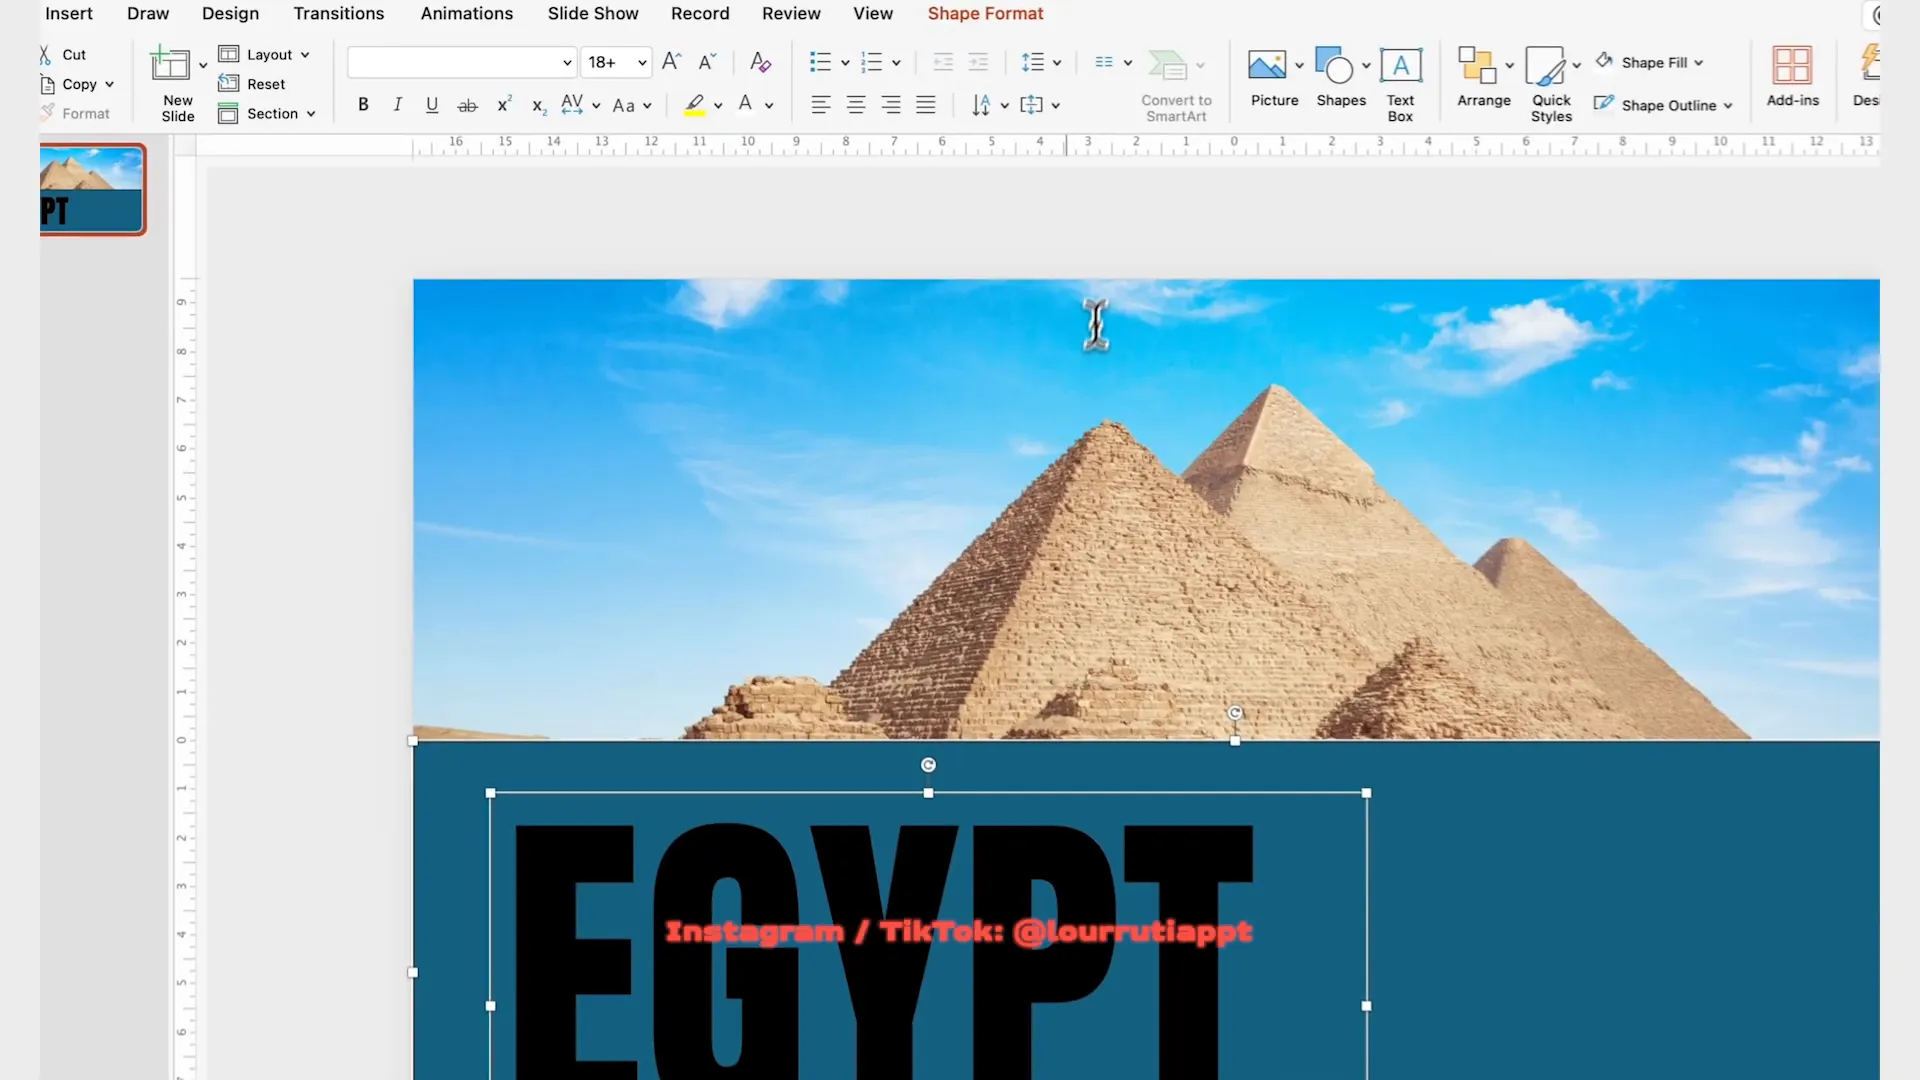
Step 1: Set a Full-Slide Background Image
Start by inserting an image that covers the entire slide. This image will be partially masked by the gradient text effect.
Step 2: Add a Rectangle to the Bottom Half
Insert a rectangle shape and position it so it covers the bottom half of the slide. This rectangle will serve as the base for the text mask.
Step 3: Insert and Style Large Text
Add a text box inside the rectangle area. Use the Anton font again for its bold and impactful style. Increase the font size to make the text prominent. For this example, the word “Egypt” is used.
Step 4: Subtract Text from Rectangle
Select the rectangle and then the text (hold Shift to select both), go to Shape Format, click Merge Shapes, and choose Subtract. This creates a cutout of the text from the rectangle.
Step 5: Apply Gradient Fill to the Shape
Right-click the shape and select Format Shape. Remove the outline and apply a gradient fill. Delete all but two gradient stops. For the right stop, use the eyedropper tool to pick a dark brown color from the image to blend the gradient organically. Adjust the left stop’s transparency to 100% so it fades out smoothly.
By moving the gradient stops closer, you can control the gradient’s transition. I recommend darkening the gradient slightly so the text stands out clearly against the background.
Step 6: Group and Animate
Select all elements except the background image and group them (right-click and choose Group or press Ctrl + G). Go to the Animations tab and choose an entrance effect like Float In. Set the animation to start With Previous so it plays automatically when the slide appears.
This animation adds a subtle but elegant movement that complements the gradient text mask effect.
Summary: Bringing It All Together
By mastering these three techniques, you can create viral PowerPoint slides that combine bold typography, clever masking, and smooth animations. Here’s a quick recap of what you learned:
- “Monet” Slide: Use a black rectangle with combined text cutout and the Morph transition to create a sliding text overlay effect.
- “India” Slide: Design a custom mask from rounded rectangles, subtract it from a base shape, and animate an image sliding behind it using motion paths.
- “Egypt” Slide: Create a gradient-filled text mask by subtracting text from a rectangle, then animate the grouped elements with an entrance effect.
Additionally, don’t forget to explore Kittl.com for ready-made templates, AI-generated images, and editable fonts that can save you time and inspire your creativity. Using these tools and techniques will help your presentations stand out whether you’re sharing them on social media or presenting in a professional setting.
Frequently Asked Questions (FAQ)
1. What version of PowerPoint do I need to create these slides?
These techniques require PowerPoint from Microsoft 365, as it supports advanced features like the Morph transition and shape merging. Older versions of PowerPoint may not have these capabilities.
2. Can I use these viral slide techniques for commercial presentations?
Yes, absolutely! Just make sure any assets you use, such as fonts and images, have the appropriate licenses for commercial use. Kittl’s paid plans include commercial licenses for their assets, which is helpful if you plan to use them in business presentations.
3. How do I install the Anton font used in the tutorials?
The Anton font is freely available on Google Fonts. You can download and install it on your computer from Google Fonts. Alternatively, Kittl.com includes this font in its templates, so you can use it without installing anything externally.
4. What is the Morph transition, and why is it useful?
The Morph transition in PowerPoint creates smooth animations by transitioning objects from their positions, sizes, and shapes on one slide to the next. It’s especially useful for creating dynamic effects like sliding text or images without complicated animation setups.
5. How can I slow down or speed up animations in PowerPoint?
Open the Animation Pane, select the animation you want to adjust, and click on Timing. Here, you can change the duration to make the animation slower or faster. For example, increasing the duration to 5 seconds creates a smooth, gradual effect.
6. Is Kittl.com free to use?
Kittl offers a free plan that lets you work on up to 20 projects. For more advanced features, commercial licenses, and unlimited projects, paid plans start at $10 per month. You can try it for free and use my discount code LOURRUTIAYT for 25% off any paid subscription.
7. Can I download the PowerPoint files for these viral slides?
Yes! I provide downloadable PowerPoint files for these viral slides on my website. Check the description box of the original video or visit my site to grab the files and explore them yourself.
Final Thoughts
Creating viral PowerPoint slides is all about combining bold design choices with smooth animations and clever use of shapes and transparency. By following these tutorials and leveraging resources like Kittl.com, you can produce presentation slides that not only communicate your message effectively but also captivate your audience visually.
Remember, practice makes perfect! Experiment with different images, fonts, and colors to make these techniques your own. Whether you’re preparing a business pitch, an educational lecture, or social media content, these viral slide designs will help you stand out.
Feel free to share your creations and tag me on social media—I love seeing what you make! Happy designing!
Check out the full video: How I made these VIRAL PowerPoints 🔥 (Pt.6)


