
PowerPoint slide design is an essential skill for anyone looking to create visually impressive and engaging presentations. If you want to elevate your slides beyond the usual templates and standard shapes, learning how to integrate creative design elements with smooth animations is key. This comprehensive guide will walk you through the step-by-step process of designing beautiful slides featuring rounded hexagons, using PowerPoint and a free external tool called Figma. Plus, you’ll learn how to add captivating animations to bring your slides to life.
Whether you’re a beginner or an experienced presenter, this tutorial will empower you to create memorable slides that captivate your audience and enhance your storytelling. Ready to become an unstoppable PowerPoint creator? Let’s dive in!
Table of Contents
- Preparing a Stunning Slide Background
- Adding a Semi-Transparent Dark Overlay
- Using Slide Background Fill for Shapes
- Creating Rounded Hexagons with Figma
- Importing and Editing SVG Shapes in PowerPoint
- Arranging Hexagons into a Cohesive Layout
- Applying Slide Background Fill to Hexagons
- Grouping Hexagons for Efficient Animation
- Adding Smooth Animations to Your Slide
- Finalizing the Slide Design with Text and Logo
- Customizing Slide Appearance with Different Backgrounds
- Frequently Asked Questions
- Conclusion
Preparing a Stunning Slide Background
The first step in creating an eye-catching PowerPoint slide design is setting a beautiful background image that sets the tone for your presentation. Instead of using plain colors or default backgrounds, try using high-quality photos that complement your slide’s theme.
For this tutorial, I downloaded several photos from Unsplash, a fantastic resource for free, high-resolution images. These images help create a professional and visually rich backdrop for your slides.
Here’s how to add a photo as your slide background:
- Select the photo you want to use and copy it to your clipboard (Ctrl + C).
- Go back to your blank PowerPoint slide.
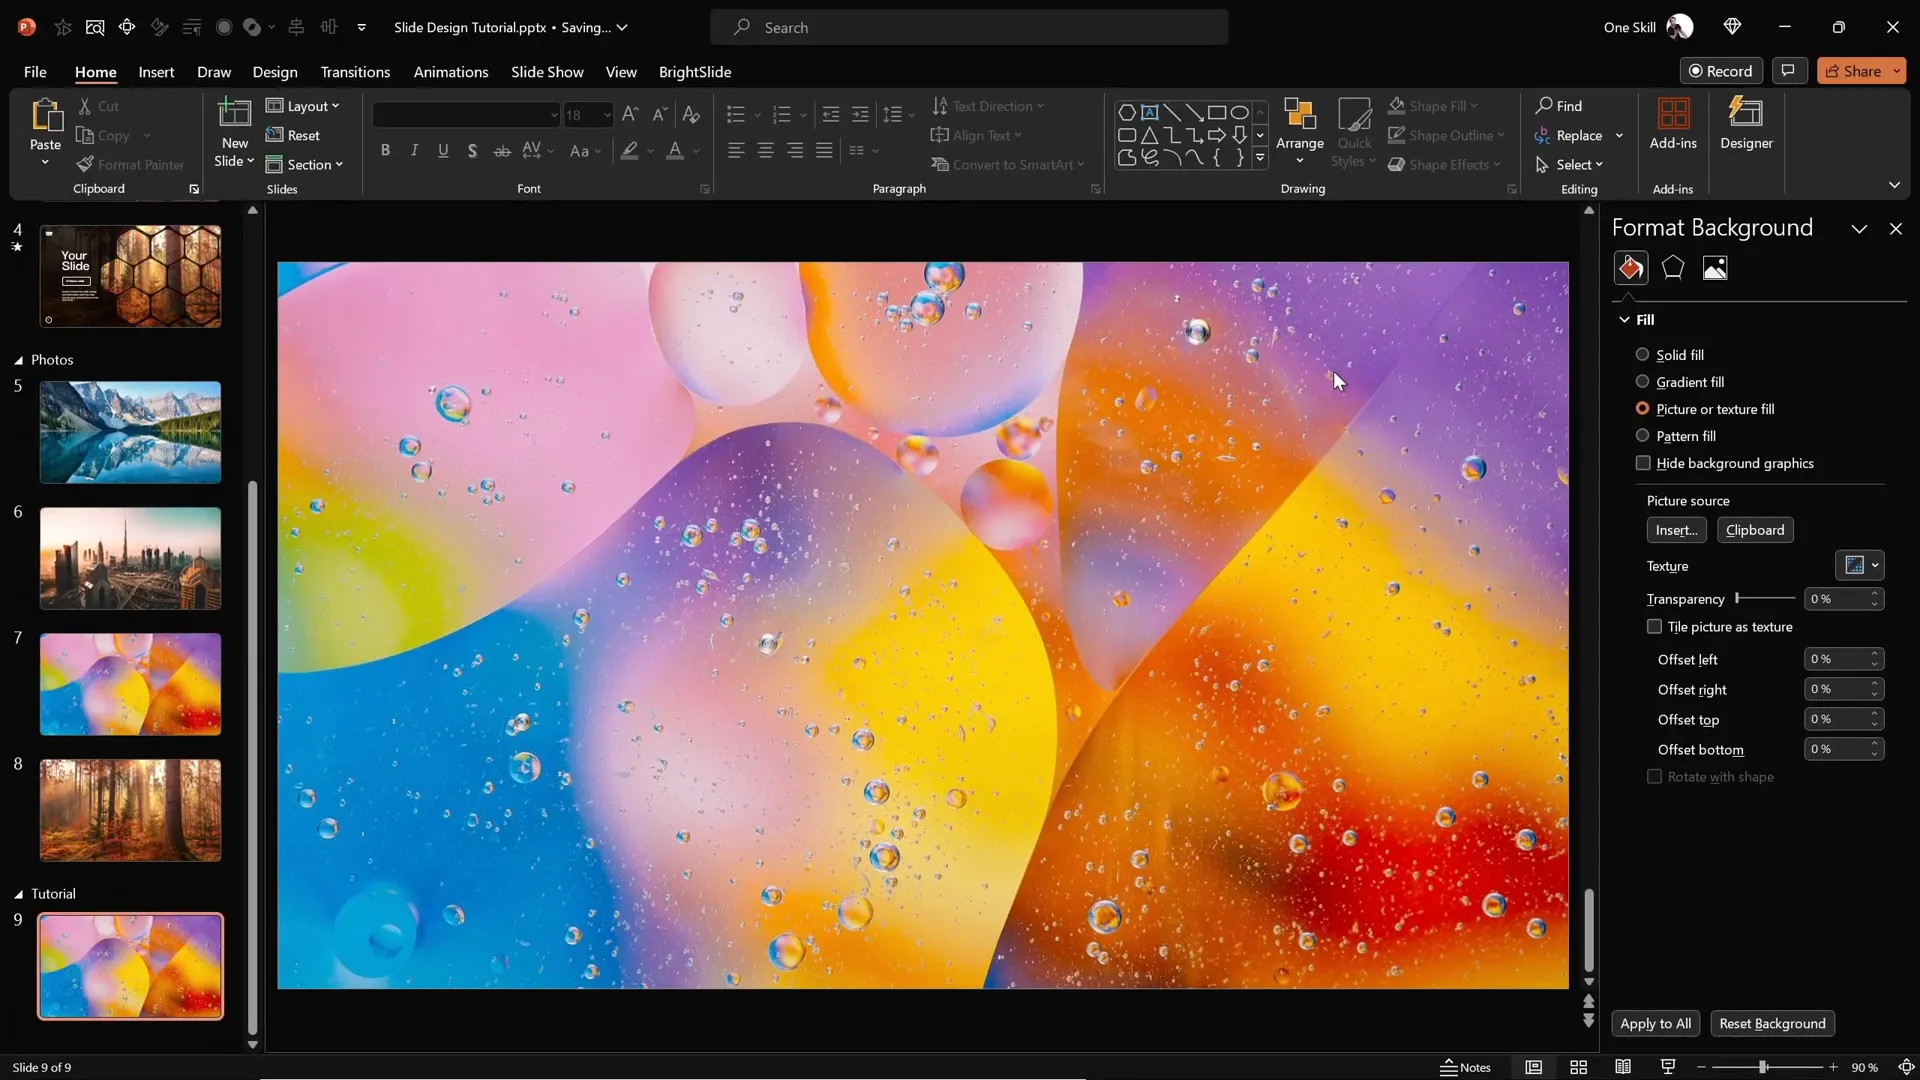
- Right-click on the slide area and choose Format Background.
- In the Format Background pane, select Picture or texture fill.
- Click on Clipboard to paste the copied photo as the slide background.
By pasting the photo as the slide background, you ensure it remains unselectable and locked behind all other slide elements, giving you a clean base to build your design on.
Adding a Semi-Transparent Dark Overlay
To make your slide content stand out against a busy photo background, it’s a good idea to add a semi-transparent dark overlay. This technique subtly darkens the background while maintaining its visual interest, enhancing text readability and design elements.
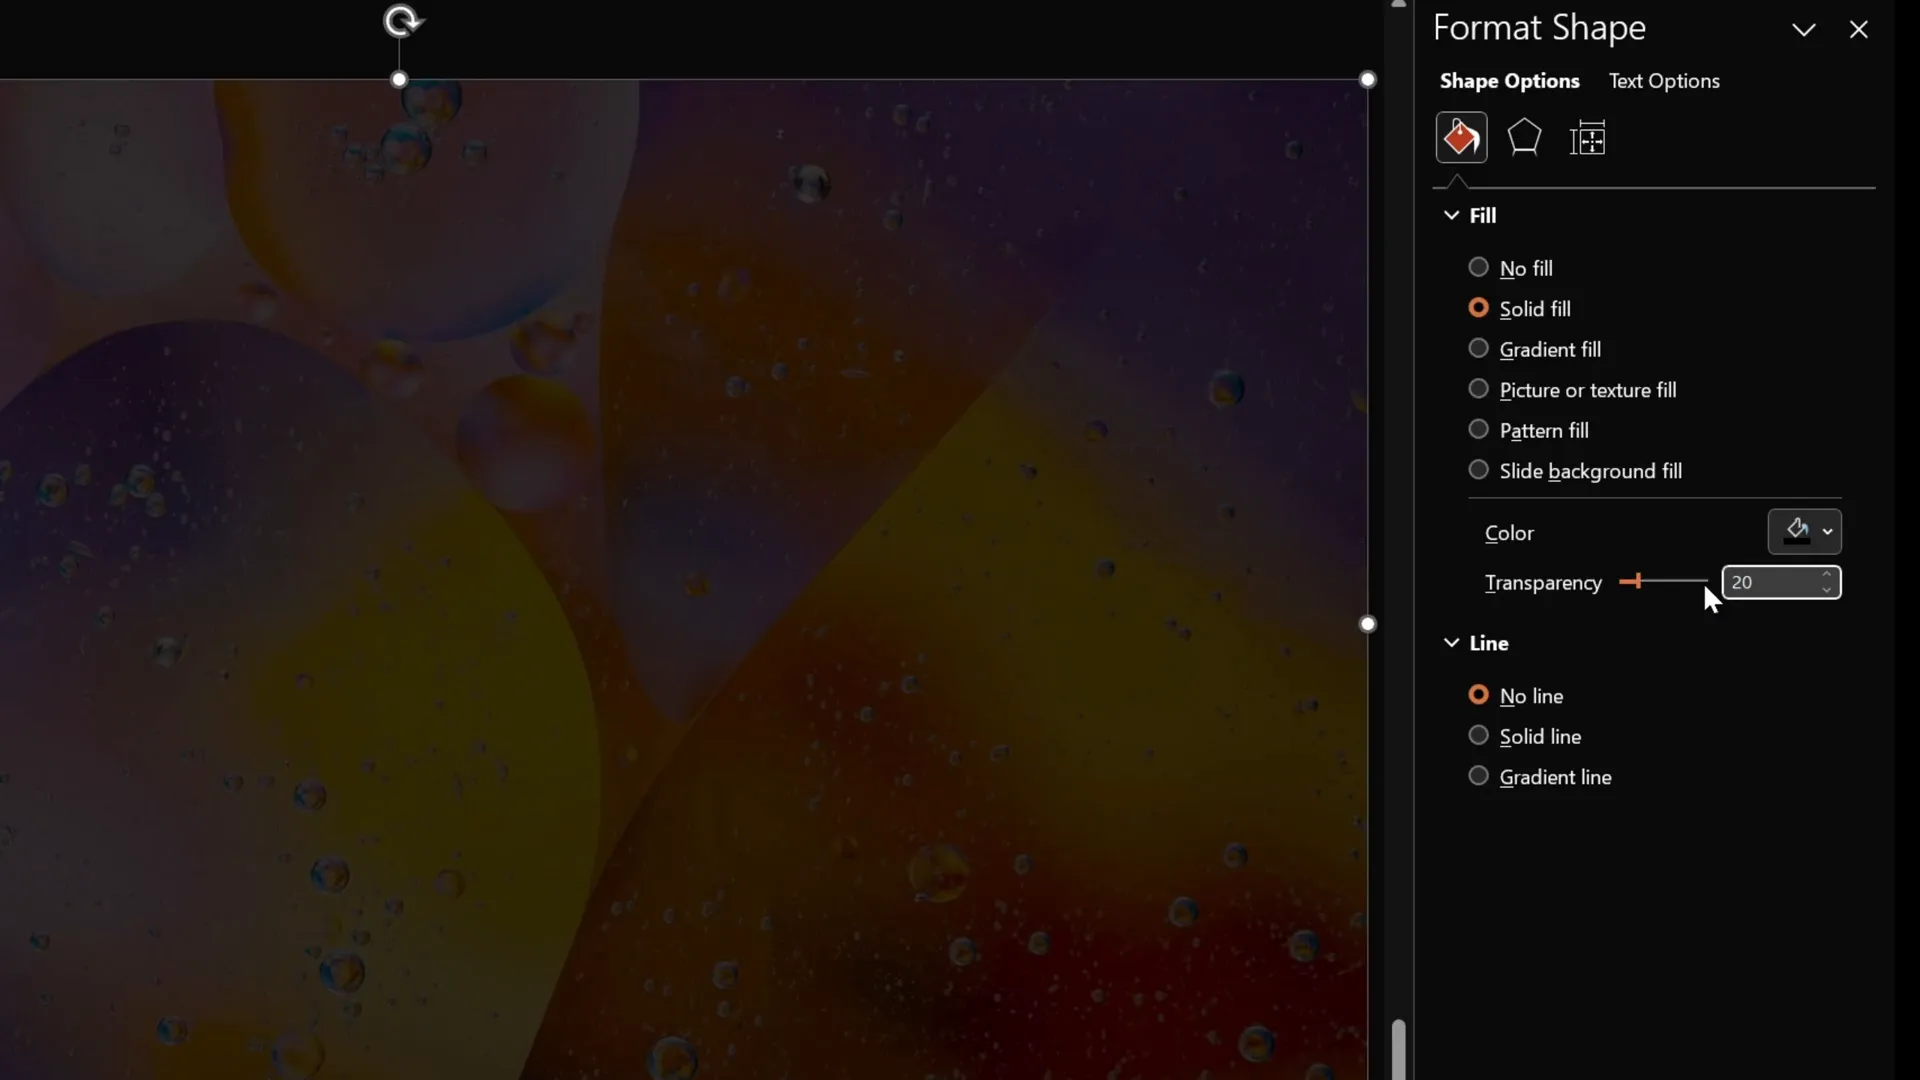
Follow these steps to add a dark rectangle overlay with transparency:
- Go to the Insert tab and select Shapes.
- Choose the Rectangle shape.
- Draw the rectangle starting at the top left corner and drag it to cover the entire slide.
- Fill the rectangle with black color.
- Adjust the transparency to around 20% to allow the background photo to shine through.
This overlay will act as a subtle filter, making your foreground shapes and text pop.
Using Slide Background Fill for Shapes
Now for the magic part: using the Slide Background Fill feature in PowerPoint. This allows you to fill shapes with the exact portion of the slide background image that lies beneath them, creating a seamless and visually appealing effect.
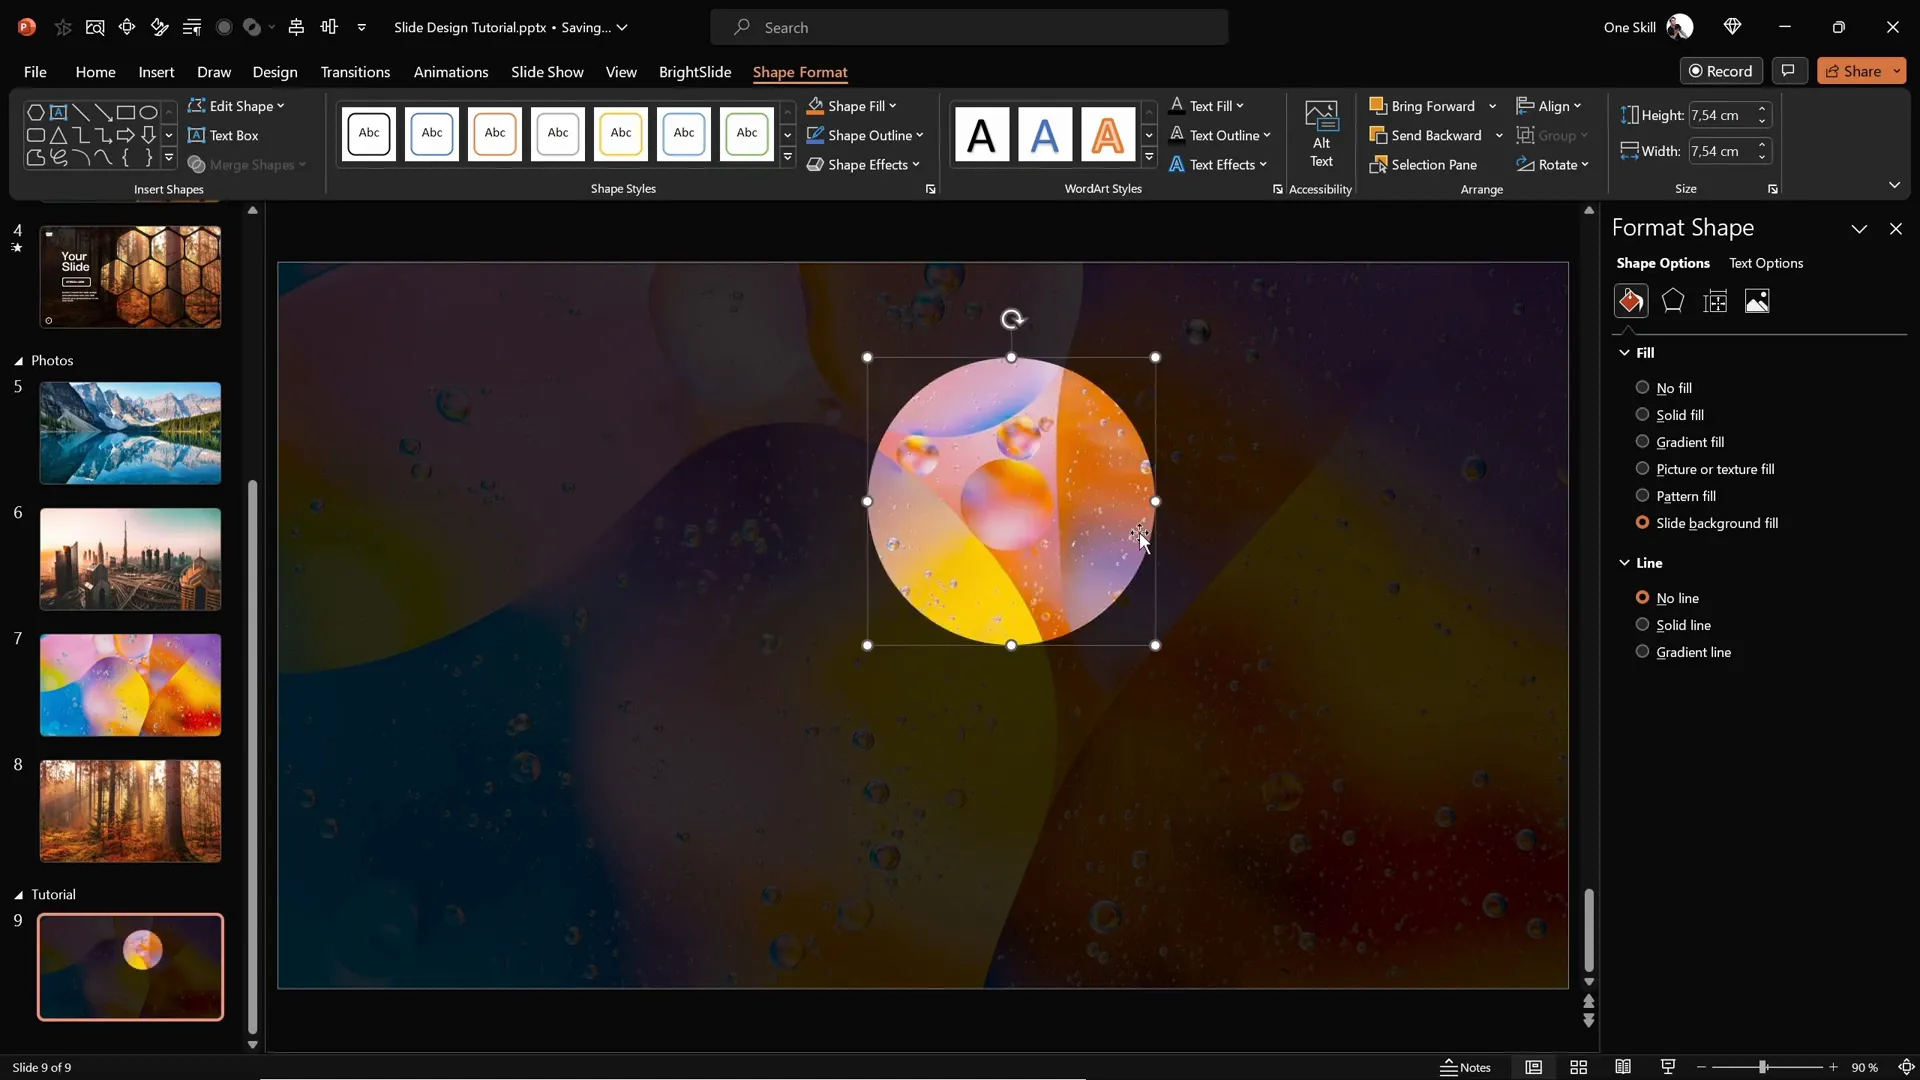
For instance, try inserting a simple circle:
- Go to Insert > Shapes and select the Oval tool.
- Draw a circle anywhere on the slide.
- With the circle selected, go to the Shape Fill options.
- Choose Slide Background Fill.
Voilà! The circle will now display the exact part of the background image beneath it, creating a stunning cut-out effect. This technique can be applied to any shape and is especially powerful when used with custom shapes like hexagons.
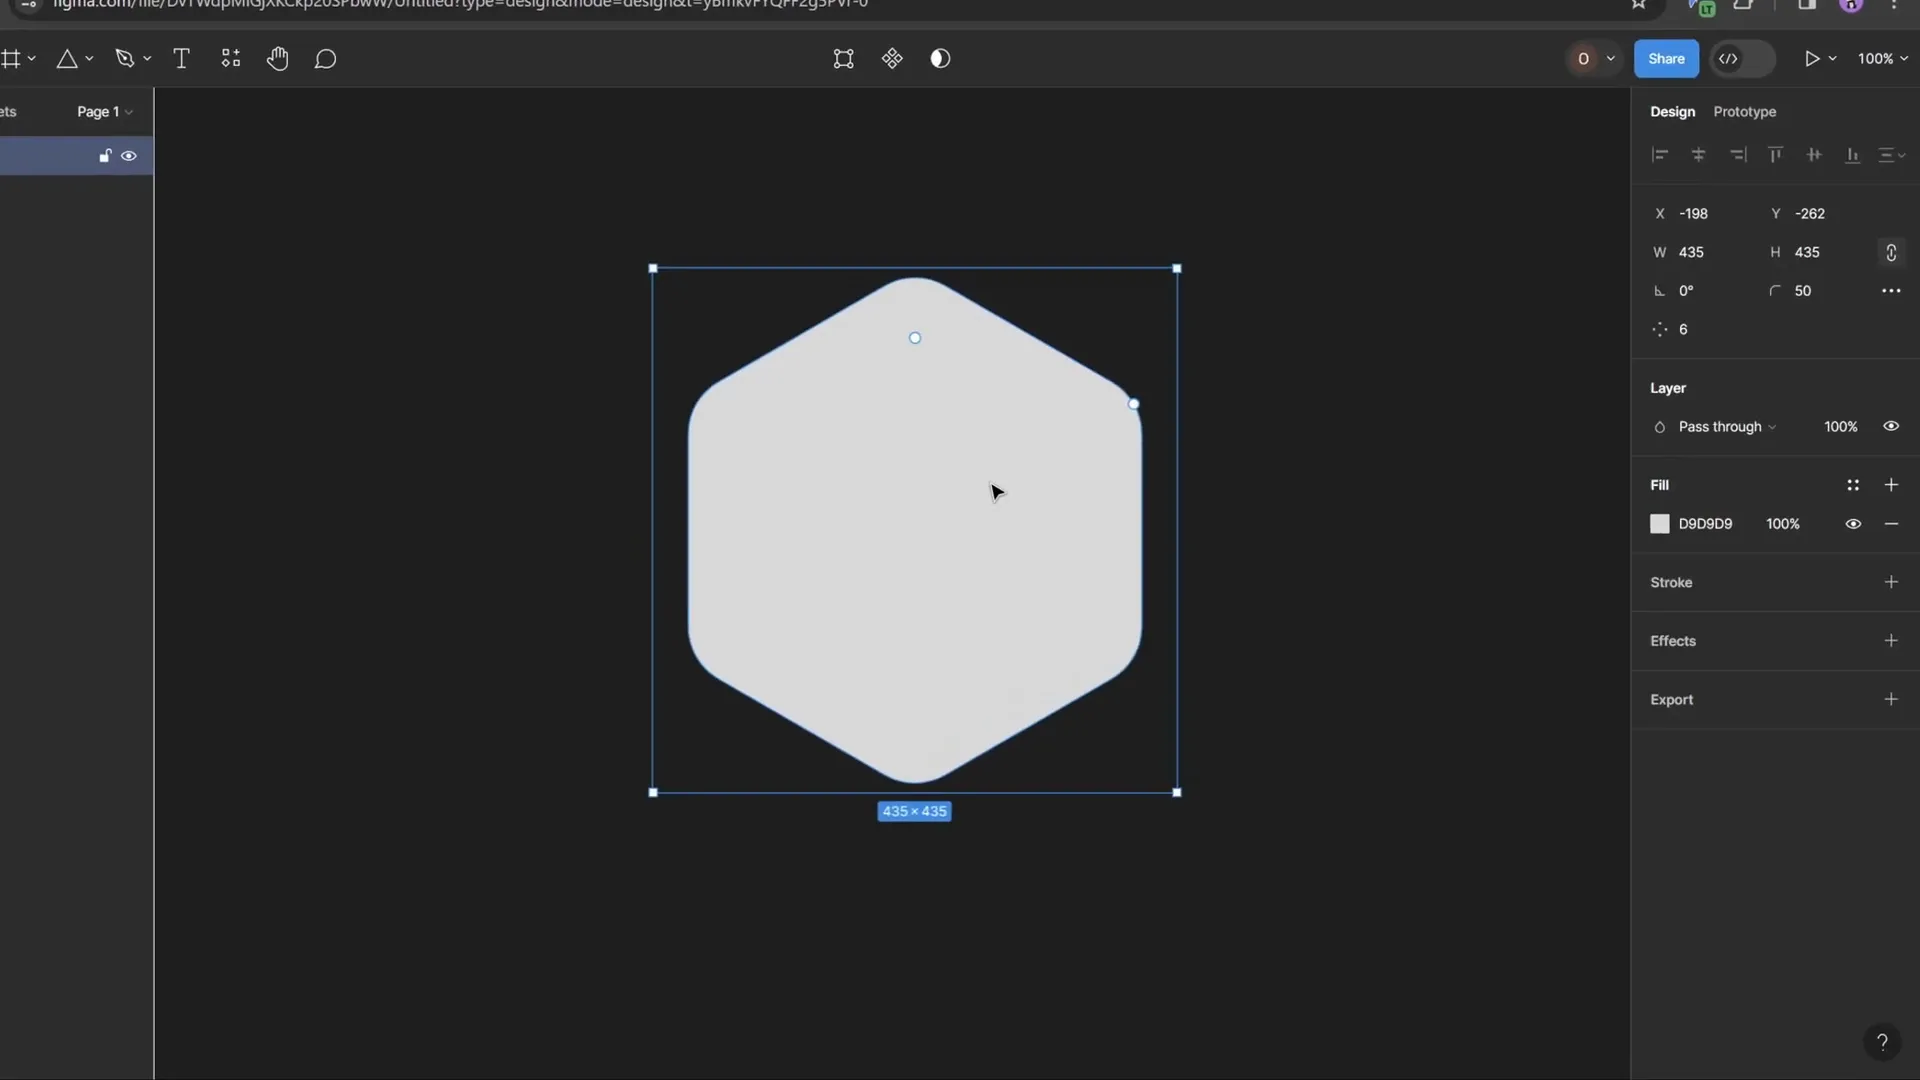
Creating Rounded Hexagons with Figma
While PowerPoint offers a variety of shapes, it lacks a built-in rounded hexagon shape, which is crucial for the modern and creative slide design we want to achieve. The default hexagon in PowerPoint has sharp corners, which may not fit your desired aesthetic.
To solve this, we use Figma, a free online design tool that allows us to create a perfectly rounded hexagon easily.
Here’s a simple process to create a rounded hexagon in Figma:
- Sign up for a free account or log in with your Gmail account.
- Create a new design file by clicking the Design file button.
- Select the Polygon Tool from the shape tools menu.
- Hold down the Shift key and draw a polygon.
- Change the number of sides to 6 to create a hexagon.
- Adjust the corner roundness slider to your liking (e.g., 50%) to create rounded corners.
- Export the shape as an SVG file.
This method gives you a smooth, rounded hexagon shape that you can import into PowerPoint.
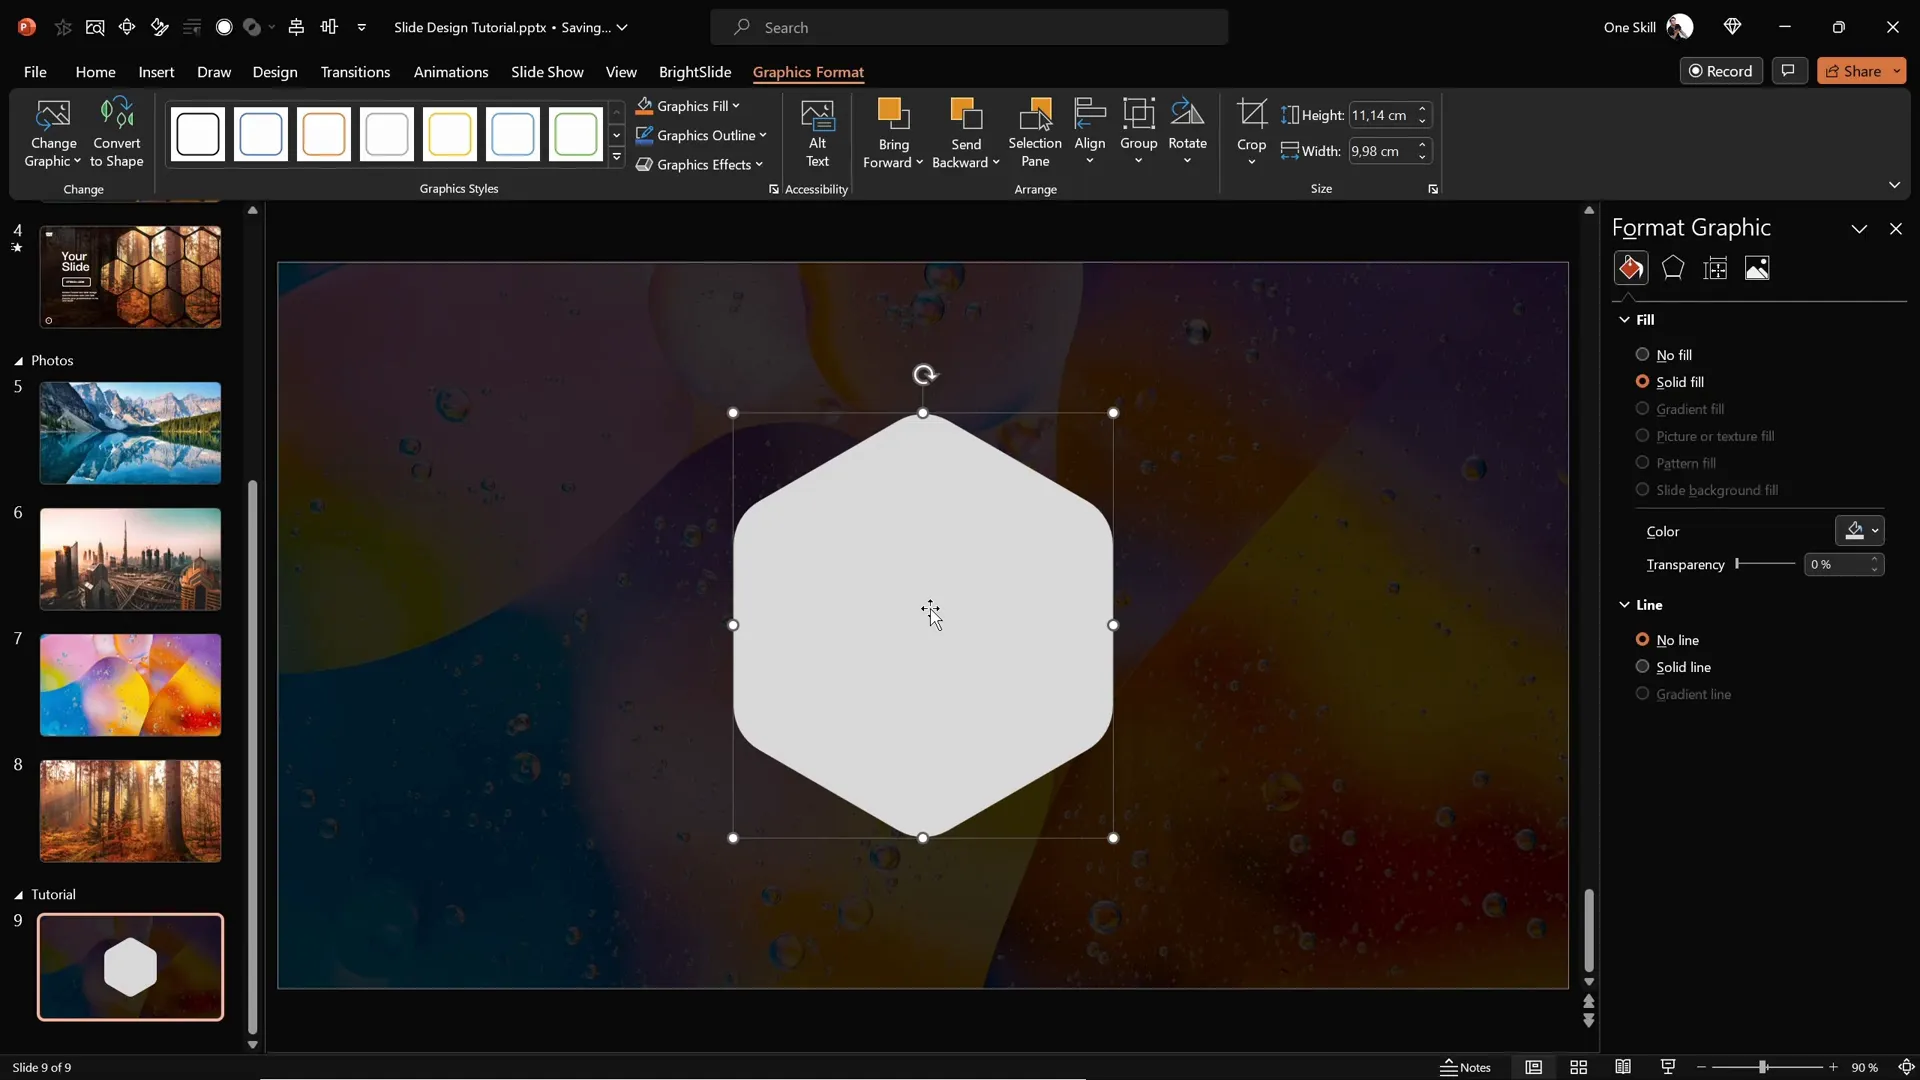
Importing and Editing SVG Shapes in PowerPoint
After exporting your rounded hexagon from Figma, the next step is to bring it into PowerPoint and make it fully editable.
To do this:
- In PowerPoint, go to Insert > Pictures > This Device.
- Select your exported rounded hexagon SVG file and insert it into the slide.
- Initially, some fill options may be disabled.
- To unlock full editing, select the hexagon, then go to Graphics Format and click Convert to Shape.
- Now, you can apply all fill options, including Slide Background Fill.
This process enables you to customize the shape’s appearance and integrate it seamlessly with the background.
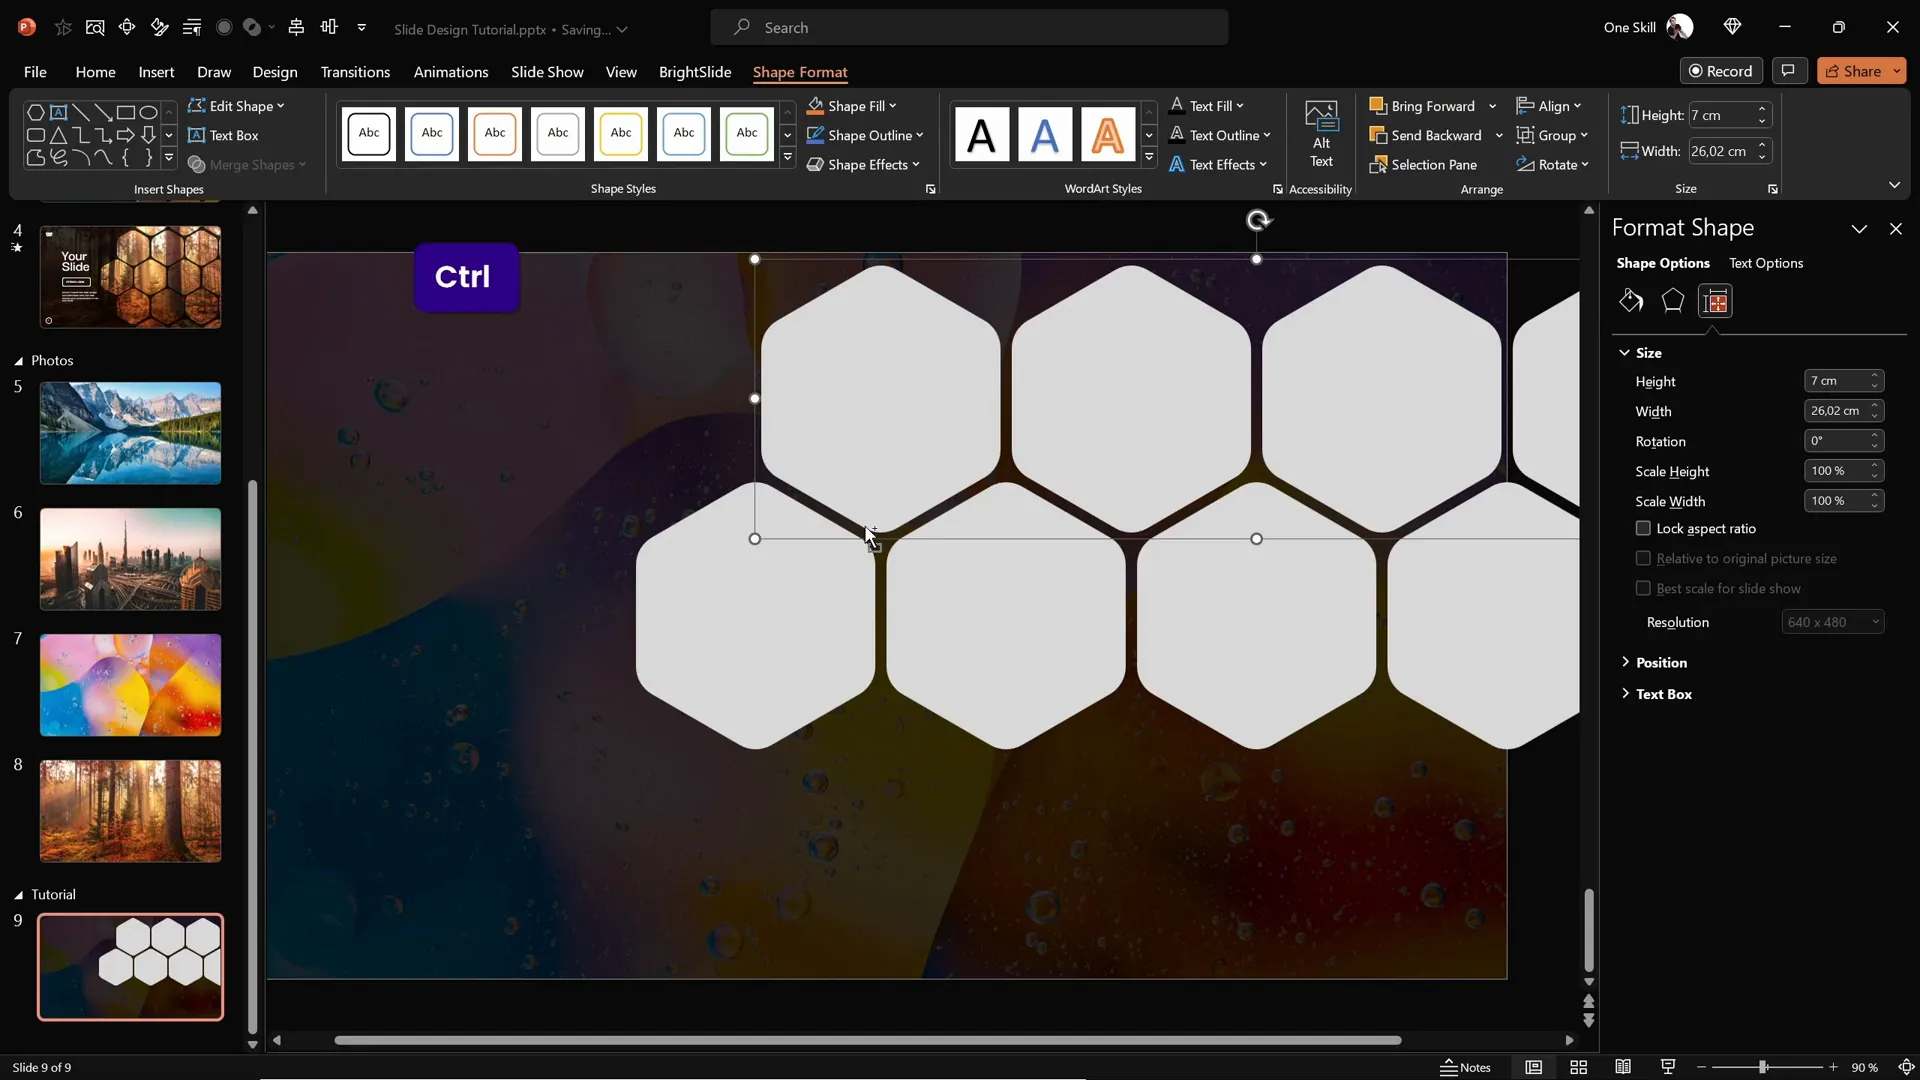
Arranging Hexagons into a Cohesive Layout
With your editable rounded hexagon ready, you can start arranging multiple copies to create a dynamic pattern on your slide.
Tips for arranging hexagons:
- Lock the aspect ratio of the hexagon to maintain consistent proportions.
- Resize the hexagon to a suitable size (e.g., 7 cm height).
- Position the initial hexagon in the center of the slide.
- Hold down Ctrl + Shift and drag to create copies in a straight horizontal line.
- Adjust spacing to your preference—narrow gaps create a compact look.
- Group sets of hexagons for easier manipulation.
- Create multiple rows by copying the groups vertically and aligning carefully.
- Add extra hexagons to the top and bottom edges for a balanced design.
This method helps you build a sophisticated honeycomb pattern that can serve as a unique design element for your slides.
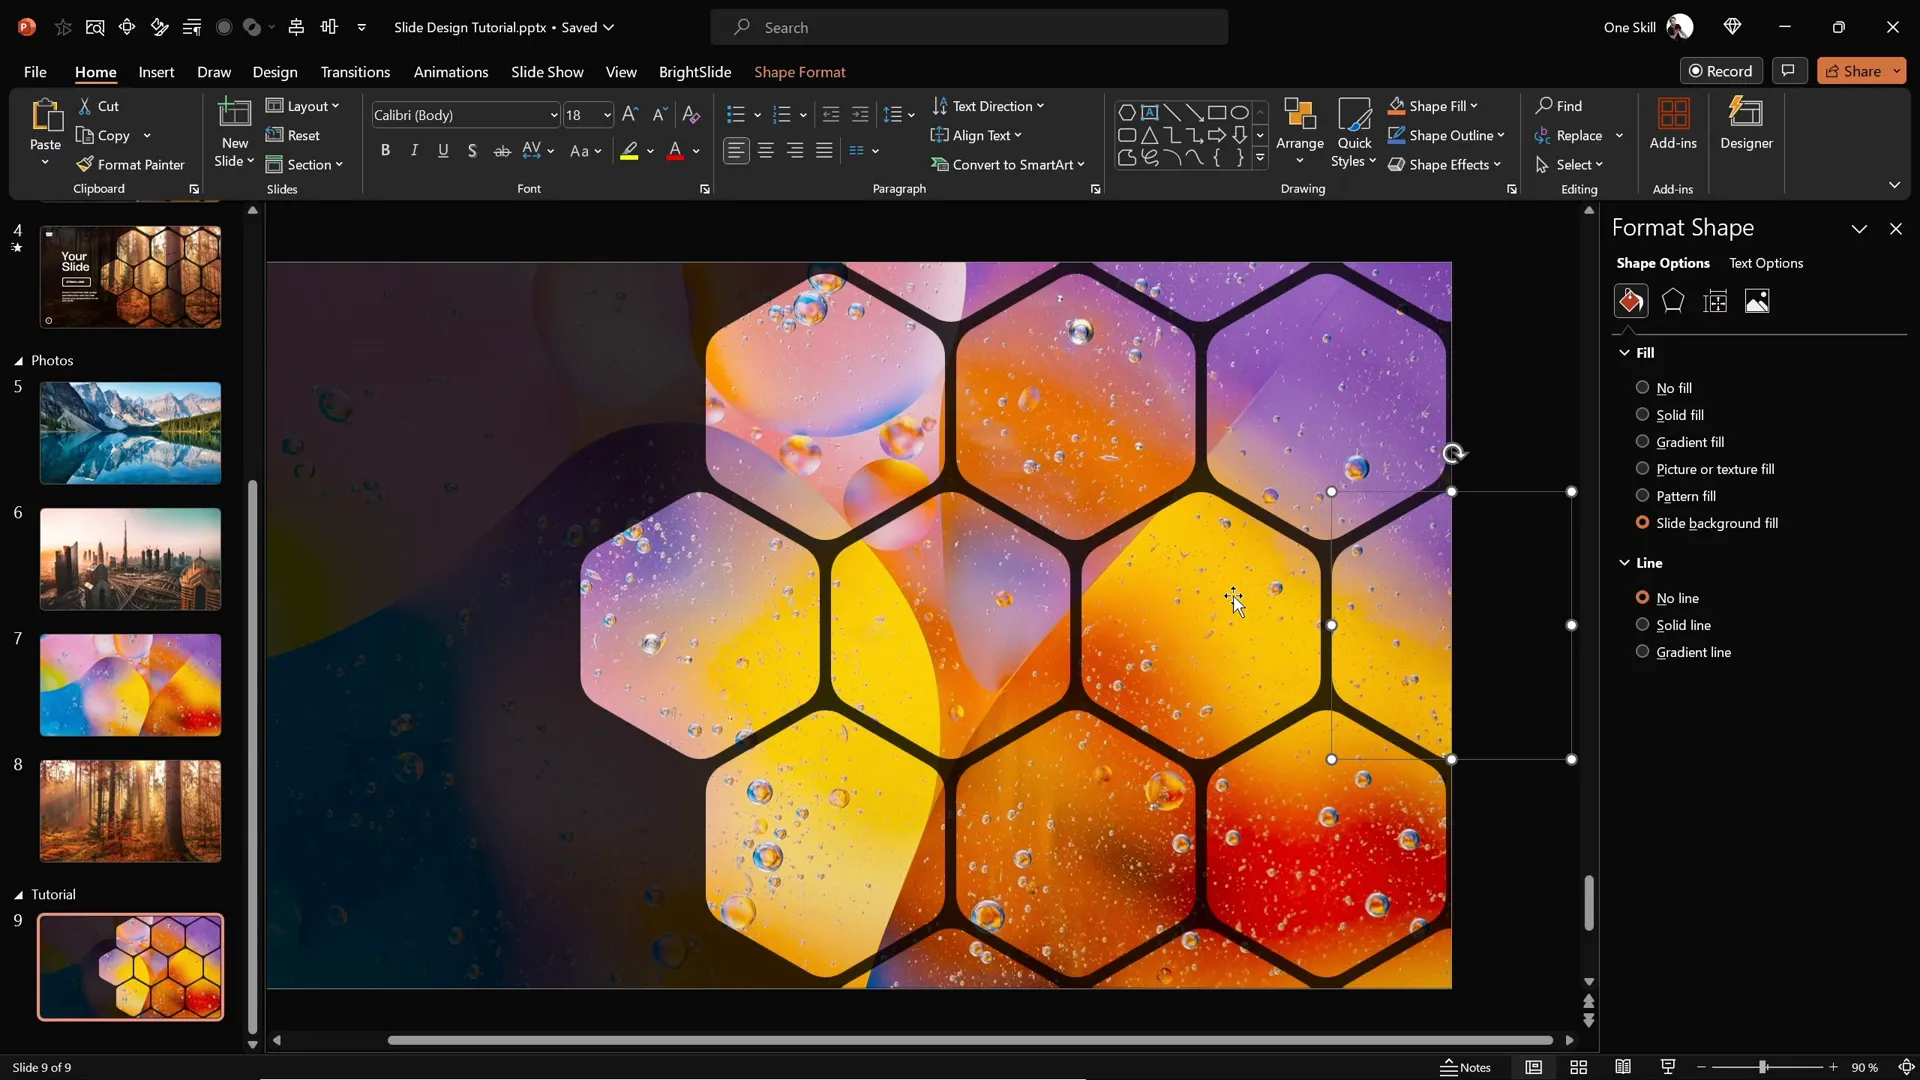
Applying Slide Background Fill to Hexagons
Once your hexagons are positioned, apply the Slide Background Fill to each shape to create a stunning effect where the hexagons reflect the underlying photo background.
Steps to apply:
- Select all hexagons that form the pattern.
- Go to the Shape Fill dropdown and choose Slide Background Fill.
This step ties your entire design together by making the hexagons appear as cut-outs showing parts of the background image through their shape.

Grouping Hexagons for Efficient Animation
To animate your design smoothly, group hexagons into logical clusters. Grouping makes it easier to apply coordinated animations and control timing.
Recommended groups:
- Middle row of hexagons (central focus)
- Top row of hexagons
- Bottom row of hexagons
- Additional clusters as needed based on your pattern
Grouping is done by selecting the desired hexagons and pressing Ctrl + G. Ungroup any unnecessary groups to delete or rearrange individual hexagons, especially those outside your visible slide area.

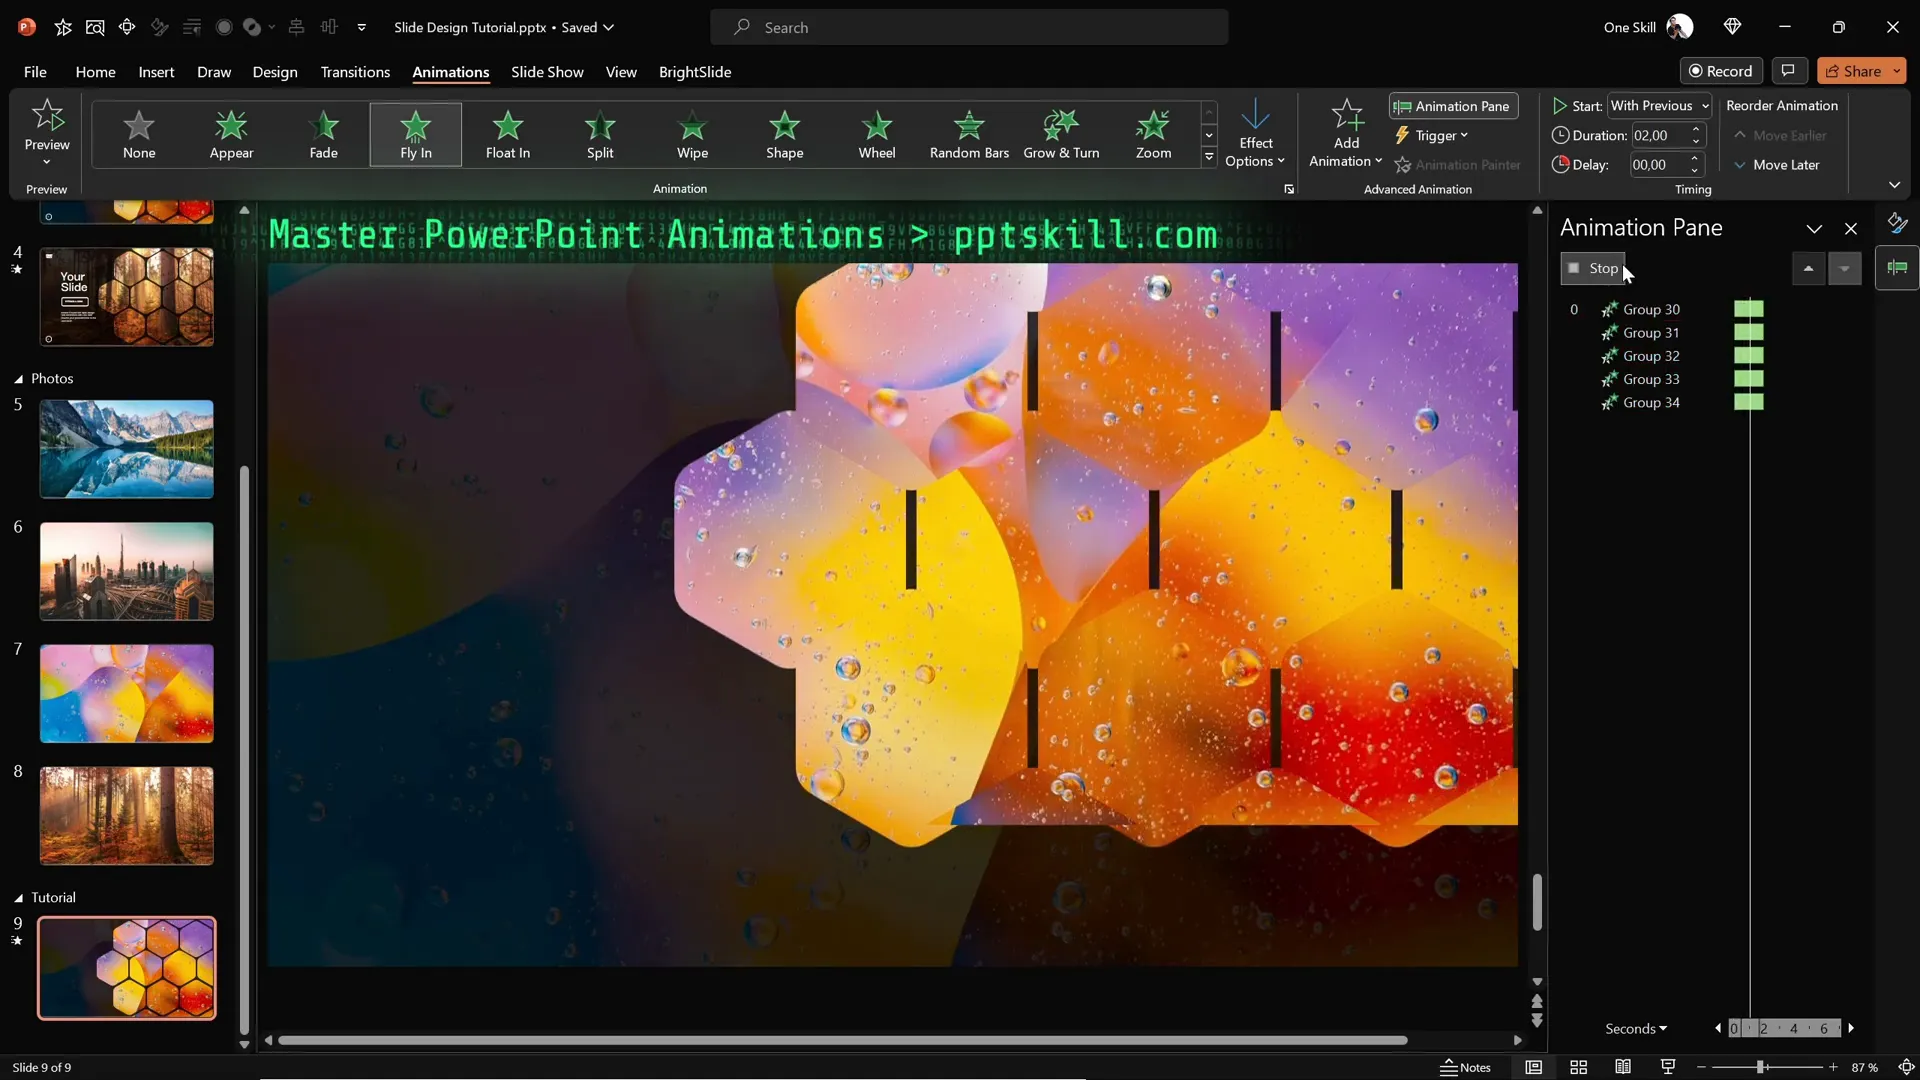
Adding Smooth Animations to Your Slide
Animations bring your slide design to life, adding a dynamic visual flow that keeps your audience engaged. PowerPoint offers various animation effects, and here’s how to apply flying animations to your grouped hexagons:
- Open the Animation Pane for better control.
- Select all hexagon groups.
- Apply the Fly In animation.
- Set the direction to From Top for the top groups.
- For bottom rows, change the direction to From Bottom to create a natural motion.
- Set all animations to start With Previous for smooth sequencing.
- Adjust the duration to about 2 seconds for a gentle effect.
- Use the Maximum Smooth End option for soft landing.
- Adjust layering so the middle hexagons stay in front, and send top and bottom groups to back.
- Send the semi-transparent overlay rectangle to back as well.
This attention to animation timing and layering ensures a polished, professional visual experience.
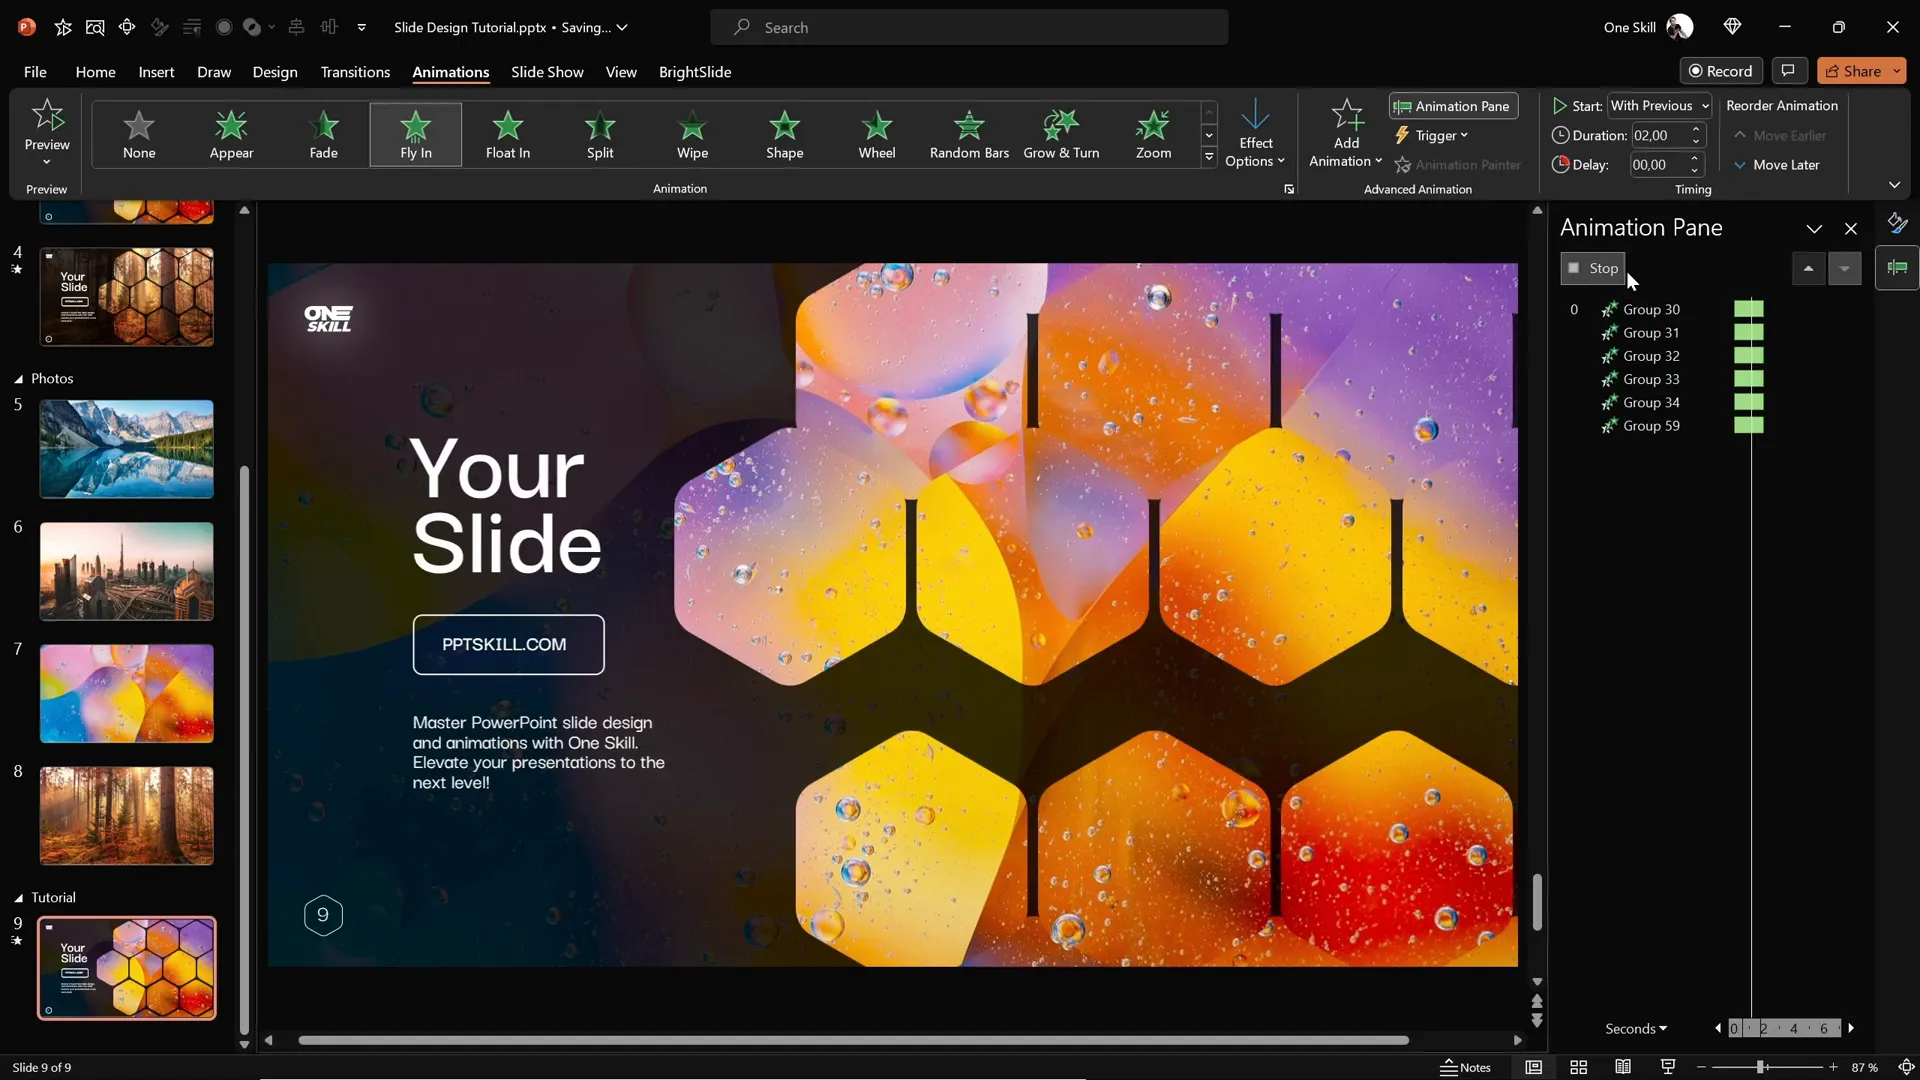
Finalizing the Slide Design with Text and Logo
Now that your hexagon pattern and animations are set, it’s time to complete the slide by adding essential text elements such as titles, logos, and slide numbers.
To do this efficiently:
- Copy existing text boxes and logos from a previous slide to maintain consistency.
- Paste them into your current slide.
- Group these text elements for easier animation.
- Apply a Flame animation effect to the text group with a direction from the left.
- Set animation timing to With Previous and duration to 2 seconds.
- Use the bounce effect with a duration of 1.5 seconds for a fun, engaging entrance.
The combination of flying hexagons and bouncing text creates a captivating visual hierarchy that guides your audience’s attention.
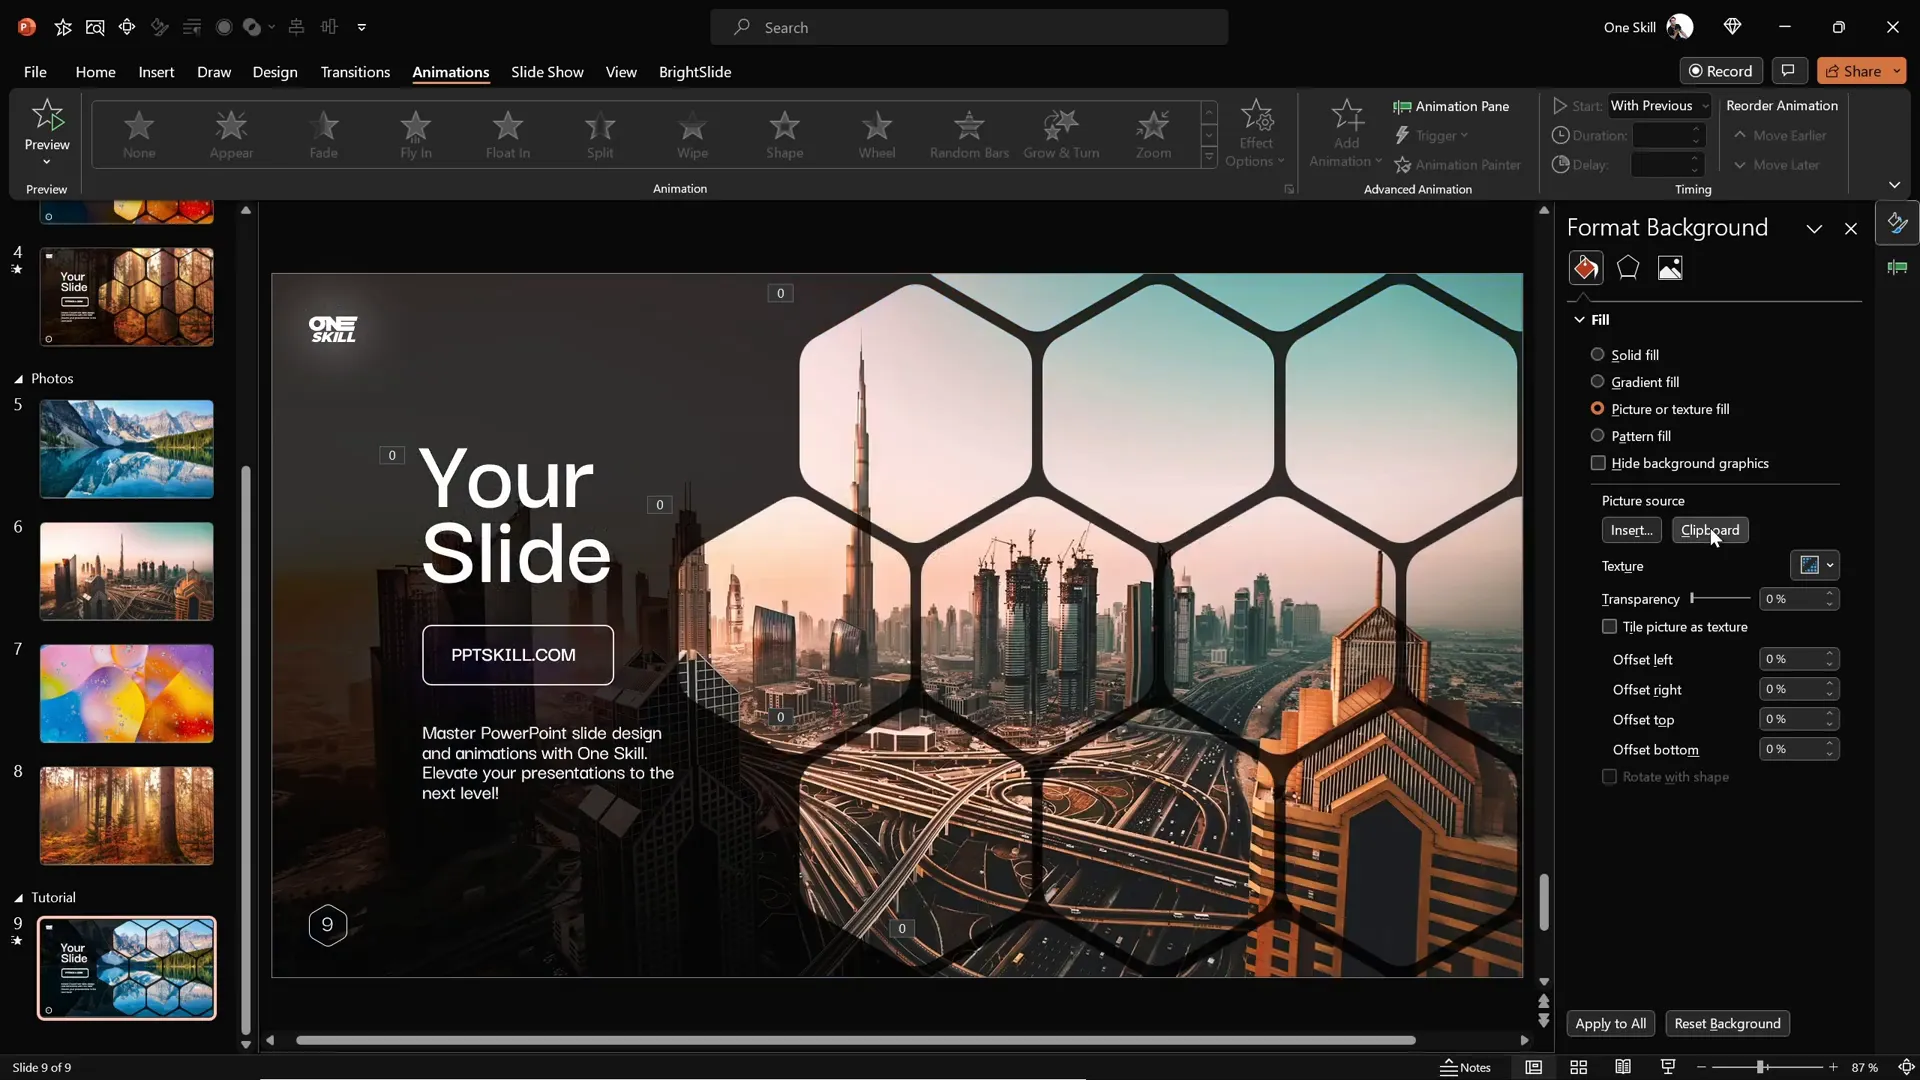
Customizing Slide Appearance with Different Backgrounds
One of the best features of this slide design is its flexibility. You can quickly change the entire look of your slide by swapping the background image, and your hexagons will automatically update with the new image thanks to the Slide Background Fill feature.
To update the background image:
- Select the new photo and copy it to your clipboard (Ctrl + C).
- Go to your slide and select one of the hexagons or any shape using slide background fill.
- In the fill options, click Clipboard to update the slide background fill with the new photo.
- Repeat for other shapes if necessary.
This quick swap allows you to tailor your slide design to various themes or branding requirements without rebuilding your layout.
Frequently Asked Questions
Can I create rounded hexagons directly in PowerPoint?
No, PowerPoint does not offer a built-in rounded hexagon shape. However, you can easily create one using external tools like Figma and then import it into PowerPoint as an SVG file.
What is Slide Background Fill, and why is it useful?
Slide Background Fill is a PowerPoint fill option that allows shapes to inherit the exact portion of the slide background image beneath them. It creates a seamless, integrated look and is particularly effective for creative shapes like hexagons.
How do I make my imported SVG shape fully editable in PowerPoint?
After importing an SVG, select the shape and click Convert to Shape in the Graphics Format tab. This unlocks full editing capabilities, including fill and outline options.
What animation effects work best for hexagon slide designs?
Flying animations with smooth easing (e.g., fly in from top or bottom with maximum smooth end) create natural, elegant entrances for grouped hexagons. For text, flame animations combined with bounce effects add a dynamic touch.
Can I reuse this hexagon slide design with different images?
Absolutely! Thanks to the Slide Background Fill feature, changing the slide background image automatically updates the hexagons’ appearance, allowing you to customize your slides quickly.
Is Figma free to use for creating shapes?
Yes, Figma offers a free tier that allows you to create and export vector shapes like rounded hexagons, making it accessible even for casual users.
Conclusion
Mastering PowerPoint slide design is about combining creativity, smart use of tools, and attention to detail. By following this step-by-step guide, you now know how to create impressive slides featuring rounded hexagons filled with your slide background image, enhanced with smooth animations that bring your presentation to life.
Using external tools like Figma enables you to overcome PowerPoint’s shape limitations and craft custom graphics tailored to your style. The Slide Background Fill feature adds a cohesive, polished look that makes your slides stand out professionally.
Remember, the power of your presentation lies not just in the content but in how you visually communicate your message. Experiment with different layouts, images, and animations to find what works best for your audience.
If you ever find yourself pressed for time, consider leveraging high-quality PowerPoint templates designed by professionals, which can save you hours while ensuring stunning results.
Now it’s your turn to create beautiful, animated hexagon slides that wow your audience. Happy designing!
Check out the full video: CREATIVE PowerPoint Slide Design Tutorial! 2024 ✨


