
If you’re new to PowerPoint or want to refresh your skills, you’ve come to the right place. PowerPoint is the go-to software application for professionals worldwide to create compelling presentations. In this comprehensive beginner’s guide, I’ll walk you through the fundamentals of PowerPoint, sharing tips and techniques I’ve gathered over fifteen years of teaching presentation software. By the end of this article, you’ll have the confidence to build your own engaging presentations that are visually appealing and easy to follow.
Let’s dive in and explore PowerPoint as if you’ve never touched it before. Throughout the process, I’ll encourage you to follow along on your own computer, experimenting with the features as we go. This hands-on approach ensures you absorb the skills effectively and can apply them immediately to your own projects.
Table of Contents
- Getting Started: An Overview of PowerPoint’s Interface
- Adding and Managing Slides
- Working with Text and Text Boxes
- Mastering Bulleted Lists
- Adding Style with Fancy Bullets and Word Art
- Saving Your Presentation: Local and Cloud Options
- Presenting with PowerPoint: Slide Show Basics
- Enhancing Slides with Pictures
- Advanced Picture Techniques: Arrange, Crop, and Effects
- Reducing File Size with Picture Compression
- Choosing Effective Pictures
- Removing Backgrounds from Images
- Capturing Screenshots Inside PowerPoint
- Using Drawing Tools and Shapes
- Adding Smooth Transitions Between Slides
- Animating Bullet Points for Better Engagement
- Using Speaker Notes to Enhance Your Presentation
- Putting Your Skills to Work: Practice and Build Your Presentation
- Frequently Asked Questions (FAQ)
Getting Started: An Overview of PowerPoint’s Interface
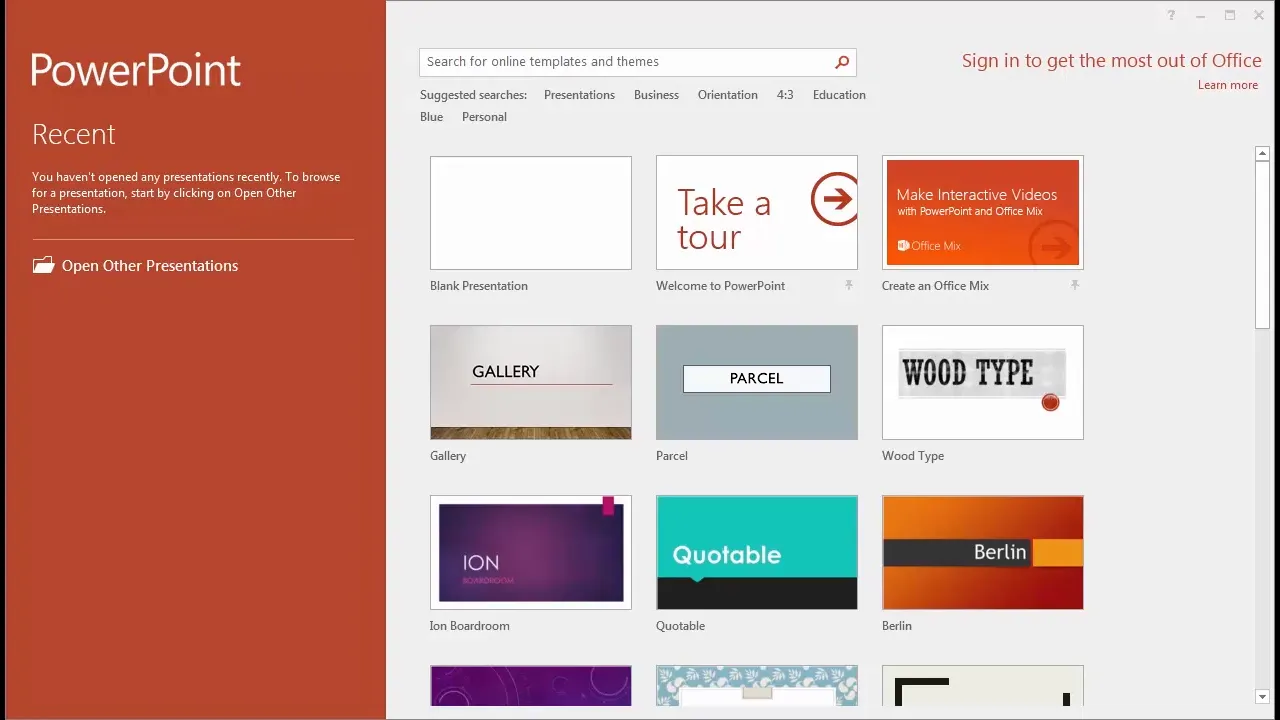
When you first open PowerPoint, you’re greeted with a startup screen that asks how you’d like to begin. You’ll see a variety of templates and design options, but most of the time, you’ll want to start with a blank presentation or a corporate template if your organization provides one.
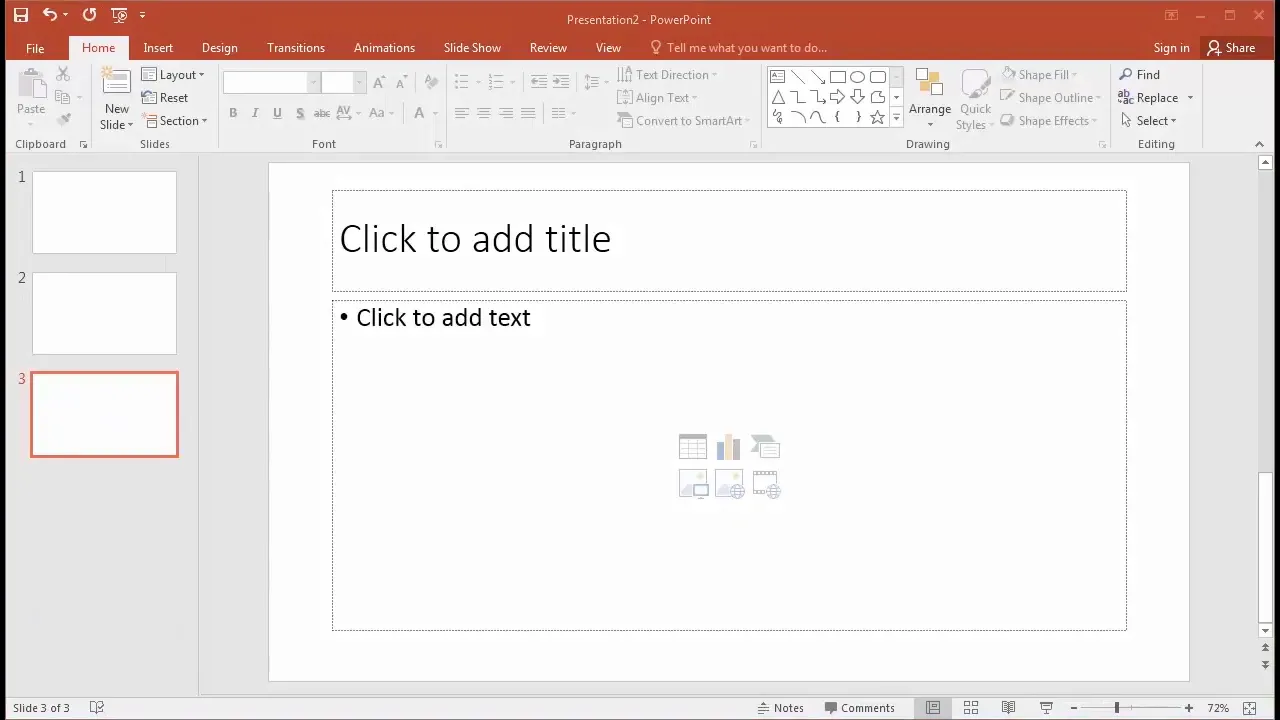
To start fresh, simply double-click the blank presentation option. You’ll then see the main slide workspace, with the current slide prominently displayed in the center and a vertical panel on the left showing thumbnails of all your slides. This sidebar helps you navigate and organize your presentation as it grows.
At the top, you’ll find the Ribbon—a strip of tabs and buttons that organize PowerPoint’s many features. Each tab categorizes related commands. For example, the Insert tab contains tools for adding pictures and other media, while the Animations tab is where you create slide animations and effects. The Slideshow tab lets you preview and play your presentation in full-screen mode.
Two tabs you’ll use frequently are the Home tab, which contains common tools like adding new slides and formatting text, and the File tab, which opens the backstage view for saving, opening, printing, and managing your presentation files.
One handy tool you’ll find at the bottom right is the zoom slider, allowing you to zoom in or out of your slide to adjust your view. Occasionally, you might zoom out to see images that extend beyond the slide edges or zoom in for detailed work.
Adding and Managing Slides
One of the core tasks in PowerPoint is adding new slides. On the Home tab, you’ll find the New Slide button. This button has two parts: clicking the top adds a new slide of the same type as the current slide (with an exception for title slides, which it avoids duplicating consecutively). Clicking the dropdown arrow reveals a gallery of slide layouts you can choose from, such as title slides, title and content, section headers, and blank slides.
While PowerPoint offers two-content and comparison slide layouts, I suggest keeping it simple. Less is more when it comes to slide content—overcrowded slides can overwhelm your audience.
You can reorder slides by dragging their thumbnails in the sidebar. If you want to duplicate a slide, right-click it and choose Copy, then right-click where you want it and select Paste. You can also use Ctrl+C and Ctrl+V shortcuts.
If you want to delete a slide, select it and press the Delete key. It’s surprisingly satisfying!
For working with multiple slides at once, PowerPoint offers the Slide Sorter view (icon resembling four slides), located at the bottom right. This view displays thumbnails of all your slides on one screen, making it easier to select, reorder, copy, or delete multiple slides simultaneously.
Working with Text and Text Boxes
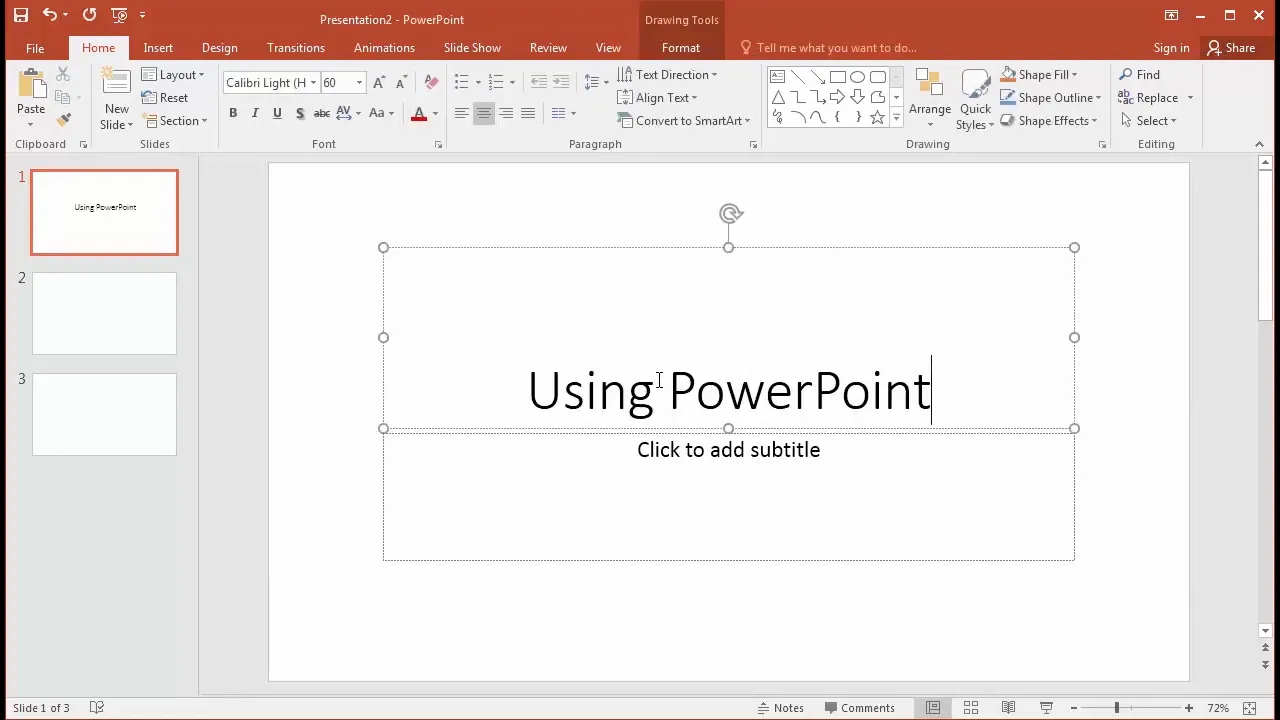
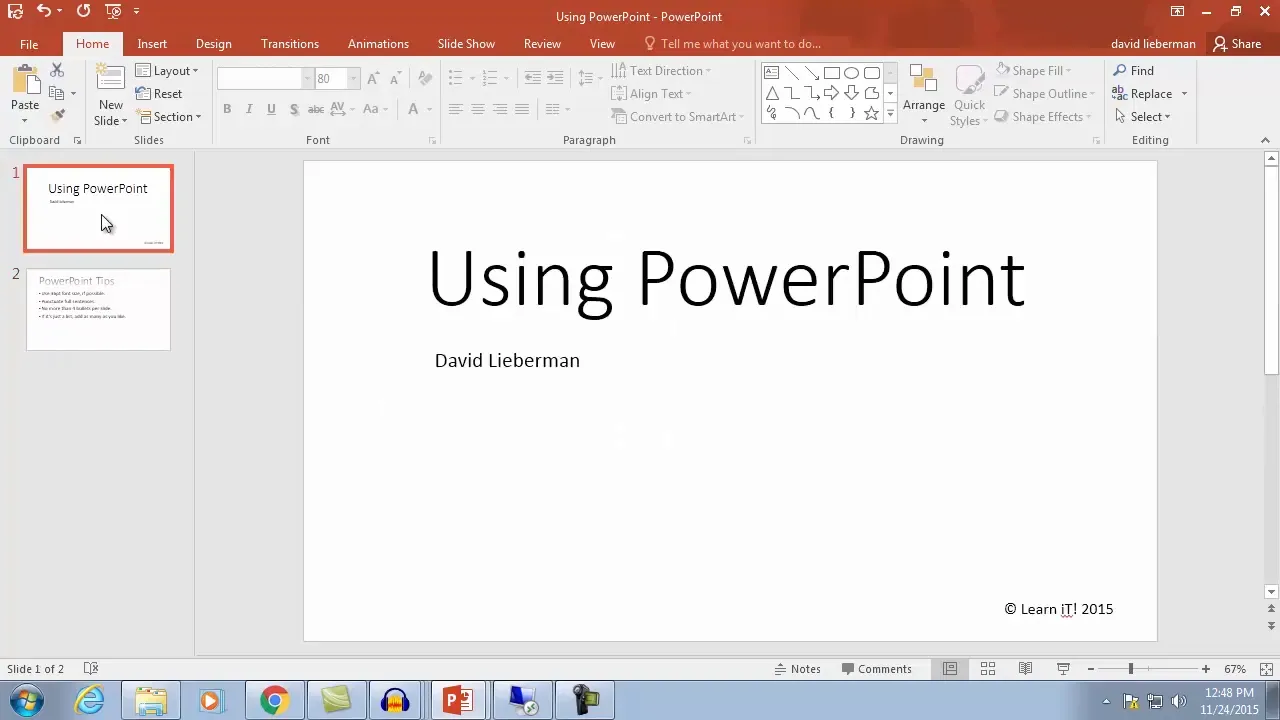
Once you have your slides, it’s time to add content. Click on text placeholders like “Click to add title” or “Click to add subtitle” to type your text. Adding your full name on the title slide adds a professional touch, even if your audience already knows you.
Editing text in PowerPoint is similar to word processing. You can highlight text and use the formatting options on the Ribbon to change font face, size, color, and style. Here’s a handy trick: instead of highlighting all text, click the edge of the text box until your cursor changes to a four-arrow icon. This selects all the text inside the box without the messy highlight, allowing you to apply formatting uniformly.
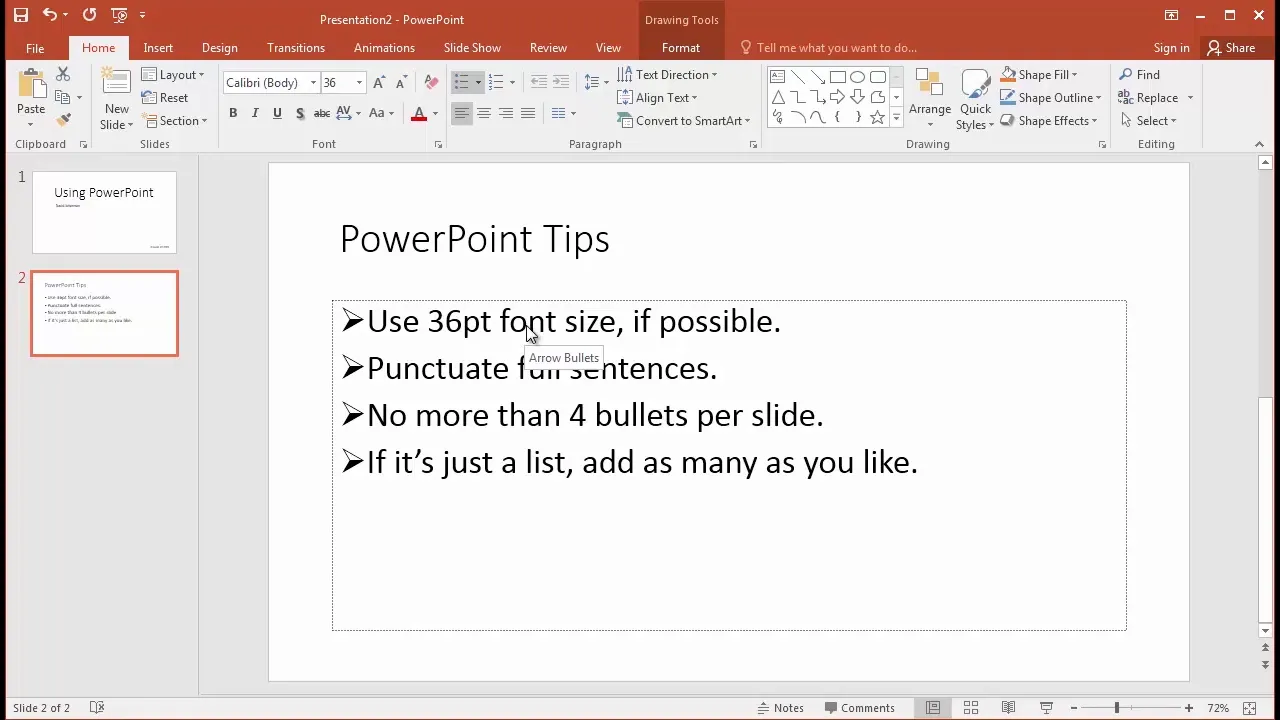
PowerPoint is a graphic design tool, so think visually. Use font size strategically: larger text signals importance, smaller text signals less emphasis. Avoid font sizes below 20 points for readability in presentations. Typically, 36 points is a good size for bullet points to ensure your audience can read comfortably.
Other formatting options include bold and italic for emphasis or inflection, shadows for text on complex backgrounds, and letter spacing or case changes. Underlining is generally discouraged, as it can confuse viewers into thinking the text is a hyperlink.
You can move text boxes by clicking their edges and dragging them or by selecting and nudging with arrow keys for precise placement. Resize text boxes by dragging their corners or sides. You’ll find a rotate handle at the top of the box for fun, though rotation isn’t commonly used.
Sometimes text aligns to the bottom of a text box by default. Use the Align Text button on the Home tab to align text to the top, which helps maintain consistent formatting across slides.
If you need a new text box, insert one from the Insert tab by clicking Text Box and dragging on the slide to create it. You can format and move it just like any other text box.
Mastering Bulleted Lists
Many slides use bulleted lists to organize information clearly. Add a new slide with the “Title and Content” layout to get a title and bullet point area. When typing bullet points, keep font size above 20 points—36 points is ideal for audience comfort.
Use punctuation only if your bullets form complete sentences. Avoid mixing full sentences and fragments in the same list for consistency. Press Enter to add new bullet points easily.
Regarding the number of bullet points, research suggests that if you’re simply displaying a list, you can have many points. However, if you’re discussing each bullet point in detail, keep it to four or fewer. Our brains can only hold about four to seven items at once, so too many bullets can overwhelm and stress your audience.
If you have many points, break them into multiple slides rather than crowding one slide.
Sub-bullet points can be created by pressing Enter for a new bullet, then indenting using the indent button on the Ribbon or the Tab key on your keyboard. Shift+Tab moves the bullet back out. Use sub-bullets sparingly; often it’s better to verbally expand on your main points instead of crowding slides.

Adding Style with Fancy Bullets and Word Art
Want to make your bullet points stand out? PowerPoint offers a variety of bullet styles and options. You can switch between bullets and numbered lists for ordered information like steps or rankings.
The bullet dropdown menu lets you choose different bullet symbols, including checkmarks or arrows, which can communicate meaning (e.g., a checkmark signals completion). Be cautious with decorative bullets that don’t add meaning—they can distract from your message.
For more customization, click Bullets and Numbering at the bottom of the bullet menu. Here you can change bullet size, color, and even use pictures or custom symbols as bullets. For example, you might use a Santa hat icon for a holiday-themed list.
Besides bullets, PowerPoint’s Format tab (which appears contextually when you select text) offers Word Art styles. These add artistic effects like shadows, fills, and outlines to your text. While some Word Art styles can look flashy, use them sparingly to keep your presentation professional.
Saving Your Presentation: Local and Cloud Options
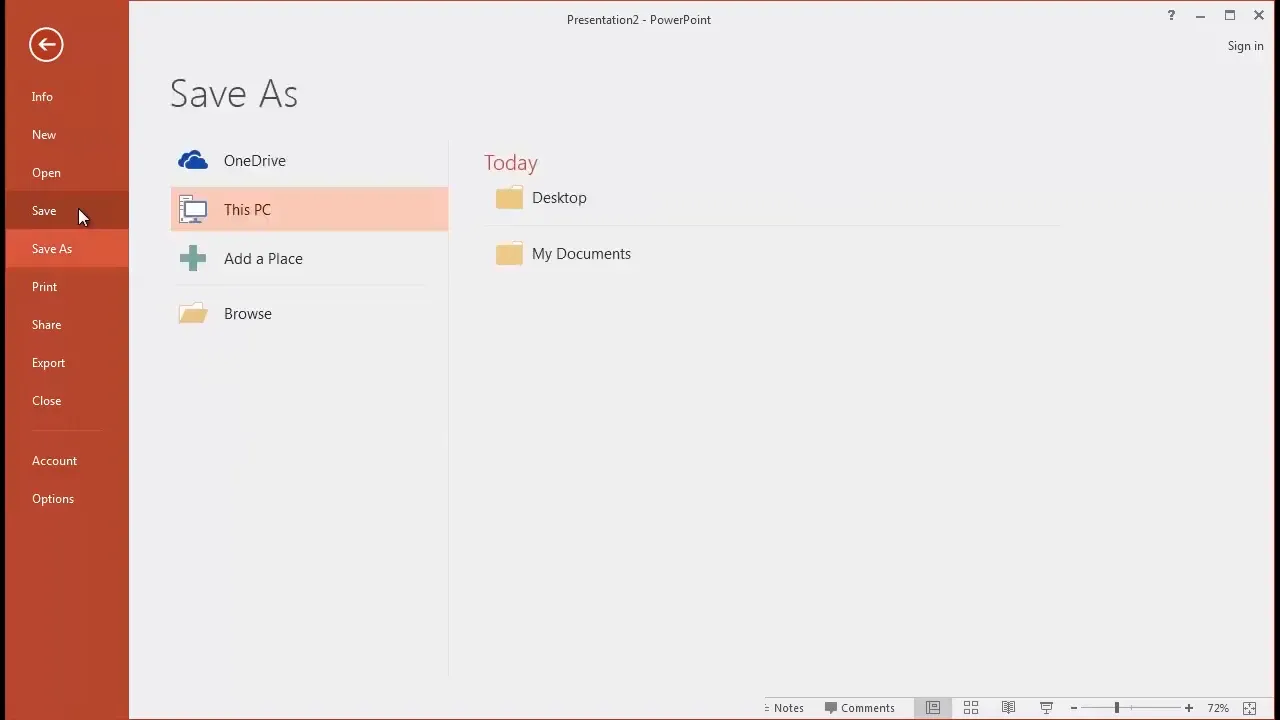
Saving your work regularly is crucial. You can save using the floppy disk icon or through the File tab. PowerPoint lets you save files locally on your PC or on the cloud via OneDrive.
If you use Microsoft Office at work, you likely have a OneDrive account linked to your credentials. Saving to OneDrive enables easy access from any device and allows multiple people to collaborate on the same file.
To save to OneDrive, select it from the save locations, sign in if prompted, and save normally. You can reopen files from OneDrive either within PowerPoint or by visiting onedrive.com.
Presenting with PowerPoint: Slide Show Basics
Once your presentation is ready, you can view it full screen by clicking the slide you want to start on and then clicking the slide show icon at the bottom right (looks like a movie screen). You can navigate slides using mouse clicks, keyboard keys, or arrow keys.
Pressing the Escape key exits the slide show. A handy shortcut to start the slide show from the current slide is Shift + F5.
Regularly preview your presentation in slide show mode to ensure your slides look as expected. Sometimes elements appear differently when viewed full screen versus editing mode.
Enhancing Slides with Pictures
PowerPoint is a graphic design tool, so adding images is essential for creating visually appealing presentations. Pictures evoke emotions and make your message more relatable.
To insert a picture, go to the Insert tab and click Pictures. Select an image from your computer, then resize and reposition it by dragging the corners or the image itself.
A key tip when resizing is to drag from the corners to maintain aspect ratio and avoid distortion.
Also, give pictures space away from text to prevent your brain from associating unrelated elements. Sometimes this means resizing pictures smaller than you might want, and that’s okay for clarity.
If you want to insert images from the web legally, use the Online Pictures option under the Insert tab. This searches Bing images filtered for Creative Commons licenses, which are labeled for reuse. Avoid clip art or cartoonish images, as they can make your presentation look unprofessional.

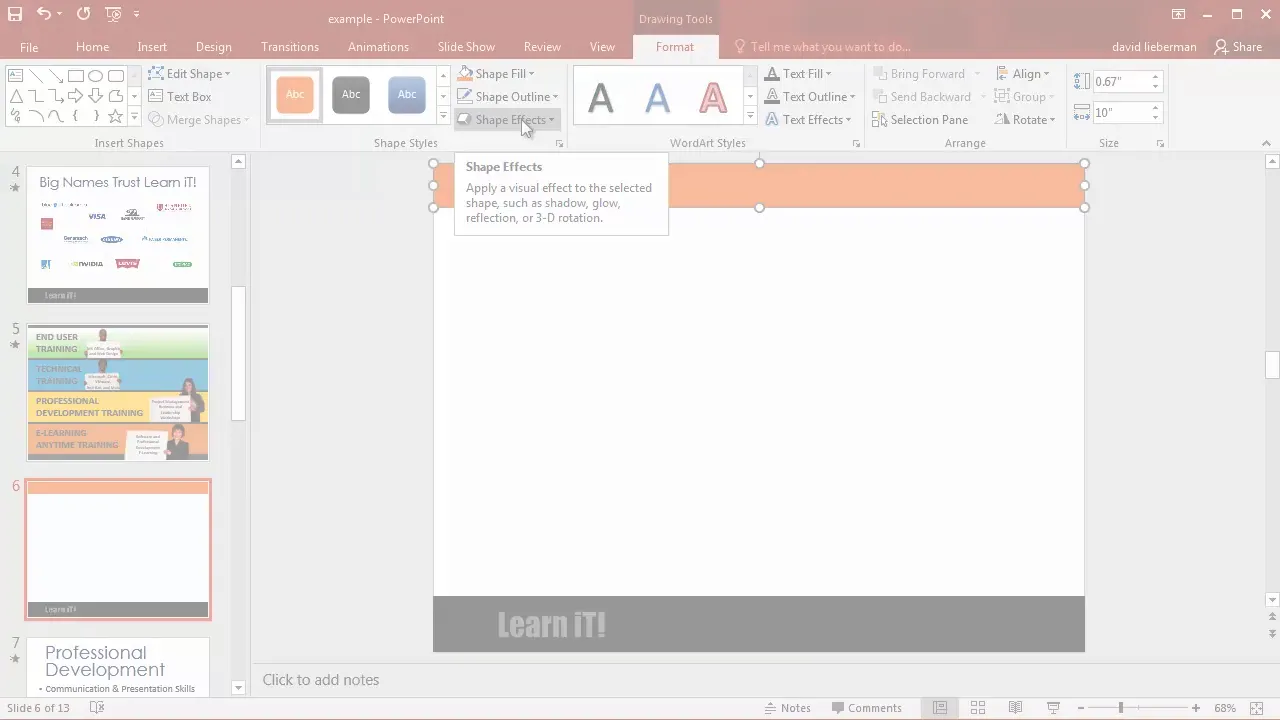
Advanced Picture Techniques: Arrange, Crop, and Effects
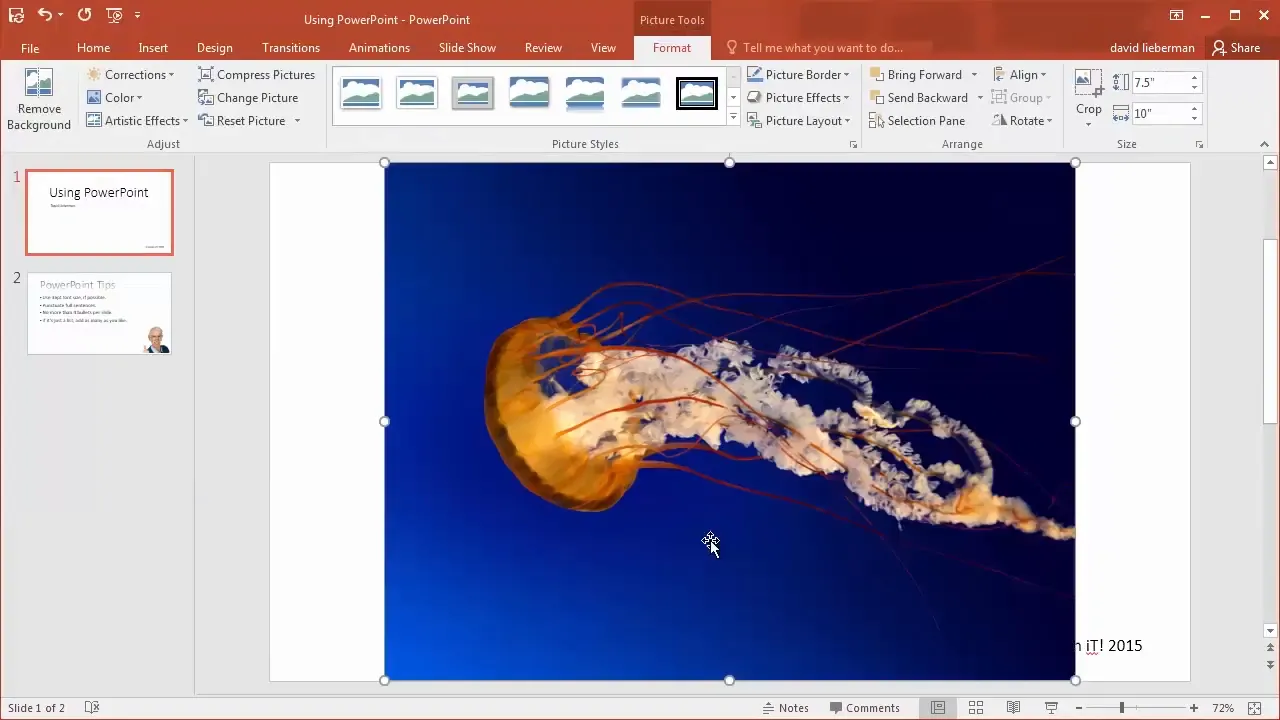
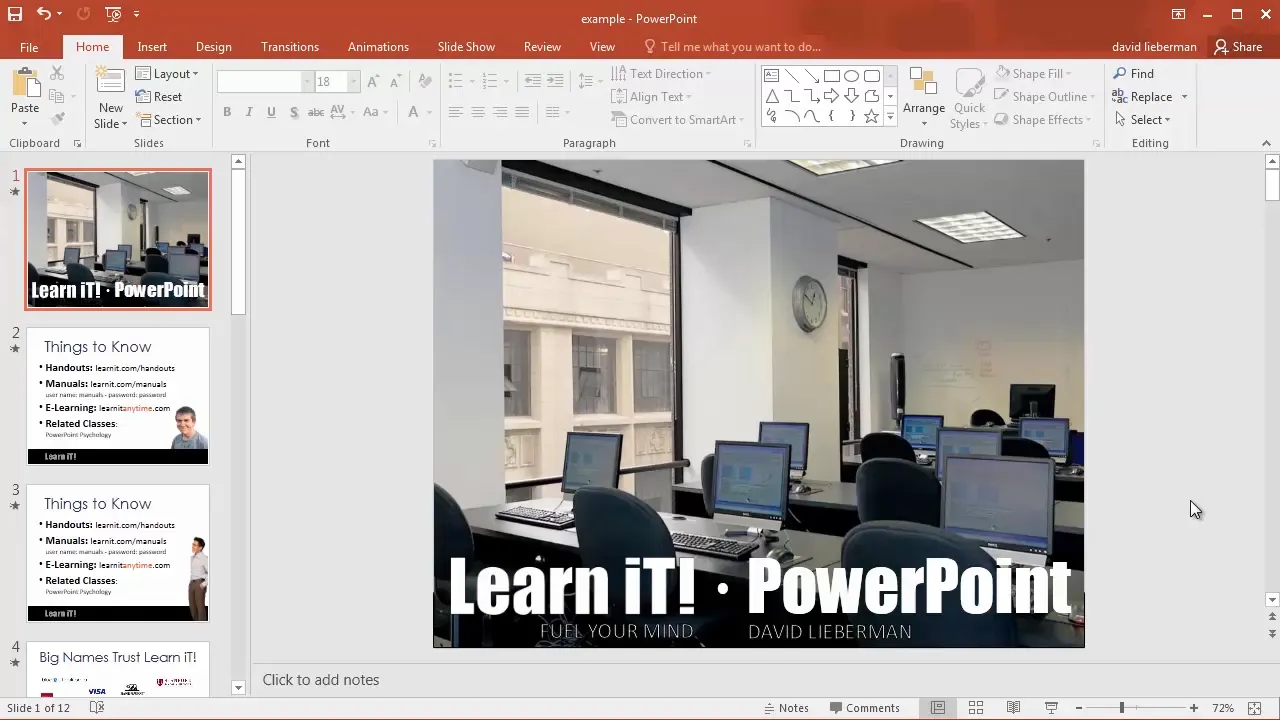
Sometimes you want a picture to fill the entire slide for impact. Insert a large image, then resize and position it to cover the slide fully. Avoid white borders around the edges for a polished look.
If the picture covers text, you’ll need to change the stacking order. On the Home tab, find the Arrange button, which lets you send objects backward or bring them forward. Use Send to Back to place the picture behind text boxes.
Adjust text color and effects like shadows to ensure readability against picture backgrounds.
To make your picture perfectly fit the slide or to trim unwanted parts, use the Crop tool on the Format tab (visible when the picture is selected). Drag the black crop handles to adjust the visible area. It’s better to crop slightly outside the slide edges than inside.
PowerPoint offers many picture styles and effects, such as borders, shadows, and glows. Choose subtle effects that mimic real-life appearances rather than overly stylized ones like circles or fuzzy edges.

You can also rotate or flip pictures to change their orientation. Flipping images is useful if you want a person or object to face inward on the slide for better flow and directionality.
Color corrections and washout effects can help images blend into backgrounds or create emphasis. However, for detailed photo editing, professional software like Photoshop is preferable.
Reducing File Size with Picture Compression
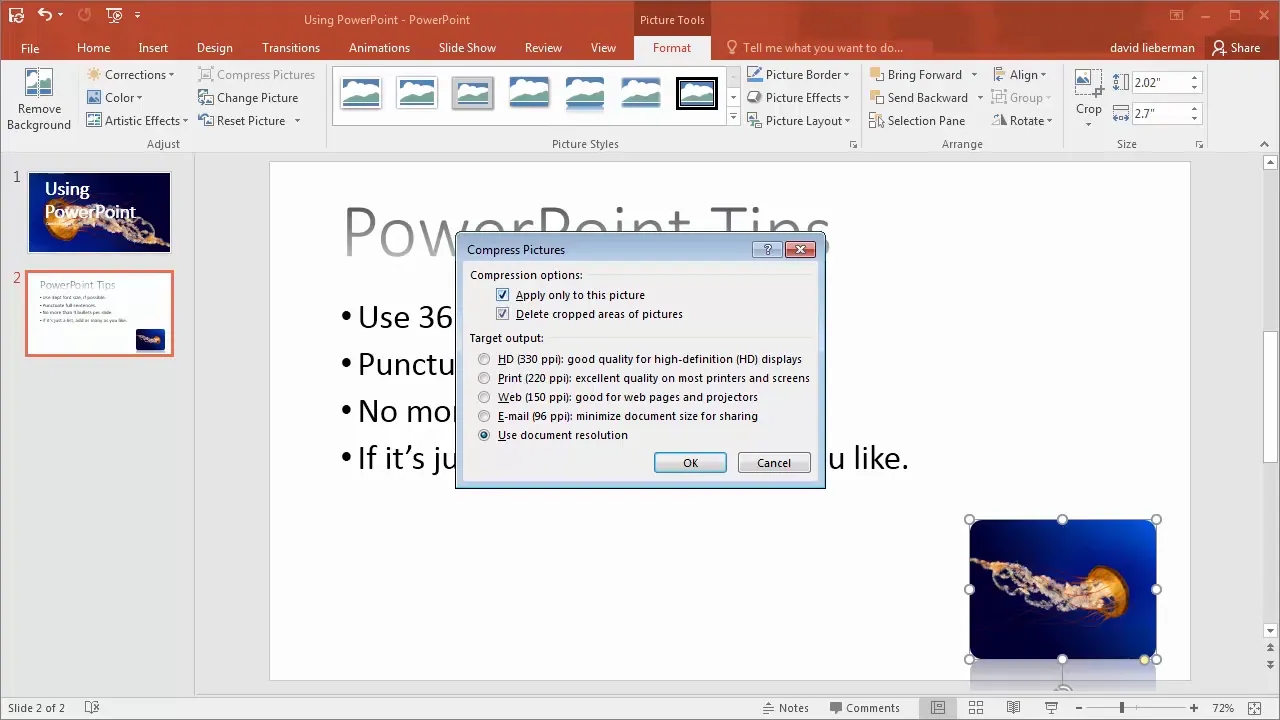
Large presentations with many pictures can become huge files that are difficult to share. PowerPoint includes a Compress Pictures feature to reduce file sizes without sacrificing much quality.
After inserting all your pictures, select one and go to the Format tab. Click Compress Pictures, uncheck “Apply only to this picture” to compress all images, and choose an output resolution (96 or 150 pixels per inch is usually sufficient for screen presentations).
This feature can dramatically reduce file size—for example, a 70-slide presentation shrunk from 45MB to 8MB.
Choosing Effective Pictures
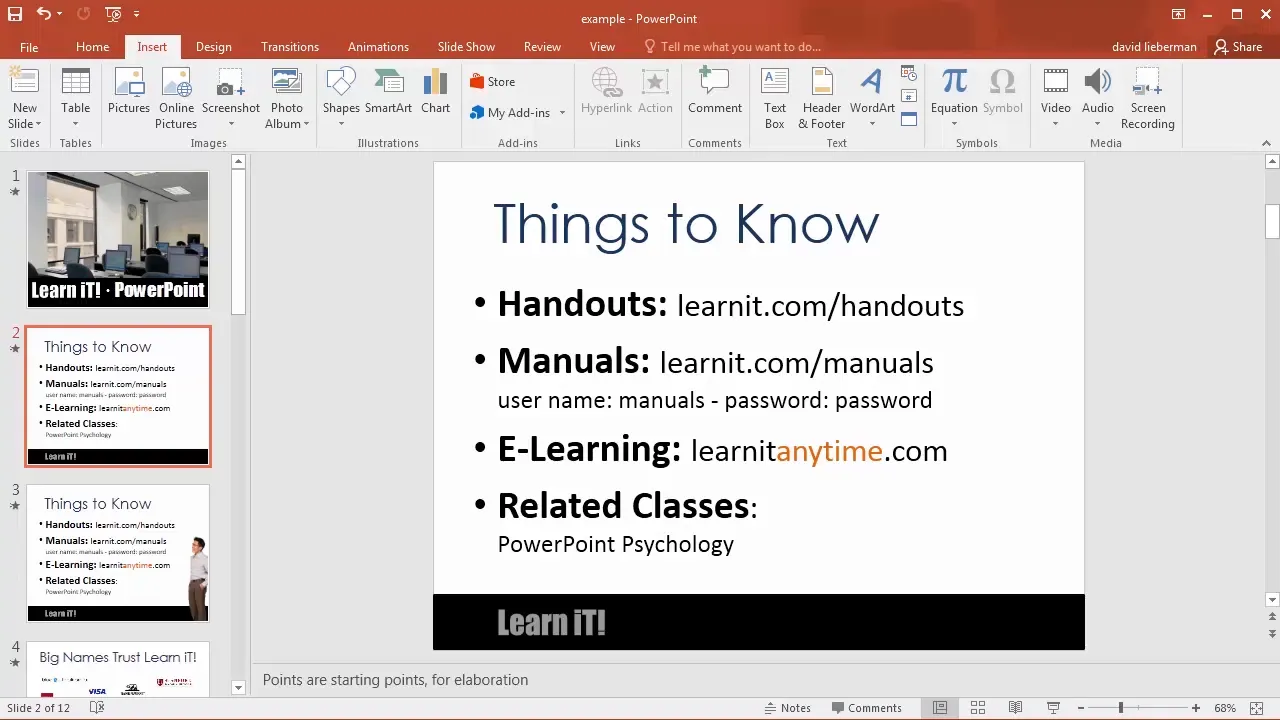
Which pictures are most successful in presentations? Research shows that images of people with transparent backgrounds, positioned halfway off the slide, have the greatest emotional and intellectual impact.
Humans empathize with other people, so pictures of people help transfer emotions and ideas effectively. Also, when images are partially offscreen, our brains naturally fill in the missing parts, increasing engagement.
Look for images labeled “transparent background” or PNG files with no background to achieve this effect.
Removing Backgrounds from Images
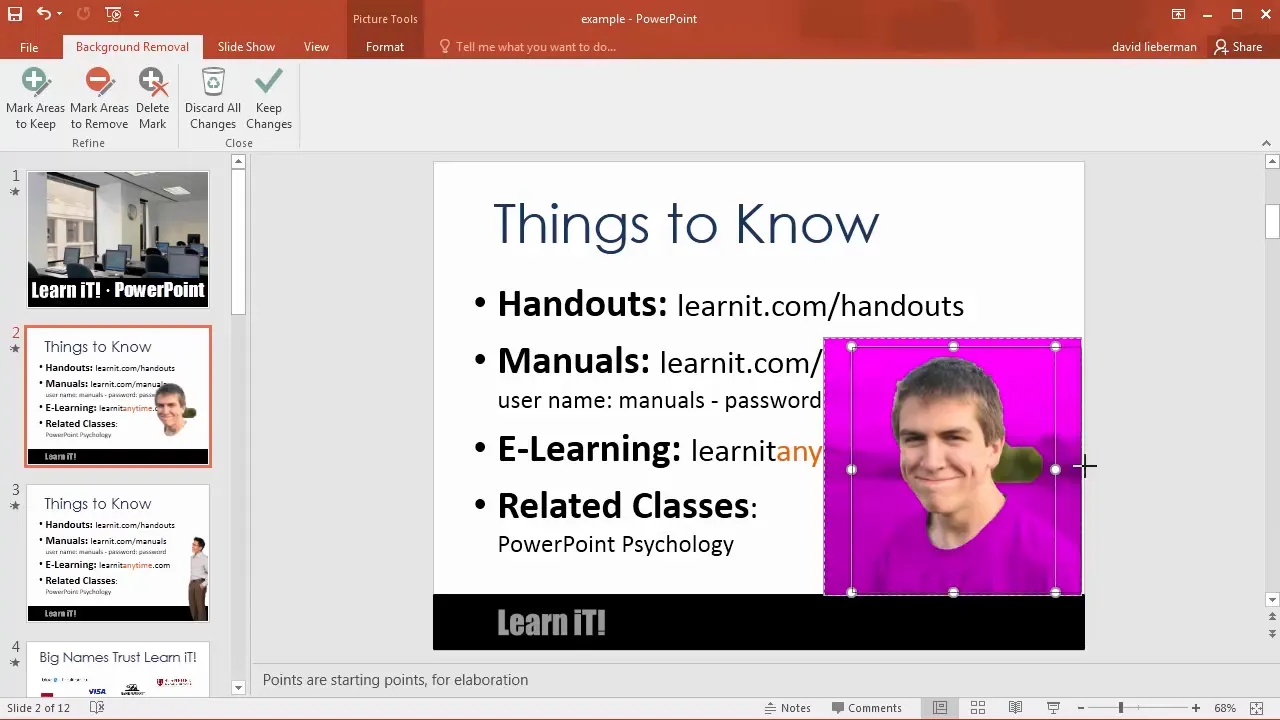
If you have a great picture with a distracting background, PowerPoint offers a built-in Remove Background tool. While not as powerful as Photoshop, it’s very useful for quick edits.
Click the picture, go to the Format tab, and select Remove Background. PowerPoint will highlight areas to remove in purple. Use the Mark Areas to Keep and Mark Areas to Remove tools to fine-tune the selection by drawing lines over the corresponding areas.
Once satisfied, click Keep Changes. This works best when there is a clear distinction between the subject and background.
For best results, remove backgrounds when the image is large, then scale down to hide imperfections.
Capturing Screenshots Inside PowerPoint
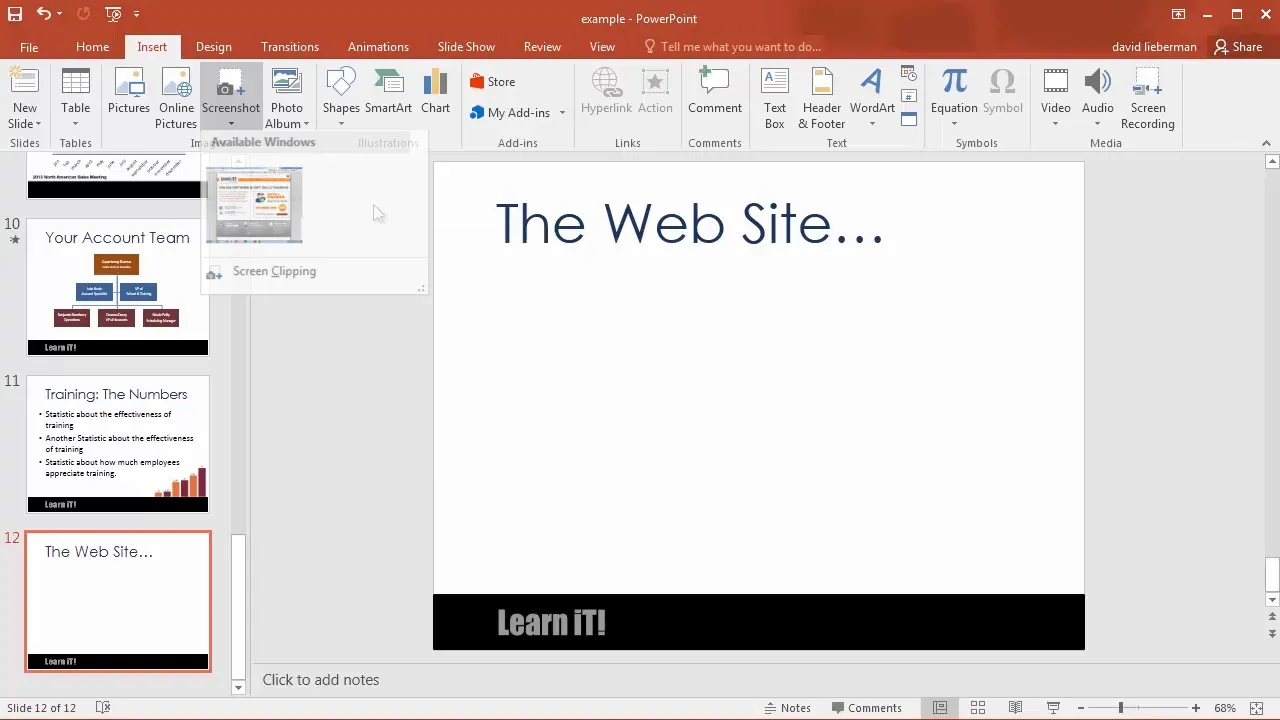
PowerPoint includes a screenshot tool that lets you capture images of other windows or parts of your screen directly into your presentation.
Go to the Insert tab and click Screenshot. You’ll see thumbnails of open windows for quick capture, or choose Screen Clipping to manually select a portion of the screen.
This tool switches to the last active window, dims the screen, and lets you drag a box to capture exactly what you need. The screenshot is then inserted into your slide, where you can resize and apply effects.
Using Drawing Tools and Shapes
PowerPoint offers a variety of shapes you can draw to enhance your slides. While you won’t be creating elaborate drawings, simple shapes like rectangles are powerful for organizing content visually.
For example, placing a colored rectangle behind text can improve readability over a busy background. Use the Insert tab, then Shapes to pick a shape and drag it onto your slide.
Resize and move shapes like pictures. The Format tab provides prebuilt shape styles, fill colors, outlines, and effects like shadows and glows. Keep effects subtle to maintain professionalism.
Shapes can contain text, but it’s often better to keep text and shapes separate for precise positioning.
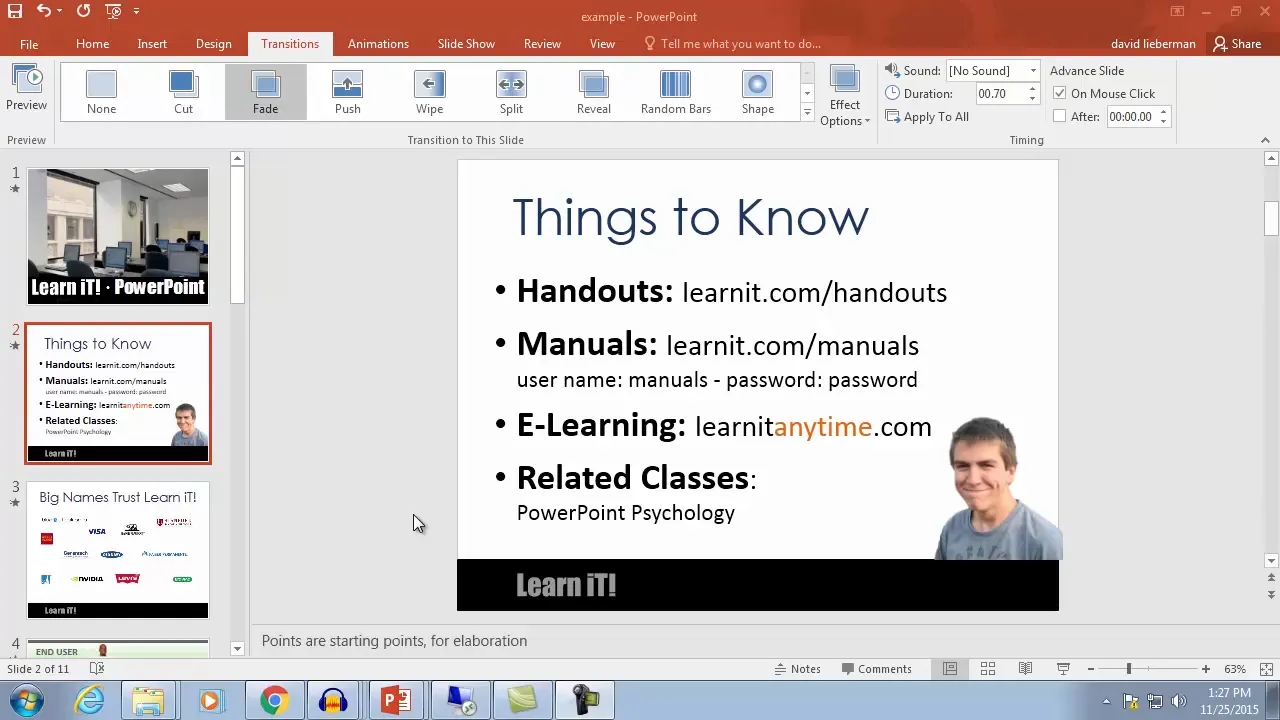
Adding Smooth Transitions Between Slides
By default, slides change abruptly, which can feel jarring. Adding transitions makes your presentation flow smoothly from one slide to the next.
Click the Transitions tab and select Fade for a classic, subtle effect. Use the Apply to All button to add the transition to every slide at once.
You can adjust the transition duration for a slower, more elegant change. For major topic shifts, use the Fade Through Black effect with a longer duration (around 3 seconds) to signal a scene change, similar to movie transitions.
Avoid flashy transitions that distract from your message. Use transitions purposefully to enhance storytelling.
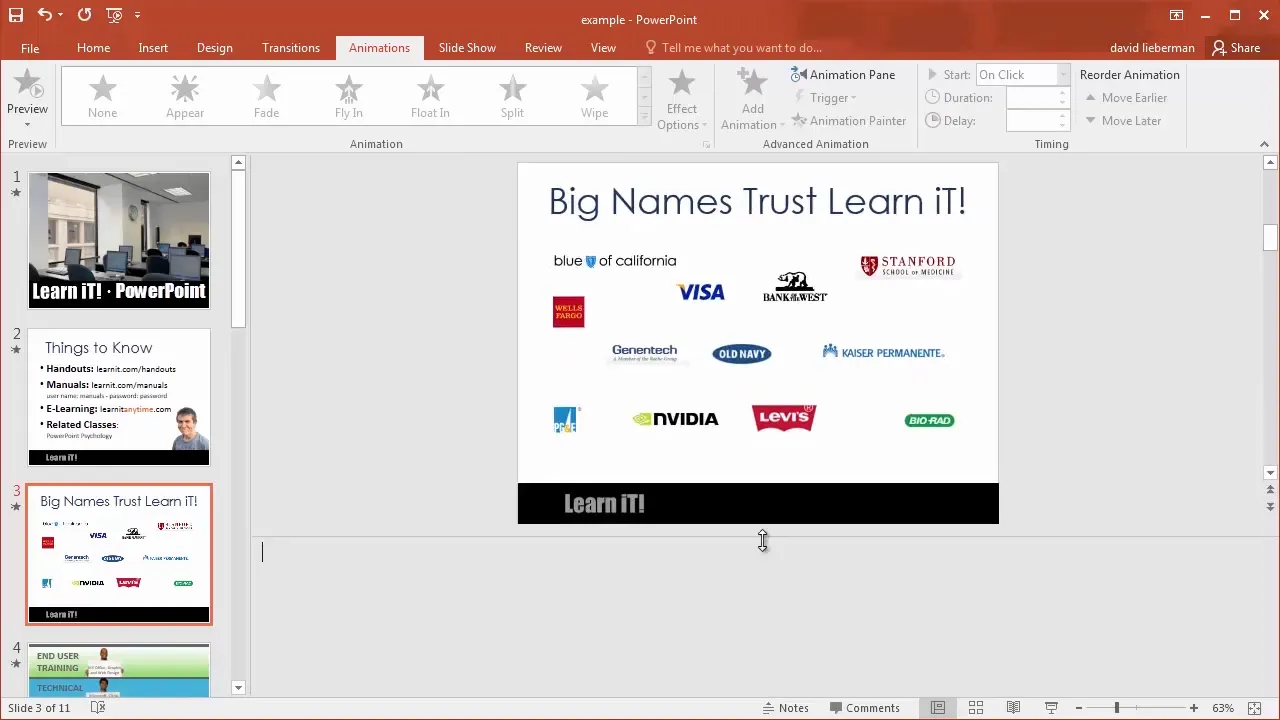
Animating Bullet Points for Better Engagement
Showing all bullet points at once encourages your audience to read ahead, which can disengage them. Instead, animate bullet points to appear one at a time as you speak.
Click inside a bullet point, go to the Animations tab, and select Fade. This makes each bullet fade in sequentially when you advance the slide.
Use simple fade animations for text to avoid disorienting effects like flying or spinning words. Animating bullets keeps your audience focused and engaged with your spoken words.
Using Speaker Notes to Enhance Your Presentation
Many presenters fall into the trap of reading slides verbatim, which bores audiences. Instead, use the Notes pane below the slide to write your script or key points.
You can open the Notes pane by dragging up from the bottom or clicking the Notes button. Add detailed notes for each slide here.
When it’s time to present, you can print notes pages (slides with notes) for reference. To do this, go to File > Print and select Notes Pages under print layout options.
One quirk: increasing font size in the Notes pane doesn’t affect the on-screen view but does make printed notes easier to read. Many experts recommend writing your entire presentation in notes first, then extracting key points for the slides.
Putting Your Skills to Work: Practice and Build Your Presentation
By following these steps, you’ve learned core PowerPoint skills that put you ahead of most everyday users. Now it’s time to apply what you’ve learned.
- Start a new presentation on a topic you might present in the future.
- Write your speaker notes first, then build your slides.
- Use images strategically to engage your audience.
- Make important text larger and less important text smaller to guide attention.
- Add smooth fade transitions between slides.
- Animate bullet points to appear one by one as you speak.
Remember, PowerPoint is a graphic design tool at its core. Good design communicates clearly and professionally, so keep your slides neat and uncluttered.
Take your time experimenting with these tools, and when you’re proud of your presentation, you’re ready to explore advanced PowerPoint features.
Frequently Asked Questions (FAQ)
What is the best font size to use in PowerPoint presentations?
For readability, keep font sizes above 20 points. For bullet points, 36 points is ideal to ensure your audience can easily read the text from a distance.
How many bullet points should I have on a slide?
If you’re just displaying a list for reference, you can have many bullets. However, if you’re discussing each bullet, limit it to four or fewer to avoid overwhelming your audience.
Can I use images from the internet in my presentations?
You should only use images you have permission to use. PowerPoint’s Online Pictures tool lets you search for Creative Commons licensed images that are free to use legally.
How do I make my slide transitions smoother?
Use the Fade transition for a subtle effect. Apply it to all slides and adjust the duration for a seamless flow. Avoid flashy transitions that distract from your message.
What is the best way to use speaker notes?
Write your full script or key points in the Notes pane. Use printed notes during your presentation to avoid reading slides aloud, which can bore your audience.
How do I remove backgrounds from images in PowerPoint?
Select the image, go to the Format tab, and click Remove Background. Adjust the selection by marking areas to keep or remove, then apply the changes.
How can I reduce the file size of my PowerPoint presentations?
Use the Compress Pictures feature under the Format tab after inserting all images. Choose a suitable resolution and apply to all images to significantly reduce file size.
Is it better to type text directly on slides or use speaker notes?
Use slides to highlight key points and visuals. Put detailed information and your script in speaker notes to keep slides clean and your audience engaged.
With these fundamentals, you’re well on your way to creating polished, professional PowerPoint presentations that communicate your message effectively. Keep practicing, and enjoy the creative process!
Check out the full video: PowerPoint 2016 Beginner Tutorial


