Welcome to an exciting tutorial on how to create a stunning 3D model treasure map using PowerPoint Office 365. This step-by-step guide will walk you through crafting an engaging, interactive presentation that integrates advanced features such as slide zooms, section zooms, custom slide zoom covers, animation triggers, and even a captivating video background. Whether you’re a PowerPoint enthusiast, a professional presenter, or simply looking to spice up your slides with some dynamic 3D elements, this comprehensive tutorial has you covered.
Throughout this article, you will learn how to harness the power of PowerPoint’s 3D models and zoom capabilities to build a visually rich and interactive experience. This tutorial is inspired by a creative approach to presentation design that stays true to a core theme—making your content both beautiful and functional.
Table of Contents
- Why Choose PowerPoint for 3D Interactive Presentations?
- Getting Started: Setting Up Your PowerPoint Presentation
- Enhancing the Treasure Map: Adding More 3D Models
- Understanding and Implementing Section Zooms and Slide Zooms
- Building the Rhino Section: Advanced Animations and Controls
- Completing the Treasure Section: Final Touches and Custom Covers
- Final Preview and Tips for Smooth Performance
- Summary: What You’ve Learned
- Frequently Asked Questions (FAQ)
- Further Learning and Resources
Why Choose PowerPoint for 3D Interactive Presentations?
PowerPoint has evolved tremendously over the years, and with Office 365, it now includes powerful tools for 3D modeling and interactive navigation. The ability to insert 3D models, animate them, and create zoomable slides means you can design presentations that captivate your audience and enhance storytelling.
One of the key strengths of this approach is the use of Slide Zooms and Section Zooms, features that allow you to create non-linear, interactive presentations. Instead of moving slide-by-slide in a fixed order, you can zoom into sections or individual slides, creating a dynamic flow that mimics modern web navigation.
This tutorial also demonstrates how to add custom covers for your zooms, making the navigation elements visually consistent and thematic, while animation triggers provide control over when animations play, enhancing user interaction.
Getting Started: Setting Up Your PowerPoint Presentation
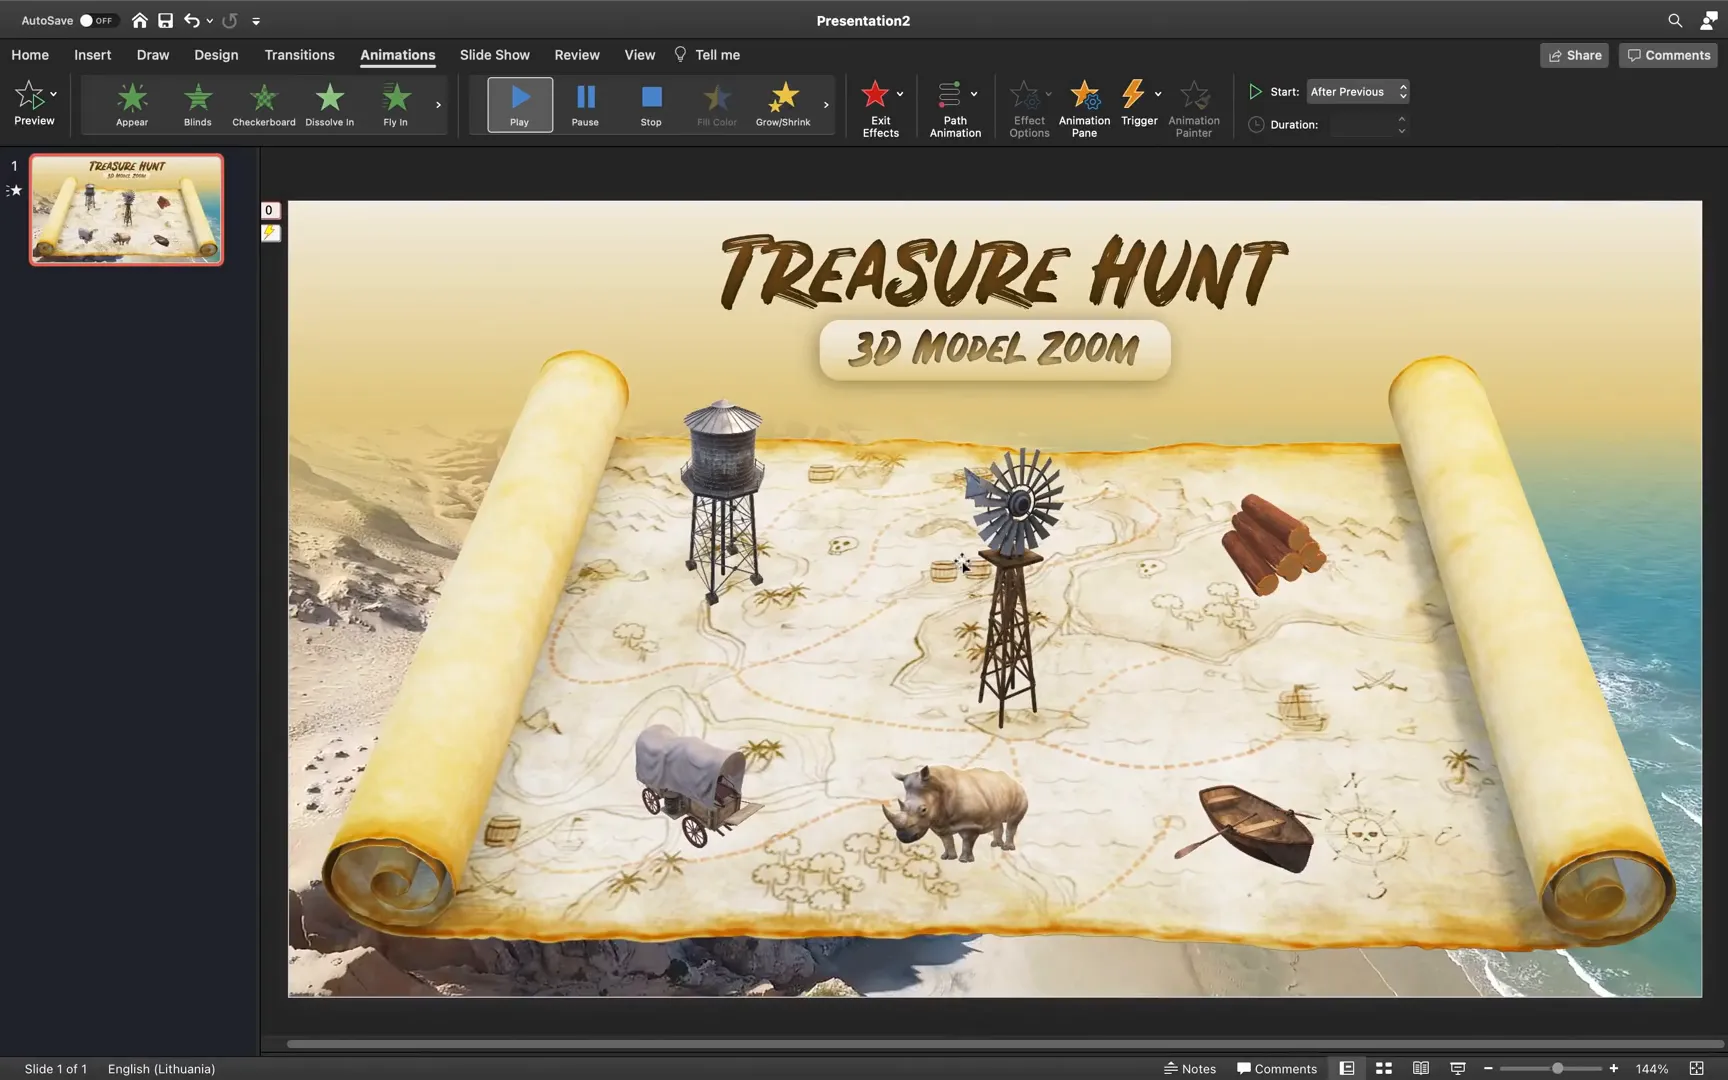
Let’s begin by opening a fresh, blank PowerPoint presentation. The goal is to build a treasure map scene using 3D models and then add interactive elements around it.
Inserting the Main 3D Treasure Map Model
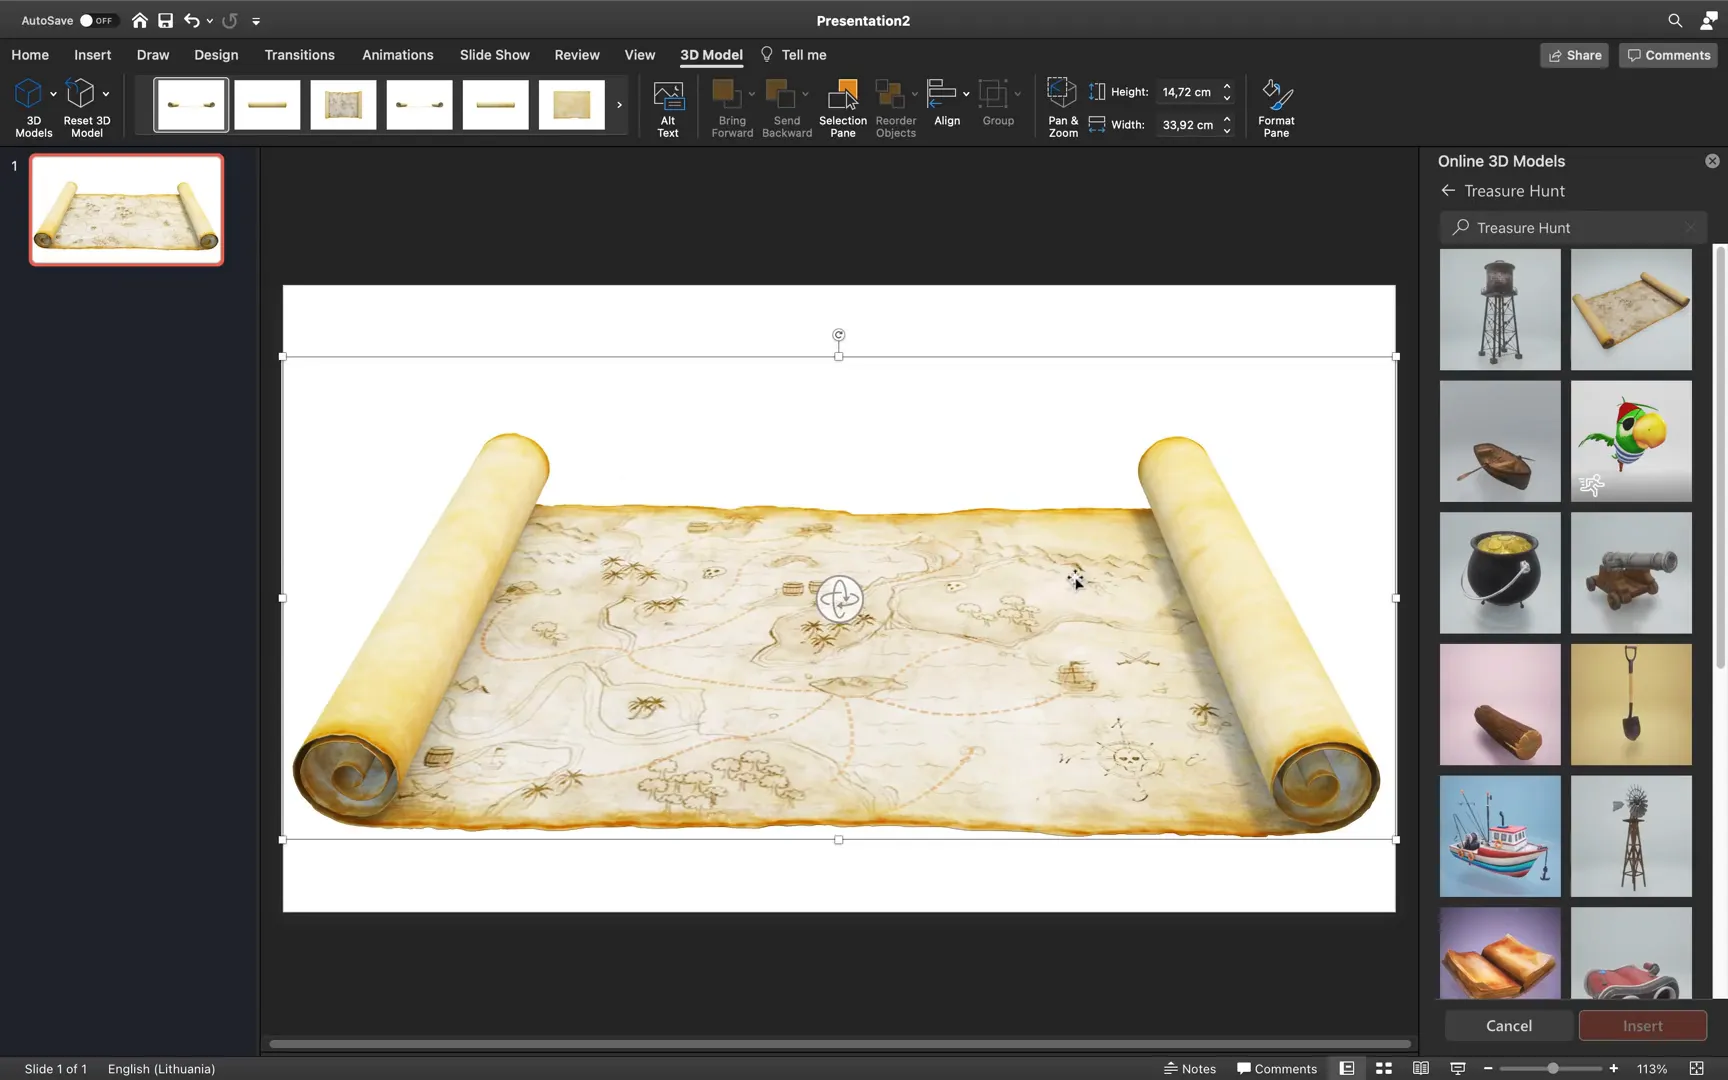
PowerPoint 365 offers a rich library of 3D models directly accessible from the Insert tab:
- Go to the Insert tab on the ribbon.
- Click on 3D Models and browse the online models.
- Scroll down to find the Treasure Hunt section.
- Insert the 3D treasure map model into your slide.
Once inserted, you can use the rotation handle on the model to adjust its viewing angle to your liking. Make sure to center-align the map within the slide for a balanced composition.
Adding Text Boxes and Background Elements
To complement the treasure map, add text boxes for titles or descriptions. To enhance readability, create a subtle grid or background behind these text boxes:
- Insert a rectangle shape behind your text boxes.
- Send the rectangle to the back so it doesn’t cover your text.
- Copy the style of an existing text box and apply it to new text boxes for consistent formatting.
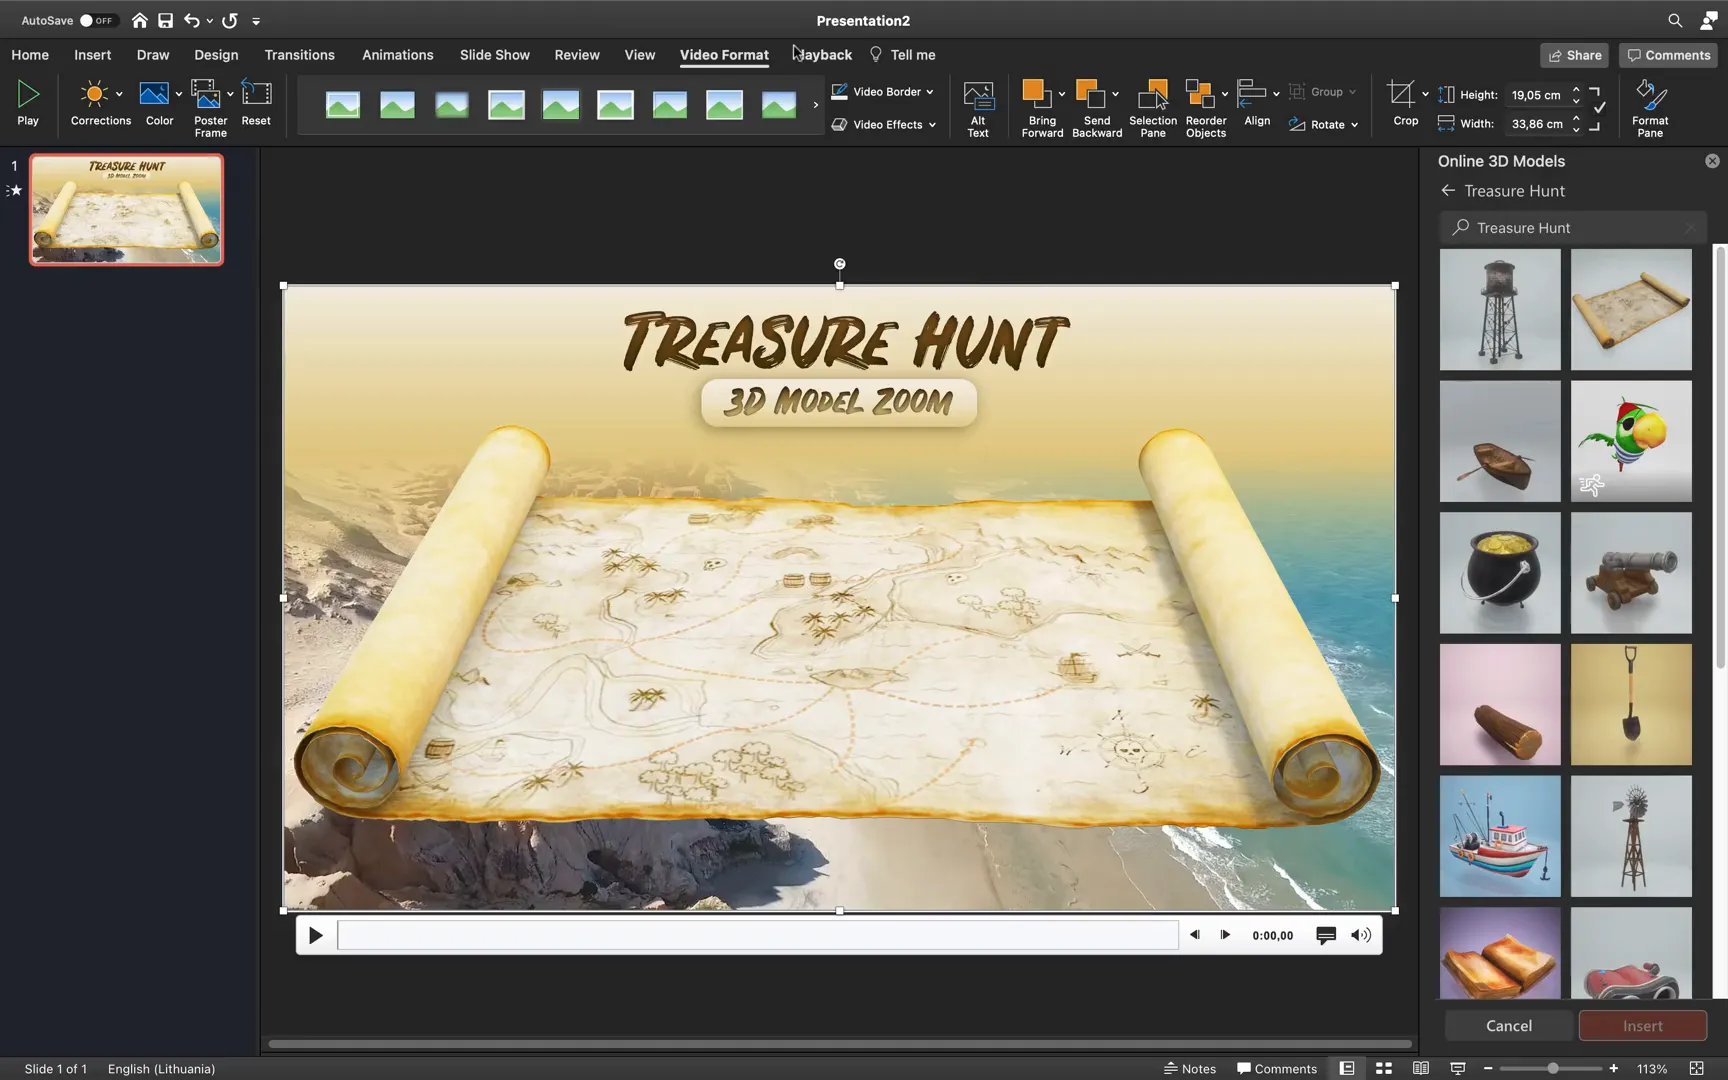
Incorporating a Video Background
Adding a video background brings life and movement to your slide, making the treasure map look more immersive. Here’s how:
- Find a suitable video (for example, a beach or ocean scene from Pexels).
- Insert the video onto the slide and send it to the back.
- Set the video playback options to Automatically and enable Loop until Stopped to keep it playing seamlessly.
Enhancing the Treasure Map: Adding More 3D Models
To create an interactive and lively treasure map, add additional 3D models representing different elements of the treasure hunt:
- Return to the 3D Models menu and select more objects from the Treasure Hunt section, such as a boat, binoculars, and a book.
- Insert these models onto your main slide.
- Resize and reposition them to fit naturally on the map.
- Use the rotation handle on each model to adjust their orientation.
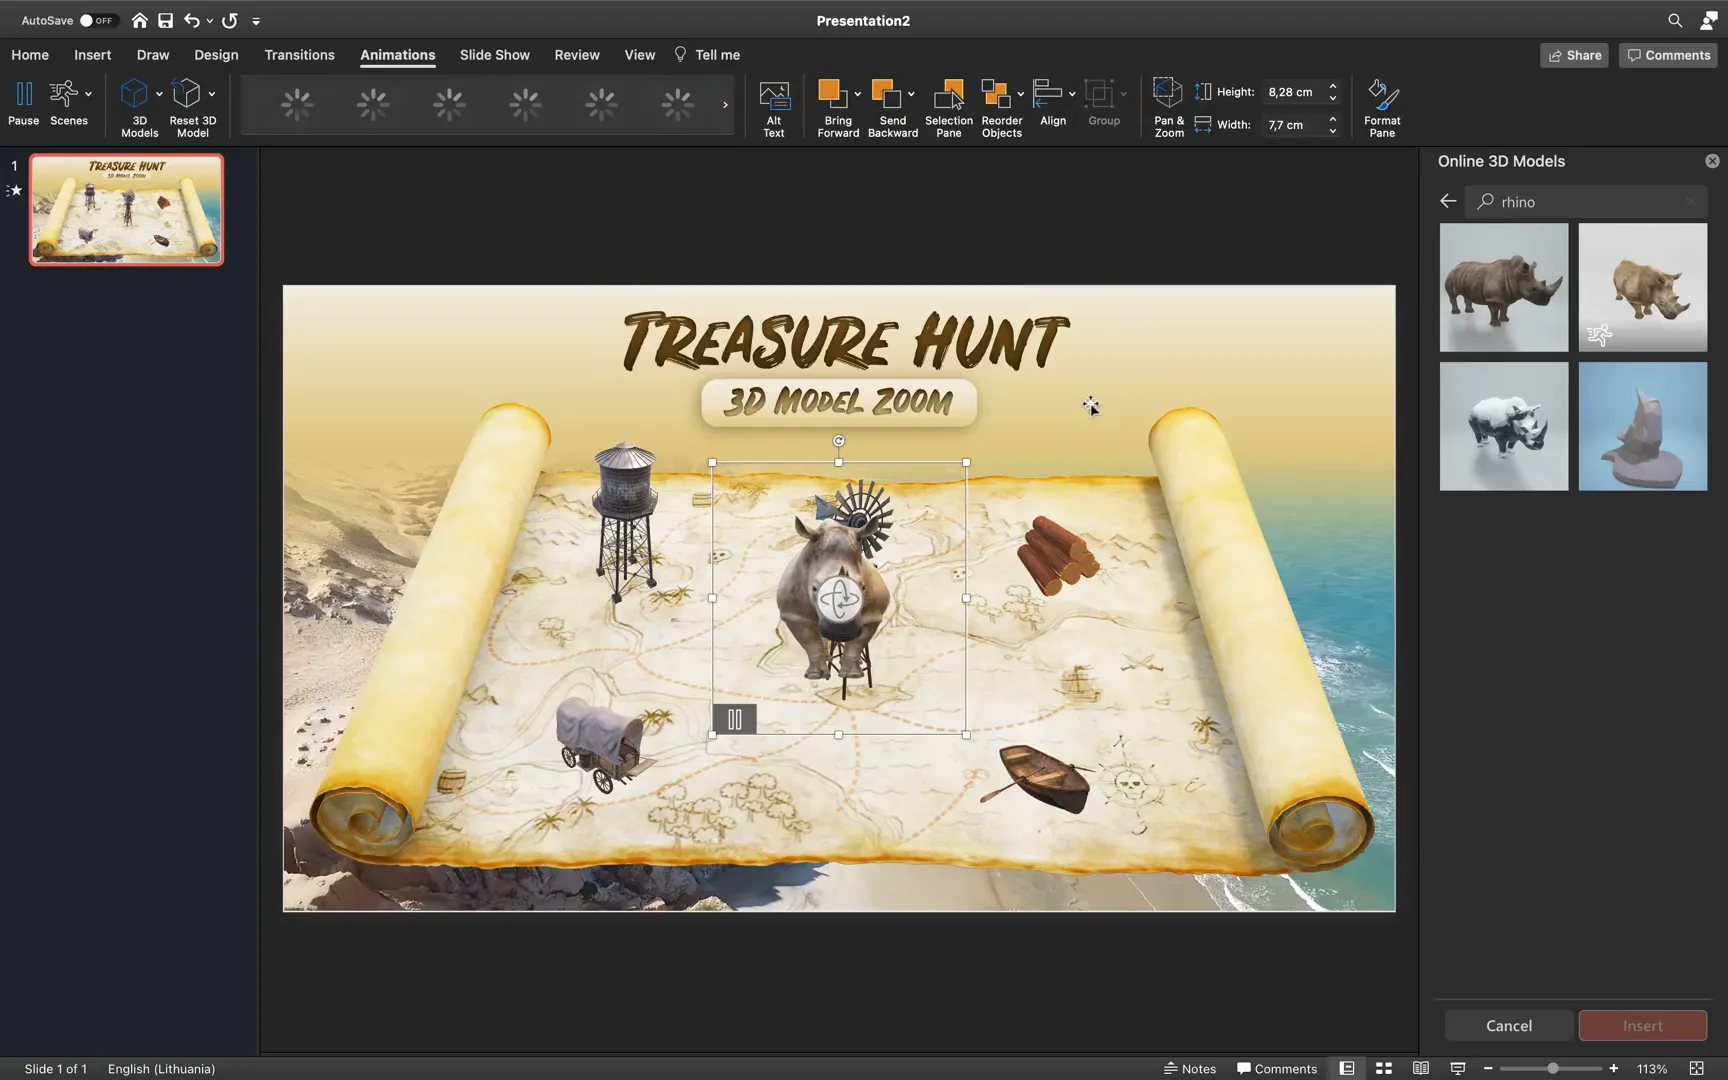
Don’t forget to include the animated Rhino model, which is a standout feature due to its built-in animations like walking and running.
Understanding and Implementing Section Zooms and Slide Zooms
One of the core interactive features in this tutorial is the use of Section Zooms and Slide Zooms. These allow you to create a layered navigation experience, where clicking on an object zooms you into a section or slide with more detailed content.
What is a Section Zoom?
A Section Zoom links to a specific section of your presentation, which can contain multiple slides. It acts like a gateway, allowing you to dive deeper into a topic and then return to the main slide.
What is a Slide Zoom?
A Slide Zoom links directly to a particular slide within a section. It’s useful for zooming into specific details or objects related to the larger theme.
Step-by-Step: Creating the Boat Section with Zooms and Animations
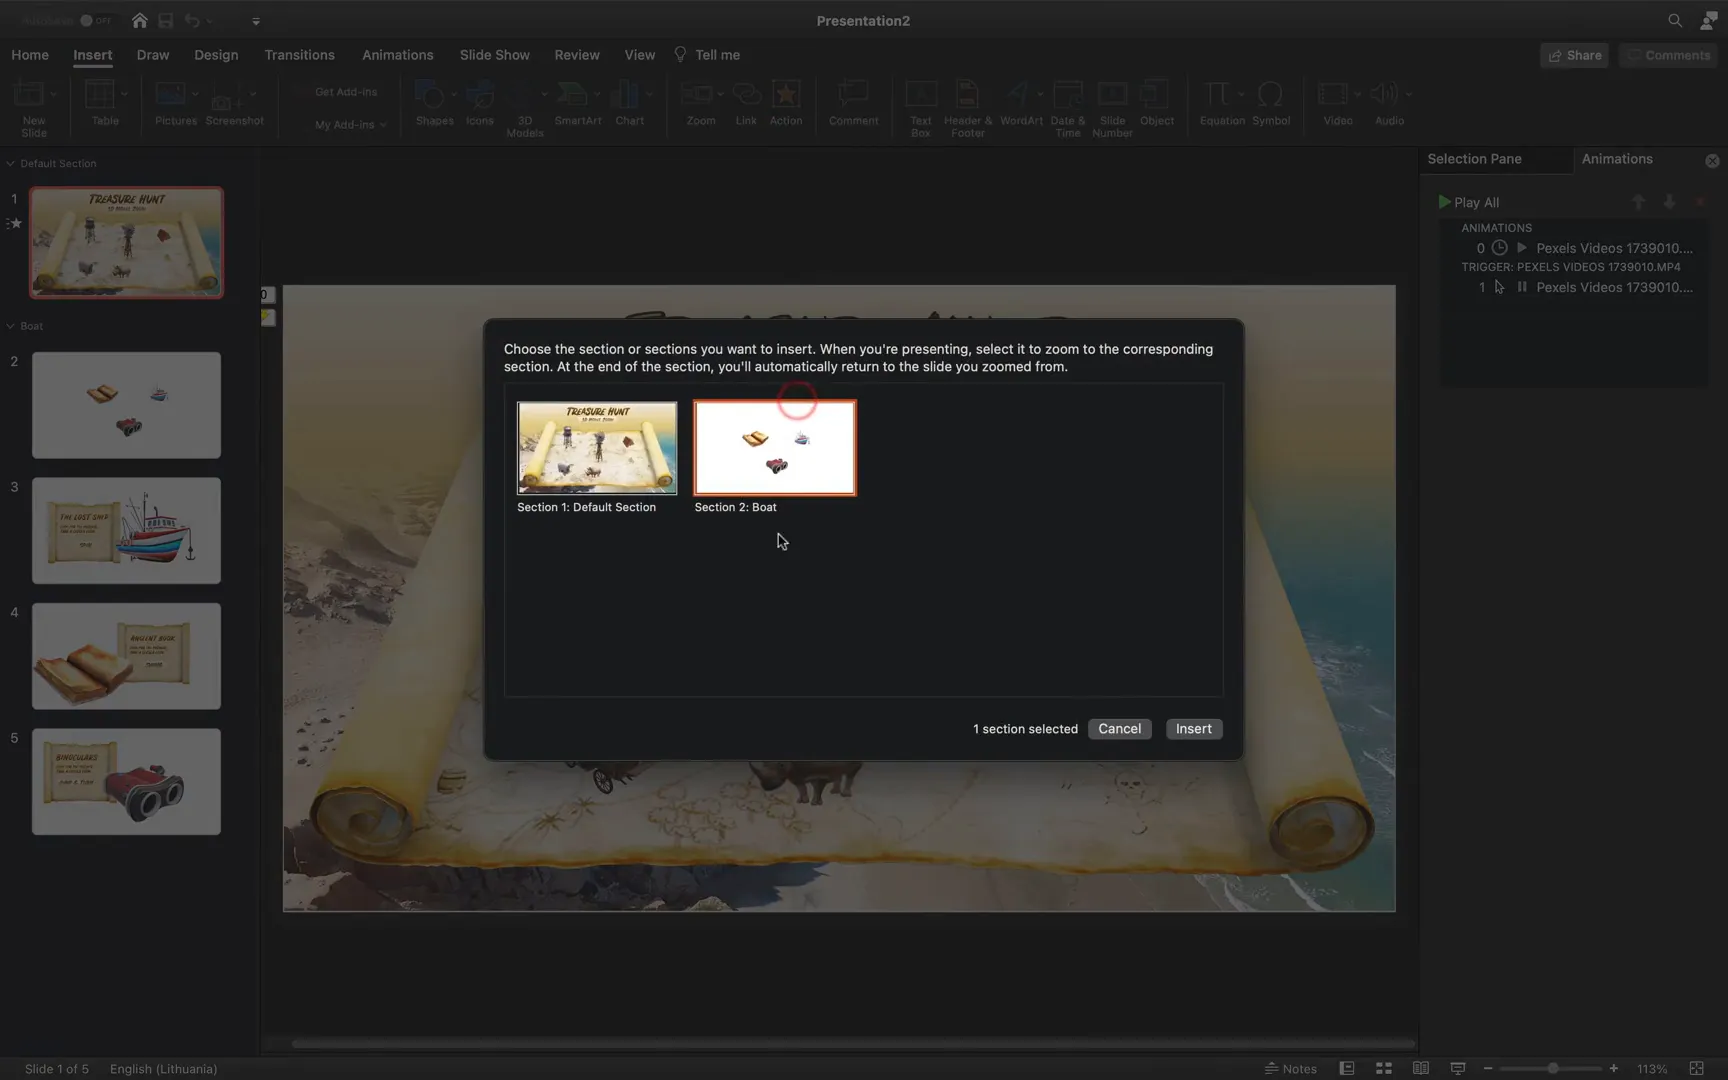
Let’s create the first section zoom focusing on the boat and its related 3D models:
- Insert a Section Zoom and name it Boat.
- Add four blank slides to serve as the section and its detailed slides.
- Copy a map image and text boxes from a previous slide to speed up the process.
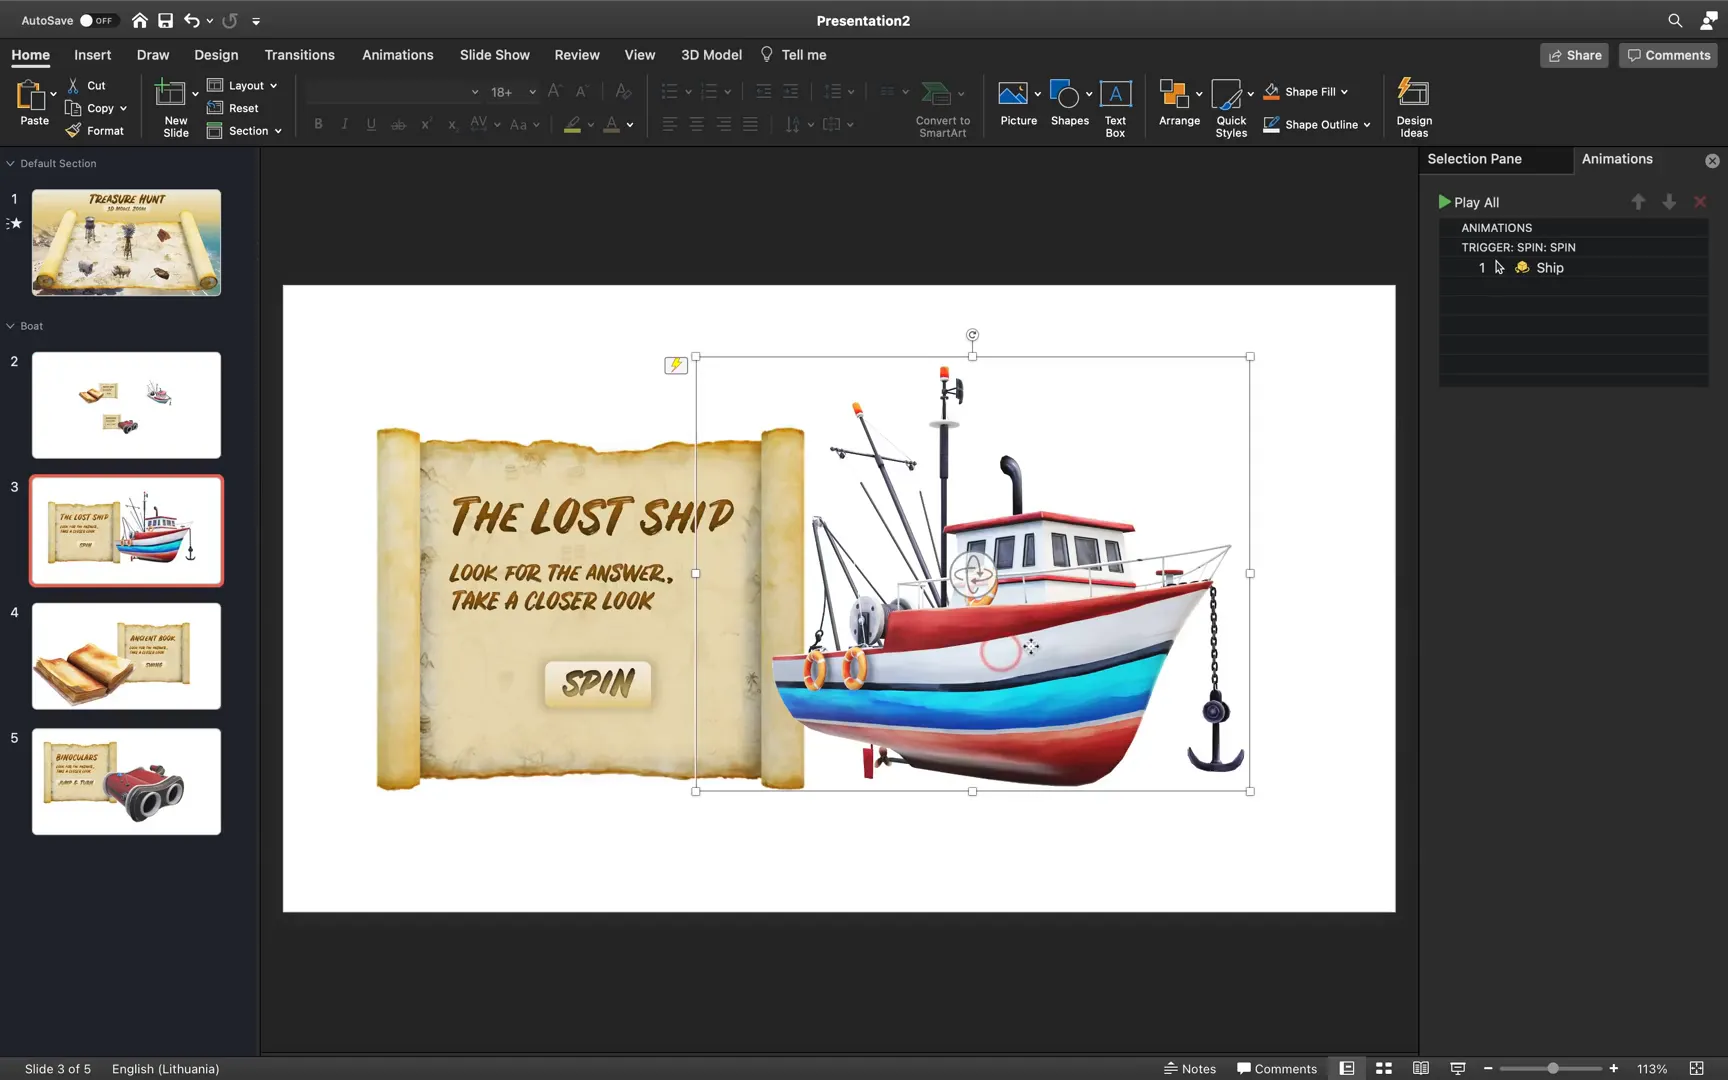
- Paste the ship 3D model onto the section slide.
- Remove any existing animations to prepare for new ones.
- Add animations like the new Turntable to the ship model.
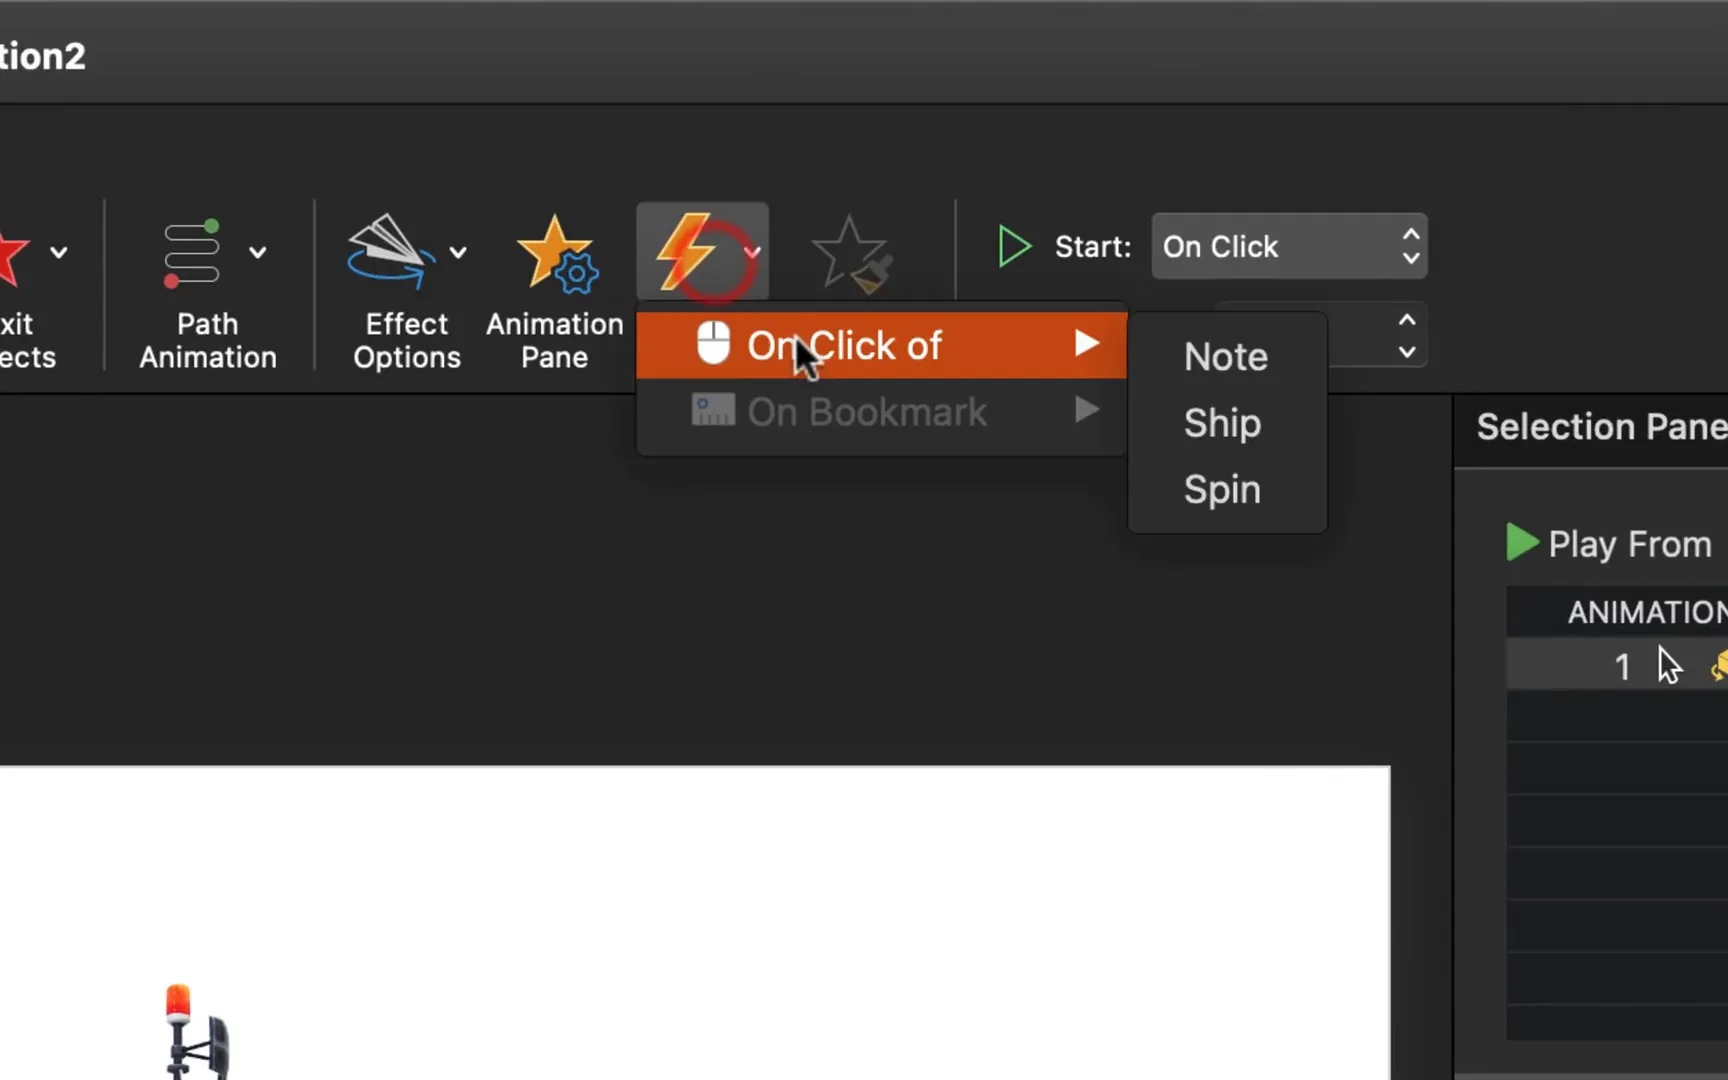
- Create a trigger button (e.g., a rounded rectangle labeled “Spin”) to control the animation.
- Link the animation to the trigger so it starts on click.
- Adjust animation duration (e.g., 10 seconds) for smooth rotation.
Repeat similar steps to add animations to other objects like binoculars (jump and turn) and a book (subtle swing). These animations add life and interactivity to the models.
Customizing Slide Zooms Covers
To enhance the visual appeal and clarity of your zooms, change the covers of your Slide Zooms. Instead of showing the full slide content, you can use a simple image or icon representing the content:
- Select your 3D model and save it as a PNG image.
- Use this image as the custom cover for the Slide Zoom.
- This technique is helpful for hiding details and keeping your navigation clean and thematic.
Ensuring Smooth Navigation with Return to Zoom
To maintain a smooth user experience, enable the Return to Zoom option for all Slide Zooms and Section Zooms. This ensures that after zooming into a slide or section, clicking again will bring the viewer back to the main slide.

Building the Rhino Section: Advanced Animations and Controls
The Rhino model is a highlight of the tutorial due to its built-in animations. Here’s how to create a dedicated section for it and control its animations:
- Add a new section named Rhino and insert a blank slide.
- Cut the Rhino 3D model from the main slide and paste it into this section slide.
- Resize the Rhino to an appropriate size for smooth animation playback.
- Copy rounded rectangle buttons for animation triggers (e.g., Walk, Run, Spin) from a previous slide.
- Select the Rhino model and add animations:
- Walking animation triggered by the Walk button.
- Running animation triggered by the Run button.
- Turntable/spin animation triggered by the Spin button.
- Adjust durations and repetition cycles for each animation as desired.
- Insert a Section Zoom on the main slide leading to the Rhino section.
- Set a custom cover image for the Rhino section zoom for a polished look.
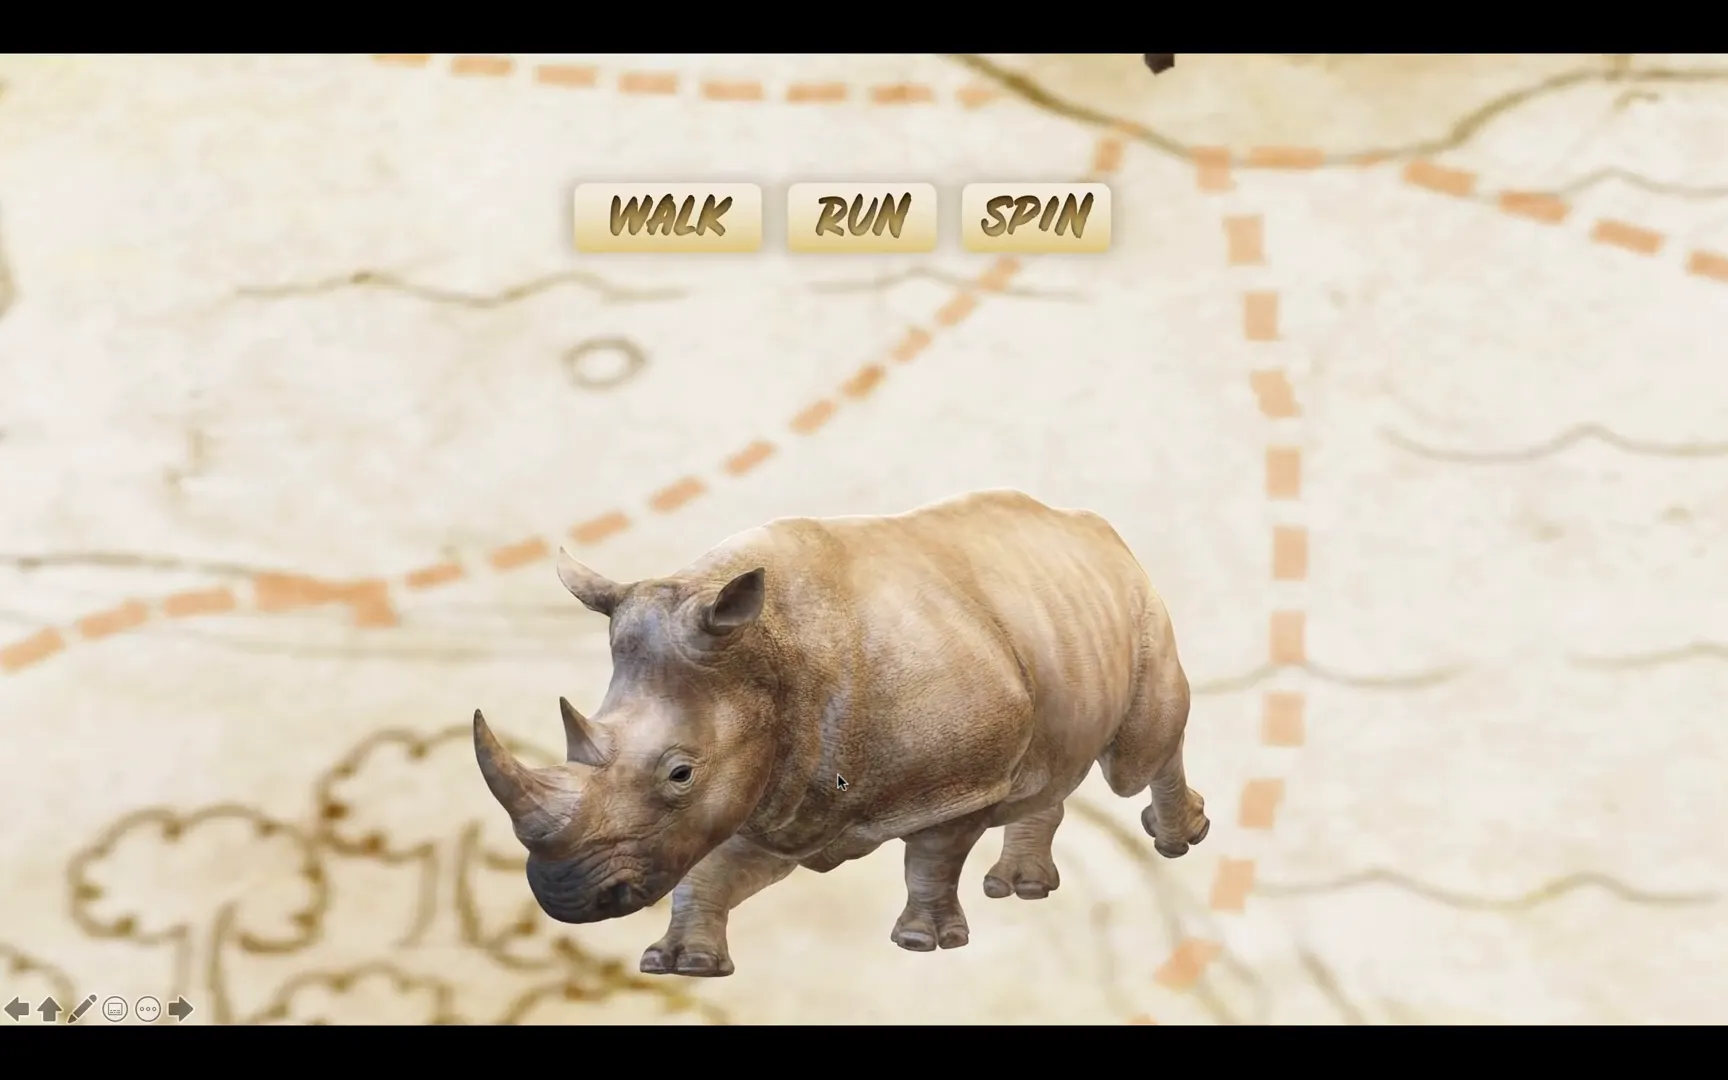
One of the coolest features is that the Rhino can spin while walking or running simultaneously, adding dynamic motion and realism to your presentation.
Completing the Treasure Section: Final Touches and Custom Covers
The last section focuses on the treasure itself. Here’s how to set it up:
- Create a new section named Treasure.
- Insert three slides representing different treasure-related elements.
- Add Slide Zooms linking to these slides.
- Make all Slide Zoom backgrounds transparent for seamless integration.
- Use custom covers such as a shovel or wooden logs to keep the treasure hidden and encourage audience discovery.
- Insert a Section Zoom on the main slide leading to the Treasure section with a custom cover.
- Ensure all Slide Zooms have the Return to Zoom option enabled.

When you zoom into the treasure slide, the hidden treasure is revealed with fun animations, such as jumping and turning 3D models, making the presentation interactive and rewarding for viewers.
Final Preview and Tips for Smooth Performance
Before finalizing your presentation, test all animations and zooms in full-screen mode. Check for smooth transitions and responsiveness, especially for animated 3D models like the Rhino.
If animations appear laggy, try reducing the size of the 3D models to improve performance. Smaller models tend to animate more smoothly on most machines.

Summary: What You’ve Learned
By following this tutorial, you now know how to:
- Insert and manipulate 3D models in PowerPoint Office 365.
- Create interactive navigation using Slide Zooms and Section Zooms.
- Add custom covers to zooms for a polished and thematic look.
- Use animation triggers to control 3D model animations on demand.
- Incorporate video backgrounds to enhance visual appeal.
- Optimize your presentation for smooth playback and interaction.
This approach opens up endless possibilities for creative and engaging presentations that go beyond traditional slide decks.
Frequently Asked Questions (FAQ)
What versions of PowerPoint support 3D models and zoom features?
3D models and advanced zoom features like Slide Zoom and Section Zoom are available in PowerPoint for Office 365 and PowerPoint 2019 onward. Ensure your software is updated to access these tools.
Can I use my own 3D models in PowerPoint?
Yes, you can insert your own 3D models saved in supported formats like .glb or .fbx. Use the Insert > 3D Models > This Device option to add custom models.
How do animation triggers work in PowerPoint?
Animation triggers allow you to start animations by clicking on a specific object, such as a button or shape. This gives you interactive control over when animations play during your presentation.
Are video backgrounds compatible with all devices?
Video backgrounds work well on most modern computers running PowerPoint. However, performance may vary on older devices or versions. Always test your presentation on the target device before presenting.
Can I export the presentation with 3D models as a video?
Yes, you can export your presentation as a video, and the 3D animations will be included. However, interactive features like zooms and triggers will not be interactive in video format.
Further Learning and Resources
For those eager to deepen their PowerPoint skills, especially around slide zooms and interactive presentations, consider exploring dedicated courses. A recommended resource includes a Slide Zoom Course available on Udemy, which offers detailed training on creating dynamic and interactive PowerPoint presentations.
Additionally, platforms like Skillshare provide excellent classes on animation, design, and other creative skills. Learning from experts like Nathaniel Drew can help you overcome creative blocks and refine your presentation style.
Remember, creativity in presentations is about combining technical skills with storytelling—making your message memorable and engaging.
Happy presenting!
Check out the full video: PowerPoint Slide Zoom Tutorial 🔥3D 🔥


