
Creating visually engaging and interactive slides in PowerPoint can elevate your presentations from ordinary to extraordinary. One of the most effective ways to do this is by using animated infographic slides that allow you to showcase multiple options or data points in a clean, dynamic format. In this comprehensive guide, you’ll learn how to create an 8-option infographic slide with animated 3D boxes, perfect for business presentations, corporate reports, or any context where you need to present multiple items clearly and professionally.
This tutorial is inspired by a detailed approach shared by POWERPOINT UNIVERSITY, a leading resource for PowerPoint enthusiasts offering over a thousand free templates and tutorials. By following this step-by-step guide, you’ll master the art of designing an animated slide featuring eight colorful, clickable boxes with icons and detailed text, all animated for a polished, interactive effect.
Table of Contents
- Overview of the 8-Option Infographic Slide
- Creating the 3D Boxes in PowerPoint
- Customizing Color Combinations
- Adding Text and Icons to Boxes
- Grouping and Duplicating Elements for Efficiency
- Setting Up Animations for Interactive Effects
- Tips and Best Practices for PowerPoint Animated Slide Design
- Frequently Asked Questions (FAQ)
- Conclusion
Overview of the 8-Option Infographic Slide
The infographic slide we will create consists of eight individual boxes arranged in two rows, each box designed to represent an option or data point. These boxes are styled with a subtle 3D effect to add depth, enhanced with distinct color schemes for easy differentiation, and contain an option number, a title, detailed text, and an icon for visual appeal.
The slide is interactive: when you click, it reveals each box sequentially with smooth entrance animations, making the presentation dynamic and engaging. You can also customize the animation style, speed, and the number of options based on your needs.

Creating the 3D Boxes in PowerPoint
The foundation of this infographic slide design is the 3D boxes. Here’s how to create them step-by-step:
- Add a new slide: Start with a blank slide in your PowerPoint presentation.
- Insert rectangles: Go to the Insert tab, choose Shapes, and select the rectangle.
- Draw the rectangle: Click and drag on the slide to create a square shape.
- Set exact dimensions: Under Shape Format, set both height and width to 2.35 inches for a perfect square.
- Customize shape fill and outline: Fill the shape with white and add a light-colored outline to create a subtle border.
- Duplicate the rectangle: Press
Ctrl + Dto duplicate the shape for later use.
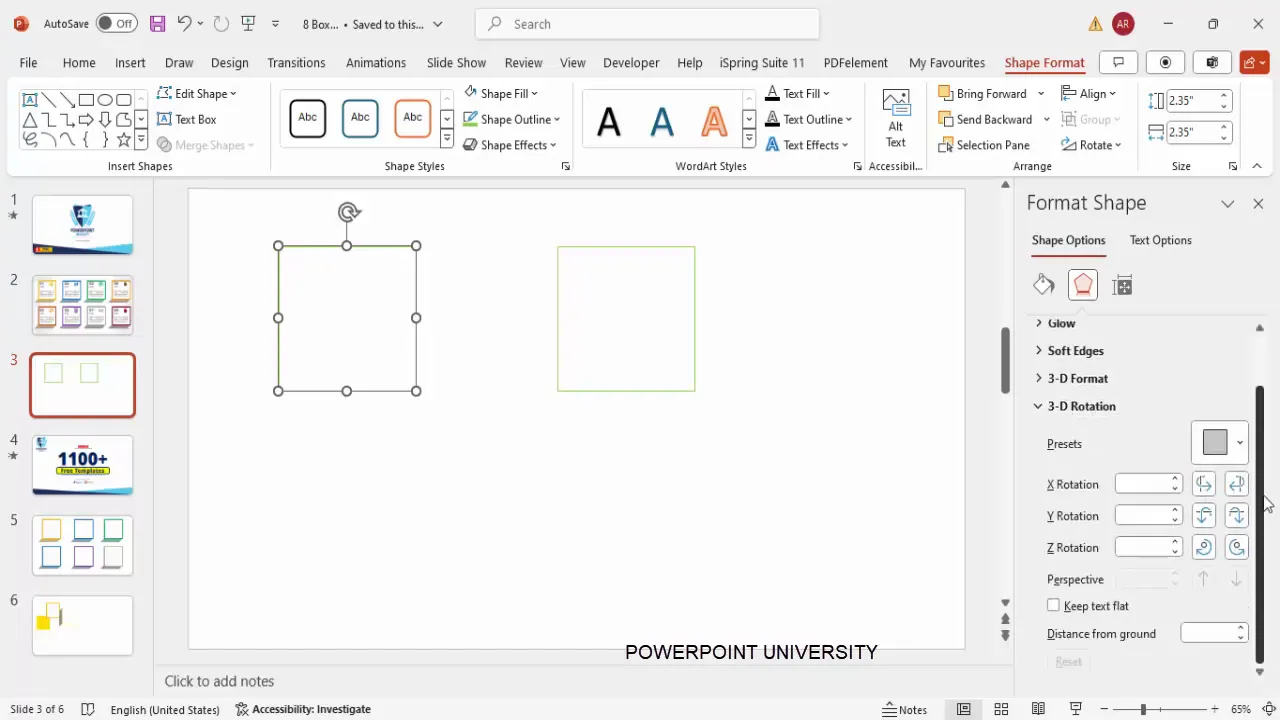
Next, we’ll add the 3D rotation and depth effect:
- Access Format Shape pane: Right-click the rectangle, select Format Shape, then navigate to the Effects section.
- Apply 3D rotation: Under 3D Rotation, choose the preset Oblique Bottom Left.
- Add depth: Switch to the 3D Format tab and increase the depth to around 125 to 150 points.
- Adjust lighting and material: Select a lighting style that enhances the 3D effect and set the material to Matte or your preferred finish.
- Change color for shading: Modify the 3D color shading to a darker tone of your chosen color to add depth perception.
- Bring the shape forward: Move the shape to the top to ensure the 3D effect displays correctly.
- Group the shapes: Select the rectangle and its 3D effect, then press
Ctrl + Gto group them for easier manipulation.
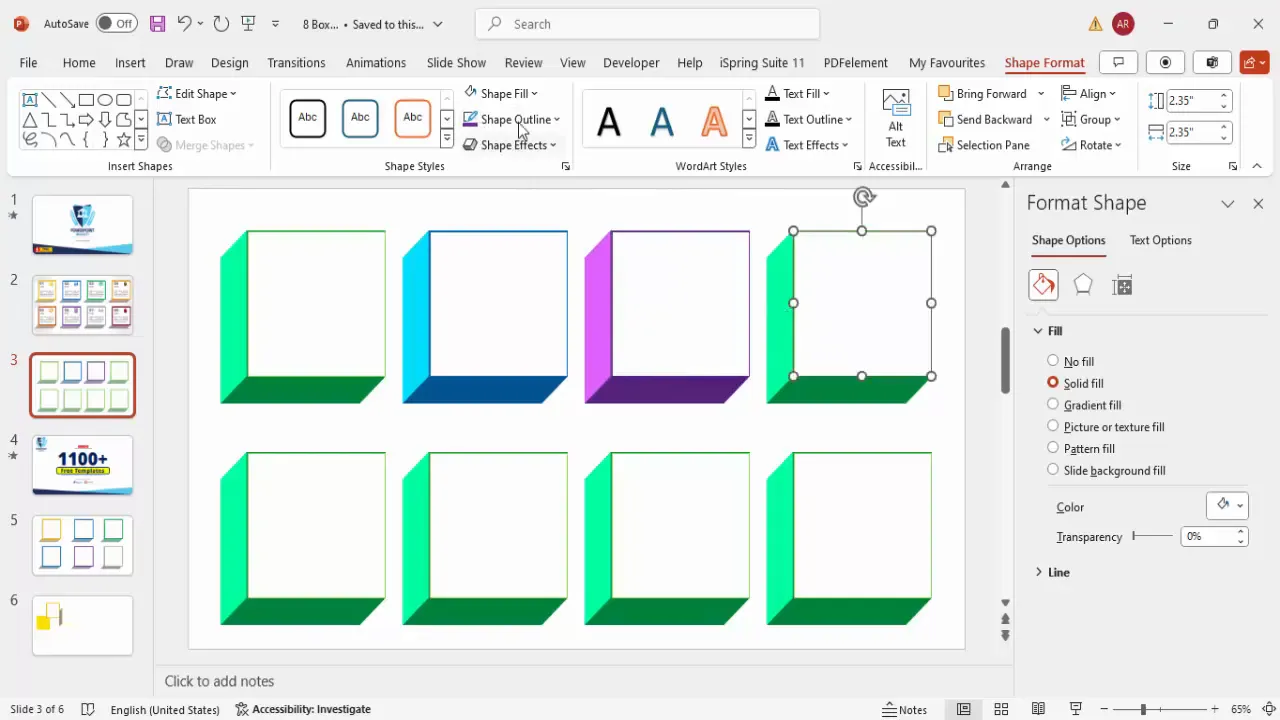
Customizing Color Combinations
Color plays a crucial role in distinguishing each option visually. Here’s how to apply and customize colors for your boxes:
- After ungrouping the shapes (using
Ctrl + Shift + G), select the back portion of each box. - Change the fill color and outline to match your desired color scheme. For example:
| Box Number | Fill Color | Outline Color |
|---|---|---|
| 1 | Light Green | Dark Green |
| 2 | Light Blue | Blue |
| 3 | Purple | Purple |
| 4 | Orange | Orange |
| 5 | Dark Red | Dark Red |
| 6 | Brown | Brown |
| 7 | Dark Green | Dark Green |
| 8 | Gray | Gray |
To ensure visual harmony, keep the outline color consistent with the fill color but slightly darker or lighter for contrast. This customization helps each box stand out while maintaining a professional look.
Adding Text and Icons to Boxes
Once your boxes are created and colored, it’s time to add informative text and icons to communicate your message effectively.
Adding Text
- Option Number: Insert a text box and type the option number (e.g., “01”). Make it bold and increase the font size for prominence. Position it near the top of the box.
- Title or Label: Add another text box below the option number, type a short title like “Data,” and format it bold with a consistent color (usually gray or matching the box palette).
- Detailed Text: Insert a smaller text box for descriptive or detailed content. Use placeholder text like “Lorem ipsum” initially, then trim it to fit neatly inside the box. Use a smaller font size and align the text properly.
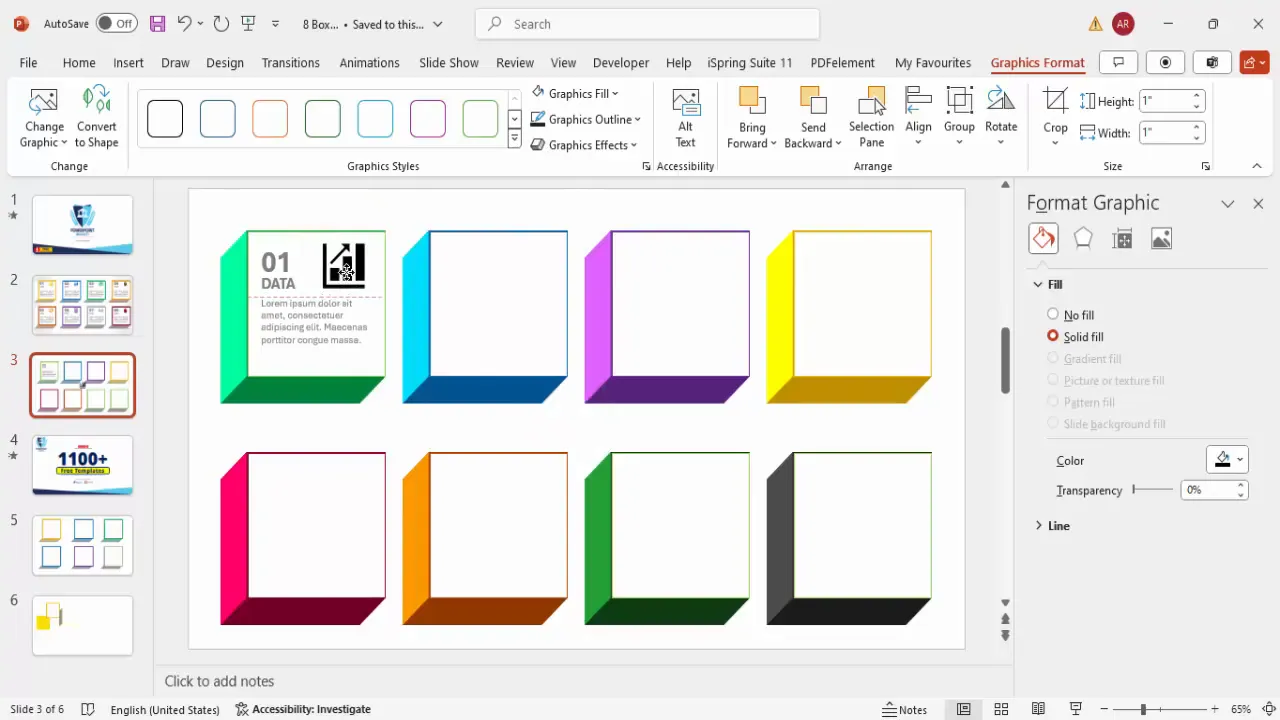
Adding Icons
- To add an icon, go to Insert > Icons and browse the selection.
- Select an icon relevant to your content (e.g., a chart, folder, or user symbol) and insert it into the box.
- Resize the icon to fit proportionally within the box (around 0.7 inches in height works well).
- Match the icon color to the box’s color scheme for a cohesive look.
- Align the icon neatly with the text elements for a balanced layout.
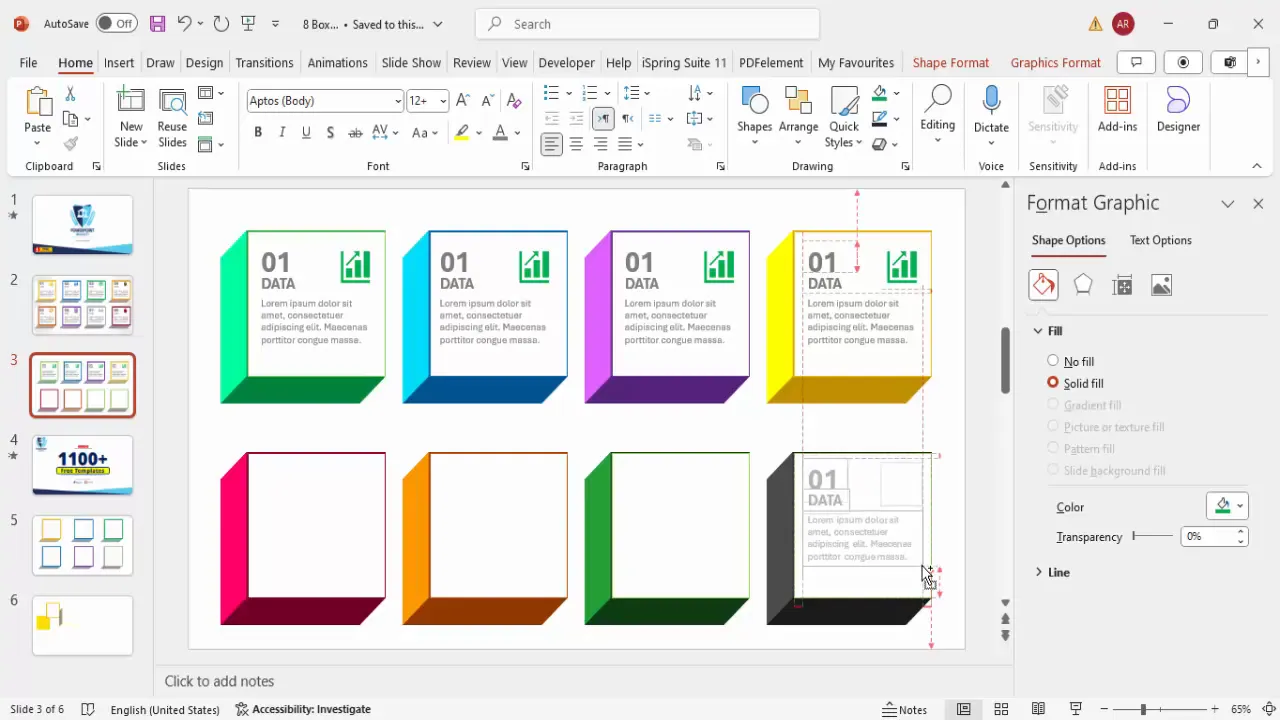
Grouping and Duplicating Elements for Efficiency
After designing one complete box with all elements (3D shape, text, icon), you can save time by duplicating and reusing it for the other options.
- Select all elements of the first box (hold
Shiftand click each element). - Press
Ctrl + Gto group them into a single object. - Hold
Ctrl + Shiftand drag the grouped box to create duplicates for options two through eight. - Position the duplicated boxes neatly in two rows with equal spacing.
- Use the Align and Distribute Horizontally options under Shape Format to ensure uniform spacing.
- Ungroup individual boxes if you need to customize colors, text, or icons separately.
This method drastically reduces repetitive work and helps maintain consistency across all options.
Setting Up Animations for Interactive Effects
Animating your infographic slide adds a layer of interaction and professionalism, allowing each option to appear sequentially when clicked.
Steps to Apply Animation
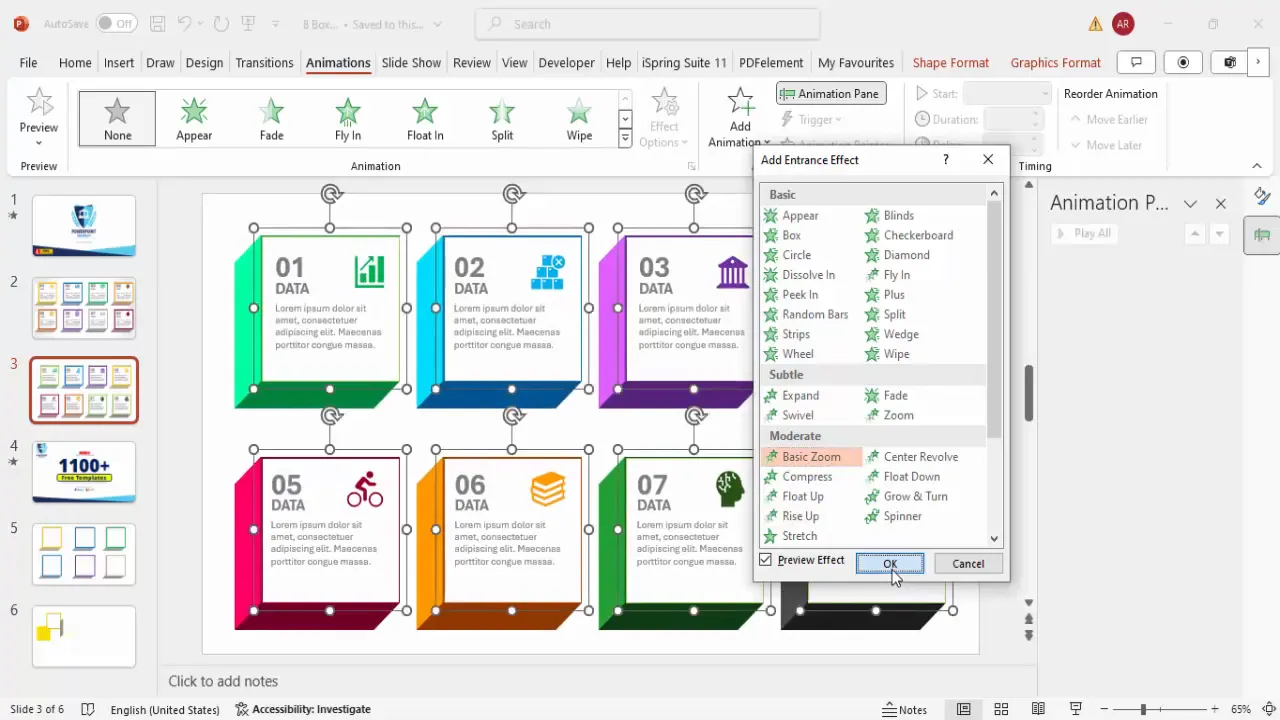
- Go to the Animations tab and open the Animation Pane for better control.
- Select all grouped boxes (press
Ctrl + Aon the slide). - Click Add Animation and choose an entrance effect like Zoom or Fade.
- Set the animation to On Click so each box appears sequentially when clicked.
- Adjust the animation speed by right-clicking on the animation in the pane, selecting Timing, and setting the duration to around 0.3 seconds for a smooth but quick effect.
- Preview the animation in Slide Show mode to ensure it flows well.
You can experiment with other entrance effects or speeds depending on your presentation style and audience preferences.
Tips and Best Practices for PowerPoint Animated Slide Design
Creating a PowerPoint animated slide design that looks professional and works smoothly requires some additional tips and best practices:

- Maintain Consistency: Use consistent fonts, colors, and icon styles for a cohesive look.
- Limit Text: Keep text concise and readable. Avoid cluttering boxes with too much information.
- Use High-Quality Icons: Choose icons that are clear and relevant to your content. Avoid overly complex or abstract icons.
- Align Elements Properly: Use PowerPoint’s alignment tools to keep text, icons, and shapes perfectly aligned.
- Test Animations: Always preview your animation sequence in full-screen mode to catch any timing or flow issues.
- Customize Based on Audience: Adjust colors, fonts, and animation speed to suit the tone of your presentation and audience expectations.
- Group Elements: Group related elements to simplify movement and animation setup.
- Duplicate to Save Time: Design one box fully, then duplicate and modify as needed.
Why Use Animated Infographic Slides?
Animated infographic slides are powerful tools because they:
- Keep your audience engaged with interactive content.
- Help break down complex information into digestible parts.
- Allow for a clean and professional presentation style.
- Enable presenters to focus audience attention on one point at a time.
- Enhance visual storytelling with motion and design.
Frequently Asked Questions (FAQ)
Can I create more or fewer than eight options in this infographic slide?
Yes, the design is flexible. You can duplicate or delete boxes to increase or decrease the number of options. Adjust the layout accordingly to maintain balance and spacing.
How do I change the icons without deleting and re-inserting them?
Select the icon, go to the Graphic Format tab, and click Change Graphics. From there, you can select a new icon without deleting the original one.
What PowerPoint version do I need for these animations and 3D effects?
These features work best in PowerPoint 2016 and later versions, including Microsoft 365. Older versions may have limited 3D formatting and animation options.
Can I use this infographic slide for presentations on other topics?
Absolutely! The slide is designed to be versatile and can be adapted for business, education, marketing, or any field where you want to present multiple options or data points.
How do I make sure the animations run smoothly during the presentation?
Preview your slide in Slide Show mode before presenting. Adjust animation speed in the timing settings to avoid delays or overly fast transitions.
Are there free templates available to start with?
Yes, you can download free PowerPoint templates that include animated infographic slides from reputable sources like POWERPOINT UNIVERSITY. These templates save time and provide professional design inspiration.
Conclusion
Mastering PowerPoint animated slide design can significantly enhance your presentation effectiveness. By creating an 8-option infographic slide with 3D boxes, colorful customization, icons, and smooth animations, you provide your audience with a visually appealing and interactive experience that conveys your message clearly and professionally.
This step-by-step guide equips you with the techniques to build such a slide from scratch, ensuring you can customize and adapt it to your unique presentation needs. Remember to keep your design consistent, animations smooth, and content concise for maximum impact.
Whether you’re preparing a corporate report, marketing pitch, or educational seminar, this infographic slide design technique will add a wow factor to your PowerPoint presentations.
Ready to try it yourself? Open PowerPoint, follow these steps, and watch your presentations come alive with interactive, animated infographic slides!
Check out the full video: Create 8 Options Infographic slide in PowerPoint


