
PowerPoint presentations are a cornerstone of effective communication, whether you’re pitching a project, teaching a class, or sharing ideas with a team. Adding animation and interactivity can dramatically elevate your slides, making them not only visually appealing but also engaging and memorable. In this comprehensive guide, we’ll walk through how to create a captivating PowerPoint animated slide design that is clickable, scrollable, and visually dynamic.
This tutorial is based on the expert walkthrough by One Skill PPT, who demonstrates how to transform a static photo into an interactive animated slide using PowerPoint 365 and free tools like Photopea. Whether you’re a beginner or an intermediate PowerPoint user, this guide will equip you with techniques to enhance your presentations with smooth animations and clickable elements.
Table of Contents
- Getting Started: Setting Up Your Slide Background
- Inserting and Cropping Photos
- Adding and Aligning Text Boxes
- Cutting Out Objects from Photos with Photopea
- Matching Cutout Photos to the Original
- Creating Clickable Elements with Hyperlinks
- Adding Morph Transitions for Animation
- Final Slide Design and Troubleshooting
- Frequently Asked Questions
- Conclusion
Getting Started: Setting Up Your Slide Background
Before diving into animations and clickable elements, it’s essential to create a visually pleasing foundation for your slide. In this case, the tutorial begins with a clean, gradient-filled slide that sets the tone for the design.
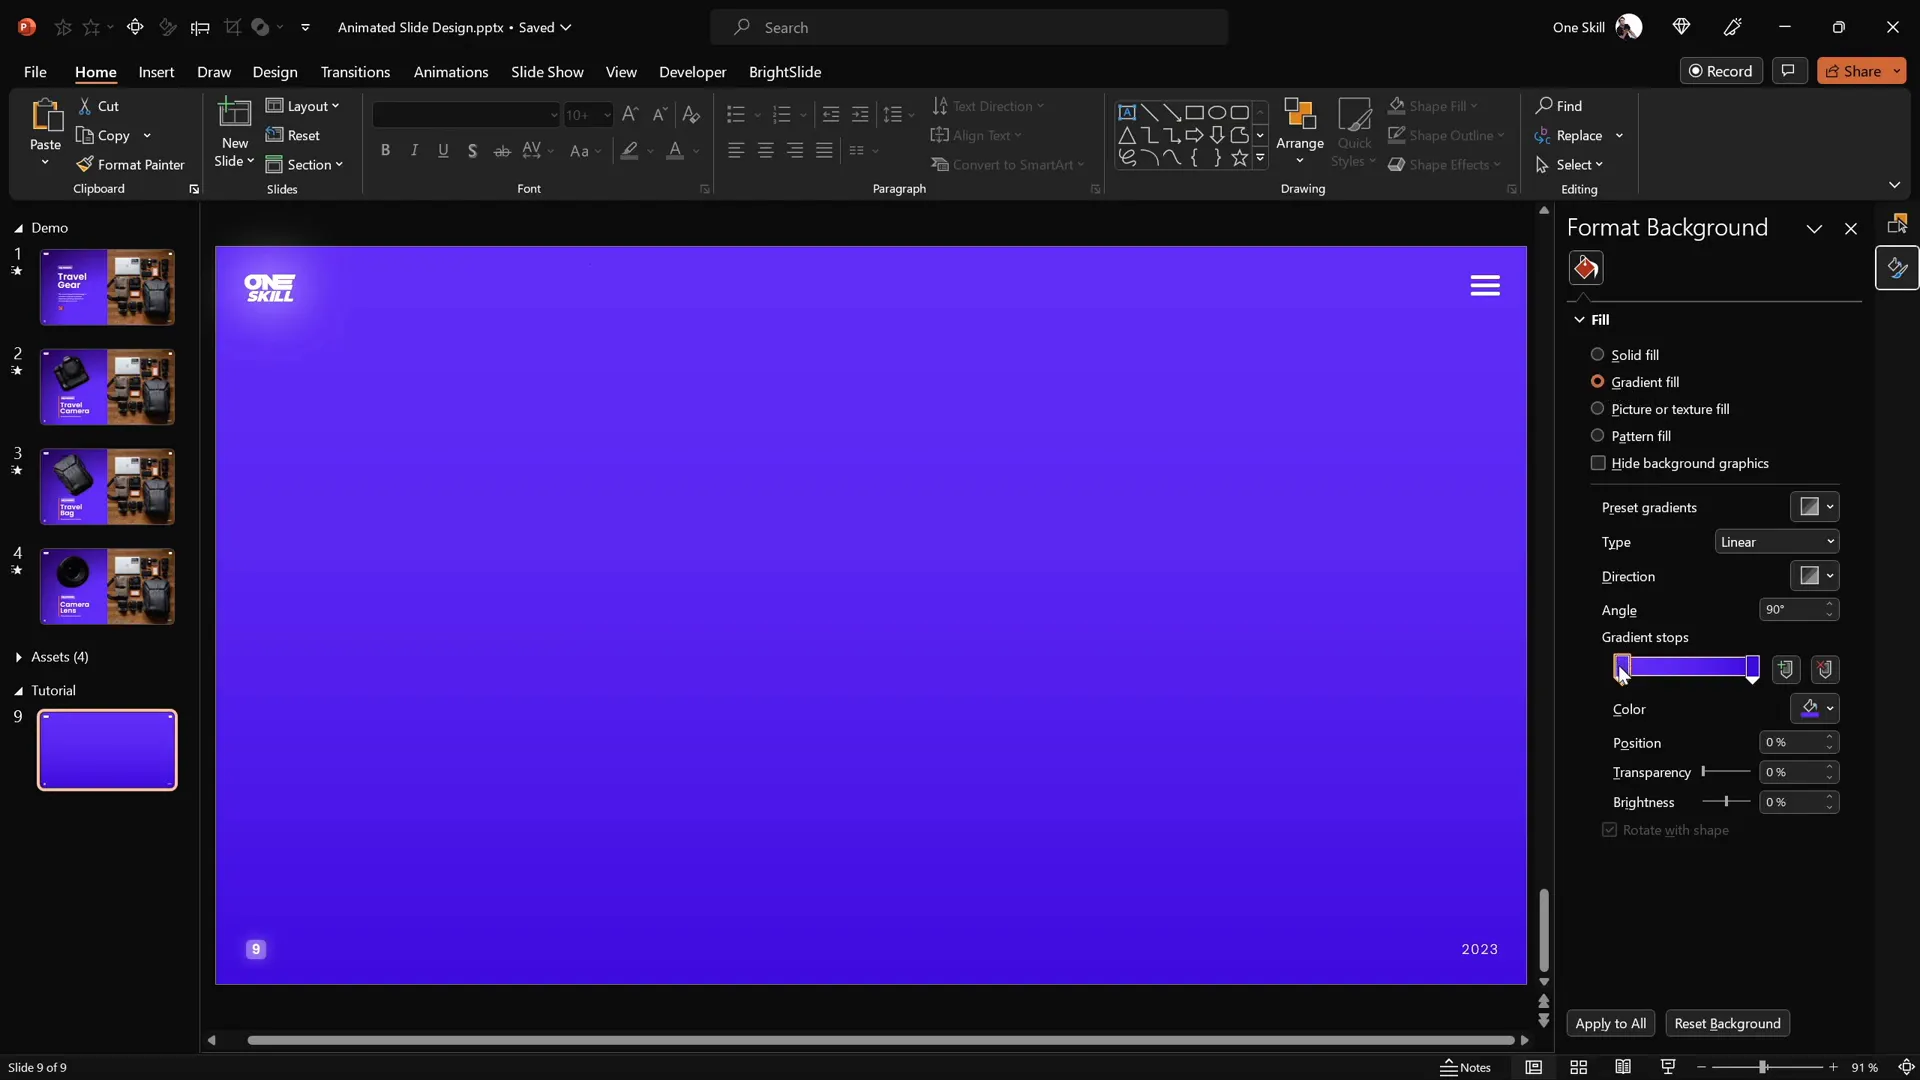
Creating a Gradient Background
Start with a blank slide in Microsoft PowerPoint 365. Apply a linear gradient fill to the slide background using two carefully chosen colors. To replicate the look:
- Right-click on the slide background and select Format Background.
- Choose Gradient fill.
- Set two color stops with the following hex codes (you can pick colors of your choice for a similar effect):
- First color stop:
#3A3A72(example) - Second color stop:
#1C1C40(example)
- First color stop:
- Set the gradient direction to linear.
Adding a Subtle Rectangle on the Left Side
To create a balanced composition, add a large rectangle that covers the left half of the slide. This section will contain your text and clickable elements.
- Go to Insert > Shapes and choose the rectangle tool.
- Draw a rectangle covering the entire left side of the slide.
- Apply a subtle gradient fill to this rectangle using two colors with hex codes similar to:
- First color stop:
#5E5E8A - Second color stop:
#414167
- First color stop:
- Add a soft shadow on the right side of the rectangle to make it pop. Adjust shadow settings such as transparency, blur, and angle to your liking.
Using the Format Painter tool, you can quickly copy and apply this style to other objects on the slide.

Inserting and Cropping Photos
Next, bring your slide to life by adding a beautiful photo that complements your design. The tutorial uses a free, high-quality photo from Unsplash, but you can use any image you like.
Steps to Insert and Crop Your Photo
- Go to Insert > Pictures and select your photo file.
- Position the photo on the right side of the slide.
- Right-click the photo and select Send to Back to place it behind the left rectangle.
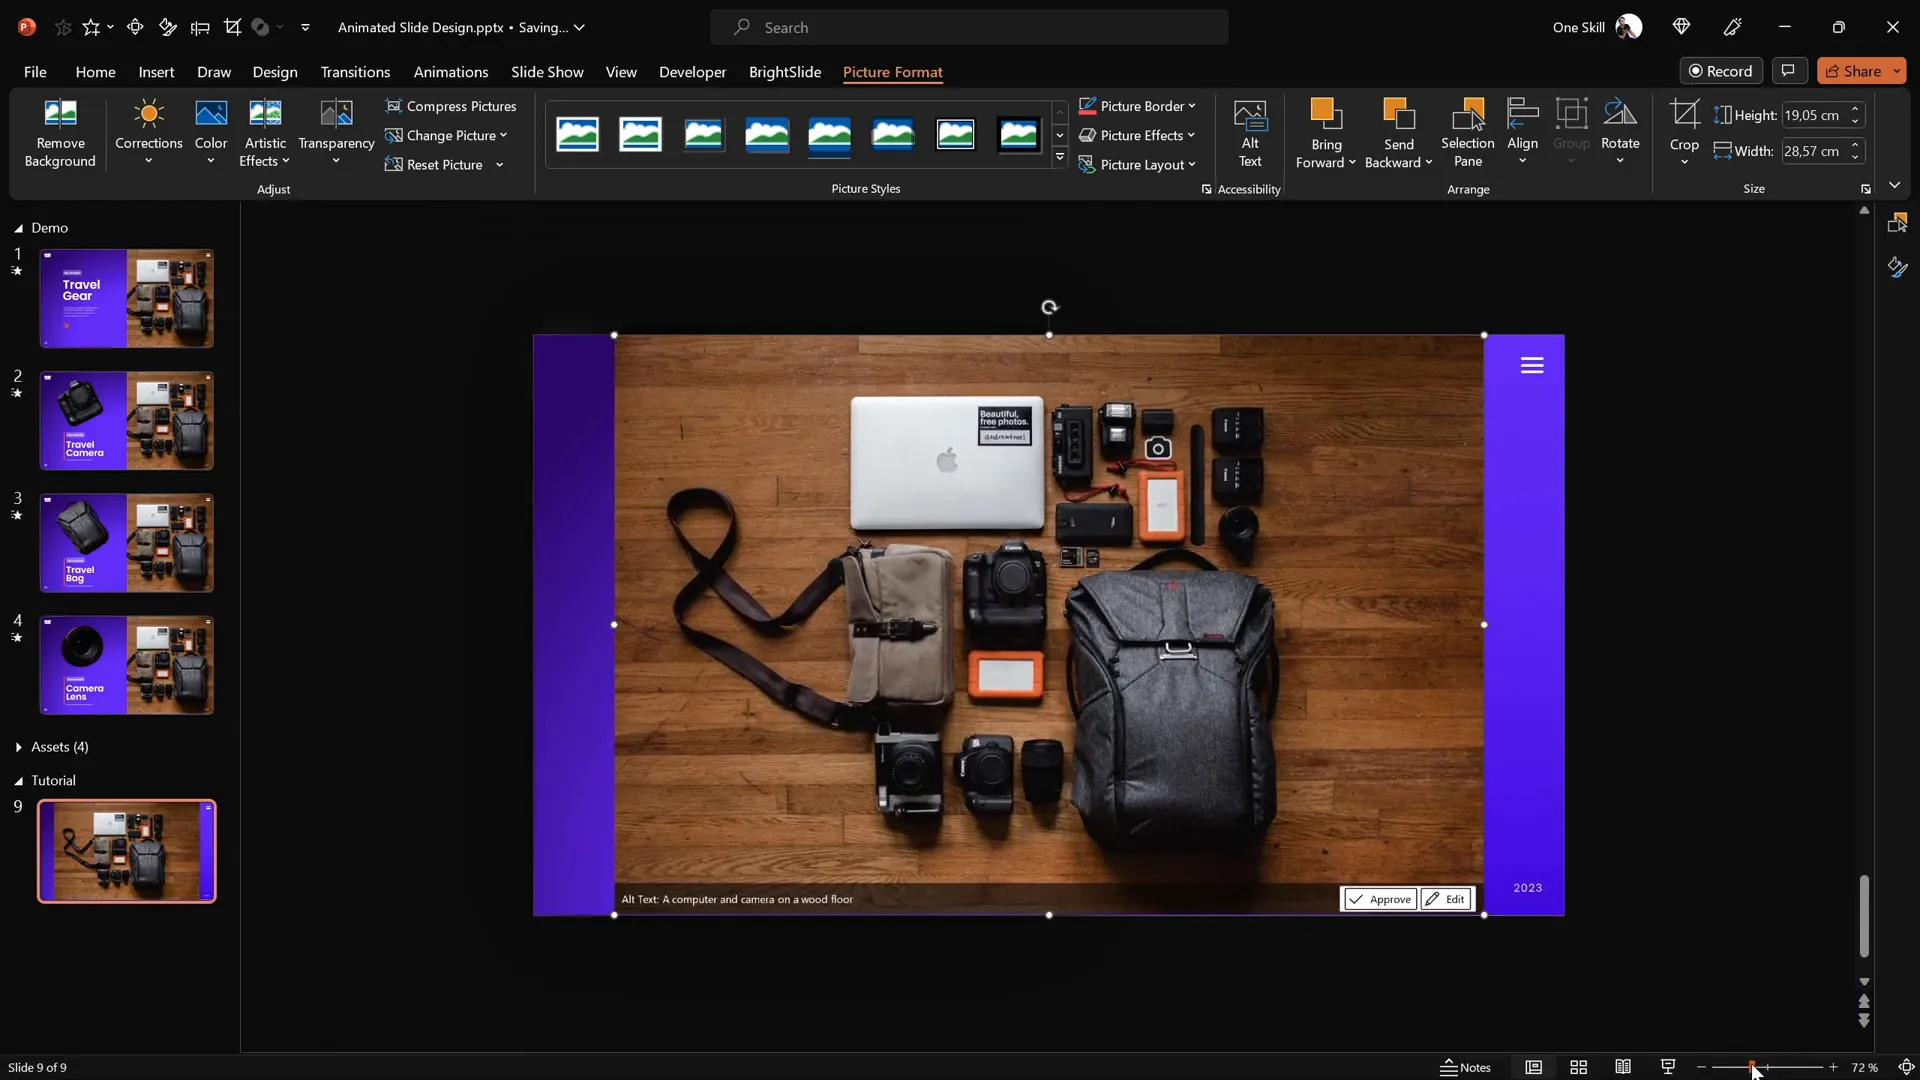
- Crop the photo so it fits perfectly within the slide dimensions and doesn’t spill over the edges.
- Select the photo, click Crop on the Picture Format toolbar.
- Drag the crop handles to trim the right side.
- Adjust the photo’s position inside the cropping area for the best framing.
- Click Crop again to finalize.
- Send the photo and rectangle to the back to ensure any logos or slide numbers are visible on top.
Adding and Aligning Text Boxes
With your background set, it’s time to add informative and stylish text boxes that will describe the clickable elements on your photo.
Using Pre-Designed Text Boxes
To save time, prepare your text boxes beforehand or use the assets provided by the tutorial creator. The fonts used in this example are Poppins SemiBold and Poppins Light, which offer a clean and modern look.
Steps to Add and Align Text
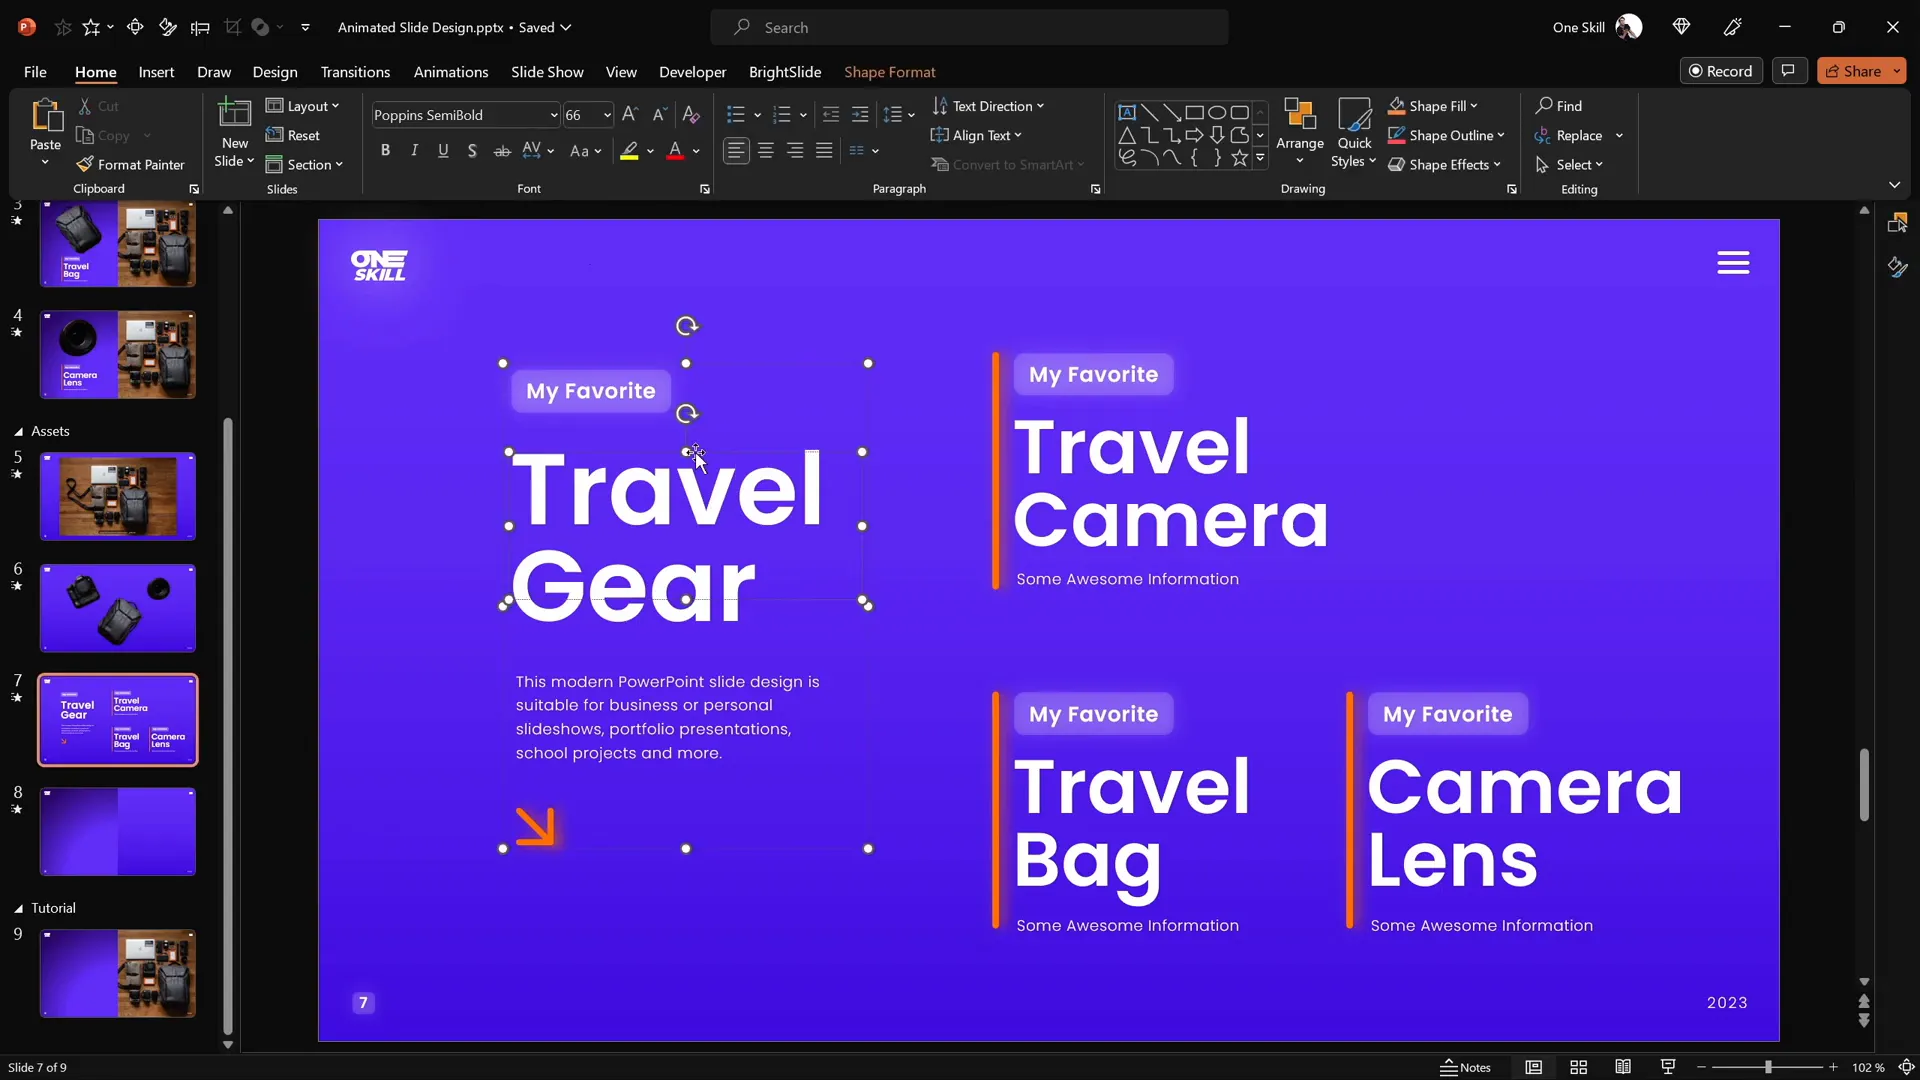
- Paste your grouped text boxes onto the left rectangle area.
- Align the text boxes precisely inside the rectangle:
- If you have the BrightSlide add-in, use its alignment shortcuts for speedy work.
- Otherwise, select the rectangle and the text box, then go to Shape Format > Align and choose Align Center and Align Middle.
- Add additional text groups for each clickable item you plan to animate (e.g., travel camera, travel bag, camera lens).
- Align all text groups to the left side and ensure the vertical spacing is consistent.
Cutting Out Objects from Photos with Photopea
To create interactive and animated slides, you need to isolate specific objects from your photo as separate layers. PowerPoint’s built-in cropping tools are limited, so for precision, use a free online editor called Photopea, which functions similarly to Photoshop.
How to Cut Out Objects Using Photopea
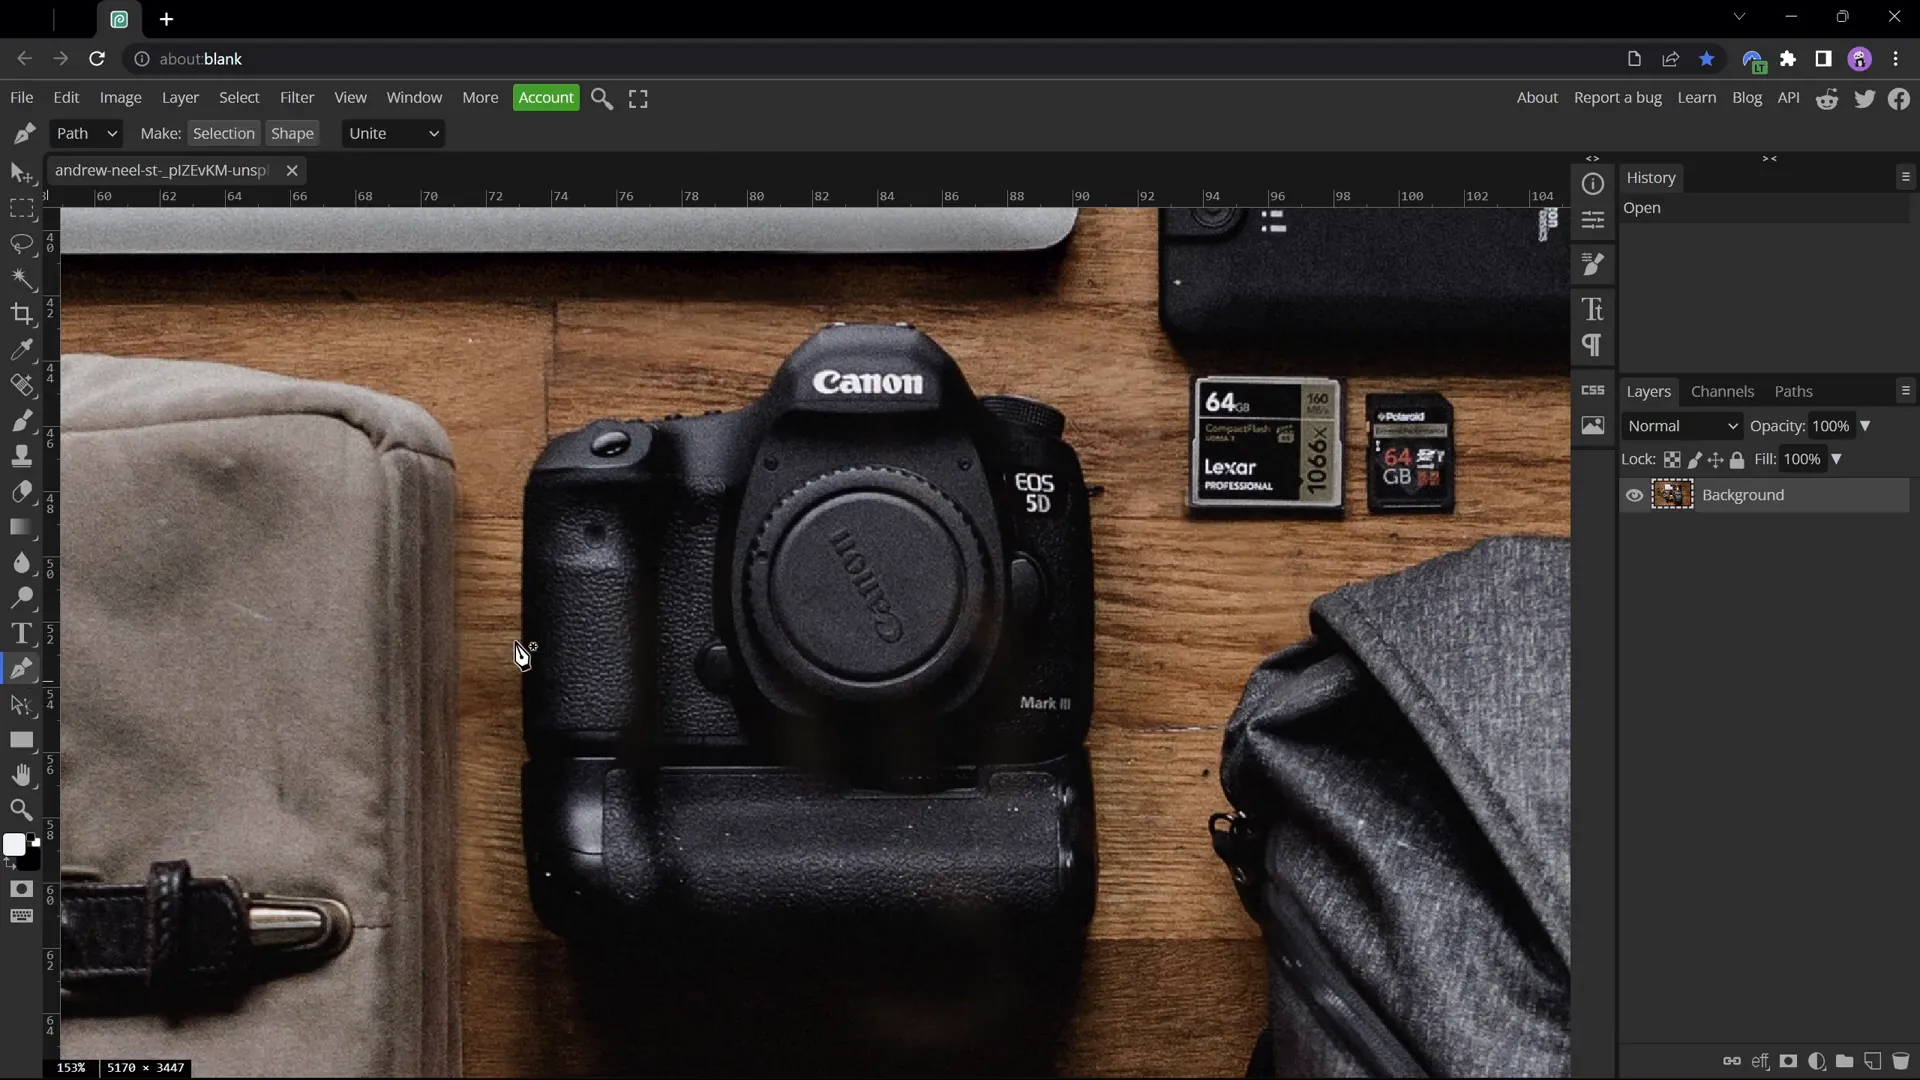
- Open your photo in Photopea.
- Zoom in on the object you want to cut out by holding Alt and scrolling.
- Select the Pen Tool and set it to Path Mode.
- Click around the edges of the object to create a precise outline.
- Use the Spacebar to adjust points if needed.
- Hold Alt to create sharp corners instead of smooth curves.
- Close the path by clicking near the starting point.
- Click Create Selection and confirm.
- Apply a mask to hide everything but the selected object.
- Trim the image to remove empty space via Image > Trim.
- Export the object as a PNG with a transparent background.
Repeat these steps for every object you want to isolate, such as the camera, travel bag, and lens.
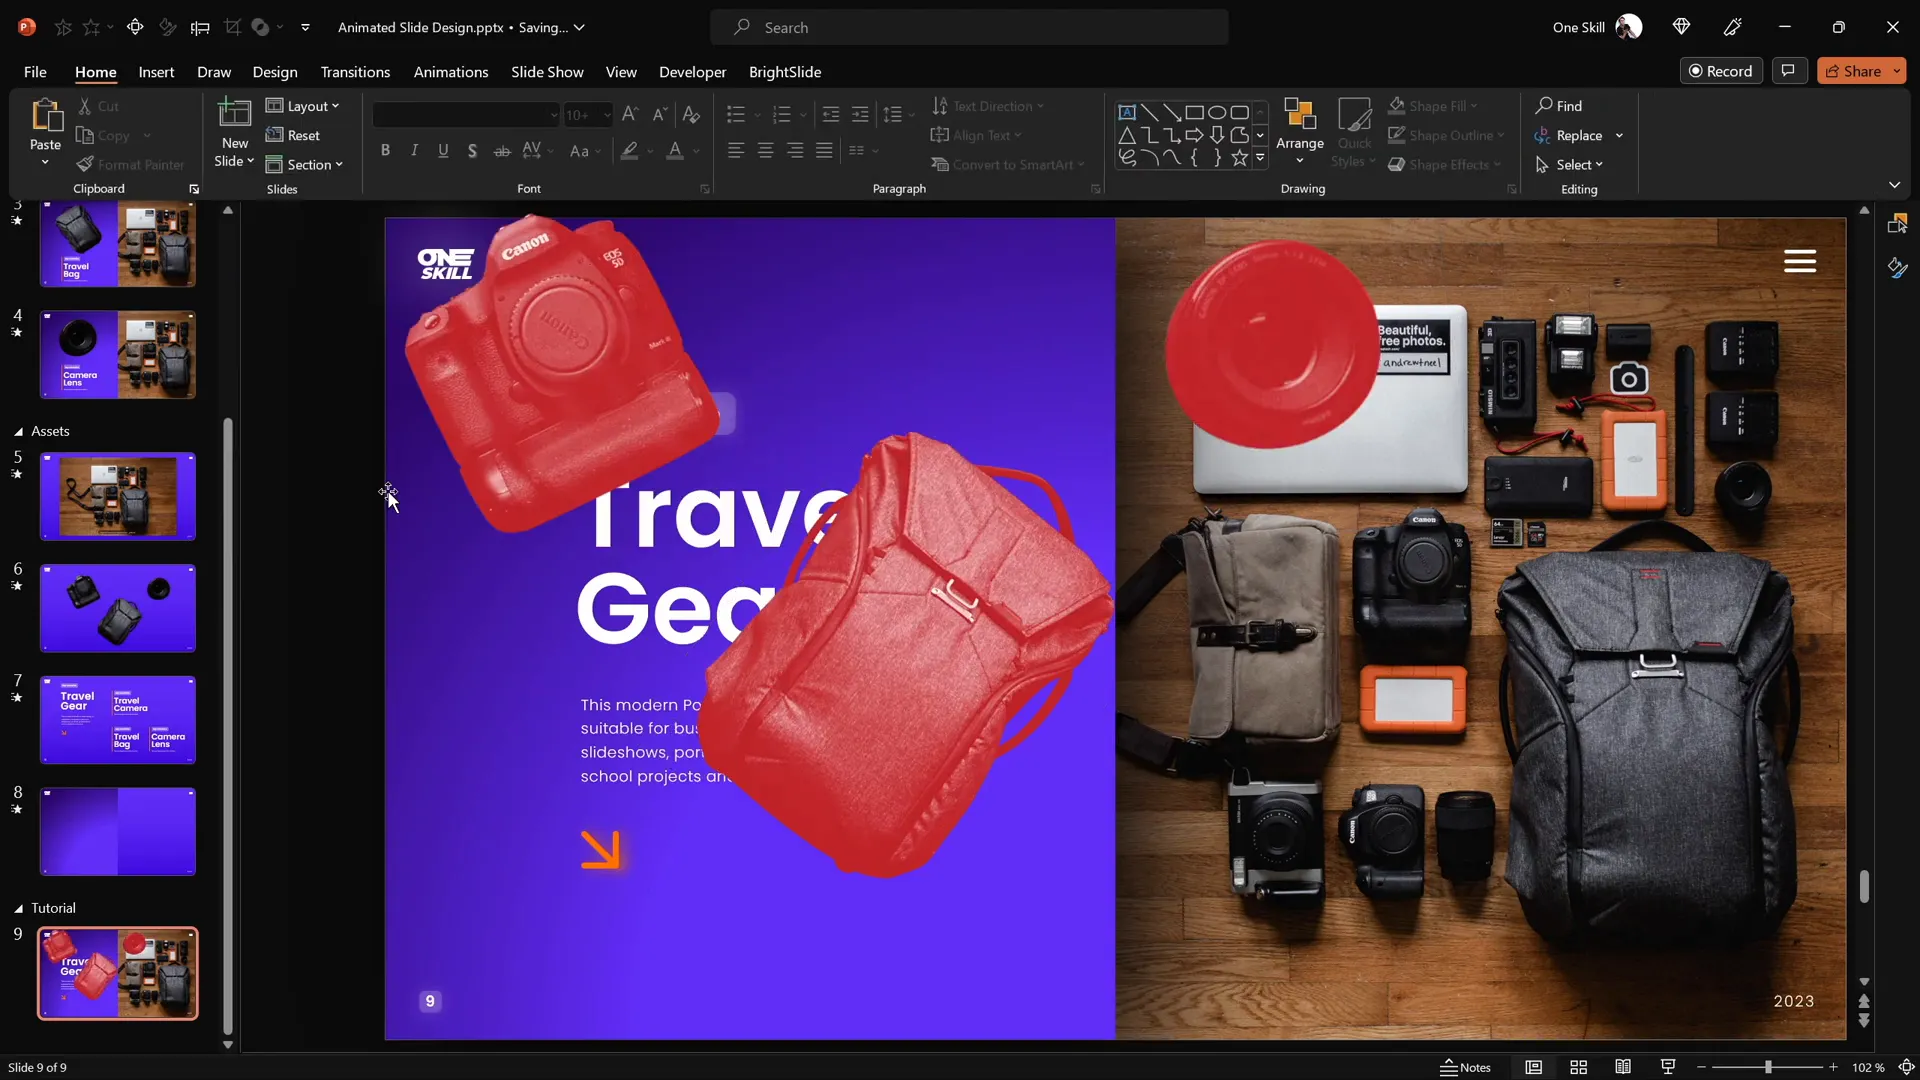
Matching Cutout Photos to the Original
Back in PowerPoint, paste your cut-out PNG objects on top of the original photo. To ensure perfect alignment and size, follow these steps:
Steps to Match Cutouts
- Select all cutouts and temporarily recolor them to a bright color (e.g., red) via Picture Format > Color. This helps in easily spotting misalignments.
- Position each cutout on top of its original counterpart in the photo.
- Adjust size and rotation using Ctrl + Shift for centered resizing and the arrow keys for fine positioning.
- Once aligned, select all cutouts and choose Reset Picture to restore original colors.
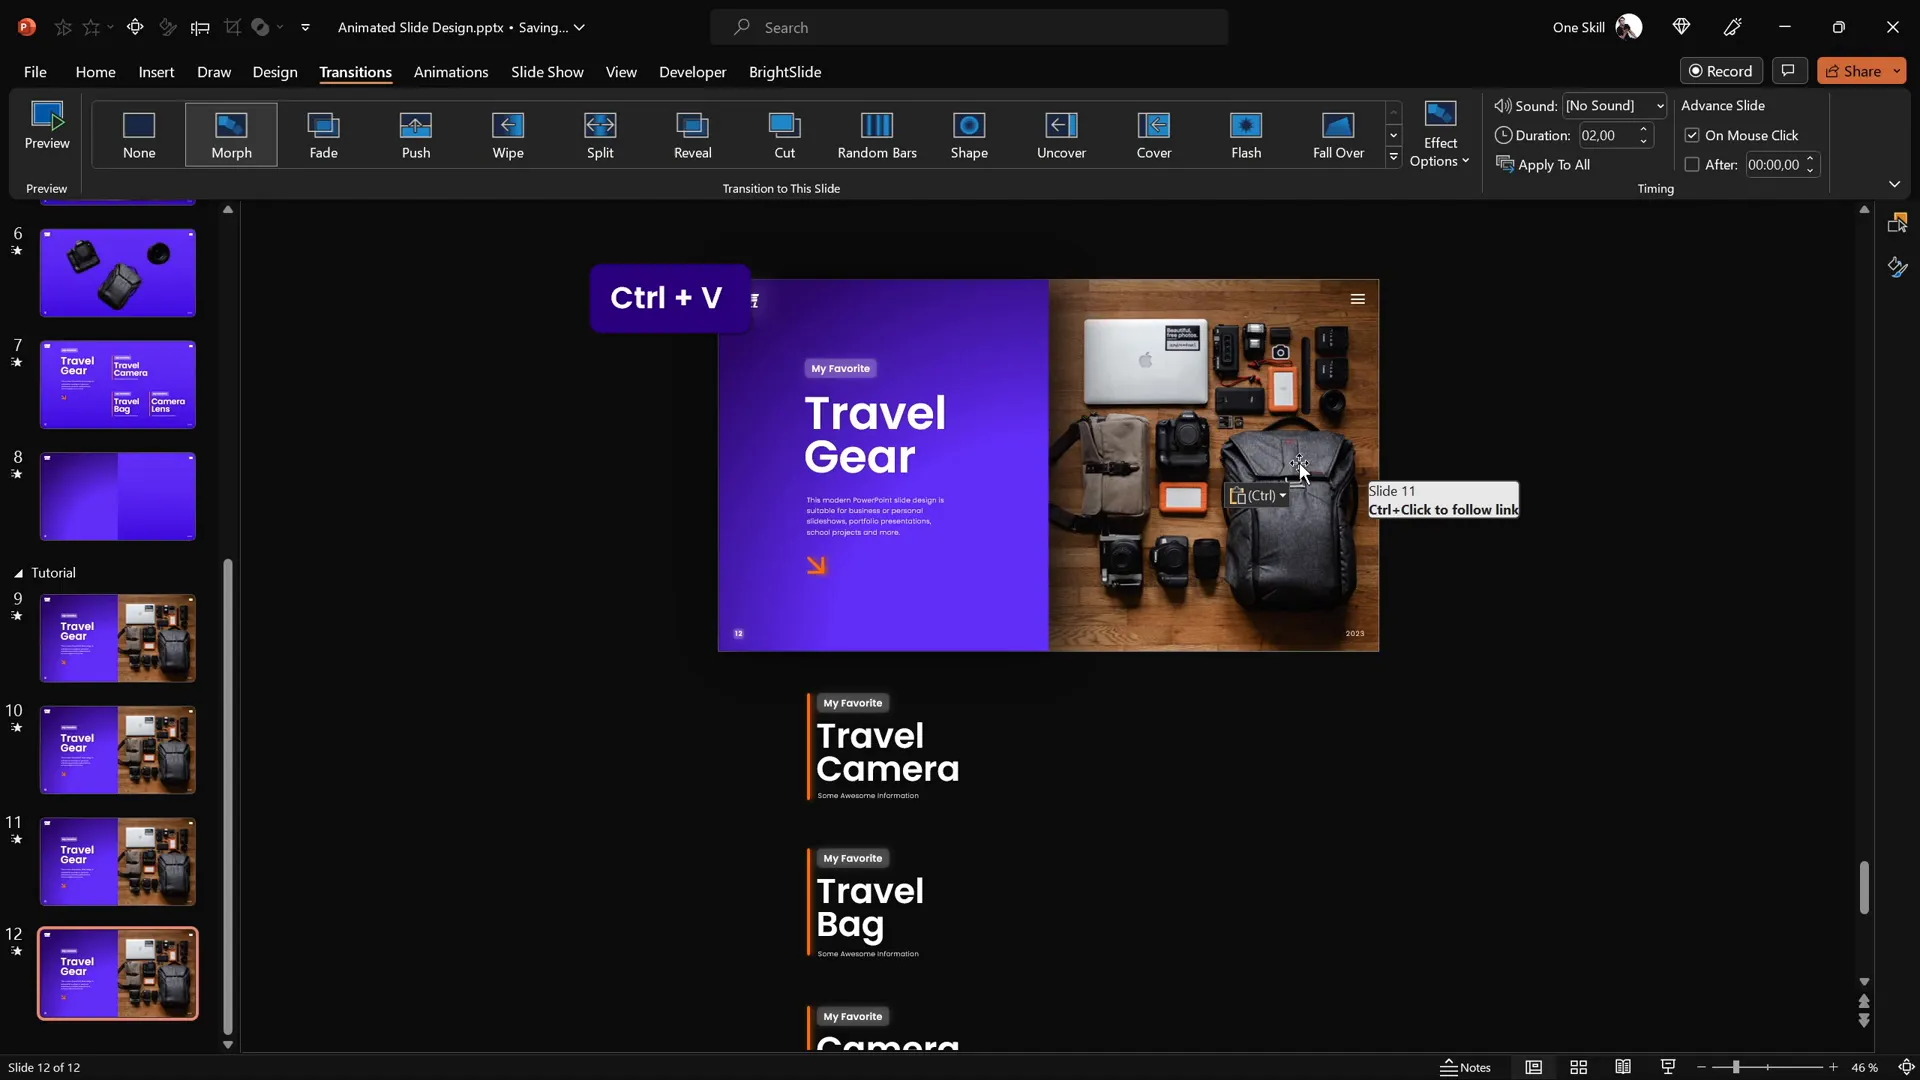
Creating Clickable Elements with Hyperlinks
Now that your objects are perfectly layered, it’s time to make them interactive. You will create multiple slides and link clickable objects to their corresponding detailed slides.
Steps to Create Clickable Elements
- Duplicate your main slide three times, so you have four slides in total:
- Slide 1: Introduction with all clickable objects.
- Slide 2: Camera details.
- Slide 3: Travel bag details.
- Slide 4: Camera lens details.
- On the introduction slide, select each cutout and press Ctrl + K to add a hyperlink.
- Link each object to its respective slide number (e.g., camera to slide 2).
- Copy the cutouts with hyperlinks and paste them onto the other slides, replacing the old ones.

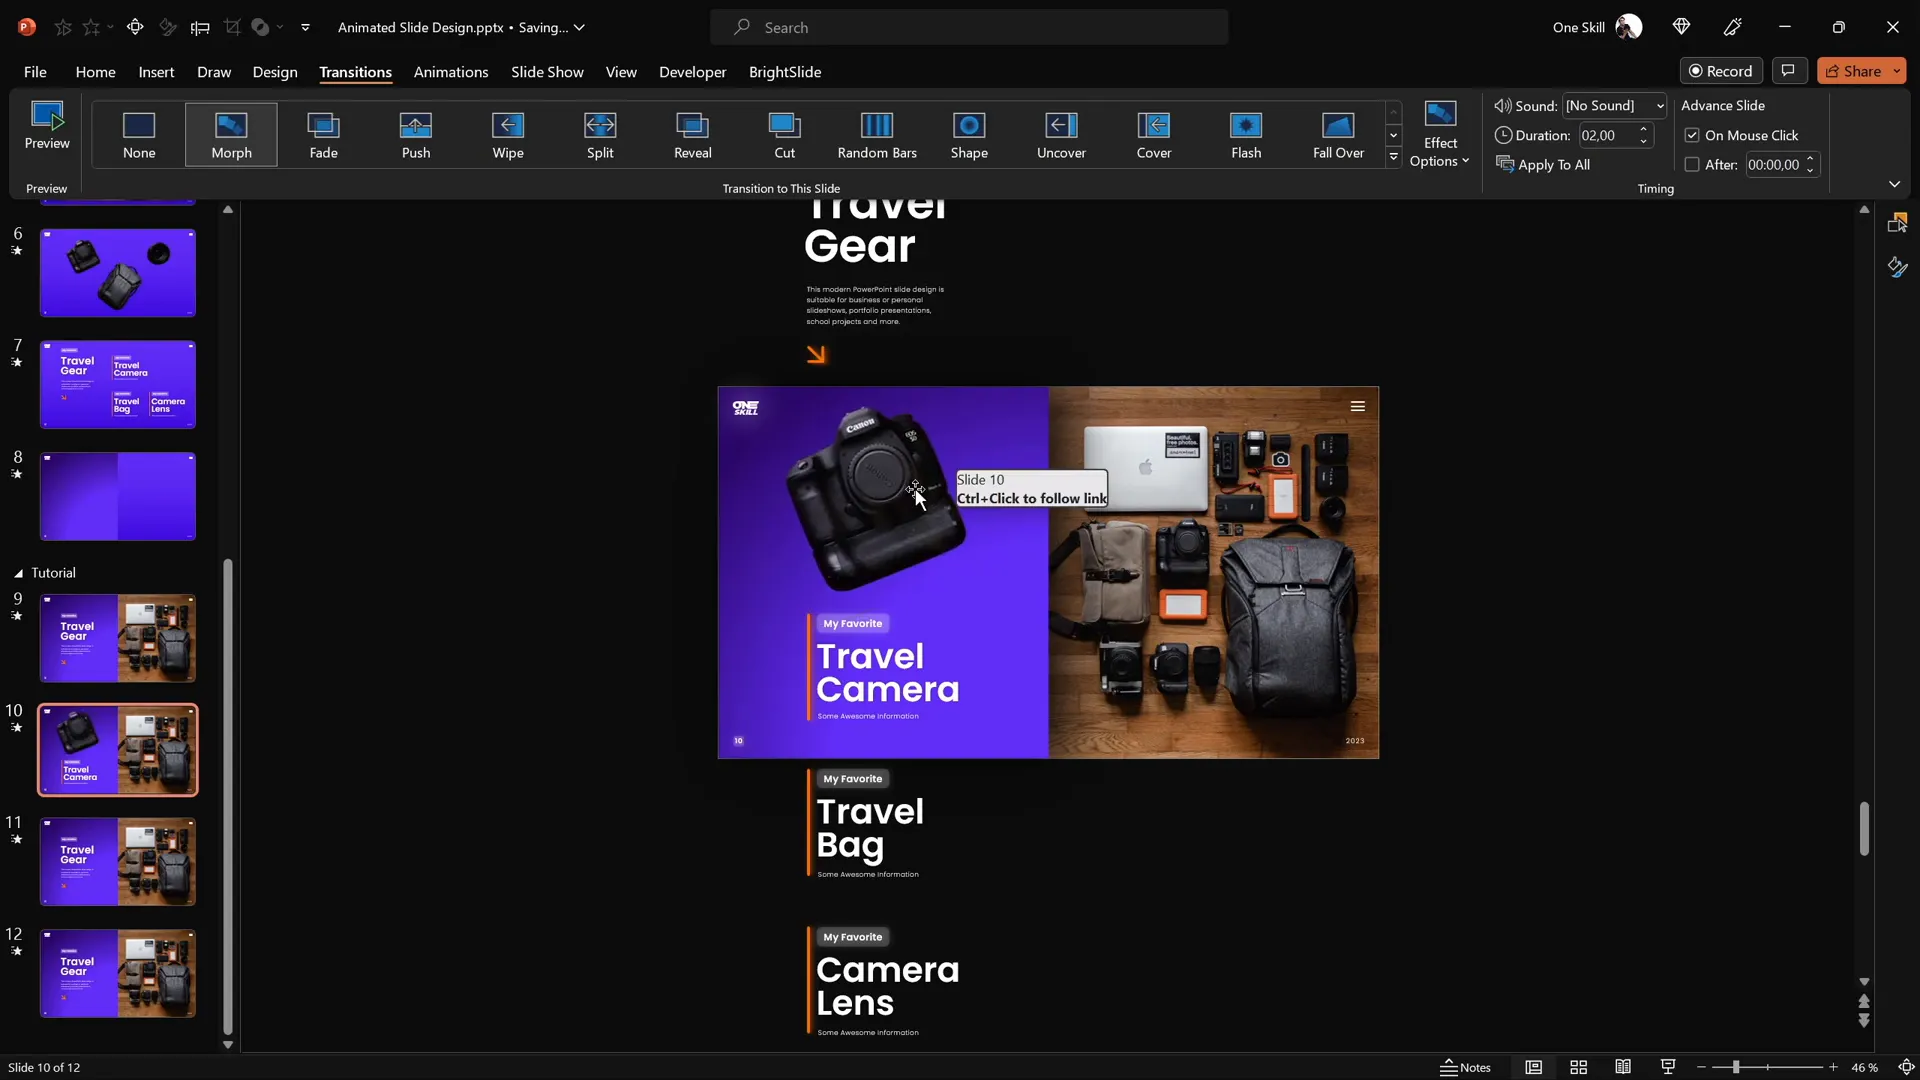
Adding Morph Transitions for Animation
The magic behind the smooth animation effect is PowerPoint’s Morph Transition. This transition animates the movement, resizing, and rotation of objects between slides.
How to Apply Morph Transitions
- Select all four slides.
- Go to the Transitions tab and select Morph.
- Adjust the transition duration if desired (e.g., 1 second for smooth effect).
Final Slide Design and Troubleshooting
With slides linked and transitions set, adjust each detailed slide to highlight the corresponding object and text:
- Camera slide: Enlarge and reposition the camera cutout. Hide or move other text boxes off-screen.
- Travel bag slide: Focus on the travel bag cutout and text. Hide other elements.
- Camera lens slide: Highlight the lens cutout and text.
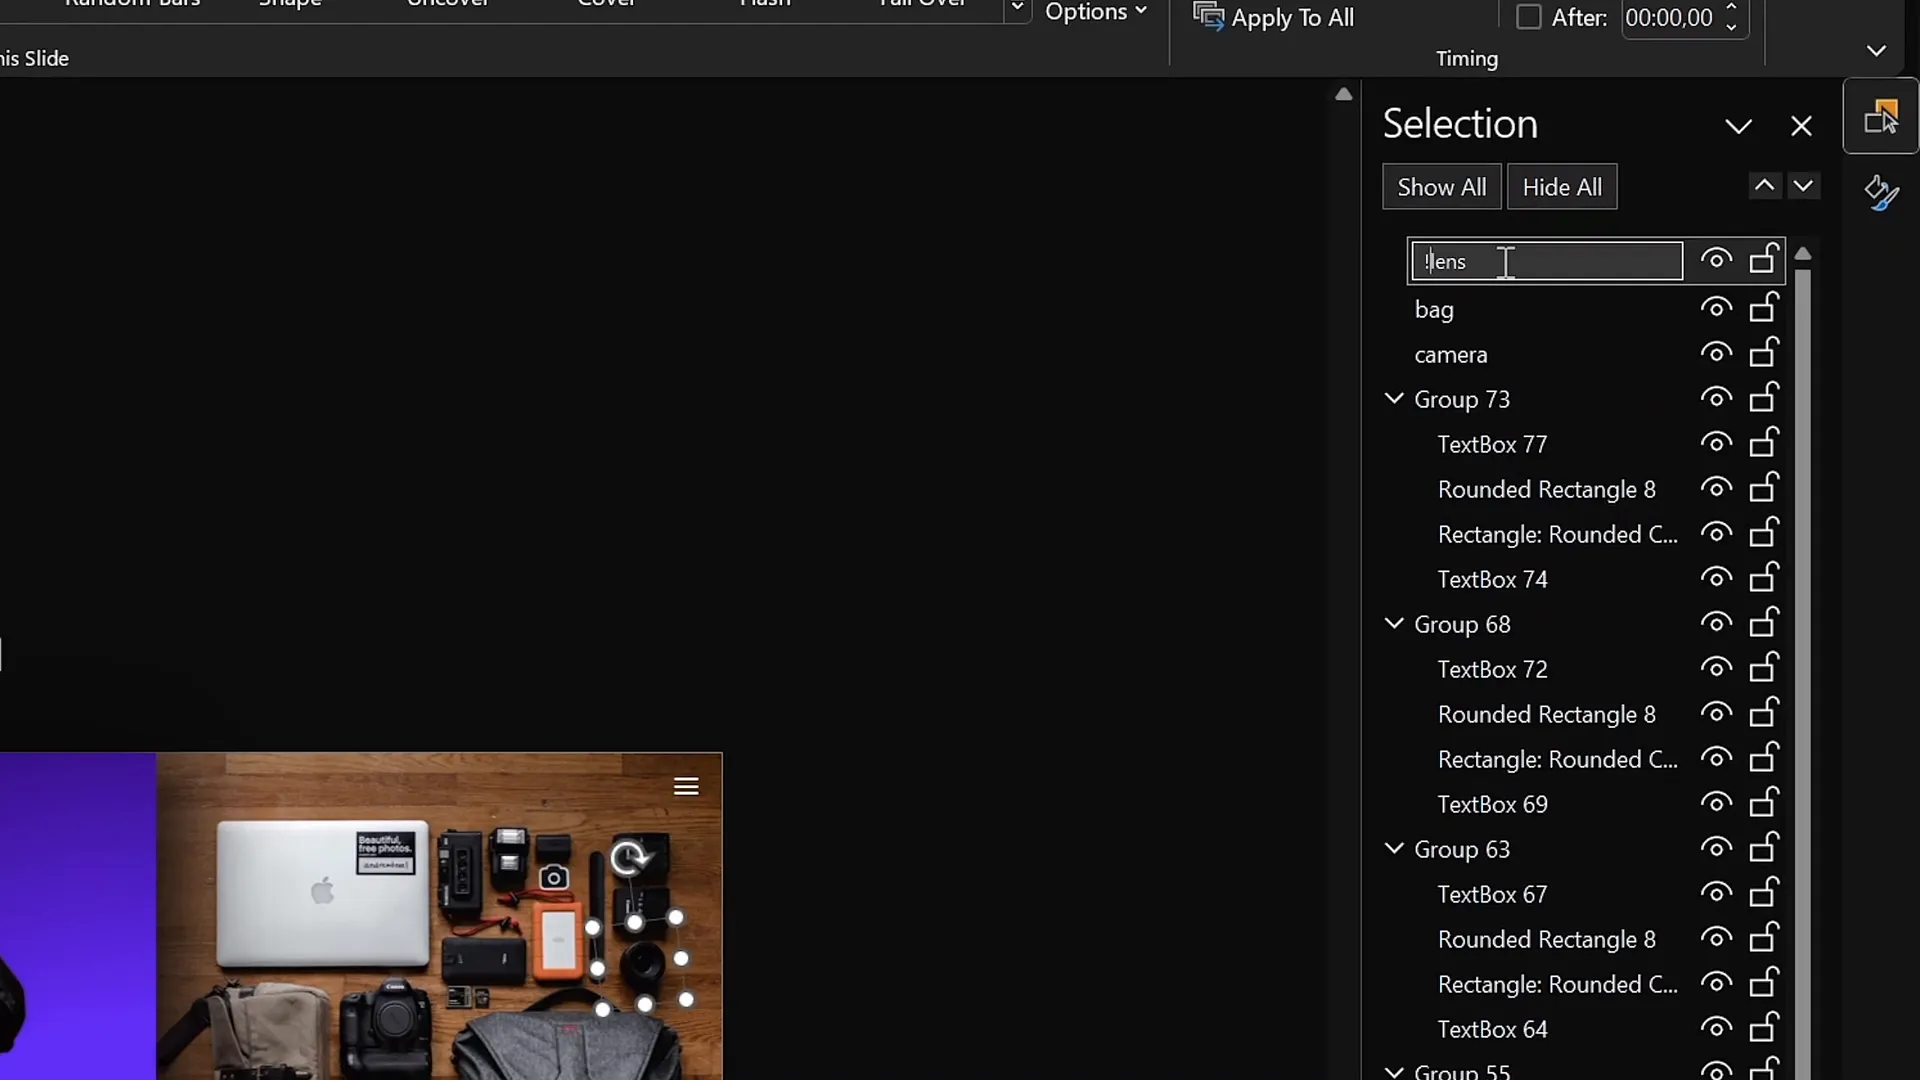
Fixing Morph Transition Issues
Sometimes, Morph struggles to animate objects that look very similar across slides. For example, the lens cutout might morph incorrectly if the naming or layering is inconsistent.
To fix this:
- Open the Selection Pane (Home > Select > Selection Pane).
- Rename the objects with unique names, such as prefixing with double exclamation marks (e.g., !!lens).
- Ensure all instances of the lens cutout across slides have the exact same name.
This helps PowerPoint recognize the objects as the same and create flawless morph animations.
Frequently Asked Questions
What version of PowerPoint do I need to create animated slide designs?
You’ll need PowerPoint 365 or PowerPoint 2019 or later to access the Morph transition and other advanced features used in this tutorial.
Can I use any photo for this animation technique?
Yes! You can use any photo, but for best results, choose high-resolution images with clear, distinct objects to cut out and animate.
Do I have to use Photopea for cutting out objects?
Photopea is a free and powerful online editor that makes precise cutouts easy. You can also use other tools like Photoshop or PowerPoint’s built-in remove background tool, but Photopea offers more control for detailed work.
Is the BrightSlide add-in necessary?
No, BrightSlide is optional but highly recommended. It adds useful productivity shortcuts like quick alignment tools that make designing faster and easier.
Can I use this technique for presentations other than travel gear?
Absolutely! This method works for any topic where you want to create interactive, clickable slides with animated transitions. Just adapt the images and text to your content.
Conclusion
Creating an engaging PowerPoint animated slide design that is clickable and scrollable is easier than you might think with the right approach. By layering cutout images, adding hyperlinks, and applying Morph transitions, you can transform a simple photo into a dynamic, interactive presentation.
This technique not only impresses your audience but also helps convey information clearly and memorably by focusing attention on key elements with smooth animations.
Remember these key steps:
- Start with a beautiful gradient background and balanced layout.
- Insert and crop a high-quality photo as your base.
- Cut out objects precisely using Photopea or similar tools.
- Match cutouts perfectly over the original photo.
- Add clear, aligned text boxes describing clickable elements.
- Create clickable areas with hyperlinks linking to detailed slides.
- Apply Morph transitions for smooth, professional animations.
- Fix any animation glitches by consistent naming in the Selection Pane.
With these skills, your PowerPoint presentations will stand out with interactive, polished animations that engage and inform.
If you want to explore more PowerPoint animation secrets, check out the creator’s YouTube channel One Skill PPT and consider subscribing for regular tutorials.
Happy presenting!


