If you’ve ever wanted to captivate your audience right from the start with a stunning animated title slide, you’re in the right place. PowerPoint is a powerful tool that offers more than just static slides—it can help you create dynamic, eye-catching presentations with animated elements that bring your content to life.
In this comprehensive guide, we’ll walk you through the step-by-step process of creating an amazing PowerPoint animated slide design for your title slide. You’ll learn how to use gradient fills, custom fonts, the PowerPoint draw tool, and video integration to craft a visually compelling introduction slide that sets the tone for your entire presentation.
Whether you’re a beginner or looking to polish your PowerPoint skills, this tutorial will provide you with practical tips and techniques to elevate your slide design and animation game.
Table of Contents
- Getting Started: Setting Up Your Slide
- Adding a Gradient Fill for Visual Depth
- Inserting and Styling Your Slide Title
- Using the PowerPoint Draw Tool for Handwritten Text
- Adding Animations to Your Text
- Cutting Out Text with Merge Shapes
- Inserting and Animating Background Video
- Creating Exit Animations for Text and Shapes
- Final Touches and Presentation Tips
- Frequently Asked Questions
Getting Started: Setting Up Your Slide
To begin your journey into PowerPoint animated slide design, start with a blank slide. This clean slate allows you to build your design from scratch without distractions or pre-existing elements.
Open PowerPoint and insert a new slide with a blank layout. The background should be set to black to provide a dramatic canvas that makes your colors and animations pop.
Once your slide is ready, you’ll want to create a base shape that covers the entire slide. This will be the foundation for your gradient background and the area where your title text will be displayed.
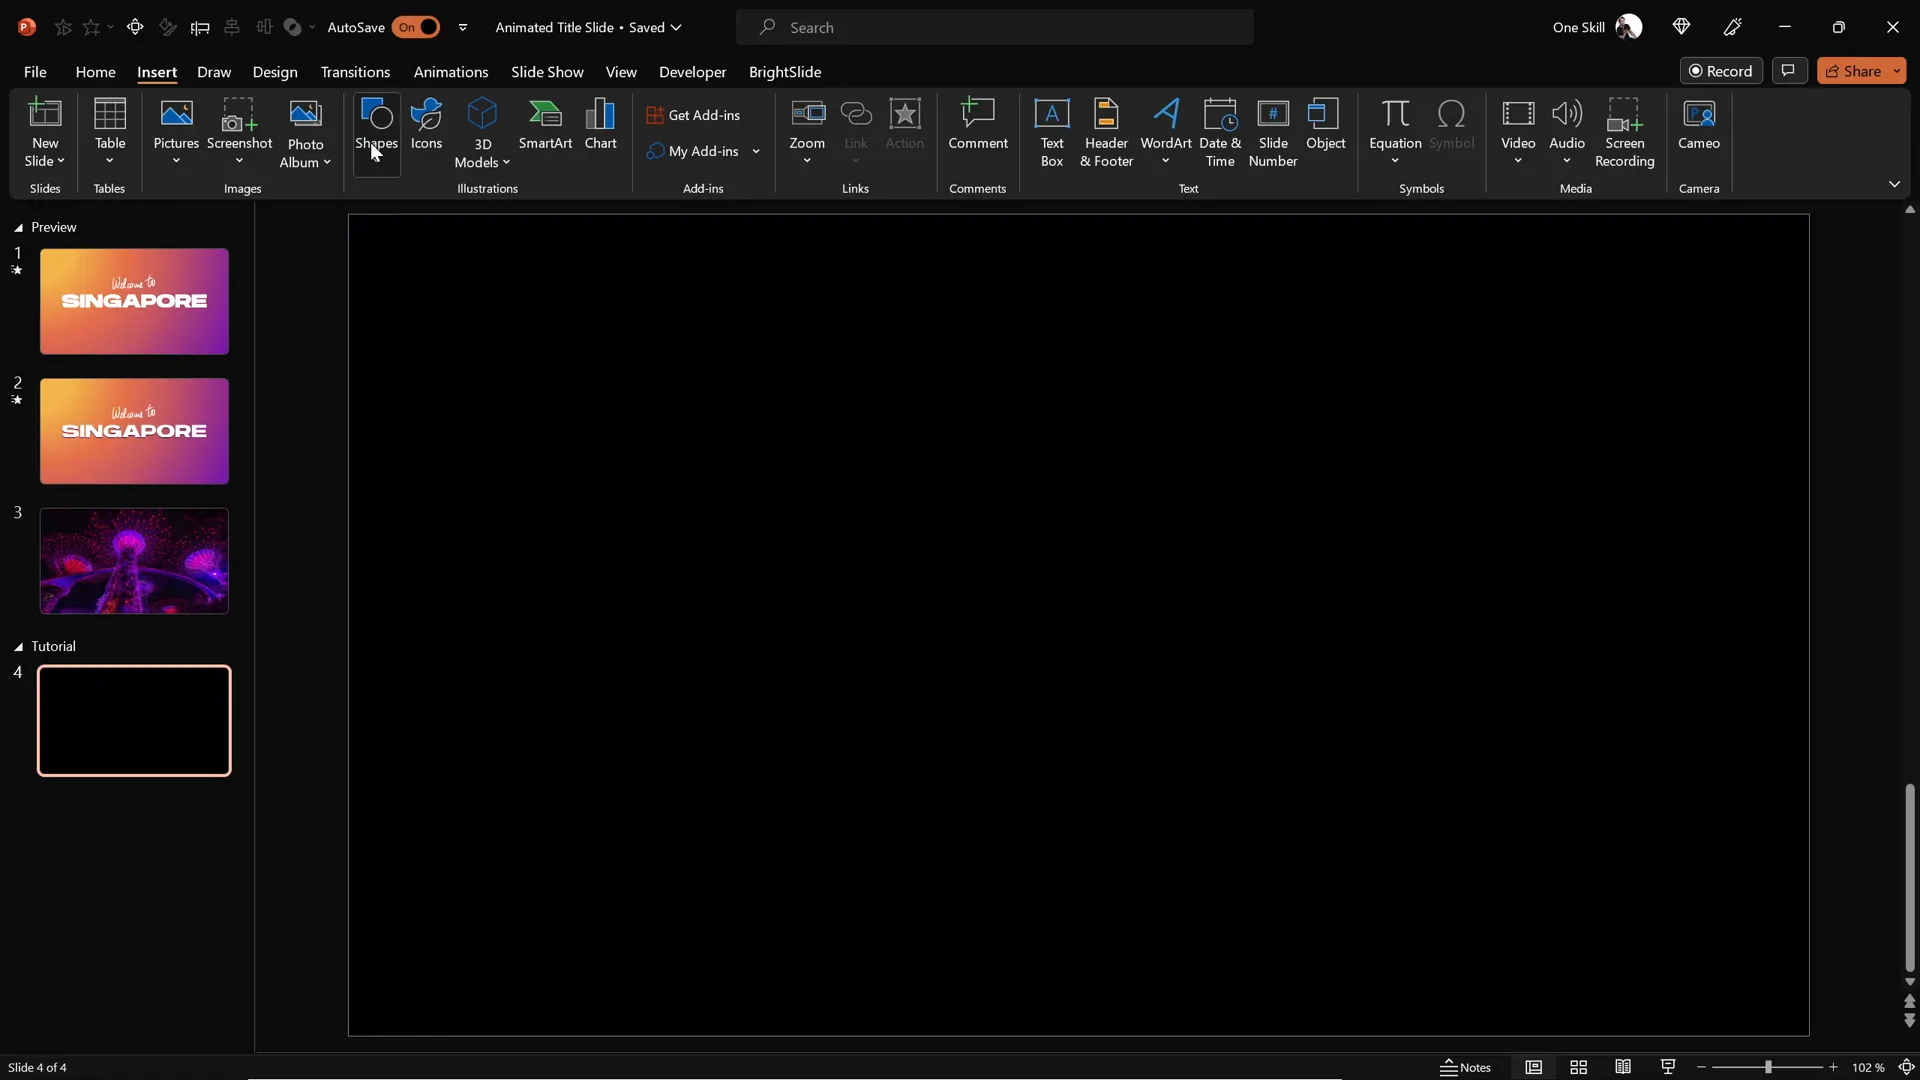
Step 1: Insert a Full-Screen Rectangle
- Go to the Insert tab and choose Shapes.
- Select the Rectangle shape and draw it to cover the entire slide area.

This rectangle will host a beautiful gradient fill that adds depth and visual interest to your title slide.
Adding a Gradient Fill for Visual Depth
To make your background more dynamic, use a gradient fill instead of a flat color. Gradient fills create a sense of dimension and can subtly direct the viewer’s eye to the main content.
Step 2: Apply a Radial Gradient Fill
- Select the full-screen rectangle you just inserted.
- Navigate to the Home tab and click the Format Painter tool.
- Click on an existing rectangle that already has a gradient fill (if available) or manually set the gradient fill by right-clicking the rectangle, selecting Format Shape, and choosing Gradient fill.
- Choose a Radial gradient type with the gradient center positioned at the top-left corner for a natural light effect.
- Adjust the color stops with your preferred palette. Here are example hex codes you can use:
- #1A2A6C (Deep Blue)
- #0F6CBD (Bright Blue)
- #00B4F0 (Light Blue)
- #FFFFFF (White for subtle highlight)
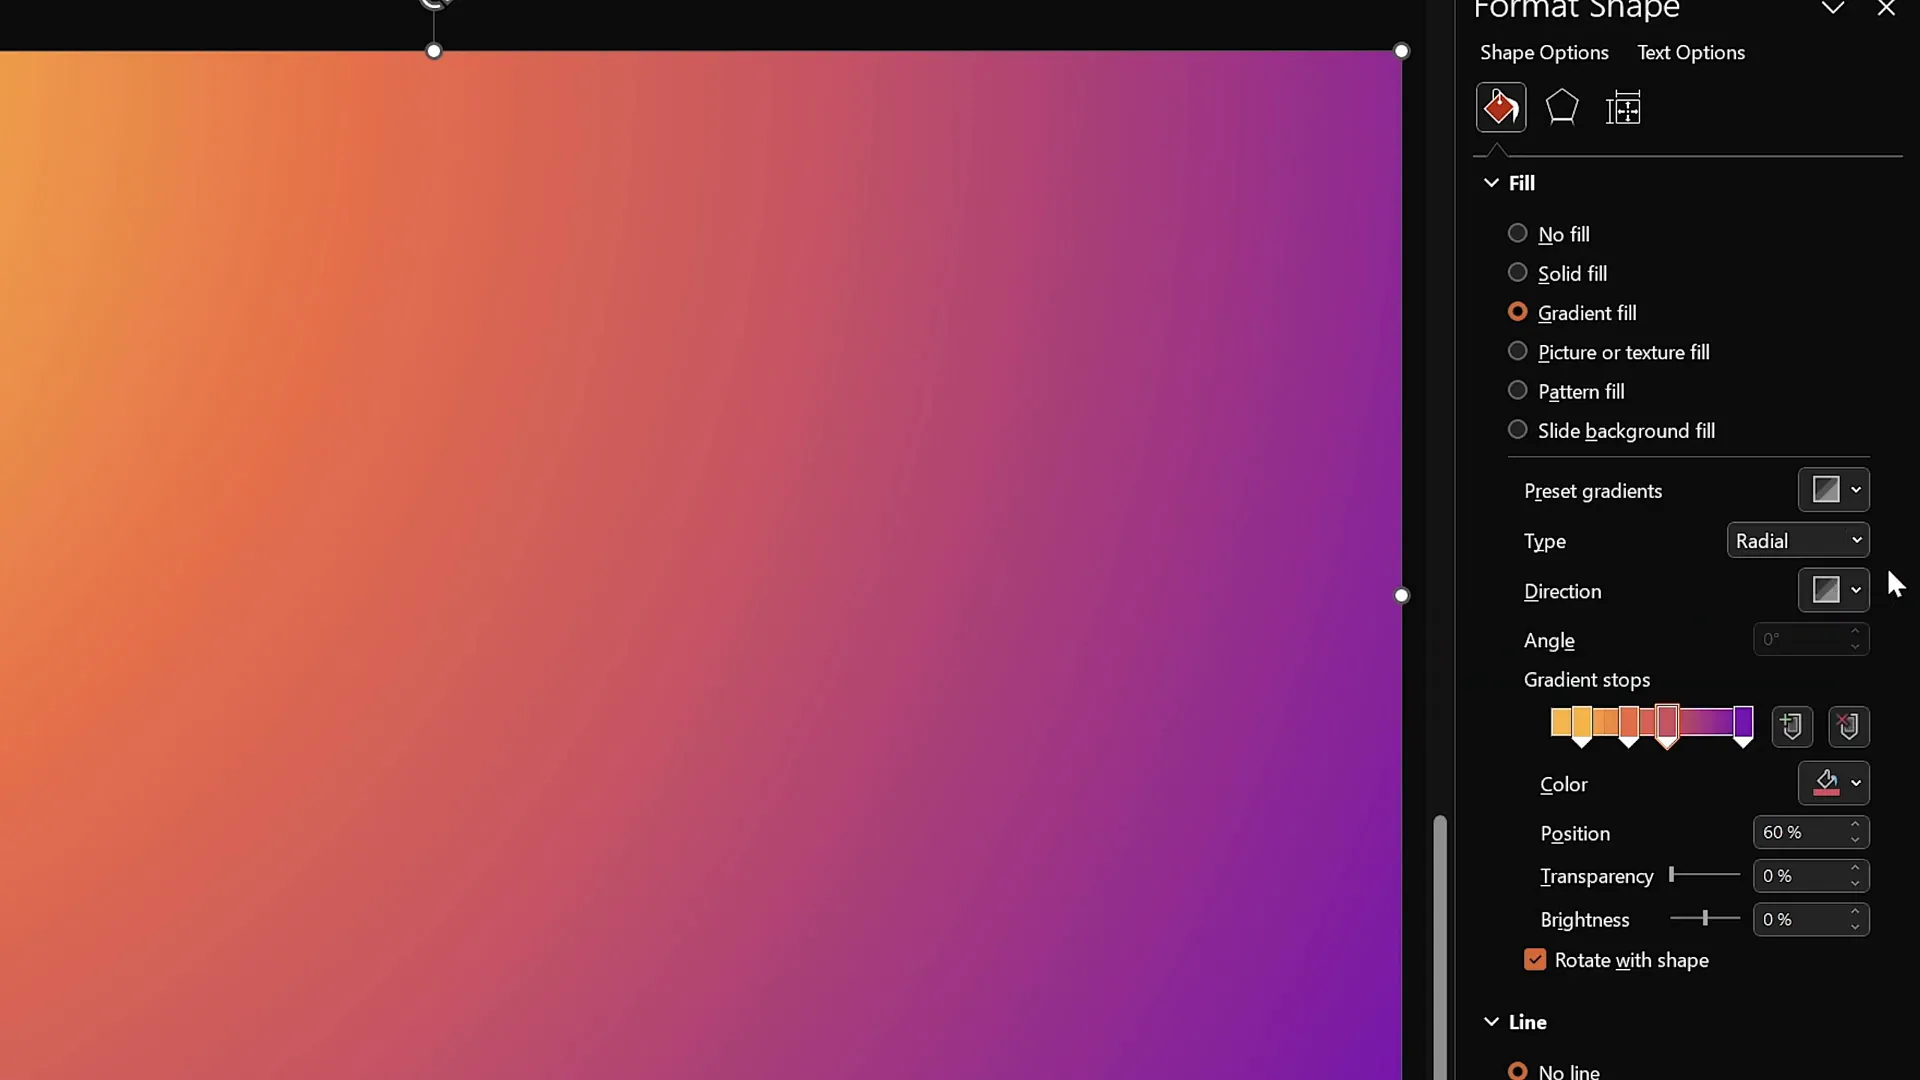
This gradient background will set a professional and attractive tone for your slide.
Inserting and Styling Your Slide Title
Next, insert a large, bold title that will be the focal point of your slide. Use a clean, modern font that stands out well against your gradient background.
Step 3: Insert a Text Box and Type Your Title
- Go to the Insert tab and select Text Box.
- Click and drag to create a text box near the center of your slide.
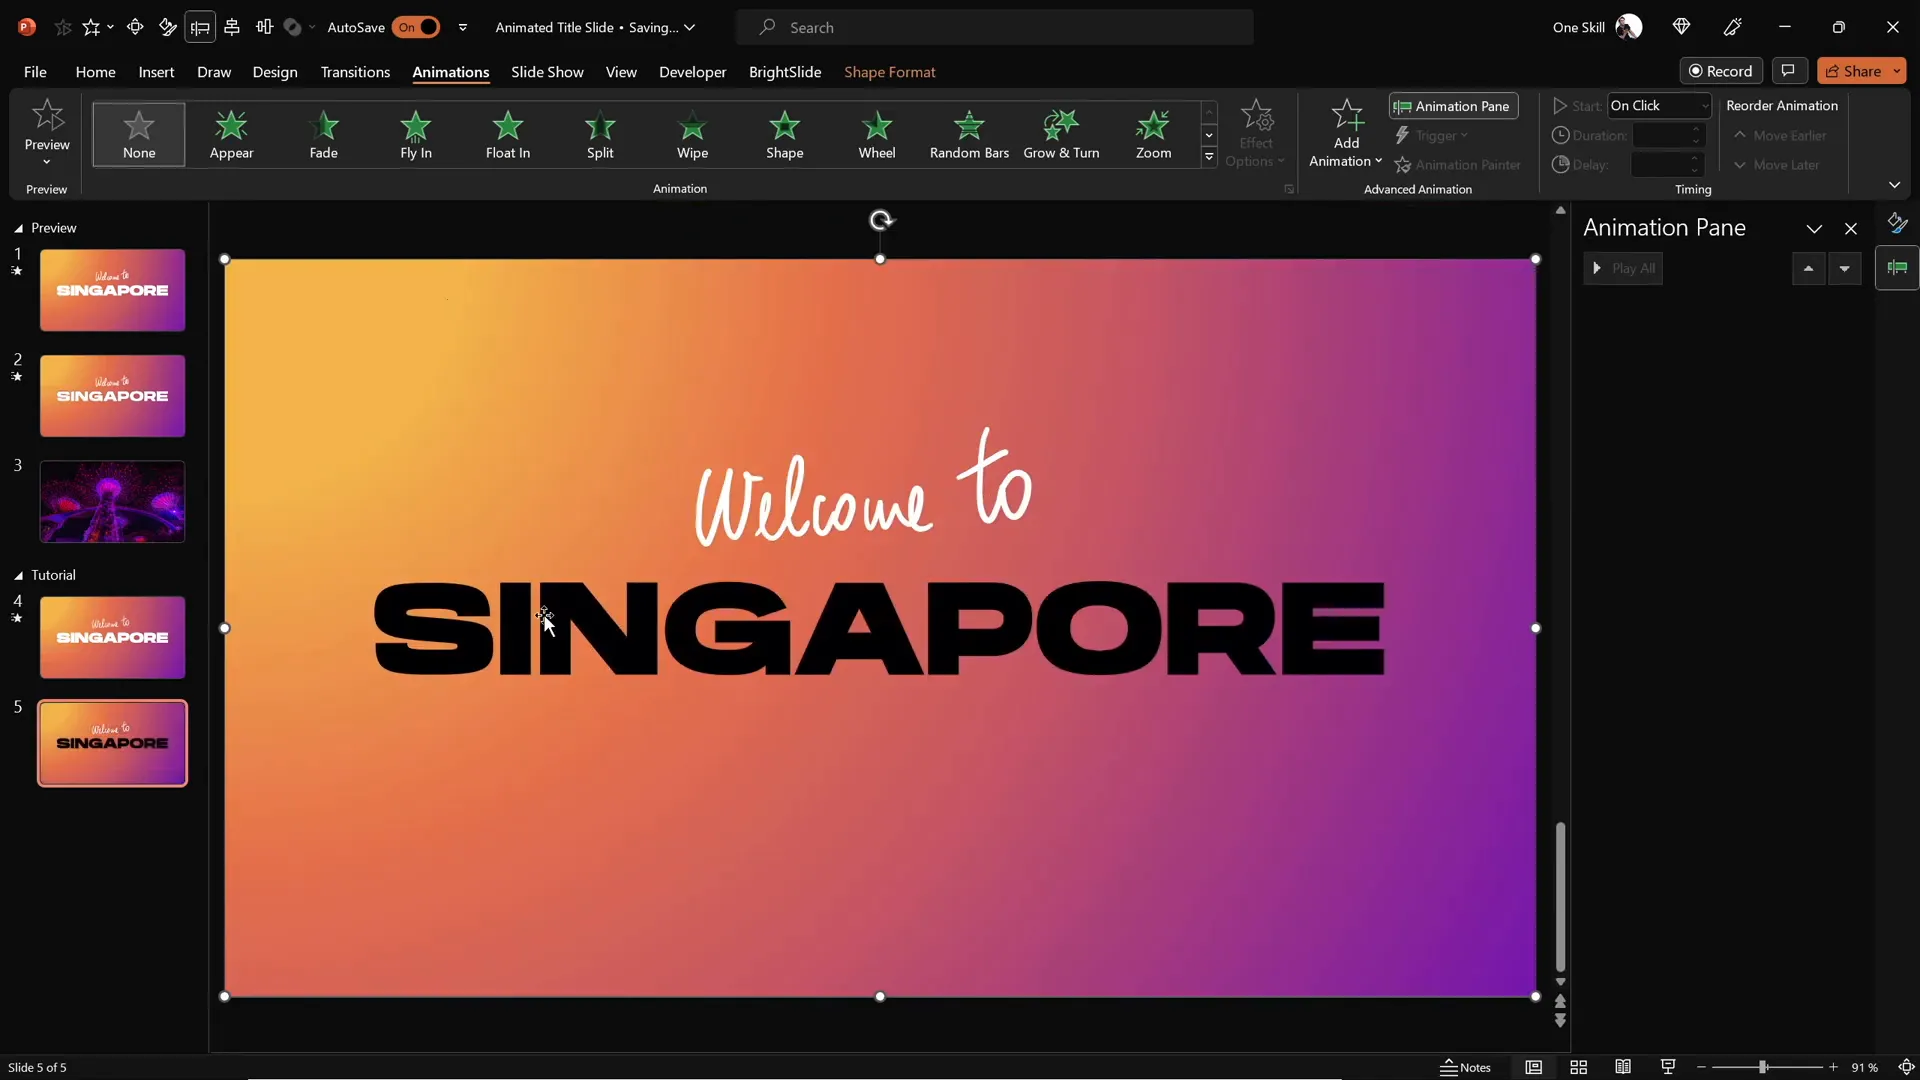
- Type your title text, for example, “Singapore.”
- Set the font to Hanson (available for free from various font sites) and increase the size to 96 pt for maximum impact.
- Center-align the text within the text box.
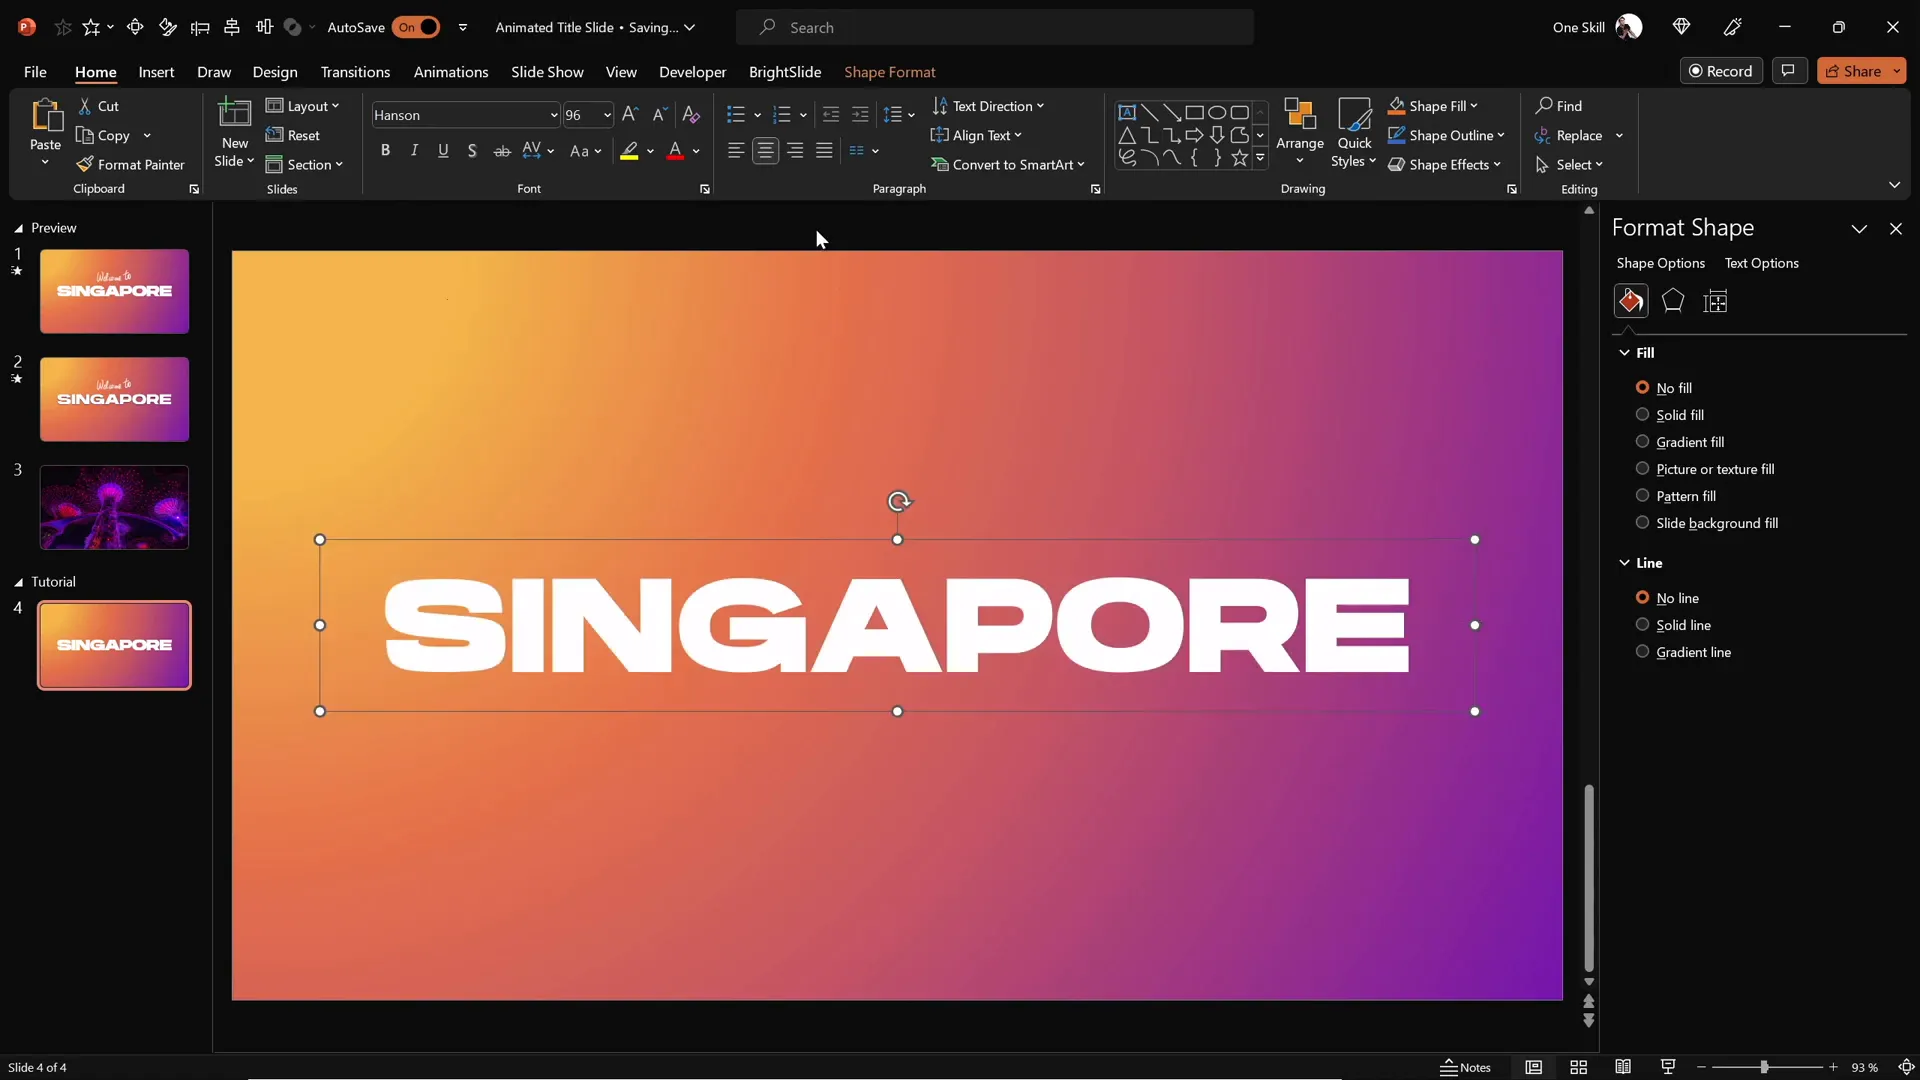
Your slide title is now ready for additional styling and animation.
Using the PowerPoint Draw Tool for Handwritten Text
To add a personal and creative touch, you can overlay handwritten text on top of your title. PowerPoint’s Draw tool lets you create custom, freeform text or shapes that look like they were hand-drawn.
Step 4: Draw Custom Text with the Draw Tool
- Click on the Draw tab in PowerPoint.
- Select the Pen tool, choose a color that contrasts well with your background and title text (for example, white or light blue), and pick a pen thickness.
- Draw your message, like “Welcome to,” above or near your main title.

Drawing smooth text can be challenging with a mouse, so consider using a graphics tablet like the Wacom Intuos for better control and smoother lines.
Once drawn, position your handwritten text close to the main title to create a cohesive design.
Adding Animations to Your Text
Animations bring your slide to life by adding movement and guiding the viewer’s attention. Let’s animate both your handwritten text and your title text to create an engaging entrance effect.
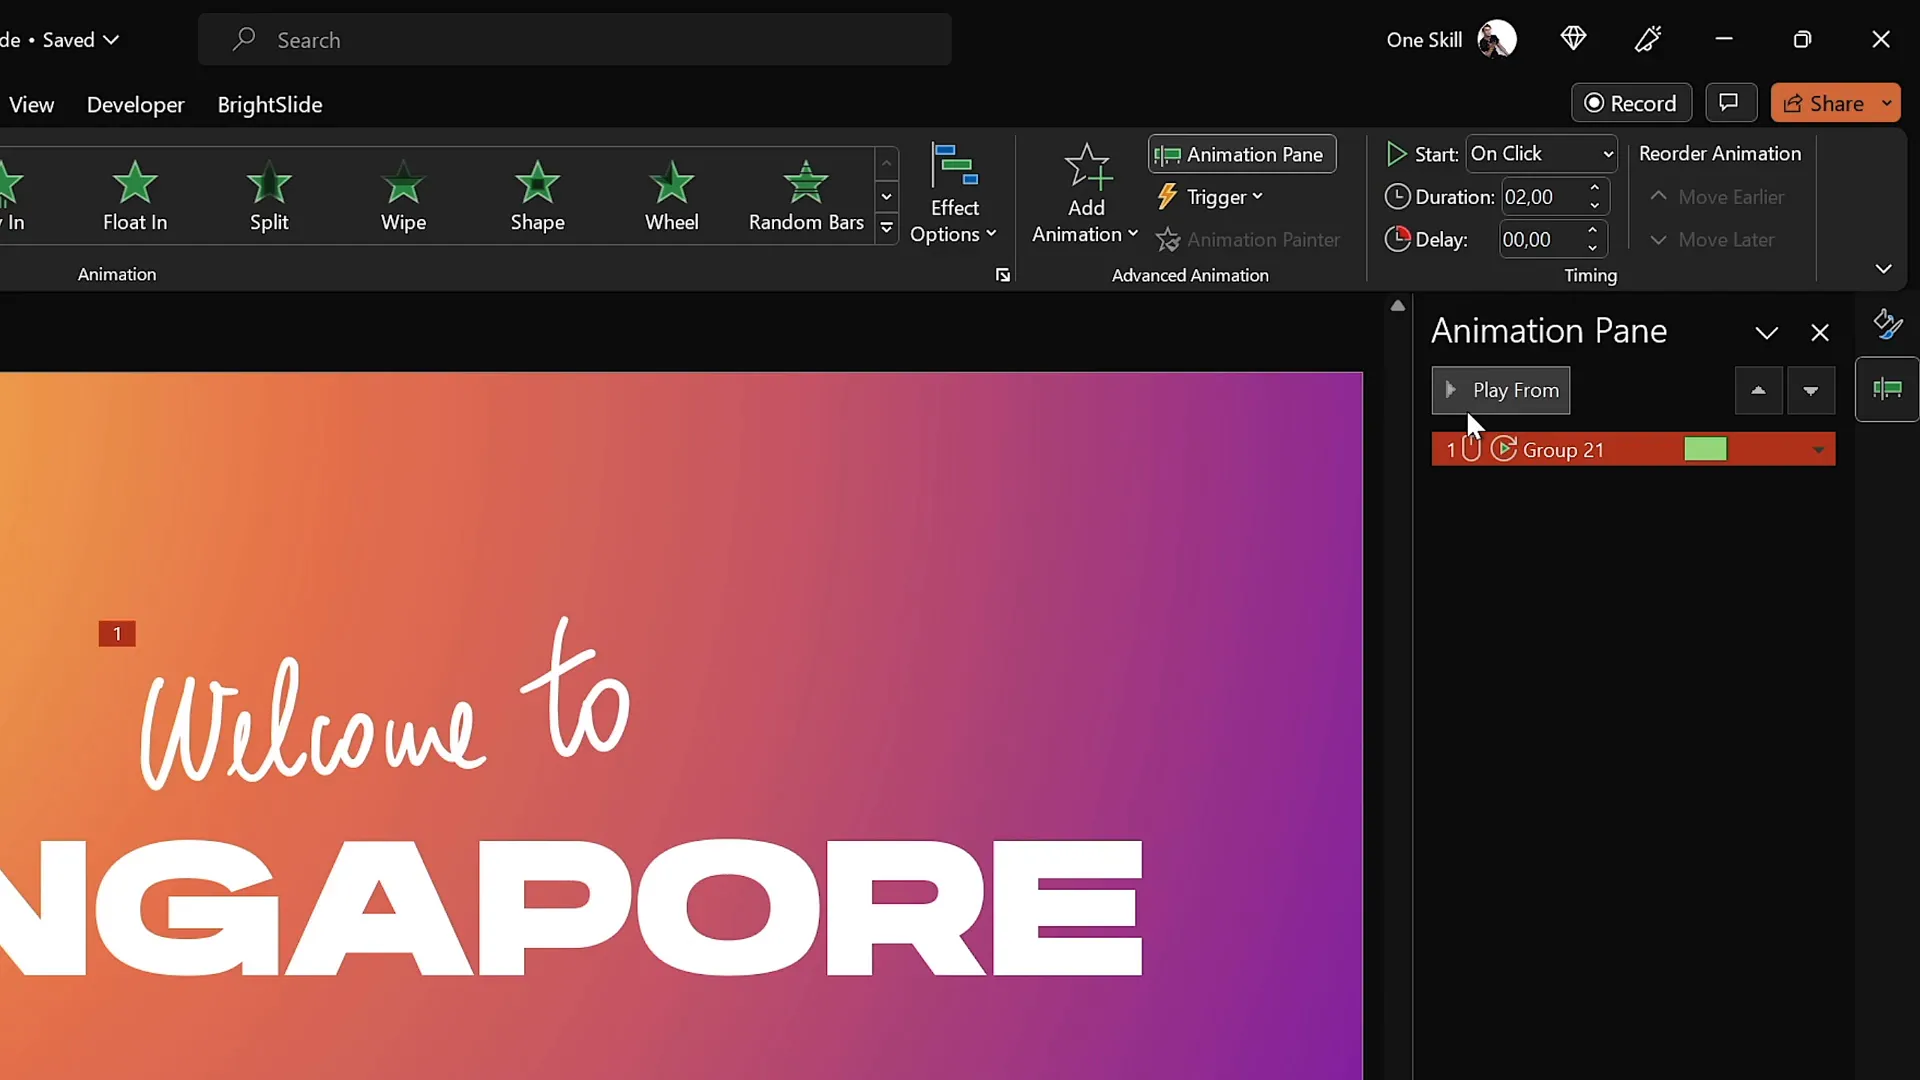
Step 5: Animate the Handwritten Text with Replay Animation
- Select your handwritten text.
- Go to the Animations tab and choose the Replay animation, which works well for drawn objects.
- Open the Animation Pane to fine-tune the animation.
- Adjust the duration from 2 seconds to approximately 1.3 seconds for a snappier effect.
- Set the animation to start With Previous so it plays automatically.
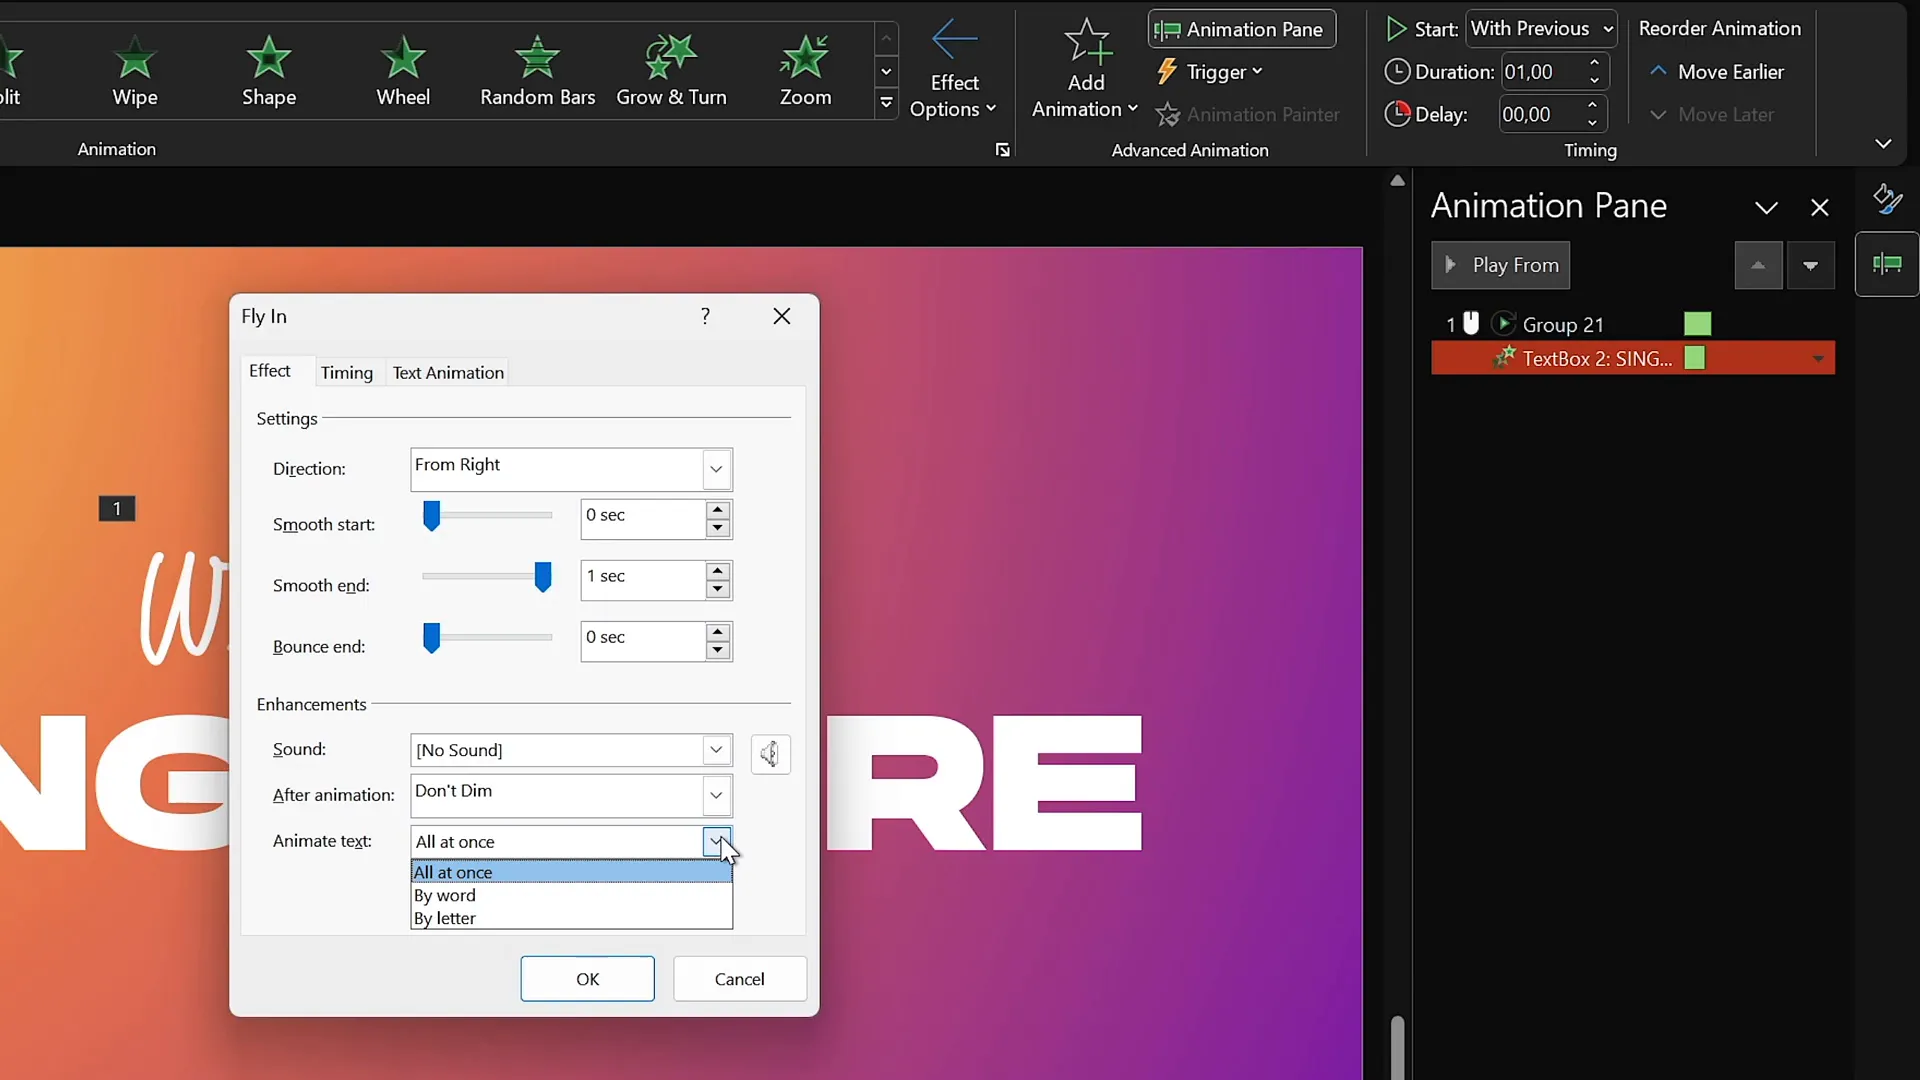
Step 6: Animate the Title Text with Fly-In and Letter-by-Letter Effects
- Select your main title text box.
- Choose the Fly In animation, setting the direction to From Right.
- Set the animation to start With Previous and duration to 1 second.
- In the animation options, increase the Maximum Movement for a smooth landing effect.
- Animate the text By Letter with a 10% delay between letters for a dynamic reveal.
Preview your animations to see the combination of your handwritten text replay and the title flying in letter-by-letter. This creates an impressive and professional entrance sequence.
Cutting Out Text with Merge Shapes
To add a creative twist, you can “cut out” your title text from the gradient background, revealing the slide’s base color behind the letters. This technique uses PowerPoint’s Merge Shapes feature.
Step 7: Duplicate Slide and Prepare for Cutout
- Duplicate your animated slide to preserve your work.
- On the duplicated slide, remove all animations temporarily to focus on shape manipulation.
- Select the full-screen gradient rectangle.
- Hold Shift and select the title text box.
- Go to the Shape Format tab, click Merge Shapes, and choose Subtract.
This action punches a hole through the gradient rectangle in the shape of your title text, revealing the black background behind it and creating a stylish cutout effect.
Inserting and Animating Background Video
Adding a background video behind your cutout text can create a stunning visual effect. Imagine colorful or dynamic footage visible only through your title letters. Here’s how to do it in PowerPoint.
Step 8: Find and Download a Suitable Video
Use royalty-free stock video sites like DepositPhotos to find high-quality clips. For example, a video of Singapore’s super trees lighting up at night can complement your slide theme perfectly.
- DepositPhotos offers photos, vectors, videos, and music for creative projects.
- Use promo code ONESKILL20 for a 20% discount on downloads and subscriptions.
Step 9: Insert and Align the Video in PowerPoint
- Copy the downloaded video and paste it onto the slide with the gradient rectangle cutout.
- Center-align the video to match the slide layout.
- Send the video to the back layer so it sits behind the cutout rectangle.
- Set the video playback options to Loop and Play Automatically (start with previous animation).
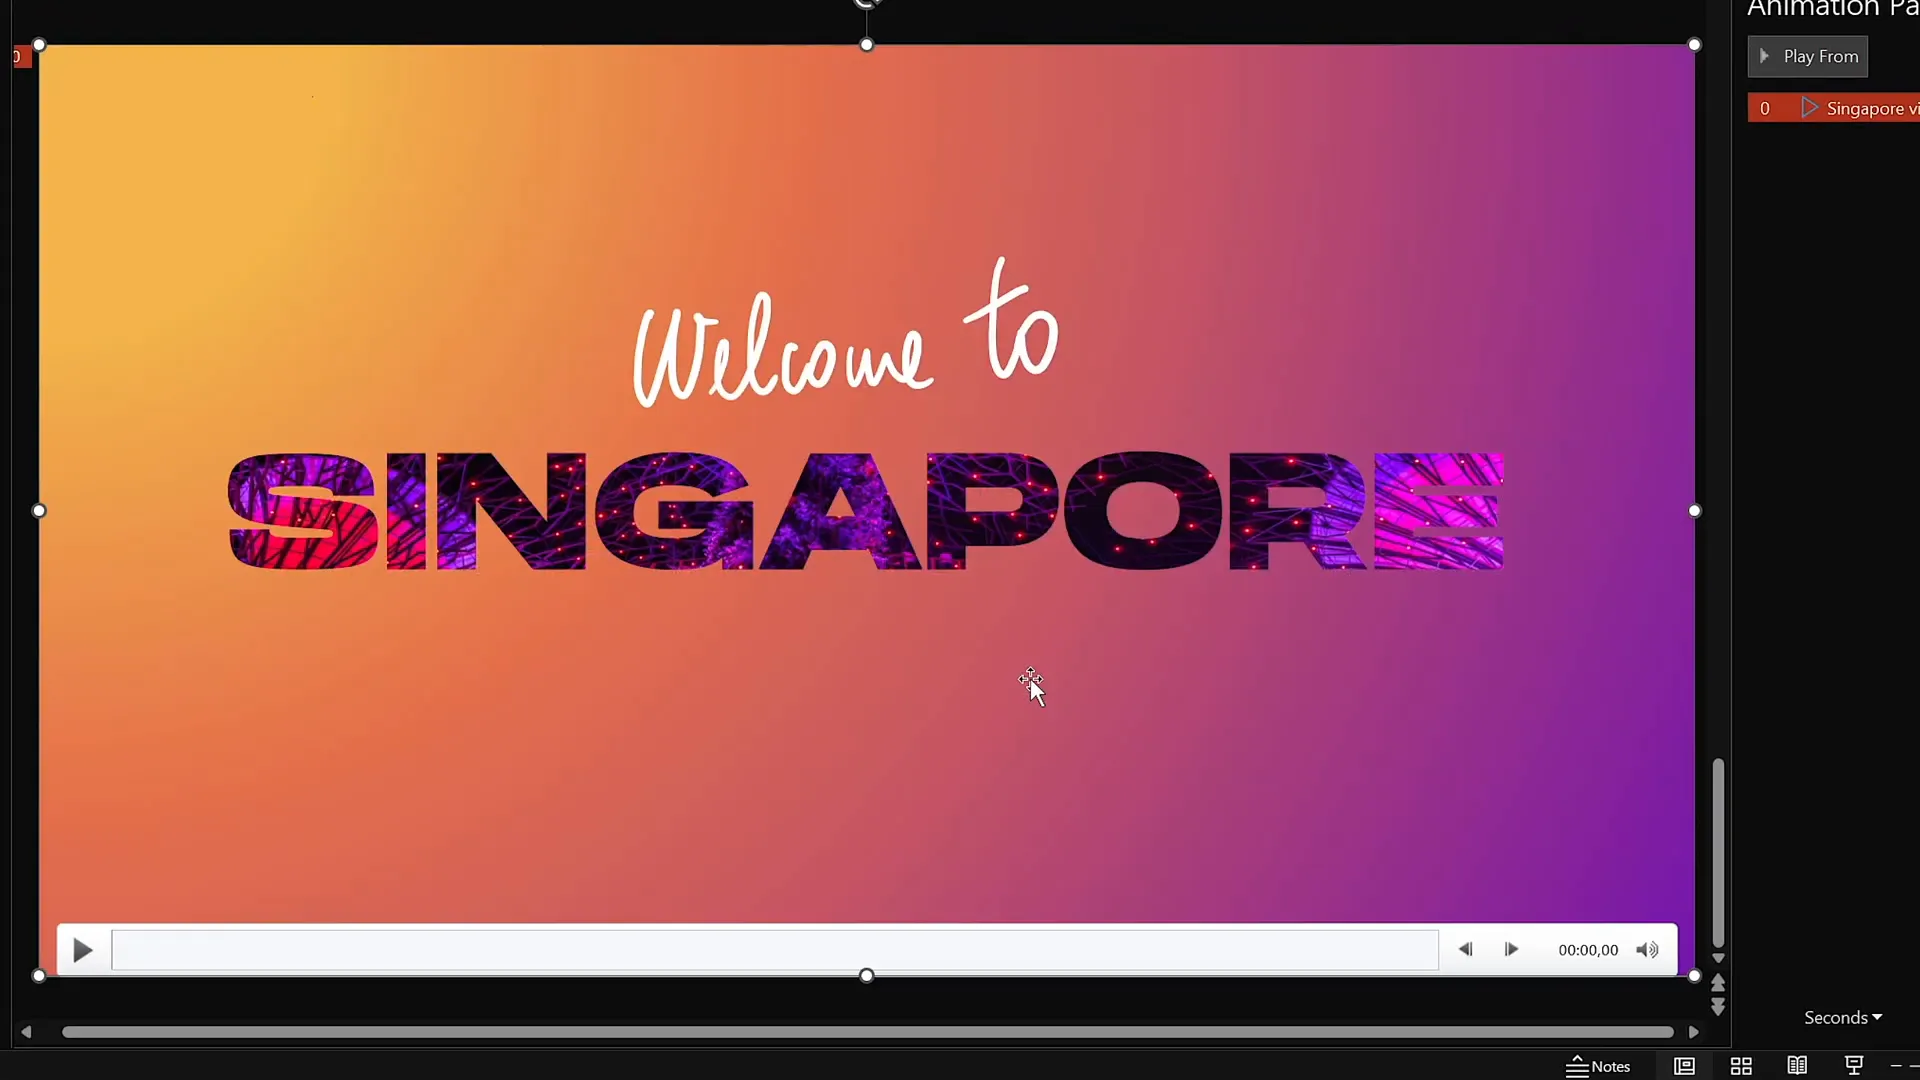
Now, your video plays seamlessly behind the cutout letters, creating an immersive animated title slide.
Creating Exit Animations for Text and Shapes
To add polish and professionalism, apply exit animations to your text and shapes so they gracefully disappear, transitioning to the next slide.
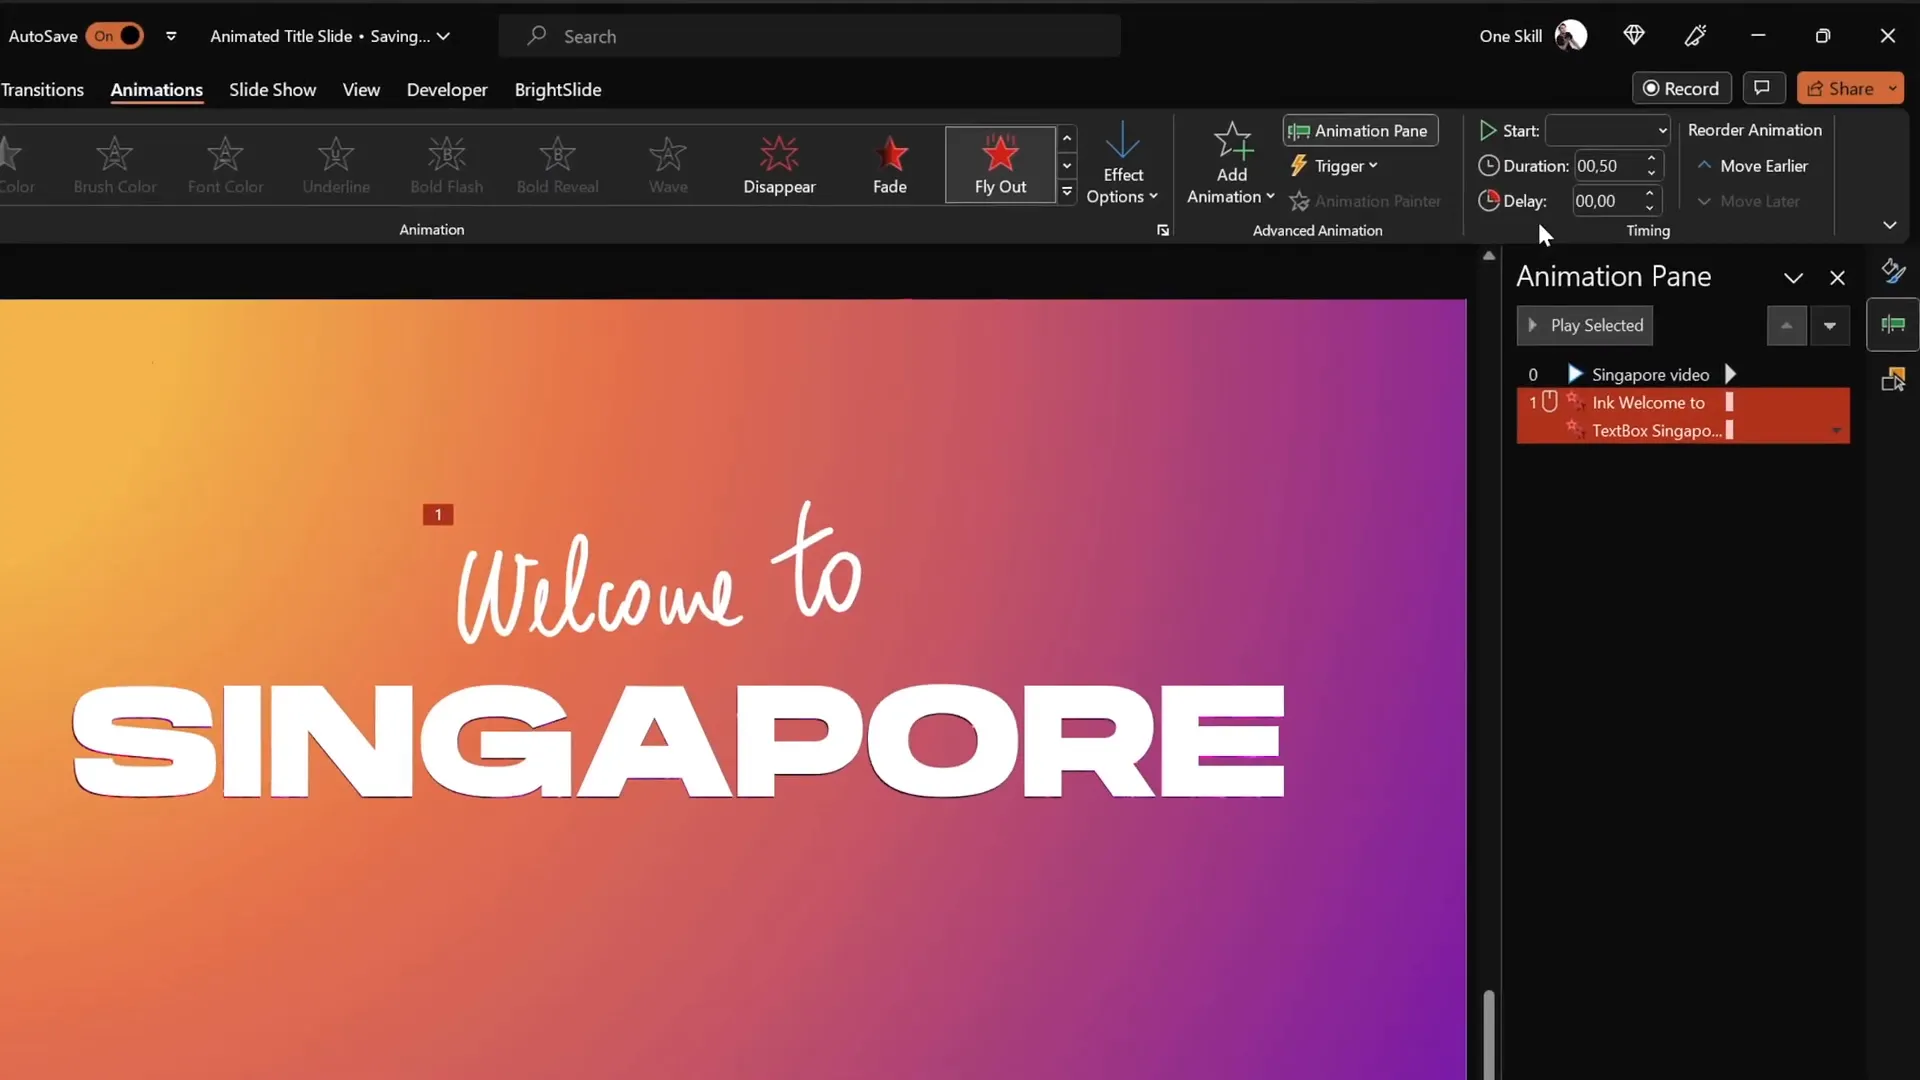
Step 10: Add Exit Animations to Text Boxes
- Select both the handwritten and title text boxes on the second slide.
- Go to Animations > Add Animation and choose the Exit Cloud animation.
- Set both animations to start With Previous and use the To Top direction.
- Increase the duration to 1 second for a smoother effect.
- In animation options, enable Maximum Smooth Start for natural movement.
- For the title text, set the exit animation to happen By Letter with a percentage delay for a letter-by-letter fly-out.
Step 11: Animate the Gradient Cutout Rectangle
- Select the gradient rectangle with the cutout text.
- Add the Grow/Shrink animation.
- Set the animation to start With Previous alongside the text exit animations.
- Set the duration to 2 seconds and enable Maximum Smooth Start.
- Set the growth size to an unusual number like 9000% to make the rectangle dramatically expand and reveal more of the video behind.
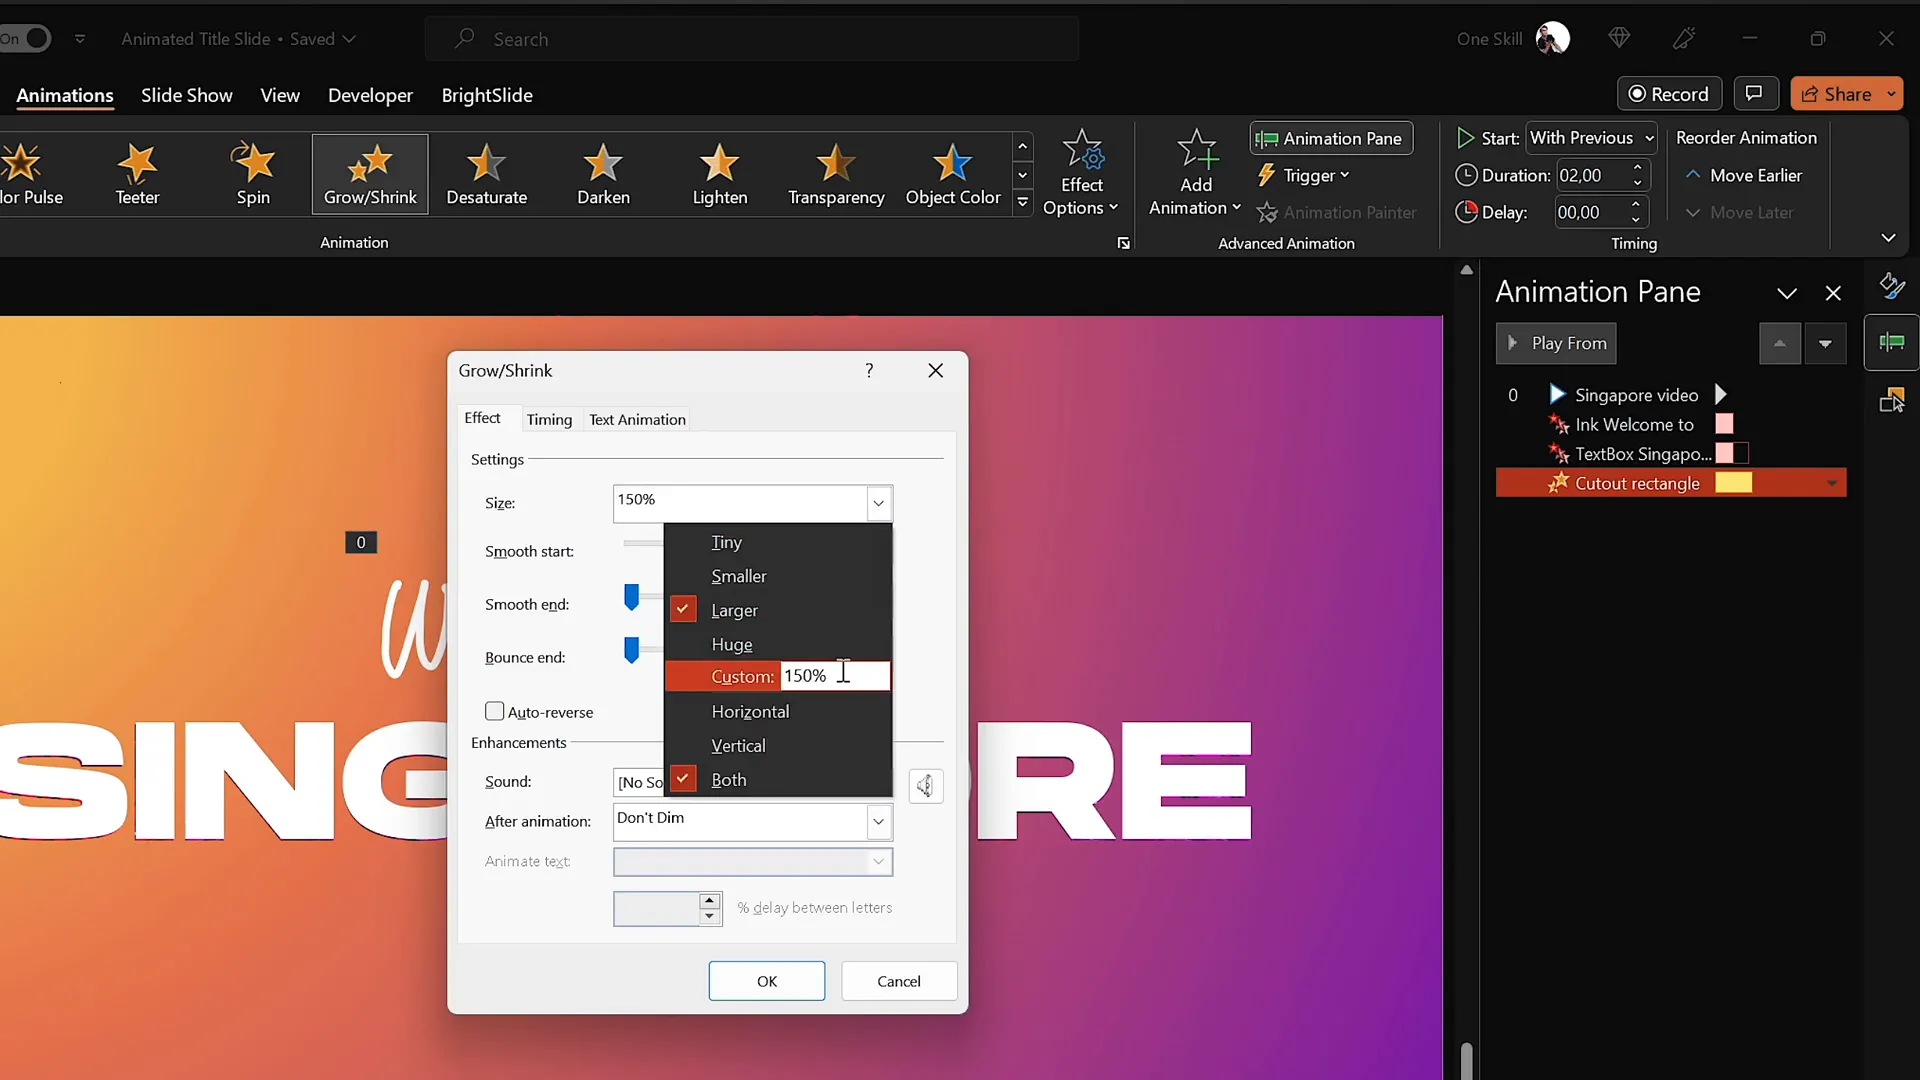
This final animation zooms the cutout rectangle, producing a compelling zoom-away effect that completes your animated title slide.
Final Touches and Presentation Tips
Before presenting, make sure to disable slide transitions on your second slide. This ensures that when you jump from the first slide to the second, there’s no visible disruption or delay, creating a smooth visual flow.
- Set slide transition to None on the second slide.
- Rename all objects in the Selection Pane for easier management (e.g., “Welcome Text,” “Singapore Text,” “Gradient Rectangle Cutout,” “Background Video”).
- Preview your entire animation sequence to ensure smooth timing and visual appeal.
With these steps, you’ll have a professional and captivating animated title slide that grabs your audience’s attention from the very first moment.
Congratulations! You’ve mastered a powerful technique in PowerPoint animated slide design that can be adapted for various themes and presentations.
Frequently Asked Questions
Q1: Can I use this animated title slide technique on Mac versions of PowerPoint?
Yes, most of these features are available on PowerPoint for Mac, especially if you are using Microsoft 365. However, some animation nuances or the Draw tool may differ slightly. Always test your animations on the device you’ll be presenting on.
Q2: Do I need a graphics tablet to use the PowerPoint Draw tool?
No, you can use a mouse or touchpad to draw, but a graphics tablet like the Wacom Intuos offers much smoother and more natural handwriting results. It’s highly recommended if you want professional-looking freehand text.
Q3: How can I get the Hanson font used in this tutorial?
The Hanson font is available for free on various font websites. A reliable source is dafontfree.io. After downloading, install it on your system to use it in PowerPoint.
Q4: Can I use other videos besides the Singapore super trees video?
Absolutely! You can choose any royalty-free video that fits your presentation topic or theme. Websites like DepositPhotos, Pexels, and Pixabay offer great options. Just make sure the video resolution and length suit your slide design.
Q5: How do I ensure my animations play automatically during the presentation?
Set all animations to start With Previous in the Animation Pane. For videos, enable Play Automatically and Loop in the playback options. Also, avoid slide transitions between animated slides for a seamless effect.
Summary Table: Key Steps in Creating a PowerPoint Animated Slide Design
| Step | Action | Purpose |
|---|---|---|
| 1 | Insert full-screen rectangle | Base for gradient background |
| 2 | Apply radial gradient fill | Add depth and visual interest |
| 3 | Insert large title text box | Main focus of slide |
| 4 | Draw handwritten text with Draw tool | Add personal, creative touch |
| 5 | Add entrance animations (Replay & Fly In) | Engage audience with movement |
| 6 | Duplicate slide and subtract title text from rectangle | Create cutout text effect |
| 7 | Insert and align background video | Dynamic visual behind cutout text |
| 8 | Add exit animations (Cloud Exit, Grow/Shrink) | Smooth transition to next slide |
| 9 | Disable slide transitions on second slide | Ensure seamless slide change |
Conclusion
Mastering PowerPoint animated slide design can dramatically improve the impact of your presentations. By combining gradient backgrounds, custom fonts, freehand text, video integration, and polished animations, you create a visually stunning title slide that immediately captures attention.
This tutorial from One Skill PPT demonstrates how accessible and powerful PowerPoint can be when you explore its animation and shape tools creatively. Whether you’re preparing a business pitch, educational presentation, or creative portfolio, these techniques will help you stand out.
For more advanced PowerPoint tips and animation techniques, check out the One Skill PPT YouTube channel and their playlist dedicated to PowerPoint animations.
Happy designing, and may your next presentation be your best yet!