
If you’re looking to elevate your PowerPoint presentations with interactive, clickable, and beautifully animated slide designs, you’ve come to the right place. This detailed guide will walk you through creating a PowerPoint animated slide design that is both clickable and scrollable, allowing you to engage your audience with seamless animations and interactive elements.
Whether you’re a professional presenter, educator, or designer, mastering this technique will add a new dimension to your slides. Plus, you don’t need advanced software—just Microsoft PowerPoint 365 and some handy free tools. Let’s dive in!
Table of Contents
- Getting Started with PowerPoint and Setting Up Your Slide
- Inserting and Formatting the Background Photo
- Adding Text Boxes for Clickable Items
- Cutting Out Objects from the Photo for Animation
- Positioning and Matching Cutouts on the Slide
- Making the Cutouts Clickable with Hyperlinks
- Applying Morph Transitions for Smooth Animations
- Designing Additional Slides for Each Clickable Item
- Fixing Common Morph Transition Issues
- Final Tips and Conclusion
- Frequently Asked Questions (FAQ)
Getting Started with PowerPoint and Setting Up Your Slide
To kick off your PowerPoint animated slide design, open Microsoft PowerPoint 365 and start with a blank slide. The first step is to create a visually appealing background that sets the tone for your interactive content.
Here’s how you can create a beautiful gradient background for your slide:
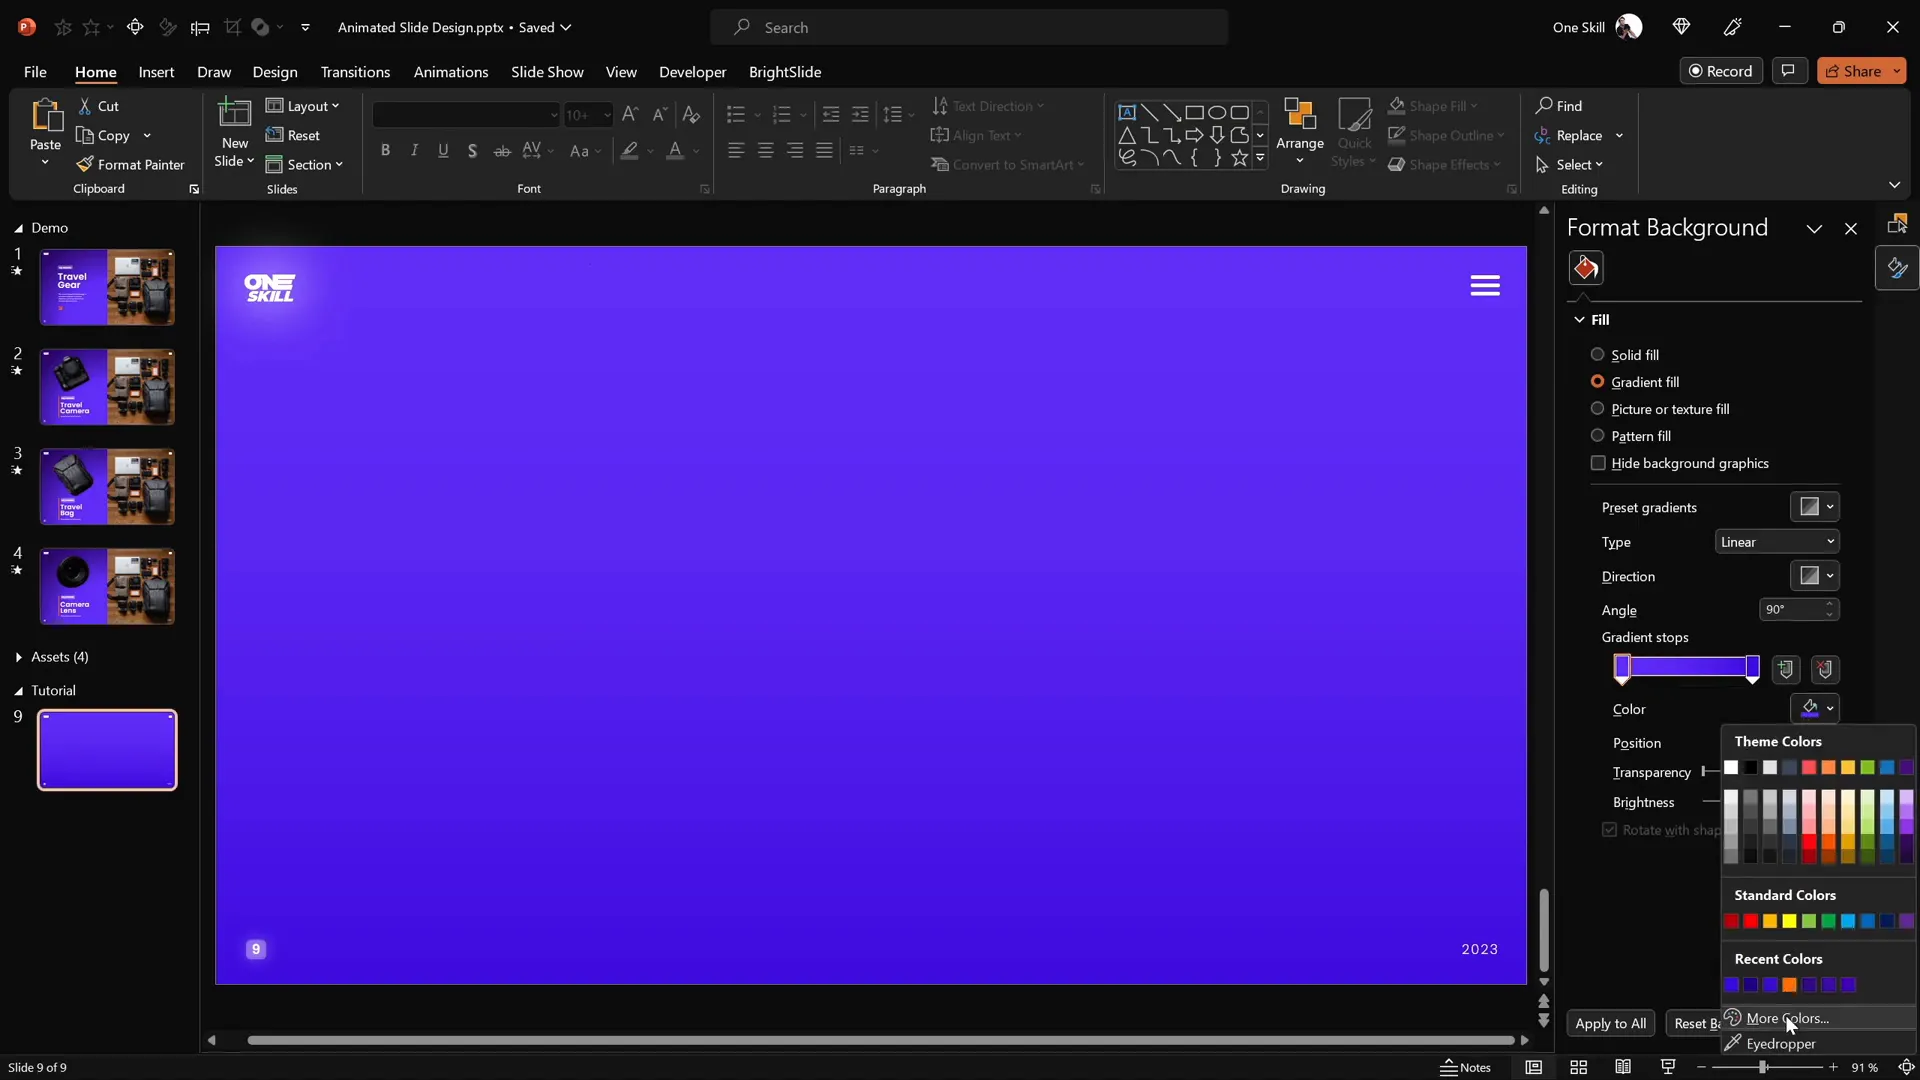
- Right-click on the slide background and choose Format Background.
- Select Gradient fill and set two color stops to create a smooth linear gradient.
- Use the exact hex color codes for precision:
- First color stop: Insert hex code here
- Second color stop: Insert hex code here
- Set the gradient type to Linear for a clean transition between colors.
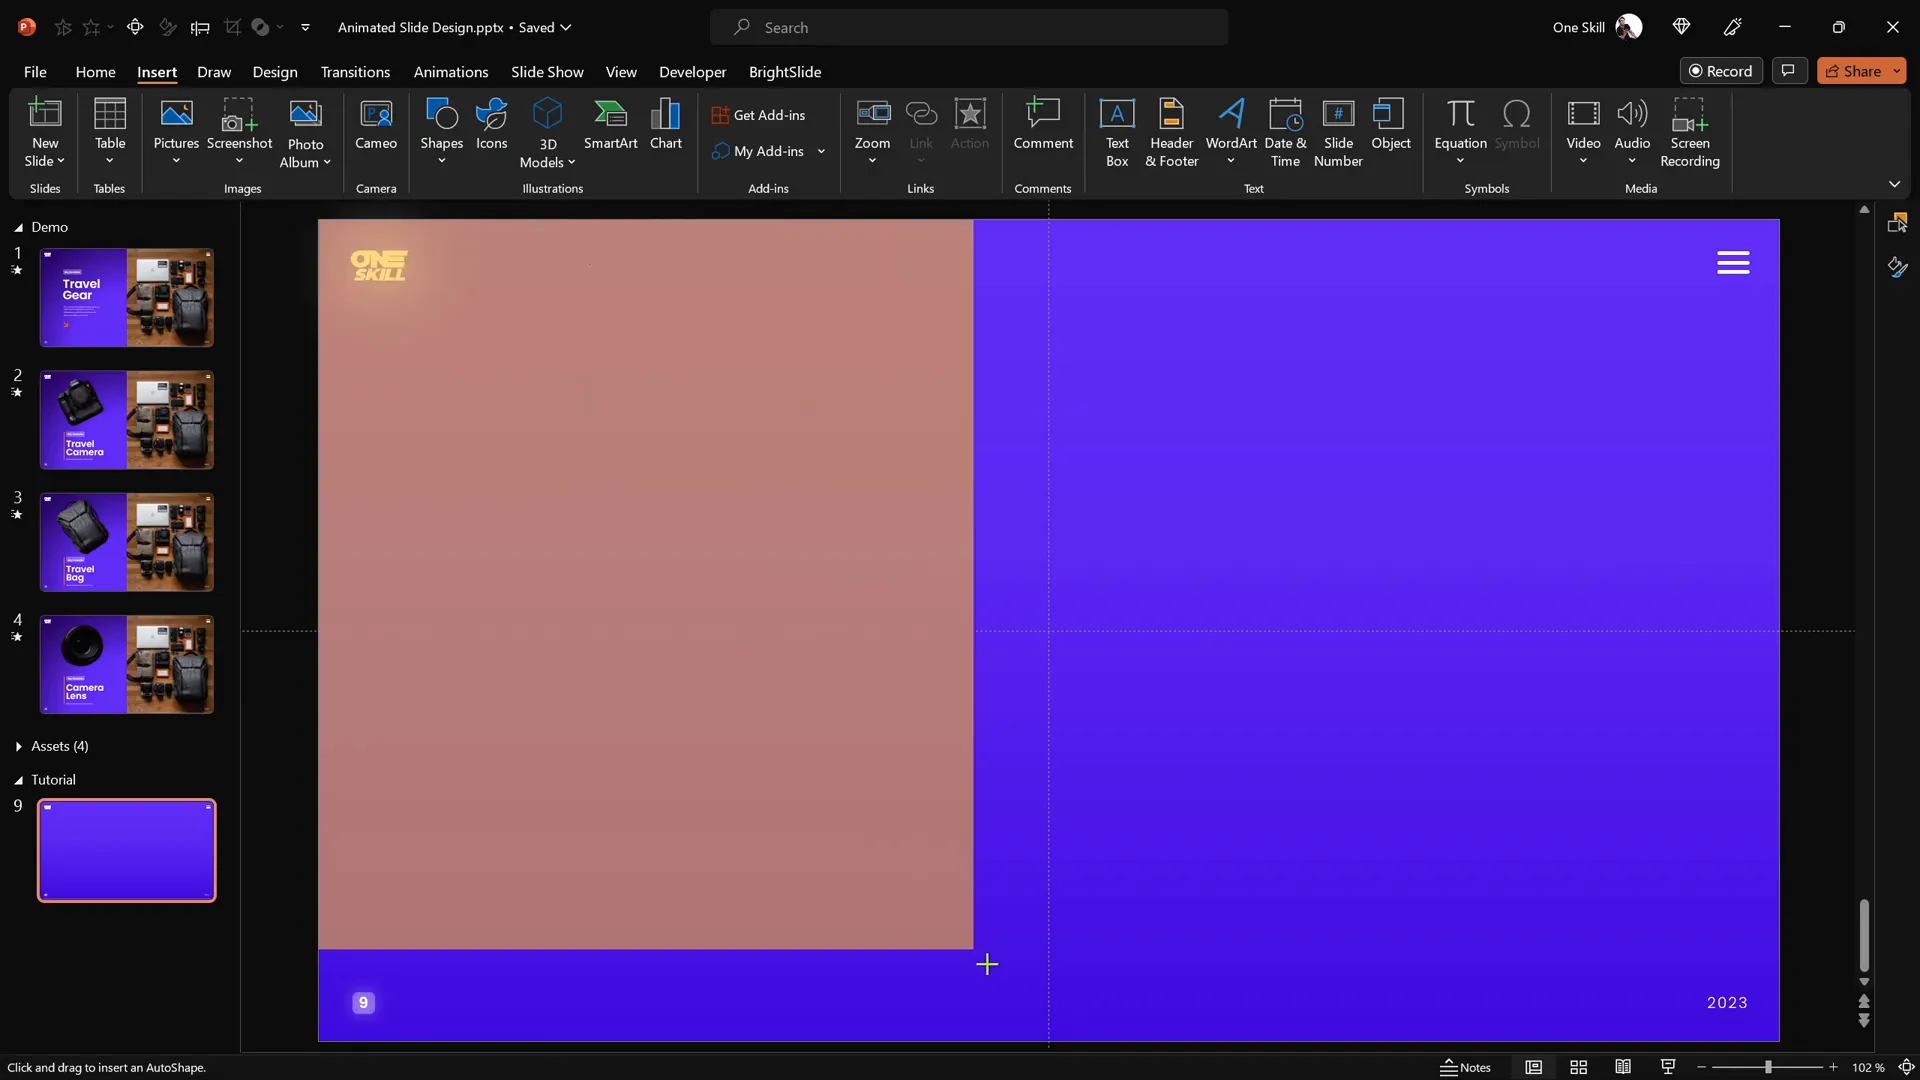
After setting the gradient background, activate slide guides to help you position elements precisely. You can enable slide guides by going to the View tab and checking Guides. This helps locate the center and edges of your slide for balanced design.
Next, insert a large rectangle shape that covers the entire left side of your slide. This will serve as a subtle panel for your clickable text elements.
- Go to Insert > Shapes > Rectangle.
- Draw the rectangle so it covers the left half of the slide.
- Apply a subtle gradient fill to the rectangle to harmonize with the background, using two soft colors.
- Add a soft shadow on the right edge of the rectangle to create depth and make it pop visually.
To save time, you can use the Format Painter tool to copy the gradient style from the background to the rectangle and then customize the shadow effects.
Inserting and Formatting the Background Photo
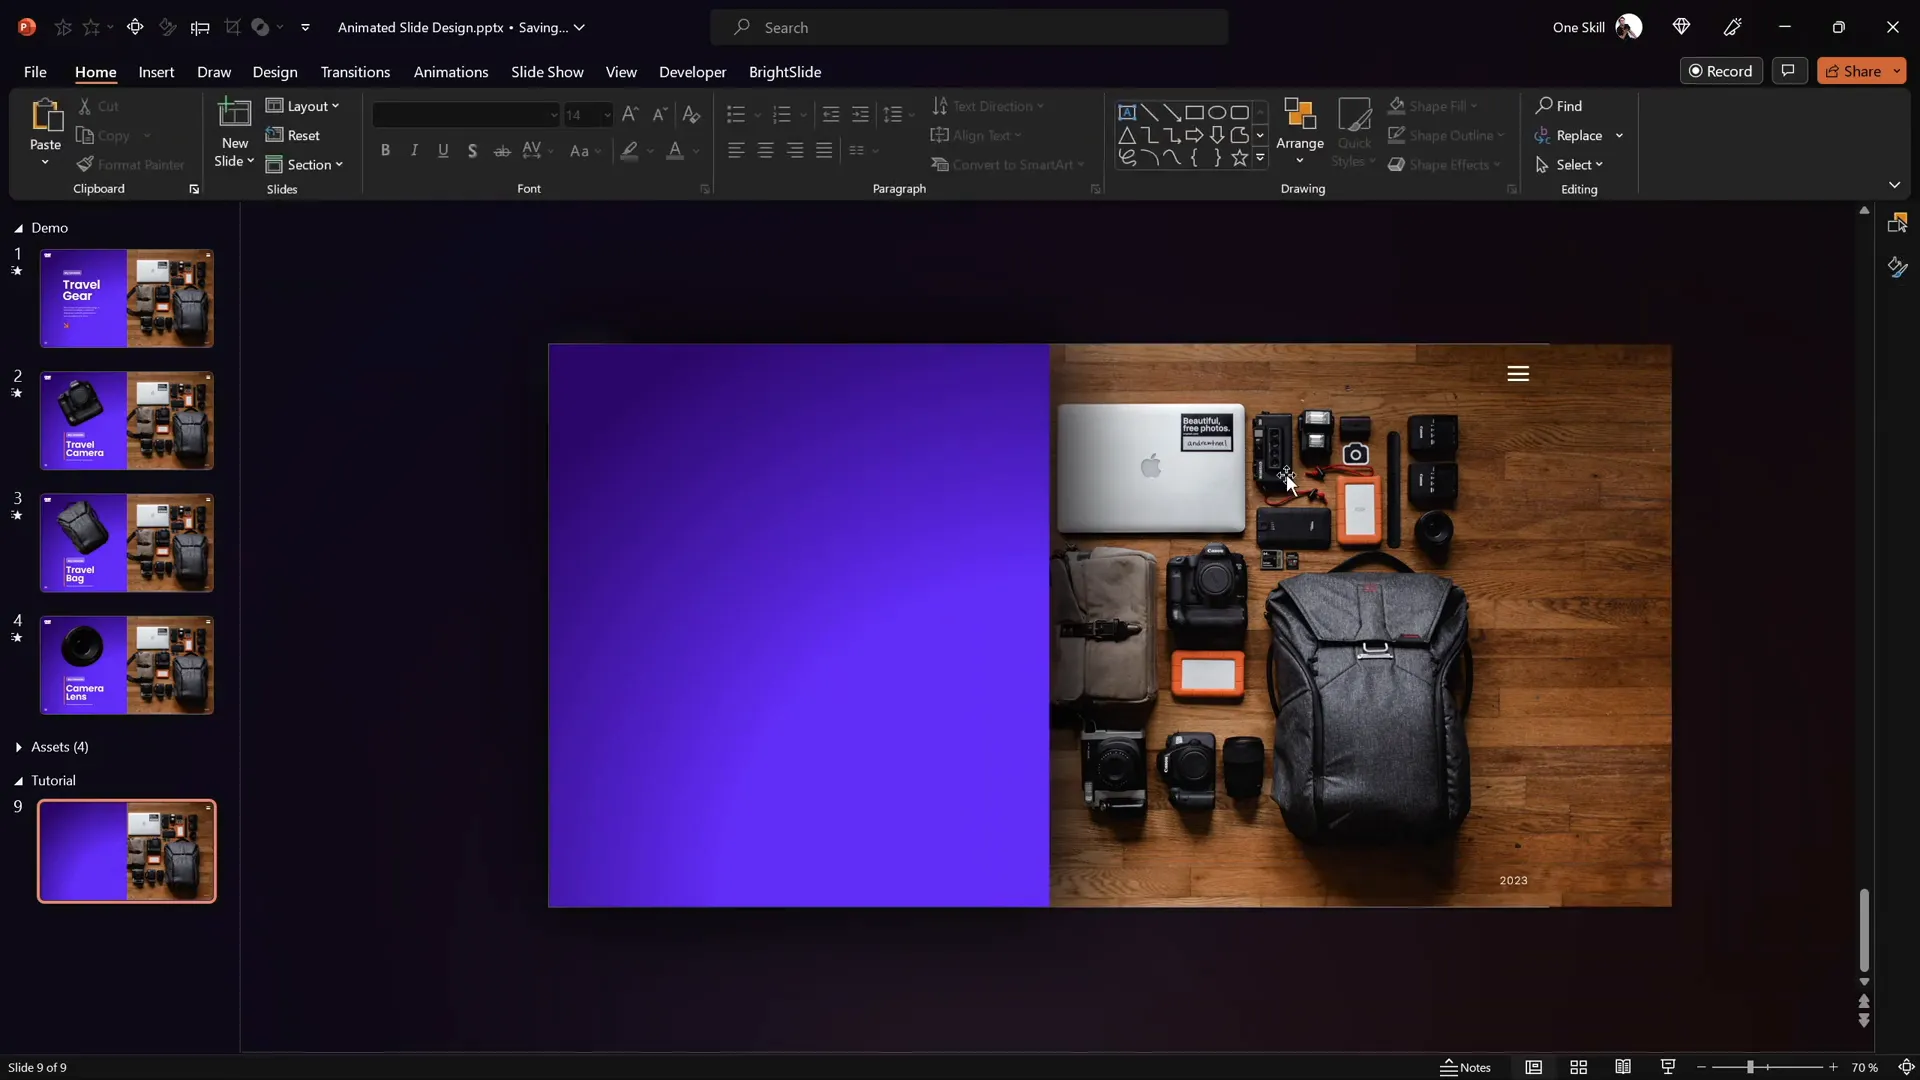
The next step is to insert a high-quality photo that will serve as the main visual on the right side of your slide. For this tutorial, we’ll use a beautiful travel-themed photo, but you can use any image you prefer.
- Download your chosen image from a free resource like Unsplash.
- In PowerPoint, go to Insert > Pictures and select your downloaded photo.
- Position the photo on the right side of the slide.
- Use the Crop tool to trim the right edge of the photo so it fits perfectly within the slide boundary.
- Send the photo to the back so your left rectangle panel and other elements remain visible.
Make sure the photo and rectangle do not cover essential elements like logos or slide numbers by sending them to the back layer appropriately.
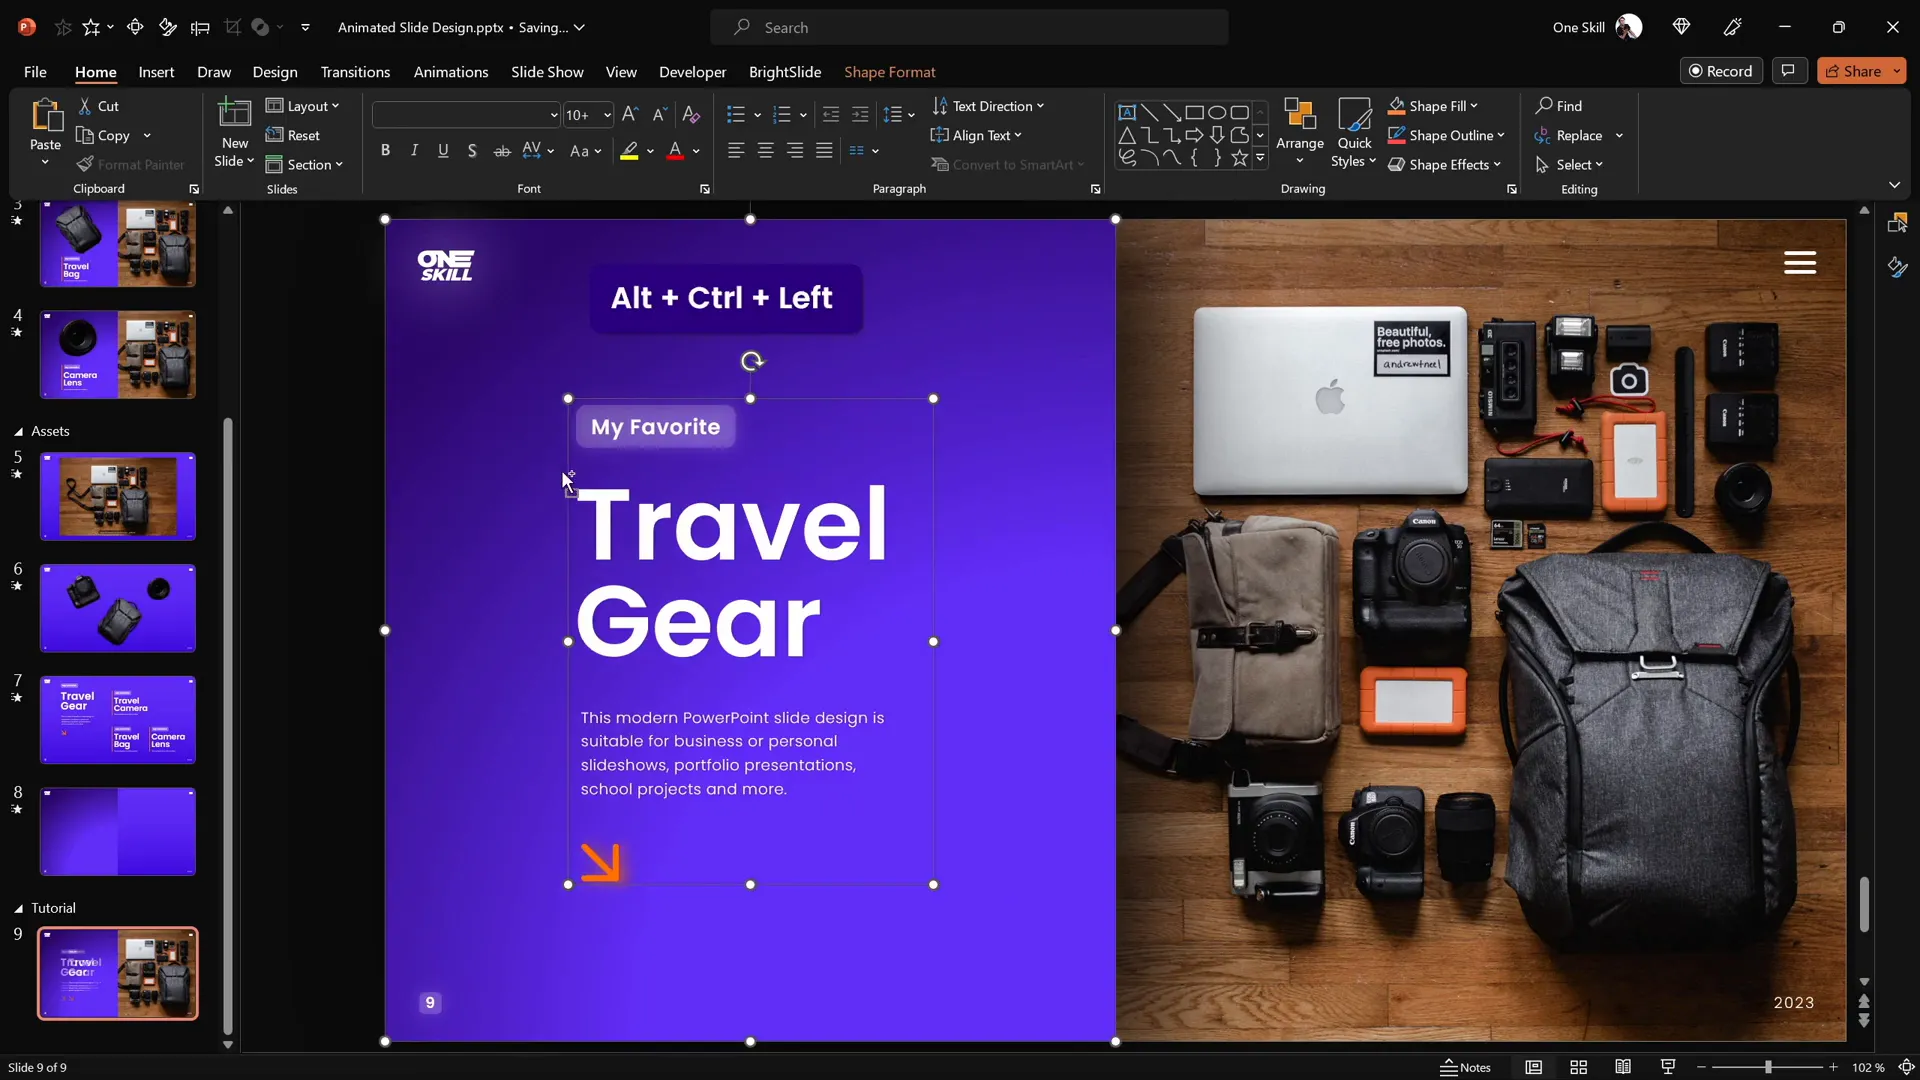
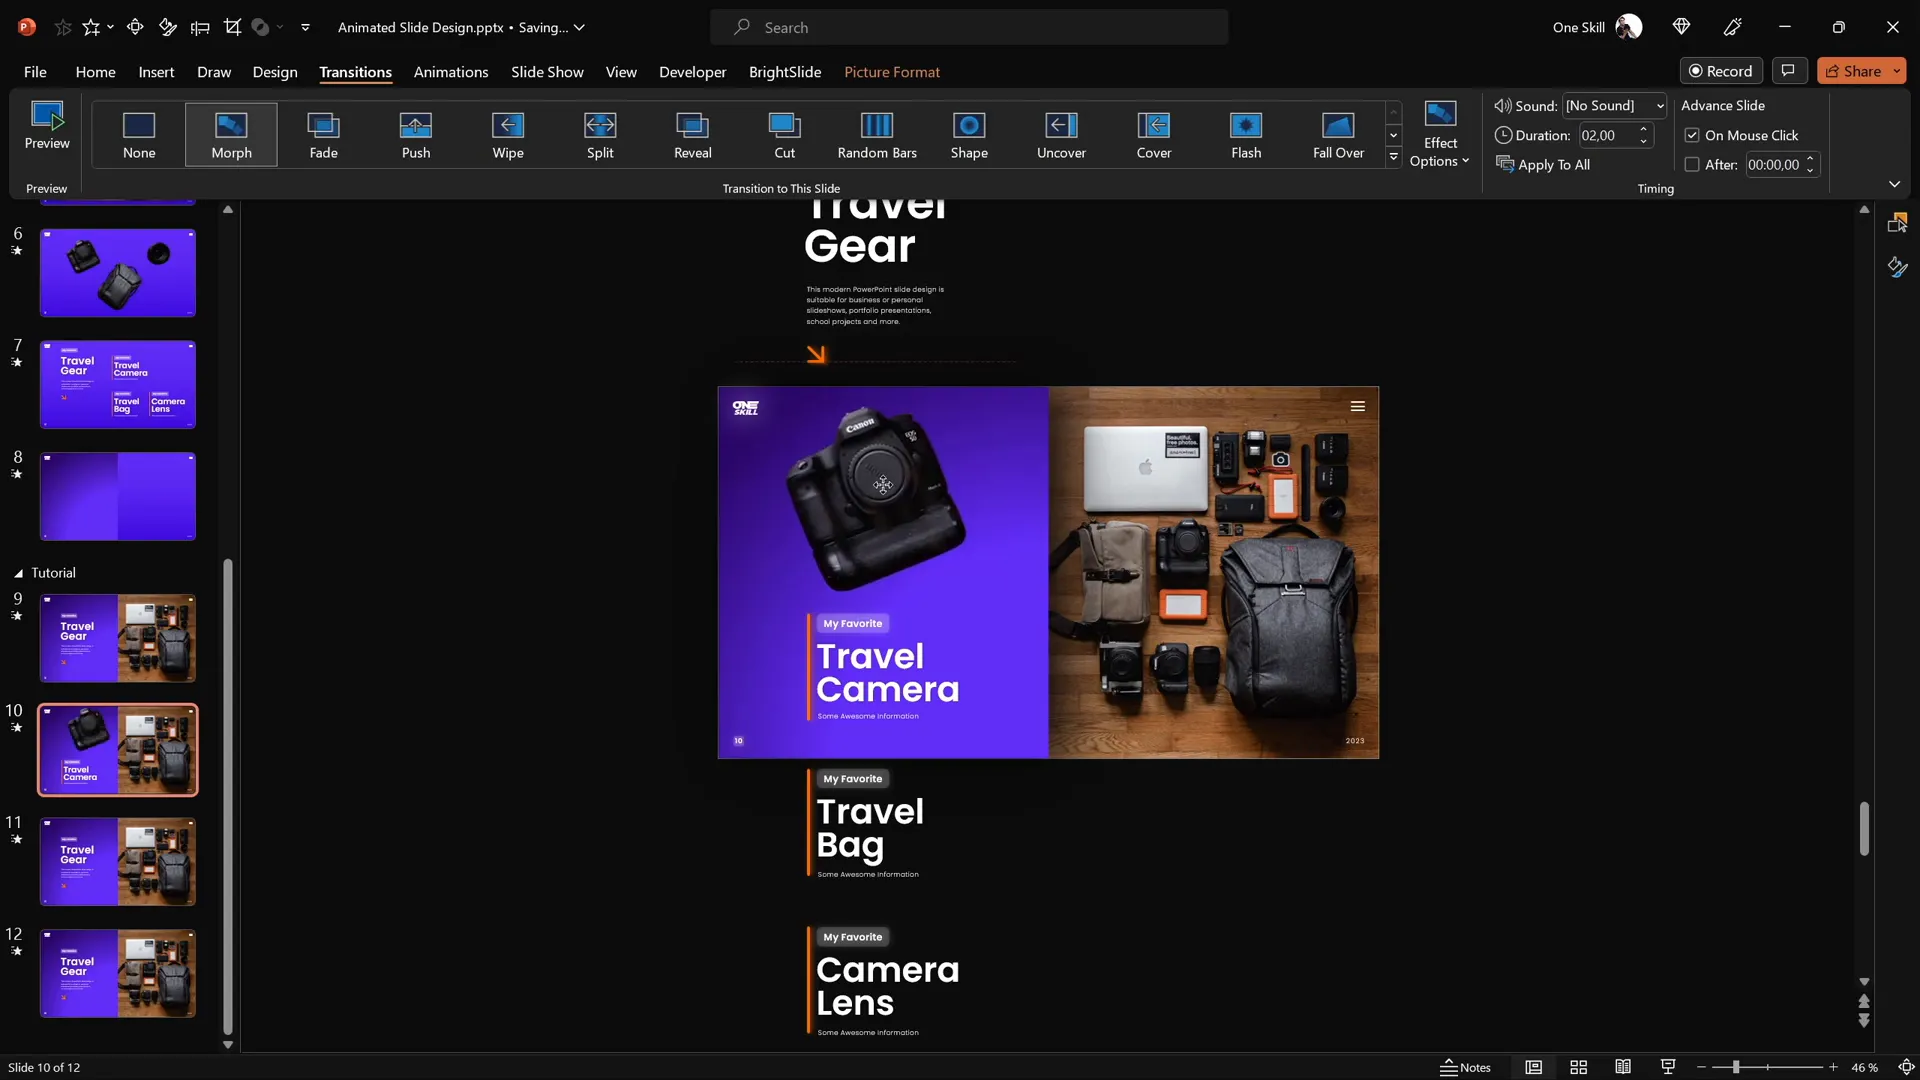
Adding Text Boxes for Clickable Items
Now it’s time to add descriptive text boxes that correspond to clickable parts of your image. In this example, we will have three clickable items:
- Travel Camera
- Travel Bag
- Camera Lens
To maintain a professional and cohesive look, use fonts like Poppins Semi Bold for headings and Poppins Light for supporting text.
Here’s how to add and align text boxes effectively:
- Create text boxes for each clickable item and group related text elements together.
- Place these text groups inside the left rectangle panel, aligning them neatly to the left.
- Use alignment tools to center your text vertically and horizontally within the panel. You can do this via Shape Format > Align options or by using handy add-ins like BrightSlide for quick alignment shortcuts.
- Arrange the text groups vertically with equal spacing for a balanced layout.
If you want to save time, prepare your text box groups in advance and copy-paste them onto your slide.
Cutting Out Objects from the Photo for Animation
To create an interactive and animated effect, you need to separate key objects from the photo as individual layers. This allows you to animate each item independently.
While PowerPoint has basic cropping tools, for more precise cutouts, use a free online photo editor like Photopea, which offers advanced selection tools similar to Photoshop.
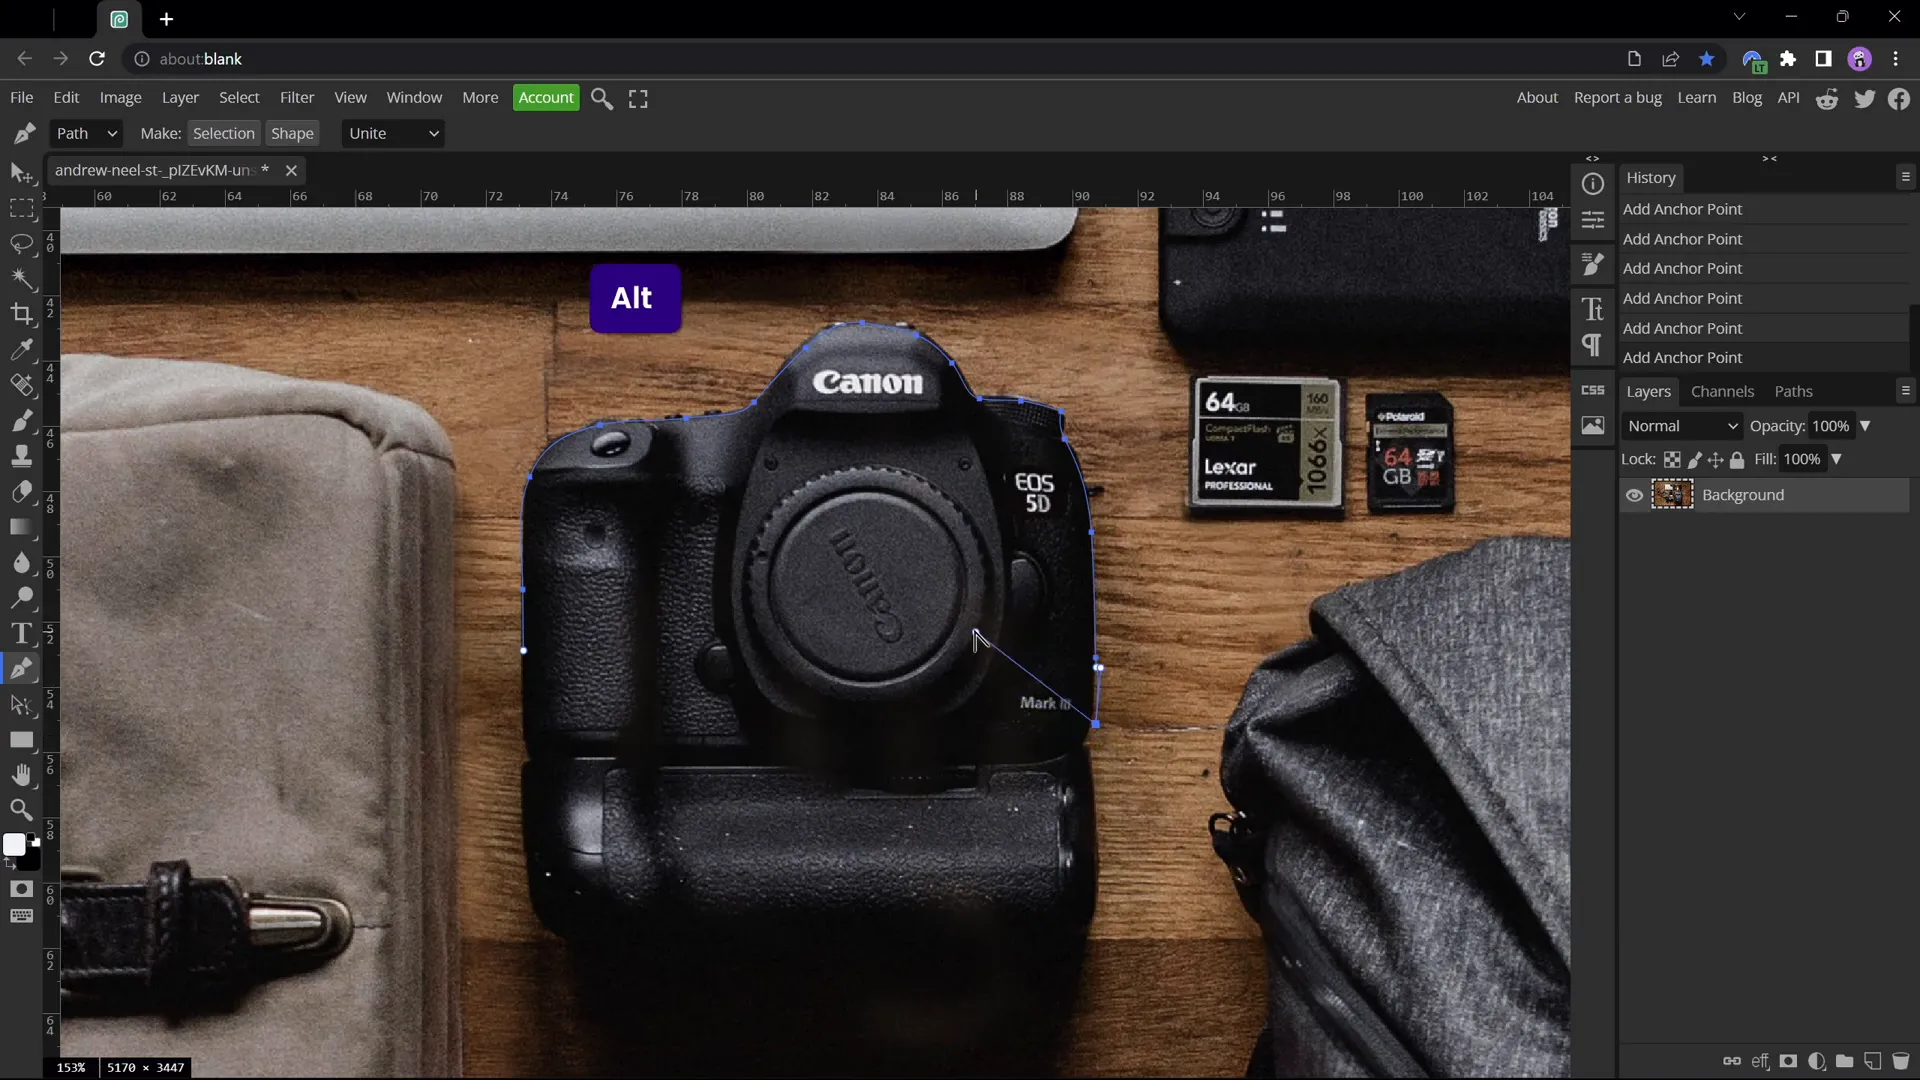
Here’s a step-by-step process to cut out an object (for example, the camera):
- Open the photo in Photopea.
- Zoom in on the object you want to cut out by holding Alt and scrolling.
- Select the Pen Tool and ensure the path mode is active.
- Click points around the edges of the object to create a selection path. Use Alt to create sharp corners and the spacebar to adjust points.
- Close the path near the starting point and click Create Selection.
- Apply a mask to hide everything outside the selection.
- Trim the image to remove empty space (Image > Trim).
- Export the cutout as a PNG file with a transparent background.
Repeat this process for each clickable item you want to animate separately. In this tutorial, the three objects are:
- Camera
- Travel Bag
- Camera Lens
Positioning and Matching Cutouts on the Slide
After exporting your cutouts, insert them back into your PowerPoint slide and position them precisely over their corresponding original parts in the background photo.
To ensure perfect alignment, temporarily recolor the cutouts with a bright color (e.g., red) using the Picture Format > Color options. This makes it easier to see if the cutouts match the photo exactly.
Steps to position and match cutouts:
- Select all cutouts and recolor them to a bright color.
- Move each cutout over its original photo section.
- Adjust rotation, size, and position using arrow keys and corner handles while holding Ctrl + Shift to resize proportionally from the center.
- Once perfectly aligned, select all cutouts and reset the picture color to remove the recoloring.
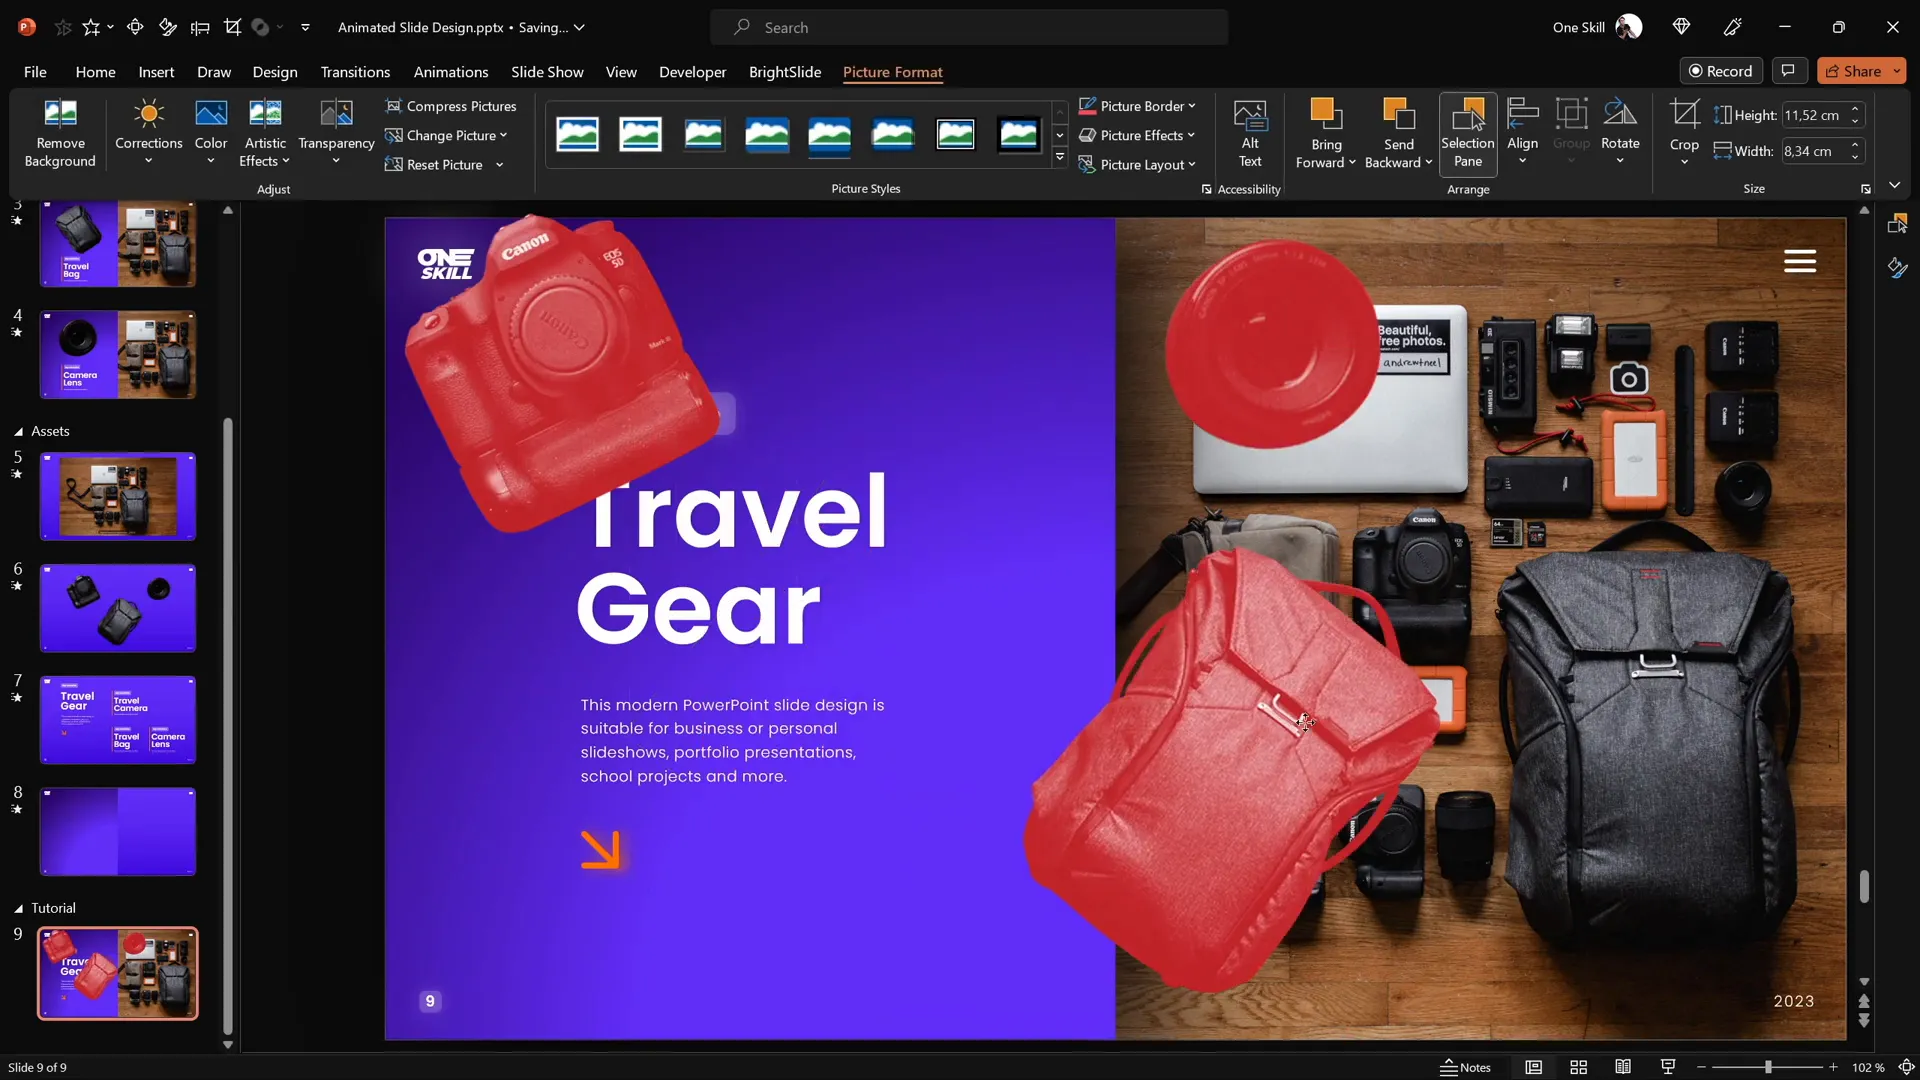
At this point, your slide should have the original photo in the background and three cutouts layered on top, ready for animation.
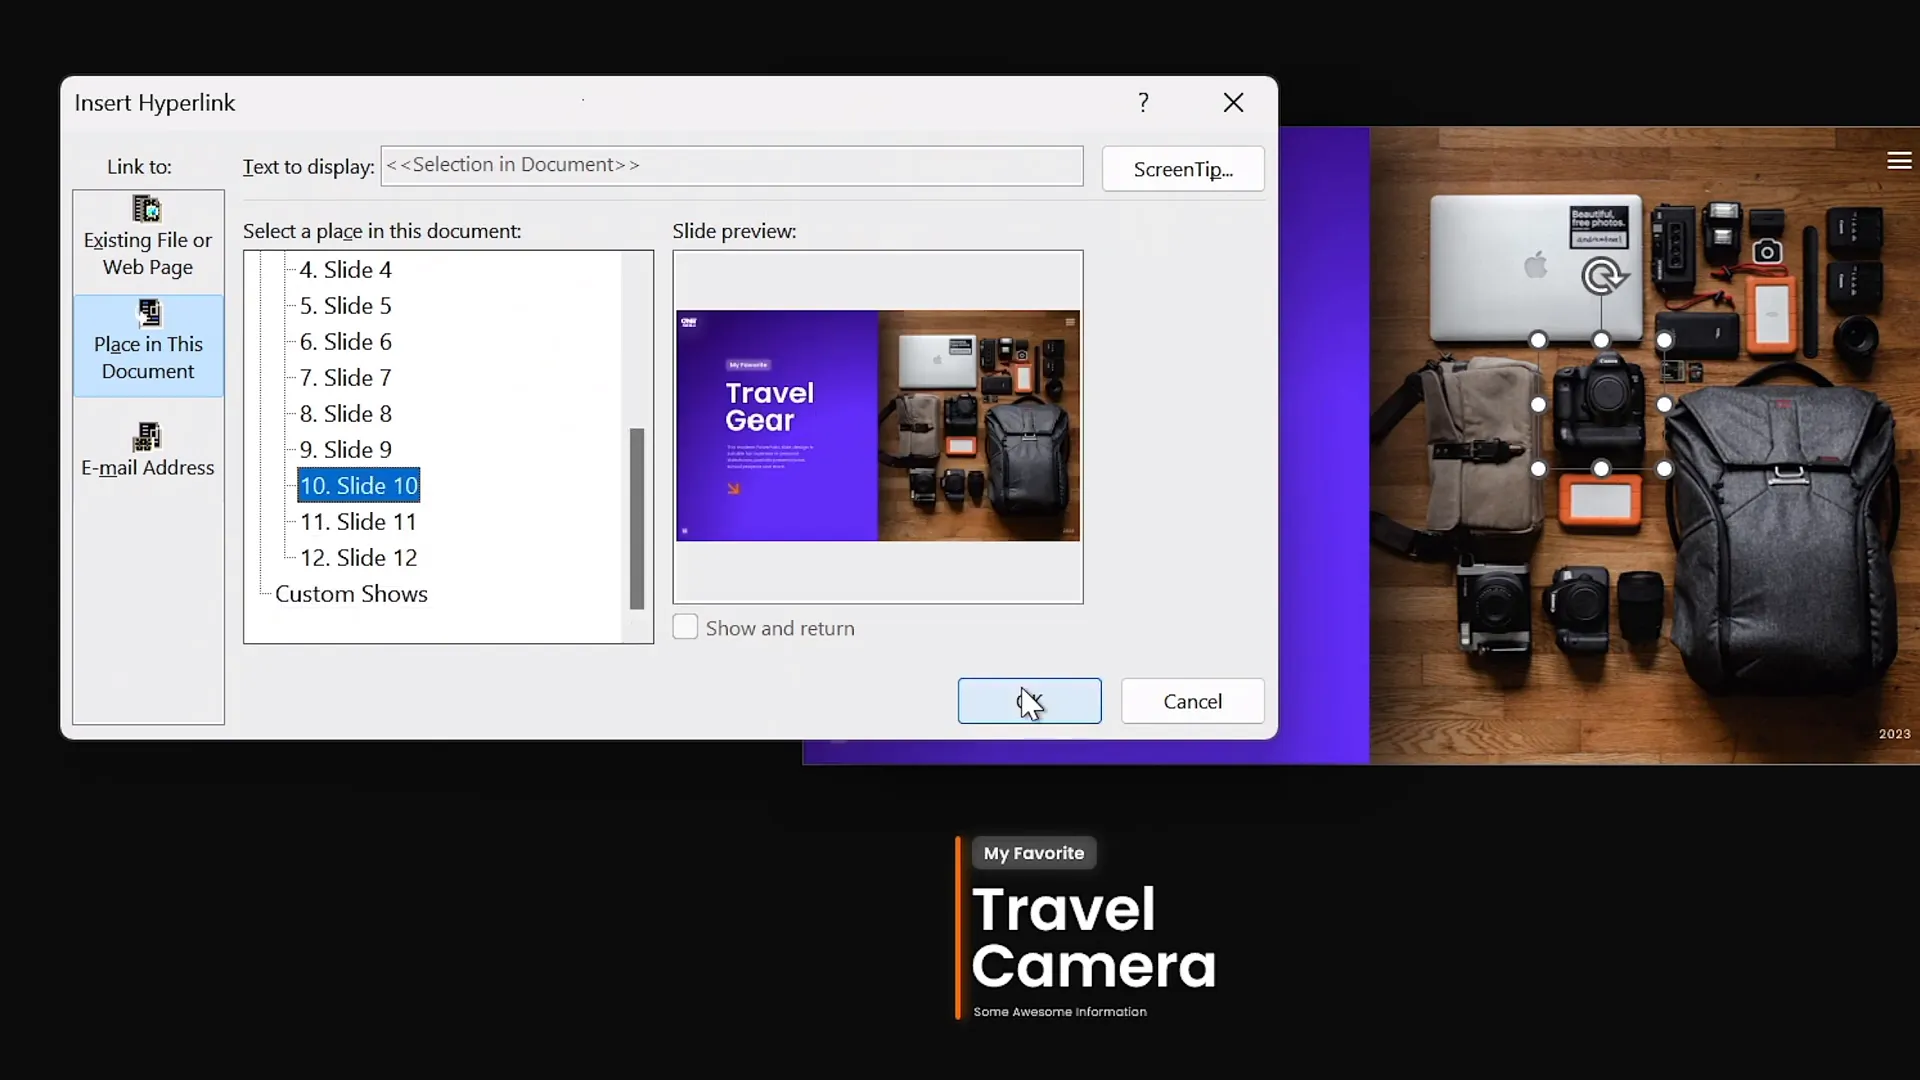
Making the Cutouts Clickable with Hyperlinks
To make your slide interactive, you’ll add hyperlinks to the cutouts so that clicking on each one navigates to a dedicated slide with further animated details.
Since each clickable item needs its own slide, start by duplicating your current slide three times, so you have four slides in total:
- Slide 1: Introduction with clickable cutouts
- Slide 2: Camera details
- Slide 3: Travel bag details
- Slide 4: Camera lens details
Next, add hyperlinks to the cutouts on the introduction slide:
- Select the camera cutout, press Ctrl + K to insert a hyperlink.
- Choose Place in This Document and link it to the camera slide (e.g., slide 2).
- Repeat for the travel bag cutout, linking it to the travel bag slide (e.g., slide 3).
- Repeat for the camera lens cutout, linking it to the camera lens slide (e.g., slide 4).
Copy the cutouts with hyperlinks and paste them onto the other slides, replacing the old cutouts. This maintains interactivity throughout your presentation.
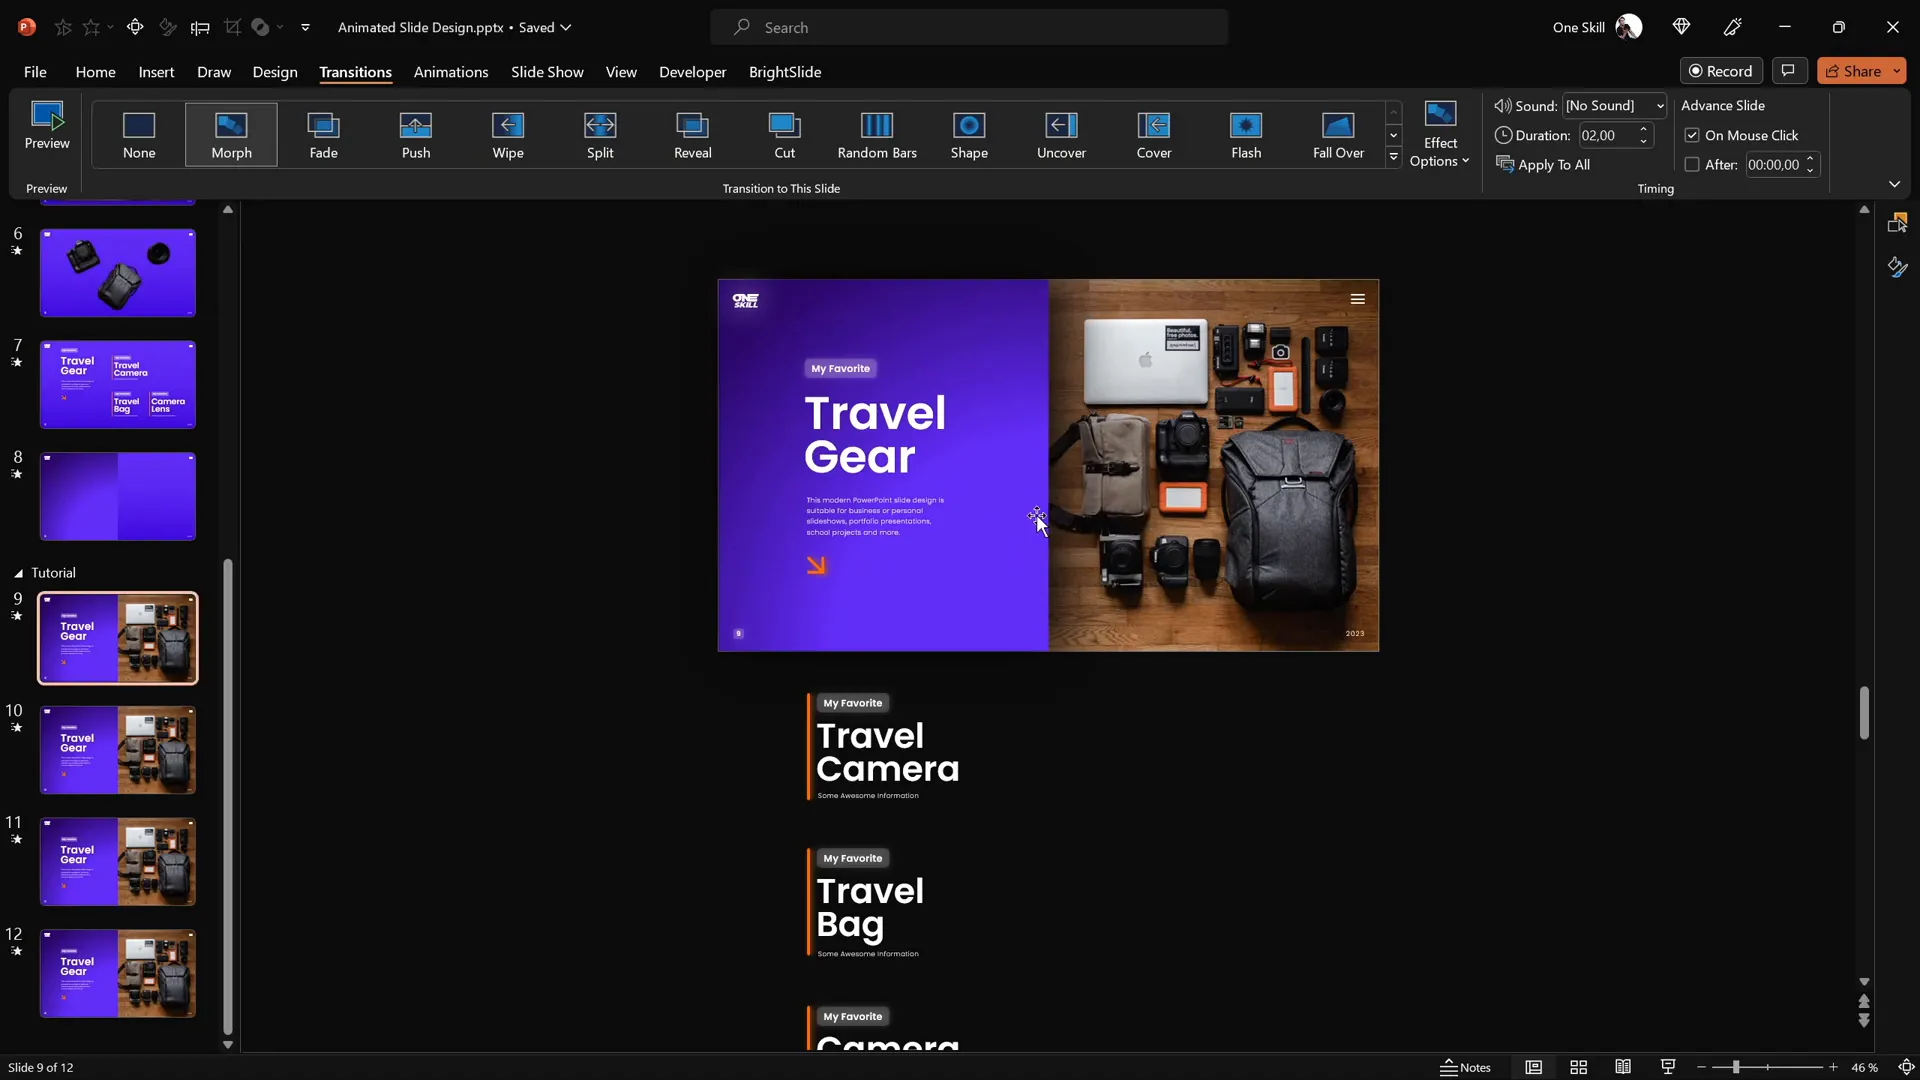
Applying Morph Transitions for Smooth Animations
The magic of this interactive slide design is powered by the Morph Transition, which animates objects smoothly between slides based on their names and positions.
To apply Morph transitions:
- Select all four slides.
- Go to the Transitions tab.
- Choose Morph from the transition effects.
This transition will animate the changes in size, position, and rotation of the cutouts as you navigate between slides, creating a dynamic and engaging effect.
Designing Additional Slides for Each Clickable Item
Customize each of the additional slides to focus on the selected item and its corresponding text:
- Camera Slide: Enlarge and reposition the camera cutout prominently. Adjust the text boxes to highlight the camera details.
- Travel Bag Slide: Similarly, resize and position the travel bag cutout, and move visible text boxes to align with this focus.
- Camera Lens Slide: Emphasize the camera lens cutout with size and position adjustments. Align text accordingly.
Make sure to hide or move away unrelated text boxes on each slide to keep the focus clear.
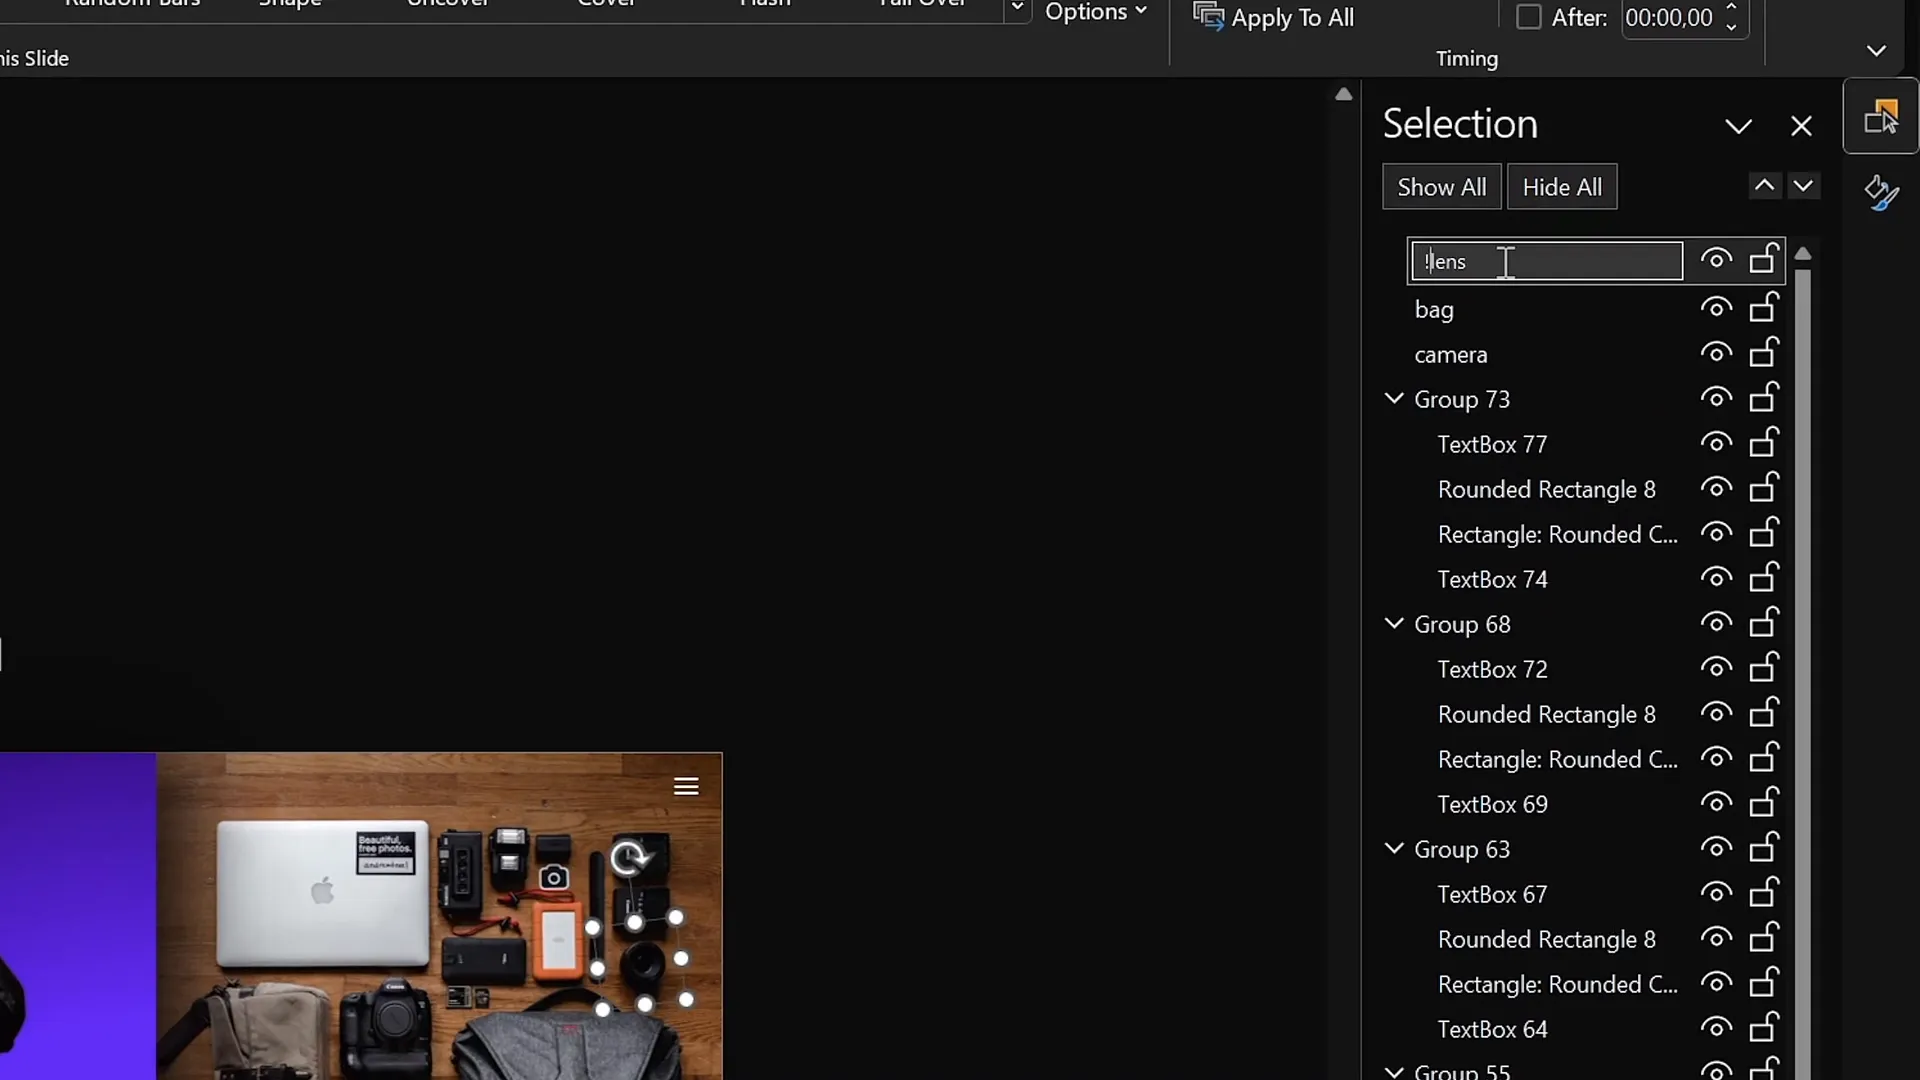
Fixing Common Morph Transition Issues
Sometimes, Morph transition can struggle to animate objects that look very similar across slides, such as multiple camera lens images. This can cause unexpected or “funny” animations.
To fix this, use naming conventions in the Selection Pane to help PowerPoint differentiate objects:
- Open the Selection Pane via Home > Select > Selection Pane.
- Rename all instances of a particular object (e.g., the lens) using a unique identifier like
!!Lens. - Ensure the same unique name is used for that object on all slides.
This technique helps Morph correctly animate the objects without confusion.
Final Tips and Conclusion
Congratulations! You now have a fully functional PowerPoint animated slide design that is clickable, scrollable, and visually engaging. This design technique is excellent for portfolios, product showcases, educational content, and much more.
Here are some parting tips to maximize your slide design:
- Use high-quality images: Crisp photos make your animations pop.
- Keep text concise: Focus on key points to avoid clutter.
- Test your hyperlinks: Make sure all clickable elements navigate correctly.
- Practice your transitions: Run through the slide show to ensure animations flow smoothly.
- Explore add-ins: Tools like BrightSlide can speed up your workflow.
- Experiment with Morph: This transition unlocks many creative possibilities beyond this tutorial.
Feel free to customize this technique with your own photos, objects, and animations to create unique presentations that captivate your audience.
Frequently Asked Questions (FAQ)
What version of PowerPoint do I need for this animated slide design?
You need Microsoft PowerPoint 365 or PowerPoint 2019 and later, as the Morph transition and some advanced features are only available in these versions.
Can I use any photo for the clickable items?
Yes! You can use any photo you like, but for best results, choose images with clear, distinct objects that can be cut out and animated separately.
Is it necessary to use Photopea for cutting out objects?
No, but Photopea offers more precision for cutting out objects compared to PowerPoint’s built-in tools. You can also use Photoshop or other photo editors if you prefer.
What if the Morph transition animation looks strange or glitchy?
This often happens when objects have similar names or appearances across slides. Use unique names in the Selection Pane to distinguish objects and ensure smooth Morph animations.
Can I add more clickable items and slides?
Absolutely! Just repeat the process of cutting out objects, positioning them, adding hyperlinks, and designing corresponding slides for each new item.
Are there any recommended fonts for this design?
Fonts like Poppins Semi Bold and Poppins Light provide a modern and clean look, but you can choose any fonts that fit your brand or style. Just keep readability in mind.
Where can I find free photos for my slides?
Free, high-quality photos can be found on sites like Unsplash, Pixabay, and Pexels.
Can I use this technique for presentations other than travel themes?
Definitely! This clickable and animated slide design can be adapted for any topic or industry by changing the photos and objects accordingly.
For more inspiration and tutorials on advanced PowerPoint animation techniques, check out the One Skill PPT YouTube channel.


