
If you want to take your PowerPoint presentations to the next level, mastering PowerPoint animation techniques is essential. Animations not only keep your audience engaged but also help emphasize key points and add a professional touch to your slides. In this detailed guide, we’ll explore five pro-level PowerPoint animation techniques that you can start using right away to impress your audience and make your presentations truly stand out.
These techniques have been inspired by the talented PowerPoint creator @interstellar_ppt, whose innovative animation ideas have been shared exclusively with us. Whether you’re a seasoned presenter or just starting out, these tips will help you animate like a pro.
Table of Contents
- Flip Effect for Slide Zooms
- Animated Textures to Spice Up Illustrations
- 3D Rotating Text Animation with Morph Transition
- Futuristic Typewriter Animation for Text
- Spinning Colorful Donut Charts
- Frequently Asked Questions
- Conclusion
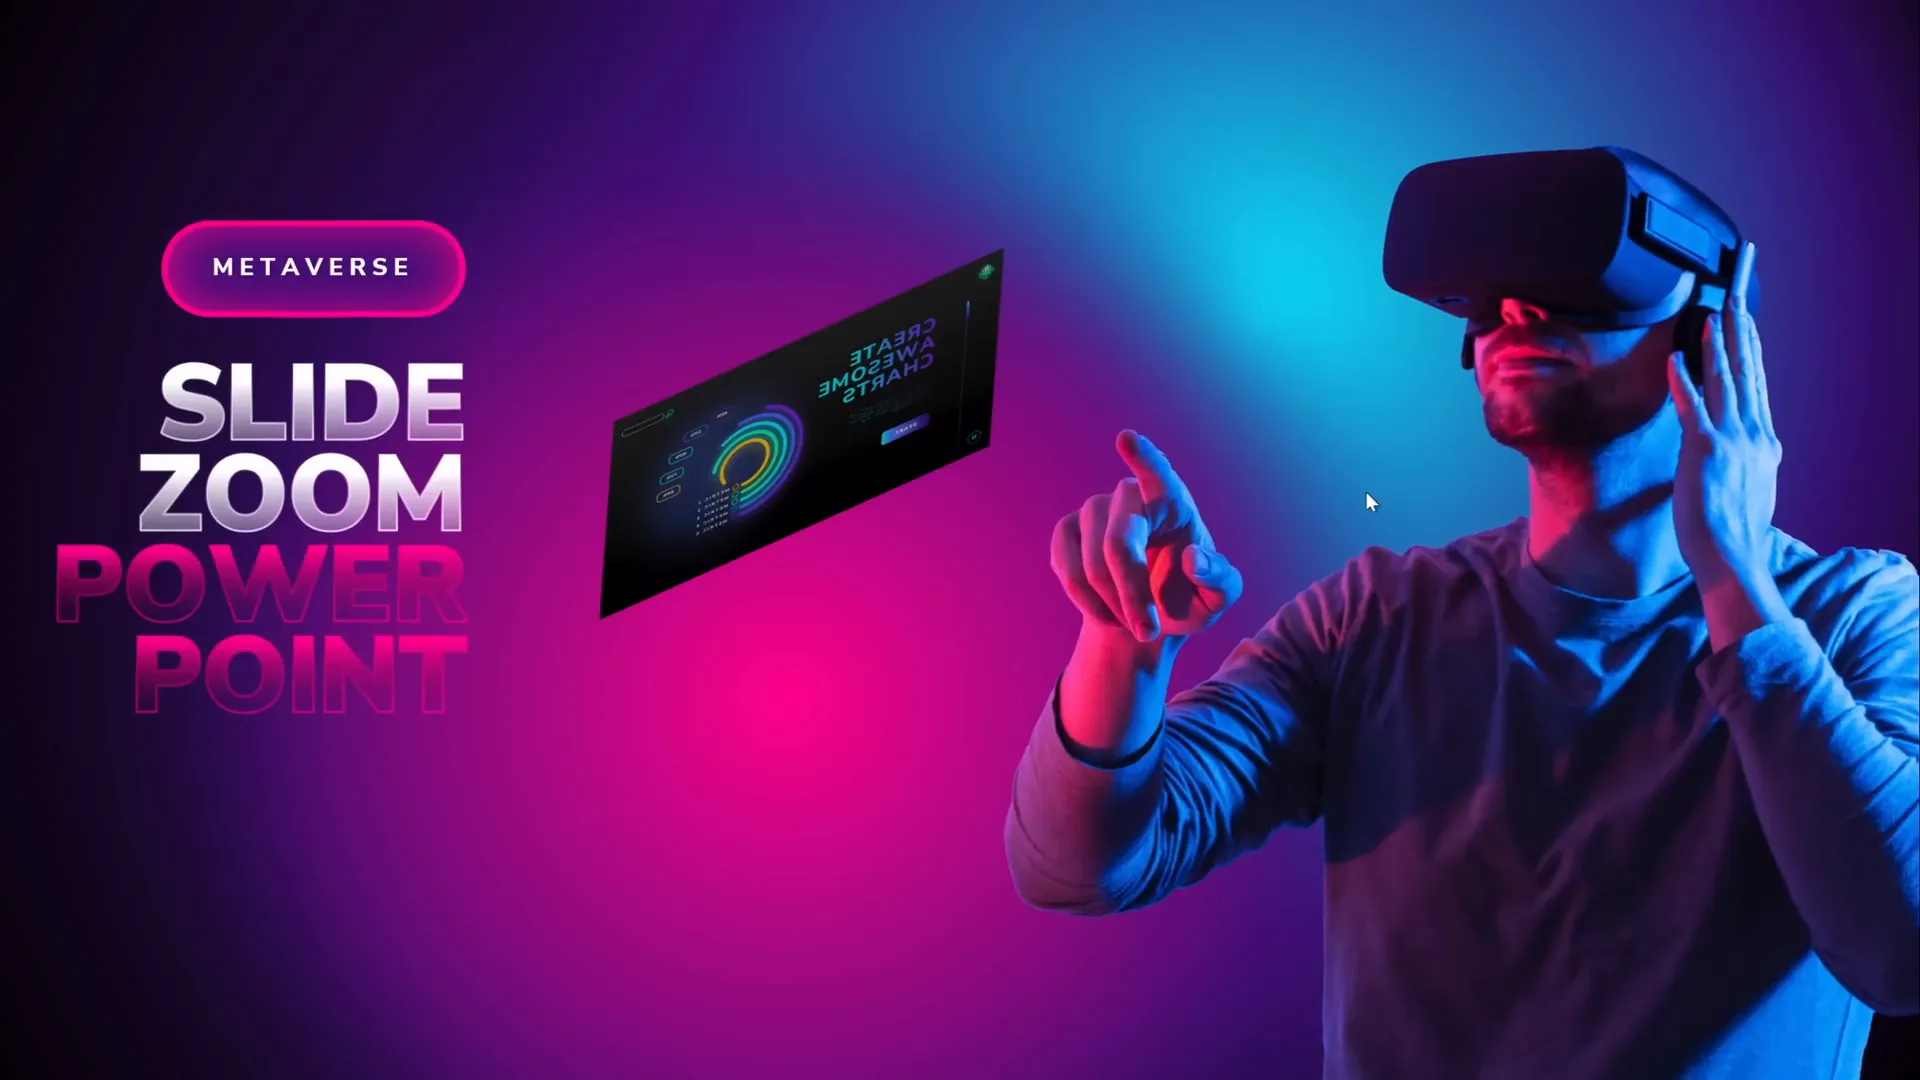
1. Flip Effect for Slide Zooms
One of the most captivating animation techniques you can add to your presentation is a flip effect on slide zooms. Slide zooms allow you to jump to a specific slide in your presentation seamlessly, and adding a flip animation makes this transition visually engaging and memorable.
Here’s a step-by-step guide to creating this effect:
- Insert a Slide Zoom: Go to the Insert tab, click Zoom, and select Slide Zoom. Choose the slide you want to zoom into.
- Remove Zoom Border: Select the slide zoom and remove its border for a cleaner look.
- Activate Return to Zoom: Ensure the Return to Zoom option is enabled so you can zoom back to the original slide after viewing.
- Add 3D Rotation: Select the slide zoom, go to the Format Shape pane, and apply a 3D rotation preset (choose a parallel rotation preset).
- Adjust Rotation Angles: Increase the X-axis rotation until the slide zoom flips to the other side, revealing the back of the slide.
- Test the Animation: Click the slide zoom during your presentation. You’ll see the slide zoom flip as it zooms in, creating a dynamic and visually interesting effect.
This subtle flip makes navigation feel smoother and more professional, adding an extra layer of polish to your presentation.
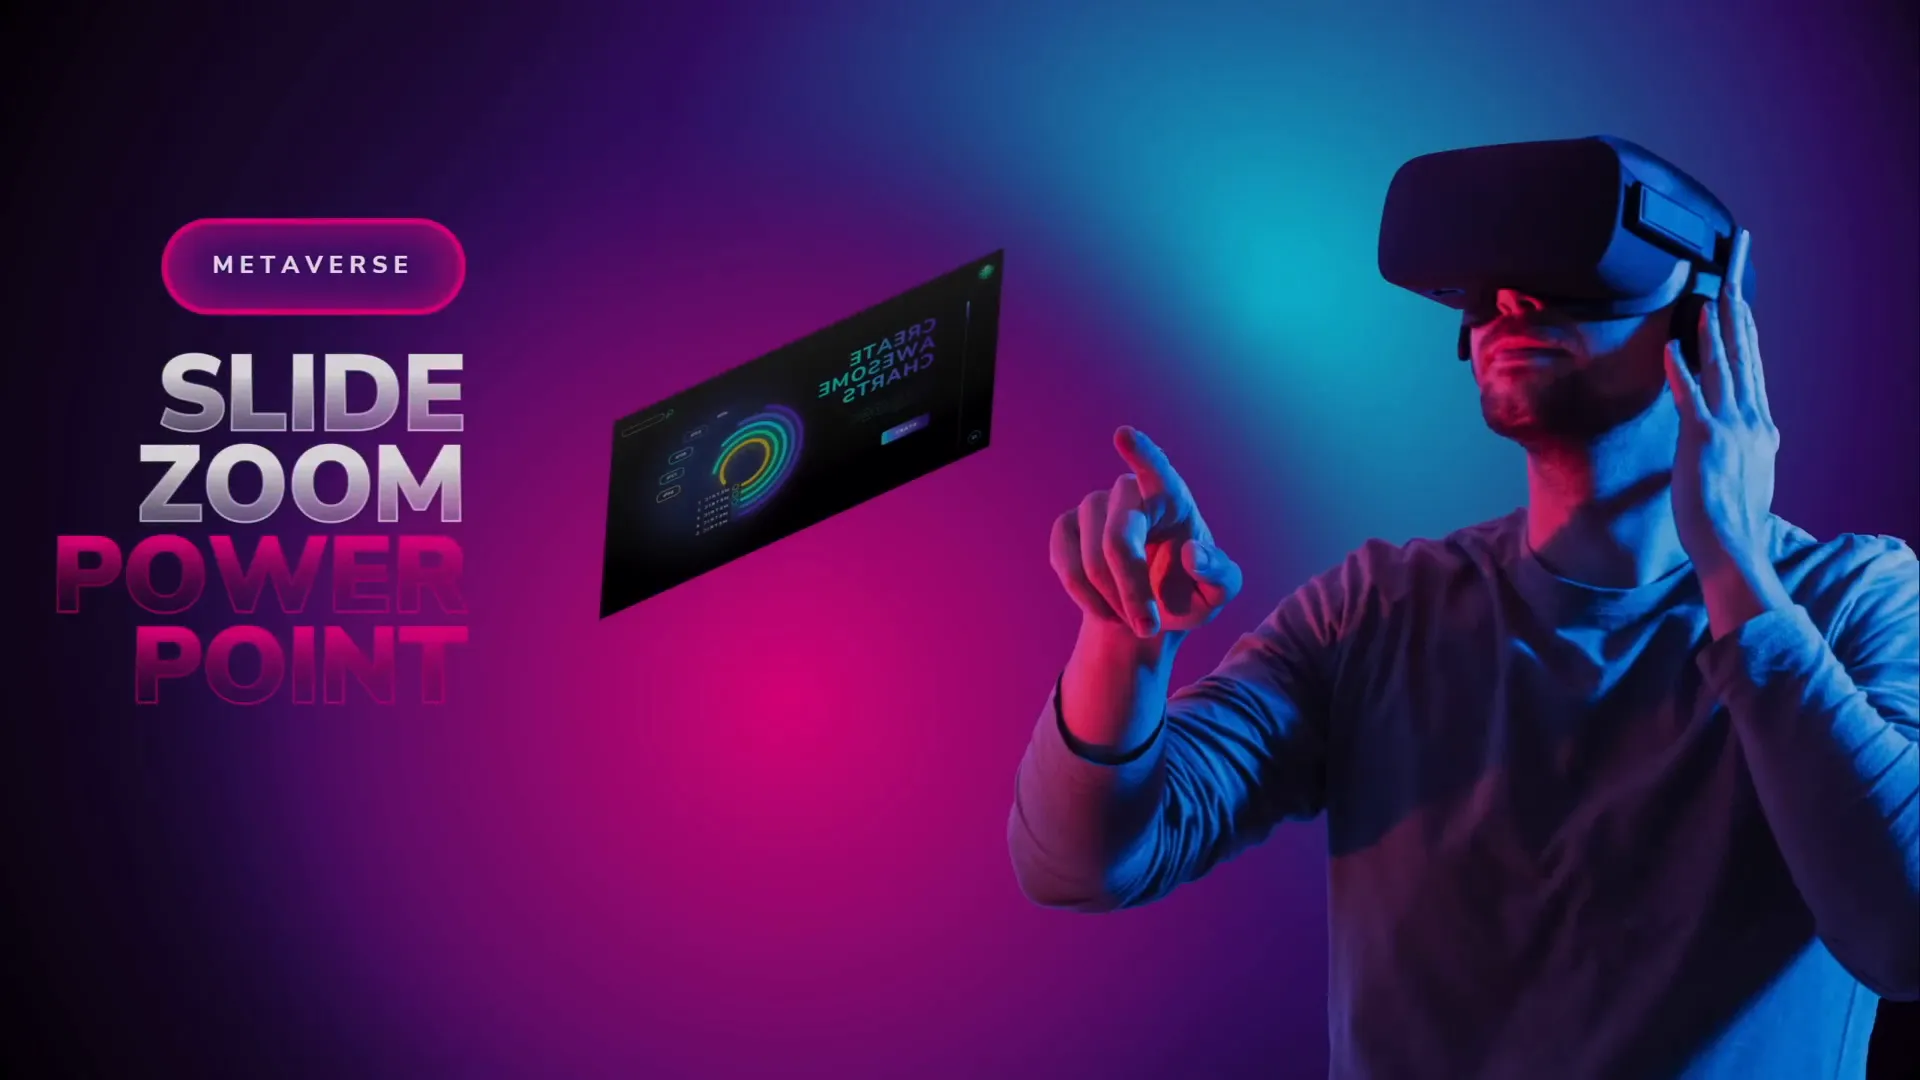
Bonus: Floating Animation for Visual Interest
To add more life to your slides, you can animate objects like images or icons to float subtly. For example, an image of a person wearing VR glasses can gently float up and down with a slight spin.
- Motion Path Animation: Add a short up-and-down line motion path with a duration of 2 seconds, smooth start and end of 1 second each, and enable auto-reverse.
- Spin Animation: Add a subtle spin of 2 degrees with auto-reverse and smooth start/end.
Combining these animations creates a gentle floating effect that adds subtle dynamism without distracting the audience.
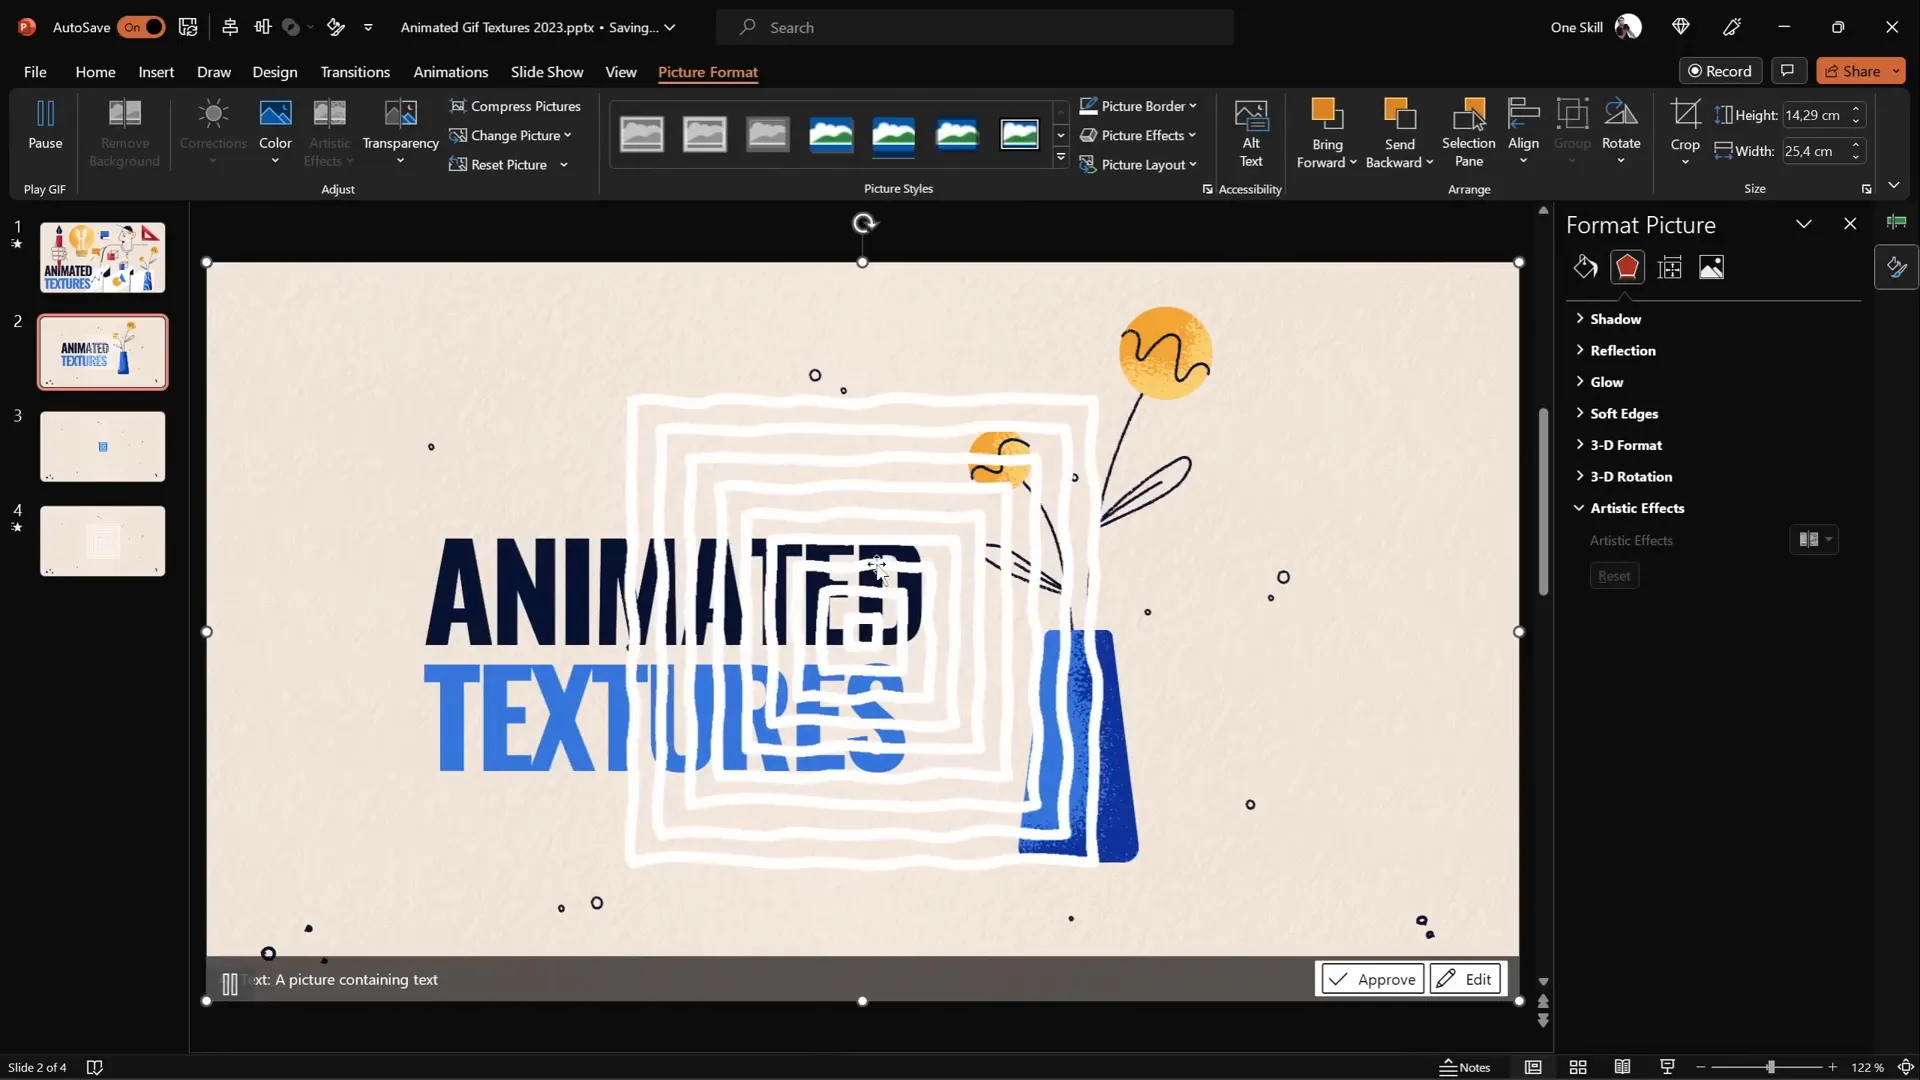
2. Animated Textures to Spice Up Illustrations
Static illustrations can sometimes feel flat, but you can bring them to life with animated textures. This technique involves creating a vector shape with animated effects and then cropping it to fit an illustration, adding movement and interest.
Here’s how to create animated textures:
- Create Vector Shapes: Use the rectangle tool to draw a square on a blank slide. Hold down the Shift key to keep it perfectly square.
- Duplicate and Resize: Duplicate the square and increase its size. Align the duplicates centrally and repeat to create several nested squares.
- Group the Shapes: Select all squares and group them (Ctrl + G) to animate them together.
- Add Spin Animation: Apply a clockwise spin animation with a quarter turn. Set the animation to start With Previous, duration 2 seconds, smooth start and end of 1 second, and enable auto-reverse.
- Add Grow/Shrink Animation: Using the Add Animation button, add a grow/shrink effect (e.g., 130% size). Again, set smooth start, auto-reverse, and start With Previous.
- Customize Line Style: Change the line style of the squares to a sketch style and adjust the outline color to white for visibility on dark backgrounds.
- Export as Animated GIF: Export this slide as a transparent, high-quality animated GIF.
- Insert and Crop: Insert the GIF into your main slide, duplicate the illustration shape, change its color for visibility, and use Merge Shapes > Intersect to crop the GIF to the shape of the illustration.
This technique results in a captivating animated texture that fits perfectly within your illustration, making your slide visually appealing and professional.
3. 3D Rotating Text Animation with Morph Transition
This technique combines 3D rotation effects with PowerPoint’s morph transition to create stunning rotating text animations, perfect for intro slides or impactful statements.
Follow these steps:
- Create a Text Box: Add your text and apply a white shadow with a blur of 100 points to give a shiny effect.
- Apply 3D Rotation: In the Format Shape pane, select a perspective 3D rotation preset (e.g., Perspective Relaxed). Set the perspective to the maximum 120 degrees and keep Y rotation at 0.
- Duplicate Slide: Duplicate the slide with the text box.
- Edit Text on Second Slide: Change the text on the duplicated slide (e.g., from “Super” to “Awesome”).
- Copy and Modify Text Box: Copy the first slide’s text box and paste it onto the second slide. Rotate this text box 90 degrees on the X-axis to make it flat (invisible) and position it so its midpoint touches the new text.
- Set Morph Transition: Apply the morph transition to both slides with a duration of 1 second.
- Repeat for Second Text: Similarly, copy the second slide’s text box back to the first slide, rotate it 270 degrees on the X-axis, and position it accordingly.
- Preview: Run the slide show to see the smooth 3D rotation effect as the text flips from one word to another.
You can extend this technique by adding more slides and text boxes to create a dynamic intro sequence for your presentation.

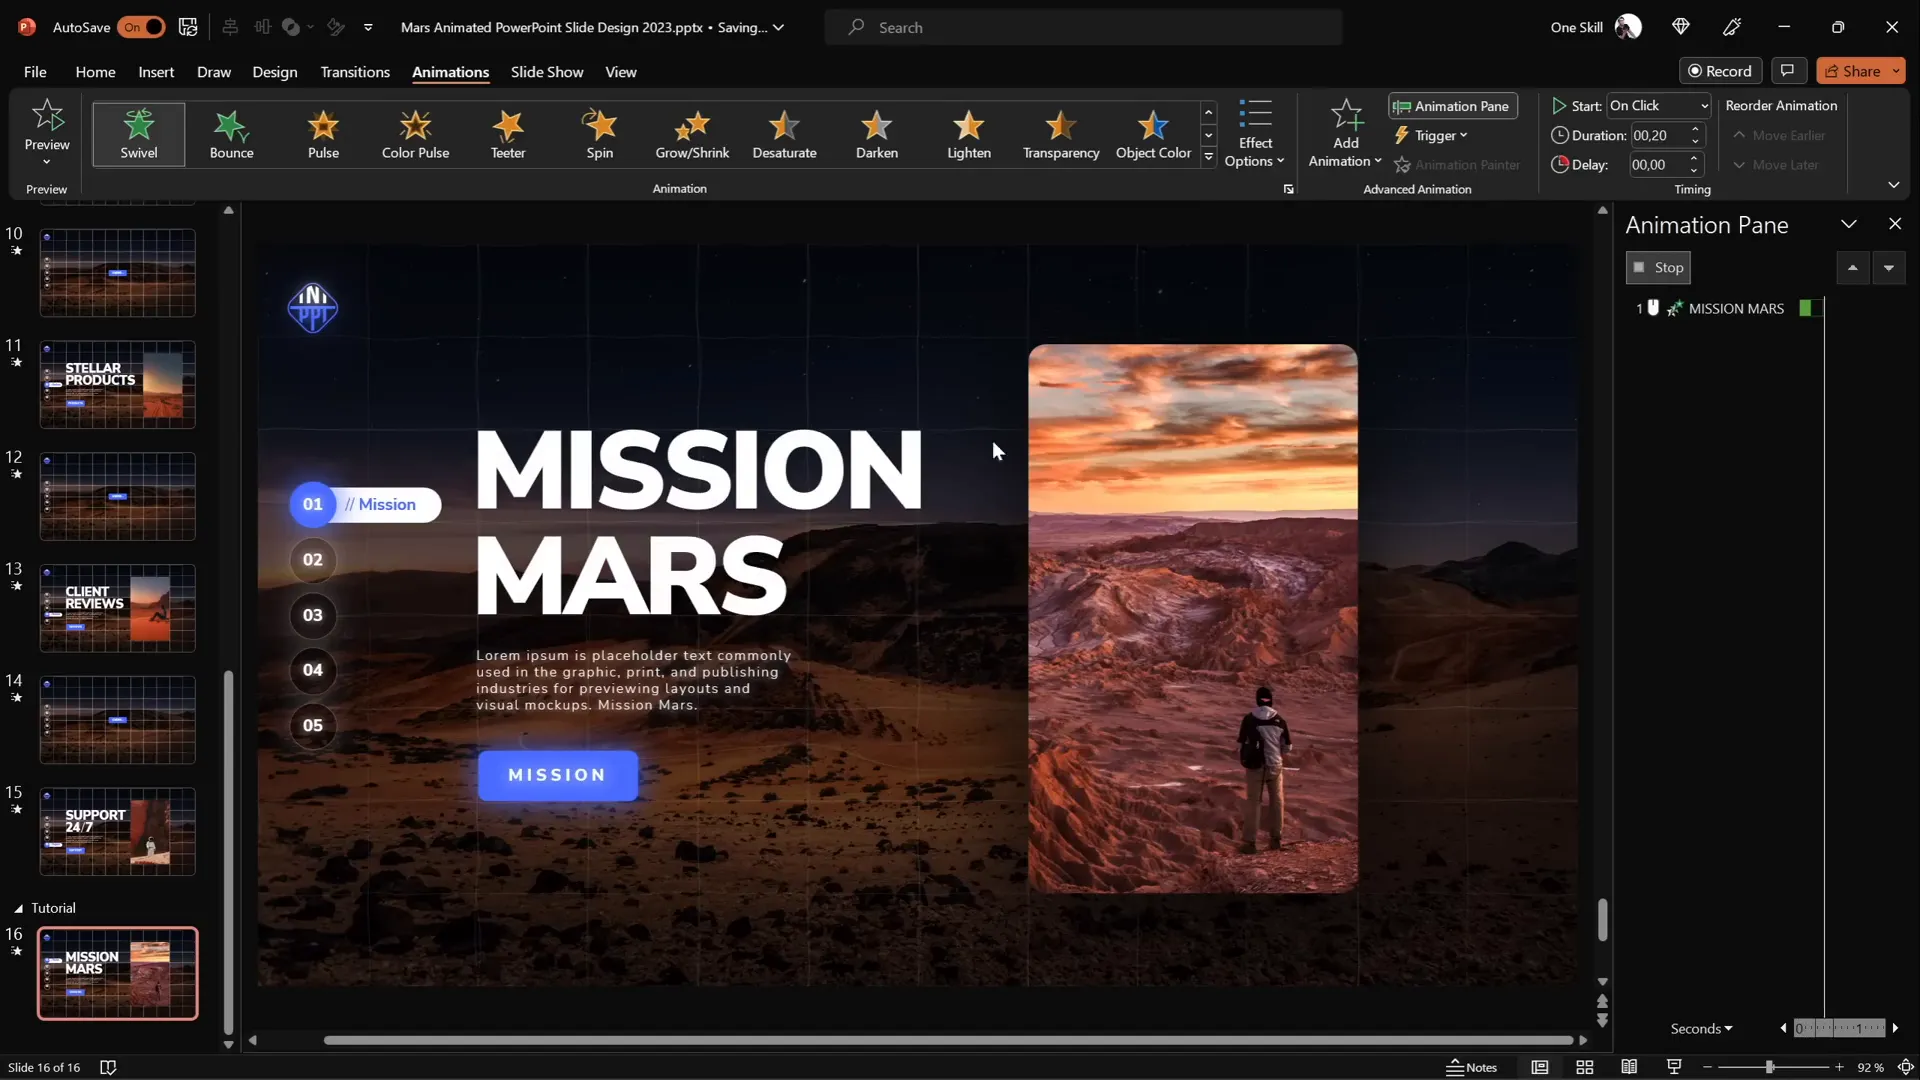
4. Futuristic Typewriter Animation for Text
Want to create a sleek, futuristic typewriter effect for your text? PowerPoint’s Swivel animation is perfect for this, especially when combined with text animation by letter or word.
Here’s how to achieve it:
- Select Your Text: Highlight the text you want to animate (e.g., a slide title).
- Apply Swivel Animation: Go to the Animations tab, find the Swivel entrance animation, and apply it.
- Adjust Animation Settings: Set the duration to 0.2 seconds for a quick effect.
- Animate By Letter: In the animation options, choose to animate text By Letter and set the delay between letters to 10% for a smooth typing effect.
- Use Animation Painter: To speed up your workflow, use the animation painter tool to apply the same animation settings to other text objects.
- Synchronize Animations: Adjust how animations start in the animation pane—set the first animation to start on click and the rest to start With Previous, so they play together with a single click.
- Animate Paragraphs By Word: For longer paragraphs, animate by word instead of by letter for faster appearance.
This creates a captivating typewriter effect with a futuristic twist that’s perfect for technology-themed presentations or any slide needing a modern flair.
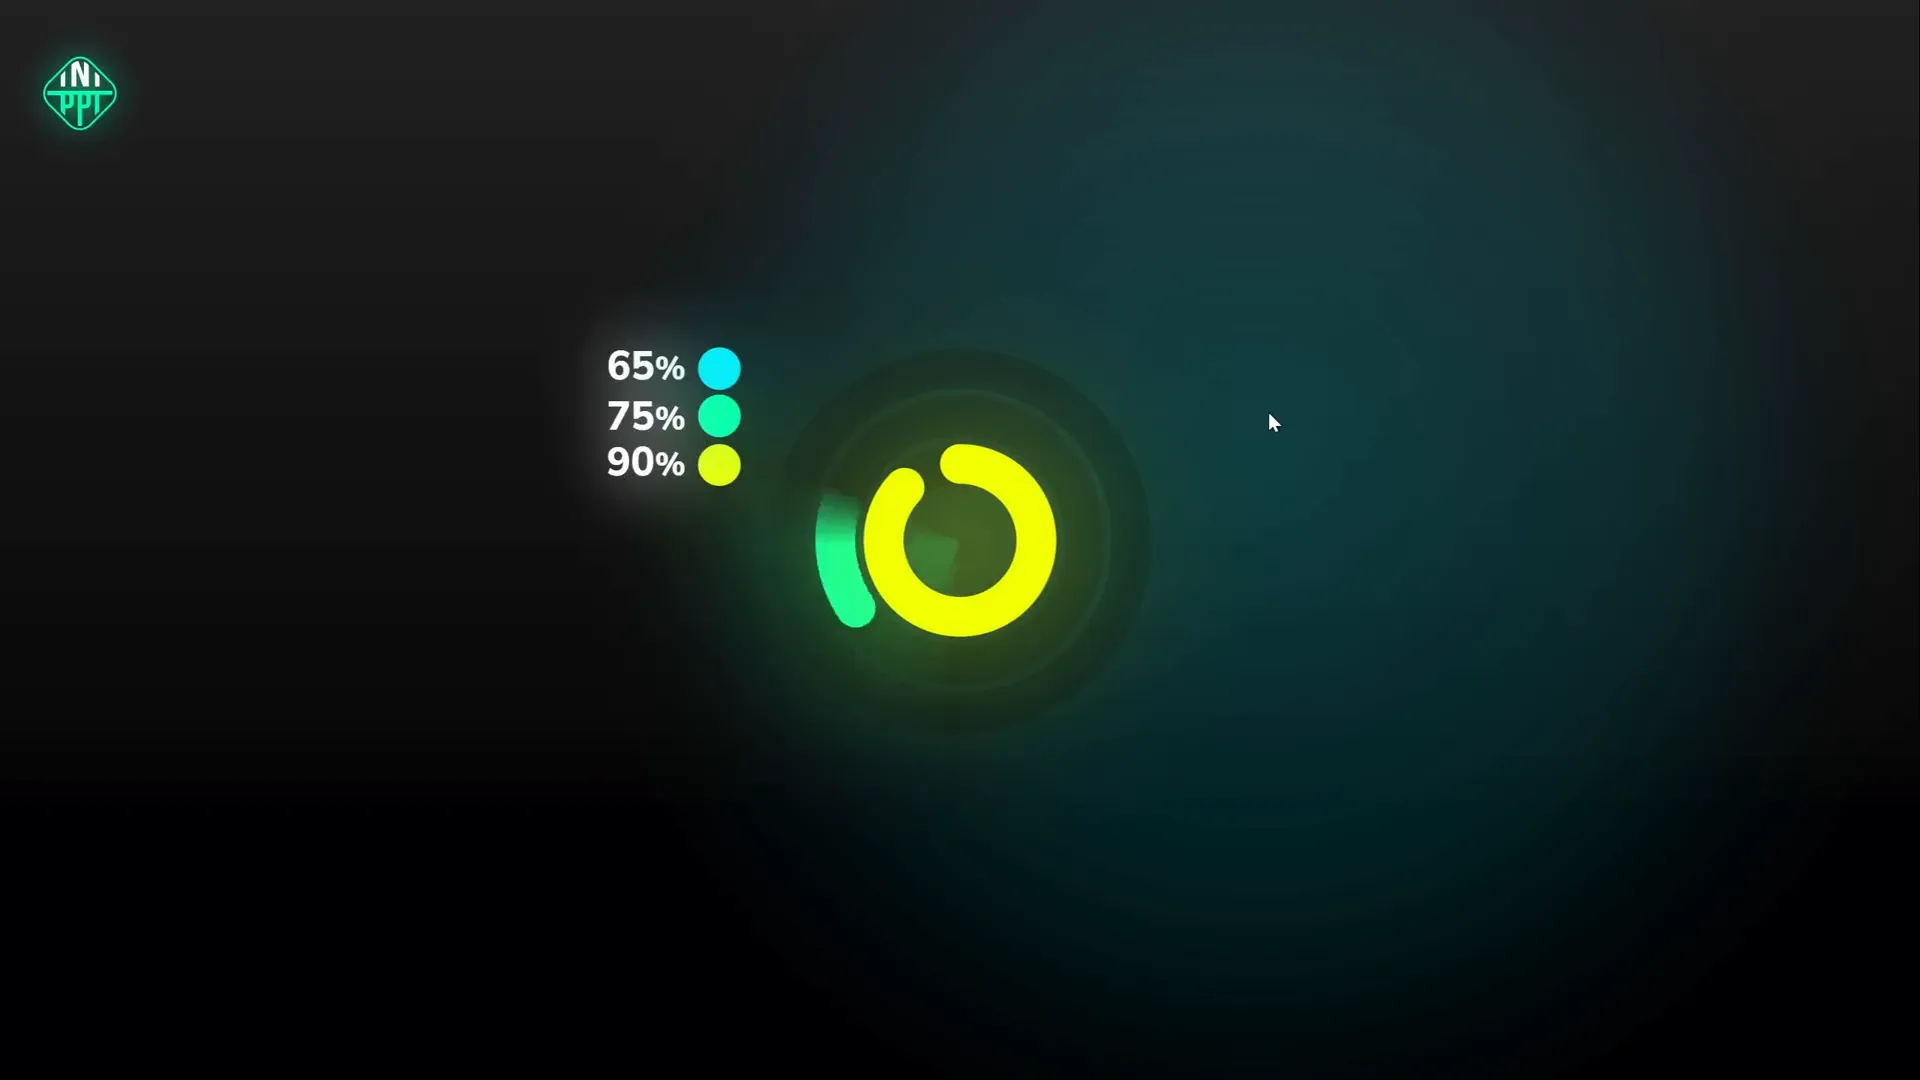
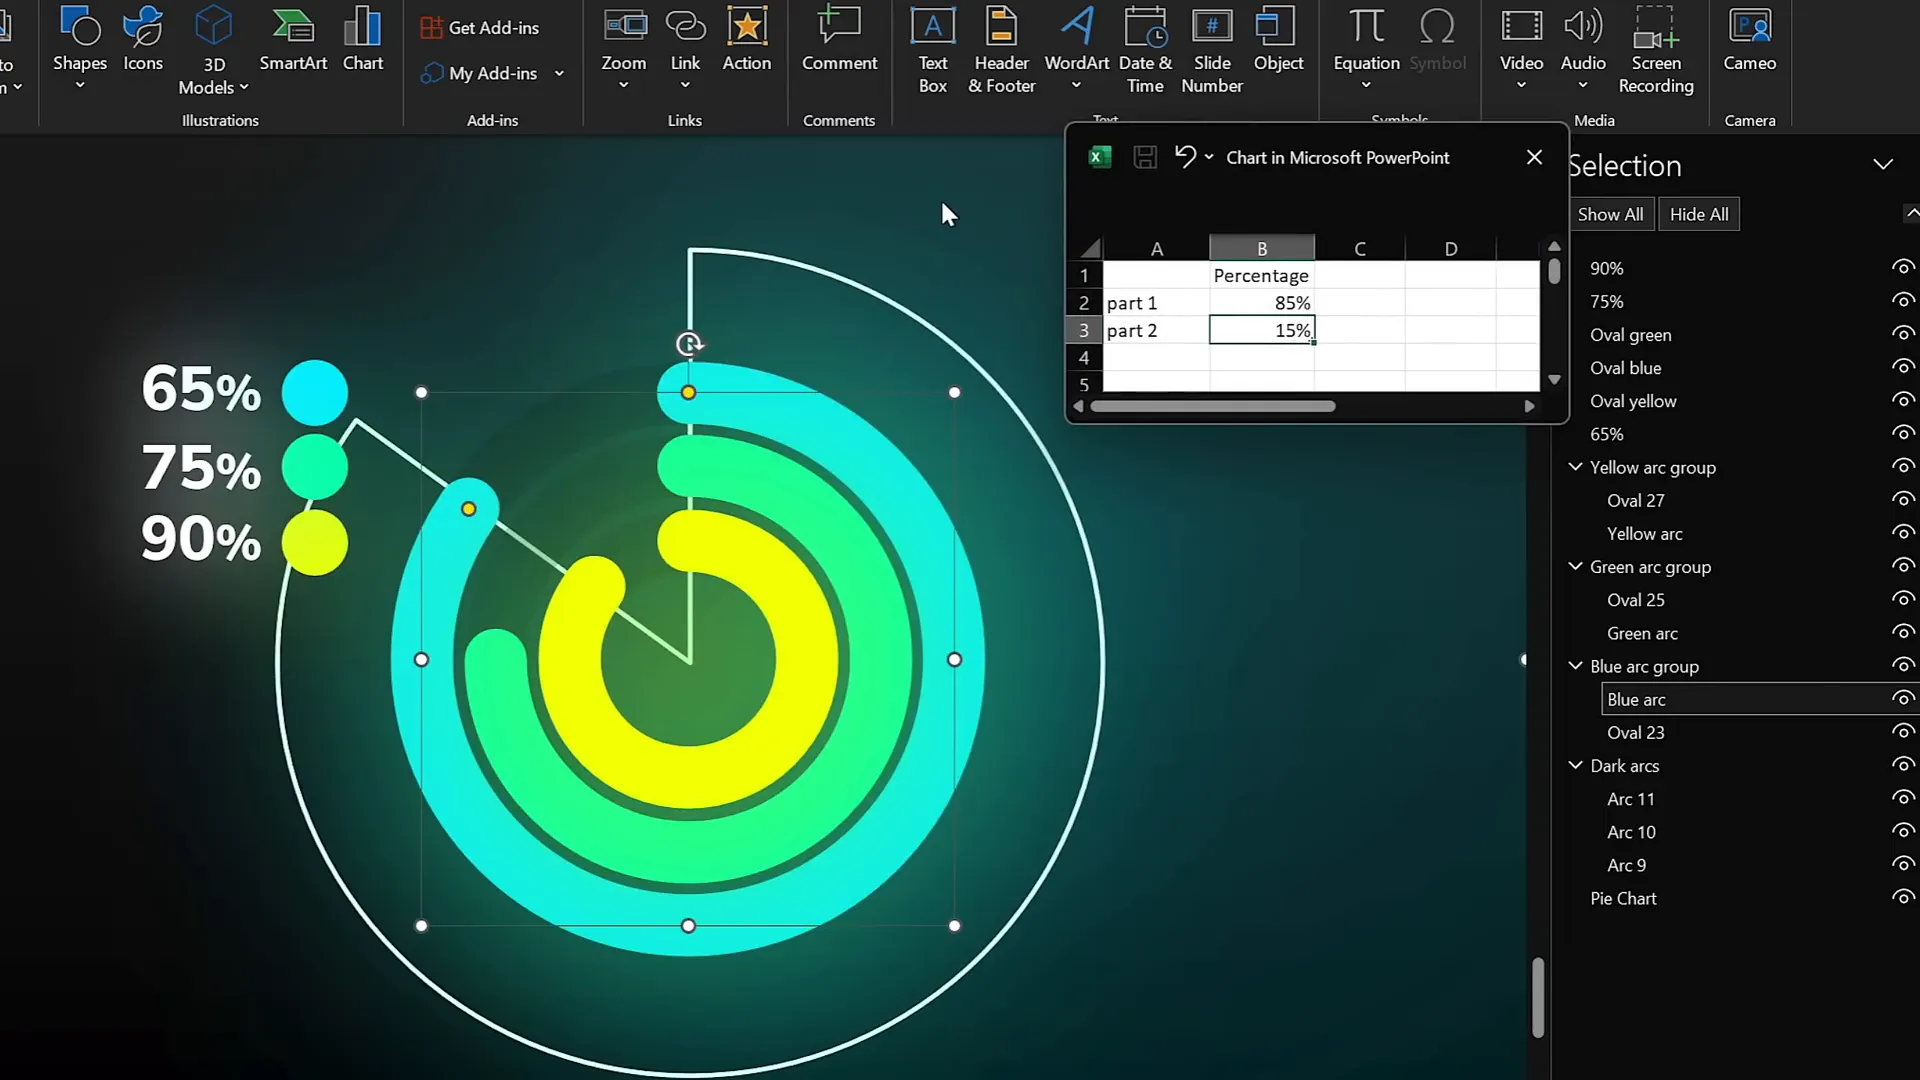
5. Spinning Colorful Donut Charts
Animating charts can be tricky, but spinning donut charts add fun and visual interest while effectively communicating data. Here’s how to create and animate these donut charts:
Creating the Donut Shape
- Go to Insert > Shapes and select the Arc shape.
- Hold down Shift to draw a perfect arc.
- Increase the line width to around 20 points.
- Set the line cap type to Round for smooth edges.
- Adjust the yellow handles to tweak the donut shape as desired.
Animating the Donut Chart
- Select the donut shape.
- Go to Animations > More Entrance Animations and choose the Wedge animation.
- Reduce the duration to 0.6 seconds for a faster effect.
- Add a Spin animation as well, set it to start With Previous, duration 1 second.
- Adjust the spin amount to 1080 degrees (3 full spins).
- Set the spin animation duration to 0.5 seconds for a quick, futuristic spin.
Use the animation painter to apply this spinning effect to multiple donut charts on your slide.
Adjusting Donut Chart Percentages Precisely
To make sure your donut chart represents accurate data percentages (e.g., 90%), use a hidden pie chart as a guide:
- Insert a simple pie chart behind your donut charts.
- Right-click the pie chart and select Edit Data.
- Adjust the percentage values to your desired data (e.g., 85%).
- Drag the donut chart’s arc line until it aligns precisely with the edge of the pie chart.
This method allows you to visually match the donut’s arc to exact data points for professional and accurate presentations.
Frequently Asked Questions About PowerPoint Animation
Q1: Can I use these animation techniques in older versions of PowerPoint?
Some advanced features like Morph transition and 3D rotation are available only in PowerPoint 2016 and later versions. For older versions, you may need to use alternative animations or upgrade to access these effects.
Q2: How can I make sure animations run smoothly during a presentation?
Practice your presentation several times to ensure animations trigger correctly. Also, keep your file size manageable by optimizing images and using compressed GIFs for animated textures.
Q3: Are these animations suitable for professional or business presentations?
Absolutely! When used tastefully, animations like flip effects, animated textures, and typewriter effects can enhance professionalism and engagement. Avoid overusing animations to keep your presentation polished.
Q4: Can I customize the speed and duration of these animations?
Yes. PowerPoint allows you to adjust the timing, duration, and delay of all animations through the Animation Pane, giving you full control over how your animations behave.
Q5: How do I create clickable menus using slide zooms?
Clickable menus can be created by inserting multiple slide zooms on a menu slide, linking to different sections. For detailed tutorials, check out Interstellar PowerPoint’s videos on clickable menus for in-depth guidance.
Conclusion
Mastering PowerPoint animation techniques can transform your presentations from ordinary to extraordinary. The five pro-level techniques covered here—flip effects on slide zooms, animated textures, 3D rotating text with morph transitions, futuristic typewriter animations, and spinning donut charts—offer diverse ways to enhance your slides and captivate your audience.
Remember, the key to effective animation is subtlety and purpose. Use these techniques to emphasize points, guide your audience’s attention, and add visual interest without overwhelming your content.
Special thanks to Interstellar PowerPoint for sharing these secrets and inspiring creative PowerPoint animation ideas. For more tips and tutorials, be sure to explore his channel.
Start experimenting with these animation techniques today, and watch your presentations come alive like never before!
Happy animating!


