
If you’ve ever wanted to take your PowerPoint presentations to the next level with sleek, professional animation, you’re in the right place. In this comprehensive guide, you’ll learn how to create an impressive animated timeline using PowerPoint’s morph transition effect. This tutorial breaks down every step, from setting up your slides to adding dynamic animations and interactive hyperlinks that will captivate your audience.
PowerPoint animation effects like morph transitions add a smooth, cinematic feel to your presentations, making complex timelines easier to follow and visually engaging. Whether you’re designing for business, education, or personal projects, this animated timeline technique will add polish and professionalism to your work.
Let’s dive deep into the process of crafting this timeline, complete with practical tips, screenshots, and best practices to help you master PowerPoint animation effects and impress your viewers.
Table of Contents
- Getting Started: Setting up Your PowerPoint Timeline
- Creating the Timeline Base: Lines and Circles
- Adding Year Labels to Your Timeline
- Naming Your Shapes for Morph Animation
- Applying and Optimizing Morph Transitions
- Enhancing the Timeline with Background Photos
- Animating Timeline Elements: Enlarging Circles and Text
- Adding Illustrations for Visual Impact
- Adding Interactive Hyperlinks for Navigation
- Final Tips and Best Practices
- Frequently Asked Questions
Getting Started: Setting up Your PowerPoint Timeline
Before jumping into the animation magic, it’s essential to set the stage properly. Start with a fresh blank slide layout in PowerPoint to give yourself a clean canvas. Avoid any preset text placeholders to maintain full control over your design.
Here’s a quick checklist for setup:
- Open PowerPoint and create a new presentation.
- Insert a new slide and set its layout to Blank.
- Activate the slide guides to help you find the center of the slide for precise alignment.
- Prepare a background photo to add visual interest and depth to your timeline.
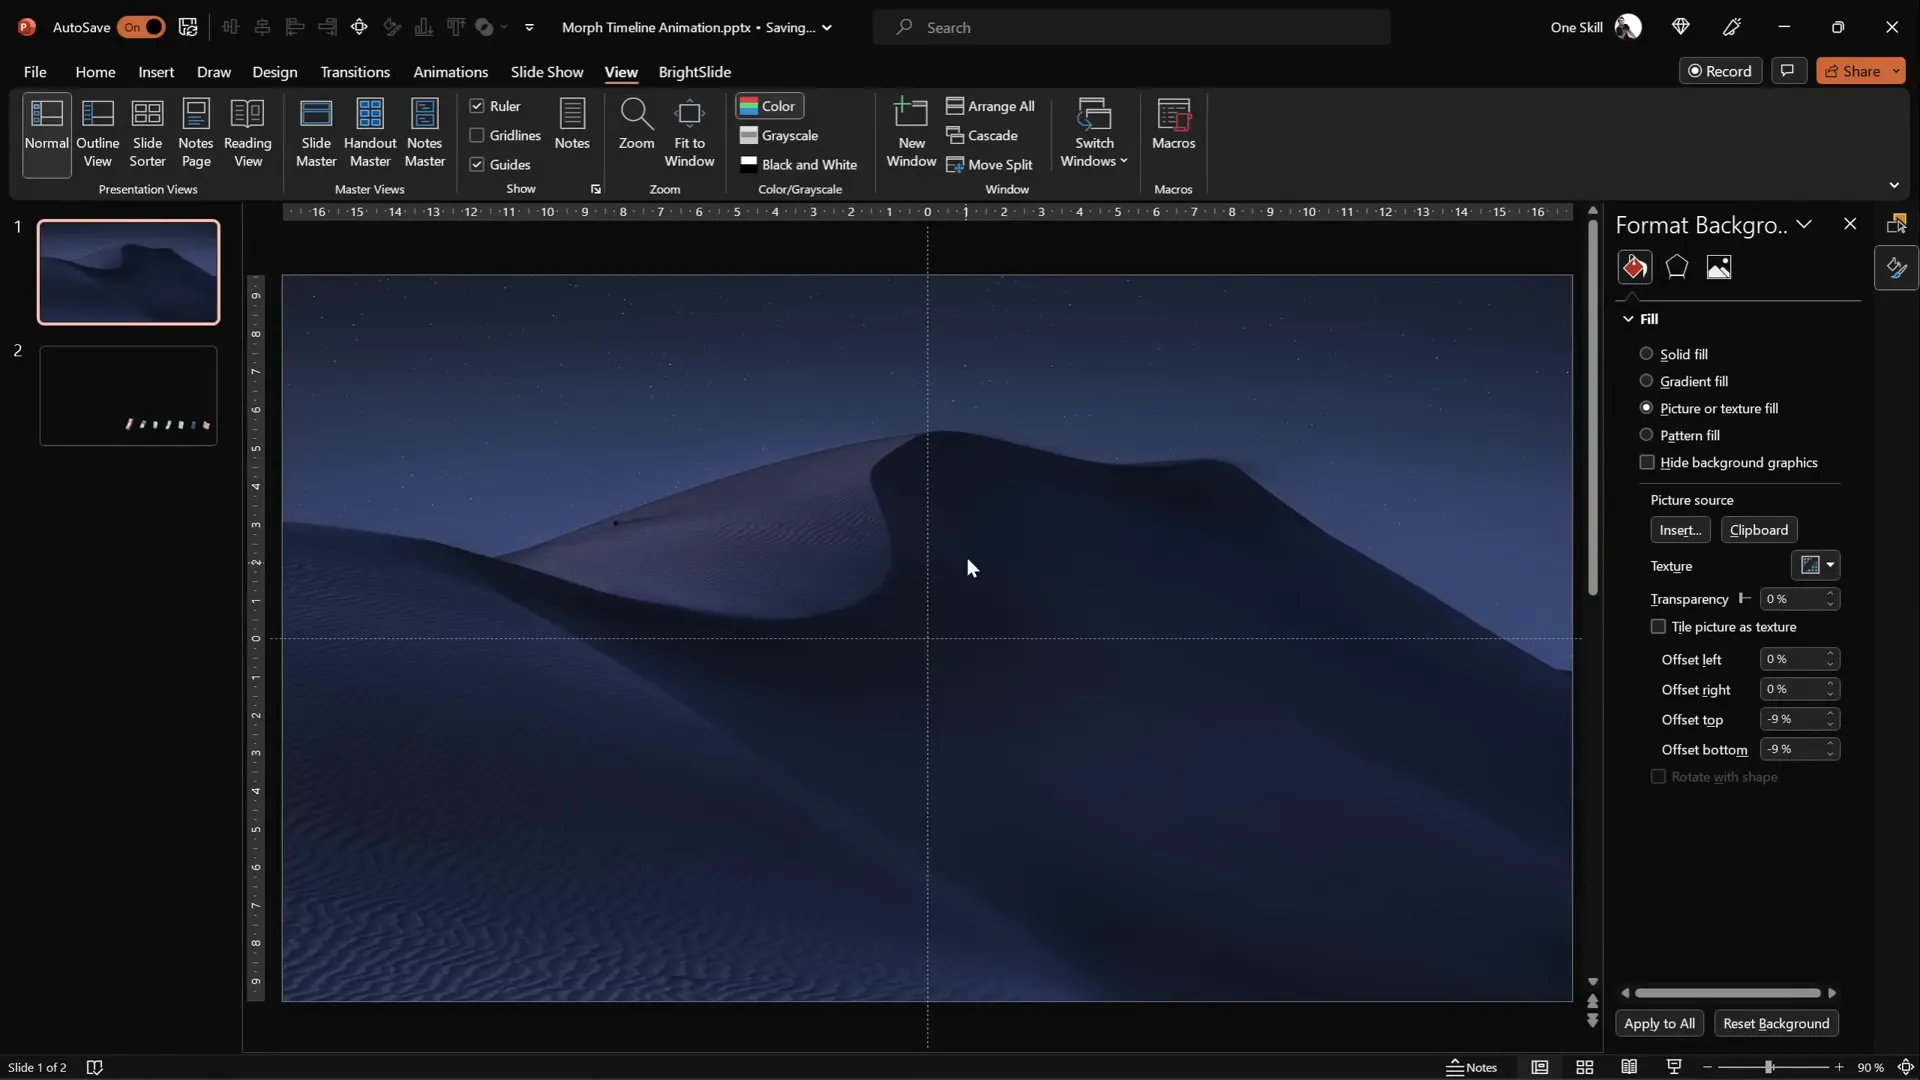
For the background photo, I recommend using high-quality free images from sites like Unsplash. Instead of inserting the photo normally, copy the image to your clipboard and use the slide background fill option to paste it. This method is crucial because it enables the circles you will add later to use the slide background fill feature, which only works if the background is a fill rather than an inserted picture.
Creating the Timeline Base: Lines and Circles
Now it’s time to build the foundation of your timeline using simple shapes. The timeline consists of a horizontal line and a series of circles representing different years or milestones.
Follow these steps to create the timeline base:
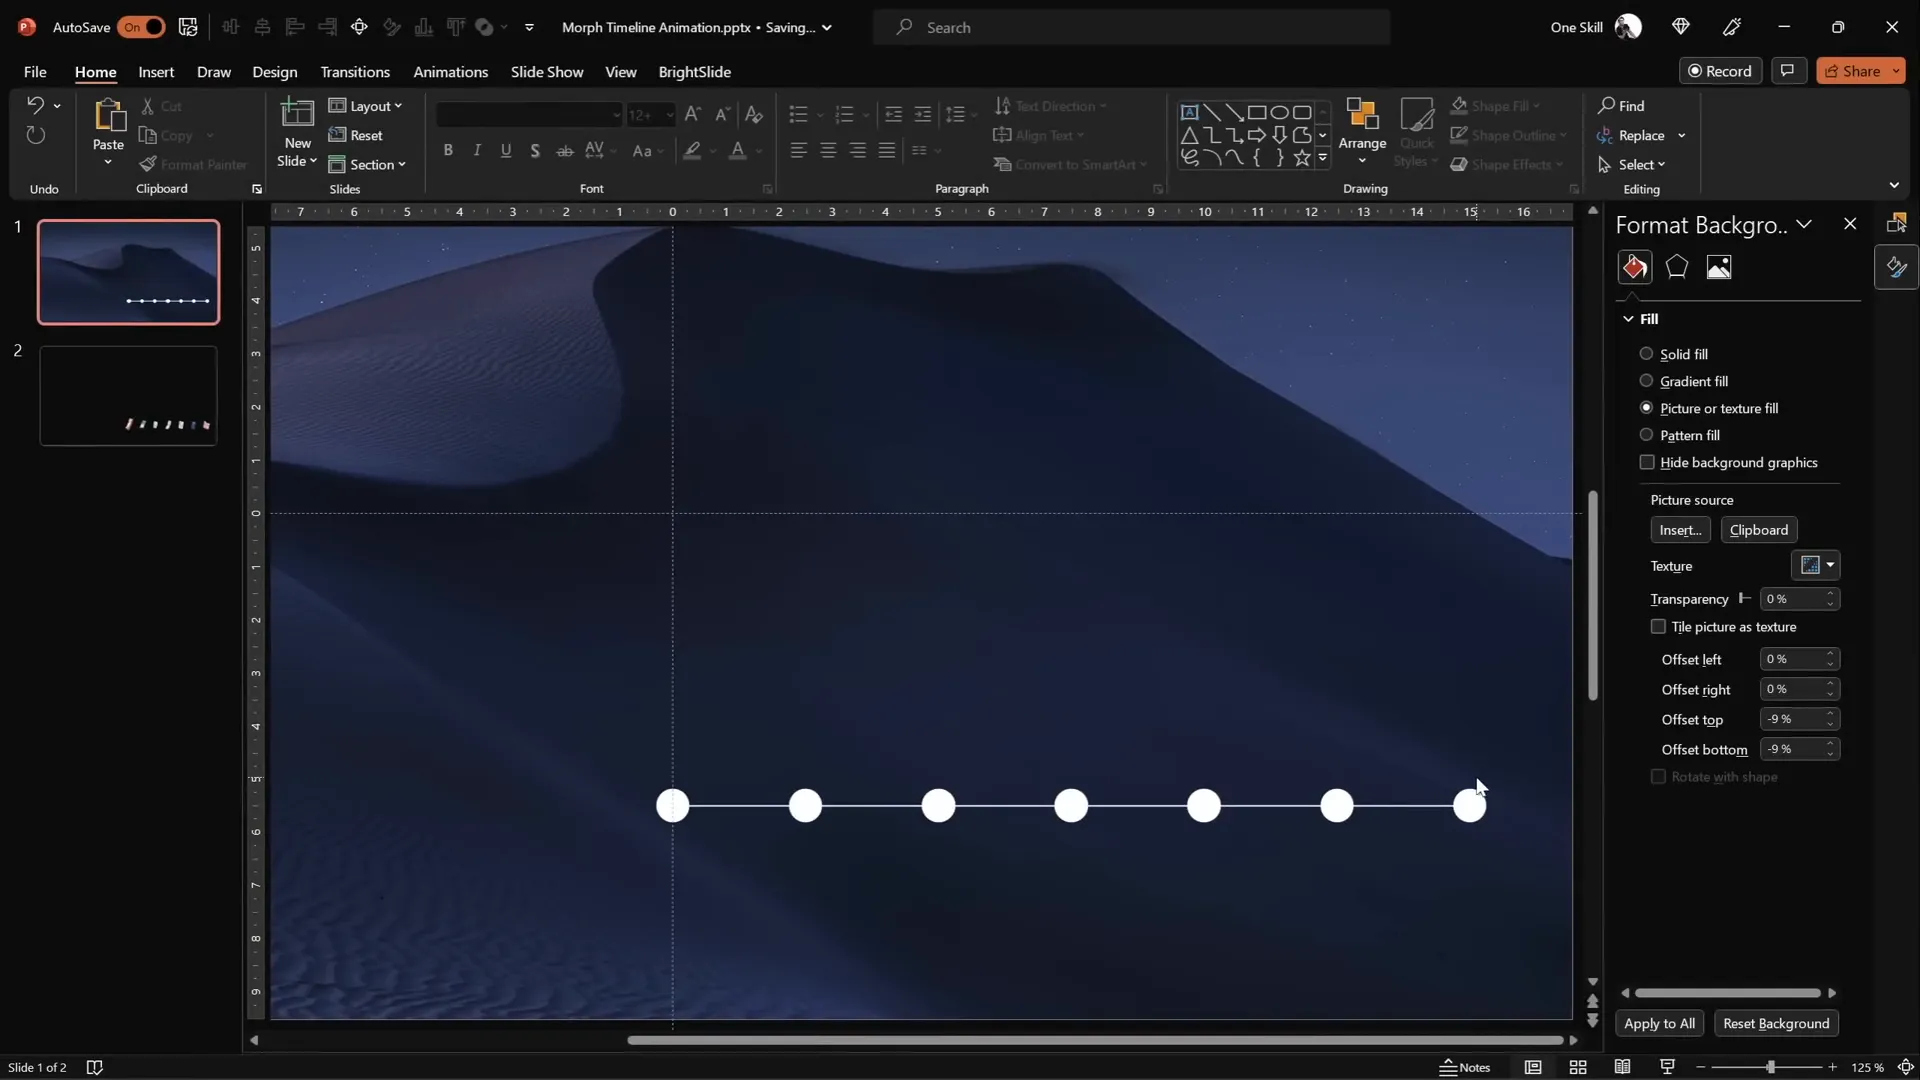
- Draw a horizontal line: Hold down the Shift key to draw a perfectly straight line starting from the center of the slide, extending towards the bottom right corner. Make it about 15 centimeters long with a line width of around 1 point for a clean, subtle look.
- Add circles: Draw seven perfect circles by holding Shift while creating them. Each circle should be about 0.6 centimeters in diameter, but feel free to adjust size based on your preference.
- Position the circles: Place the first circle to the left of the line’s start point. Then, hold Ctrl + Shift and drag to create duplicates, spacing them evenly along the line.
- Distribute circles: Select all circles, then use the Align options to Distribute Horizontally so that the gaps between the circles are equal.
This simple setup forms the skeletal structure of your timeline, ready for the next step: labeling.
Adding Year Labels to Your Timeline
Each circle represents a key year or milestone on your timeline, so it’s important to add clear, concise labels. Here’s how to do it:
- Create text boxes and type in the years you want to showcase. For example: 1980, 1985, 1990, and so forth up to 2020.
- Use a clean, readable font like Hanson and keep the font size small (around 5pt) so the text fits neatly inside the circles.
- Initially, keep the text black so you can see what you’re typing clearly.
- Once all years are entered, select all text boxes and change the font color to white to make the text invisible for now. This will allow the morph transition to reveal the text dynamically later.
Naming Your Shapes for Morph Animation
One of the tricks to creating smooth morph animations is to give your shapes consistent and meaningful names across slides. This allows PowerPoint to recognize the same objects and animate their movement seamlessly.
Follow these naming conventions:
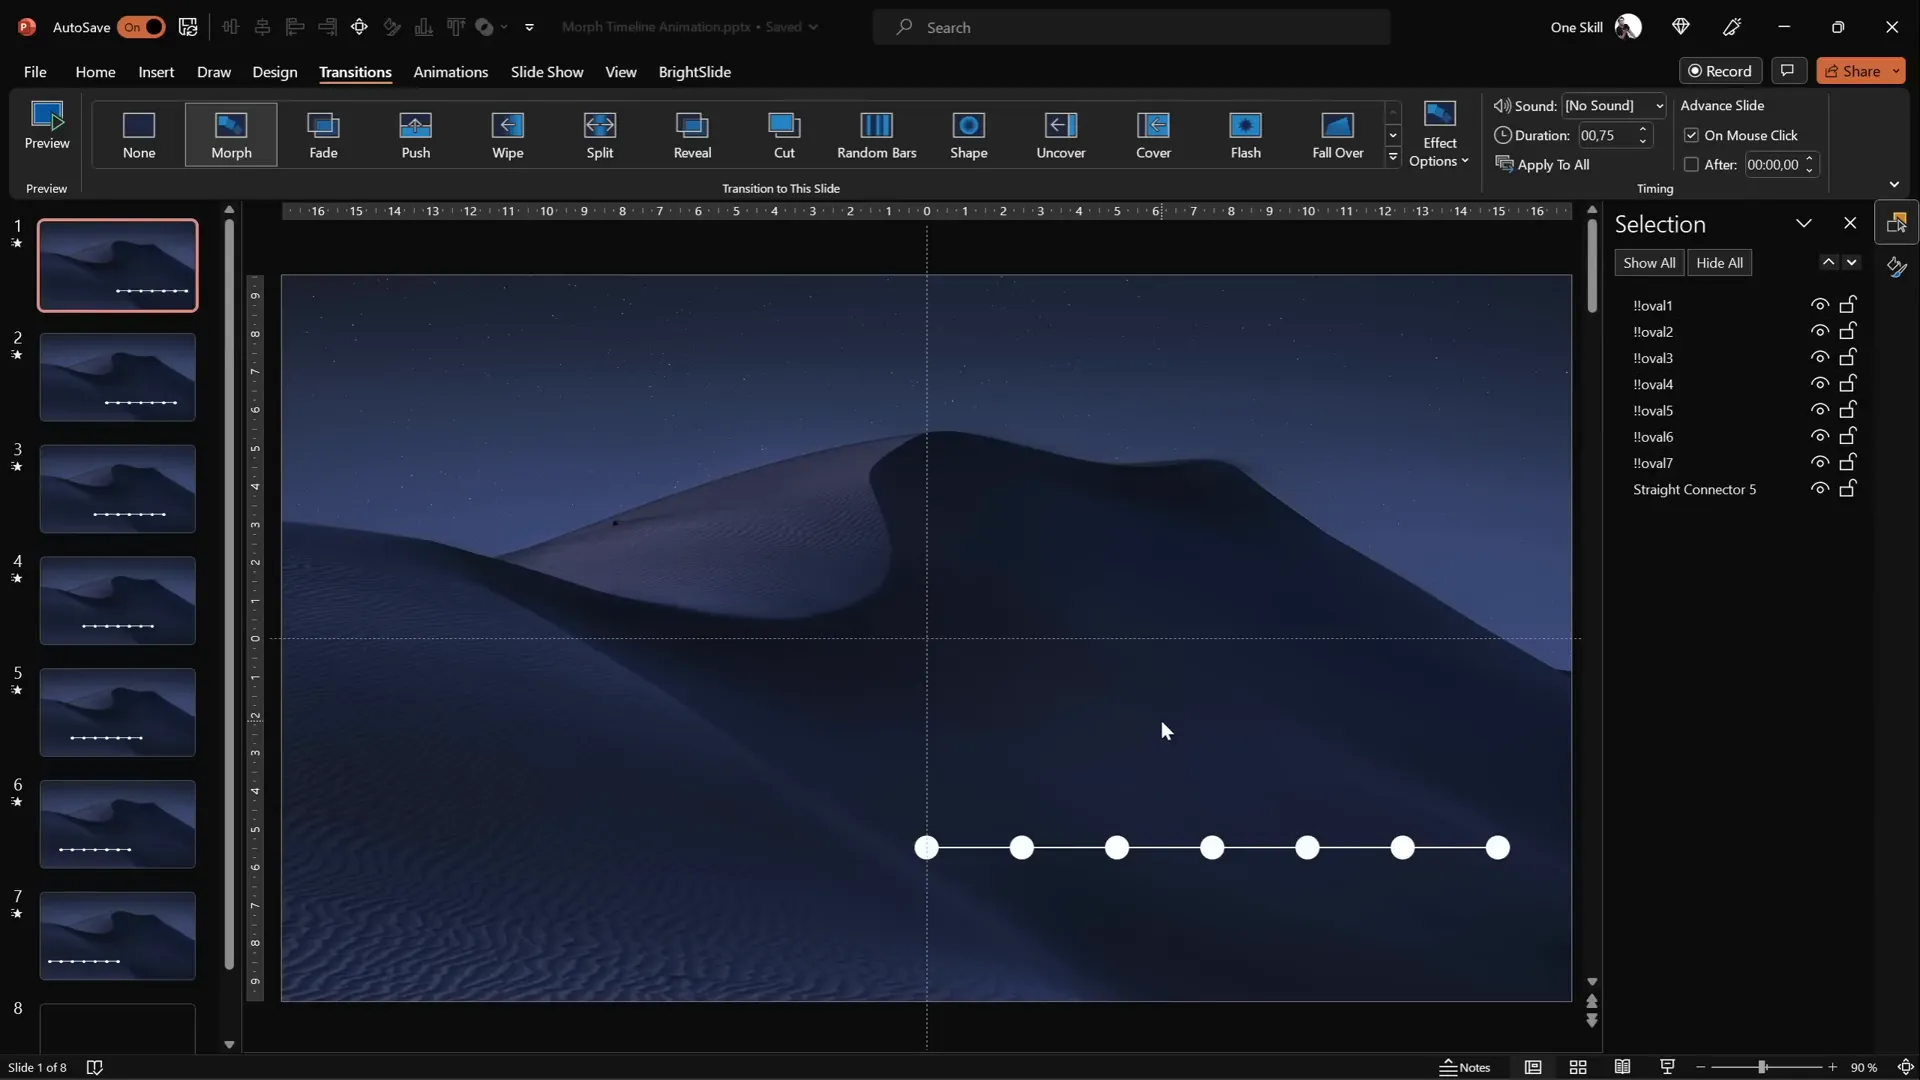
- Open the Selection Pane (found under Home > Arrange > Selection Pane).
- Name each circle with a consistent pattern, such as !!Oval1, !!Oval2, and so forth. The double exclamation marks ensure these objects appear at the top of the selection list for easy access.
- Do the same for the text boxes, matching them with their corresponding circles.
Consistent naming is essential because the morph effect depends on matching object names between slides to animate their movement and transformation.
Applying and Optimizing Morph Transitions
Now that your timeline shapes and labels are set up, it’s time to apply the morph transition effect to animate your timeline smoothly.
Here’s the process:
- Set the Transition for your slides to Morph. This transition animates the movement, resizing, and other changes between slides automatically.
- Adjust the transition Duration to about 0.75 seconds for a quick but smooth effect.
- Duplicate your timeline slide multiple times, shifting the position of the circles and line slightly to the left on each successive slide.
- Use the original slide as a guide to ensure the circles align perfectly as they move across the timeline.
- Remove any guide shapes or duplicate circles you no longer need.
When you play the presentation, the circles will glide smoothly along the timeline, thanks to the morph transition, creating an elegant animated effect.
Enhancing the Timeline with Background Photos
Using a compelling background photo can add depth and visual interest to your timeline. Here’s how to enhance your slide with a photo background:
- Choose a high-quality photo from free resources like Unsplash.
- Instead of inserting the photo directly, copy it to your clipboard and use the Format Background > Picture or texture fill > Clipboard option to paste it as the slide background.
- This technique allows the circles and shapes to use the background fill option so that they blend naturally with the photo.
This subtle integration creates a polished look where the timeline elements appear to float over the background image, enhancing the overall aesthetic.
Animating Timeline Elements: Enlarging Circles and Text
To highlight the current year or milestone on each slide, create an animation effect by enlarging the corresponding circle and increasing the font size of the year inside it.
Follow these steps:
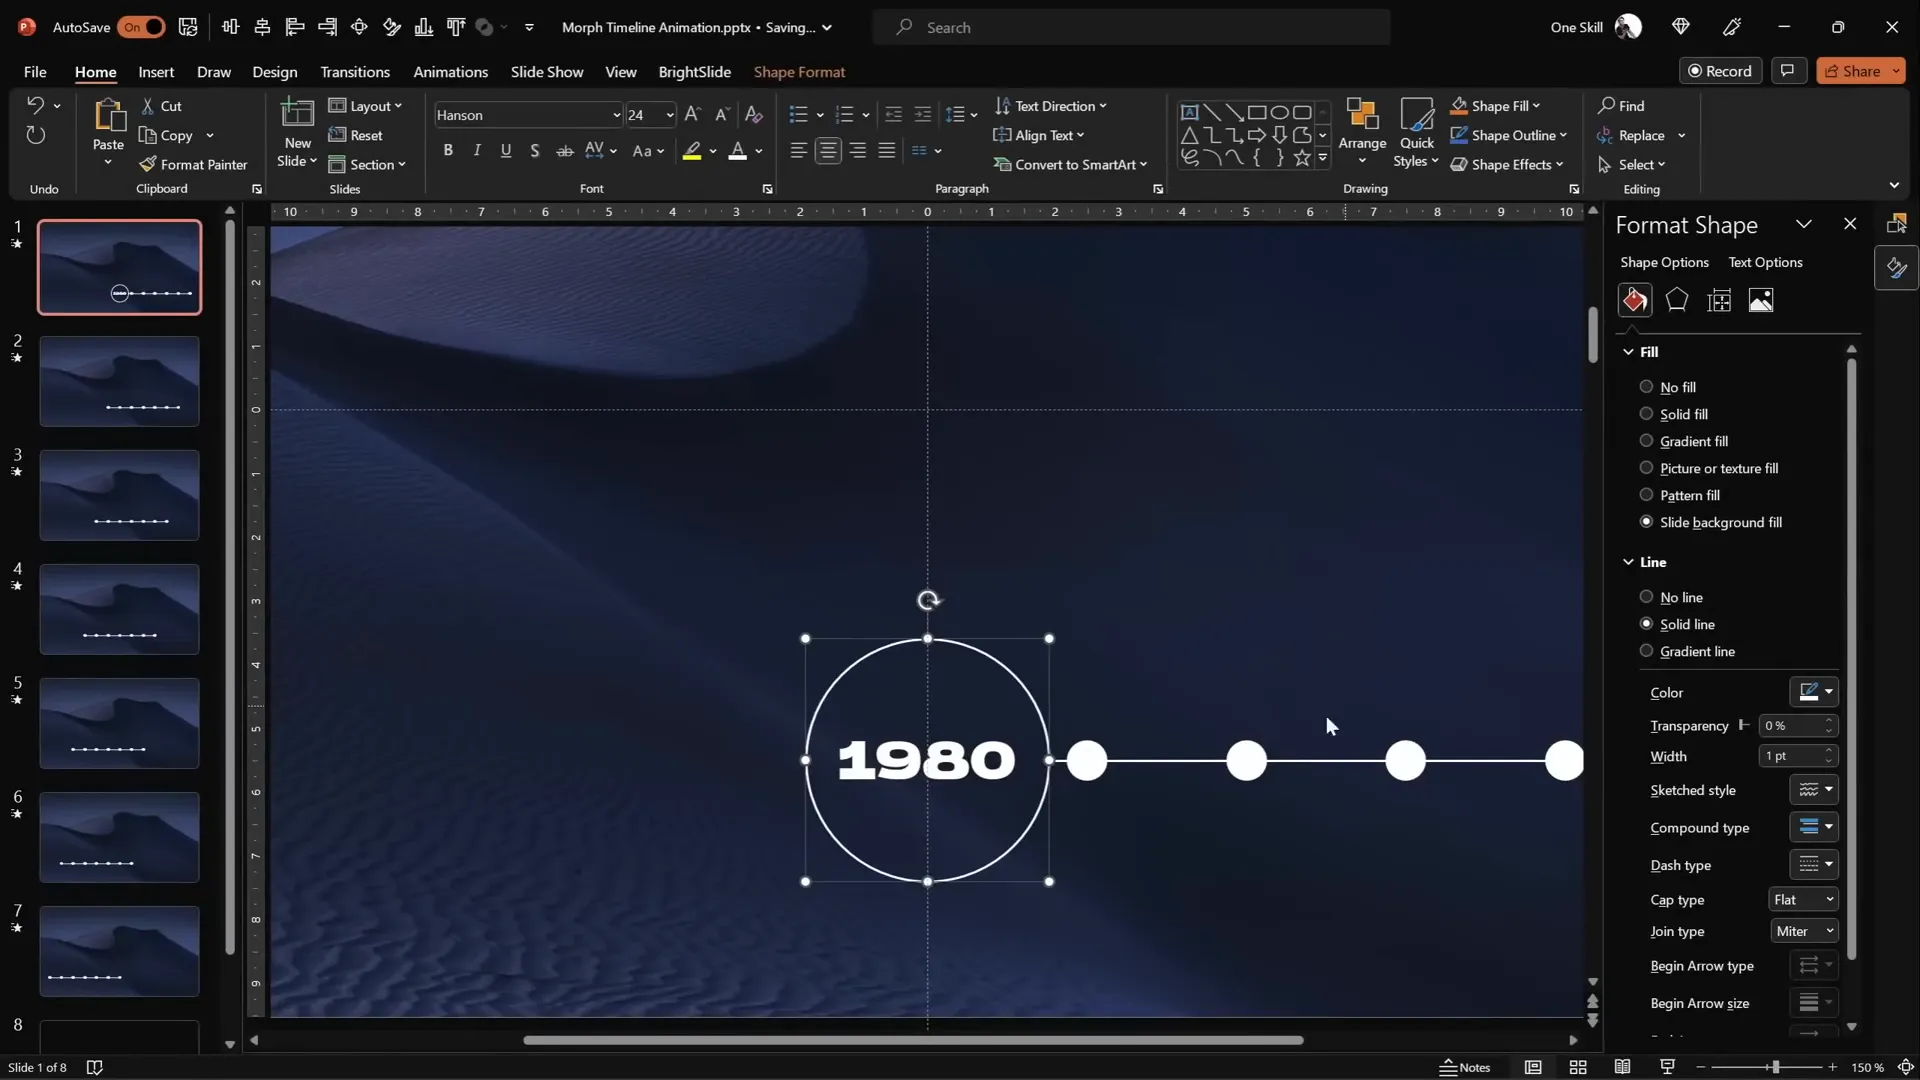
- Select the circle for the current year on each slide.
- Hold Ctrl + Shift and drag from the corner to resize the circle evenly from the center.
- Change the fill of the circle to a lighter background color or no fill to make the text stand out.
- Increase the font size of the year to around 24pt so it becomes clearly visible.
- Copy the circle style from the first enlarged circle using Ctrl + Shift + C and paste it onto the other circles on subsequent slides with Ctrl + Shift + V to maintain consistency.
This technique creates a focal point for your audience, guiding their attention along the timeline as it animates.
Adding Illustrations for Visual Impact
To make your timeline even more engaging, add thematic illustrations or icons that correspond to each milestone. For example, phone illustrations can represent technological milestones over the years.

Here’s how to add and animate illustrations:
- Download suitable illustrations from free vector resources like Freepik.
- Paste all the illustrations onto the first slide and arrange them just above the timeline.
- Name each illustration in the Selection Pane with the same naming convention as the circles (e.g., !!Phone1980, !!Phone1990).
- Resize and rotate the illustrations as desired to add visual variety.
- On each subsequent slide, move the illustrations one step to the left to match the morph animation of the timeline circles.

When played in sequence, the morph transition animates not only the circles and text but also these illustrations, creating a dynamic and compelling visual narrative.
Adding Interactive Hyperlinks for Navigation
To enhance user interaction, you can add hyperlinks to your timeline circles, allowing viewers to jump between key slides easily.
Here’s how to add hyperlinks:
- Select a circle on the right side of the timeline on the first slide.
- Press Ctrl + K to open the hyperlink dialog.
- Link the circle to the last slide (e.g., slide 7) to allow quick navigation forward.
- On the last slide, select the circle on the left side and link it back to the first slide.
- Optionally, add hyperlinks to other circles for more navigation options.
This feature is especially useful in interactive presentations or kiosks where users control their own navigation.

Final Tips and Best Practices for PowerPoint Animation Effects
To wrap up, here are some additional tips to ensure your animated morph timeline is polished and professional:
- Consistent Naming: Always name your shapes consistently to avoid morph glitches.
- Use Slide Guides: Align objects precisely with guides to maintain a clean layout.
- Optimize Transition Timing: Adjust morph transition duration to suit your presentation pace.
- Test Your Animation: Preview your slideshow regularly to catch any alignment or animation issues early.
- Keep Text Readable: Use sufficiently large fonts and contrasting colors for clarity.
- Use High-Quality Images: Ensure background photos and illustrations are high resolution to avoid pixelation.
- Keep It Simple: Don’t overload your timeline with too many elements; focus on clarity and flow.
By following these best practices, your PowerPoint animation effects will look professional and keep your audience engaged throughout your presentation.
Frequently Asked Questions
What is the Morph transition in PowerPoint?
The Morph transition is a powerful animation tool in PowerPoint that creates smooth movement and transformation effects between slides by matching objects with the same names. It can move, resize, and change the appearance of shapes and text, making animations look fluid and dynamic.
Can I use any version of PowerPoint to create morph animations?
Morph transitions are available in PowerPoint 2019, PowerPoint for Microsoft 365, and PowerPoint Online. Older versions like PowerPoint 2016 or earlier do not support morph animations.
How do I name objects for morph animations?
Use the Selection Pane to rename objects with unique and consistent names across slides. For example, name a circle on slide 1 as “Oval1” and the corresponding circle on slide 2 with the exact same name. This helps PowerPoint recognize and animate them smoothly.
Can I add interactive navigation to my timeline?
Yes, you can add hyperlinks to shapes or text boxes in PowerPoint that link to other slides. This allows users to jump between sections of your timeline easily, making your presentation interactive and user-friendly.
What are good sources for free images and illustrations?
High-quality free images can be found on Unsplash, and free vector illustrations are available on sites like Freepik. Always check the license terms before using images in commercial projects.
How can I ensure my timeline animation runs smoothly?
Make sure all objects are aligned properly, named consistently, and that the morph transition duration is set to a comfortable speed. Preview your presentation multiple times to catch any issues.
Can I customize the look of the timeline circles?
Absolutely. You can change the size, color, fill, and outline of the circles to match your presentation style. Using no fill or light background fills can help highlight the text inside the circles.
Is it possible to download the example files?
Many PowerPoint tutorial creators offer downloadable example files. Check the video description or tutorial source for links to templates and assets to help you get started quickly.
Conclusion
Creating an animated morph timeline in PowerPoint is a fantastic way to visually represent chronological data, milestones, or project phases with style and clarity. By leveraging PowerPoint animation effects, especially the morph transition, you can craft smooth, engaging timelines that guide your audience’s focus and enhance storytelling.
From setting up your slide background and drawing precise circles to adding interactive hyperlinks, each step contributes to a professional and polished presentation. Remember to keep your design clean, your text readable, and your animations smooth for the best impact.
With practice, you’ll find that mastering PowerPoint animation effects like morph transitions opens a world of creative possibilities, making your presentations memorable and impactful.
Now it’s your turn! Start experimenting with these techniques and bring your timelines to life with PowerPoint’s powerful tools.
Check out the full video: ANIMATED PowerPoint Morph Timeline ✨ Free Download


