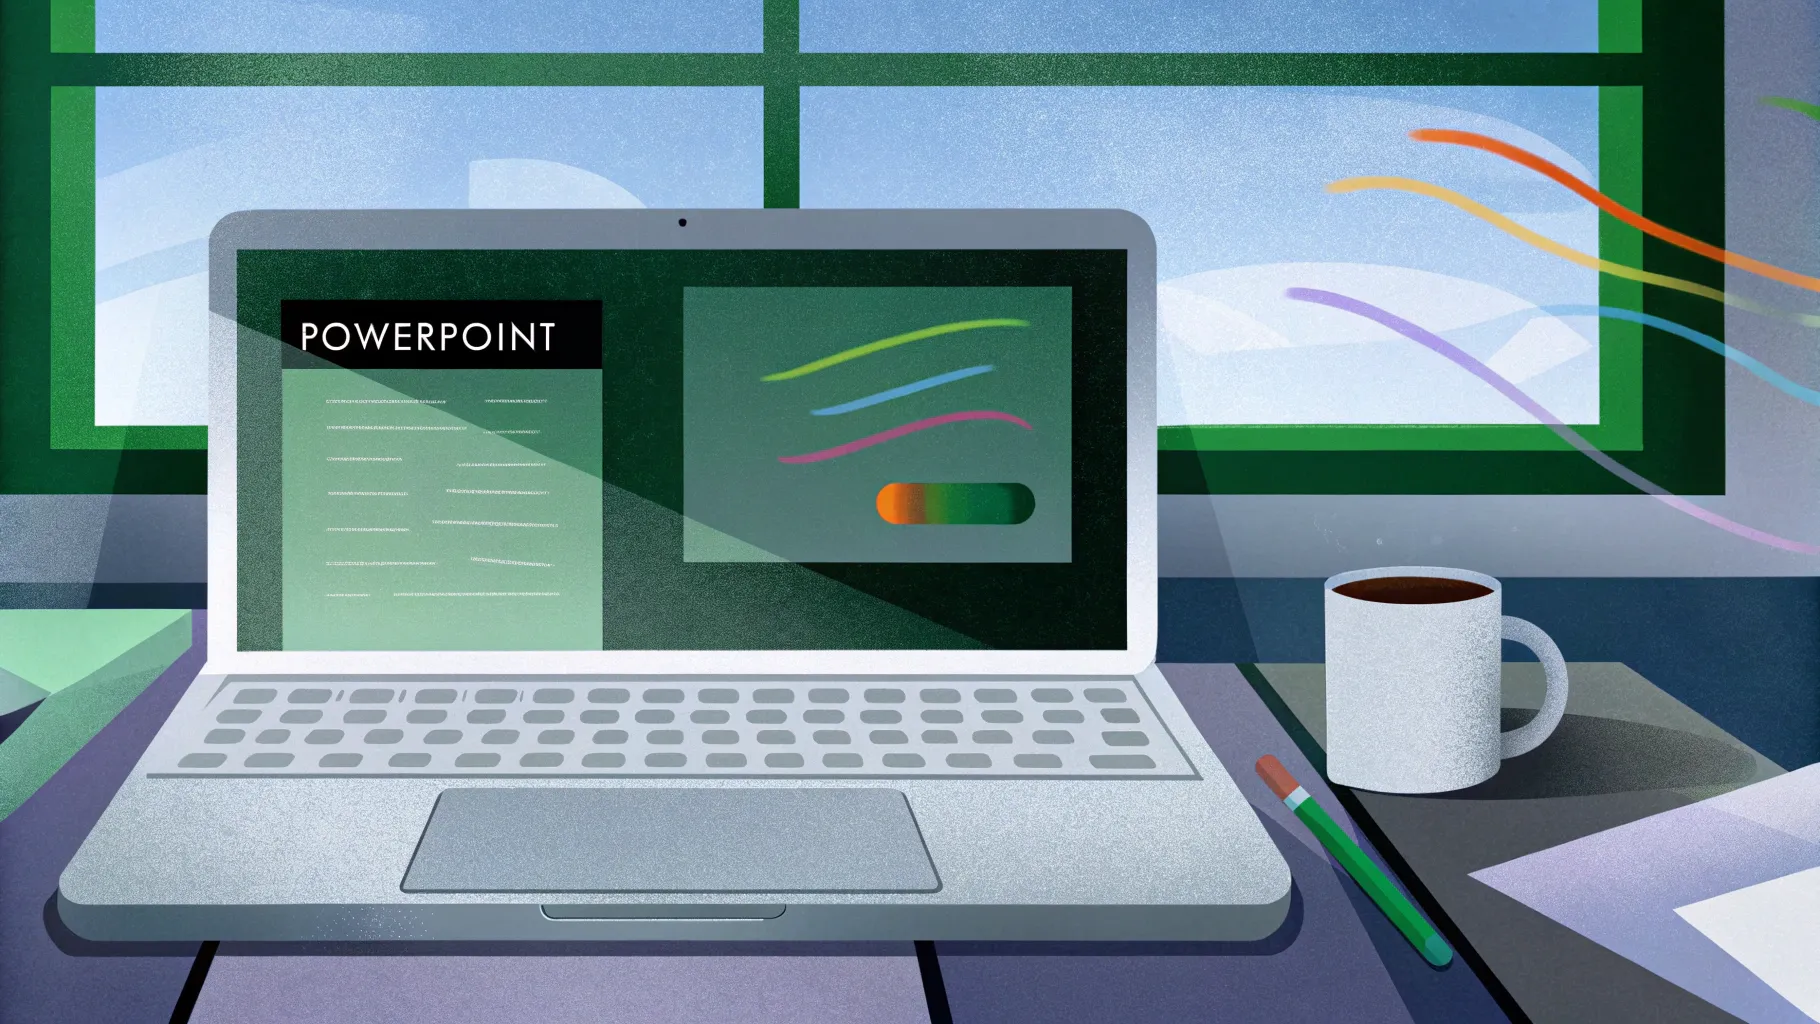
If you want to elevate your PowerPoint animation effects skills and add dynamic, professional touches to your presentations, you’re in the right place. In this comprehensive guide, we’ll walk you through the step-by-step process of creating captivating scrolling bar animations, pulsing buttons, and vibrant scribble effects that bring your slides to life.
Animations can transform a static slide into an engaging story that captures your audience’s attention and improves the overall impact of your message. Whether you’re preparing a business pitch deck, a report, or a proposal, mastering these animation techniques will set you apart and make your presentations memorable.
Table of Contents
- Why Animation Matters in PowerPoint Presentations
- Creating Beautiful Scrolling Bars
- Customizing Slide Layouts for Animation
- Designing Rounded Rectangles for the Scrolling Bar
- Building the Scrolling Animation with Motion Paths
- Rotating and Adjusting Scrolling Bars
- Adding the Opposite Direction Scrolling Bar
- Animating Additional Slide Elements
- Creating Pulsing Buttons with Growth-Shrink Animation
- Drawing and Animating Scribbles
- Animation Timing Tips for Smooth Transitions
- Conclusion and Next Steps
- Frequently Asked Questions (FAQ)
Why Animation Matters in PowerPoint Presentations
Imagine two slides: one is static, looking like a simple screenshot, and the other is vibrant with smooth animations moving across the screen. Instantly, the animated slide feels more alive, professional, and engaging. This is the power of PowerPoint animation effects.
Adding animations helps:
- Draw attention to key messages
- Guide the viewer’s eye through the content
- Make complex information easier to digest
- Enhance storytelling and engagement
- Give your presentations a polished, modern look
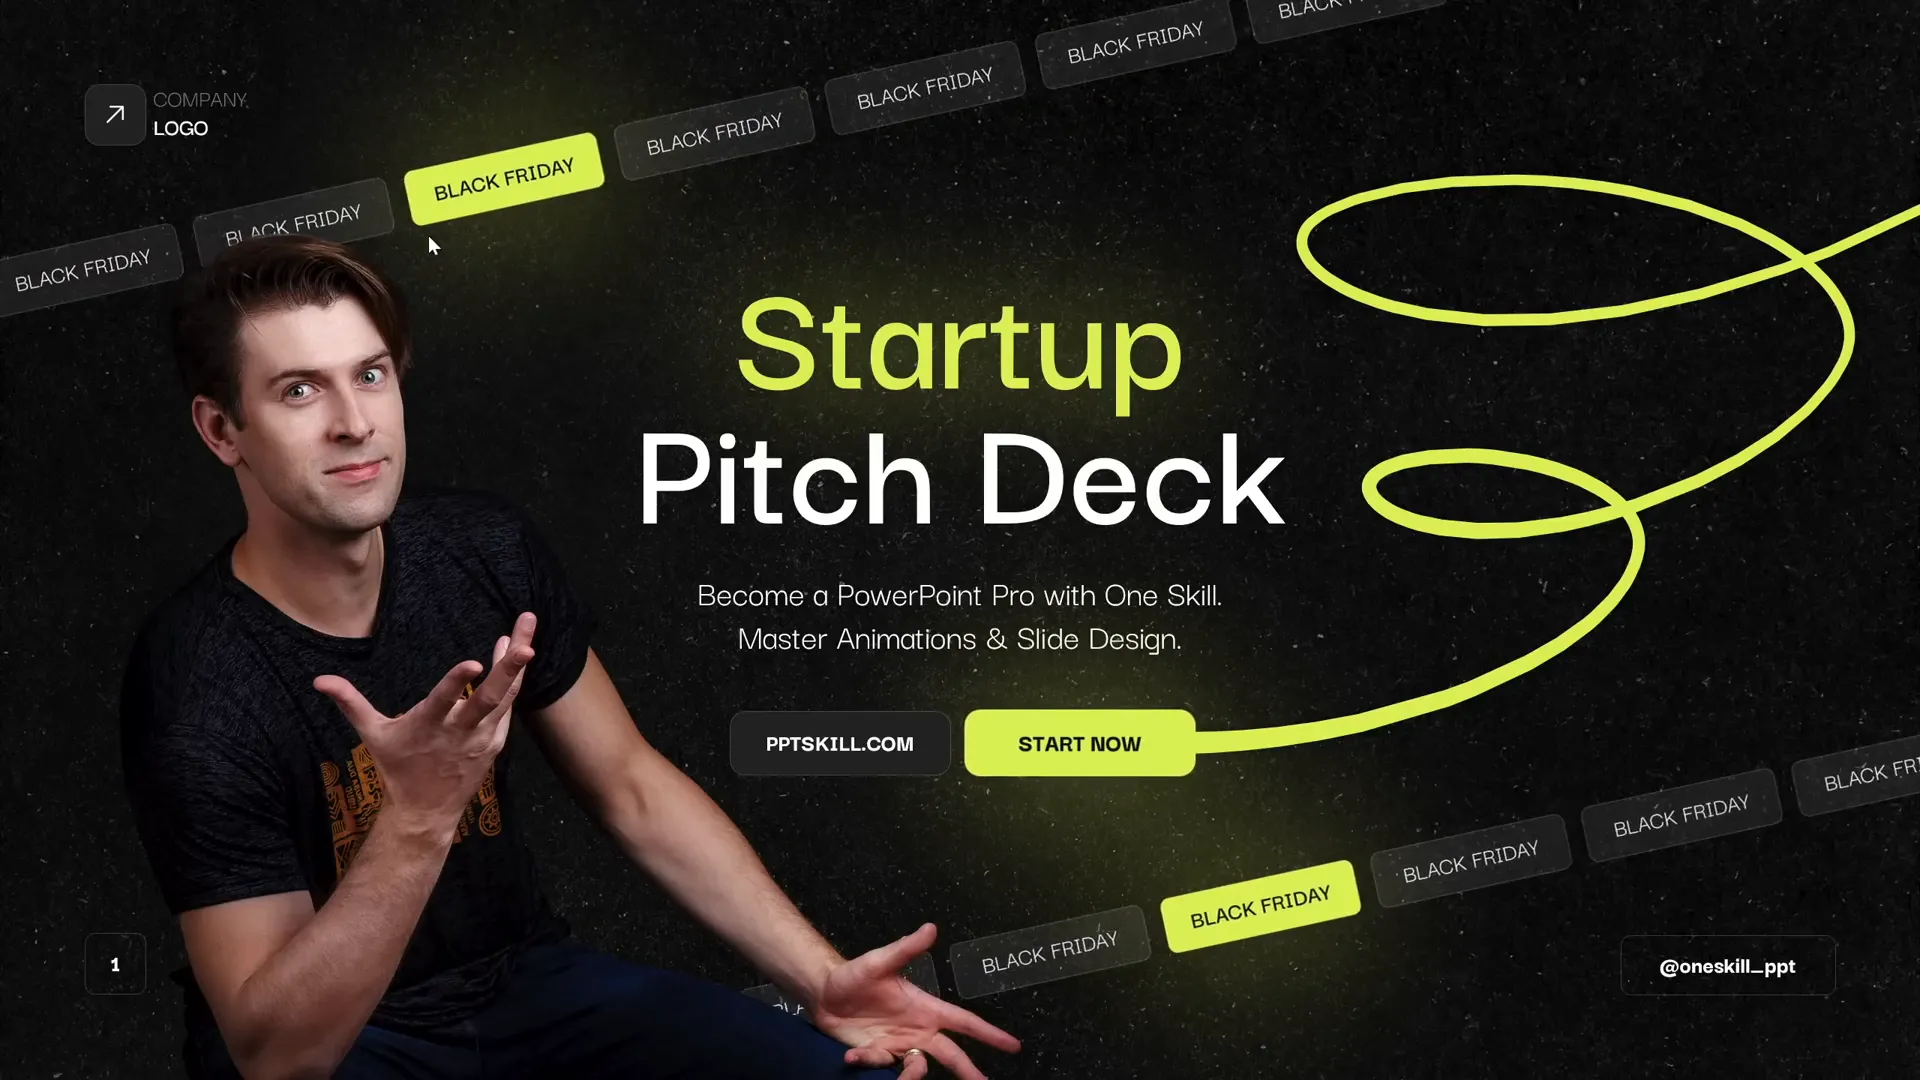
In this tutorial, we’ll focus on creating scrolling bars—a trendy, neon-style animation perfect for business pitch decks, reports, proposals, and more. These effects add subtle movement that keeps your audience interested without overwhelming them.

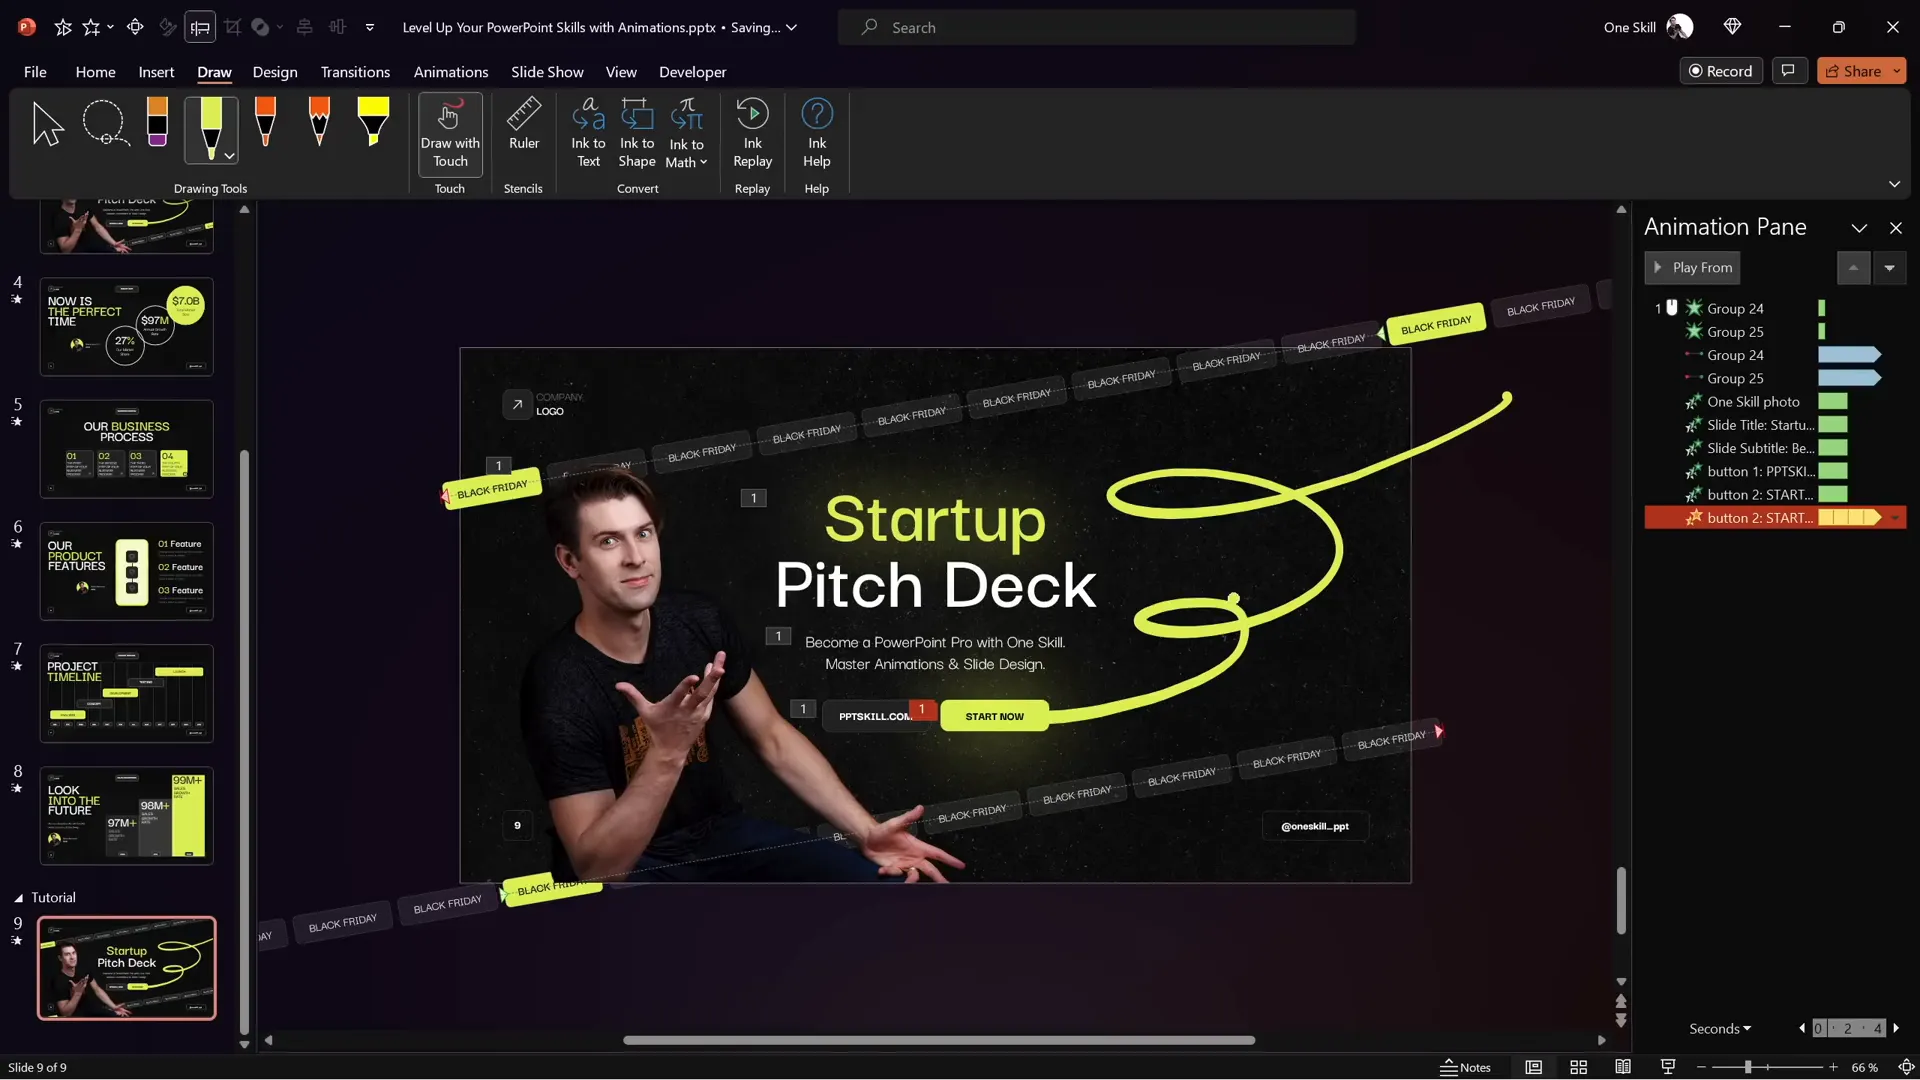
Creating Beautiful Scrolling Bars
Scrolling bars are a fantastic way to add a modern, dynamic element to your slide. Our example uses two scrolling bars: one at the top moving left, and one at the bottom moving right, creating an eye-catching opposing motion effect.
Step 1: Insert a New Slide
Start by inserting a fresh, blank slide. This ensures you have a clean canvas to work with. Keep in mind that your slide might look different if you haven’t customized your slide master.
- Click the Home tab.
- Click New Slide and select a blank layout.
Customizing the slide master can help maintain consistency and add backgrounds or logos automatically, but we’ll cover that in the next section.
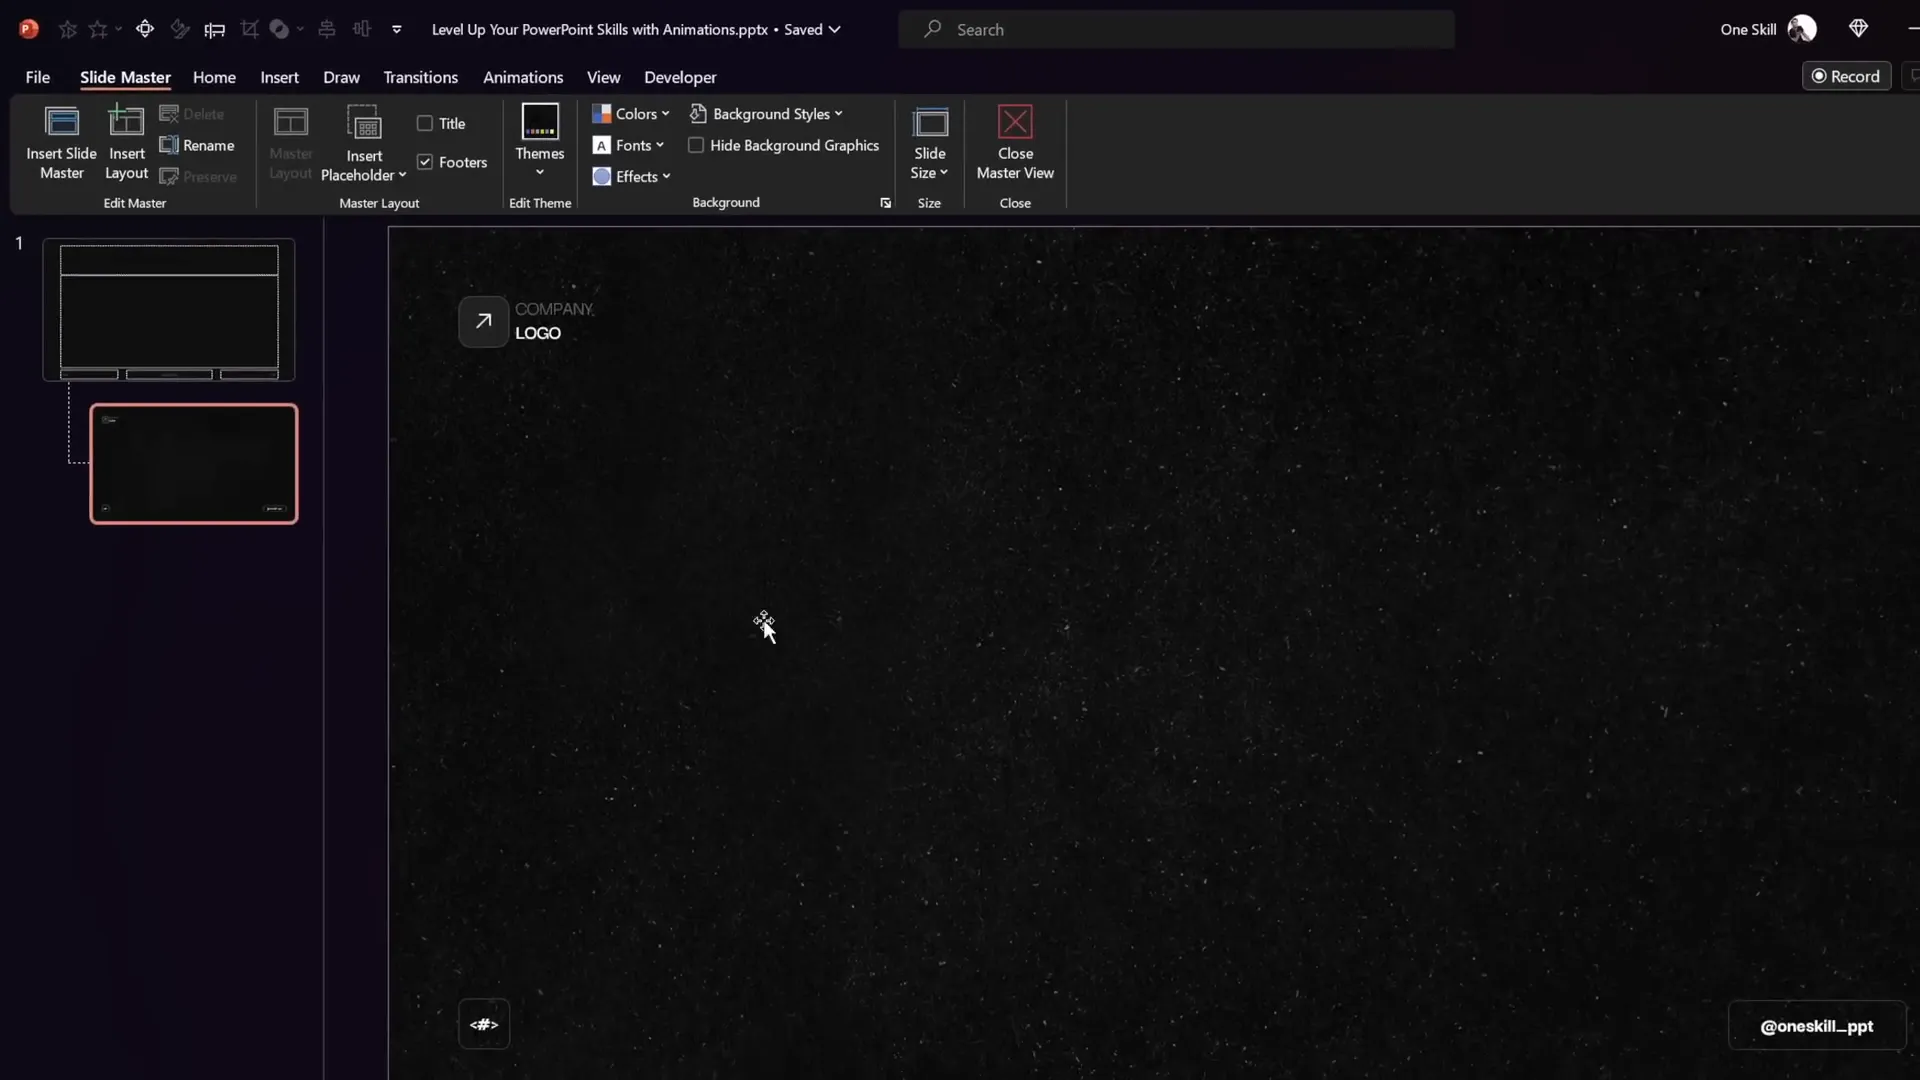
Step 2: Customize Slide Layouts for a Professional Look
To give your slides a polished, branded look, customize your slide master:
- Go to View > Slide Master.
- Insert a dark texture background or any image you prefer.
- Add a footer, slide number, and company logo in your preferred positions.
- Close the Slide Master view to apply changes.
This approach ensures every new slide follows your design style, saving time and keeping your presentation cohesive.
Designing Rounded Rectangles for the Scrolling Bar
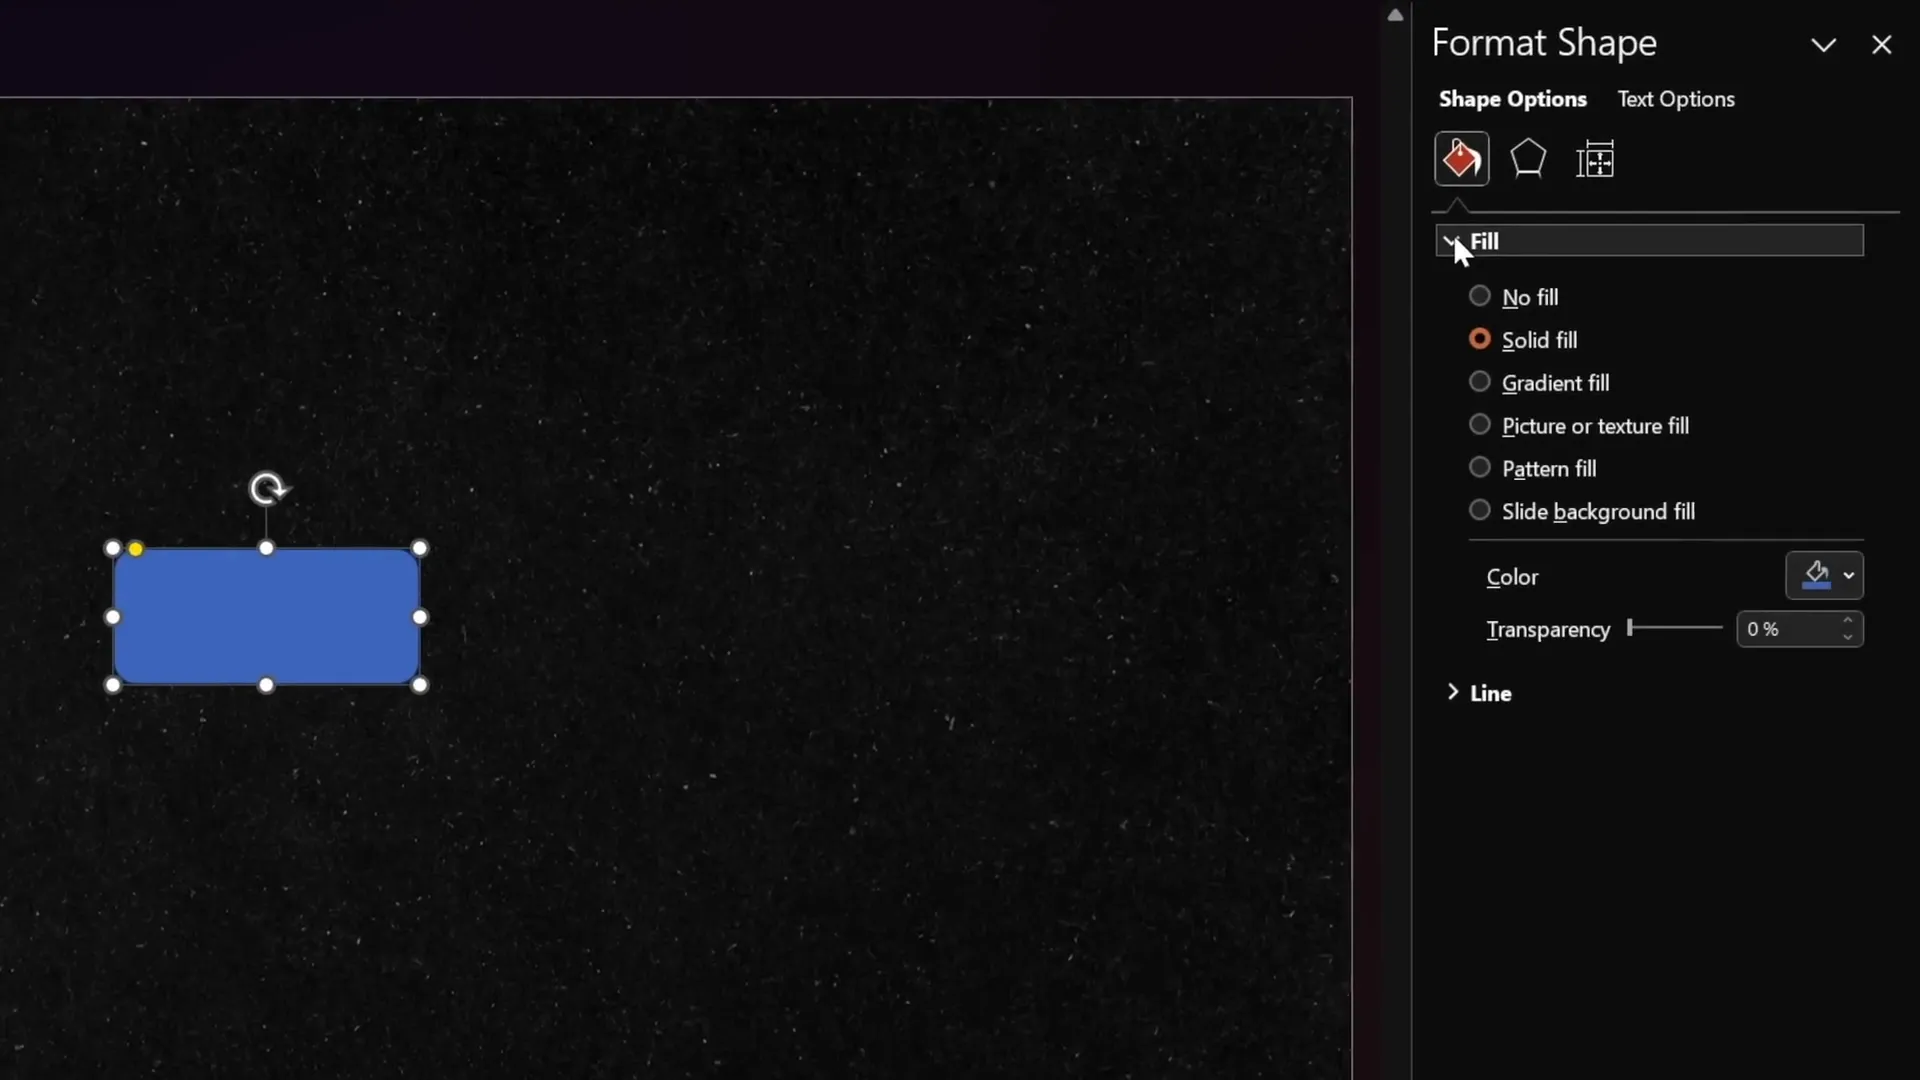
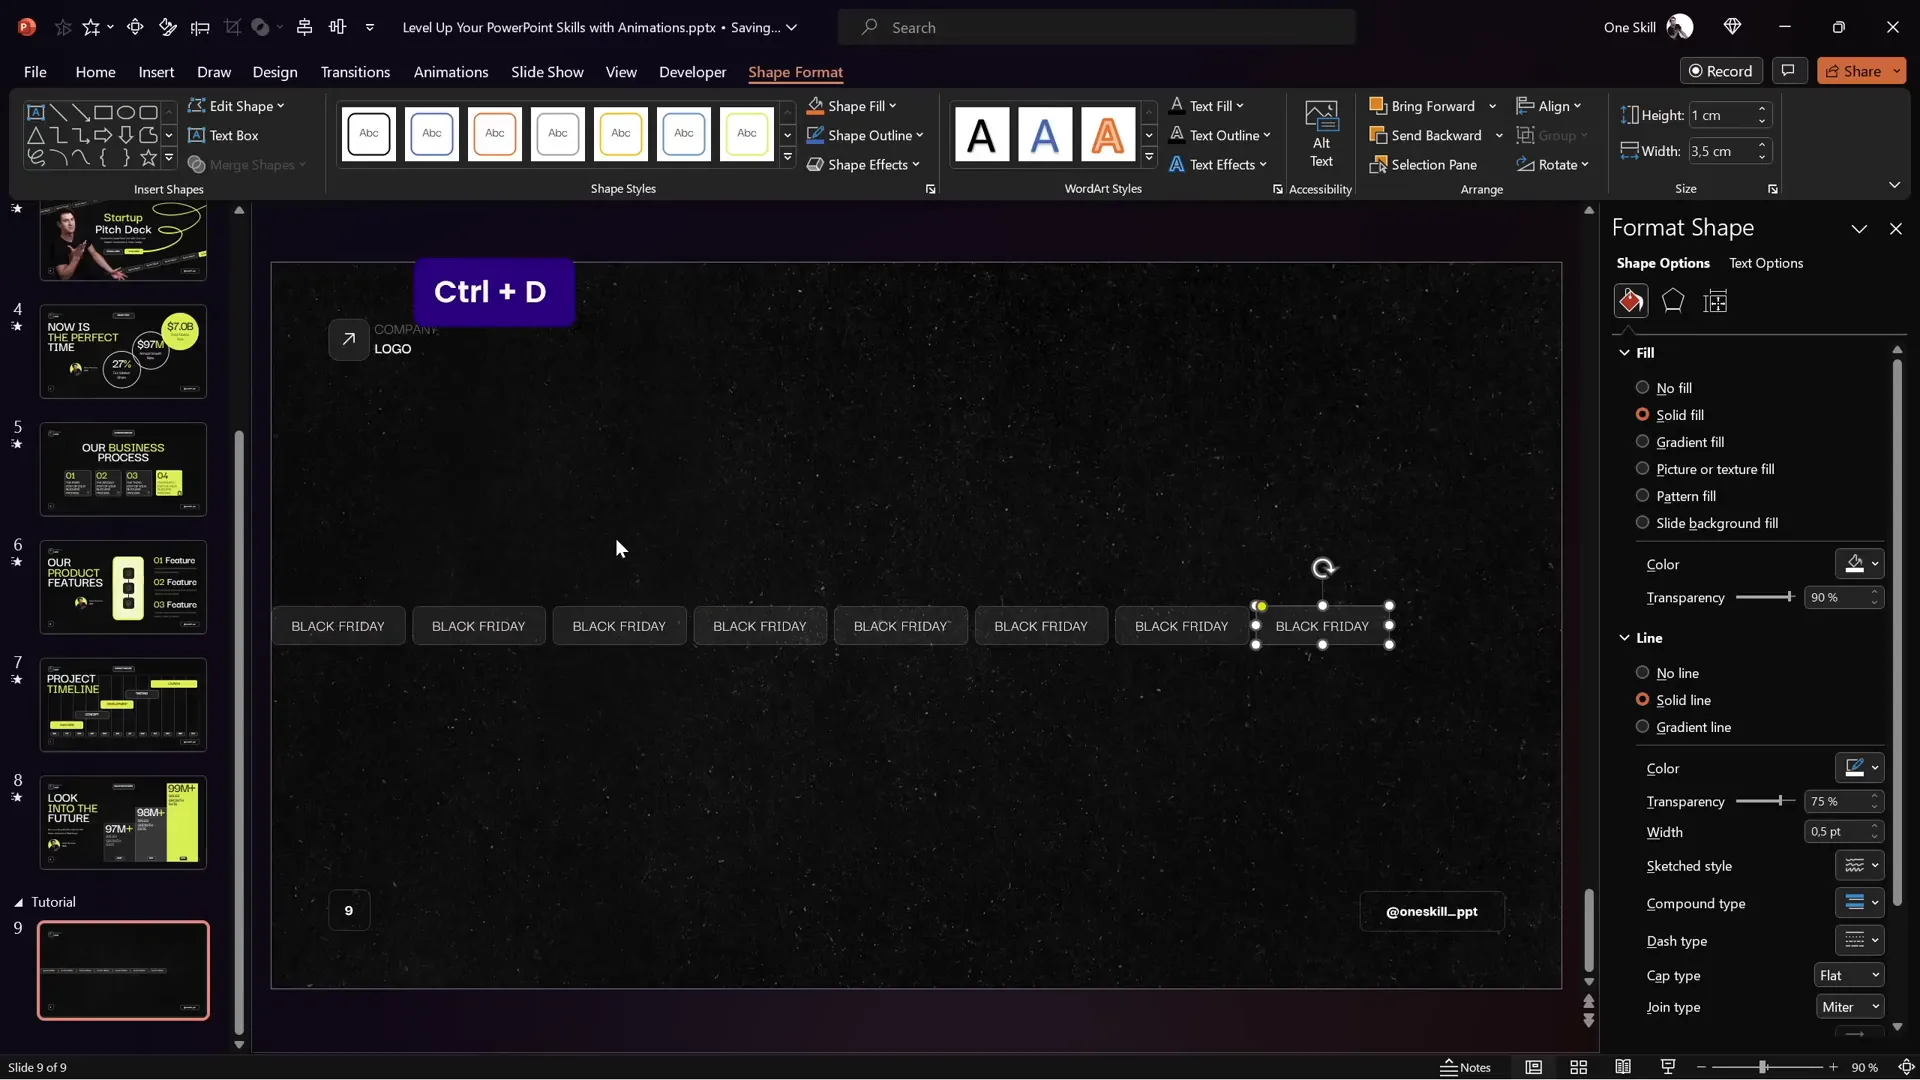
The scrolling bar is made up of multiple rounded rectangles with a semi-transparent white fill and a subtle white border. Here’s how to create the base shape:
- Go to Insert > Shapes and select the Rounded Rectangle tool.
- Draw a rectangle approximately 3.5 cm wide and 1 cm tall.
- Right-click the shape and choose Format Shape.
- Set the Fill color to white with 90% transparency.
- Set the Line color to white with 75% transparency and thickness to 0.5 pt.
- Use the Darker Grotesque font at size 12 with white font color for text inside the rectangle.
- Type your desired text, e.g., “Black Friday.”
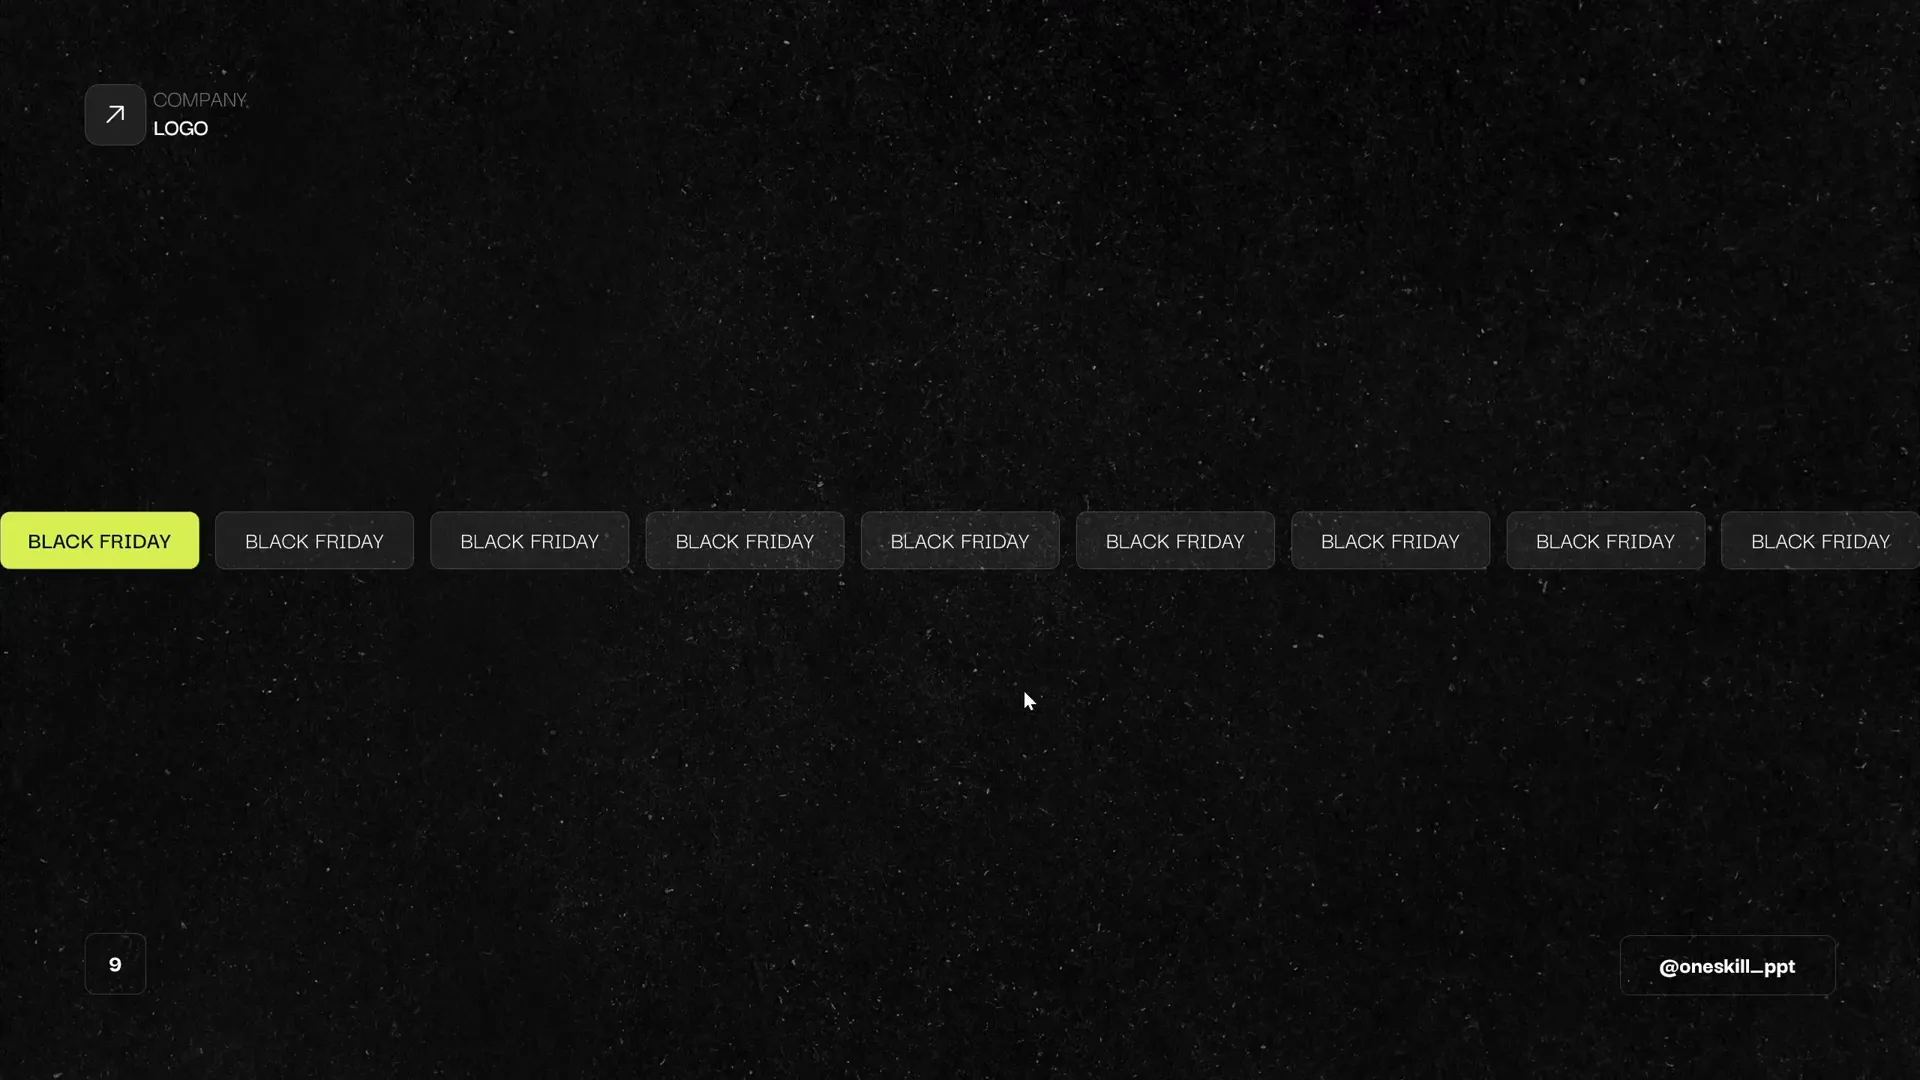
Next, duplicate this rectangle multiple times to fill the width of the slide:
- Select the rectangle and press Ctrl + D to duplicate.
- Move the duplicate to the right, leaving equal gaps.
- Repeat until the last rectangle extends beyond the slide edge, then delete the excess.
- Use the Align > Distribute Horizontally option to evenly space the rectangles.
- Group all rectangles together (Ctrl + G).
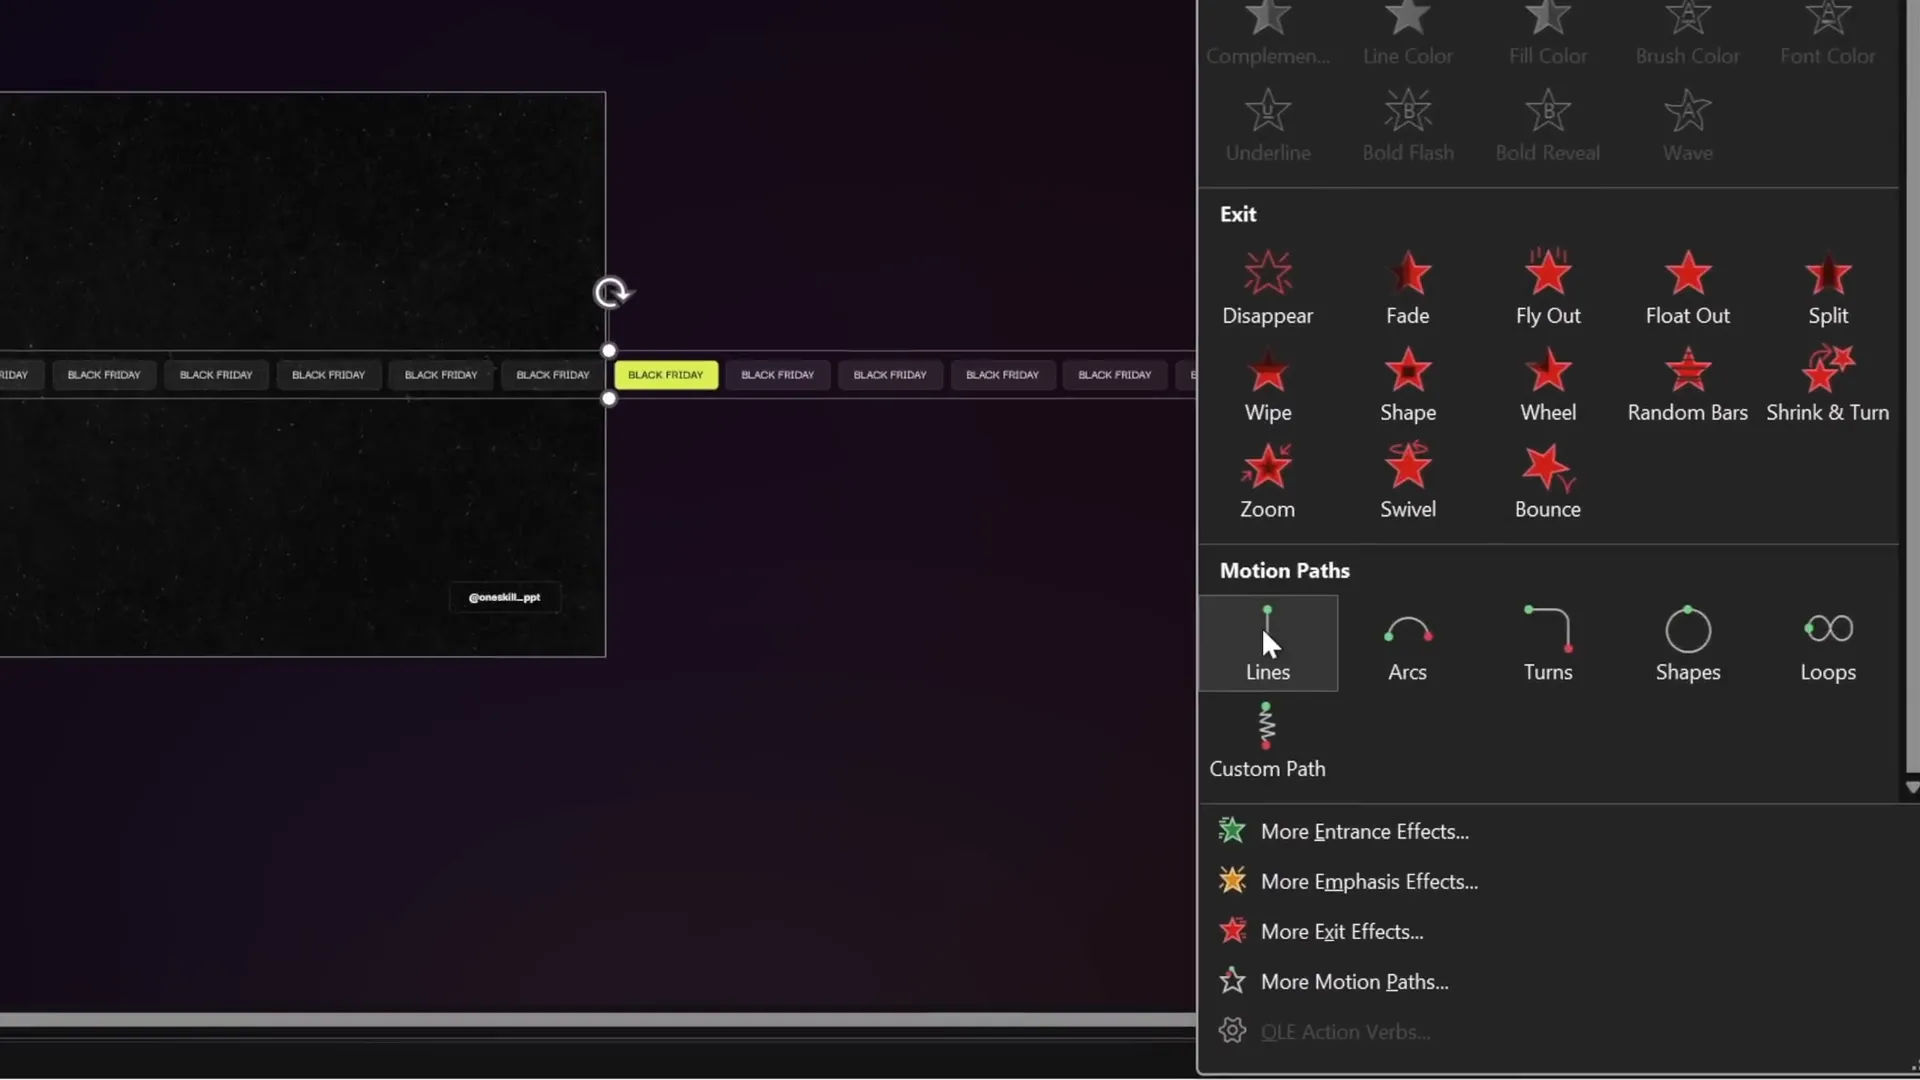
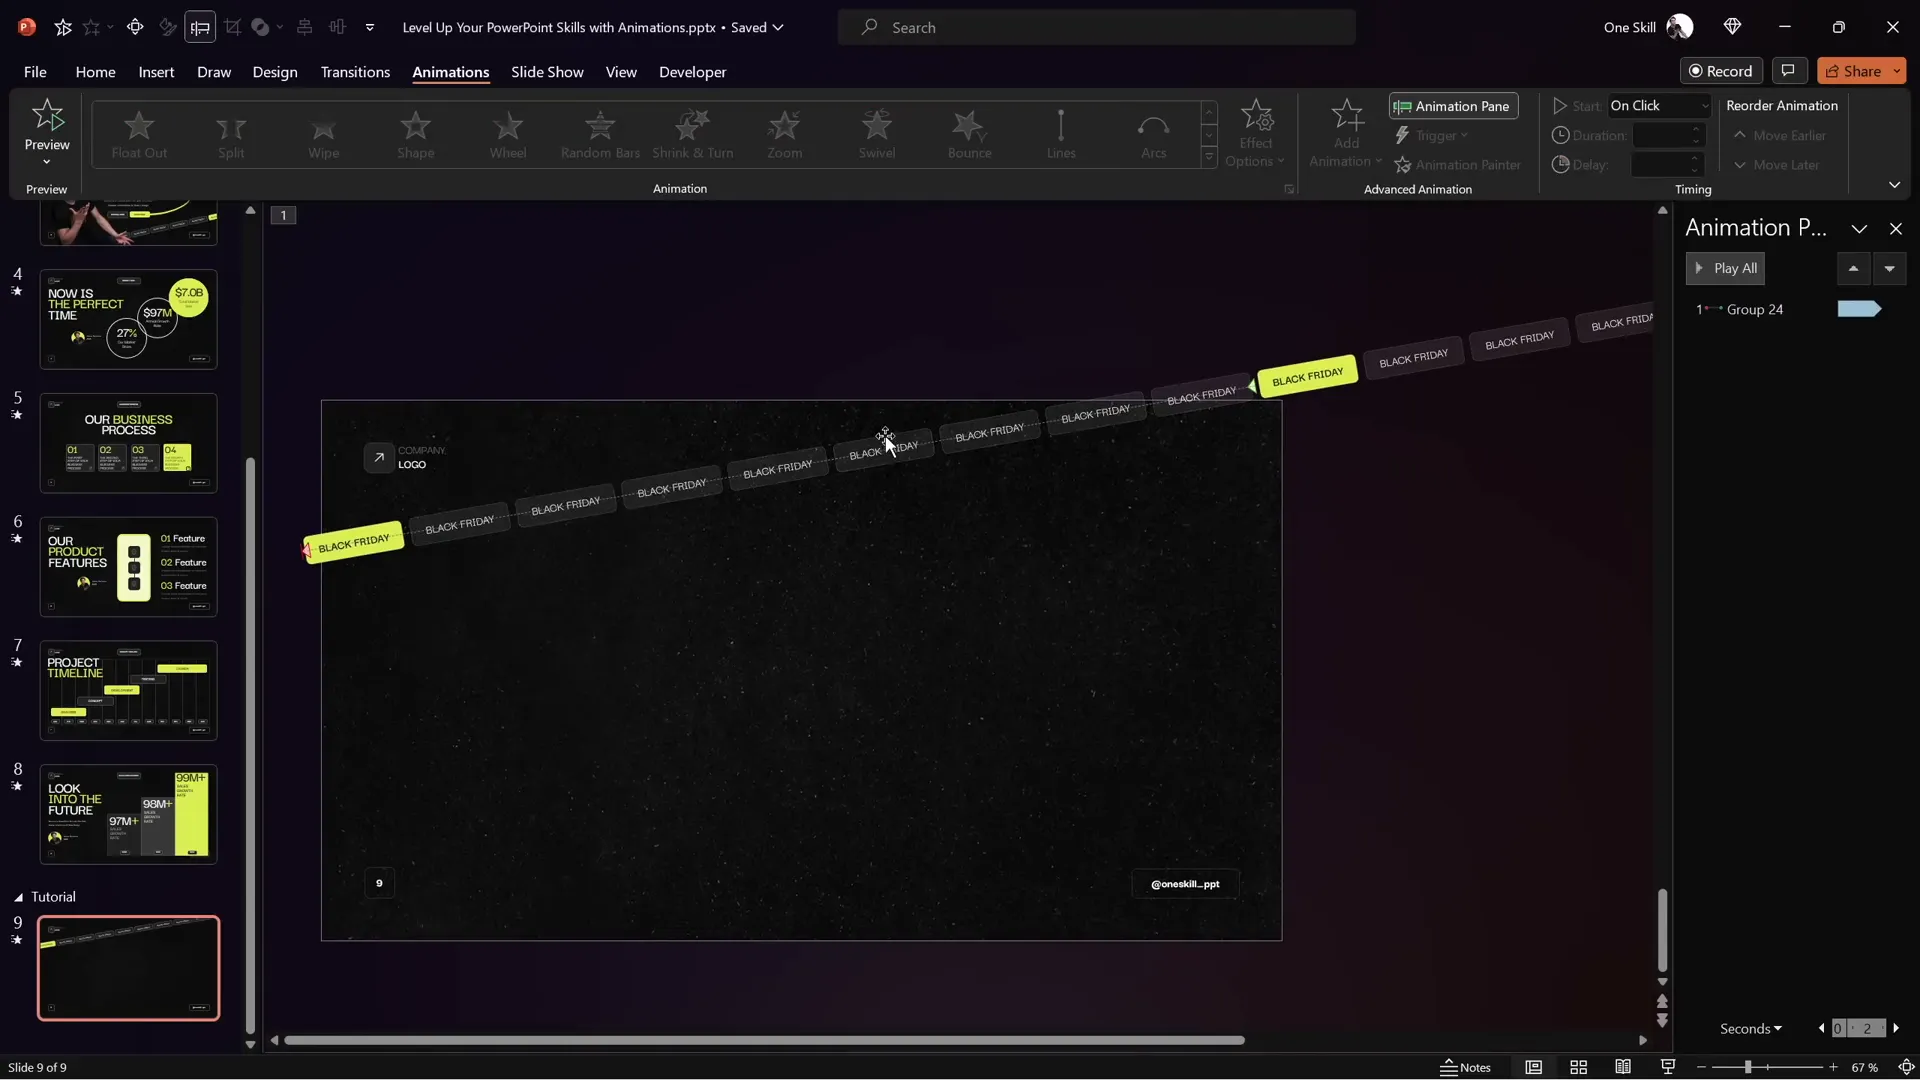
Building the Scrolling Animation with Motion Paths
To animate the scrolling bar, we’ll use a motion path animation that moves the grouped rectangles horizontally across the slide.
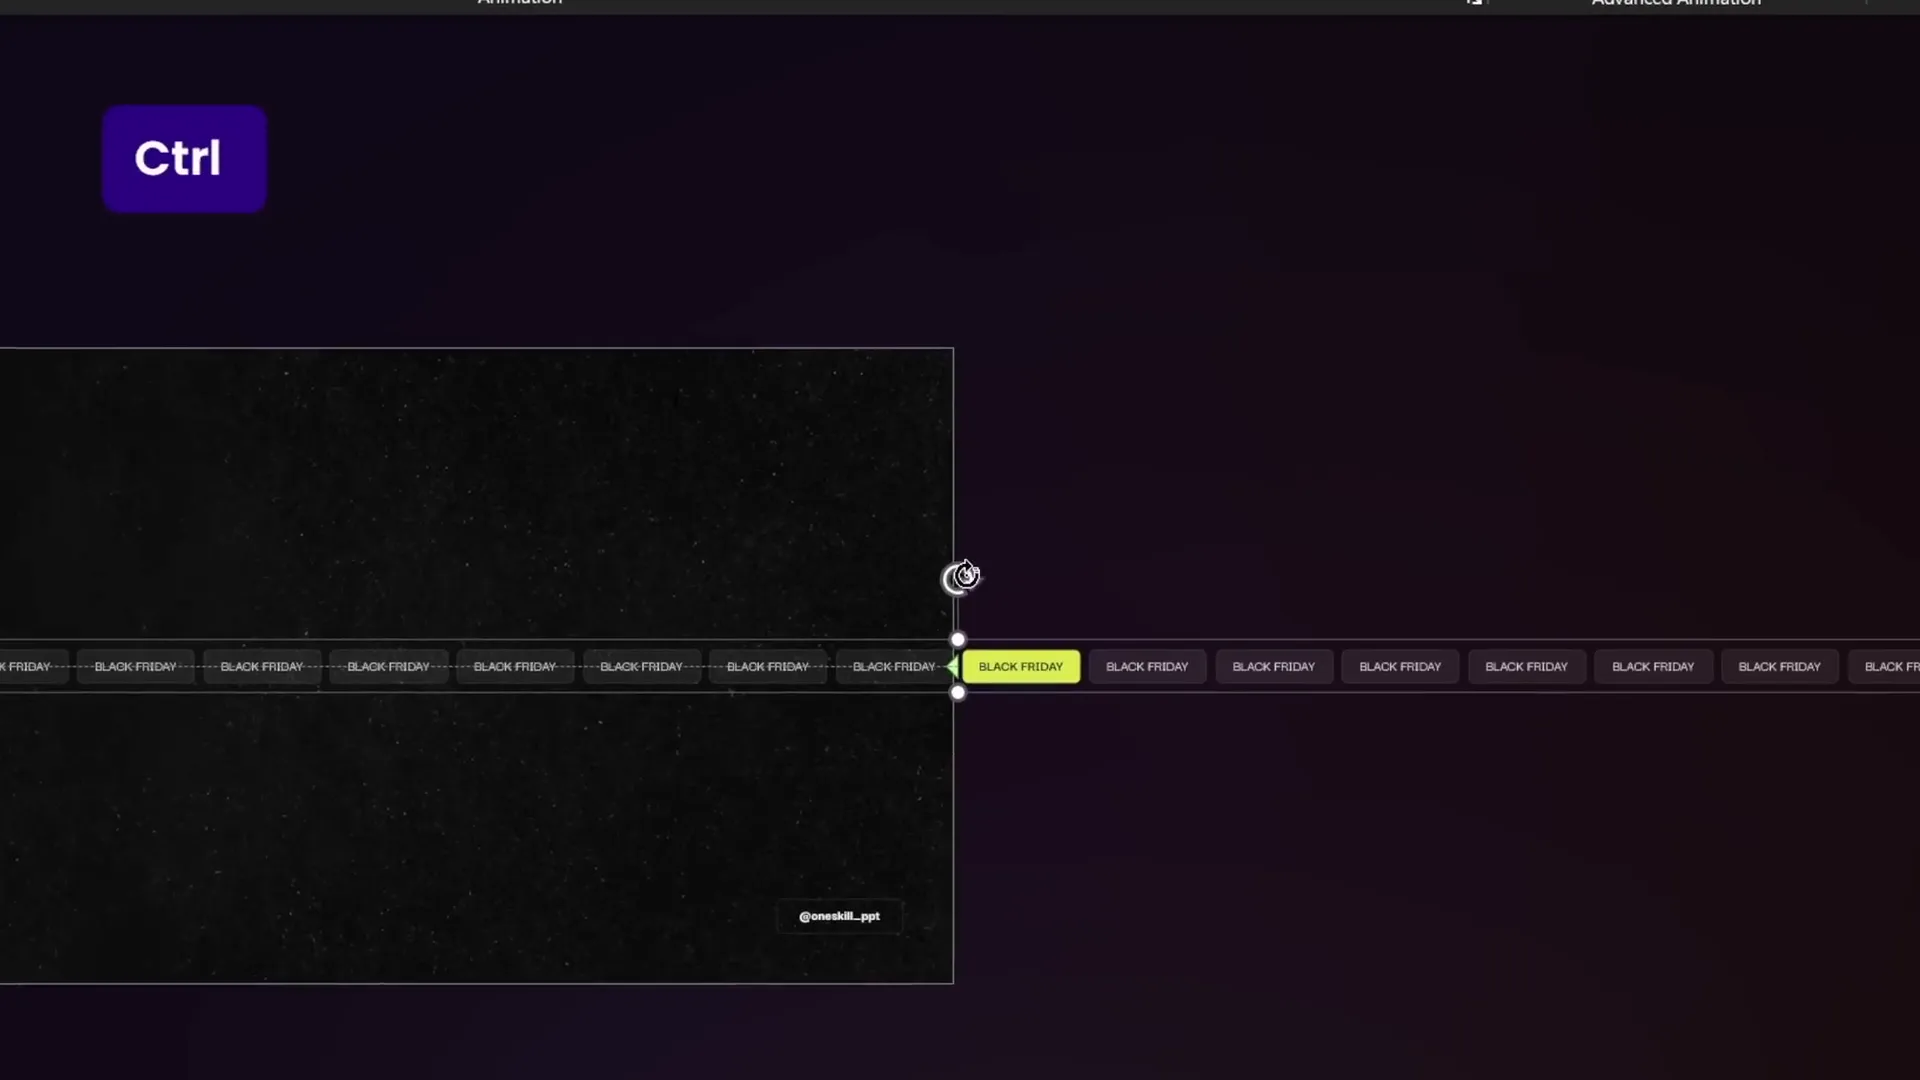
- Duplicate the entire group of rectangles and place the duplicate to the right, aligning it precisely with the original group.
- Make the leftmost rectangle in each group brighter—this helps visually align the motion path later.
- Group the two large groups into one big group.
- Select the big group and apply a Motion Path > Left animation.
- Adjust the red end point of the motion path so that the second bright rectangle exactly overlaps the first.
- Set animation duration to 5 seconds.
- In animation options, remove smooth start and smooth end for a consistent speed.
- Set the animation to repeat Until End of Slide for seamless looping.
When played, the rectangles scroll smoothly to the left, creating an endless scrolling effect.
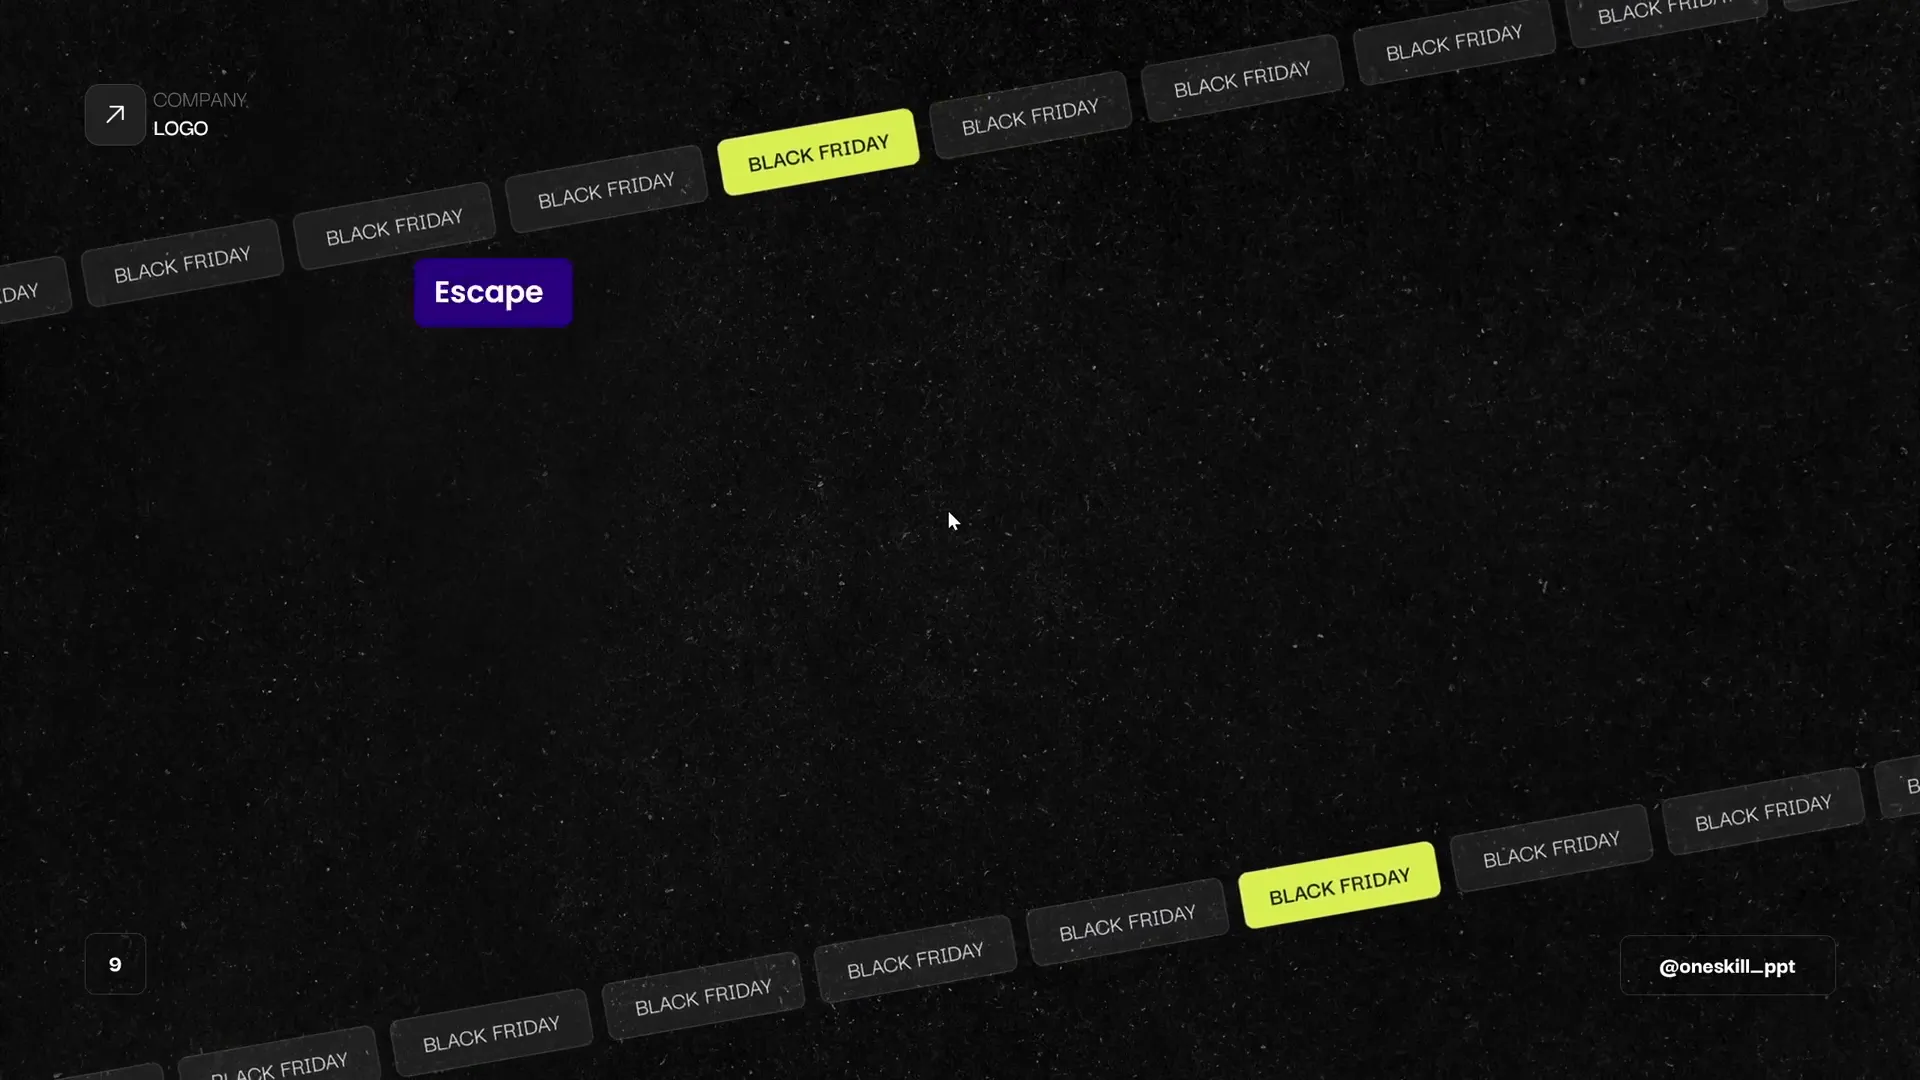
Rotating and Adjusting Scrolling Bars
To add a creative twist, you can rotate the scrolling bar to create a tilted effect:
- Select the grouped rectangles.
- Use the rotation handle to rotate the group to your desired angle.
- Ensure only the first group of rectangles is visible on the slide to avoid gaps.
- Adjust the motion path end point again to perfectly align the bright rectangles for seamless scrolling.
You can also slow down the scrolling speed by increasing the animation duration, e.g., to 10 seconds, for a more elegant effect.
Adding the Opposite Direction Scrolling Bar
For added flair, create a second scrolling bar that moves in the opposite direction:
- Duplicate the entire scrolling bar group.
- Move the duplicate slightly to the left to prevent gaps.
- Make sure only the second group of rectangles is visible on the slide.
- Change the motion path animation direction to Right.
- Align the bright rectangles to synchronize the animation.
- Set the animation to start With Previous so both bars animate simultaneously.
- Add a subtle fade-in animation to both scrolling bars, ensuring to use the Add Animation button to preserve existing animations.
Now you have two beautiful scrolling bars animating seamlessly in opposite directions, adding a dynamic, modern look to your slide.
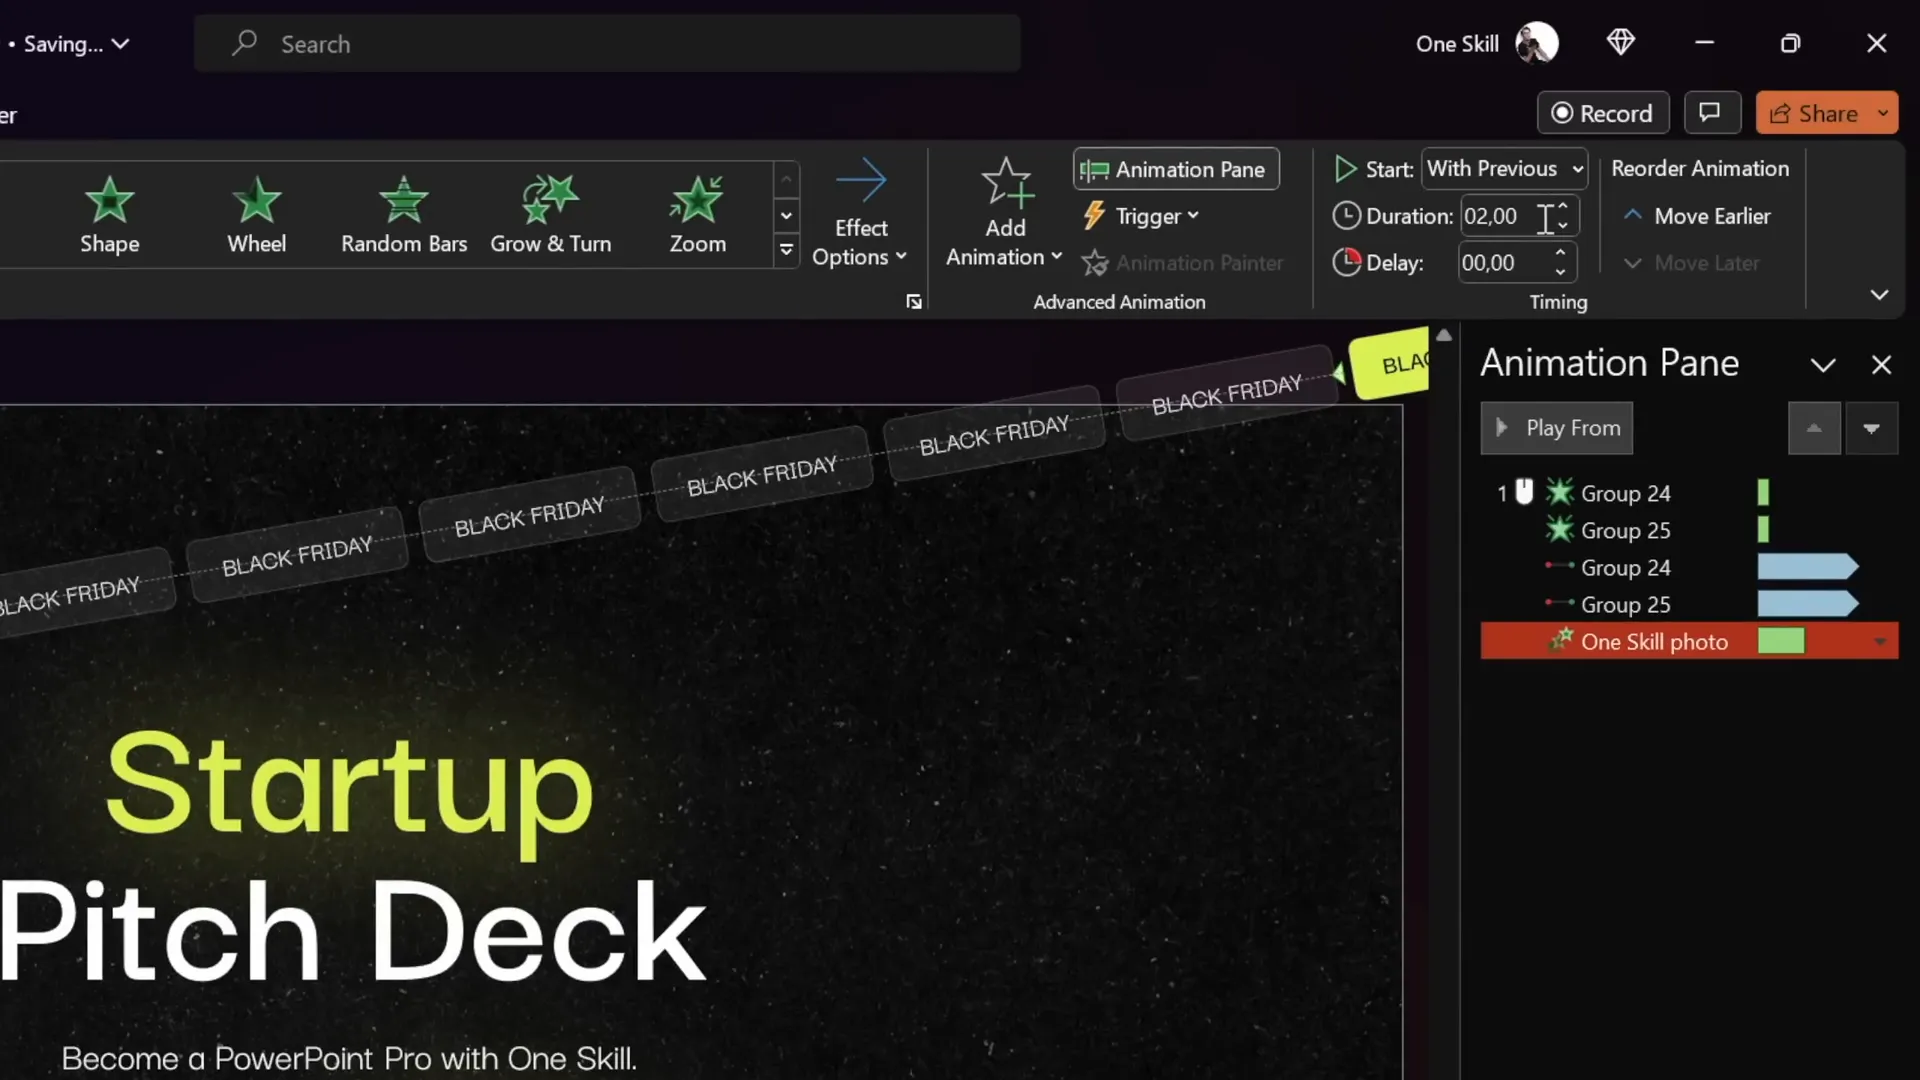
Animating Additional Slide Elements
Beyond the scrolling bars, animating other slide elements like images, titles, subtitles, and buttons can further enhance your presentation.
- Select the image or photo on your slide.
- Apply a Fly In animation from the left.
- Set the animation duration to 2 seconds and start it With Previous.
- In the animation options, add a Bounce End effect of 1.5 seconds for a smooth, bouncy finish.
- Use the Animation Painter tool to copy this animation to other objects like titles and buttons for consistency.
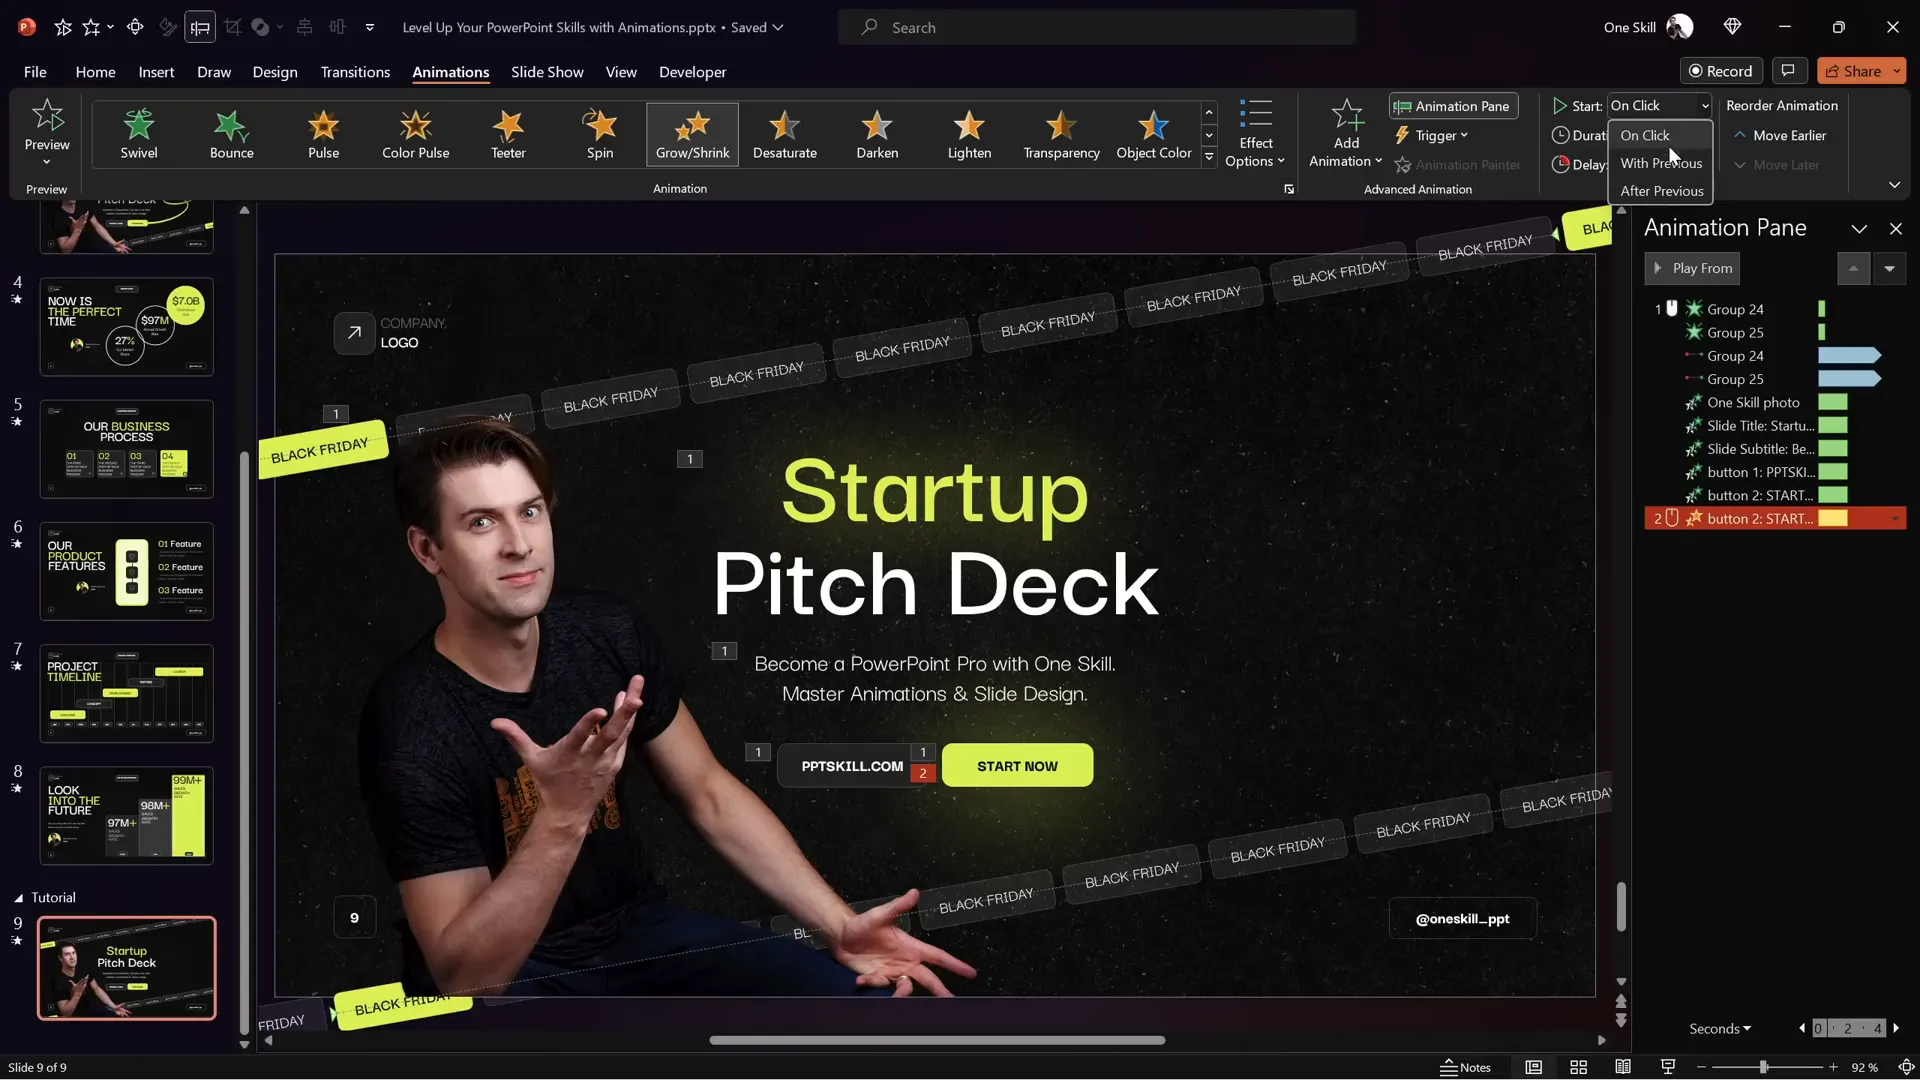
Creating Pulsing Buttons with Growth-Shrink Animation
To make your call-to-action buttons stand out, add a pulsing effect using the Grow/Shrink animation:
- Select the button you want to animate.
- Add a Grow/Shrink animation starting With Previous.
- Set the duration to 0.5 seconds.
- In animation settings, set the size to 105% for a subtle pulse.
- Enable Auto Reverse so the button grows and shrinks smoothly.
- Set the animation to repeat Until End of Slide for continuous pulsing.
- Add a slight smooth start and smooth end (e.g., 0.25 seconds each) to soften the pulse transition.
Drawing and Animating Scribbles
Adding a vibrant scribble animation can inject personality and creativity into your slide. Here’s how to do it:
- Go to the Draw tab in PowerPoint.
- Choose a pen color (e.g., bright lime neon) and select the thickest pen for smooth lines.
- Draw a scribble that fits your slide’s style and message.
- If needed, use Ctrl + Z to undo and redraw until satisfied.
- Select the scribble and apply the Replay animation.
- Set the animation to start With Previous for seamless integration.
- Adjust the animation duration (e.g., 1.5 seconds) based on desired speed.
Animation Timing Tips for Smooth Transitions
Careful timing ensures your animations flow naturally and maintain audience engagement. Here are a few tips based on the example:
| Animation | Start | Duration | Additional Settings |
|---|---|---|---|
| Scrolling Bars | On Click / With Previous | 5-10 seconds (looping) | Repeat Until End of Slide, No Smooth Start/End |
| Photo and Text Elements | With Previous | 2 seconds | Bounce End 1.5 seconds |
| Pulsing Button | With Previous | 0.5 seconds | Grow/Shrink 105%, Auto Reverse, Repeat Until End of Slide, Smooth Start/End 0.25s |
| Scribble | With Previous (Delayed 2 seconds) | 1.5 seconds | Starts after button flying animation finishes |
Setting delays and using “With Previous” strategically helps create a smooth sequence of animations without awkward pauses or overlaps.
Conclusion and Next Steps
With just a few simple but carefully constructed PowerPoint animation effects, you can transform your slides from static and boring to lively and professional. This tutorial covered:
- How to create and animate scrolling bars with motion paths
- Customizing slide layouts and designing semi-transparent rounded rectangles
- Animating images and text with flying and bounce effects
- Adding pulsing animations to buttons for calls to action
- Drawing and animating vibrant scribbles for visual interest
- Managing animation timing for smooth, seamless playback
By mastering these techniques, your presentations will look modern, polished, and engaging—perfect for business pitches, reports, or any professional setting.
If some concepts here seem complex, consider enrolling in courses like the PowerPoint Animation Mastery Course, which offers step-by-step instruction and free slide templates to accelerate your learning.
Now it’s your turn to bring your slides to life with these animation effects!
Frequently Asked Questions (FAQ)
1. What are PowerPoint animation effects, and why are they important?
PowerPoint animation effects are visual effects applied to slide elements to create movement or transitions. They help emphasize key points, maintain audience interest, and make presentations more dynamic and engaging.
2. How can I create a seamless looping scrolling bar animation in PowerPoint?
Create two groups of rounded rectangles with semi-transparent fills, place them side by side, and apply a motion path animation that moves the group horizontally. Adjust the motion path endpoint so the rectangles overlap perfectly, and set the animation to repeat until the end of the slide for a seamless loop.
3. Can I customize the speed of my animations?
Yes. You can adjust the animation duration to make animations faster or slower. For example, increasing the motion path animation duration from 5 to 10 seconds slows the scrolling bar movement, creating a more elegant effect.
4. How do I add a pulsing effect to buttons?
Use the Grow/Shrink animation with a slight increase in size (e.g., 105%), enable auto-reverse, and set the animation to repeat until the end of the slide. Adding smooth start and end transitions softens the pulse.
5. What if I want to add hand-drawn scribble animations?
Use the Draw tab in PowerPoint to create a scribble with the pen tool. Apply the Replay animation effect to the scribble and adjust timing to sync it with other animations on the slide.
6. How do I ensure animations run smoothly and in sync?
Use the Animation Pane to adjust start options (On Click, With Previous, After Previous) and add delays where needed. This allows precise control over the sequence and timing of animations.
7. Are these animation techniques suitable for all types of presentations?
Yes, these techniques are versatile and can be adapted for business presentations, educational content, marketing pitches, or creative slideshows. Just ensure animations support your message without overwhelming your audience.


