
Are you looking to elevate your presentation game with dynamic, visually captivating timelines? Look no further! In this comprehensive guide, I’ll walk you through the step-by-step process of creating a stunning animated morph timeline in PowerPoint using powerful Powerpoint Animation effects. This tutorial is inspired by viewer requests and is designed to help you master the morph transition, a game-changing feature that brings your slides to life with seamless animation.
By the end of this article, you will have the skills needed to craft your own custom animated timeline, complete with smooth transitions, engaging visuals, and interactive elements that keep your audience hooked. Whether you are a beginner or an intermediate PowerPoint user, this tutorial will unlock new creative possibilities for your presentations.
Table of Contents
- Getting Started: Setting Up Your Slides
- Designing the Timeline Elements
- Applying the Morph Transition for Animation
- Enhancing the Timeline with Illustrations
- Adding Hyperlinks for Interactive Navigation
- Frequently Asked Questions (FAQ)
- Conclusion
Getting Started: Setting Up Your Slides
The foundation of any great animated timeline starts with a clean, well-organized slide setup. Here’s how to prepare your PowerPoint workspace:
1. Create a Blank New Slide
Begin with a fresh blank slide. This ensures you have full control over every element without any distractions from default placeholders or layouts.
2. Set Slide Layout to Blank
Right-click on the slide and select Layout → Blank. This removes any pre-existing text boxes or placeholders, giving you a clean canvas.
3. Activate Slide Guides
To ensure perfect alignment, activate the slide guides. This helps you locate the center and edges of the slide precisely, which is crucial for evenly distributing timeline elements.
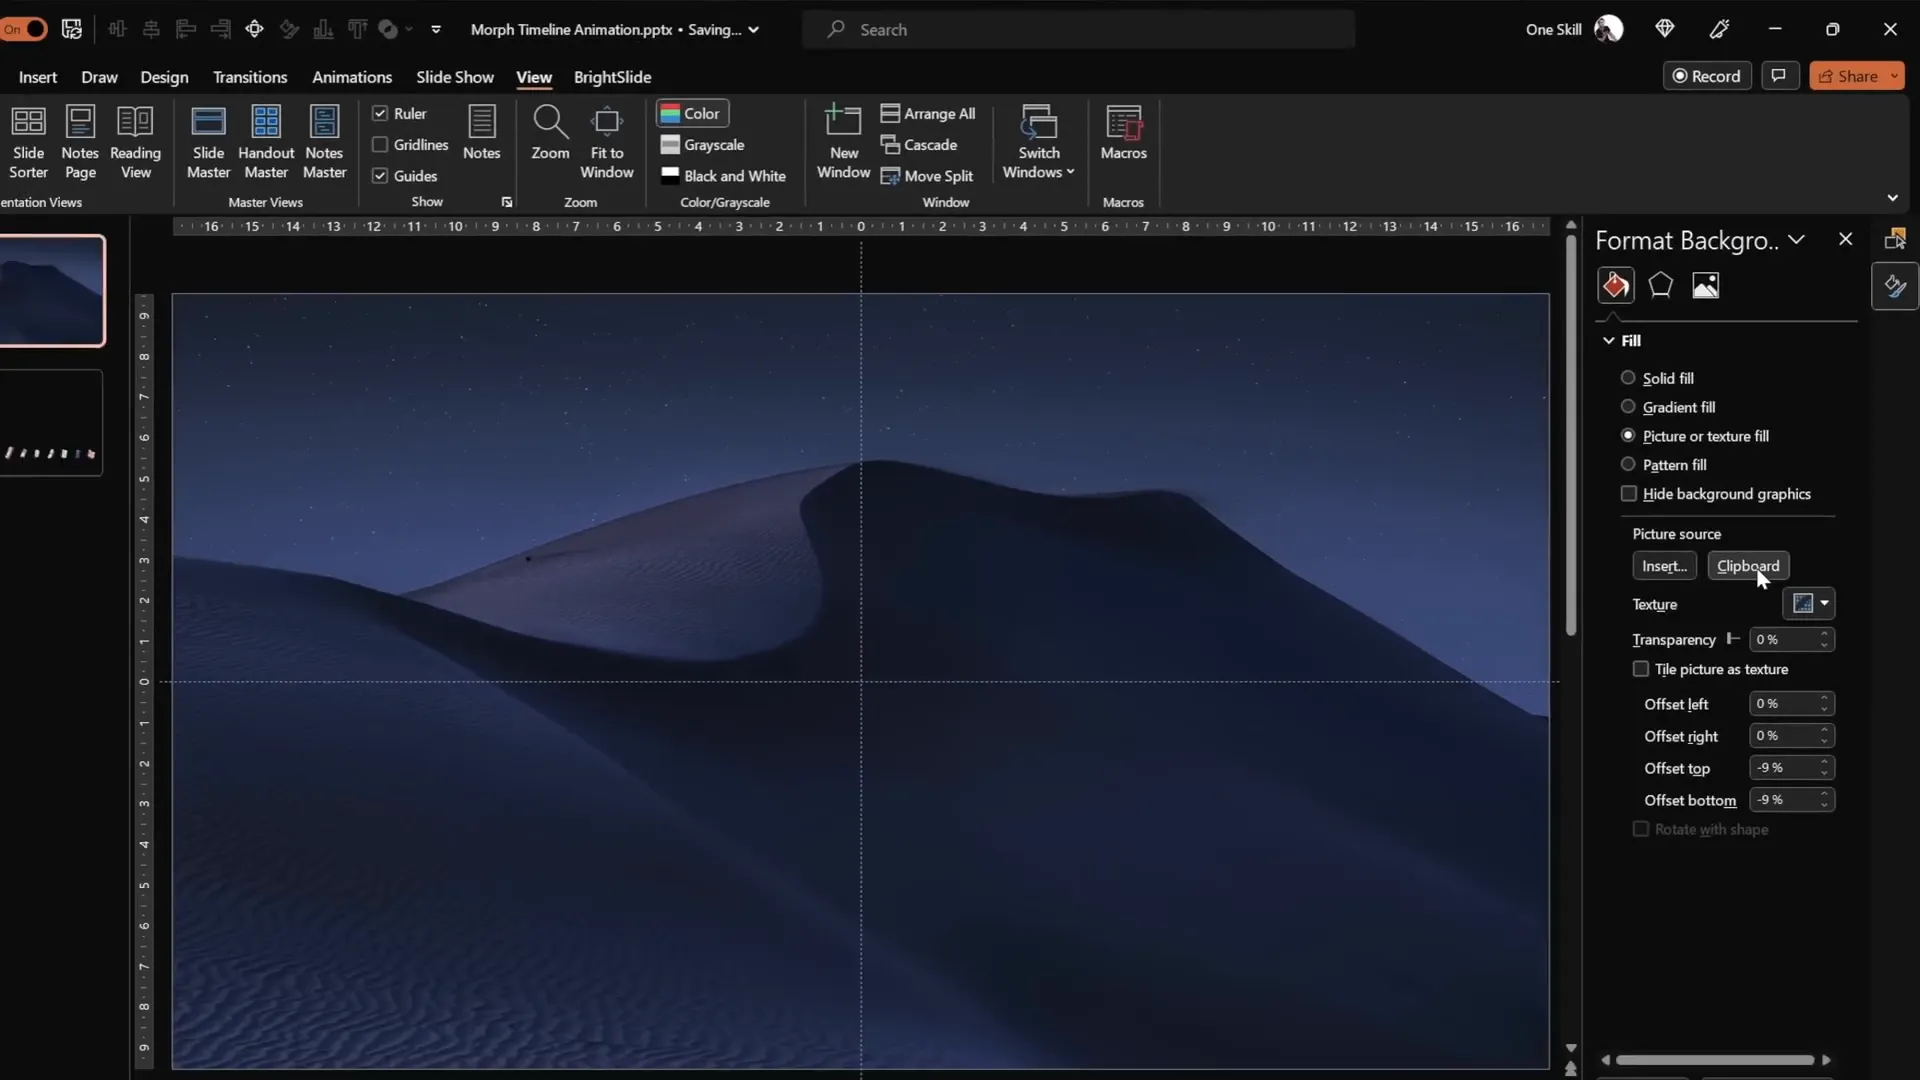
4. Insert a Background Image
Instead of simply inserting a full-screen image, fill the slide background with a picture from your clipboard. This method allows shapes on the slide to use the background fill option, enabling seamless animation effects later on.
- Find a high-quality image on sources like Unsplash.
- Right-click the image and select Copy.
- Go to the slide background fill settings: Format Background → Picture or texture fill → Clipboard.
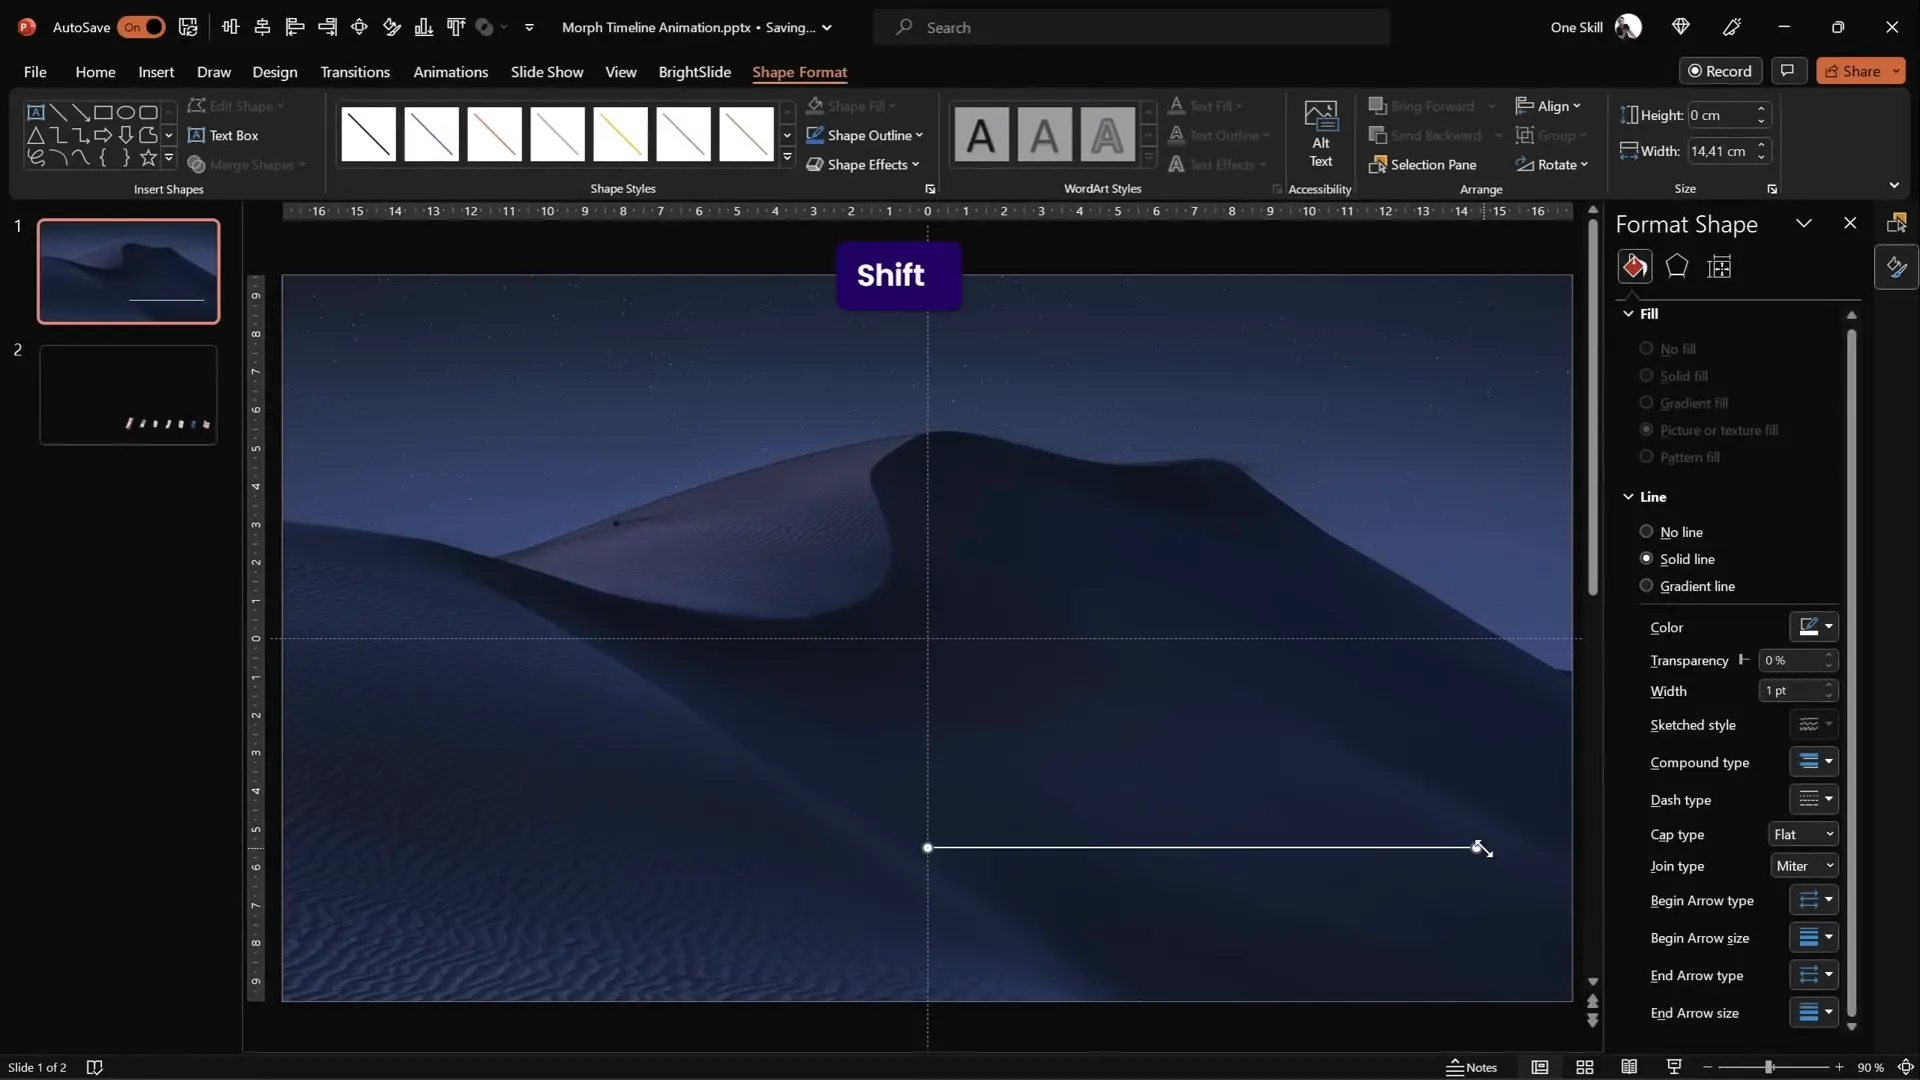
5. Draw the Base Timeline Line
At the bottom right corner of your slide, draw a straight horizontal line to serve as the timeline base.
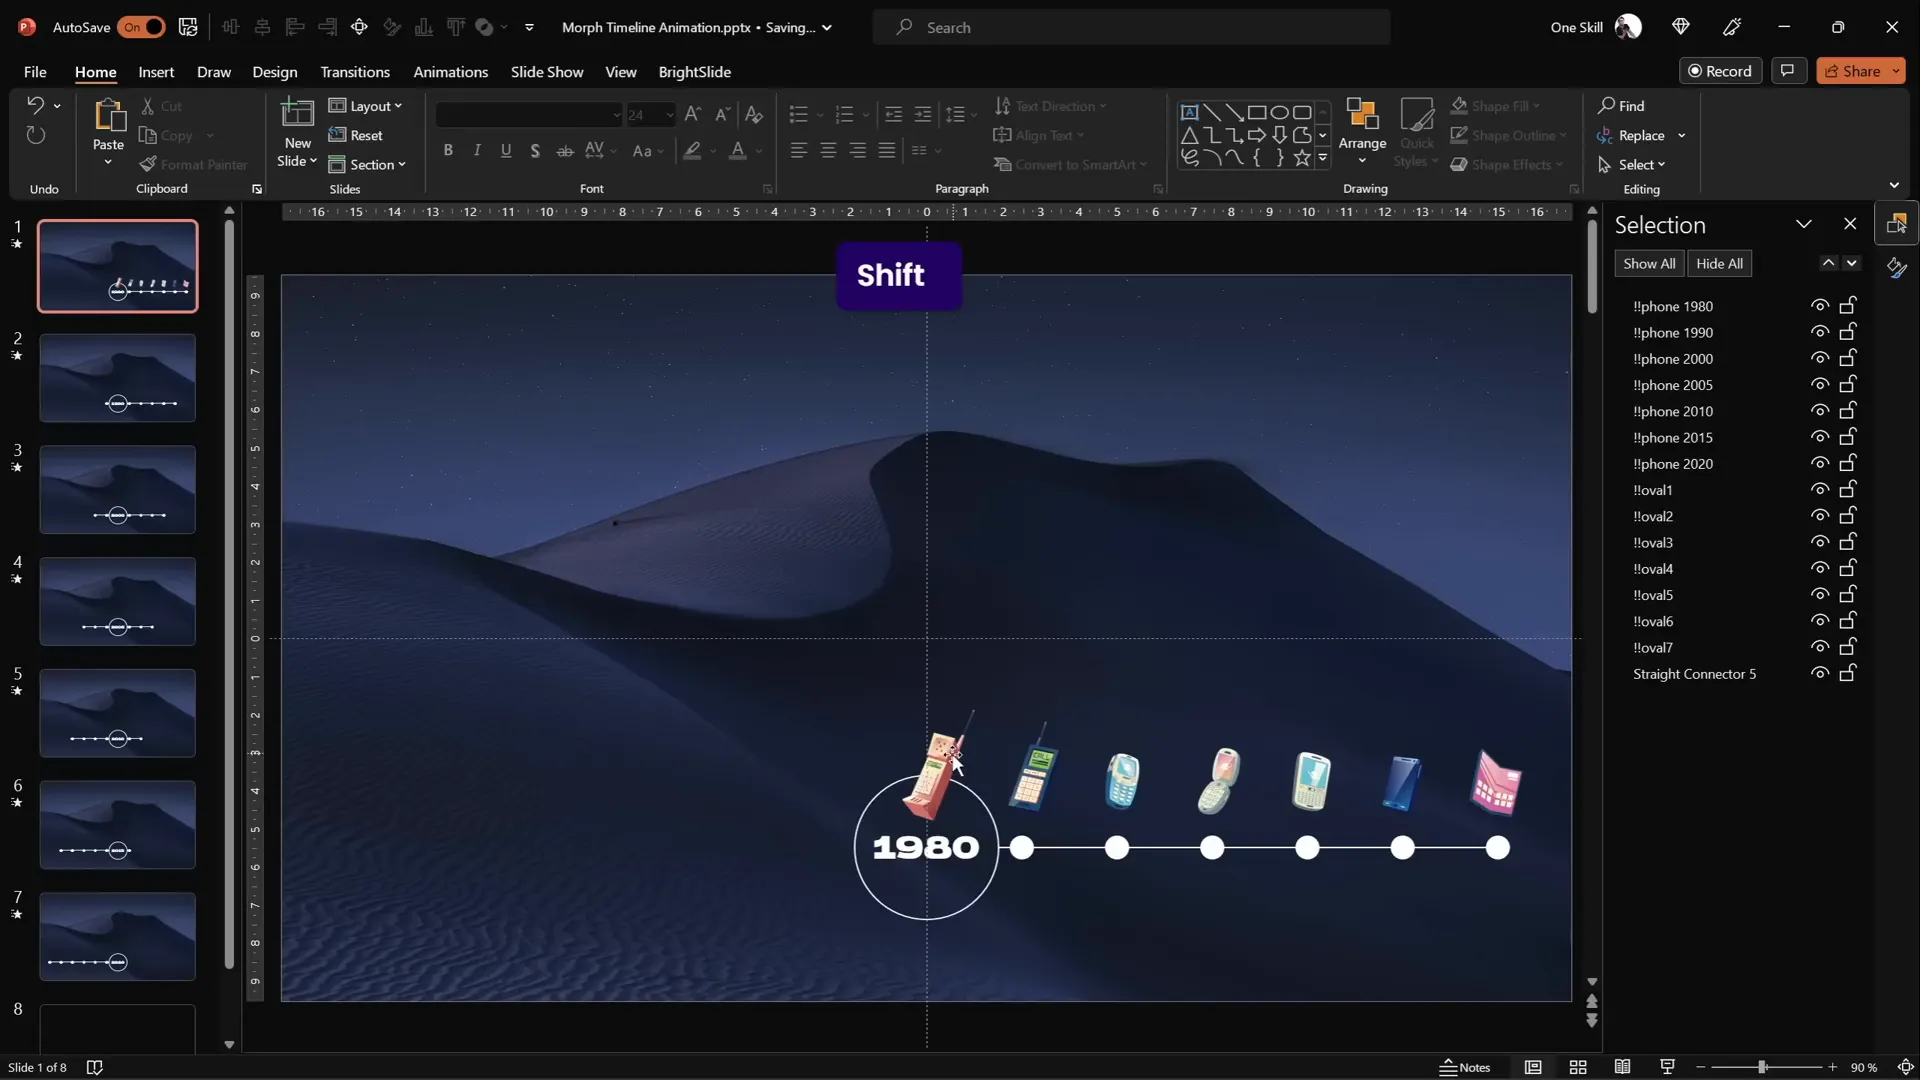
- Hold down the Shift key to ensure the line is perfectly horizontal.
- Start drawing from the center of the slide.
- Set the length to approximately 15 centimeters and line width to 1 point for a clean, minimalist look.
Designing the Timeline Elements
Now that the base is ready, the next step is to add timeline markers and labels that will animate smoothly across your slides.
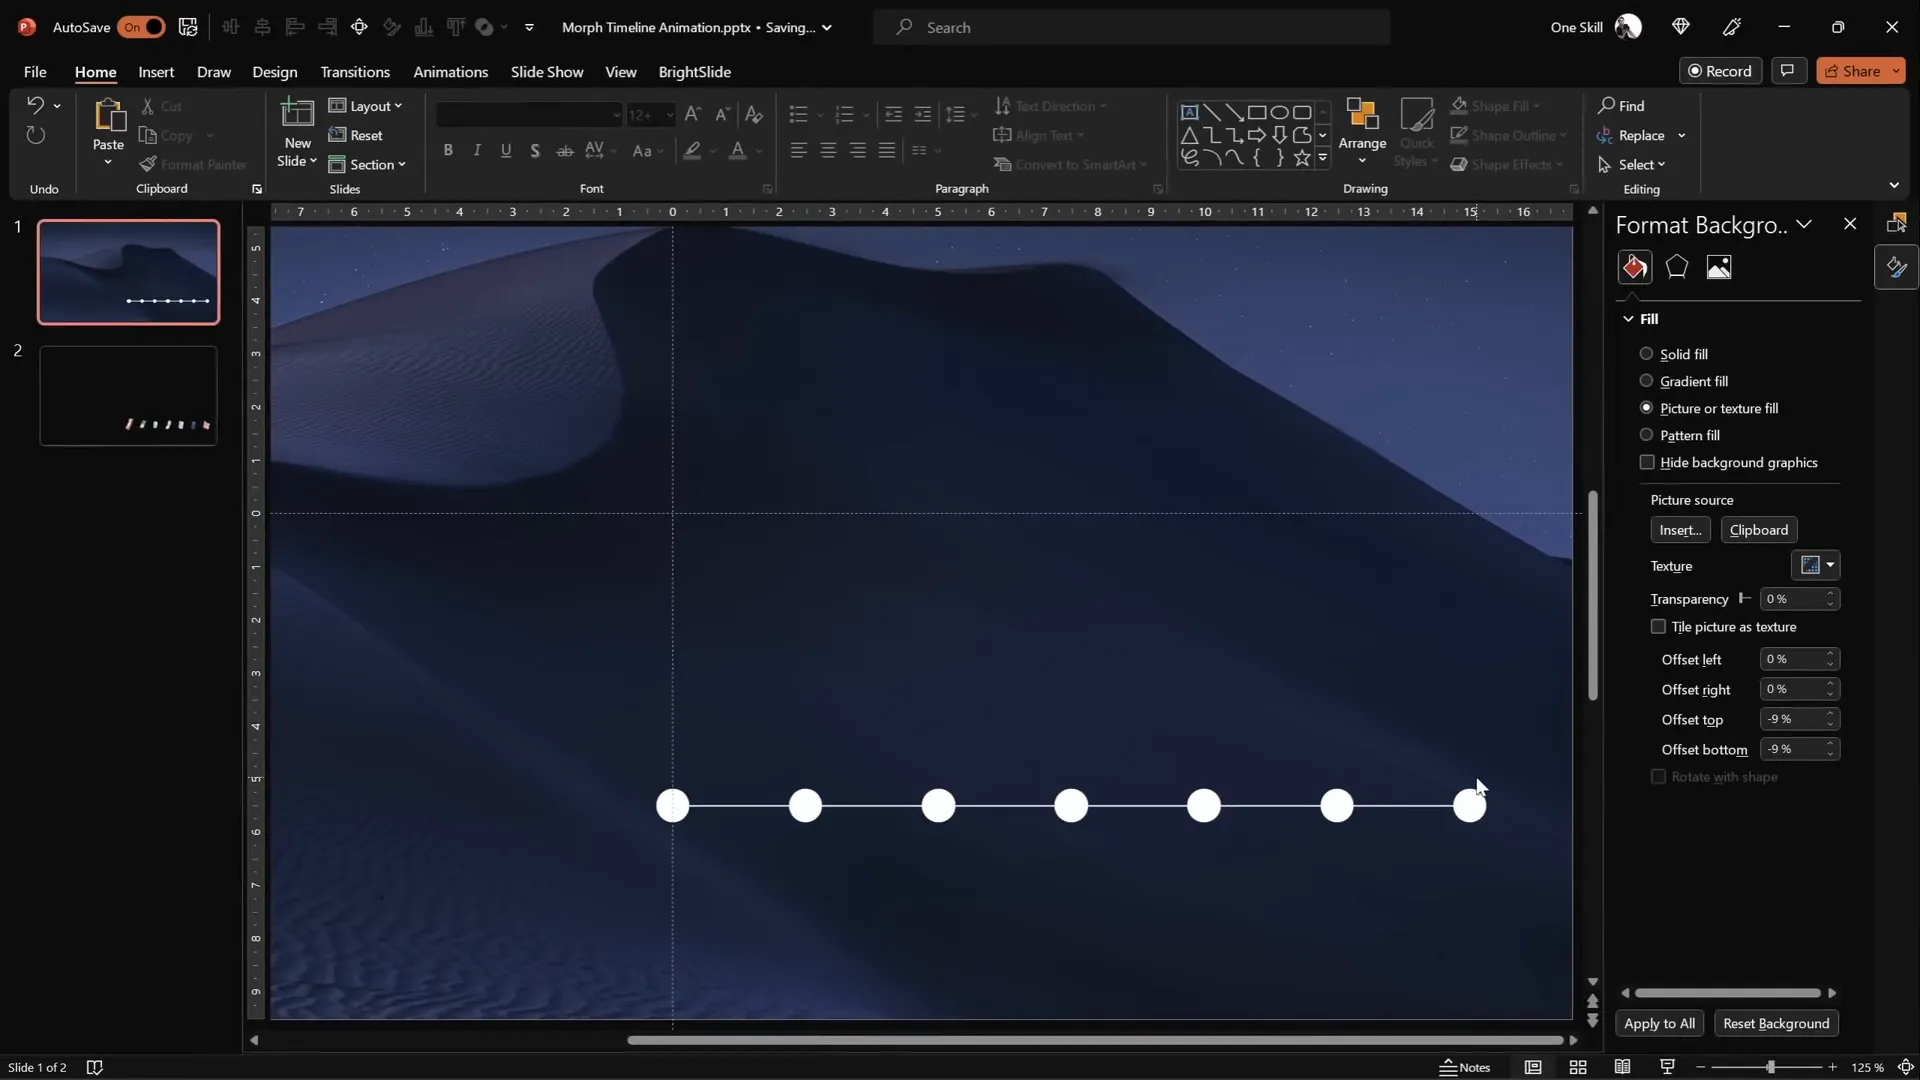
1. Insert Timeline Circles
We will use circles as timeline markers. Here’s how to create and position them:
- Draw a perfect circle by holding the Shift key while dragging.
- Set the size to 0.6 cm by 0.6 cm, but feel free to adjust according to your design preferences.
- Place the first circle on the left side of the timeline line.
- Use Ctrl + Shift and drag to create a second circle on the right side of the line.
- Duplicate these circles until you have seven markers spaced evenly across the timeline.
- Select all circles, go to Align options, and choose Distribute Horizontally to ensure equal spacing.
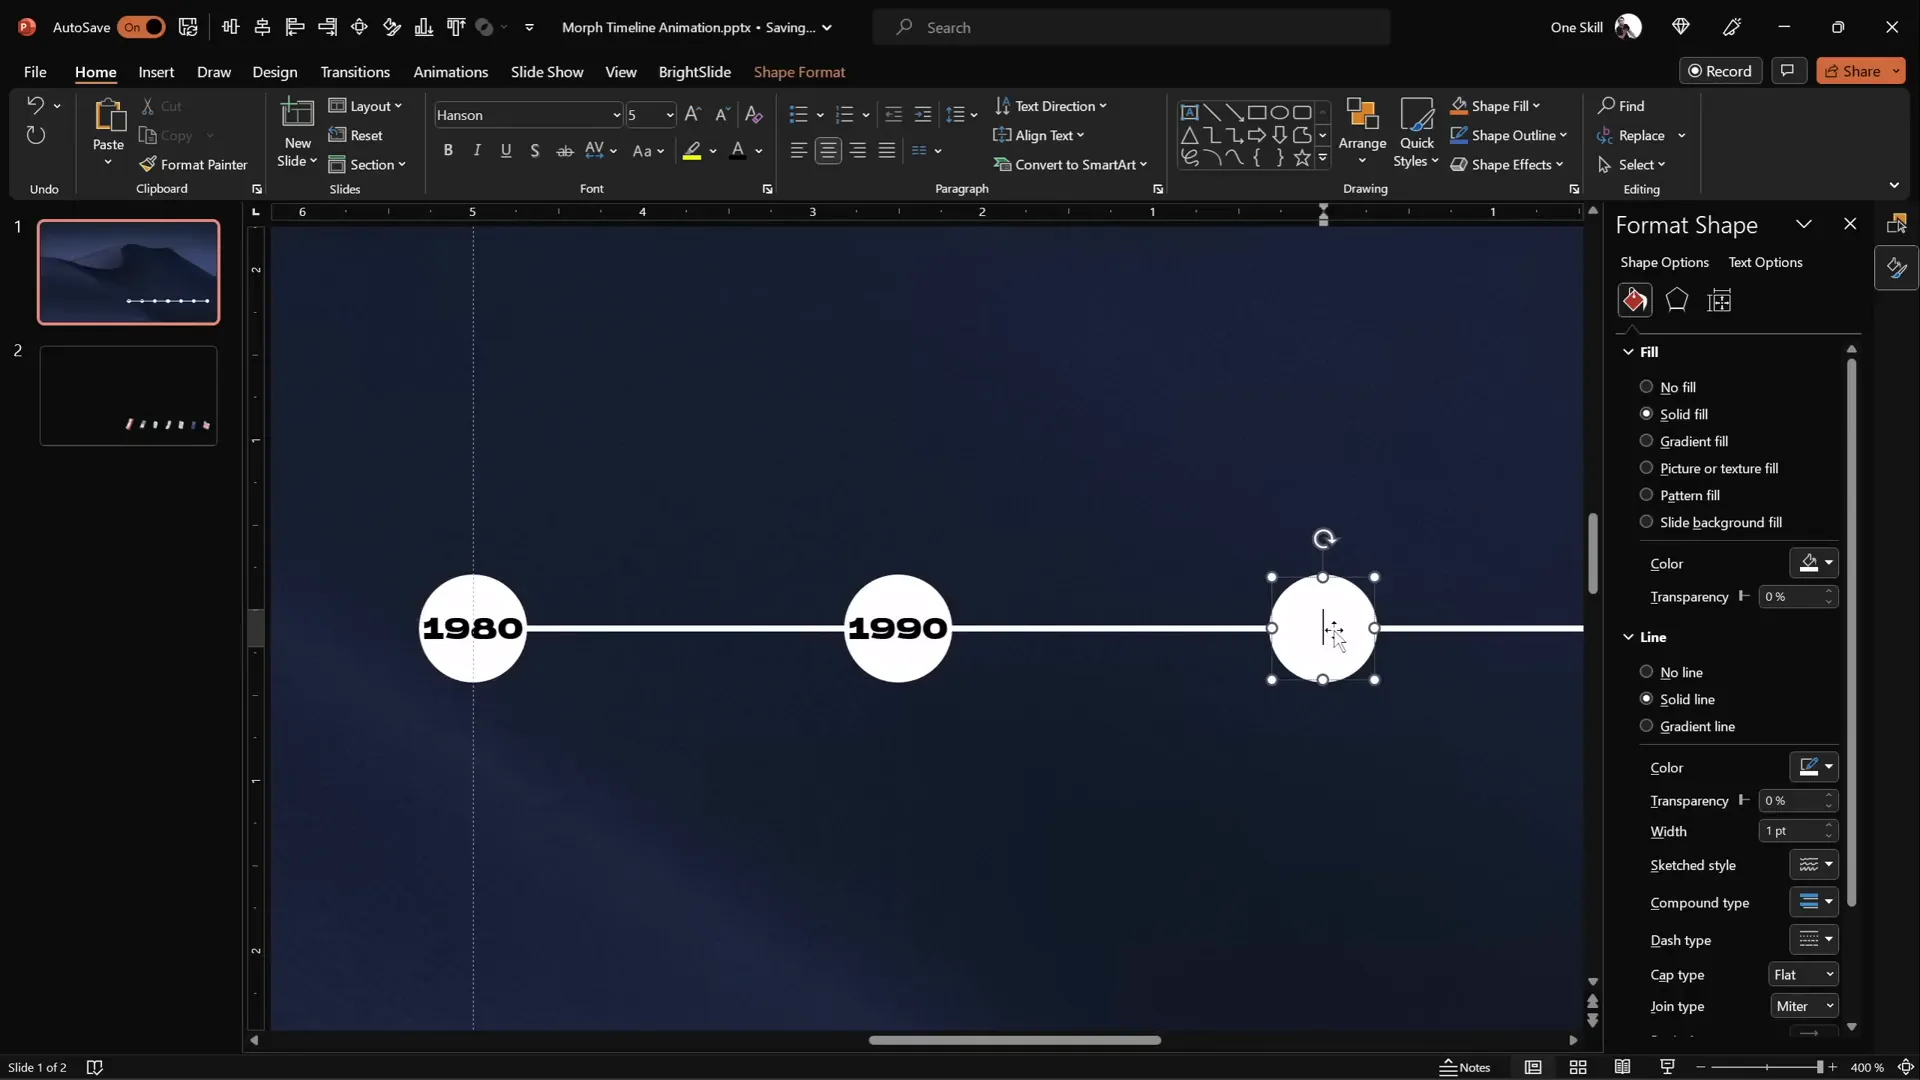
2. Add Year Labels Inside Circles
Each circle will represent a specific year on the timeline. Here’s how to add year labels:
- Zoom in on each circle and insert a text box inside it.
- Use a small, clear font like Hanson at size 5 for initial placement.
- Type the years sequentially, e.g., 1980, 1990, 2000, up to 2020.
- Initially, keep the text color black for visibility while typing.
- Once done, select all year text boxes and change the font color to white to make the text invisible temporarily.
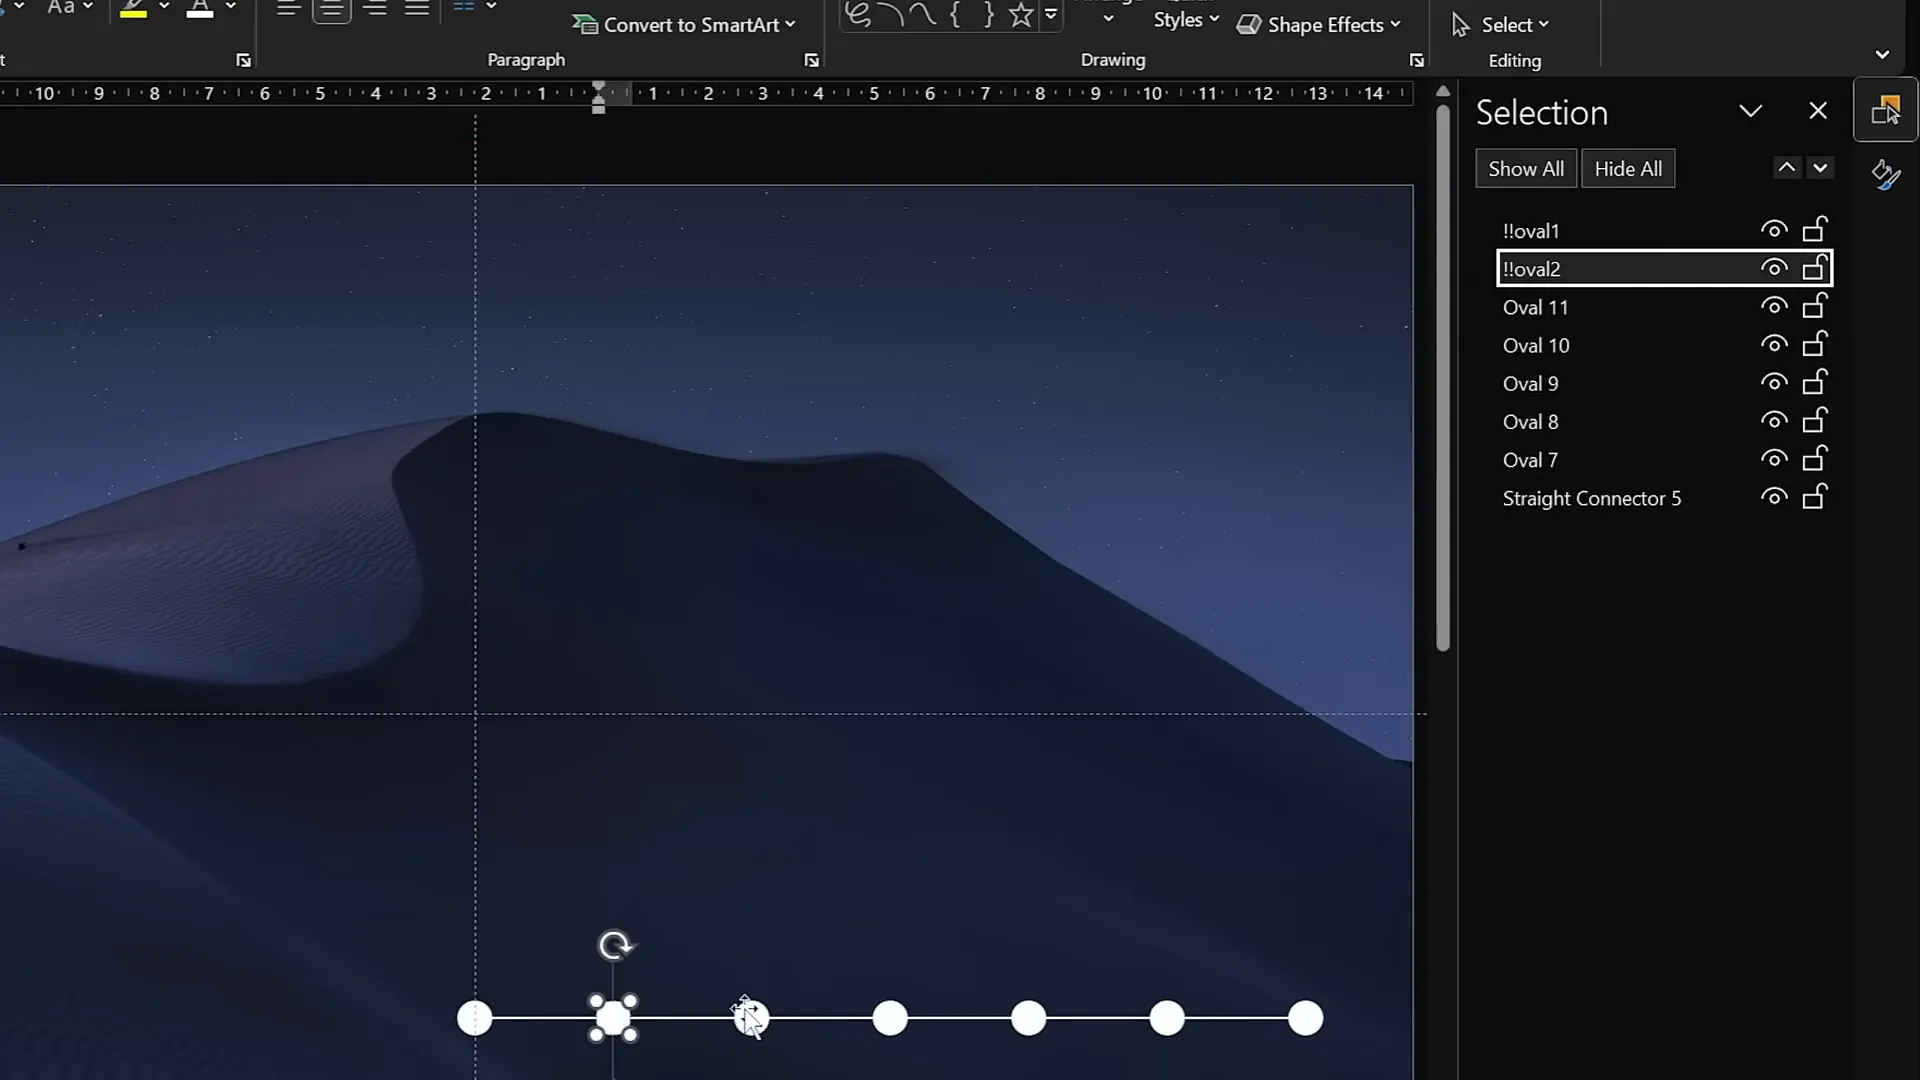
3. Name Timeline Circles for Easy Management
To manage the animation and transitions effectively, give each circle a unique name in the Selection Pane:
- Use a naming convention like !!Oval1, !!Oval2, etc., with double exclamation marks at the start for easy sorting.
- This helps PowerPoint recognize and animate these objects consistently across slides.
Applying the Morph Transition for Animation
The morph transition is the star feature that brings your timeline to life by smoothly animating objects from one slide to the next.
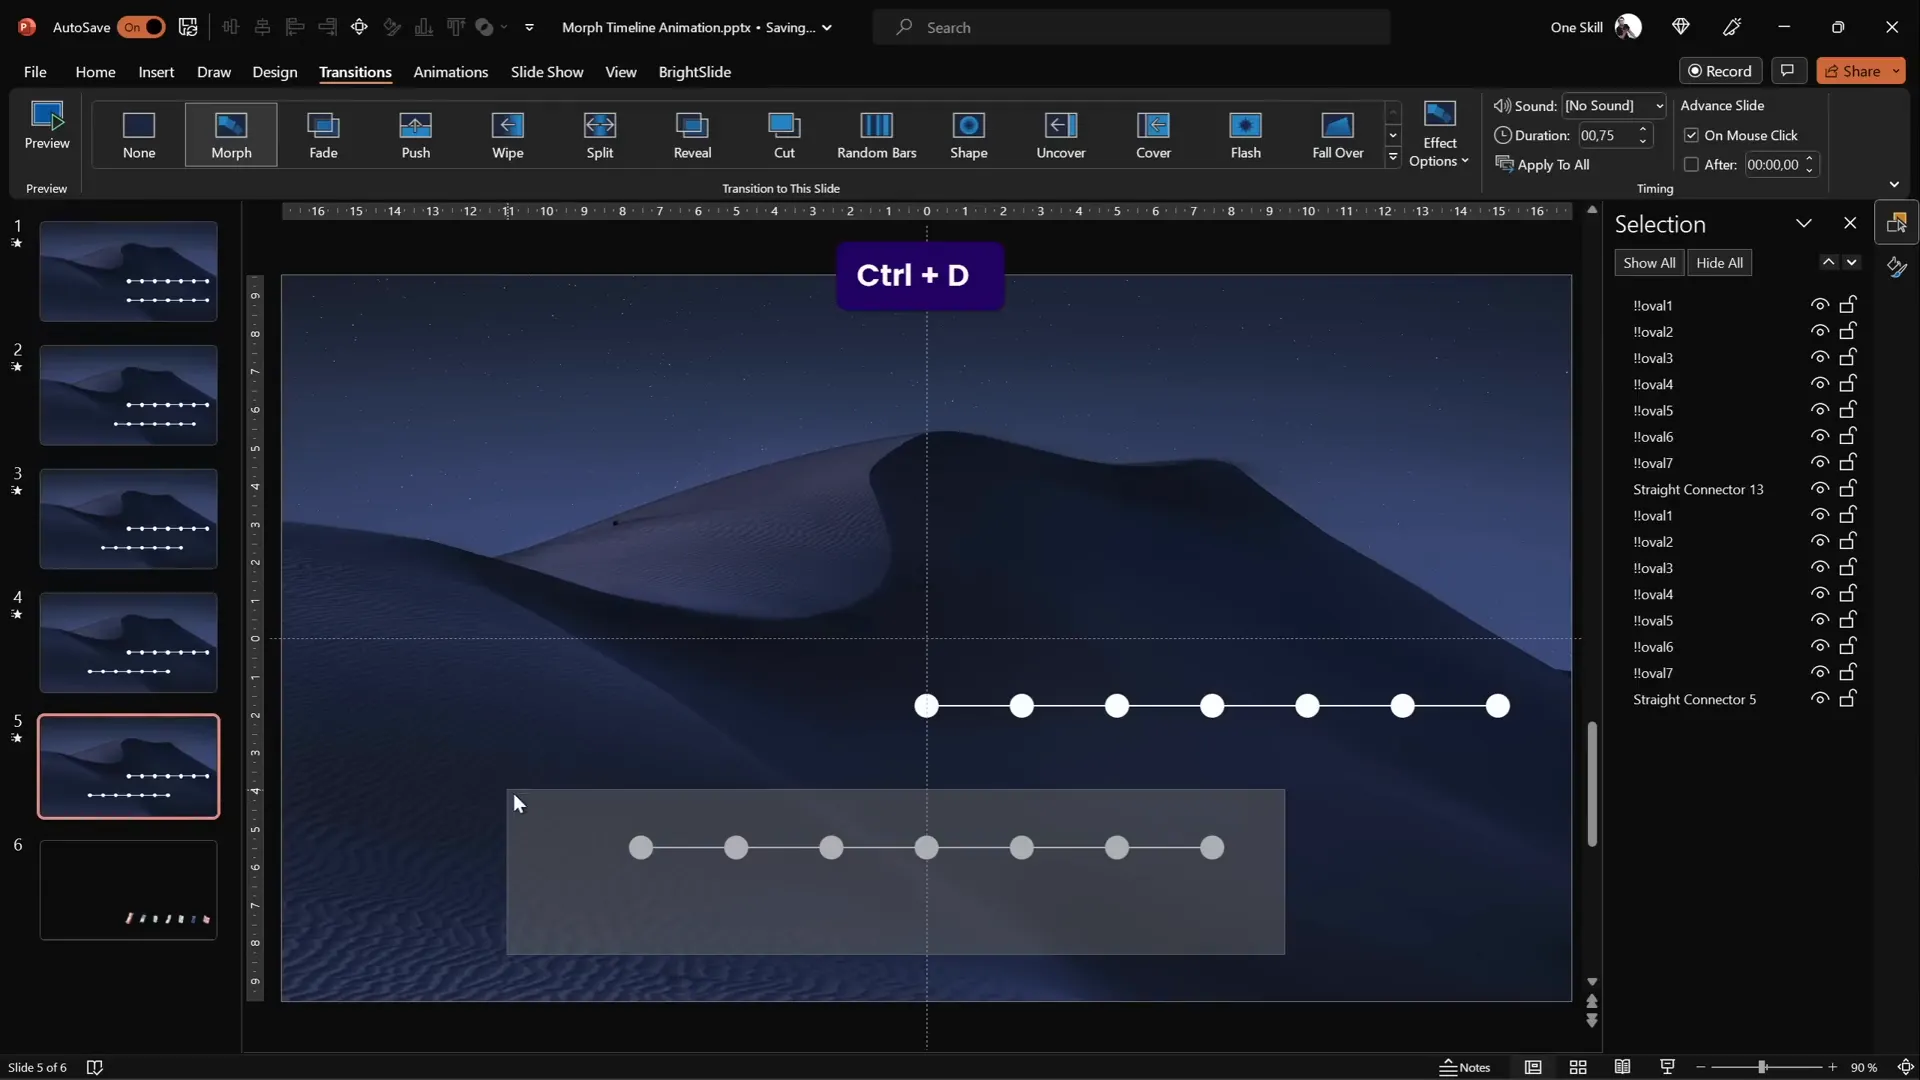
1. Set Slide Transition to Morph
For each slide in your timeline sequence, apply the Morph transition with a short duration to create a fluid animation effect:
- Select the slide.
- Go to the Transitions tab.
- Choose Morph as the transition effect.
- Set the duration to 0.75 seconds for a quick but smooth animation.
2. Create Slide Copies for Animation Frames
Duplicate your timeline slide multiple times to create the frames needed for your animation:
- Duplicate the first slide to make the second slide.
- On the second slide, select all timeline circles and the timeline line, then move them one step to the left.
- Repeat this process to create seven slides, each showing the circles shifted progressively left.
- Use the original circles as guides initially, then delete them once alignment is complete.
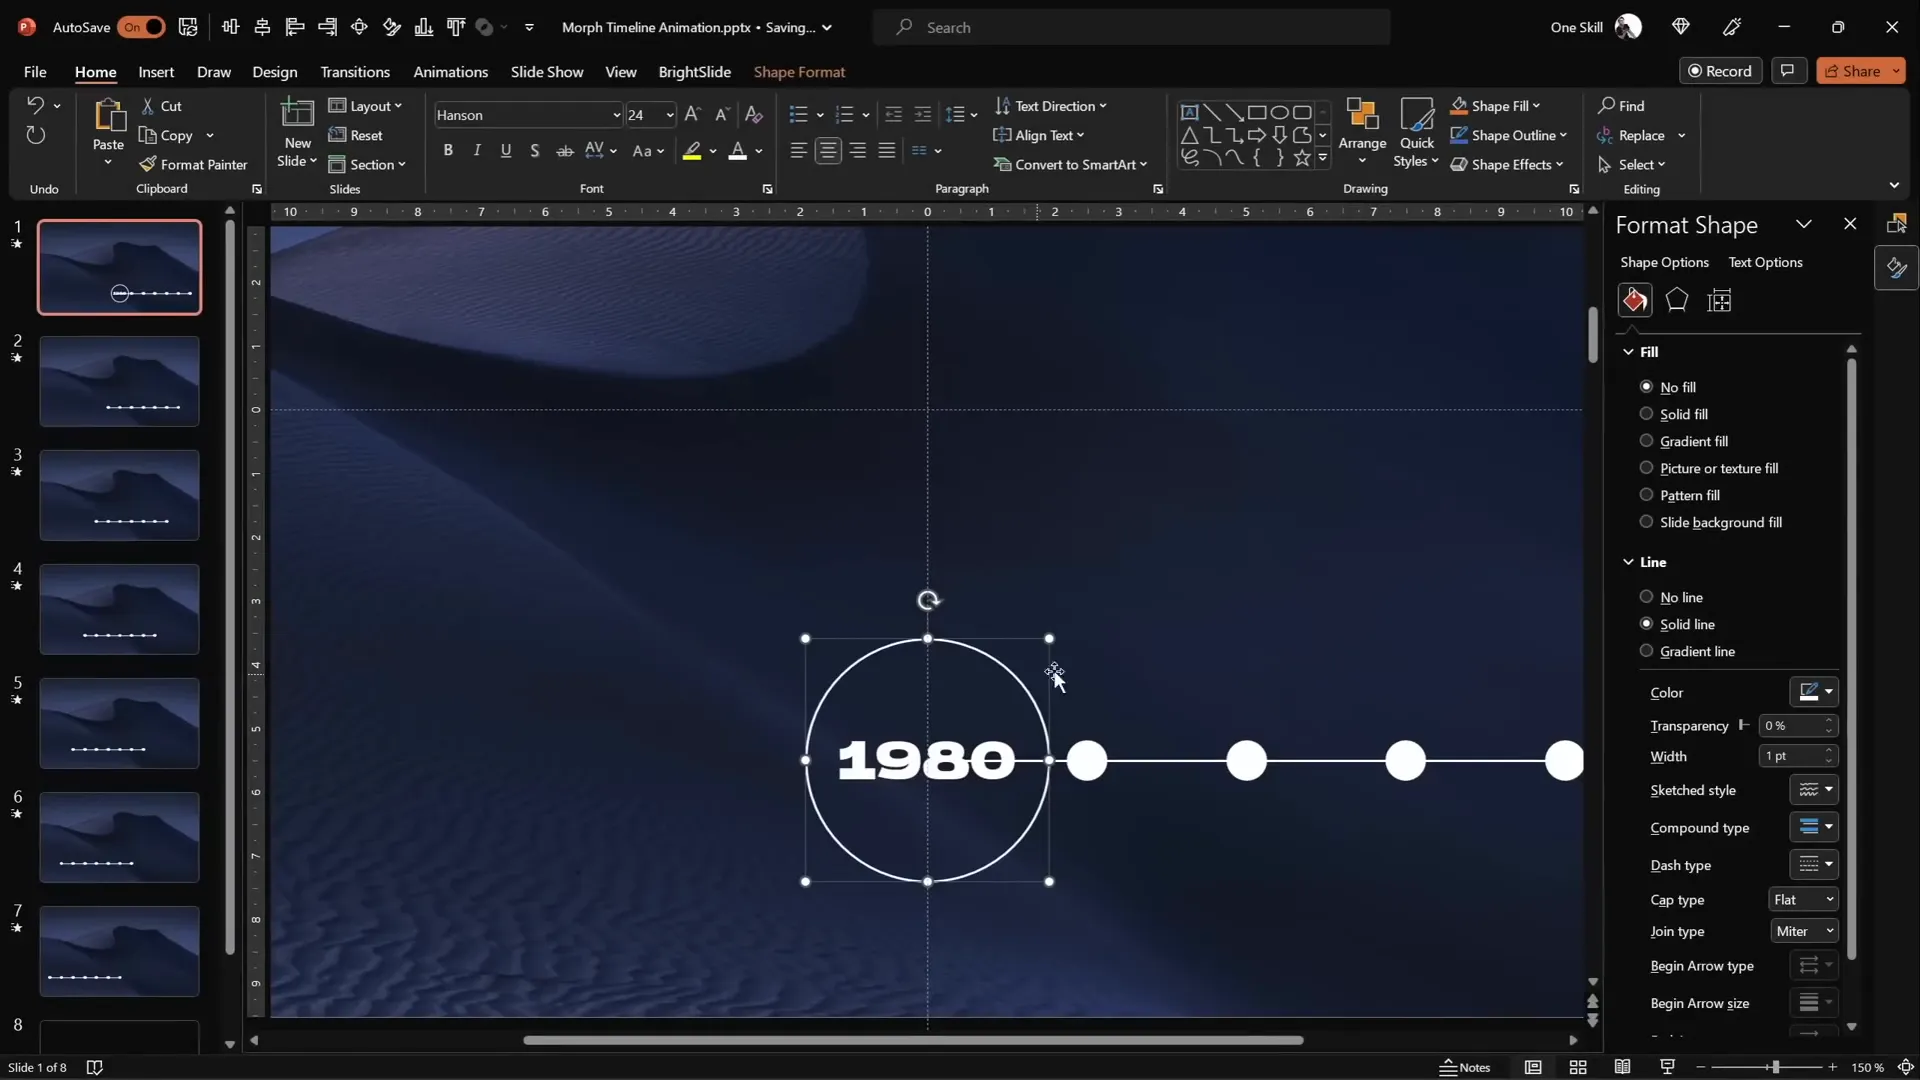
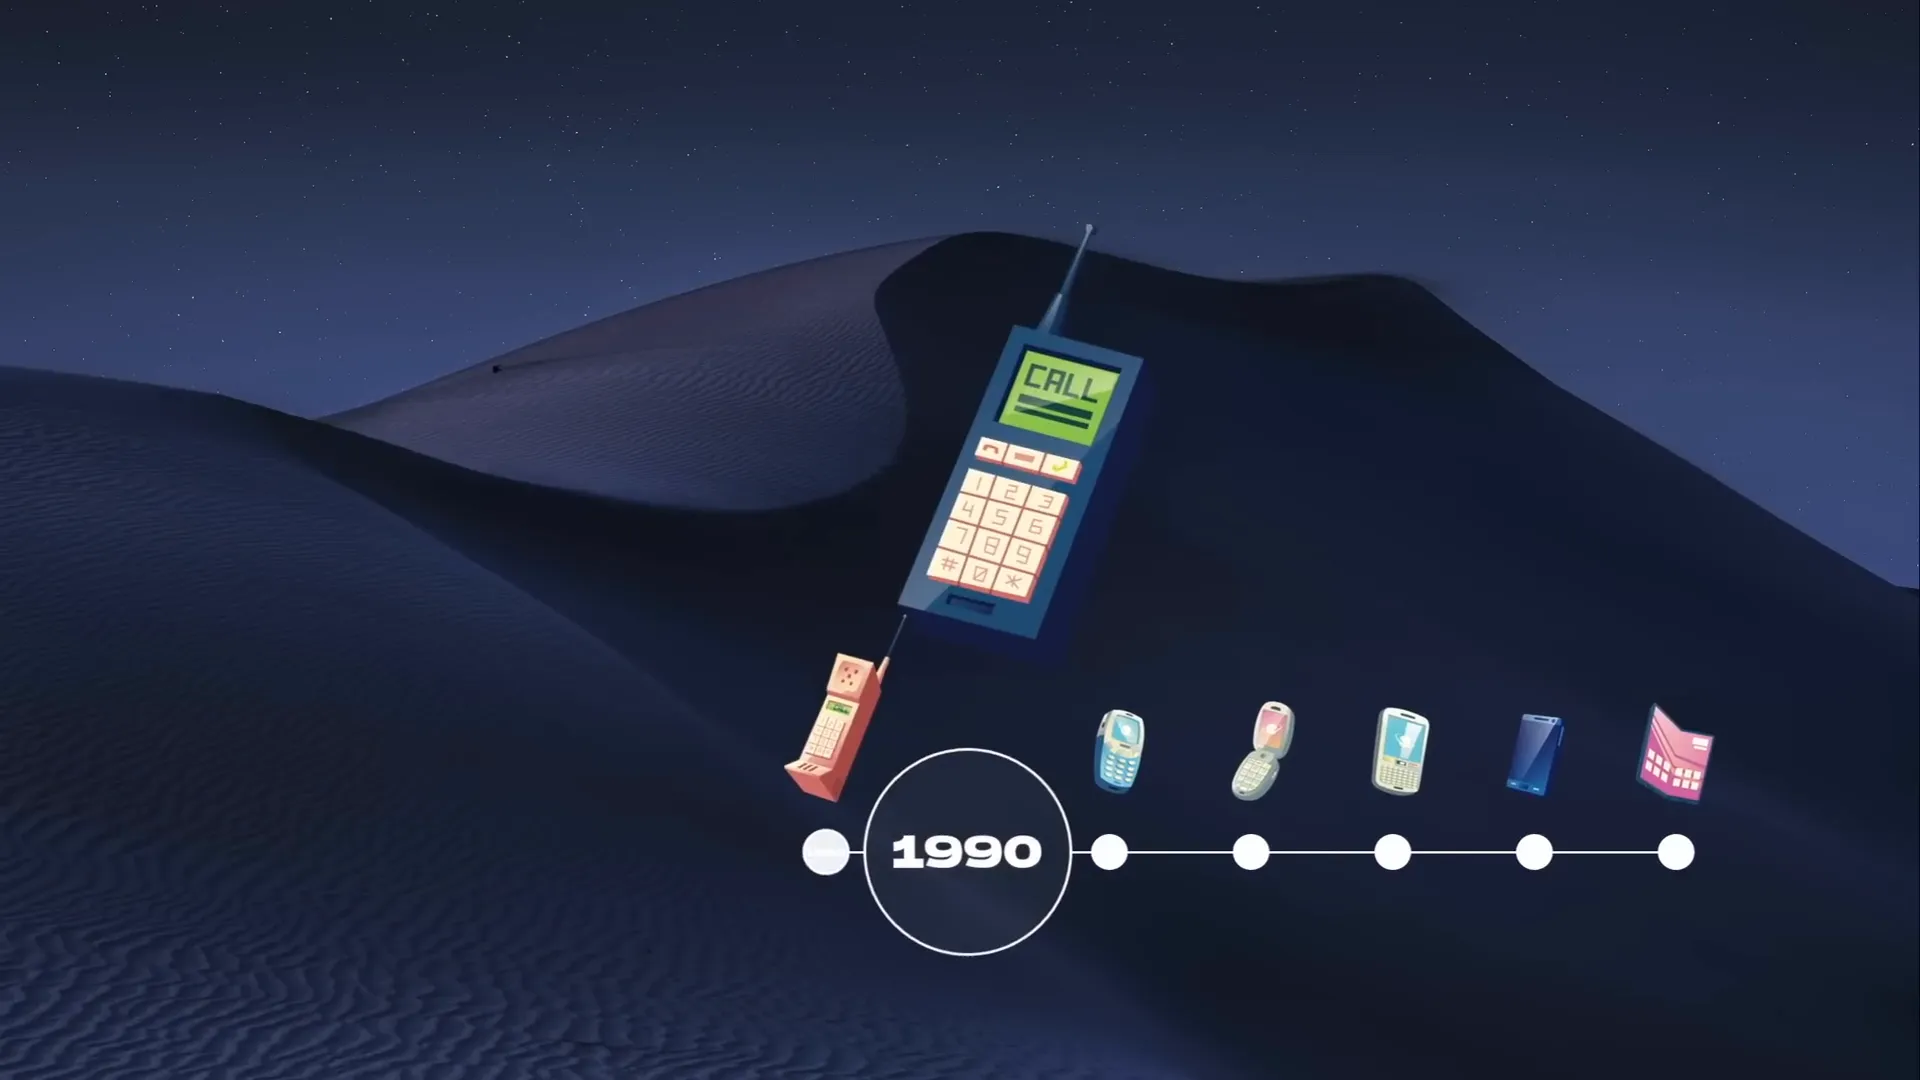
3. Resize and Highlight the Active Year Circle
To emphasize the current year in the timeline, resize the corresponding circle and make its year label visible:
- On each slide, select the circle representing the active year.
- Hold Ctrl + Shift and drag a corner handle to resize the circle proportionally from the center.
- Remove the fill of the circle by selecting No Fill.
- Increase the font size of the year label inside the circle to 24 for visibility.
- Apply a light background fill to the circle to hide any lines behind the text.
- Copy the style of the resized circle and paste it onto subsequent circles to maintain consistency.
Enhancing the Timeline with Illustrations
Adding relevant illustrations can bring personality and depth to your timeline animation, making it more engaging and memorable.

1. Gather Illustrations for Each Timeline Year
Collect themed images or illustrations that correspond to each year or event on your timeline. For example, phone illustrations representing different technological eras.
- Use free resources like Freepik phone illustrations.
- Name each illustration in the Selection Pane with the double exclamation mark convention followed by the corresponding year.
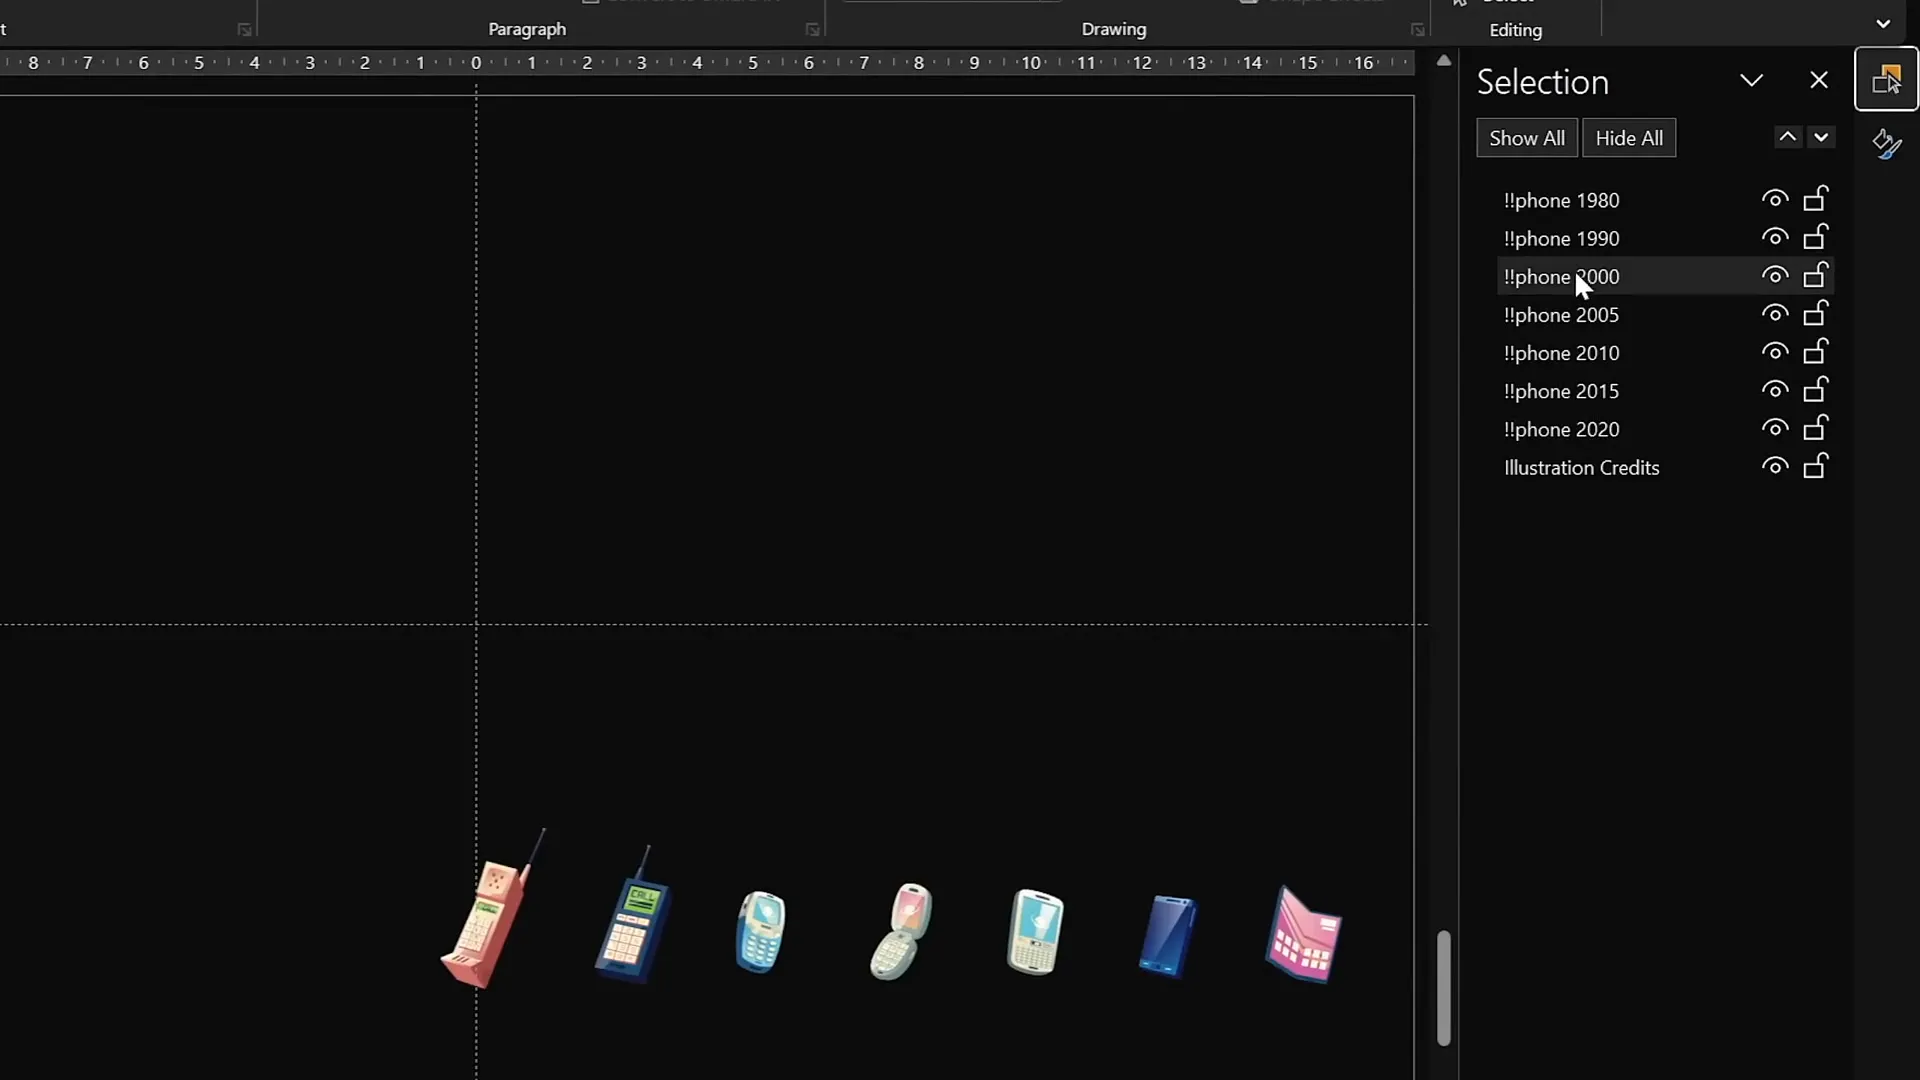
2. Position Illustrations Above the Timeline
Paste all illustrations into the first slide and arrange them just above the timeline line:
- Resize and rotate each illustration as needed to fit the design aesthetic.
- Ensure the illustration for the active year is larger or more prominent.
- On each subsequent slide, move all illustrations one step to the left to maintain animation consistency.
3. Preview the Animation
Run the slideshow in full screen to see the morph transition in action, watching the timeline circles and illustrations glide smoothly along the timeline.
Adding Hyperlinks for Interactive Navigation
Enhance your timeline’s interactivity by adding hyperlinks to timeline circles, allowing users to jump between slides seamlessly.
1. Add Hyperlinks to Navigation Circles
Insert hyperlinks on the first and last timeline circles to enable quick navigation:
- On slide 1, select the circle on the far right and add a hyperlink to slide 7.
- On slide 7, select the circle on the far left and add a hyperlink back to slide 1.
- Use Ctrl + K to insert hyperlinks.

2. Customize Hyperlinks for Full Timeline Navigation
Feel free to add hyperlinks to other circles to allow users to jump to specific years or events directly, enhancing the user experience and engagement.
Frequently Asked Questions (FAQ)
What is the Morph Transition in PowerPoint?
The Morph transition is a PowerPoint animation effect that allows smooth movement and transformation of objects from one slide to the next, creating the illusion of motion and dynamic change without complex animation setups.
How do I name objects in PowerPoint for better animation control?
Use the Selection Pane (found under the Home tab → Arrange → Selection Pane) to rename objects with clear, consistent names. Adding prefixes like double exclamation marks (!!) helps in sorting and selecting objects easily during animation setup.
Can I use any images for the background and illustrations?
Yes, but for best results, use high-quality, royalty-free images from sources like Unsplash for backgrounds and Freepik for illustrations. Ensure images are relevant to your timeline content for cohesive storytelling.
Is the Morph transition available in all versions of PowerPoint?
The Morph transition is available in PowerPoint 2016 and later versions, including PowerPoint for Microsoft 365. If you have an older version, you may not have access to this feature.
How do I make the timeline interactive?
Add hyperlinks to timeline markers that link to specific slides, allowing viewers to jump between different points in the timeline easily.
Conclusion
Creating an animated morph timeline in PowerPoint using Powerpoint Animation effects is a powerful way to present chronological information in a visually compelling, interactive format. By following the steps outlined above, you can design a timeline that not only looks professional but also engages your audience with smooth transitions and dynamic visuals.
Remember, the key to mastering this technique is practice and attention to detail—from setting up your slides and naming objects properly to applying the morph transition and enhancing the timeline with relevant illustrations. Adding hyperlinks further elevates your timeline’s functionality, making your presentation both beautiful and user-friendly.
With these skills, you will be able to impress your audience and convey your story with style and clarity. So go ahead, try it out, and watch your PowerPoint presentations come alive!
Check out the full video: ANIMATED PowerPoint Morph Timeline ✨ Free Download


